Piecing Full Circles
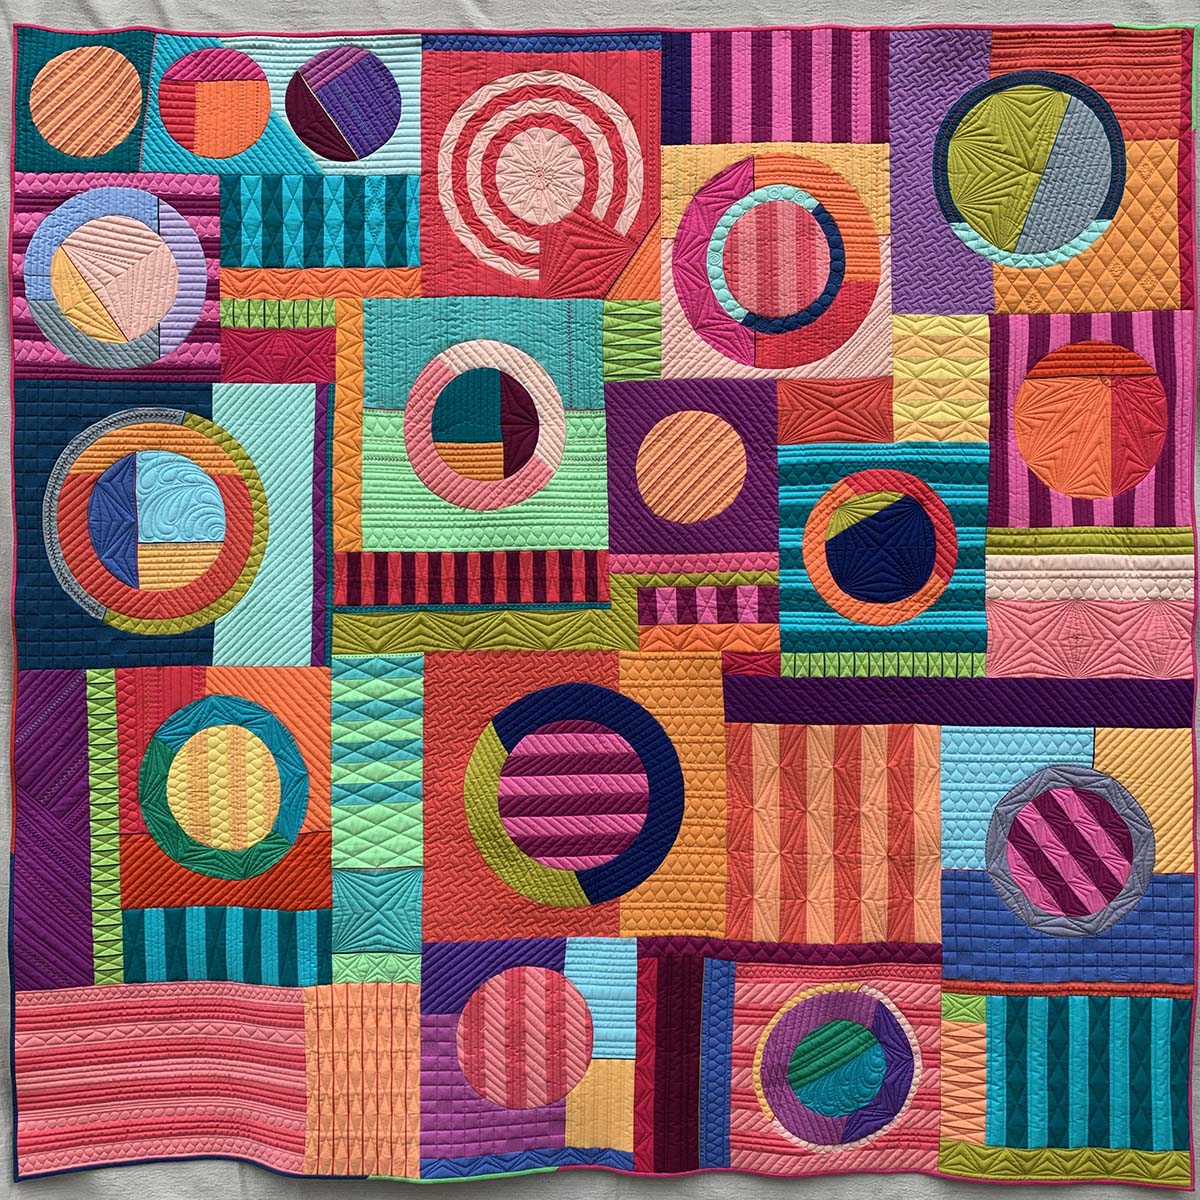
Curves take your quilt designs to another level, but what happens when you start piecing full circles? The design possibilities explode!
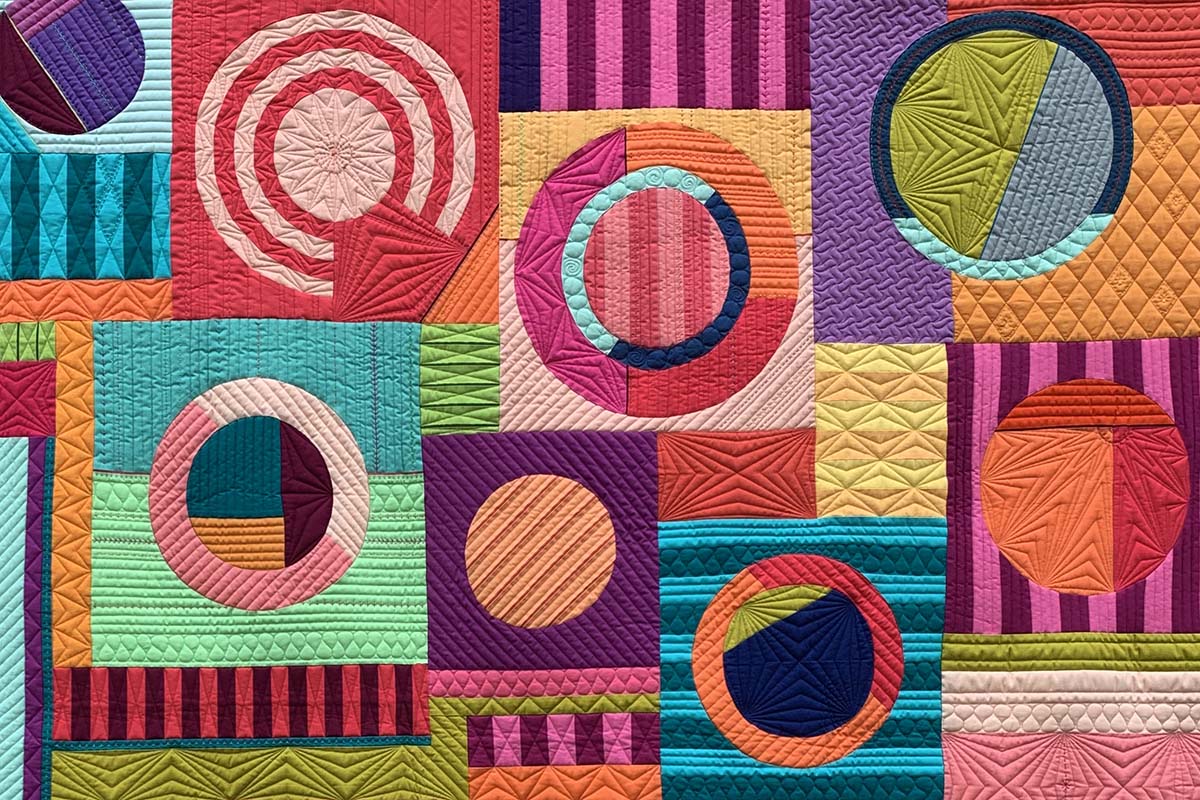
Even though sewing a full circle may look intimidating, careful cutting and sewing combined with a few essential tips and a bit of practice make it easy to master.
Why would you piece full circles when you could piece them in segments?
Pieced curved segments are great for many traditional quilt block designs, but sometimes your design benefits from using a full circle.
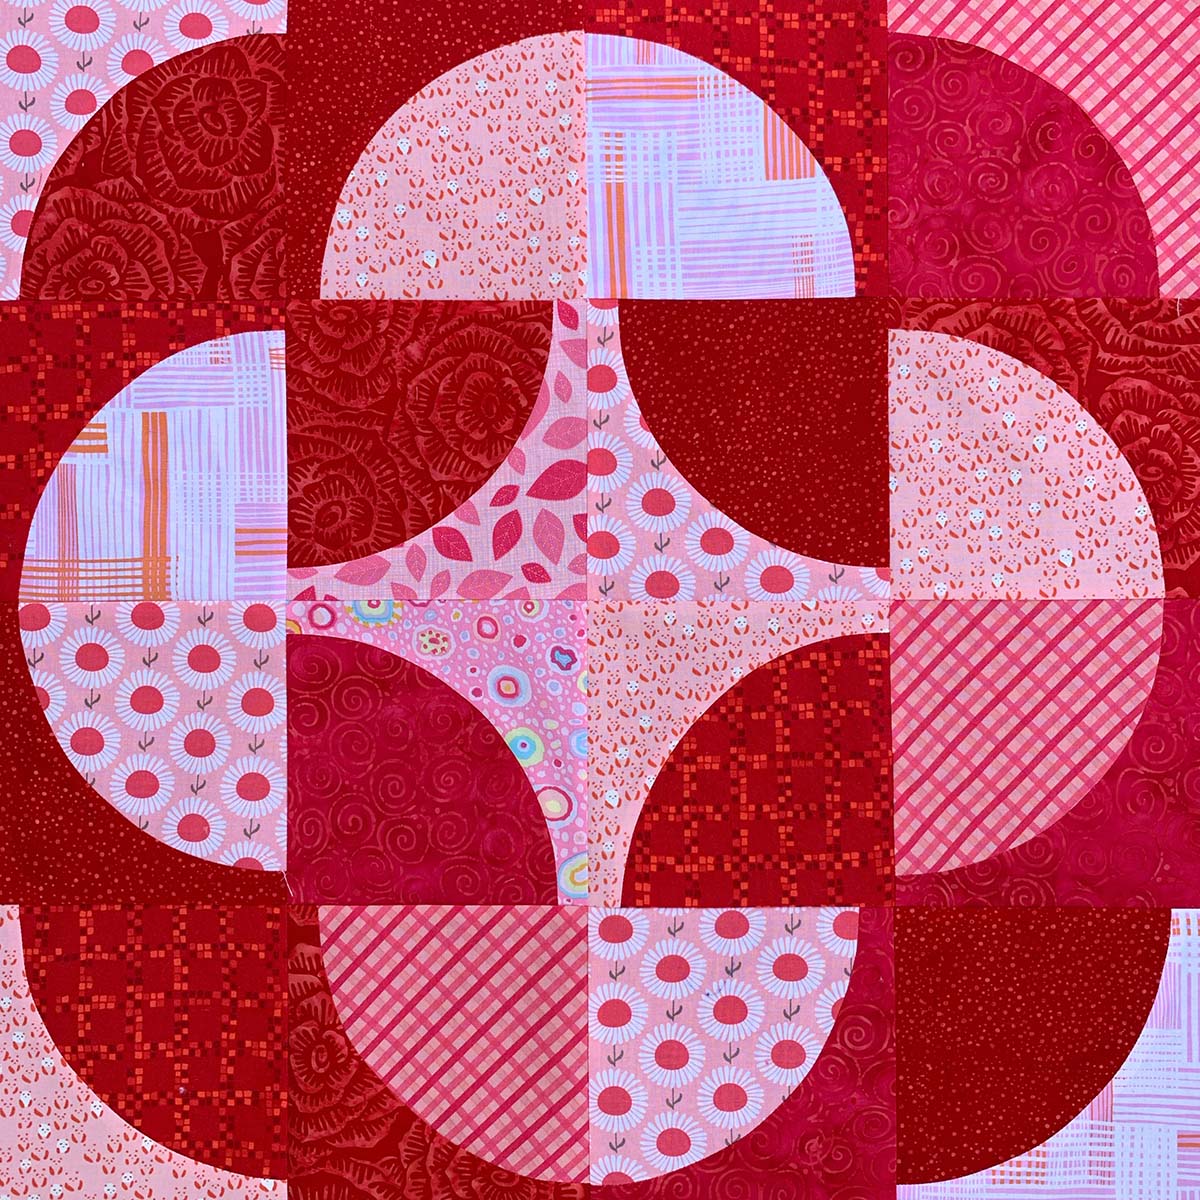
This Cleopatra’s Puzzle block works well with piecing curved segments because the block requires these divisions within the design.
When does it make sense to use full circles in a design?
- You want or need the center of the circle to be one fabric without any seams
- The central circle is split into un-equal or non-quadratic seams
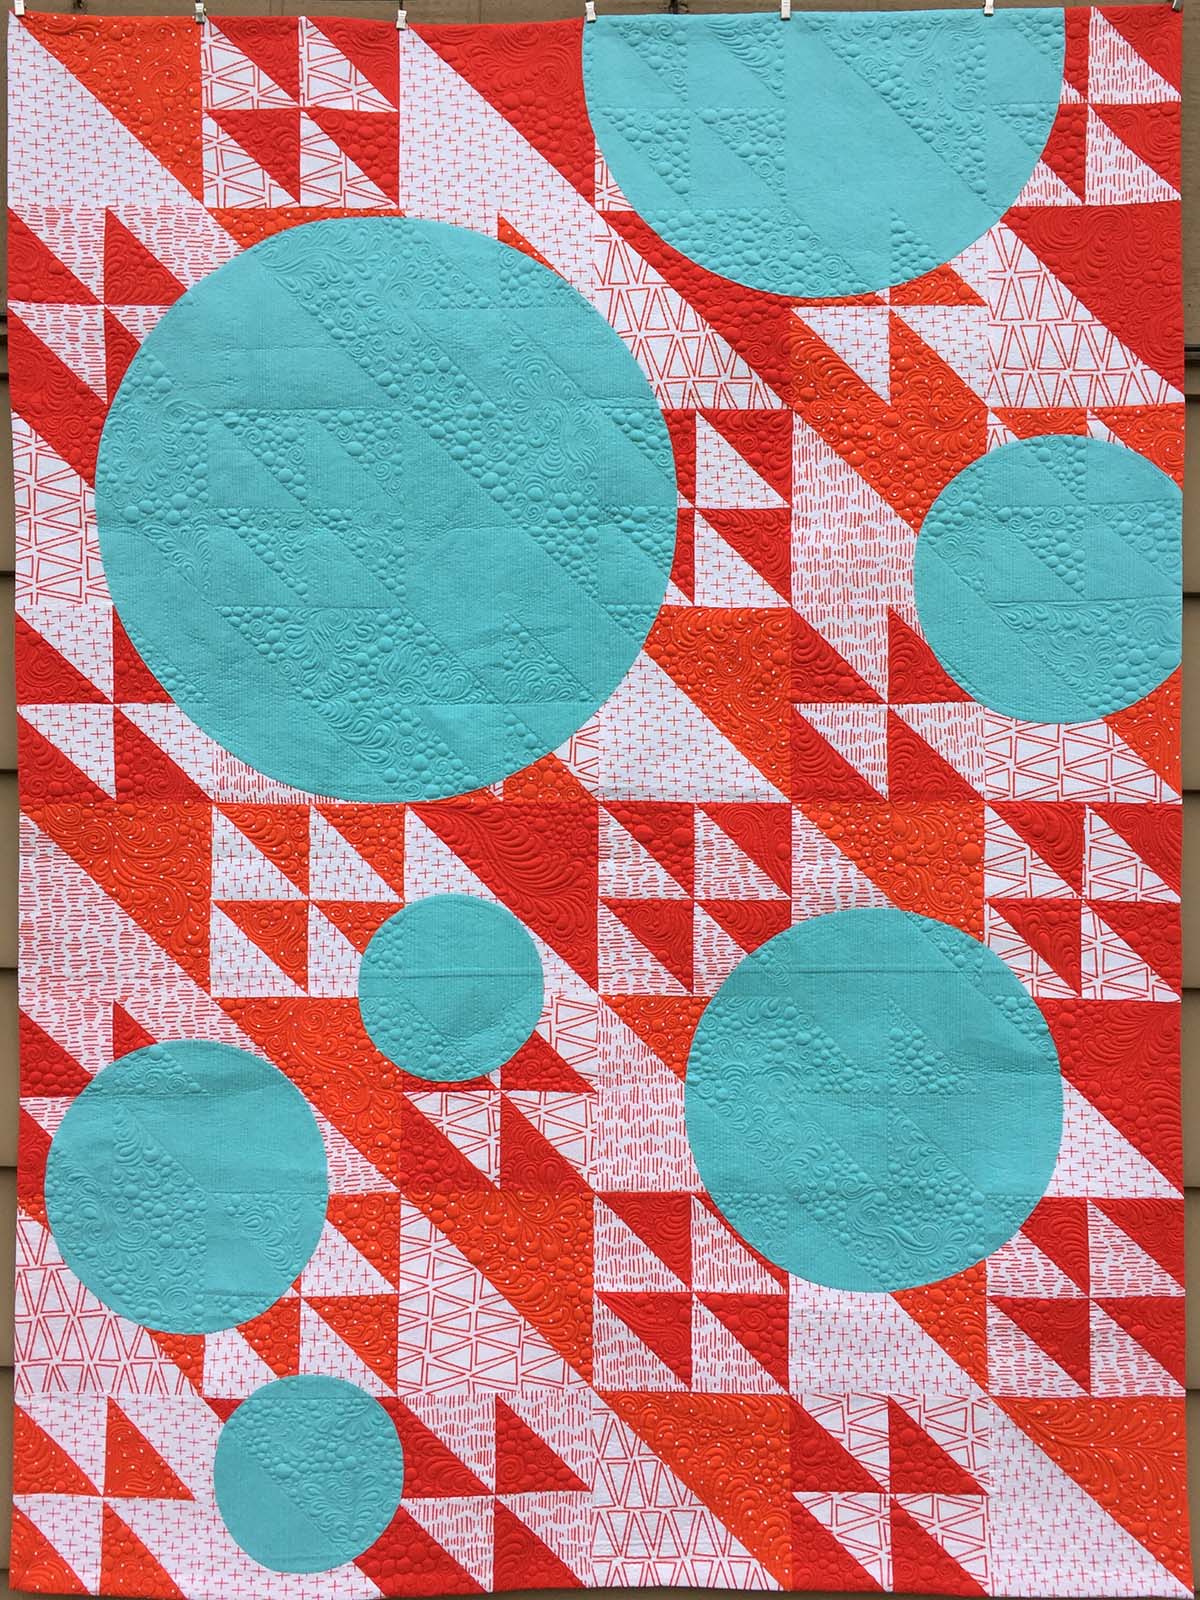
- The circle is inserted into a pieced background
- The design includes a variety of angles
- The design features a distinctive print within the circle, including fussy cutting.
How Pieced Circles Fit Together
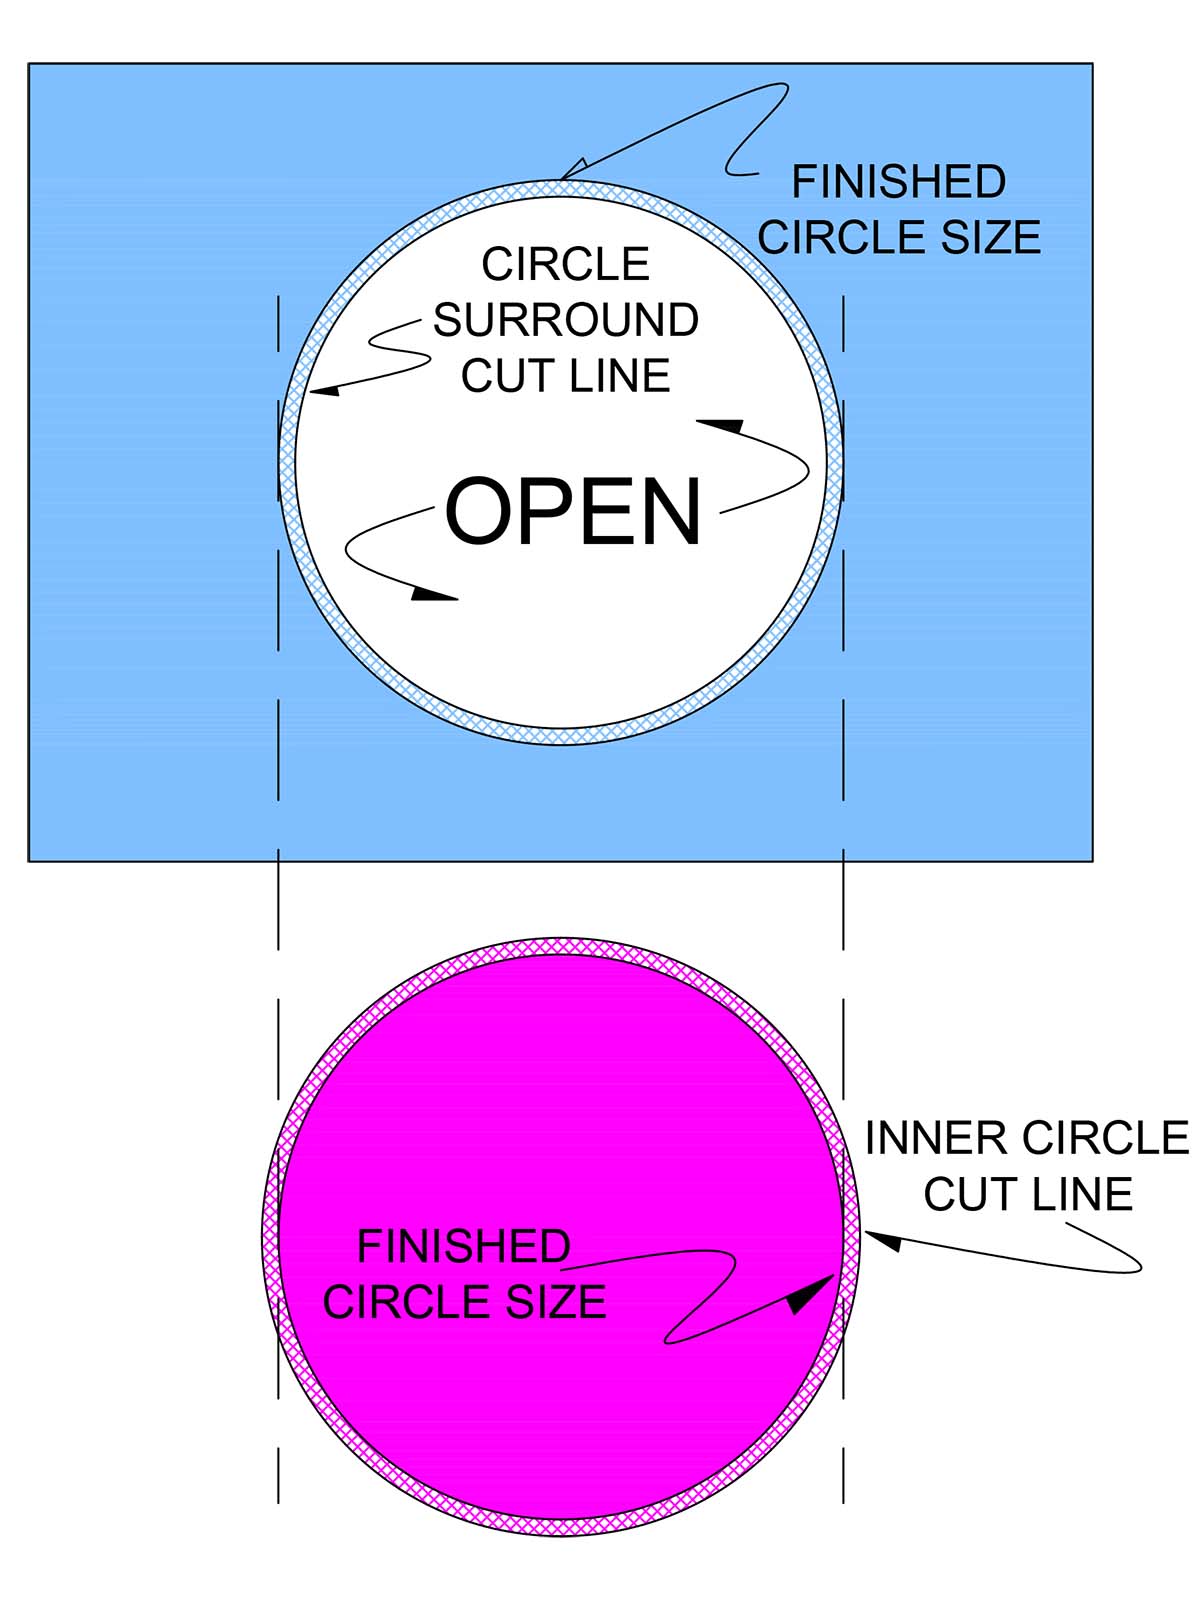
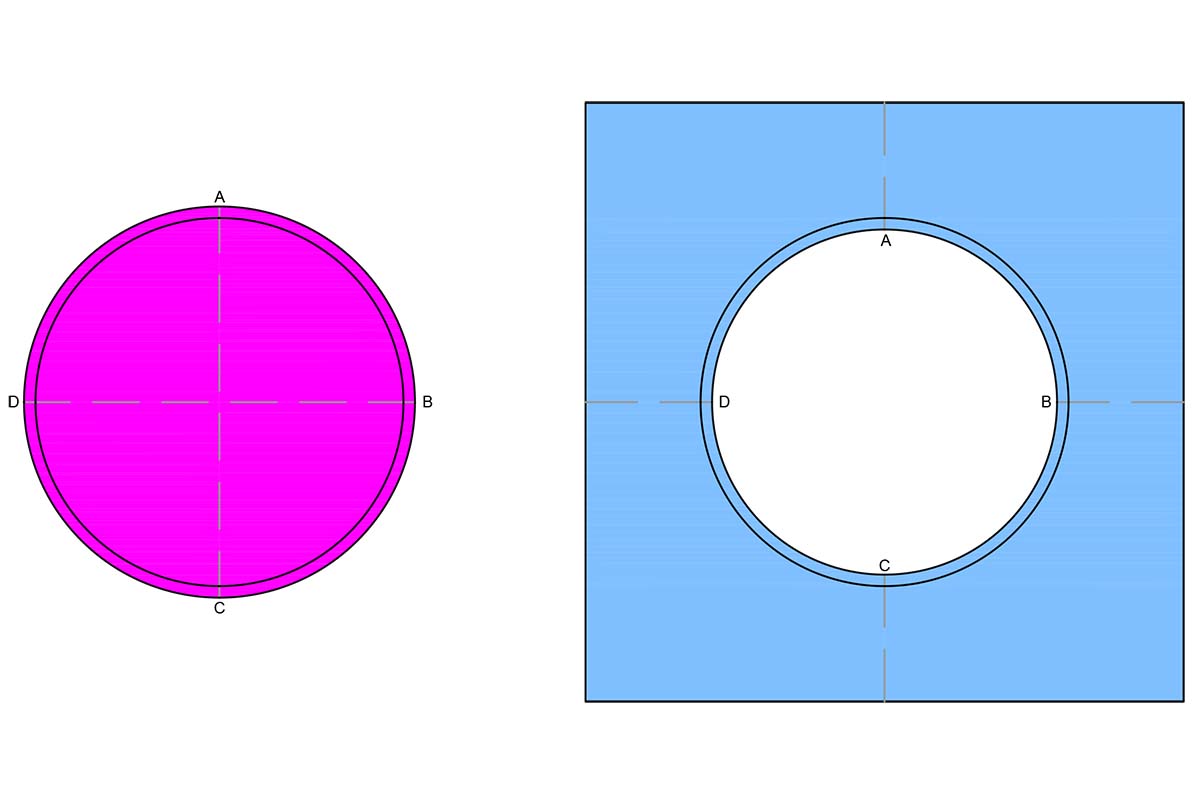
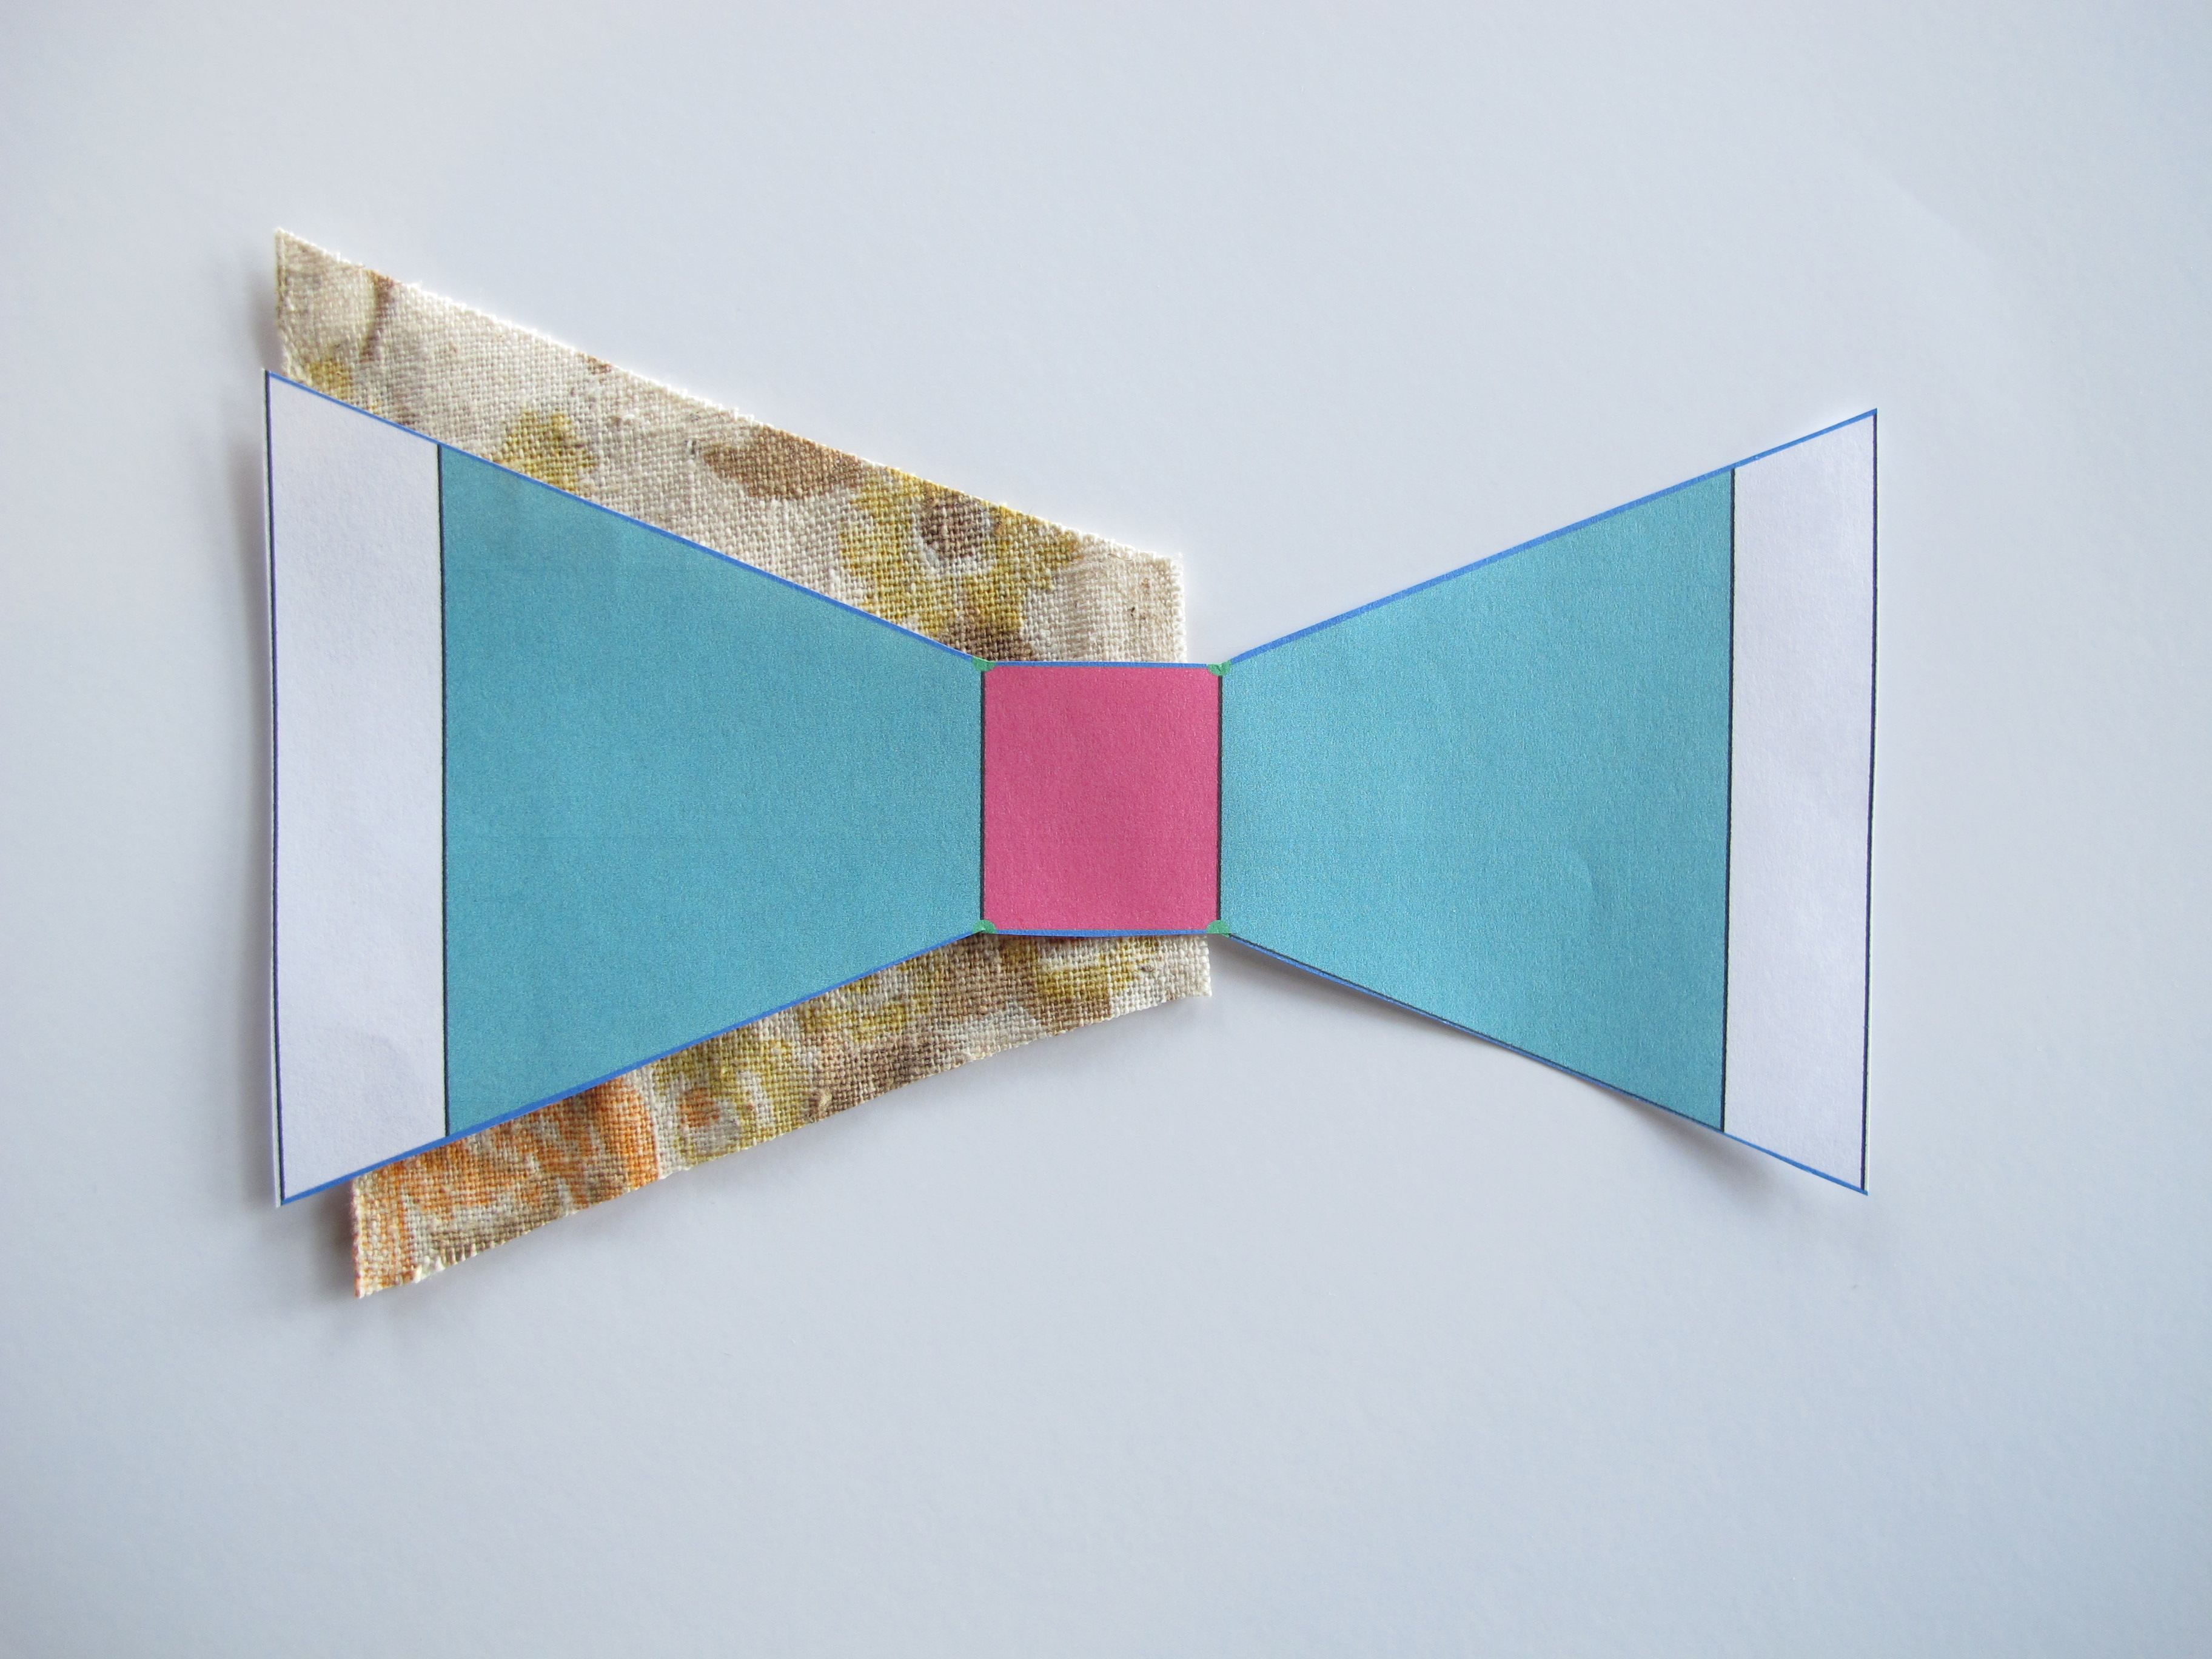
If you have sewn curves before, you may have noticed that the cut pieces don’t look like they should fit together, but once you start sewing, they do. The same thing happens when piecing a full circle. It works because the templates for your pieces are based on the finished size of the circle, and then seam allowance is added. The seam allowance is added to the outside edge of the circle and the inside edge of the surround. This is why, at first glance, the circle inset looks like it will be too large to fit into the surround, but don’t worry- it will work!
Piecing a Full Circle
Materials for Piecing a Full Circle
- Fabric* for the Central Circle: Cut a square at least 10″ x 10″
- Fabric* for the Circle Surround: Cut a square at least 14″ x 14″ (Always cut the surround larger than the desired finished size to allow for trimming at the end of the end of the block construction.)
- Coordinating 50-weight thread
- Download and Print the template below at 100% or “actual size.”
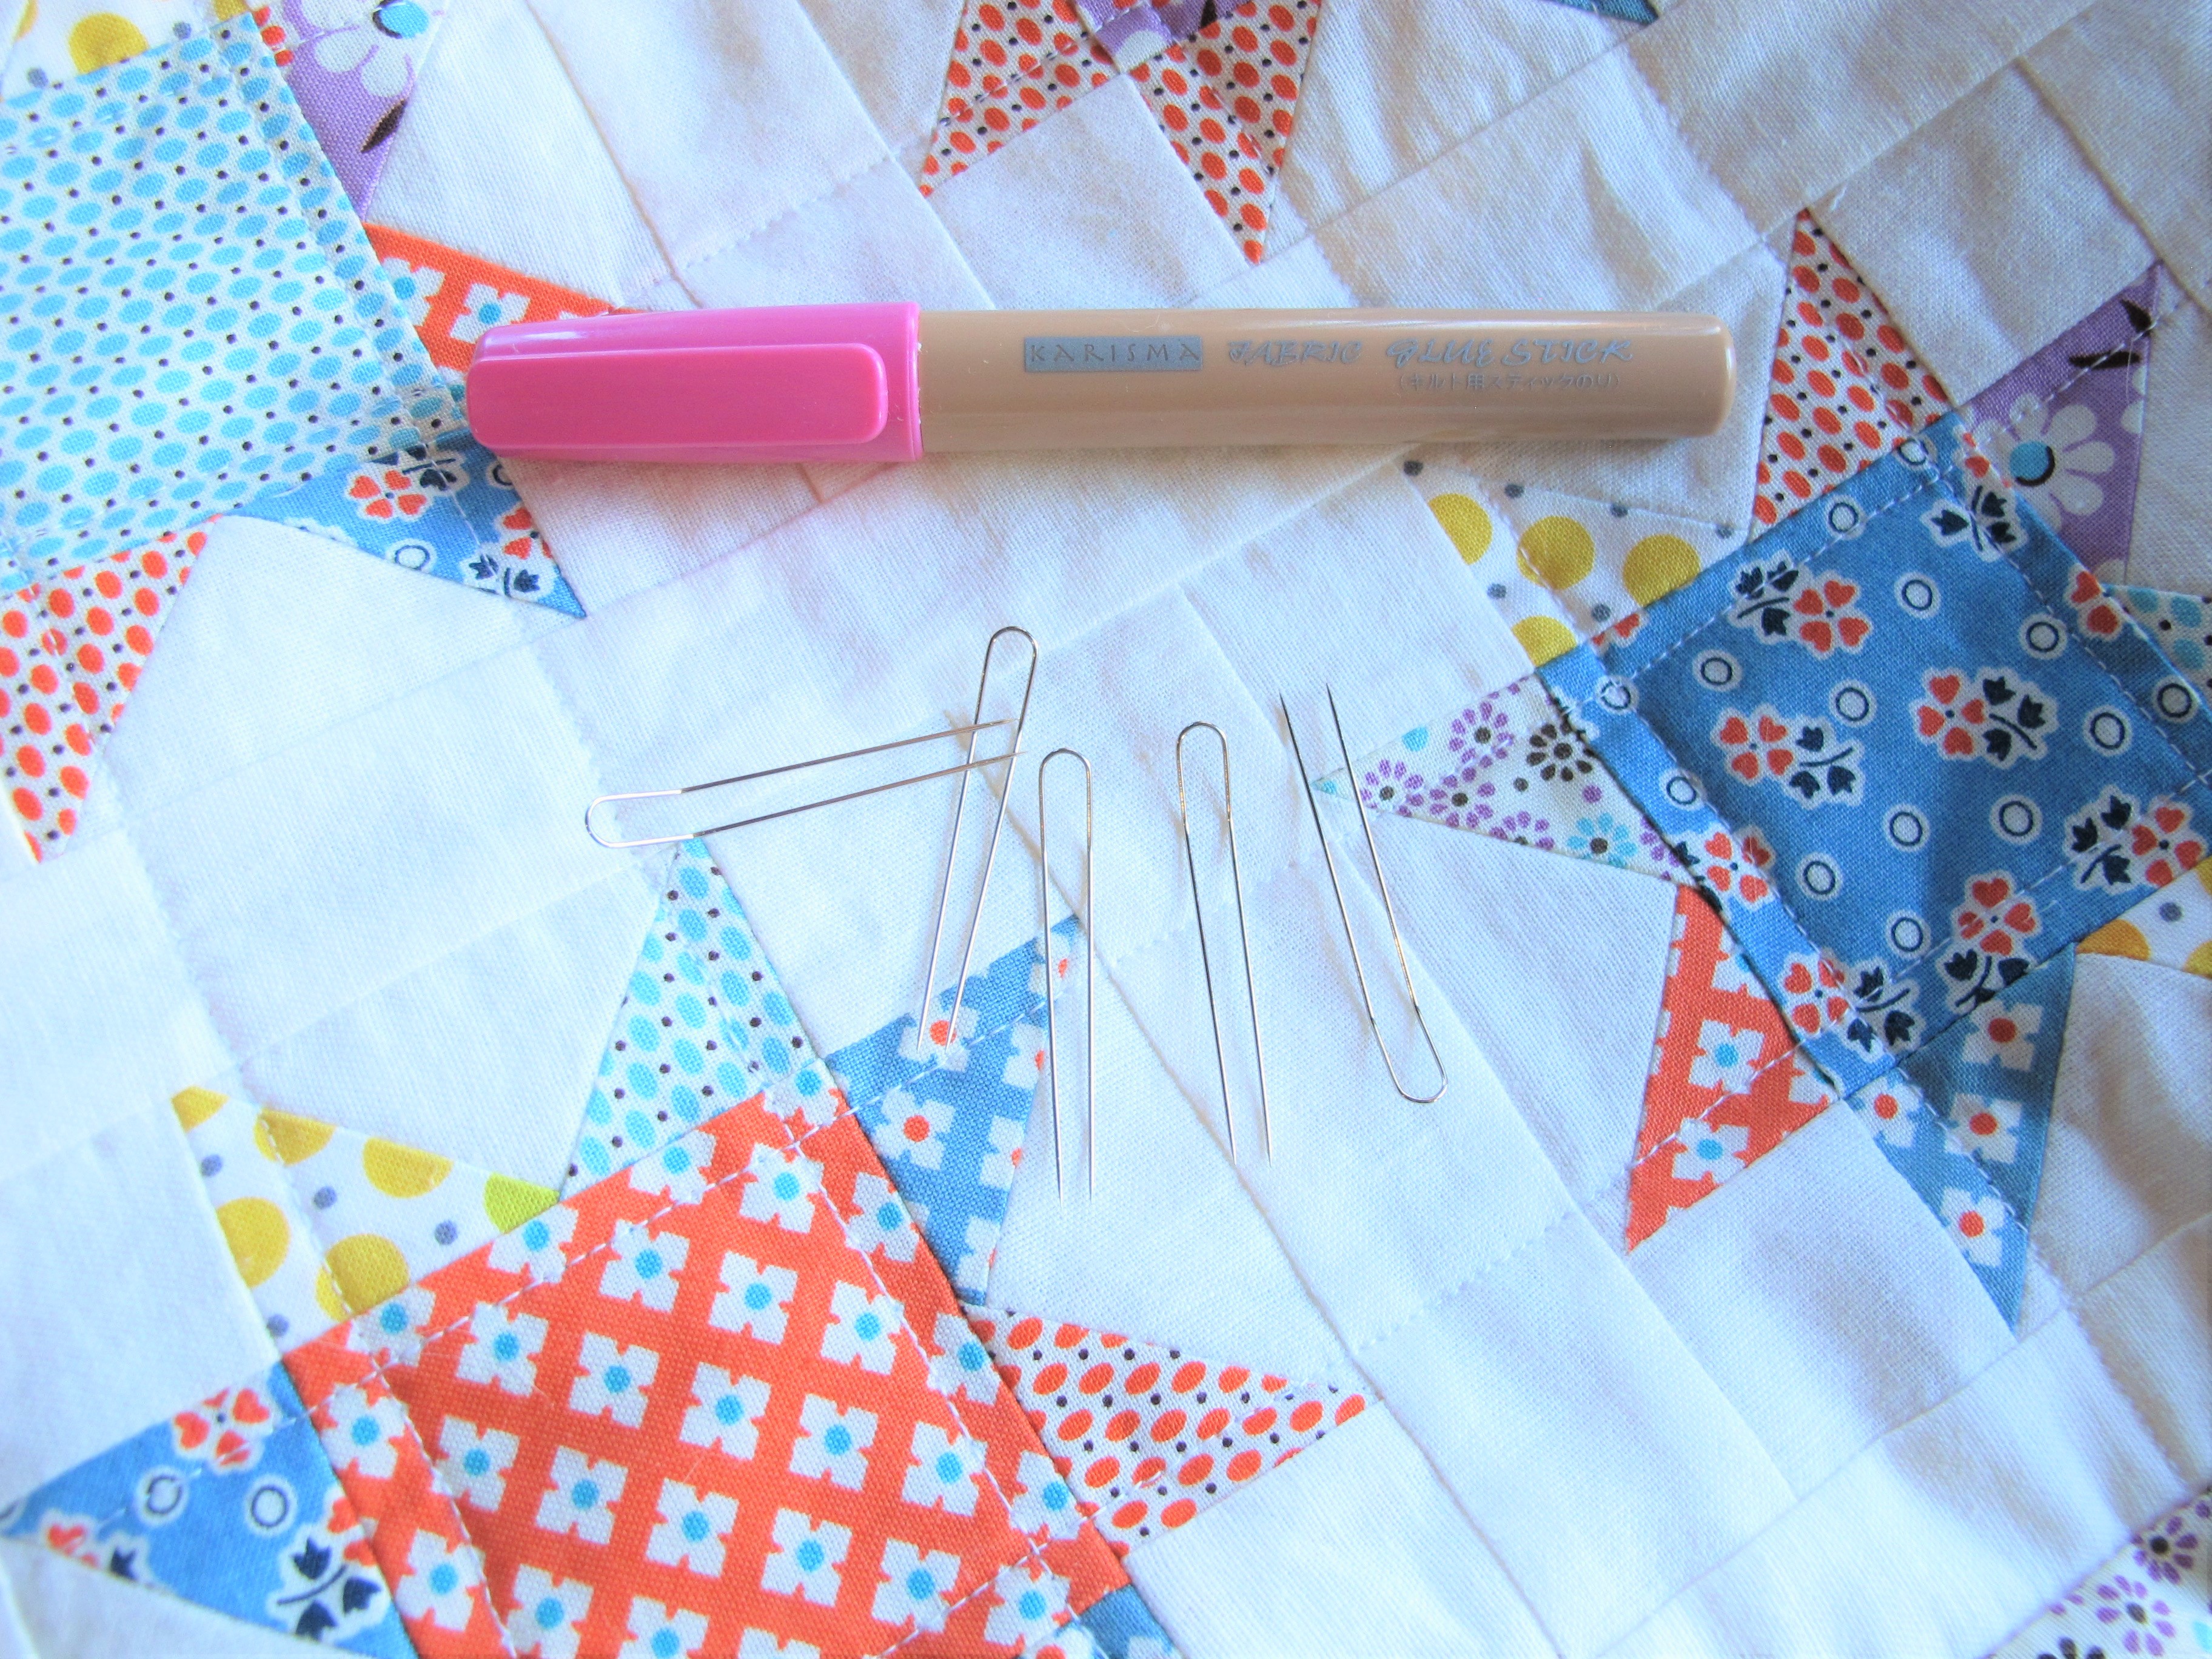
- Fabric marker or pencil that will mark your fabrics
- Straight Pins
- Fabric Scissors
- Paper Scissors
*Do not use your favorite, hard-to-replace fabric the first time you make a full circle. Save that for when you are confident with this new skill!

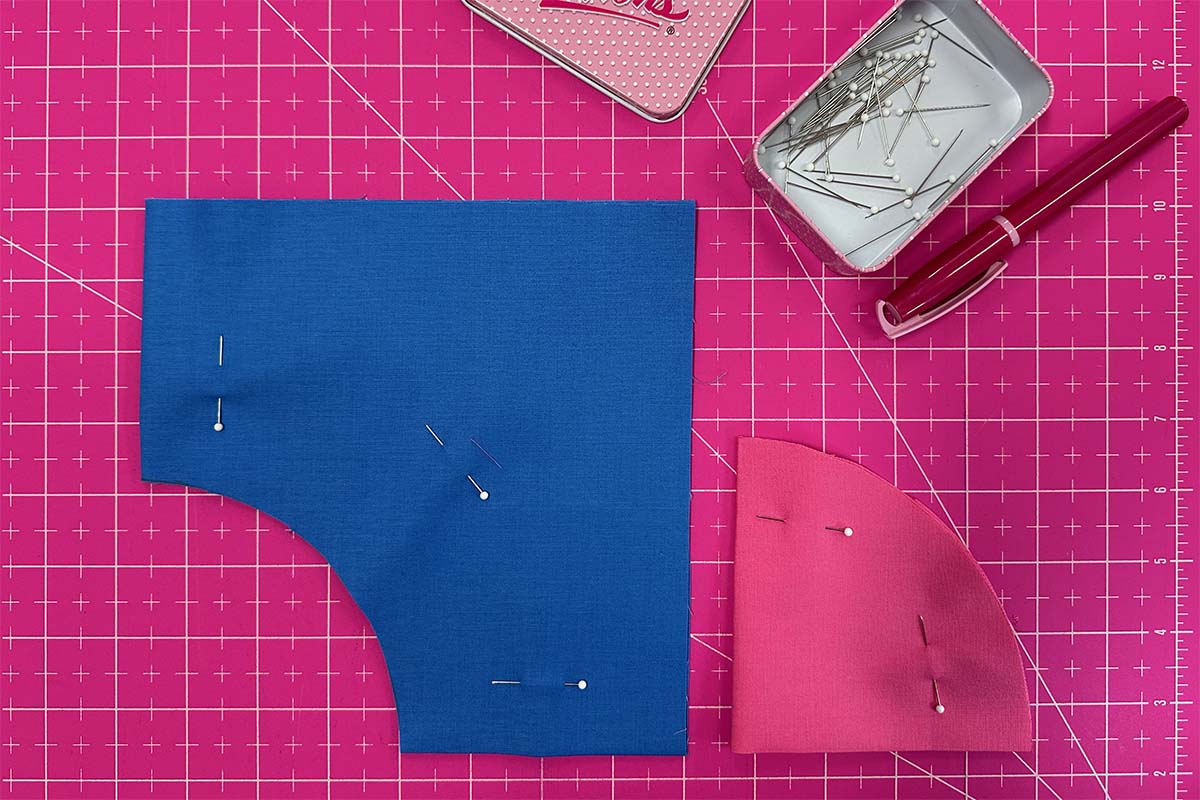
Cutting the Circle and the Circle Surround
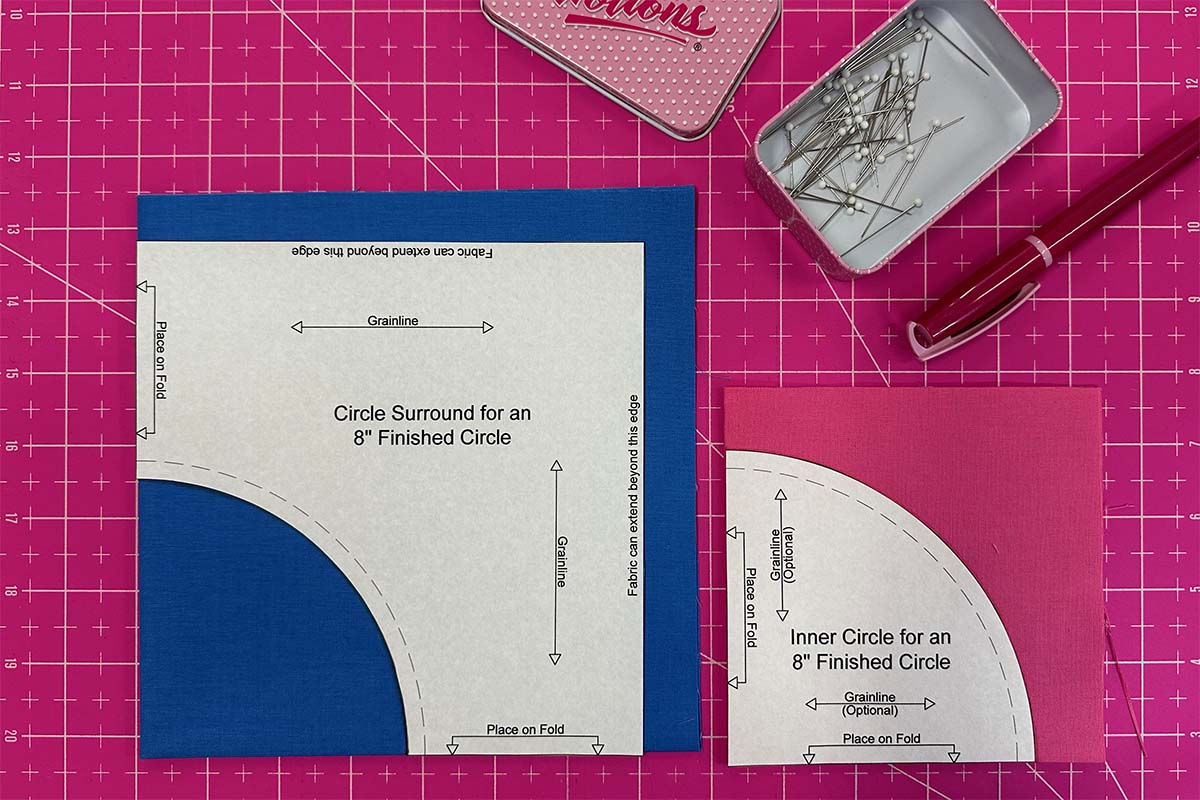
The key to a great experience piecing full circles is cutting your materials accurately. I am including a template you can download and print to practice cutting and piecing your first full circle. The circle created using the template will have a finish with an eight-inch diameter.
To ensure the template is printed correctly, measure the 1″ square on the template to ensure it measures 1″ in both directions. Cut the two templates out on the outermost solid lines.

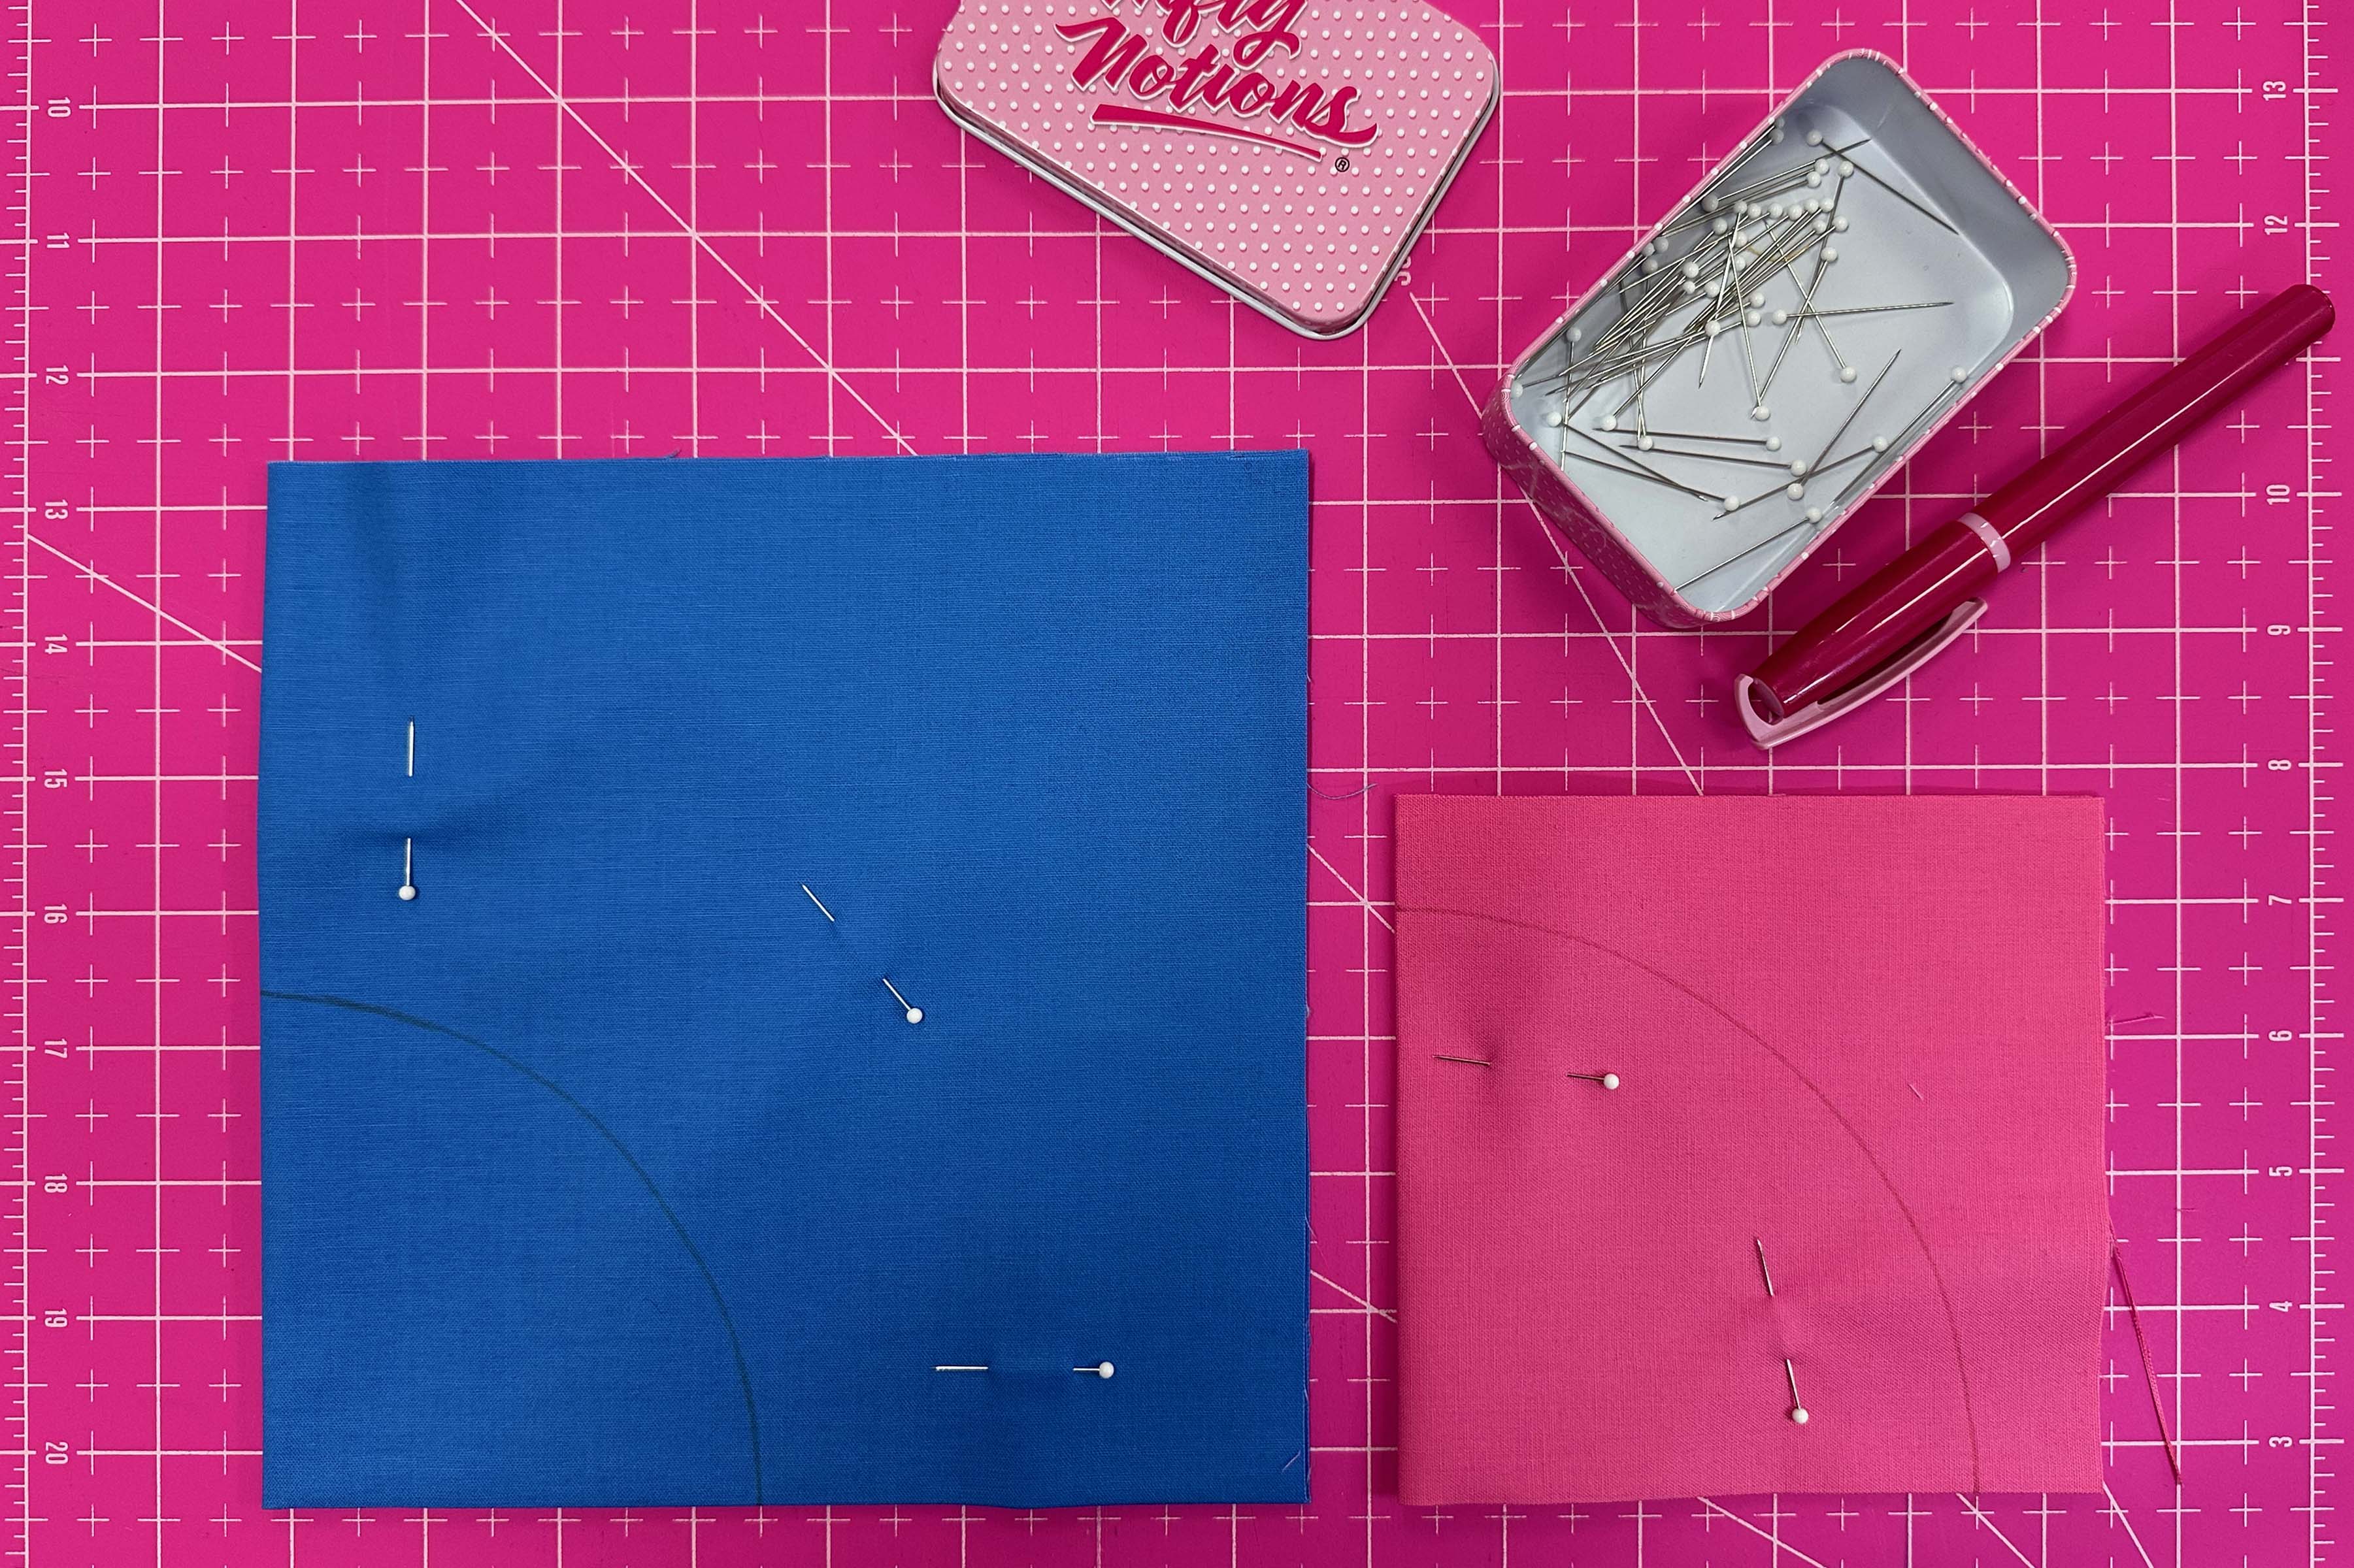
Fold each fabric in half lengthwise and press. Keep the fabric folded, fold each in half widthwise, and press this crease. If you open the fabric, you should see four equal sections, two in the top row and two in the bottom. Pay particular attention to the second fold line to ensure the creased edges line up.
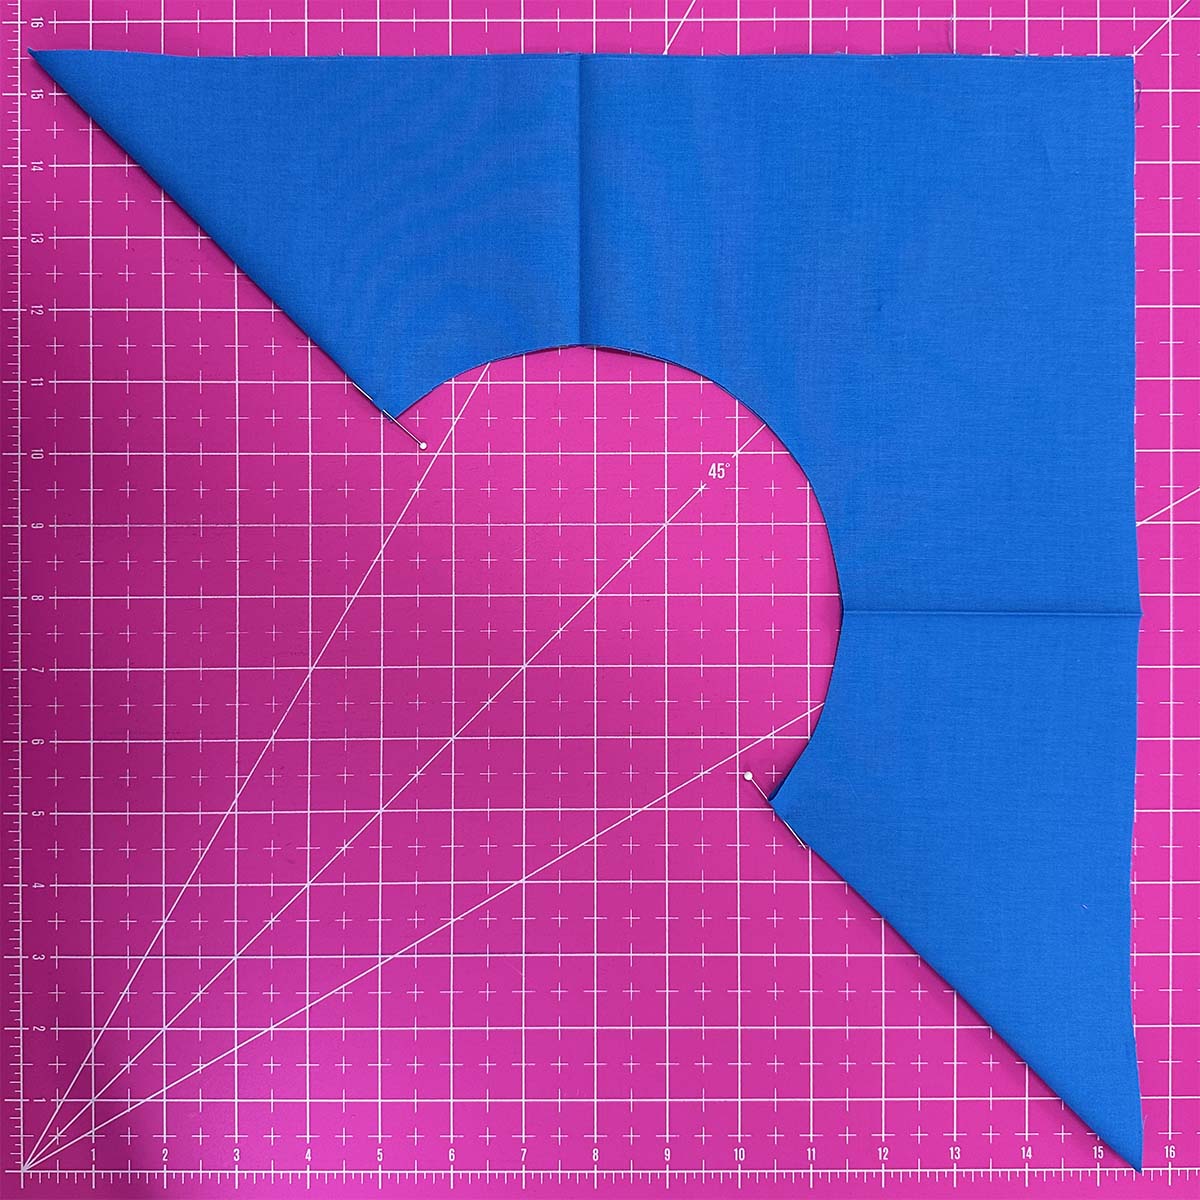
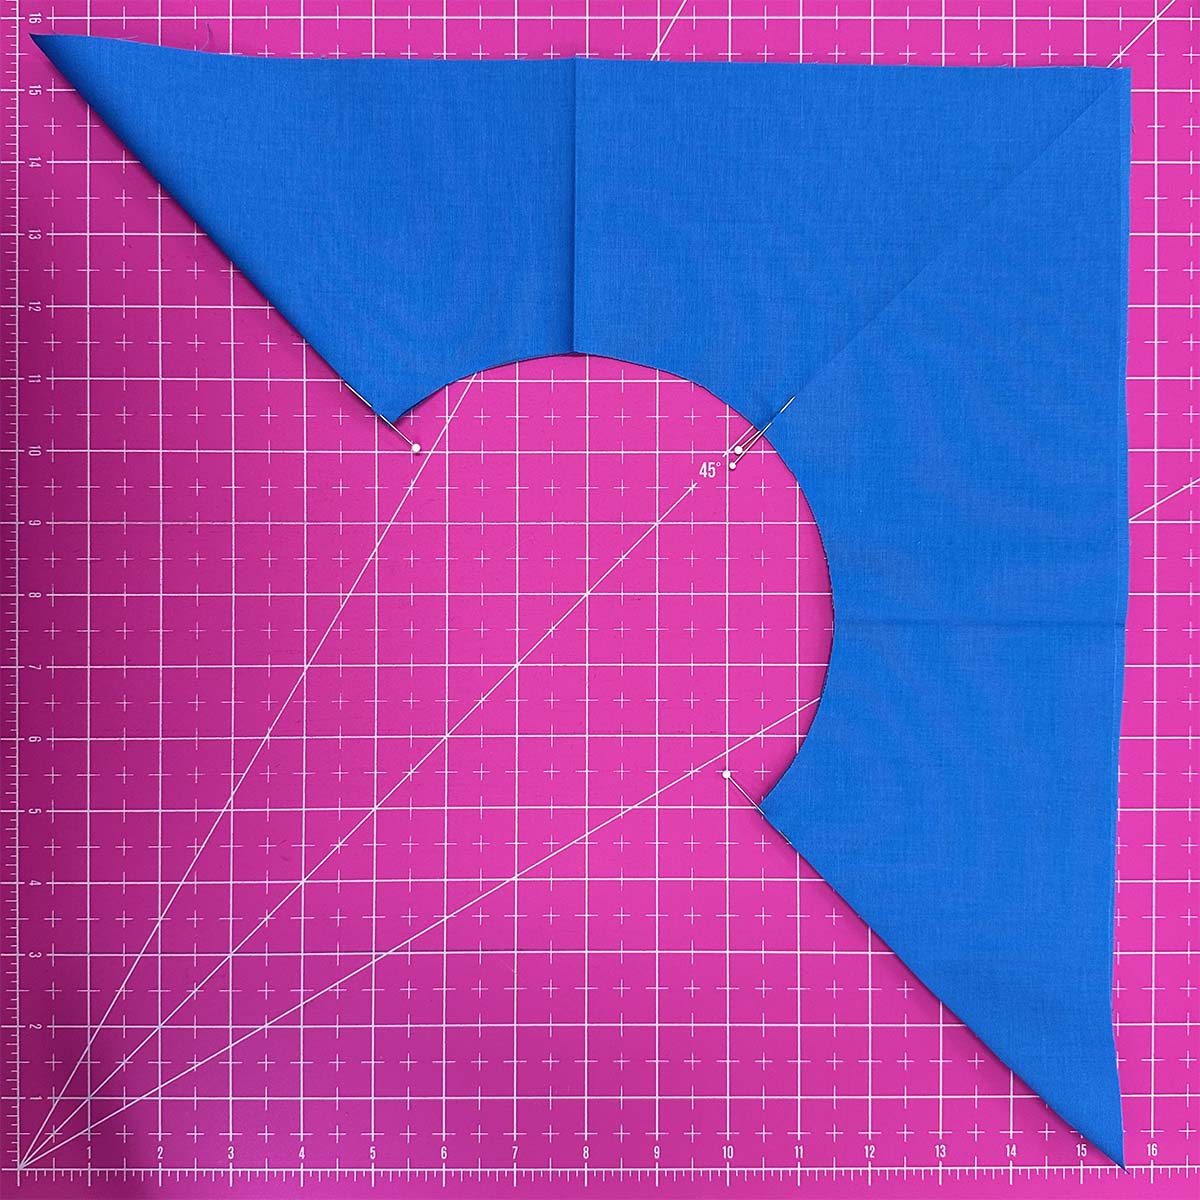
With the fabric folded along the pressed creases, position the paper templates, lining up the cut edges of the template on the folded edges of the fabric as indicated on the template. The edges of the block surround may not extend all the way to the edge of the template, or the fabric may extend beyond the edges. Any size surround will work for this block if the curved section has at least 1″ of fabric beyond the curved cutting line in all directions. I suggest cutting the surround larger than you want for the finished size, then trimming when the block is complete.
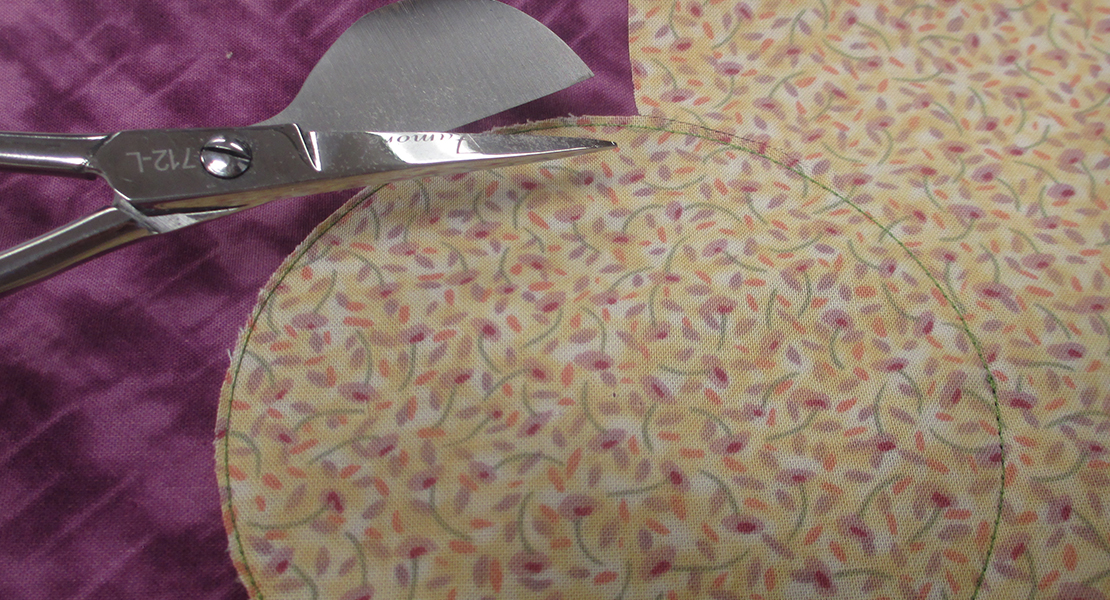
Use your fabric pencil or marker to trace the curved edge of the template onto the fabric. Then, use fabric scissors to cut the curve carefully and accurately. Leave both the circle and the circle surround folded until it is time to pin.
Sewing Machine Set-up for Piecing Full Circles
An accurate 1/4″ seam allowance is essential to have your full circle come out smooth and flat.
To prepare for sewing
- Thread your machine with 50-weight thread in a coordinating color
- Put the 1/4″ Patchwork Foot #37/37D, #57/57D or #97/97D onto your machine.
- Engage the dual feed if your machine has the option available.
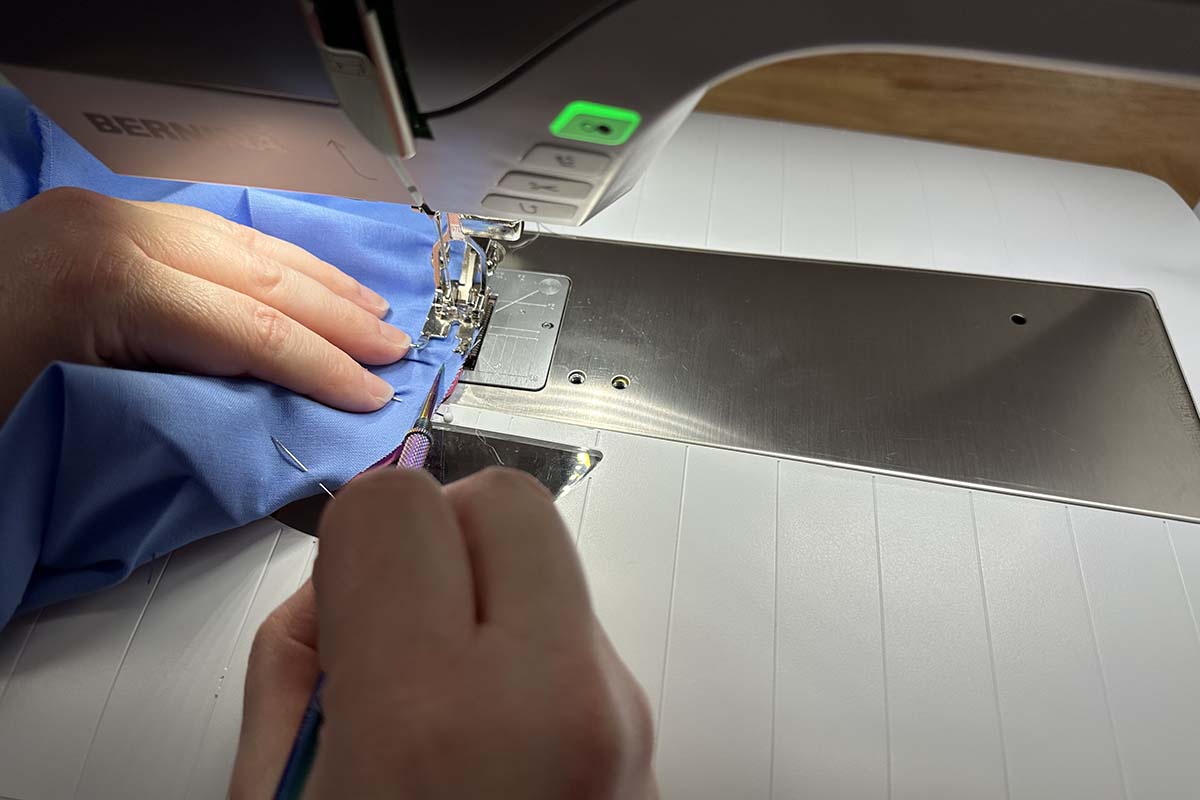
I am sewing on a BERNINA 770QE PLUS using the 97D Patchwork foot with the Dual Feed engaged. I recommend not using the external seam guide when sewing circles. Leaving it off the machine allows you to keep your pins in place longer as they approach the presser foot.
Piecing the Circle
Marking and Pinning the Pieces
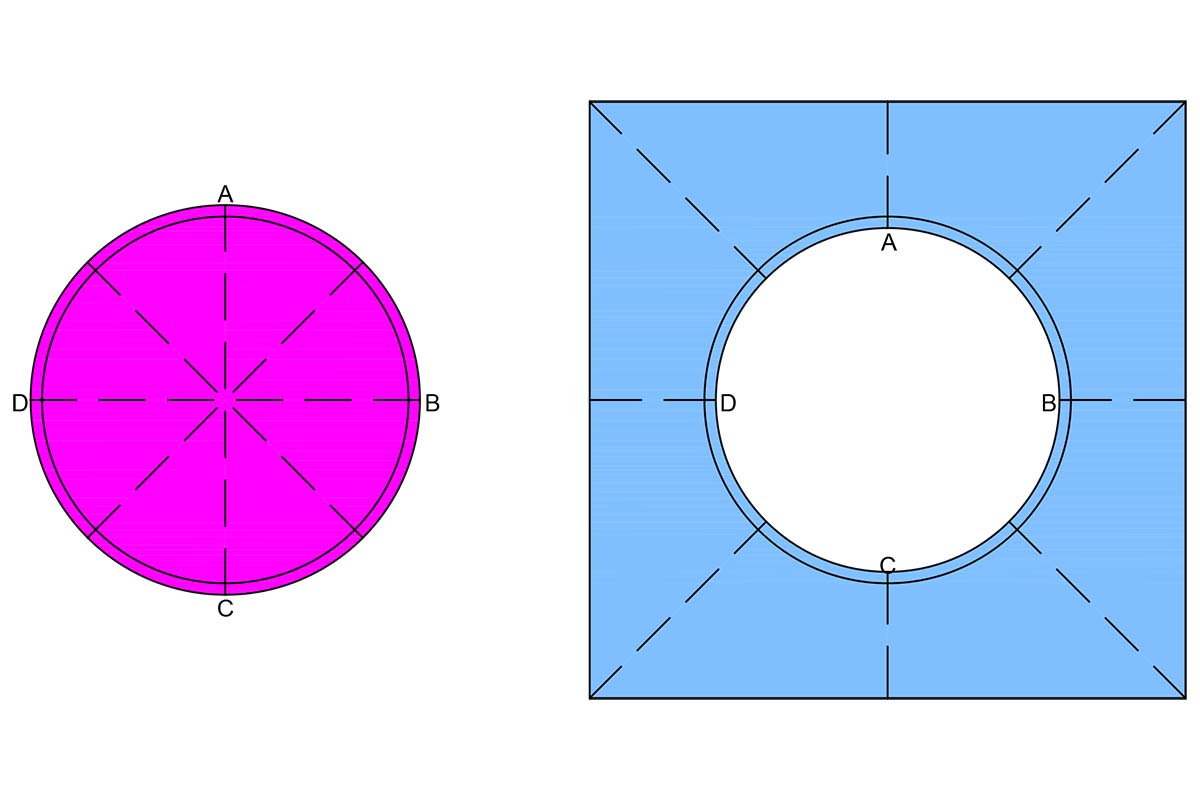
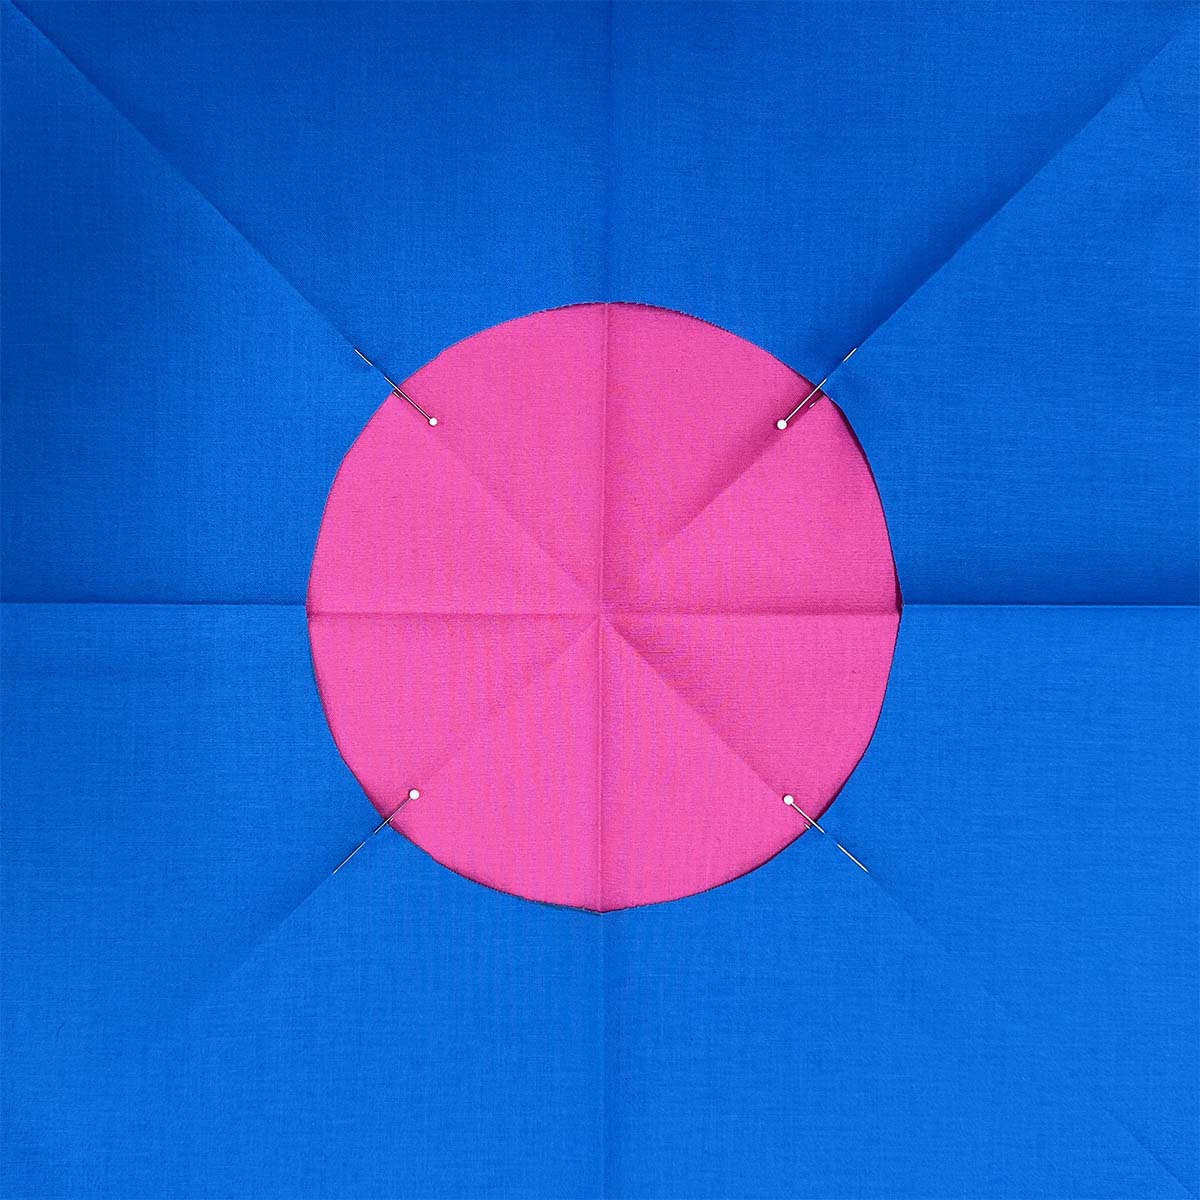
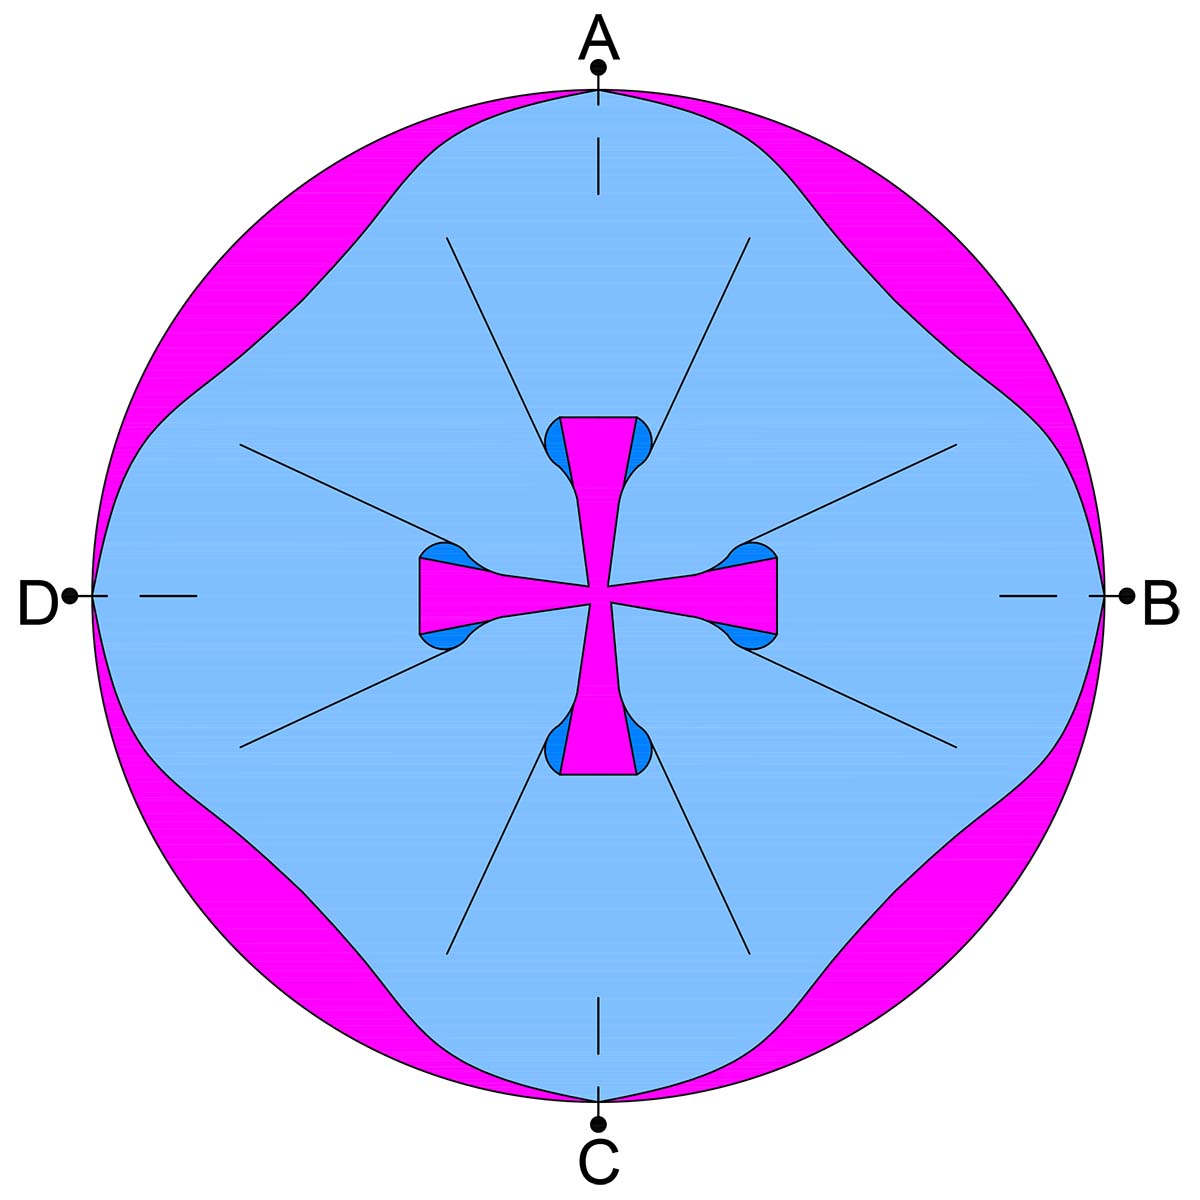
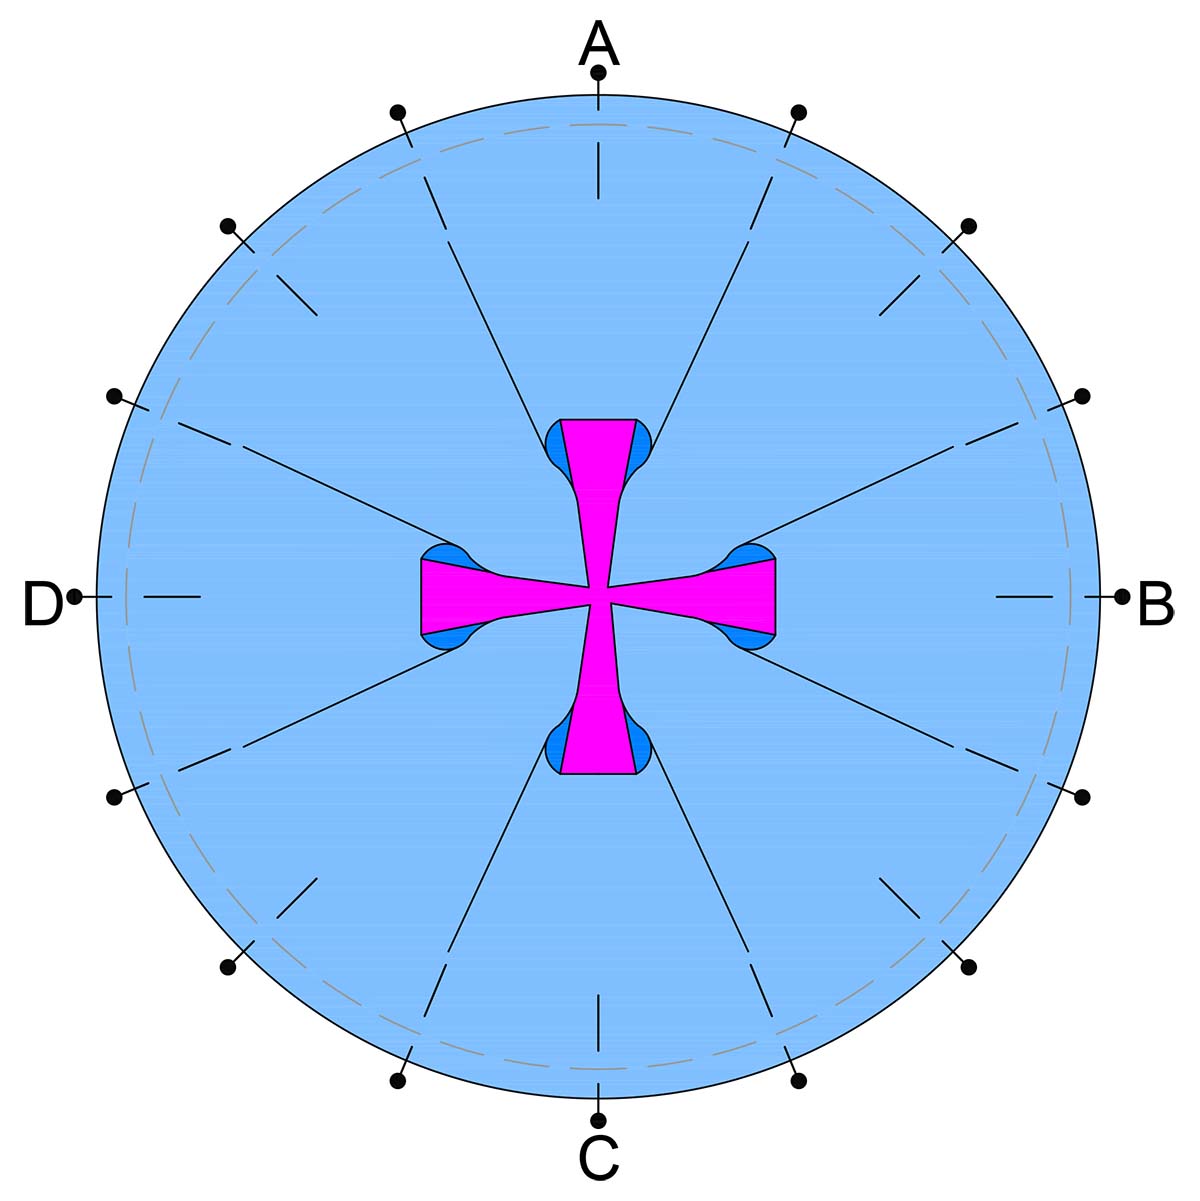
The fabric for the circle and surround are folded into quarters during the cutting process. These folds will also help with the piecing of the circle. The following diagrams mark the ends of these folds as A, B, C, and D. When helpful, diagrams are followed by a photograph in fabric form showing what the step looks like. If it is helpful to you, label your circle and surround pieces as shown.
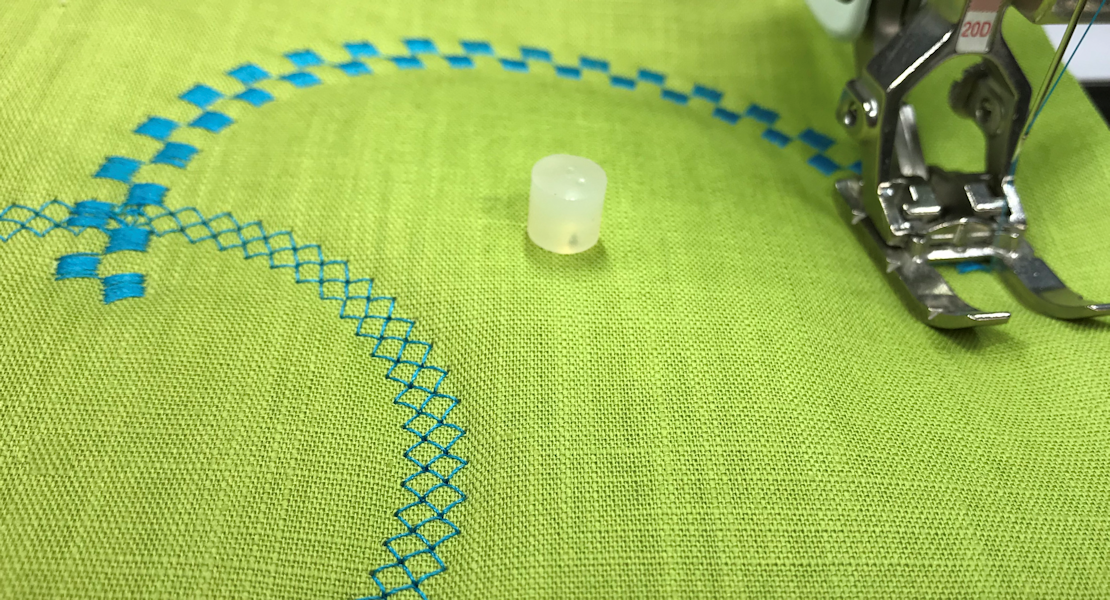
Fold the circle in half diagonally, matching points A to D and B to C. Mark this crease using pins, a crease mark, or a removable fabric pen.
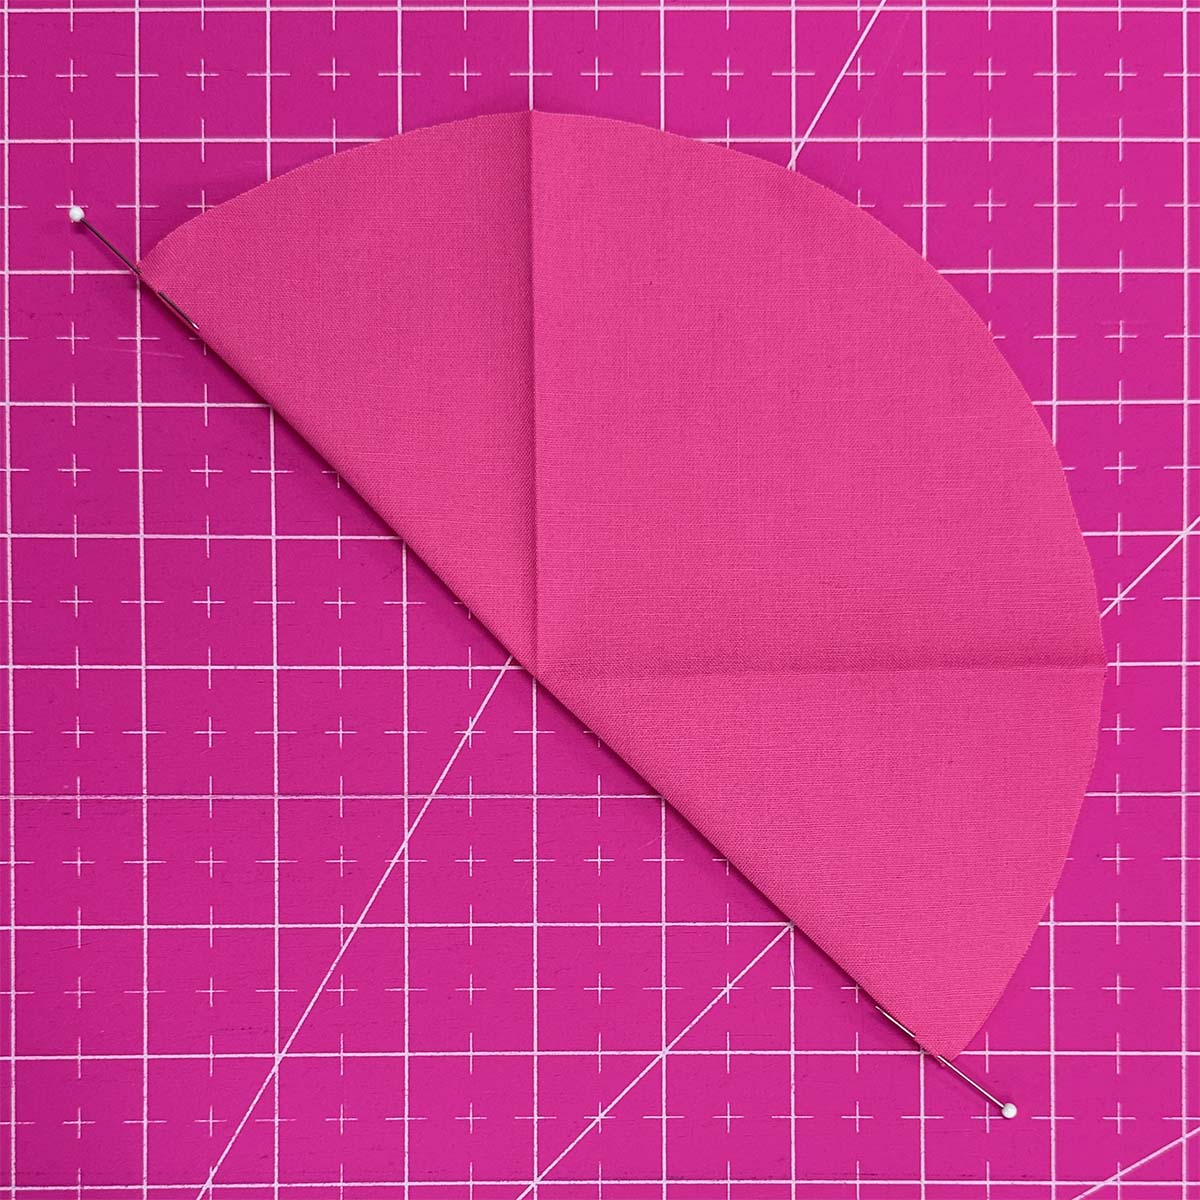
Fold the circle in half in the other direction to create the other diagonal line. Unfold the circle.
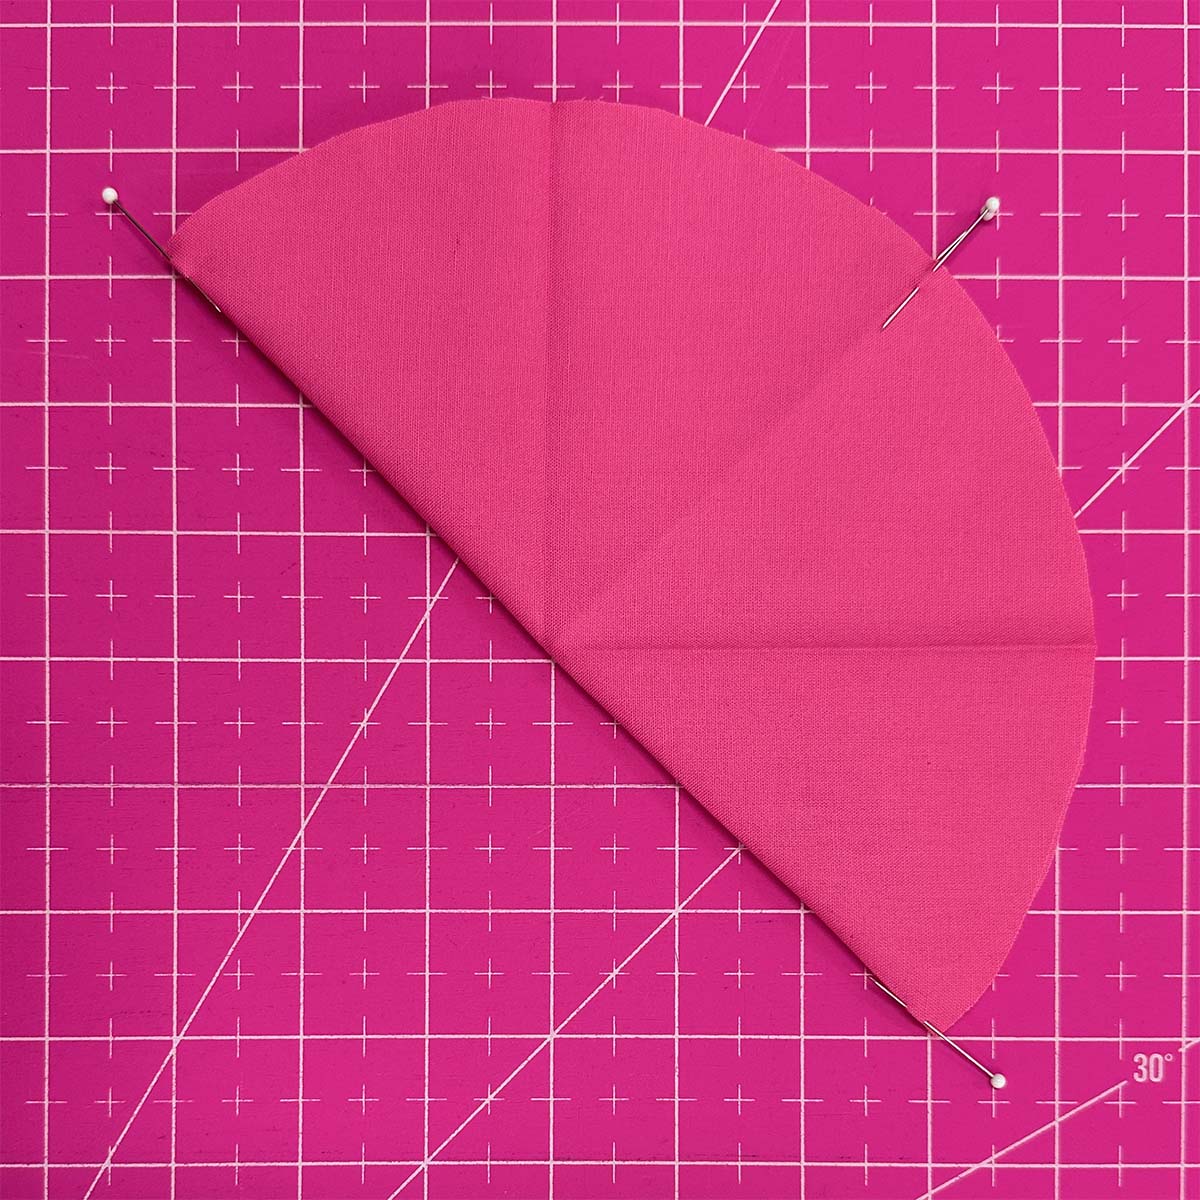
Repeat this process with the circle surround. Your circle and circle surround are now divided into eight equal parts along the curved edges.
Note: Curved cut edges are prone to stretching. Handle all pieces gently as you unfold and pin.
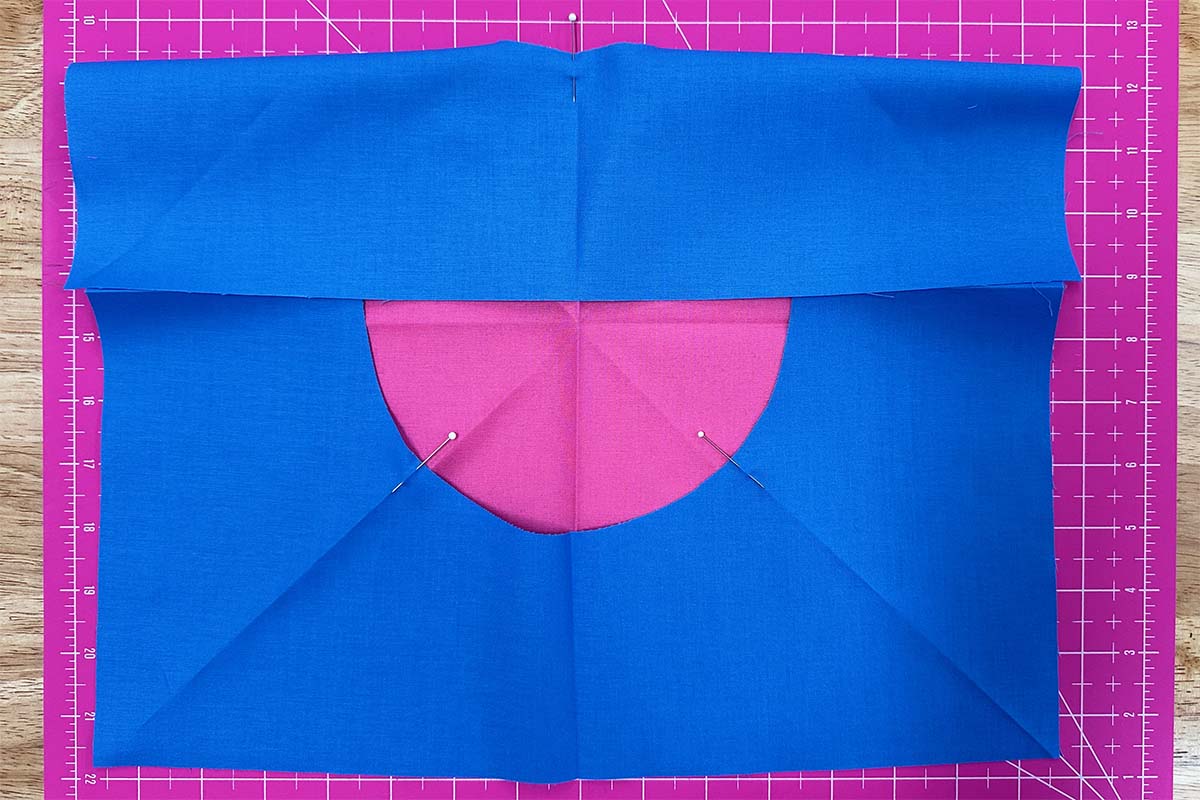
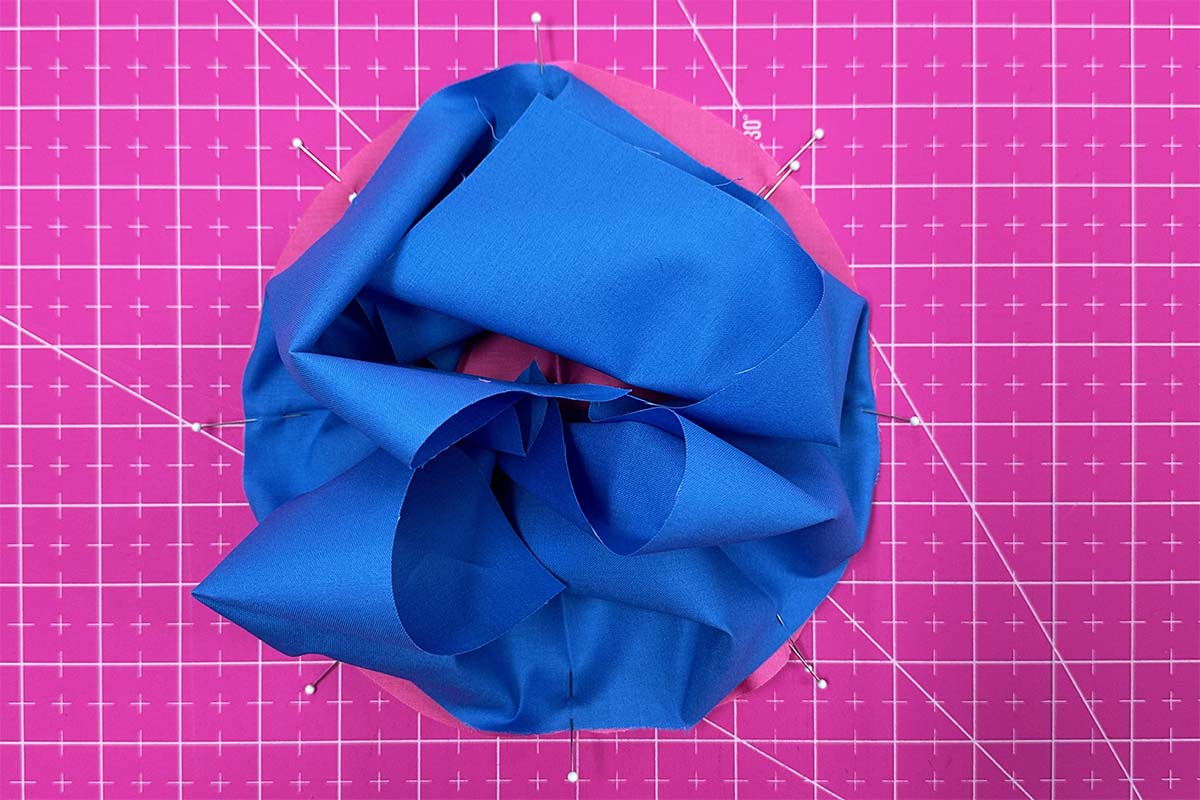
With the circle on the bottom and the surround on top, place the pieces right sides up in the position you want them to finish.
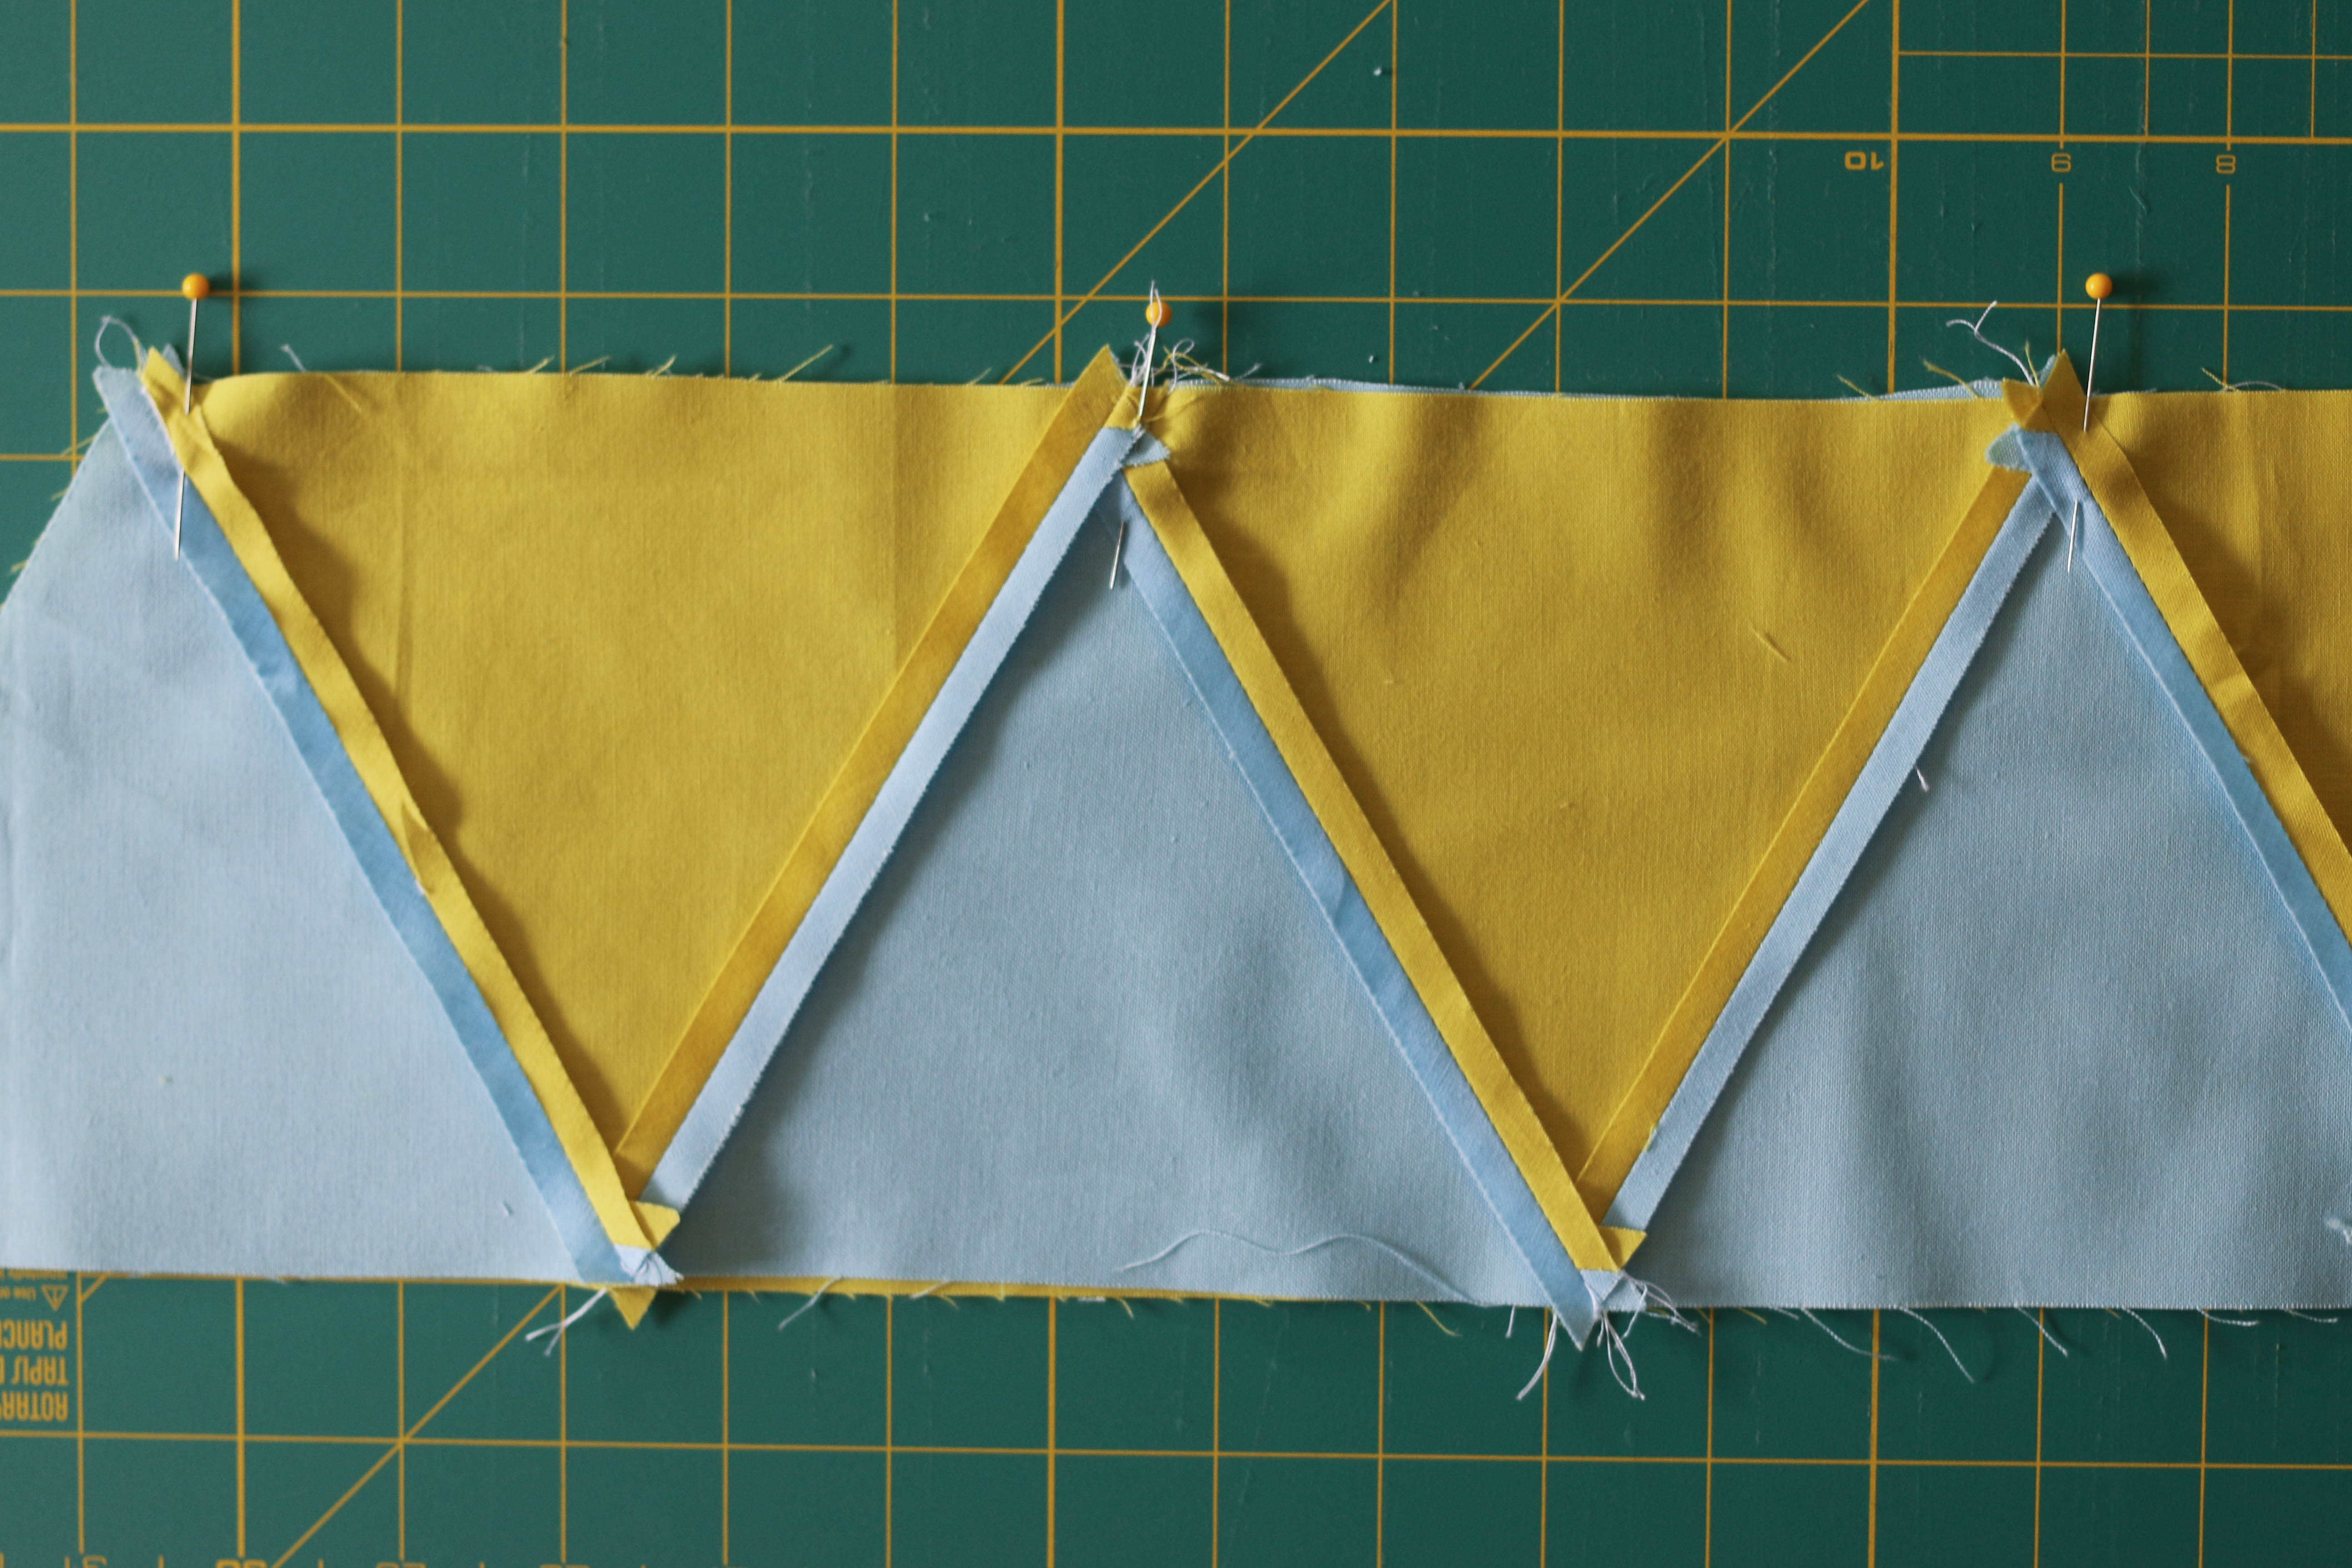
Pin points A-D using the process shown in the photos below.
Fold the circle surround point A down over the center circle so the right sides of the fabrics face each other and the cut edge aligns at the point.
Continue this process, matching each point on the circle to the corresponding point on the surround. Align the raw edges and pin.
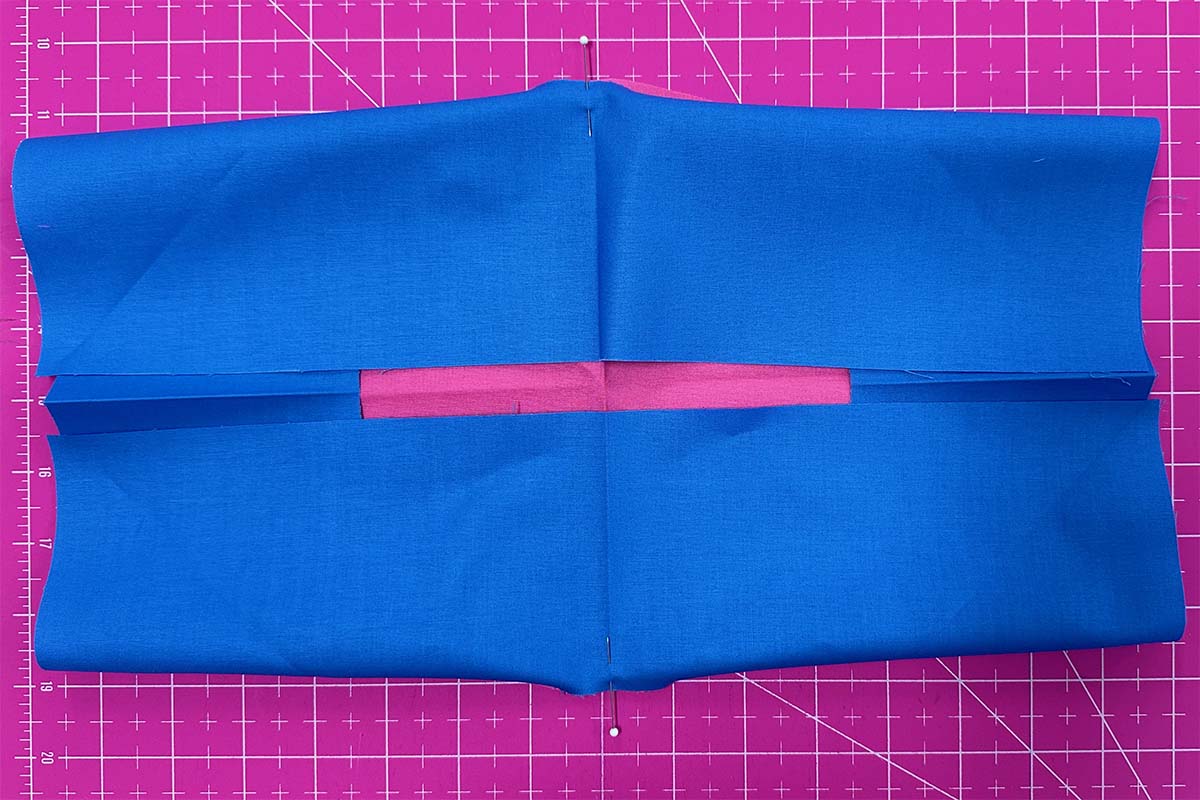
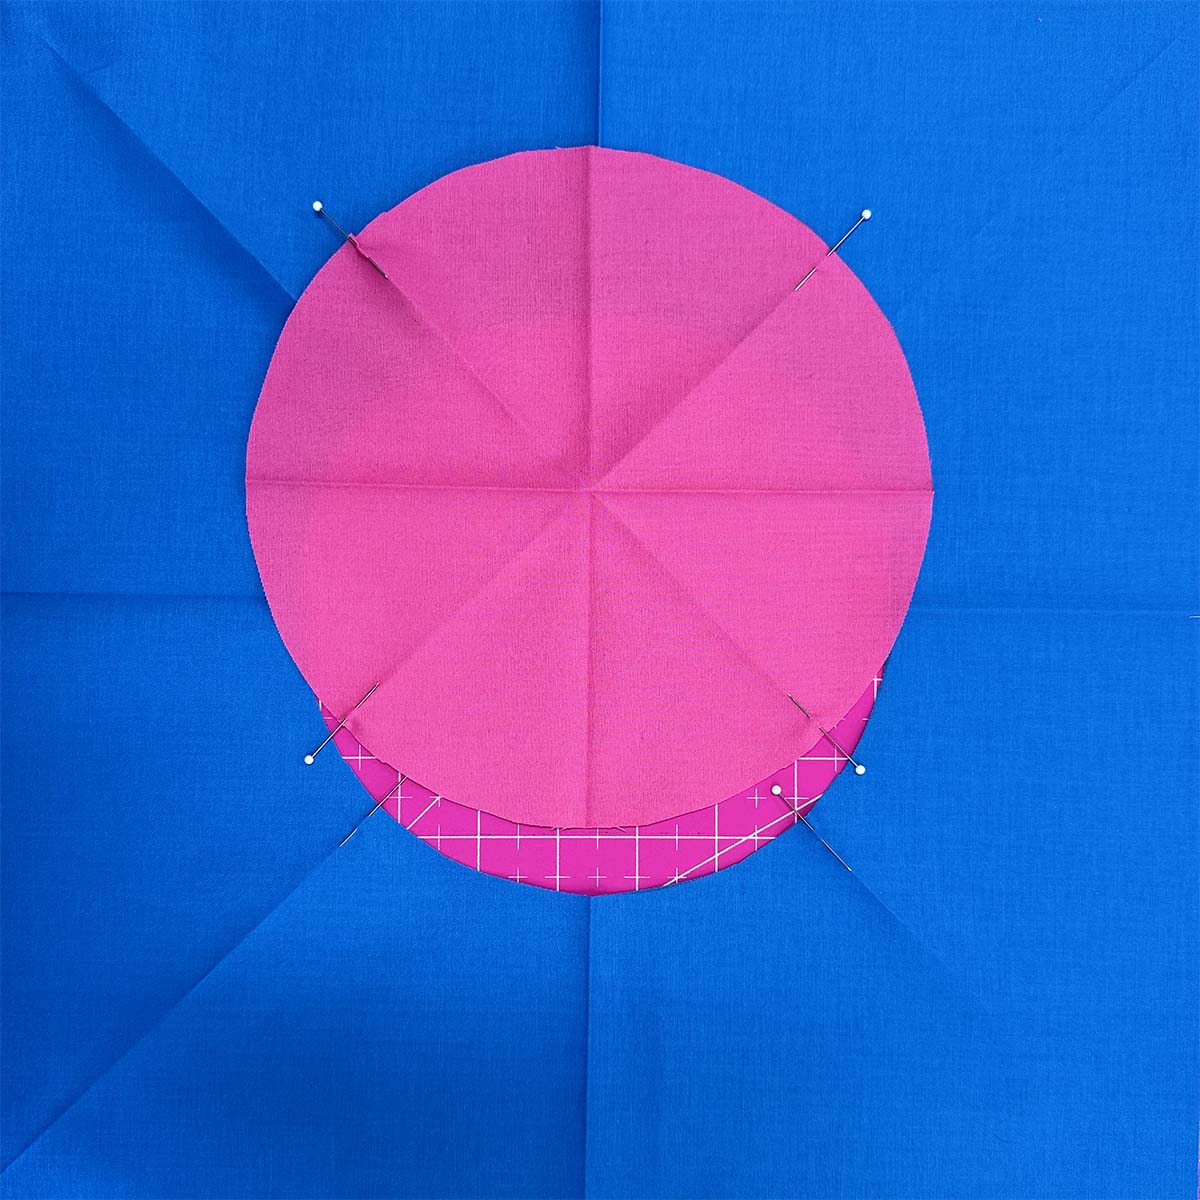
Once points A, B, C, and D are pinned, align and pin the marks halfway between them.

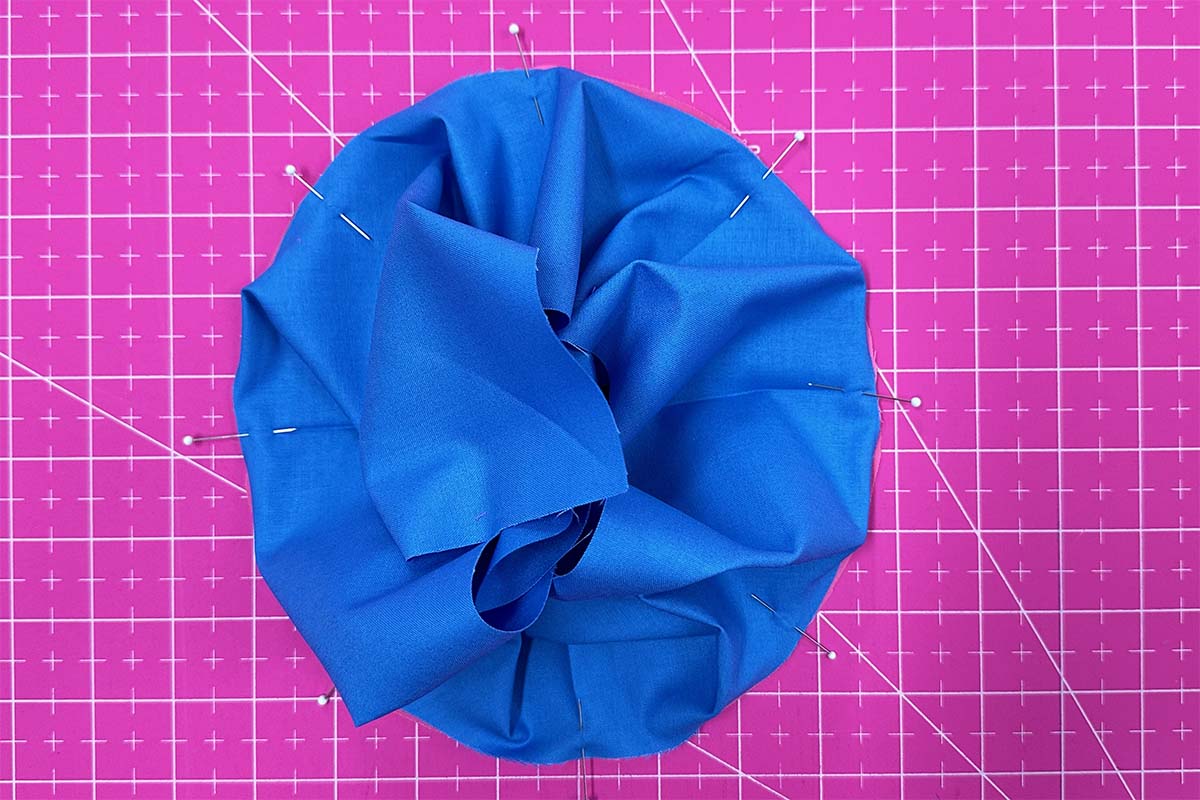
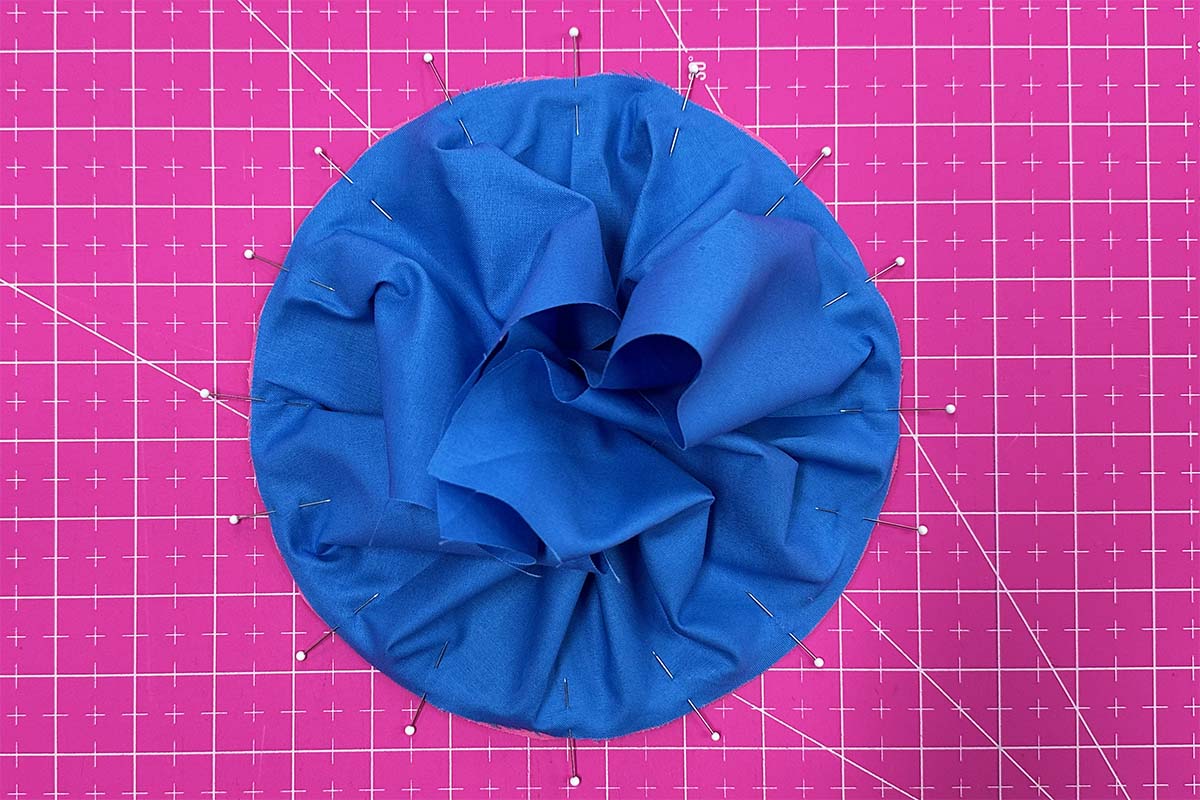
Continue placing pins about halfway between the previously placed pins and aligning the raw edges of the circle and surround. Add as many pins as you like. For a circle this size, I put at least one additional pin in each eighth of the circle, but you may want to add more, especially if this is your first time sewing a full circle.
Stitching the Full Circle
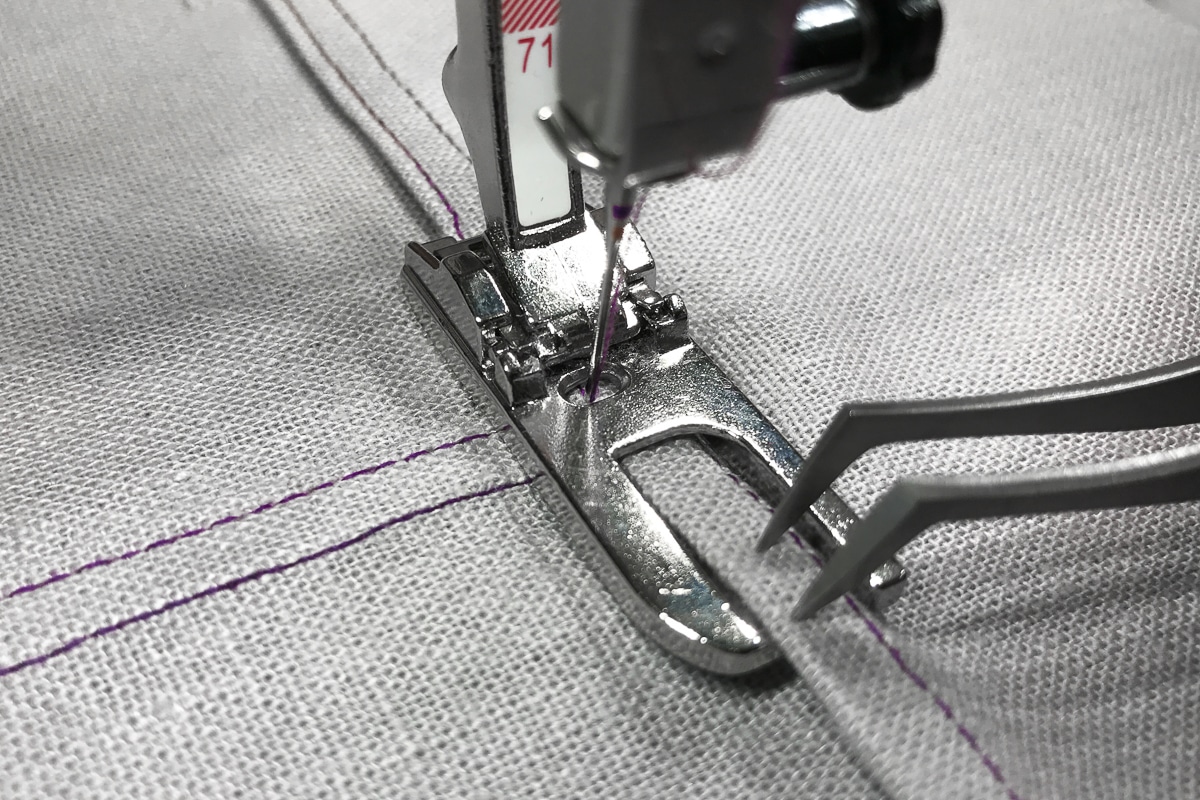
Stitching slowly, sew around the pinned edge using a 1/4″ seam allowance. Remove the pins as you sew.
Pay attention to how the fabric is positioned between the machine needle and the next pin. The fabric elsewhere on the block may look bunched up as you sew, but it will get your attention as it heads under the needle.
If you notice a bubble of fabric forming in the top layer of fabric, try to catch it early and lighten the pressure of the presser foot to help prevent stretching. I have found that 40-45 presser foot pressure works for most quilting cotton, but you may need to adjust the pressure if you work with thicker or thinner fabrics.
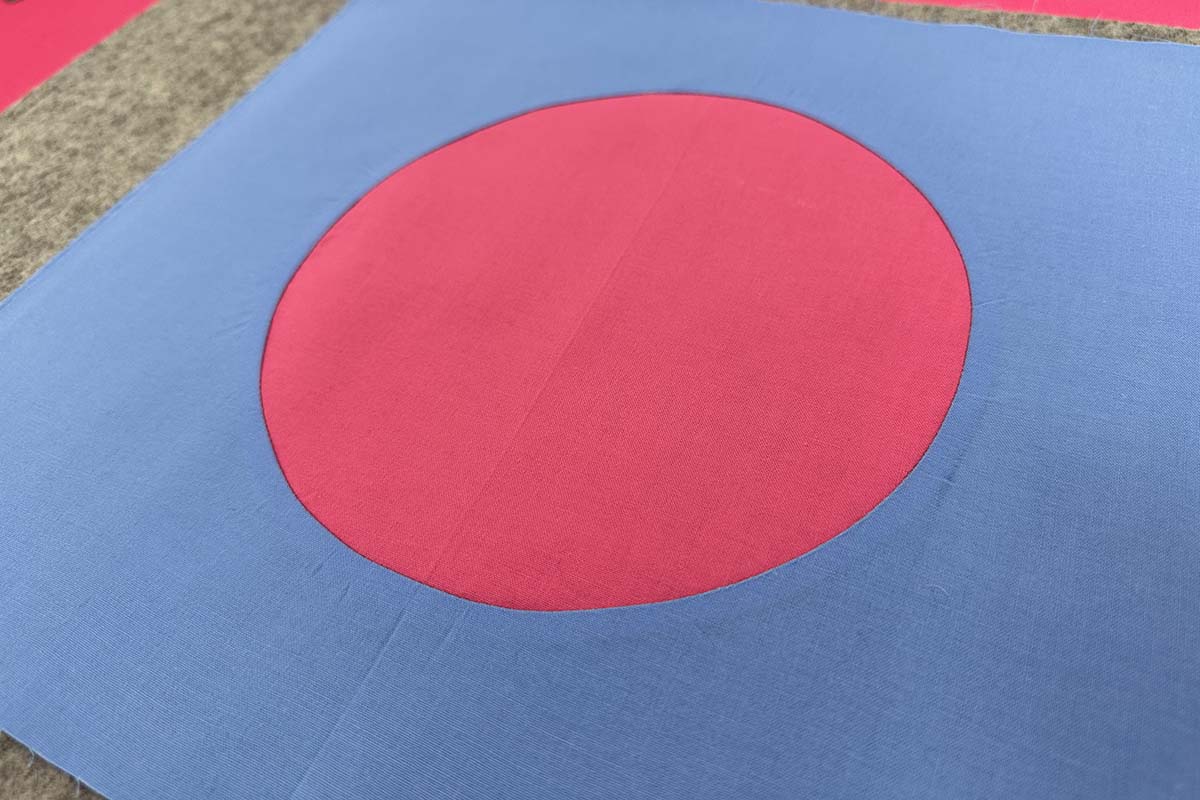
Pressing the Full Circle
Once you are finished piecing the full circle, press the seam allowance towards the surround or the central circle. I typically press out towards the circle surround, but that can change if the surround is:
- Heavily pieced, and the seam allowance would have less bulk if pressed toward the center circle.
- A very light-colored fabric, and the center circle fabric is dark enough to create shadowing.
- A heavier fabric that makes the seam allowance want to lay toward the center of the block.
I press in two stages.
First, with a dry iron, I gently position the seam allowances in the direction I want them to lay, pressing lightly as I move around the circle.
Second, I use a starch alternative (such as Flatter or Best Press) and/or a lot of steam to press the block flat. This process can be repeated several times if there is minor bubbling in the center of the block. If there is more bubbling in the center of the block than will press out, you may need to check that you are stitching an accurate 1/4″ seam allowance and try again.
Going Further With Piecing Full Circles
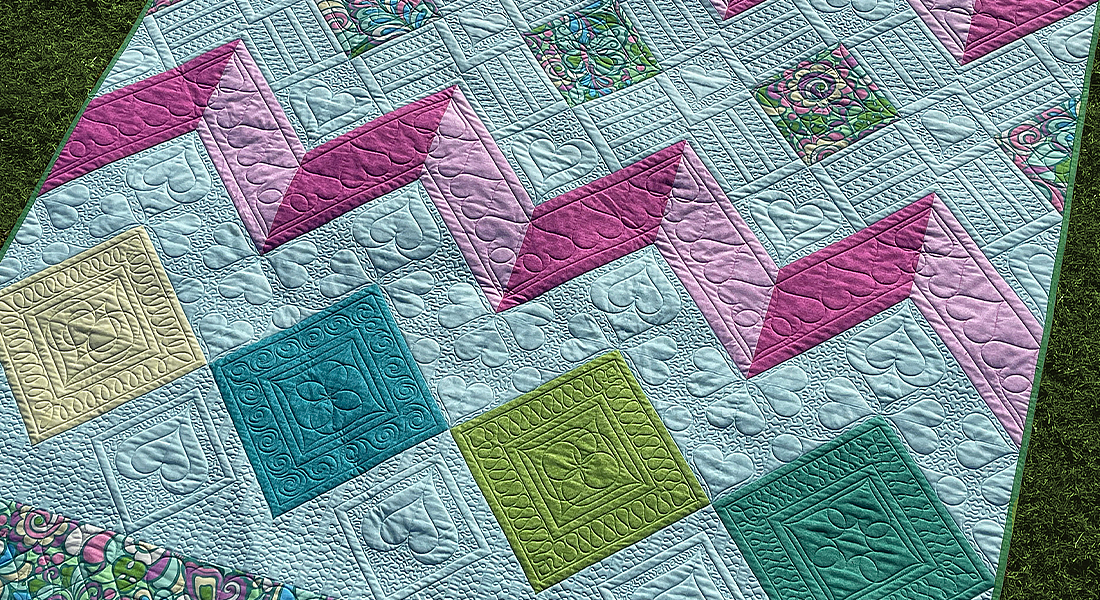
You can add a design twist once you have mastered the piecing technique for full circles.
Change the Circle Size
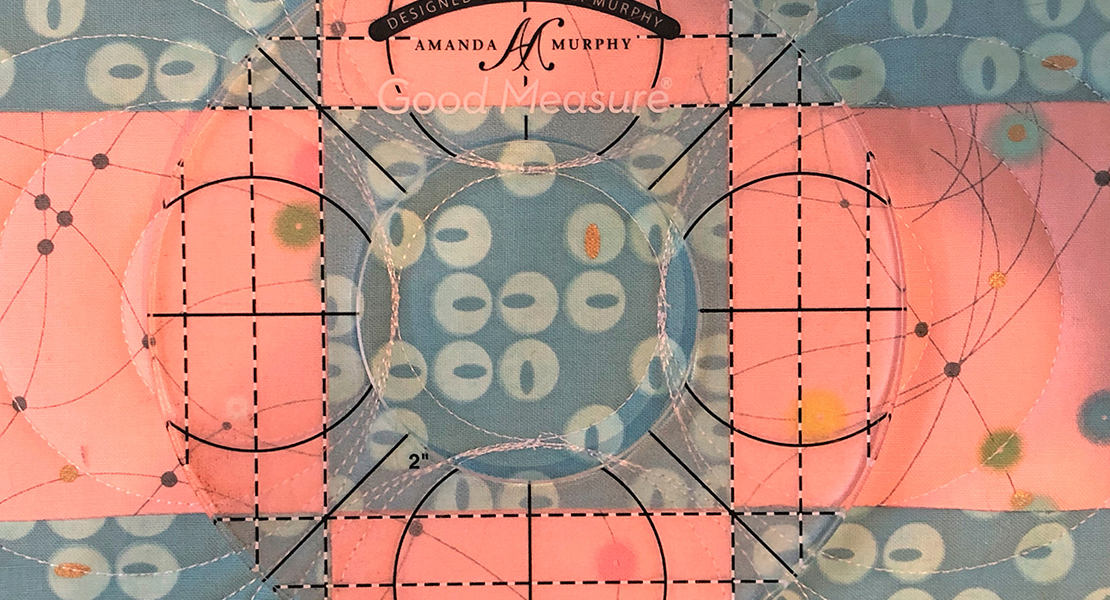
You can draft your own circle templates to make different sizes of circles, but it’s even easier using a specialty ruler designed to create full circles. My favorite is the Classic Curves Ruler. I used it in most of the designs shown here.
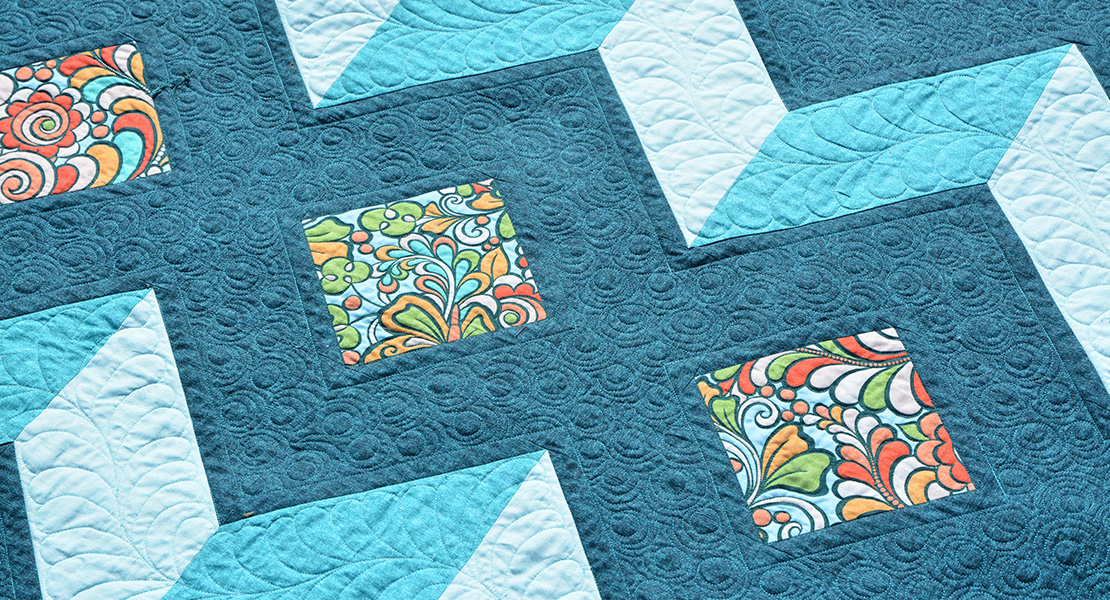
Piecing Full Circles Inside of Circles
Why stop at one circle when you can have more? When placing one circle inside another, work from the outside inward towards the center to prevent stretching and distortion.

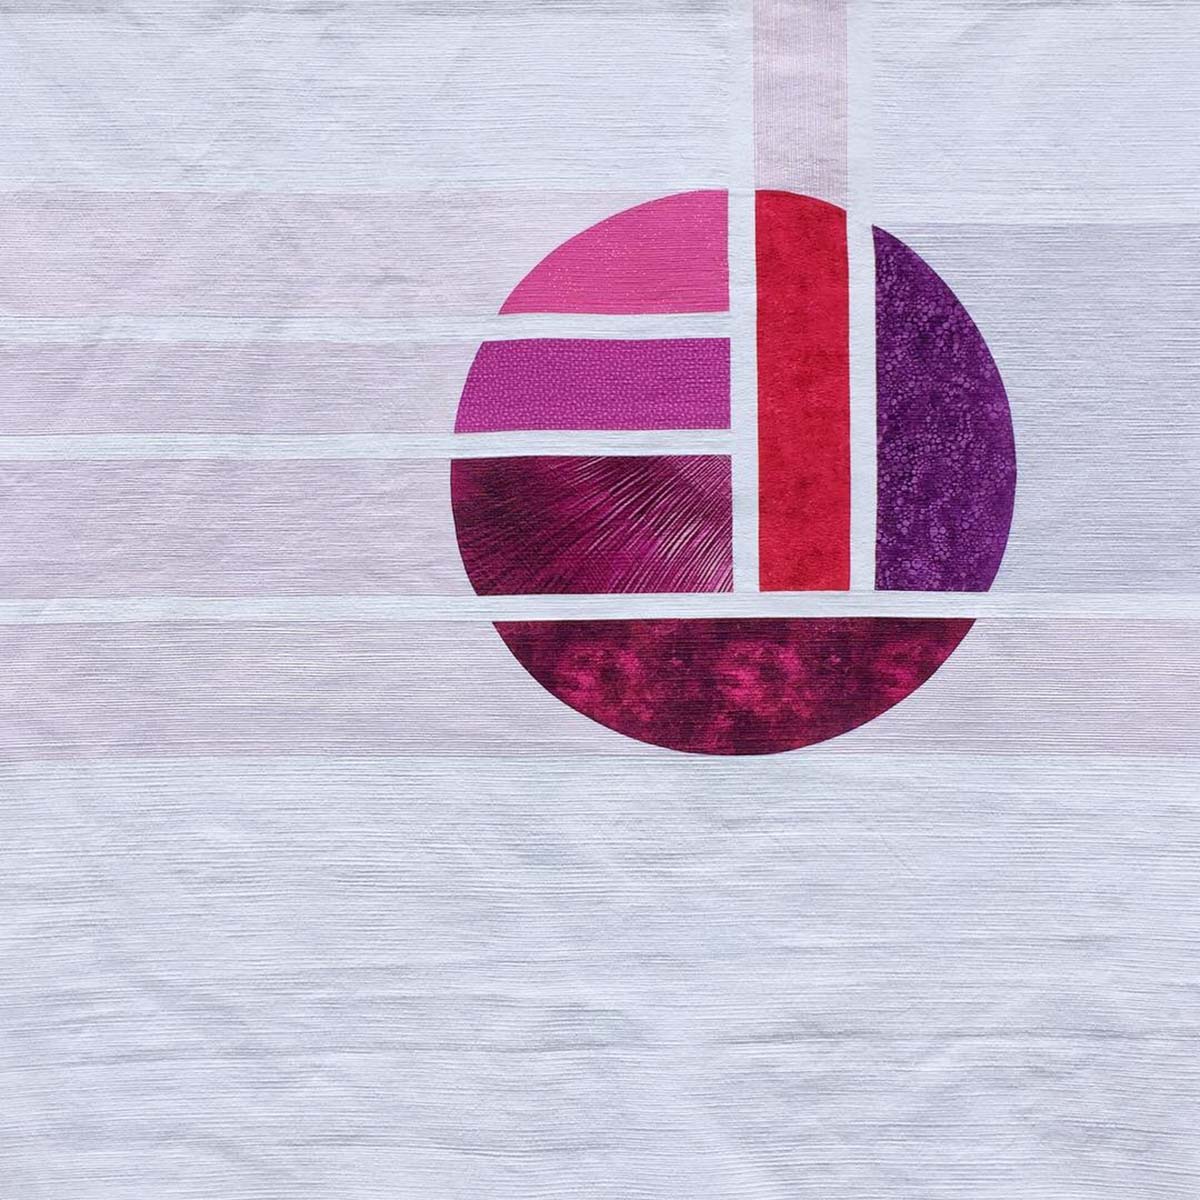
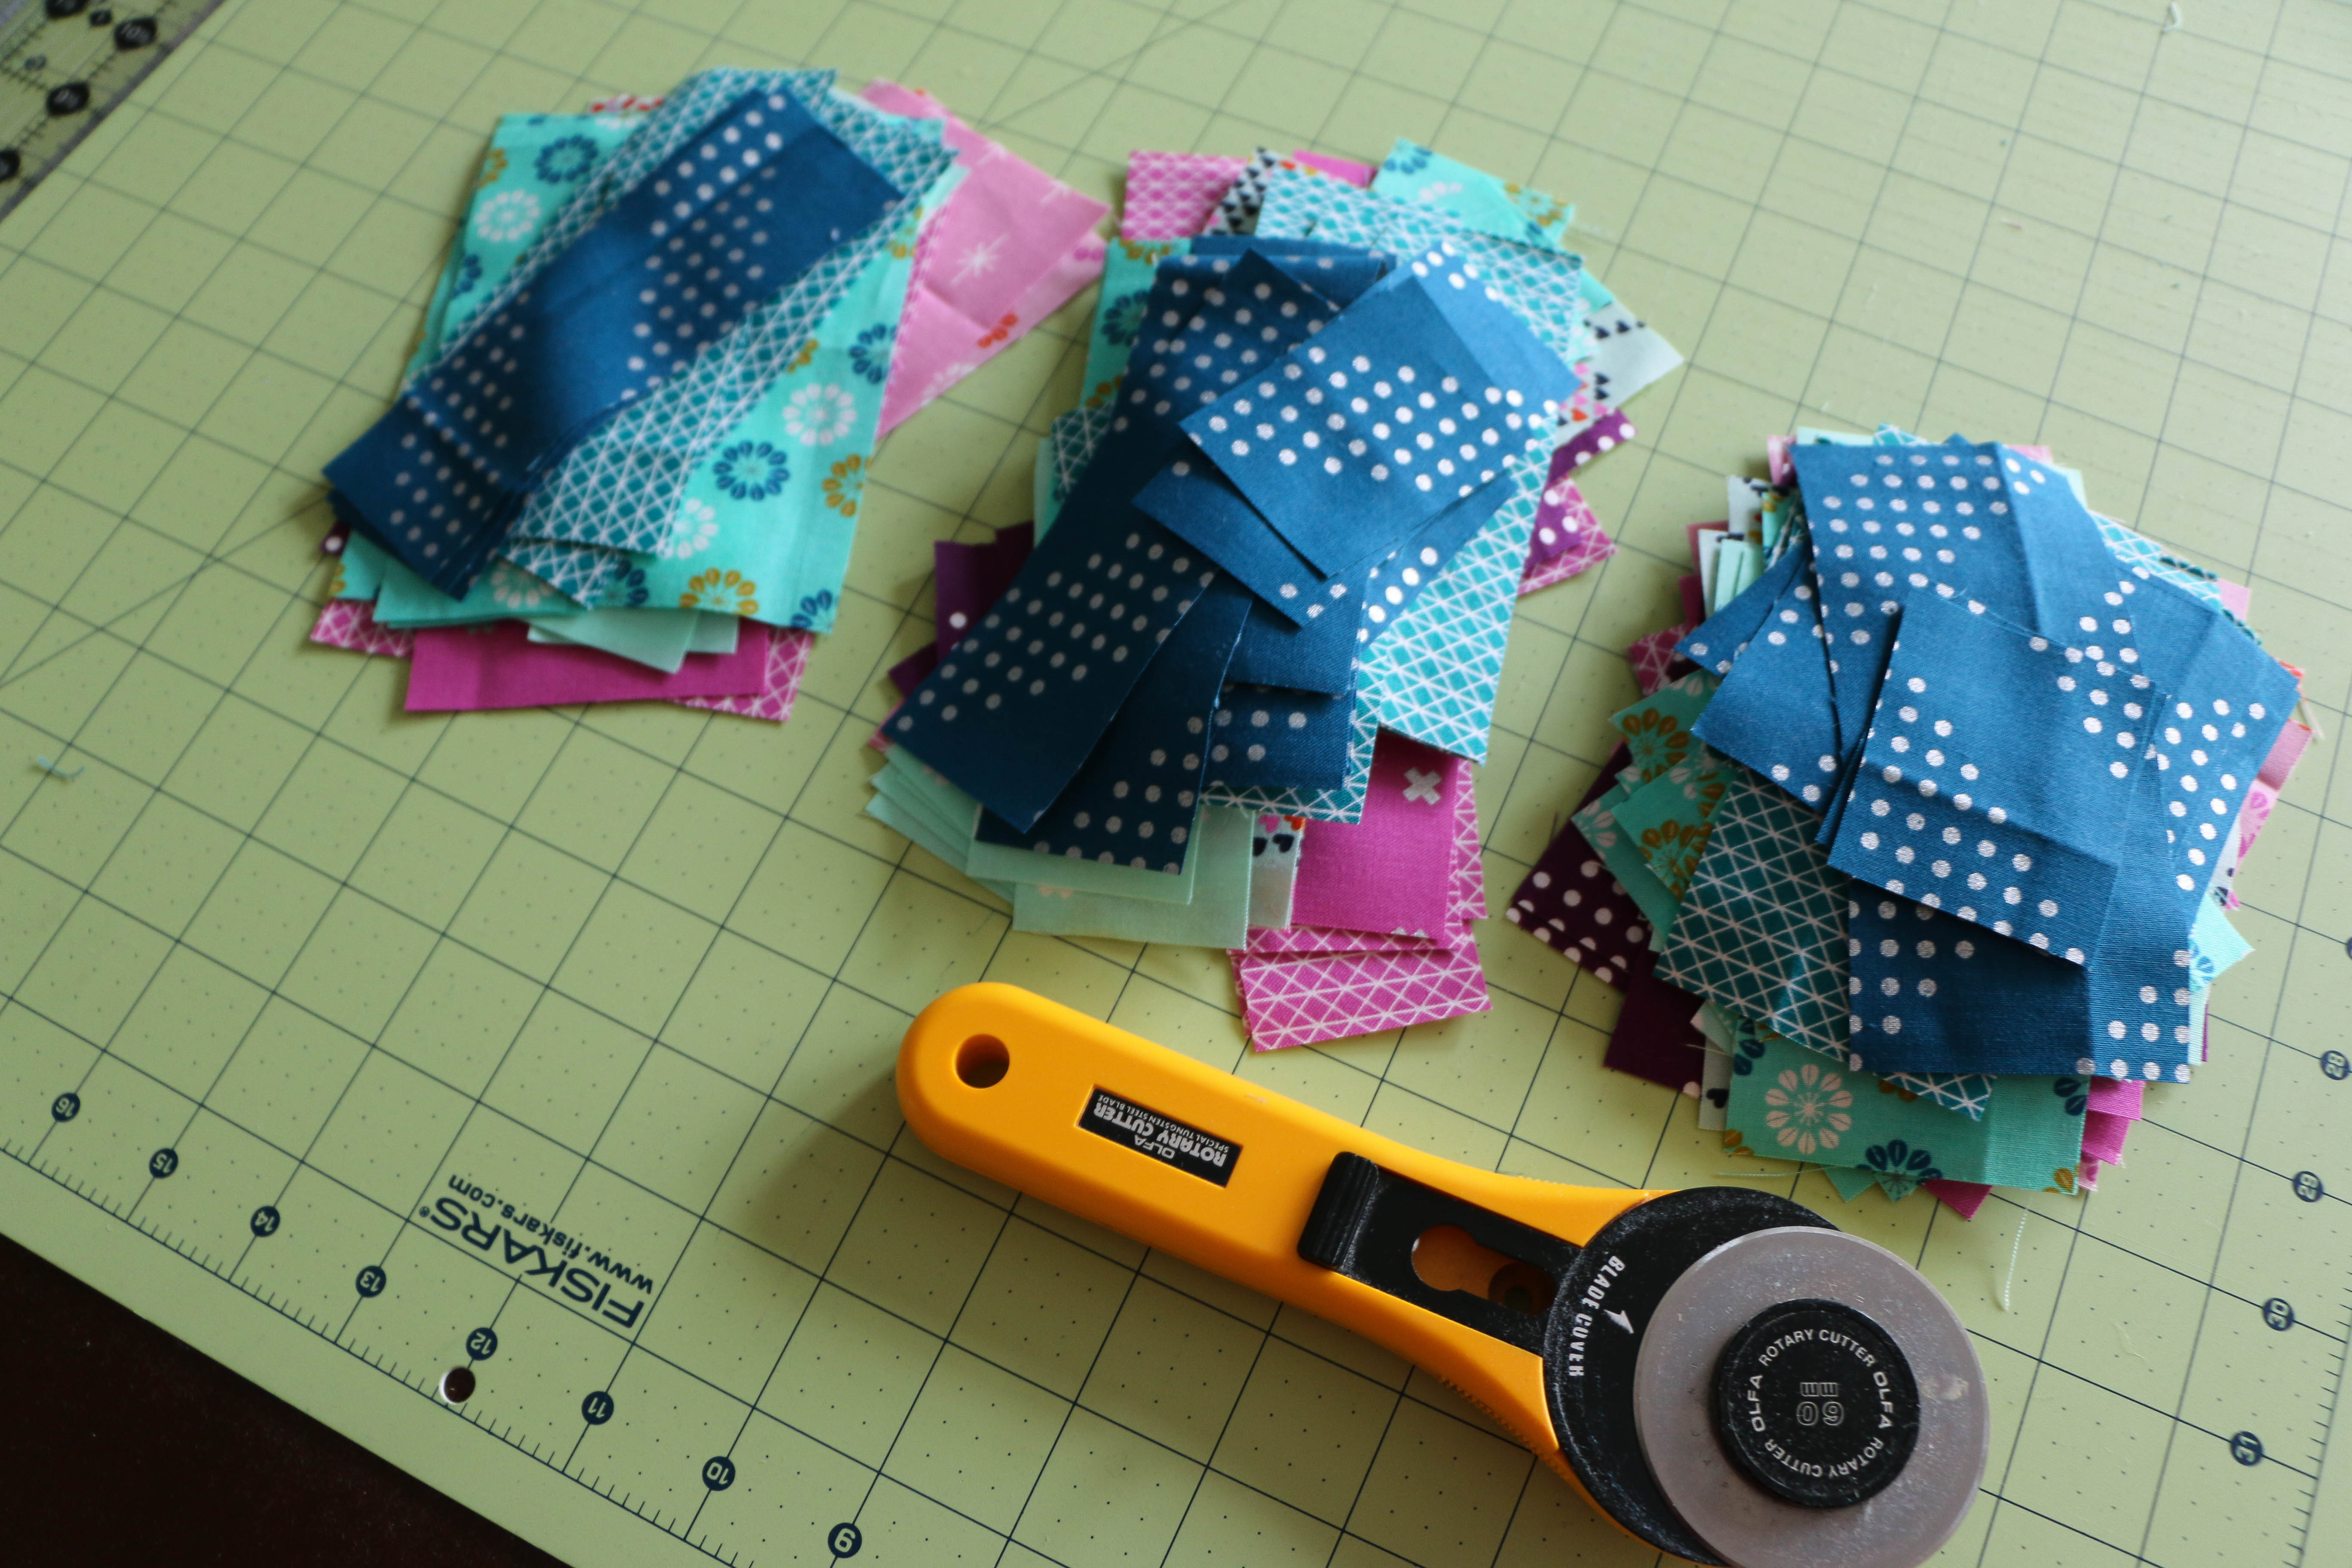
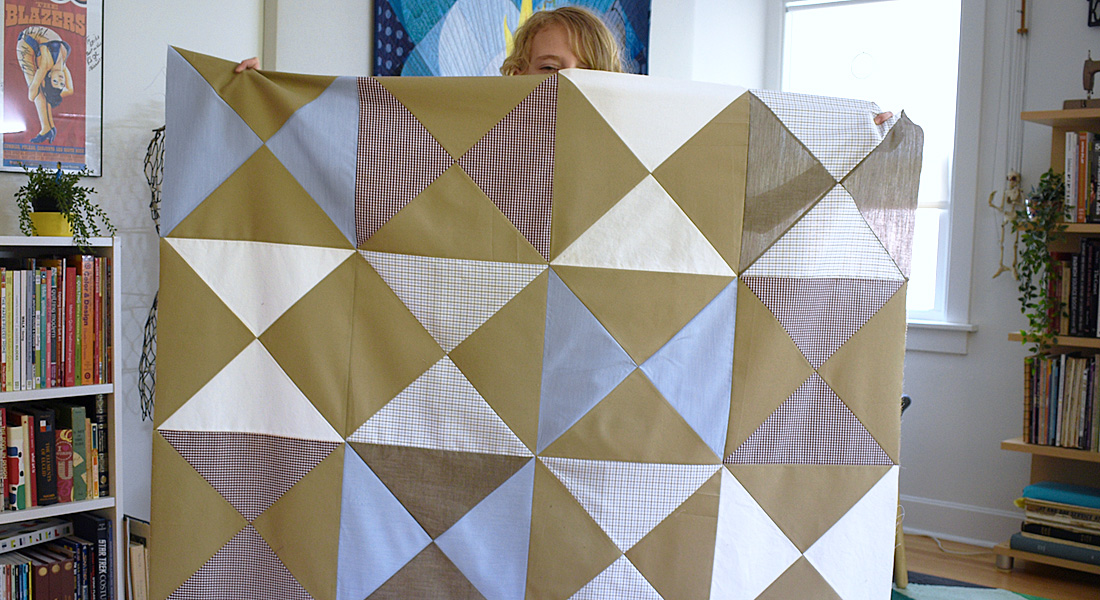
Piece the Components of the Circle
You can add interest to the overall design by piecing different fabrics together before cutting out your circle and circle surround pieces.

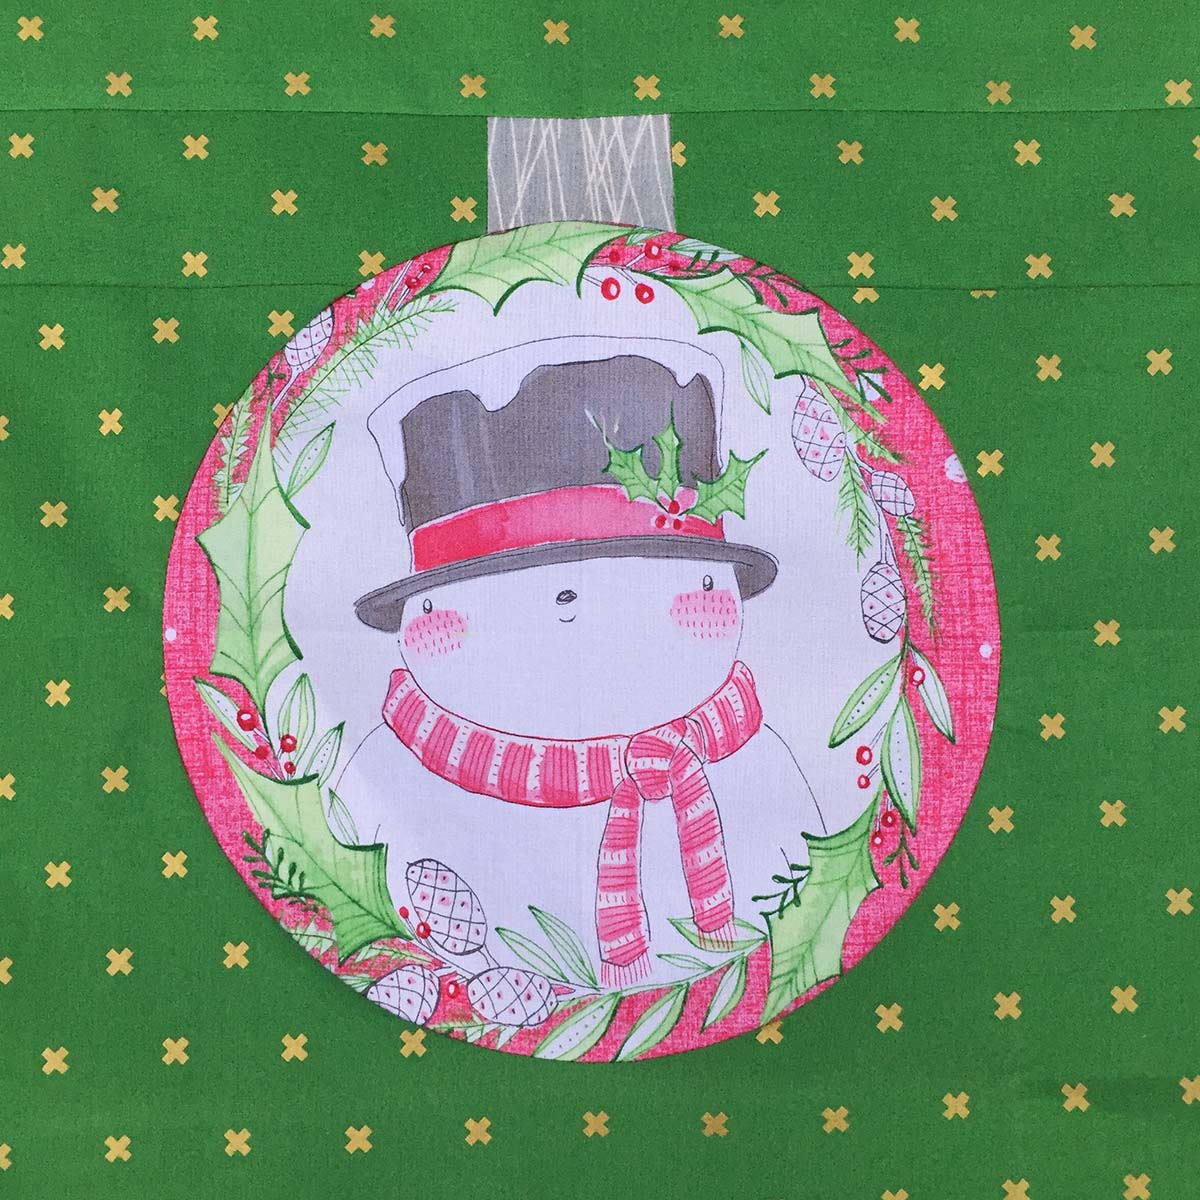
Try Some Fussy Cutting
A significant advantage to using a full circle in your piecing is the ability to fussy cut a favorite fabric to feature in the center of your block. Measure to find the vertical and horizontal center of the image you want to fussy cut and position the initial folds along those lines before cutting.
How will you take your pieced circles to the next level?


Is there a pattern available for Stripe Club?