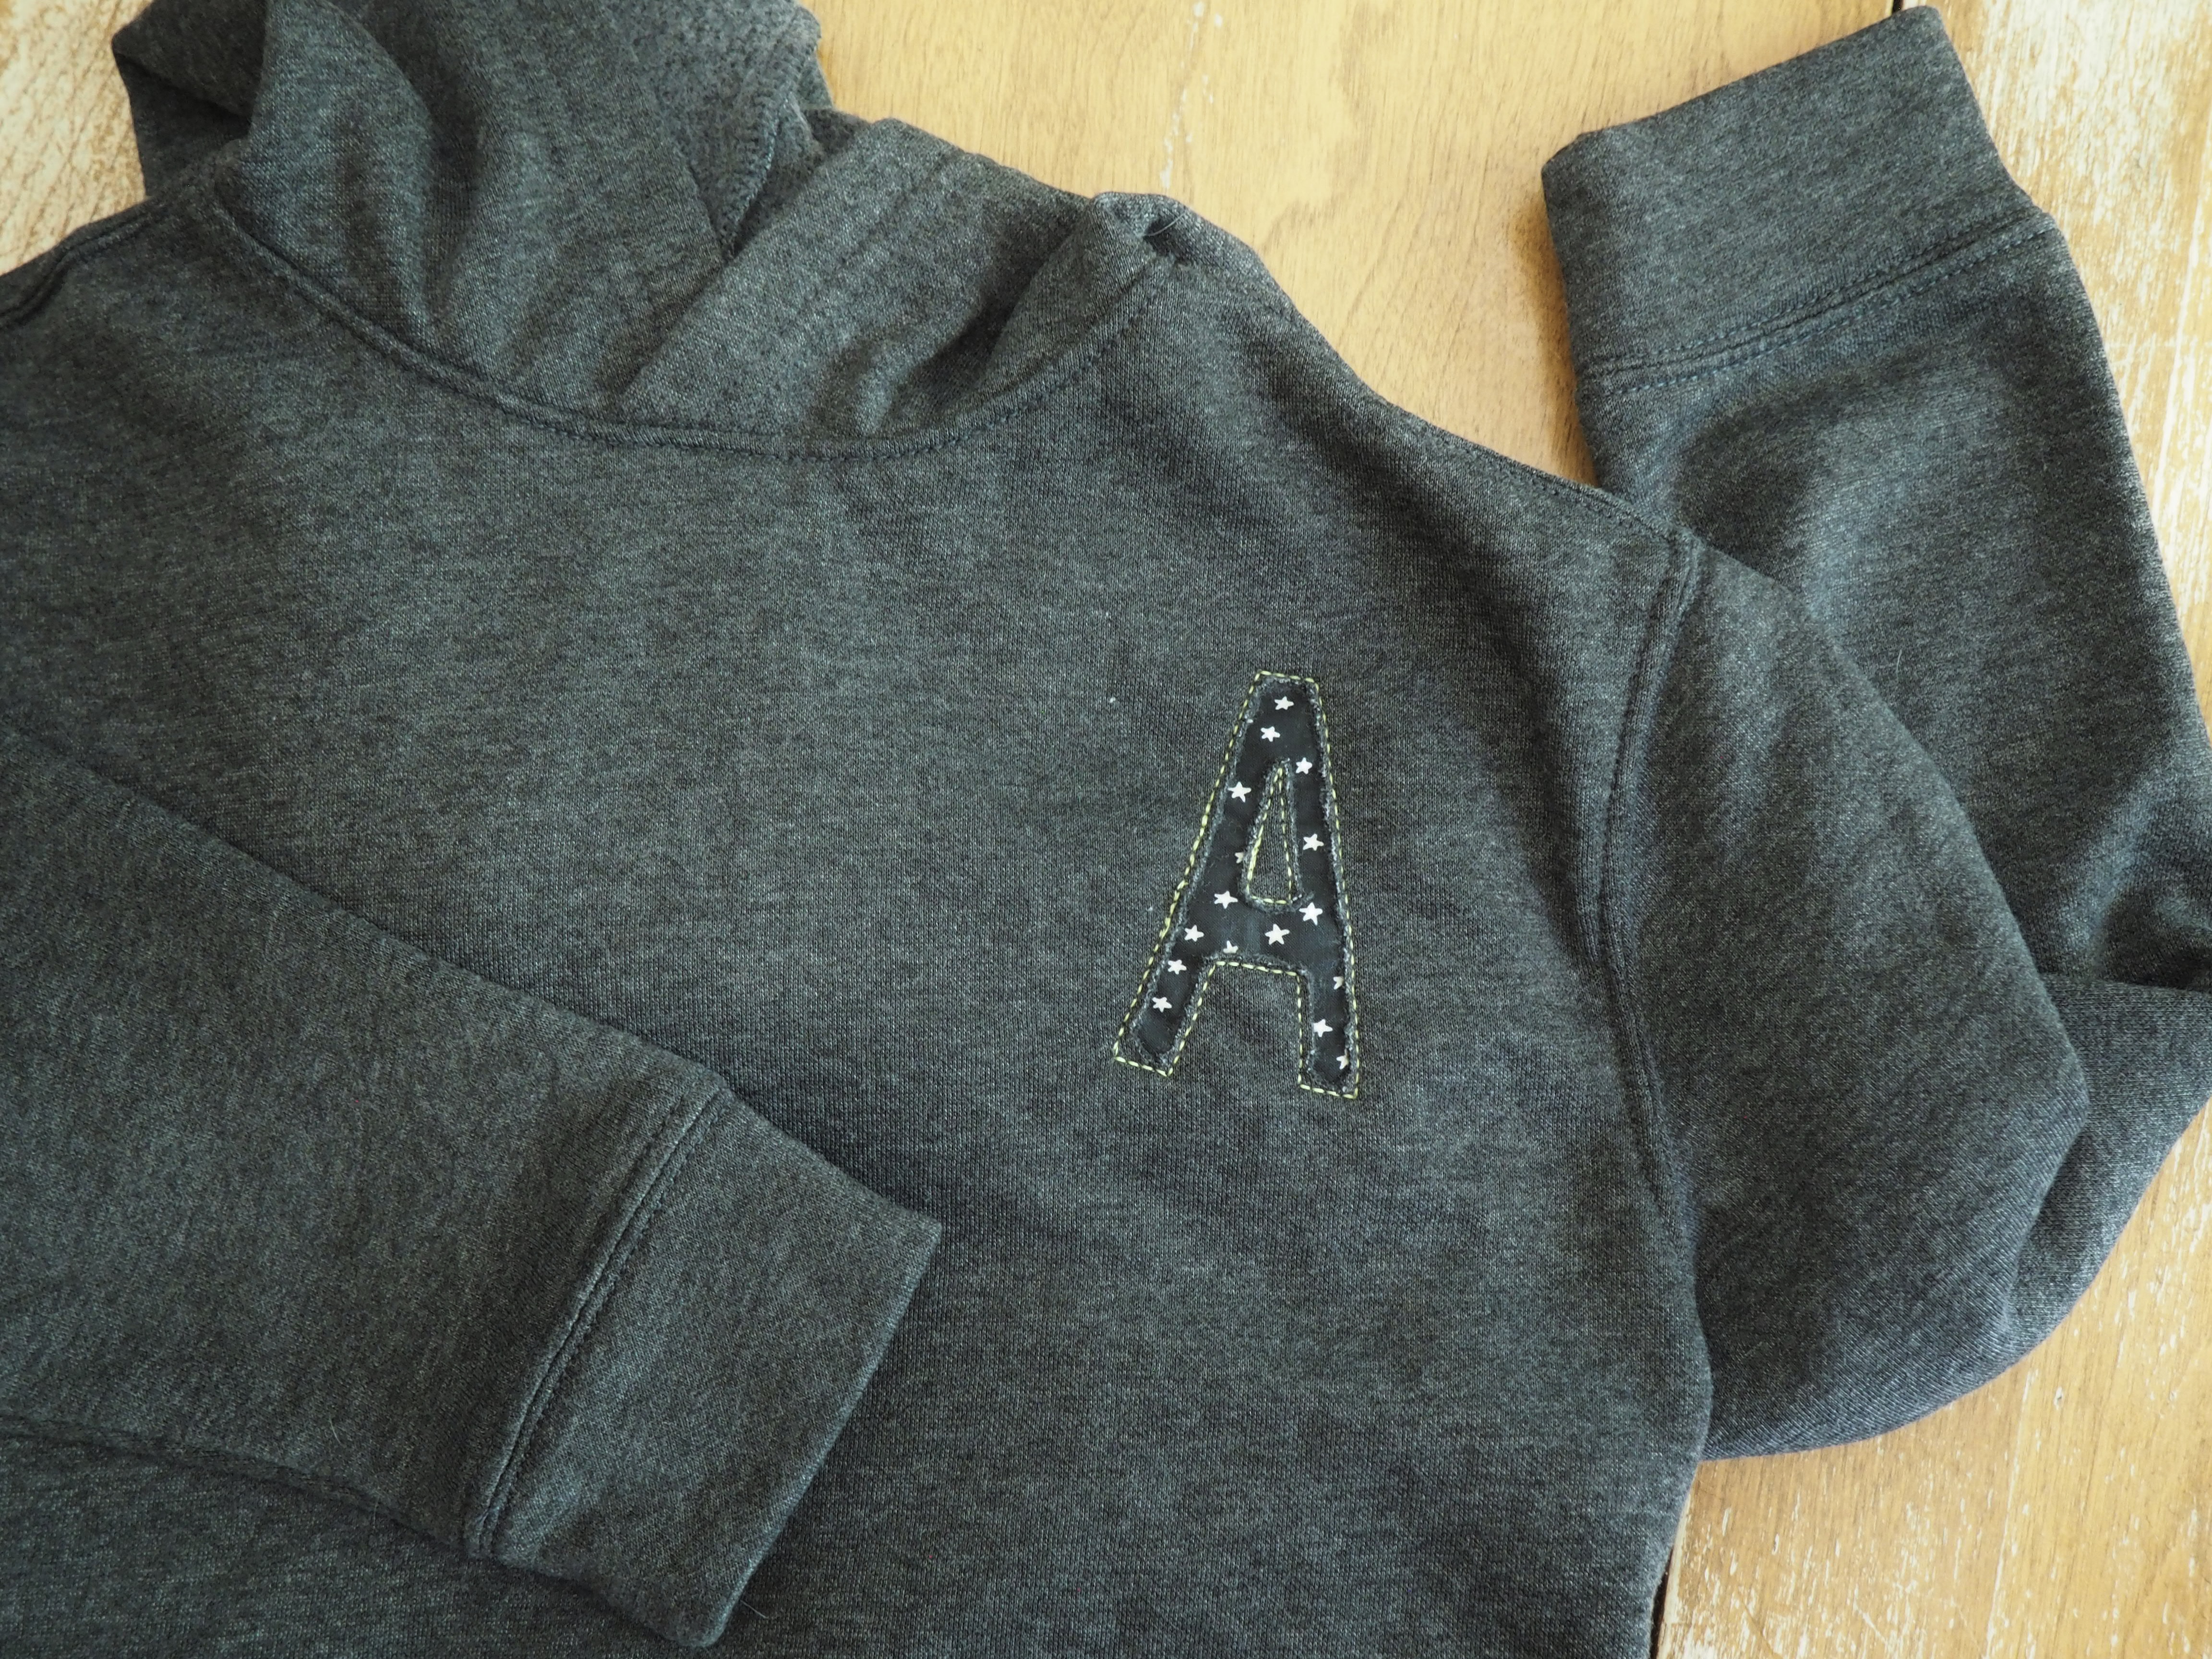
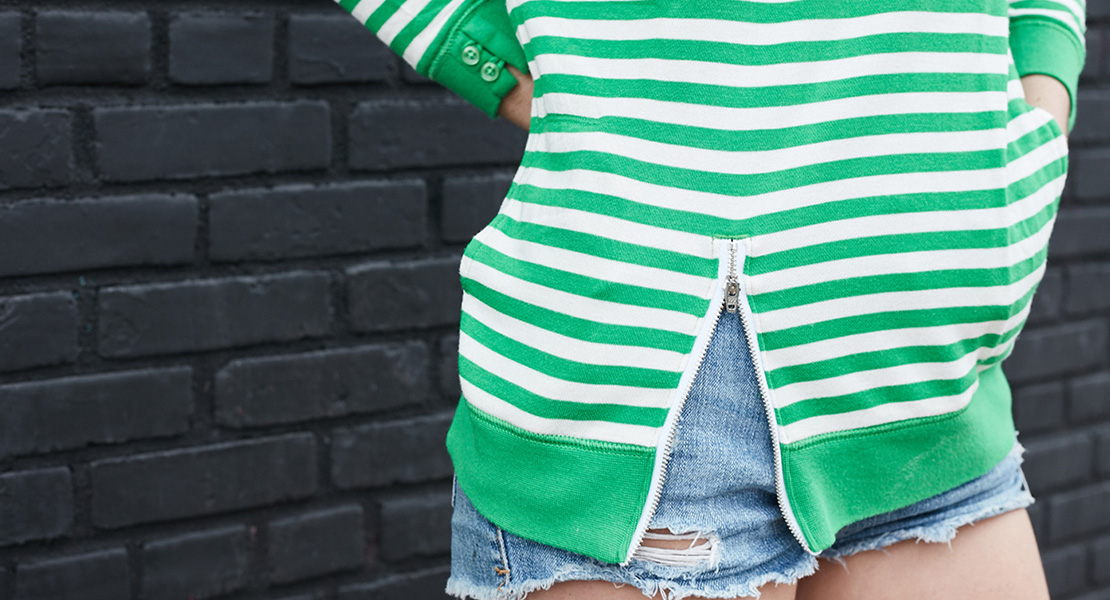
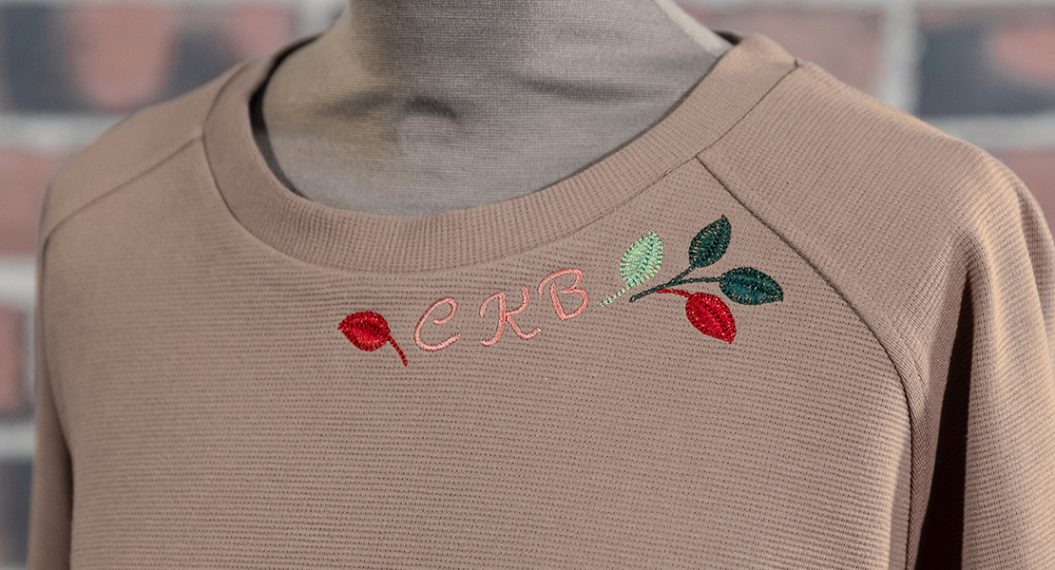
Quick & Cozy Reverse Appliquè Sweatshirt
Hi again fellow stitchers!! Candice from A+CO here with a fun and quick tutorial. Have you seen those adorable appliqué sweatshirts that are all over social media lately? Initials, team mascots, birth year, MAMA/DADA… all of these are great ways to dress up your fav cozy loungewear. We are going to embellish with a twist today and use a technique called Reverse Appliqué.
This reverse appliqué sweatshirt project allows you to use your domestic BERNINA to add a design with an accent fabric without needing the embroidery module. Today we will walk through stitching one initial on the sweatshirt but you can completely customize this project and make it your own. Grab a cup of coffee, your fav cozy sweatshirt (just don’t put it on yet!), and let’s get sewing!
Materials Needed
- BERNINA 735
- Accent fabric (approximately 1” larger than your design on all sides)
- Stabilizer
- Temporary adhesive (I used both spray adhesive and a school glue stick)
- 50wt thread in a coordinating color
- Sweatshirt
- 4 safety pins
- Sewing notions (iron, pins, rotary cutter, etc.)
- Small snips or scissors
Instructions to Make a Reverse Appliqué Sweatshirt
The first step in making your customized sweatshirt is to decide on your design. I used a simple letter that I found online, printed, and cut out to use as a template. You could also freehand a design onto your sweatshirt with your favorite temporary marking tool (chalk pencil, water-soluble marker, etc.).
You’ll also want to pick out an accent fabric that’ll show through the design and a coordinating thread color. The thread that you use on top will show so I recommend either matching to your sweatshirt or going bold with a color that will stand out and add to the design.

Steps to Sew Your Reverse Appliqué Sweatshirt
- Prepare your template by printing or drawing it onto a piece of paper or card stock. Cut it out carefully. Tip: for the small inner sections of my letter “A”, I used the sharp point of a needle to perforate the edges instead of trying to get scissors in there.
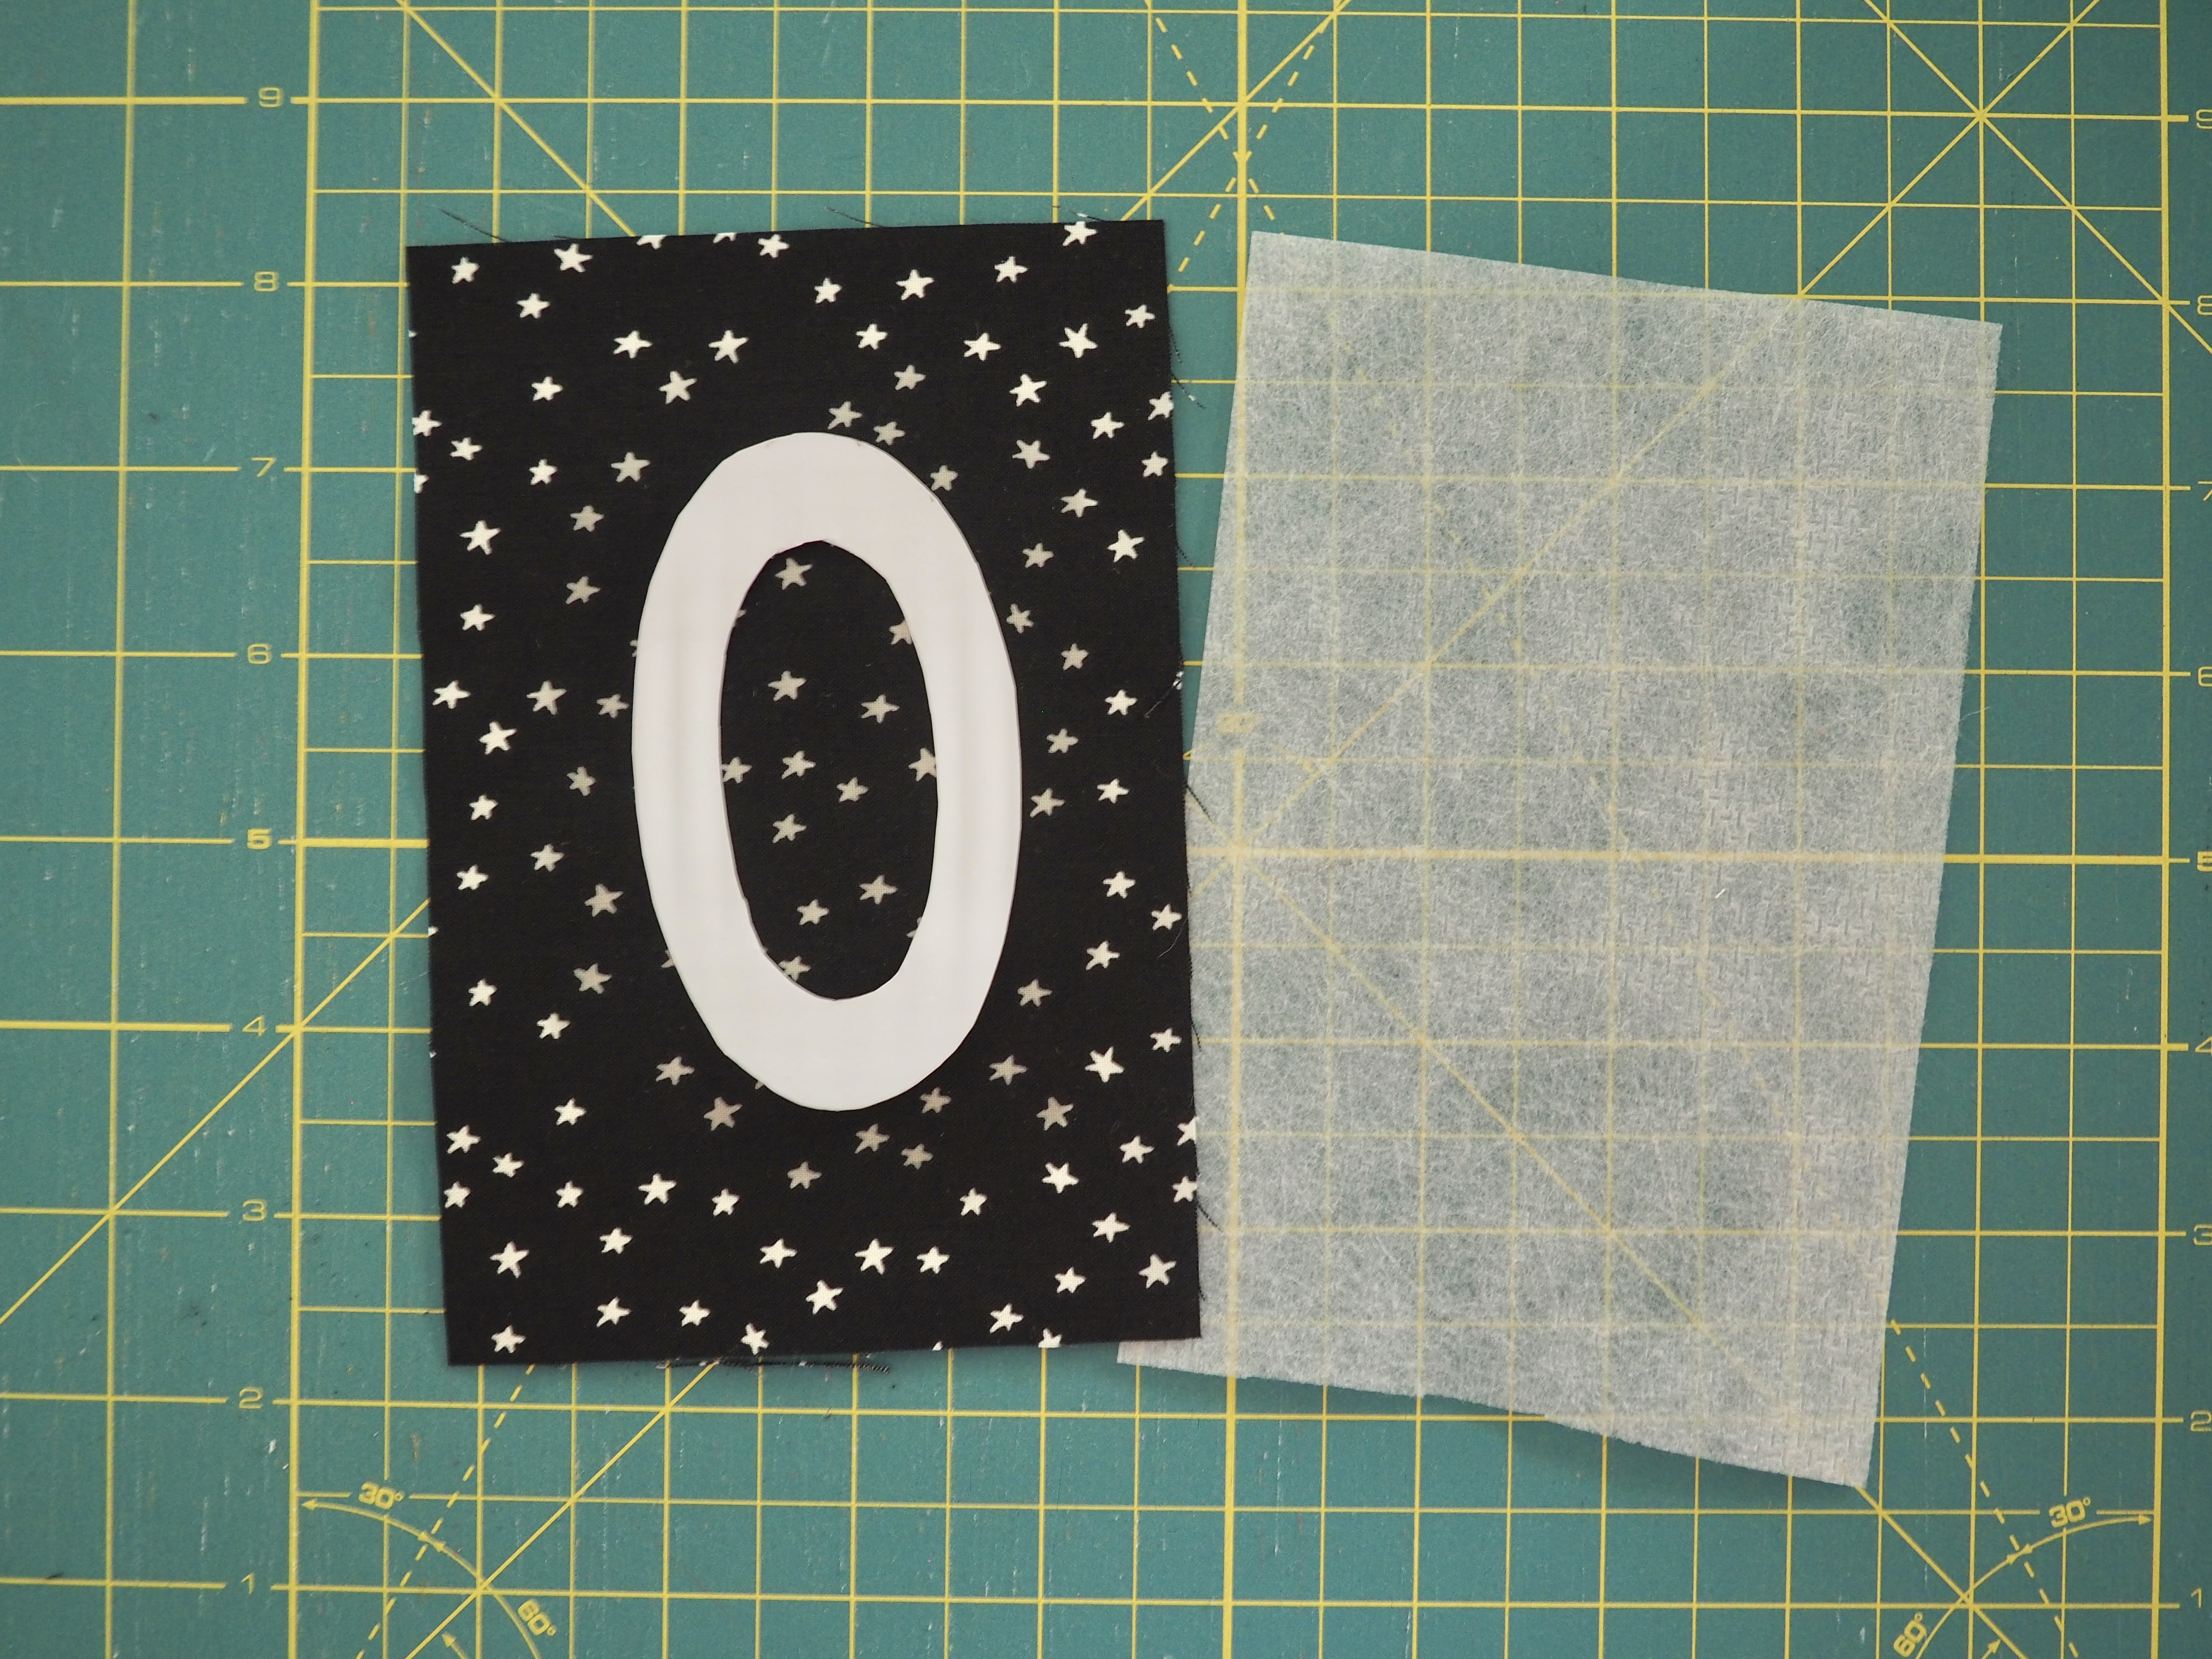
- Cut out 1 piece of your accent fabric and one piece of stabilizer measuring at least 1” larger than your design on all sides
- Adhere the stabilizer to the wrong side (back) of your accent fabric, following the manufacturer instructions
- Lay your sweatshirt flat on the table in front of you with the section to be sewn facing up
- Determine the layout of your design. Lay your template onto the sweatshirt going to correct direction (do not reverse the design)
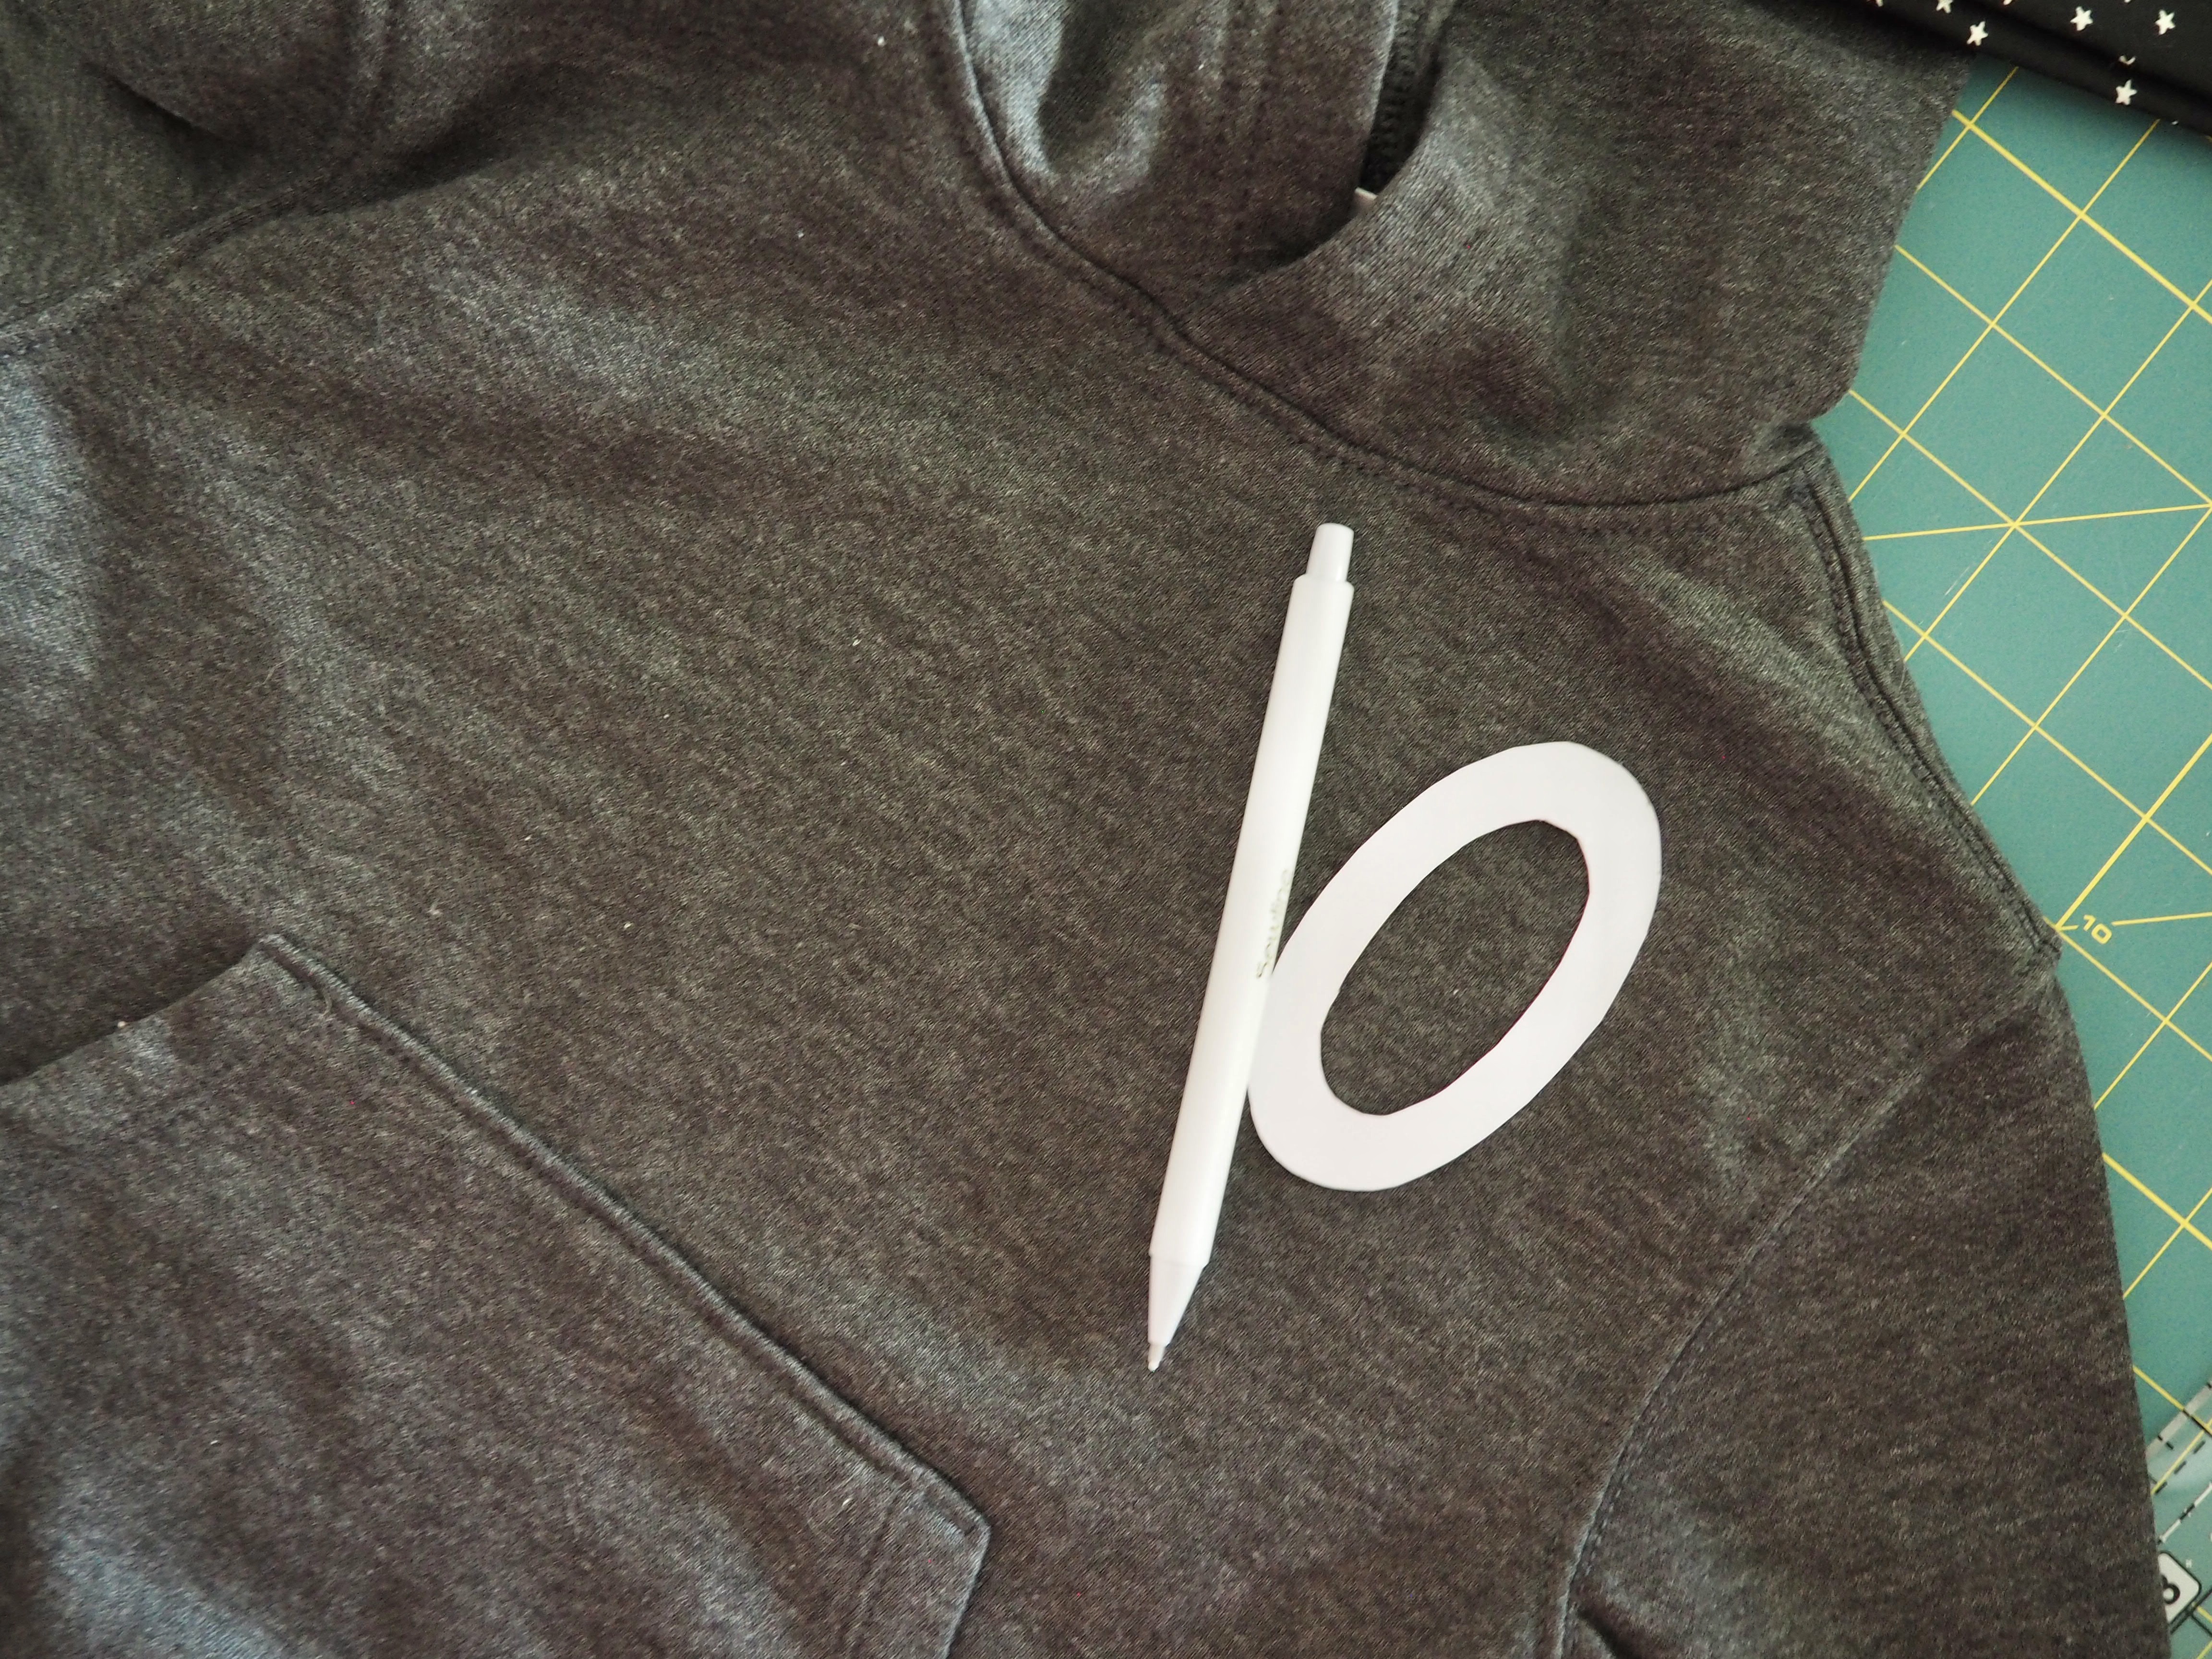
- Using your favorite marking tool, carefully trace along all edges of the template. If your design includes an inner section (think the letters O, P, A, etc.), be sure to trace the inner part as well. Alternatively. you can use a temporary adhesive to secure your template to your sweatshirt and stitch around the outside.
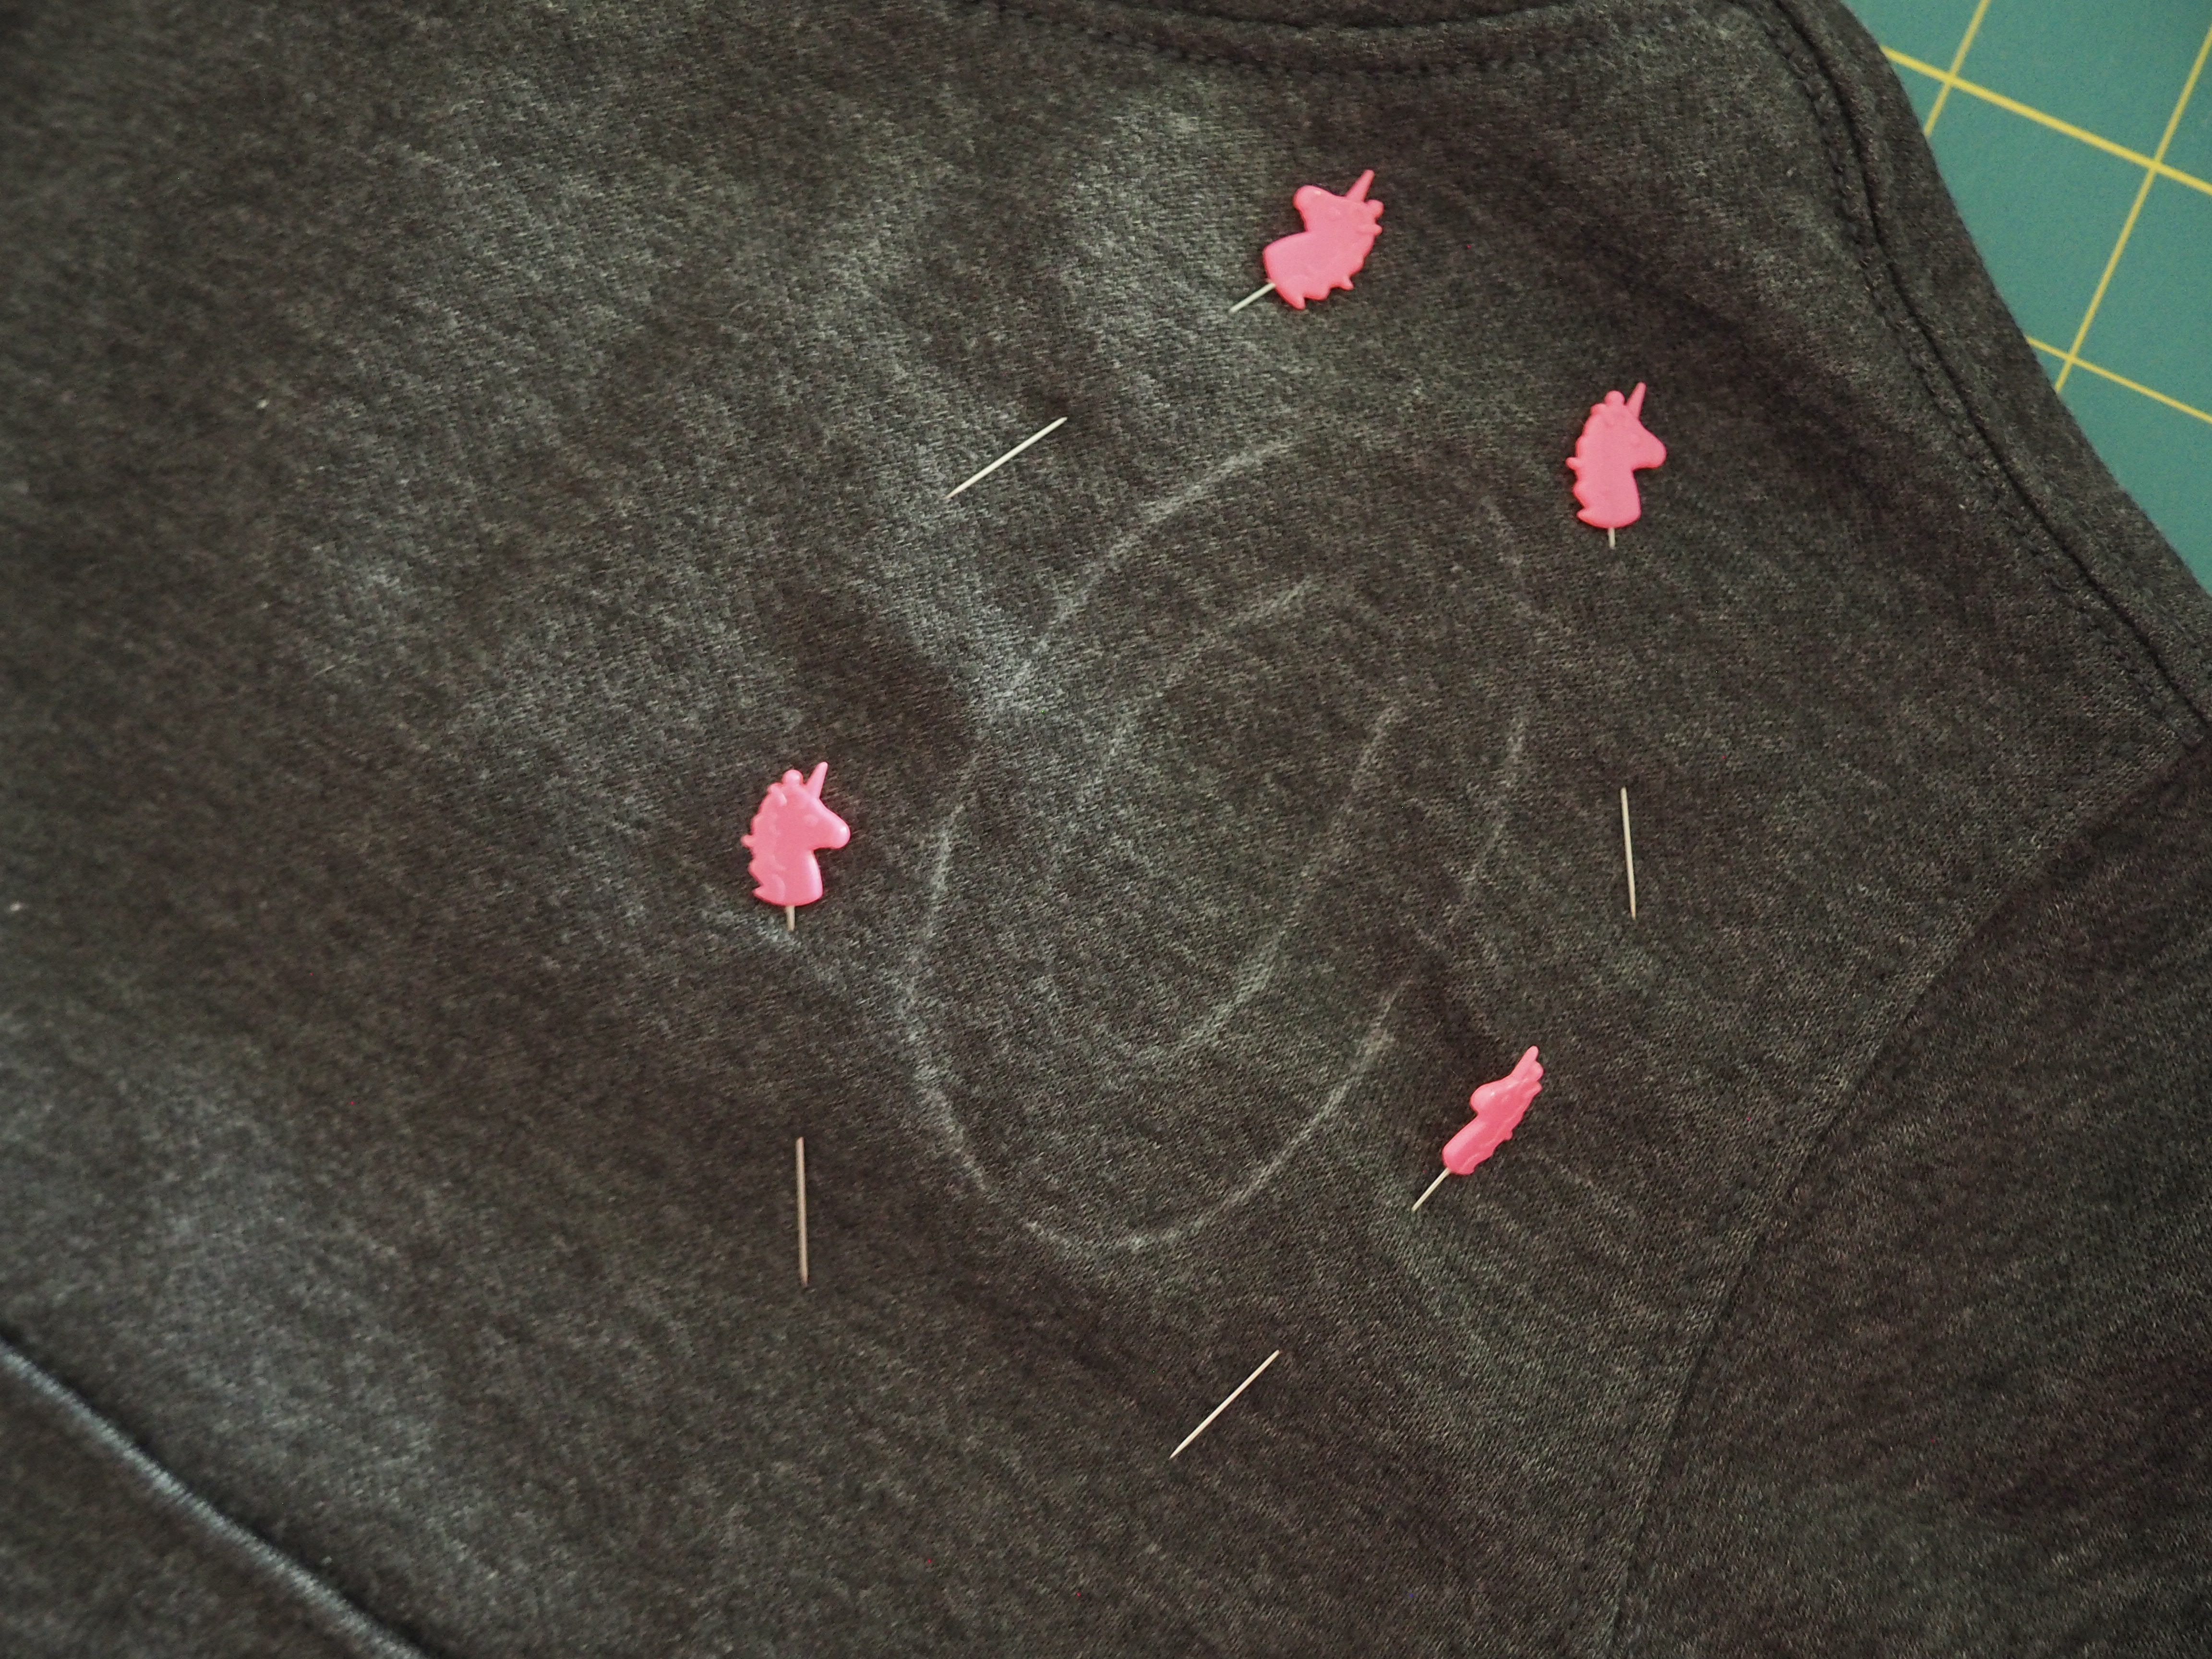
- Mark the top, bottom, and two edges of your design with your safety pins, making sure to only pin through the single layer of your sweatshirt. Turn the sweatshirt inside out

- Using the back of the safety pins as a guide, place your fabric, right side down, centered over the area marked by the pins. The right side of the fabric should be facing the inside of the sweatshirt, with the stabilizer side facing up
- Use a washable glue stick along the edges of the fabric to hold it in place. Carefully turn the sweatshirt right side in
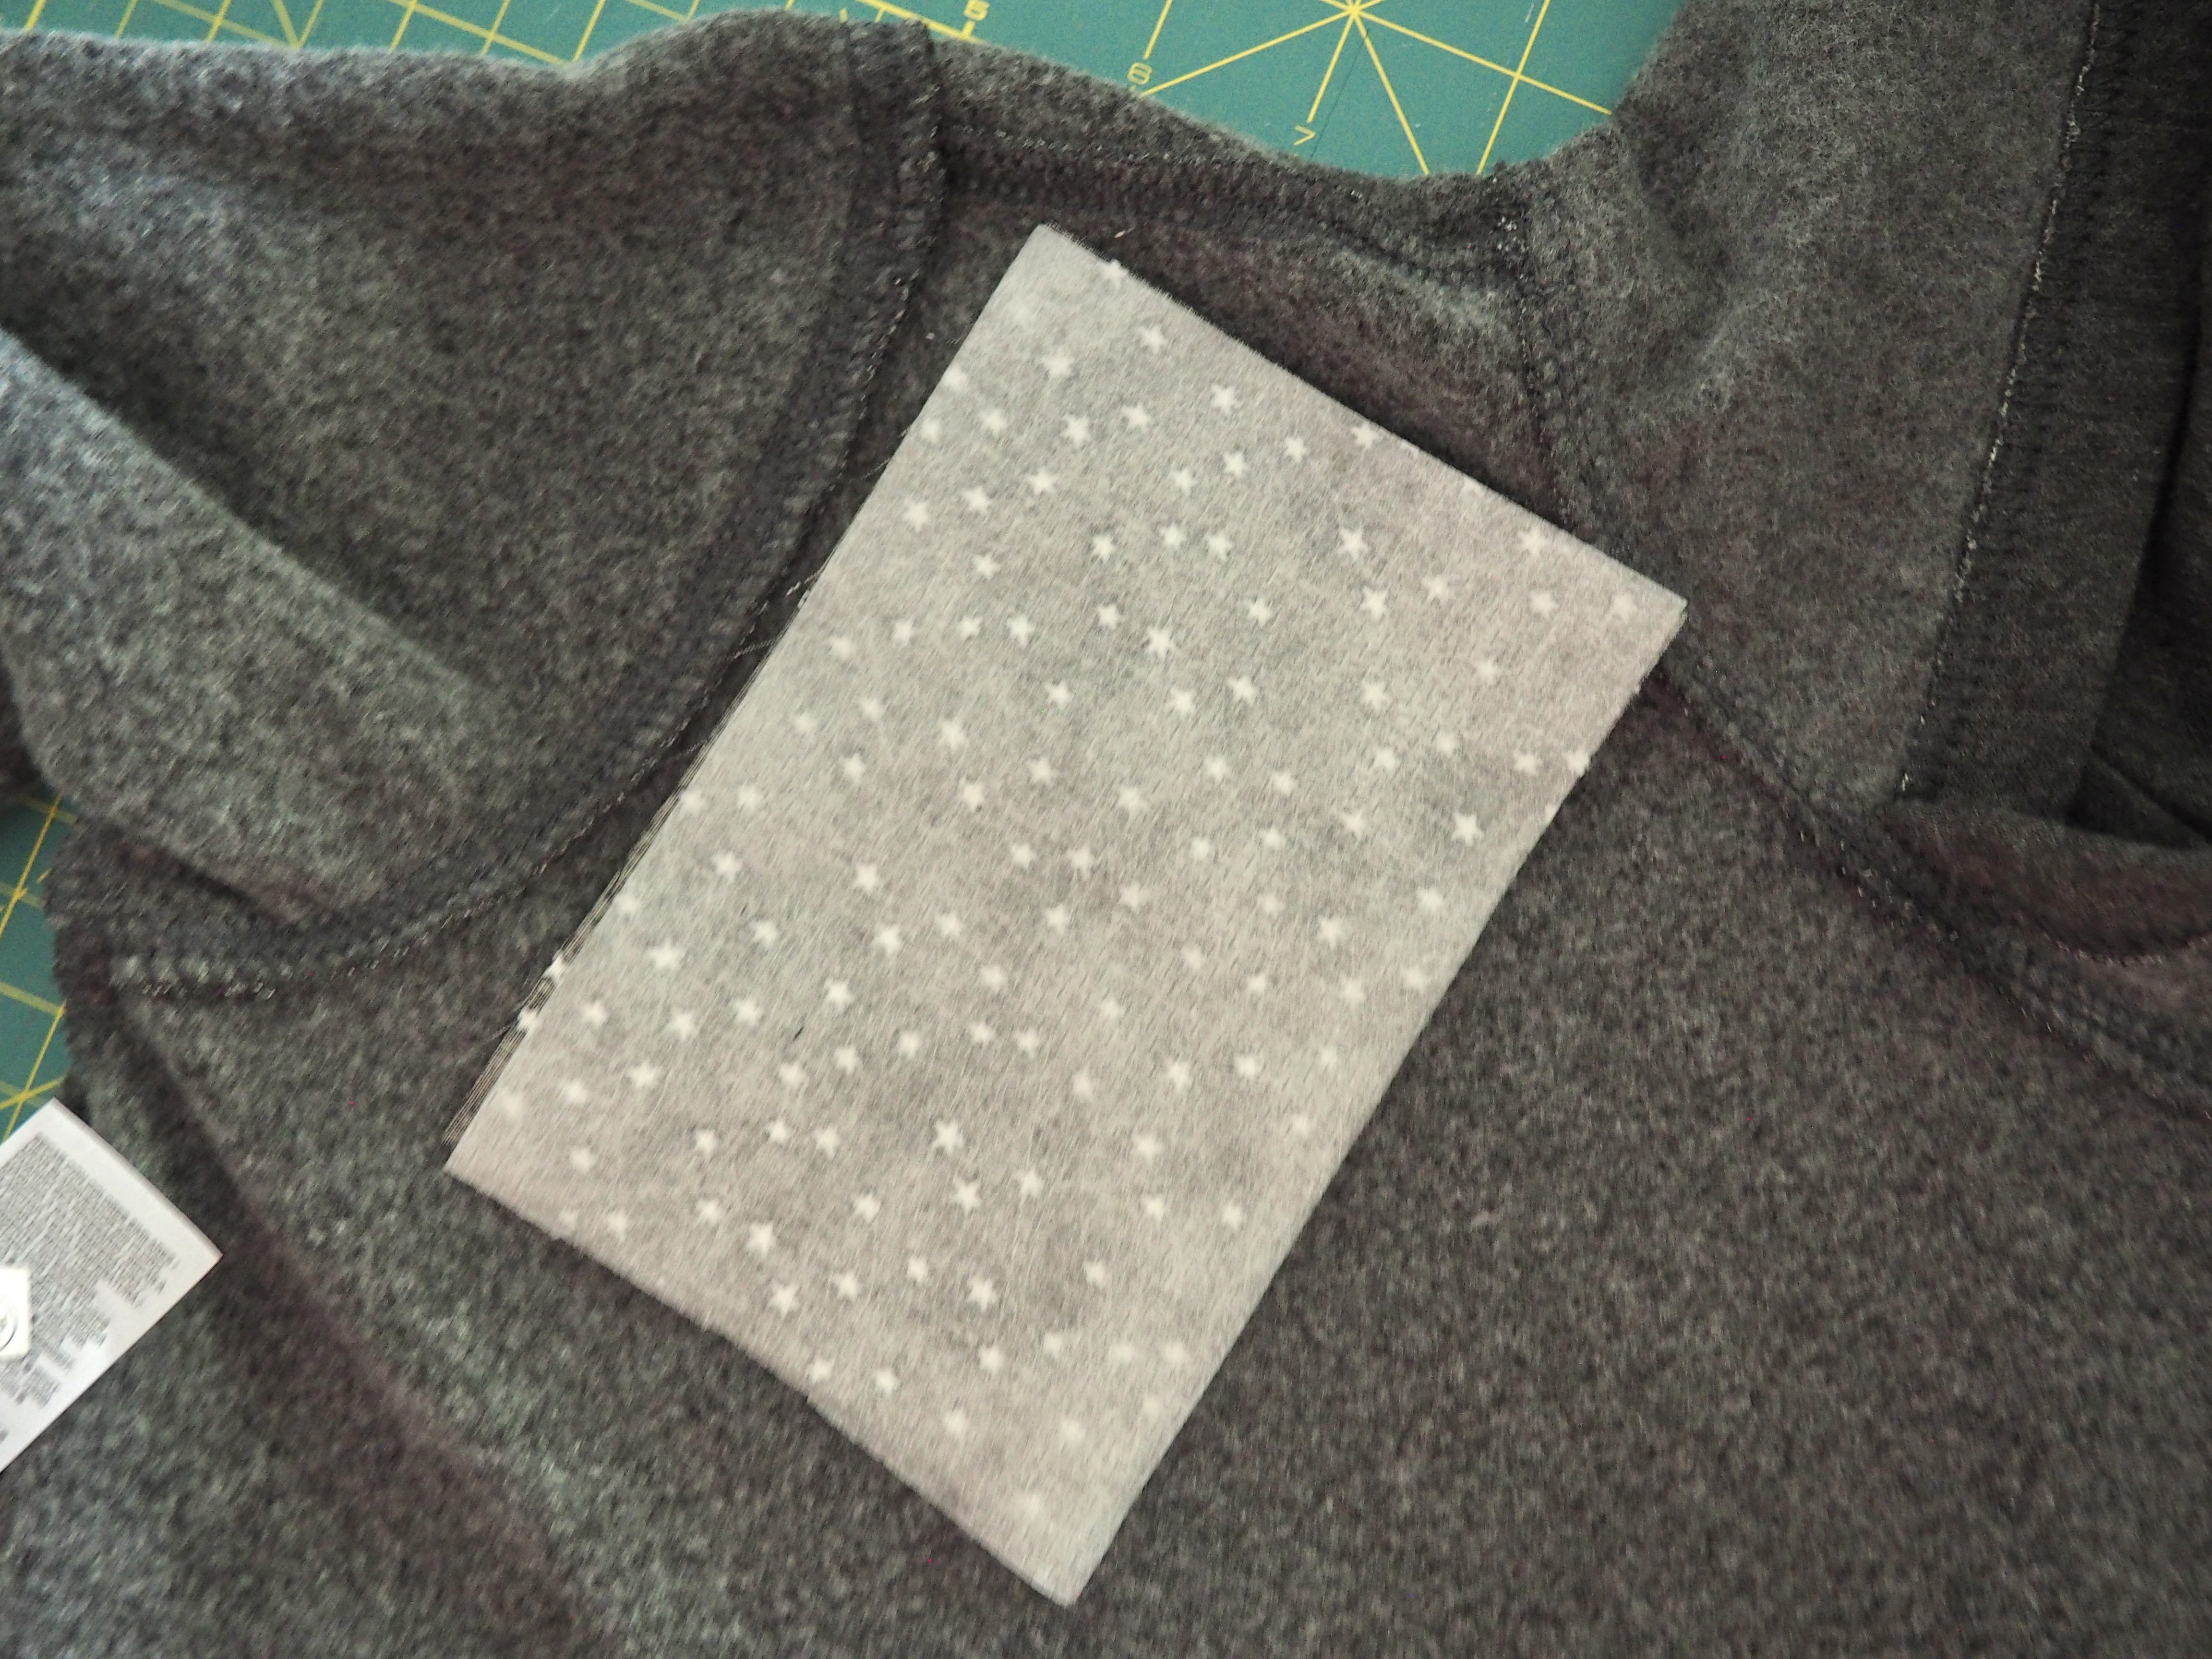
- Making sure that the fabric didn’t shift inside the sweatshirt, gently remove the safety pins. Use sewing pins to secure the fabric to the sweatshirt, ensuring that you only are pinning through the one layer of shirt and the fabric. Do not pin through the other side of your sweatshirt
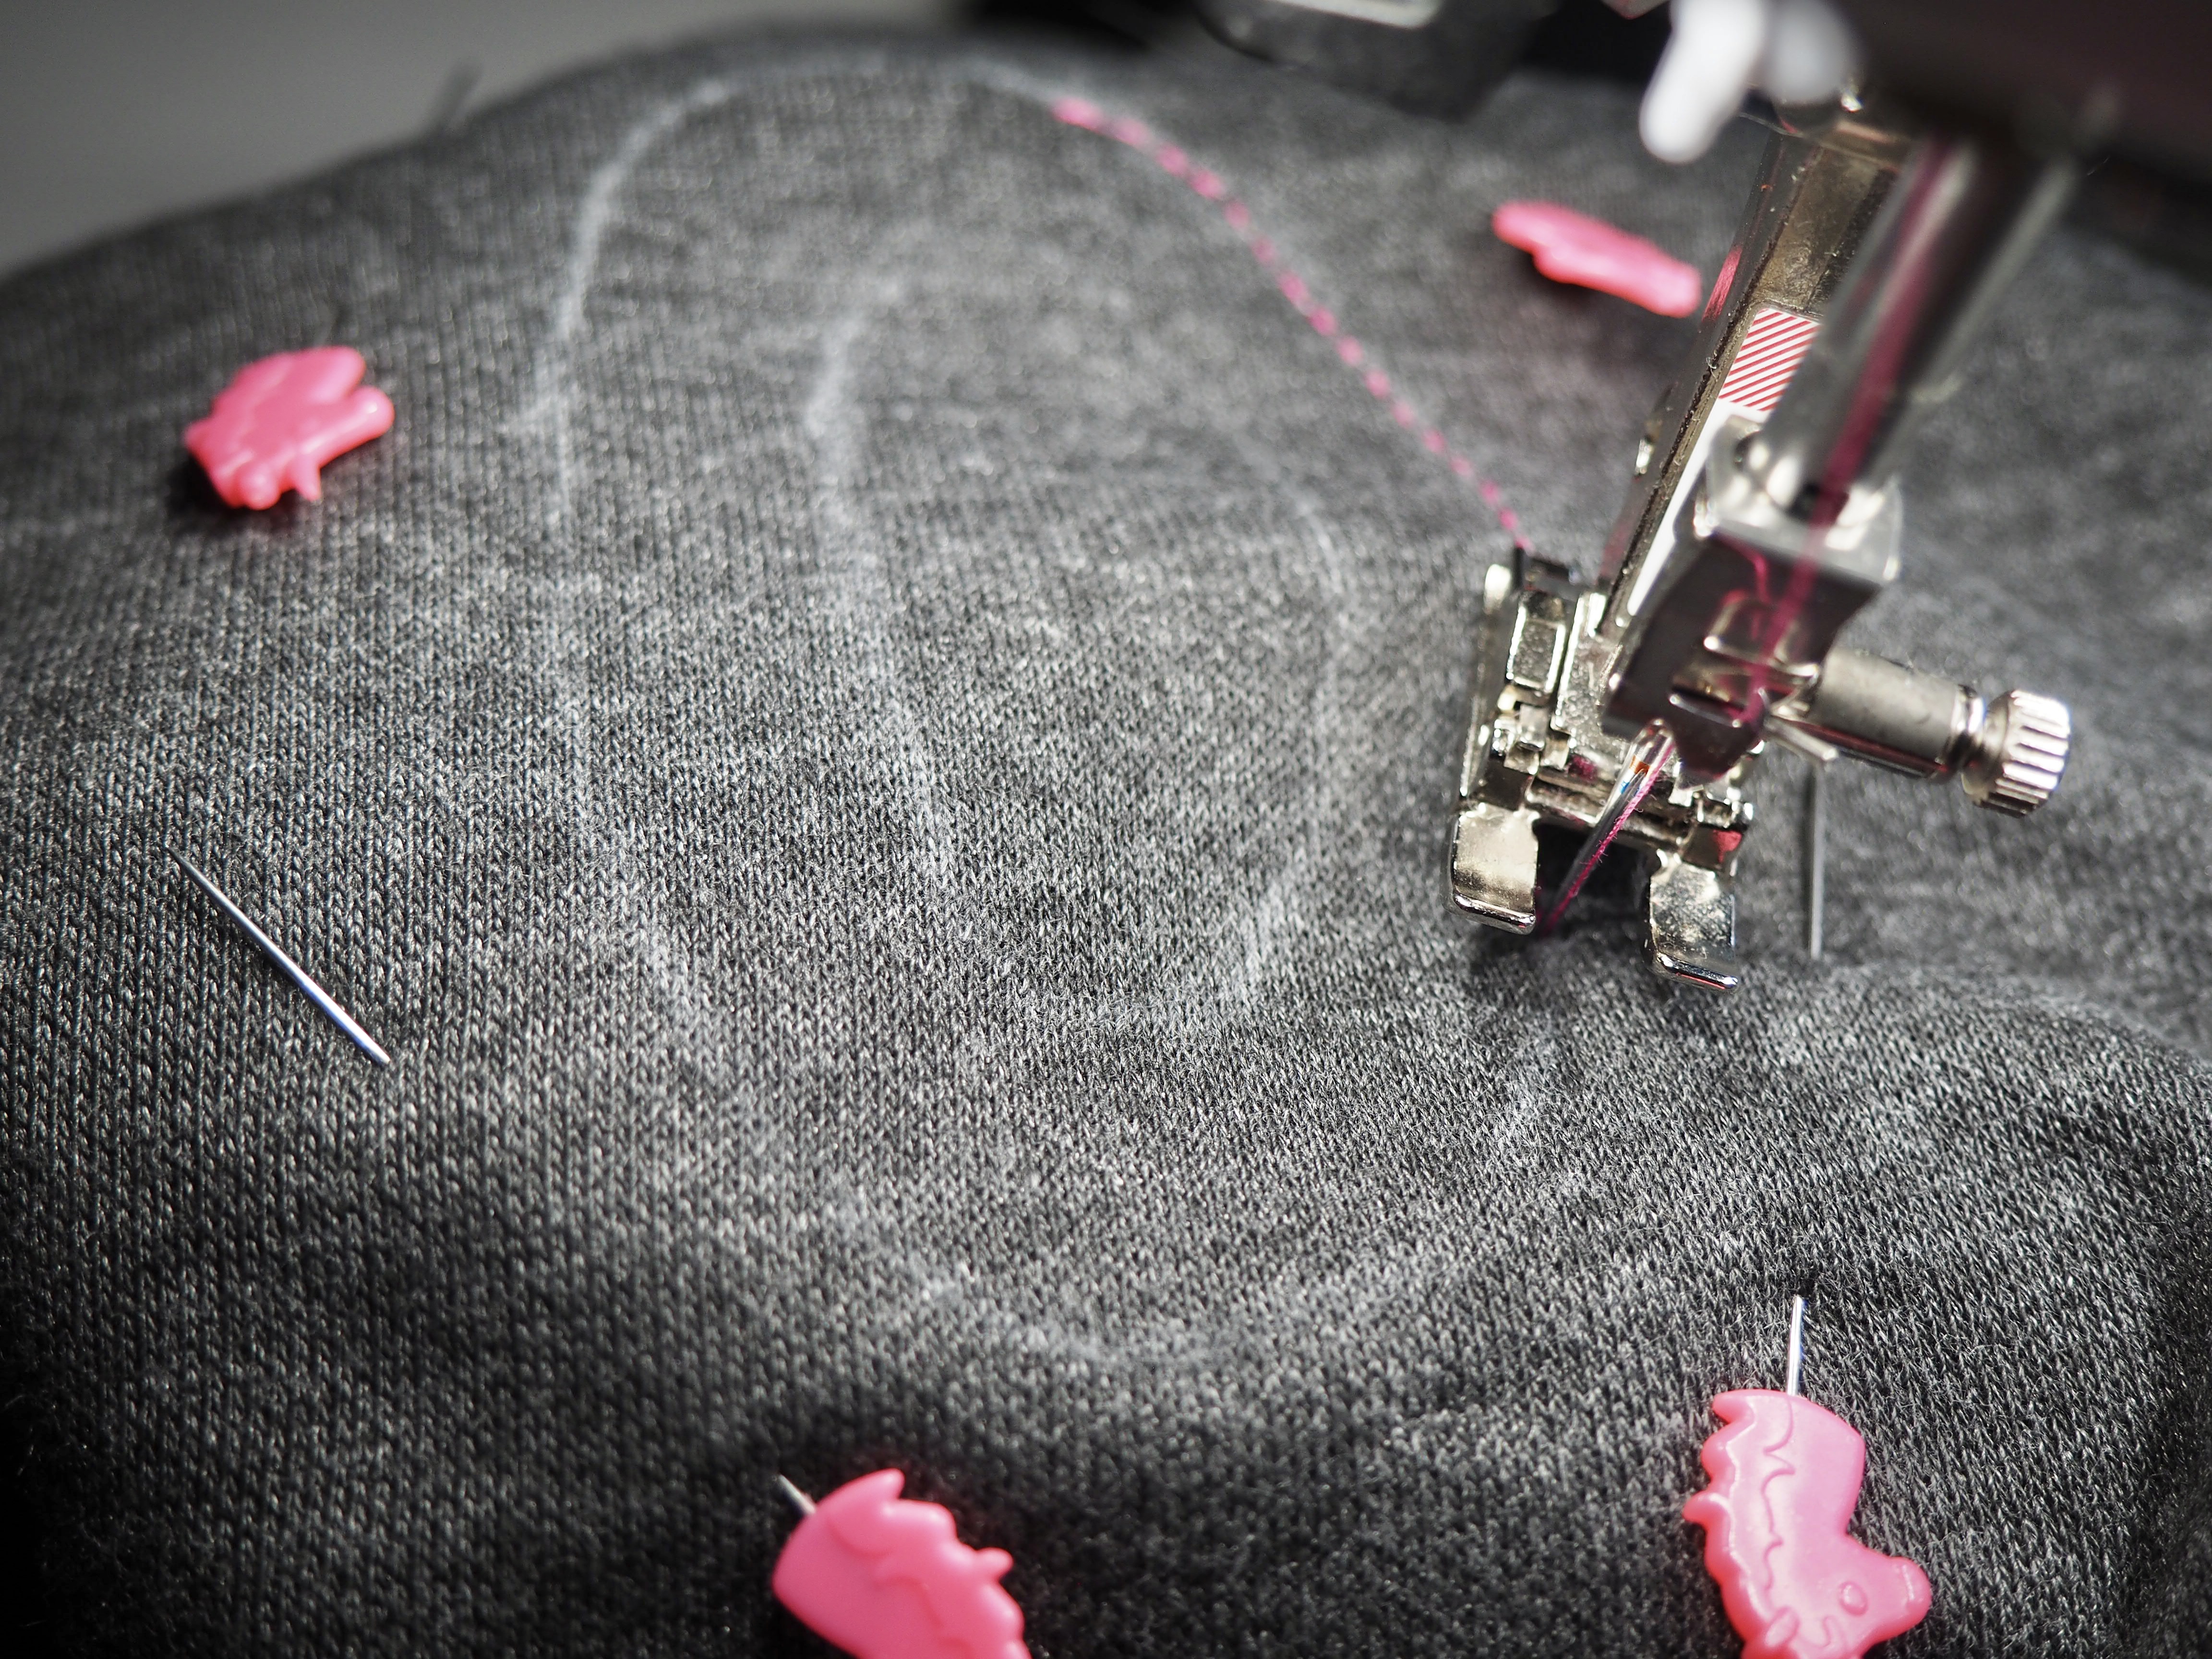
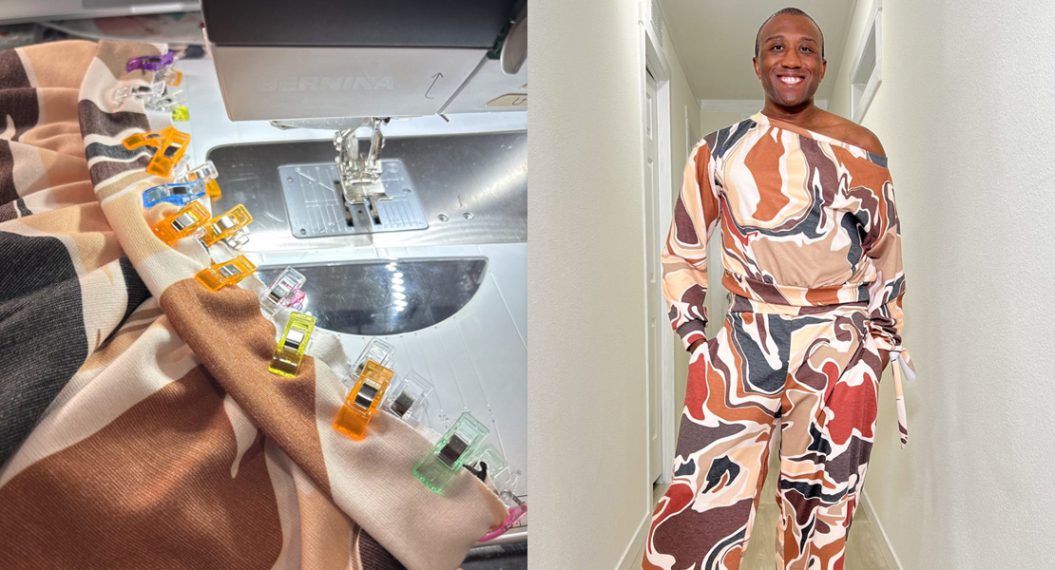
- At your sewing machine, stitch along the design, backstitching at the beginning and the end to secure. A couple of notes for this step: I like to use stitch 6. This is a triple stitch and adds some dreamy texture to your finished project. Turn the speed down and use the needle down feature. As you stitch around the curves, the needle down feature lets you adjust your sweatshirt without the whole thing shifting and getting wonky
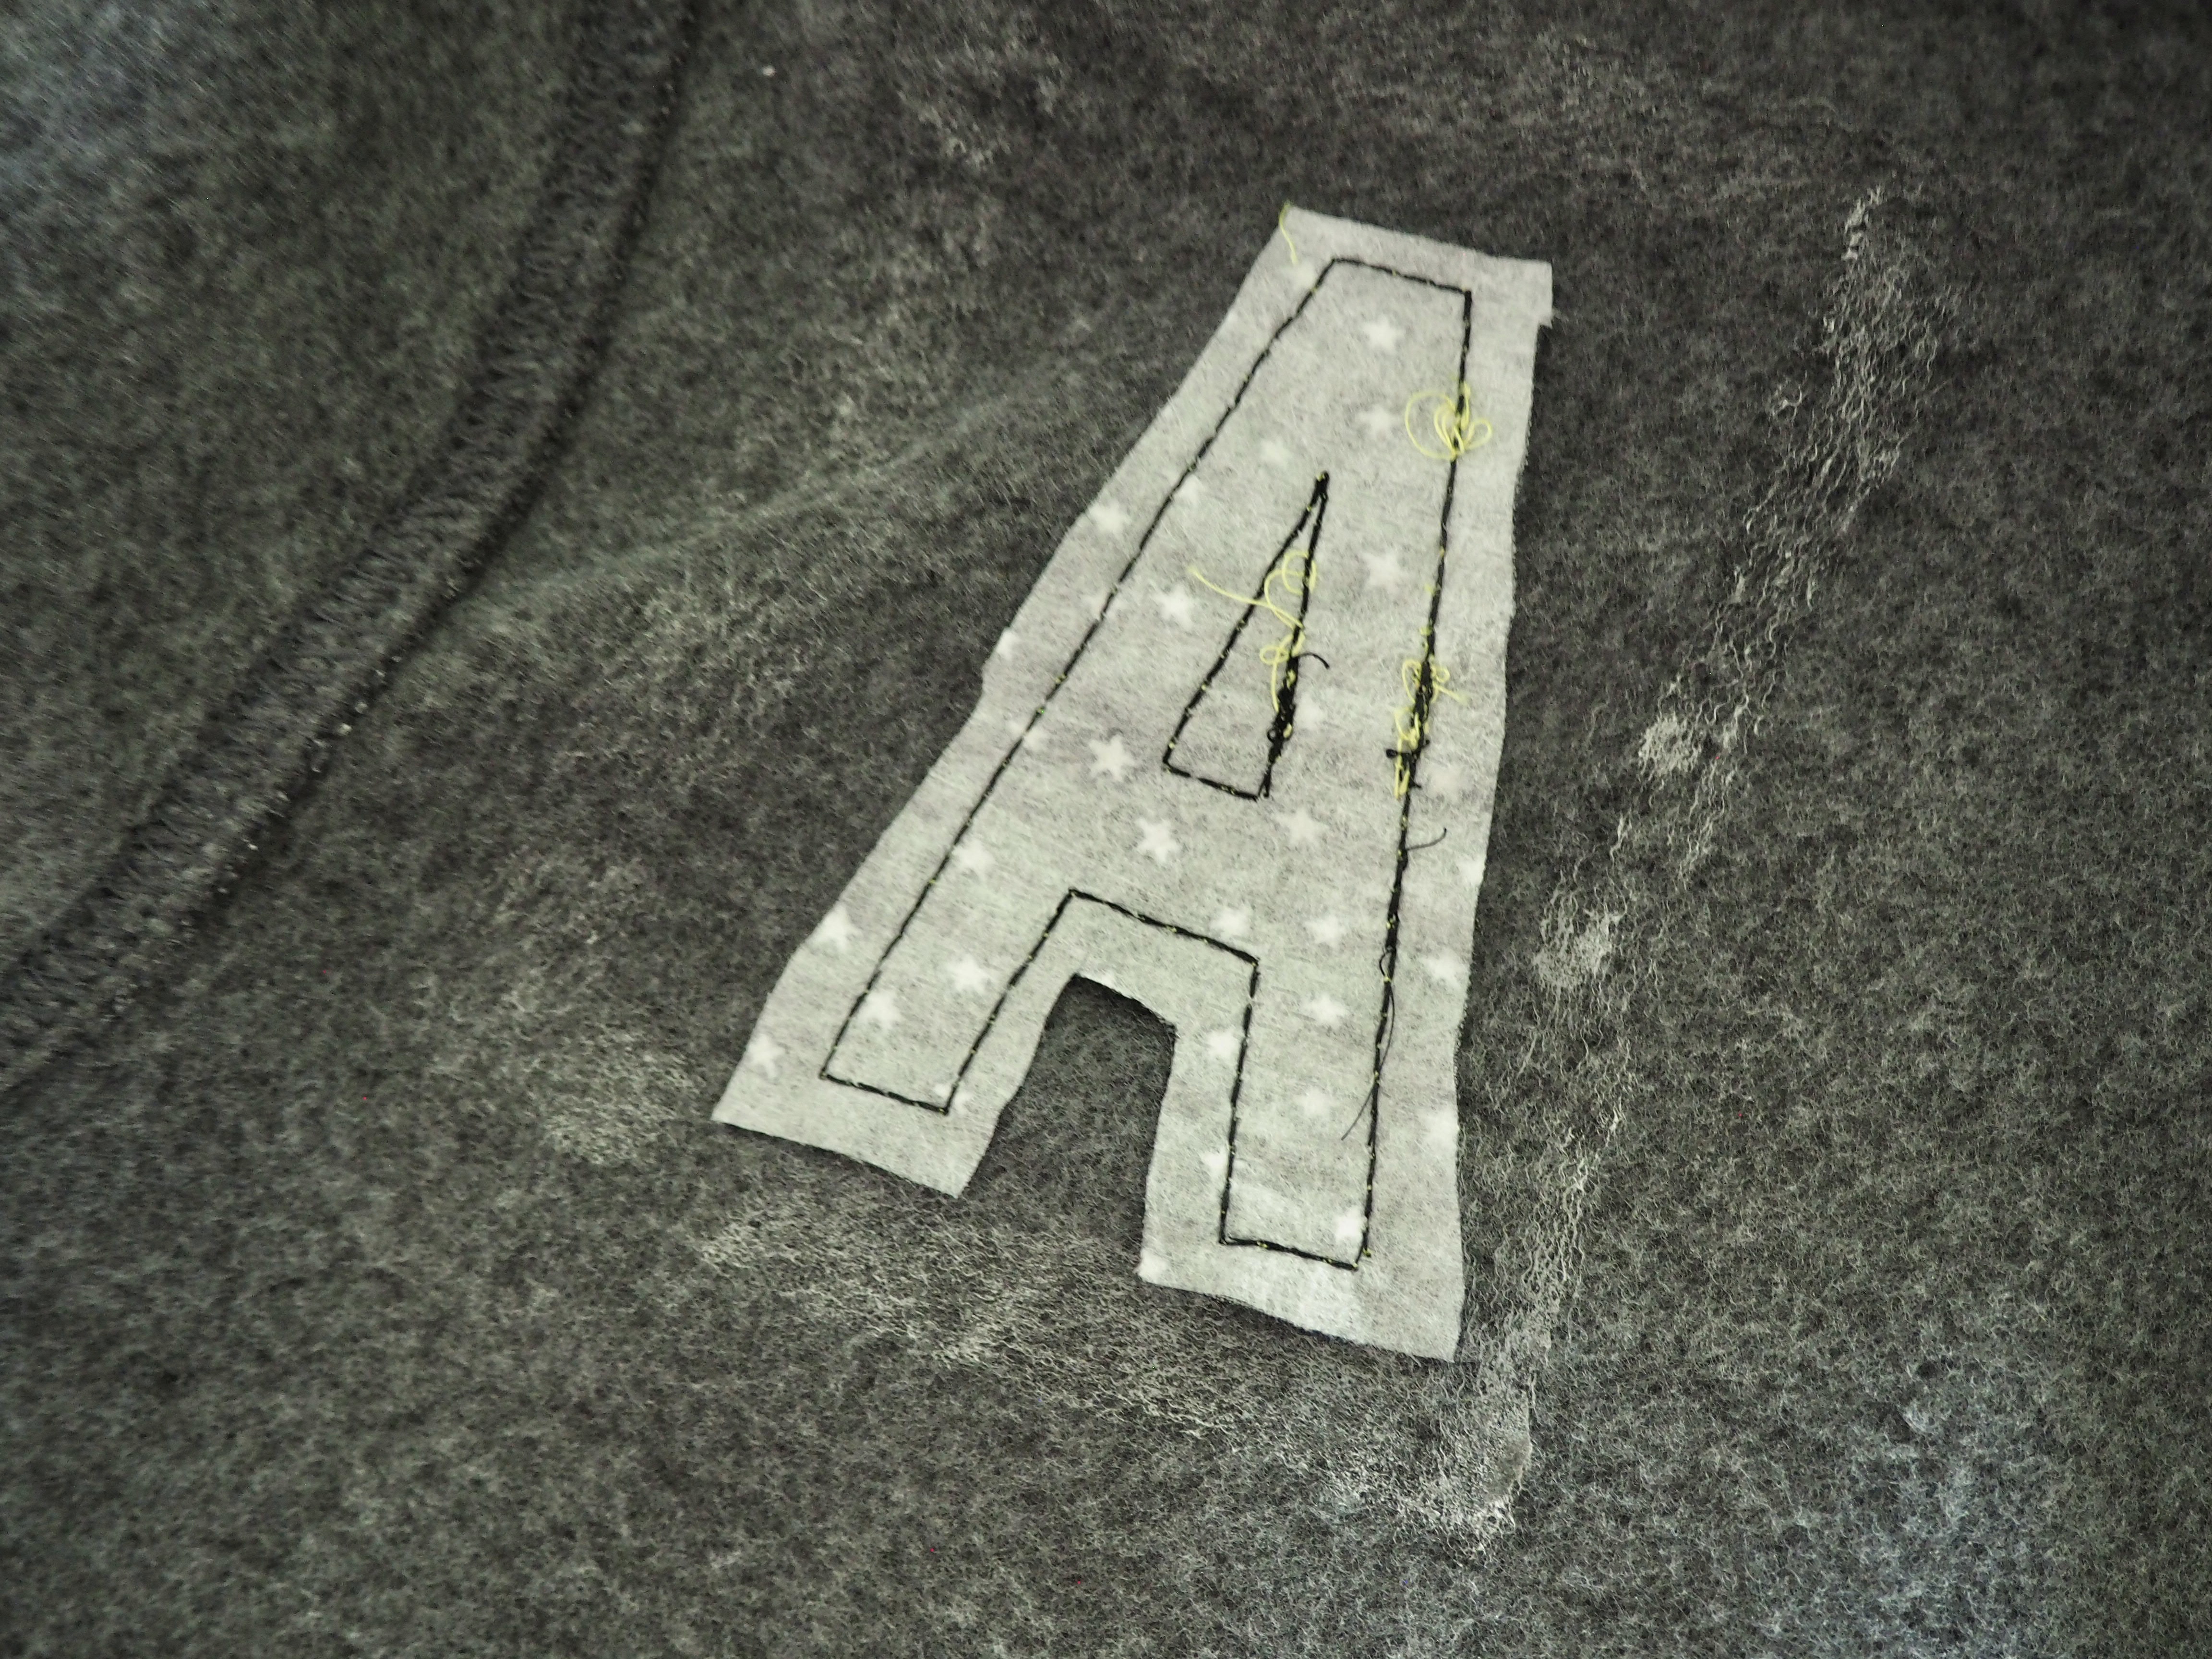
- Once you’ve stitched along the design, use your small snips to very carefully cut out the sweatshirt inside of your design, taking great care to only cut through the sweatshirt layer. DO NOT cut through the accent fabric layer. As you cut away the sweatshirt material, your accent fabric will show!
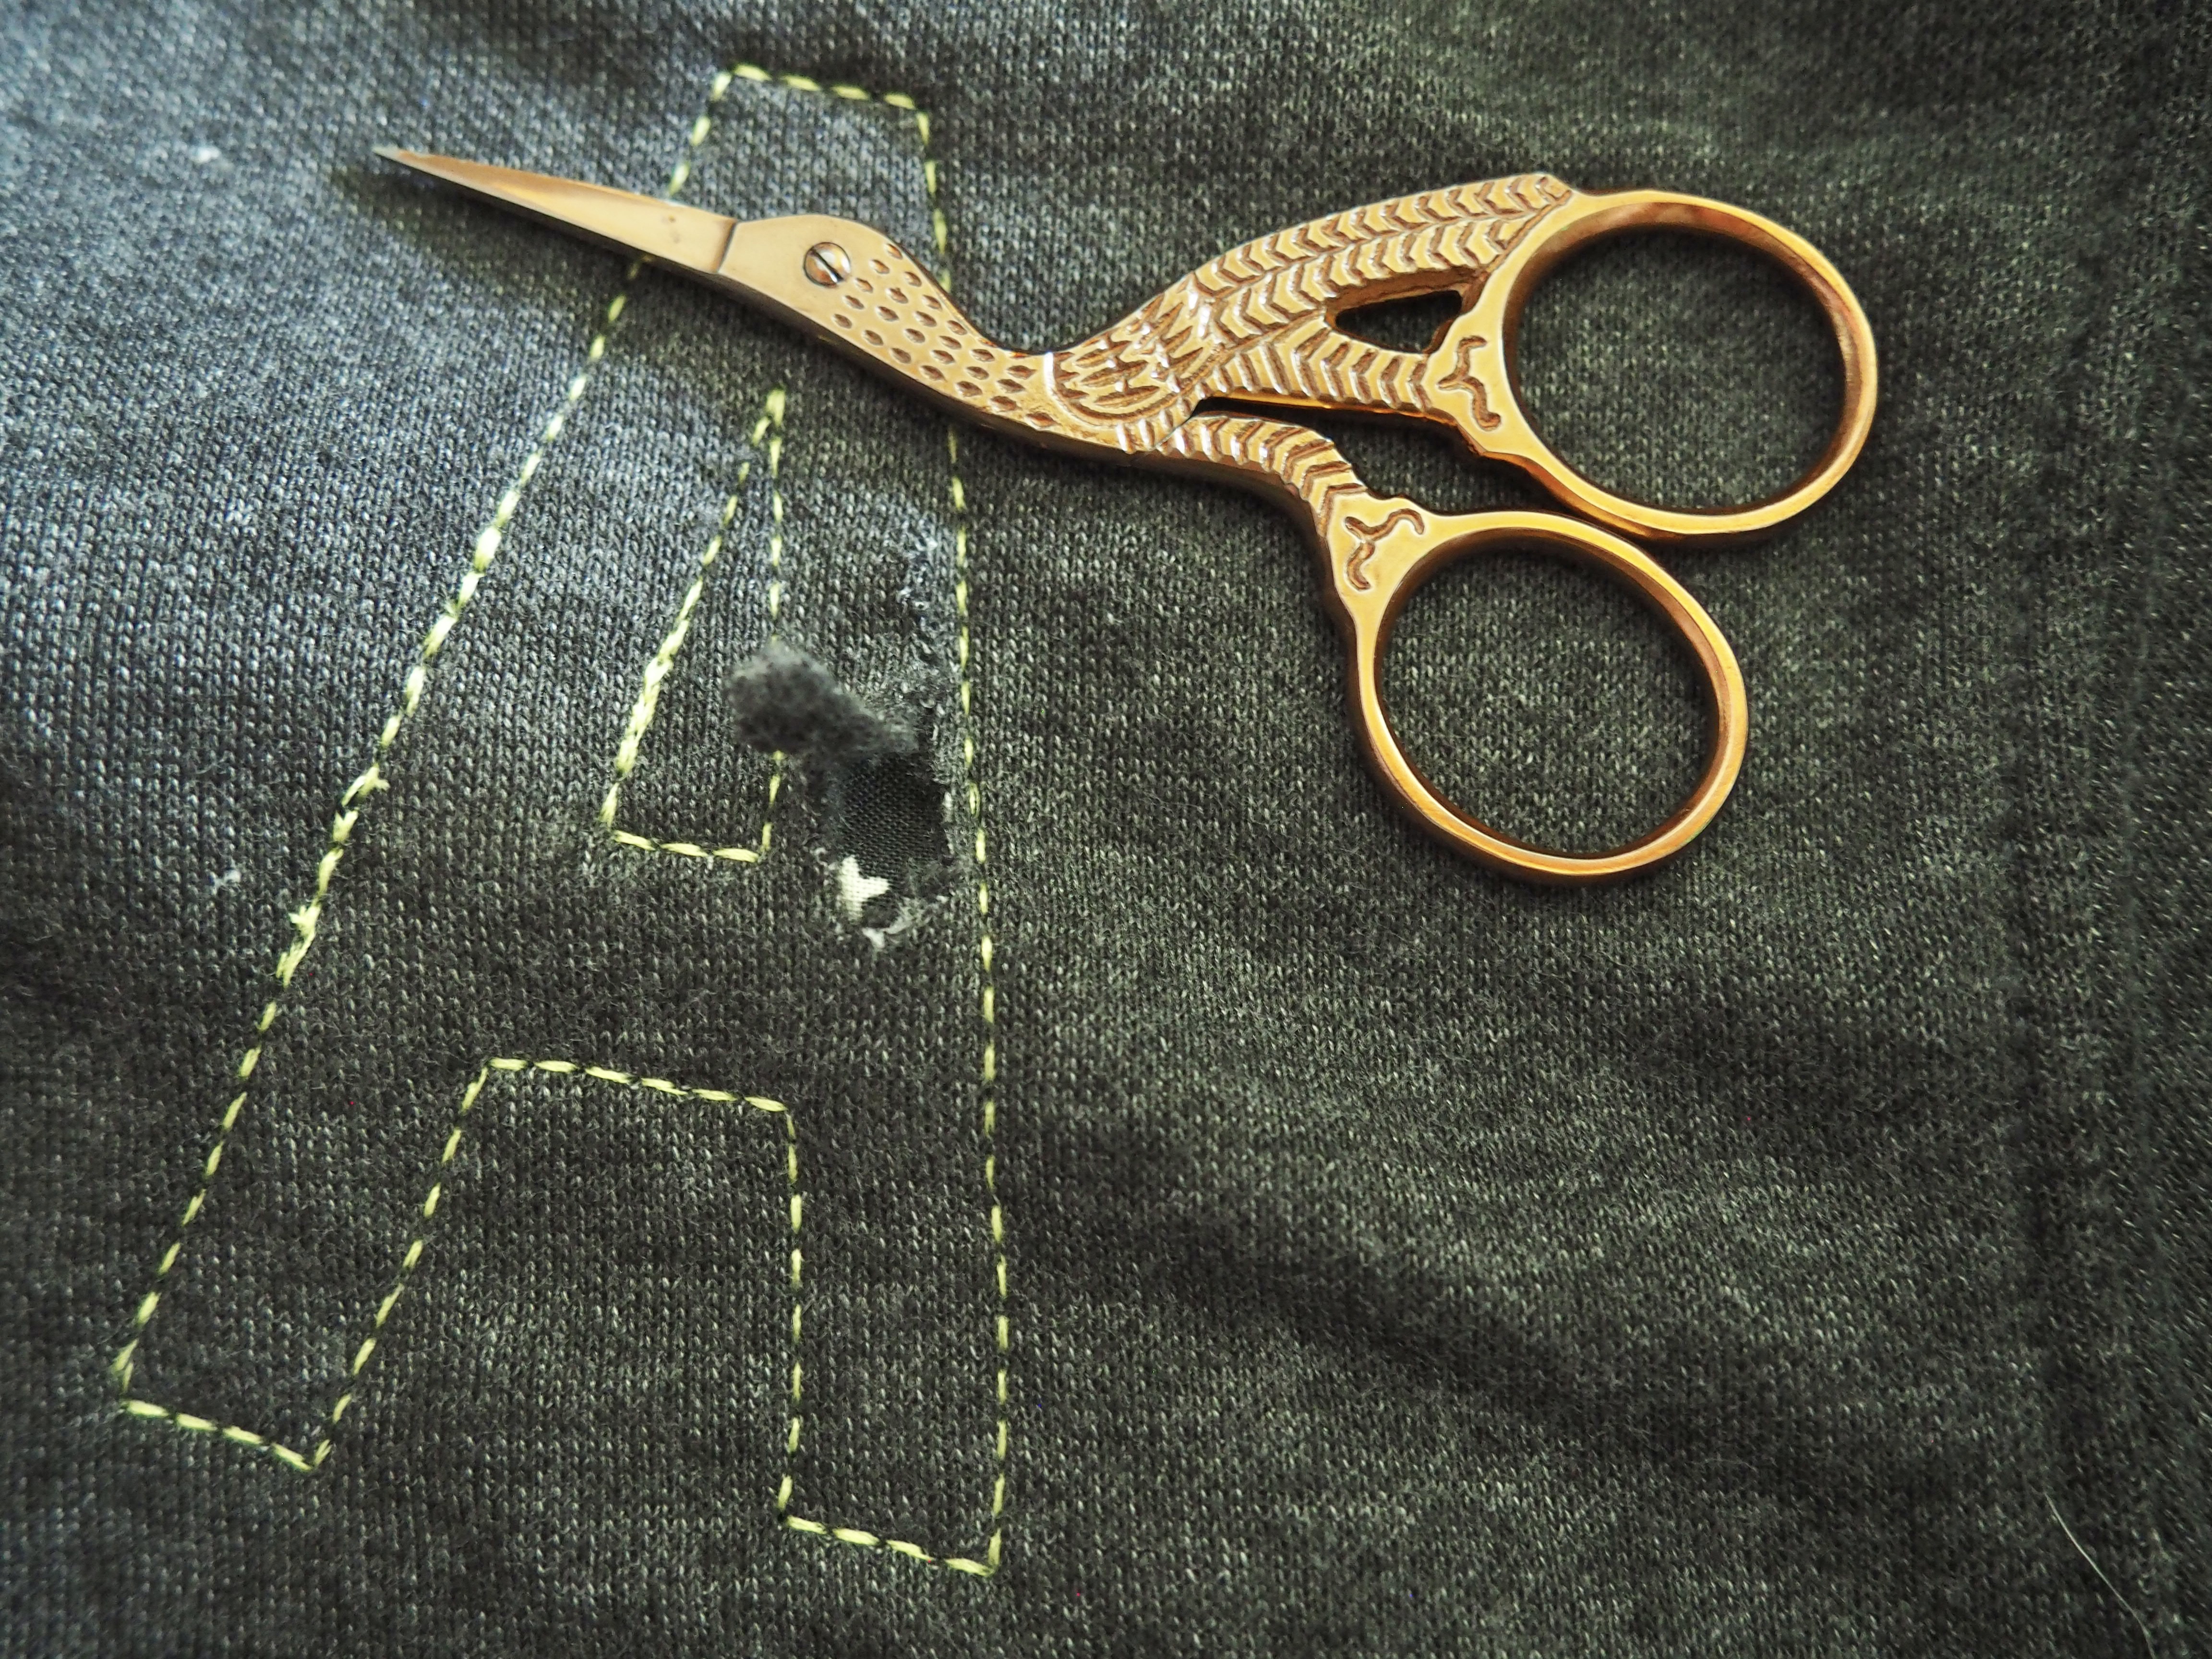
- On the inside of your sweatshirt, trim the excess accent fabric as desired
That’s all there is to it! Now, pop that cozy sweatshirt on and go digging for some other fun things to customize with reverse appliqué. I bet this would look great on that farmers market tote bag you love so much, or even your kiddo’s favorite fleece with a super suspect stain that needs to be covered. If all else fails, hit up your local thrift shop and you’re sure to find some gems just waiting on their second life.
If you do make your own reverse appliqué shirt, I’d love to see it! Tag me on social media at @aandcowi or leave a comment here on We All Sew.
Used Products
What you might also like


2 comments on “Quick & Cozy Reverse Appliquè Sweatshirt”
-
-
What a fun idea! I have to add this to my to do list.
Leave a Reply
You must be logged in to post a comment.

I’m hoping to sew at least a few minutes every day to complete a king size quilt for our bed.