How to Quilt Clamshells
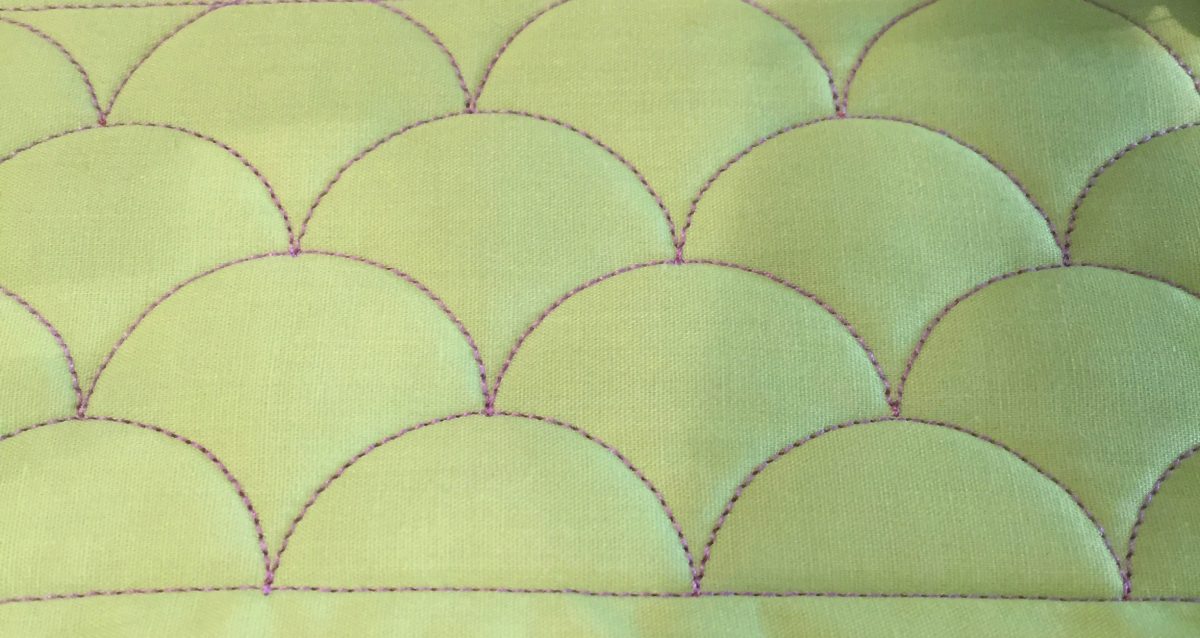
Ah the clamshells! They are one of those techniques that can really give you a bang for your design. They look amazing as an all over design but just as wonderful when you implement then as a fill. I felt showing a brief tutorial on how to quilt clamshells would be fun.
Let’s start off with an allover design. I find larger circles work really well for this design, however, it does depend on the piecing in the quilt and the size of your quilt. If your quilt is really large, I would recommend using an 8″ 0r 10″ circle and if you find that a baby quilt is your current project the 6″circle would be very beneficial.
Loading your quilt: Load the bottom of the quilt at the top if your top is directional. Maybe your quilt isn’t directional then lucky you; it doesn’t matter!
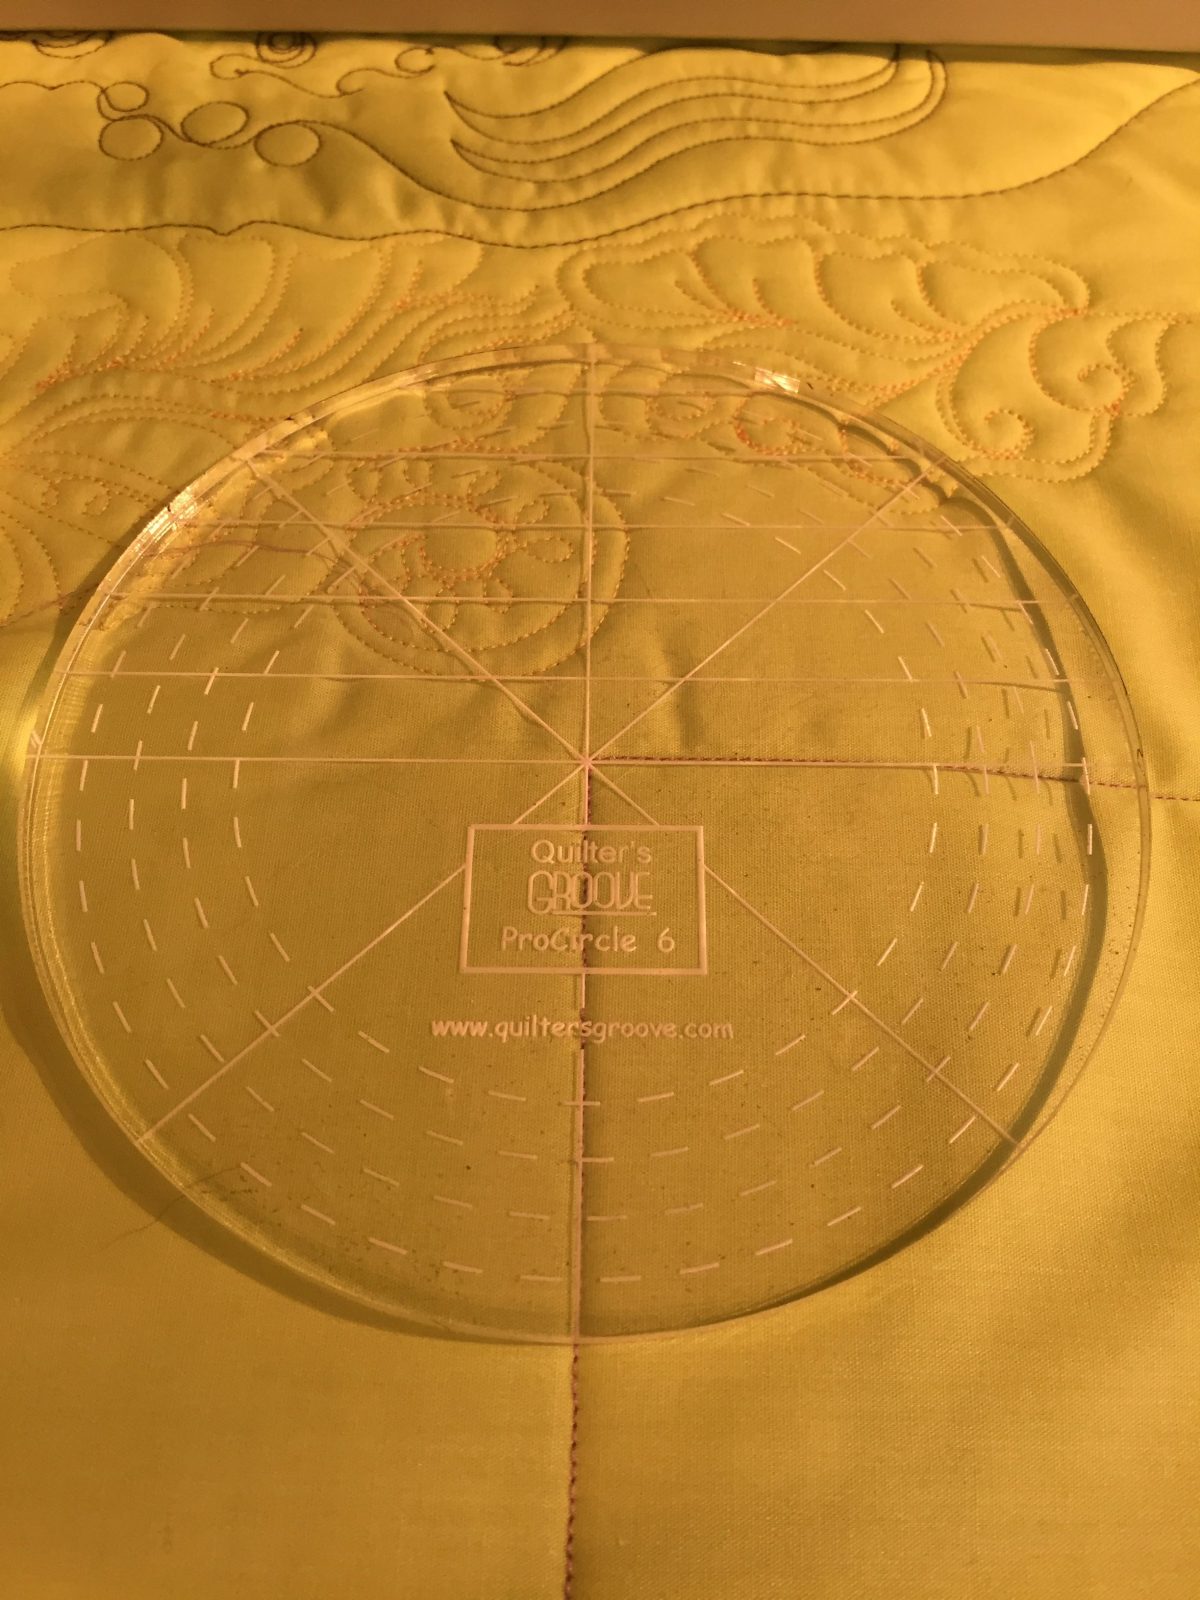
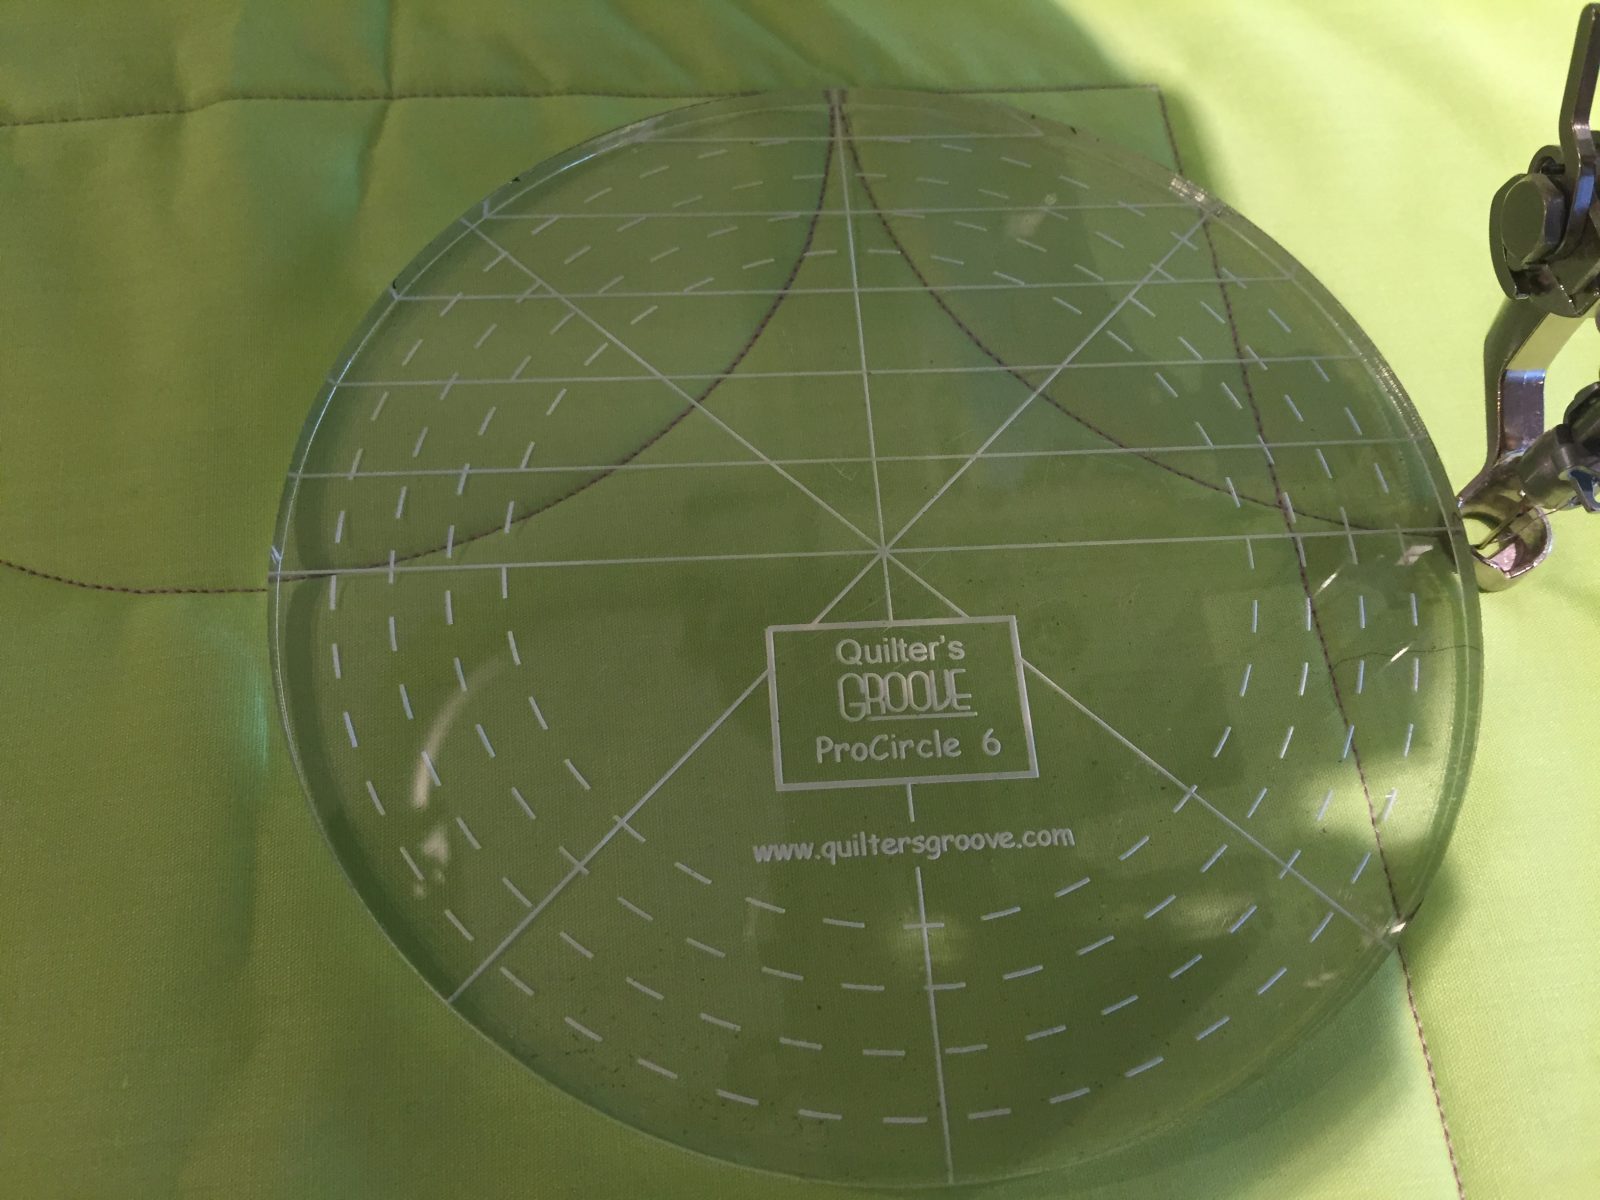
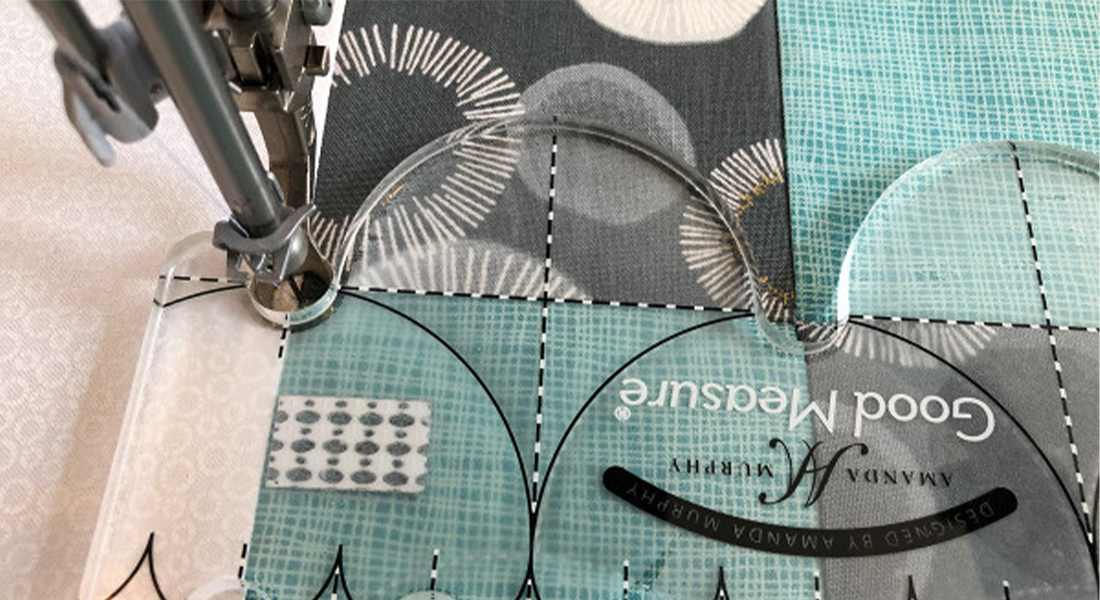
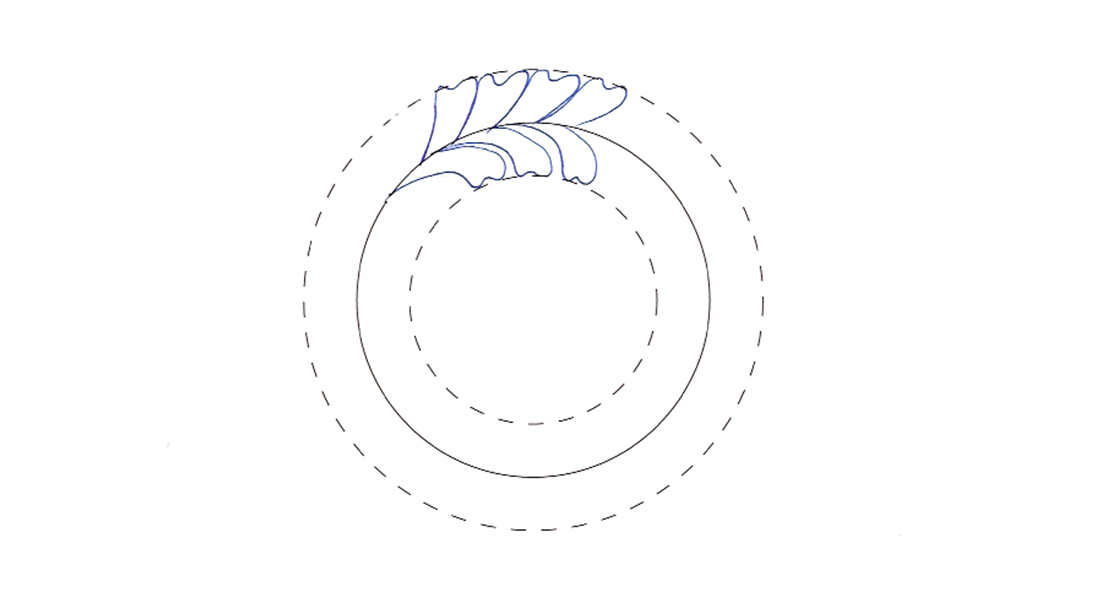
I will be using the Quilter’s Groove ProCircle 6 for this demonstration.
- Line up the center horizontal line with the top edge of your quilt and the vertical center line with the side of your quilt as shown.
Begin with your needle in the down position on the side of the quilt. You will stitch along the side of the template/ruler until you’ve come to the top of the quilt.
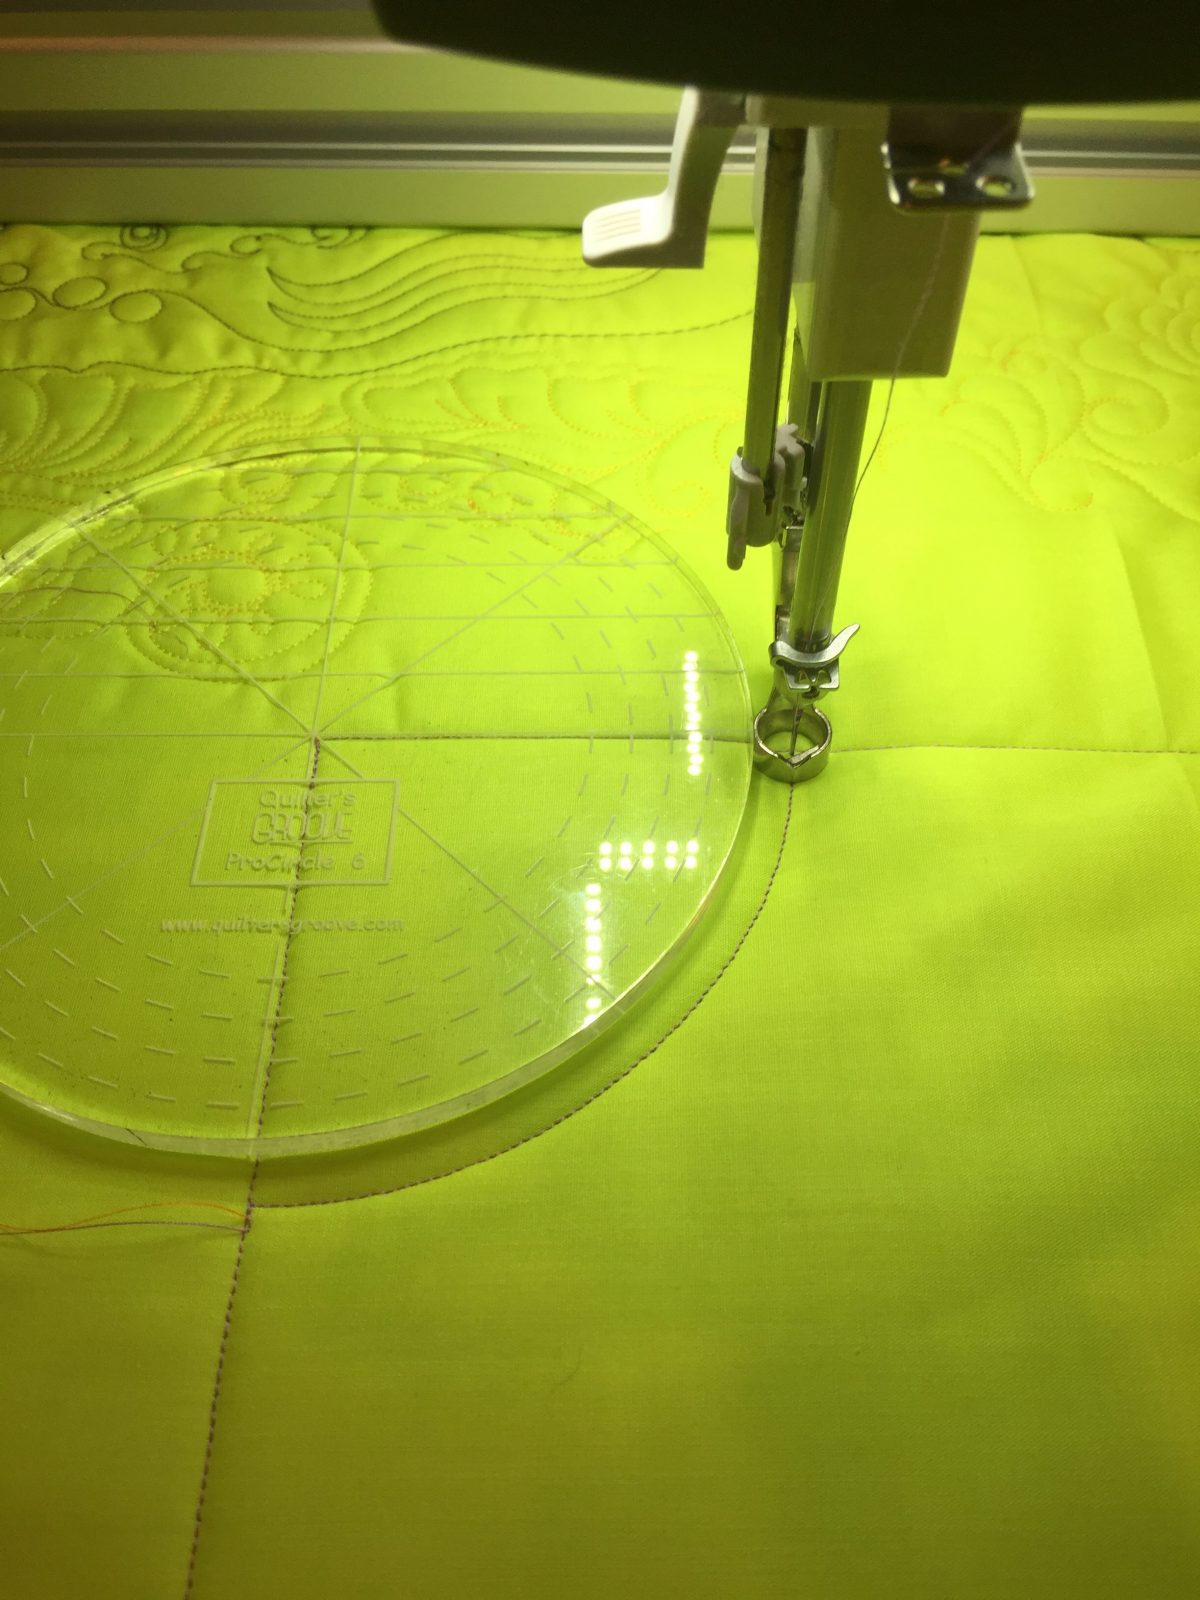
Stop with your needle in the down position, this will ensure that your machine doesn’t move. Reposition the template along the top of the quilt with the ruler on the right side of the needle. Lining up your center horizontal line with the top of the quilt.
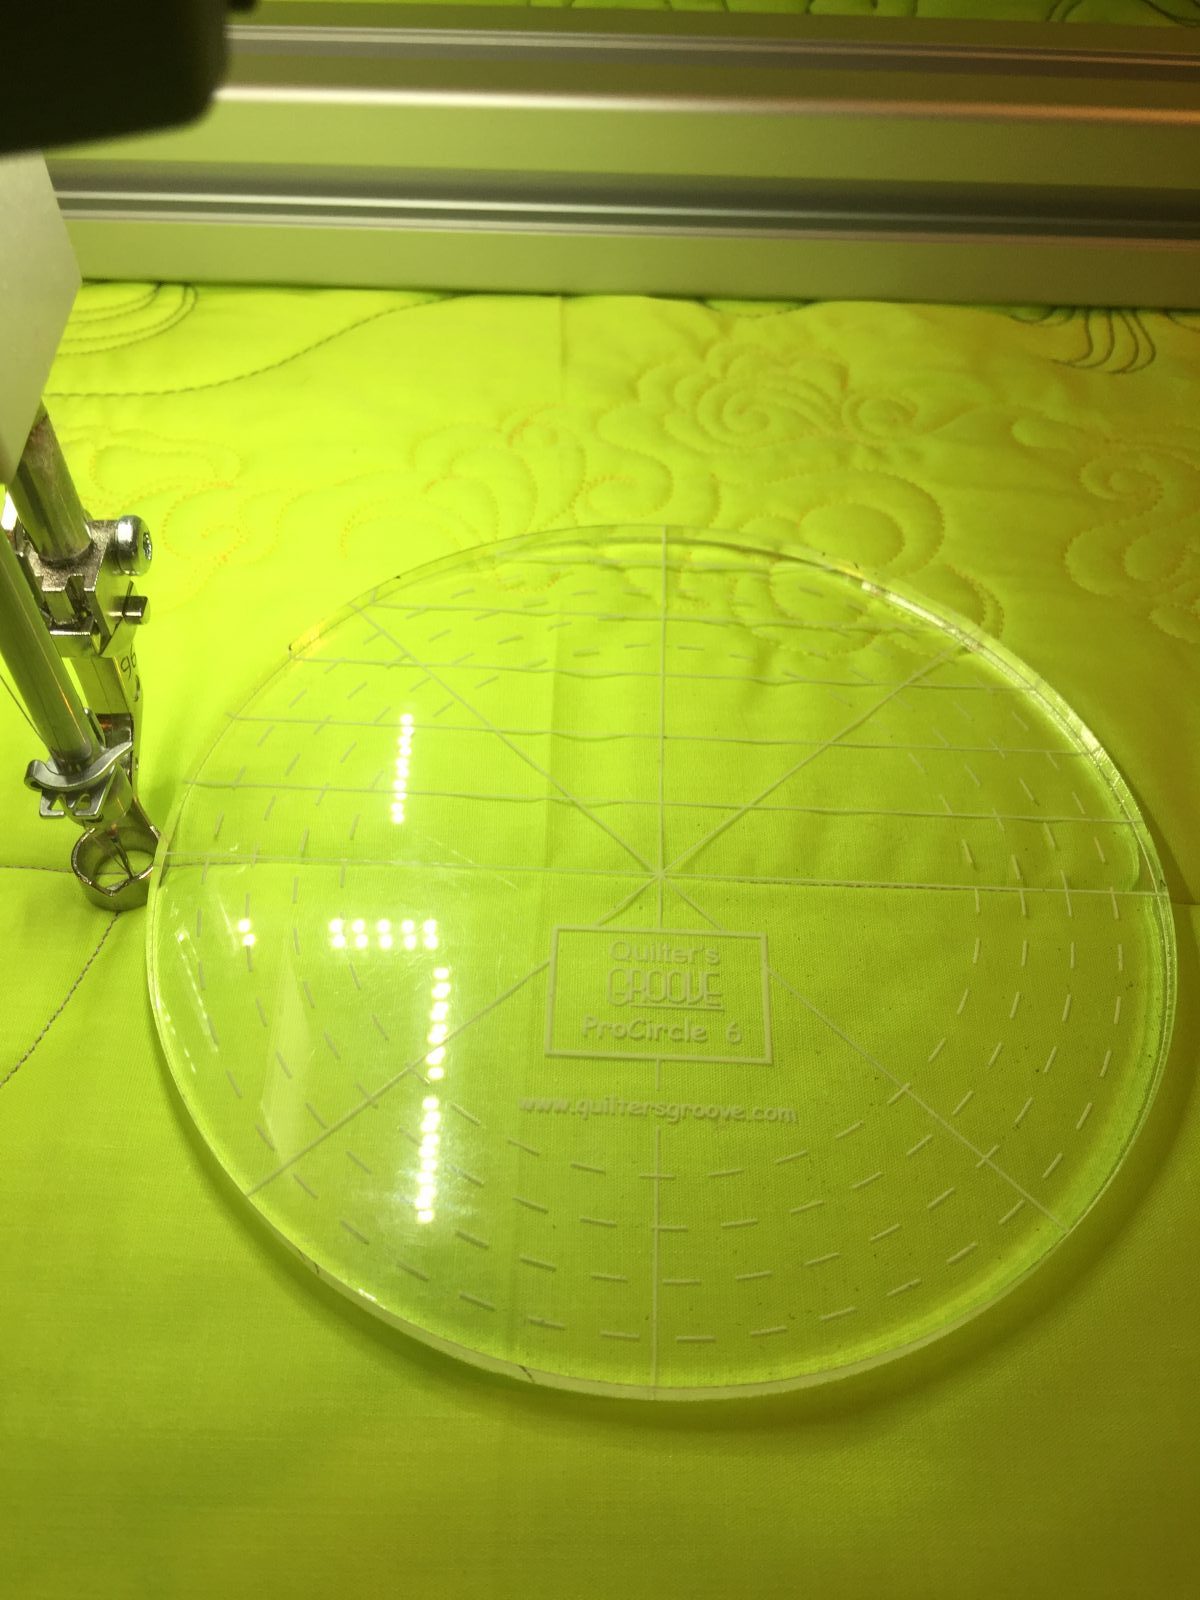
Stitch along the outside edge of the ruler. I like starting with holding the template on the right side of the needle and stitch as far as I can. I then stopped with the needle in the down position and reposition my hand to the left of the needle.

Continue until you reach the edge of the quilt. Now, don’t panic if you don’t have a full half circle at the end; just make sure you can stitch to the halfway point. Even if it’s off the quilt, it needs it to line up the next line.

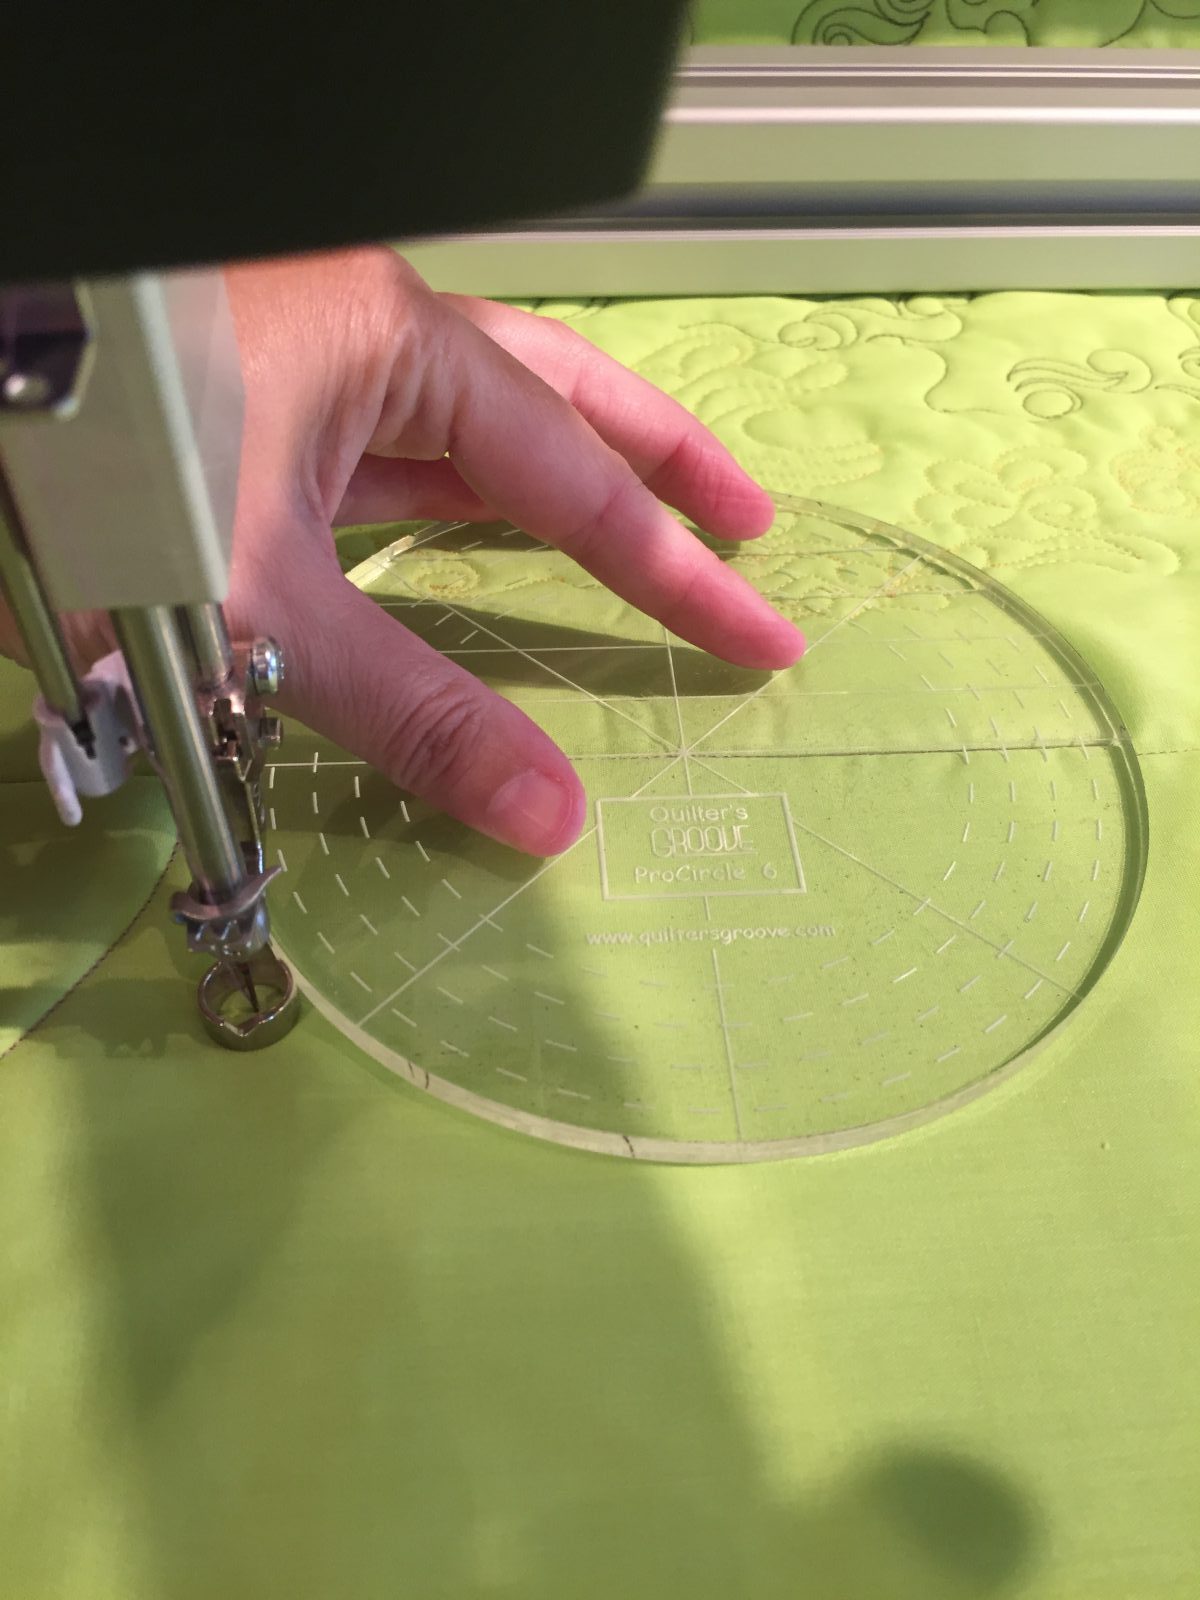
Now move the template/ruler and align the center horizontal line with the tops of the existent clamshells.
Continue to stitch along the bottom of the circle until you reach the other side. You will repeat this pattern over and over until you’ve completed the quilt.

In order to accomplish this design smaller as a fill, simply follow the steps given for allover design just incorporate a smaller template/ruler.
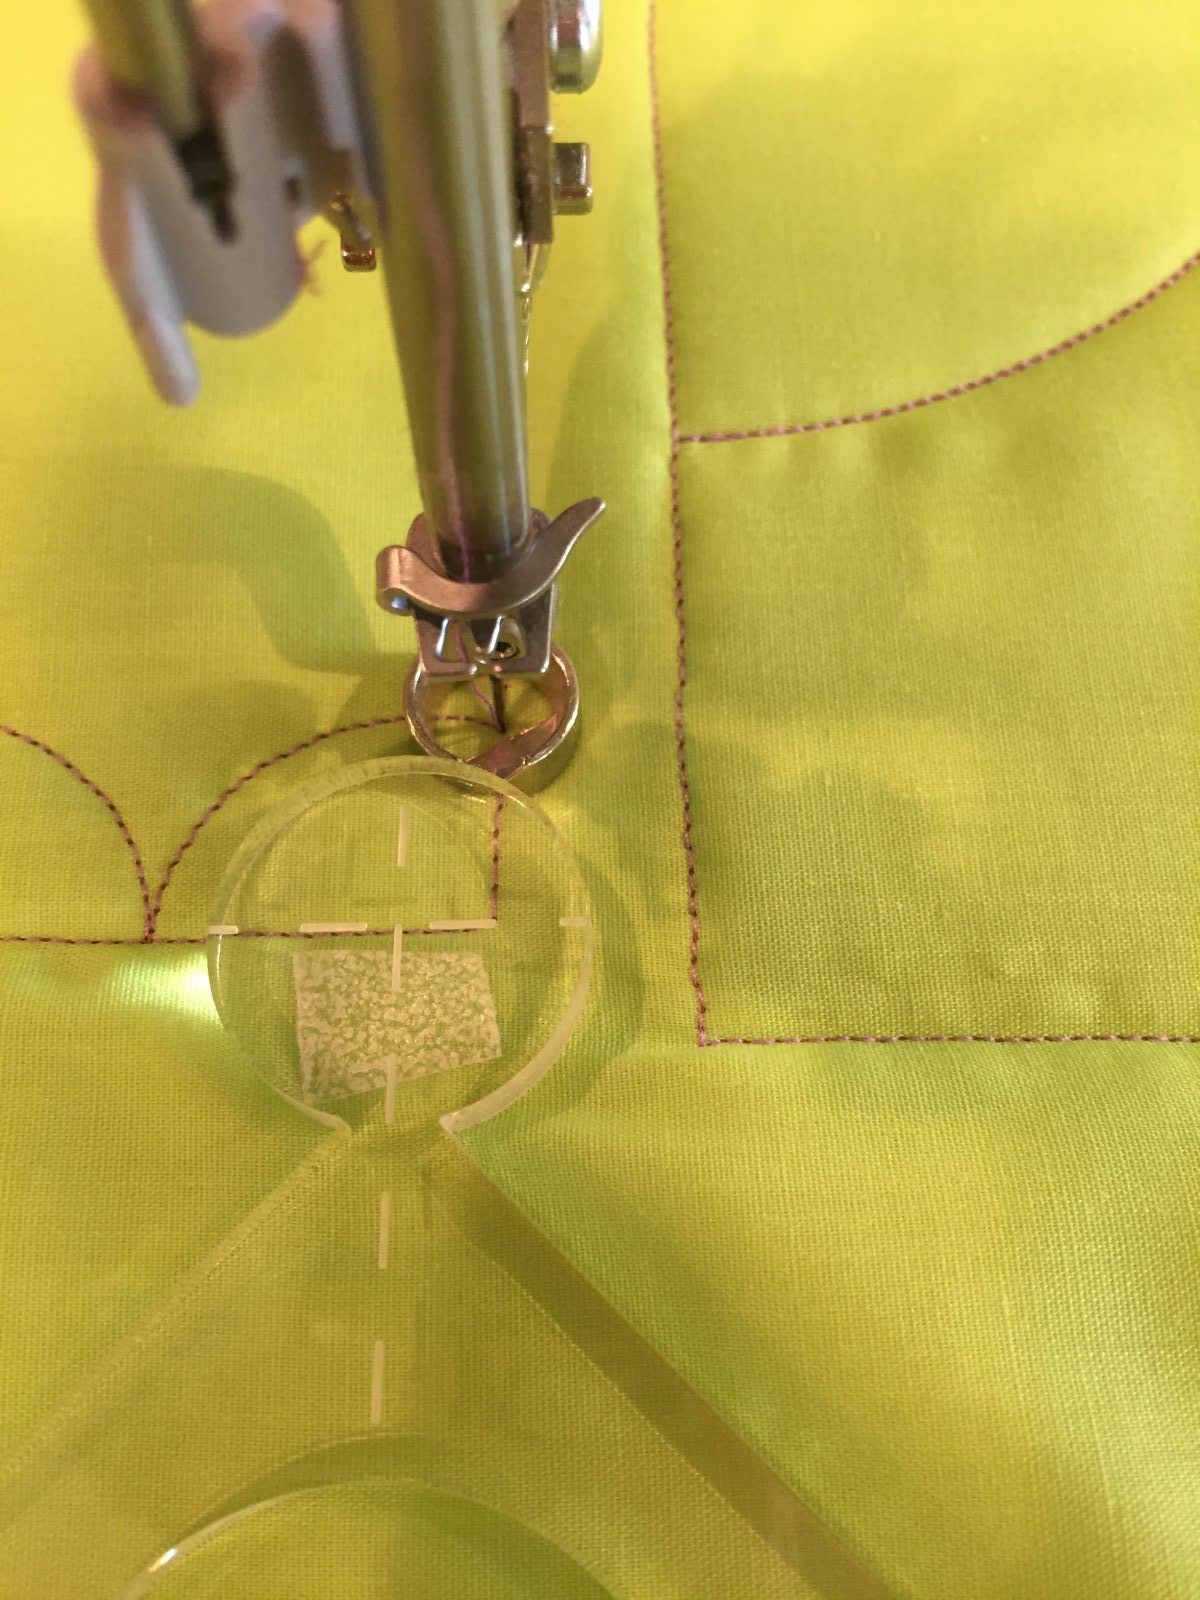
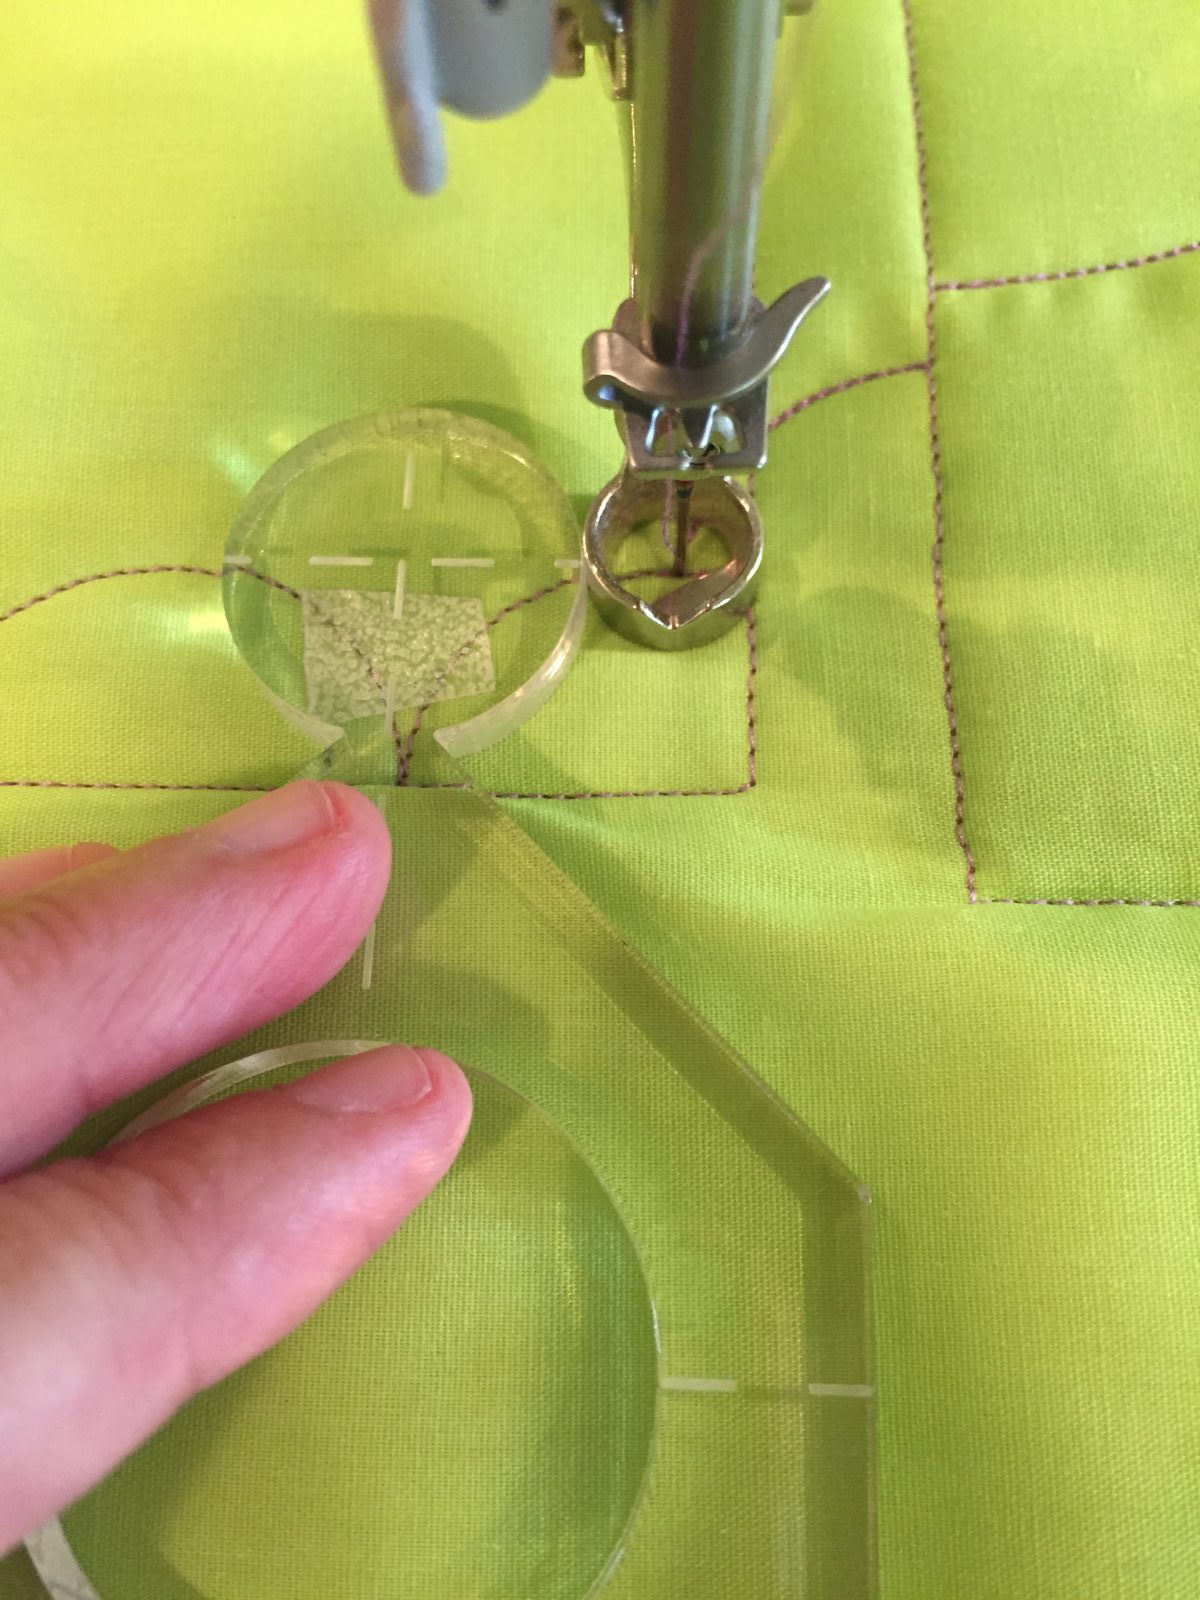
Here I used the Quilter’s Groove ProPebble 1/2. I have dropped my needle in the bottom corner. Take into consideration that depending on where this design is being placed on the quilt, you might be working upside down or sideways. Practice with your templates in all directions. Stitch along the top of the circle.

Stitch to the opposite side of the area you would like to fill. You will observe that I didn’t stitch a full half circle, this is okay.
Backtrack to the center line to get your next row lined up.
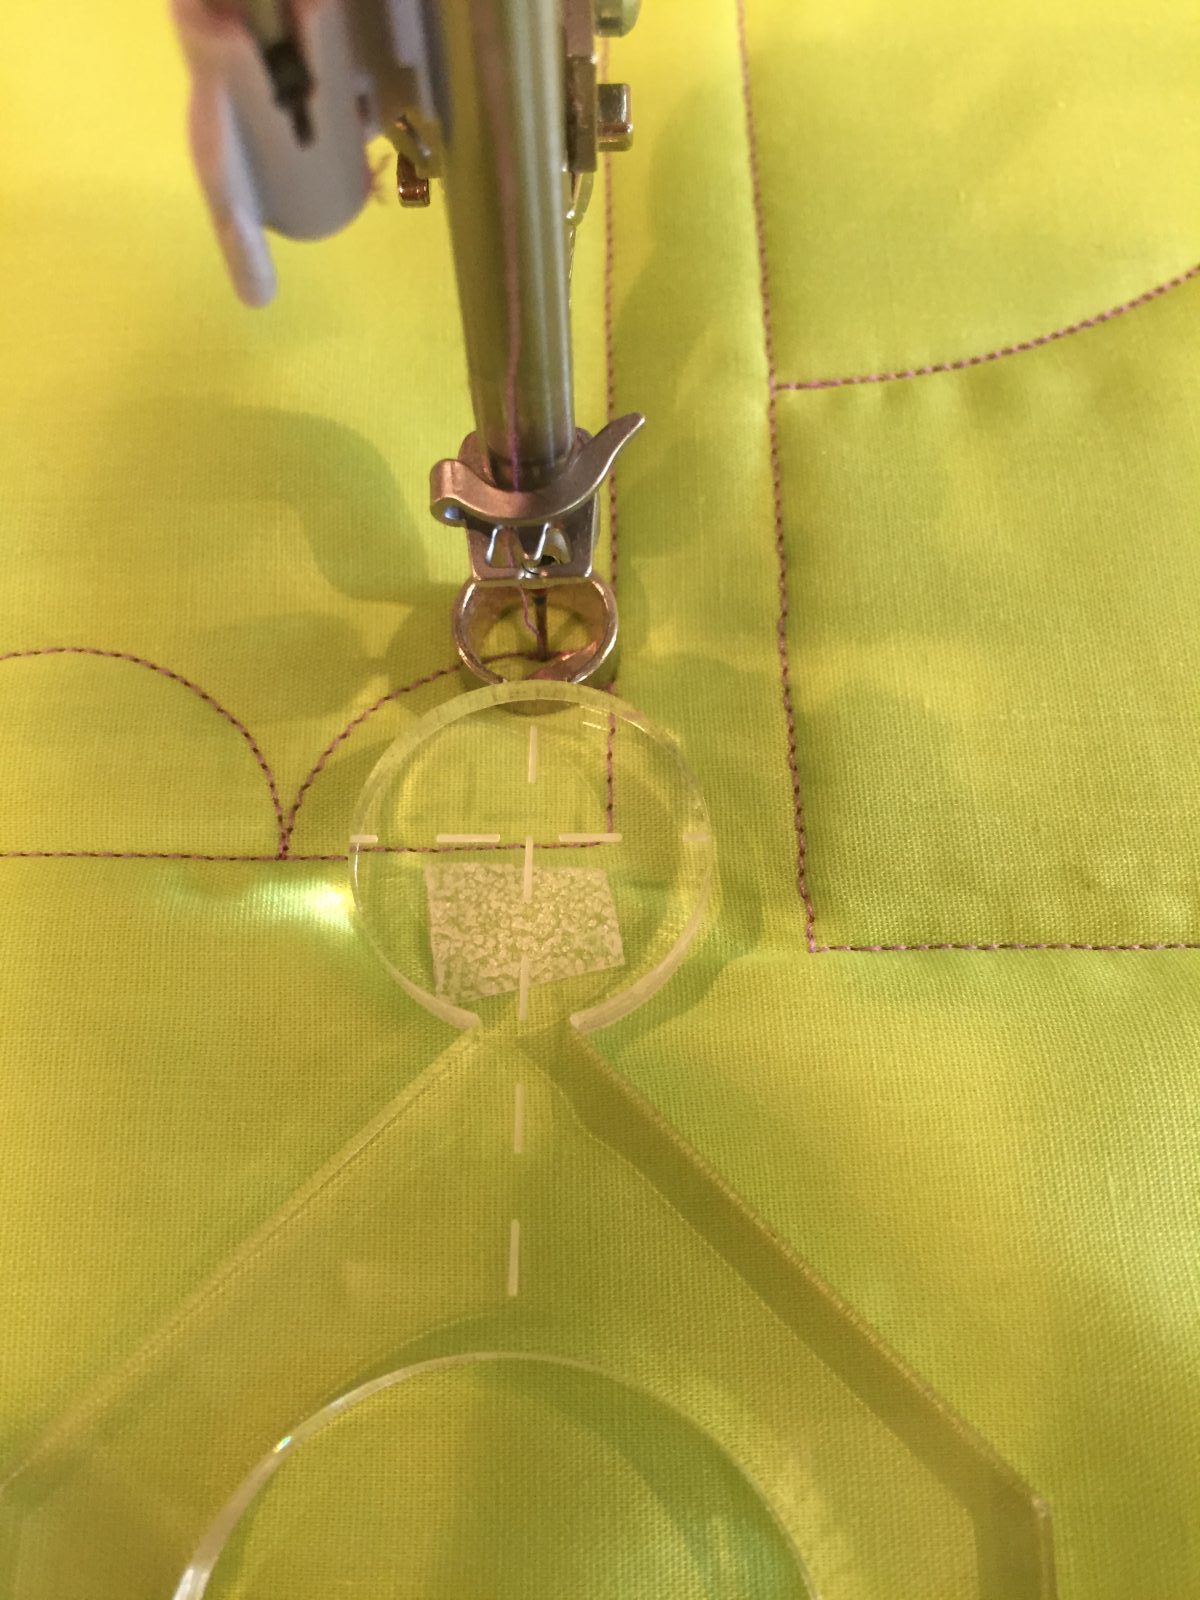
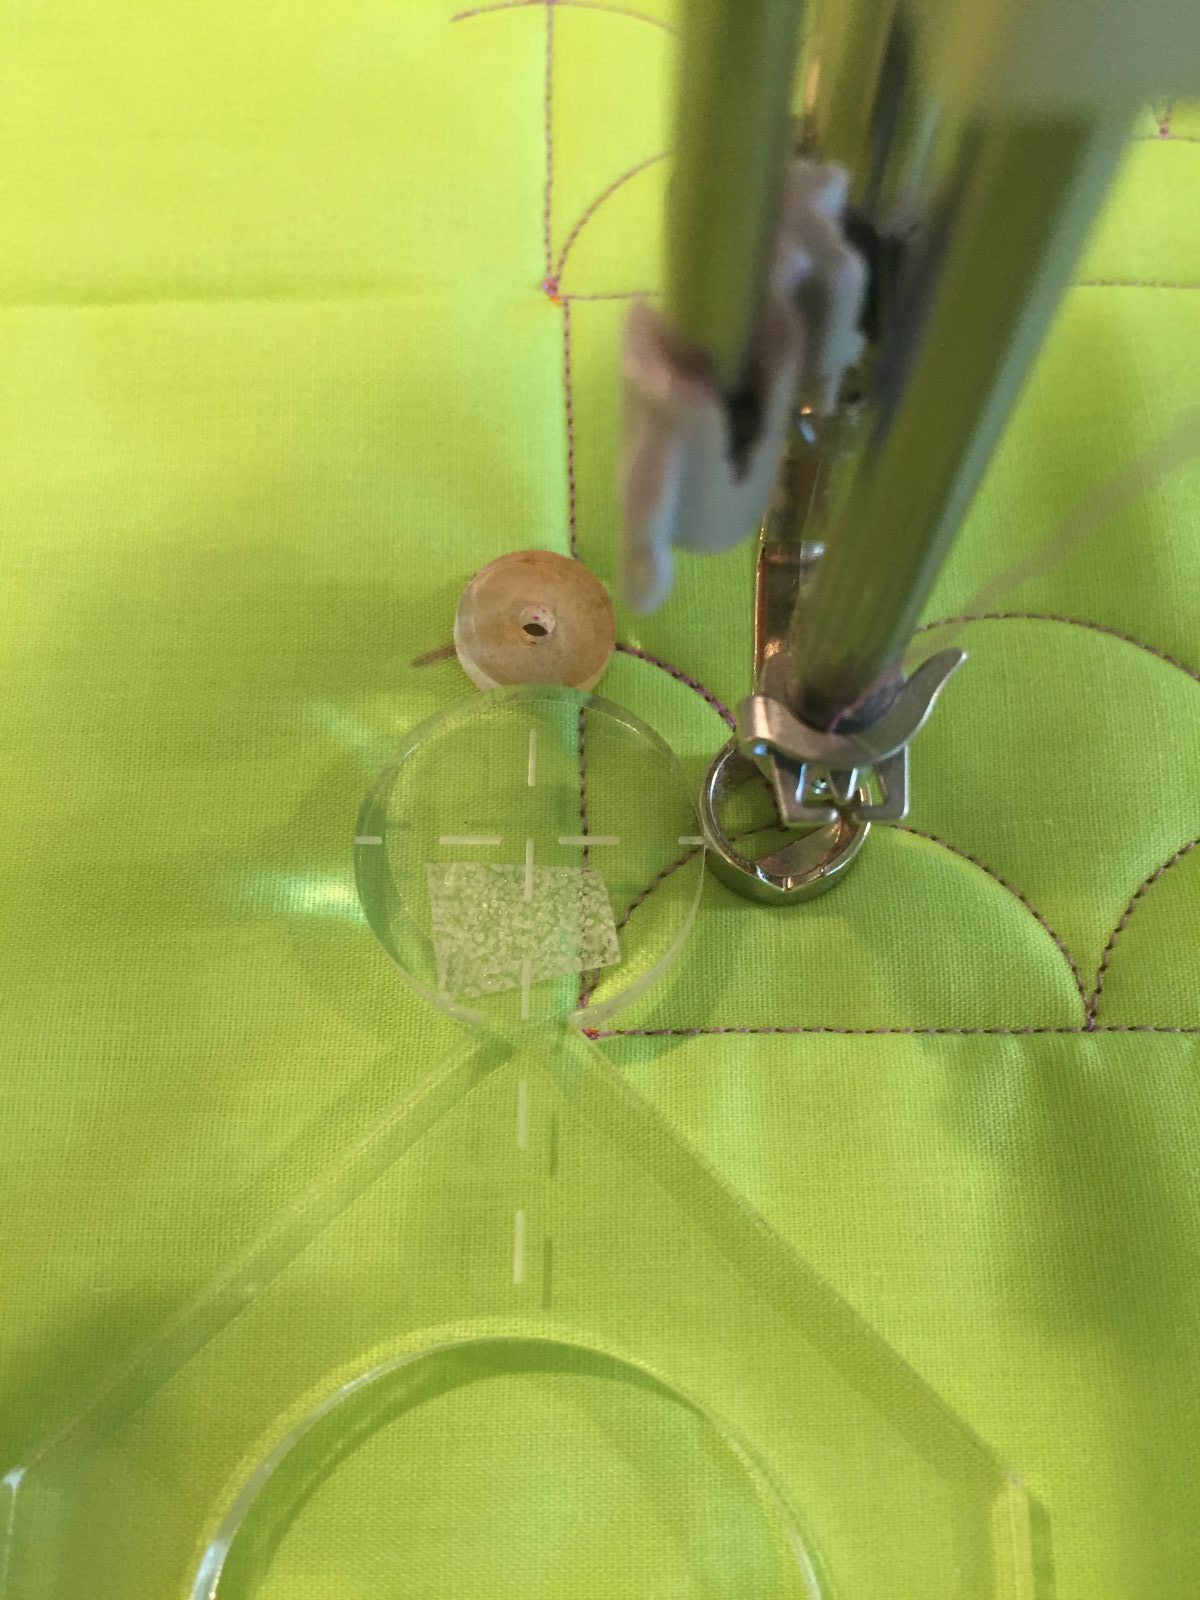
There is a small area that needs to be filled, so I repositioned my template/ruler to the right, next I’ll stitch to the top of the circle, then backtrack down to where I started.
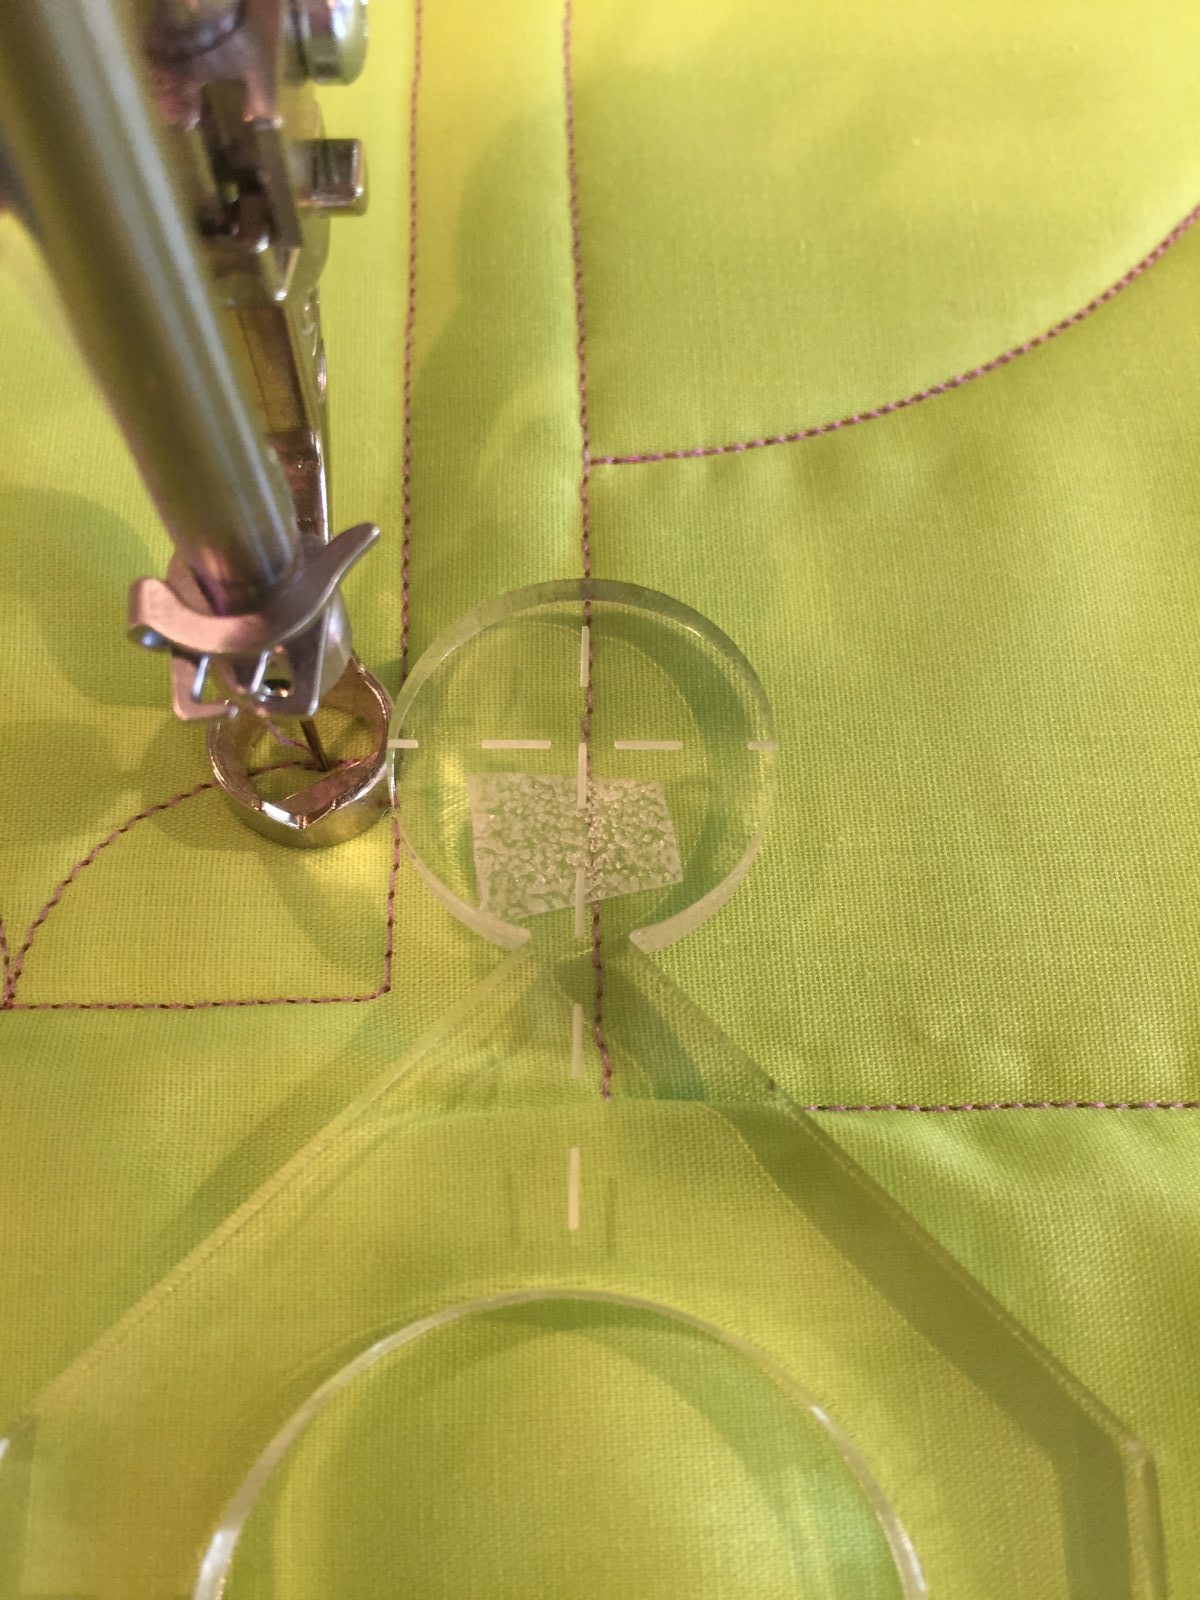
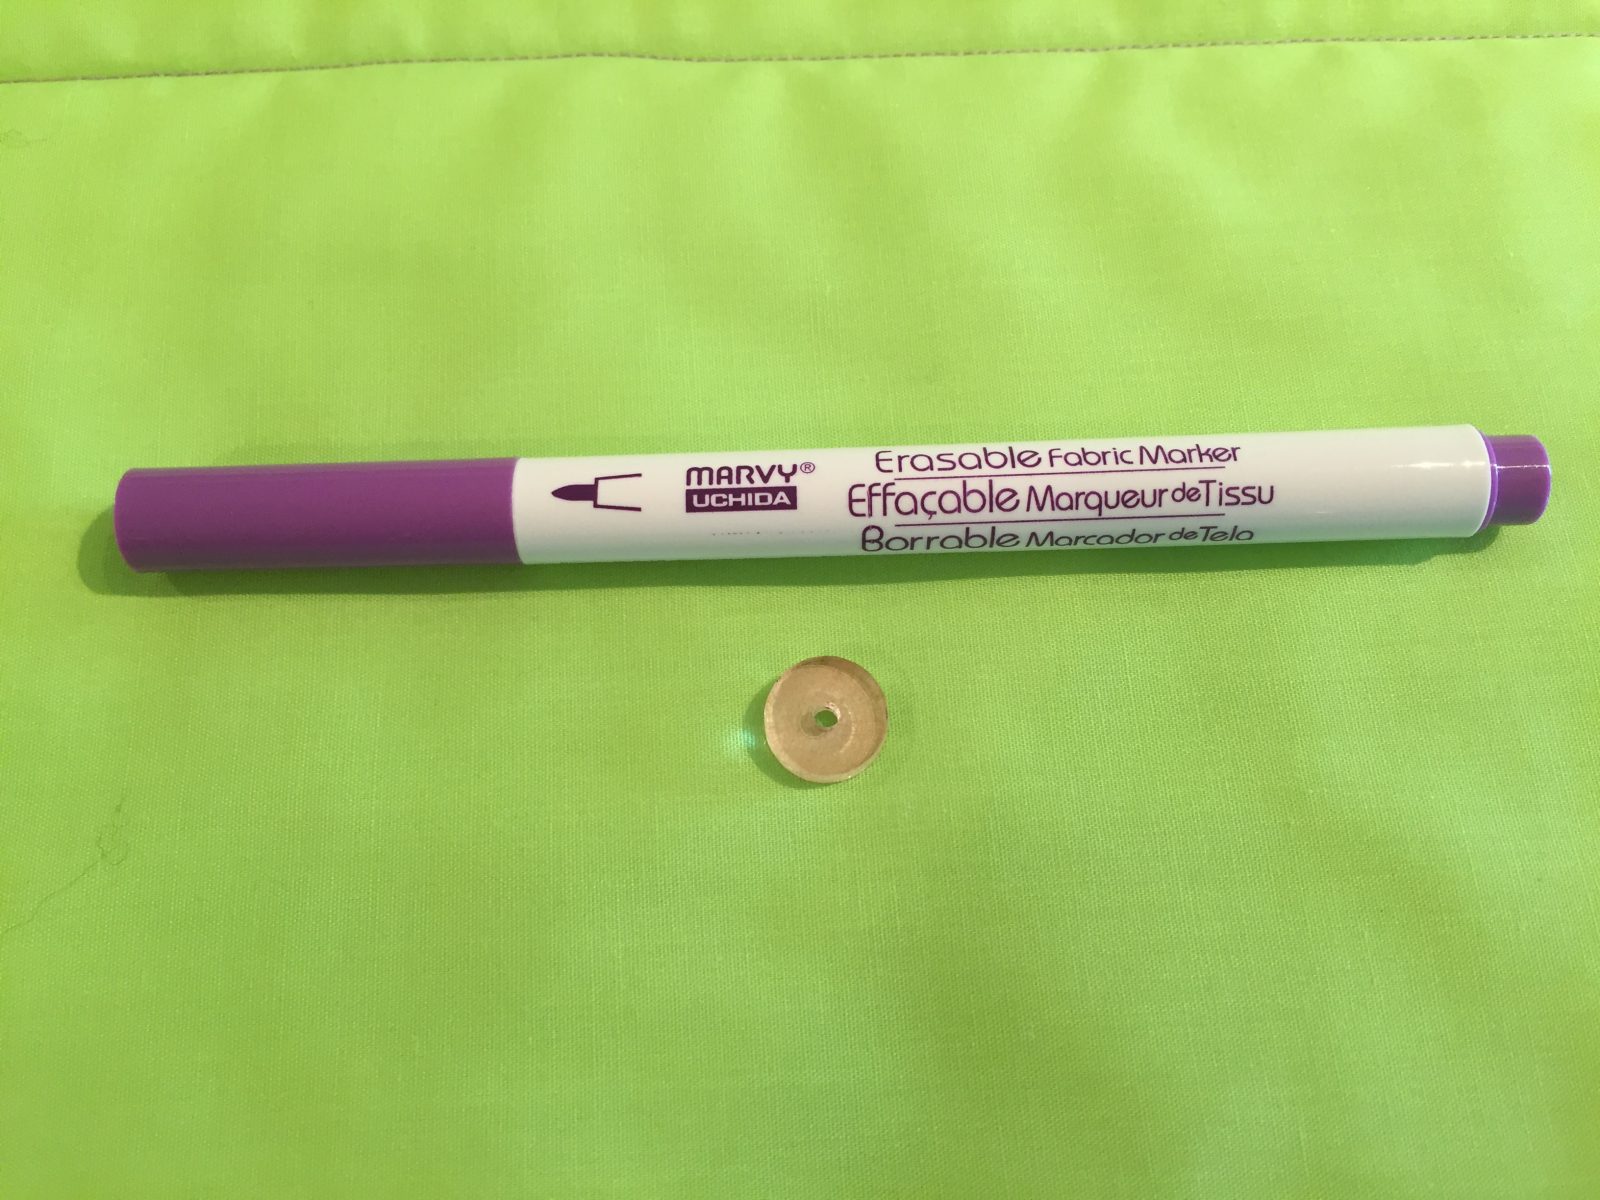
You will note that in order to stay inside this square there is an area outside that needs to be marked in order to line up next row. I use a Hopper, which is a 1/4″ spacing disk to mark up to the top of the circle. This gives me a point to line up to for the next row. Stitch up to the edge of the area you want to fill until you are able to line up the ruler for the next row.
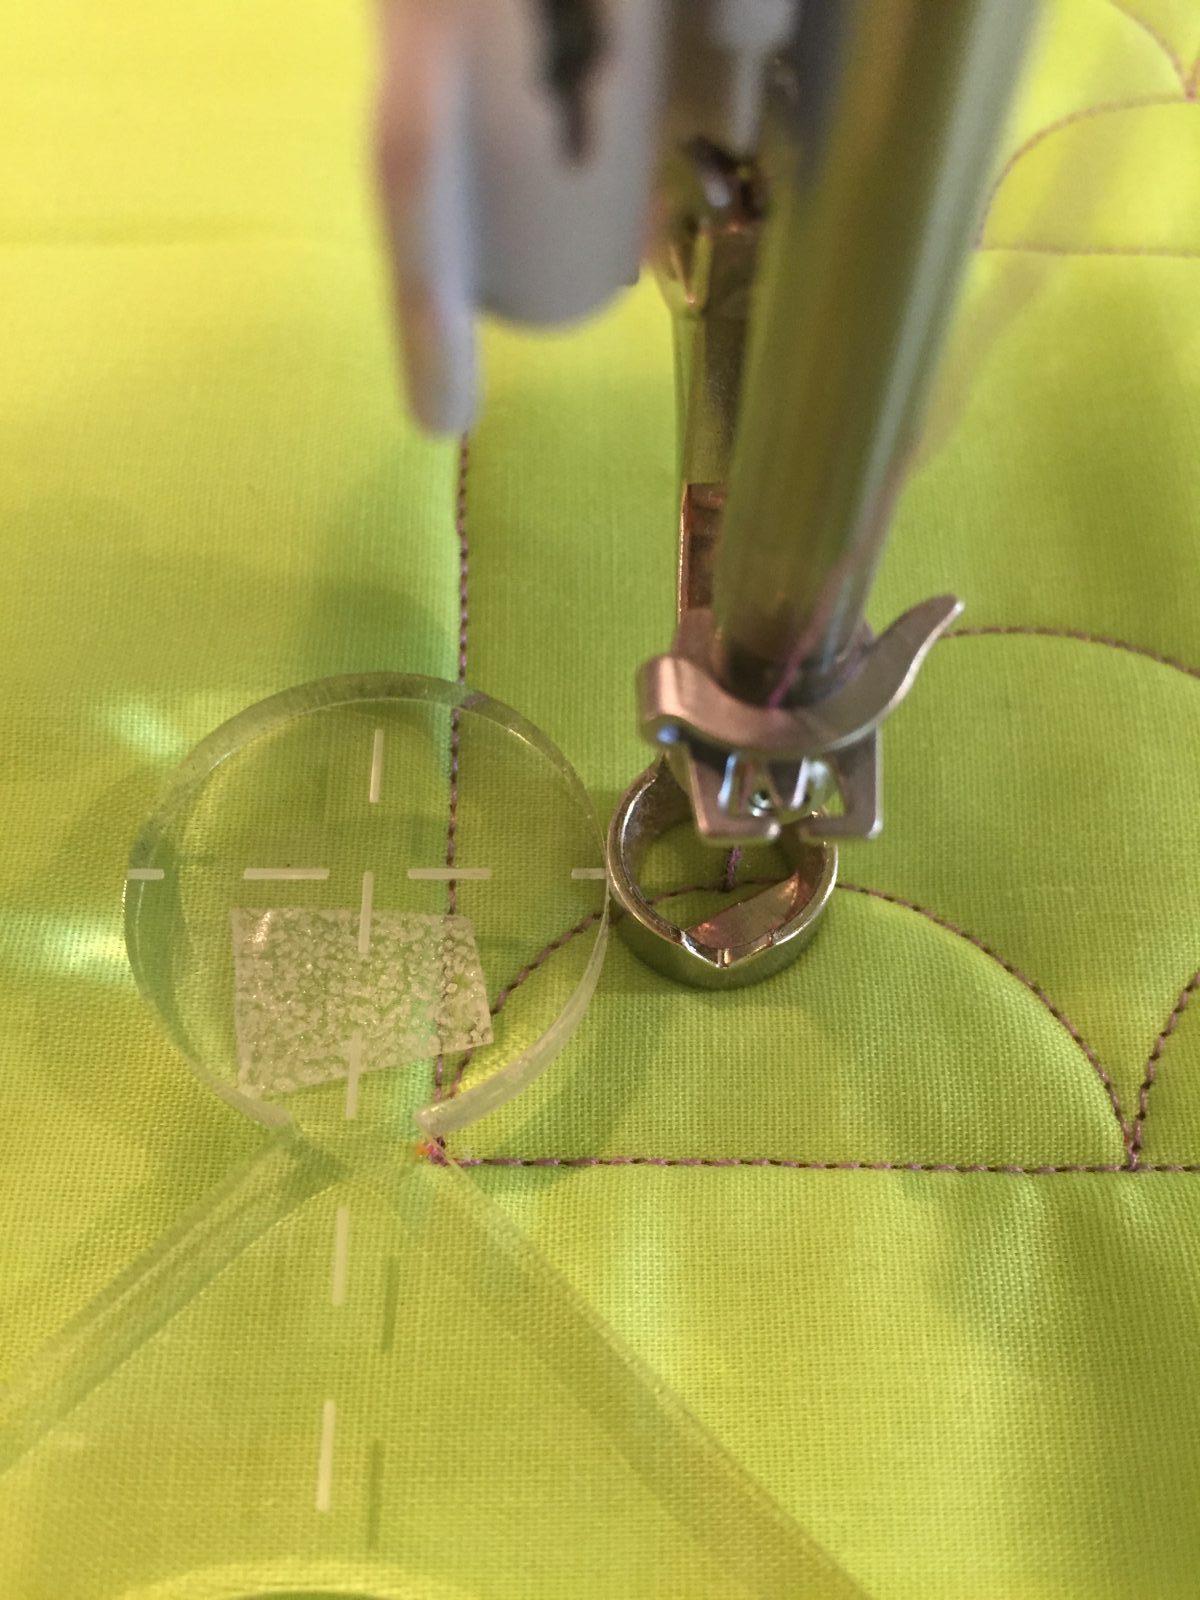
You can now continue to fill up the space with your clamshell design.
Yes, clamshells definitely give the quilter a two for one design. Now maybe you’ll go clamming?!
Used Products

What you might also like


2 comments on “How to Quilt Clamshells”
-
-
I am on the longarm here so it is the 96 foot. You will want to use the 72 foot.
-
Leave a Reply
You must be logged in to post a comment.

Please let me know what foot you are using for the clam shells. I have a Bernina 200 and a 580.
Thanks