Don’t Forget the Quilt Label!
Hi there, Lee here again from Freshly Pieced! I’ve been quilting for more than 10 years, probably finishing at least 50-60 quilts in that time. Guess how many of those quilts I’ve actually labeled? Five of them. And in those cases, it was only because I was entering the quilt in a show, and a label was required under the rules.
So quilters, I get it. In the rush to finish something (either because you’re tired of it or because you’ve got a deadline), labeling the quilt is often the last thing you want to do. But would an artist leave a painting unsigned, just because she was too tired for that last step? Labeling your quilts is important, both for you as the maker and for the eventual recipient of the quilt. I recently resolved to get as many of my quilts labeled as possible. So let’s talk today about the various ways to make that happen.
How to Label a Quilt
Basic handwritten method.
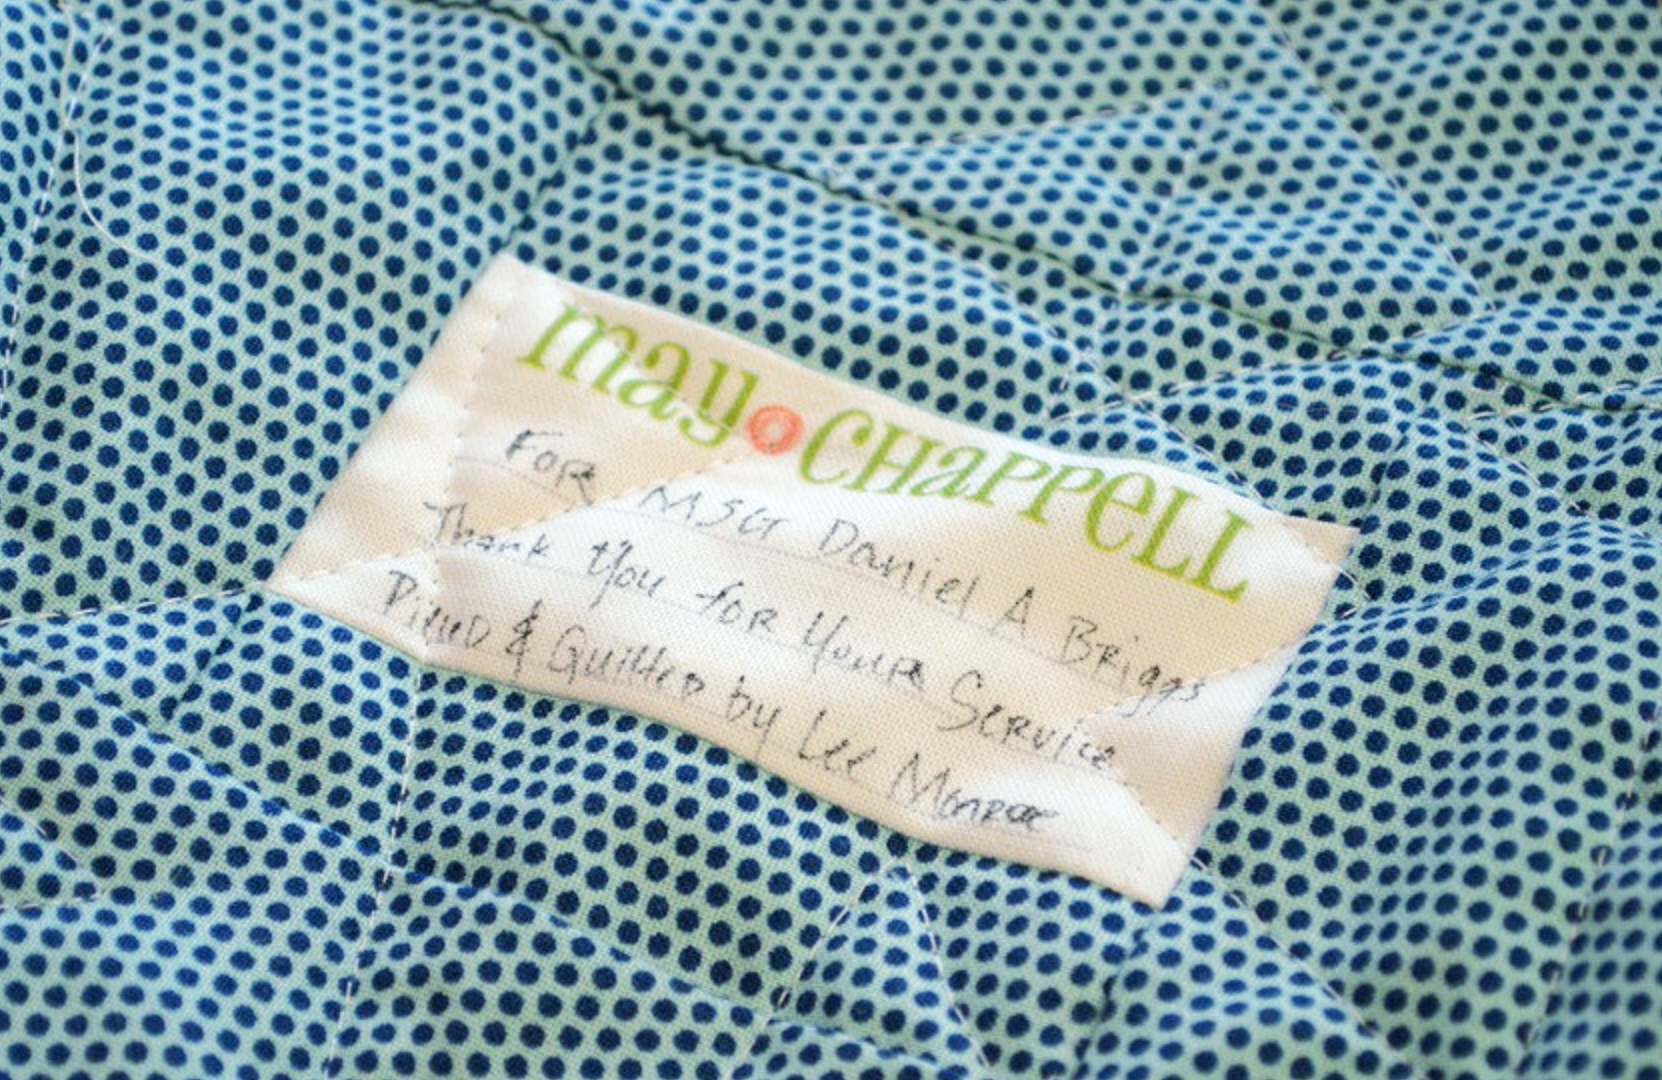
Yes, people still do this! The lovely label shown above was made (and photographed) by Lee Monroe of May Chappell. A handwritten label takes the least amount of technical know-how, and probably the least amount of time, making it a perennial favorite. The drawbacks are: 1) You have to know exactly what type of pen you’re using to mark on the quilt, or court potential disaster; and 2) If you have handwriting as sloppy as mine, you may prefer to stay away from this one. LOL.
Despite my lackluster penmanship, I have used this method in a pinch. Here are some tips for handwritten labels:
• Don’t write directly onto your quilt. (Eek.) Cut out and write on a separate piece of label fabric, and then piece that into the quilt back or stitch it onto the quilt. That way if you screw up, or the ink doesn’t play nicely with the fabric, you can just grab another piece and start over.
• Use a fine-tip permanent marker such as a Micron pen or fine-tip Sharpie for more control, minimal ink-spreading on the fabric, and washability. But always test the pen first on a scrap of fabric, and wash your test scrap if you plan to wash the labeled quilt!
• HEAT-SET your handwritten quilt label by pressing the label with a dry iron (no steam!) on its hottest setting.
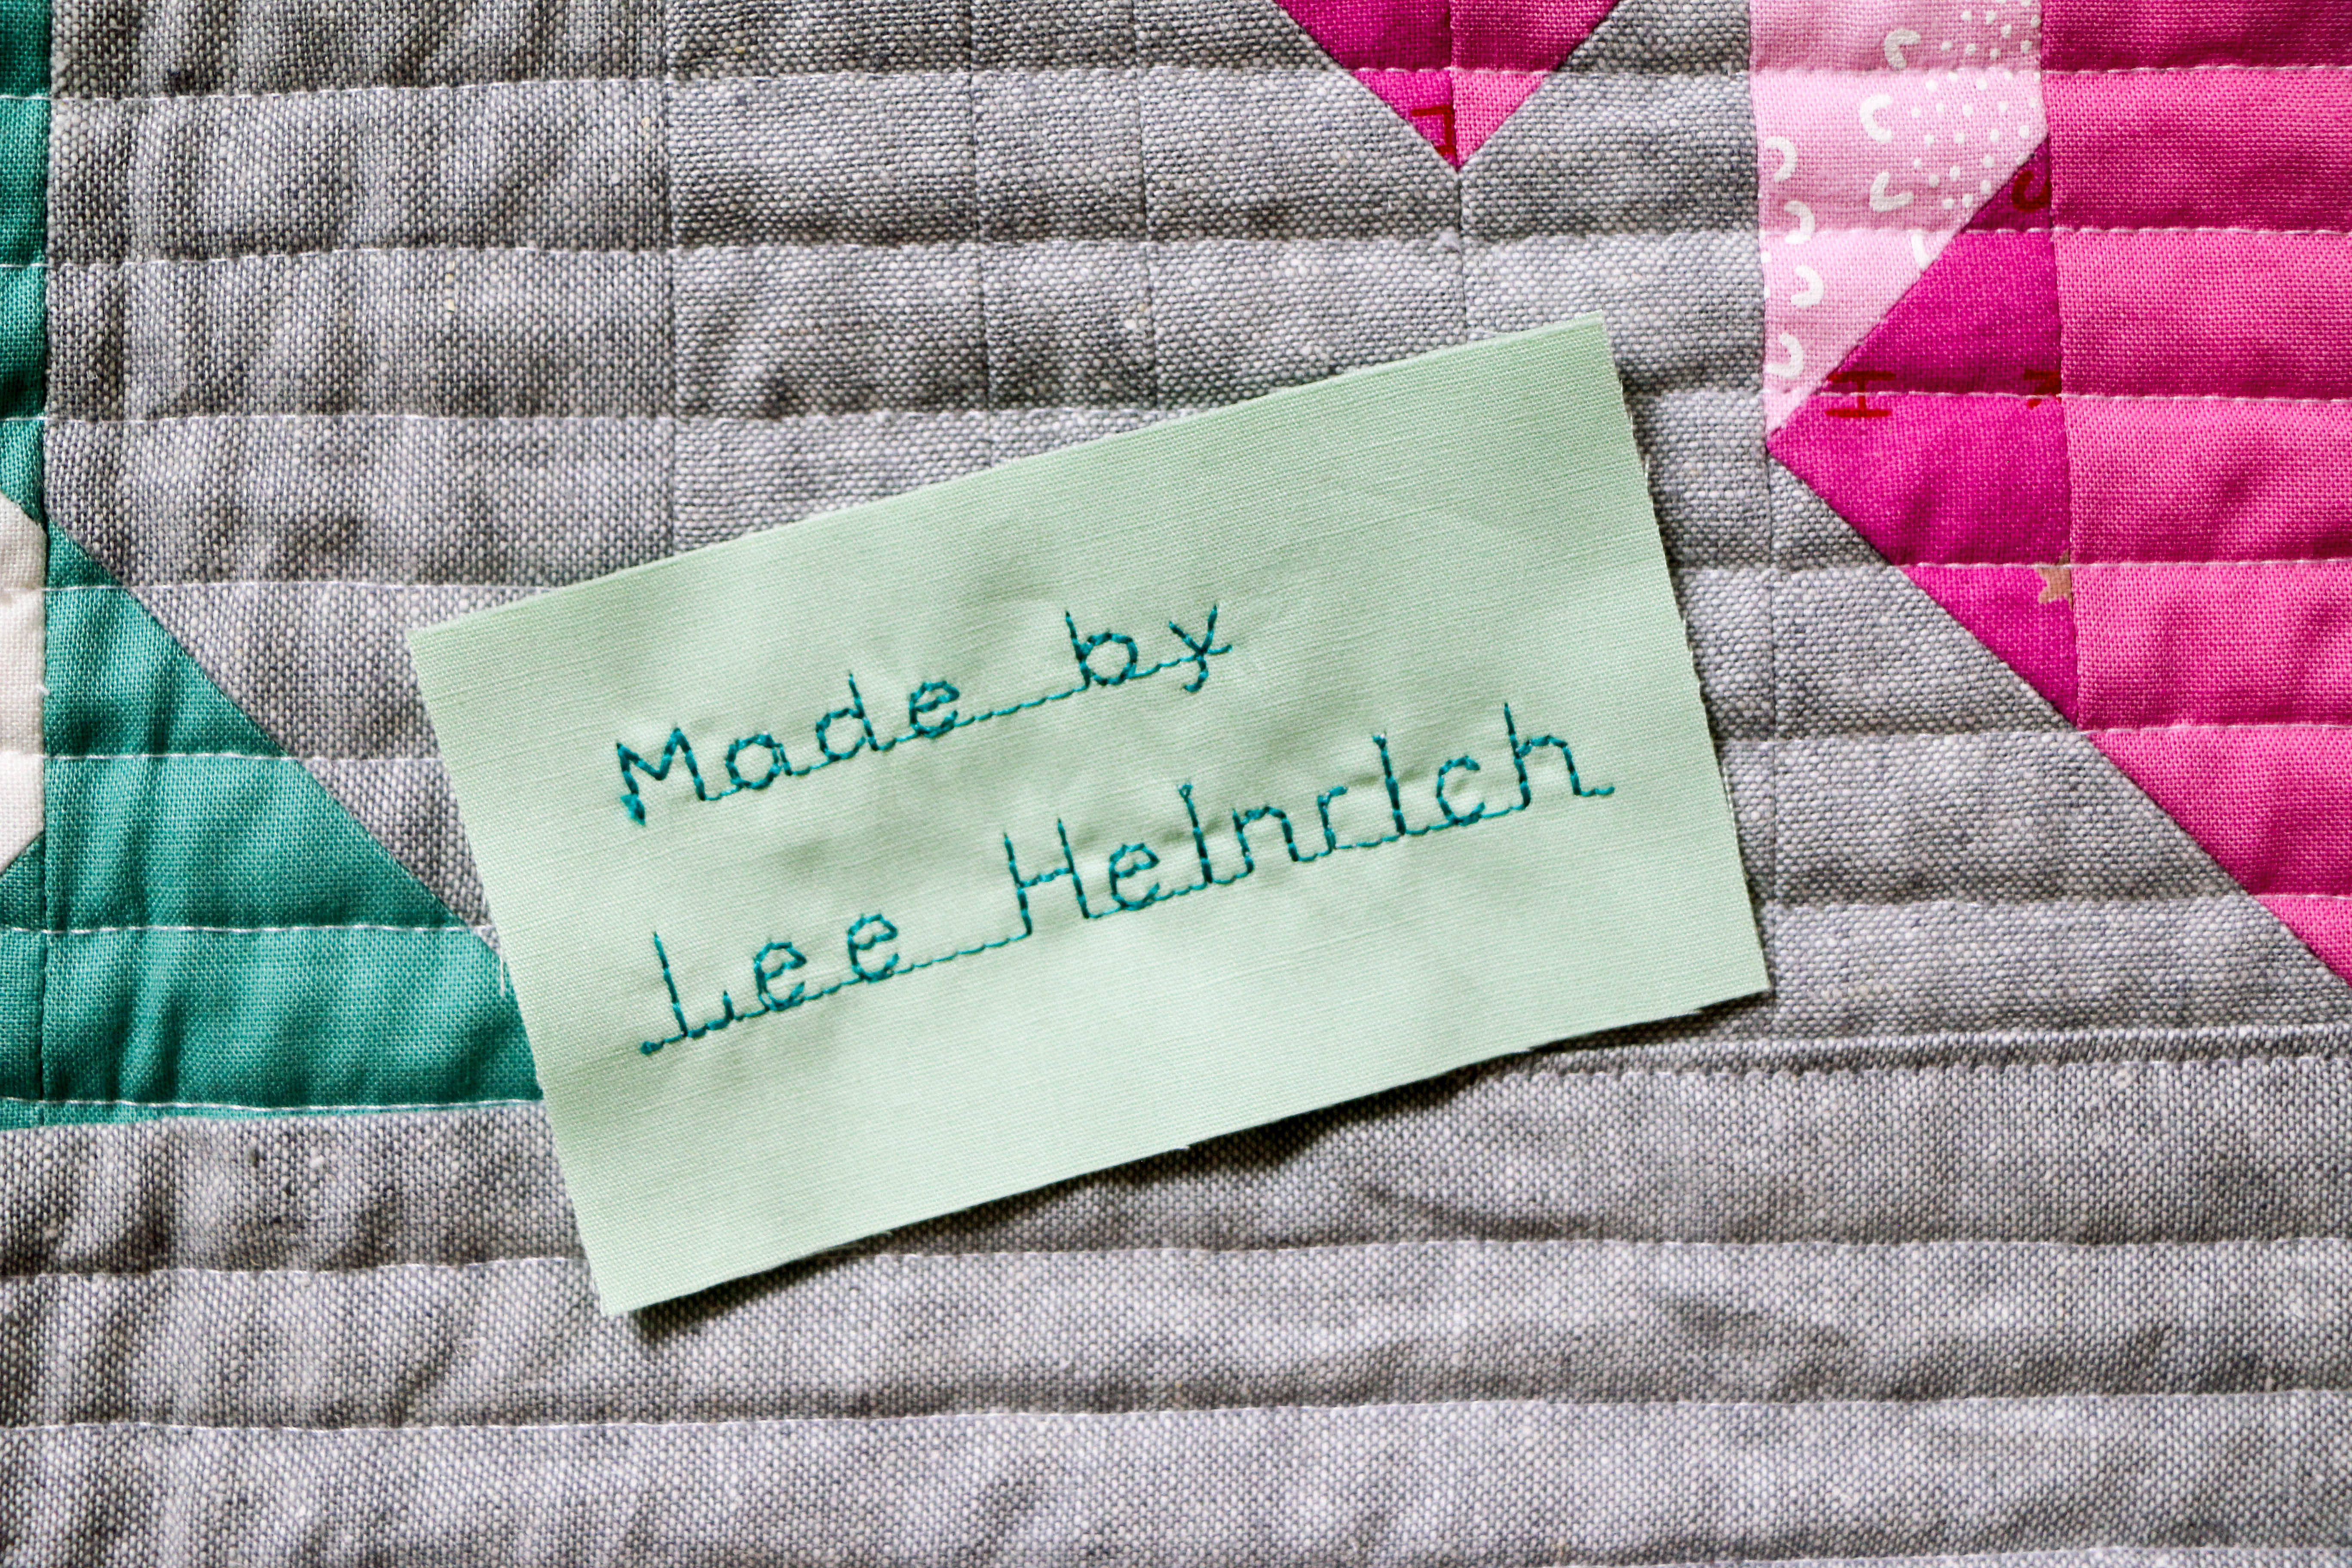
Use your Bernina!
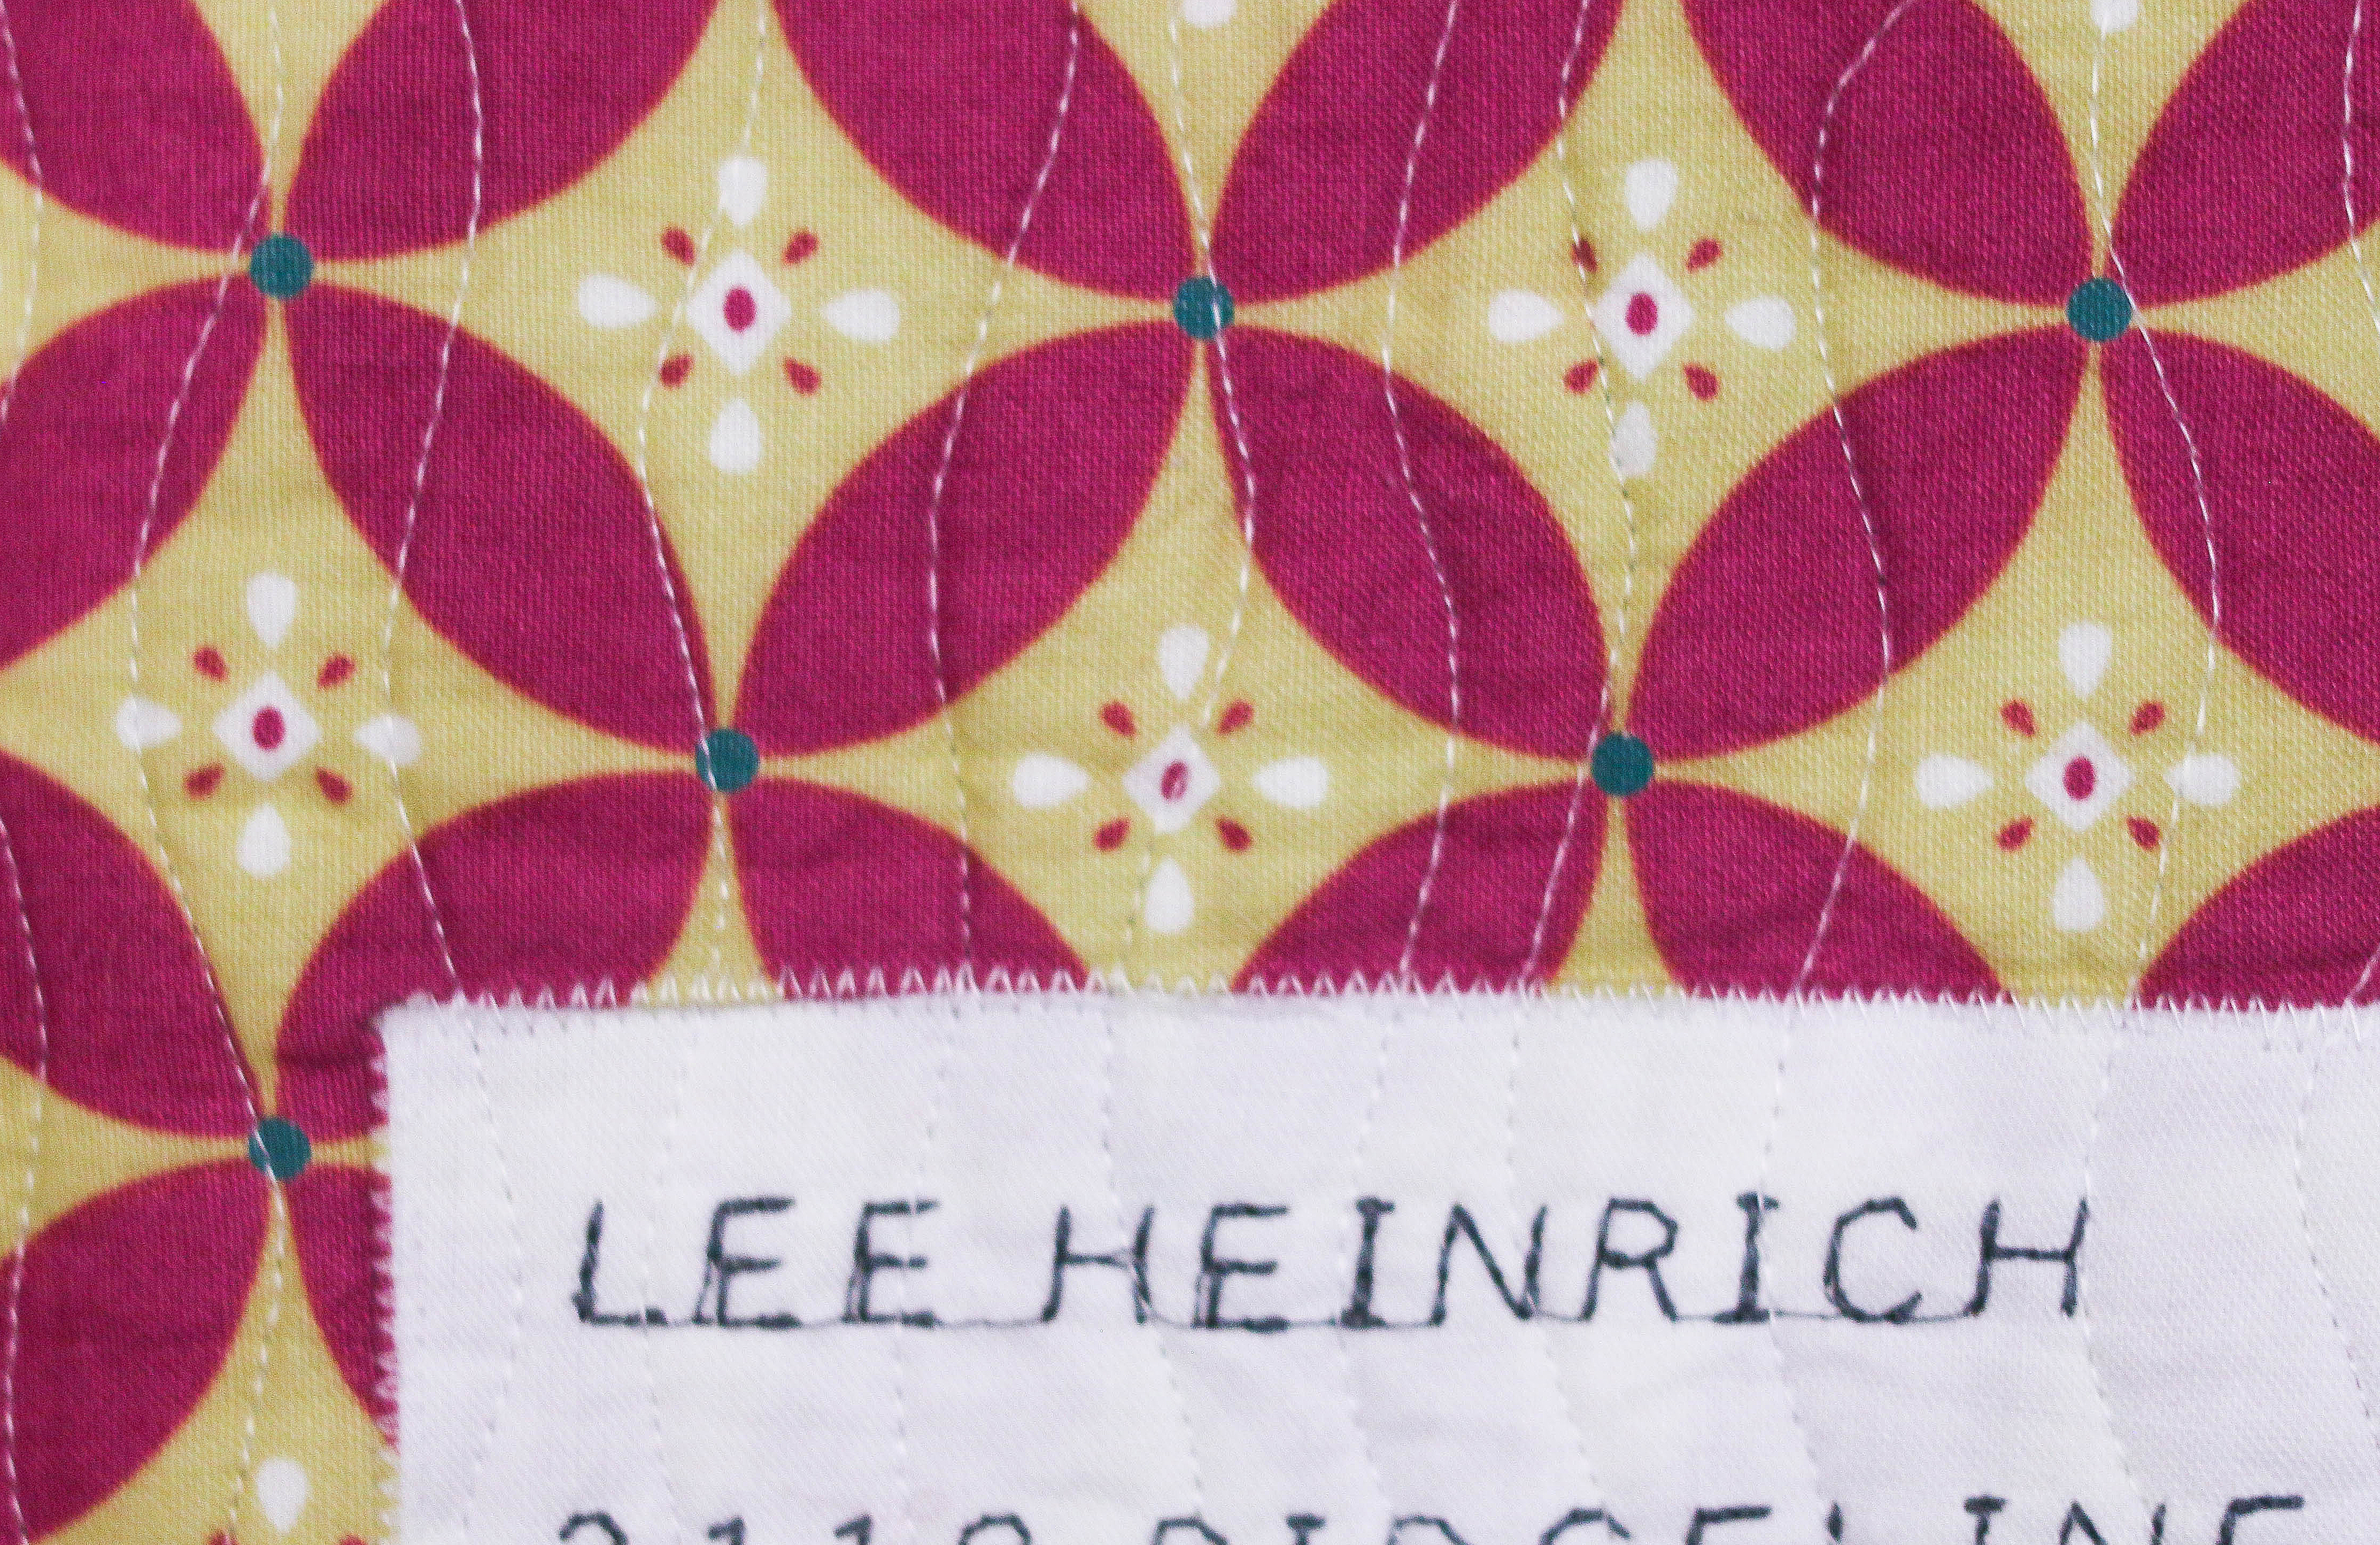
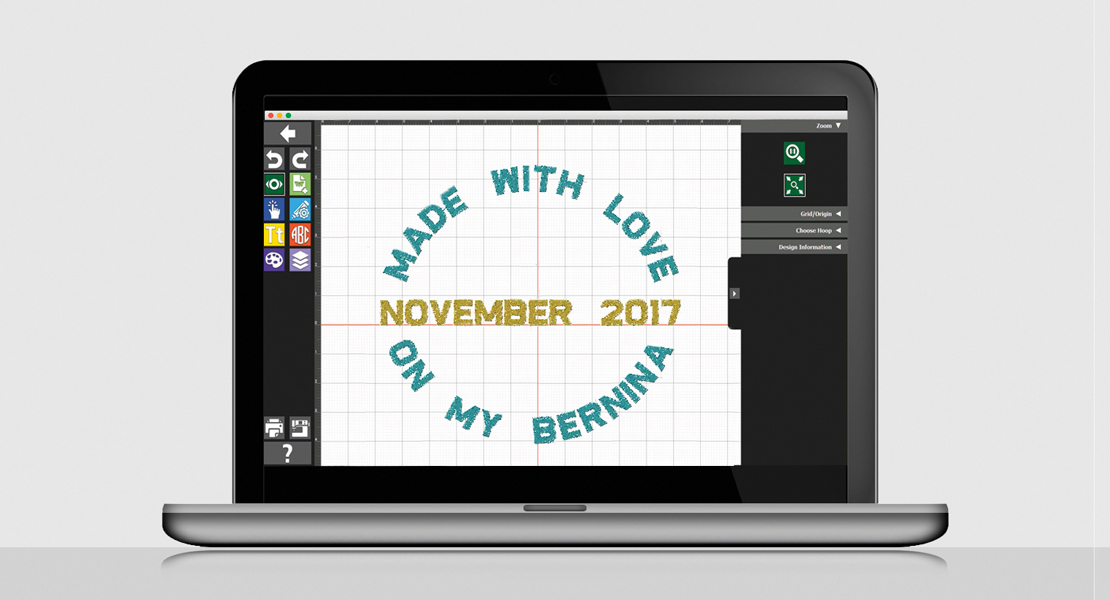
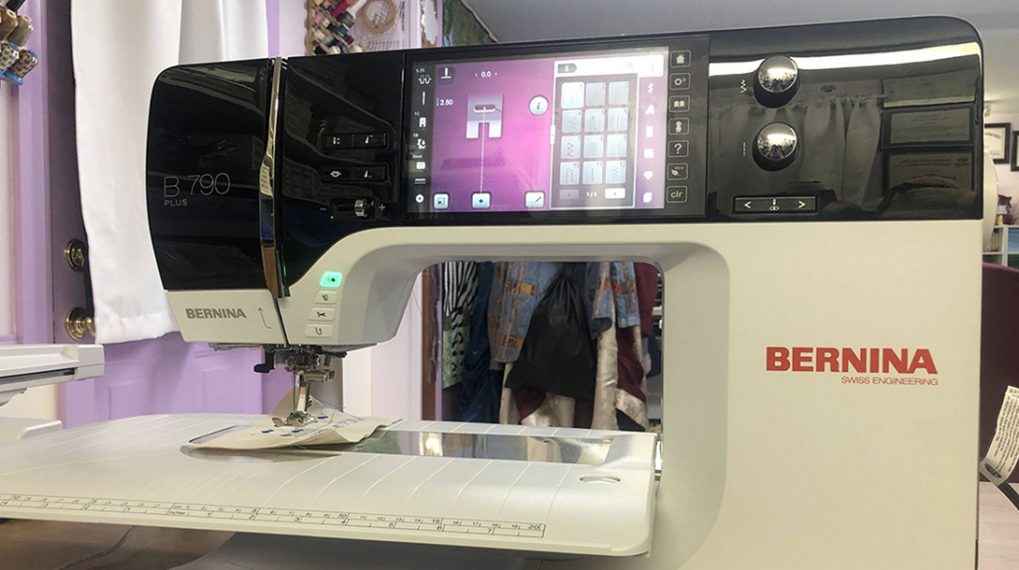
Of course, an even better, more permanent way of labeling a quilt is with stitching. Many Bernina models have built-in alphabet stitches—what better use for those than making a quilt label? You can make a label in minutes using this method. Here’s a quick how-to, using my Bernina 770:
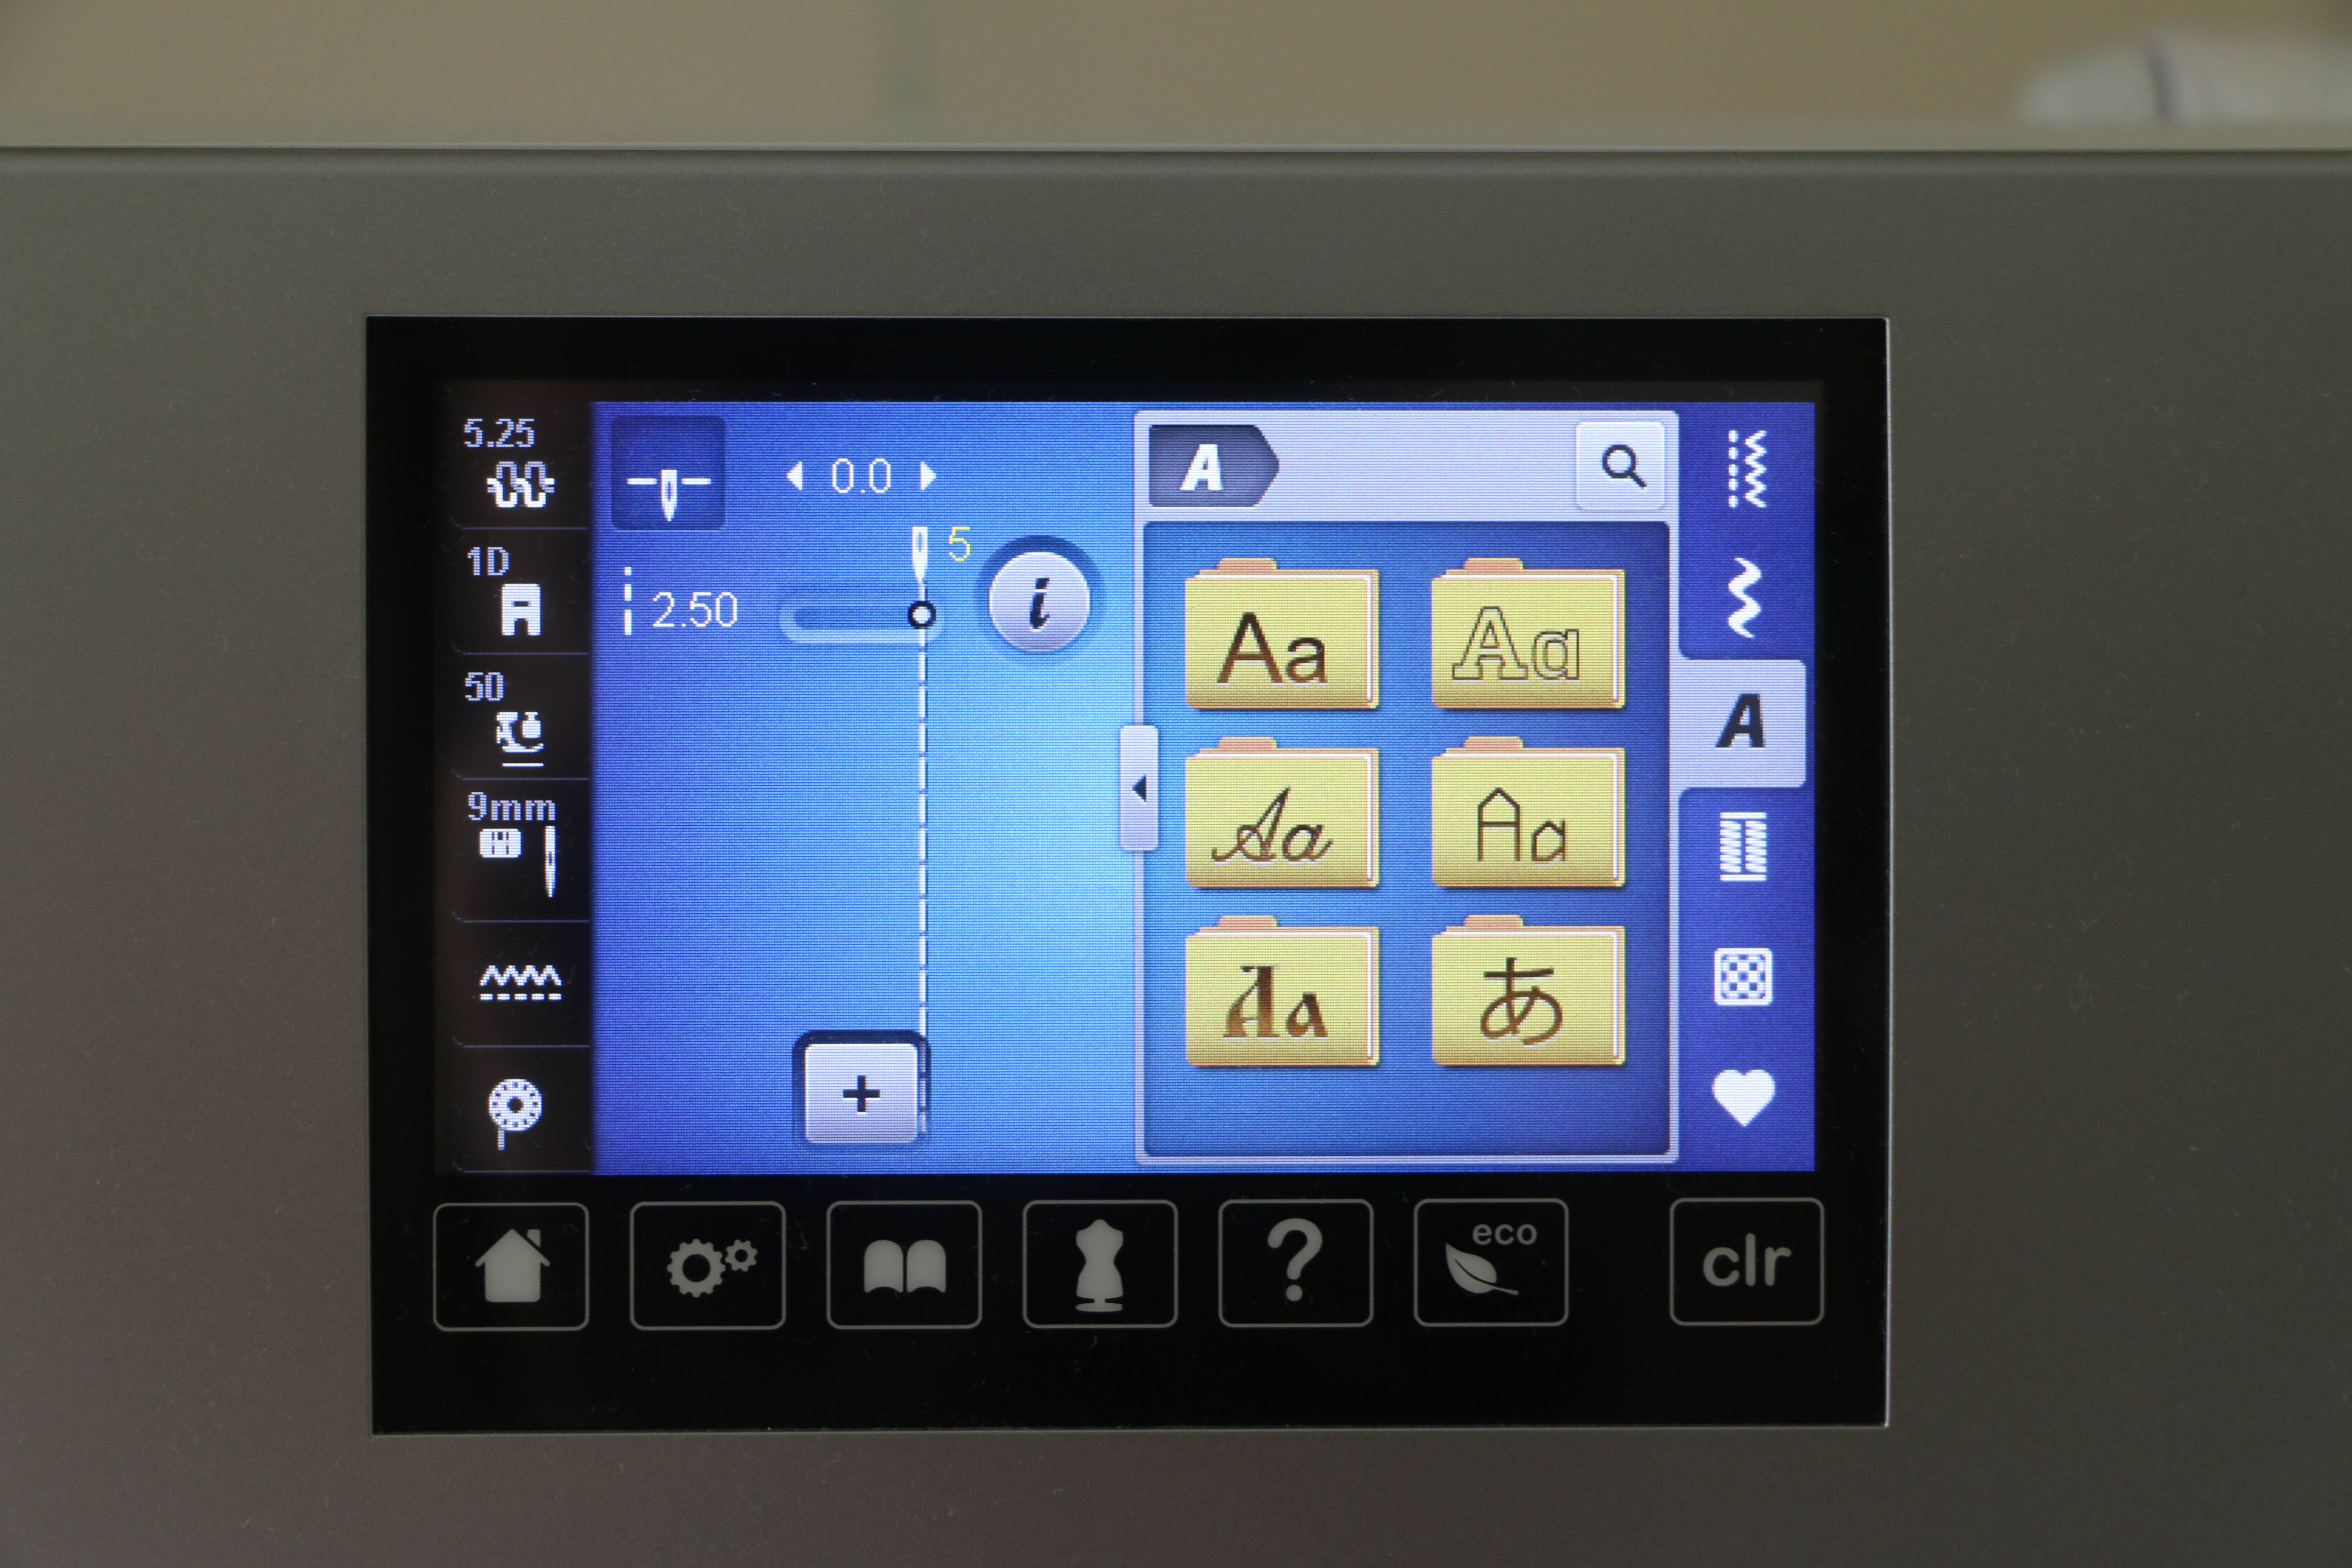
1. Select the Alphabet tab on the menu screen and select your desired font.
2. Touch the Plus button at the bottom of the screen to enter “Combi” mode. This will allow you to program in entire lines of text.
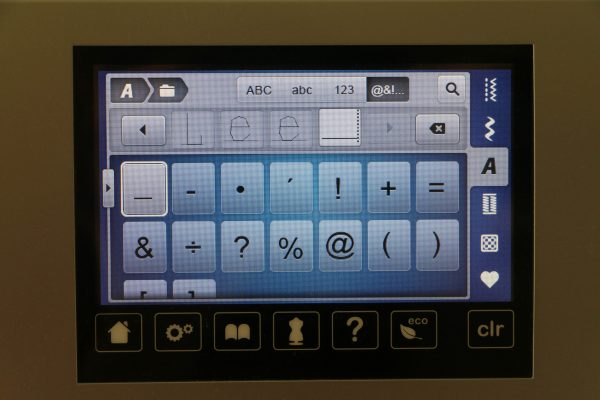
3. Select the arrow to the left of the letters to expand the letter screen, then type in the letters you need. The space key is under the “@&!” tab.
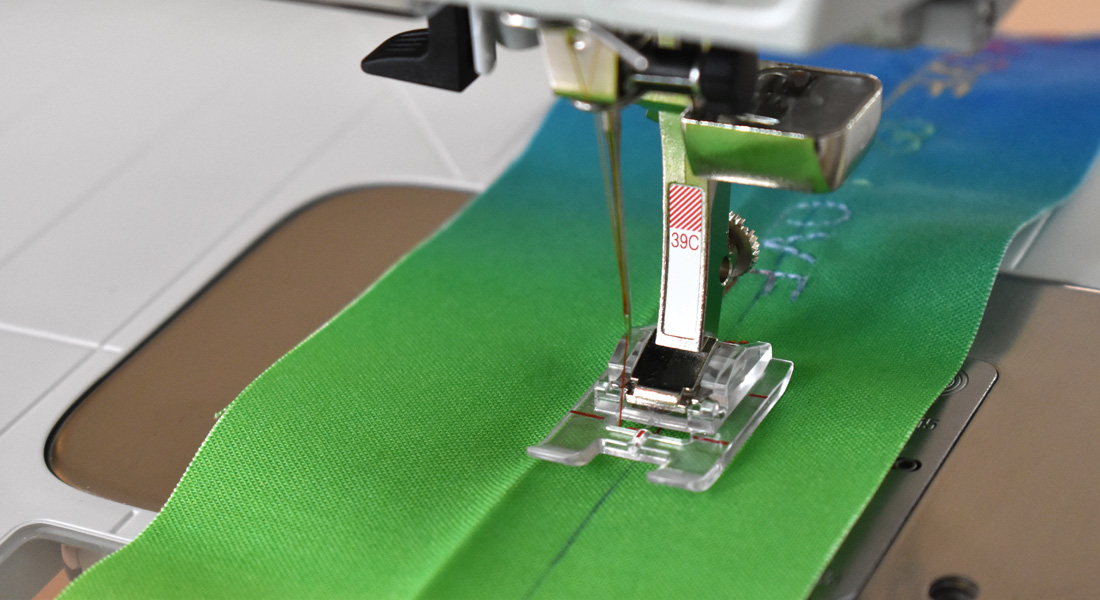
4. Once you have the letters programmed, just start stitching. I like to stitch onto fabric backed with interfacing or a double-layer of fabric for extra stability. If you normally use a straight-stitch presser foot and/or plate, don’t forget to switch them out! I used the 1D presser foot to stitch my example.
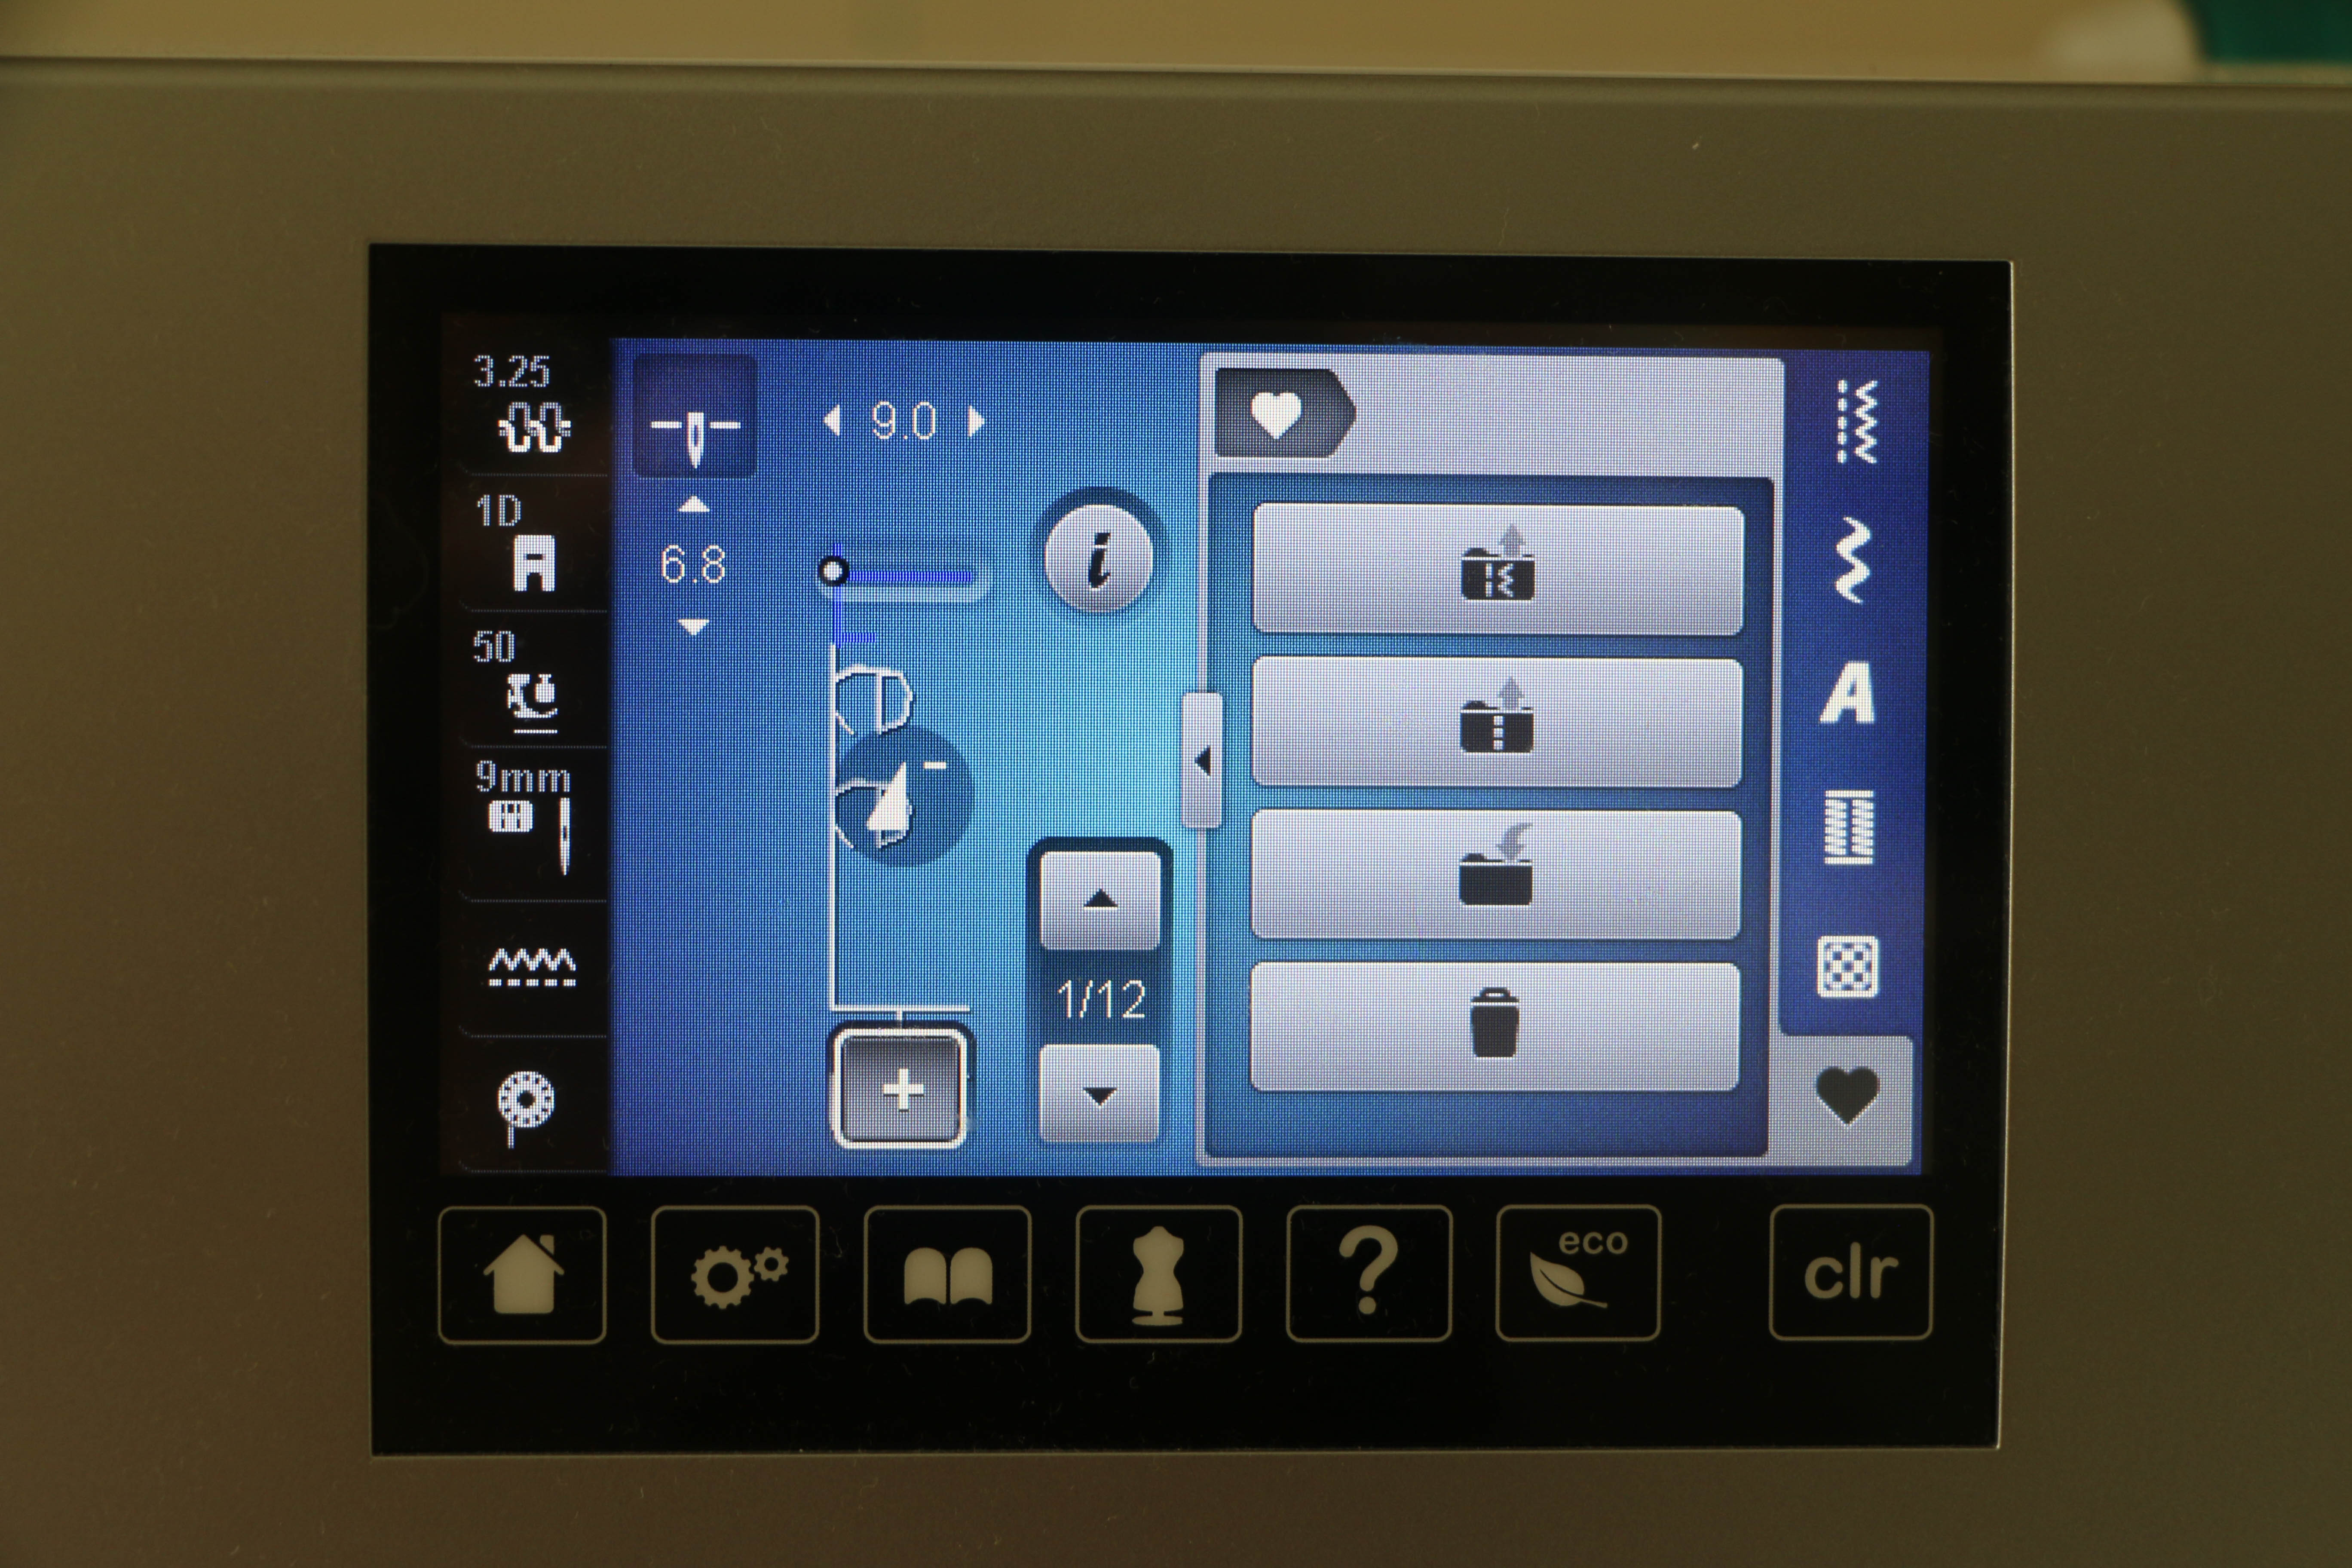
5. When you’re done stitching, you can save this text as a stitch-pattern, which means you don’t have to re-enter it every time you want to make a label. To save, touch the Heart icon in the lower right, and then the button with the file folder and arrow pointing into the folder (third one down on my screen).
6. In the future, to load that same text stitch pattern, click the Plus button to enter Combi mode, then touch the Heart tab. Then you’ll be able to select from all your saved stitch patterns.
7. To add the label to your quilt, you can piece the label into the quilt back (my preferred method provided I’m thinking that far ahead), machine-appliqué it onto the quilt (again, this requires attaching it prior to quilting), or hand-stitch it onto the back in cases of a quilt that’s already finished, stitching it much as you would when hand-stitching binding.
Printable fabric.
Many companies make fabric that is designed to run through inkjet printers. June Tailor has printable fabric sheets with fusible backing that are specifically for quilt labels, available from many quilt shops. You just create a label on your computer, print it onto one of these sheets, and attach to your quilt. These sheets also often require heat-setting with a hot dry iron, so be sure to follow the instructions that come with the fabric sheets for best results.
Story Patches.
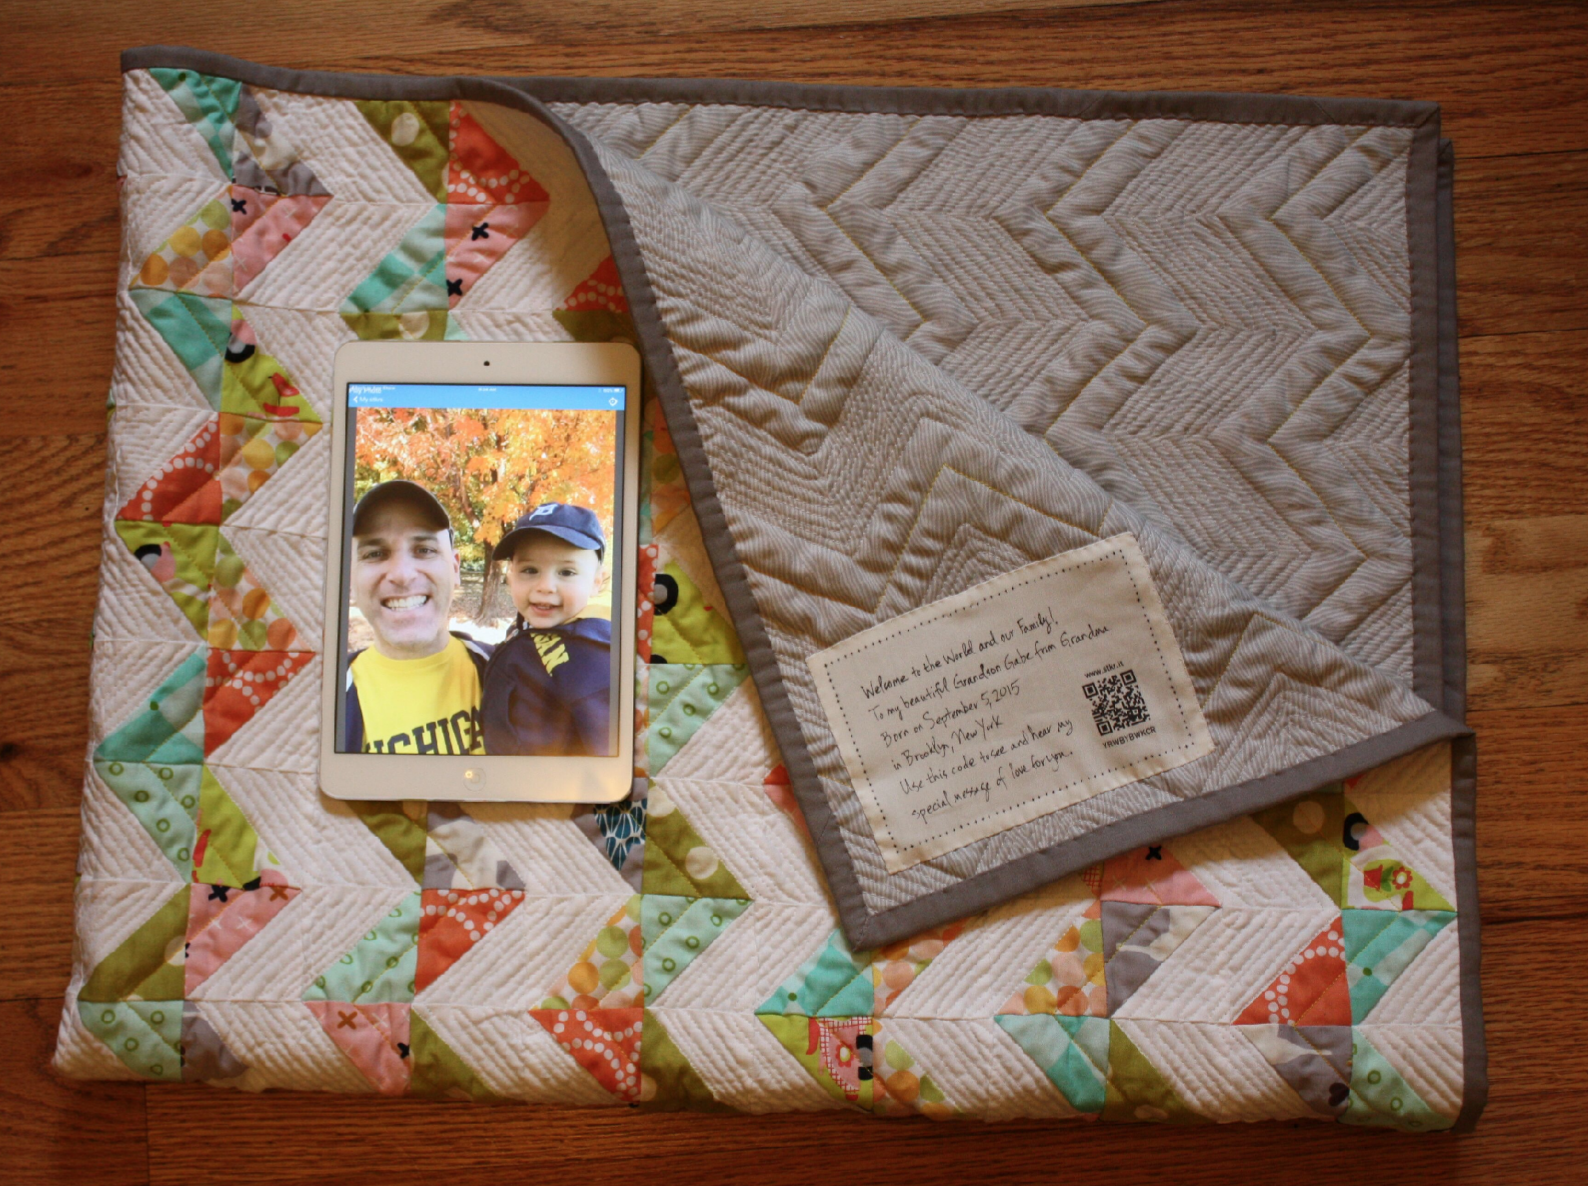
Here’s where we start getting really high-tech! Story Patches are labels that you can buy with unique, pre-printed QR codes. You can set up the label’s QR code with any information you want—photos of you making the quilt, for example, or you can record a voice message. The sky is the limit! Then, any time someone scans the QR code off the quilt label, they’ll see the details you provided. The label also comes with space for writing some basic info like your name, the date the quilt was made, etc., and the labels come in a variety of styles. Click here for more information about Story Patches.
Use on-demand printing services.
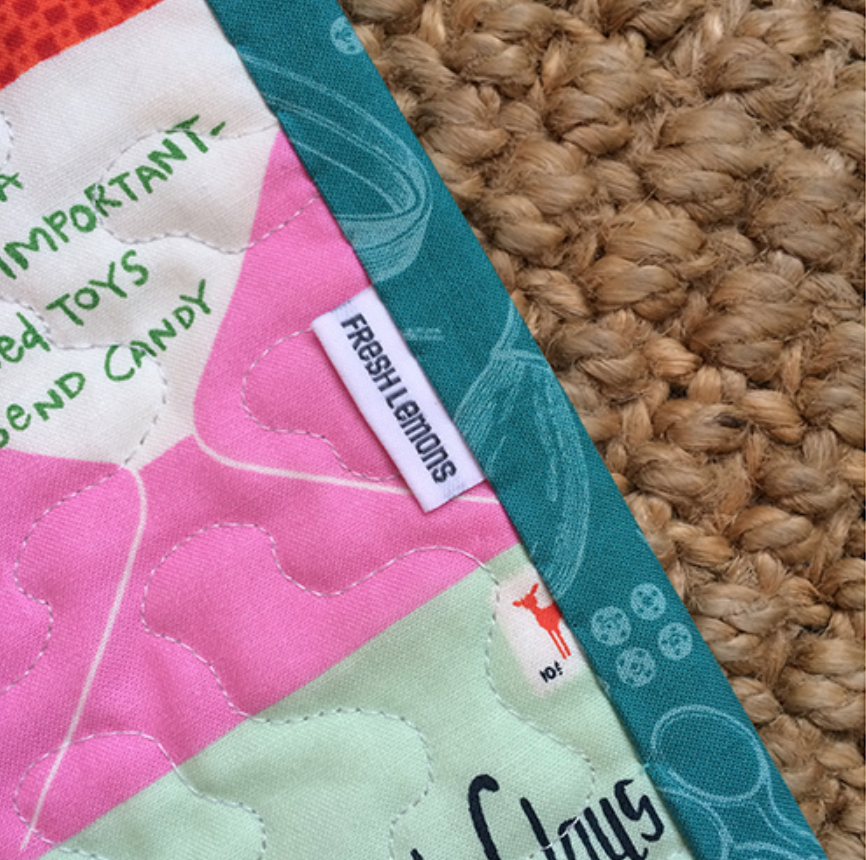
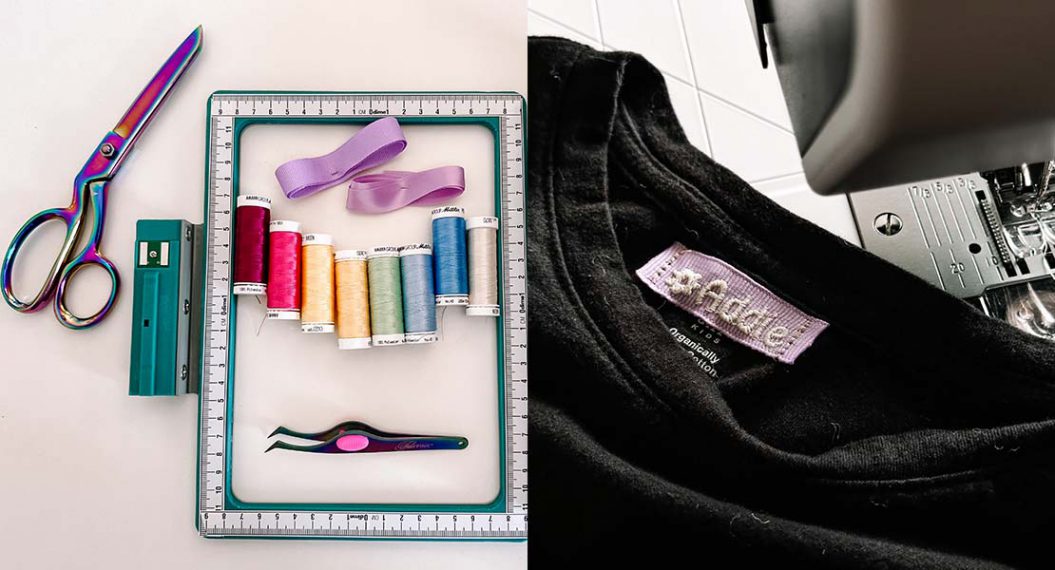
Today’s on-demand print technology gives quilters even more options for reasonably-priced personalized labels, ranging from tiny labels with just your name or business (like the labels above, used by Faith Jones of Fresh Lemons Quilts), all the way up to larger, more detailed labels. Etsy offers plenty of sellers who can work with you to create gorgeous personalized labels for your quilts—just search “quilt labels” on that site for dozens of options. Modern Yardage is another website with some great personalized label options.
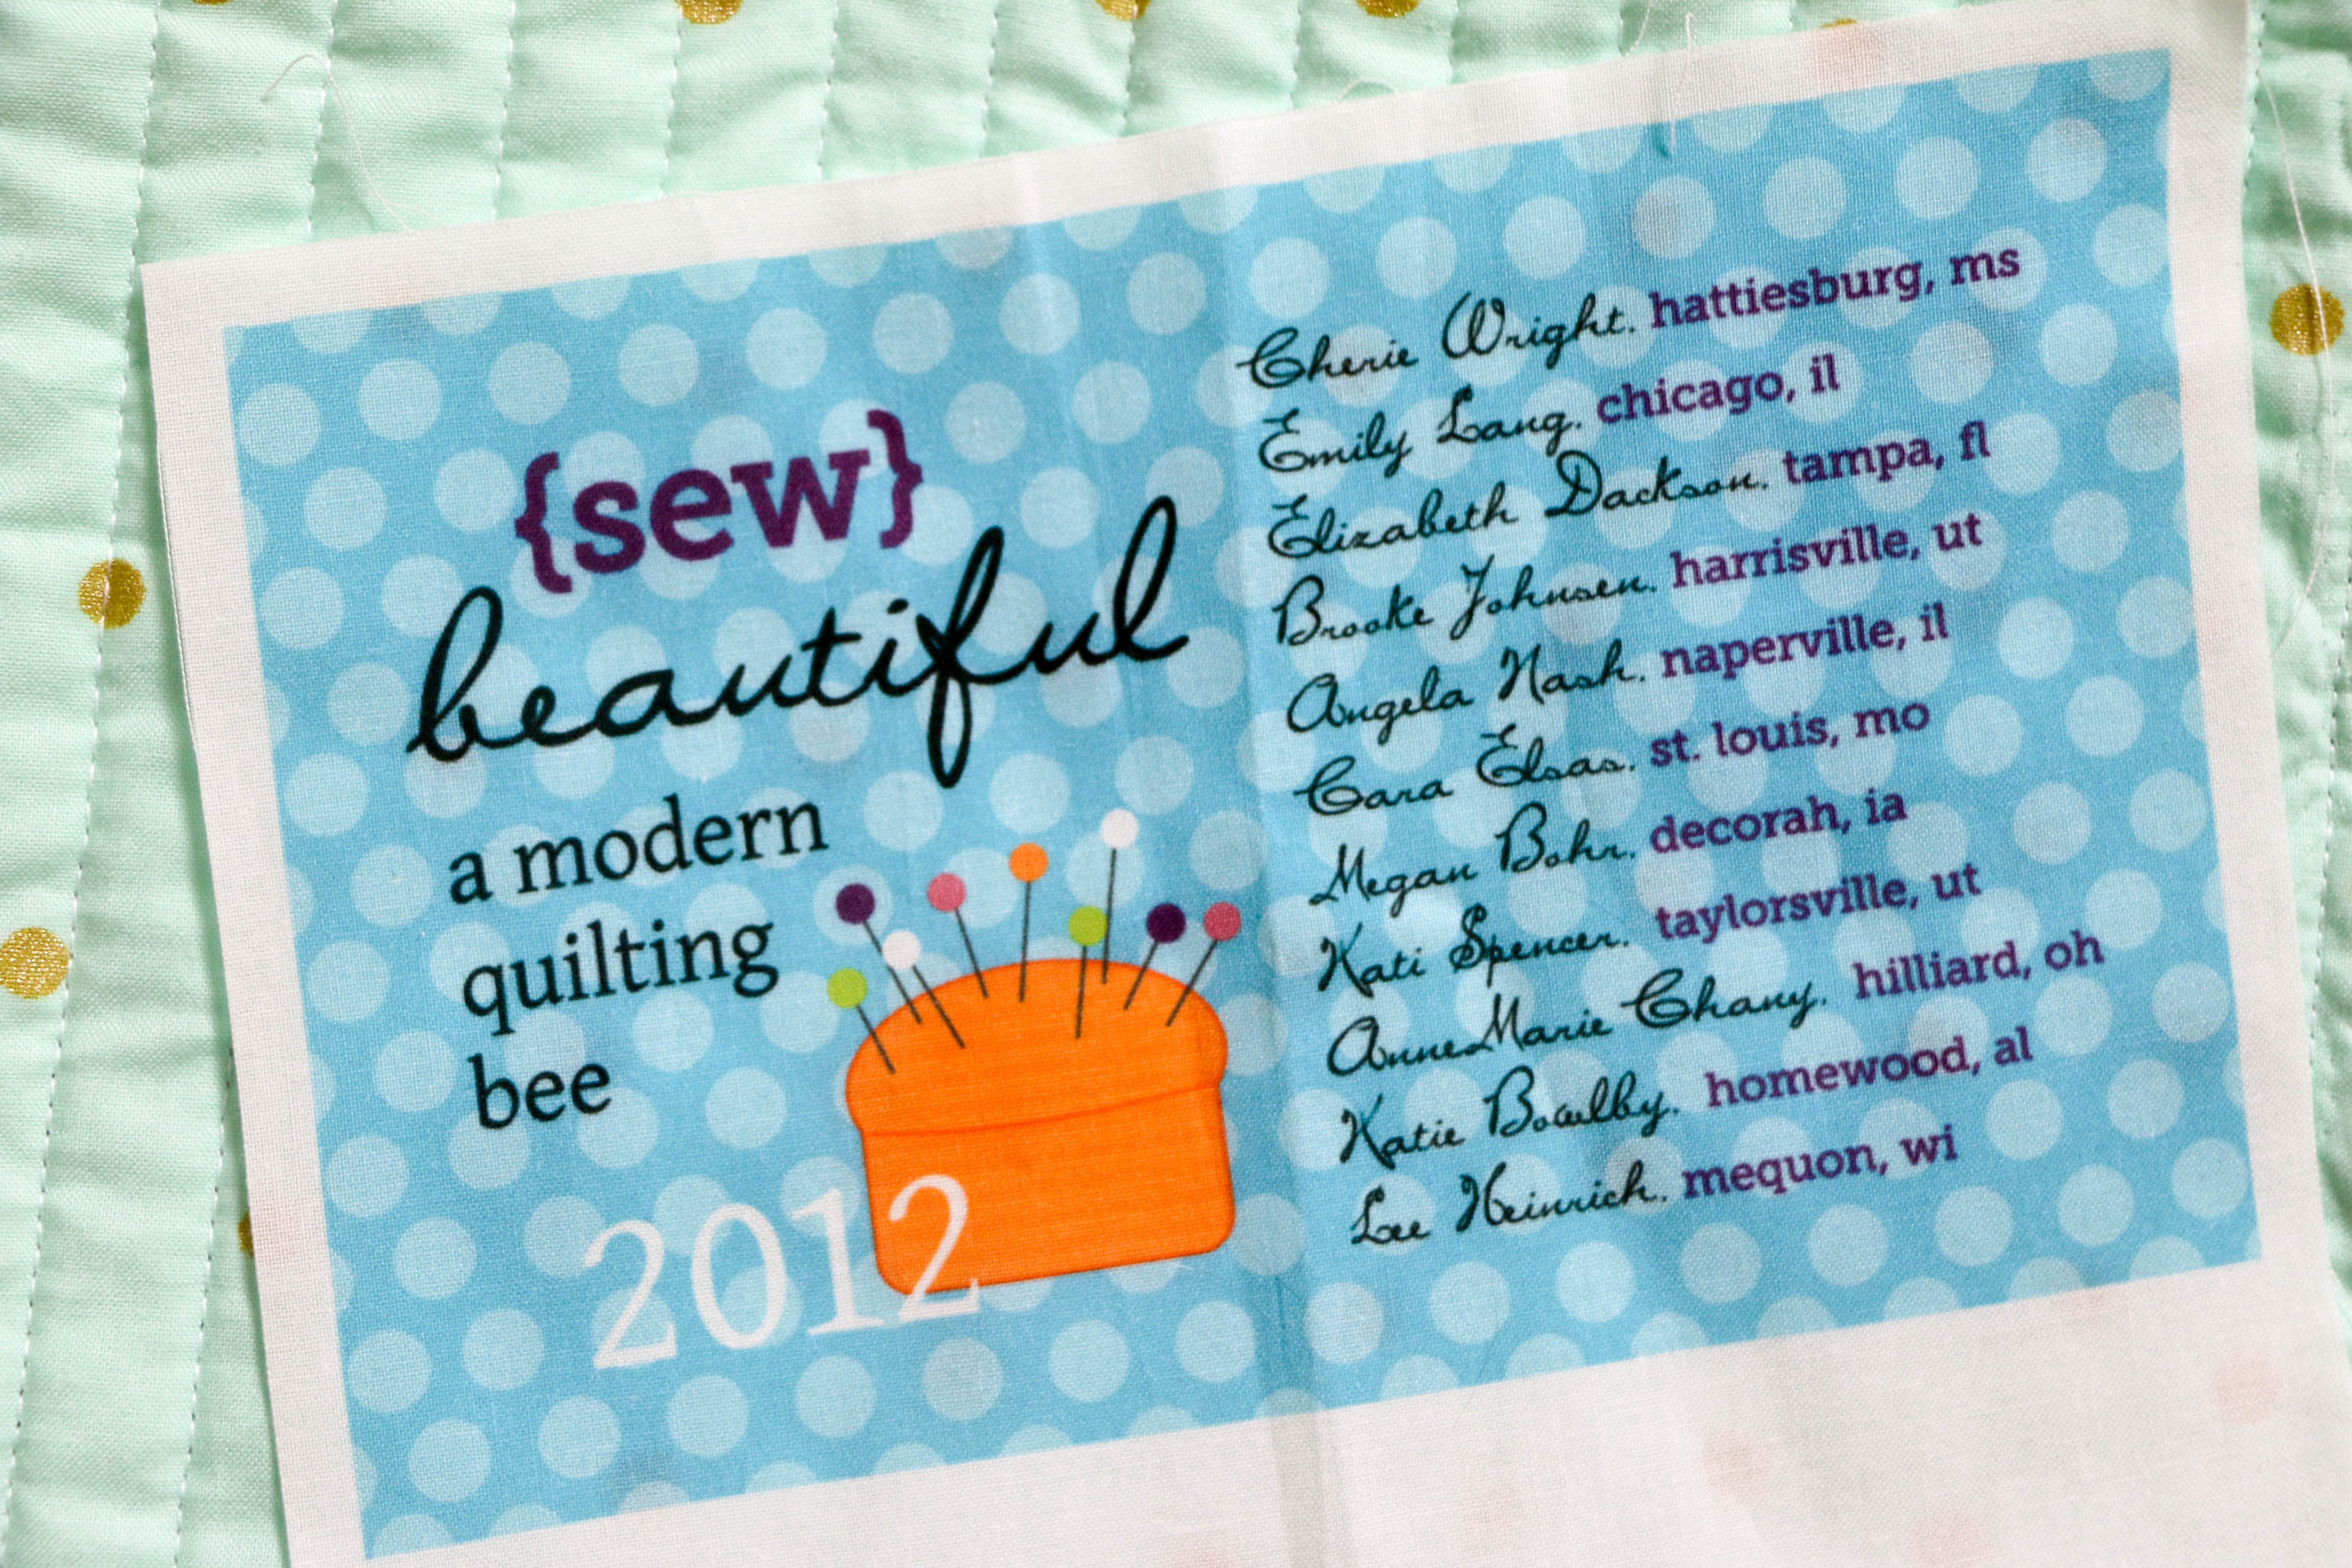
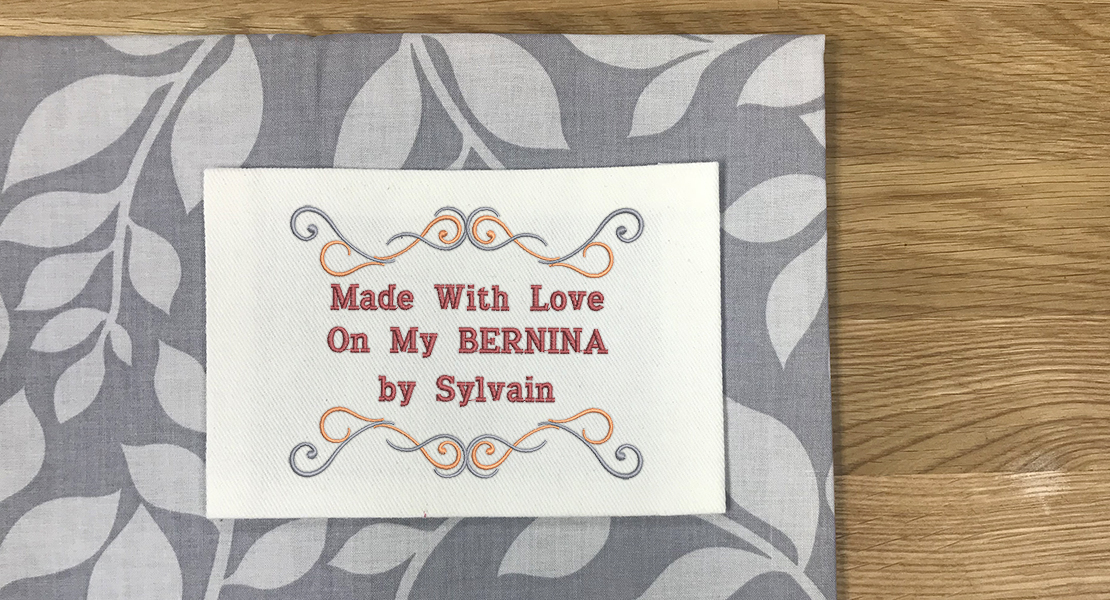
Or, for the ultimate flexibility, those with some design know-how can upload a design directly to a print-on-demand website like Spoonflower and have labels printed themselves. I used Photoshop and Spoonflower to create this label for a quilt bee that I participated in several years ago. It was a great way to give credit to everyone who made blocks for the bee!
Regardless of which method you choose for labeling your quilts, don’t be afraid to get creative! Play around with colors and shapes and make your label as much a part of the quilt as the piecing and the quilting. And remember, future generations of quilt lovers will thank you for the details the label provides!
Used Products

What you might also like


2 comments on “Don’t Forget the Quilt Label!”
-
-
Hello @ibenez97, to stitch multiple lines with the lettering function, each line is stitched separately to create a label with multiple lines of text.
-
Leave a Reply
You must be logged in to post a comment.

Sure appreciate all you’re tips. So helpful. Thank you. How do you get the 770QE to do the paragraph? I tried and all I could accomplish was all on one line. Thanks bunches. It wanted me to change to the Maxi hoop.