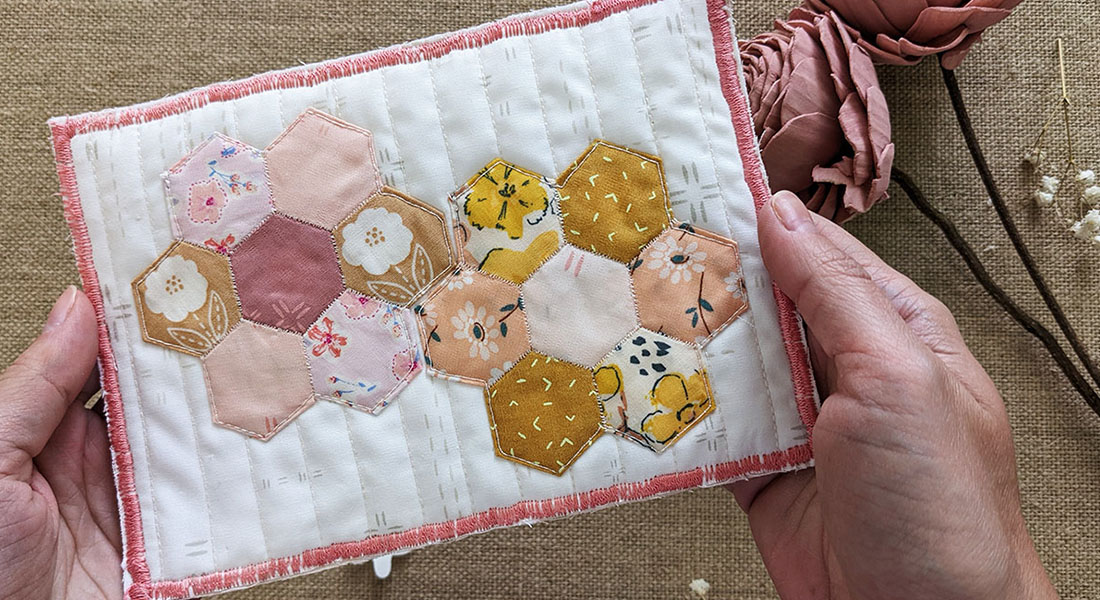
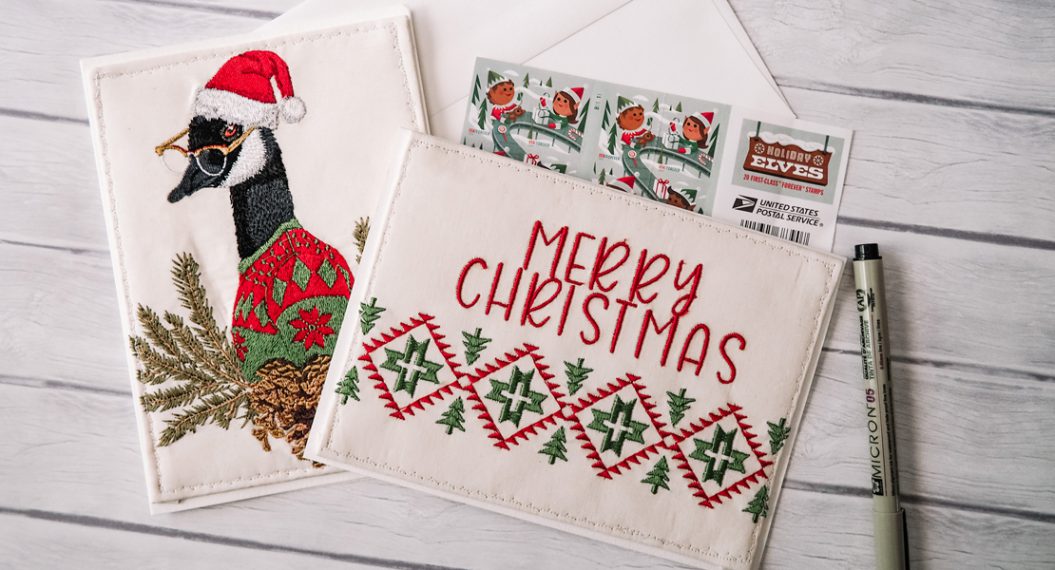
Embroidered Mother’s Day Card
Looking for something handmade and heartfelt for the mothers in your life? Embroidered cards are a wonderful way to create something lovely for your loved ones and the best part is they don’t take long at all to make! Let’s kick it up a notch by not just making but designing your own embroidered Mother’s Day card on the BERNINA 990.
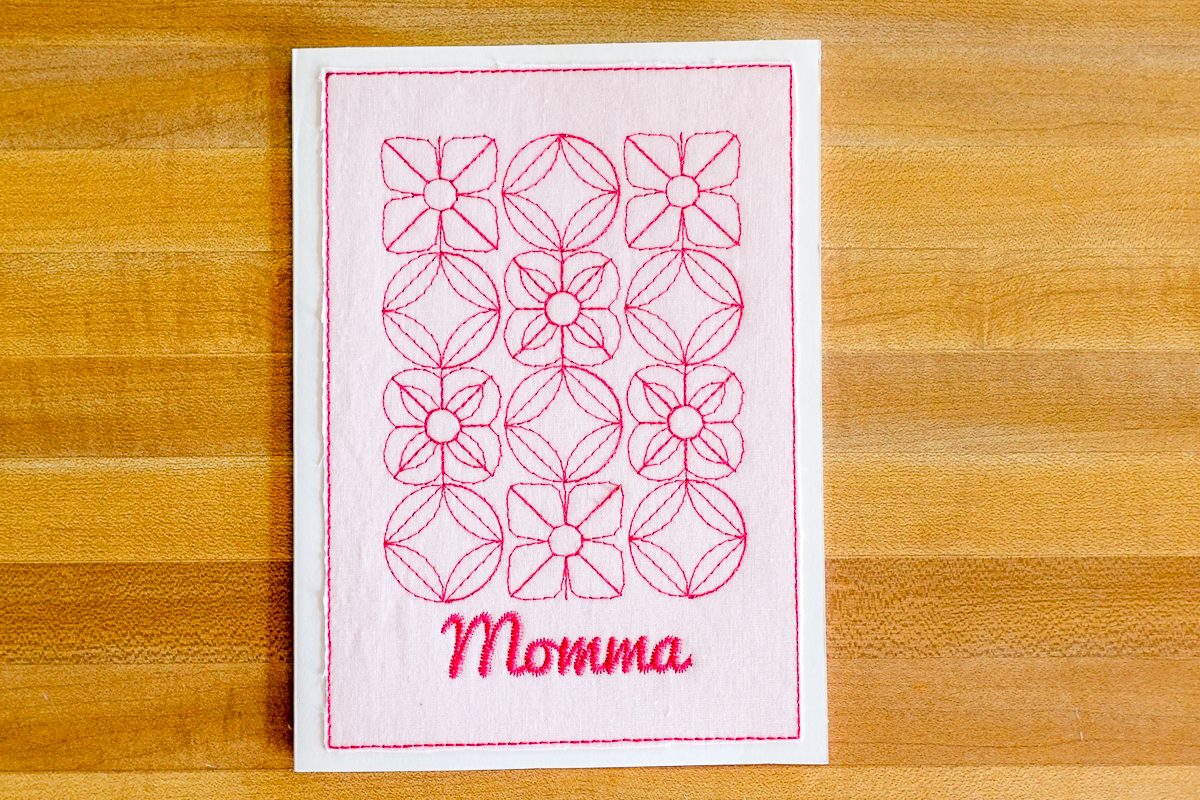
I will get you started with one super cute card using the BQM designs and lettering loaded on the BERNINA 990, but it’s my hope that you will feel inspired enough to experiment and design some cards of your own for any occasion.

Materials to Design an Embroidered Mother’s Day Card
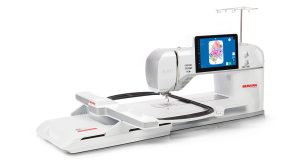
- BERNINA 990
- Embroidery Foot #26L
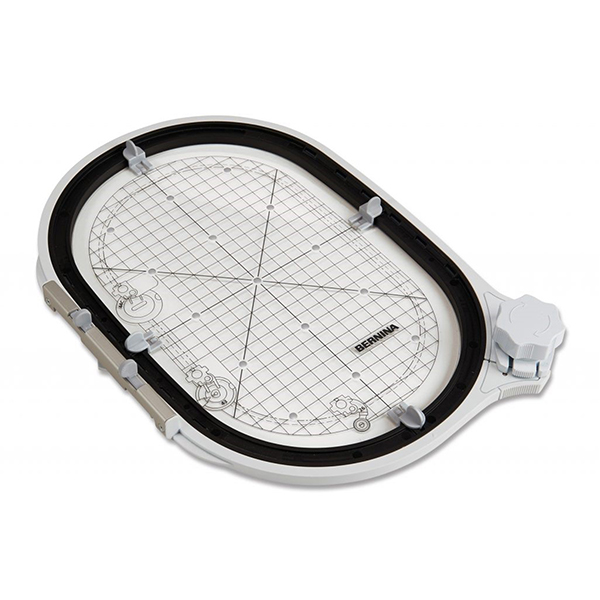
- Midi Hoop
- 75/11 Embroidery needle
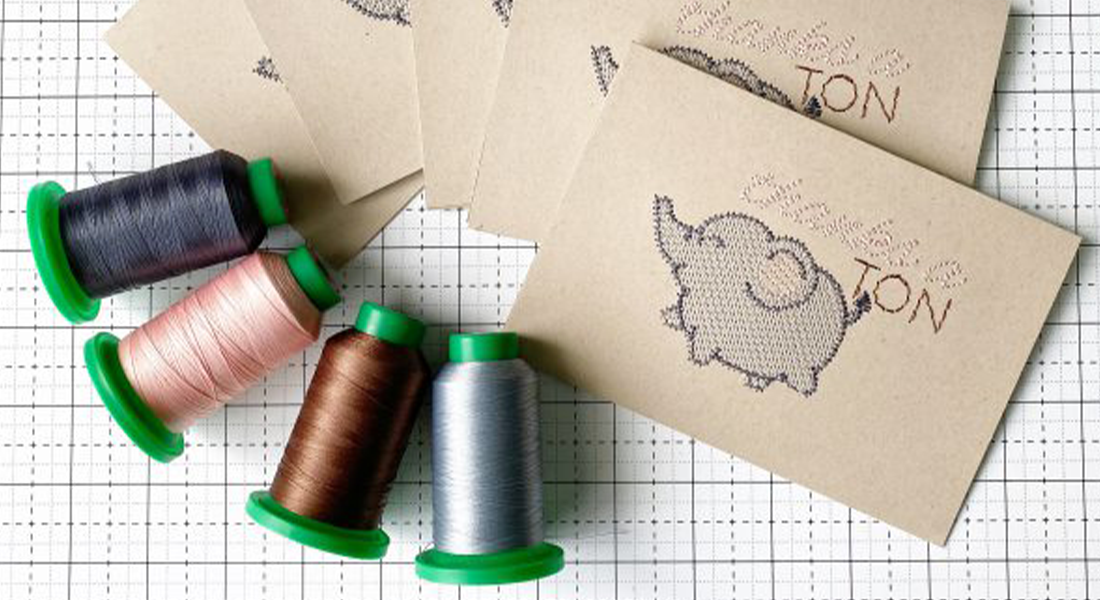
- Embroidery Thread
- OESD Blank Greeting Cards & Envelopes Size A7 (A6 will work too)
- 6” x 8” piece of quilting cotton
- OESD Medium Weight TearAway
- OESD Fuse & Seal
- OESD SoftWeb
- OESD Bobbin Thread in White
- OESD Embroidery Tape
- 505 Temporary Adhesive Stick
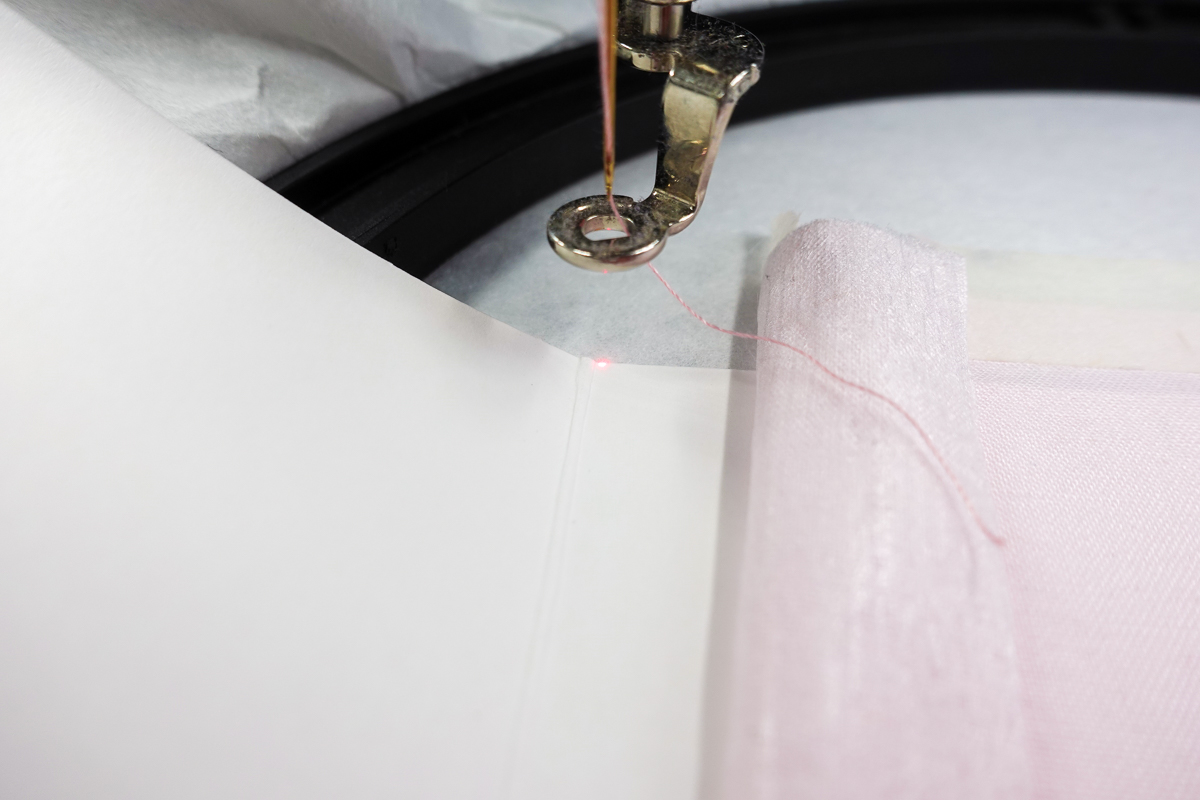
Step 1: Prepare Fabric & Machine
Set up your B 990 by installing a 75/11 embroidery needle, attaching the Embroidery Foot #26L, and selecting the proper foot in the presser foot selection. Wind a bobbin with the bobbin thread and insert it into the machine. Attach the Straight/Cutwork Stitch Plate, as well as the embroidery module. Ensure the machine is in Embroidery Mode (Feed dogs will automatically drop).
Prep the quilting cotton by fusing a 6” x 8” piece of SoftWeb to the wrong side of the fabric.
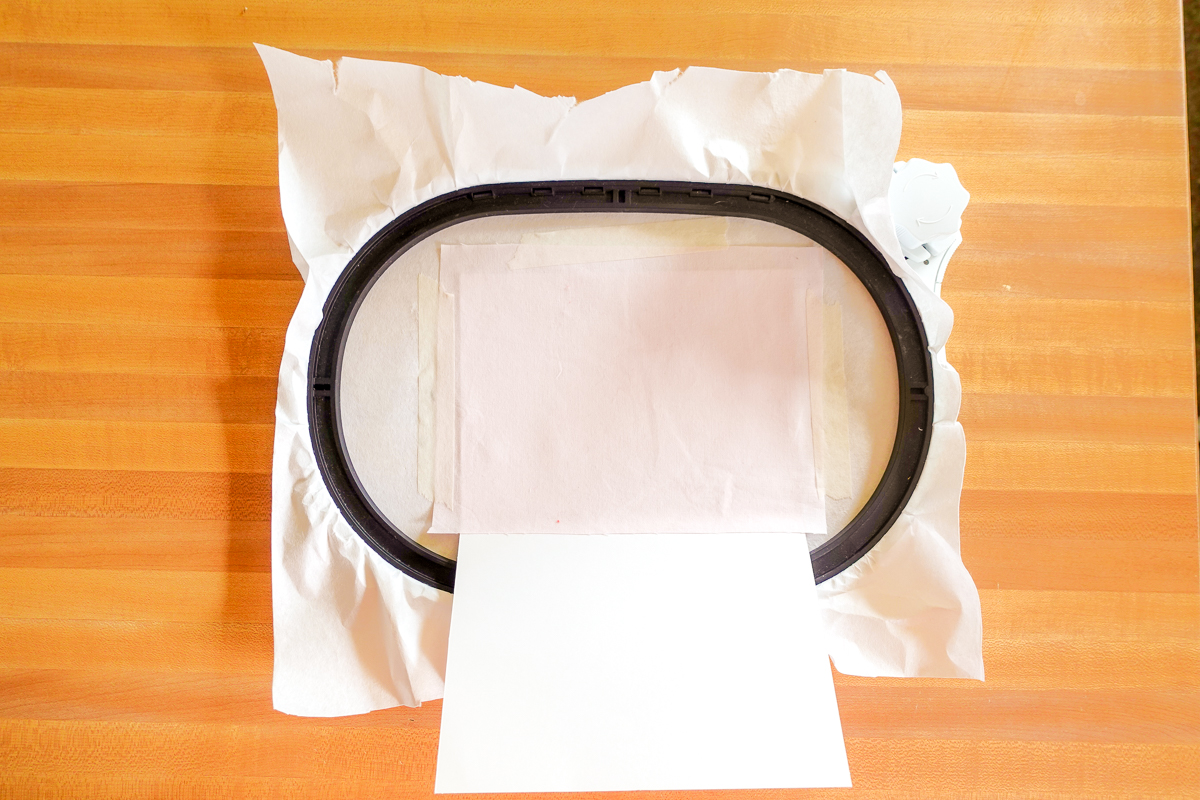
Hoop the Medium Weight TearAway in the Midi Hoop.
On the wrong side of the card front, apply the 505 basting stick. Stick the card to the stabilizer, roughly centering it in the hoop. Next, cover the card front with the fabric (right-side up) and secure with the embroidery tape, ensuring the fabric is flat.
Do not put the hoop on the machine until the B 990 prompts you to do so.
Step 2: Embroider the Card
In the File Manager, select Embroidery Designs, then the Quilting folder, then Template, and design #QS101.
The design will open in a different hoop than the one we are using today.
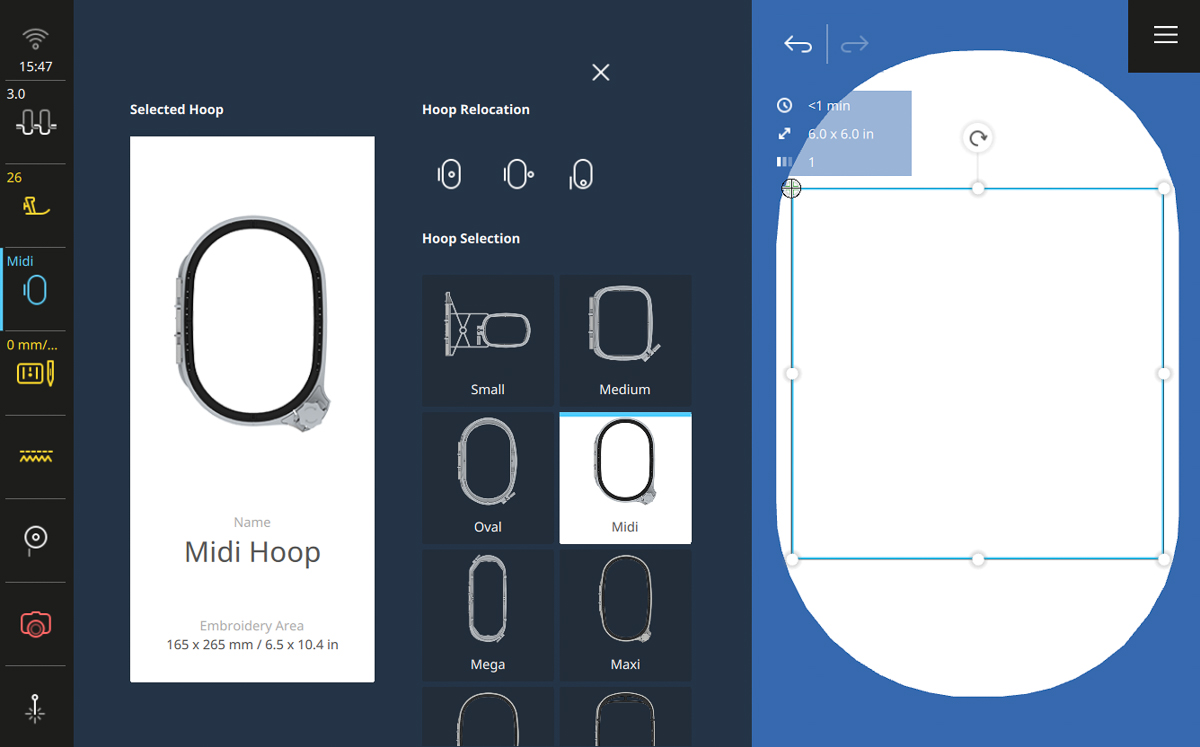
Go to the Hoop Selection icon in the status bar and select the Midi Hoop, then close the menu.
I love how the B 990 has the Select Hoop information, which includes a photo of the hoop, the hoop name, and the embroidery area.
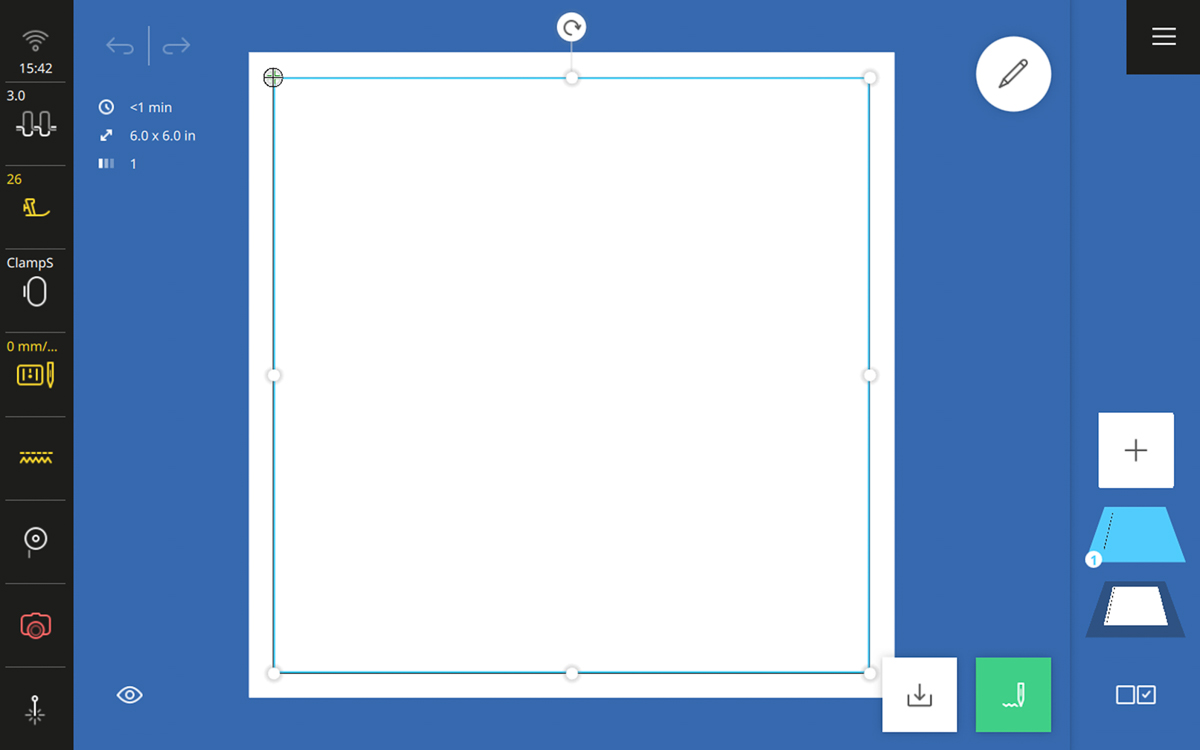
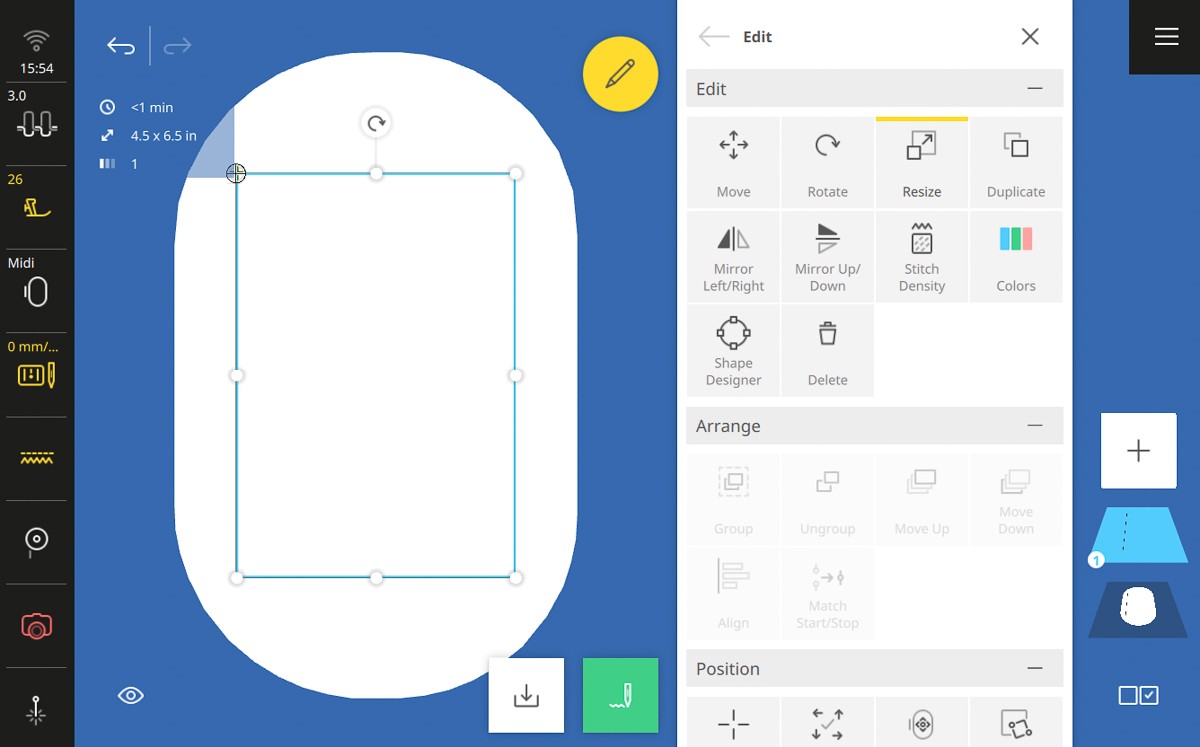
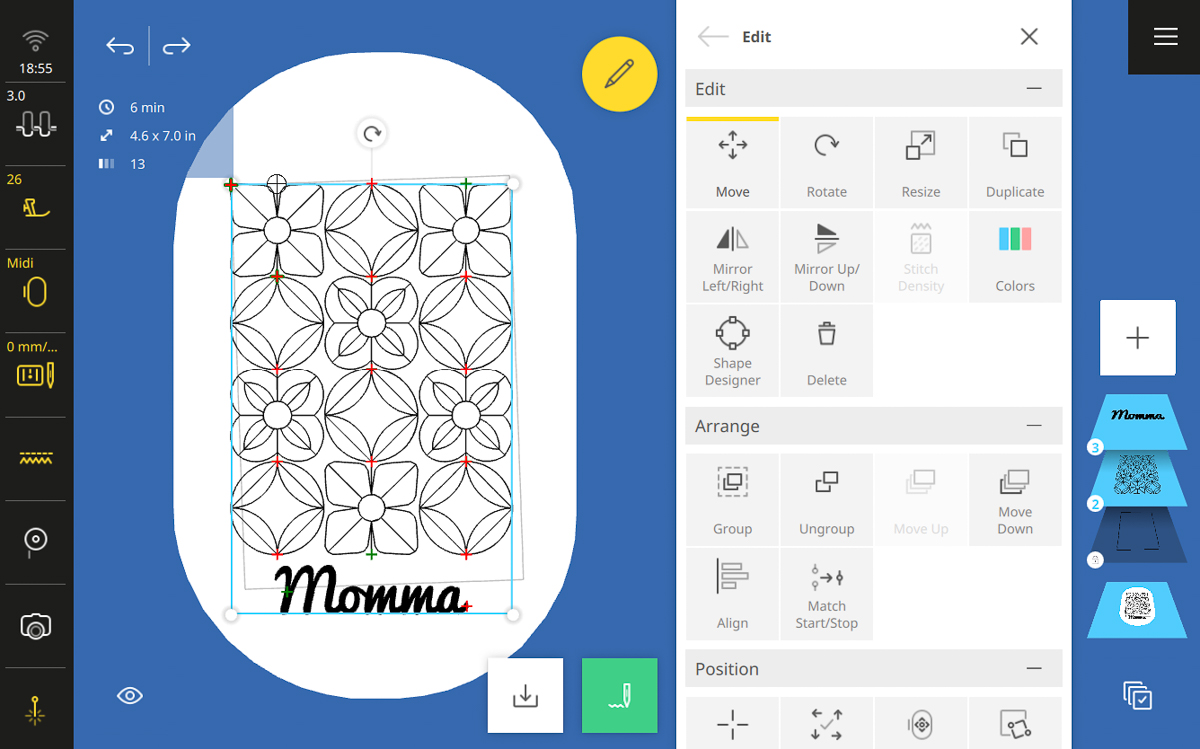
Use the Bounding Box to resize this template to 4.5” x 6.5”. Open the Edit Menu.
The Template folder is made up of single stitch BQM designs that can be infinitely resized in a multitude of ways for embroidery and quilting projects. Today, we are going to use the template as an appliqué, then as a boundary for the design we will be creating.
Step 3: Pinpoint Placement
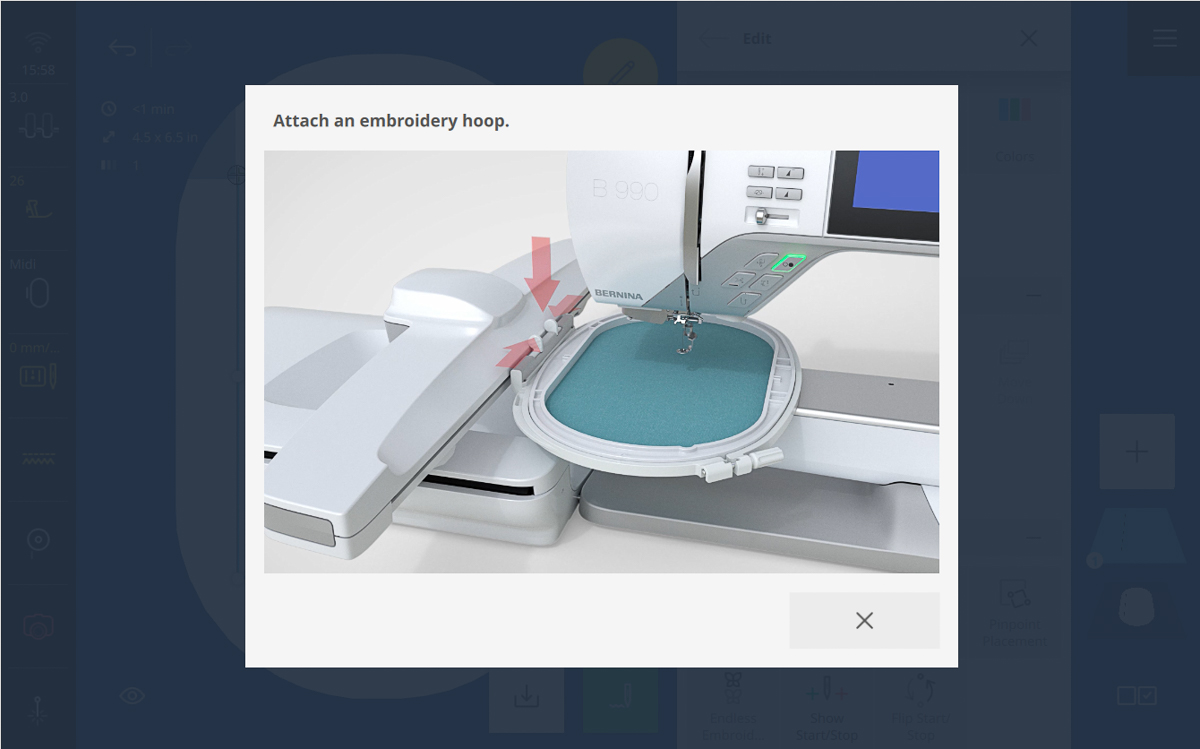
Open Pinpoint Placement. The B 990 will prompt you to put the hoop on the machine. Be careful not to damage the card while attaching the hoop. Once the hoop is attached, the Pinpoint Placement menu will open.
The machine may need to initialize before it can stitch, scan, or use Pinpoint Placement and it wants to do this without the hoop on. I see many people get frustrated with embroidery before they even get started. More often than not, it’s because they attach the hoop before the machine has asked for it. By waiting until the machine asks for the hoop, you are saving yourself extra steps and minor frustrations.
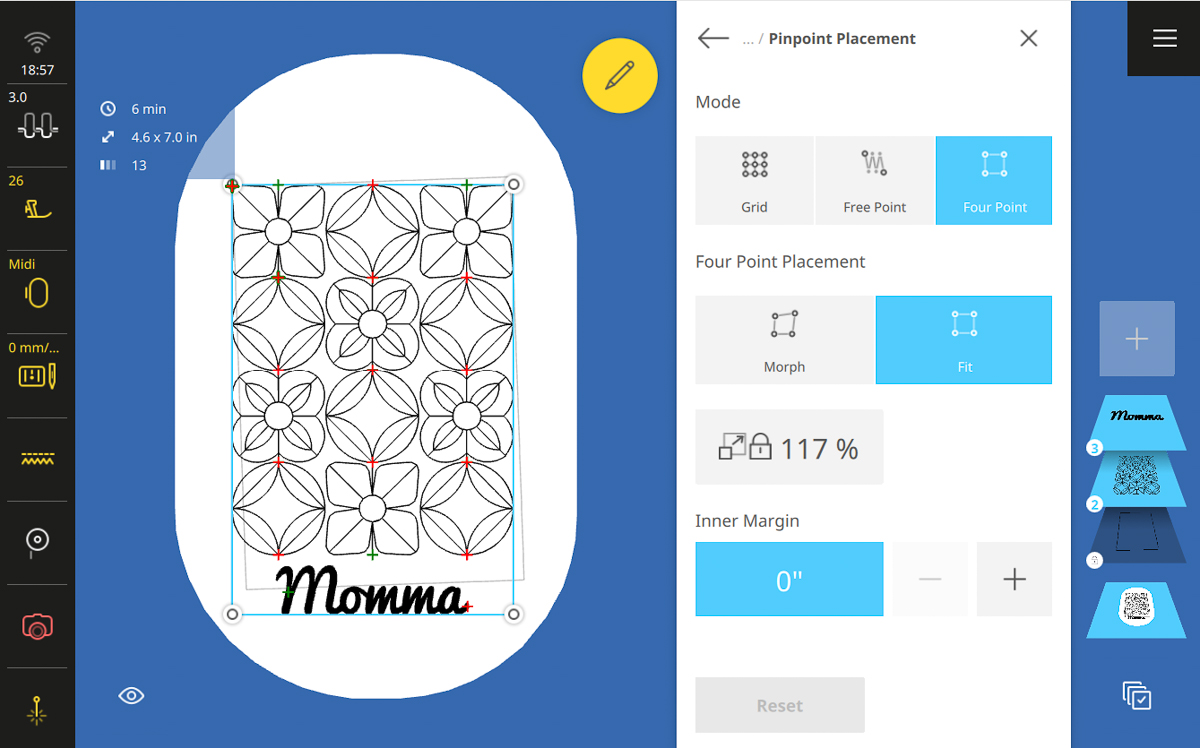
In Pinpoint Placement, select Four Point & Fit. Select Scale Lock. This will keep the dimensions of the template intact.
I know it looks like the template has disappeared, but it’s there, I promise! You’ll see on the next step.
Turn on the Pinpoint Laser, located at the bottom of the Status Bar.
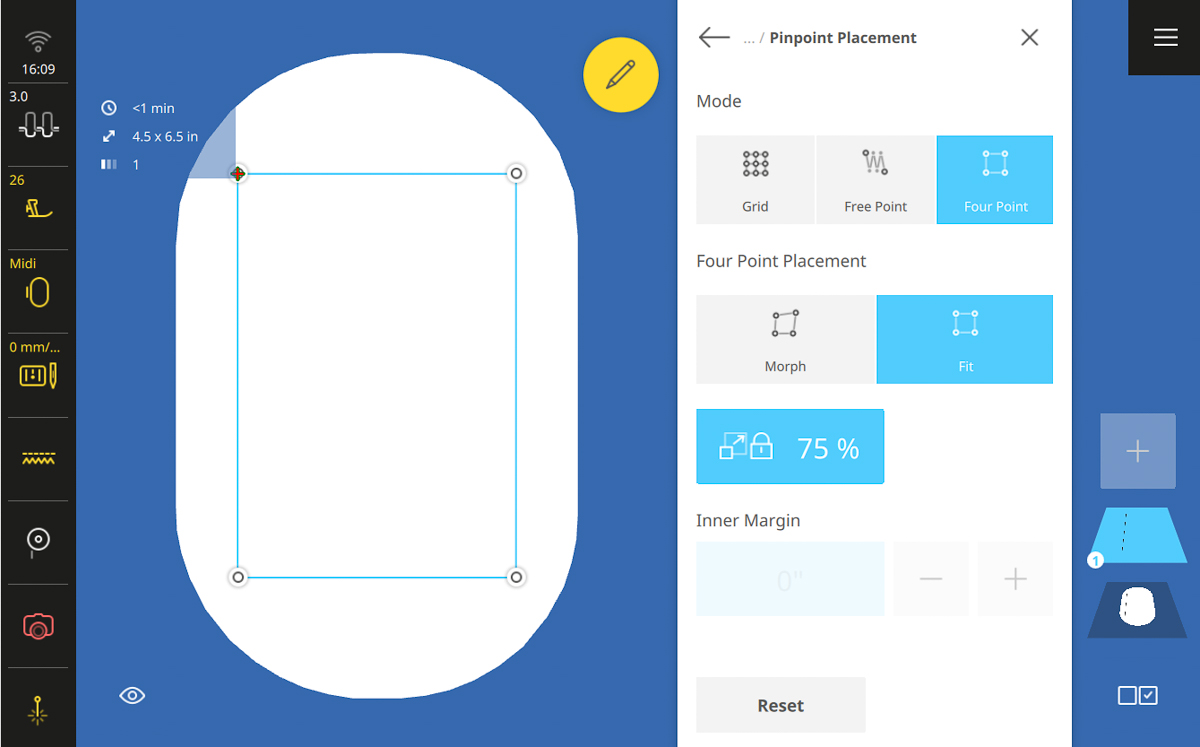
Tap the top left node. Watch the laser point in the hoop and use the Multi-function Knobs to align the laser with the top left corner of the card. If it is hard to see the card corner due to the fabric covering the card, peel back the corner of the fabric while placing the laser.
Repeat this with the top right node, aligning it with the top right of the card.
Note how the template design isn’t morphing or changing as you adjust the Pinpoint Placement. The shape is scale locked (remember, we turned that on) and centering itself within the boundaries you are setting with Pinpoint Placement.
Place the bottom two points in the same manner as the first two.
The template is centered in the card boundaries! It doesn’t matter if the card was hooped crooked; it’s going to look fantastic in the end.

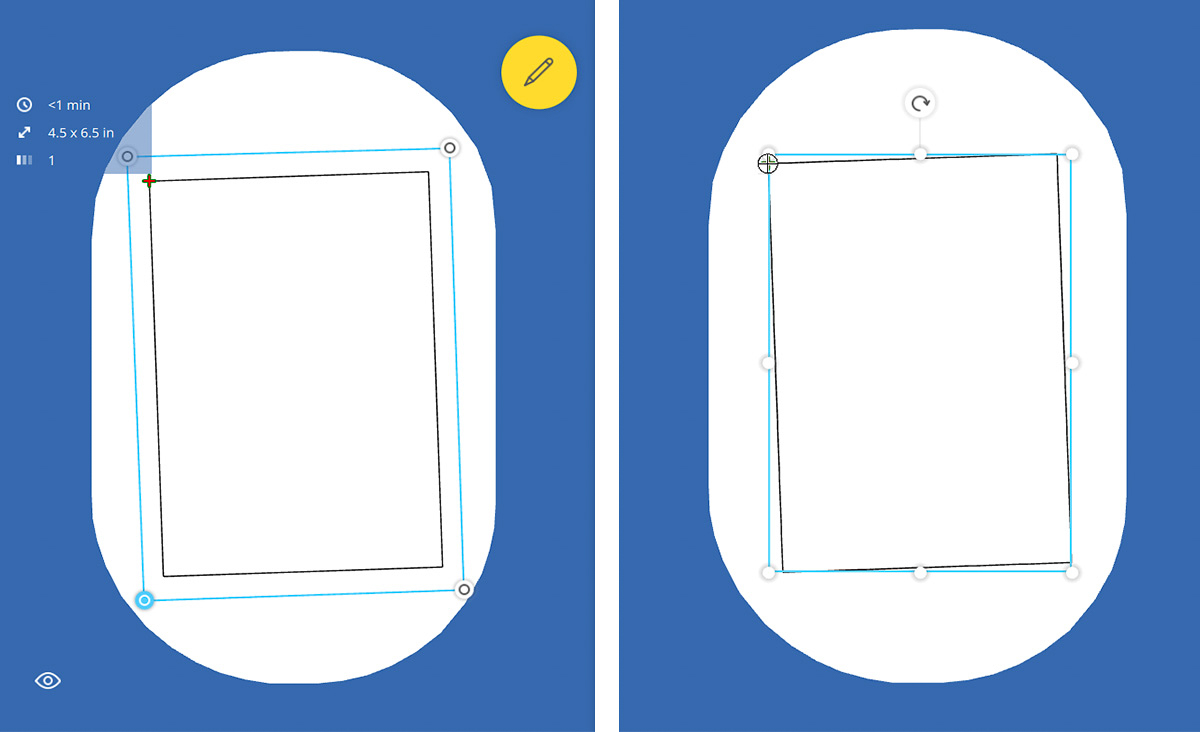
Before we do the next step, let’s talk about Pinpoint Placement vs the Bounding Box.
Right now, on the screen, you are looking at the Pinpoint Placement nodes and boundaries. When you close the Pinpoint Placement menu, these boundaries will appear to change, which can feel stressful. What is happening, though, is the transition from the Pinpoint Placement boundary to the Bounding Box, which looks different because they do different things!
In the photo below we see the Pinpoint Placement boundary (left), everything looks perfect! This is how the design will look with the Pinpoint Placement menu open. Note there is no rotate handle at the top and the nodes look different from the Bounding Box (right).
In the second photo (right), we see what happens when we go back to the Edit Menu or close out of the Edit Menu after using Pinpoint Placement. Some things to note about Bounding Box:
- It goes around the full design, capturing it in its entirety.
- It will stay vertical unless the design has been rotated (this may make the design look wrong, but you have to trust that the work you did in Pinpoint Placement was perfect (because it was!))
What is most important to note is that you cannot re-open Pinpoint Placement and adjust the design. We see students do this often “just to check” and it greatly affects their design. Closing out of Pinpoint Placement is the point of no return. I don’t say this in a scary way but only to impress upon you that you will not be able to open Pinpoint Placement back up and adjust the design.
A BERNINA motto is: “You can’t Fit a Fit or Morph a Morph”. This means once you use Fit (or Morph) to position the design, you can’t open it back up and position that design again without distorting the design beyond what you intended. So, if you really need to redo the Pinpoint Placement on the design, you must undo the first Pinpoint Placement you did and go forth from there.
Seem like a lot? That’s okay! All you have to do is to remember that when the Pinpoint Placement menu is closed and you see the skewed Bounding Box, you understand why this is happening and you trust that your Pinpoint Placement is still perfect.
With that knowledge, close out of the Edit Menu. See what I mean? It looks off, but believe me, you did it perfectly.
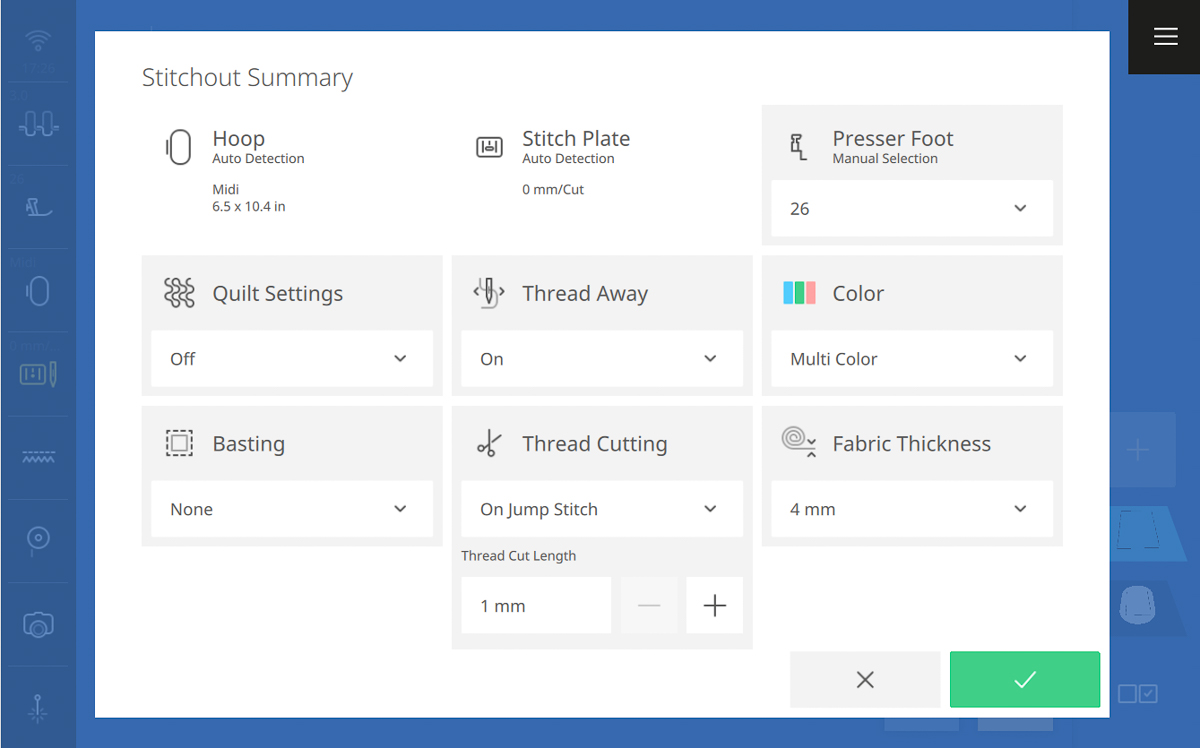
Step 4: Stitch Out Template
Tap the Stitchout icon, then select the following:
- Quilt Settings: Off
- Basting: None
- Thread Away Mode: On
- Thread Cutting: On Jump Stitch
- Thread Cut Length: 1 mm
- Presser Foot: 26
- Color: Multi Color
- Fabric Thickness: 4 mm
Tap the green check mark when ready.
Stitch out the template. This is a single stitch design; to get a more prominent look, you can stitch it out twice in a row.
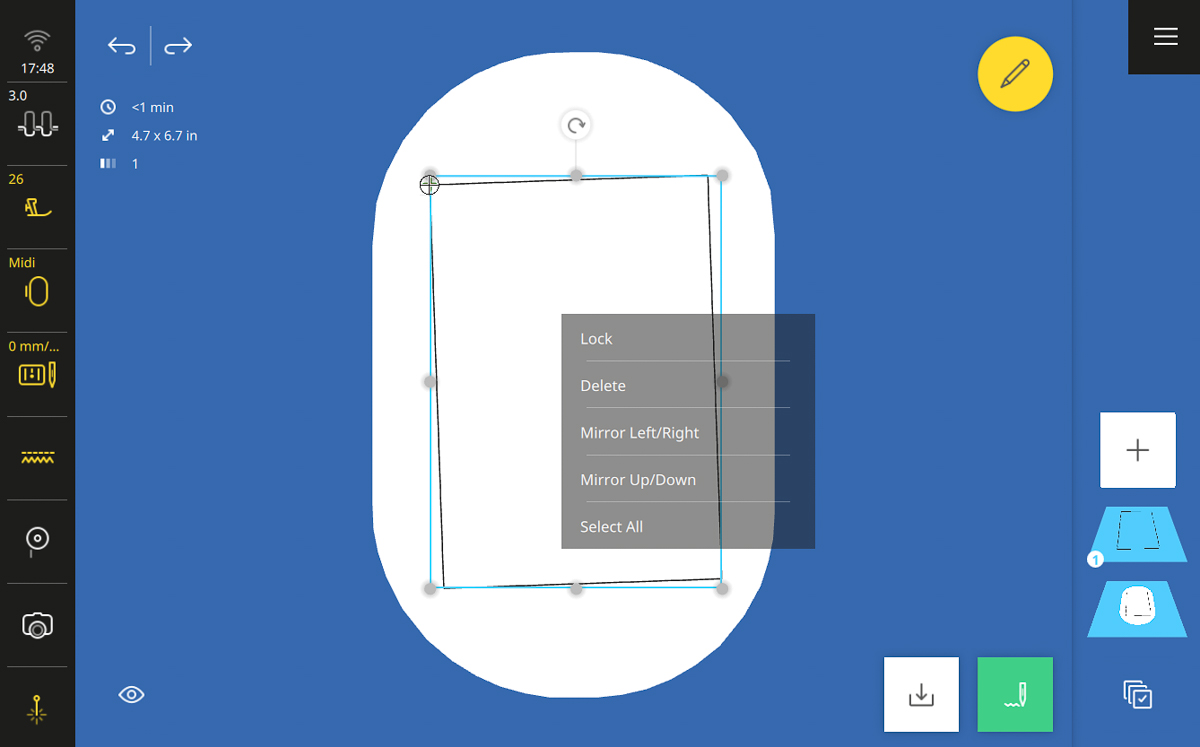
When finished, tap Finish Embroidering. Then tap Edit, in the bottom left corner, to return to editing the design.
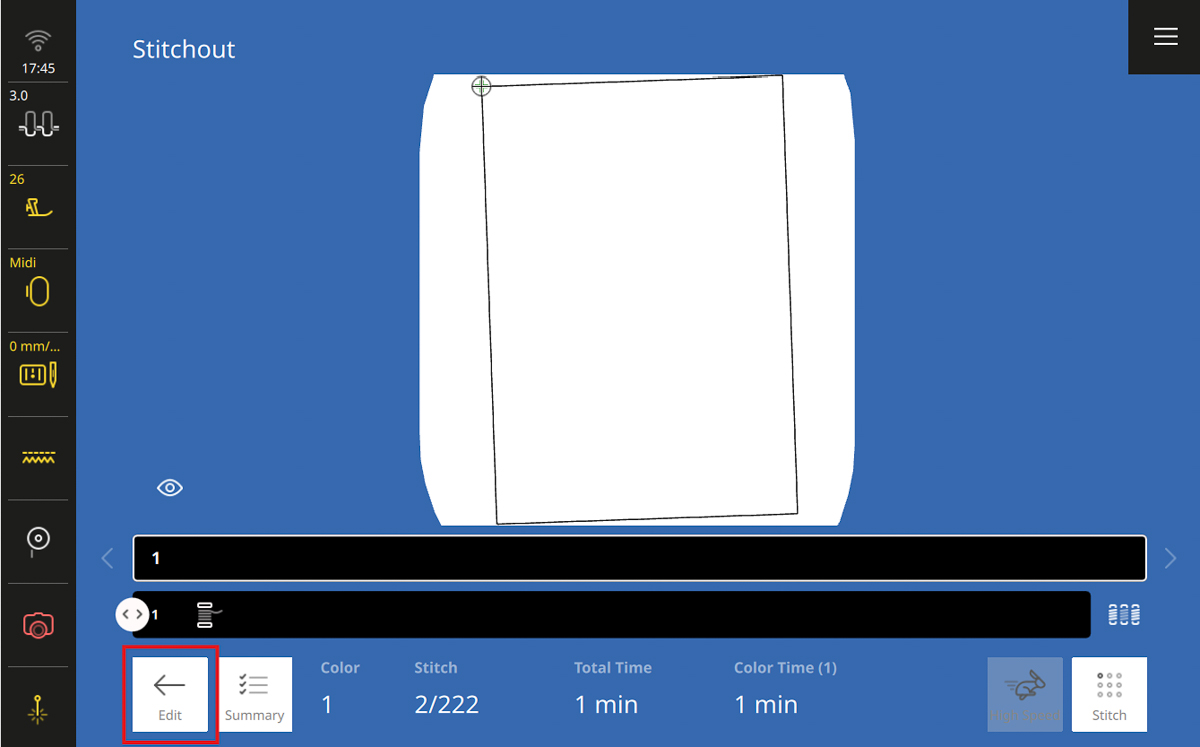
Tap and hold on the design to activate the Context Menu and select Lock. You know the design is locked when the lock appears on the layer in the Layer Bar.
This will protect the design from being accidentally edited or moved. This template design will now be used as the outline for the design you are going to create.
Step 5: Design the Quilt Motif
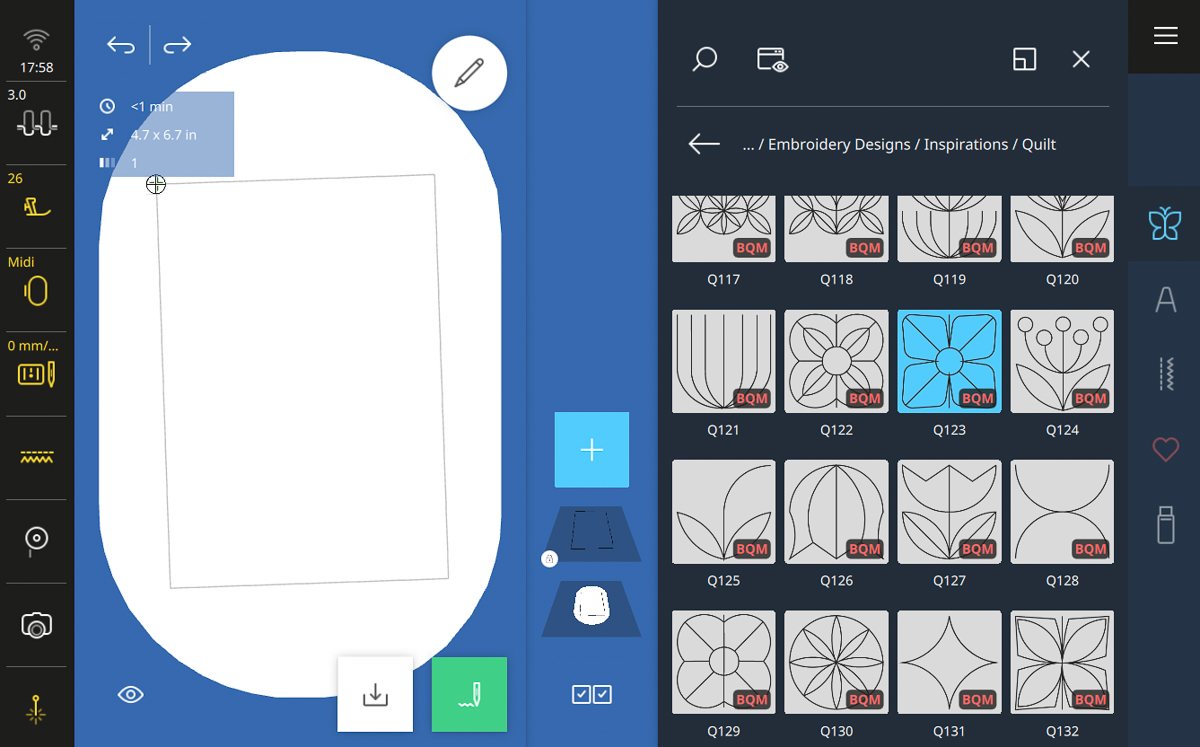
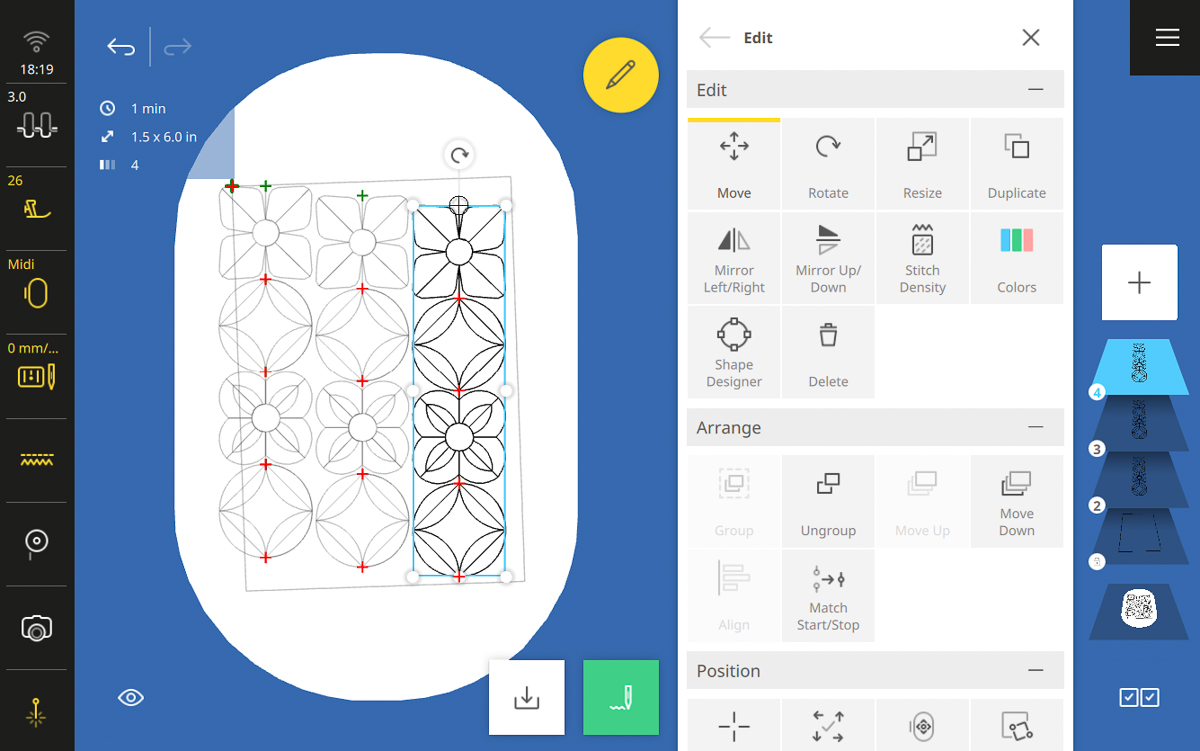
Tap Add Motif (the plus sign) in the Layer Bar, then select the Embroidery Designs folder, then Inspirations, then Quilt. This folder contains all the B 990 exclusive BQM designs.
Select design #Q123.
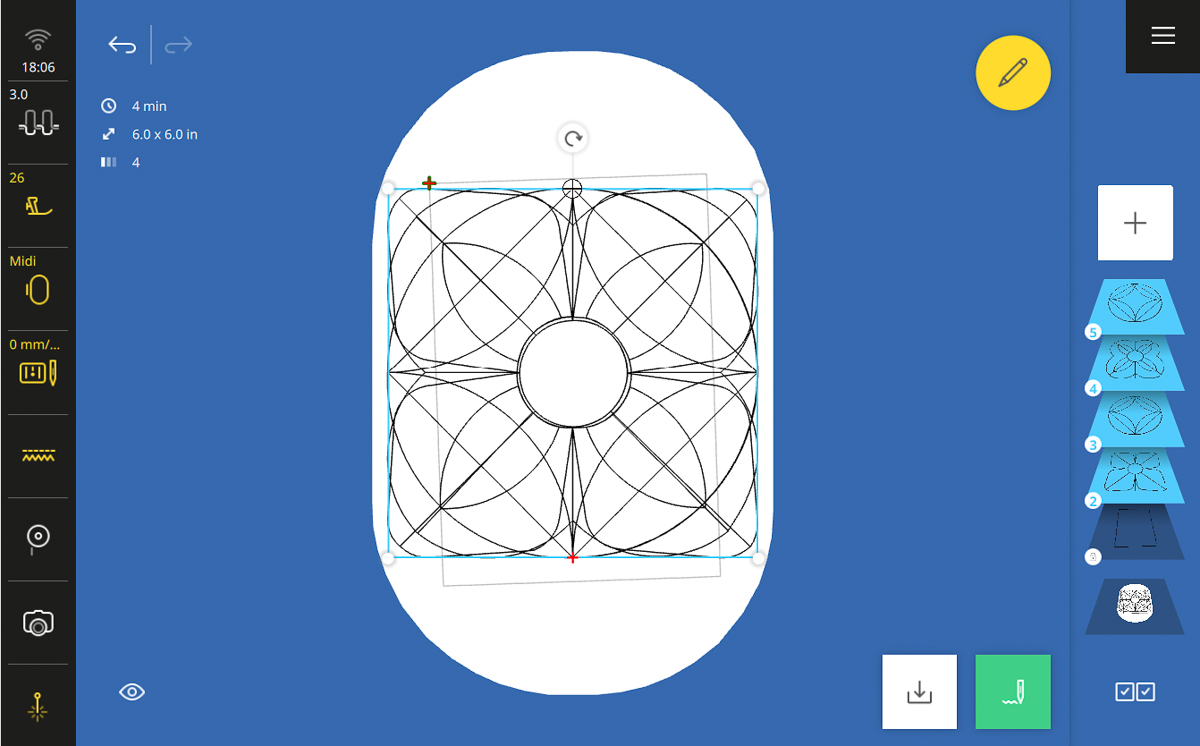
The design opens and fills the hoop, but we won’t worry about that for now. We are going to open all four designs right on top of each other to edit them together.
- Select Add Motif, then design #Q133
- Select Add Motif, then design #Q122
- Select Add Motif, then design #Q133.
In the Layer Bar, all four layers are selected (highlighted in light blue) and within the hoop they are all stacked on top of one another. Double check your layers were opened in the correct sequence.
Open the Edit Menu.
Select Resize and change the size to 25% (because all of the quilting designs are selected, their sizes are all changed at once).
Go back to the Edit Menu.
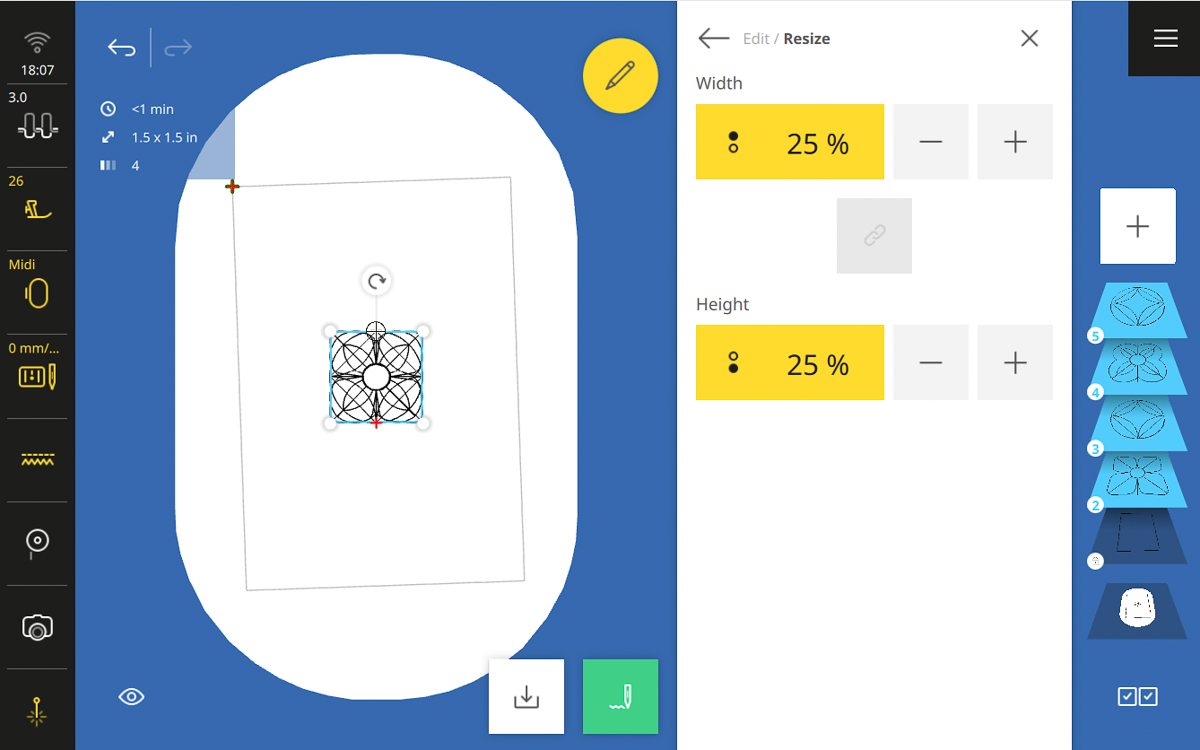
Select Match Start/Stop to align the designs perfectly! Resist the urge to move the design into the hoop.
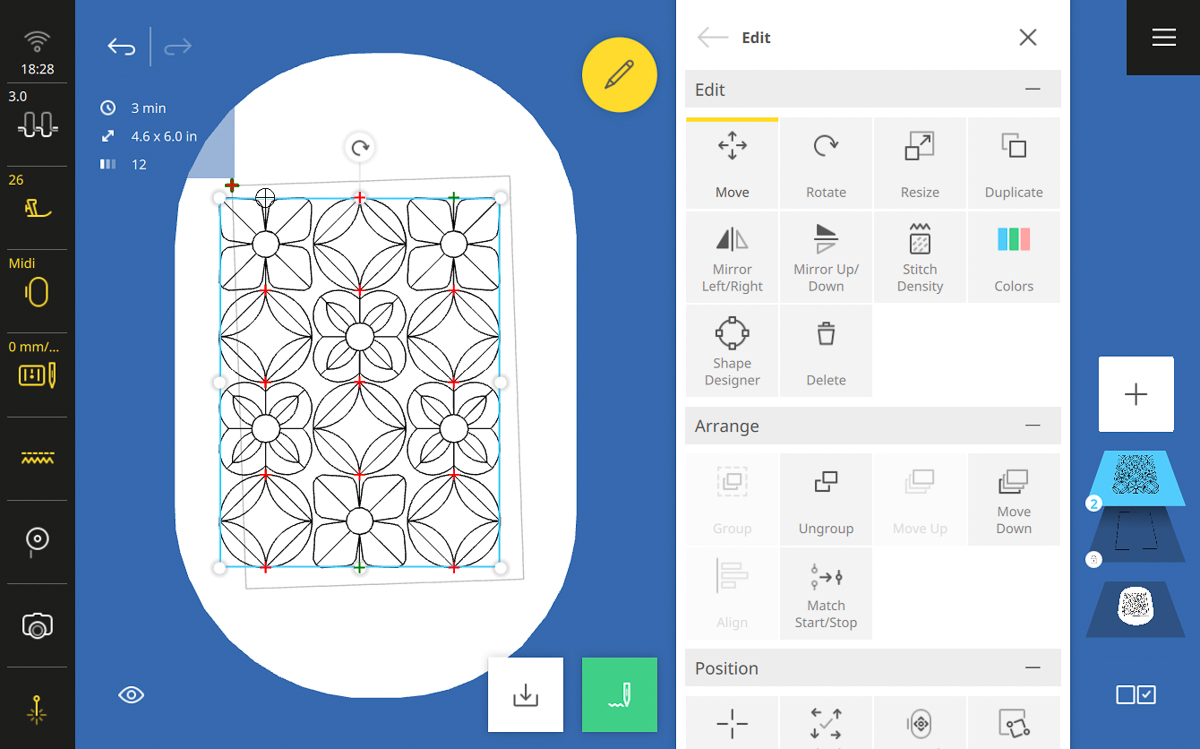
Select Group to combine the designs into one motif / one layer.
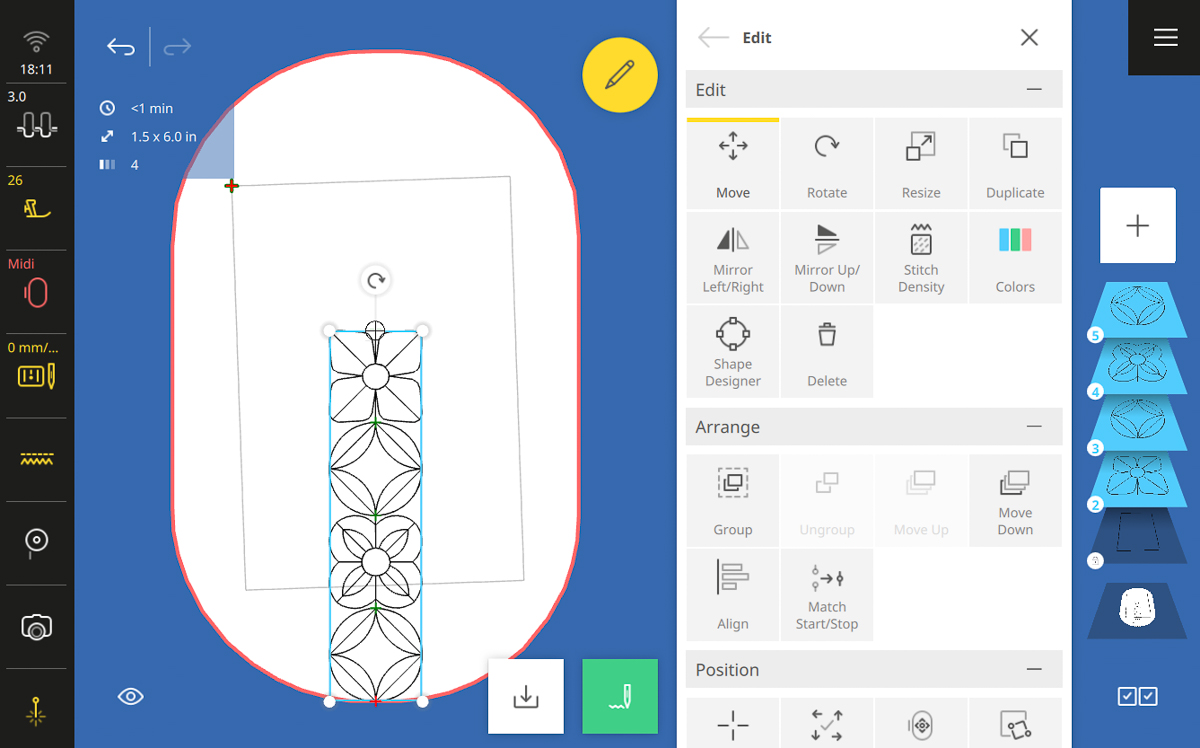
Move the design up in the hoop. Don’t fit it in the template yet; drag it up and over to the side of the hoop.
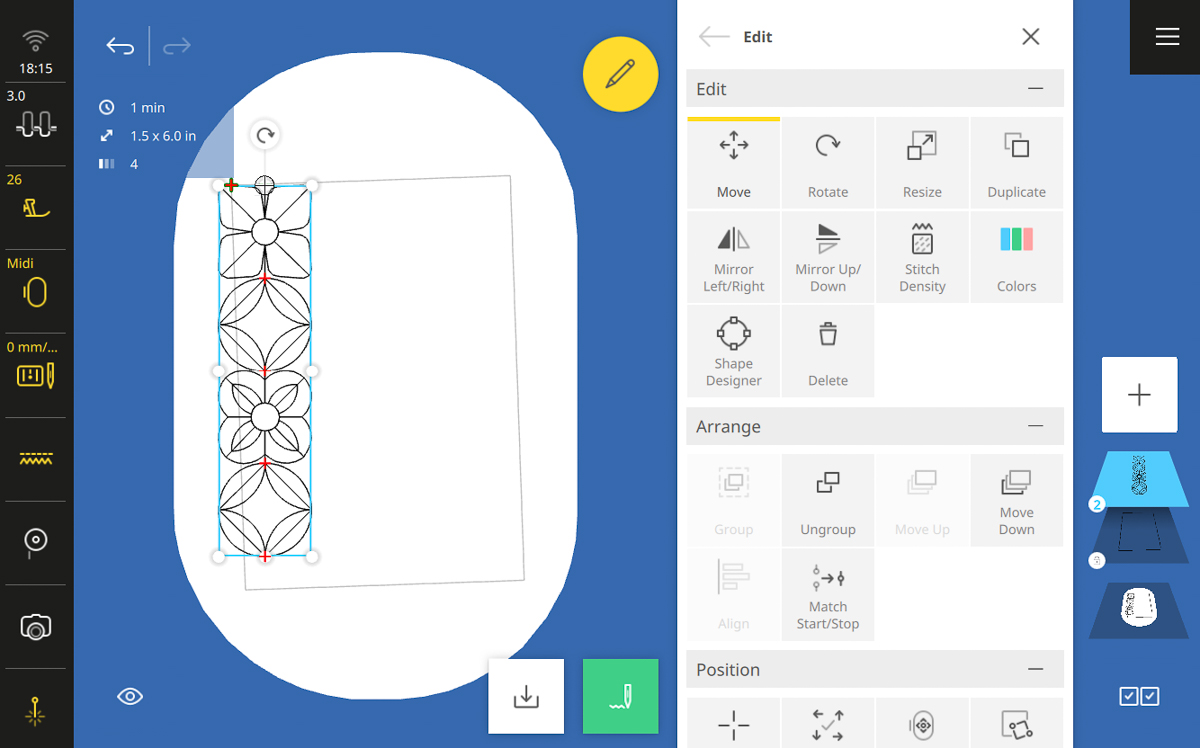
Select Duplicate and drag the new design to the right of the first layer. Do not try and make them center or match or anything like that (I know you want to!). Just drag them close to another for now. Tap Duplicate again and once again drag the new design to the right of the previous design.
Note: I know it’s getting more and more difficult to ignore the template behind the design but keep it up! It’s going to come back into play later. Do not try and make your design fit within the template, rotate it to match, etc.
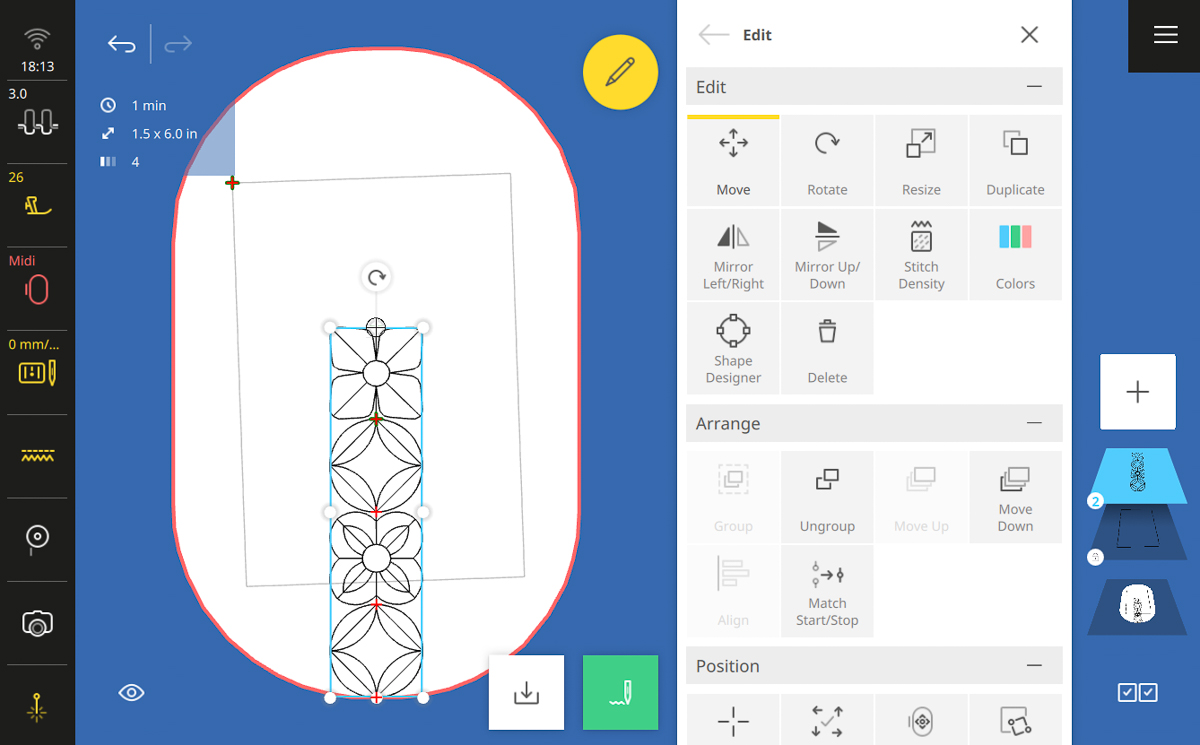
Deselect Layer 4 and then select Layer 3. Tap Mirror Up/Down.
Select all by tapping the Hoop View under the locked layer (very bottommost layer). Tap Align and select Center Vertical then Distribute Horizontal.
You can adjust the spacing as desired, but be sure to repeat the last step if you do so the designs are aligned and even.
Go back to the Edit Menu and select Group.
Close the Edit Menu.
Step 6: Add Lettering
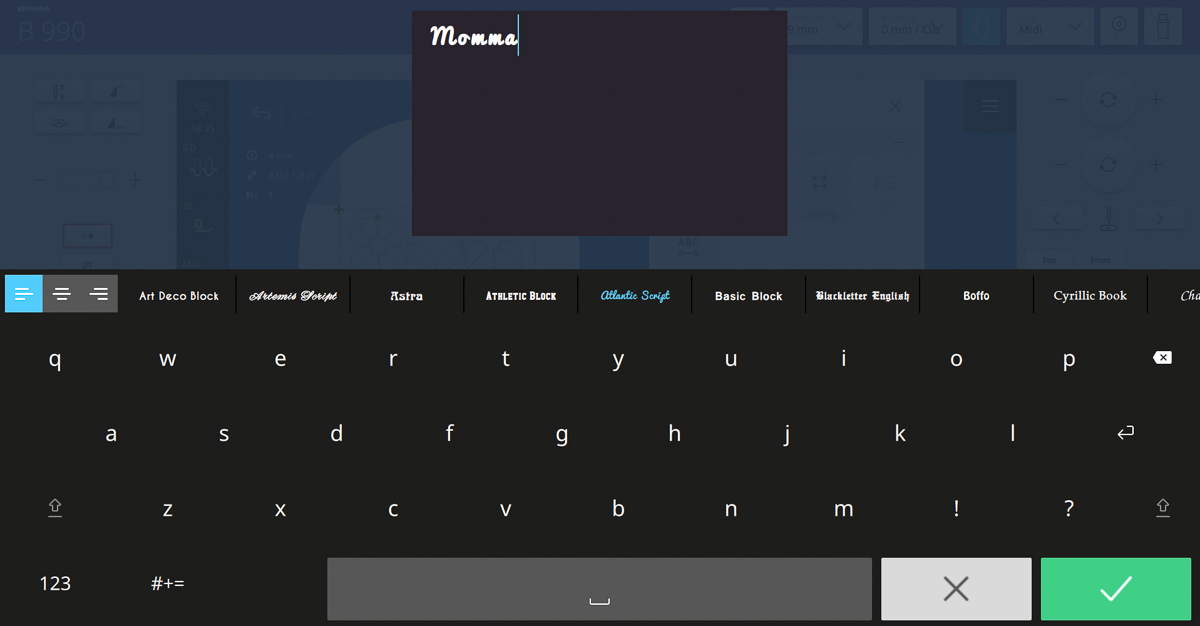
Tap Add Motif and select Lettering from the Quick Access menu.
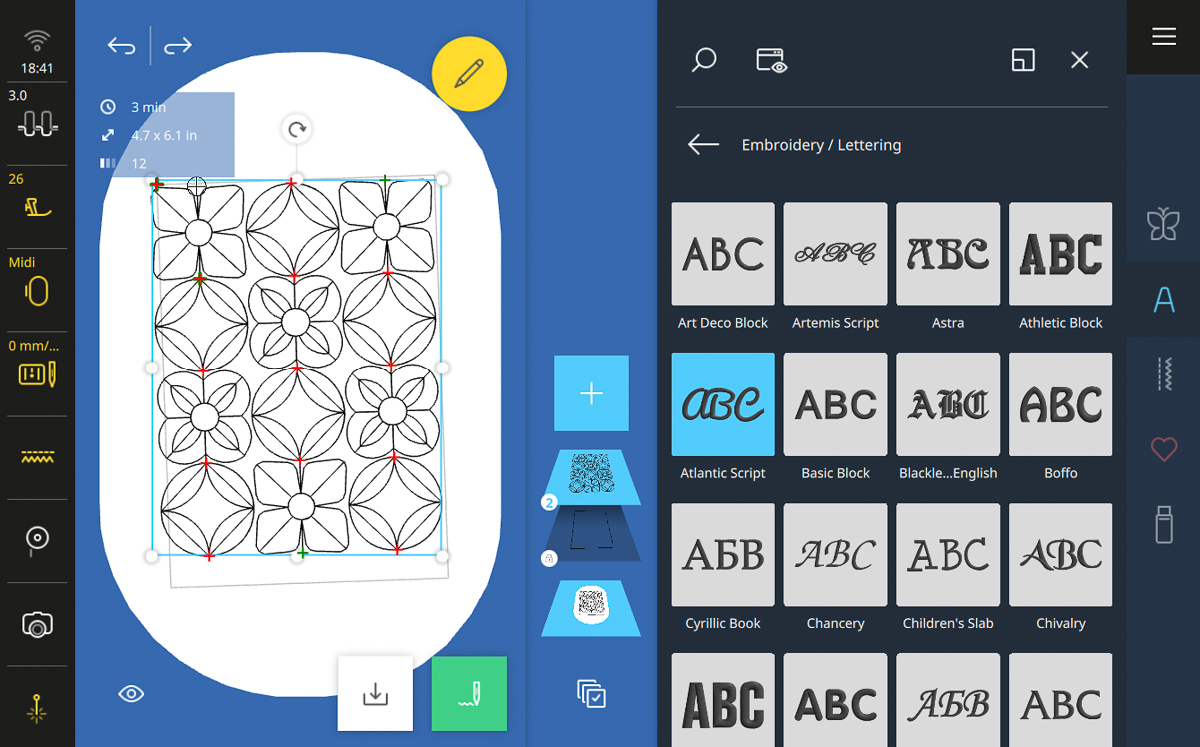
Select Atlantic Script then type Mom (or Momma, Mommy—whatever it is you call the person you want to celebrate today!). Confirm with the green check mark.
Drag your lettering so it is just under the quilting motif.
Adjust the lettering using the Bounding Box. You want the lettering to have a shorter length than the design but not be super small. Mine is resized to about 80% if that helps you make any stylistic choices.
Open the Edit Menu.

Select All by tapping the Hoop View under the locked layer. Select Align, then Center Horizontal.
Check that none of the Bounding Box is outside or close to the perimeter of the hoop. If necessary, drag the designs to the center of the hoop.
Tap the Back arrow to return to the Edit Menu.
With both the lettering and quilt layers selected, select Pinpoint Placement.
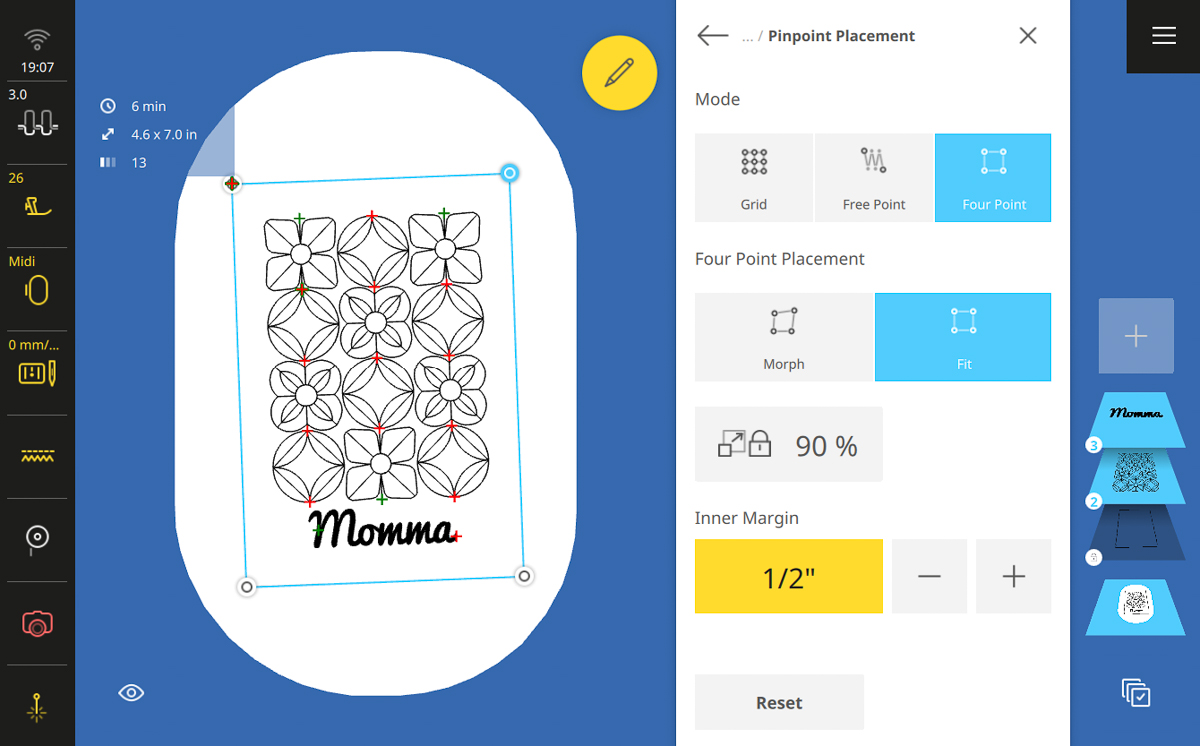
Select Four Point and Fit. This time, do not choose Scale Lock.
Place the four points of the design on the four corners of the template design already stitched out.
Remember to start in one corner and work clockwise or counterclockwise from there. I like to start with the point that is already closest to where it needs to go.
Once finished with the Pinpoint Placement, set Inner Margin to 1/2”. You can also set it to 1/4” if you prefer that look! I love the flexibility I have with Fit. I can either set a specific size and protect it with Scale Lock or use Inner Margin to decide what margin I need based on the desired look.
Return to the Edit Menu.
Note: Remember, this is the point of no return! And The Bounding Box might look off, but the design placement is perfect.
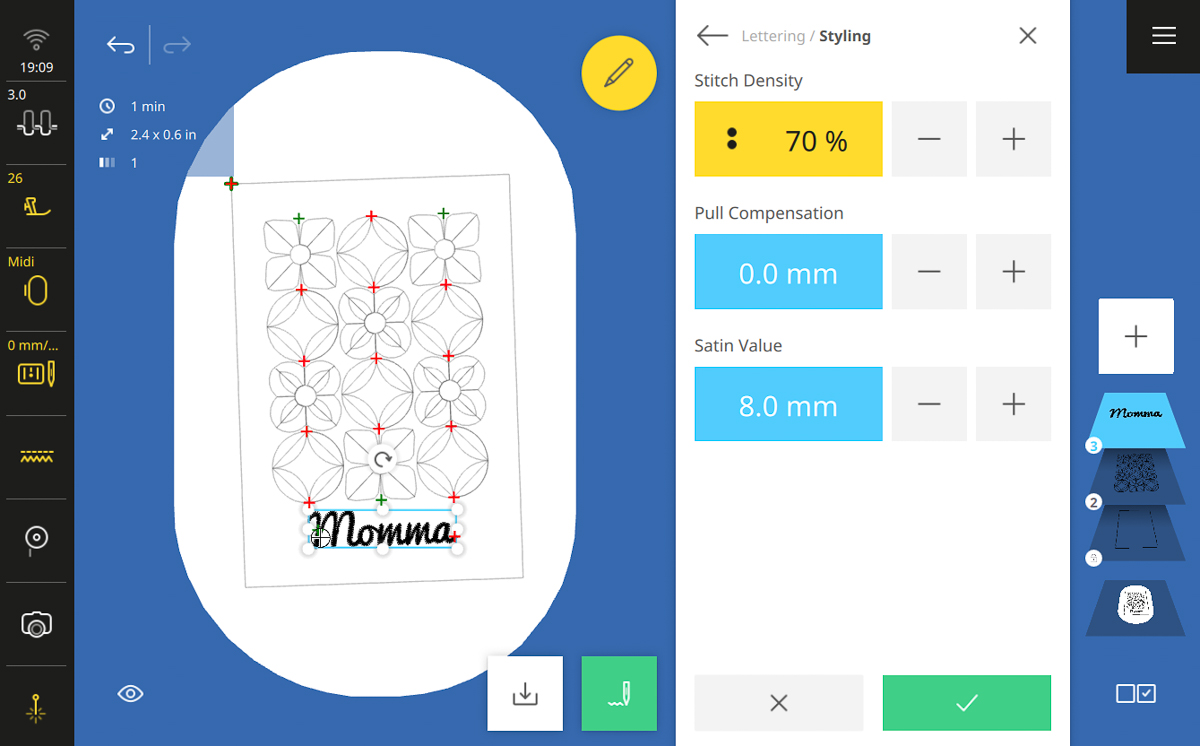
Select the lettering layer.
Select Styling and set the Stitch Density to 70%, then confirm with the green check mark. This step is important because if the stitches are too dense, they will perforate the paper too much and ruin the card. We have some protection against this with the fabric layer but, still, better to keep the integrity of the card with a low stitch density. That’s why quilting designs are perfect for cards!
Close the Edit Menu.
Unlock the locked layer by tapping it in the Layer Bar and confirming with the green check.
I like keeping the template around because, at this phase, I can see if I like the way the card will look. You can see the template design as the appliqué stitches and then the cute custom card design within it. At this point, if you don’t like the way it looks, you can go back in the tutorial and fix something.
Once happy with the way everything looks, delete the template layer.
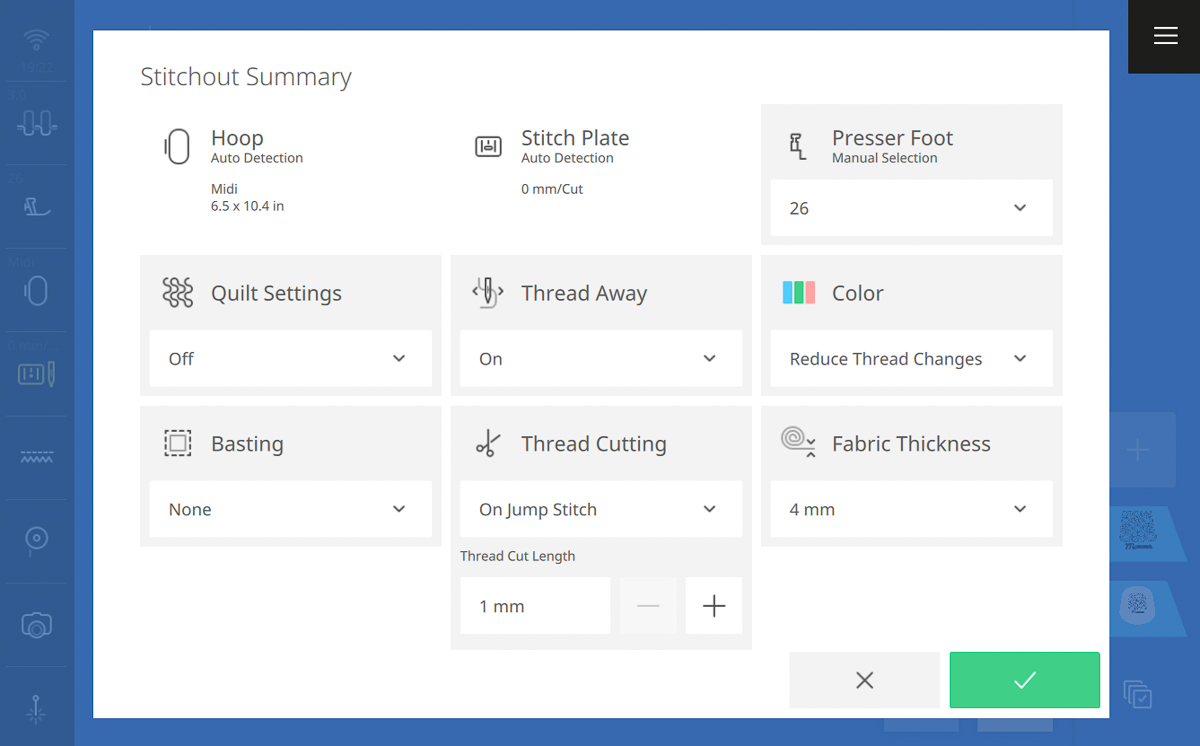
Step 7: Stitchout the Design
Select Stitchout.
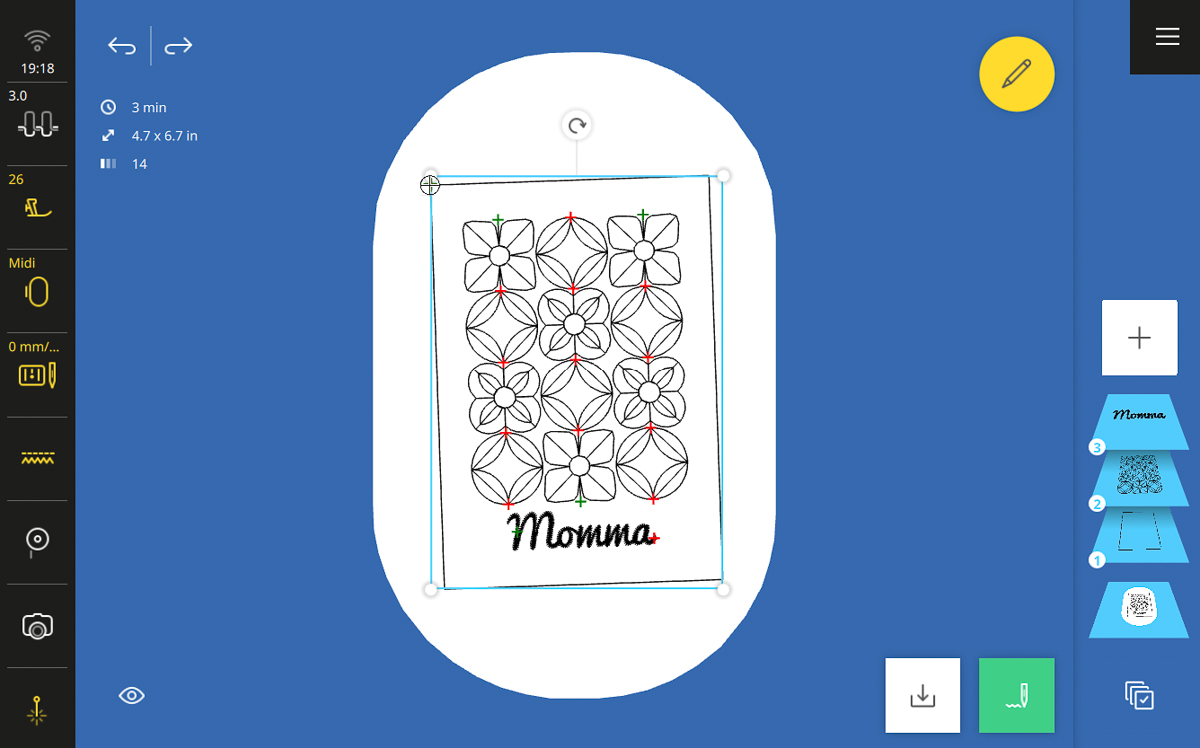
In the Stitchout Summary, select the following:
- Quilt Settings: Off
- Basting: None
- Thread Away Mode: On
- Thread Cutting: On Jump Stitch
- Thread Cut Length: 1 mm
- Presser Foot: 26
- Color: Reduce Thread Changes
- Fabric Thickness: 4 mm
Tap the green check mark when ready.
Note: “Reduce Thread Changes” is the necessary setting to allow all the quilting designs to stitchout without the machine stopping between each motif. Even if you plan to change the thread between the quilting motif and the lettering you will want to have “Reduce Thread Changes” on.
Stitch out the design.
When finished, tap Finish Embroidery, remove the hoop from the machine, and then remove the project from the hoop.
Gently tear away the excess stabilizer from the back of the card. Just tear away to the template stitches. No need to get all the stabilizer out.
Turn over the card and cut away the excess fabric around the template border. You can decide if you want a little fabric showing or a lot, just be careful not to cut the stitches.
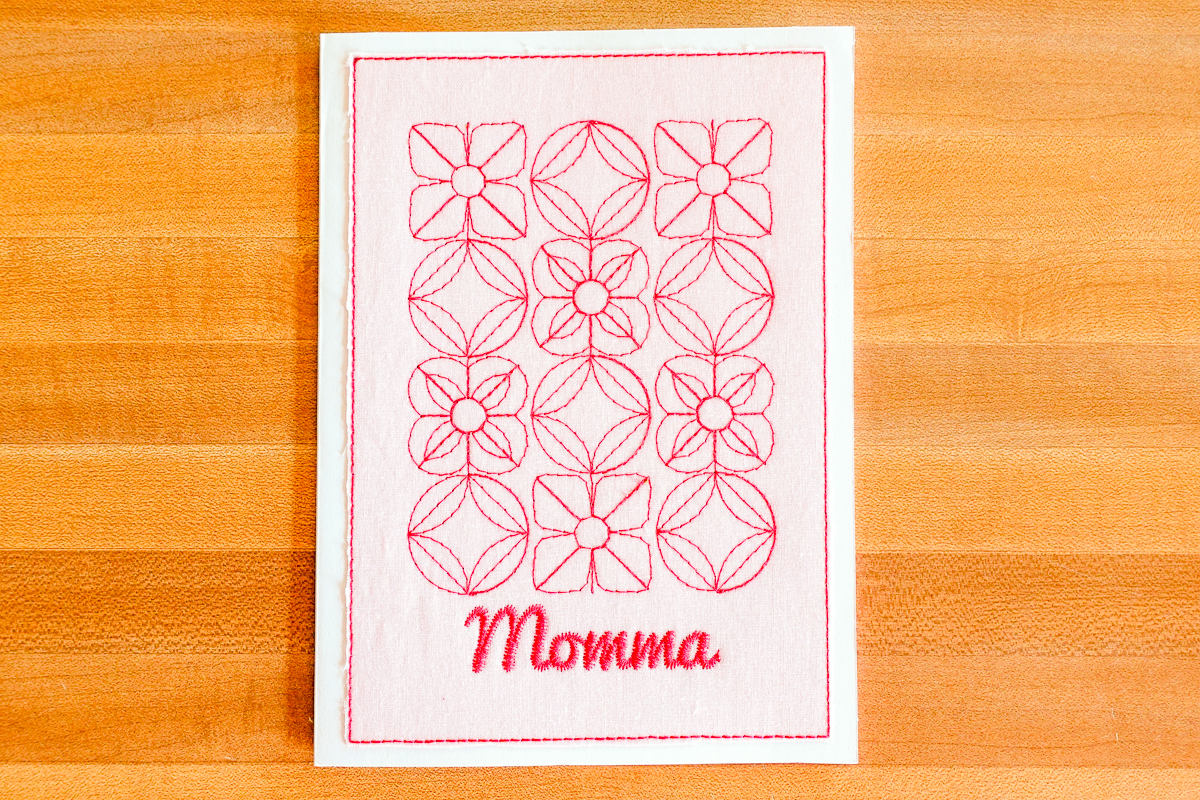
Take a blank card and cut it in half.
Cut a piece of Fuse & Seal to match the size of the card and fuse it to the back of the paper.
Fuse the Fuse & Seal card piece to the wrong side of the card front, covering the threading (or you can use fabric or decorative card stock for this step).
And with that, the card is finished!
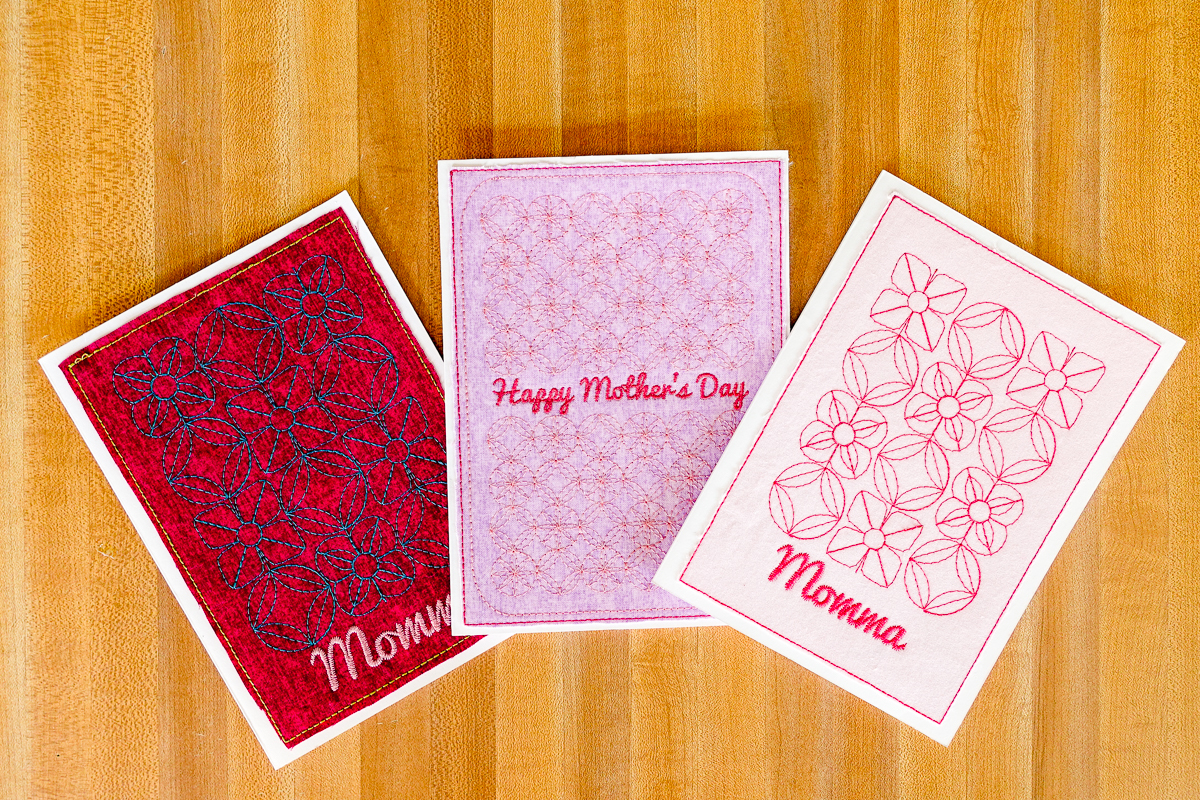
I hope you play around with different colors, template designs, and quilting motifs to design many more cute and colorful cards on your BERNINA 990.
Looking to add even more handmade love to your Mother’s Day? Check out this WeAllSew post Sew Something Special for Mother’s Day. You can also gain some more embroidery inspo from this wonderful Celebrate National Embroidery Month post!
Happy Embroidering!