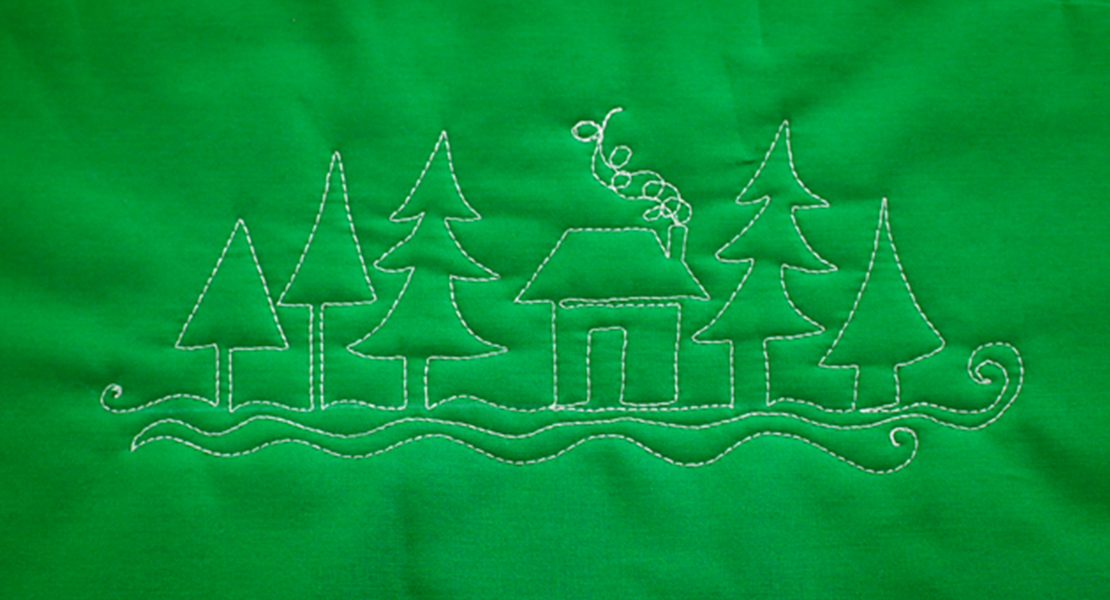
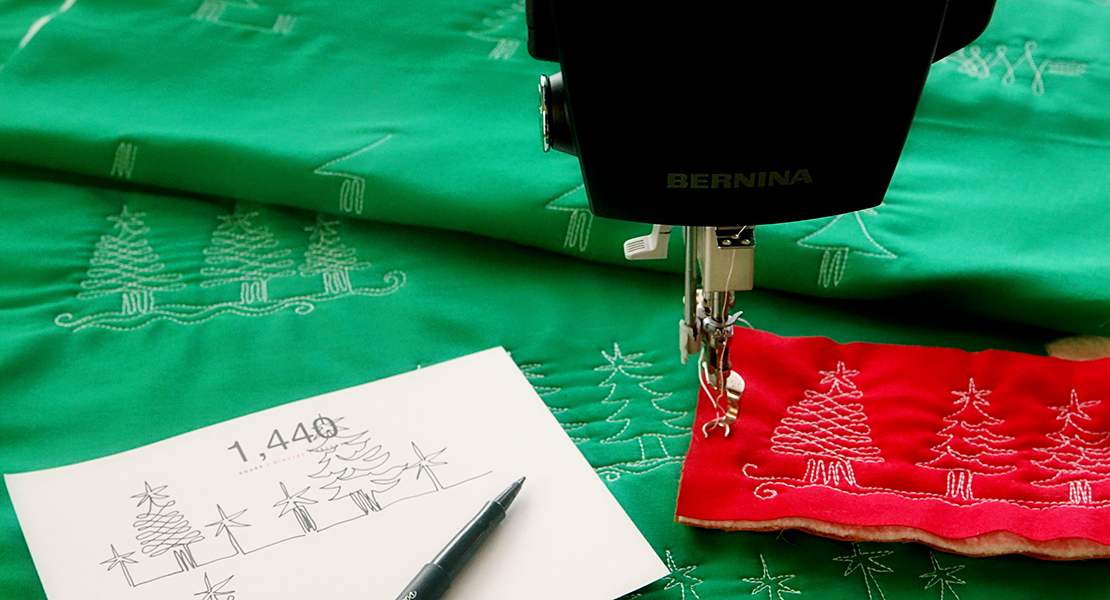
Free-Motion Quilting Pine Boughs and Holly
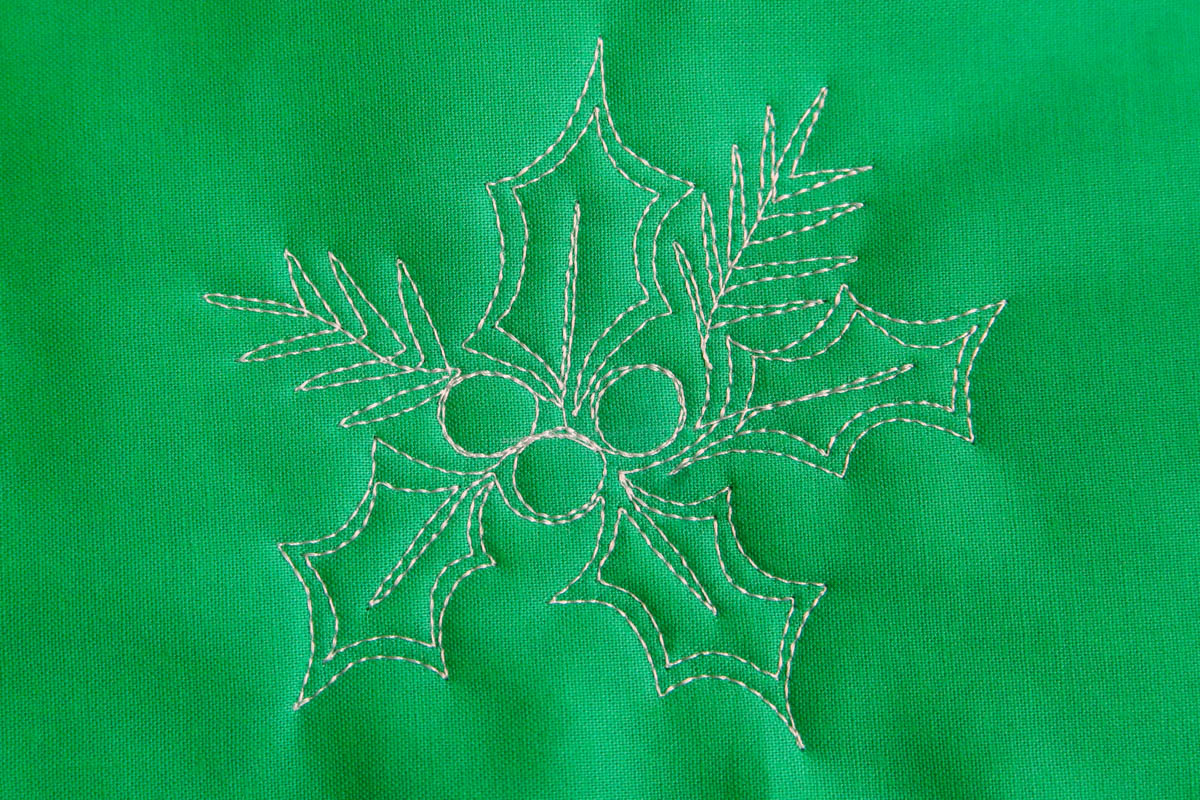
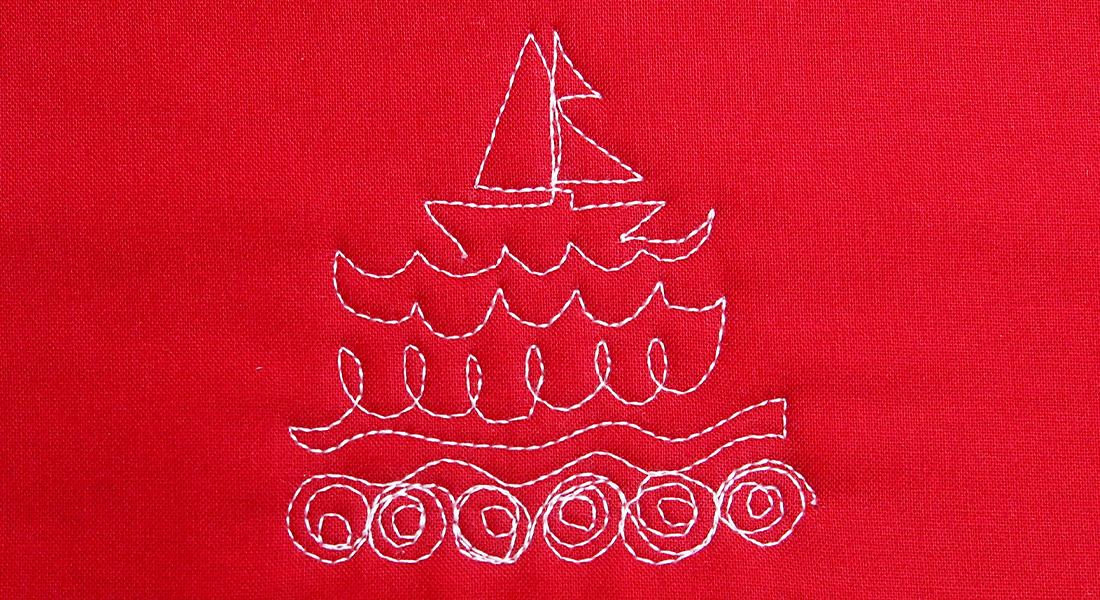
Whether you are quilting a Christmas quilt or adding a quick embellishment to your Christmas towels and napkins, Pine Boughs and Holly are the perfect motif! Stitch the leaves in a circle to create the perfect wreath for a small wall hanging or to fill a large quilt block, or stitch the pattern in a row to create a fabulous border.
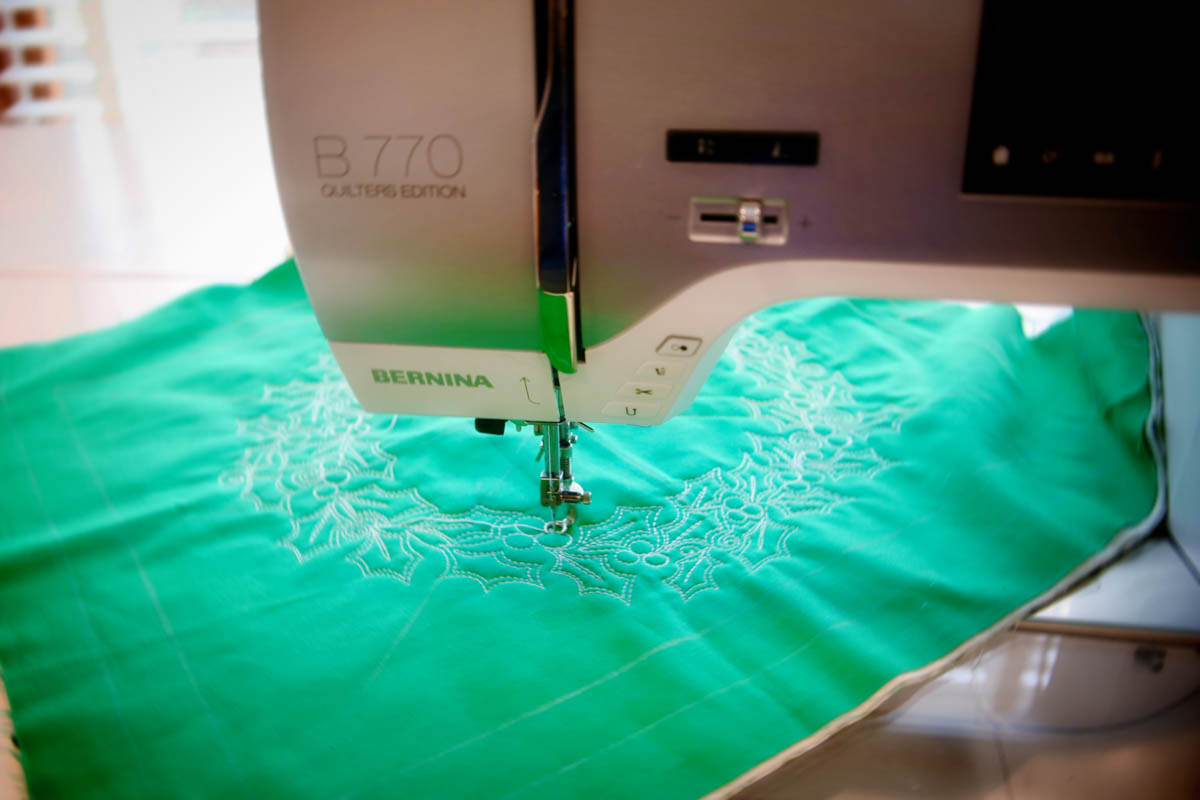
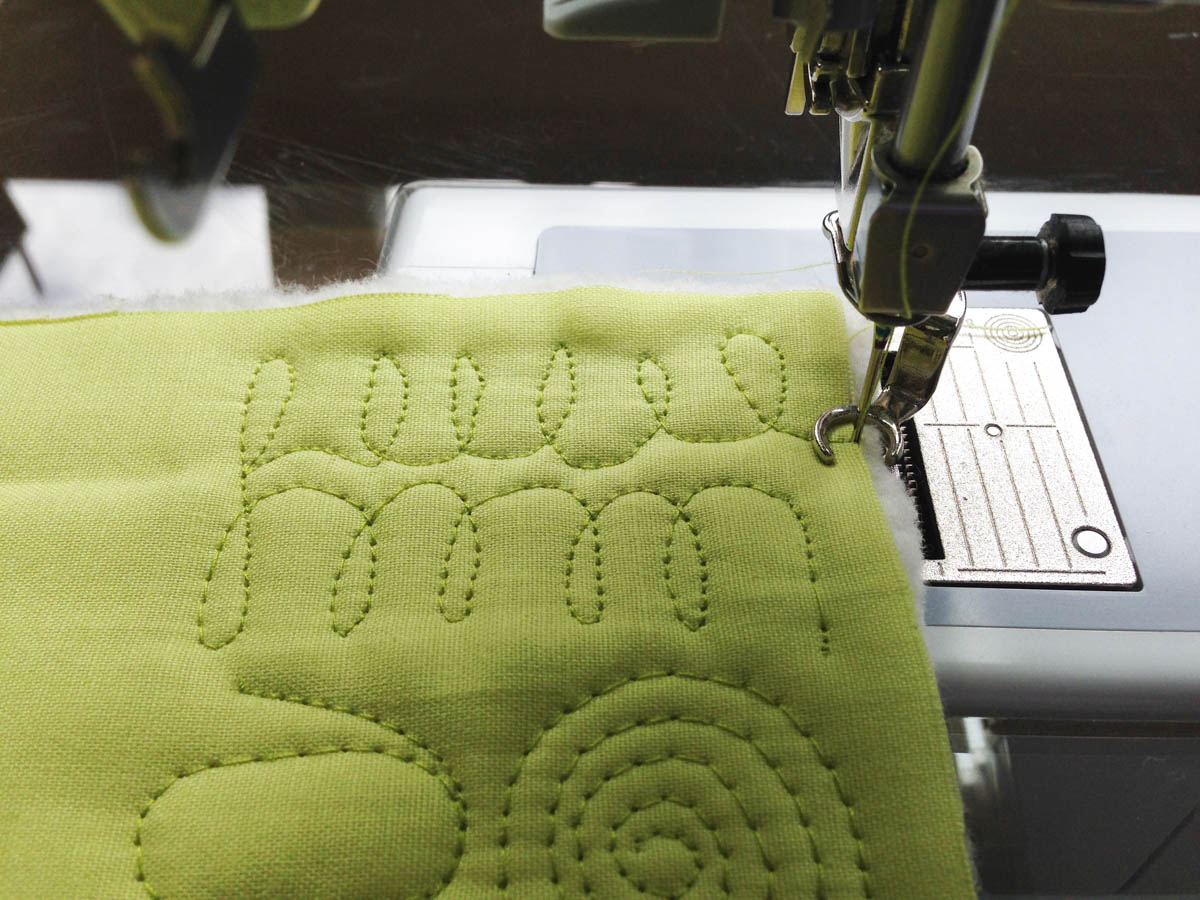
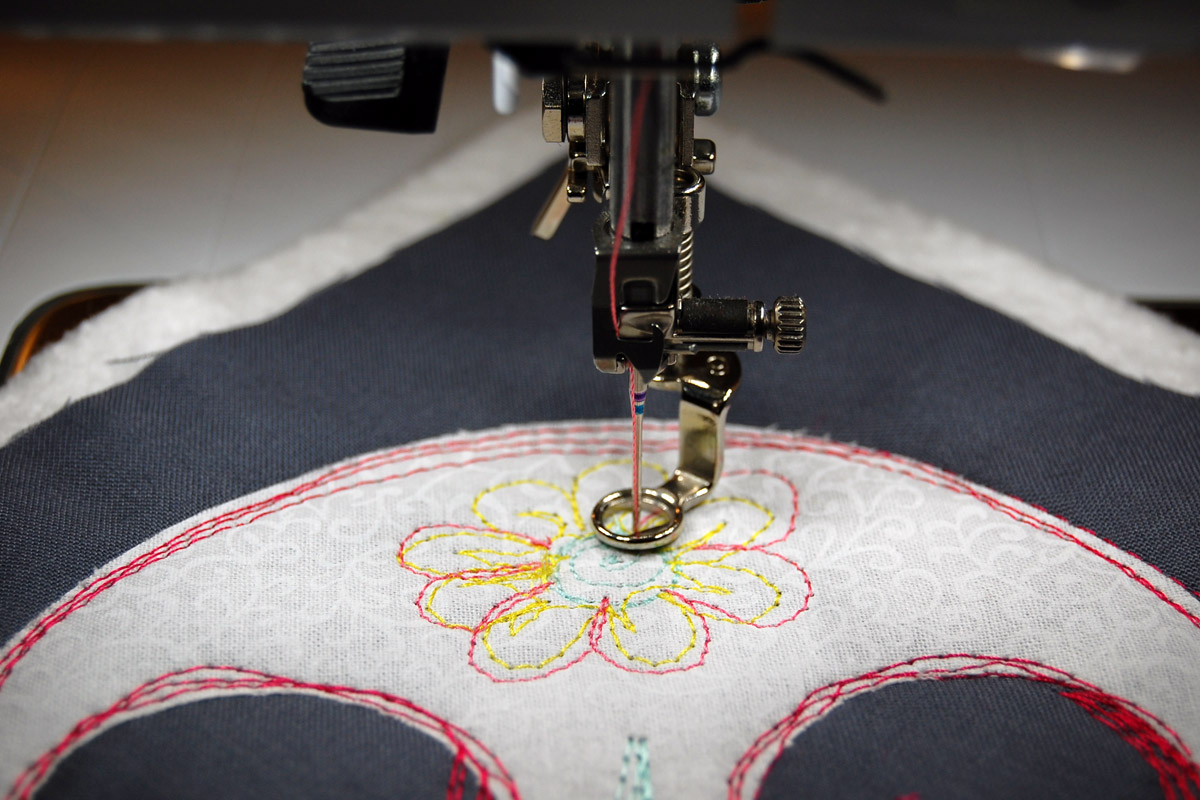
Creating the perfect free-motion stitch is easy on BERNINA sewing machines like my BERNINA 770 QE—just lower the feed dogs and adjust the top tension until you can see individual stitches. Use a single-hole throat plate for best results and try my favorite foot for machine quilting, the BERNINA Free-motion Embroidery Foot #24. I like it because it is open toed and offset for greatest visibility.
For more tips see my recent post on WeAllSew: Twelve Steps to Free Motion Quilting
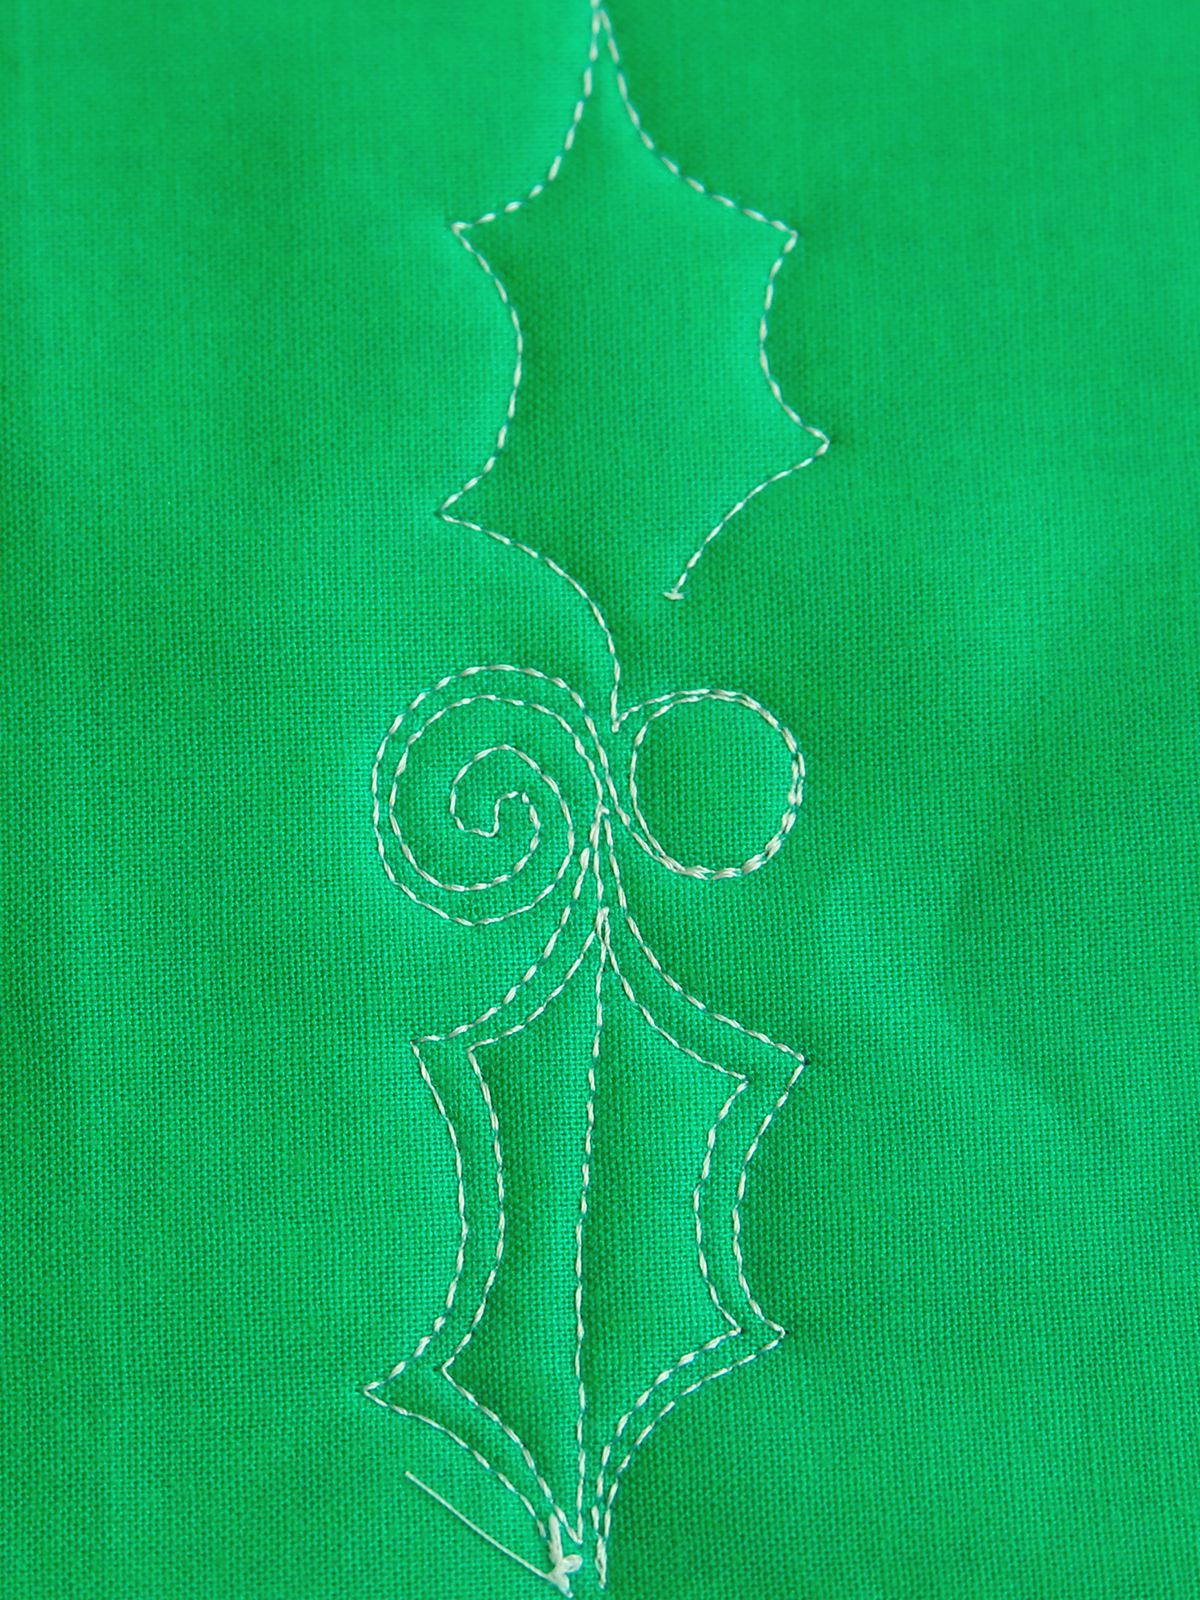
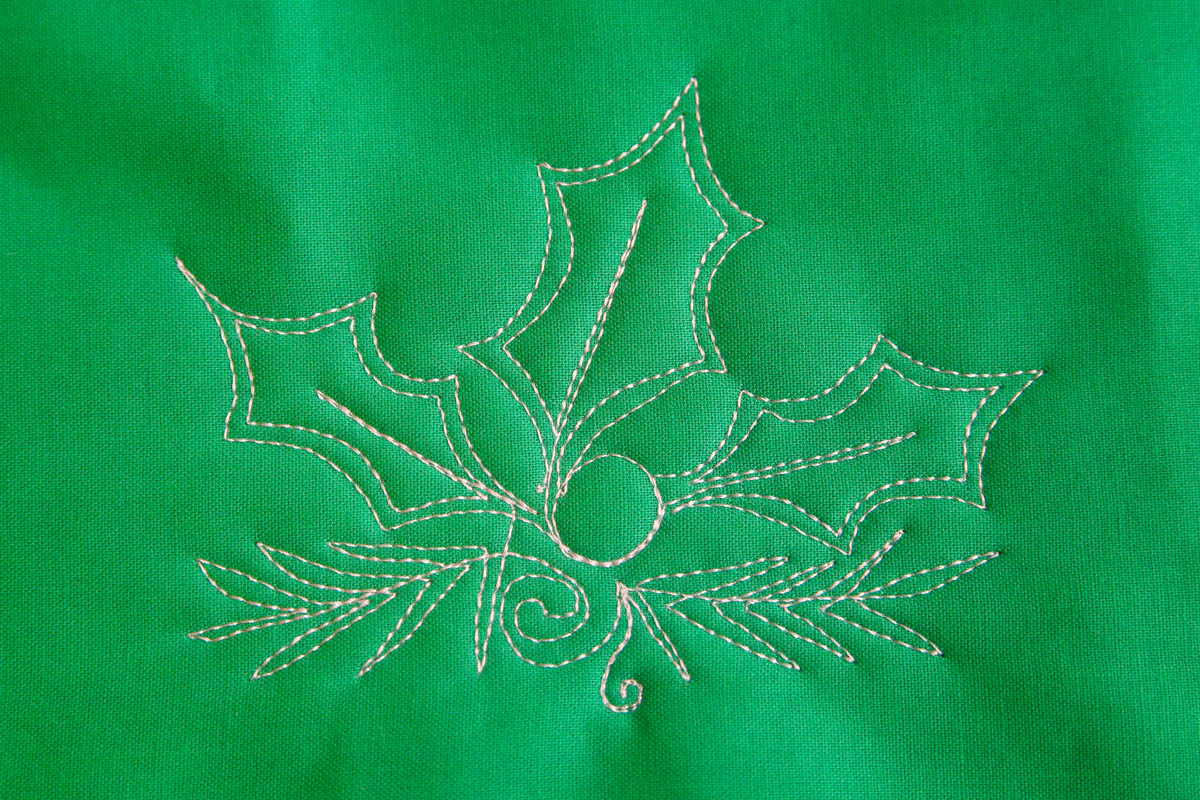
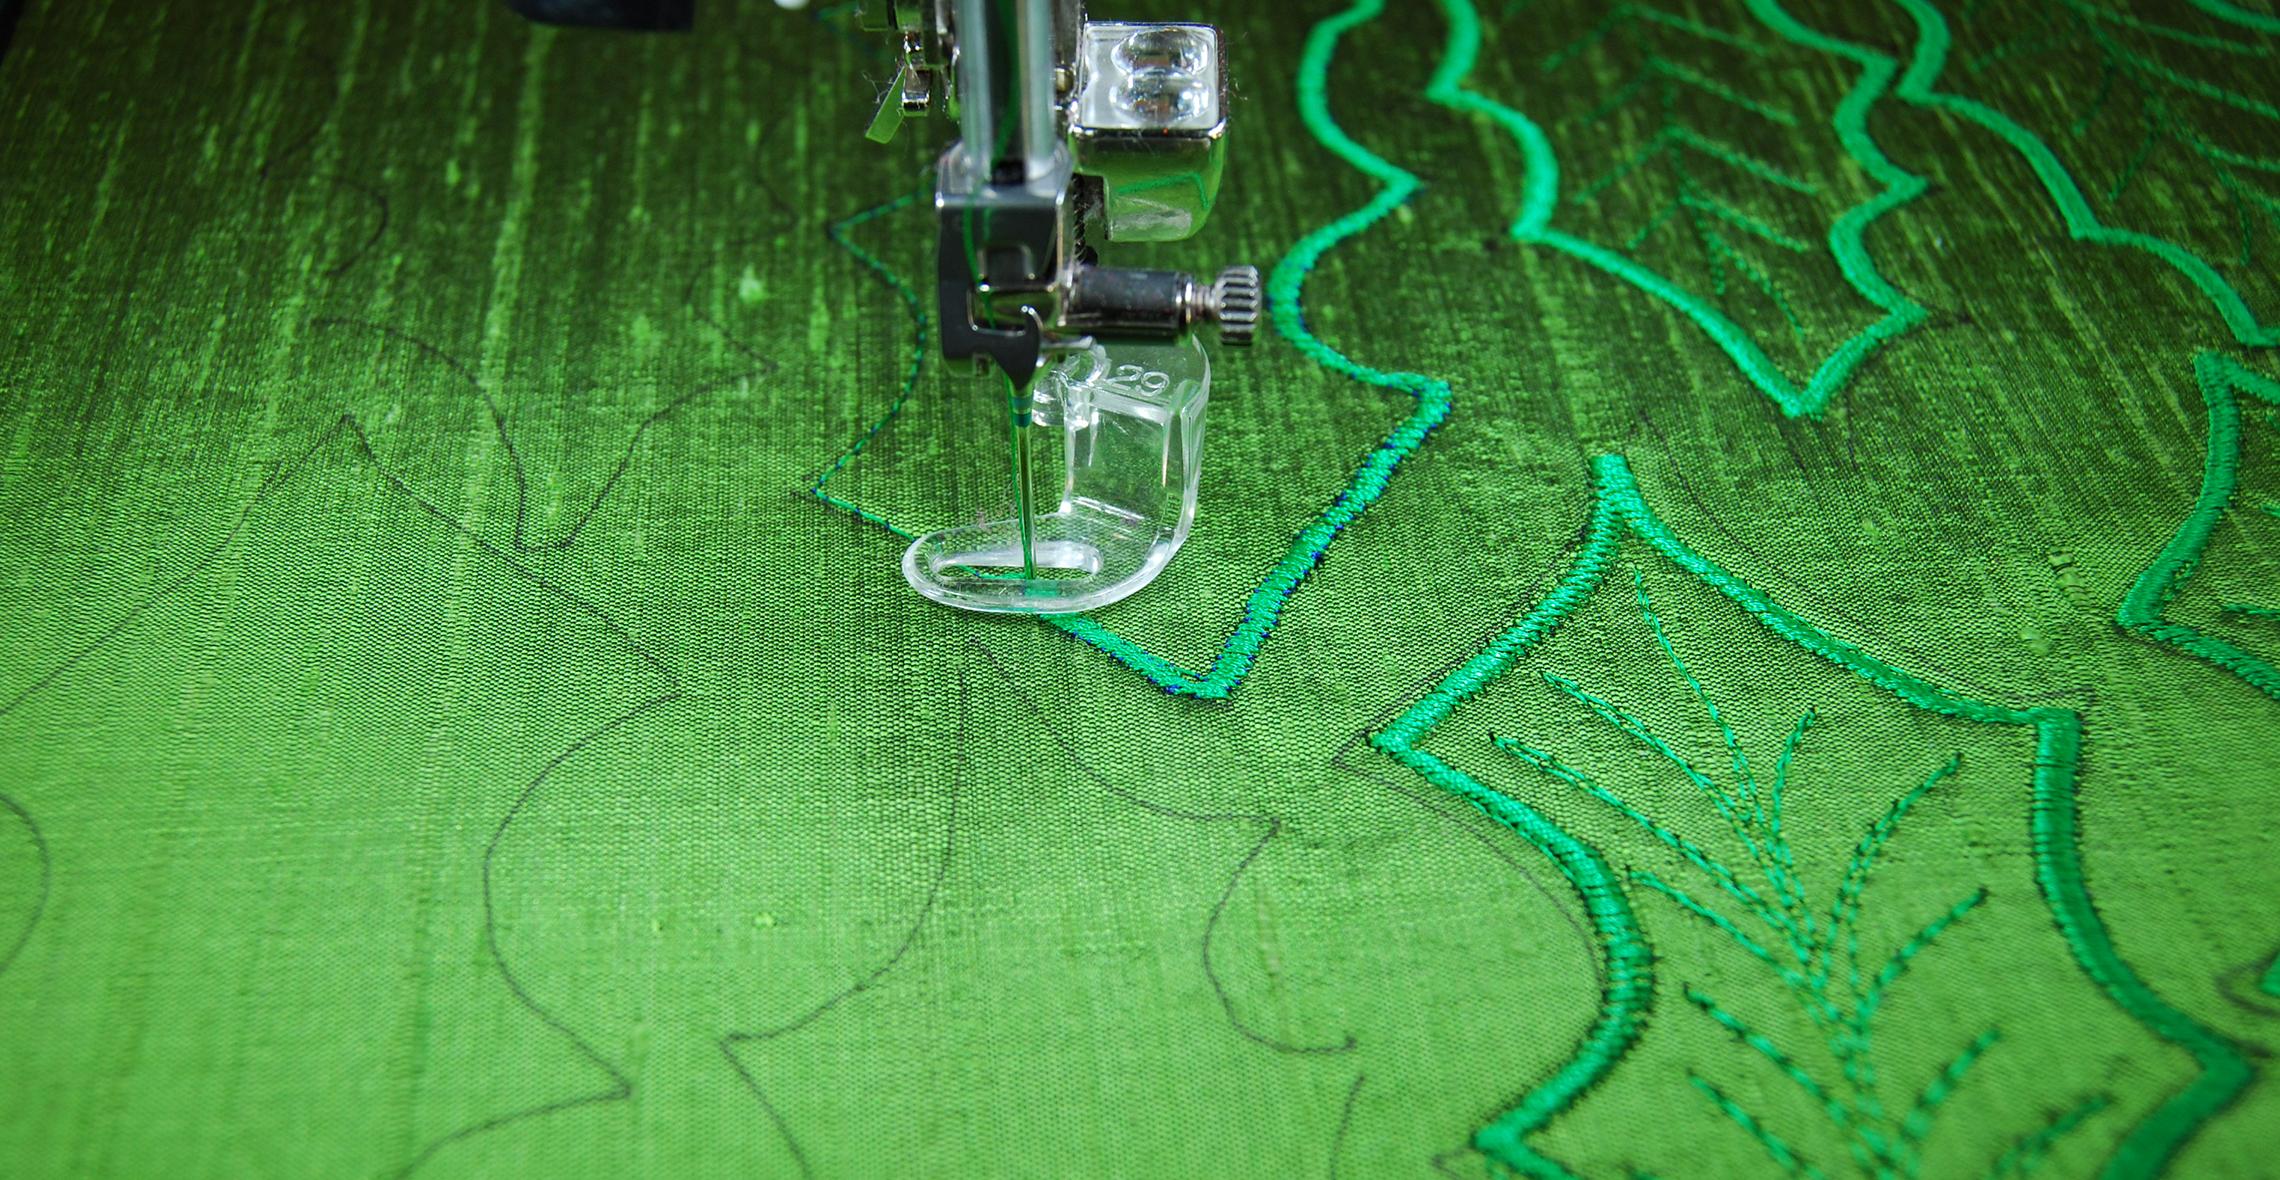
Begin the Holly leaf by stitching scallops.
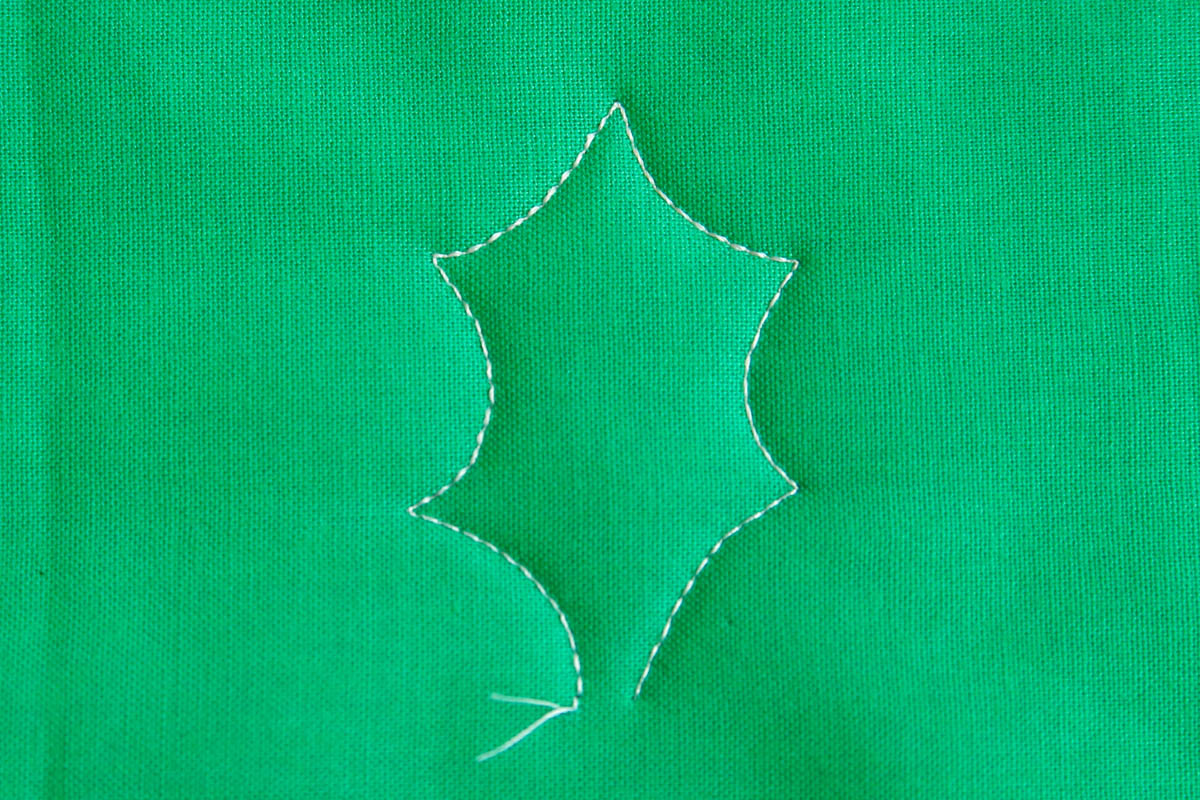
Stitch the right side of the leaf by mirror imaging the first side. Leave a slight gap at the base of the leaf to exit later.
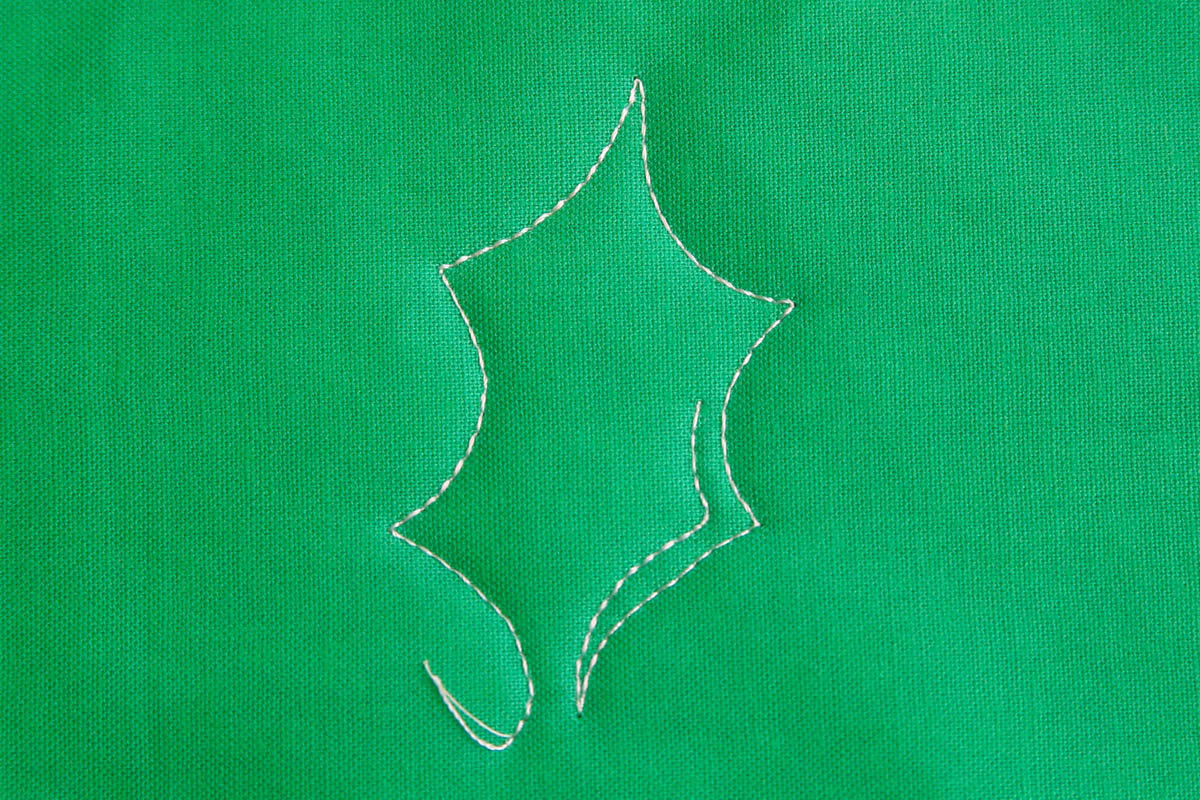
Begin echo stitching the inside of the Holly Leaf.
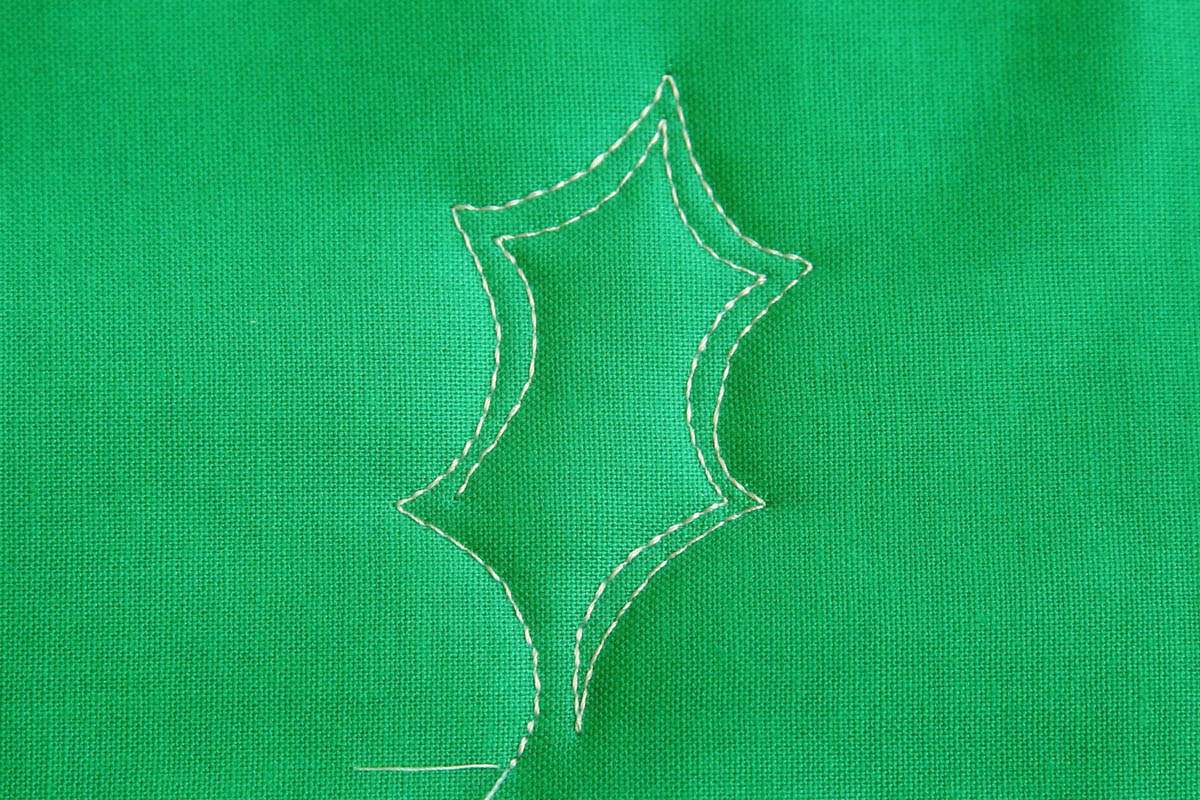
Continue around the inside of the leaf.
When you reach the base of the leaf, stitch into the center to create a vein.
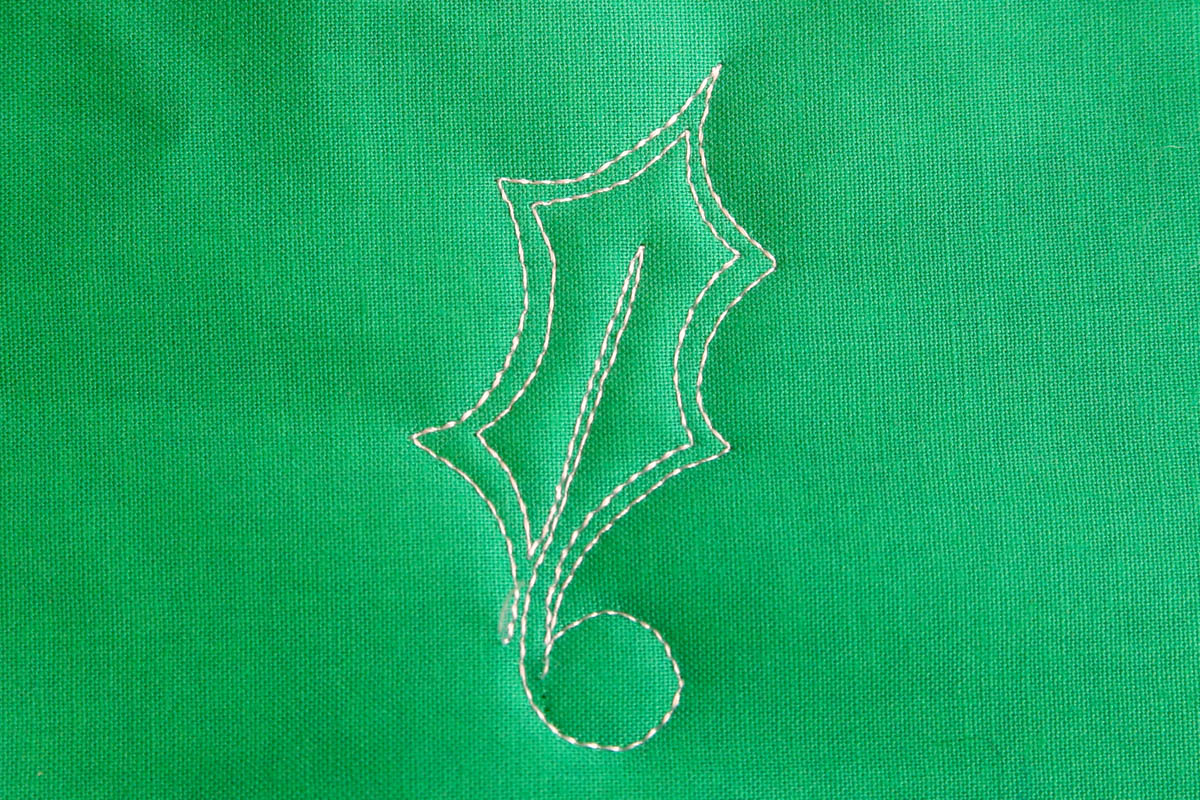
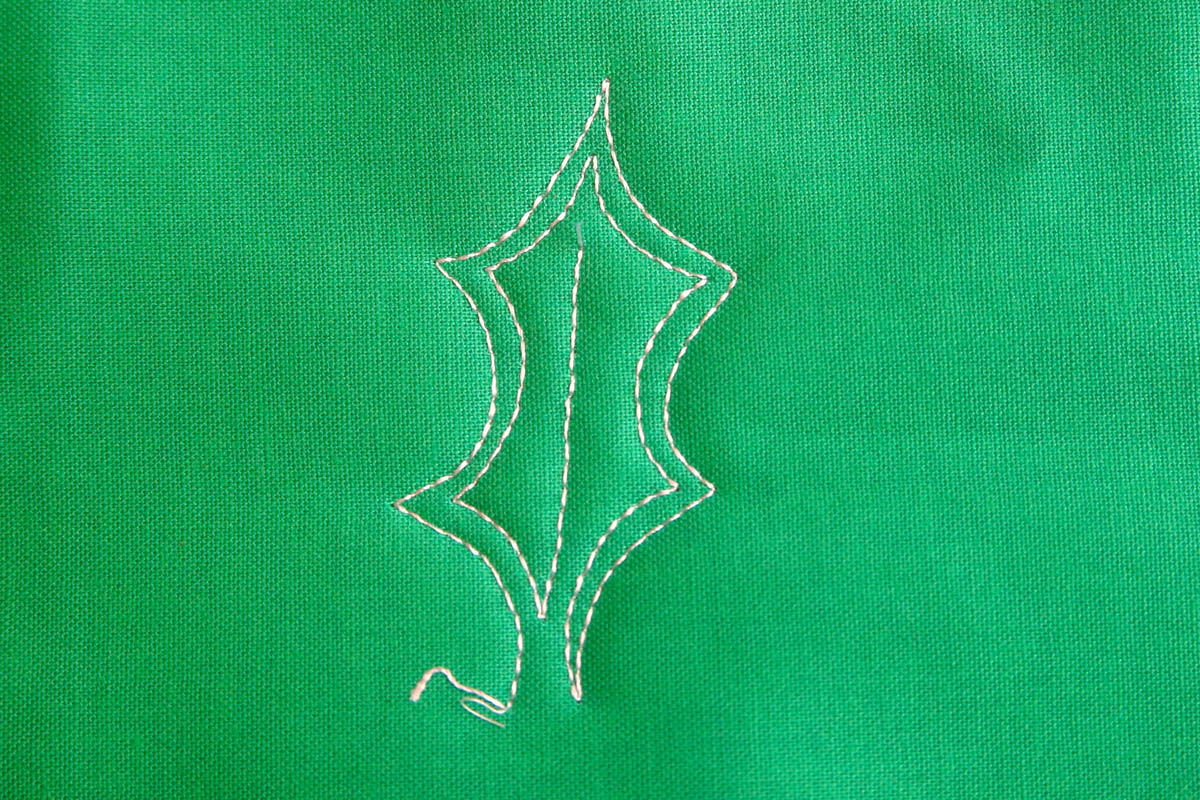
Closely echo stitch the vein and out the gap at the base of the leaf, adding circle berries before adding another Holly Leaf.
If you are creating a border, stitch through the center of the leaf instead of echo stitching back to the base of the leaf. Continue through the tip of the leaf to add berries or swirls and then add another Holly leaf.

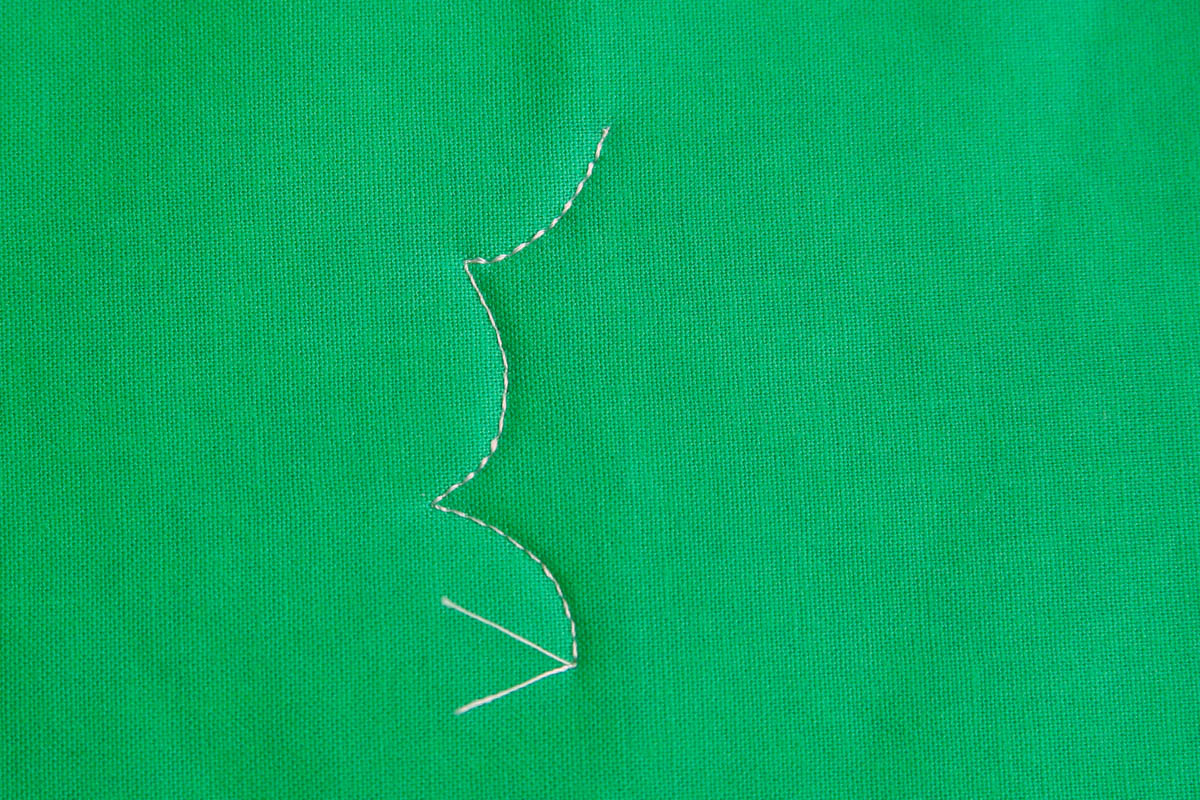
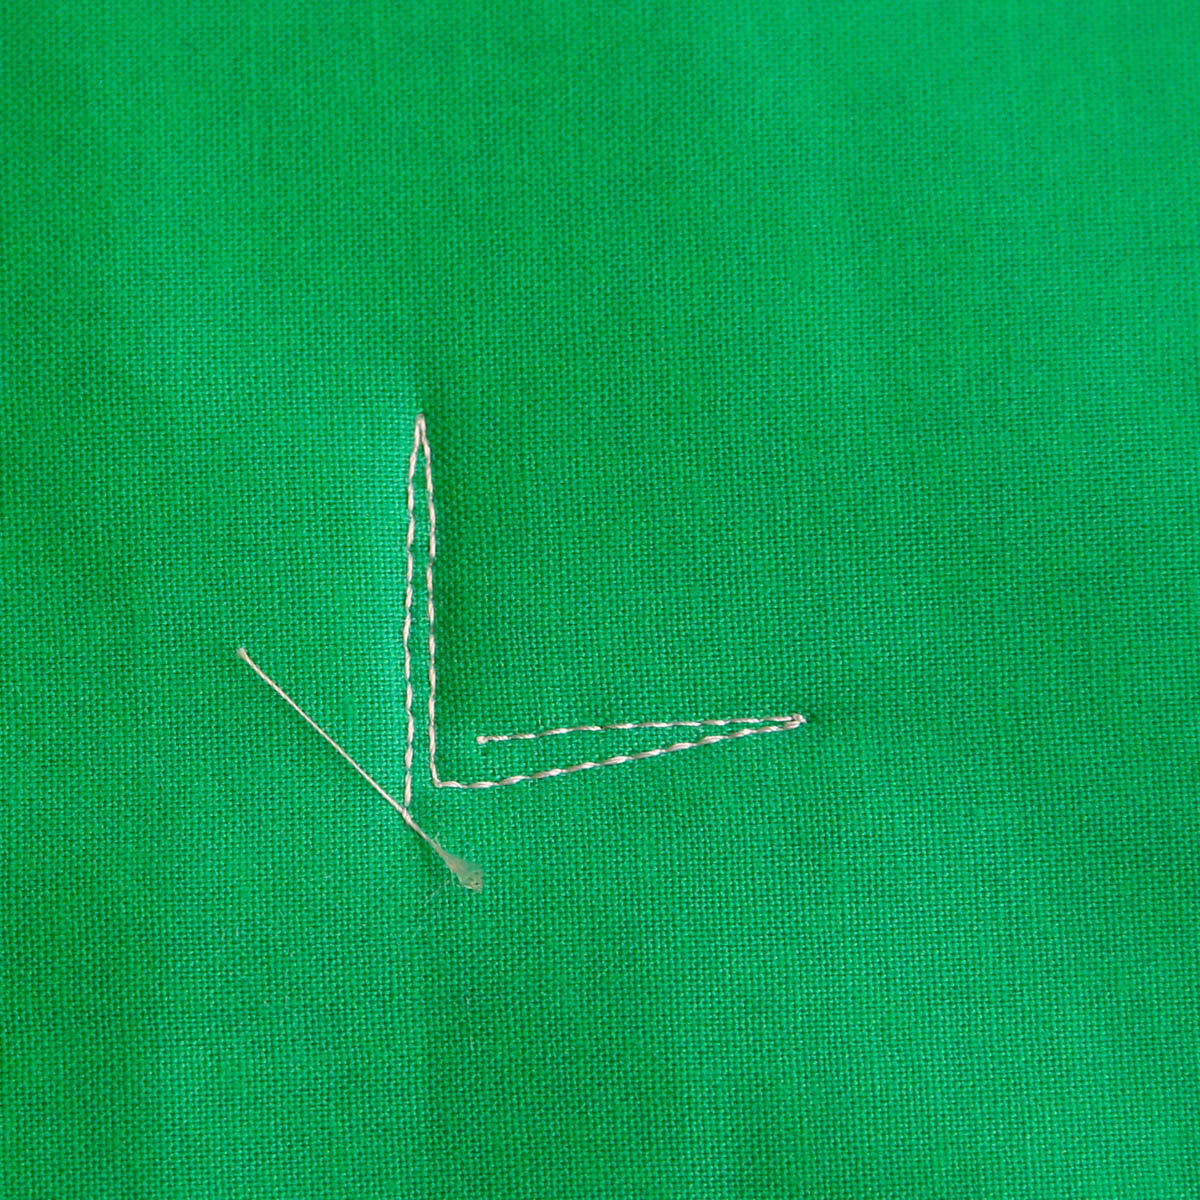
To stitch the Pine Bough, stitch a short straight line and echo stitch back.
Stitch another short line to the right and echo stitch back to the center.
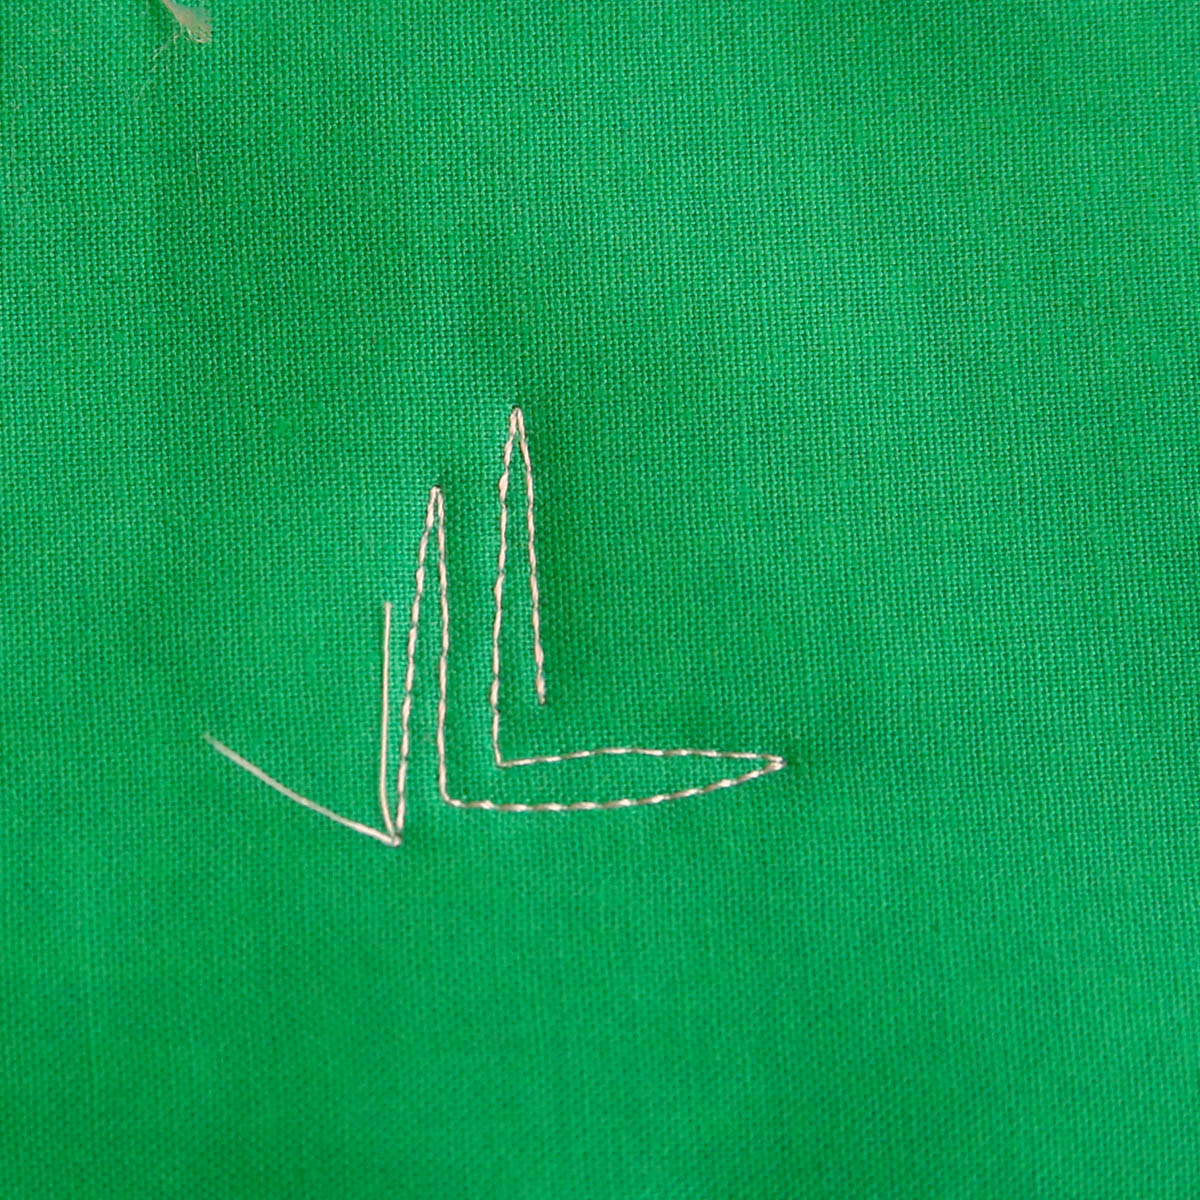
Continue stitching short, echo-stitched lines, alternating sides.
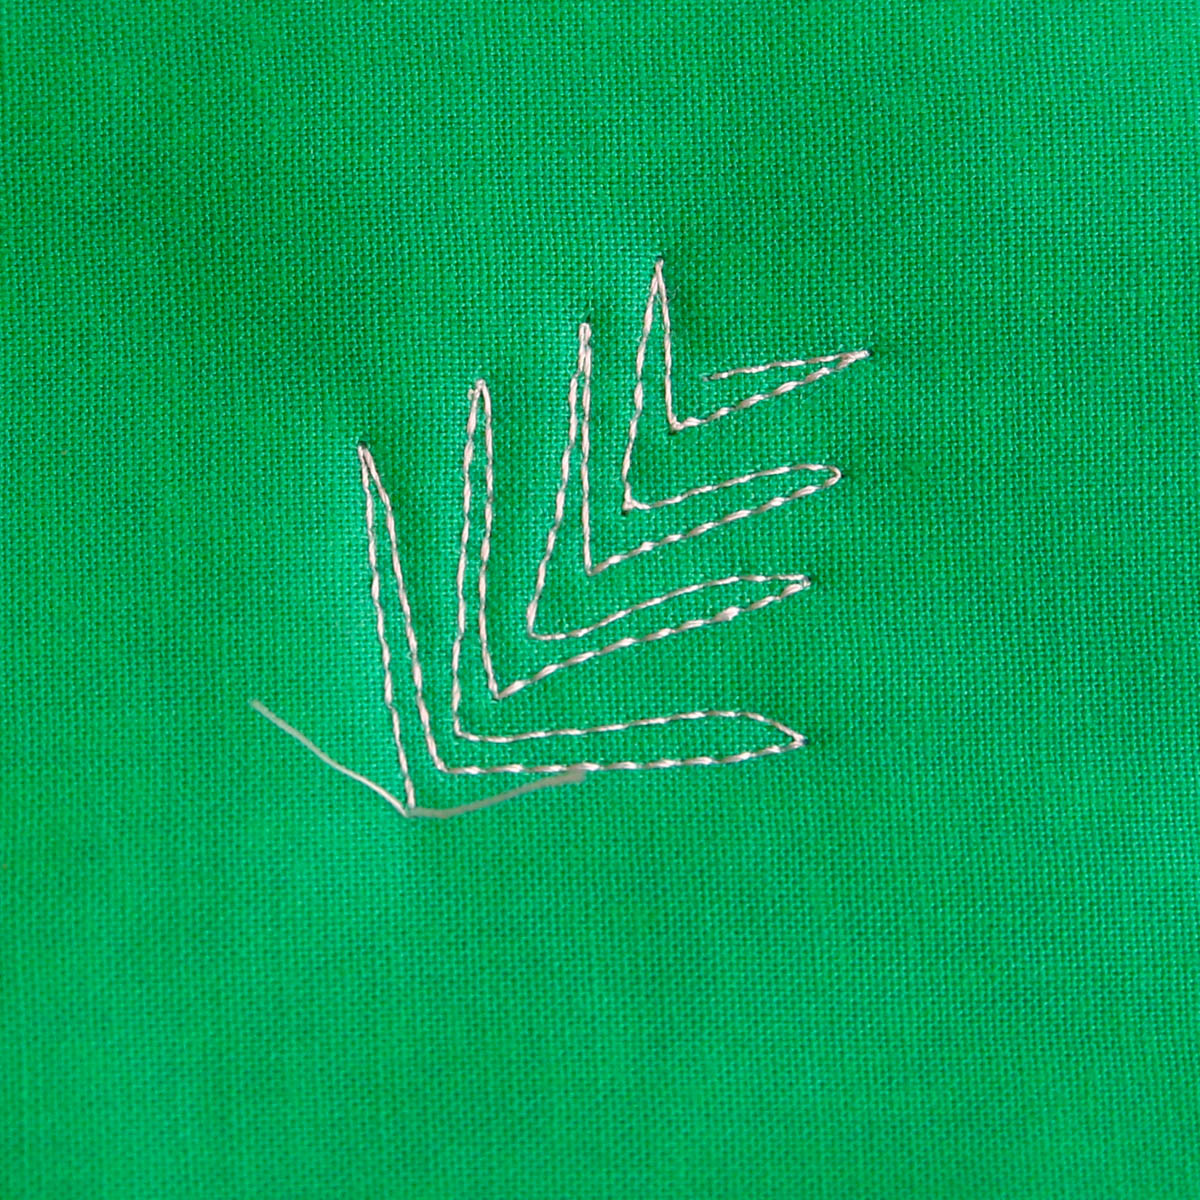
As you progress, stitch shorter lines so the bough tapers at the tip.
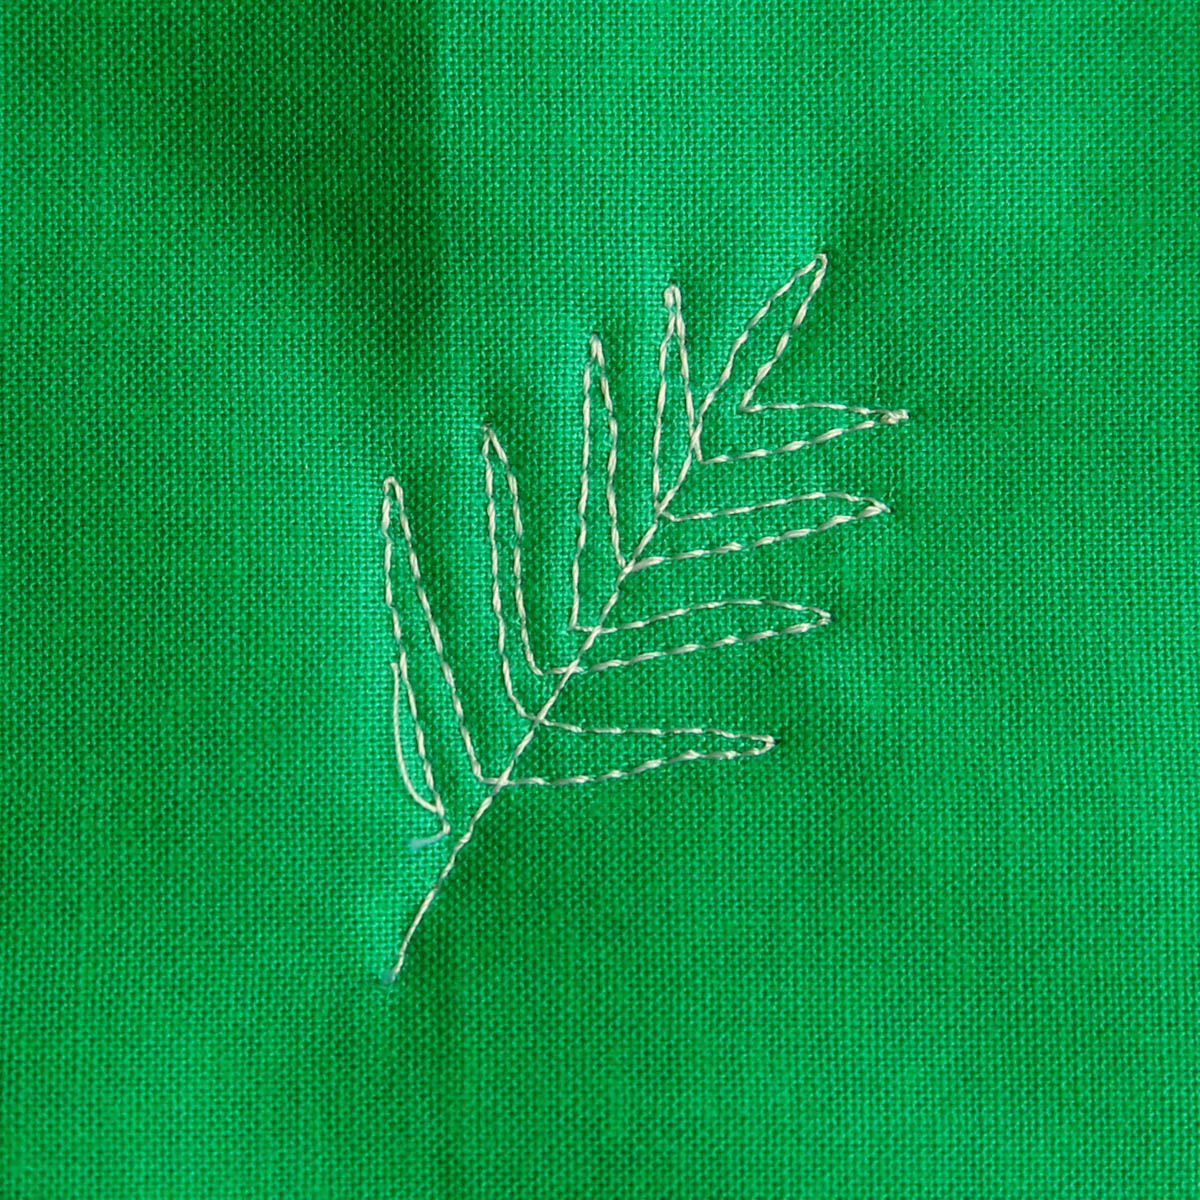
At the top, stitch a single straight pine needle, then stitch through the center of the motif and back to the base of the Pine Bough to begin the next motif in the design.
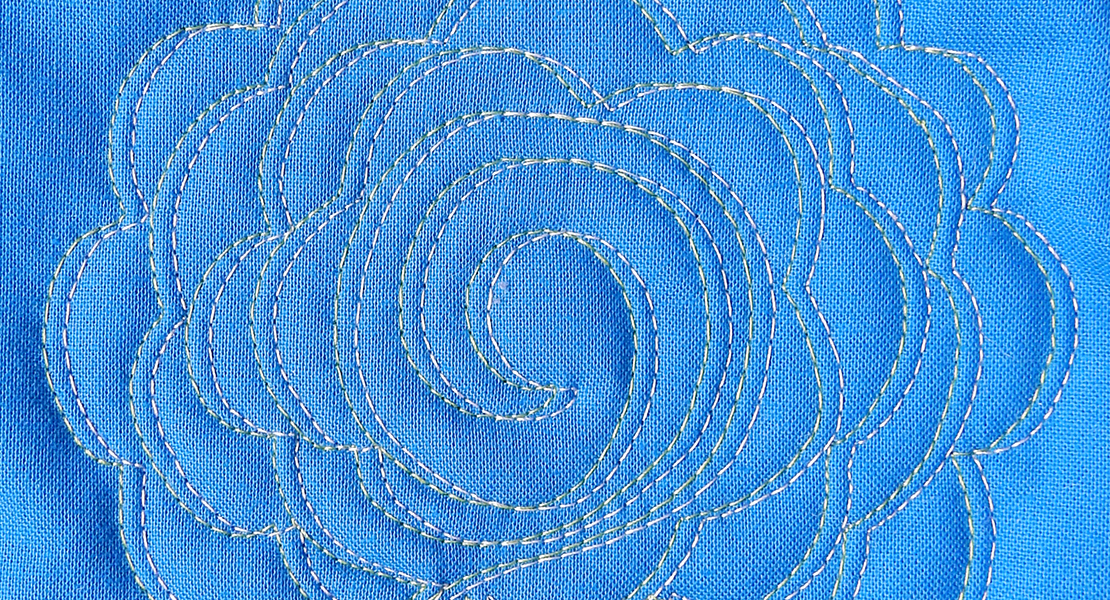
Combine Holly Leaves, Berries, Spirals and Pine Boughs to create a beautiful design element for your next project.
For more machine quilting motifs, tutorials, and inspiration, visit me at www.theinboxjaunt.com.
Merry Christmas!
Lori Kennedy

Our December 14 Gift for You:
Today’s gift is a BERNINA seam ripper and tape measure to one awesome WeAllSew fan.
All you have to do is post a comment below answering the following question:
What free-motion technique would you like to learn?
A winner will be chosen at random on December 15, 2016 and announced the following week!
Good luck!
The contest is open for comments until December 14 at 12:00 midnight Central Time. Click here for contest rules.
Used Products


What you might also like

77 comments on “Free-Motion Quilting Pine Boughs and Holly”
-
-
I also would like to learn this. I want to quilt a stone house.
-
Probably anytime a technique would be good since I’m not much of a quilter
-
-
I’m a beginner and haven’t done any free motion quilting so I need to learn the basics.
-
Thank you for the step by step tutorial. This holly and berries is a free motion technique I’d like to practice and learn as well as couching while doing free motion.
-
I would just like to feel more at ease doing free motion quilting!
-
Wonderful tutorial!! I am fairly new to free motion so I am not sure what techniques there are to learn ; ) I am happy to learn anything! Thanks for the chance to play : )
-
I’d love to learn how to stipple.
-
I dont know any free motion techniques! Maybe something like pebbles or abstract flowers.
-
I would love to be proficient in the paisley and tear drop free motion designs that I have seen.
-
I am so new to quilting. Just learning really. I guess I should start with some basic technique. Will be checking out my local quilt shop for a class.
-
Any that I could actually do! I’m not at all artistic, that is what they make patterns for!
-
I think I’ve mastered vines and leaves but beyond that I still struggle with a smooth consistent stitch. Feathers are okay but flowers and sharp images are a struggle.
-
I would love to learn embroidery and quilting. Although doing free hand rustic appliqué would be nice also!!
-
I hope look at enough “how tos” from Bernina to take a leap of faith and just try free motion anything.
-
Long arm free motion.
-
I would love to learn a border design of several different Christmas trees
I am hooked on Lori Kennedy’s blog on free motion quilting, I read it daily And have learned so much! -
This post makes it look so simple, that I want to give it a try and create my own holly leaf motif.
-
I love Lori Kennedy’s free motion quilting. She breaks it down into easy components. I would love to become
more comfortable with free motion quilting. -
Any! I am a beginner in this area!
-
Feathers – I just can’t seem to stitch them correctly.
-
I’m just learning how to free-motion quilt, so I’d be happy to learn anything new!
-
Would love to master free motion feathers.
-
What FMQ technique would I like to learn?
Through Lori’s blog lessons I’ve become pretty good with doodling and quilting on small projects. Larger projects are a problem. I’d like to learn how to handle the bumps and slowdowns crossing seam lines causes. I get bogged down and lose the rhythm. Some help would be appreciated. -
As an artist, I have been able to use my sewing machine as my drawing tool. I aught myself thread painting & free-style quilting & use these techniques quite a lot in my art quilts.
-
ferns and feathers
-
I would like to learn the technique of switching direction when free motion a simple design. Thanks.
-
I would like to learn to do free motion embroidery to be able to decorate things like towels and fleece blankets.
-
I’d just like to learn how not to twitch at the wrong moment.
-
I’d like to have the confidence to draw easy basic patterns.
-
I would like to learn how to freemotion a grid without having to stop/start or back track over so many previos lines of quilting.
-
I would like to have more tips for smooth transitioning of basic patterns.
-
I’m a FMQ beginner, but I’d really like to make my stippling look nice and even, and also learn how to micro-stipple.
-
I also would love to know how to transition between patterns and how to quilt with a high density.
-
Love to practice free motion. Great tutorial!! Thx.
-
Love to practice the free motion with an open toe do that I can see where I am going. Good tutorial. Thank you.
-
I’d like to get a ruler foot and some rulers and try that technique.
-
I’d like to try the rulers also…maybe Santa will surprise me with #72 and rulers!
-
-
Thank you for tutorial. Really pretty. I need some practice.
-
I am an absolute beginner with fmq so I need to learn it all! 🙂
-
So far, I’ve only done stippling and swirls, so I’d love to learn to do recognizable objects like this, though my next step is probably pebbles.
-
I can hardly wait to try this. I am so ineffective with FM that my New Year’s resolution it to practice , practice, practice. Especially since I have a quilt I made, that needs to be quilted, and it will just be used at my house for “tummy time” for grandchildren.
-
Feathers, Feathers, Feathers. I’m trying to practice them every day, but sometimes I only see teardrops, and at other times, they are looking pretty good. When does the consistency kick in?
-
I need to learn the basics
-
I am a beginner so I desire to learn them all but feathers really intrigue me the most.
-
Lori always has such cute creative designs. I want to learn them all!
-
Everything. I know that sounds odd but I am a beginner and haven’t attempted any free motion techniques at this time. I feel my dealer didn’t really explain enough about this technique to me when I had my short lesson on this.
-
I would like to learn how to do border and sashing designs.
-
I would love to become proficient at feathers. Mine are not uniform unless I use a template or mark them first.
-
I’d like to improve the flames or waves. I don’t make many wall hangings and like the quilts to be relaxed, draping softly. Seam rippers are never far away from me. Never can have enough of them.
-
Feathers! Spirals!
-
I love FMQ the best! I could use an all-over snowflake or one for a border. This holly is great!
-
I am just learning, so any free motion quilting exposure is great!
-
I love all the zentangle patterns. It would be fun to learn the basics to create something so unique.
-
I would like to learn how to stitch feathers to fill in borders or other open spaces.
-
I would like to have more uniform stitches.
-
how to evenly space a design such as feathers
-
I’m just learning so I need a lot more practice still with the basics
-
I am fairly new at FMQ but am so enjoying the learning process! I recently began learning to make feathers. I have a ways to go but want to become proficient. I want to eventually be able to design and make a whole cloth quilt.
-
I have been experimenting with free motion quilting for the last few months. I would like to be better at feathers and learn
how to do pebbles -
All over designs
-
I am petrified of free motion quilting…..to the point I won’t even try it. I have had a BSR for many years and have still not attempted. Your demonstration makes it look easy, maybe I will finally have a go of it.
-
I want to learn pebbles or bubbles, circles. Thank you.
-
I would love to learn how to quilt feathers… my favorite!
-
Actually, I want to learn this! I am going to be looking for some fabric scraps tomorrow to practice with. I used to draw holly and red berries on letters many years ago, but somehow never thought of stitching them.
-
All of them. I just got a bernina 830 so now I can get started. Love watching your tutorials.
-
Thank you for all of the wonderful instructions and ideas. I would like to learn both the feathers in free motion and ruler work for a domestic machine. I have a QE 750, that I absolutely adore.
-
I think I need some sort of transfer to get all those details in.
-
I would like to be able to free motion feathers. Mine generally end up looking like anything BUT a feather.
-
As a beginner I would like to start at the beginning, and learn how to make the classic feather stitch.
-
I would love to do this motif. I would love to do flowers and wonderful designs like this one. I have rulers and would love to do free motion to connect the ruler work areas. I have a Bernina 770 QE with the #72 foot and not sure of the other feet I have. I am an experienced sewer, but a relatively new quilter. I can do the stitch in a ditch to stabilize the quilt, but have a hard time coming up with designs and the coordination to stitch them! Thank you for helping us learn more free motion quilting.
-
I would like to see free motion patterns that would be good used in sashings and borders.
-
Interested in what I should consider when deciding what design is best. For example, should a very linear quilt be done with a linear design or contrasted with something curvy. Also, what marking tools are best to use.
-
Being fairly new to free motion quilting I like to see all your creative ideas and know I just need to practice, practice, practice.
-
I would like to learn FMQ in shapes of strawberries and their flowers.
-
I want to learn circles on quilts and many free motion patterns.
Leave a Reply
You must be logged in to post a comment.

I would like to know how to make something that looks like a rock or stone wall.