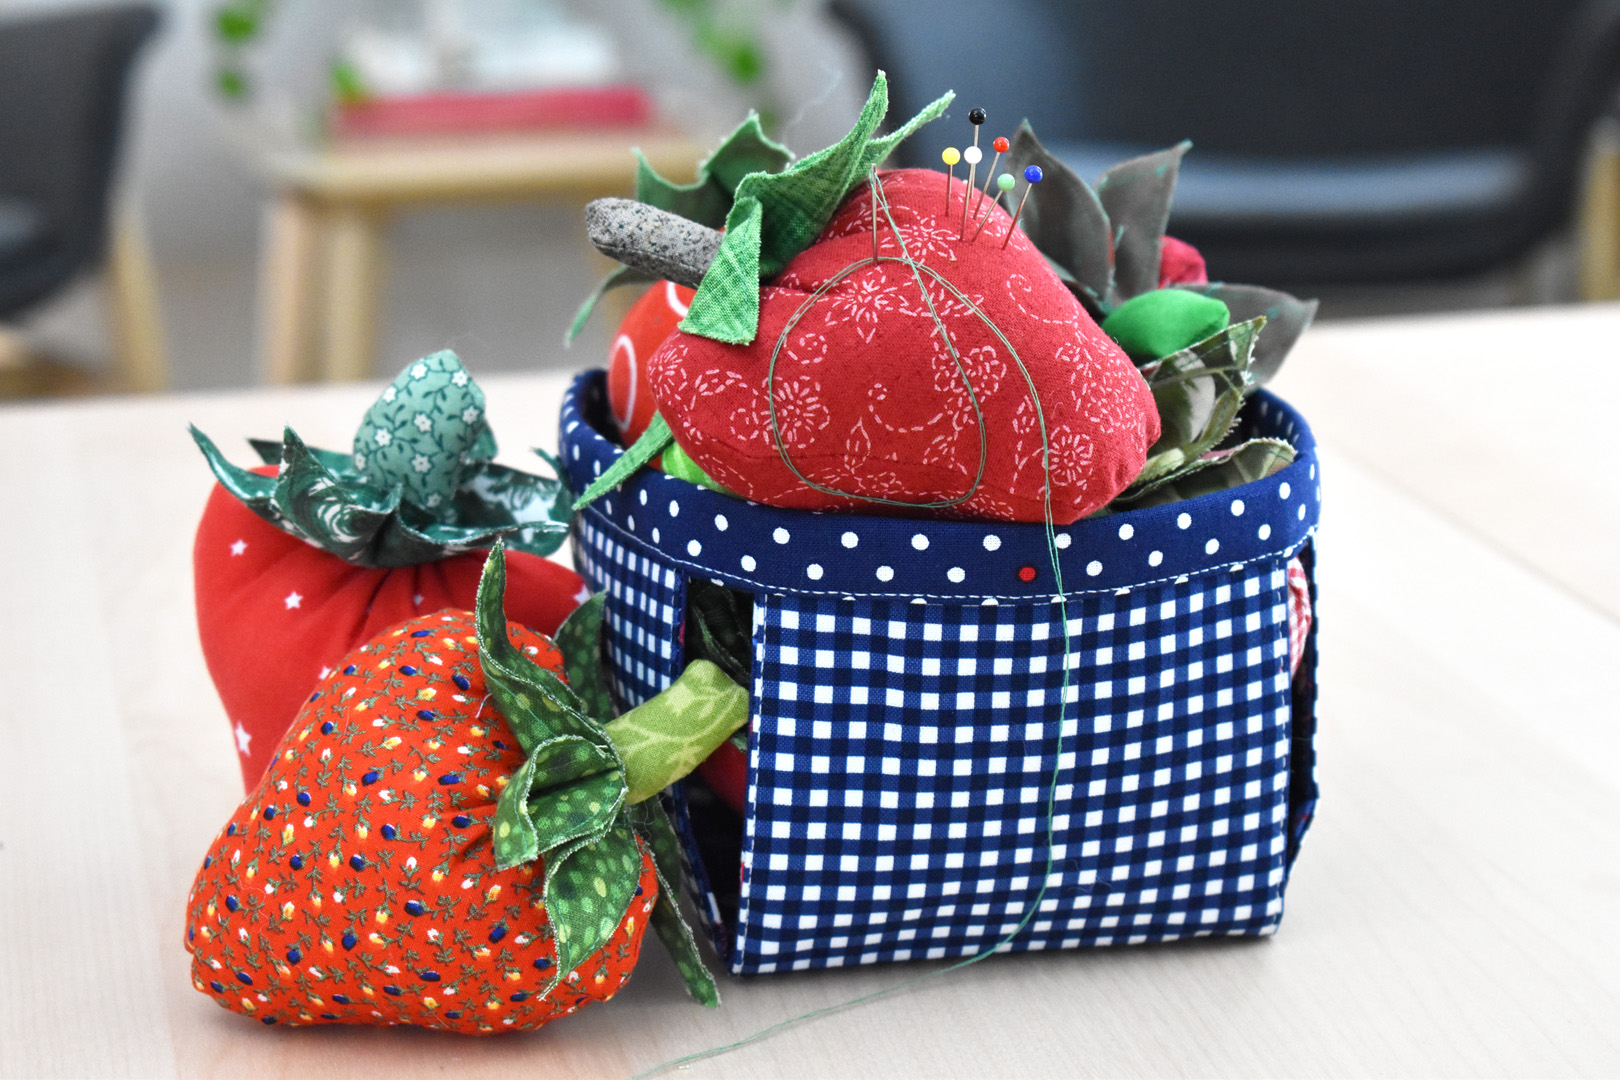
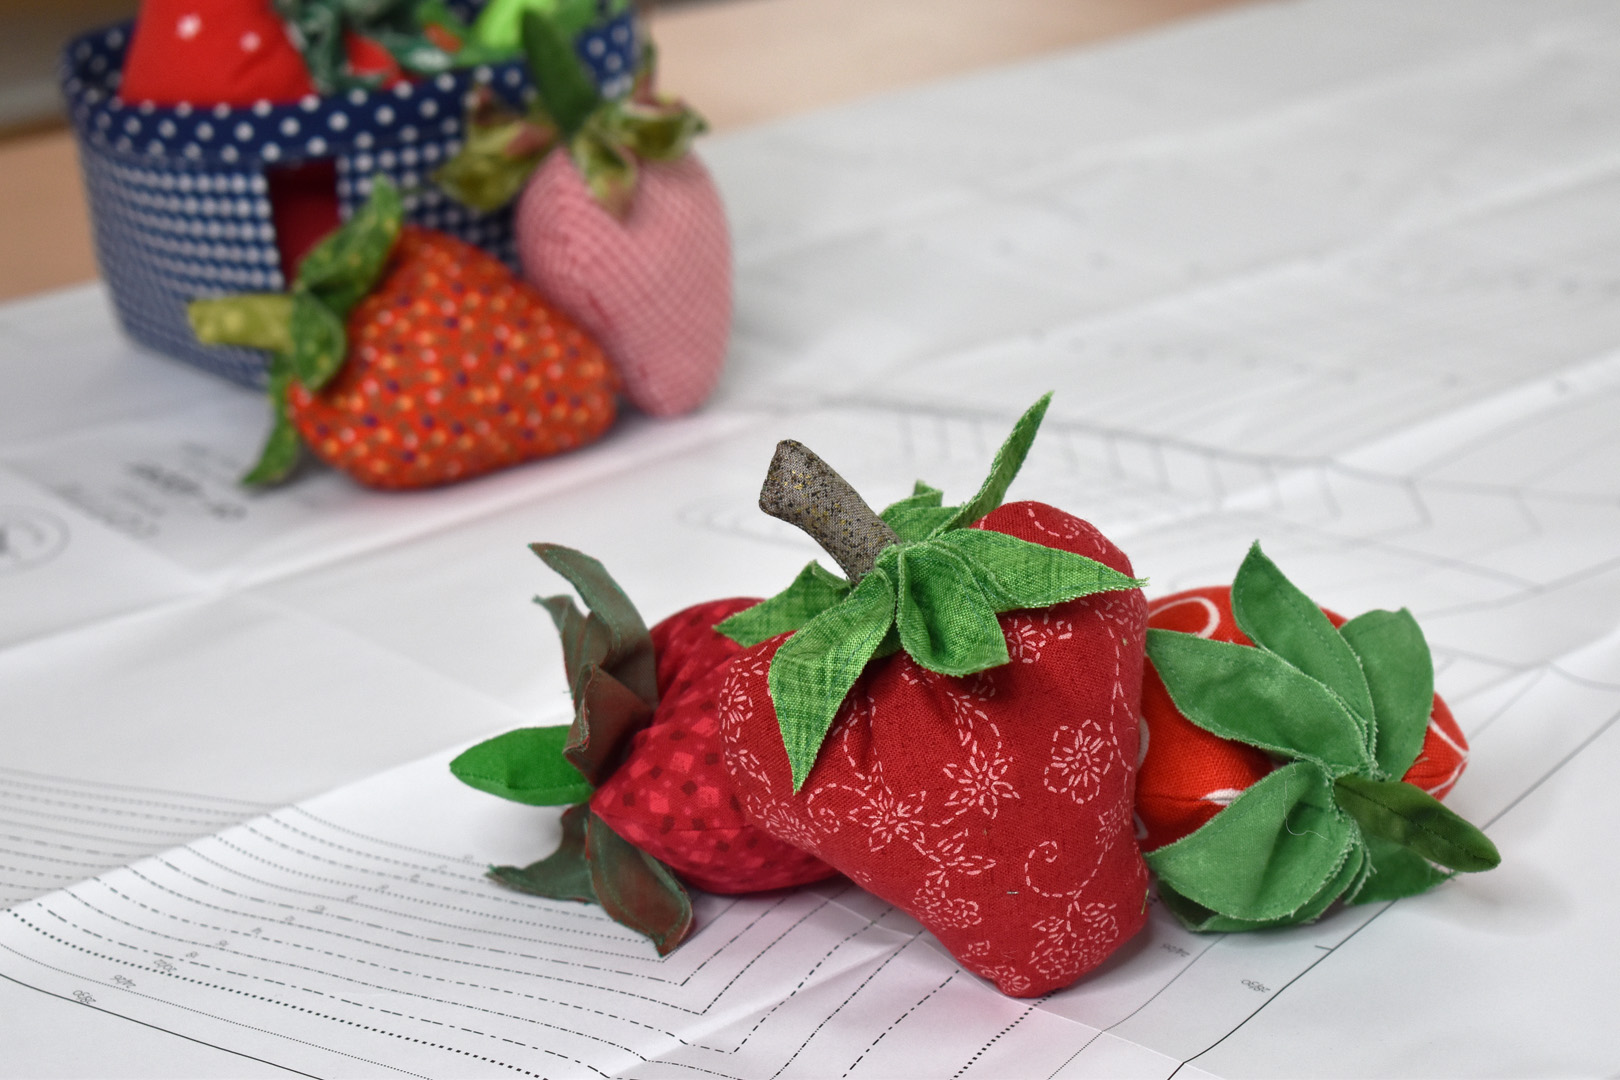
How to Make a Strawberry Pincushion
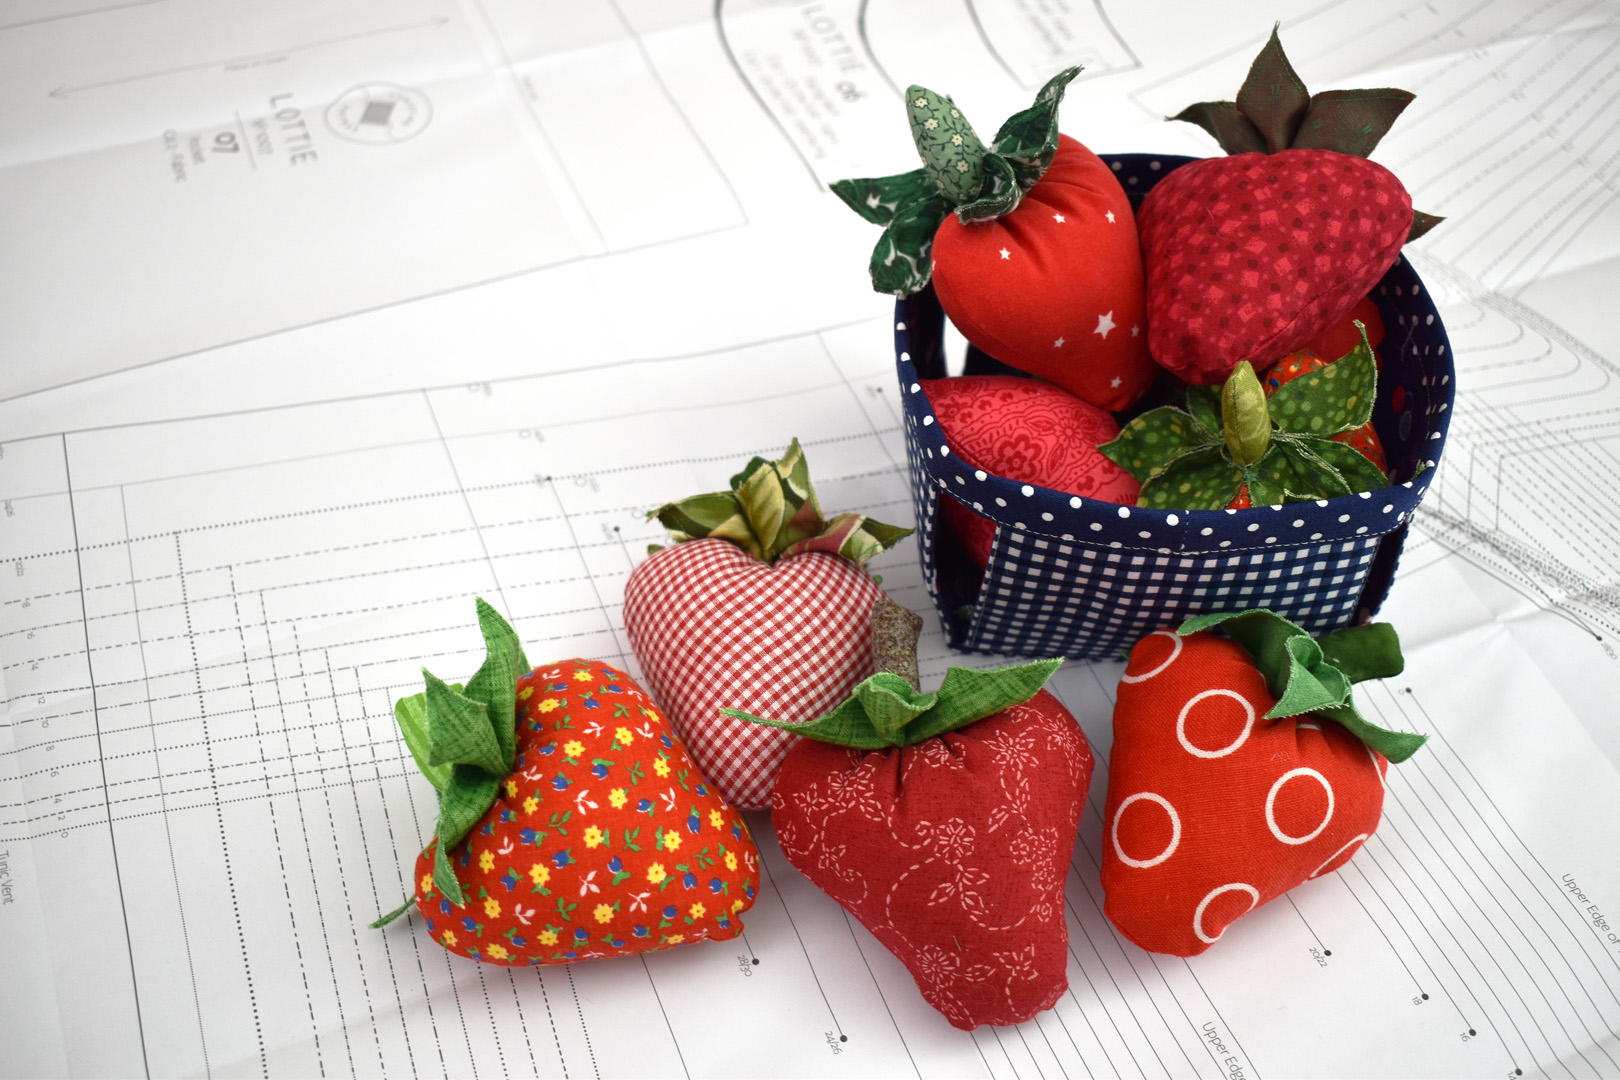
This little strawberry can be a pincushion, pattern weight, or sachet – the secret is all in how you stuff it! Grab a few scraps of red and green fabrics, download the free pattern, and set up your basic sewing supplies to get started.
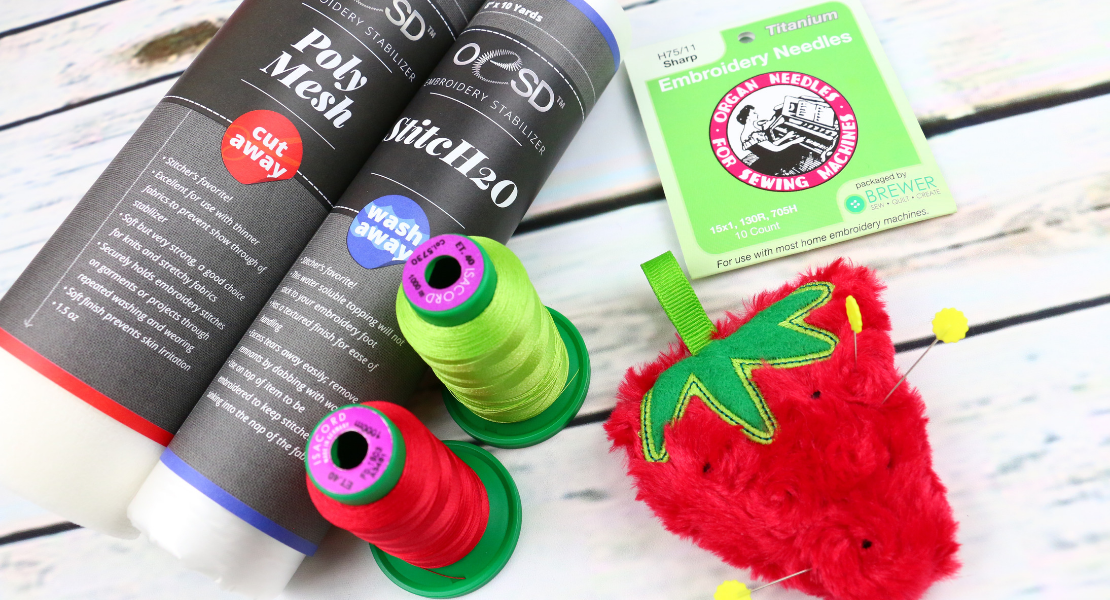
Materials to Make a Strawberry Pincushion
- Download the Strawberry Pincushion Pattern here
- Red and green 100% cotton fabric scraps:
- Two 6″ x 5″ pieces of red for the strawberry
- One 3″ x 4″ scrap of dark green for the stem
- One 6″ x 9″ piece of light or medium green for the top
- Iron and pressing surface
- Scissors and thread snips (pinking shears optional)
- Basic hand sewing supplies
- Fabric glue stick
- Fabric marking pen or pencil
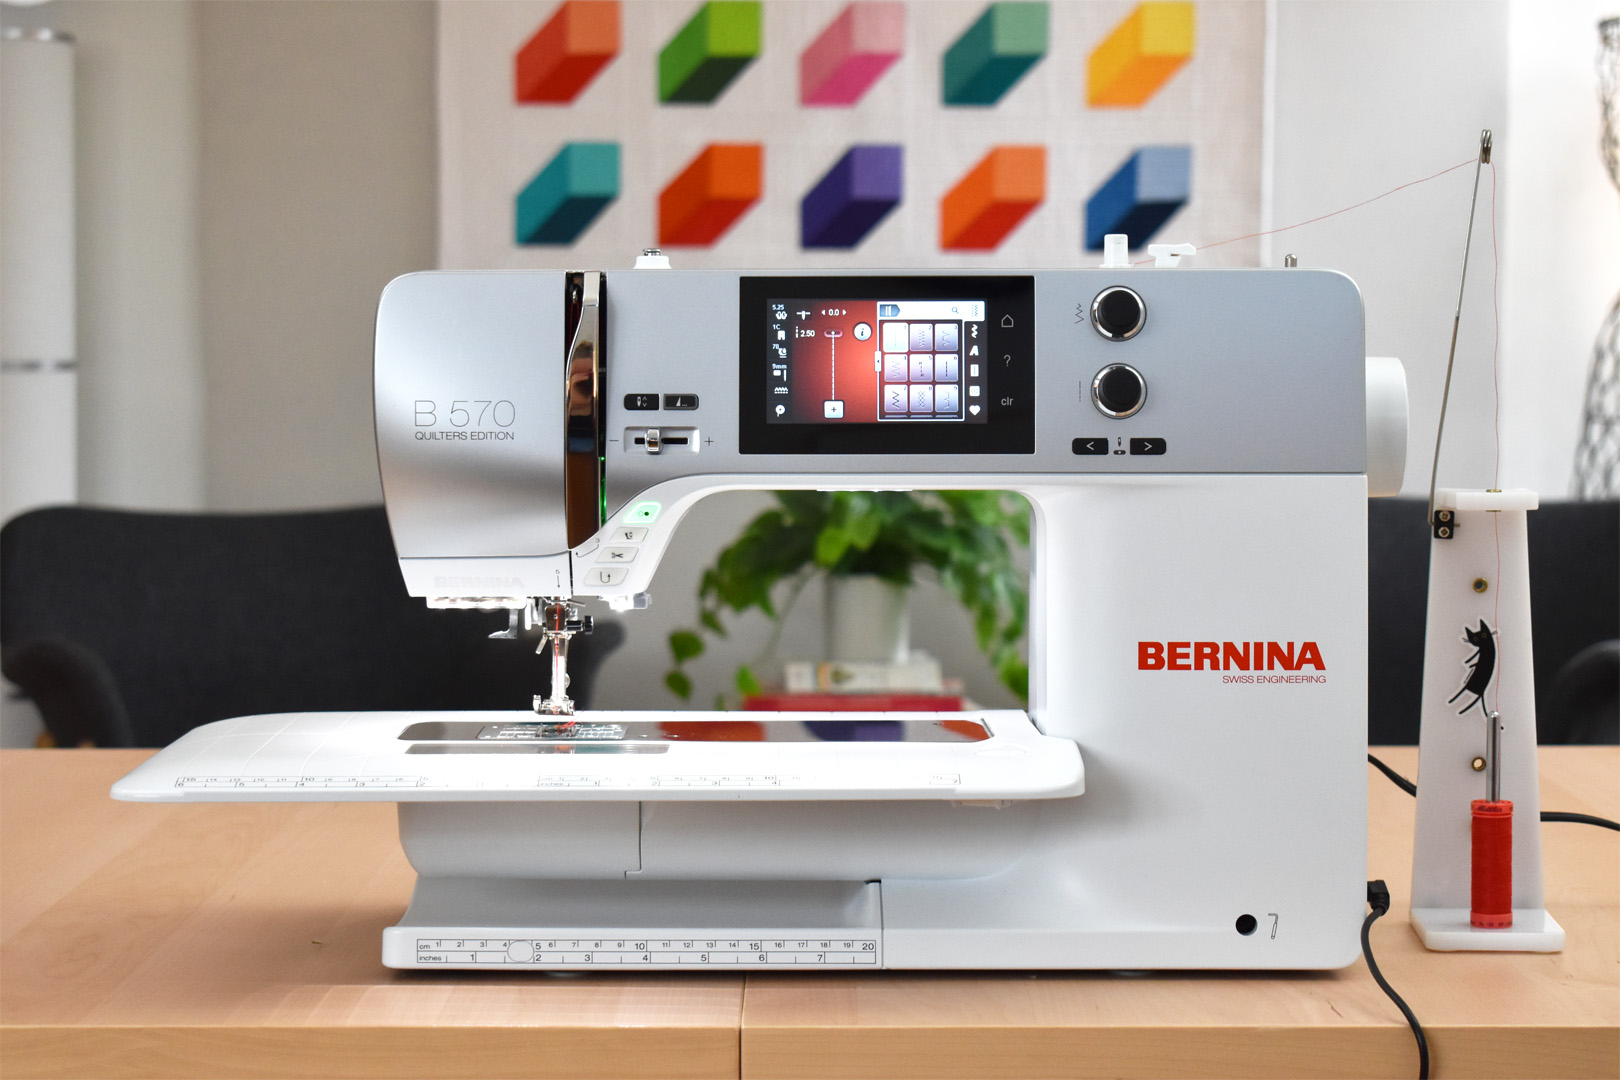
- Sewing machine (I use a BERNINA 570 QE)
- Straight stitch needle plate
- BERNINA Patchwork foot of your choice (I use Patchwork foot #97)
- Polyester fiber fill and stuffing of choice (read more below)

Print the Strawberry Pincushion Pattern at 100%, do not shrink or stretch to fit the page (this will distort the pattern).
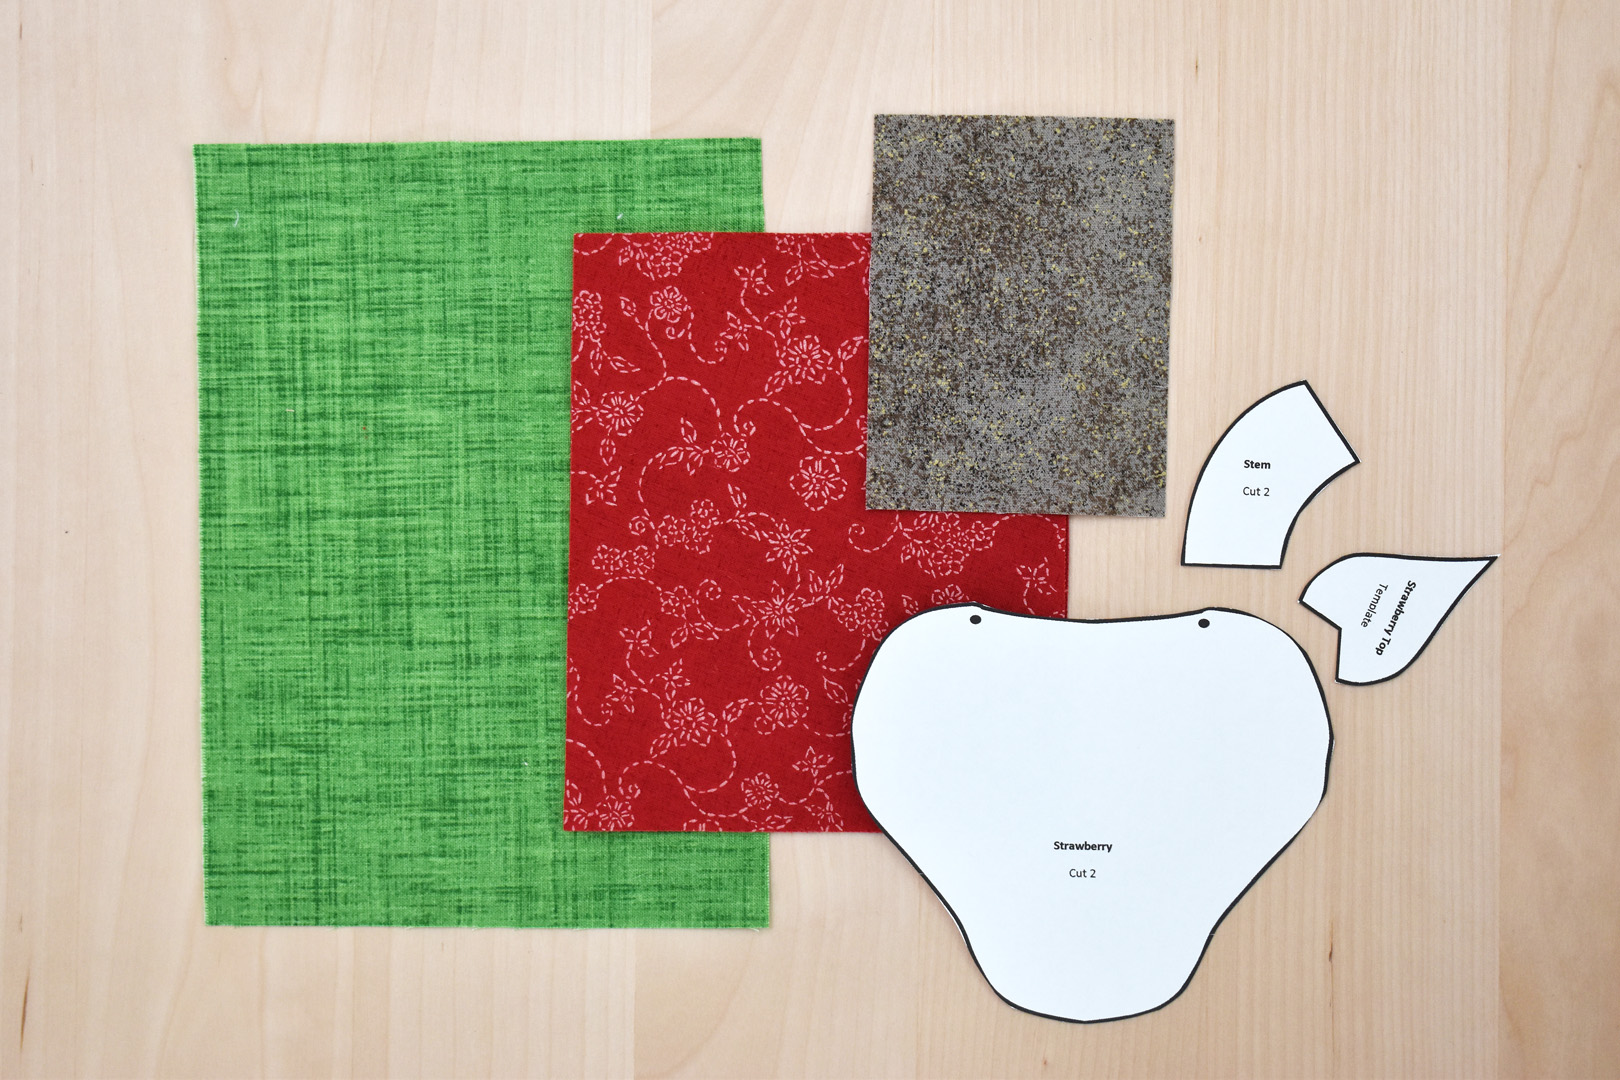
Carefully cut out the three pattern pieces; the strawberry, stem, and top. Cut your fabrics to size according to the materials list above.
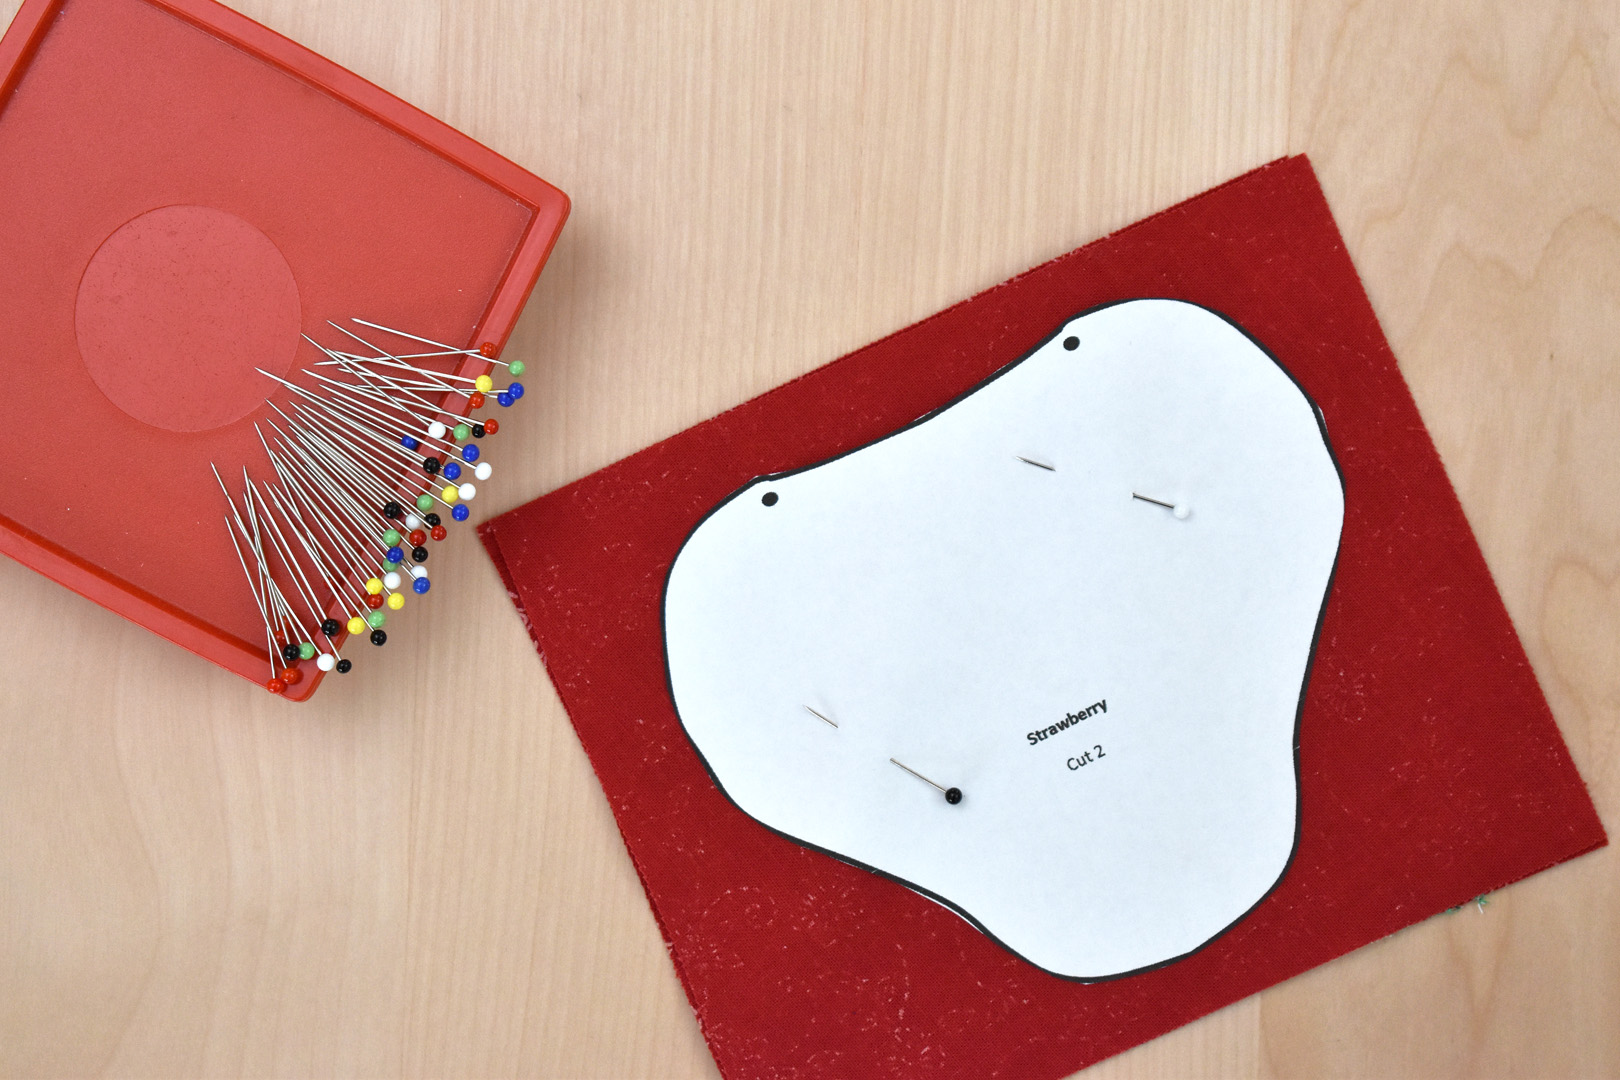
Place the two red rectangles of fabric right sides together and secure the strawberry pattern to the fabric with pins.
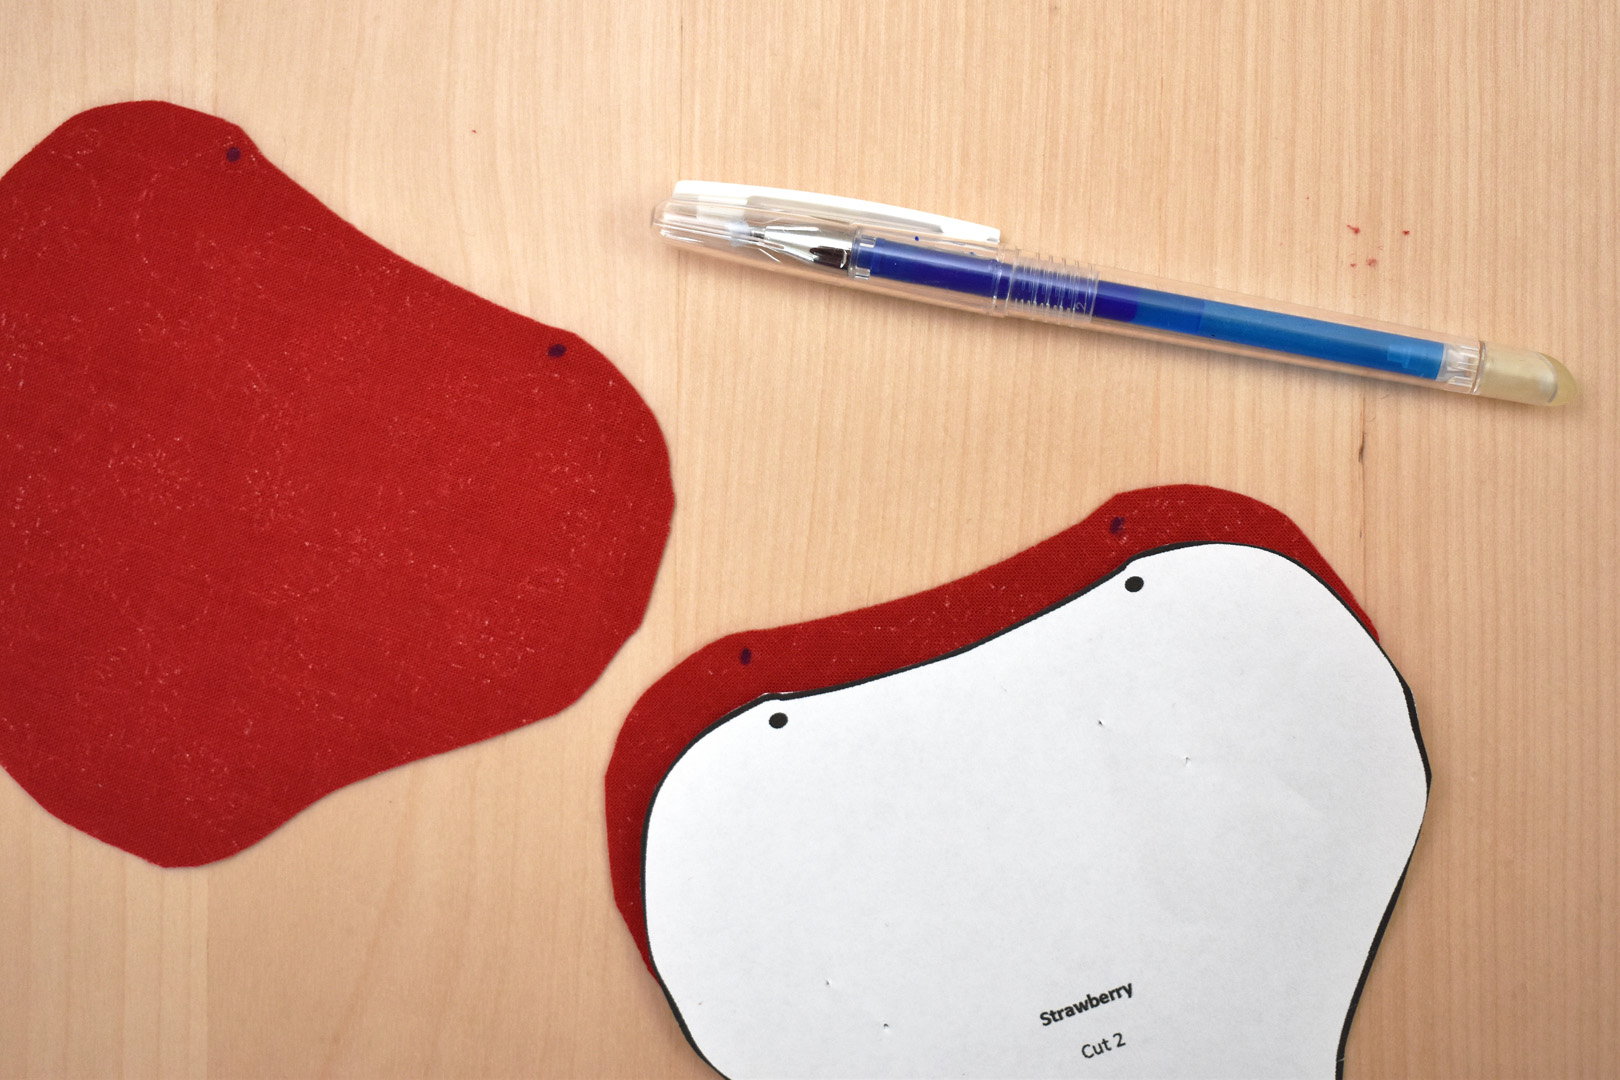
Using a fabric marking pen or pencil, transfer the dots on the strawberry pattern to the wrong side of both pieces of fabric.
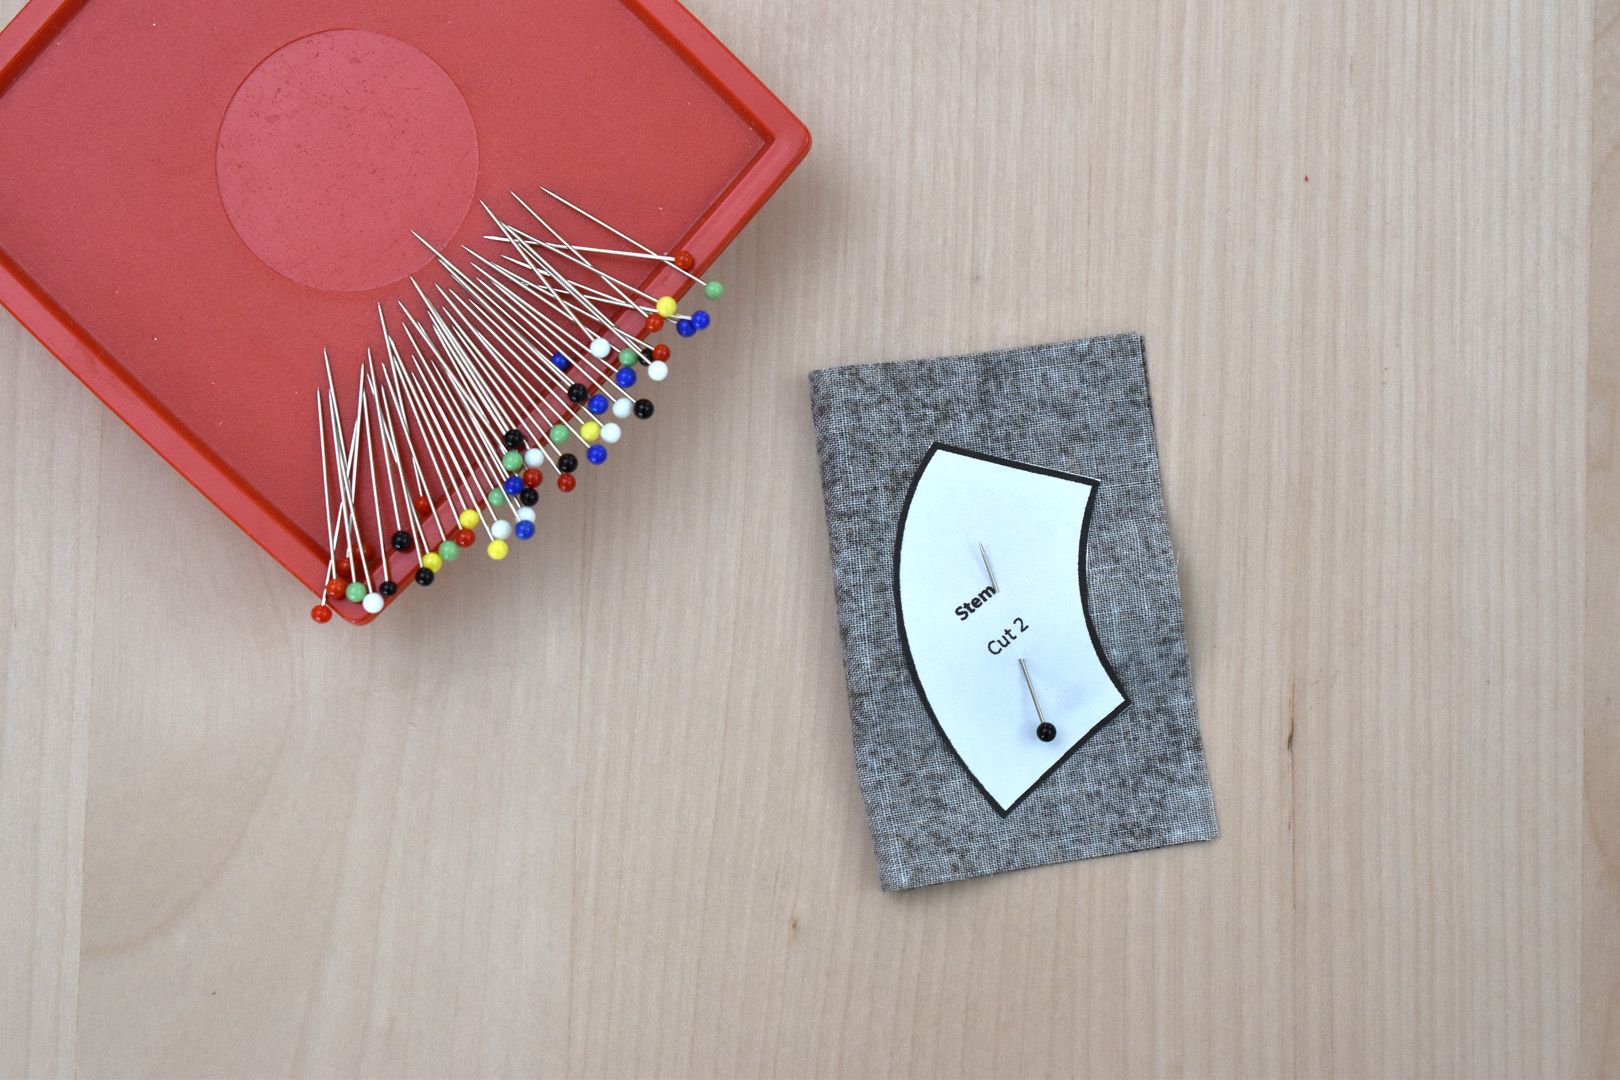
Fold the small rectangle of dark green fabric over right sides together to cut out the stem.

Fold and press the large rectangle of green fabric in half lengthwise, wrong sides together.
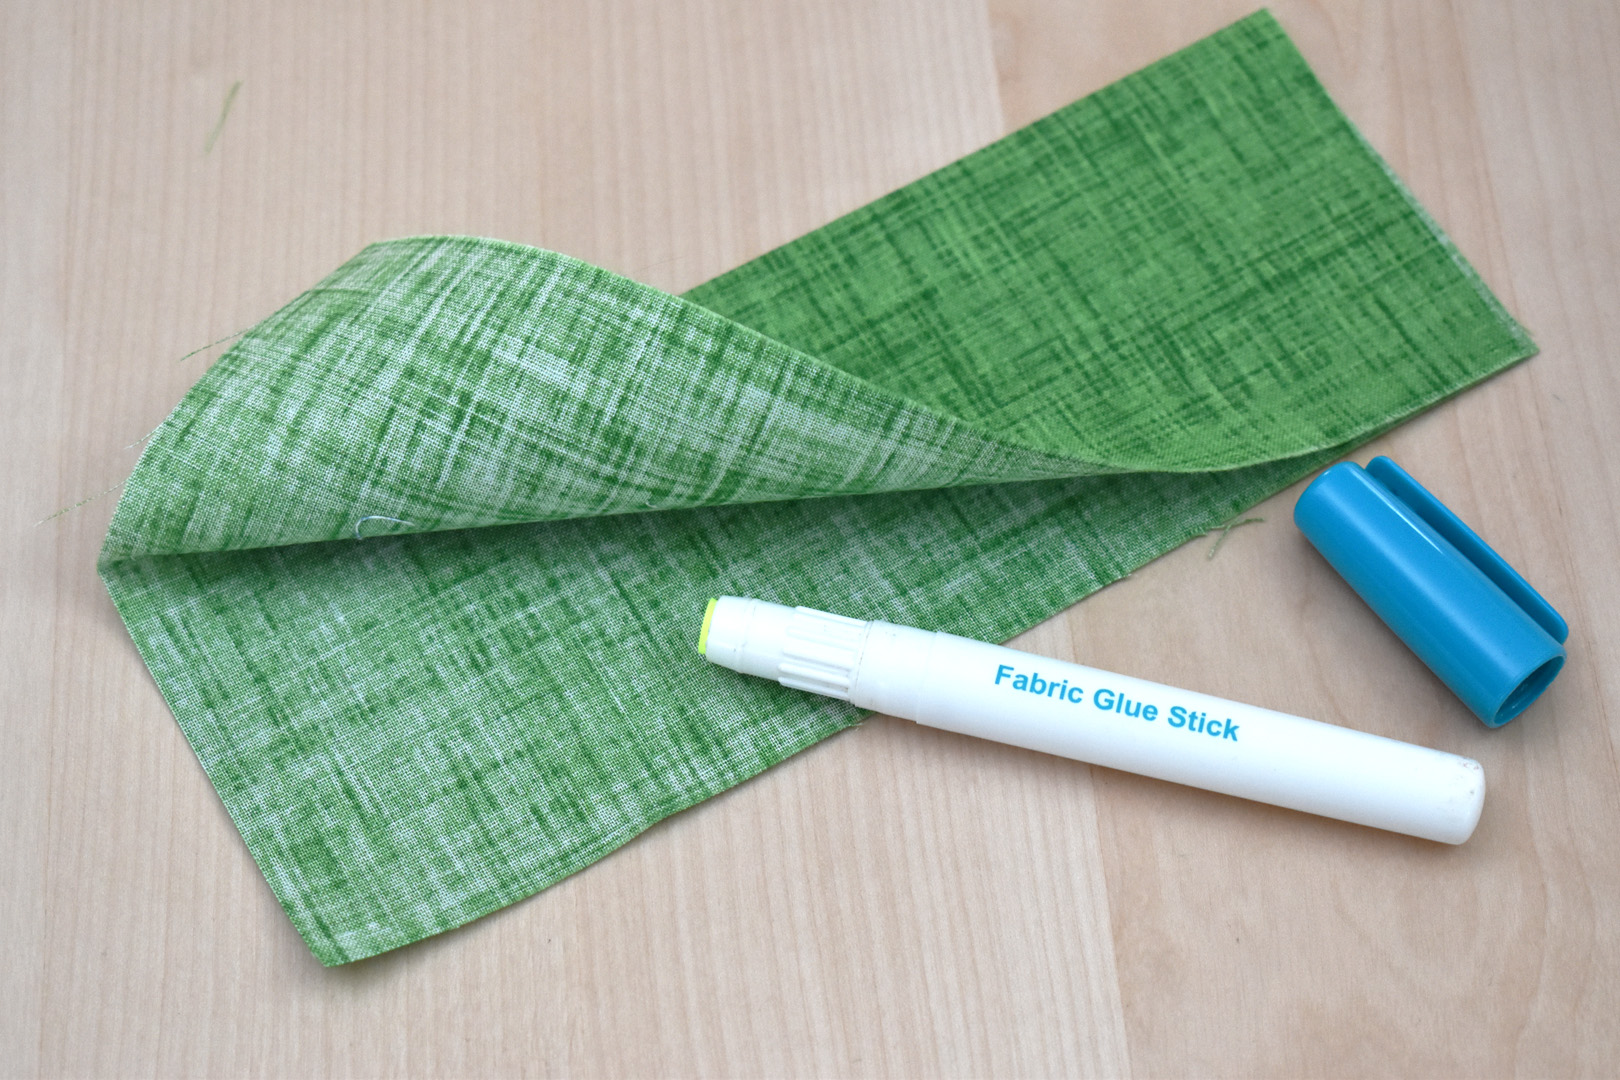
Use a small amount of fabric glue stick to hold the folded fabric securely together. This will help keep the fabric from shifting during the next steps.
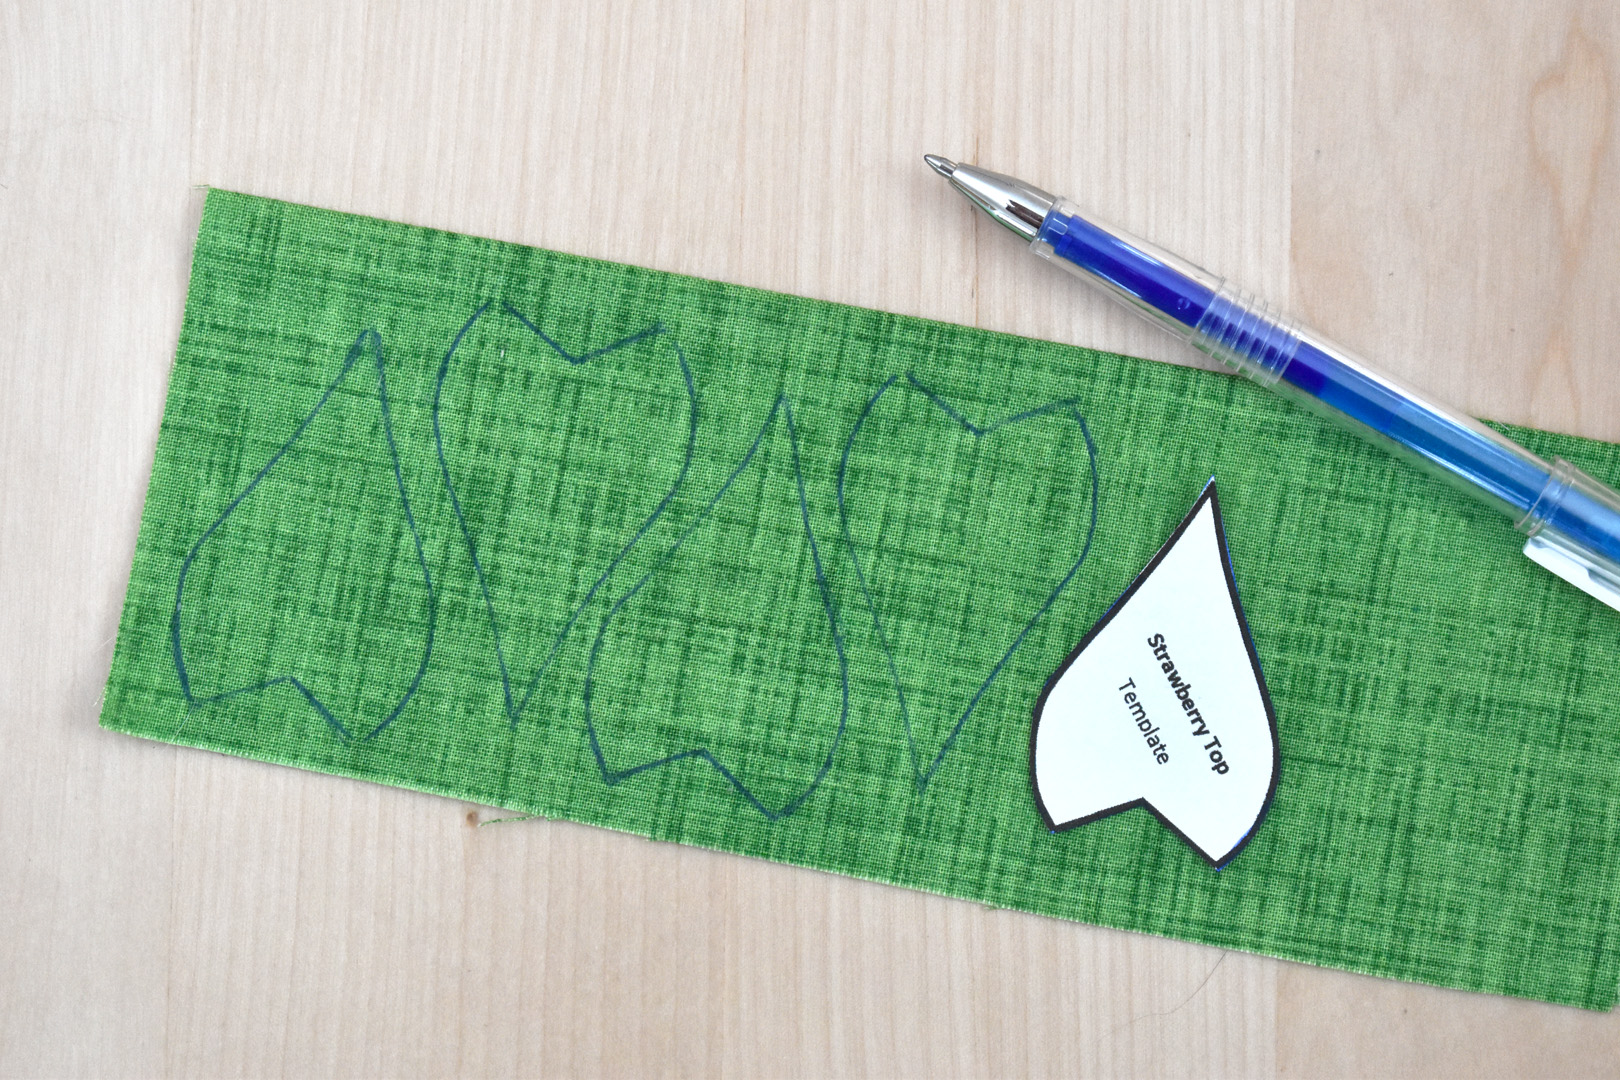
Using the fabric marking pen, trace the outline of the strawberry top 6 times on the fabric as pictured. Then set aside the stem and top for sewing in later steps.
Set up your machine to sew with a sharp size 80/12 or 75/11 needle, a straight stitch needle plate, and a quarter-inch foot. Thread the machine with red thread that coordinates with the strawberry fabric, and shorten the stitch length down to about 2.0mm.

First, stay-stitch a scant quarter inch (this means sew a little less than a quarter inch) between the two dots across the tops on both pieces of fabric. Trip thread tails after stitching.
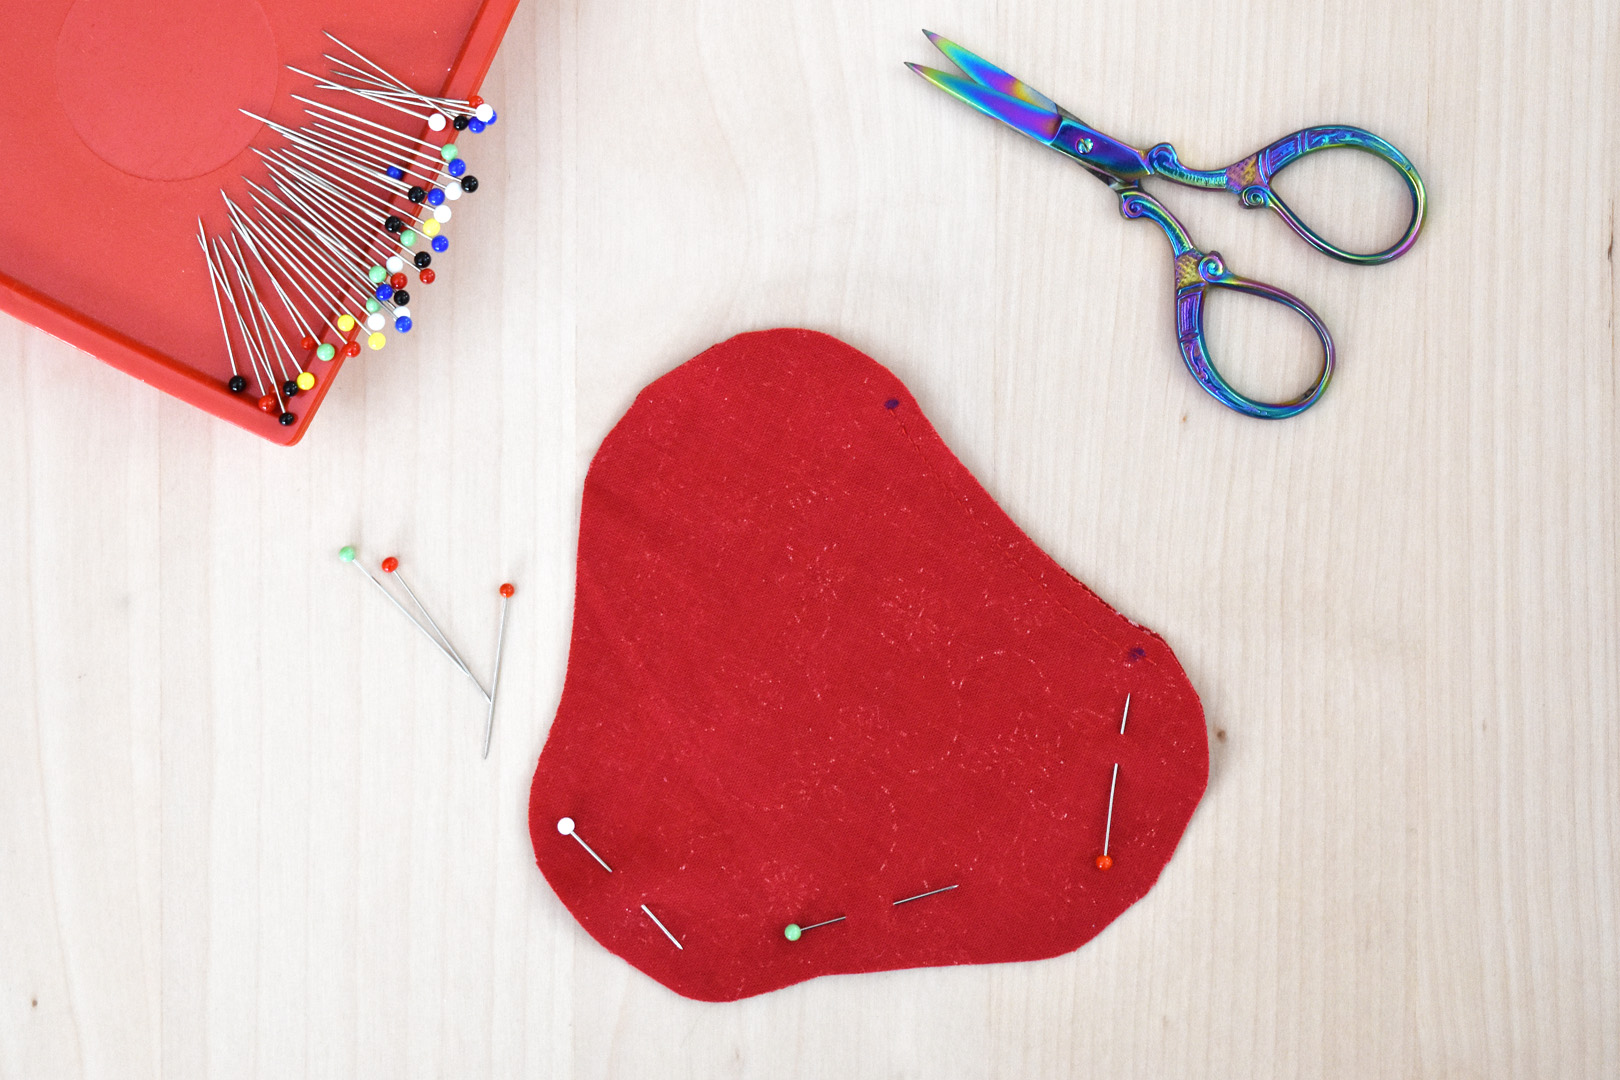
Pin the two strawberry pieces together, making sure to leave the top open between the dots.
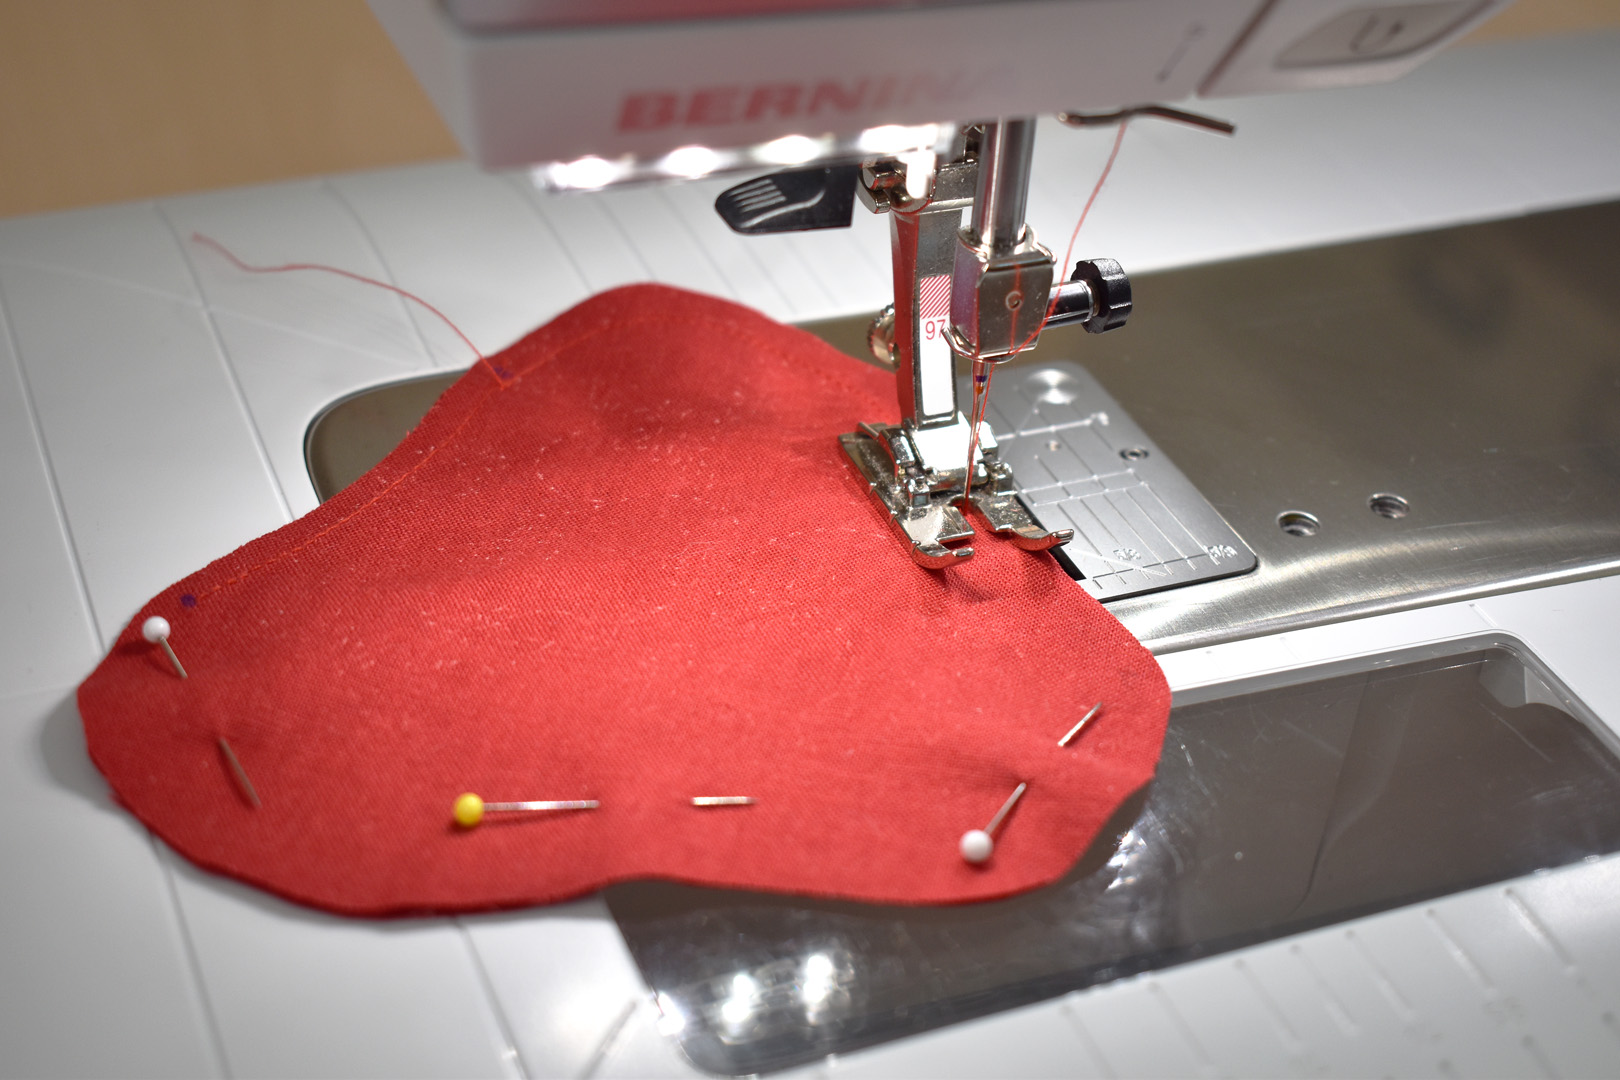
Sew around the strawberry shape with a quarter inch seam, starting at one dot and ending at the other, leaving the space between the two dots open for turning and stuffing. Backstitch a few stitches when beginning and ending. Sew slow and steady around the shape to help create smooth curves.

Clip curves with scissors, or trim close to stitching with pinking shears. Turn the strawberry shape inside out.

Use a chopstick or turning tool to help push out the seams. Press the seams flat, turning under the opening at stitching line. Remove the red thread from the sewing machine and set the strawberry aside.
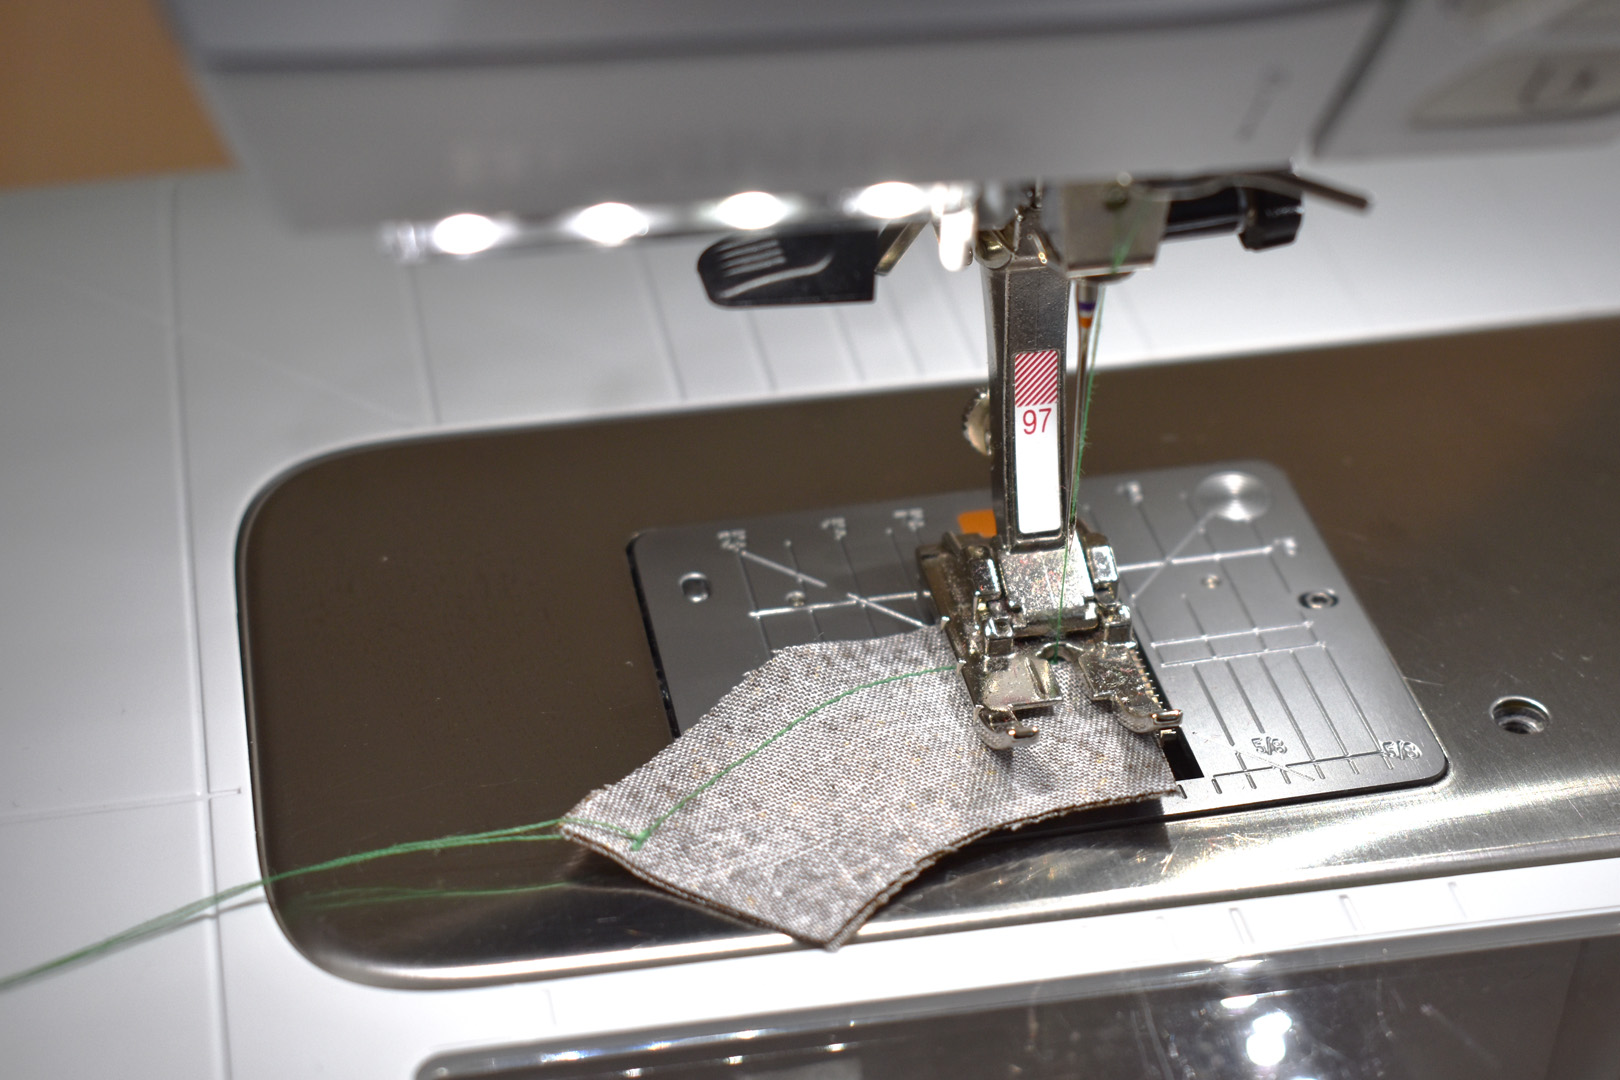
Rethread the machine with green thread, and sew the stem together with a quarter inch seam. Be sure to leave the bottom open for turning and stuffing. Not sure which end is the bottom? Just lay the pattern back over the cut pieces to double-check, the bottom is a bit slimmer than the top.

Trim the top corners of the stem after stitching, and use tweezers to turn the stem inside out. Use a chopstick to help poke out the corners. Press the seams flat.

Lightly stuff the stem with fiber fill, using needle nose tweezers to help push the stuffing in. Set the stuffed stem aside.

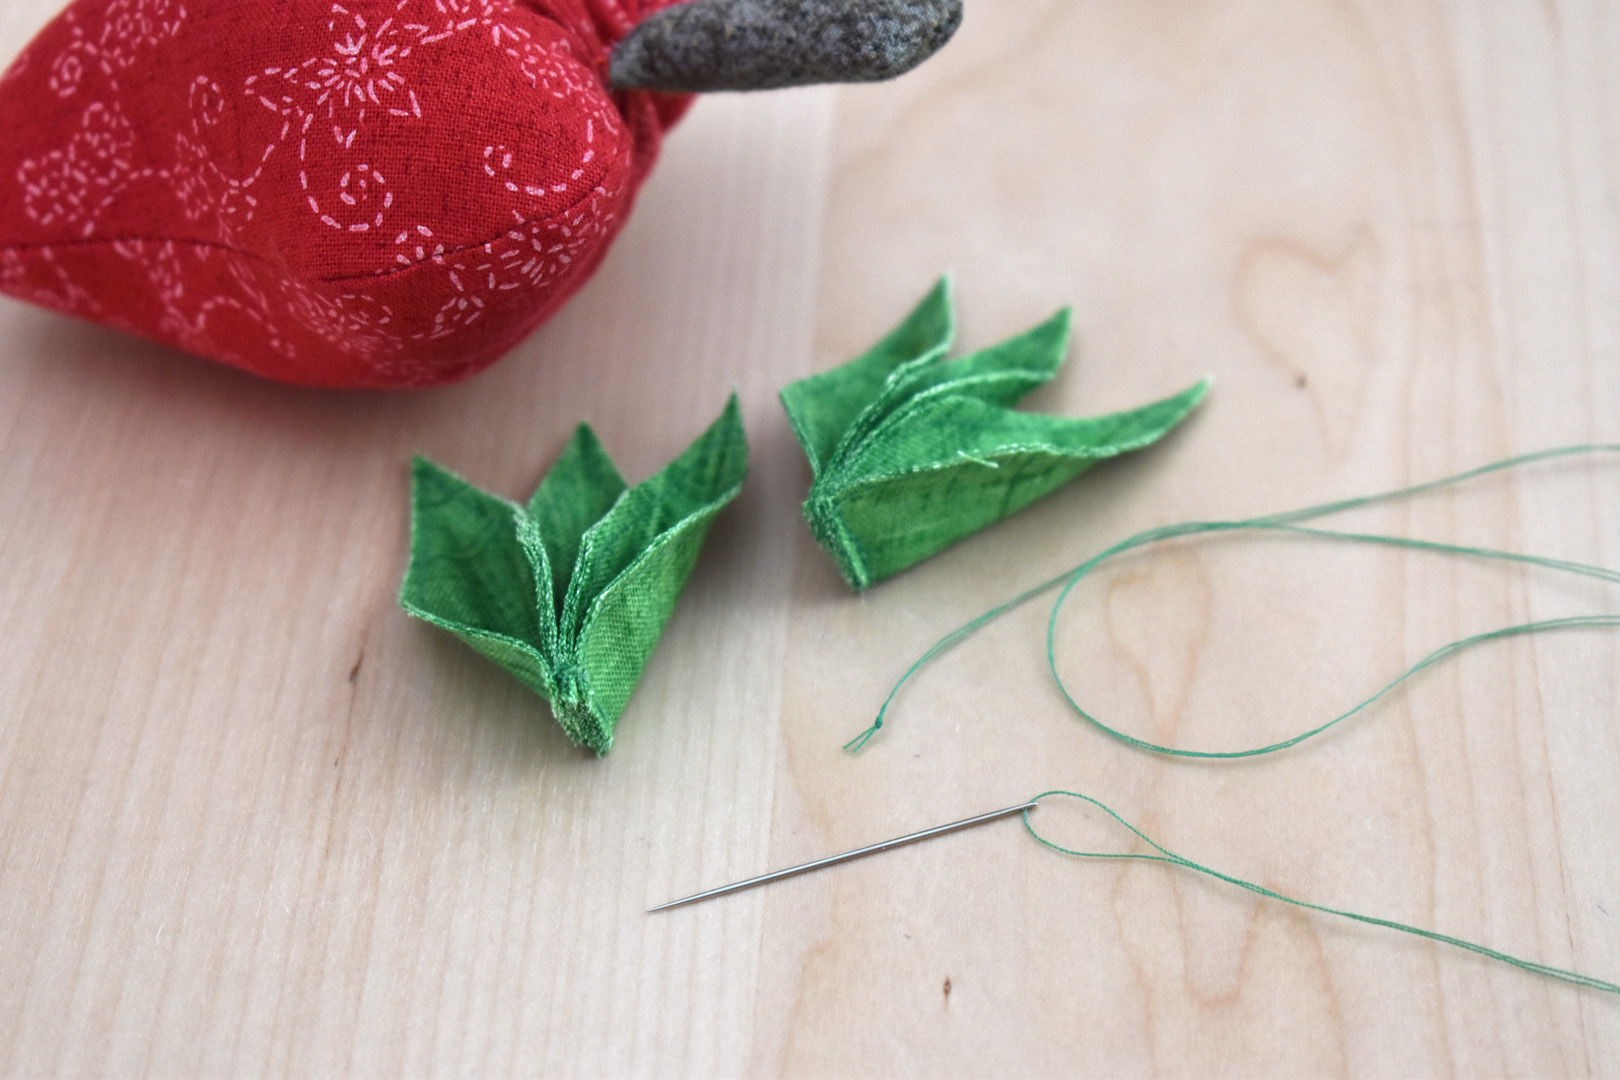
Stitch along the leaf shapes traced on the green fabric, staying inside the traced lines, leaving the bottom part open as pictured below.

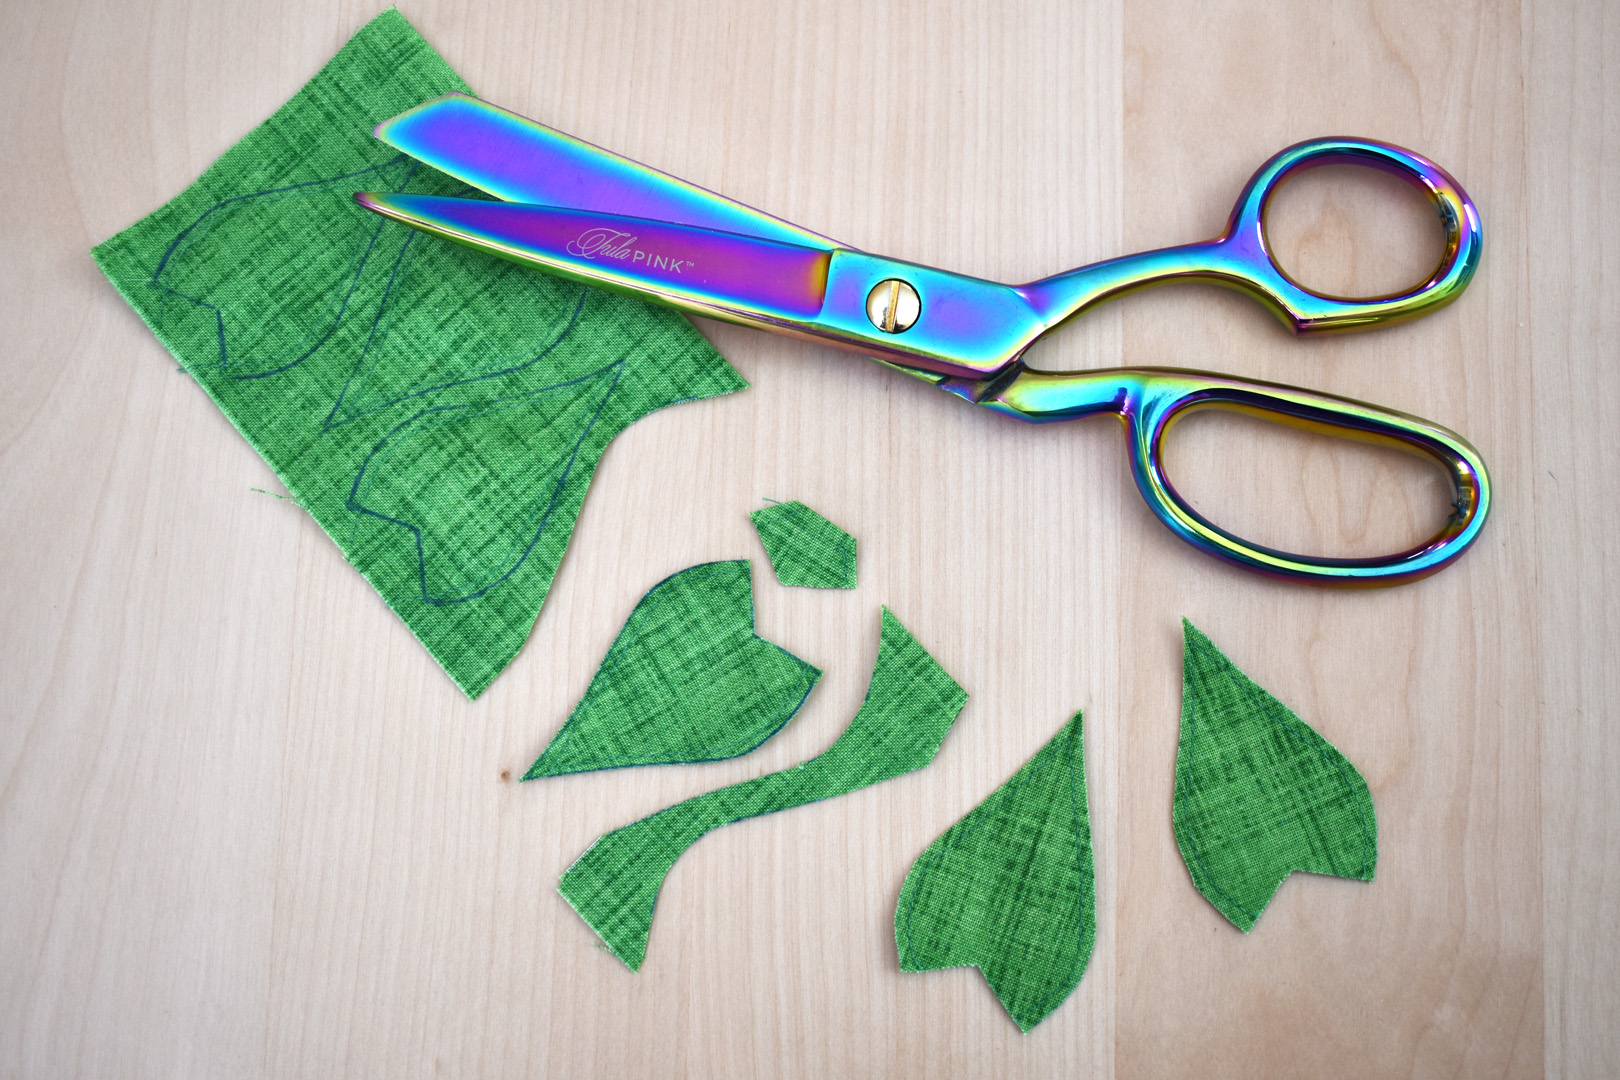
Cut out the leaf shapes along the traced lines.
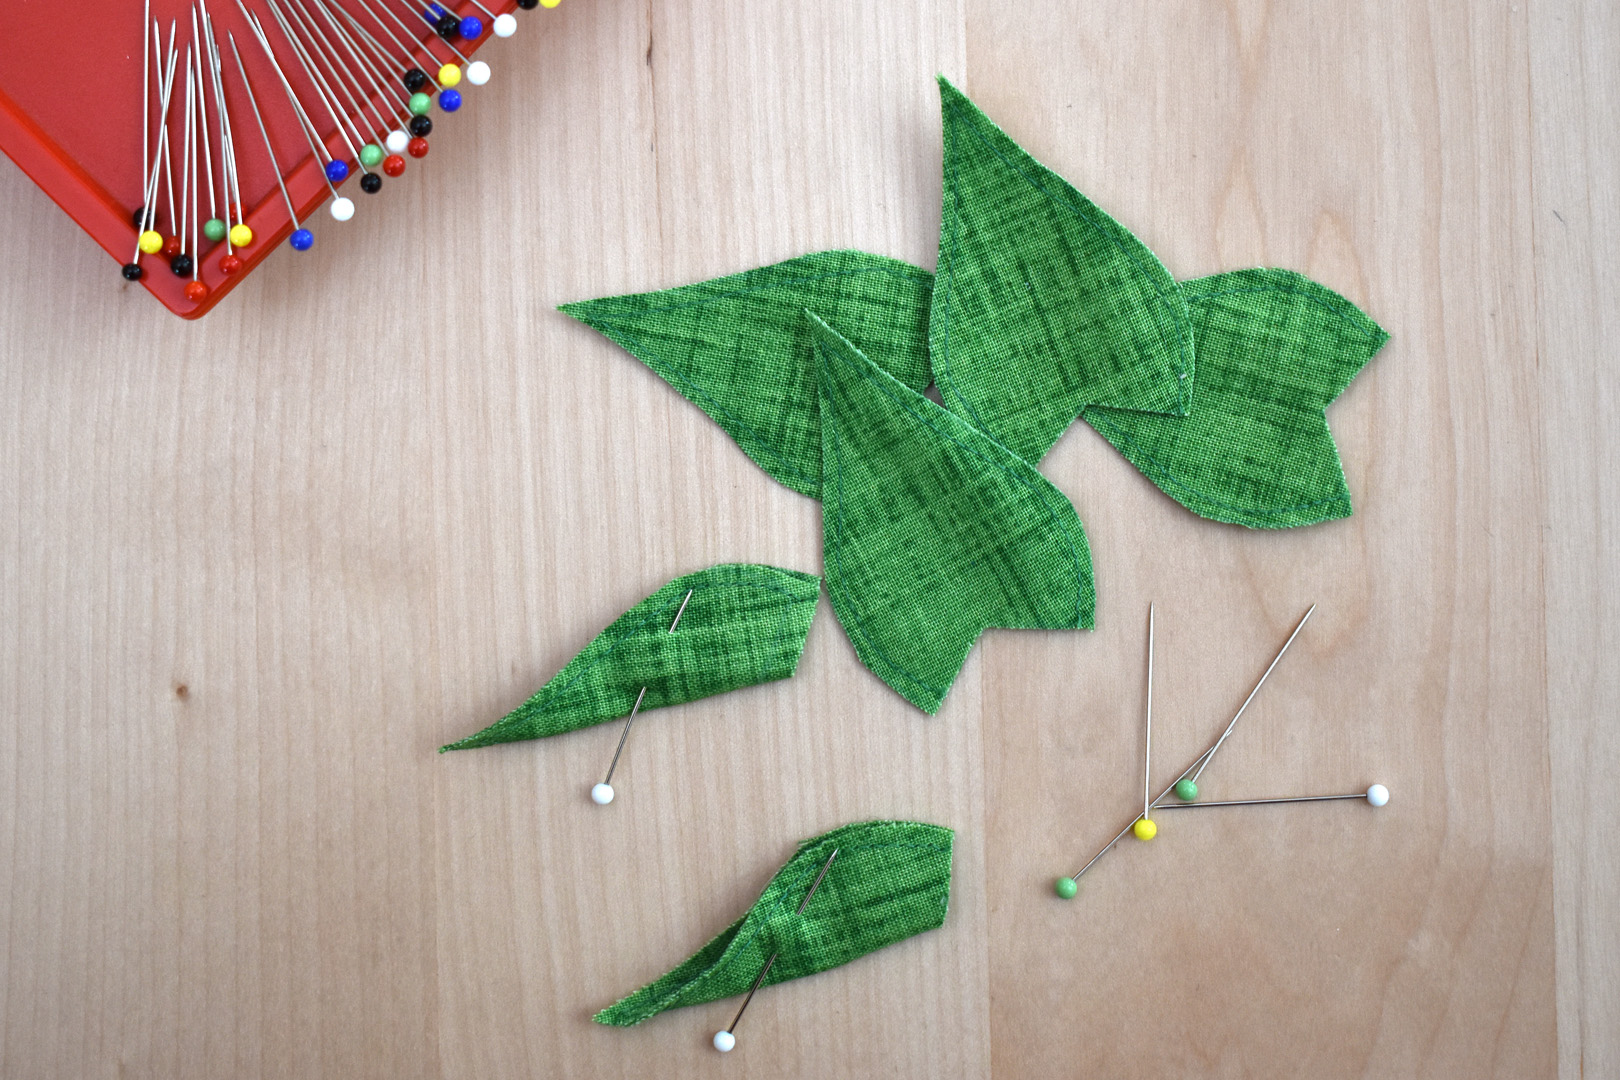
In this step three of the strawberry top leaves are basted together, creating two sets of three tack-sewn leaves. First, fold three leaves in half, matching the back-end angles together, and place a pin through the leaf towards the pointy end.
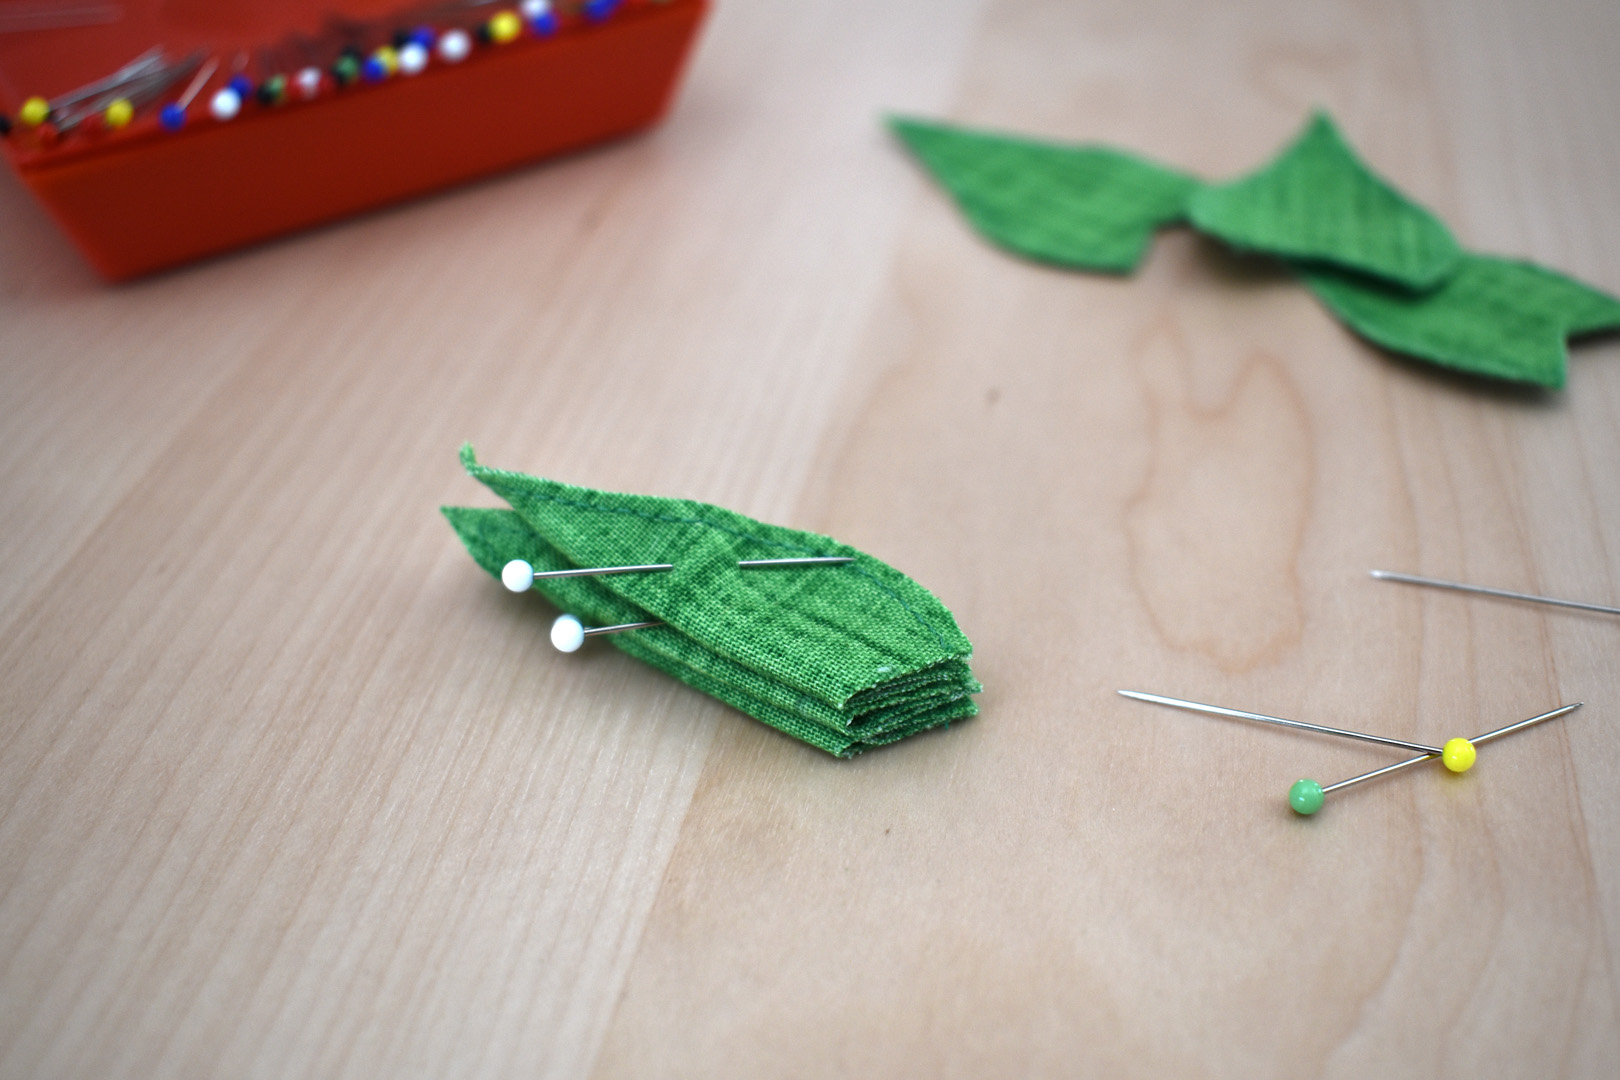
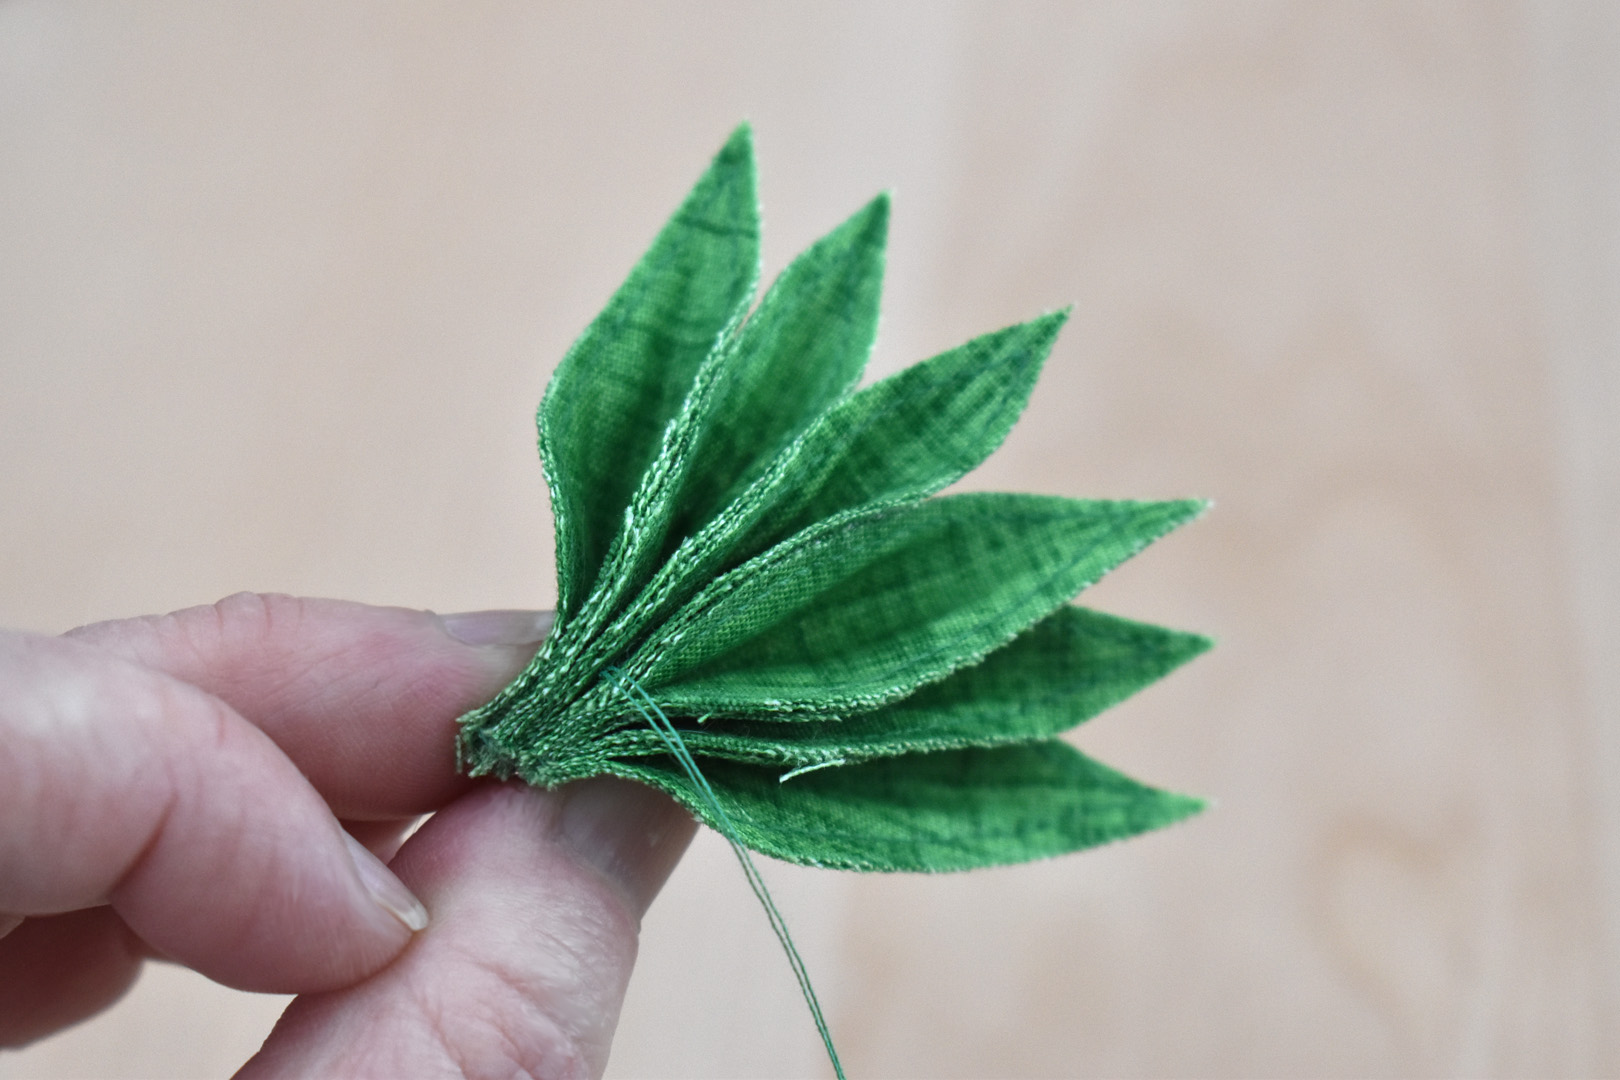
Stack three pinned leaves together, matching the back ends together. Make sure that all the pins are away from the flat, back end of the leaves for stitching.
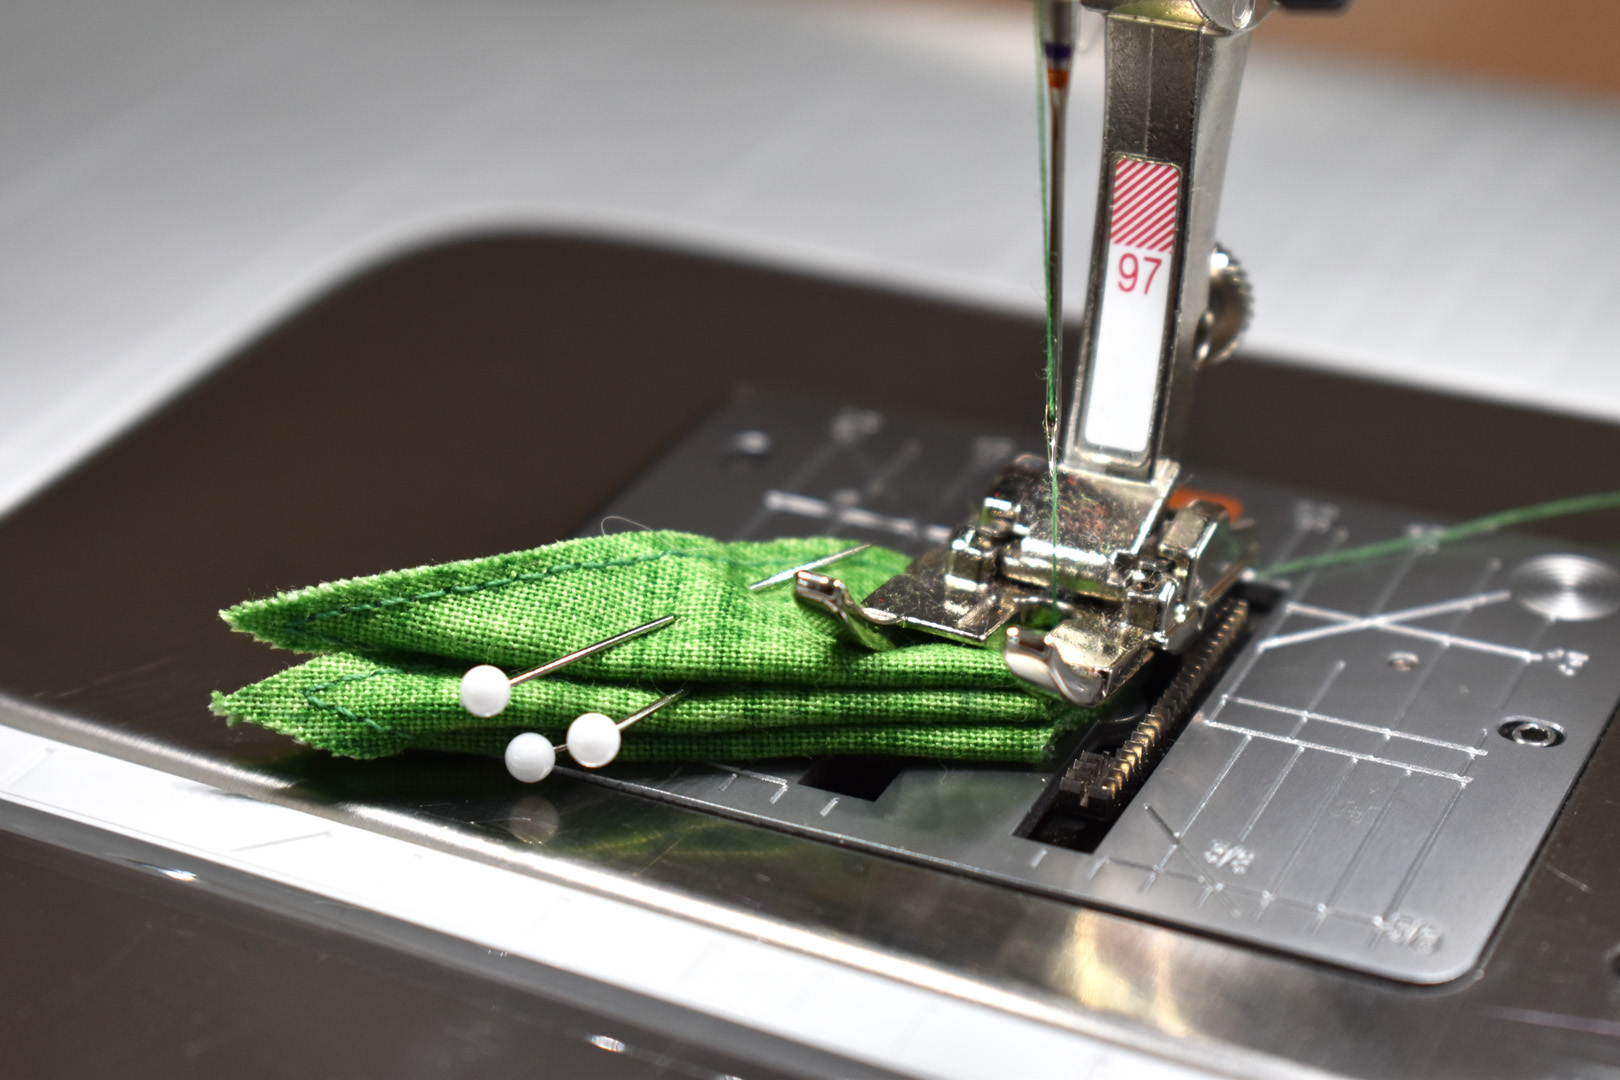
Place the back end of the leaves under the presser foot. Here is where the straight stitch needle plate and quarter inch foot are going to help sew through all these thick layers!
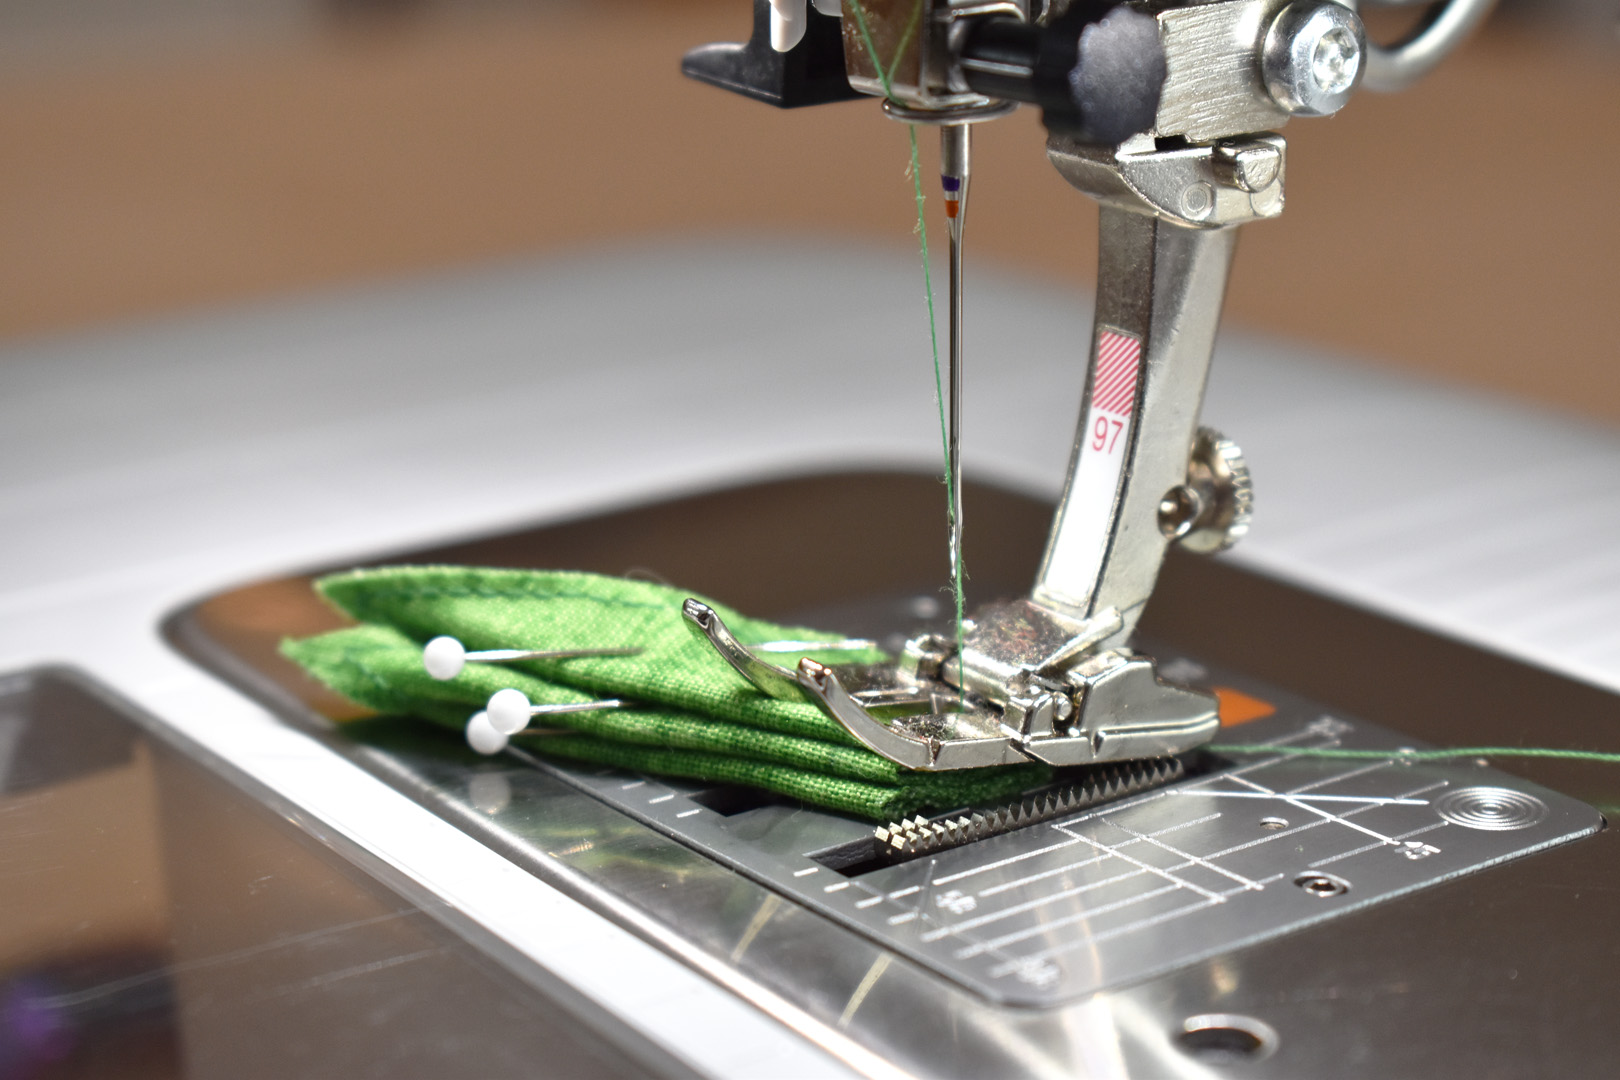
Stitch back and forth across the back end of the leaves to tack them all together, sewing close to the edges. Trim any thread tails after stitching.
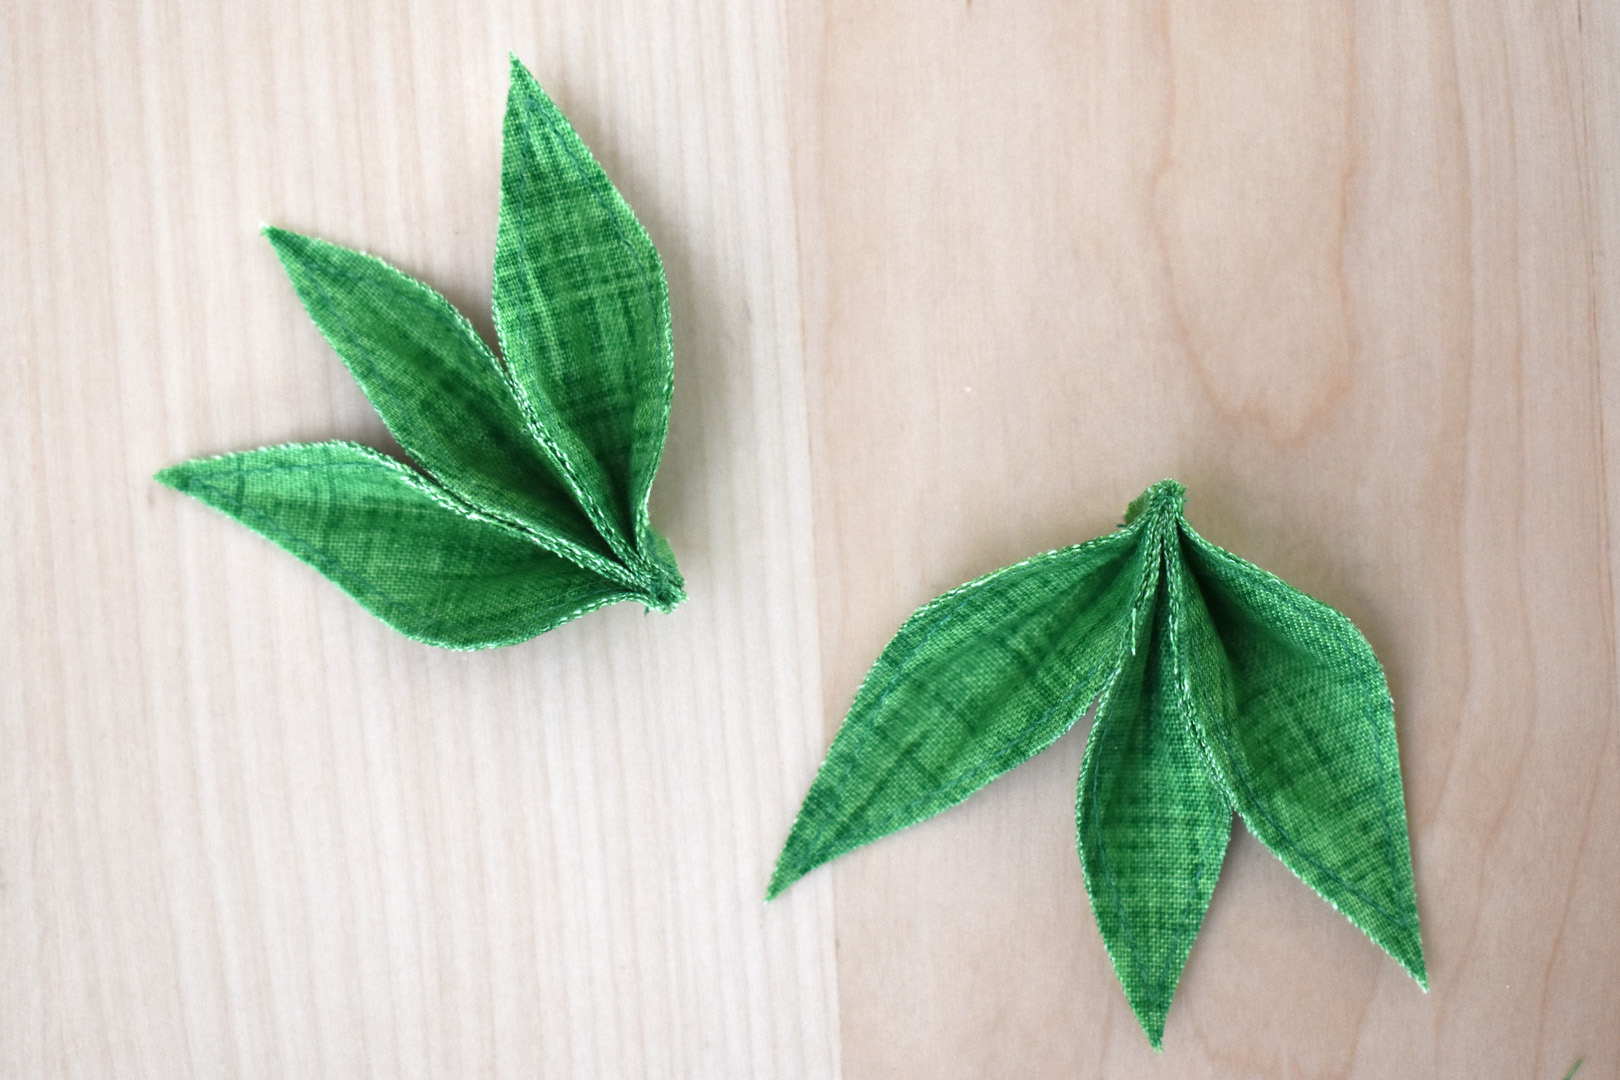
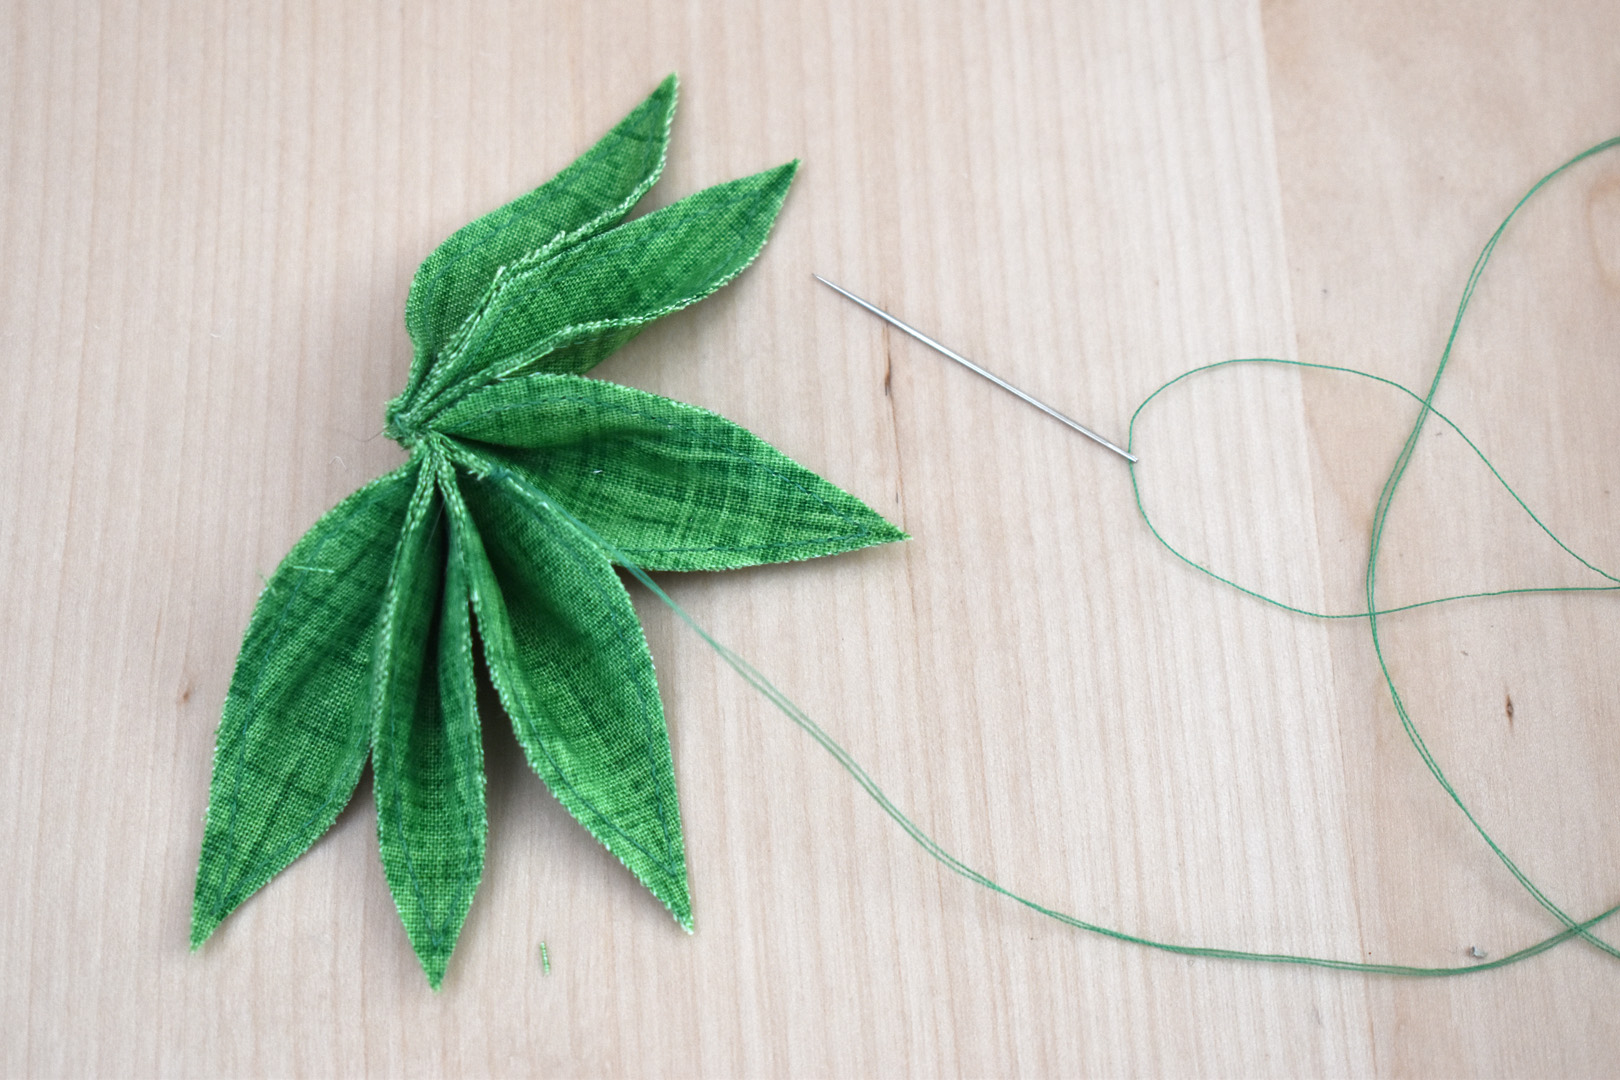
Set the two tacked together strawberry tops aside.
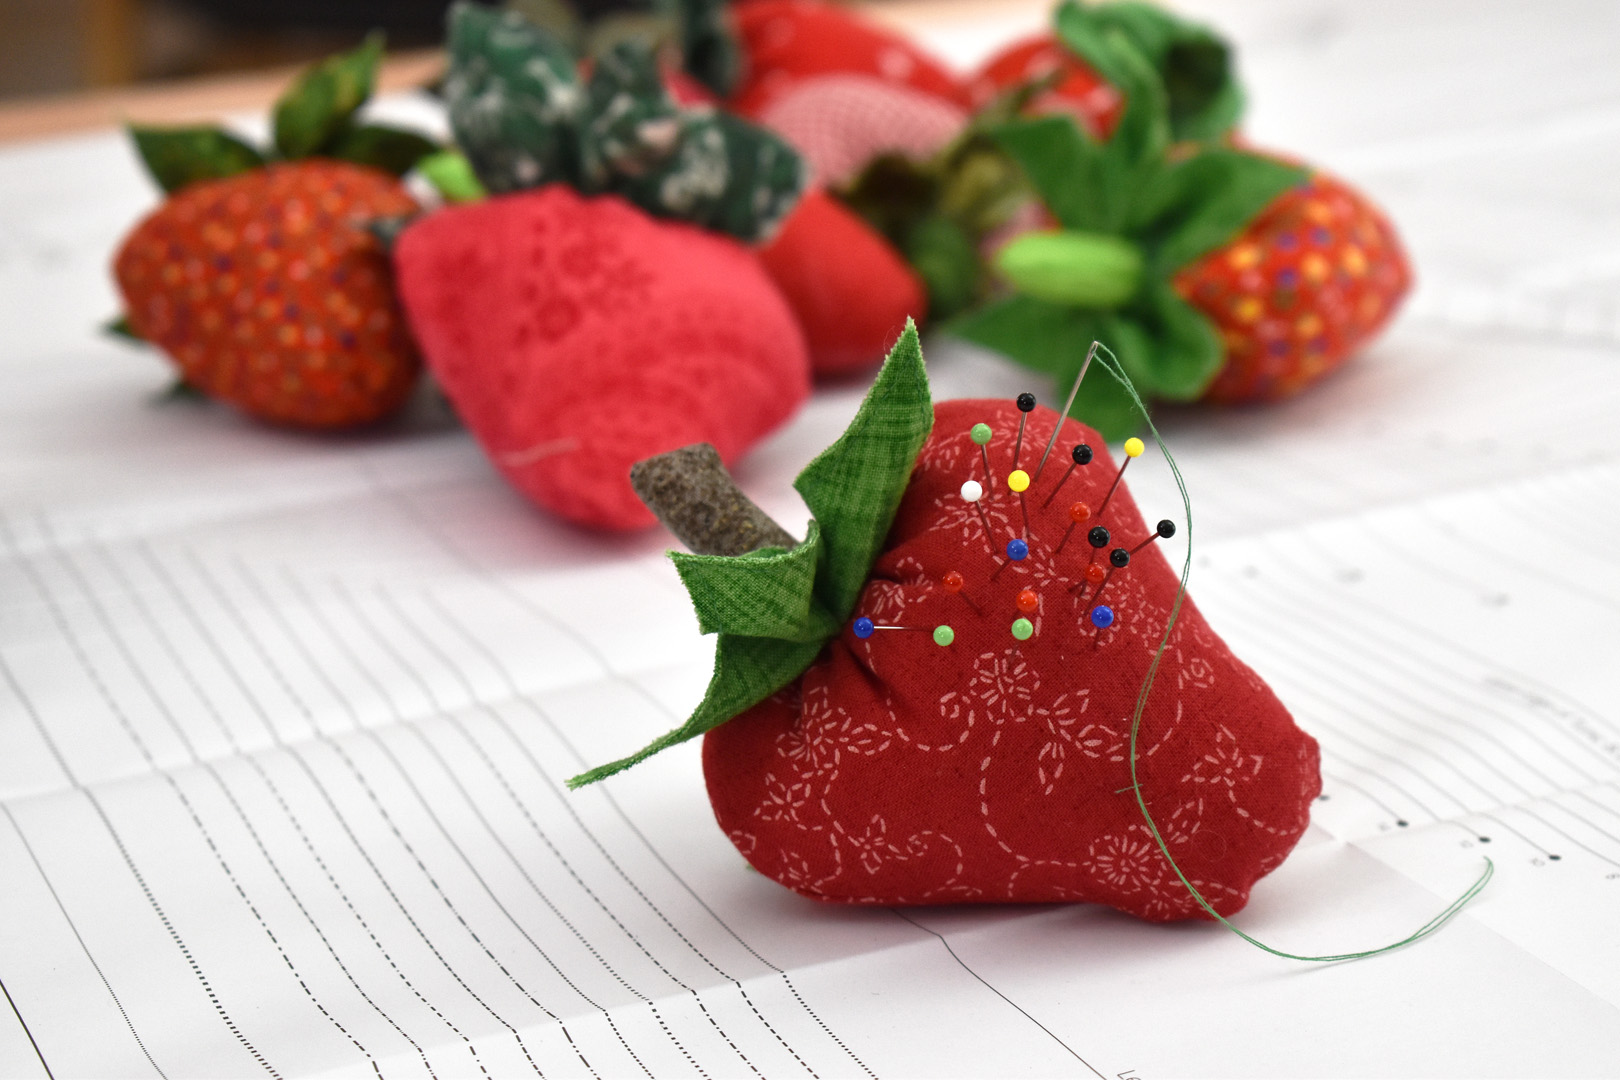
Grab your hand sewing supplies; red and green thread, a needle, thimble, thread snips, and seam ripper. Select the stuffing for your strawberry to add along with the fiber fill based on the categories below.
Creating a stuffed strawberry pincushion.
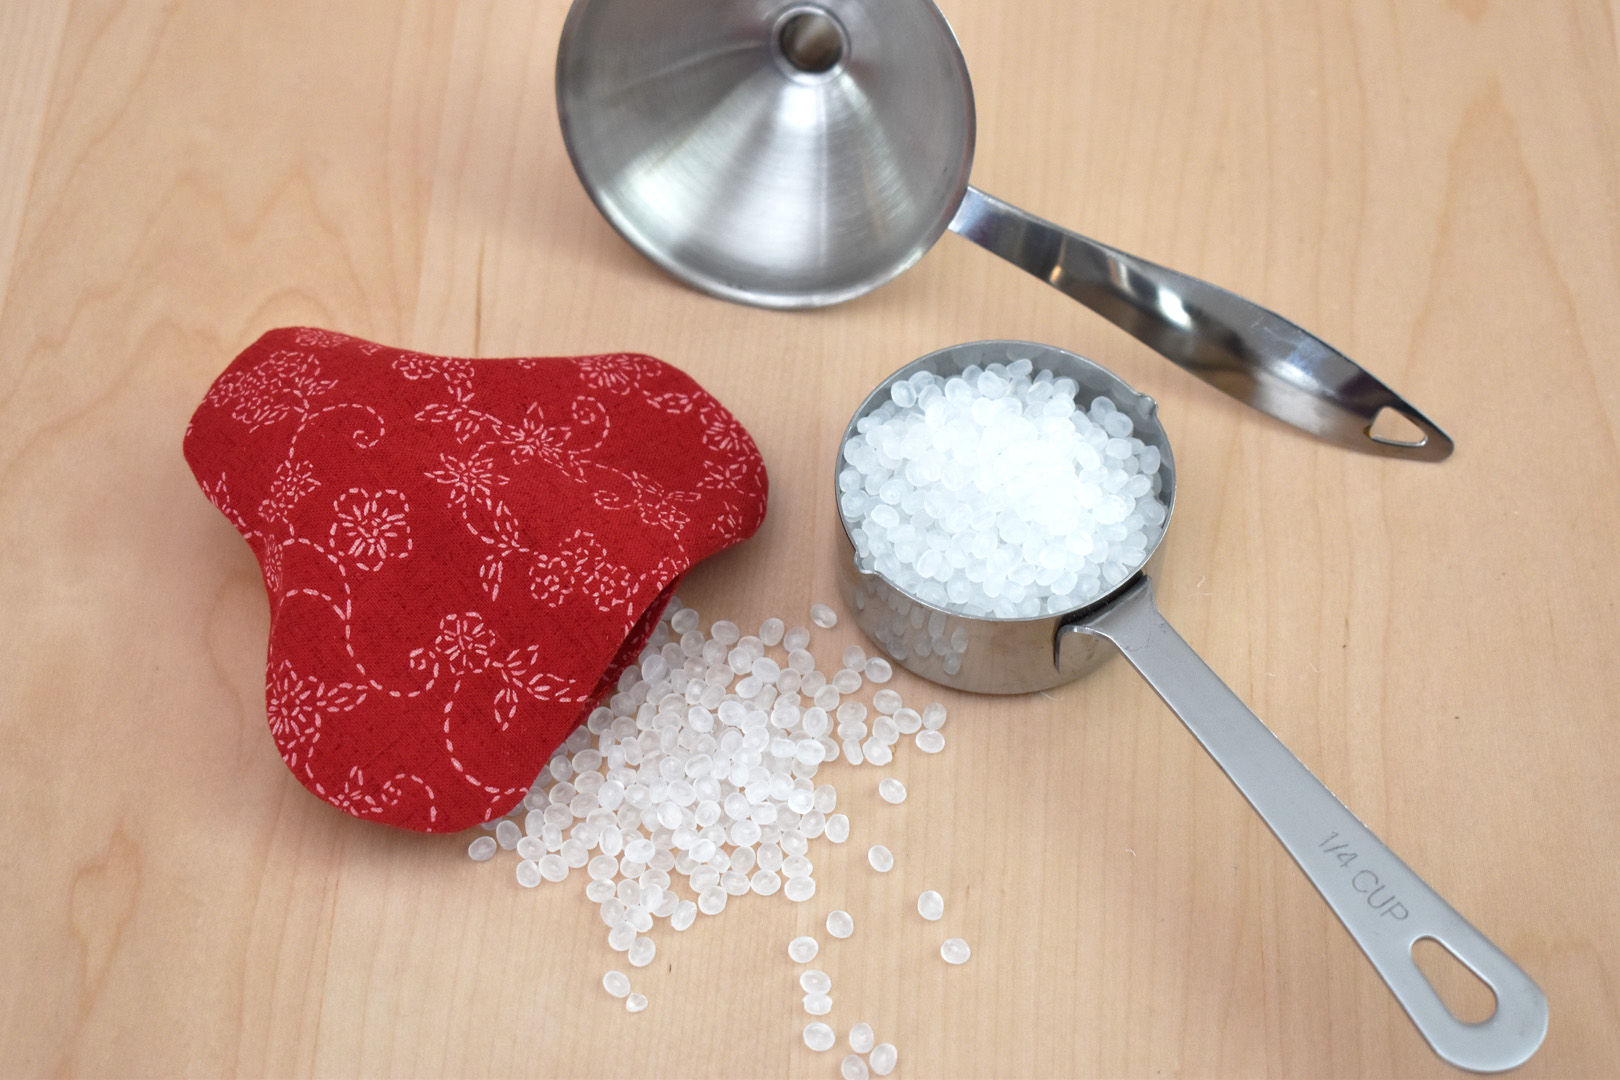
To make a stuffed pincushion, you can use anything from rice to steel wool, crushed walnuts, fabric scraps, or polyester fiber fill. My favorite stuffing for a pincushion is usually plastic beads found in the doll making aisle of the craft store. The beads are heavy enough to give the pincushion some weight, but won’t hurt the pins or needles. I start by adding a small wad of fiber fill at the very bottom of the strawberry, then fill it up about 3/4 of the way with the plastic beads, and finish it off with a little more stuffing at the very top.
Creating a stuffed strawberry pattern weight.

To make a pattern weight, you can use anything from beans or rice to glass beads or pebbles, magnets, pennies or marbles. My favorite pattern weight stuffing are small, clean pebbles found in the local plant store for use with potted plants. It’s heavy, but it’s also not going to rust, or attract any unwanted friends (like edible contents might). I start with a small amount of stuffing in the bottom, and find that I don’t need to fill it all the way up with the pebbles to get the needed weight – when it’s heavy enough I finish filling the rest with stuffing up to the top.
Creating a stuffed strawberry sachet.
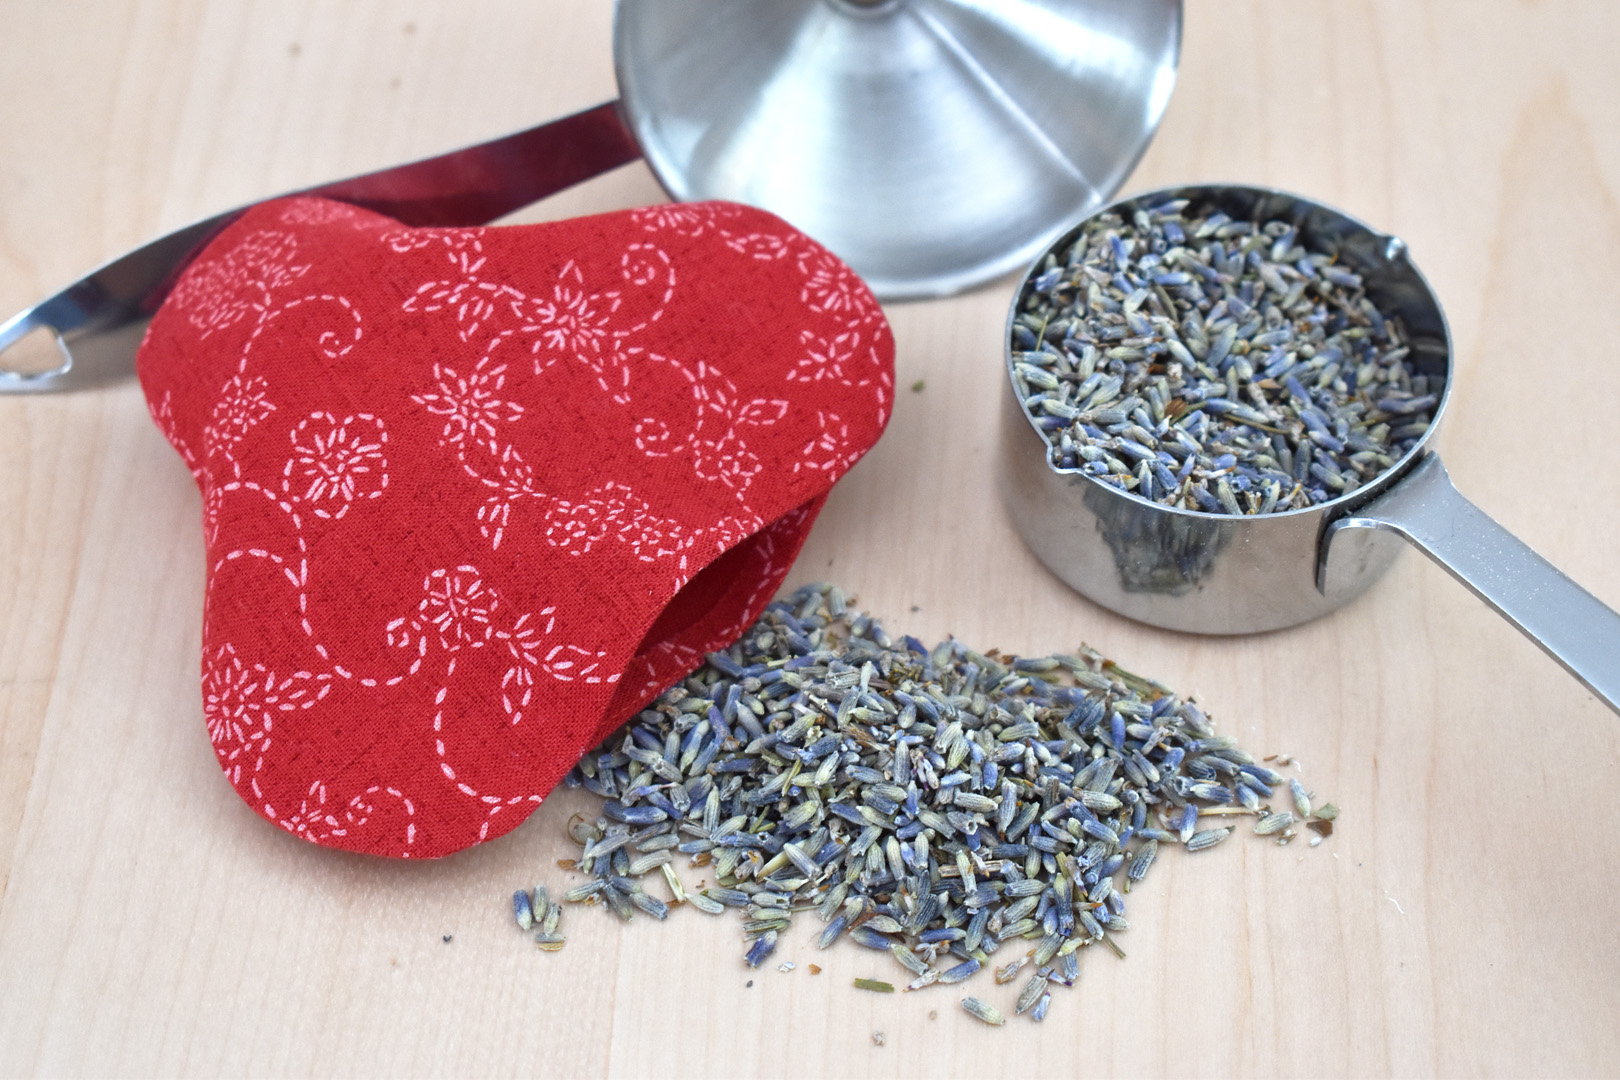
Add your favorite dried herbs, potpourri, or a few drops of essential oils to create a sweet-smelling sachet. Lavender is my absolute favorite! I add a little stuffing to the bottom, add about 1/4 cup of dried lavender, then top it off with more stuffing. These little sachets make great gifts.
Now let’s stuff this strawberry!
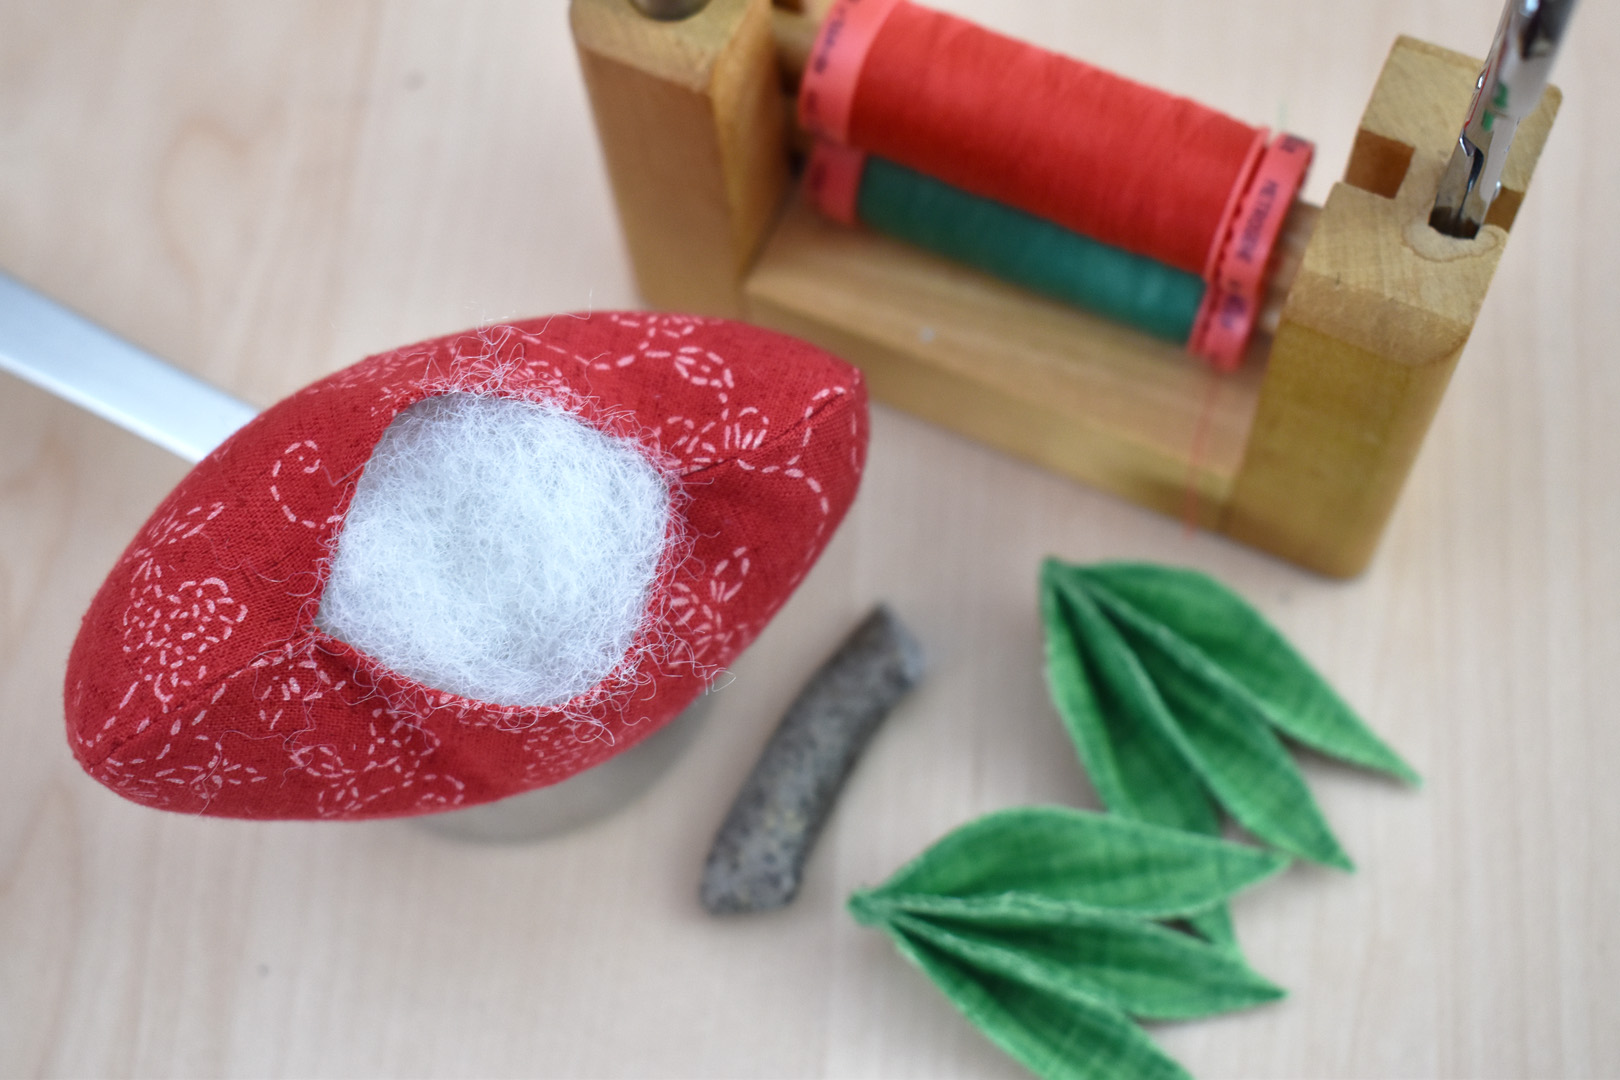
No matter how you stuff the strawberry, make sure to leave a little room at the top for stuffing.
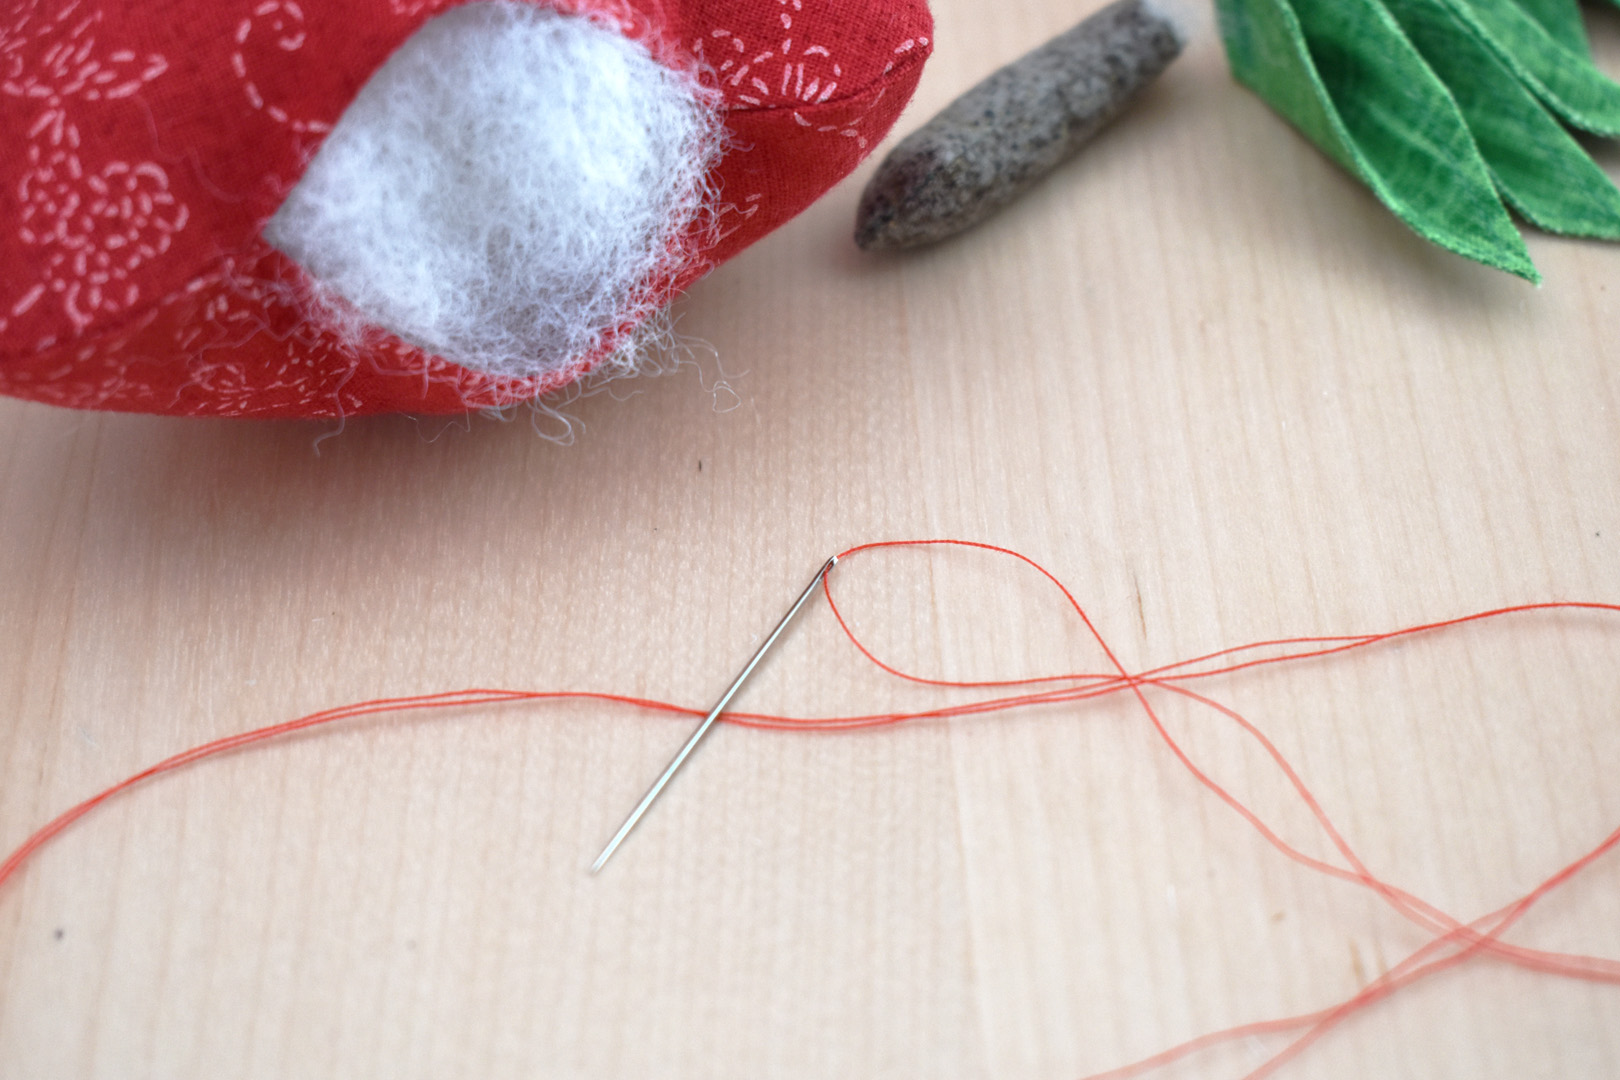
Thread a needle with a double strand of coordinating red thread, and tie a knot in the ends.
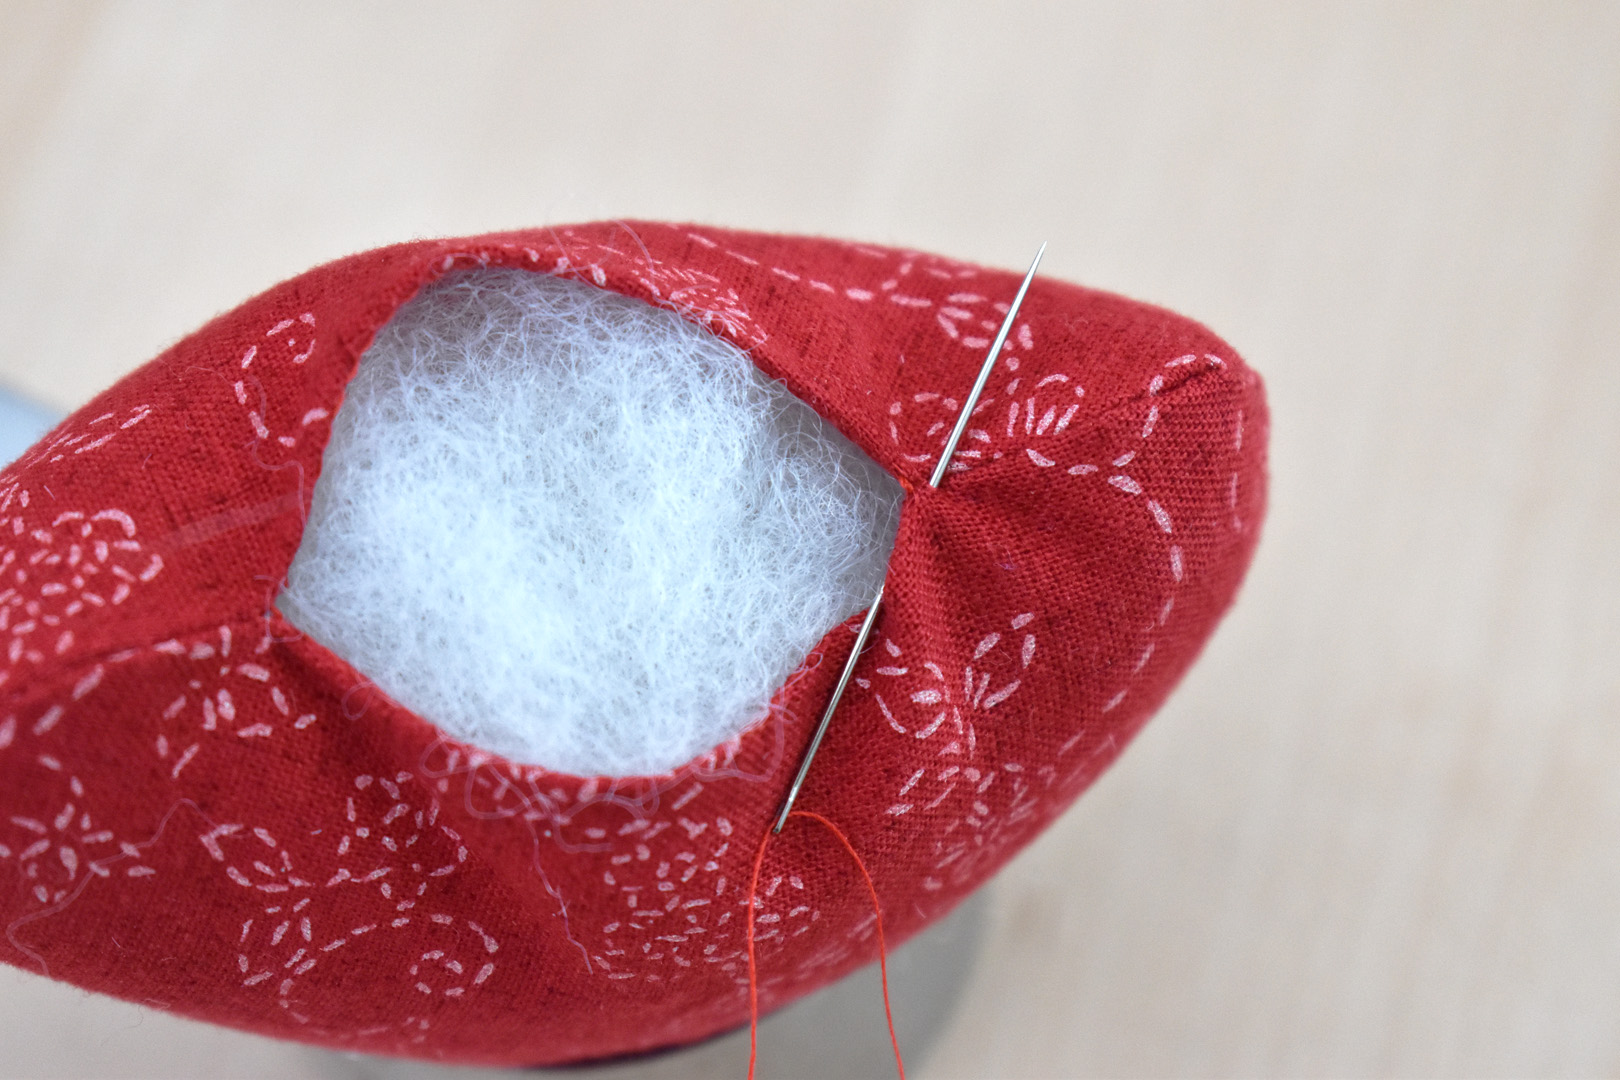
Bring the needle up from the opening near the seam, about 1/8″ away from the folded over edge. Take a few stitches in this spot to anchor the thread.
Stitch all around the opening with a running stitch.
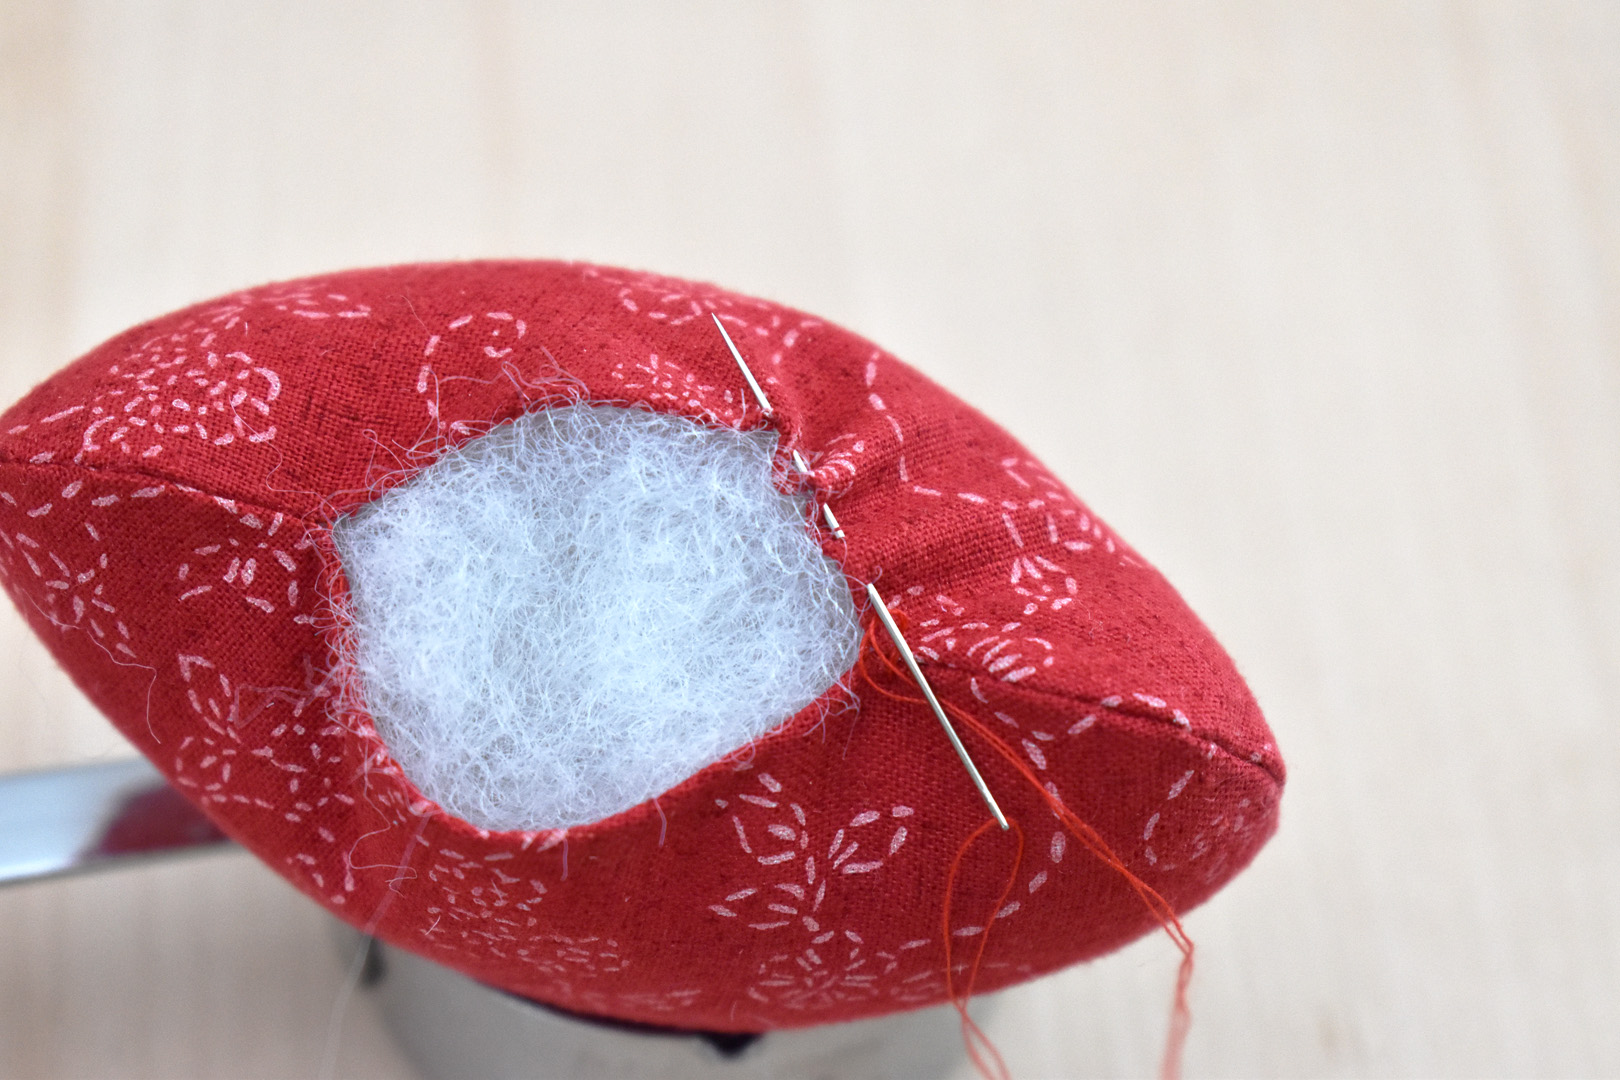
Return the needle to the starting point, and you will notice that the opening is beginning to pull closed with the running stitches. Now grab that stuffed stem to insert into the opening.
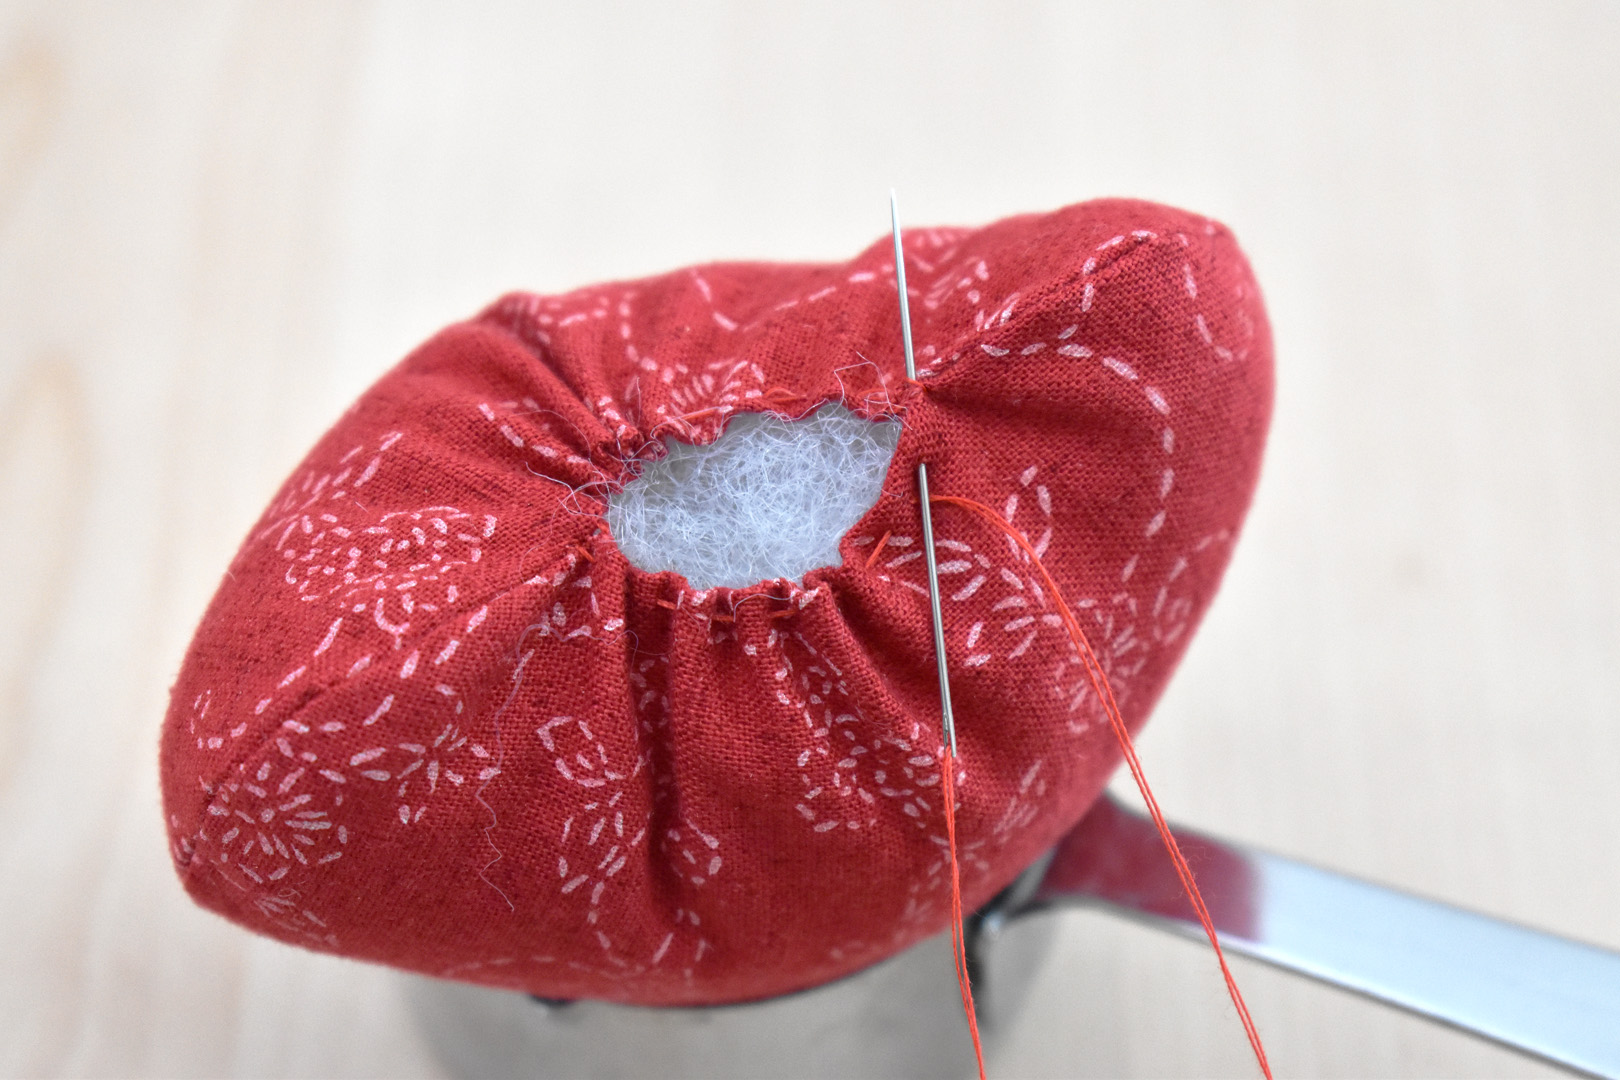
Pull the thread tightly to force the opening to close around the stem. Take a few stitches in place to anchor the stitches and tie a knot, but do not cut the thread yet.
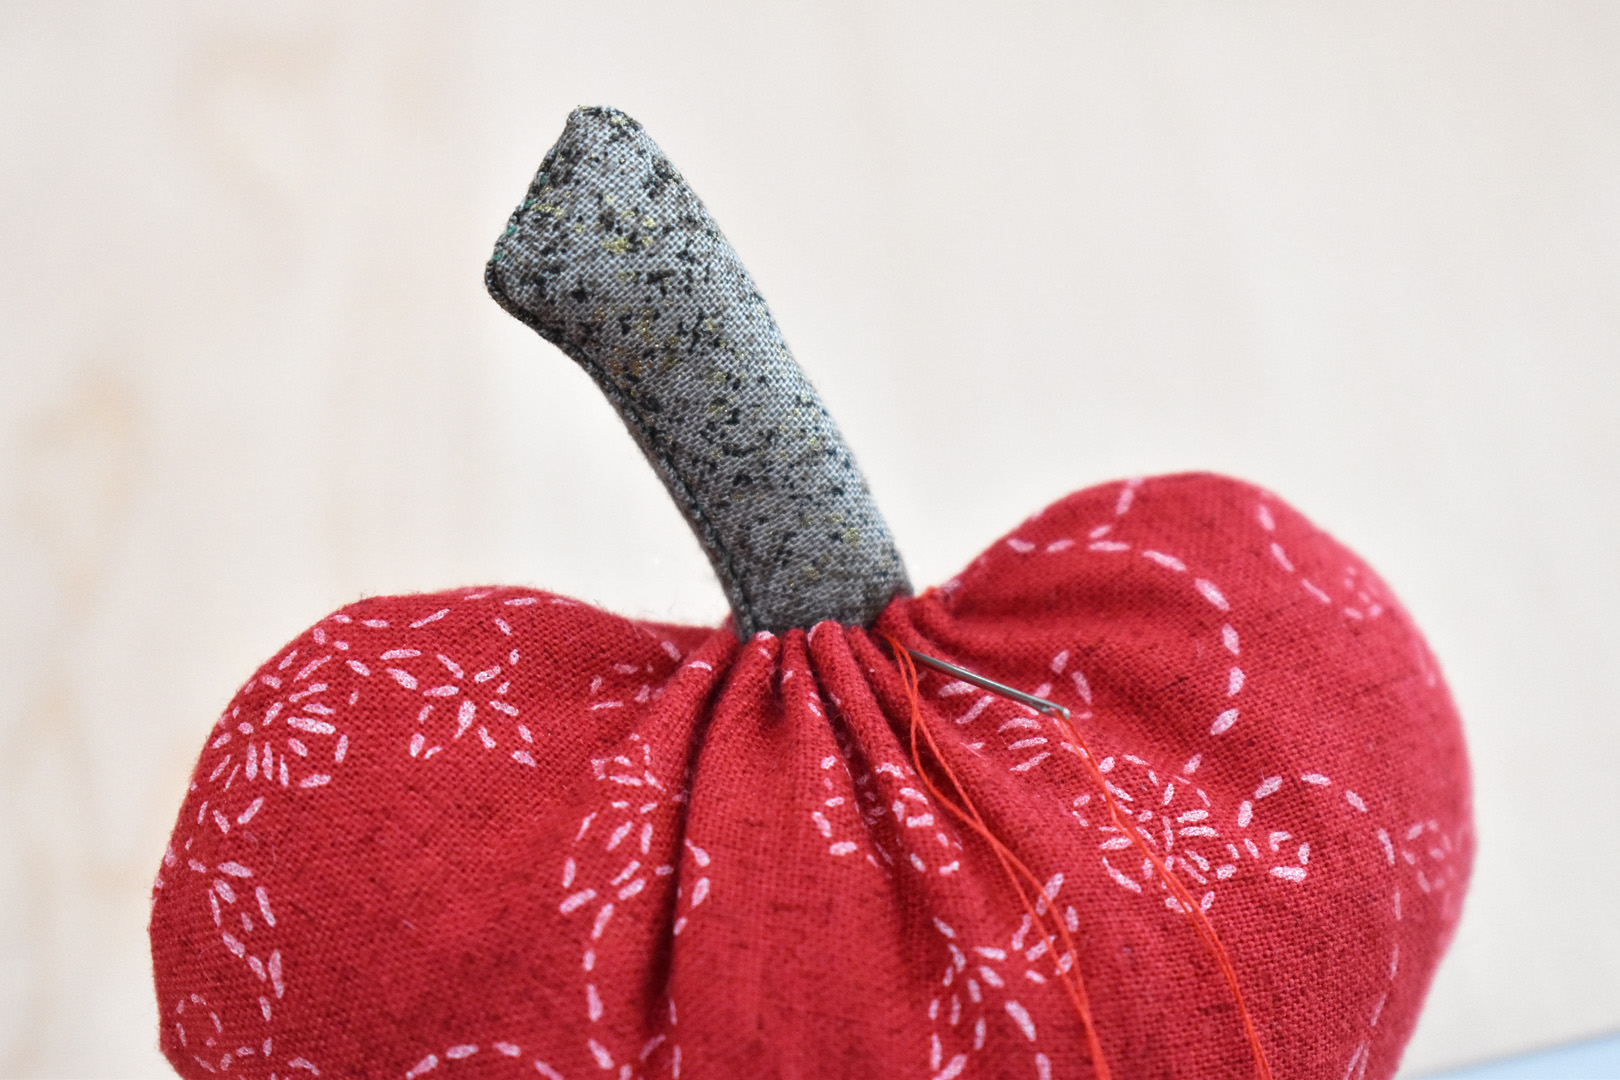
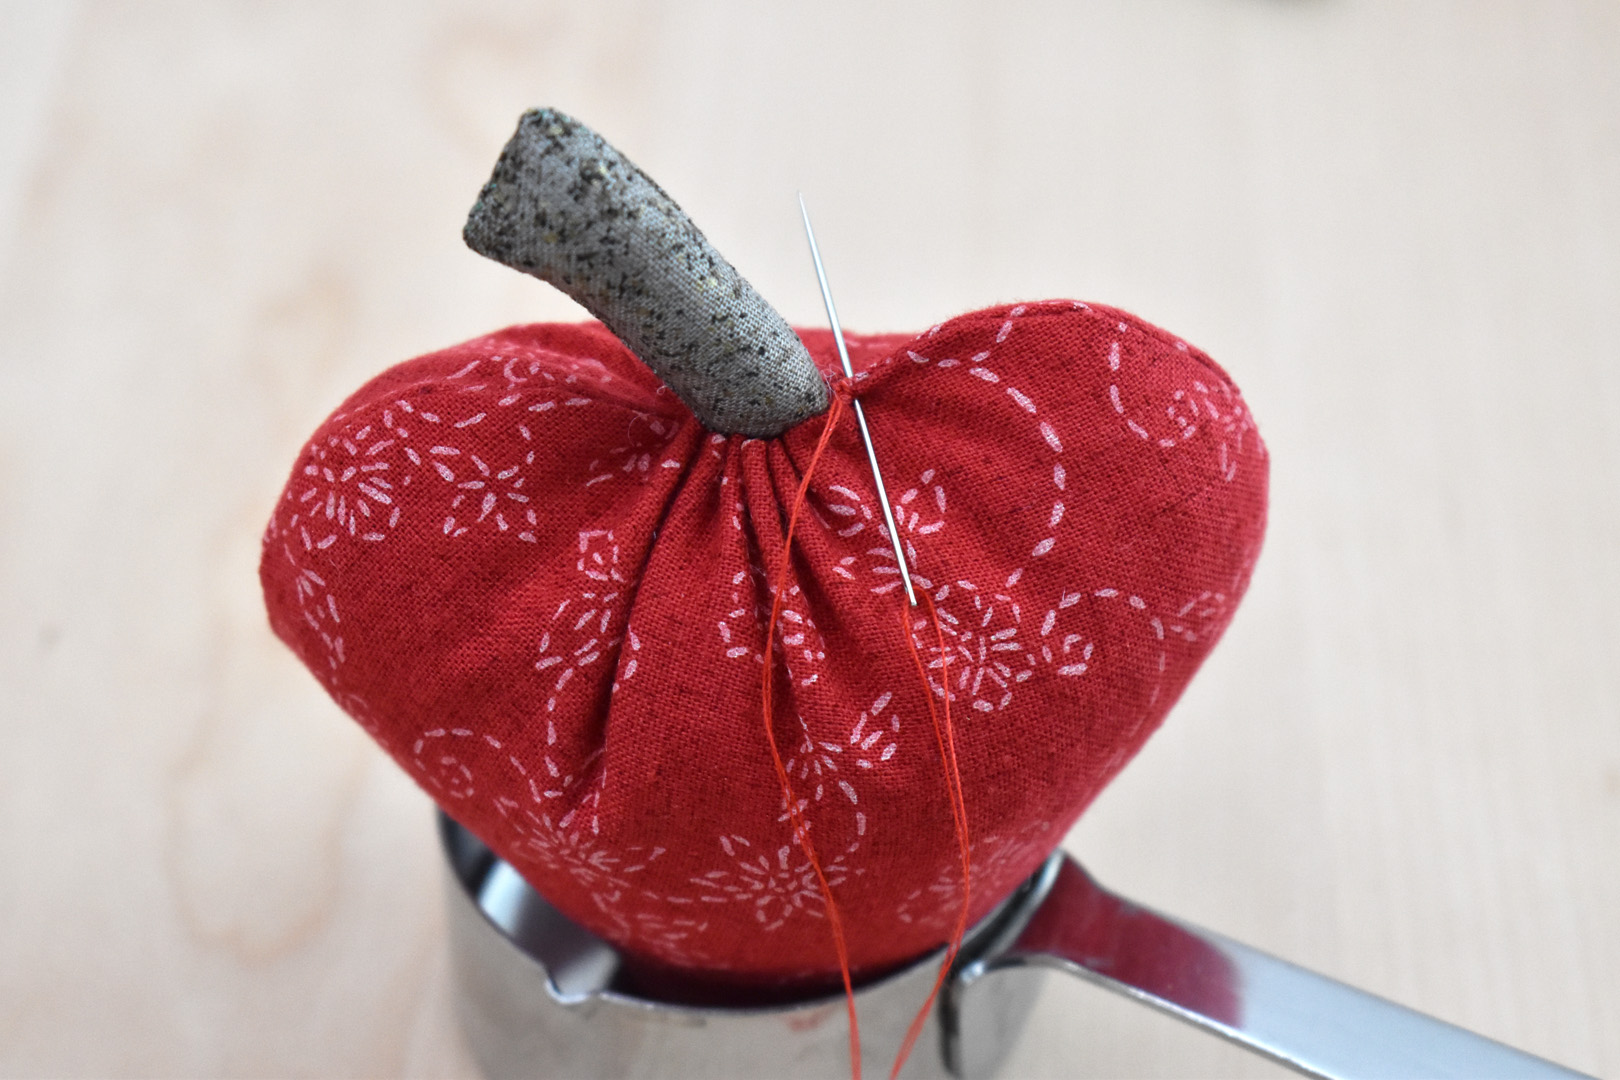
Now sew back and forth through the top edge of the gathered opening and the stem to really anchor the stem in place. When secured, tie a knot in the thread and cut close to the knot.
Next, thread the needle with a double strand of green thread, tying a knot in the ends. Tack-stitch the sides of the two tops together at one side following the steps below.

First, in one of the top bunches, insert the needle about 3/8″ from the end, just under the stitching.
Pick up the other top bunch, and place it next to the first one so that the thread is in between the two bunches.

Pull back the two leaves on the top of the sandwiched bunches, and the two leaves on the bottom. Now tack stitch the two middle leaves together, sewing over where the thread is, securing with a knot. Do not cut the thread ends yet!
Leave thread ends attached to tack the topper on the strawberry.
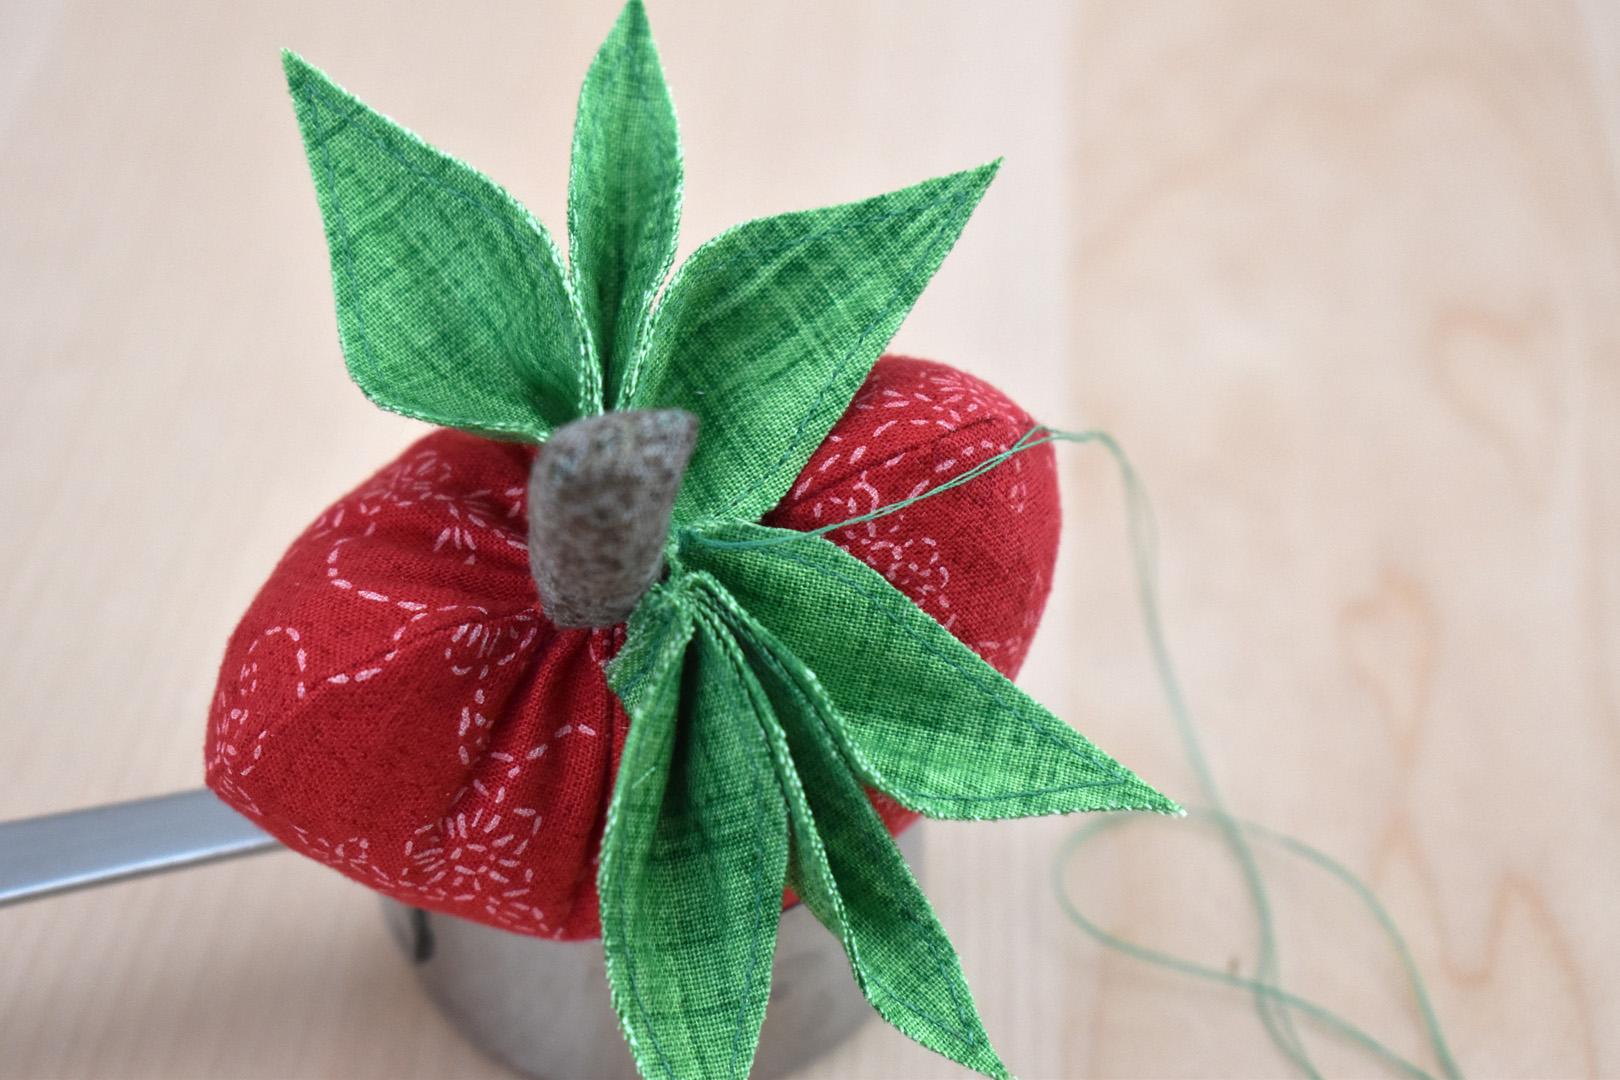
Wrap the topper around the base of the strawberry stem, pulling the leaves around to meet on the other side. Push down to make sure the topper is sitting at the bottom of the stem, and pull the leaves together around the stem snugly.
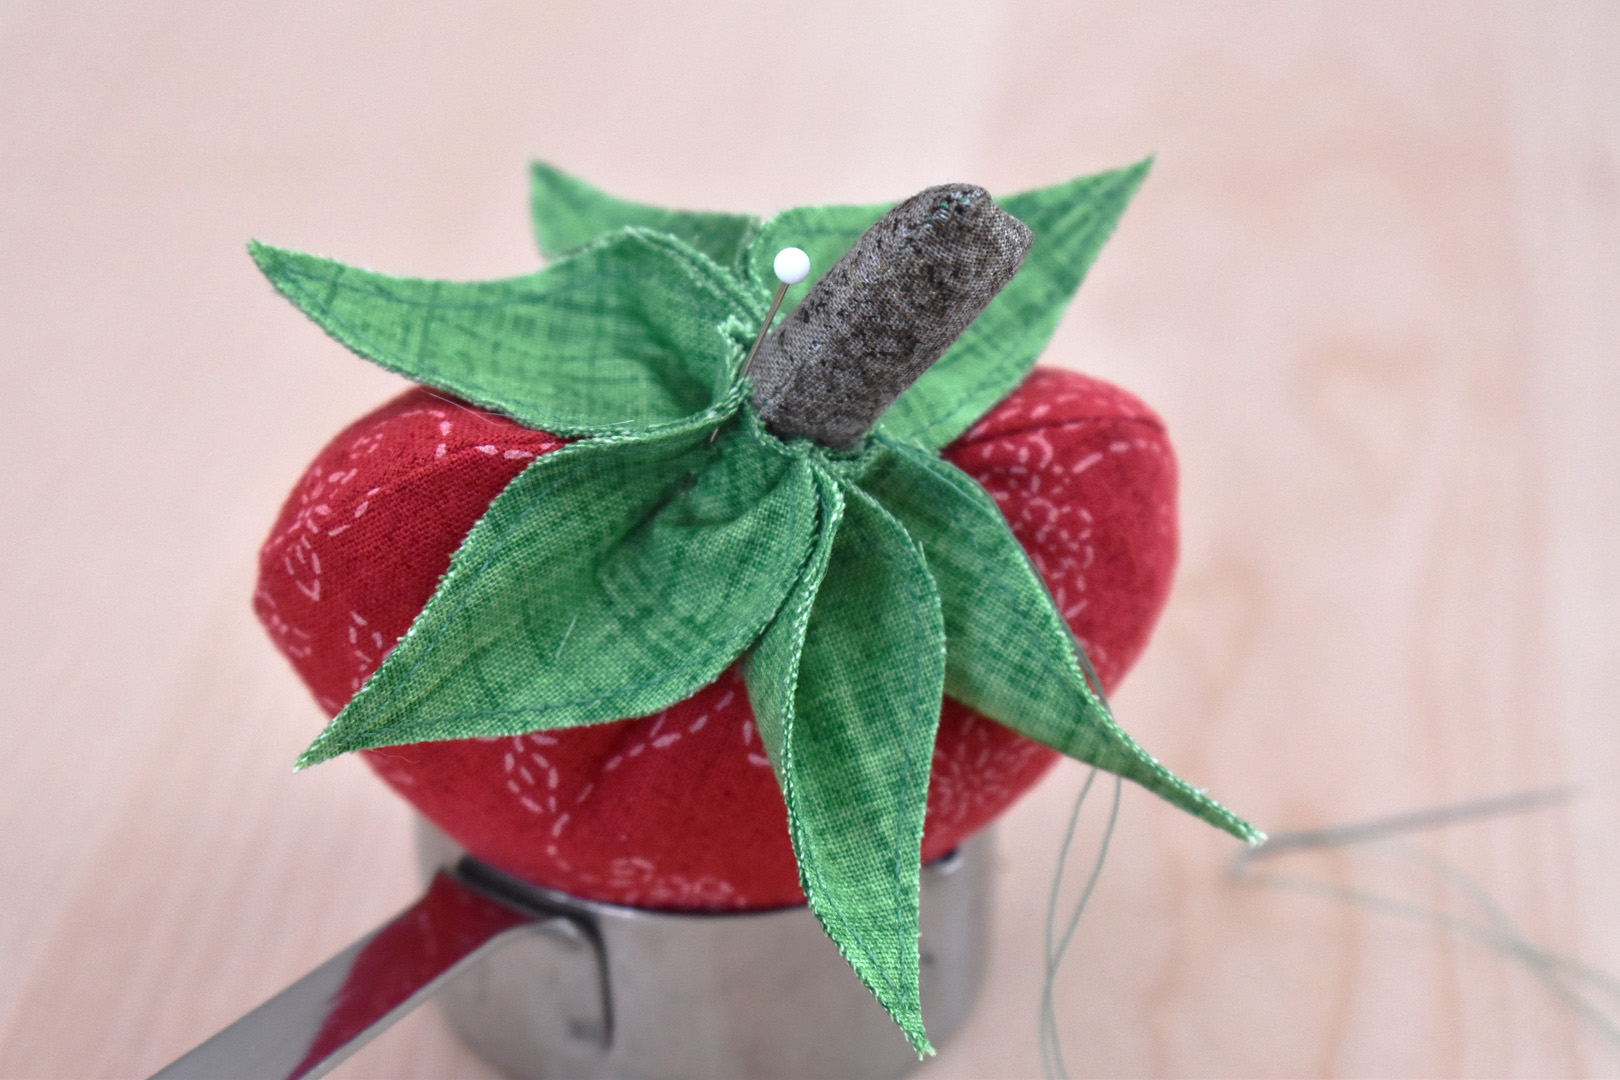
Pin in place.
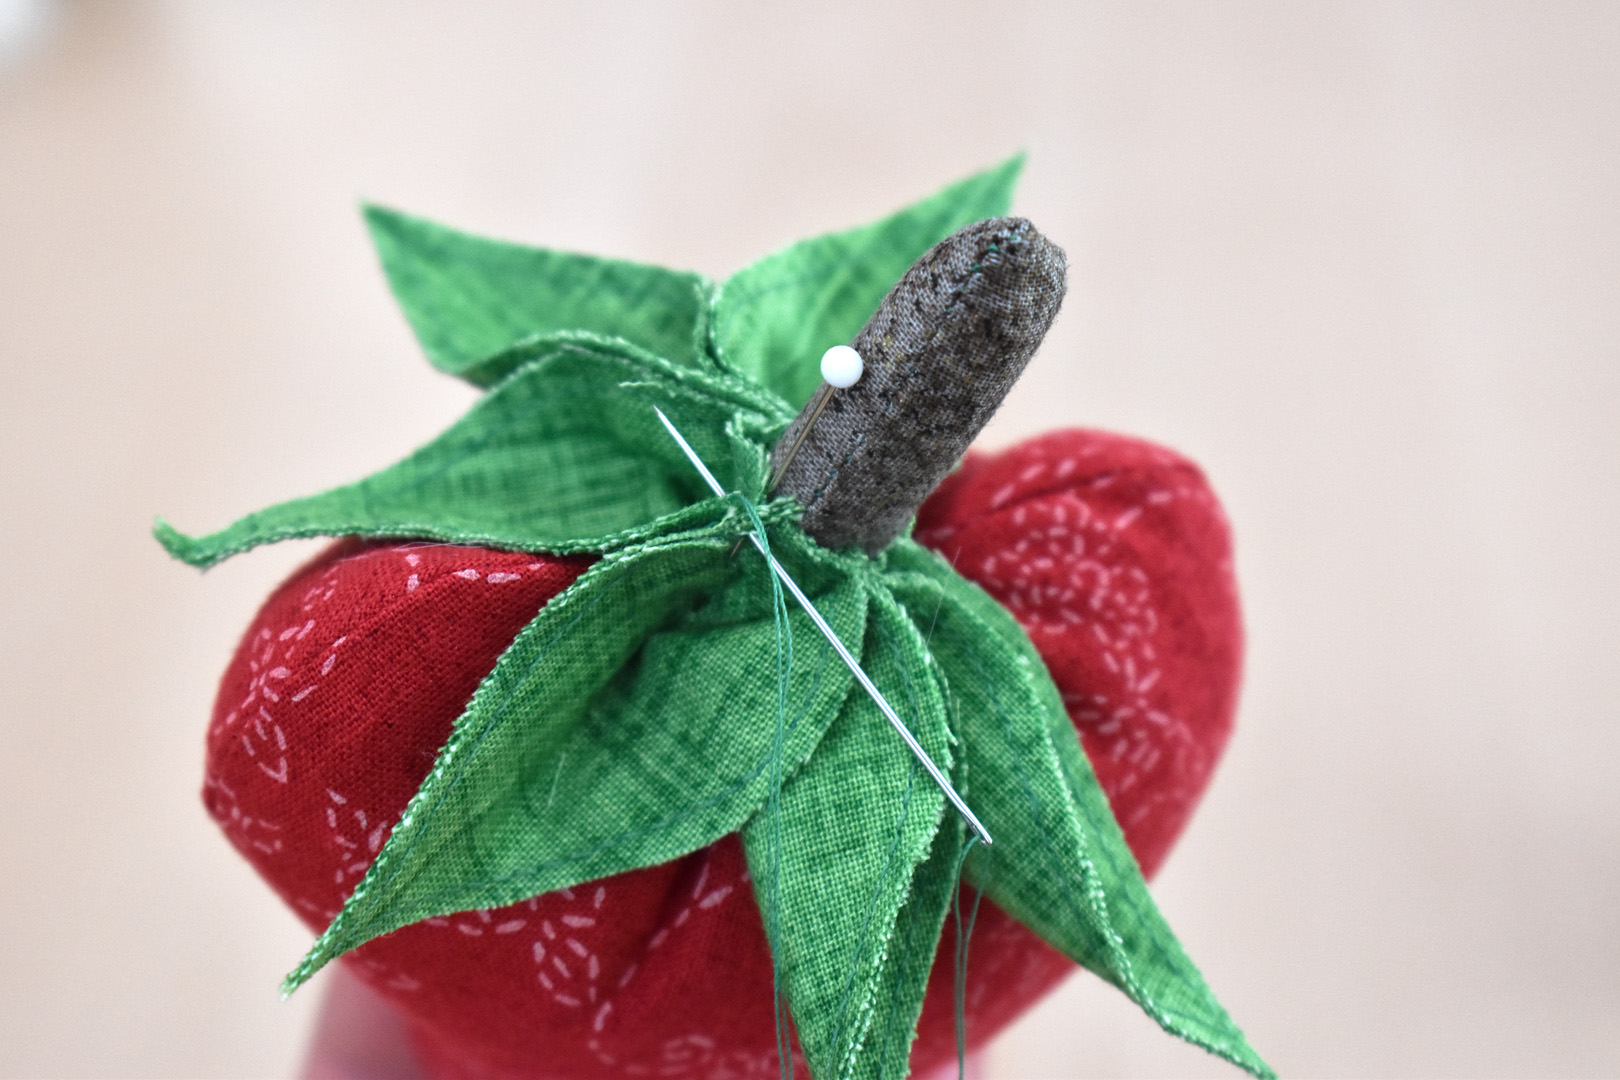
Run the needle and thread through the stem to the other side of the topper, and tack the two leaves together just as on the other side. Secure with a knot, then run the needle and thread back and forth through the topper and stem a few times to secure the topper in place. Knot and cut the thread ends, and the strawberry is ready to enjoy!
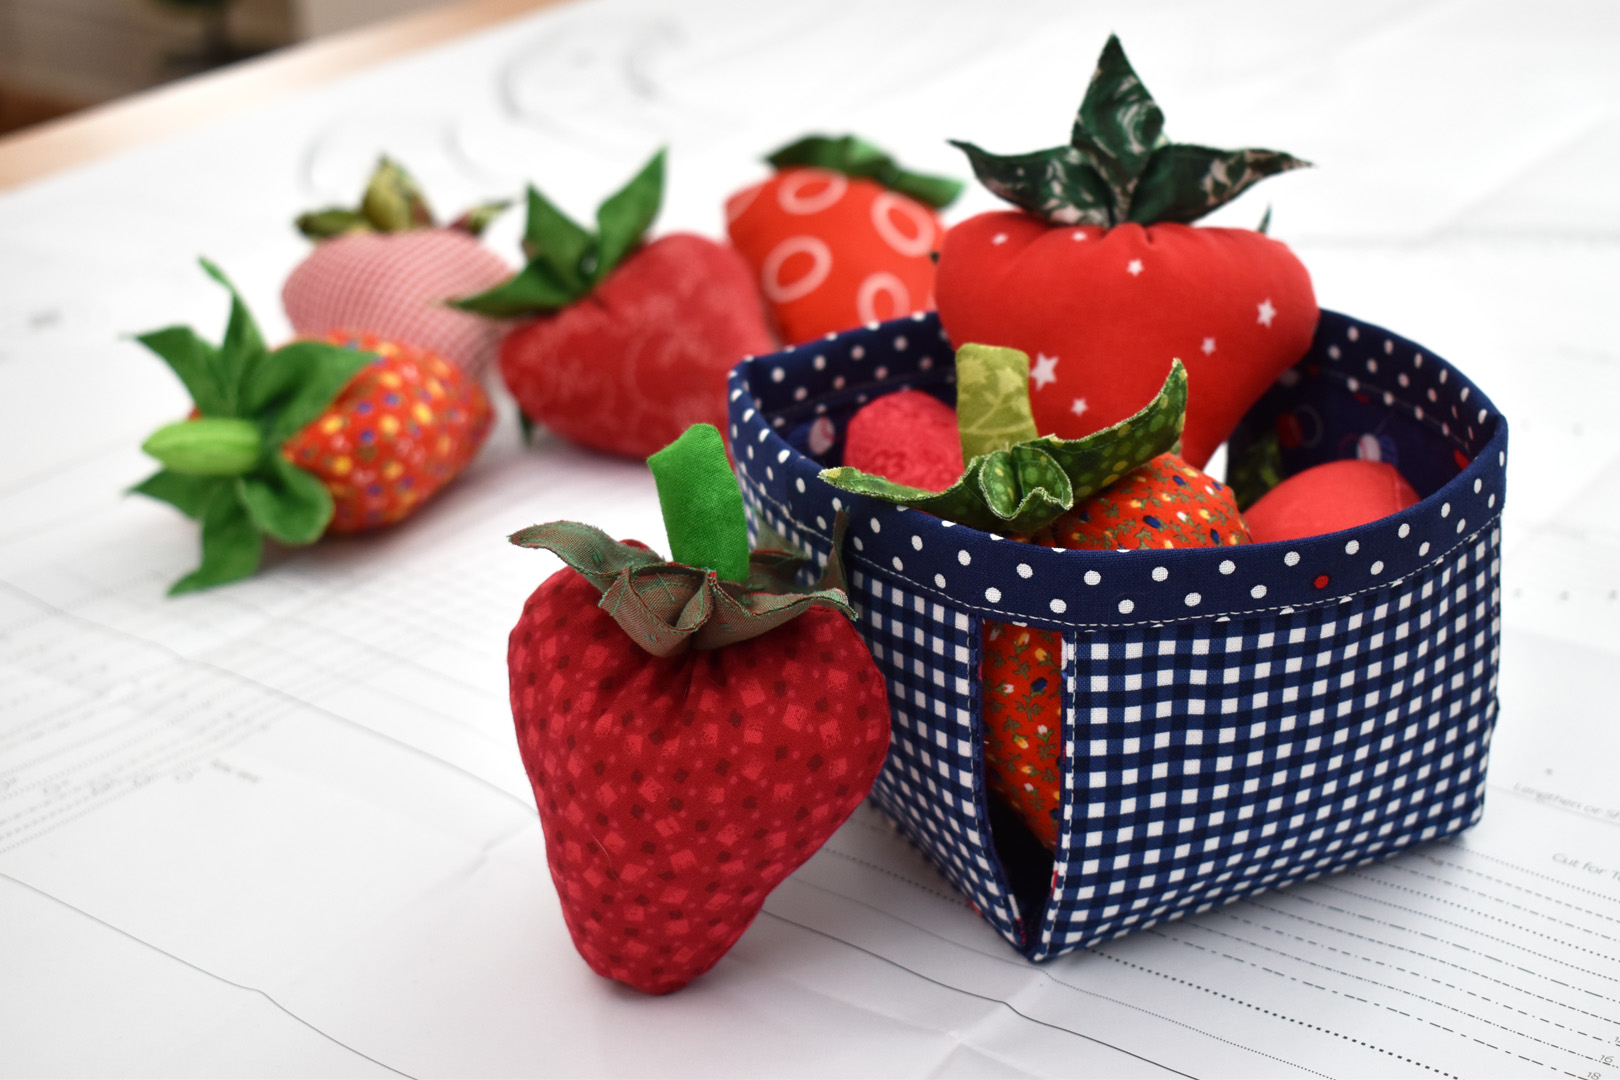
Make a whole set of stuffed strawberries and create a berry basket to hold them! Click here to find my Fabric Pint-Sized Berry Basket tutorial at WeAllSew.
Used Products


What you might also like


One comment on “How to Make a Strawberry Pincushion”
Leave a Reply
You must be logged in to post a comment.

A lot of fiddling but very adorable!