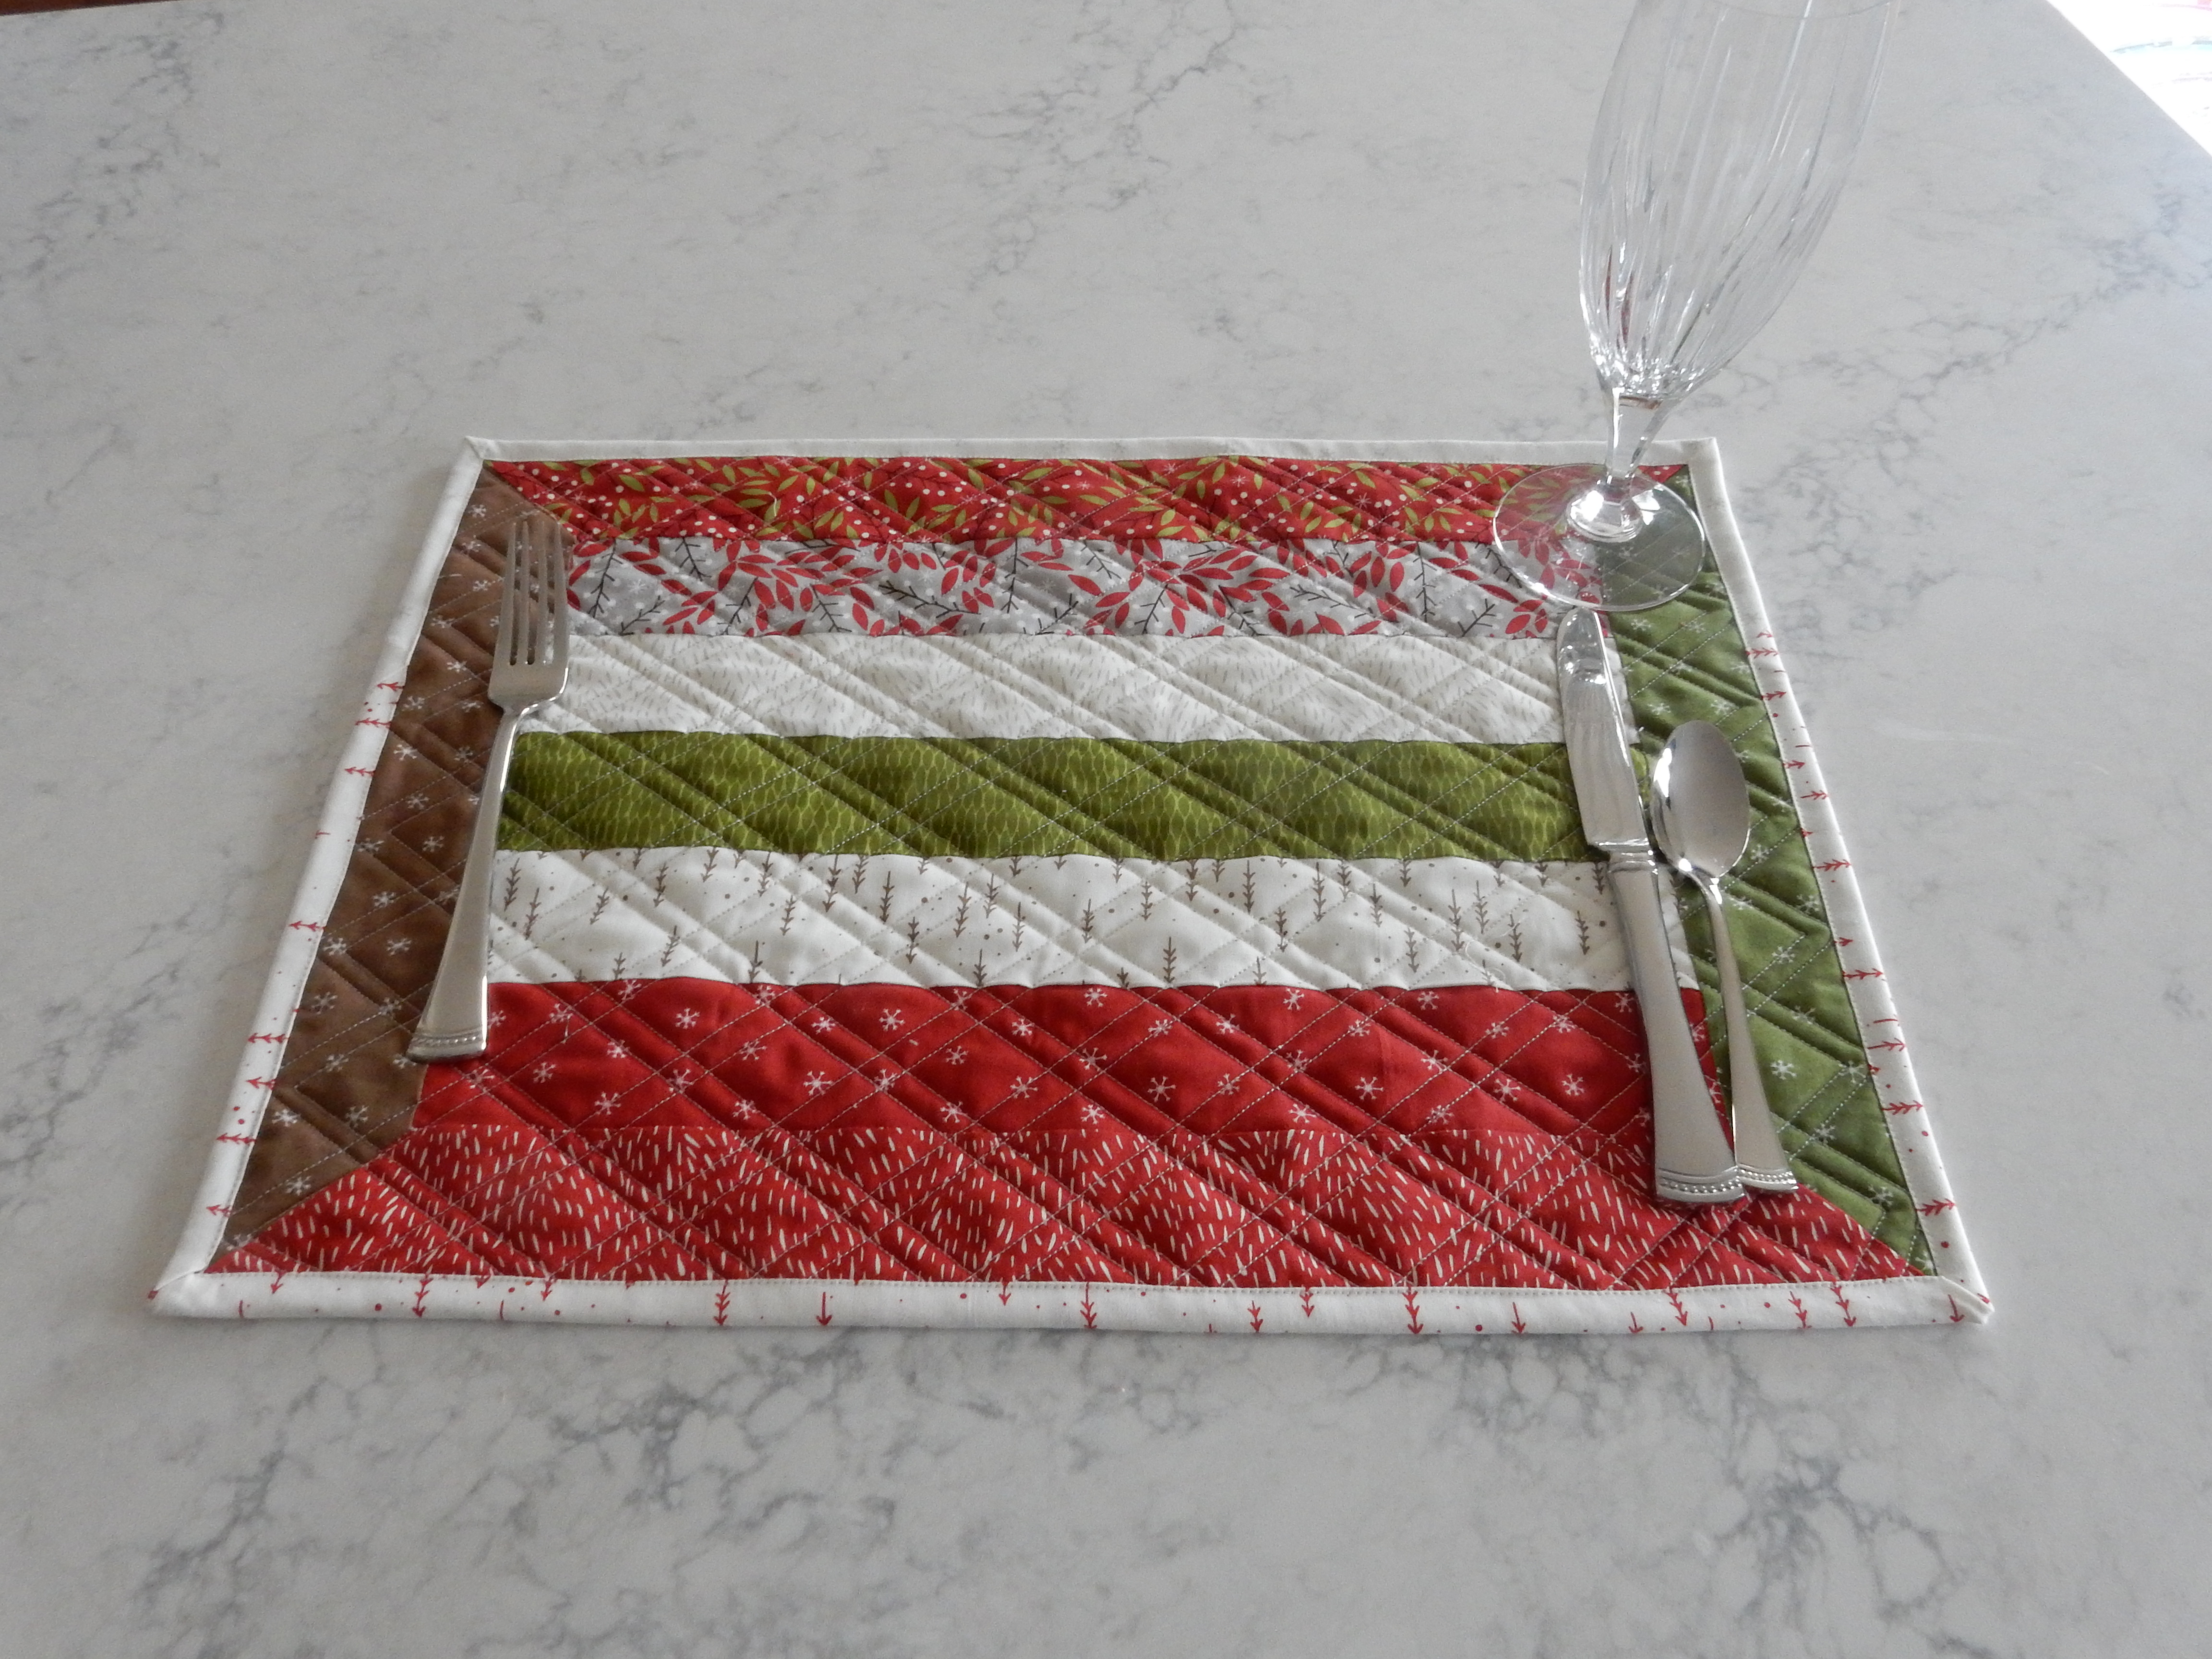
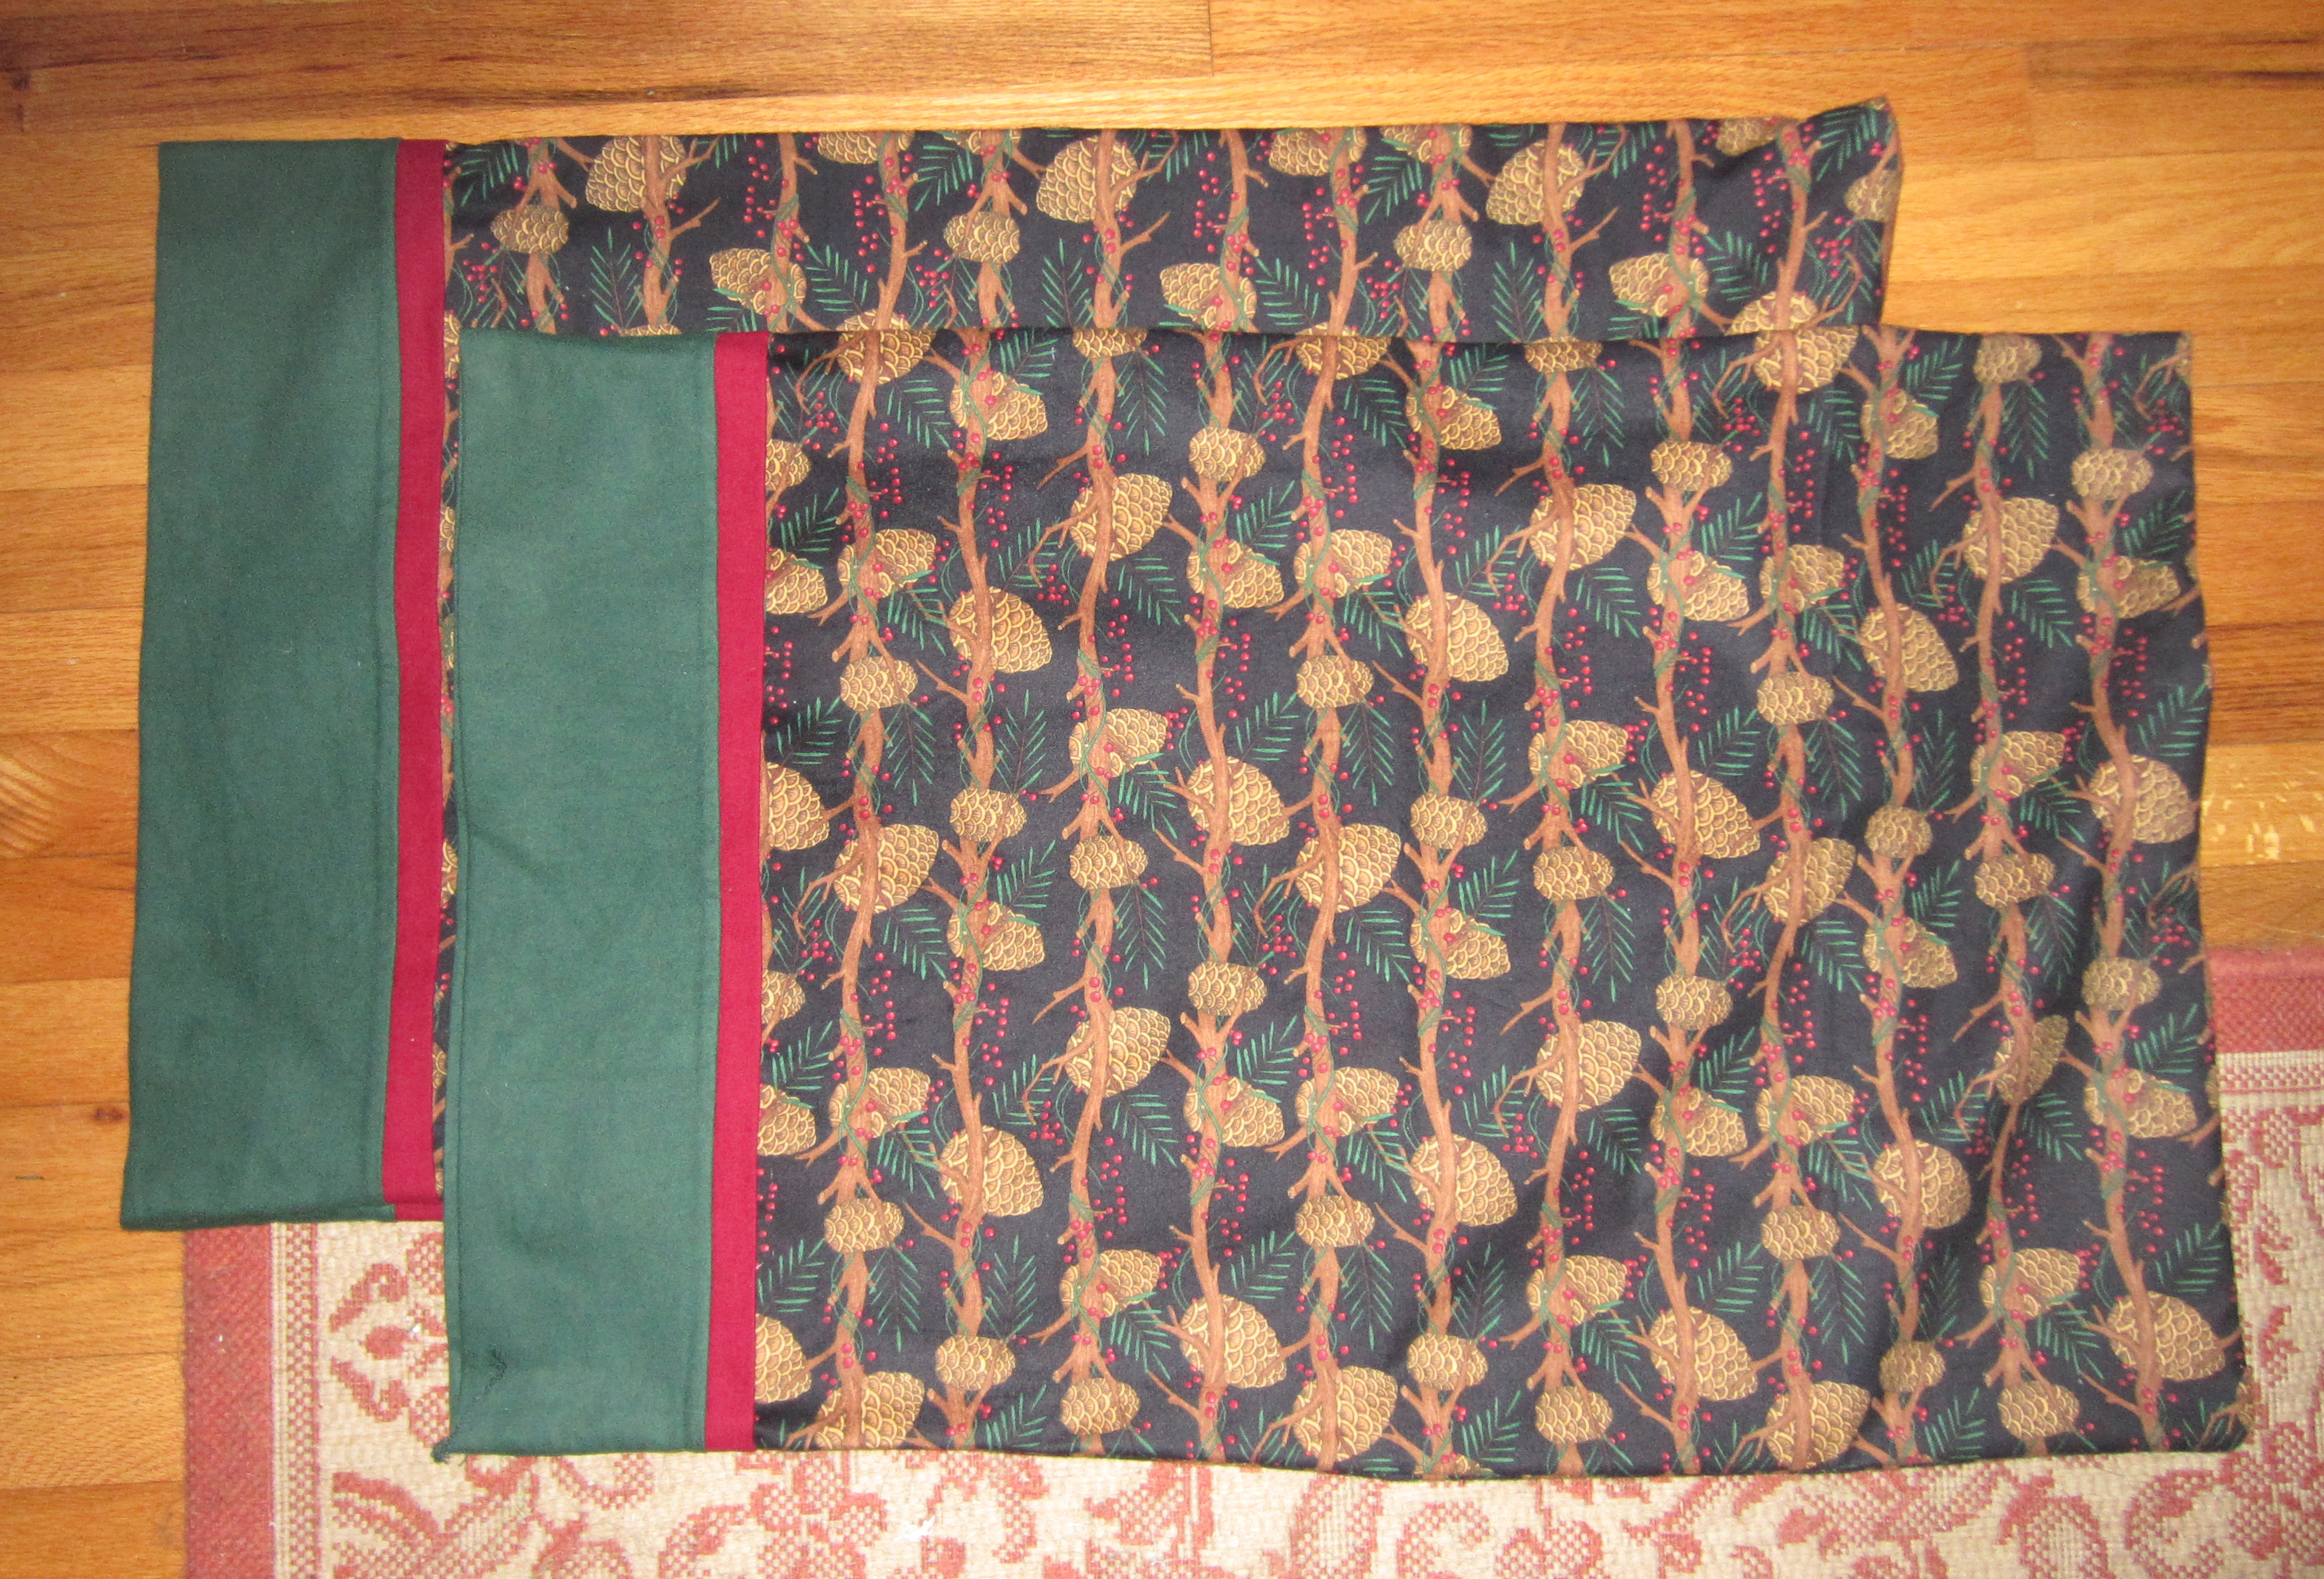
How To Make Easy Holiday Placemats
The Holidays are a while off but I thought today would be a great time to get ahead of the Holiday Season rush and make some new placemats for my dining room table using my new BERNINA 790 PLUS. These Placemats are quick and easy to make and it means I’ve got one more holiday item checked off my to do list! Keep reading to find out how I made these.
Materials to Make Easy Holiday Placemats
Materials listed will make 6 placemats.
- 41 – 2 1/2″ x WOF of fabric strips (I’m using Merriment by Gingiber for Moda)
- 1 3/4 yards backing fabric
- Scrap pieces of batting
- BERNINA Patchwork foot #37 , #37D, #97, or #97D
- Basic sewing notions
Picking out your Fabrics:
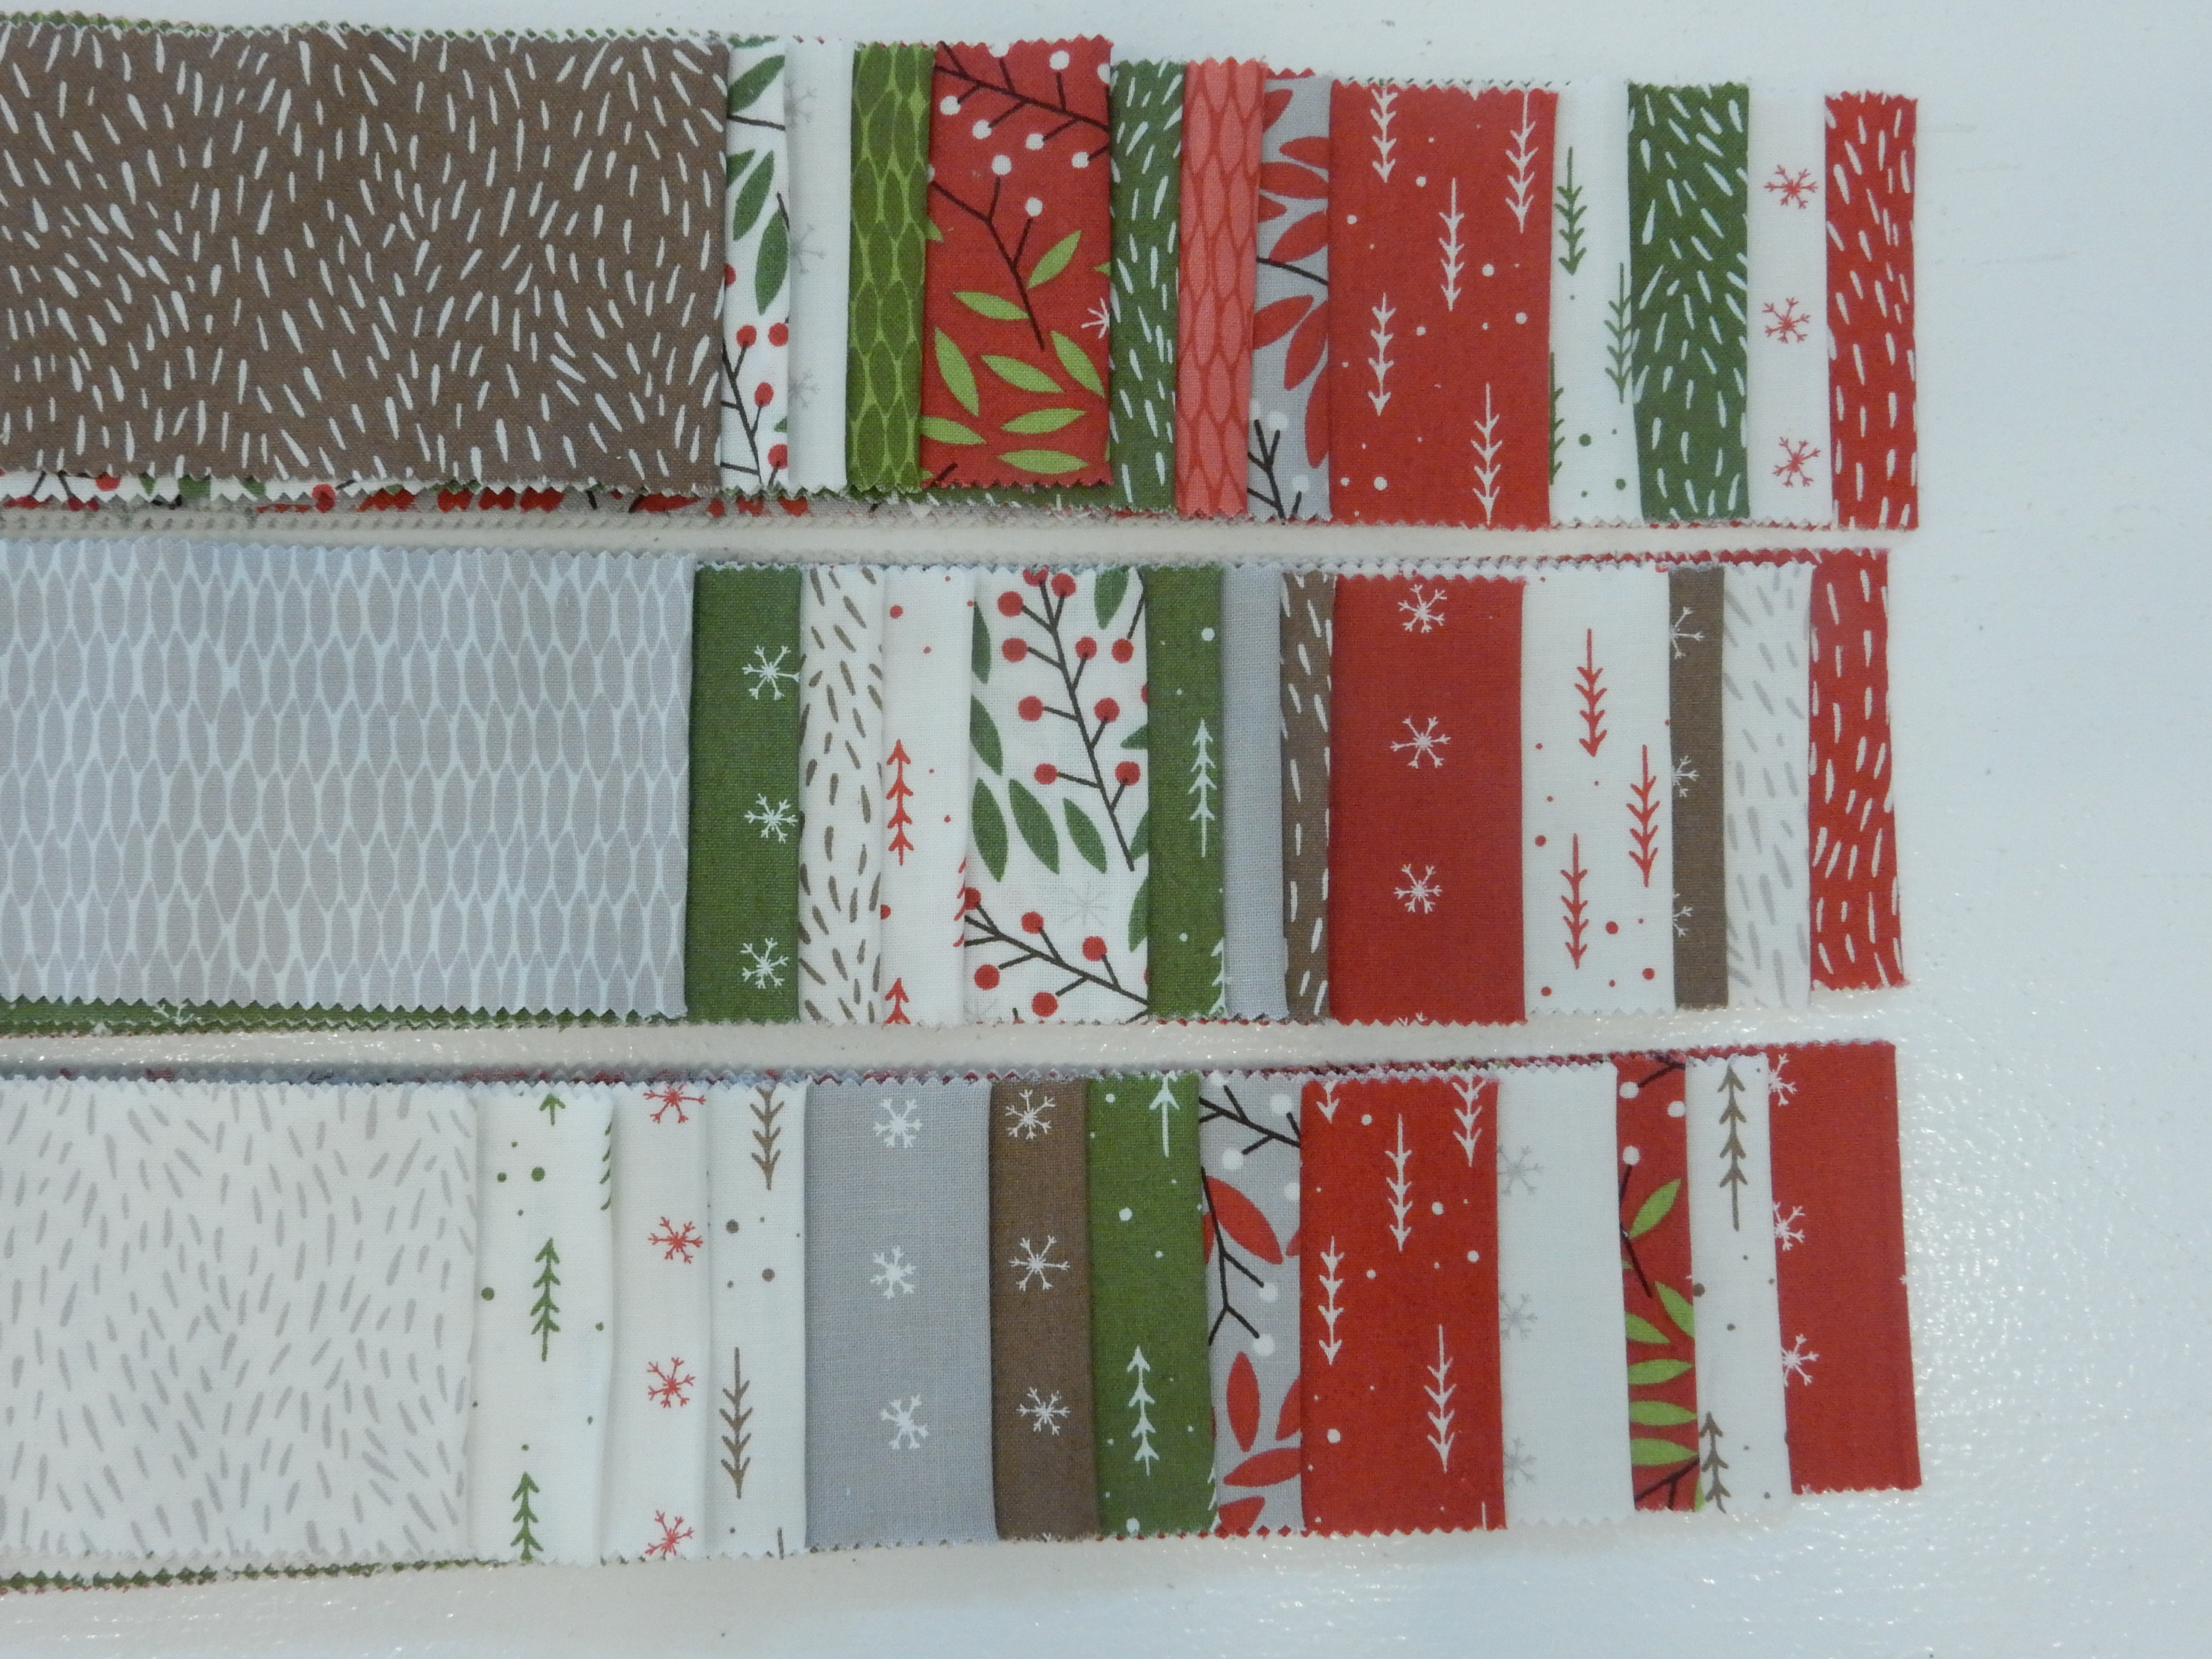
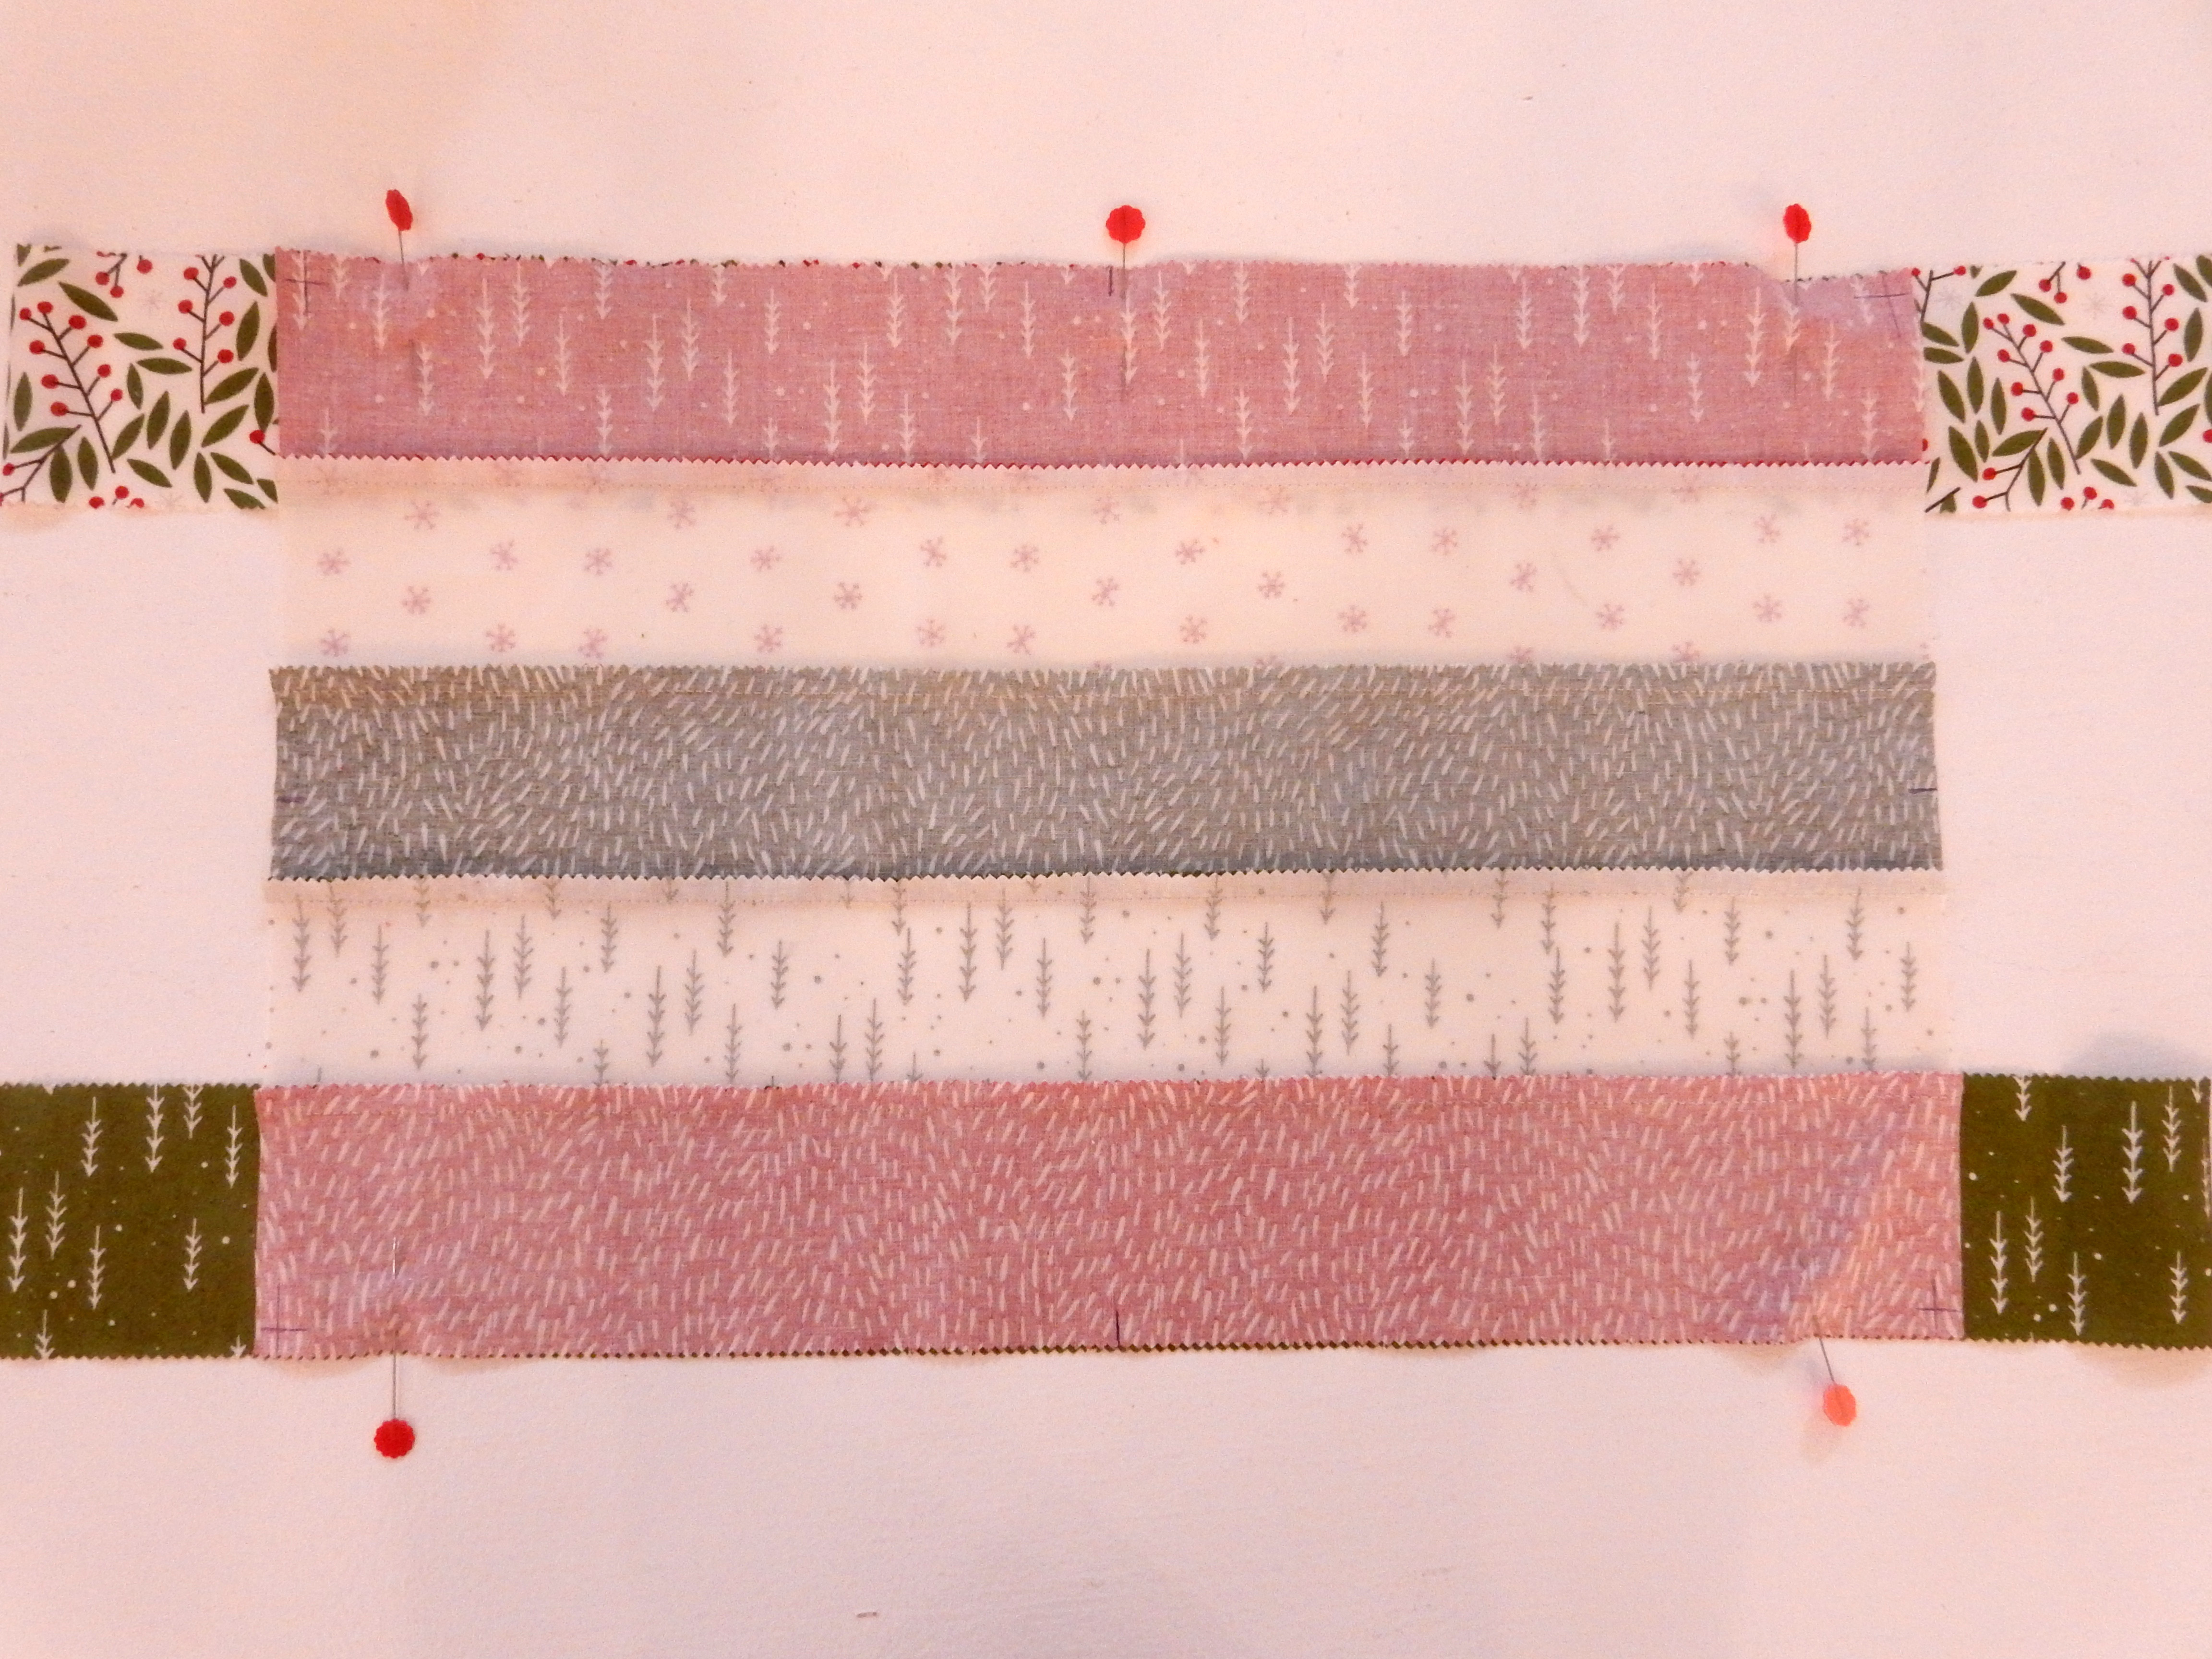
Start by dividing your 41 strips of fabric into three different piles of (13) 2 1/2″ x WOF strips of fabric. Use an assortment of dark, medium and light fabrics. I enjoyed the scrappy look this combination provided!
Each pile will contain the following:
- 5 strips for your placemat center
- 4 strips for your placemat border
- 4 strips for your placemat binding
Making the placemat center:
We are going to start by working with one pile of your strips, pick 5 strips of 2 1/2″ x WOF for the center of your placemat. Sew these together lengthwise making a pieced rectangle that is 10 1/2″ x WOF. I purposely picked three darker fabrics and two lighter fabrics and really like how it looks.
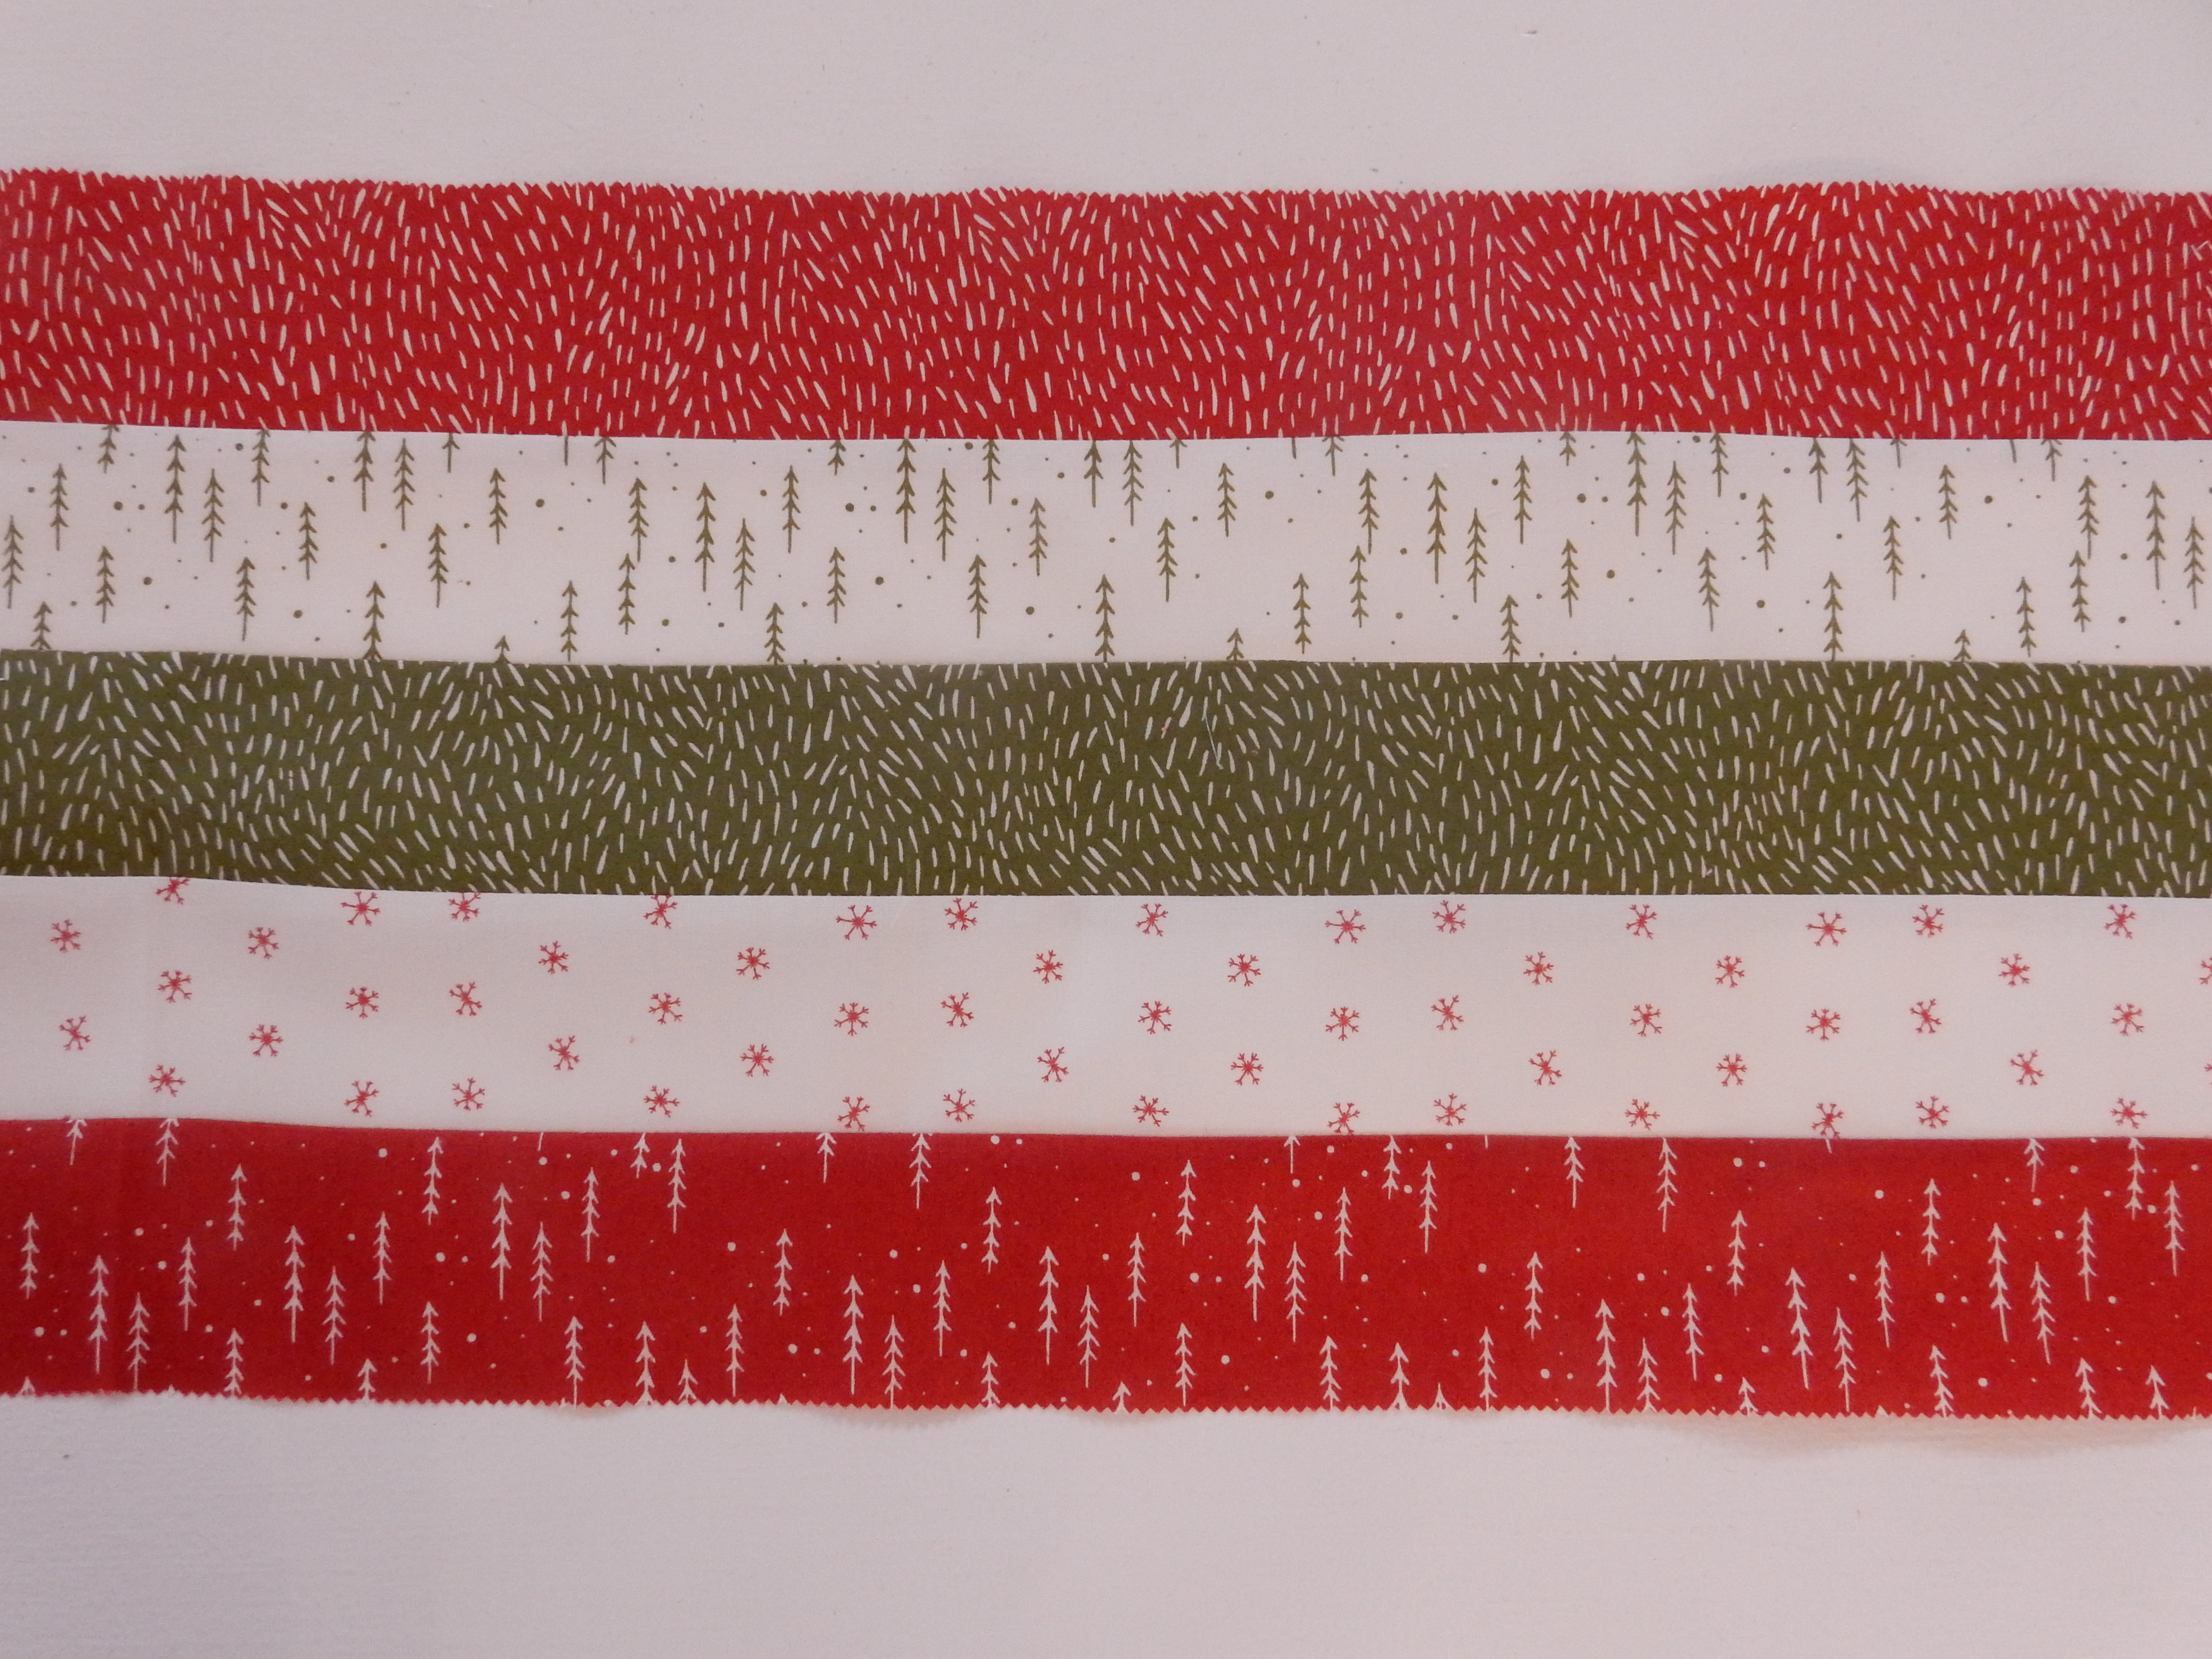
Cut the pieced rectangle into two rectangles, 10 1/2″ x 16″. Set one rectangle aside.
Don’t forget to press:

Press all of your seams to one side before going on to the next step of adding your borders.
Marking for borders:

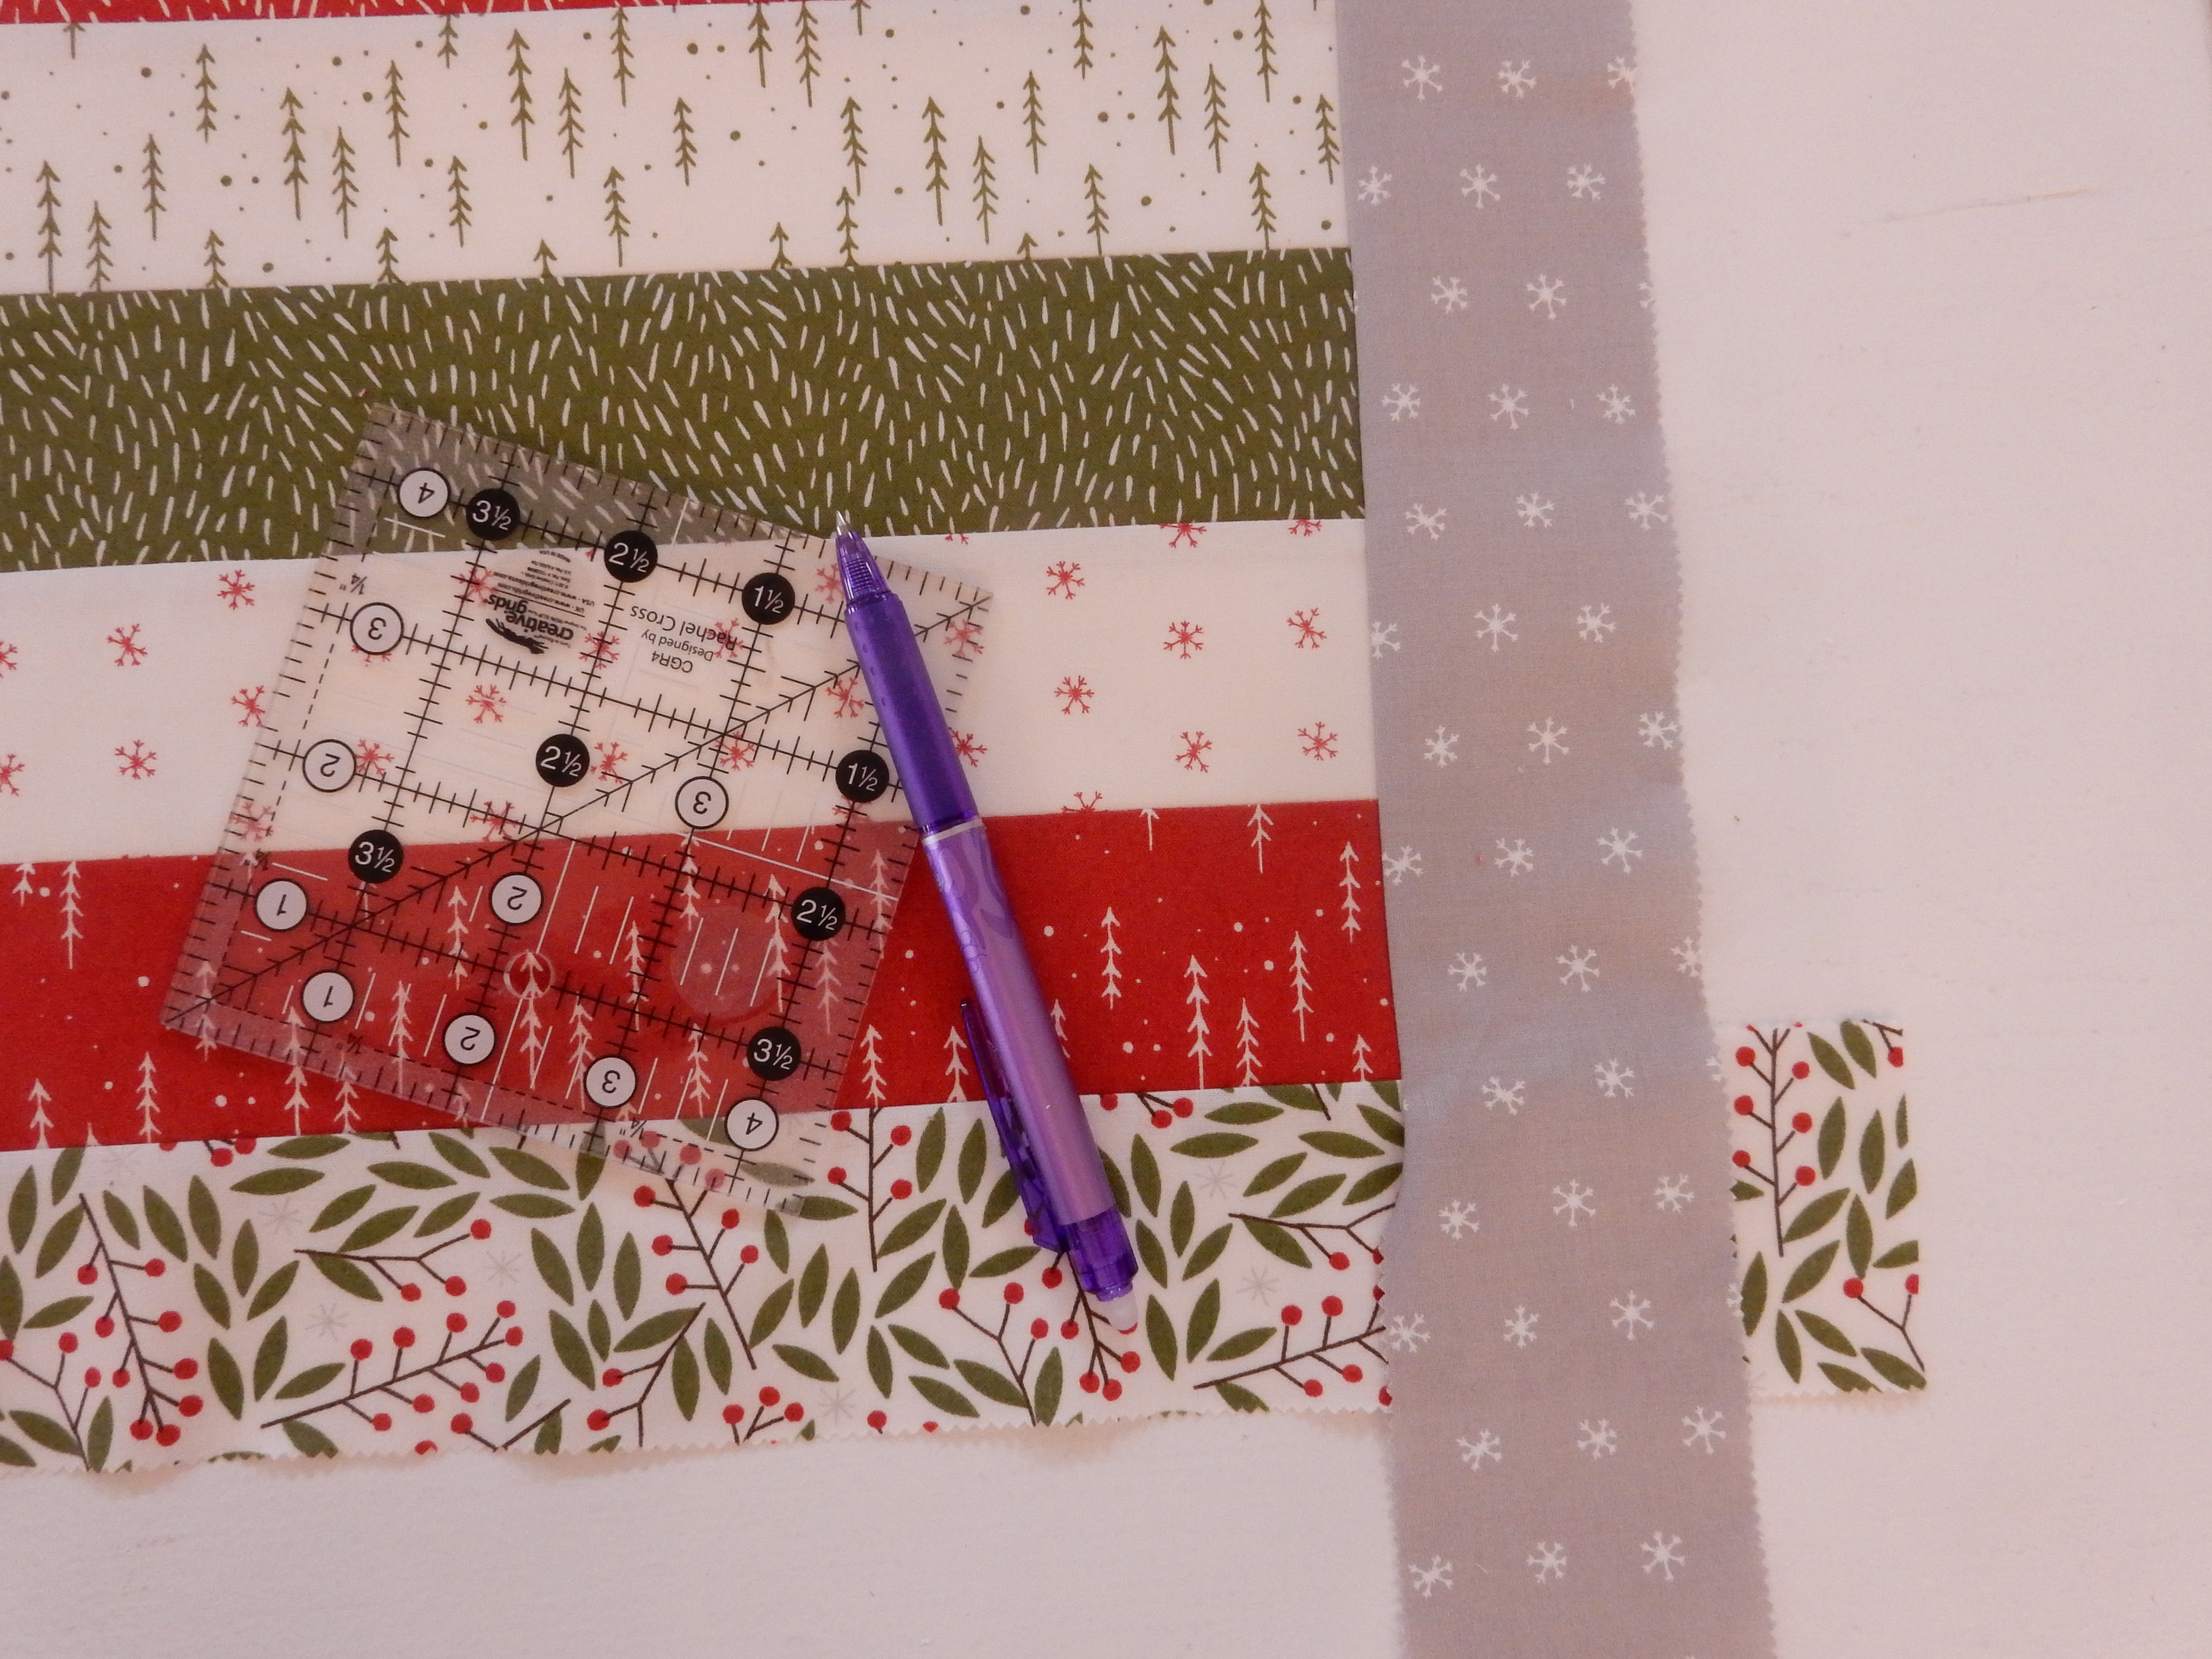
Mark the centers on all four sides of the pieced rectangle. You can mark them with a pen as I did or you can mark them with a pin. If you use a marking pen make certain it will disappear or isn’t set with heat.
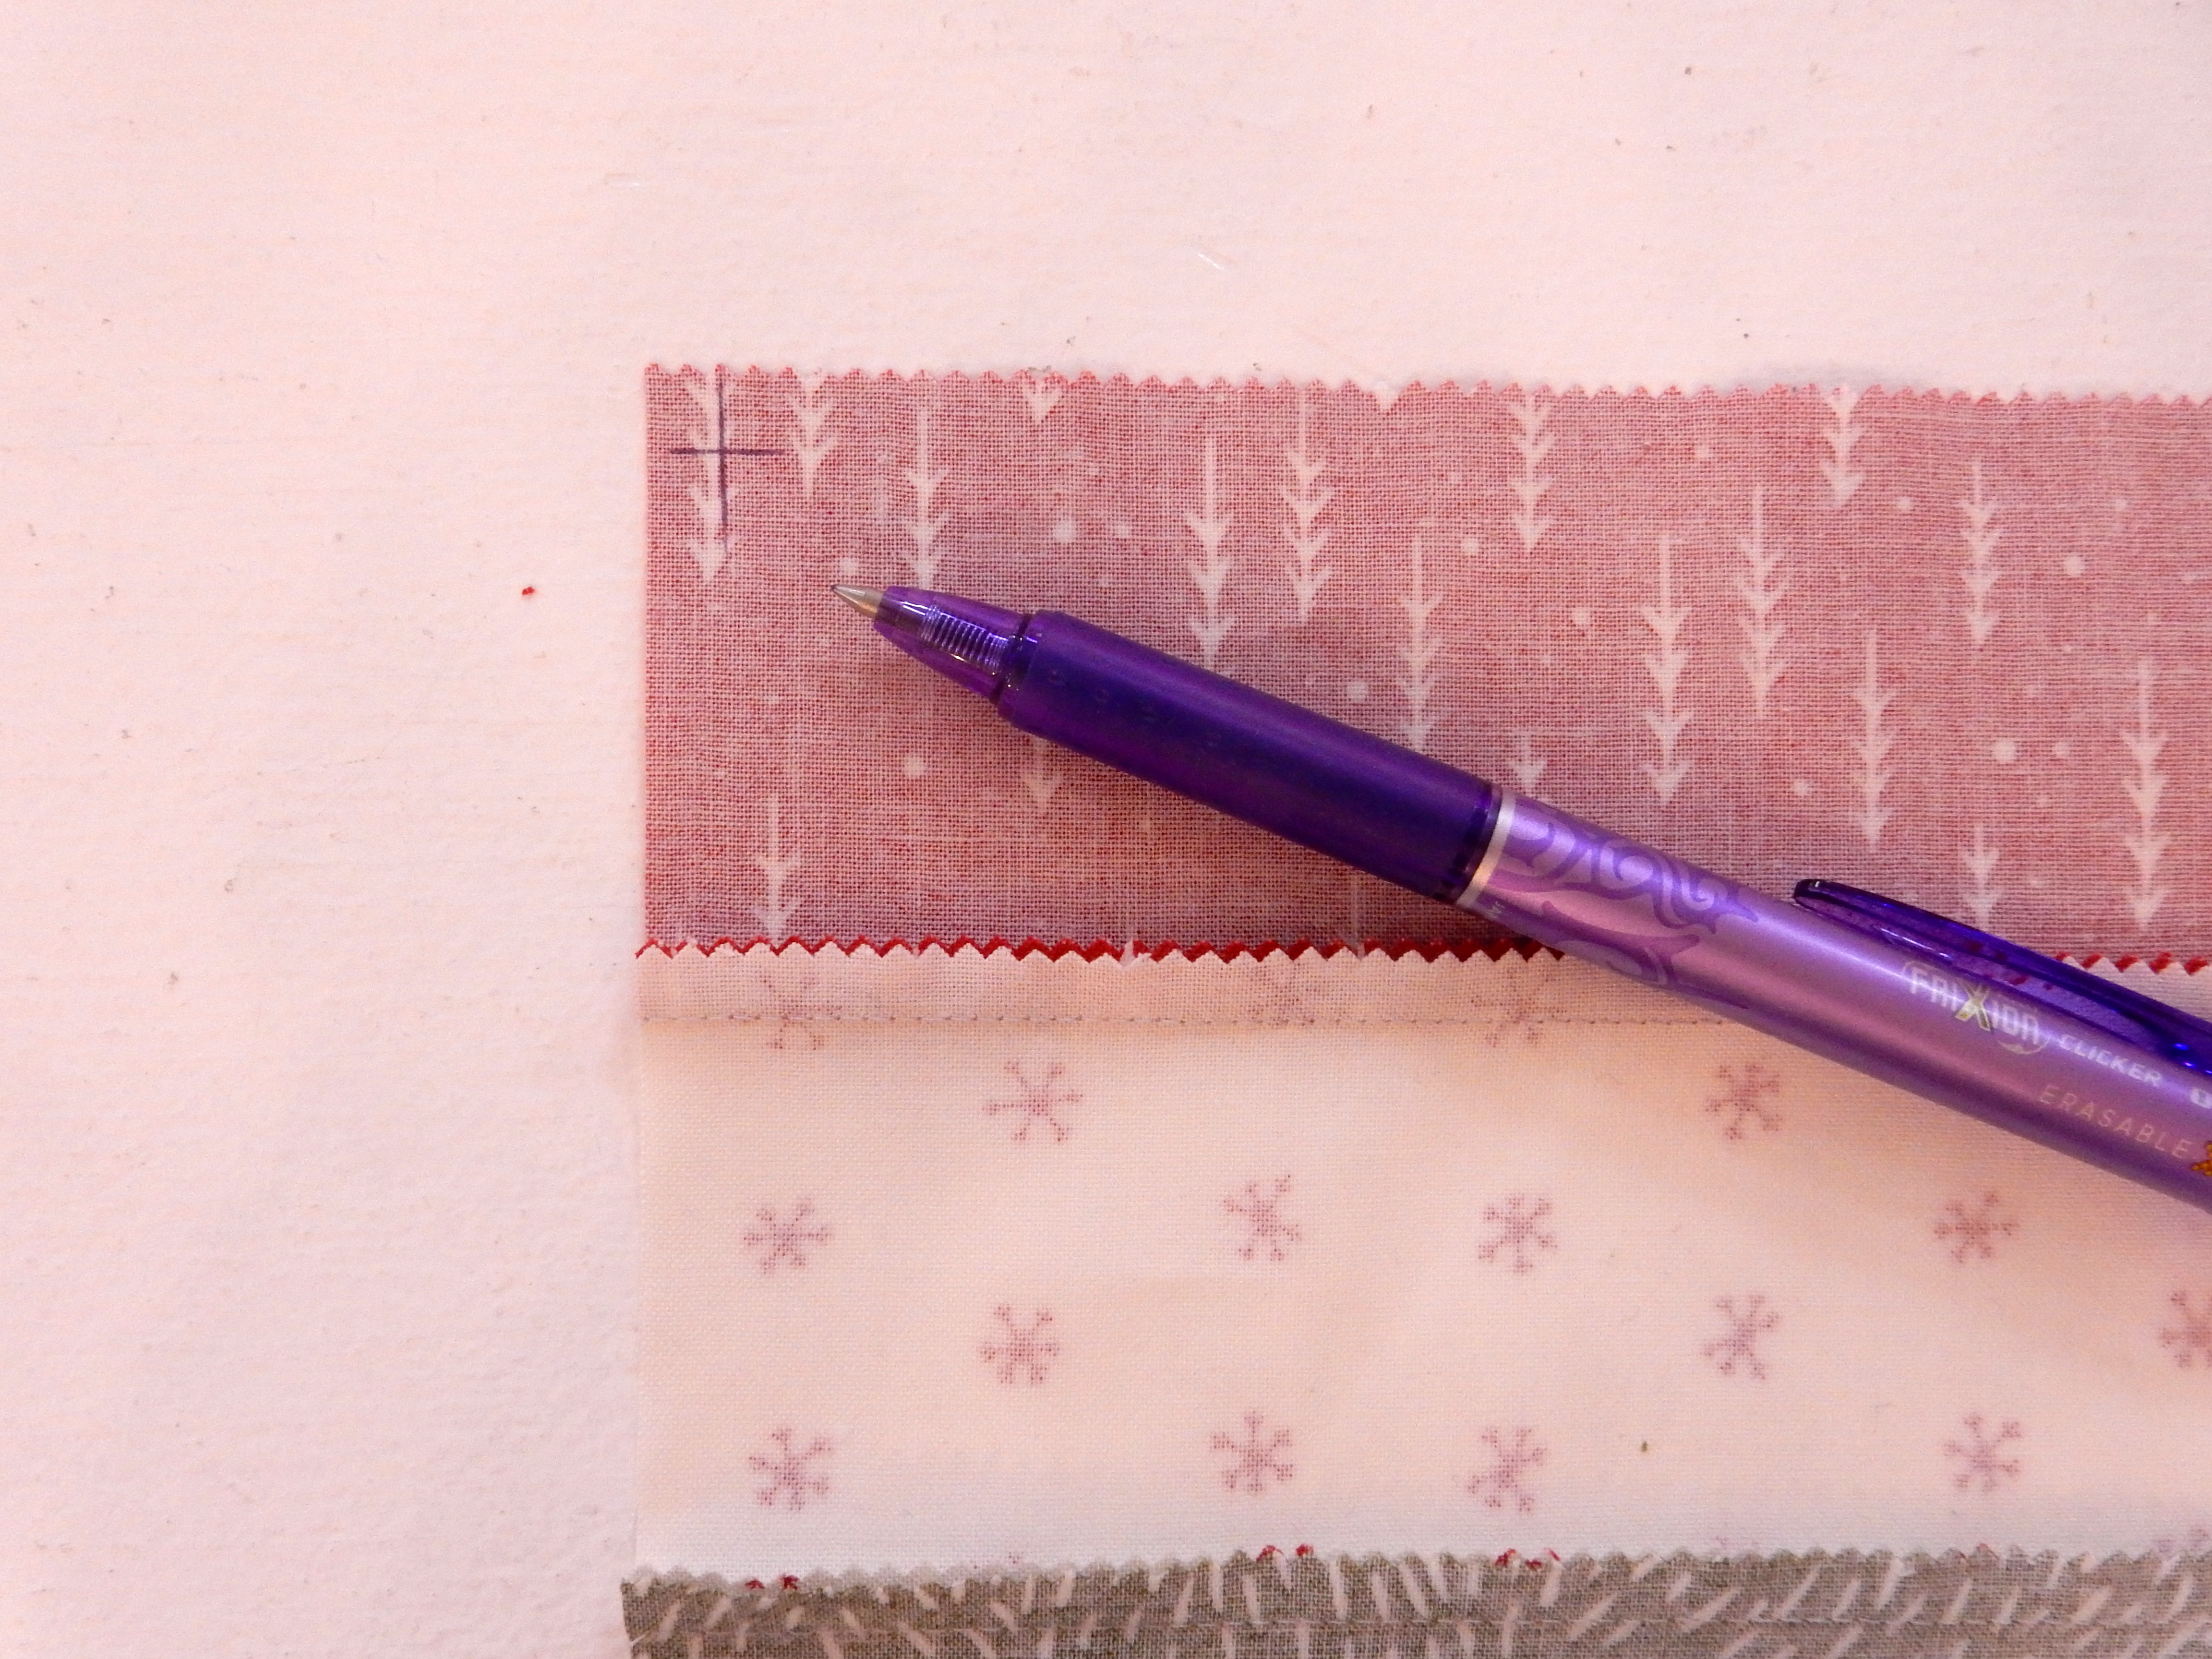
Mark 1/4″ in from all four corners. This ‘X marks the spot’ is very important when mitering borders. Keep reading to find out why.
Picking and marking your border fabrics:
To me this is always one of the fun parts of sewing, I get to play with all of the fabrics and audition them with my placemats. From your pile of strips pick 4 strips for your borders, cut them each in half making four strips of fabric that are 2 1/2″ x 20″. Set half of them aside.
Next we we are going to need to mark out borders so we can match them to our Placemats. Mark the centers of your 4 border strips and then mark two of these strips from the center out on each side 7 3/4″ (top and bottom).
On your two remaining border strips mark from the center out on each side 4 3/4″ (sides).
Pinning:
Matching up your center and corner marks, sew the border strips to the pieced rectangle edges, stopping exactly at the corner markings (X marks the spot) of your placemat centers. DO NOT cut the extra length. Repeat for all edges. Don’t forget to press!
Press the seam allowances towards the border. Your done with pressing now until your placemat is done.
Easy miters:
To Miter the corners are a lot easier than people think all you need to do is start by laying your pieced rectangle flat in front of you.
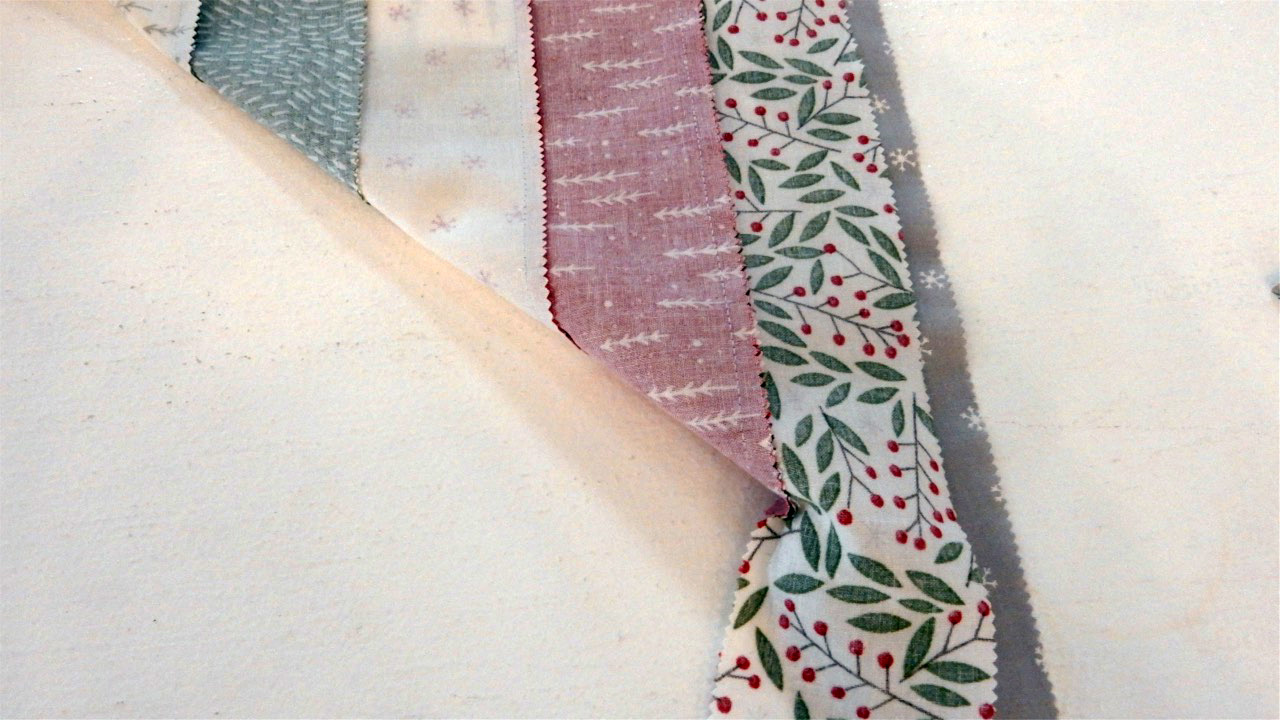
Next, bring the two strips of border fabric together (your bottom border fabric will be folded to match up with your right border fabric) matching the long edges and creating a 45 degree fold in the pieced rectangle.
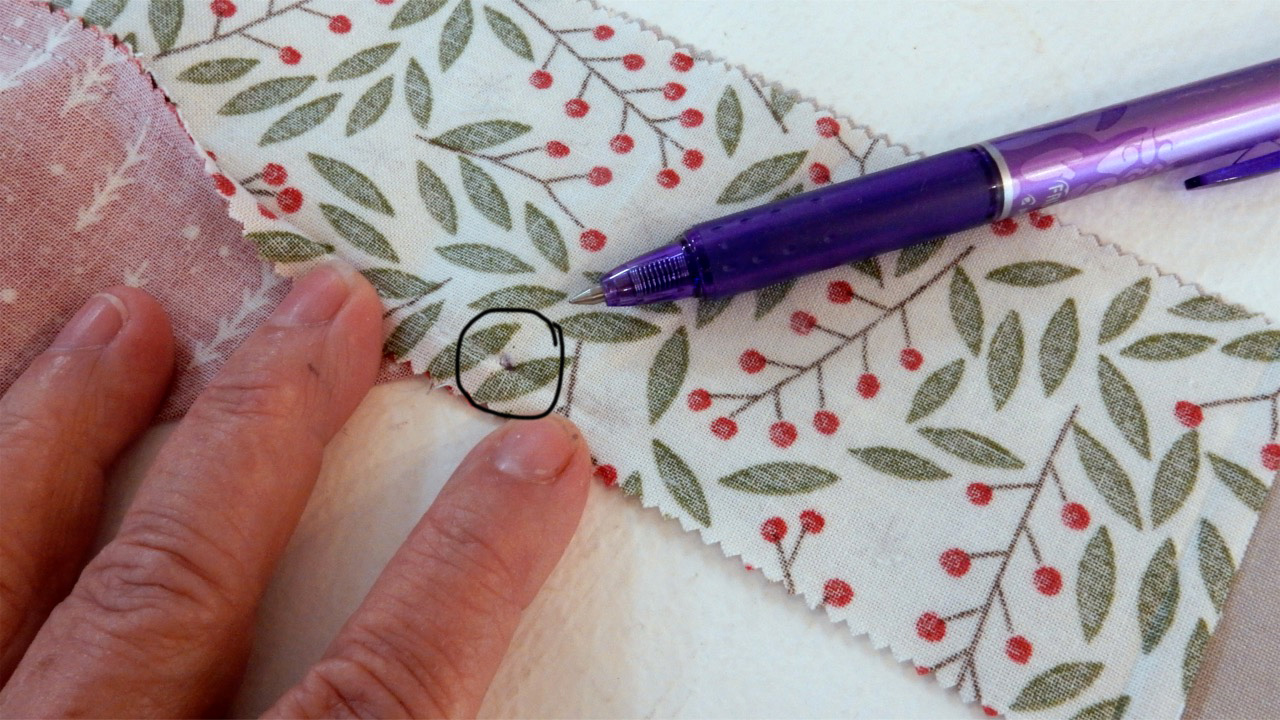
See that little dot? This dot is just as important as your X marks the spot is. It’s the starting point to sew your mitered corners together.

Using a ruler with a 45 degree mark, mark from the seam line corner (where the two borders meet) out diagonally at a 45 degree angle. I’m using a Creative Grids 4 1/2″ ruler with a 45 degree mark on it. This 45 degree line is extremely helpful. Do you see how it’s lined up with the outside edge of my border fabric? This helps in making certain that I’m marking an actual 45 degree angle. Refer to my YouTube video for detailed instructions. Repeat for all corners.
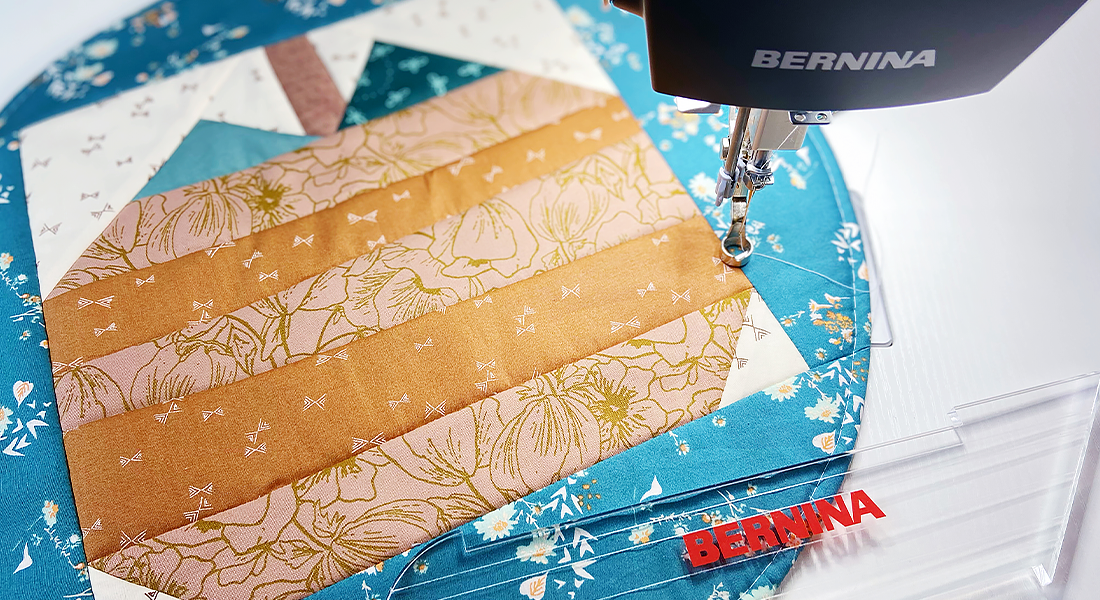
Stitch on marked lines starting exactly at the seam intersection and backstitching at the end of each seam. My BERNINA 790 PLUS ‘presser foot up/down’ feature allowed me to hoover over my stitching line so that I could easily find where to start stitching! Next you can trim the excess border fabric and press the corner seams open.
Repeat to make the remaining placemats.
Finishing your placemats:

Layer the placemat tops, batting and backing and quilt as desired. This is the perfect type of project to use to practice your Free Motion Quilting with your BERNINA Stitch Regulator! Sew the binding strips ends together using diagonal seams. Fold the binding in half iron sides together and press. Bind the placemat edges, mitering corners.
That’s it! You have placemats to decorate your holiday table! Stay tuned because up next will be matching napkins!


