Never Tear Out Stitches Again! How to Make Paper Piecing Easy
Hi there! Lee here from Freshly Pieced. As anyone who’s ever taken one of my classes can tell you, I love foundation paper piecing. I love the accuracy, and I love the complex, interesting designs this technique allows you to create. In fact, it’s one of my missions in life to convert the whole sewing world to my paper piecing ways. So I’m here today to give you my absolute favorite paper piecing tip ever. It’s so beautifully simple you’ll probably think it’s too good to be true. But it’s 100% for real!
Okay, so now that I’ve probably totally oversold it, are you ready for my favorite paper piecing tip?
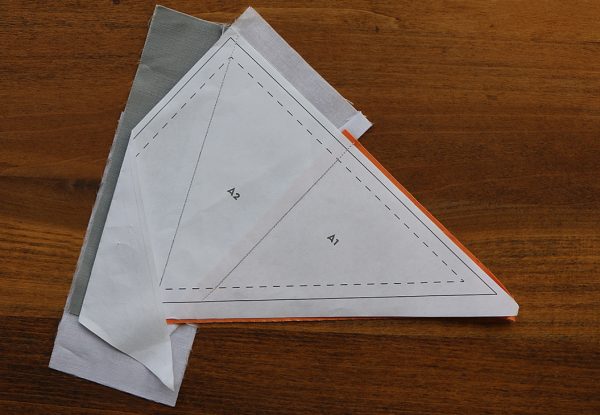
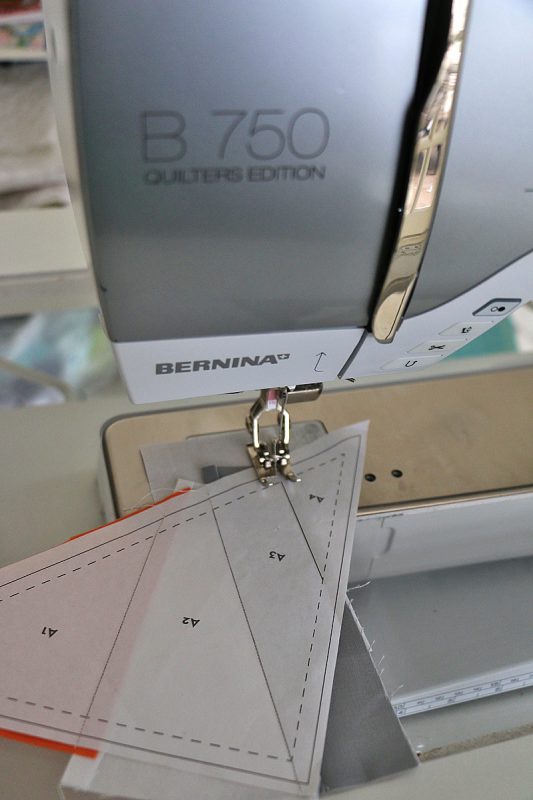
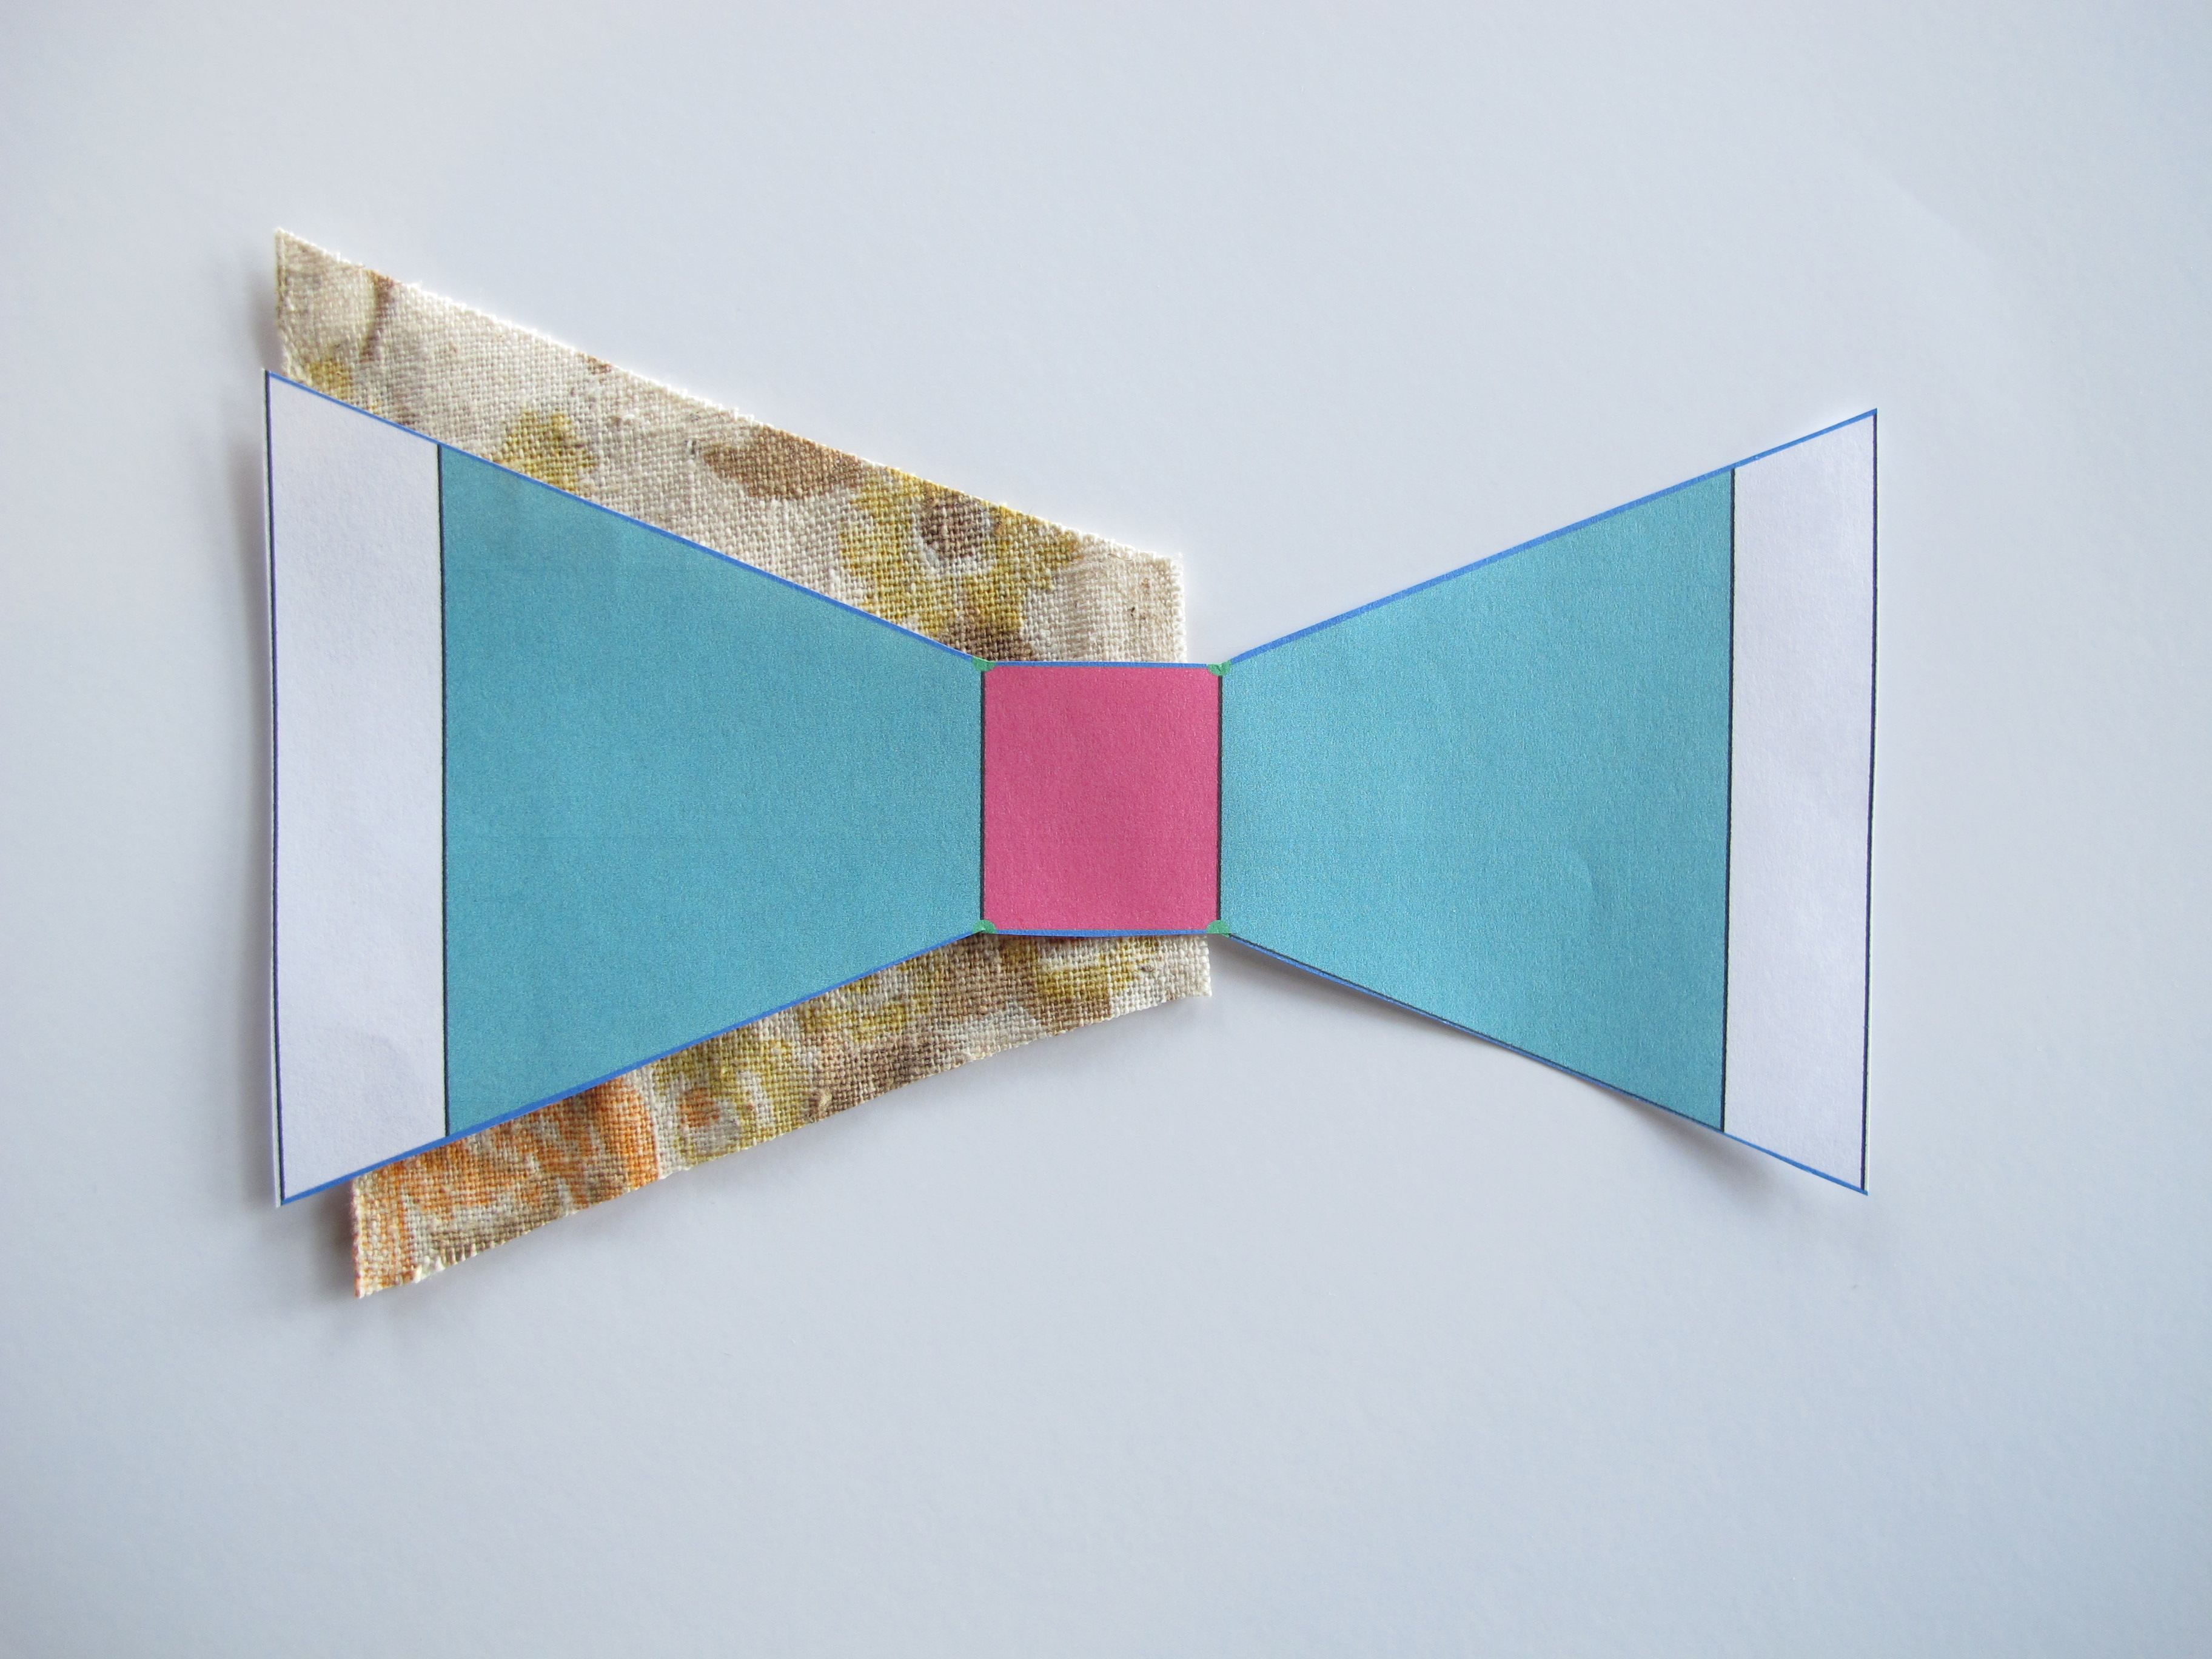
For the purposes of this post, let’s say you’re making this unit (which is part of a traditional Wheel of Fortune block).
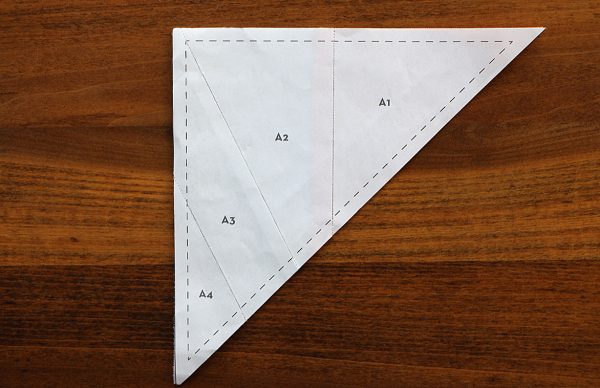
Here’s what it looks like from the back, with the paper-piecing template still on.
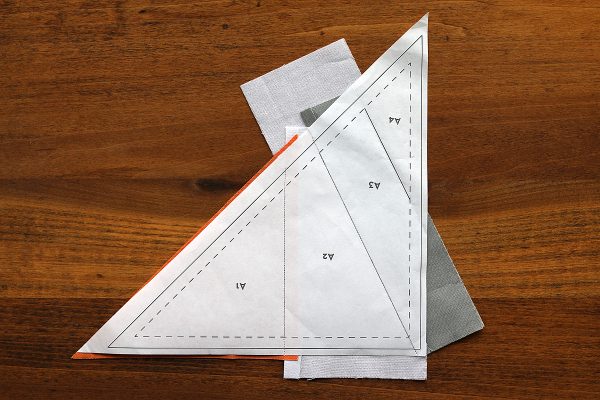
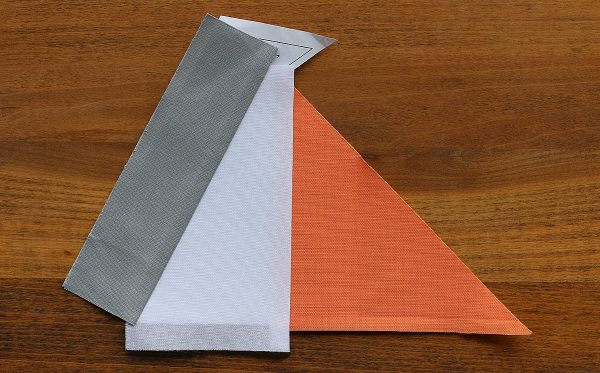
Now let’s say you’ve already pieced the first three pieces in your four-piece unit (as shown above). So far, so good!
But check out that where that next little piece needs to go. You’ve got a tricky angle, and the area you need to cover is offset. That’s a bad combination in paper-piecing! Nine times out of ten, beginners will place that next piece wrong, and as a result, when the piece is sewn, they’ll flip it into place and find that they “missed” the tip of the triangle. That means tearing out stitches (which is never fun, but it’s really not fun when you’re paper piecing), and making another blind attempt to place the piece correctly (and maybe another, and another …). This is a prime example of the kind of seam that makes people tear their hair out and swear off paper-piecing FOREVER.
But guess what? I have an insanely easy way to avoid all of that. Get ready to love paper-piecing again! (Or maybe for the first time.)
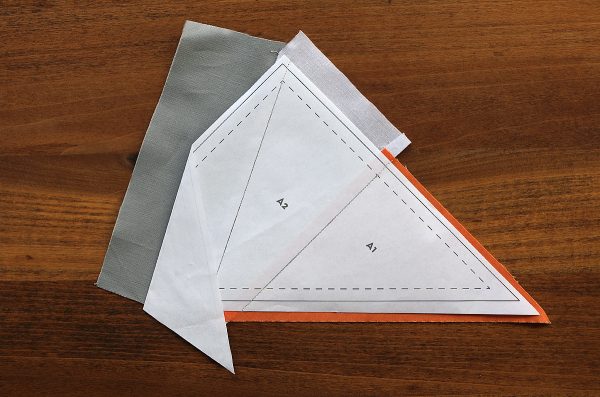
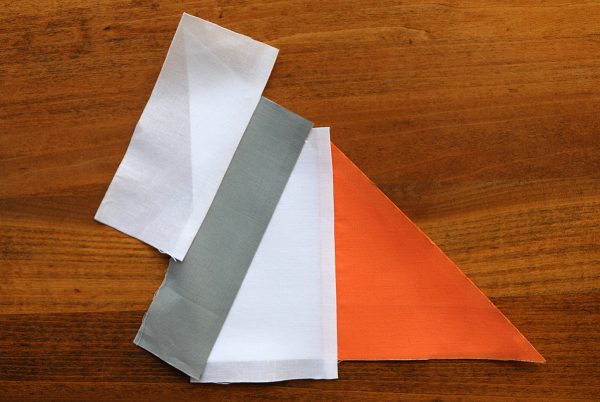
First, fold back the paper template along the line you’re about to sew. (In this case, it’s the line between A3 and A4.)

Next, trim off any excess fabric from piece number 3, a quarter-inch away from the fold of the paper template, as shown above. (By the way, if you have trouble with paper-piecing, folding back the paper and trimming the excess fabric is always helpful, no matter what kind of angle you’re dealing with. It gives you a better visual reference point for placing the next piece.)
Now you should have a unit that looks like this.
Next, flip the unit over—this photo shows it from the other side. See that part of the folded paper template that’s sticking out at the top? That’s the key to this next step.
Now you’re ready to place your fourth and final piece. And here’s where the magic happens. If you place your next piece so that it covers the folded paper template where it’s sticking out from behind the unit, it will be in the correct place. Every time.
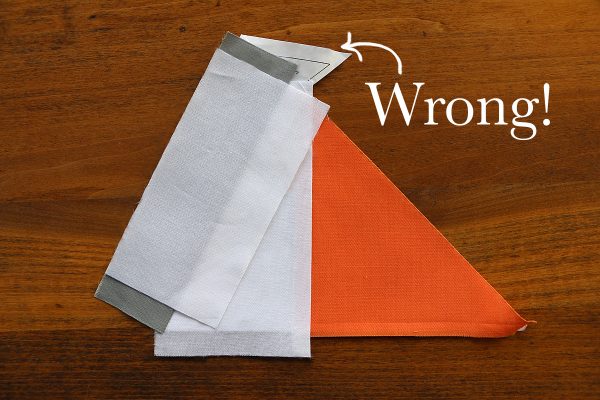
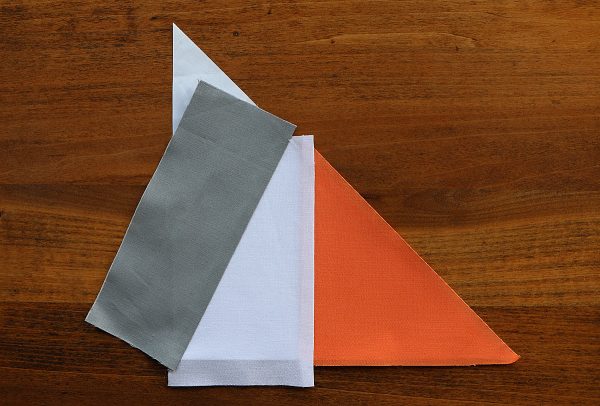
It’s true! So, see the photo above? That’s wrong. The white fabric piece is not placed so that it covers up that little bit of paper template you can see sticking out from behind, at the top of the unit.
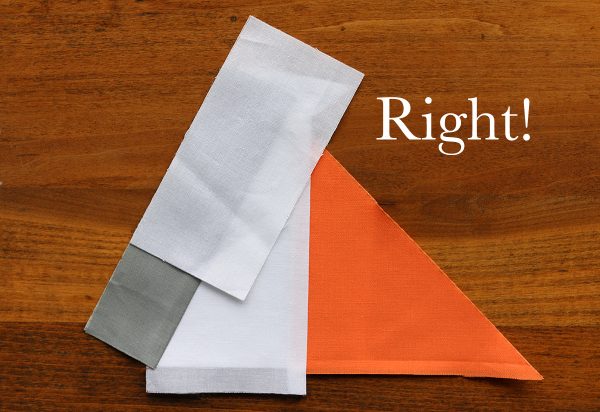
And here’s the piece placed correctly. I’ve moved it up so that it covers that little bit of paper template that was showing in the previous picture. You don’t have to worry about anything else—just whether the part of the template that sticks out is covered. And you’ll be good.
Here’s what it looks like when placed correctly from the other side.
Now, unfold the folded paper. Flatten out your paper template without moving the piece you just placed.
And sew on the line as usual.
Here’s what it looks like when sewn into place, in the correct spot. No missed corners!
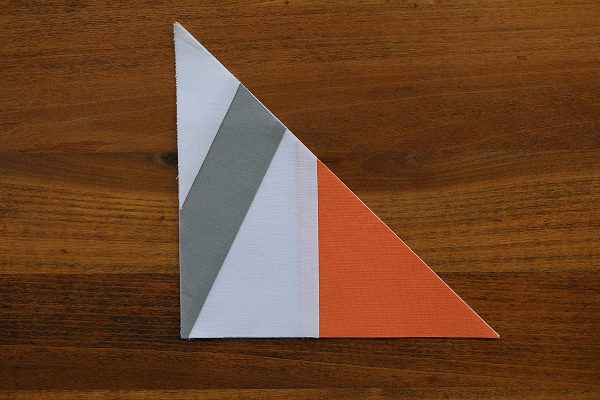
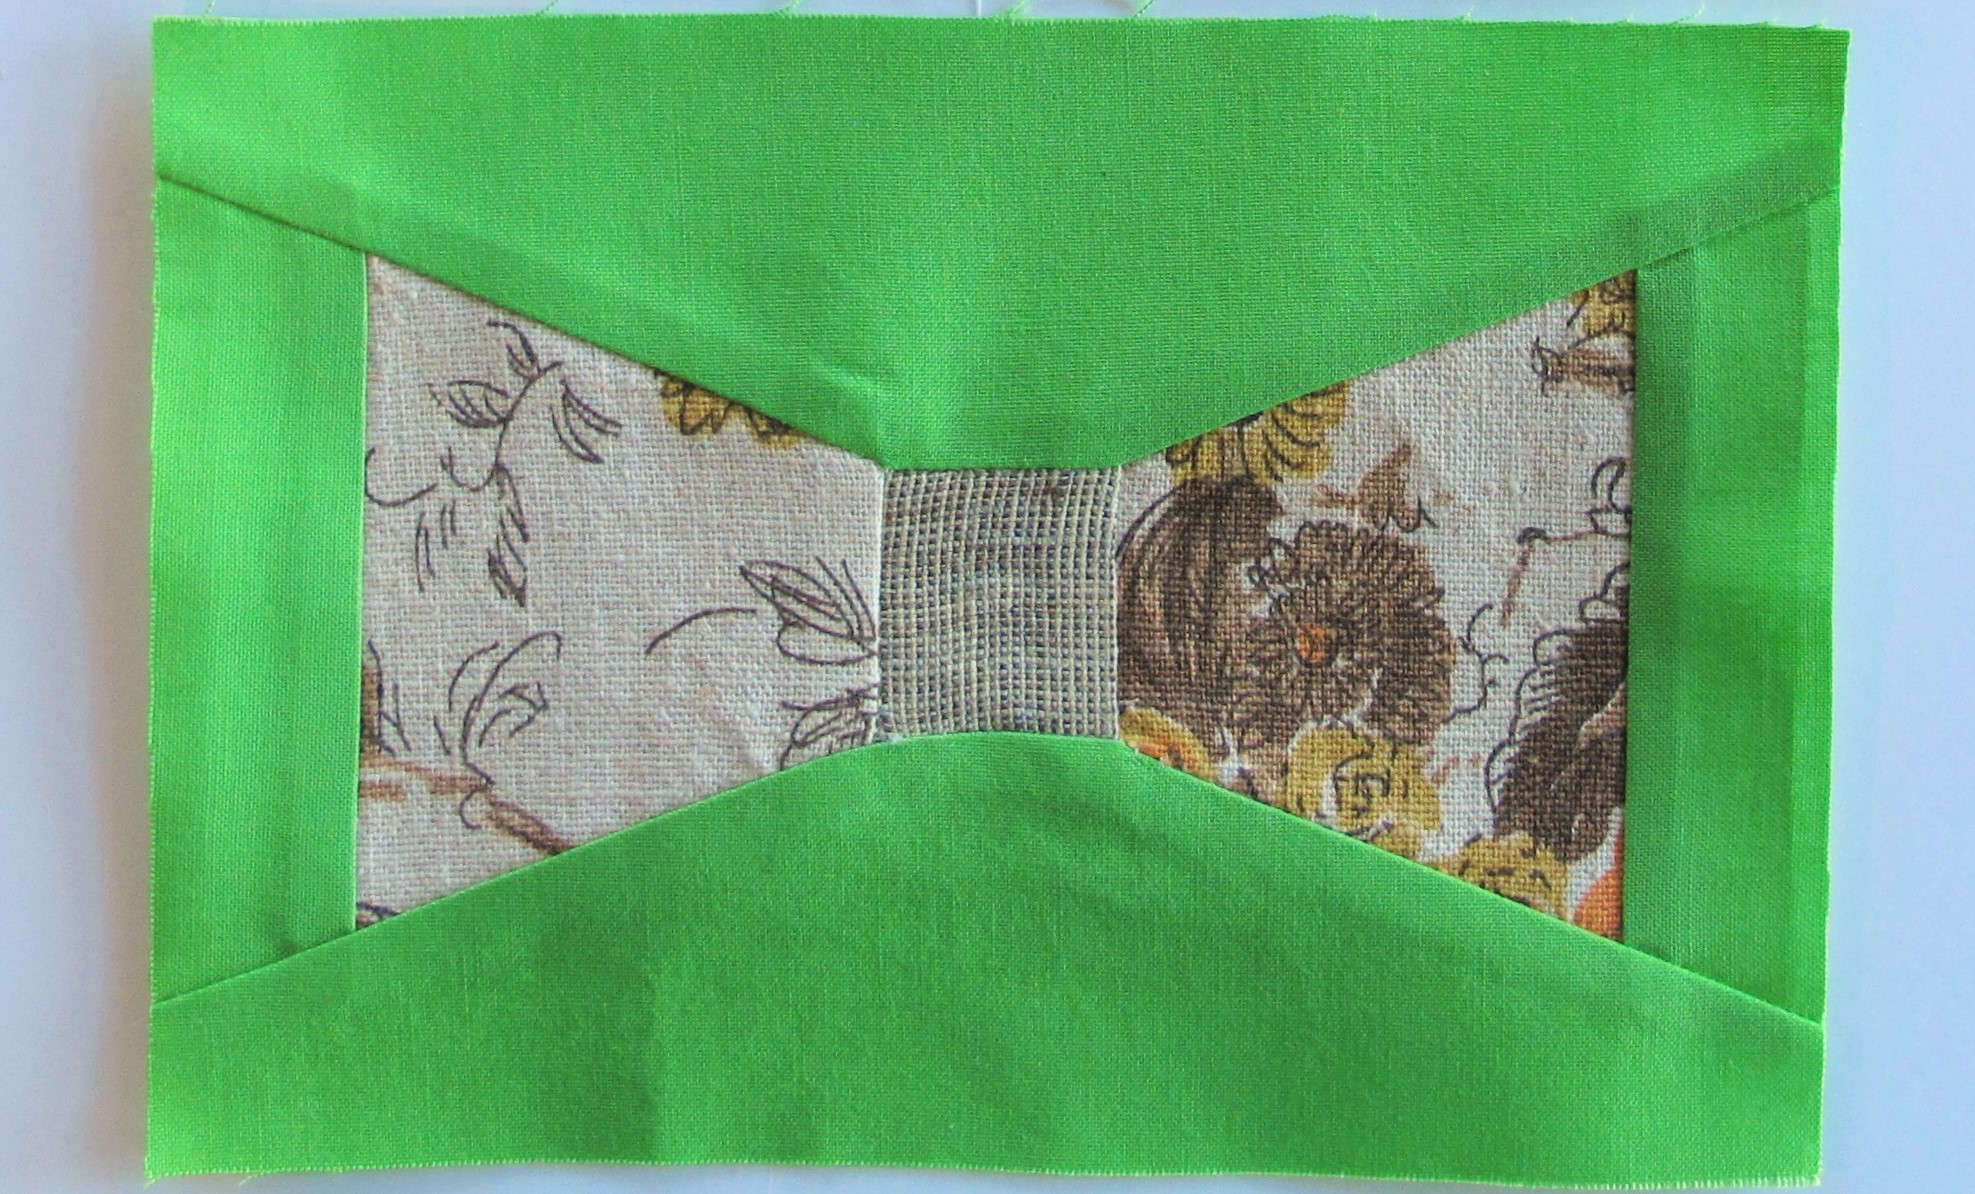
Finally, here’s our completed unit, all neatly trimmed and ready to go.
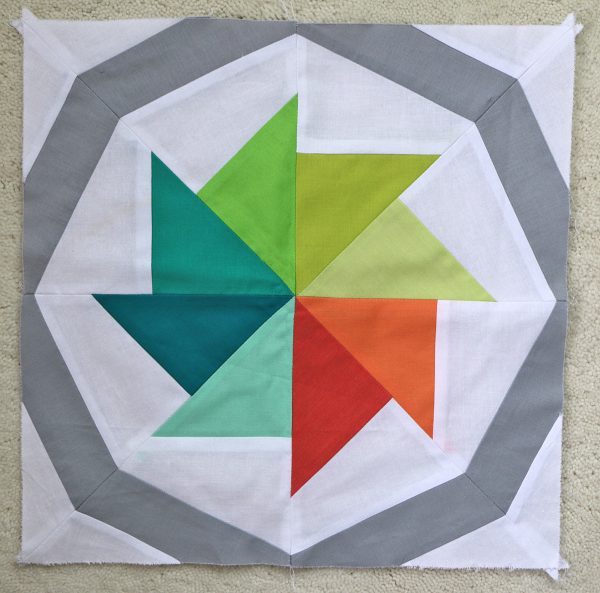
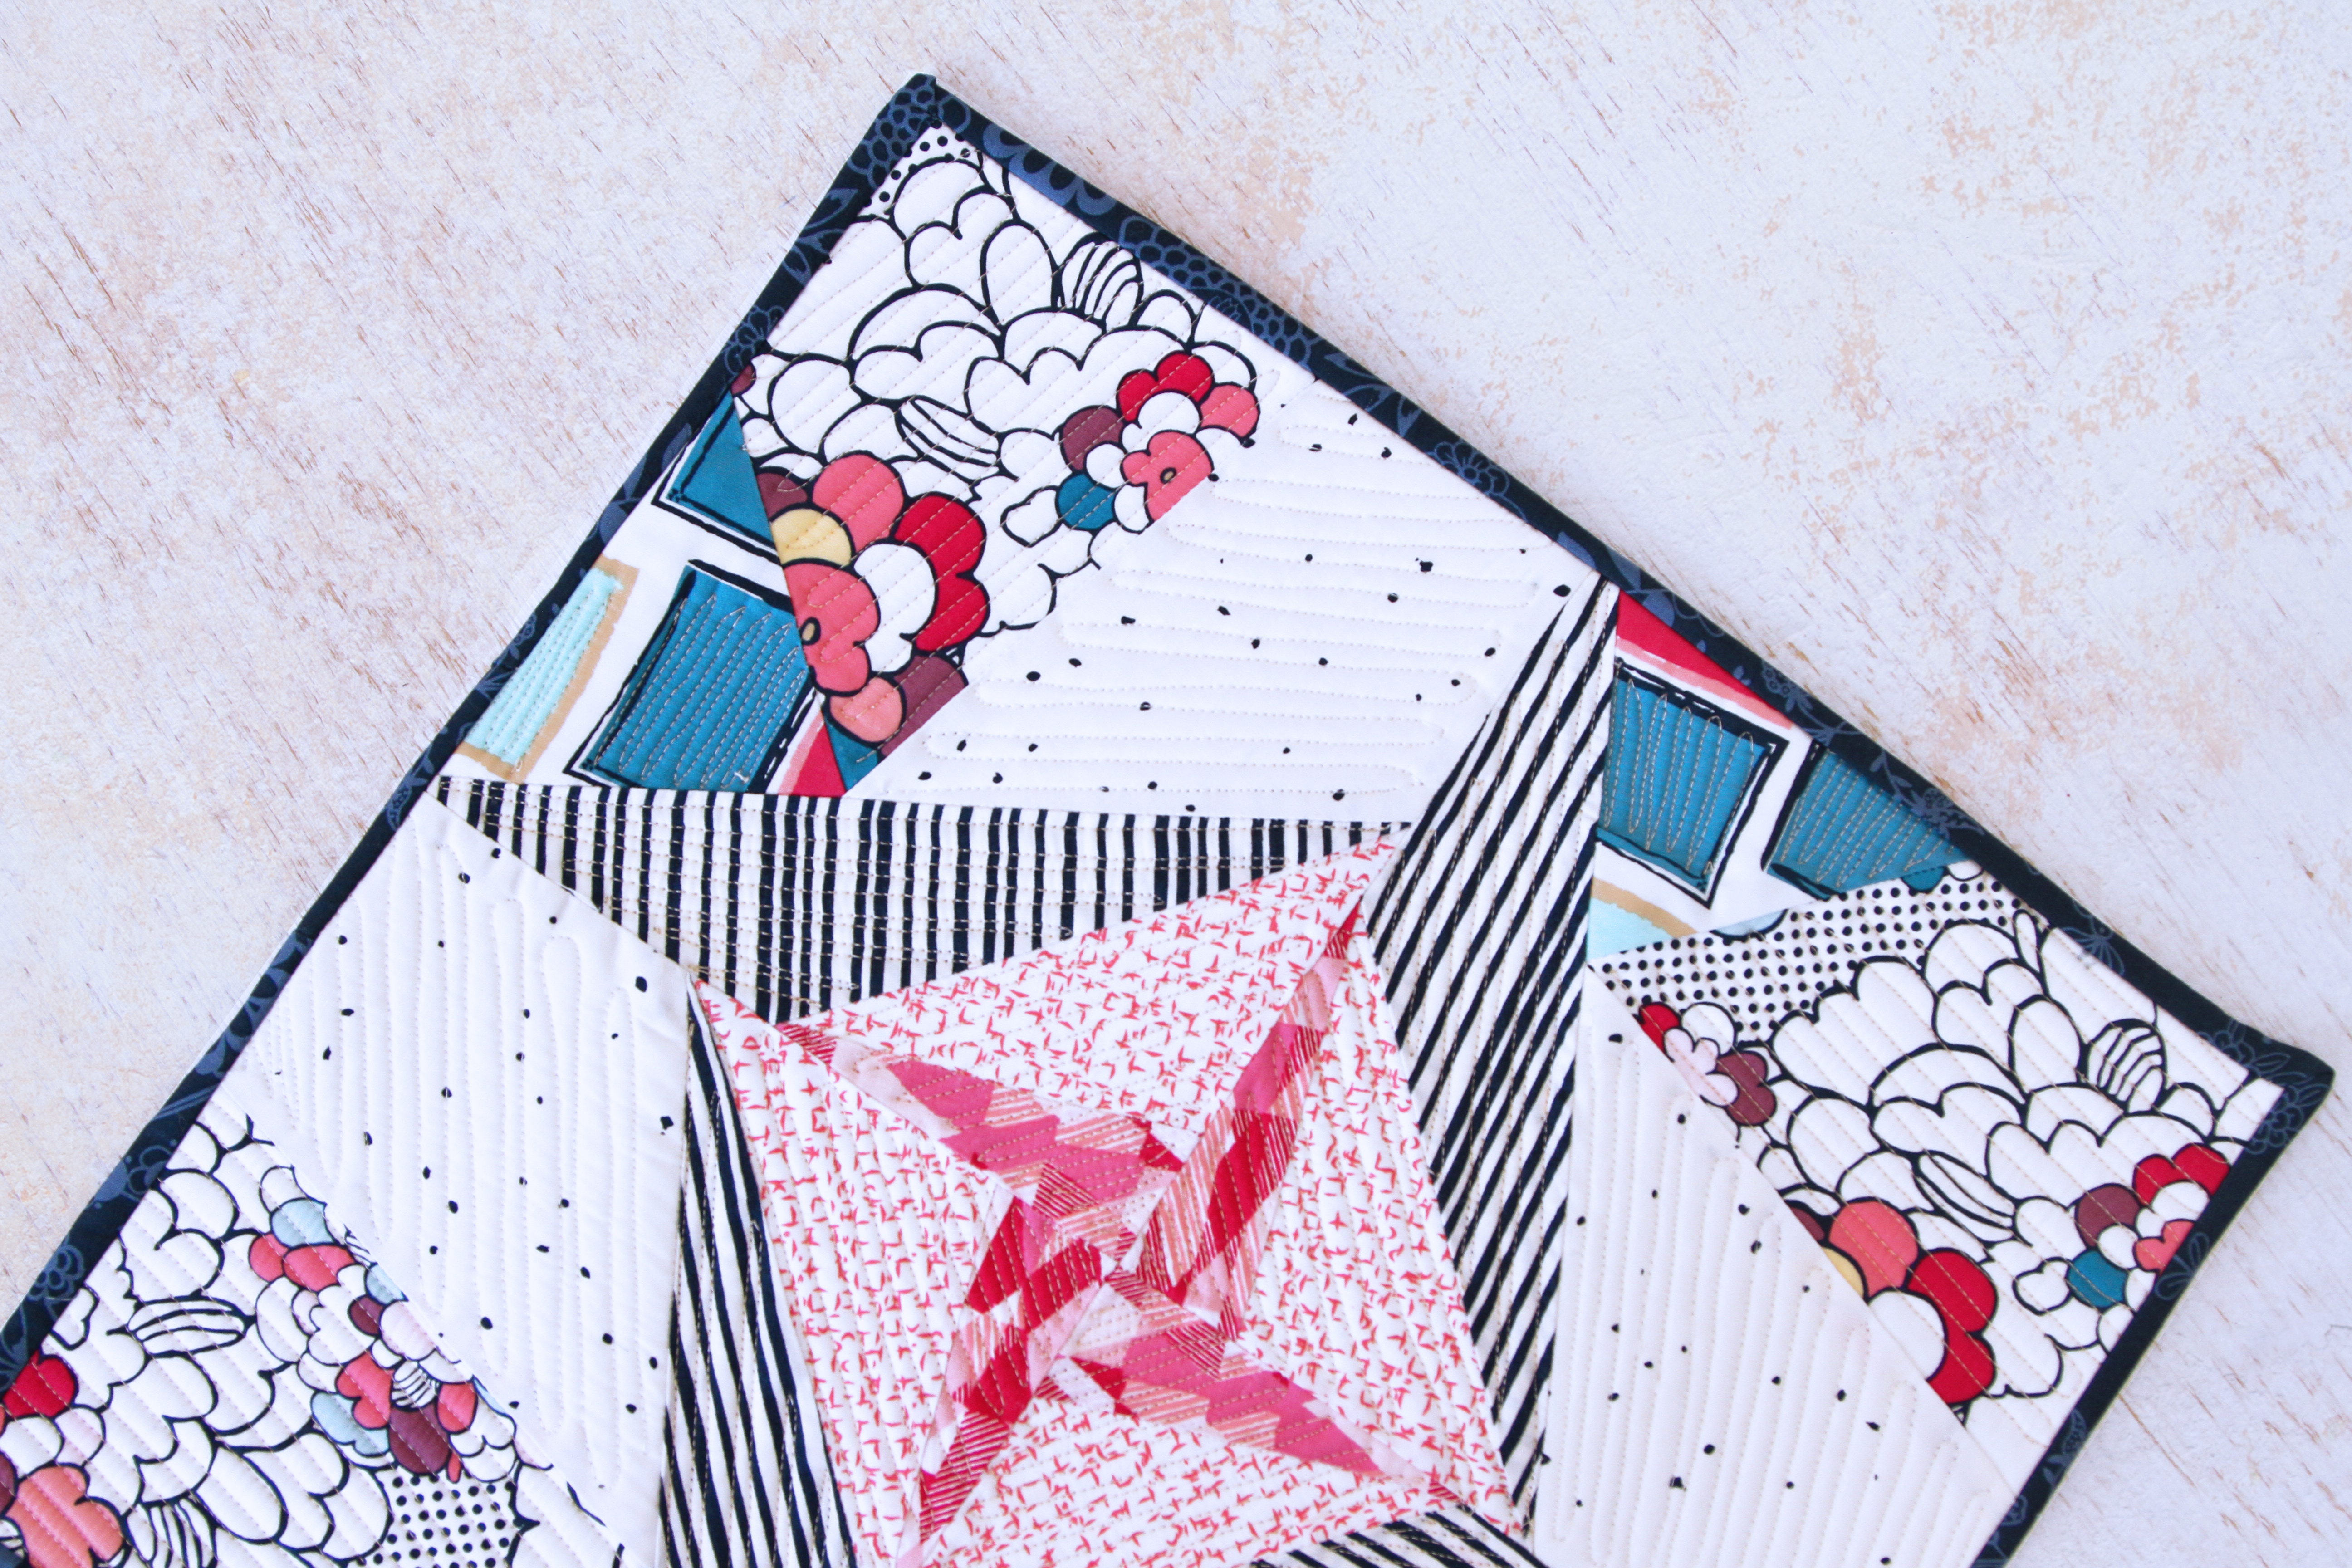
And just in case you’re curious about the block that this unit makes, here is the completed block. You can find the instructions to make this block and the paper-piecing templates in my book, Vintage Quilt Revival: 22 Modern Designs From Classic Blocks, available from Interweave Press.
That’s it! You’ve just learned something that will make all your paper-piecing endeavors much easier. This trick works any time you fold the paper template over and have some part of it sticking out.
I look forward to seeing all of you paper-piecing all the things. Enjoy!


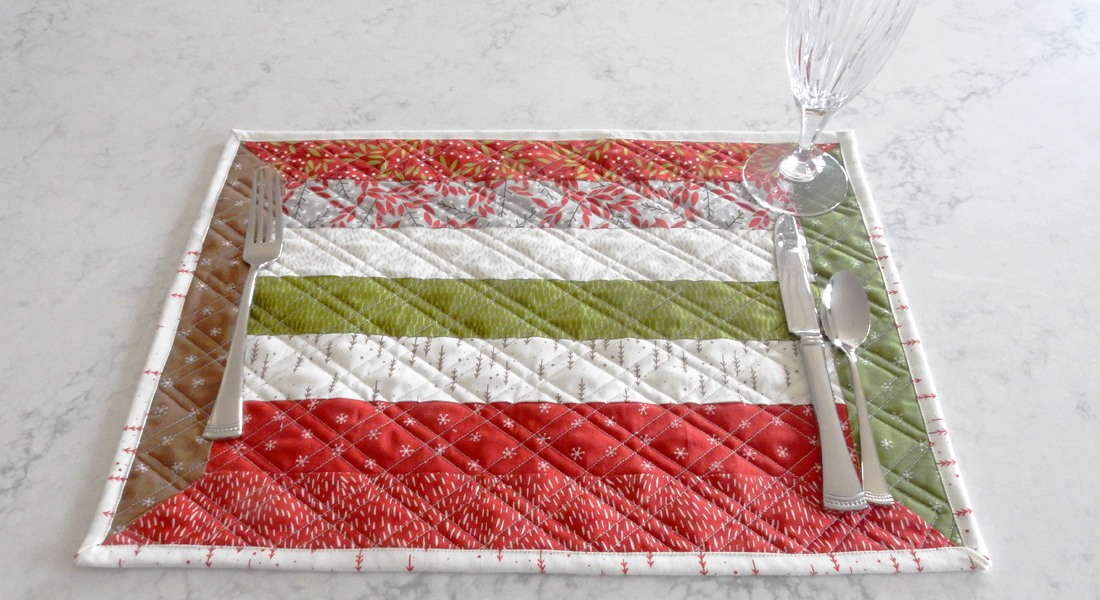
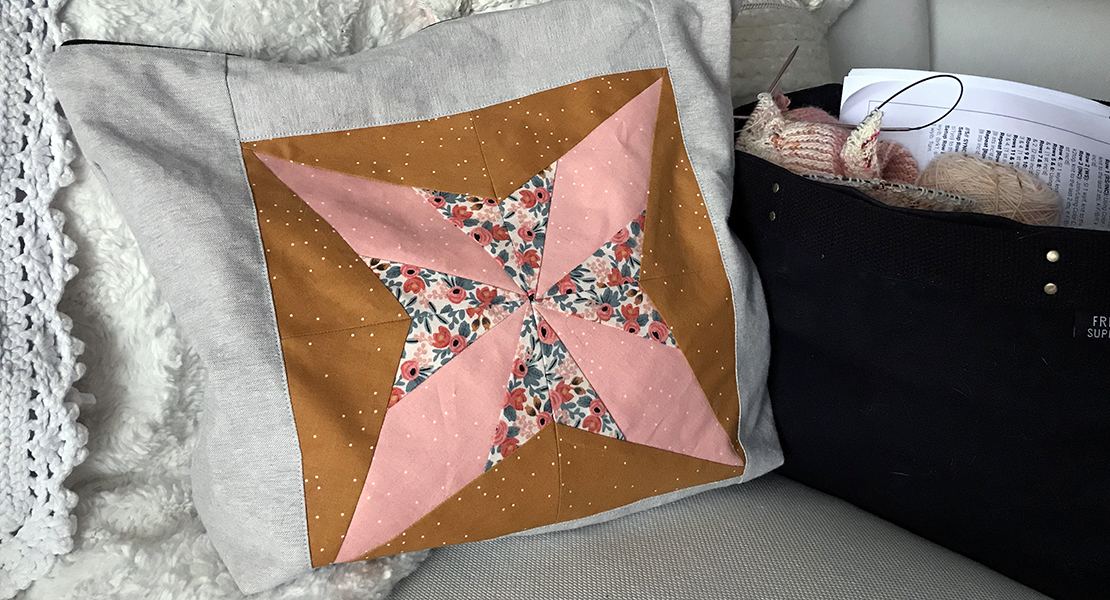
What you might also like


42 comments on “Never Tear Out Stitches Again! How to Make Paper Piecing Easy”
-
-
Thanks, glad you enjoyed it! : )
-
Loved this article and found it very useful. I too love paper piecing but hate taking the papers out, do you have any tips for the paper removal?
-
-
Thank you for posting this. I love to paper piece and have gotten fairly good with strange angles but still sometimes still made tearing out mistakes. This should make a big difference!
-
Thanks, Verna! I’m glad I could help! : )
-
-
Love paper piecing.
-
I’m new to the idea of paper piecing. Are you actually sewing the paper into the design? Do you tear the paper out after? And does it affect the tension of the threads? Sorry I’m new
-
Hi Rachel – Yes, paper-piecing is where you sew the fabric onto a foundation made of paper. For paper-pieced designs, you print out a paper pattern and sew directly onto the line. Then when you’re done with the unit, you tear the paper out. It can be a difficult skill to wrap your head around because the piecing method is essentially backwards from traditional piecing, but once you get the hang of it, it’s awesome! You don’t have to worry about accurate cutting or even an accurate 1/4″ seam! : ) Here’s a complete tutorial for paper-piecing beginners, from my fellow Bernina ambassador, Faith of Fresh Lemons Quilts – enjoy! http://www.freshlemonsquilts.com/tag/paper-piecing-tutorial/
-
Sounds like a promising technique! I can’t wait to try it out!
-
-
-
Can’t wait to try this! I do get frustrated with tearing out : (
-
Paper-piecing can certainly be frustrating, so hopefully this will make a difference! : )
-
-
Awesome, thanks!
-
You’re so welcome, glad you enjoyed it! : )
-
-
Thank you for the instructions on paper piecing,
I’ll have to give paper piecing a try one day.
So many new things to learn.-
Hi 12copylady – Glad you enjoyed the tip! I hope you’ll try it! : )
-
-
Where were you about two days ago? I just finished piecing my very first paper pieced block and was about to give up on paper piecing until I read this article and helpful tip. I was ending up with fabric going the wrong way after I sewed and then flipped the fabric over. Very frustrating to have to redo many times and wasting lots of fabric to make sure the piece was big enough. Now I can’t wait to try this tip on another block to see if it actually works. But it will have to wait until next year as I’ve got a project to finish.
-
Hi Karen – Sorry to hear I’m two days too late!! I do hope you will give it another try though! : )
-
-
I am totally new at this…awesome!
Question: what “paper” do you use?
-
Hi Gympygirl! I always use standard office/copy paper for paper-piecing – the cheapest kind I can find! This allows me to easily (and inexpensively) print as many copies of the paper-piecing pattern as I need (depending on the pattern, you could need dozens or even hundreds of copies of the pattern!) However, you still want paper that is thin and easy and tear out when you’re done stitching, so that’s why the cheapest kind is best. There is also special paper made specifically for paper-piecing which is VERY thin and easy to tear out. I’ve never tried that type of paper, but I’ve heard good things about it. One further paper-piecing tip which is extremely important: ALWAYS print paper-piecing templates at 100% size or “exact size” in your print dialog box. “Print to fit” is usually the default when printing, and this can result in templates that will be slightly too small! That’s another thing that often trips up beginners to paper-piecing.
-
-
I’m sorry, paper piecing still drives me crazy!
-
After making 8 out of 12, 14″ snowflakes blocks I still do not love paper method. Glad you do. I do cut the way you show and tell.
-
Thanks for the clear pictures and instructions; these will be very helpful as I teach one of my scheduled classes in early February.
Thought the comment about paper to use was good; I too like a cheap, light weight paper or even better a paper called Stitch and Ditch but this doesn’t go through a copy machine very successfully so one has to trace their pattern onto the paper and then, of course, there are chances of mistakes — lines being crooked etc. -
Lee this is brilliant! I love paper piecing and am always very careful about trimming and placing pieces, but it can be a real easy mistake to get it wrong. You are a genius! I only hope I can remember your tip. I puinned it twice to make sure that I do! LOL
-
*pinned (not puinned)
-
-
Great tutorial!!!
-
As I have signed up for a friendship block exchange and it requires 24 paper pieced 6 inch blocks– you might have saved my life. I can do all but two of the triangles of a simple star pattern. But they have nearly driven me crazy– on the TWO I have finished. I have had to purchase more fabric and TAPE the paper as it was “unsewn” so many times. Did I mention it was TWO blocks that I have successfully made? I might post again after I actually do this!! Thanks so much! I do love the precision and crispness, hence the friendship block exchange.
-
Wow, sounds like quite an undertaking, and lots of frustration! I’m so glad I could help!! : )
-
-
Thanks so much for this tip. I have not paper pieced for a long time. I love the way every point is exact in the finished block. I will definitely keep this tip for future reference as I begin paper piecing again.
-
Very excited to try this out but on the road for business. I assume you still need to confirm that your piece is covering the other end that is under the block.
-
Hello Lee,
I am so glad I found this tutorial! I took a paper piecing class a year or so ago and once I got the hang of it I enjoyed how easy and perfect the pieces came together. In the class I took, the pattern was already prepared for just a small little tabletop mat.
I have found a quilt pattern that I would love to make and was told that my quilt pattern would be great for paper piecing! The problem is, my quilt pattern is not made with paper piecing instructions. Is there a conversion process? I am at a complete loss. Any tips or direction would be most appreciated!!!-
Hi there! Unfortunately, there really isn’t an easy way to convert a non-paper-pieced pattern to paper-pieced. That would require drafting the paper-piecing pattern itself, which is something I do in Adobe Illustrator. It could also be done in EQ or with old-fashioned graph paper, but I think it would still require some technical/drafting skills to do so. If I were you, I would look for a similar pattern that IS paper-pieced—there may very well be one out there already! Good luck!
-
-
Oh. My. I’m speechless. How is it that I have THREE books written by Big Name, Big Deal celebrity quilters on foundation paper piecing, and not one of them included this magical sanity saving trick?! I LOVE YOU!!!
-
Currently working on paper piecing the Wedding Ring. Love, Love, Love it.
I like the thinest paper also, but the cost – – Arg. So here is a tip for those fortunately enough to live near a newspaper facility. I buy the left over rolls of newsprint paper that are too small to use for $2 or $3. Yes, I have to cut the paper to size for my printer but I get hundreds of sheets for little investment. I use a rotary cutter marked specially for paper and use blades no longer suitable for fabric but great for paper. As in fabric, you can fold the paper and cut multiple layers. The only draw back, sometimes a small amount of ink is on the outside, wipes off easily and discard.
I also purchased a 11×17 printer when my last printer died. Now, plenty of room for the ‘B’ segment of the Wedding Ring. Remember, print all pieces required at the same time if possible. Keeps the accuracy of the pieces.
Thanks for the tip, happy piecing. -
I took my first paper piecing class this past June with PP quilt designer Deb Karasik. I fell in love instantly with PP!! However, this tidbit you’ve shared is def one I will remember! Even with Deb’s excellent instruction, after class in my home sewing room I ‘shorted’ myself more than a few times and had to do some ‘backwards’ sewing!! Thank you so much for the share. I saw a link for this article via Pinterest, now off to your blog for more! Ann in NC
-
I find paper piecing an opportunity to test my skills, since I frequently have to “unsew” but I am getting better.
vlrustad-Do you not find that newsprint produces a lot of lint? My husband prints many of his amazing pictures on our printer and is very concerned that the newsprint will produce lint that will cause the printer to not print cleanly.
I find that Carol Doak’s patterns provide the cutting dimensions for the pieces so there is no guessing on the size of the pieces need for the patterns, does anyone else provide that information with their patterns?-
I appreciate your comments on my tutorial! I absolutely do provide cutting dimensions for all pieces in my paper-piecing patterns. I’m always amazed that most patterns do not include that info! (You can find my shop at http://freshly-pieced-quilt-patterns.myshopify.com/collections/digital-download-patterns – not all of my patterns are paper-pieced, but Cartwheels, Gridlock, Shooting Star, and Chevron Star all are, and Wavelength and Terrazzo include an option to paper-piece.) Cutting dimension preferences vary – some people prefer pieces to be very oversized to prevent mistakes, while that drives other people crazy because they don’t want to waste fabric. So I do think you have to take cutting dimensions in any paper-piecing pattern with a grain of salt and possibly make a test block before cutting ALL your pieces.
-
-
Sorry, I really appreciate your tutorial, I find that my mistakes often revolve around misplacing the fabric, especially when angles are involved.
-
Great! Simply brilliant!
-
This tutorial saved my sanity! I’ve been working on a paper piecing project for my daughter. I can’t tell you how many times I have had to rip out a seam because the piece wasn’t positioned properly. I had tried numerous different ways of getting it right, to now avail and was ready to pull my hair out. Actually walked away from the project yesterday cause I couldn’t get it to work. Then I thought – someone out there in the quilting world must have come up with a solution for this problem – I can’t possibly be the only person struggling with this! And so I googled and found your post! I am now back to happily piecing my project. Thanks so much for you wisdom and experience!
-
Fantastic! And here I thought I knew it all. Saw that hint and said “holy guacamole! that is brilliant!”
-
-
Oh my WORD this was a lifesaver!!! Did my very first FPP project and I’m hooked. Went from fear, to swearing like a sailor, to searching… to OBSESSED! Thank you, thank you!
Leave a Reply
You must be logged in to post a comment.
Brilliant! Thank you.