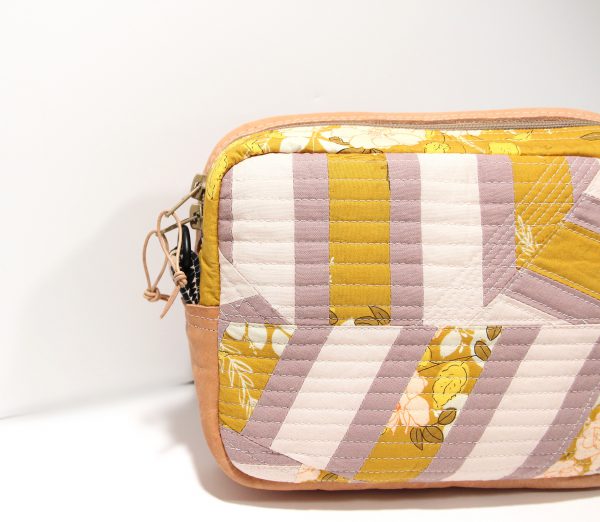
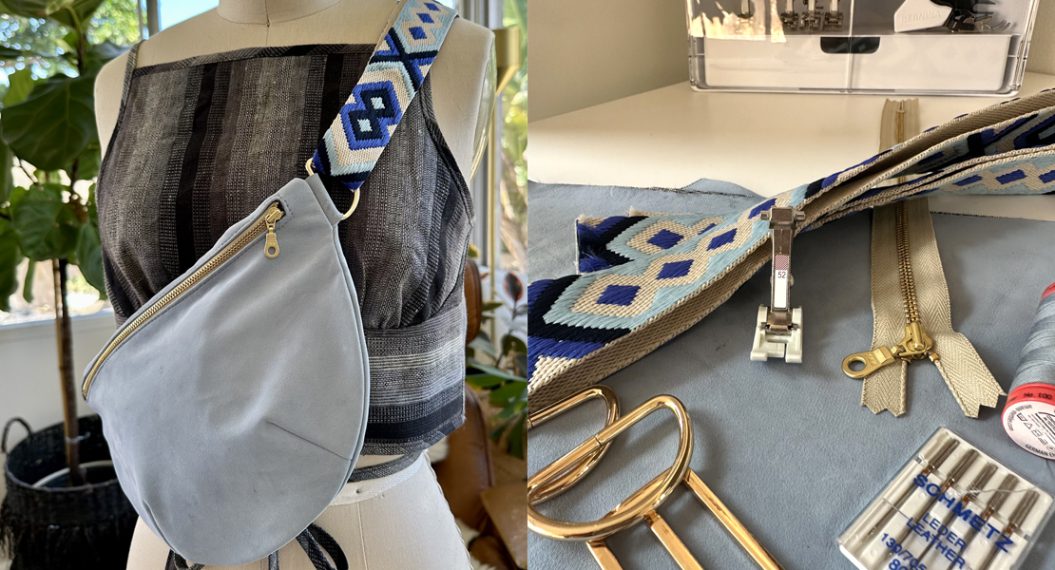
How to Sew a Convertible Leather Hip Sack
We’re gonna sew LEATHER!! I hope you are super giddy thinking about making this Convertible Leather Hip Sack.
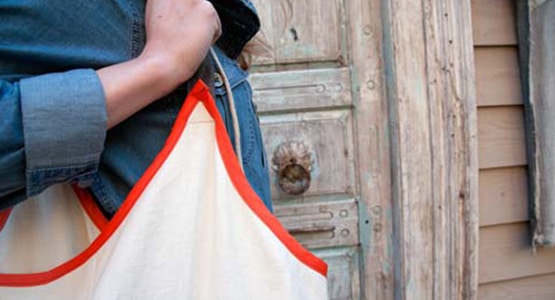
When hip sacks first started coming back into fashion I jumped on that bandwagon . . . well if I’m being honest I never fell off it in the first place (haha, child of the 80’s right here). But when you couldn’t really find hip sacks, or as we called them back then “fanny packs,” I started adding straps to some of my clutches to turn them into hip sacks. I’ll admit the sewing is a little rough on my beginning bags because, well, it was hand done and my hand stitching is NOT strong. Plus back then I didn’t own my BERNINA 530. All I had was my starter sewing machine and that thing wasn’t nearly strong enough to sew through thick fabric, let alone leather!
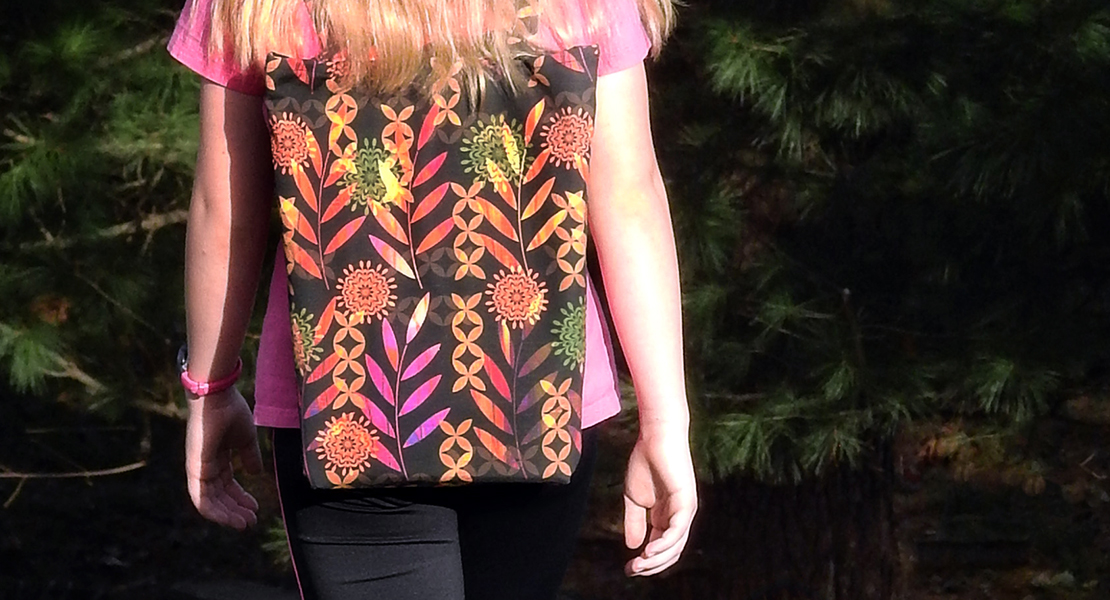
I own about 10 hip sacks and they all differ in shape, size, and fabric but none of them are perfectly right for me. So now that I’ve had my BERNINA 530 for 7 years, I figured it might be time to stop being scared of sewing leather and start taking all my favorite parts of all those bags to make the hip sack of my dreams. A bag that can function not only as a hip sack and clutch but also be convertible for a baby carrier and a cross-body bag.
I know, I know, that’s a lot to ask for from just one bag, but that’s the fun thing about being able to make your own. Customizable!!! For example, the size of this Hip Sack is based on my wallet. I’ve owned my wallet for 14 years, and I love it, yet only one of my hip sacks is big enough for it to fit in comfortably.
Before you jump into this Convertible Leather Hip Sack project, make sure you’ve completed your quilt panel. My How to Make a Quilt Panel blog post will walk you through how the quilt panel for this project needs to be made.
What You Need to Sew a Convertible Leather Hip Sack
Oh, wait if you follow me at all Honymfin.com or @honymfin on Instagram you know I’m a “fly by the seat of my pants” kind of lady. Basically, when I have an idea I make it up as I go! So a few tips I learned along the way that will hopefully help you . . .
- Choose a leather that is on the thinner more moveable side
- The width of your Choice in zipper will change the dimensions of the wrap-around panel. I ended up liking a double zipper pull zipper, it is wider than a standard zipper and added 1/2 inch to my wrap-around panel. I trimmed it down.
- Sew slowly, always using the leather glue
Time
- Depending on your life this Convertible Leather Hip Sack takes an evening or a weekend . . . I have a newborn baby so it took me a month, haha. I’ve broken it down into steps to help you with your timetable.
Stitching
- Length: 3.00
- 1/4 seam allowance (unless specified)
Terms
- WOF= Width of Fabric
Supplies to Sew a Convertible Leather Hip Sack
- Rotary Cutter
- Quilting Ruler
- Cutting Mat
- Clips
- Thread
- MicroTex Needles
Leather Tools
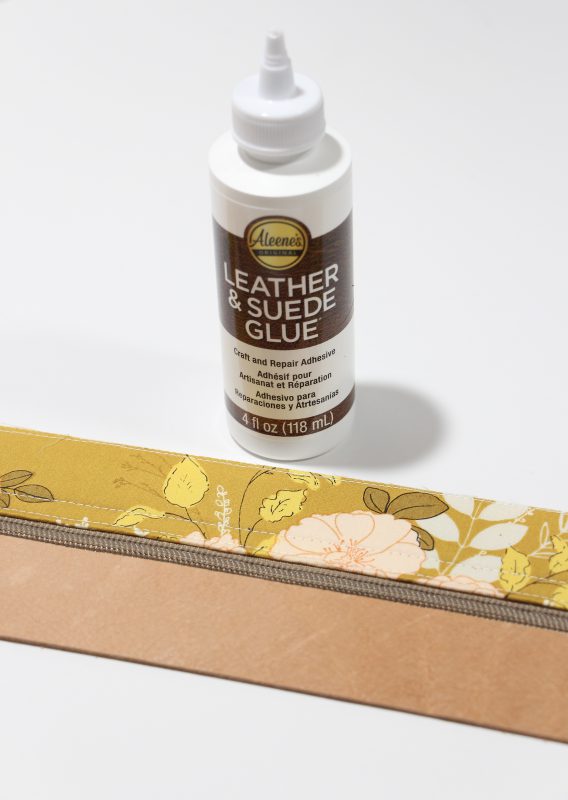
- Leather Glue
- Leather Machine Needles
- Leather Punch (optional)
- Snap Setter (optional)
- Hammer (optional)
Materials
- Quilt Panel 9in x 14in
- Fabric 6in xWOF
- Bias tape 1.5in x 80in (can be cut on the straight)
- Leather (cuts below)
- Pellon Stabilizer 809 6in x WOF
- 12 in zipper and 9 inch zipper (standard)
- Vinyl 12 gauge 9 x 6 inch
- Buckram (Pellon 375) 11 x 7 inch
- Heat Bond Lite 3/4 x 6 inch
- Optional: 4 Snaps, 3 1-inch D-rings
Sewing Machine
- My machine is the BERNINA 530 SE Swiss Red (She is 7 years old)
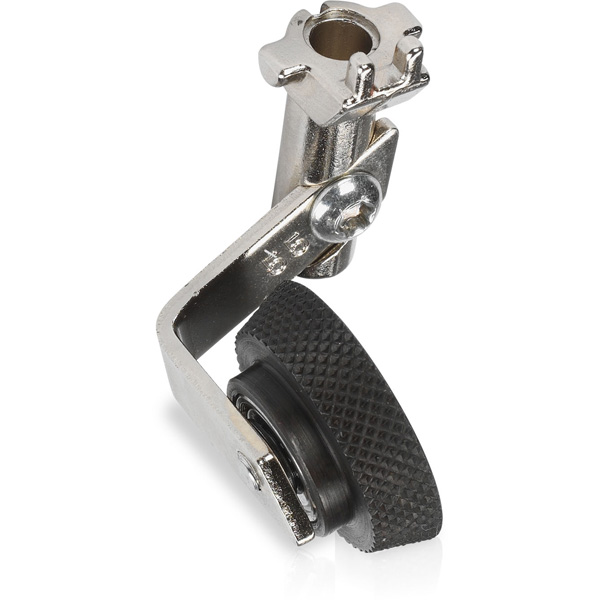
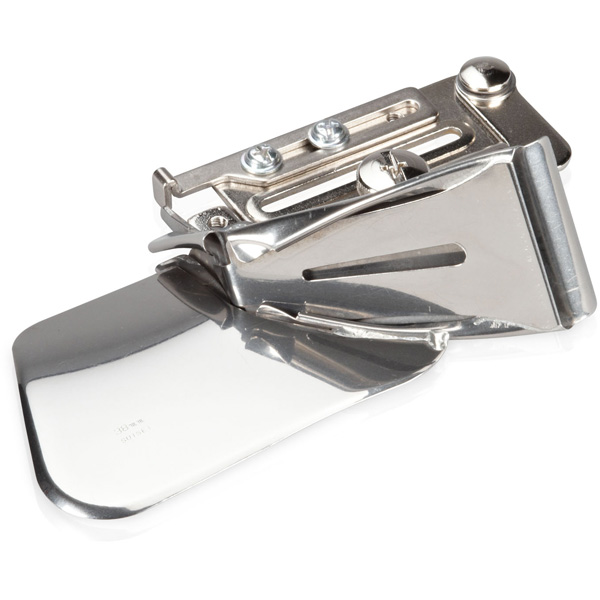
BERNINA Presser Feet
- Leather Roller Foot #55
- Binder Attachment for Unfolded Bias Tape #88
- Zigzag Foot with Non-stick Sole #52
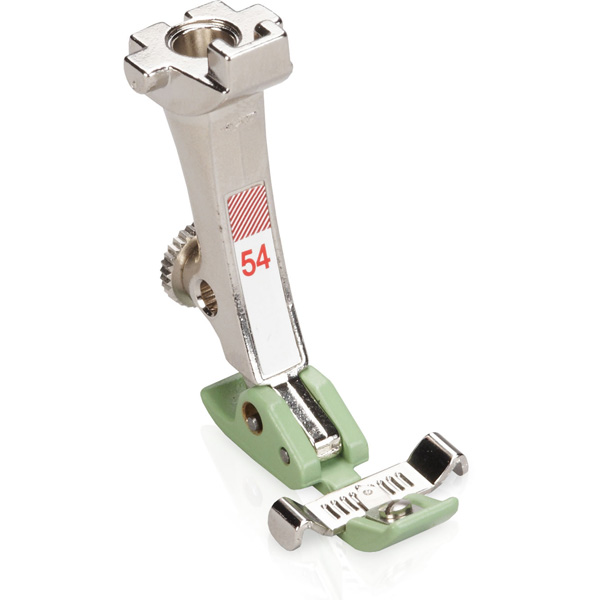
- Zipper Foot with Non-stick Sole #54
*As always, you CAN make this project with your standard Presser Foot #1, but you will need to take a slower approach and make adjustments as you go. The different presser feet will make this project faster and easier.
Let’s Get Sewing!!!
Steps to Sew a Convertible Hip Sack
Step 1: Cutting Materials
Cut everything you need and lay it all out before starting your Convertible Leather Hip Sack.
Quilted Panel
- 2 pieces 9in x 7 inch
*Overlock/serge all the sides of both quilted pieces, it will help them from fraying while you work with it.
Fabric For Bias Tape
- 2 pieces 1.5in x WOF
Fabric Lined with Pellon 809
- 2 pieces 2in x 15in
- 4 pieces 2in x 3in
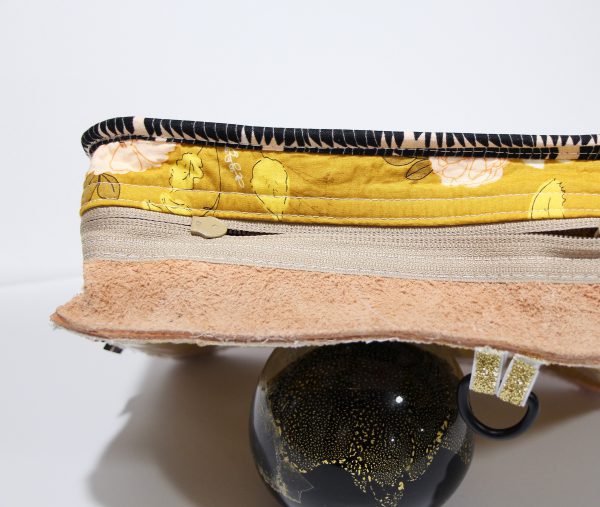
Leather
- 1 piece 9in x 7in
- 1 piece 1.5in x 15in
- 1 piece 3in x 15.25in
- 4 pieces 1in x 5in
Vinyl
- 1 piece 9in x 6
Buckram
- 2 pieces 3/4in x 5.5in
- 1 piece 9in x 7in
Optional
Scraps for D-rings . . . ribbon, leather, quilted . . . your choice.
- 3pieces 1in x 3in
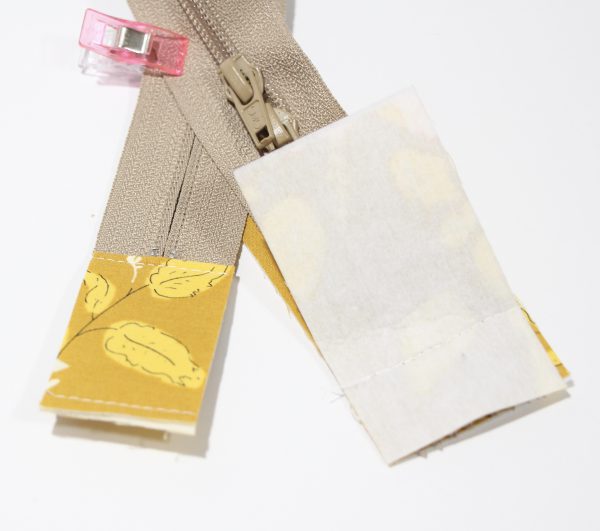
Step 2: Making the Wrap Around
Part A
- Use Presser Foot of your choice and Microtex Needle.
- Grab your 12-inch zipper and the 2 x 3-inch fabric with Pellon pieces.
- Sew right sides together with zipper in-between. Sew as close as you can to zipper stoppers going towards zipper teeth (repeat both ends).
- Fold over your new tabs so that the wrong sides are together with the zipper in the middle and sew in place 1/4 from zipper stoppers again (repeat both ends).
- Sew ends together and trim sides of tabs to match up with zipper width (repeat both ends).
- Trim your now 16/17 inch zipper with tabs down to 15 inches long.
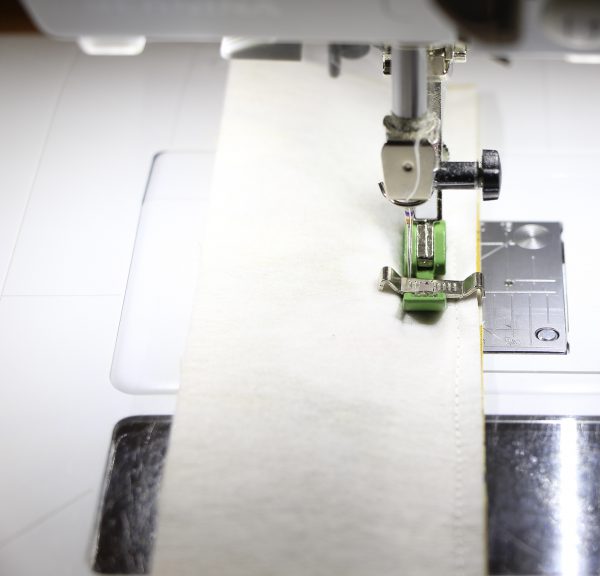
Part B
- Switch to your zipper foot (I used #54 with the guide).
- Now take the 2 x 15-inch fabric with Pellon pieces and add them the same way you did with tabs to with your 15-inch zipper. Right sides of the fabric together, zipper in-between with zipper teeth inside. Keep in mind when working with zippers . . . if you are right-handed make sure the zipper pull is pulling to the right before adding the fabric. Chances are you will wear your clutch hip sack on the right hip and you will want it opening from the front of the body to the back of the body. If you are left-handed you may want to do the opposite.
- Press fabric away from zipper teeth and sew down 3 times. First, about a 1/16 away from the edge closest to the zipper. Second, 1/4 away from the previous stitch. Third, sew or overlock/serge the open edges together.

Part C
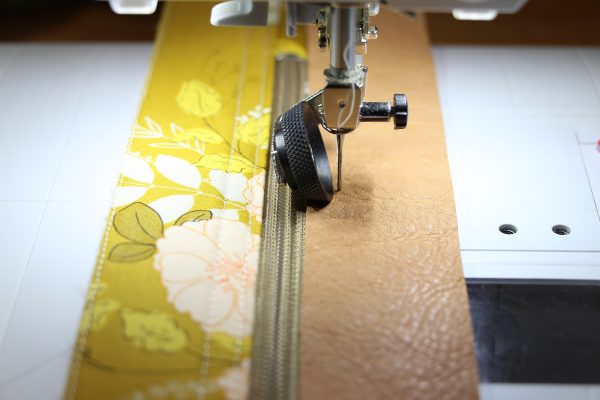
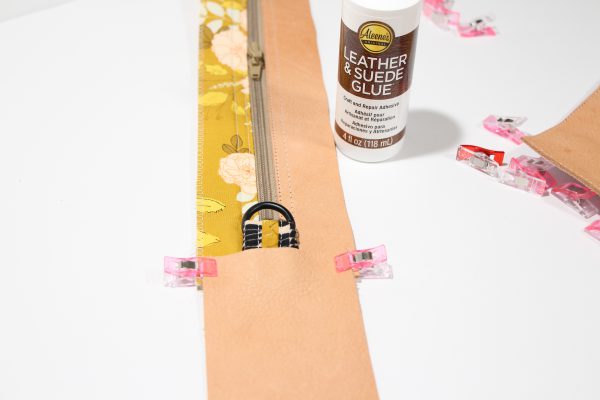
- Switch to Leather Roller Foot #55 and leather needle
- Spread a thin line of LEATHER glue down the opposite side of the zipper as the fabric
- Press the leather piece 1.5 x 15 inches down on top of the glue. Use clips on the ends to hold in place for 10 minutes (you want to wait the 10 minutes for the glue to get tacky but not hard)
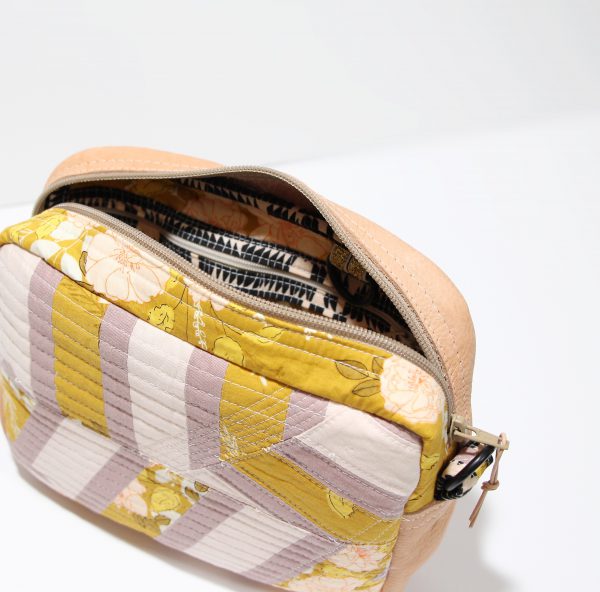
- After 10 minutes, sew the leather the same way you sewed Part B. Now you have completed the zipper panel.
Stretch and Dance, you’re getting there!
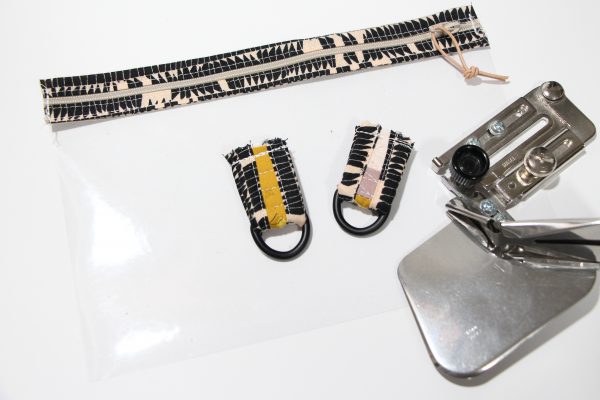
Part D (Optional)
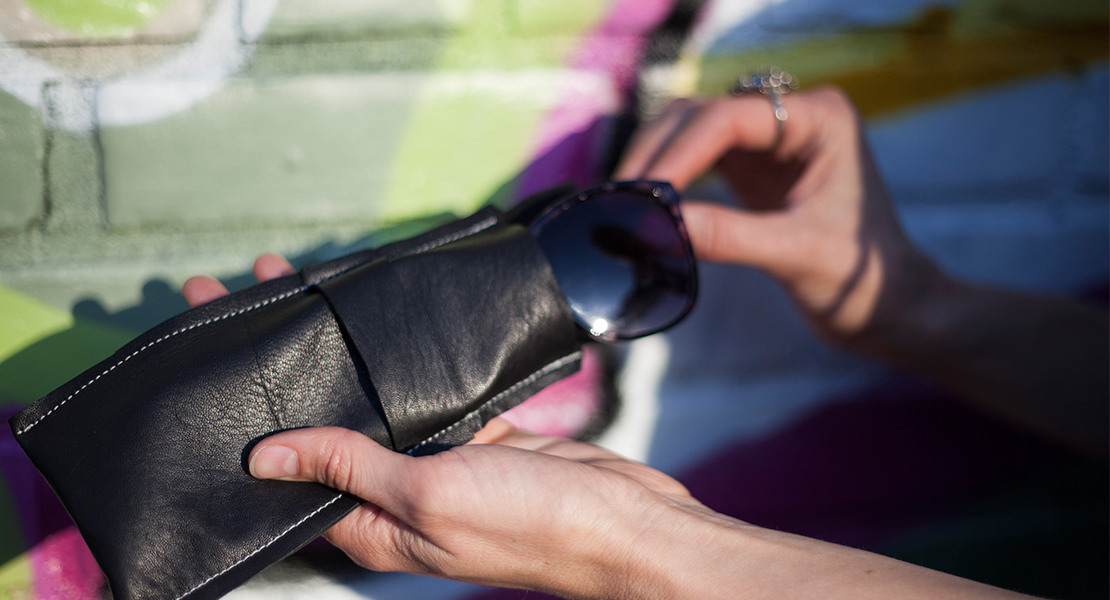
The D-rings are a great addition to any bag. They instantly make it convertible to crossbody, or just a great way to keep track of keys and whatnot!
If you’re adding the D-rings
- Switch your presser foot to Zigzag Foot with Non-stick #52 (one of my favorites!!!). Micotex Needles worked best for me at this junction point.
- Create tabs of your choice. Make them 3/4 x 3 inches.
- Fold over through D-ring and sew in place. Backstitch a few times since this may become a pressure point for your bag when hanging from your body.

Note: I used different scraps with the different bags I tested all worked. Thicker ones were just a little more challenging to sew through, so go slow. If you want easier, go with a nice ribbon.
Part E
- Switch Back to Leather Roller #55, and use your needle of choice depending on D-ring tab of choice.
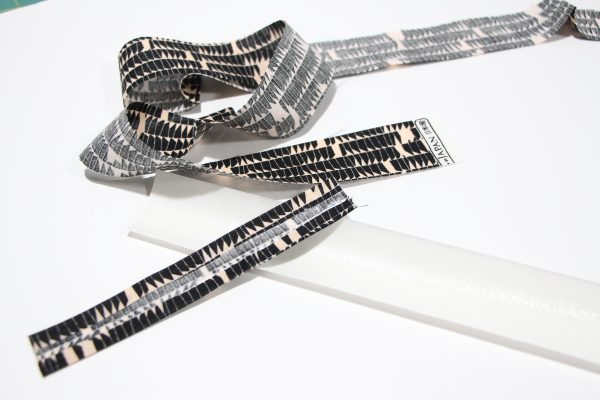
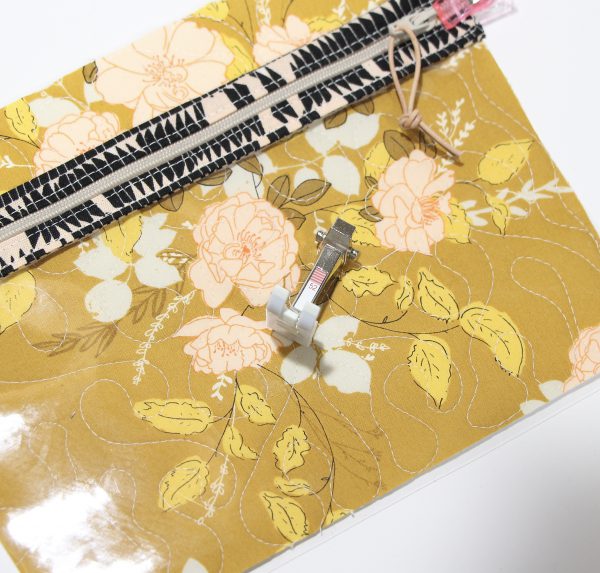
- Now take 6inches of bias tape, iron it to the heat bond lite, and cut it in half.
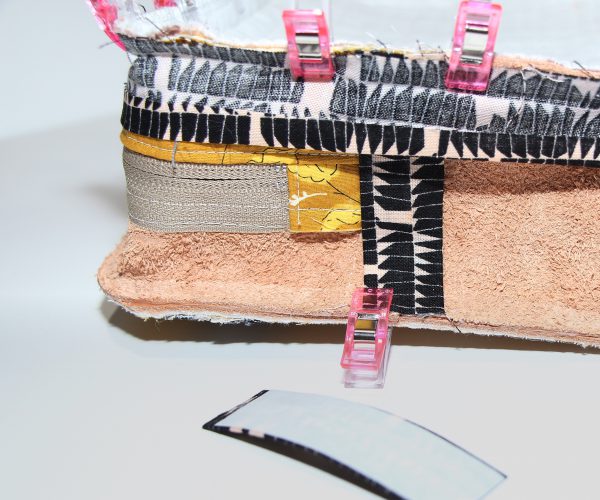
- Attach that bias tape to the backside of the Zipper panel by ironing and clipping. This piece will cover all that stitching you just did to keep the D-ring on. Let the bias tape hang over the ends about 1/4 inch so that when you sew the next part the connection point will be covered as well. (I added this part later, but doing it at this junction works better.)
Part F
- Spread a thin layer across the top both ends of the zipper panel
- Place 3 x 15 inch leather piece ends on to glue 1/2 in up on the zipper panel. Clip and wait 10 minutes before sewing in place.
- Sew the same way as the leather on the zipper panel (1/16 inch and 1/4 inch).
Do Another stretch with another dance and pat yourself on the back!!! 1 of 3 pieces is complete
Step 3: Back Leather Panel
Part A
- Take the 9 x 7-inch piece and mark 4 places: 2 inches in on each side, across and 1 inch down (see picture).
- Attach a 9 x 7-inch piece of Buckram to leather . . . the buckram will slide off-center a bit when attaching it to the leather. Don’t let this worry you, just get it as close to even as possible
- Using a leather punch, punch out those marked places.
- Set male parts of snaps.
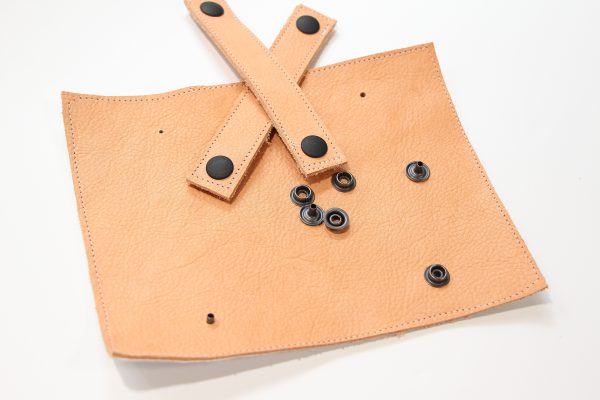

Part B
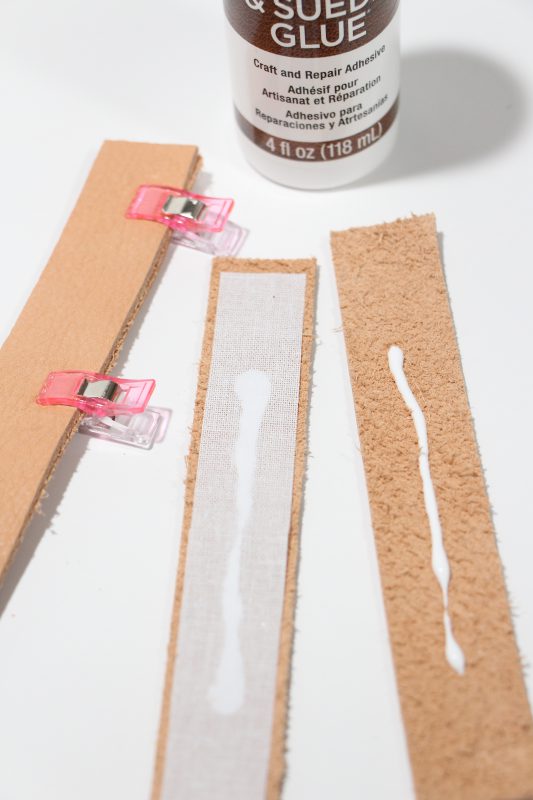
- Take the 4 leather pieces, 1 x 6 inch, and the Buckram, 3/4in x 5.5in
- Spread a little leather glue on one leather strip.
- Center the Buckram and sandwich it with the other leather strip.
- Clip and wait the 10 minutes before sewing all the way around.
- Mark 1 inch down and 1/2 inch in.
- Punch out the marks.
- Set the female side of snaps to strips.
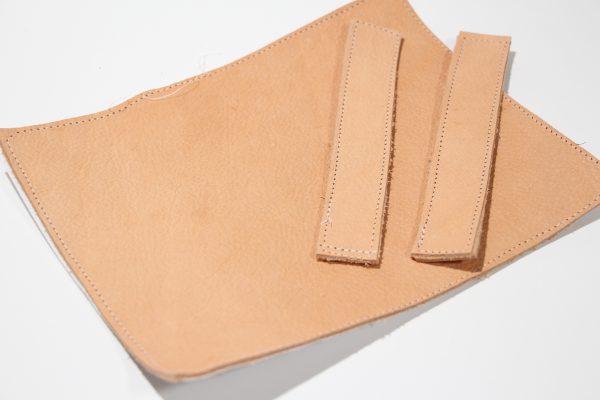
Note: If you don’t have snaps and don’t want to add them, you can of course sew these straps on. I do recommend backstitching a few times to help hold this pressure point over time. I like the snaps because ,again, it instantly gives the bag a convertible edge! You can add longer ones to hold a sweater, or just have one across the top to use as a hand clutch. I like options!!!
You’re doing Great. Grab another stretch with a dance and pat yourself on the back!!! 2 of 3 pieces are completed.
Step 4: Vinyl Zipper Panel
Part A
- Switch your foot to the presser foot #95 with the Binder Attachment #88, with a MicroTex needle.
- Use the Binder Attachment to attach the 1 1/2 inch bias tape onto the top side of the 9 inch zipper. You may need to use an awl to keep the zipper super close to the bias tape as it feeds through the attachment. Note: Don’t forget to keep your zippers opening the same way.
- Also use the Attachment to add bias to the 9 x 7 inch vinyl pieces.
- Then attach the vinyl pieces to the bottom of the zipper.
- Backstitch both ends where bias tape end, and trim off metal stoppers.
Part B
- Switch to the Zigzag Foot #52.
- Take one of your 9 x 7 inch quilted panel (the one you want on the inside of clutch) and mark 1 inch down from the top.
- Now take your new vinyl piece with zipper attached and attach it to your quilted panel at the 1 inch mark.
Part C
- Change stitch length to 5.00, with needle of your choice.
- Grab your vinyl panel and leather panel. Put wrong sides together and sew together, vinyl side down, by stitching just around the edges. If your vinyl sticks to your sewing table, put a little piece of fabric under it so that it moves freely as you sew. Make sure that fabric doesn’t go under the needle while sewing.
Part D (optional)
If you’re adding the D-ring to inside, follow the same steps for previous D-rings . . . for this D-ring, as you can see from the picture above, I had a thicker fabric scrap but changed my mind for some fun gold elastic that I had laying around so I used that. Have fun with it, and make it your own!
Last stretch with another dance and pat yourself on the back!!! All 3 pieces completed you’re in the home stretch now!
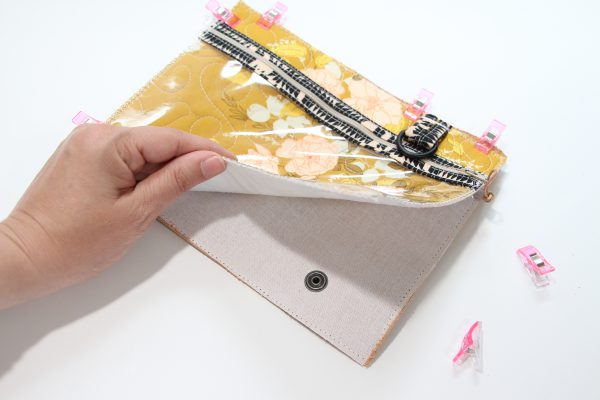
Step 5: Putting It All Together
Part A
- Switch to the Leather Roller Foot with the needle position one place away from foot and a needle of your choice.
- Grab your 2nd quilt panel and your wrap around panel
- Fold both in half and mark the middle with a needle or a pen.
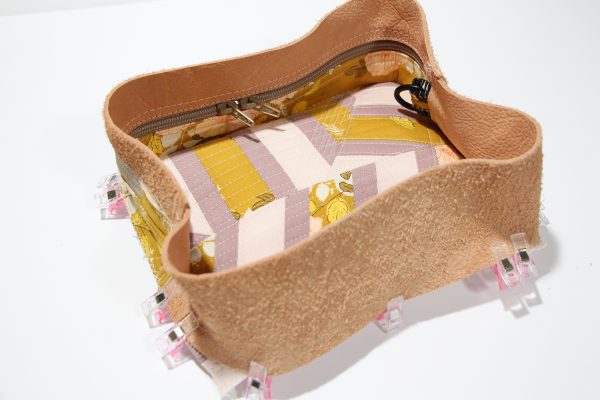
- Line them up right sides together and clip all the way around
- Once all clipped, take the leather glue and smooth a little bit across all the leather to leather parts lifting a clip or two up at a time.
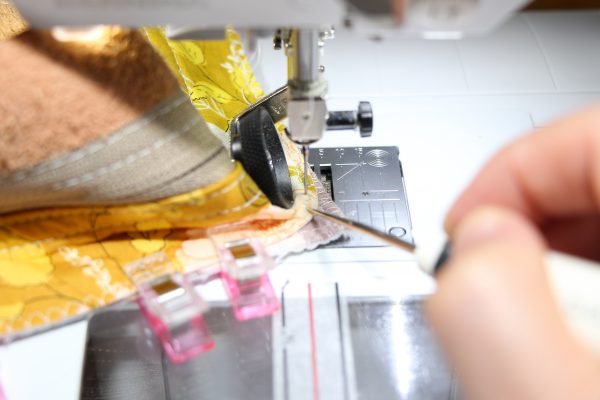
- Working slowly, sew all the way around. When sewing corners you may need to fold fabric/leather out of the way to keep it clean and smooth.
- Trim corners of quilted panel to match up with leather.
Part B
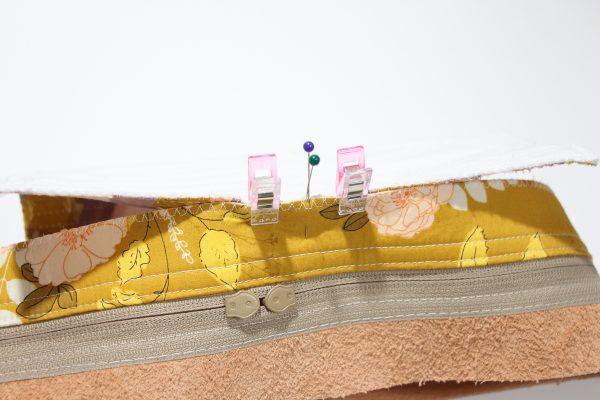
- Repeat Part A with the back panel.
Note: Make sure you open your zipper before sewing on the back panel of the hip sack. If you don’t then, you won’t be able to open it, and it will need to be seam ripped open. Trust me on this one . . . I may have done it twice. (See it in the pictures, lol, oops!)
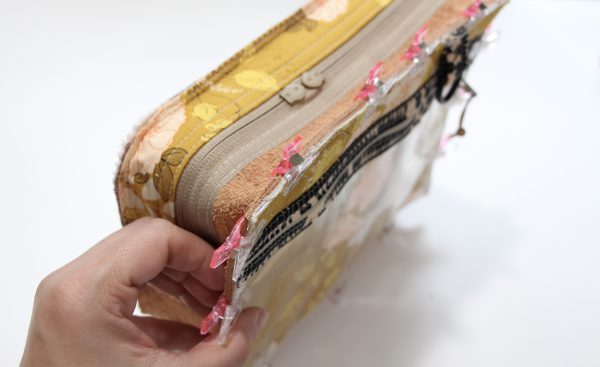
Step 6: Make It Pretty!
- Switch to Zipper Foot #54 and MicroTex Needle
- Take your remaining bias tape and inclose all that hard work!
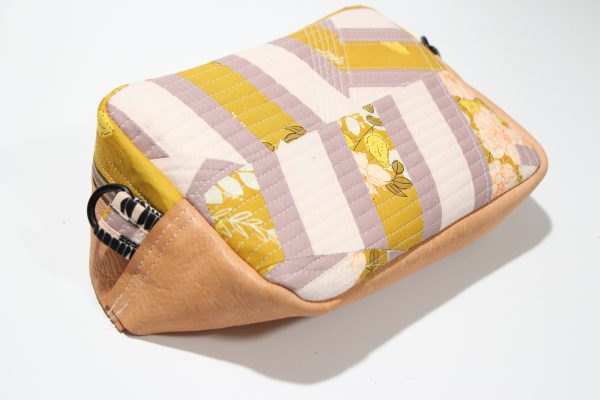
Yay, you just made a bag with leather!!!
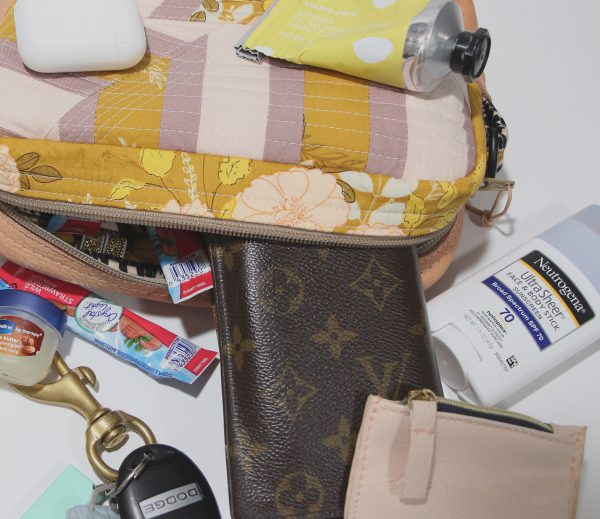
Now fill it up and run around hands free!!!
Don’t forget to Tag me @honymfin on Instagram so I can see it!
Happy Sewing, and thanks for being here!
Don’t forget to check out my previous post, How to Make a Quilt Panel!
Used Products

What you might also like


7 comments on “How to Sew a Convertible Leather Hip Sack”
-
-
no problem, I will send a picture of that in to be added for you…the D-rings on the side allow you to add a strap for cross body or over shoulder wearing and the leather snap straps on the back allow you to add a belt, or attach it to an a baby carrier like an Ergo(which I love), you can even use the straps on the back for a light sweater holder while wearing as a cross body bag. If you have IG follow me and tonight I will do a little story demonstration!! @honymfin
-
-
I am also interested in seeing the picture of how the strap lays on the hip.
-
Thank you for your comment!!! I sent in pictures to get added to this tutorial. But you can also head over to my IG @honymfin and watch an IGTV video which shows me using it!
-
-
Please describe which weight thread works best on top and in bobbin when stitching leather. Thanks!
-
Hi Lorraine, I used regular Gutermann Natural Cotton Thread Solids in White 50wt and have had zero problems with reliability. I use the hip bag pictured in this post weekly if not daily! I love it so much. I just keep in in my big purse and pull it out when running errands and adventuring. Hope that helps!
-
-
I am not familiar with IG. Once I get to your page, how do I search for the video?
Leave a Reply
You must be logged in to post a comment.

Add a picture of how it attaches to your hip. I don’t see a strap or how it is attached to make it hands free.