How to Sew Easy and Beautiful Single-Welt Pockets
Hi everyone! I’m Jaclyn, a BERNINA Ambassador sewing on a beautiful B 735. You may have read my recent post, Finding Time to Sew as a New Mom where I shared time-saving sewing tips and productivity strategies for sewists. Today I’m back with a tutorial demonstrating how to sew foolproof single-welt pockets that produce a stunning result without stress.

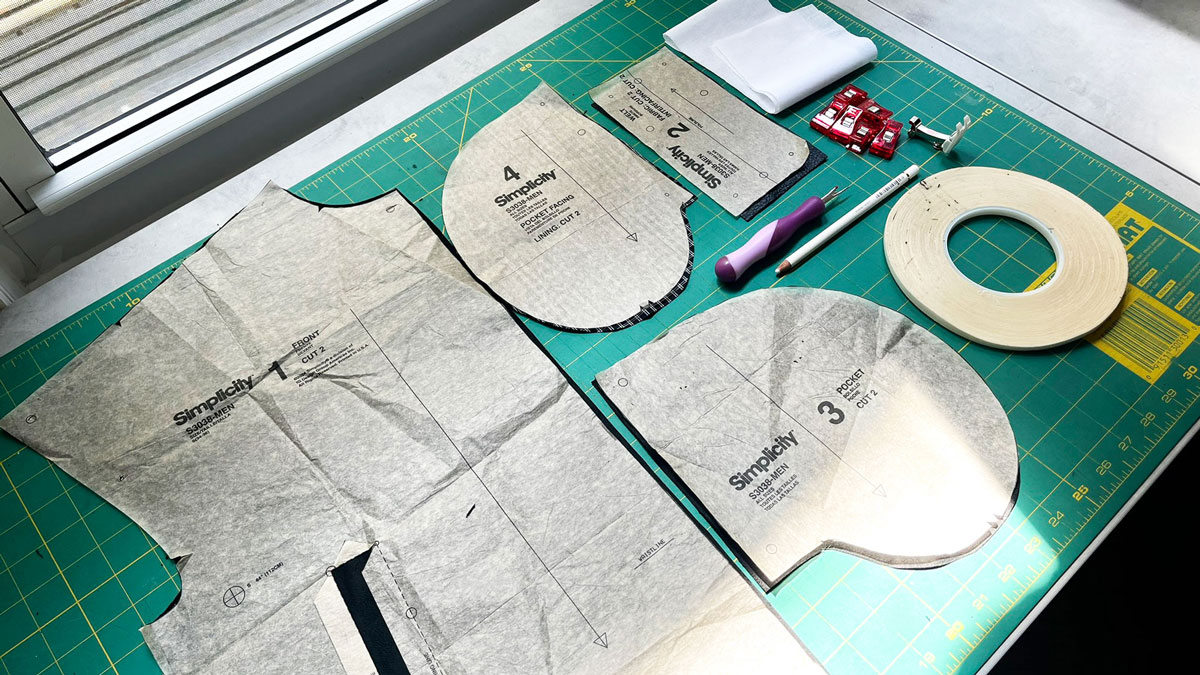
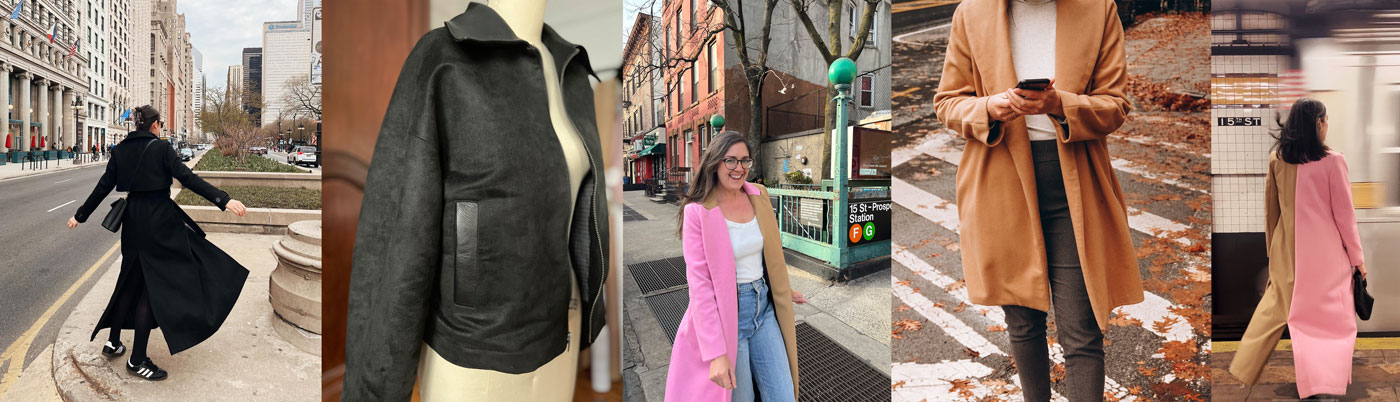
Recently, I finished a jacket project, Simplicity S3038. (Technically, two! I batch-sewed matching jackets using the same pattern and fabric for both my husband and I.) S3038 is a drop-shoulder, cropped jacket with welt pockets. It has a unique back yoke that is integrated with the sleeve. (As a side note, typically I am not a drop-shoulder gal, but I made an exception because of the design details of the back. It’s a really cool design—field jacket-meets bomber jacket-meets moto jacket.) I wanted to add a more polished, dressy jacket to my wardrobe, so I decided to sew mine using a combination of: 1) suede (faux) for the self, and 2) smooth-grain leather (real leather hide) as accents for the collar and welt pockets.
I consider myself to be an advanced sewist, but there always seemed to be this magical mystery around getting a good result on a welt pocket. Previously, my welt pockets ended up in that “sisters-not-twins” category—with results ranging from decent to “well, you tried.” But with this method I’m about to share, I busted out four perfect single-welt pockets in a row, easy-peasy.
One thing I want to underscore is that this method works for any single welt-pocket construction—it’s not just for suede and leather projects. However, as a little bonus, at the end of this post, I’ve included some tips for sewing with leather if that’s of interest to you.
Foolproof Single-Welt Pockets
Materials to Sew a Single-Welt Pocket
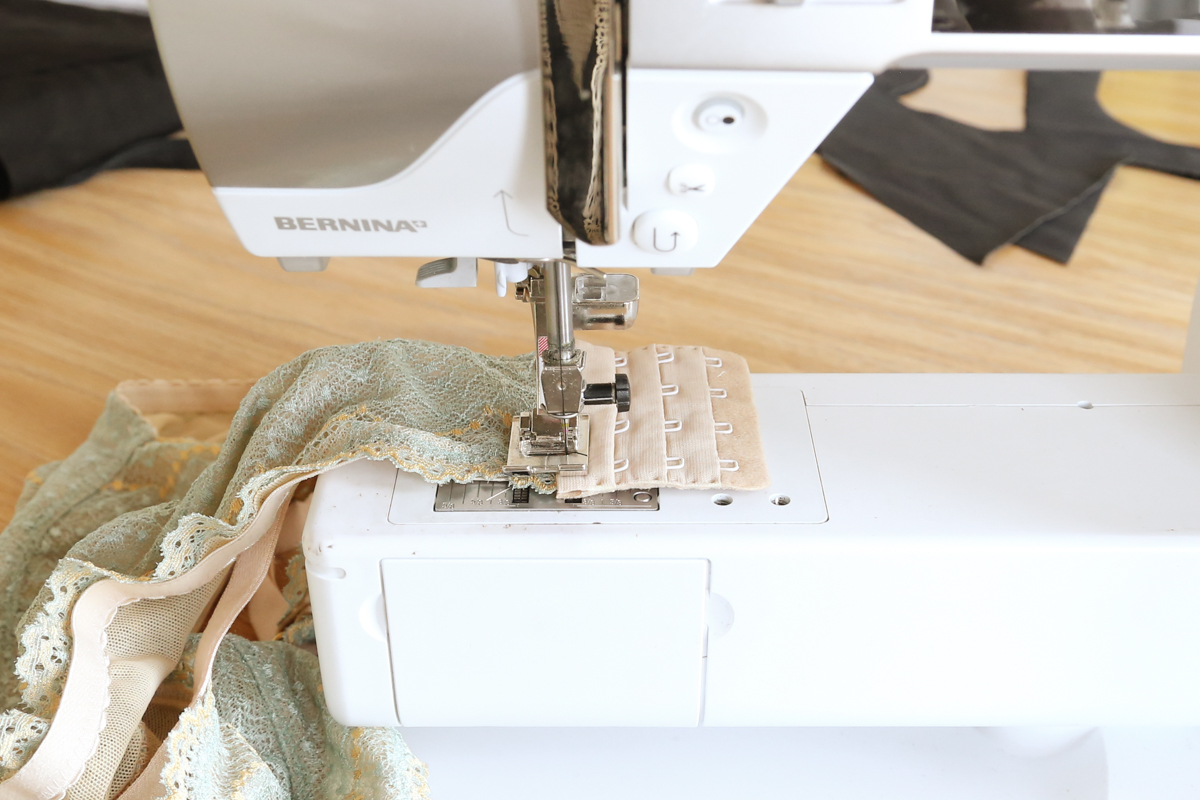
- Double-sided transparent tape
- This is the secret ingredient for this tutorial. I like a wash-away one—you can stitch right through it without gumming up your needle. For the leather welt pockets on my own project, I used a 1/4″ Hyperstik. Note: if using Hyperstik (or any non-wash away tape), take care to not position the tape in the path of any stitching as sewing through it can gum up your needle.
- Interfacing (suitable to your fabric)
- Fabric-marking pen/pencil (to mark the outlines and cutlines)
- Pocket bag and welt pattern pieces
- Pattern piece that you are installing the welt pocket to (such as a jacket front or the back of a pair of trousers, etc.)
- Seam ripper
- pins or clips (optional for aligning front and back pocket bag pieces as you sew)
Instructions to Sew a Single-Welt Pocket
Note: Before I dig in, I want to note that these instructions are for a welt pocket installed into a lined garment. You could use these same instructions for an unlined garment (for example, single-welt pockets on a pair of trousers). But for nice inside finishings, you would need to make some adjustments, such as pre-finishing pocket bags and the raw welt edges.
1. Prepare the Welt
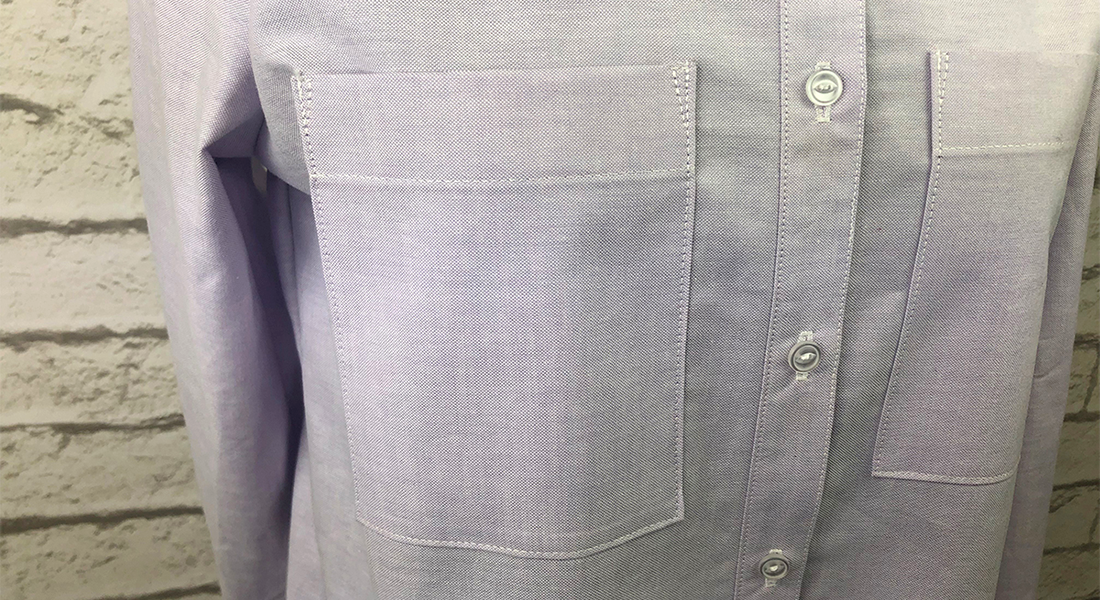
Single-welt pockets can be designed in a variety of ways, but typically you will have 1) a front pocket bag and 2) a back pocket bag that are installed into the project. My pocket is constructed as follows:
- A welt + front pocket bag that are sewn together as one full front pocket bag. The welt will be visible on the right side of the project. You can choose to cut this in the self OR in a contrasting fabric for fun pocket pizazz. The front pocket bag pattern piece that attaches to the welt will not show. You can cut this in a lining fabric or the self–whichever you prefer.
- The back pocket bag (typically cut in the self). The back pocket bag is the back side of the pocket—the side of the pocket closest your body when worn. The back pocket bag will show as you insert your hand into the pocket, so you will want to be intentional with what fabric you cut it out of. Use the self to match your project OR plan for intentional contrast if you want a fun pop of color. *See troubleshooting tip in step 7 for additional information.*
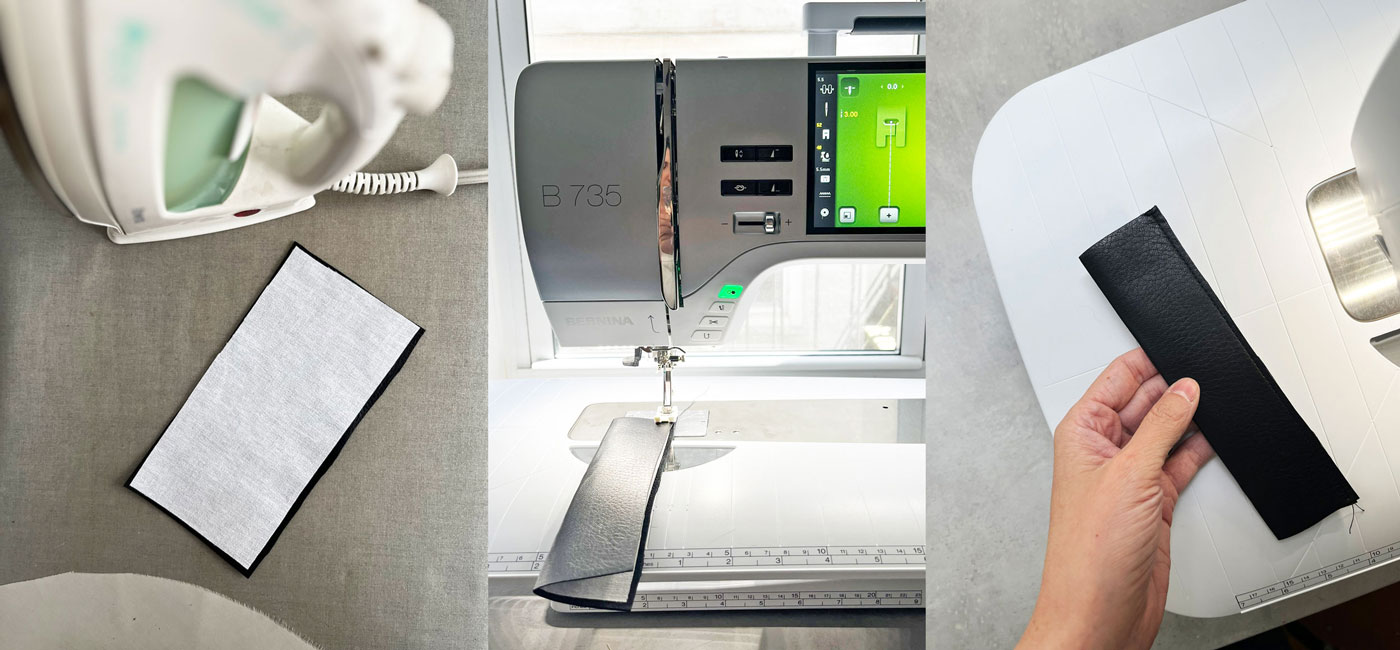
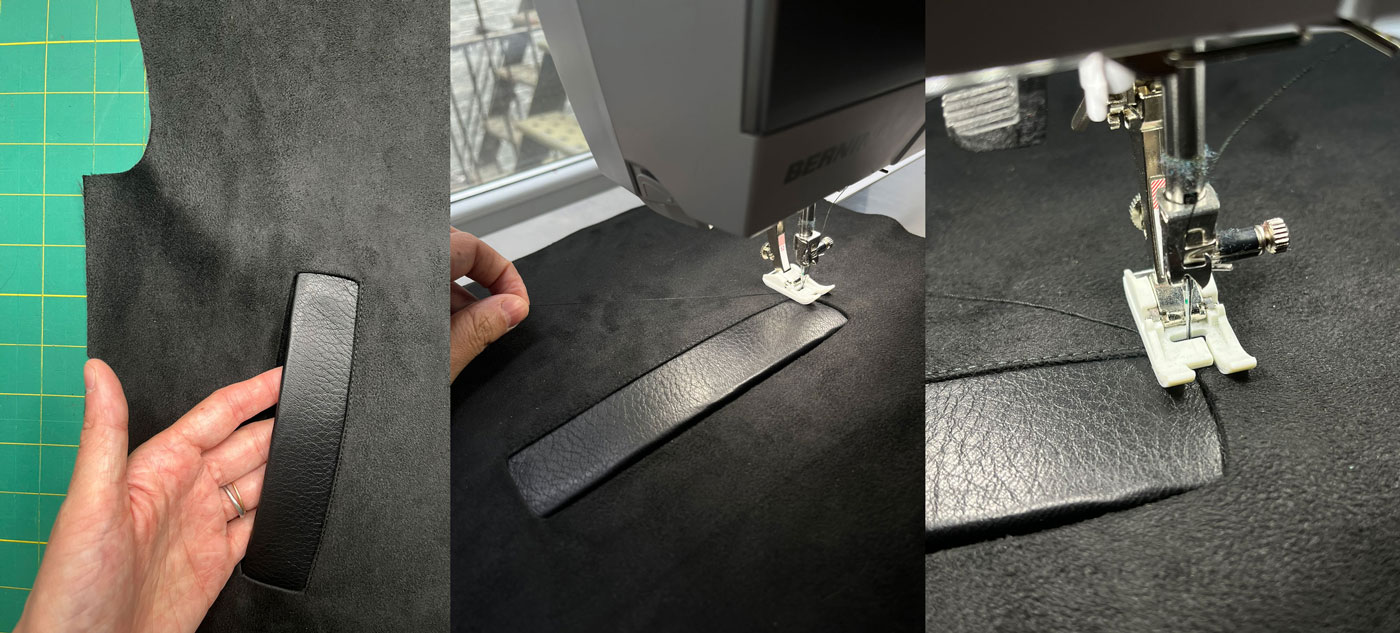
Interface the wrong side of the welt pattern piece to give it stability. Fold the welt in half—wrong sides together—and press. Baste the long, raw edges of the welt together.
2. Attach the Welt to the Front Pocket Bag
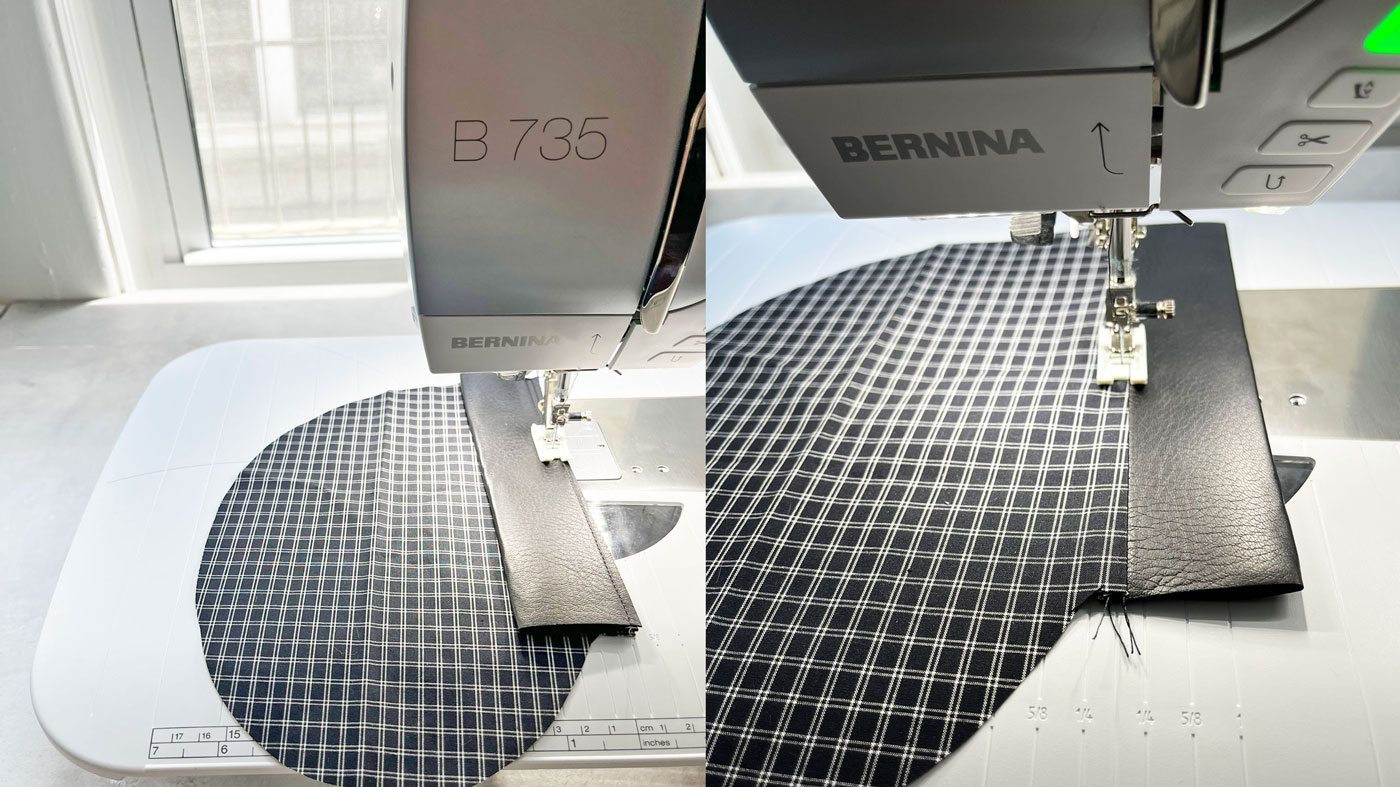
Raw edges aligned, sew the welt to the front pocket bag to create the full front pocket bag piece.
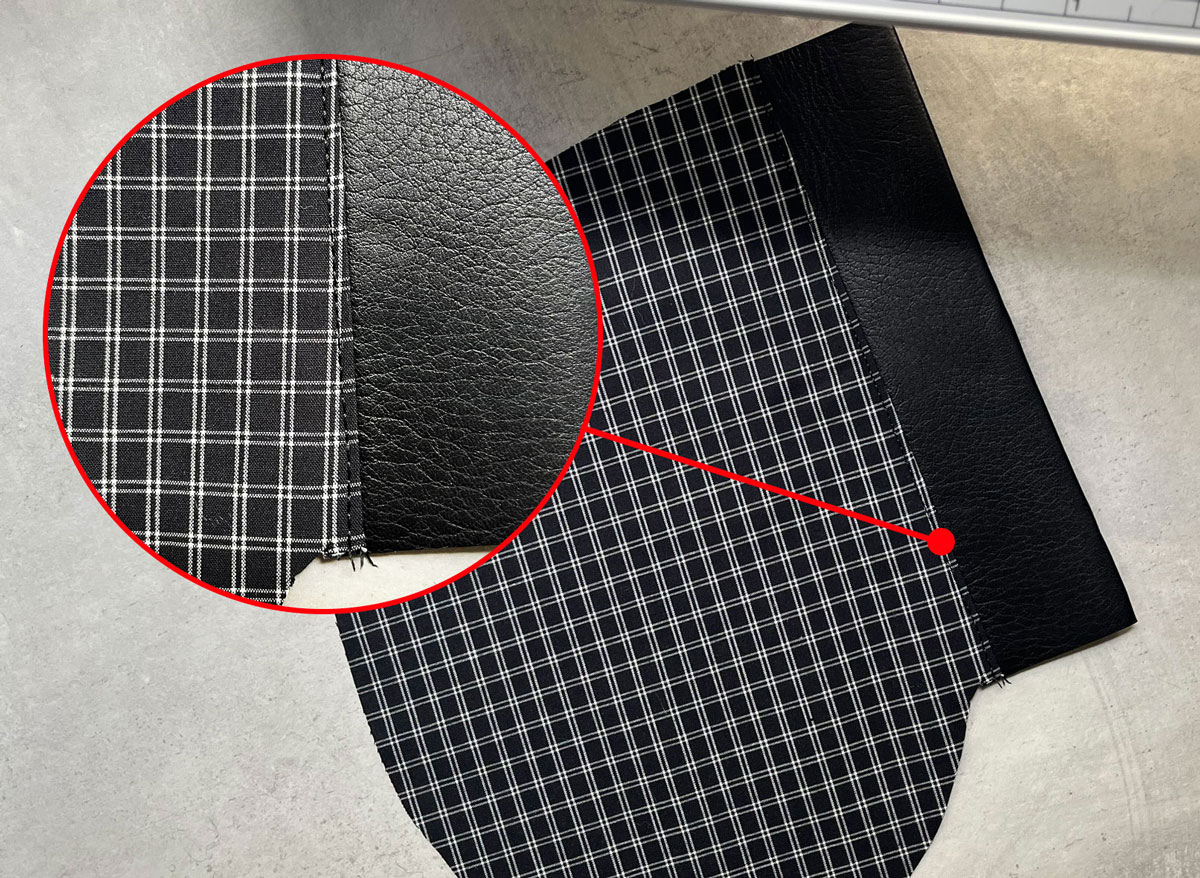
Press the seam away from the welt toward the front pocket bag, and stitch the seam allowance to the front pocket bag. Now you should have: a full front pocket bag, a back pocket bag, and your project where you are installing the welt pocket.
3. Mark the Edges and Cutlines of the Pocket Opening
Interface the pocket opening on the wrong side of your project. Accurately mark the edges and the cutlines of the pocket opening.
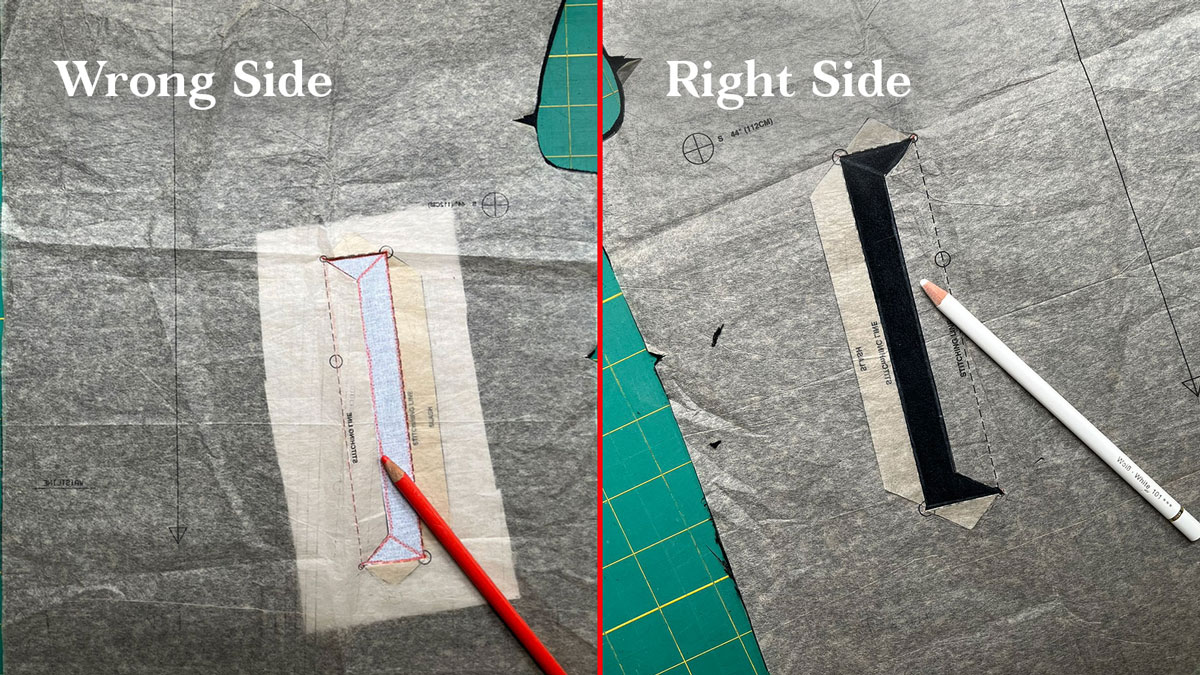
Pockets get a lot of use and strain. Interfacing the area is really important to give the pocket stability to withstand the stress of pushing and pulling. Fuse a rectangle of interfacing on the wrong side of your project. It should cover the entirety of the opening + a little extra (I’m not extremely precise with this– I usually interface an area that covers the pocket opening, plus an extra inch on all sides of the opening.)
Next, use a marking tool to carefully and accurately mark all edges and cutlines of the welt on both the right side and the wrong side (on top of the interfacing). An accurately-marked welt pocket is half of the battle!
4. Cutting
Cut the Center Cutline of the welt and cut the diagonals up to the pocket corners.
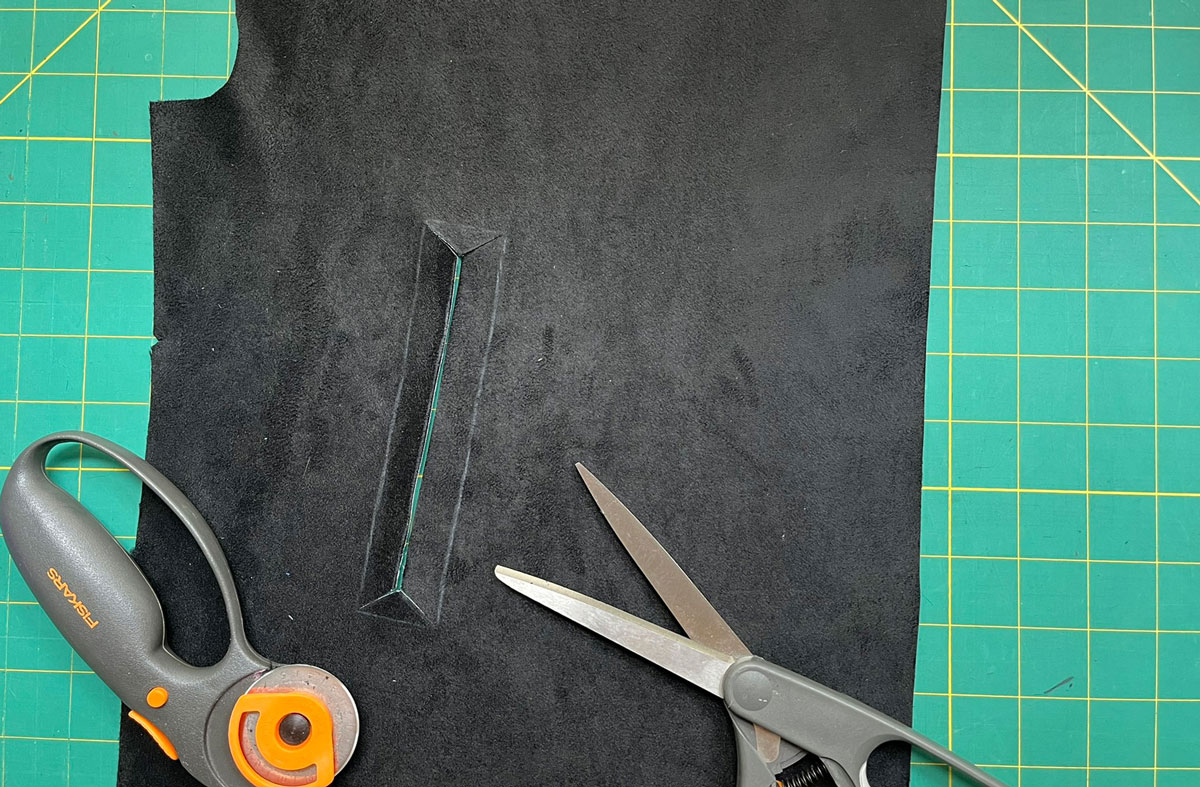
Cut carefully, accurately, and cleanly—especially the diagonals into the pocket corners.
5. Create the Pocket Opening
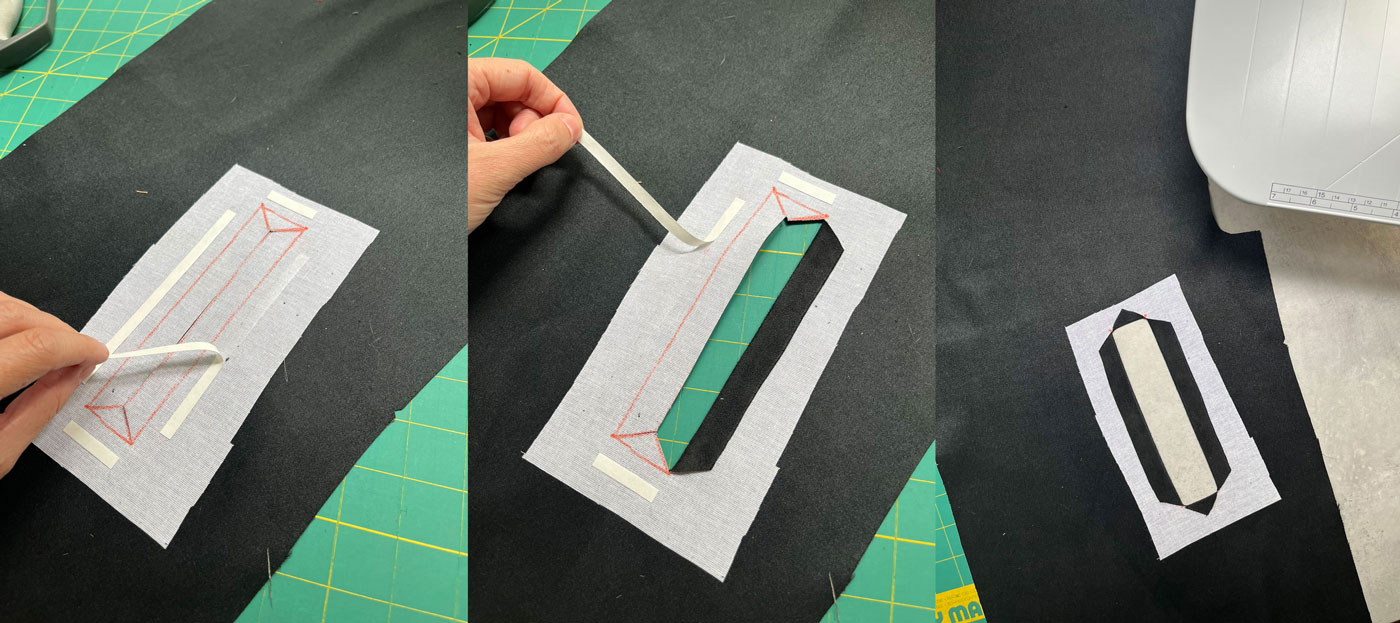
This is where the magic of this single-welt pocket method starts, and why accurate markings and cutlines on both sides are important.
On the wrong side of your project, adhere four pieces of the double-sided sticky tape along each side of the pocket opening. Use the pocket markings on the right side of the project as your guide for where to fold. One tab at a time, remove the paper to expose stickiness, and fold each of the four “tabs” of the pocket opening to the wrong side of the project. Secure all tabs to the wrong side with the tape to hold them in place. Press. This creates the edges of the pocket opening.
A few important notes for this step:
- When folding the four tabs back, fold enough to make sure that your markings aren’t showing on the front side (or use a heat-erasing marker, but I have trust issues with those 😂).
- When folding the tabs back, the corners in particular need to be very clean– no fraying fabric showing, no loose threads. Fold enough so that the corners are clean. Neaten them up now if you need to. Trim any little threads.
- You will eventually be edgestitching around all edges of the pocket opening. When positioning the double-sided tape, if you’re not using a wash-away tape, make sure that your sticky tape is not right up next to those folded pocket openings edges so that you don’t gum up your needle when edgestitching in future steps.
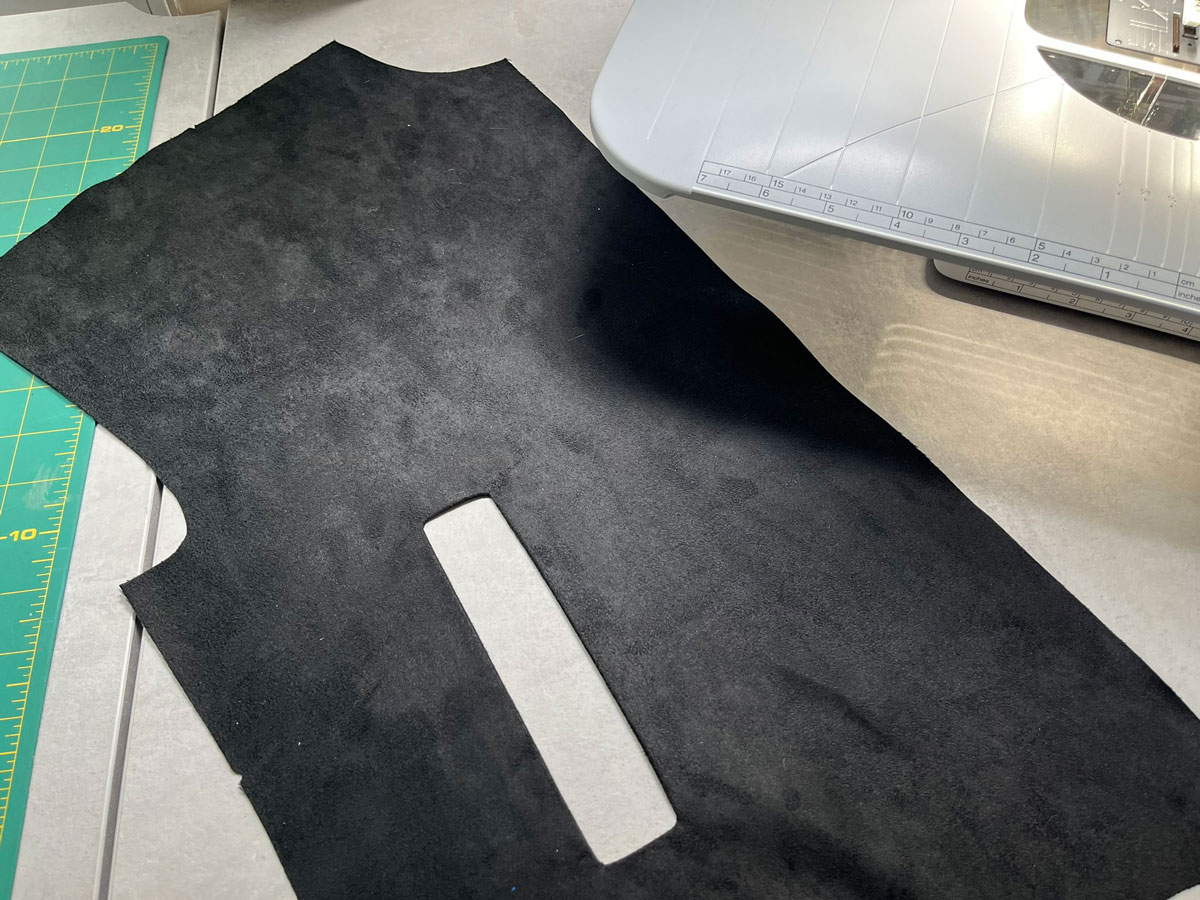
At the end of this step, you should be left with your project that has an open rectangle in it from the four tabs being folded and taped to the back.
6. Attach the Front Pocket Bag to the Pocket Opening
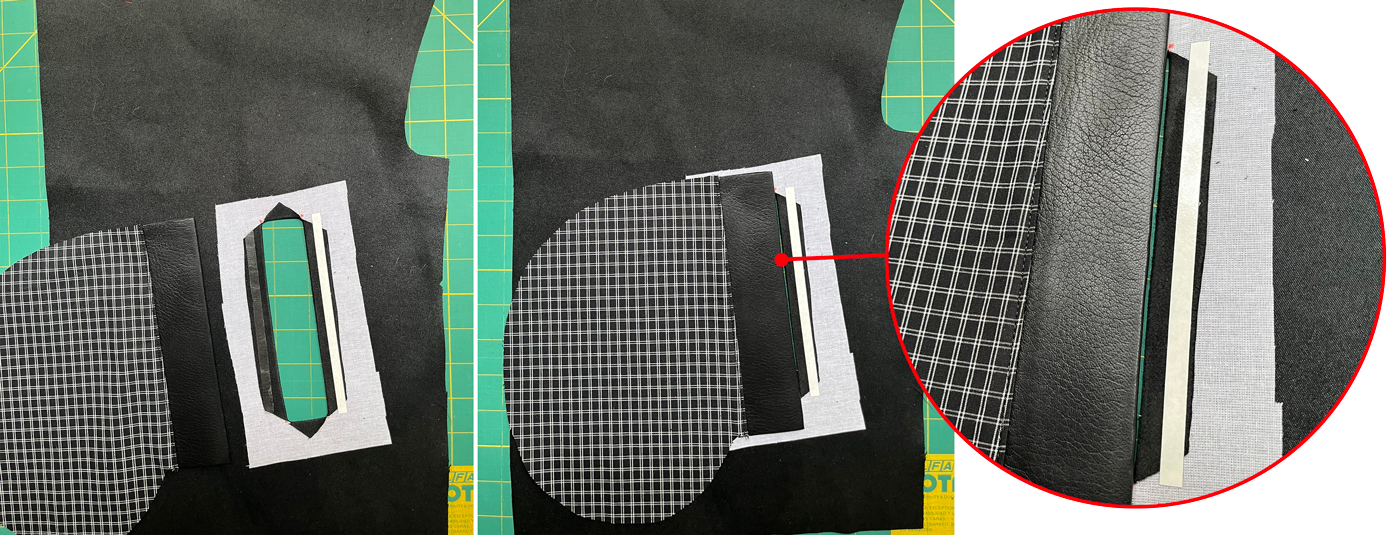
On the wrong side of the project, apply double-sided tape along the two long edges of the pocket opening.
Expose the stickiness on the tape positioned on the bottom pocket edge. (Don’t remove the paper on the top edge tape yet. You’ll use that in the next step.) Grab the front pocket bag. (Reminder that the front pocket bag is now composed of the welt + front pocket bag stitched together in step 2.)
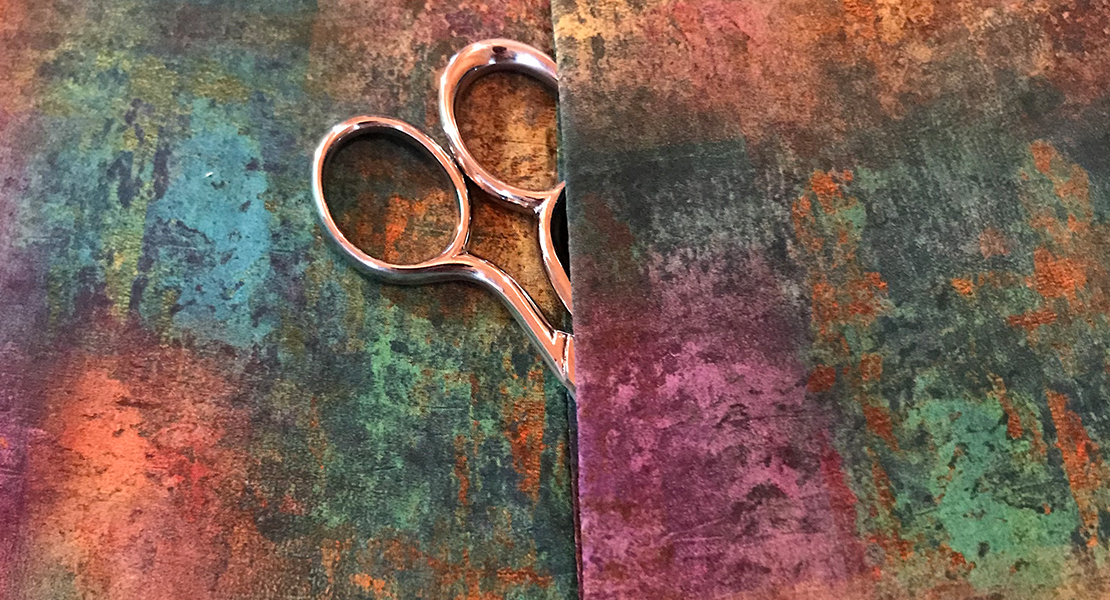
On the wrong side of the project, but with the right side of the front pocket bag face up, position the welt over the pocket opening. (The wrong side of the front pocket bag is facing the wrong side of the project.) Align the welt’s folded edge with the top edge of the pocket opening. TIP: When positioning the welt, I like to leave a hairline sliver of space between the top of the welt and the top edge of the pocket. I feel like this makes the finished pocket easier to get into. See detail photo above. The front pocket bag is held in place on the wrong side of the project with the sticky tape on the bottom edge of the pocket opening.
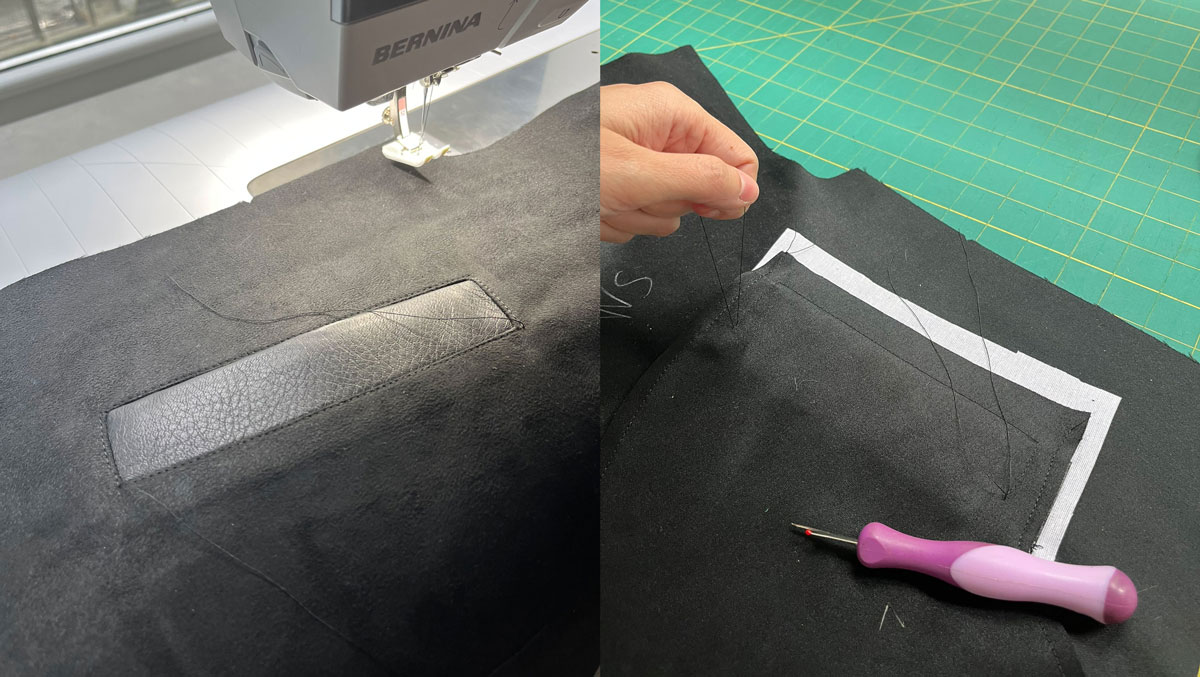
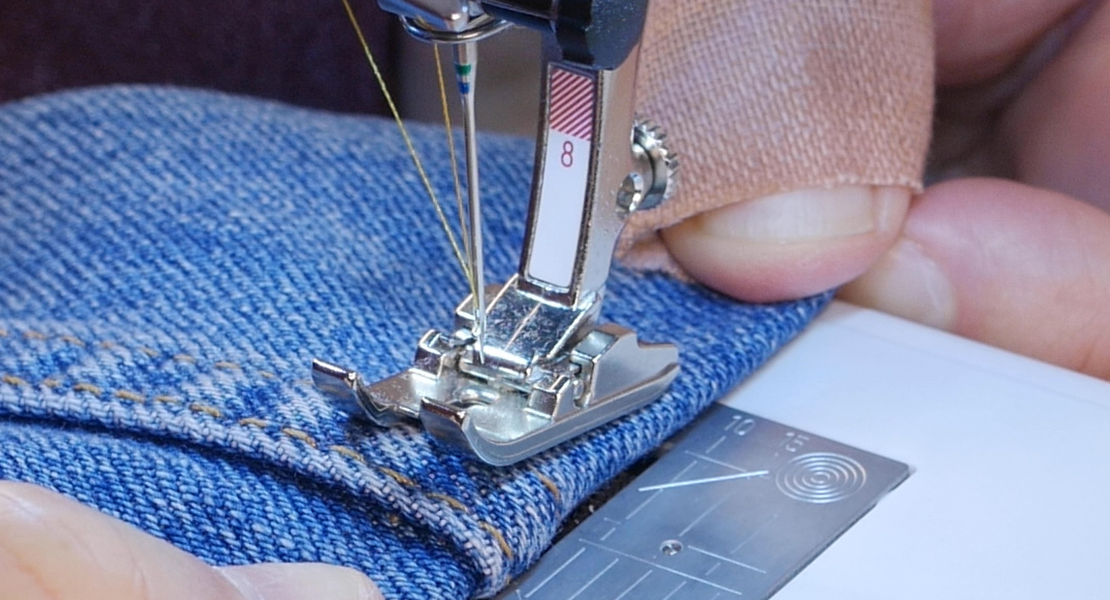
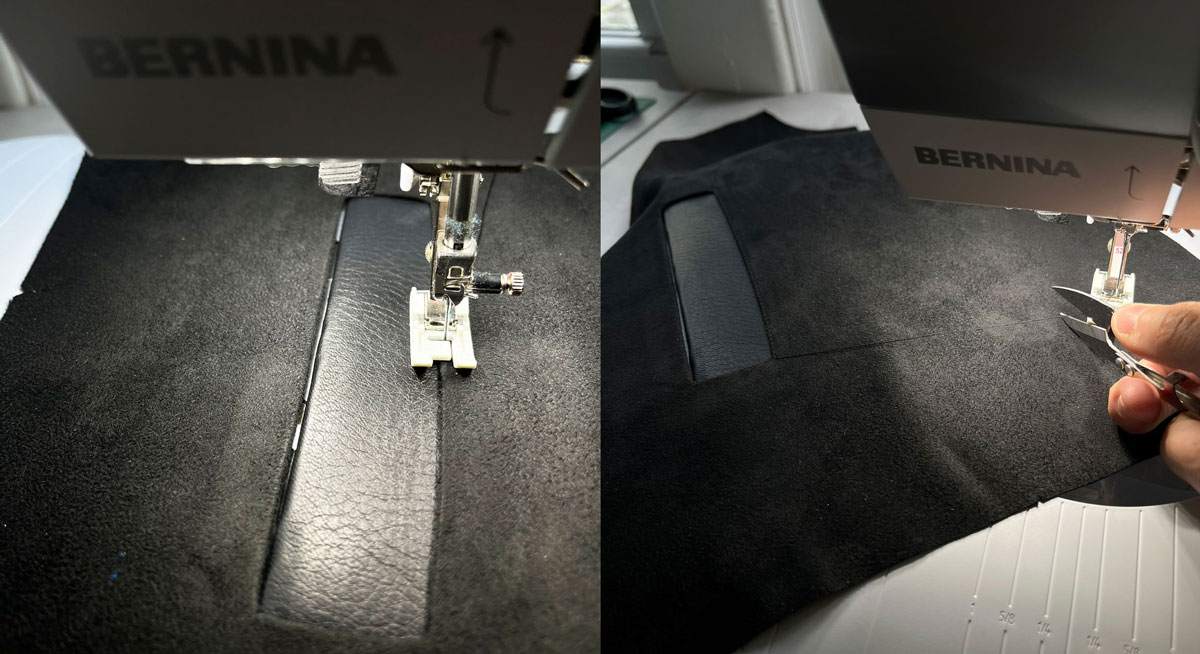 Flip the project over so that the right side is facing you. Pull a little thread tail before you begin stitching. From the right side of the project, edgestitch along the bottom long edge of the pocket. Do not backstitch. Pull a few inches of thread tail when cutting the threads.

Flip the project back over to the wrong side. Using a seam ripper, pull thread tails to the wrong side at both the beginning and end of the stitching. Tie three knots to secure. (This secures the stitching without back stitching.)
7. Attach the Back Pocket Bag
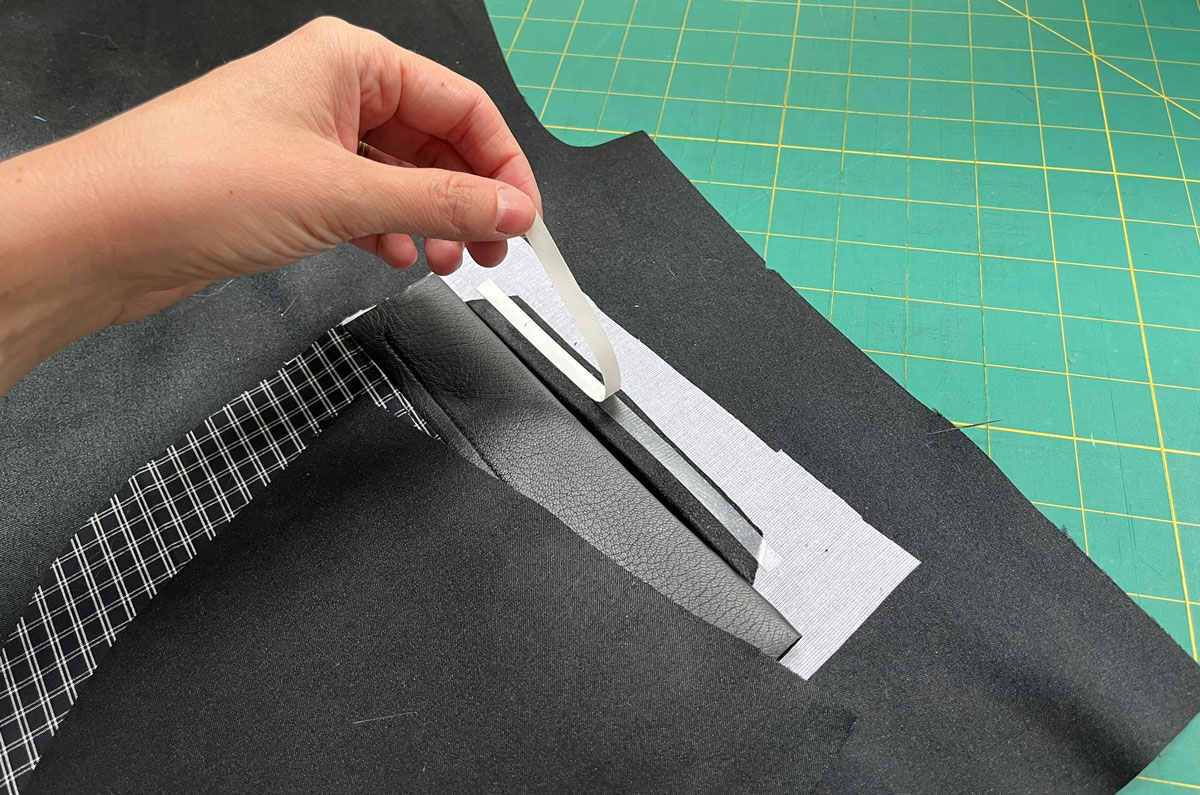
On the wrong side of the project, now remove the sticky tape paper on the top edge of the welt pocket opening, exposing the stickiness.
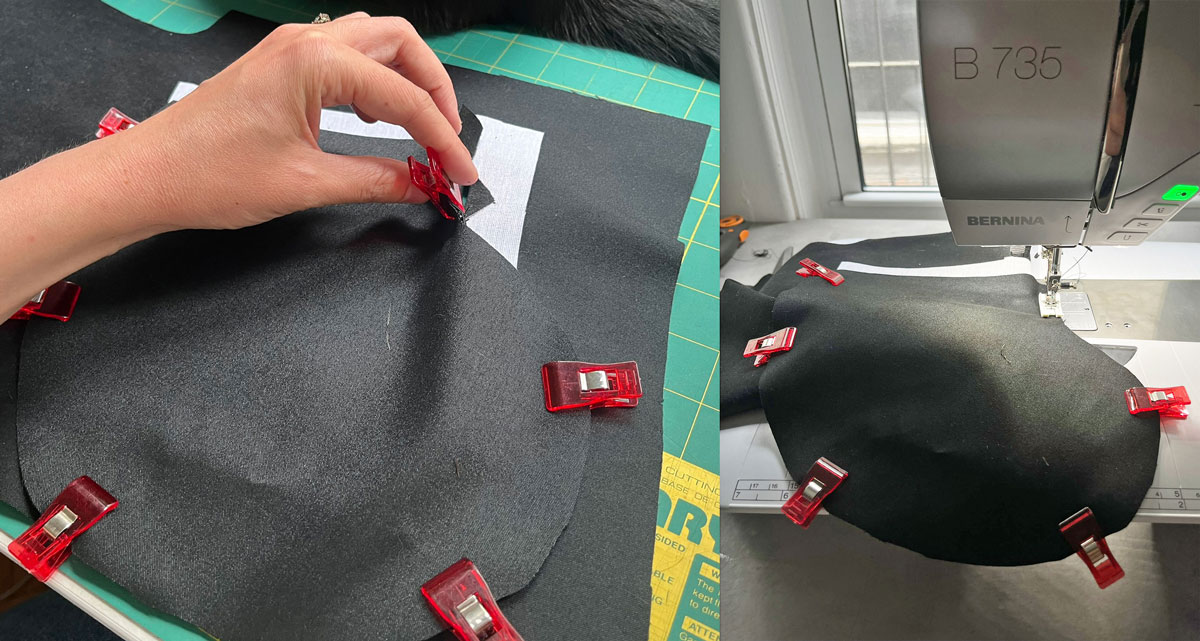
Grab the back pocket bag. With right sides facing, align the back pocket bag with the front pocket bag. Pin pocket bag edges together. The top of the back pocket bag needs to be covering the pocket opening and is secured to the project with sticky tape along the top edge of the welt pocket opening.
Stitch the back pocket bag to the front pocket bag at edges, making sure to keep your project free of your stitching.
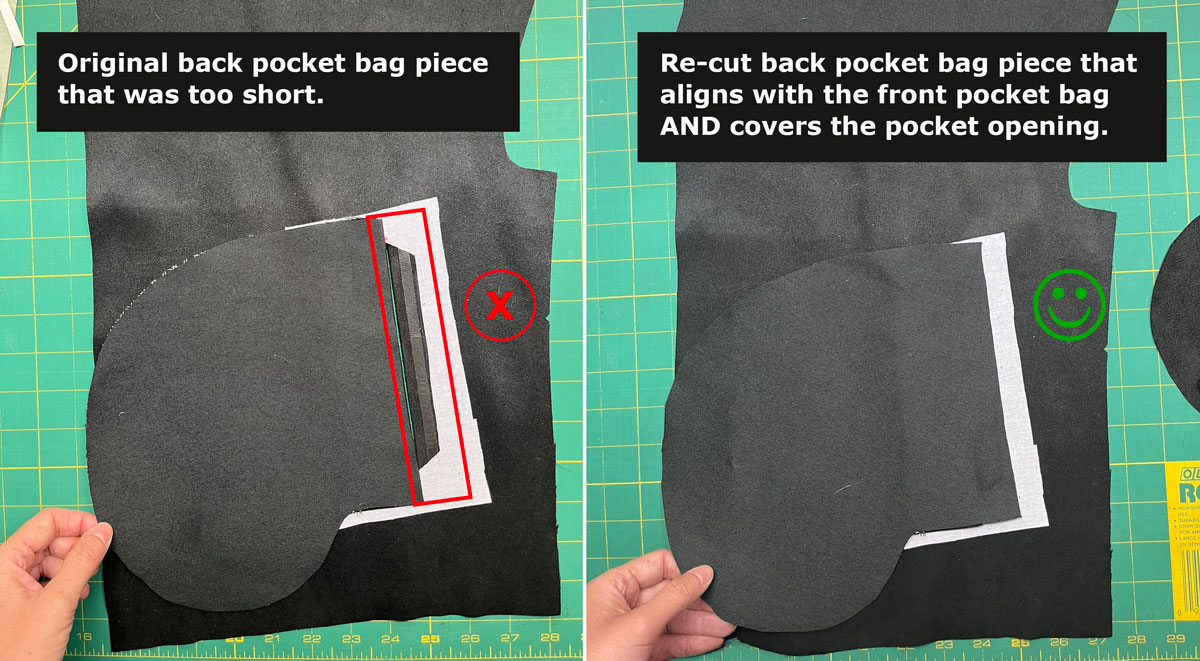
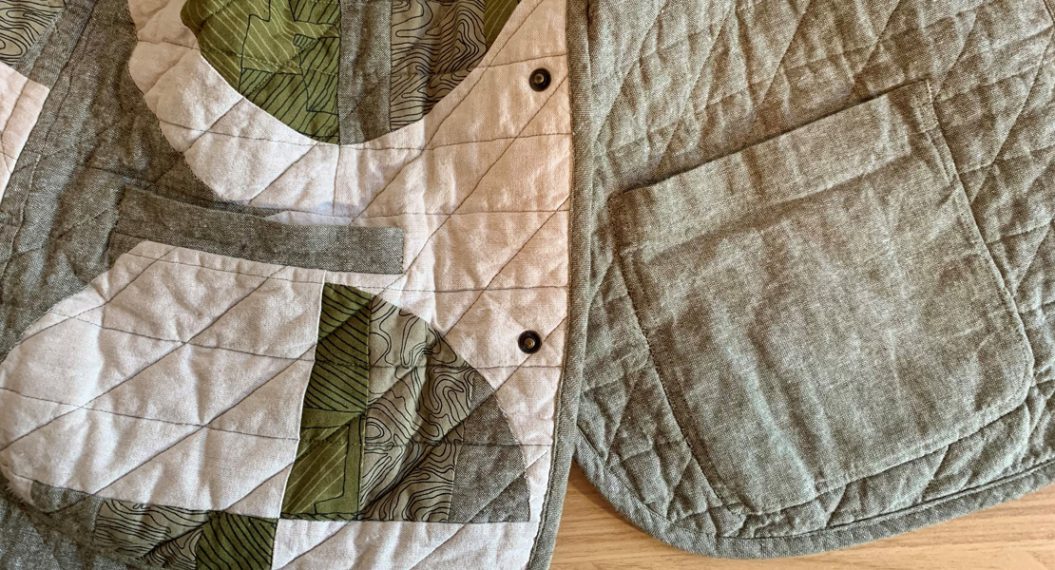
Troubleshooting Tip: If your pocket pieces are aligning and covering the pocket opening, you can skip this tip. However, it is at this step that you may find that your back pocket bag does not align with your front pocket bag AND also cover the welt and pocket opening. (Especially if your pocket pieces were not designed to be installed with this method.) You might need to extend/expand your back pocket bag. (See example below.) My back pocket bag as-drafted by the pattern was too small to align AND cover the opening, so I re-cut my pocket bag to have a little more length. I wanted to include this because you may want to wait until this step to hold your back pocket bag pattern piece over your work to assess if you need to make any adjustments to it—especially if you are limited on fabric.
8. Edgestitch
Edgestitch the remaining 3 edges of the pocket opening from the right side of the project.
This final bit of stitching is both functional and decorative. It further secures the folded pocket opening tabs, and also secures the back pocket bag to the project.
Before sewing, pull a short length of thread tails out. From the right side of the project, edgestitch around the three remaining unstitched edges of the welt pocket opening, pivoting at each corner. Start and stop your stitching at the exact end points of the stitching that you’ve already done along the bottom of the welt pocket. This will give you a seamless, clean look. Do not back-stitch.
At the end of the third unstitched side, detach your project with a thread tail. As before, use a seam ripper to pull the thread tails to the wrong side of the project. Tie a knot three times on each to secure. Trim threads.
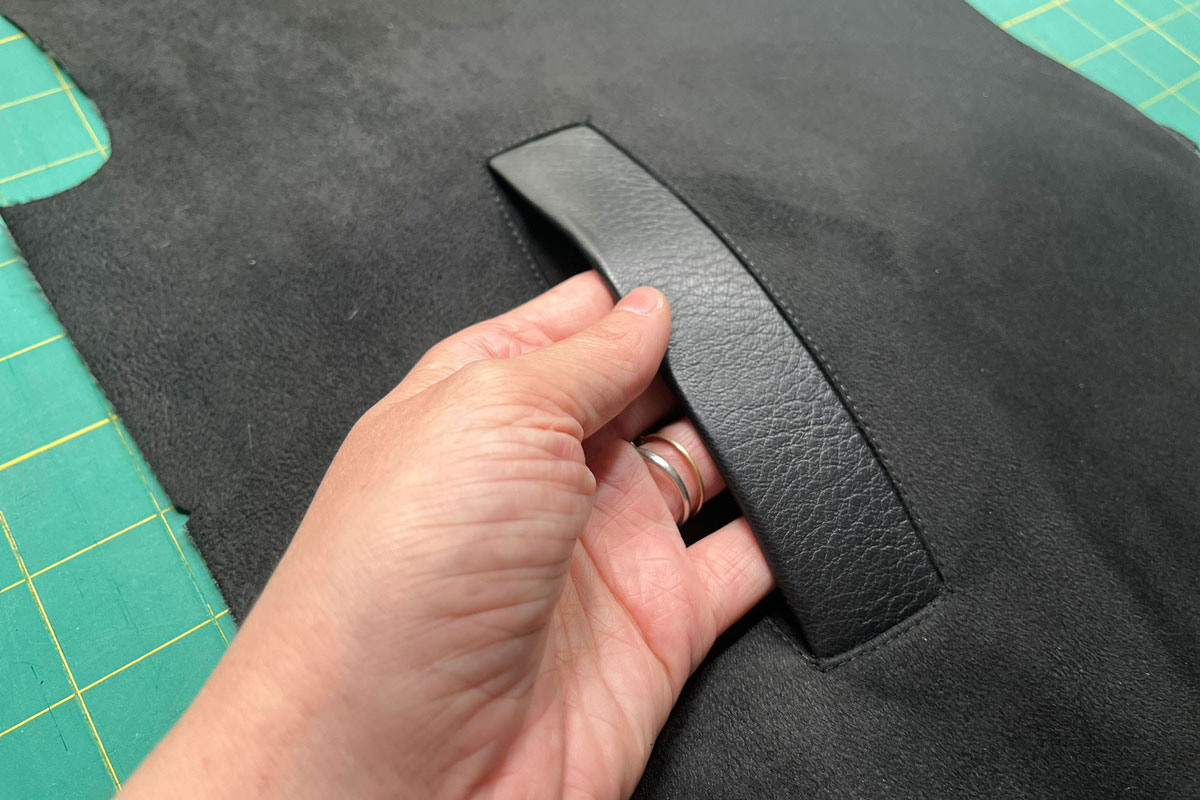
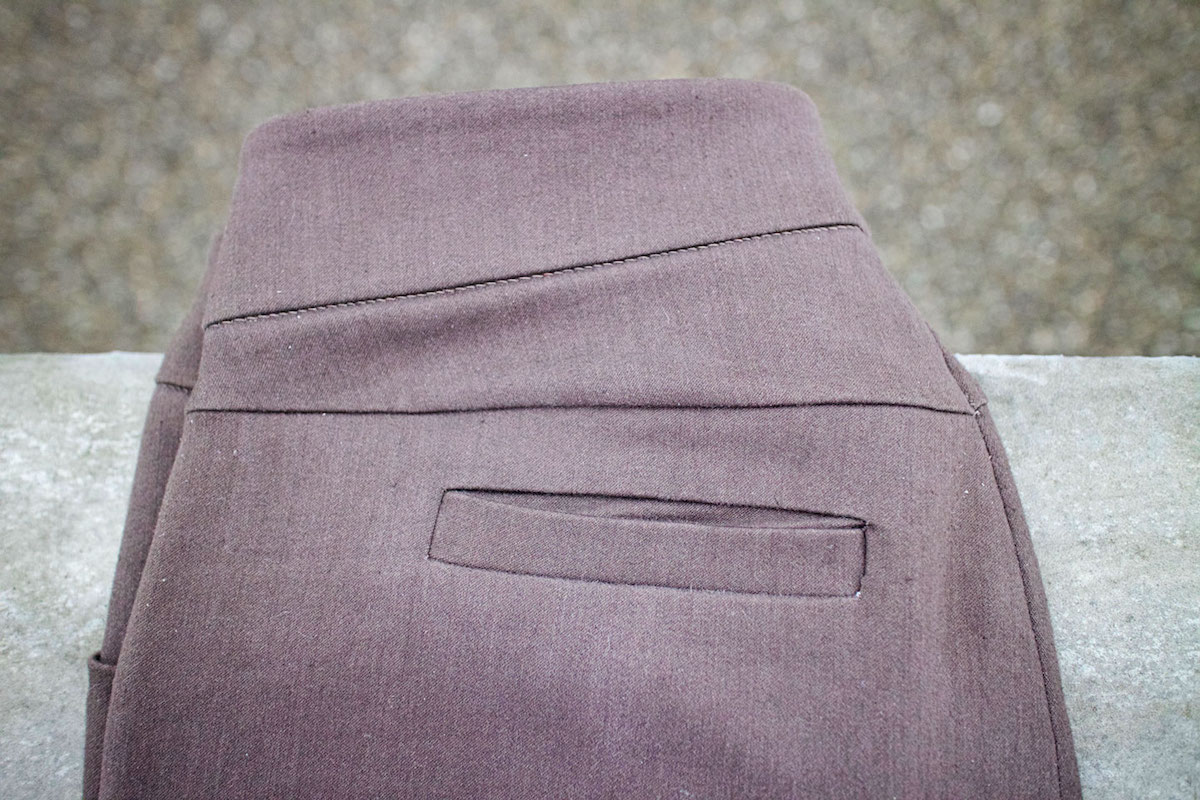
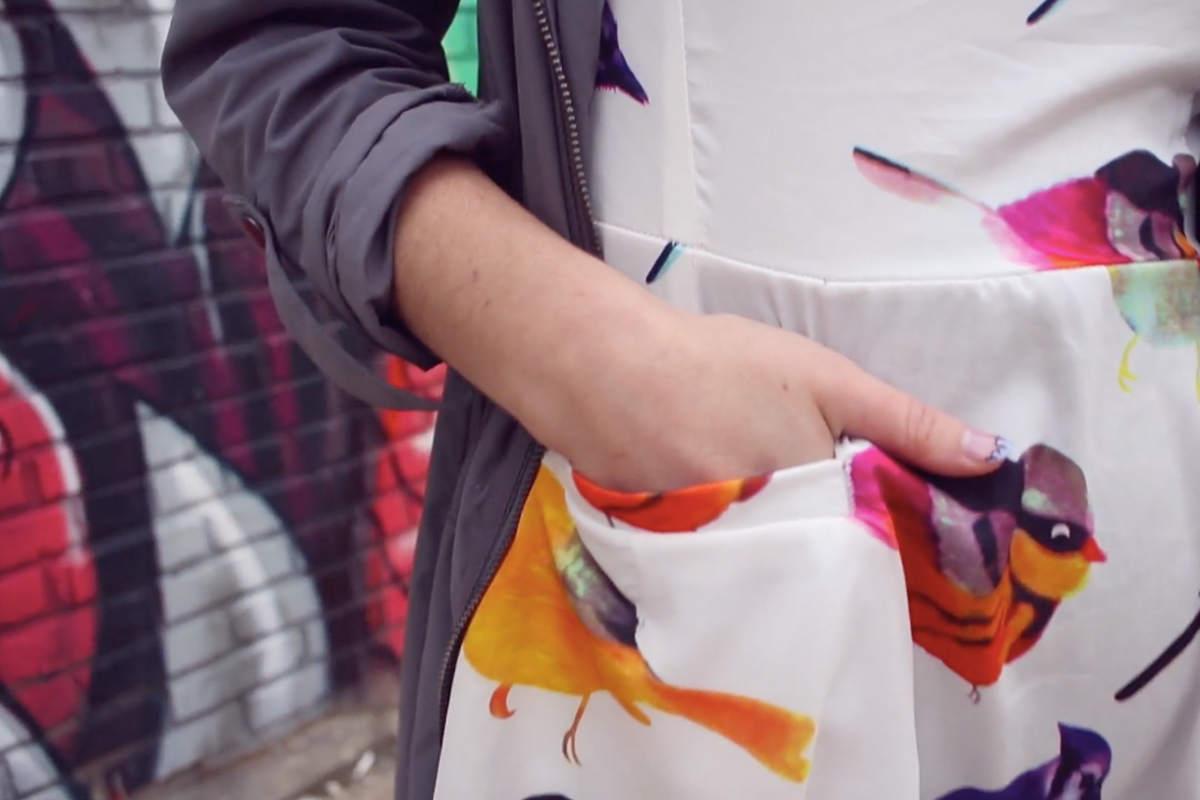
Your single-welt pocket is now complete!
Bonus Tips for Sewing with Leather
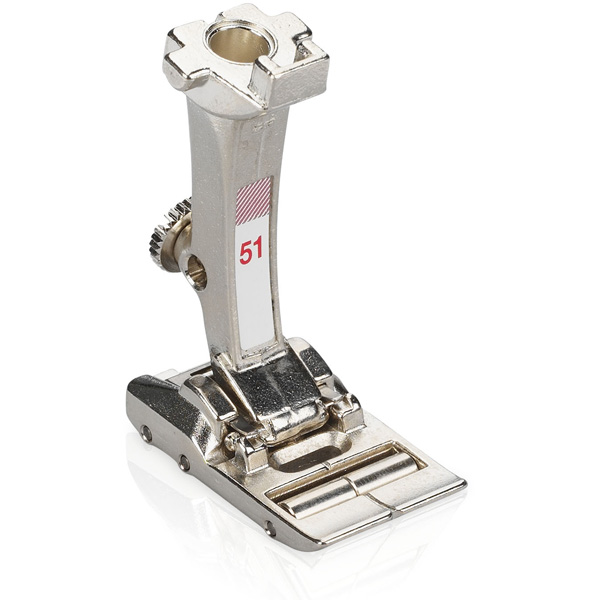
- You will absolutely need presser feet suitable for the material. I recommend Zigzag Foot with Non-Stick Sole #52 and Roller Foot #51. I have both and use both, and I’ve encountered situations where one works better than the other, depending on the leather. If you only get one, start with Zigzag Foot with Non-Stick Sole #52!
- I utilize Creative Consultant on my B 735 to apply leather settings as a starting point, but each leather is different. It’s very worth your time to do some experimenting on a scrap piece before starting on your project. If your machine does not have Creative Consultant, I recommend starting with: a non-stick foot, a leather needle, a longer stitch length (3-3.5), and slightly reduced foot pressure.
- With leather, it’s a “measure twice, cut and/or stitch once” situation. Once the holes are there–they’re there. There’s no going back. To that end, use clips rather than pins with leather projects, and only position clips within the seam allowances. Even strong clips can leave permanent marks.
- Think of holes made in leather like perforations. When they are spaced too close together, it can weaken the material. Keep the stitch length on the longer side, and don’t back stitch unless you’re sure your needle will sink exactly into the previous holes.
- Personally, I feel a lot of self-imposed ethical pressure when I sew with leather. I’m really careful with my work so that I don’t waste it. I haven’t used it that much, so I still feel like I have a lot to learn. You can’t really get practice without using it, but there are many variables from hide to hide that can affect the final result. I’ve only ever purchased leather from textile recycling facilities (Fabscrap is local to me in Brooklyn), or “flawed” hides in the clearance section. If you’re new to the material, I’d recommend experimenting with a reclaimed textile first if possible! There are so many beautiful leathers available through these means.
Finally, an ode to jacket projects:
And just as a second bonus, will you allow me a moment to wax poetic about jacket-sewing? They are one of my favorite projects to sew. Jackets combine the perfect amount of details-sewing mixed with bursts of more auto-pilot sewing. There’s nothing like the feeling of completing beautifully crispy collar points, or bagging a coat, or zipping up a finished jacket, am I right?! And that sense of accomplishment you feel wearing that gorgeous winter coat you made all season? Unparalleled! Jackets give you such bang-for-your-time-investment-buck, too! They get so much re-wear that it feels worth it to put your time and energy into them. I love sewing jackets! If you haven’t made one before, I highly encourage you to give it a go.
If this post inspires you to try out this single-welt pocket method, I’d love to know if it’s changed your life as much as it’s changed mine. After I finished the pockets on my latest S3038 jacket, I practically RAN to my email to ask BERNINA’s social media team if I could write a post about it! (haha) Please come back and comment below or tag me over on Instagram (@jaclynsalem) so I can see your projects.
Happy sewing!
Jaclyn
Used Products


What you might also like


One comment on “How to Sew Easy and Beautiful Single-Welt Pockets”
Leave a Reply
You must be logged in to post a comment.
Excellent article on sewing welt pockets so will try some of the techniques when I make another. The detail and pictures make a difference. Thanks.