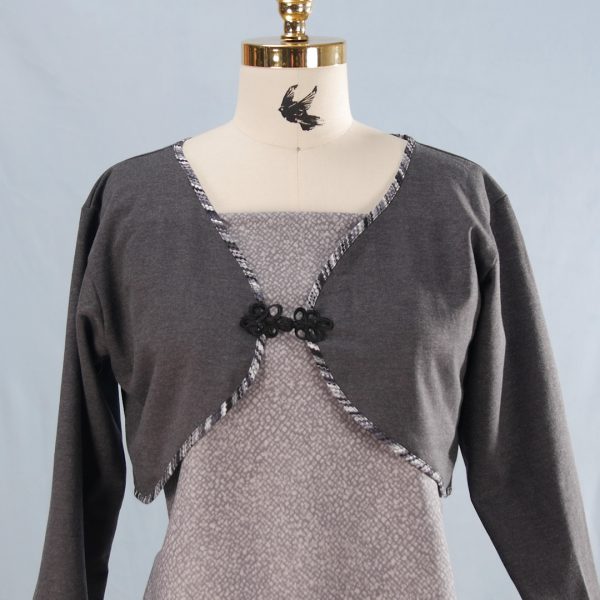
How to Upcycle a Sweatshirt into a Bolero
Turning a sweatshirt into a cardigan is nothing new, but this version is cropped and rounded for a unique look. Cut, bind, and add a frog closure and you’ve got a stylish and cozy addition to your wardrobe. This project is made simple with the BERNINA Binder Attachment #88.
First, let’s take a look at the supplies we’ll need:
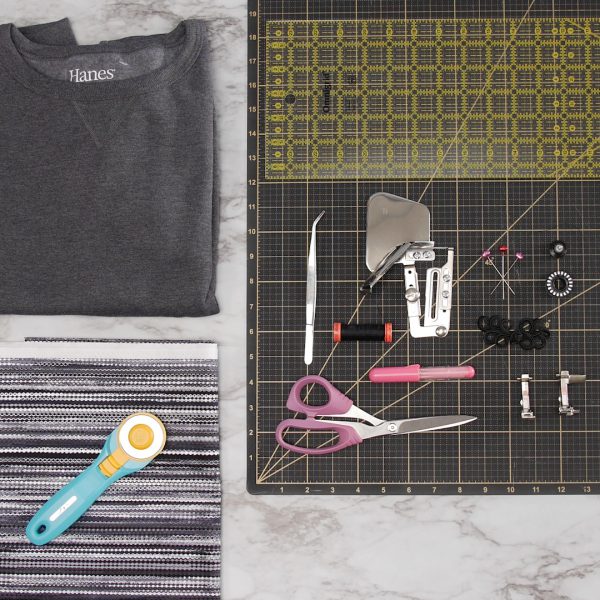
Supplies to Upcycle a Sweatshirt into a Bolero
- Sweatshirt
- Cotton fabric for bias binding
- Ruler
- Rotary Cutter
- Long tweezers with a curved tip
- Chalk marker
- Pins
- Frog Closure
- Scissors
- Measuring tape
- Mettler Metrosene Polyester thread
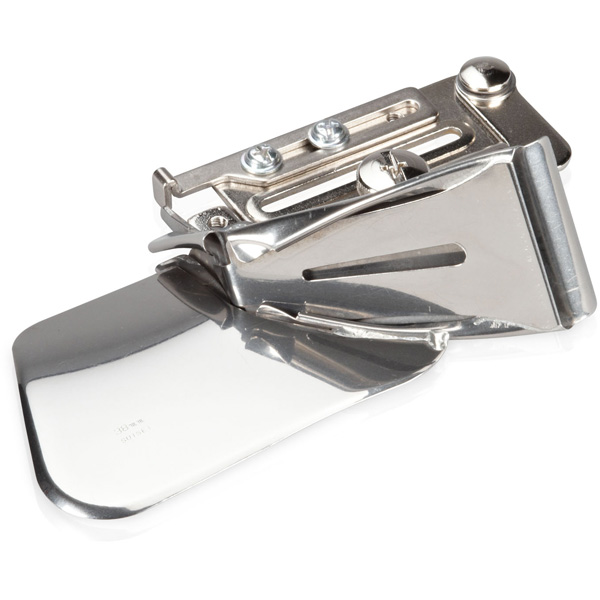
- Binder Attachment for Unfolded Bias Tape #88 32mm, or 38 mm
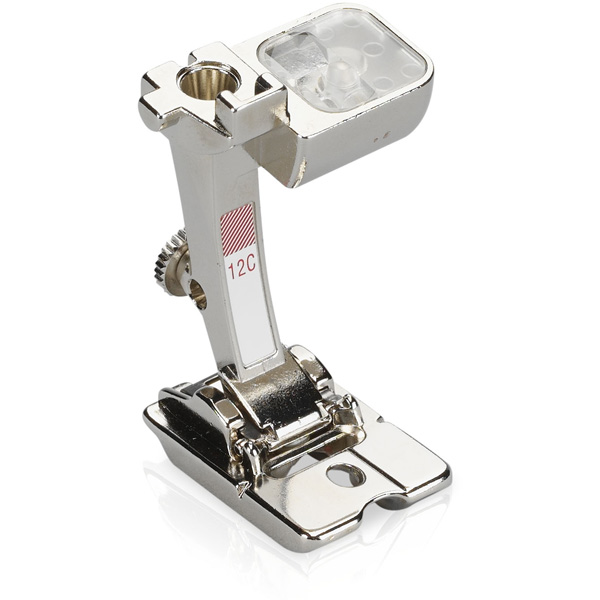
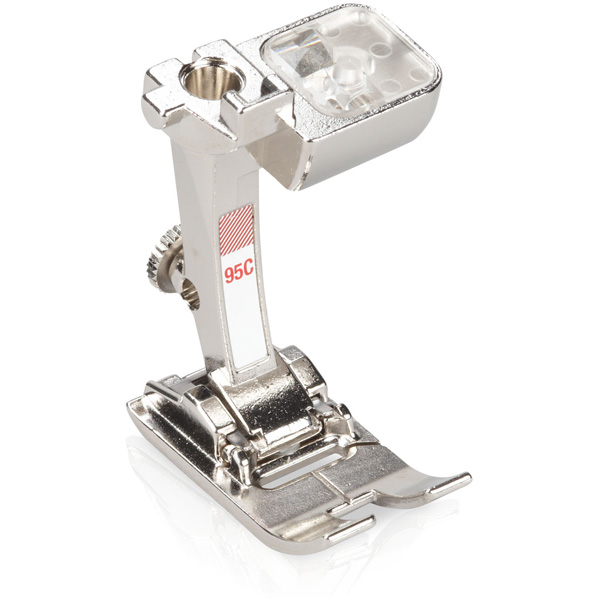
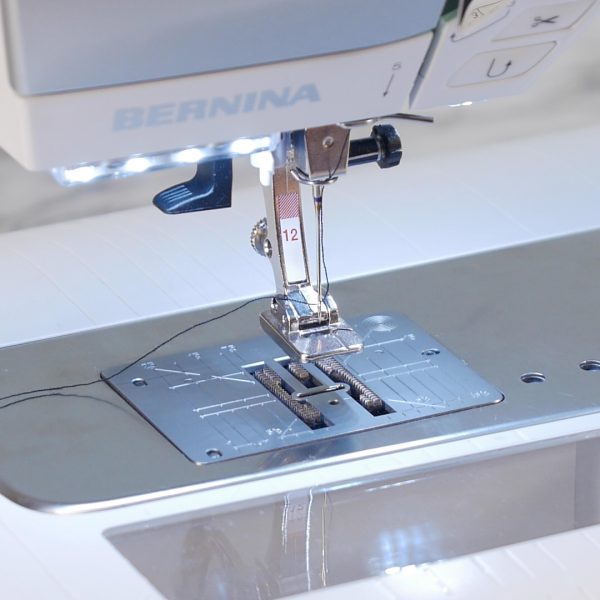
- Binder Foot #95/95C
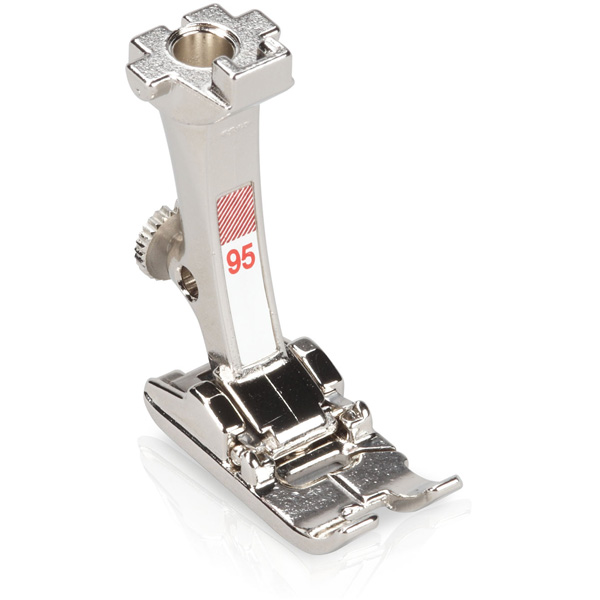
- Bulky Overlock Foot #12C
- BERNINA Sewing Machine (B 570 QE featured here)
Steps to Upcycle a Sweatshirt into a Bolero
Step 1: Prepare the Sweatshirt
Mark a line down the center of the sweatshirt.
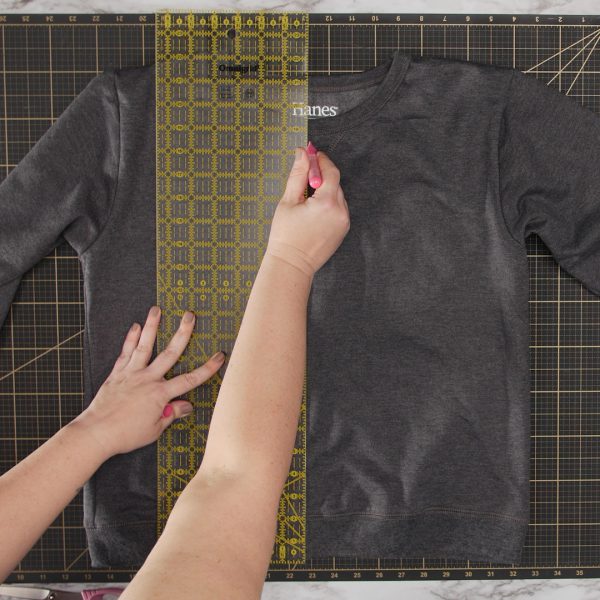
Next, mark the bottom edge. You’ll want to try on your sweatshirt to decide this length for this Bolero-style jacket.

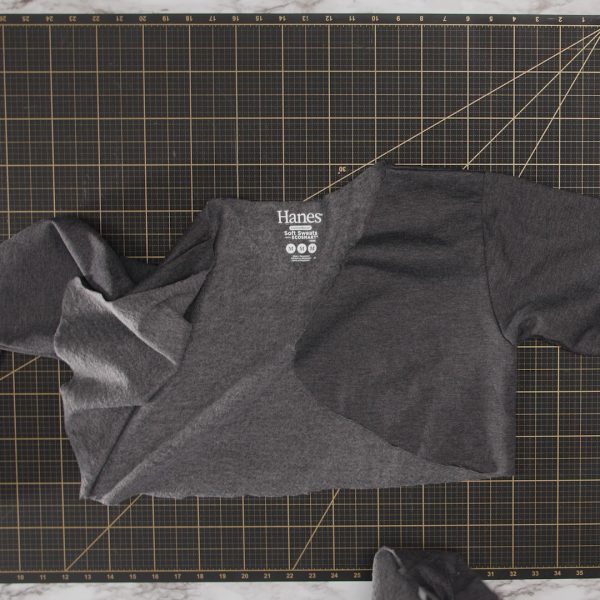
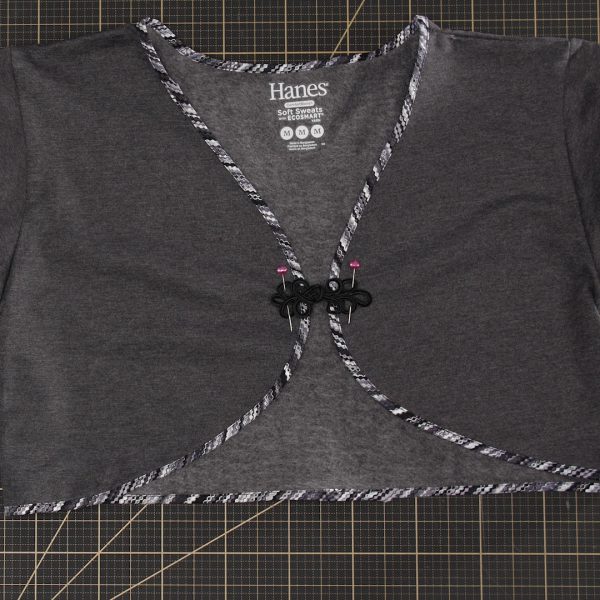
Trace the desired shape by rounding the bottom front edges and cut along your marked lines, keeping the project symmetrical. The entire bound or ribbed neckline should be removed. This sweatshirt had a neck detail, so we also adjusted the new neckline to remove it.
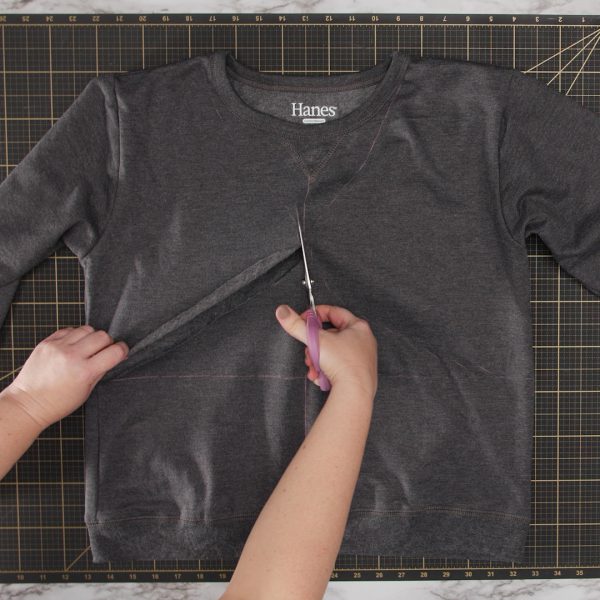
Cut the back straight across continuing from the bottom edge you marked on the front.
Step 2: Prepare the Binding
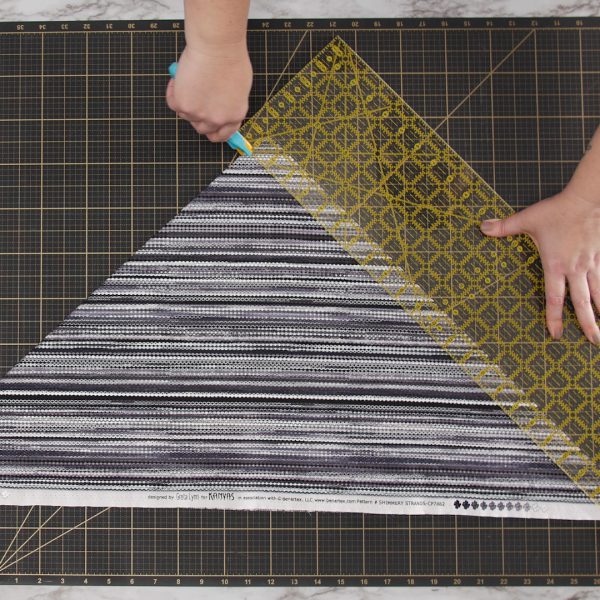
Measure the circumference of the cut edge of your sweatshirt to determine how much bias you will need. Cut bias strips, being sure to add extra to account for sewing the strips together and leaving a tail to finish the bound edge. Here we folded the fabric to make cutting the strips easier and get longer strips. You can read another technique for cutting your strips in this post.
We are using the 32 mm binder, so the strips should be cut 32 mm, which is just a hair larger than 1 ¼”.
Join strips by lapping them perpendicular to one another and then sewing a diagonal line at the intersection of the two pieces. Trim seam allowance to ¼”.
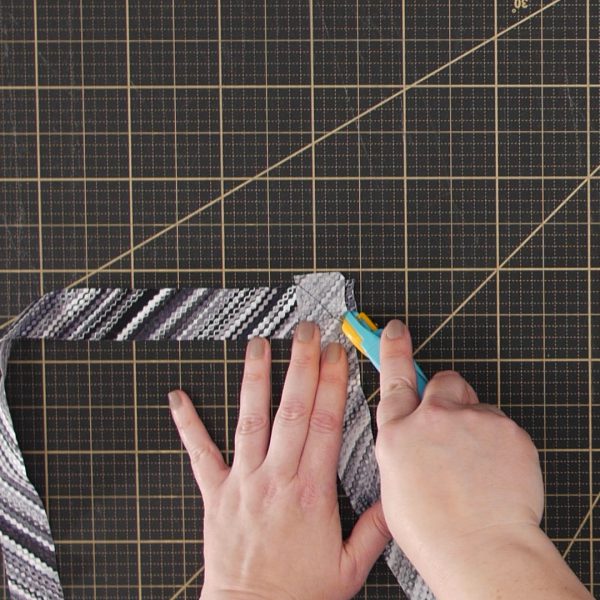
Press the seams to one side and trim the excess seam allowance (dog ears).
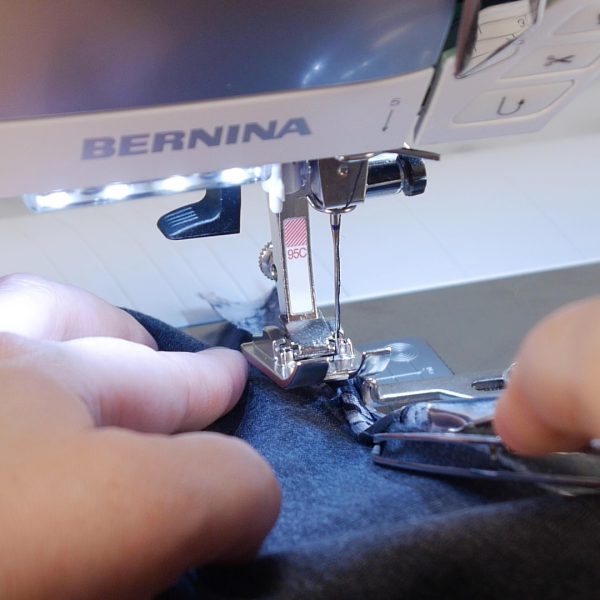
Step 3: Attach the Binding to Sweatshirt
Attach Foot #95C and the binder. Feed the bias strip into the binder and use the tweezers to pull the now-folded strip under the foot. The binder magically folds your bias strip into double-fold bias tape!
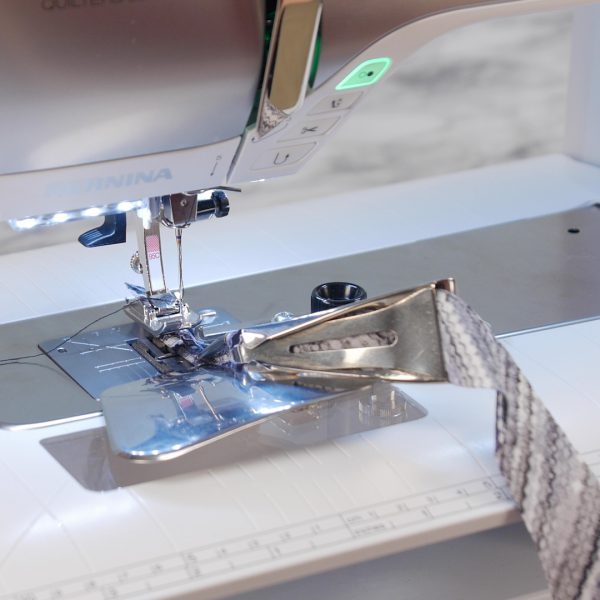
Move the needle position to 4.

Starting at the bottom center, tuck the sweatshirt into the binding, using the tweezers to guide it in place. Stitch, checking frequently to make sure the sweatshirt is tucked between the binding layers. Depending on your sweatshirt, the fabric may want to curl, so starching the edges before you start can help with this process. Stitch all the way around the cut edge of the sweatshirt, stopping a few inches from the beginning and leaving an unsewn tail of binding a few inches long.
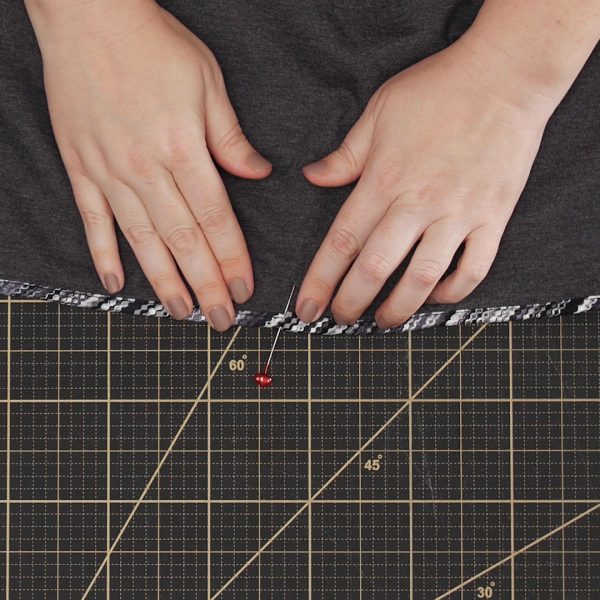
Trim the starting tail close to the starting stitching, then trim the ending tail so there is just enough binding to cover the start of the binding, plus enough to fold under a hem. Take your time getting the fold as desired, checking both the back and the front of the binding. Pin in place.
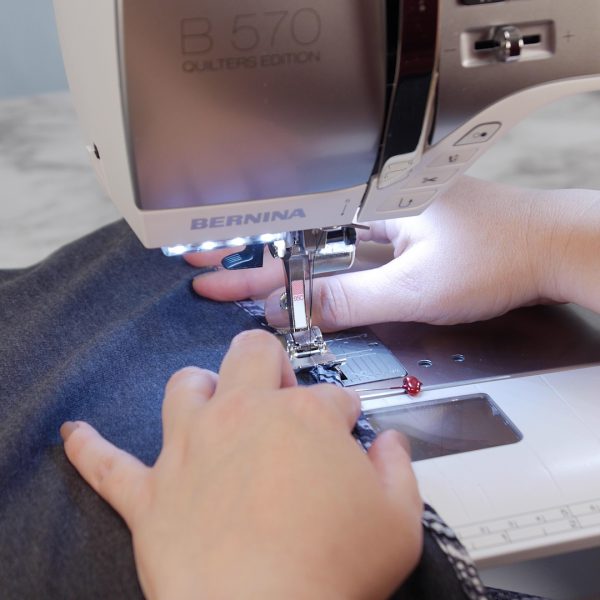
Remove the binder attachment. Return the project to the machine and stitch the binding tail in place, following the stitching you have already done. Be sure the bottom side of your binding tail is caught in the stitching.
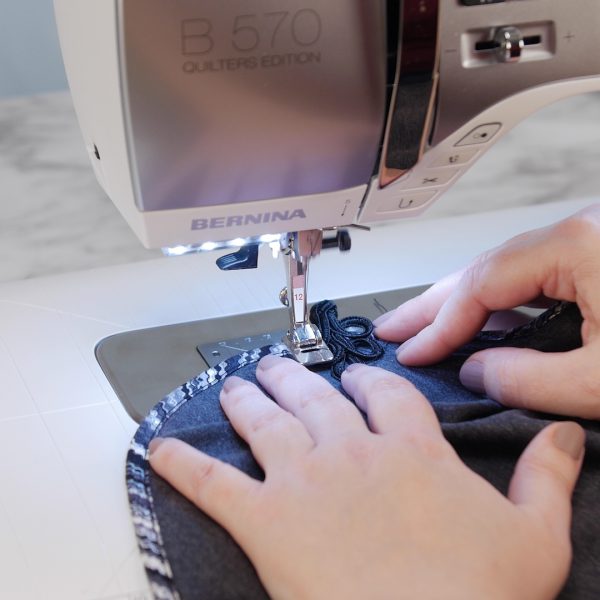
Step 4: Attach the Frog Closure
Pin your frog closure in place.
Attach Bulky Overlock Foot #12C. This foot has a channel that allows you to stitch piping and cording. Select Stitch #2 and set the stitch width to the size of your frog closure cording. Set the stitch length very short, around 1.
Stitch the frog in place at several locations, allowing the concave bottom of the foot to hold the cording of the frog in place while you stitch.
Your project is ready to wear!