Modern Cathedral Window Pillow, Part One
Hey sewing friends, Candice from A+CO here with another project to share. Today I’m going to share one of my most favorite quilting techniques with you, Cathedral Windows. I love using Cathedral Windows as a way to show off focus fabrics that are perfect for fussy cutting.
Cathedral Windows are not a new block but we are going to make them with a modern twist. Originally, Cathedral Window blocks were made by manipulating the fabric through folds. In this modern version we will use a few simple steps to create the same finished look without the hassle.
The instructions here will lead you through making an 18” x 36” pillow with an inset zipper. You can also easily half the fabric and make a smaller square pillow, or skip the pillow part completely and use the quilt top another way. I personally think this would look super cute used in a tote bag or as a wall hanging.
This project will be broken down into three posts:
- Part 1 (that’s this one!): Gathering materials, cutting fabric, prepping our frame pieces, and sewing the base of the Cathedral Window quilt top together
- Part 2: Quilting the pillow top and adding the windows (here’s where the magic really happens)
- Part 3: Pillow construction
Materials to Sew a Modern Cathedral Window Pillow
- BERNINA 735
- Fabric (see requirements below)
- Iron
- Glue stick for basting (I use a washable school glue stick)
- Clips/pins
- Ruler and rotary cutter
- Thread
- Zipper
- Batting
Fabric
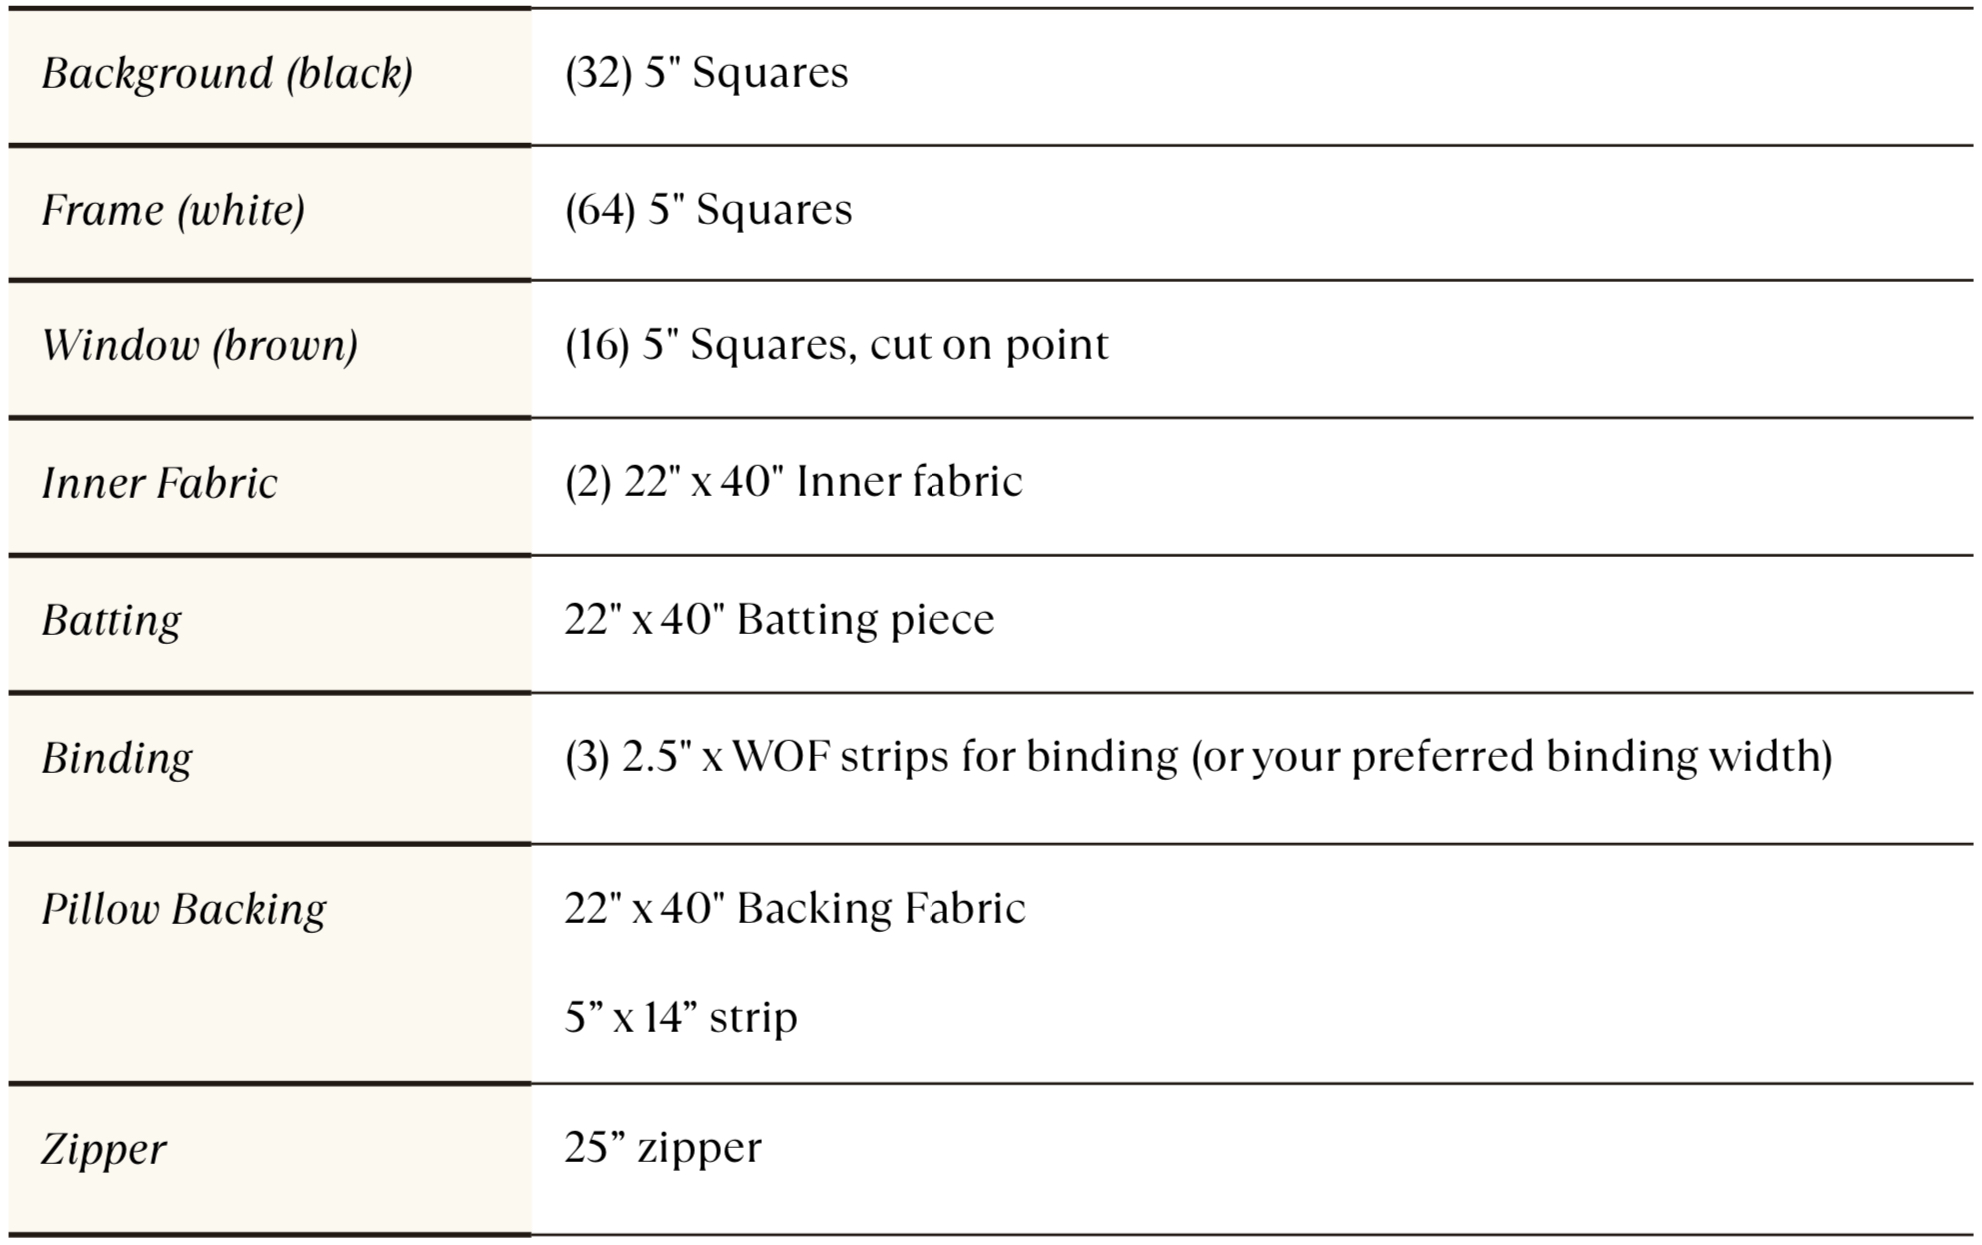
There are three parts to a Cathedral Window block, the background, frame, and window. The window fabrics are cut on point, meaning that they will be positioned as a diamond, with a point on the top, bottom, and each side. Non- directional fabrics work best, at least for your first time.
Steps to Make a Cathedral Window Pillow
In this first post, we are going to focus on cutting our fabric, planning the layout, and prepping the frame windows.
Planning the Base Layout
When planning the layout, you’ll need to be mindful of any directional prints. We will be working with a few layers and one of those layers, the frame, has a diagonal that needs to run a certain direction for each piece. If you are using a single solid or non-directional print for the background and frame, you can skip this step.
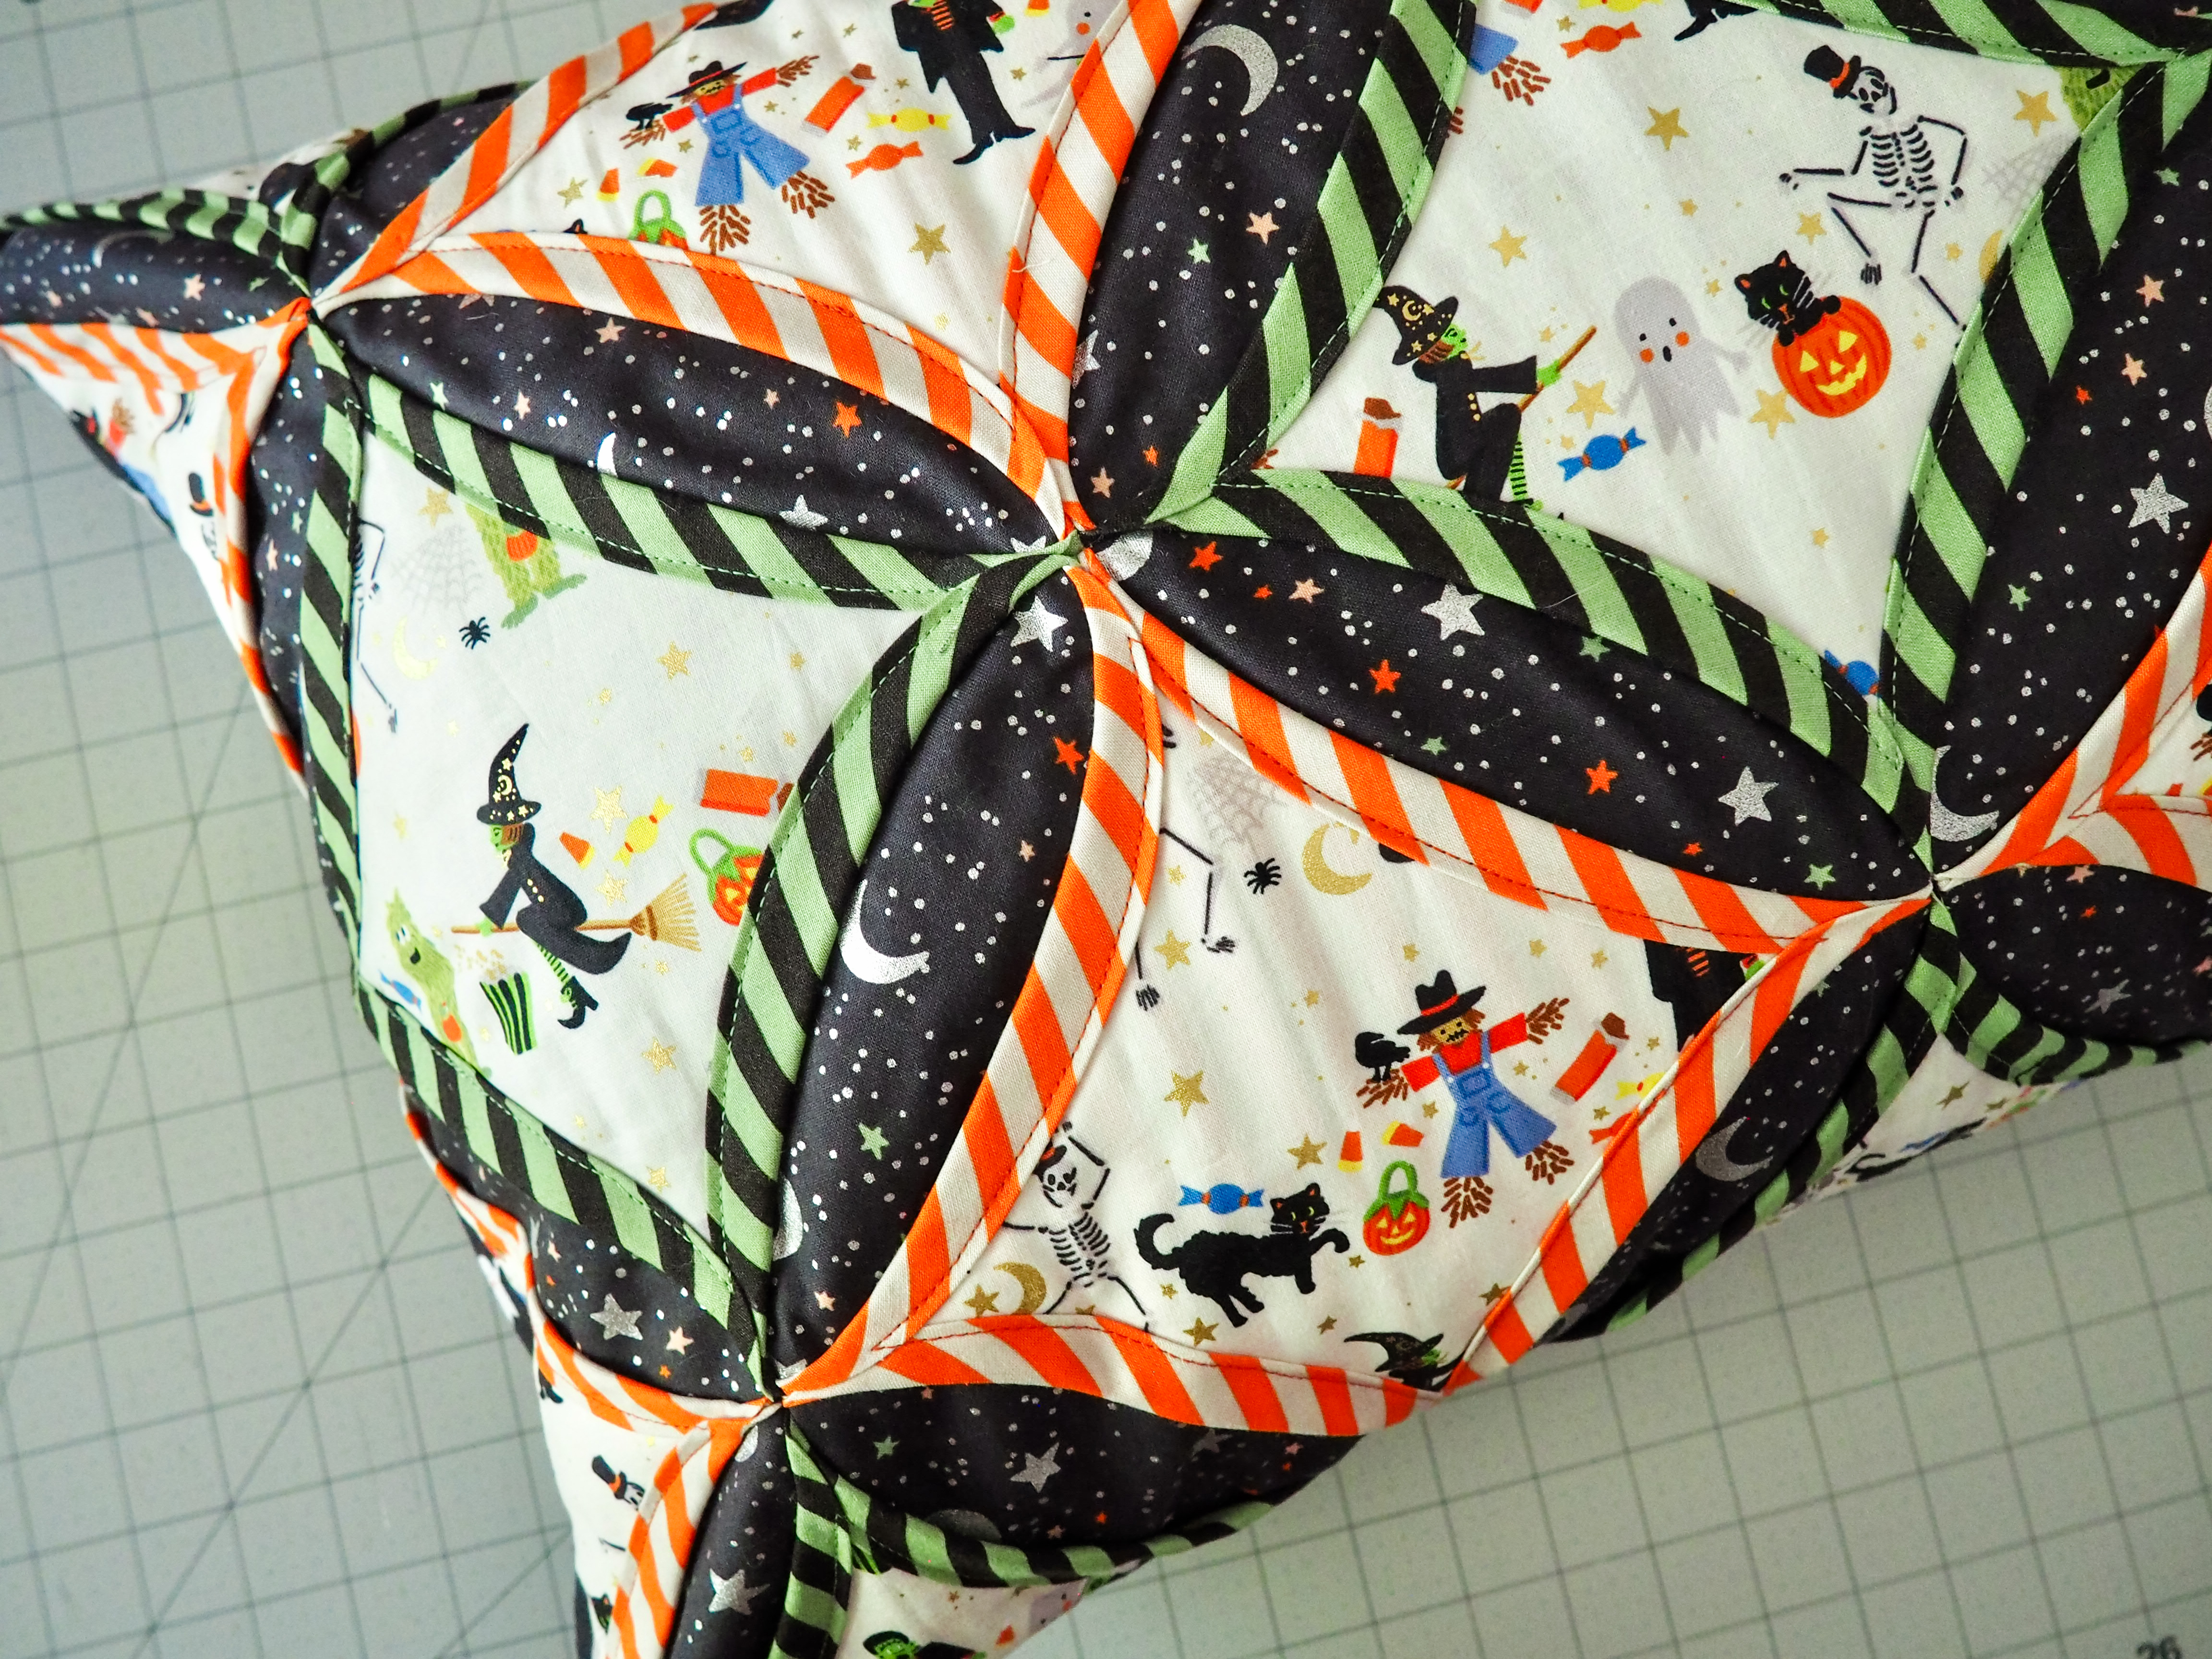
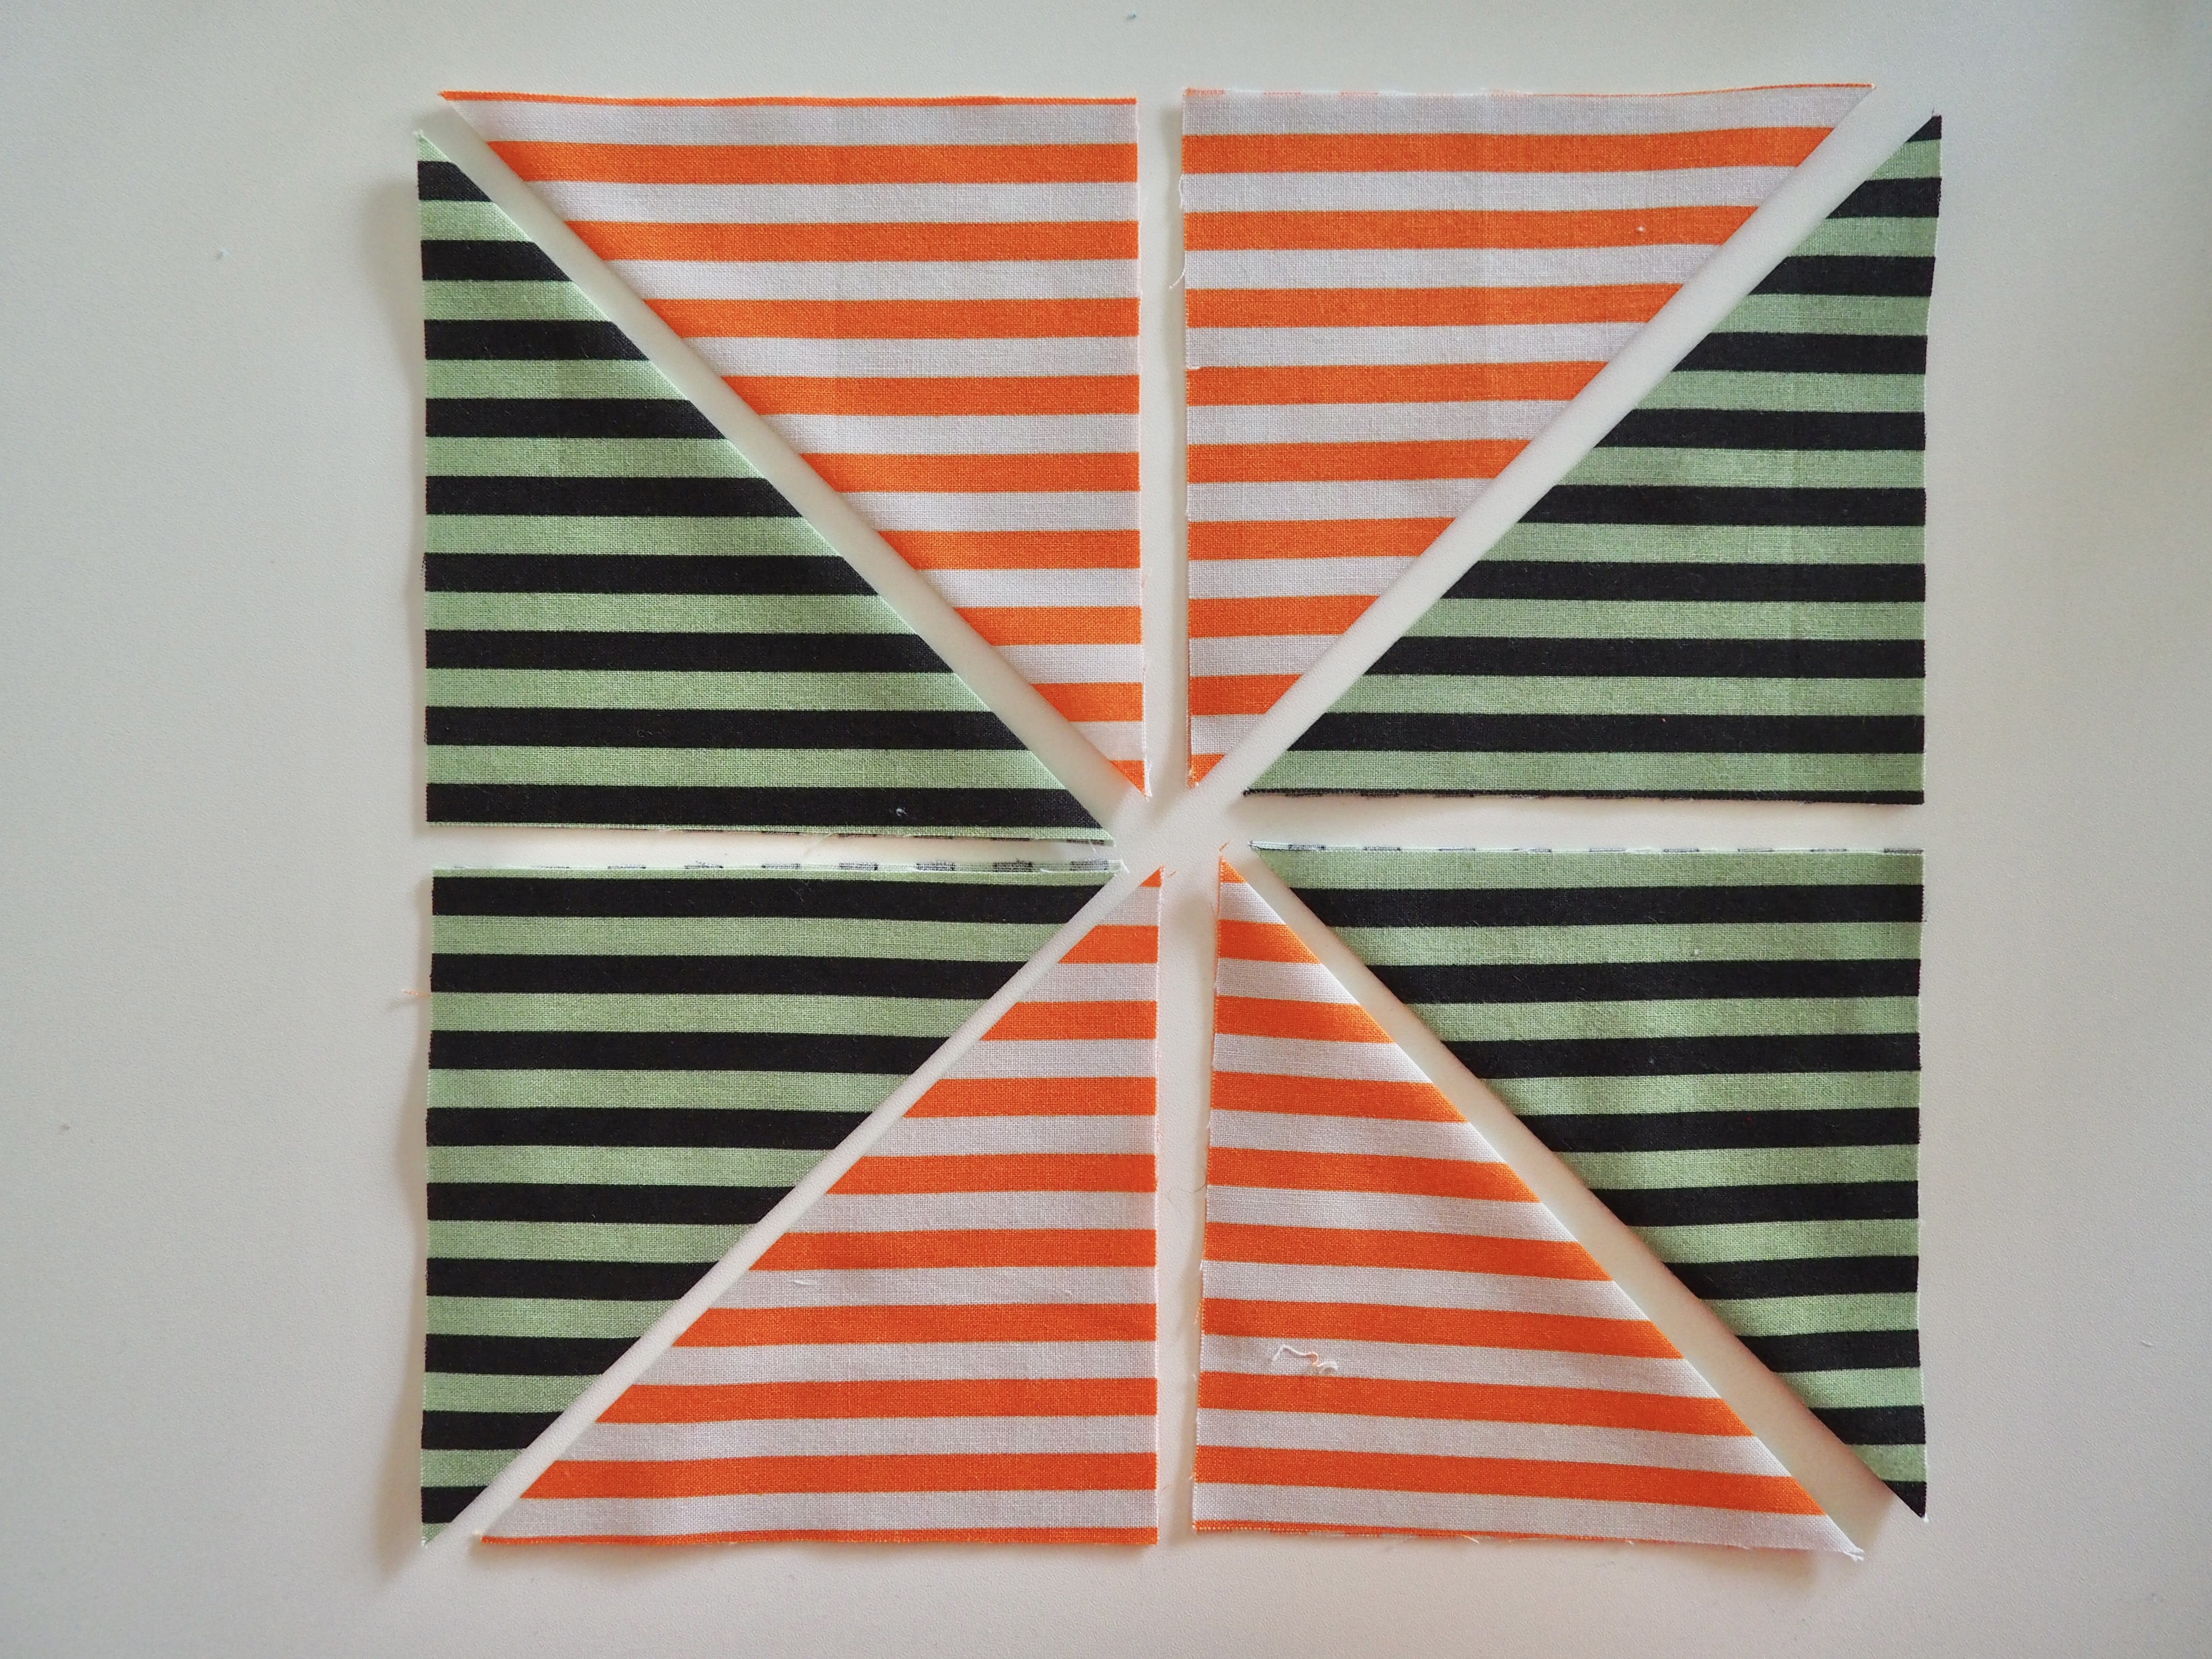
In the example below, you’ll see that the frame fabric is striped and each of those stripes is running vertically. I also used two different color prints.
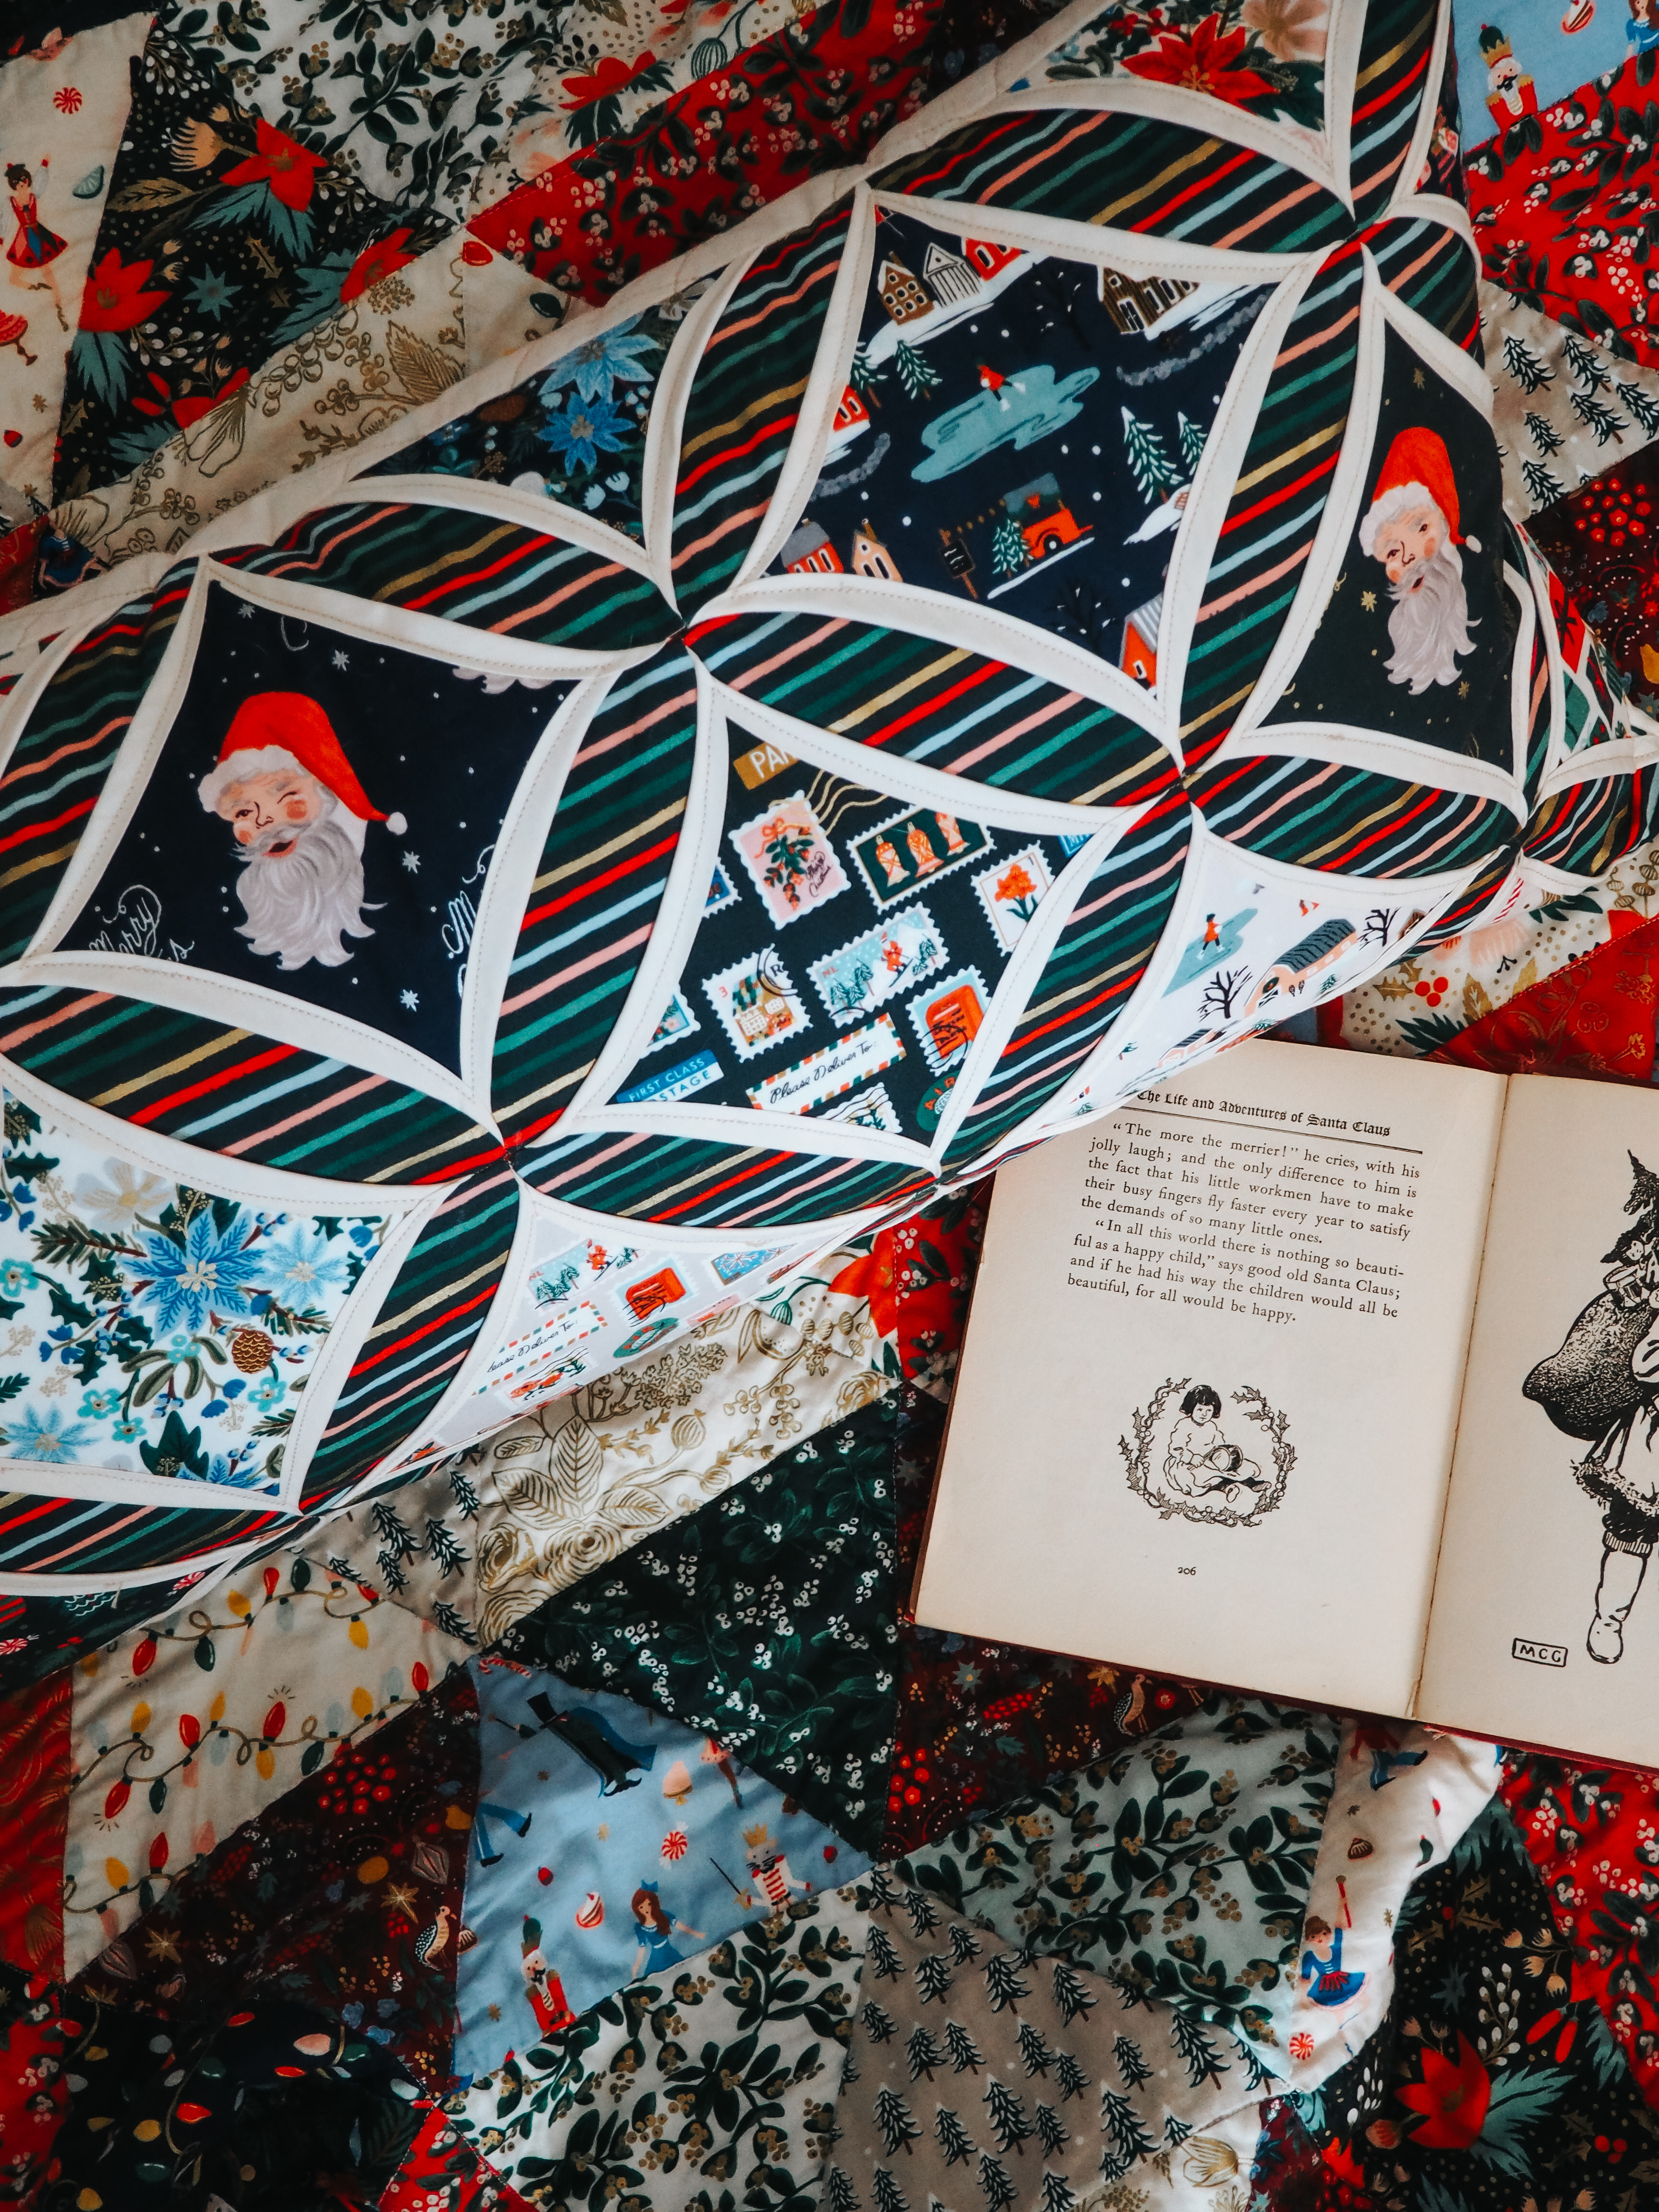
In this Christmas example, the background print is striped and each of the stripes is running horizontally.
Let’s get started with planning our layout.
- Grab your background squares first and lay them out in a grid with 8 across and 4 down. When finished, only the center section of each background square will show. Arrange your fabrics within the 8×4 grid as desired, based on their print, color, direction, etc.
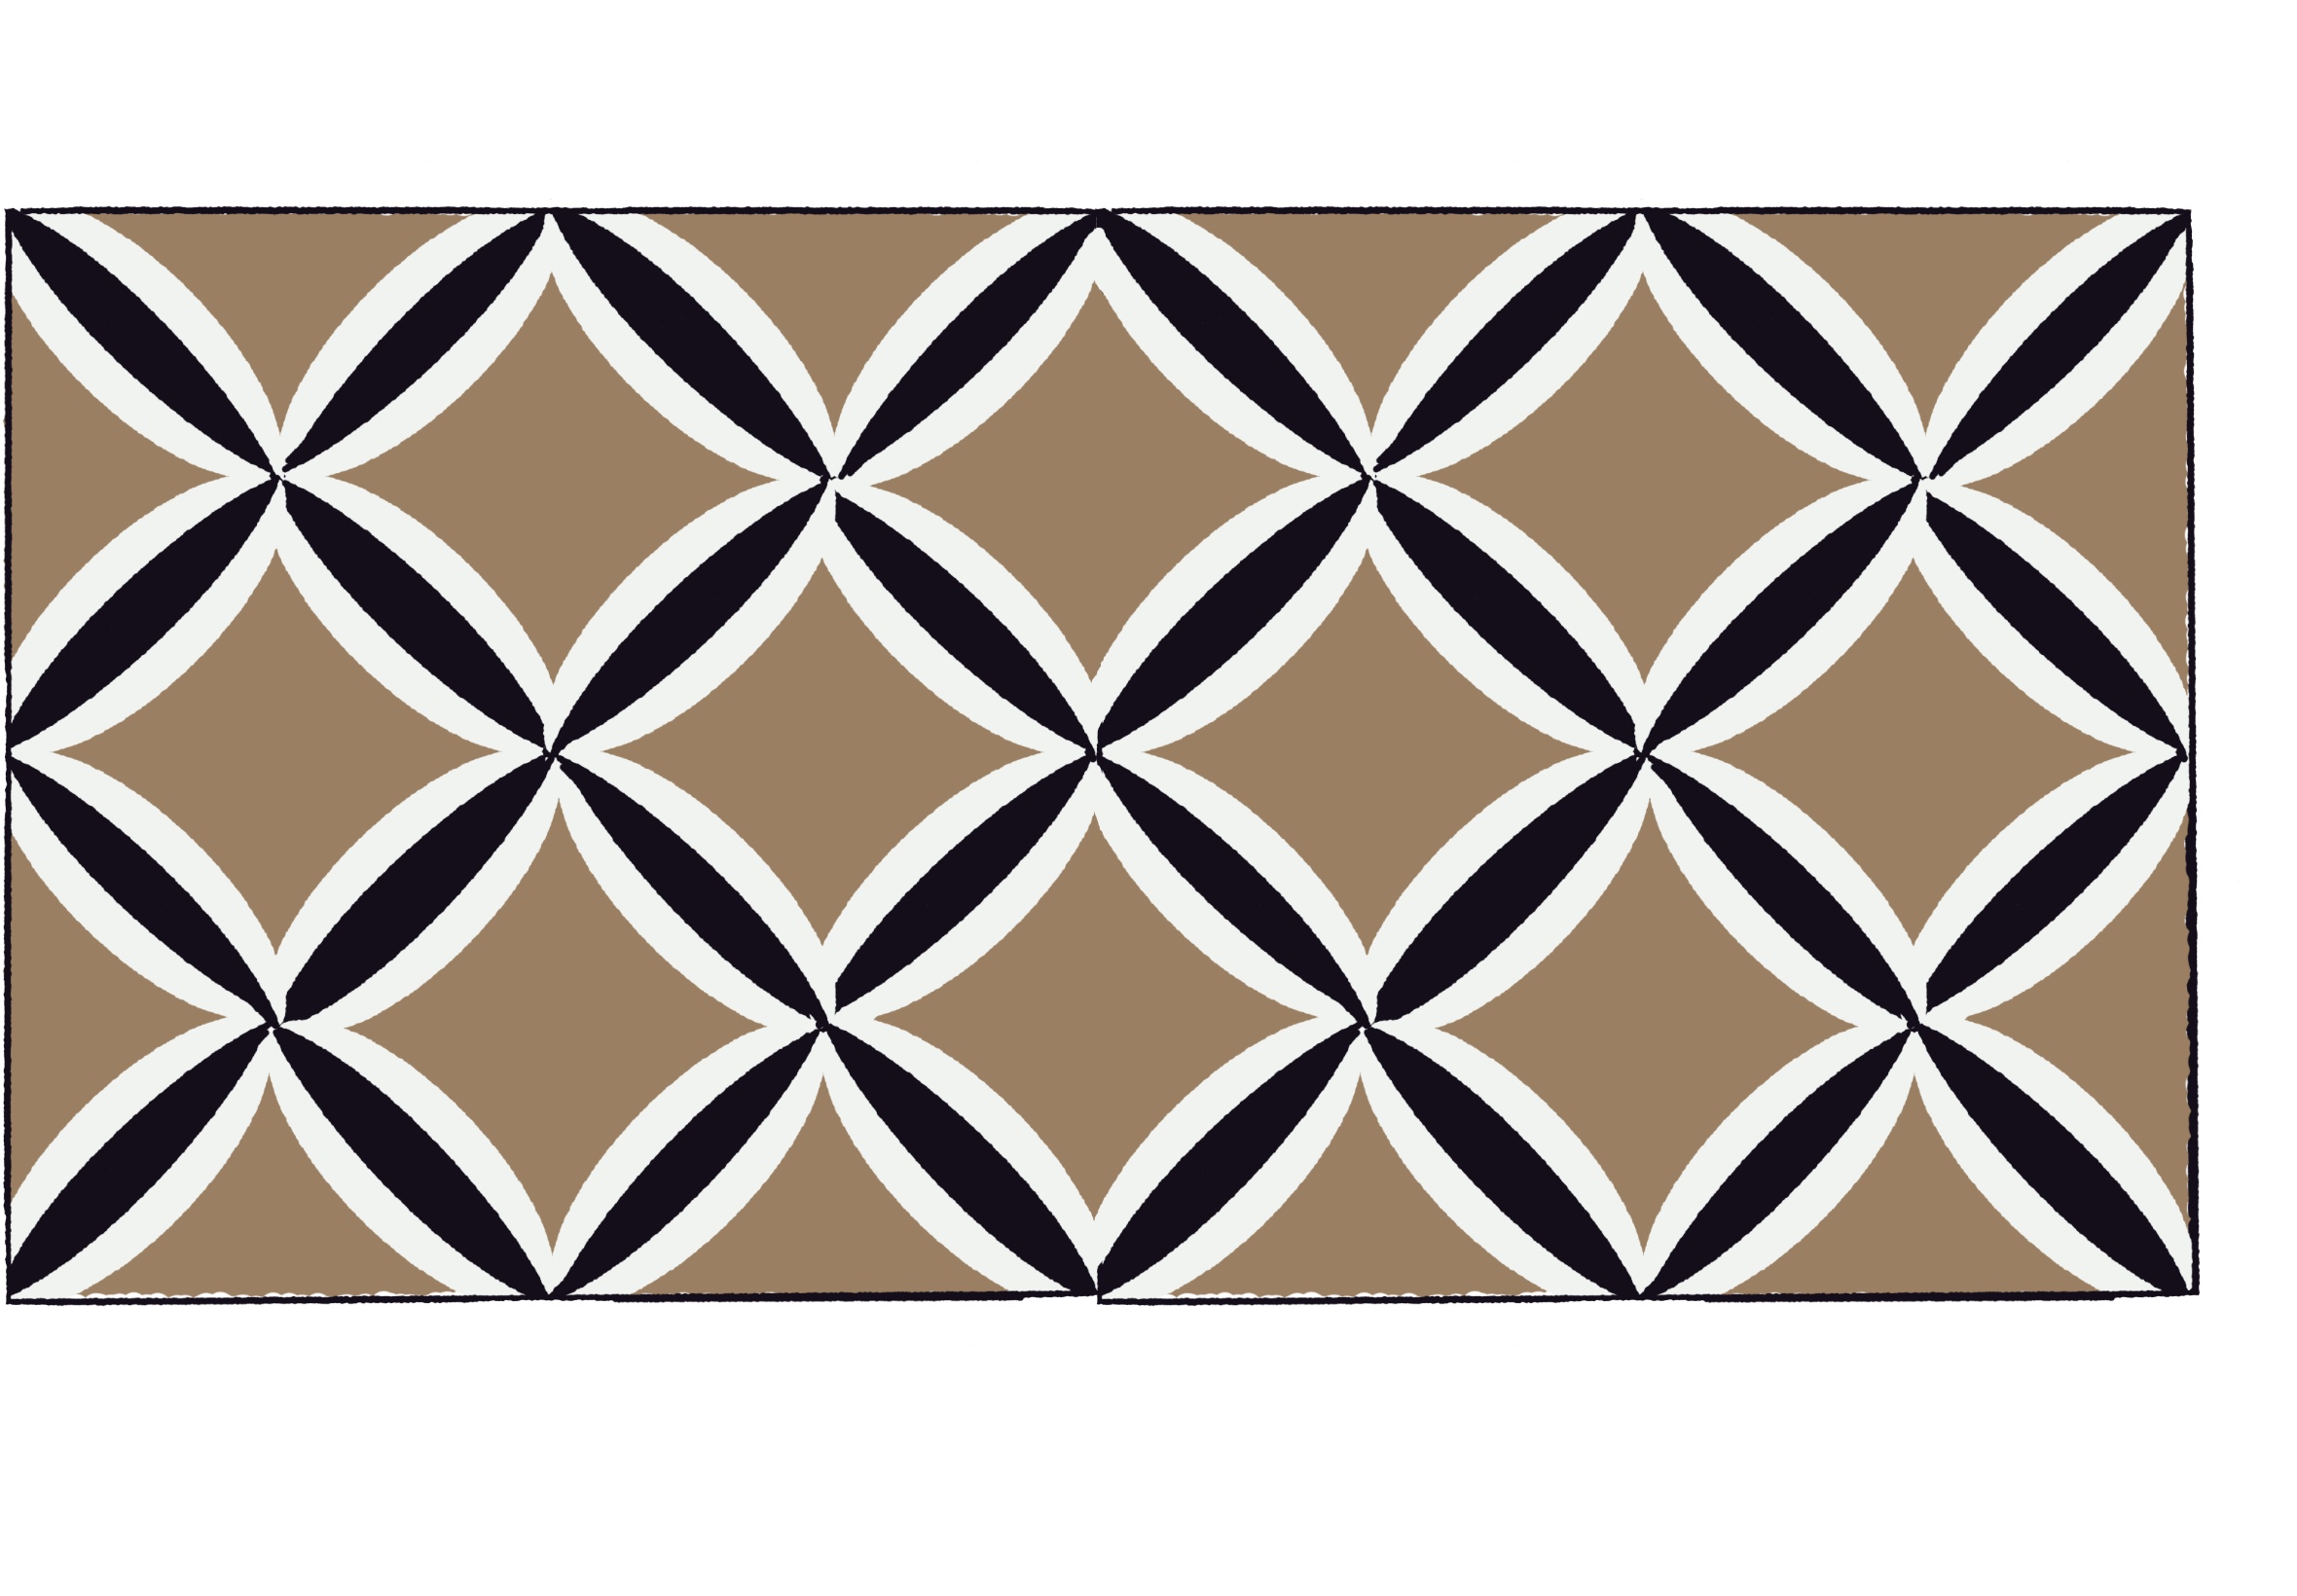
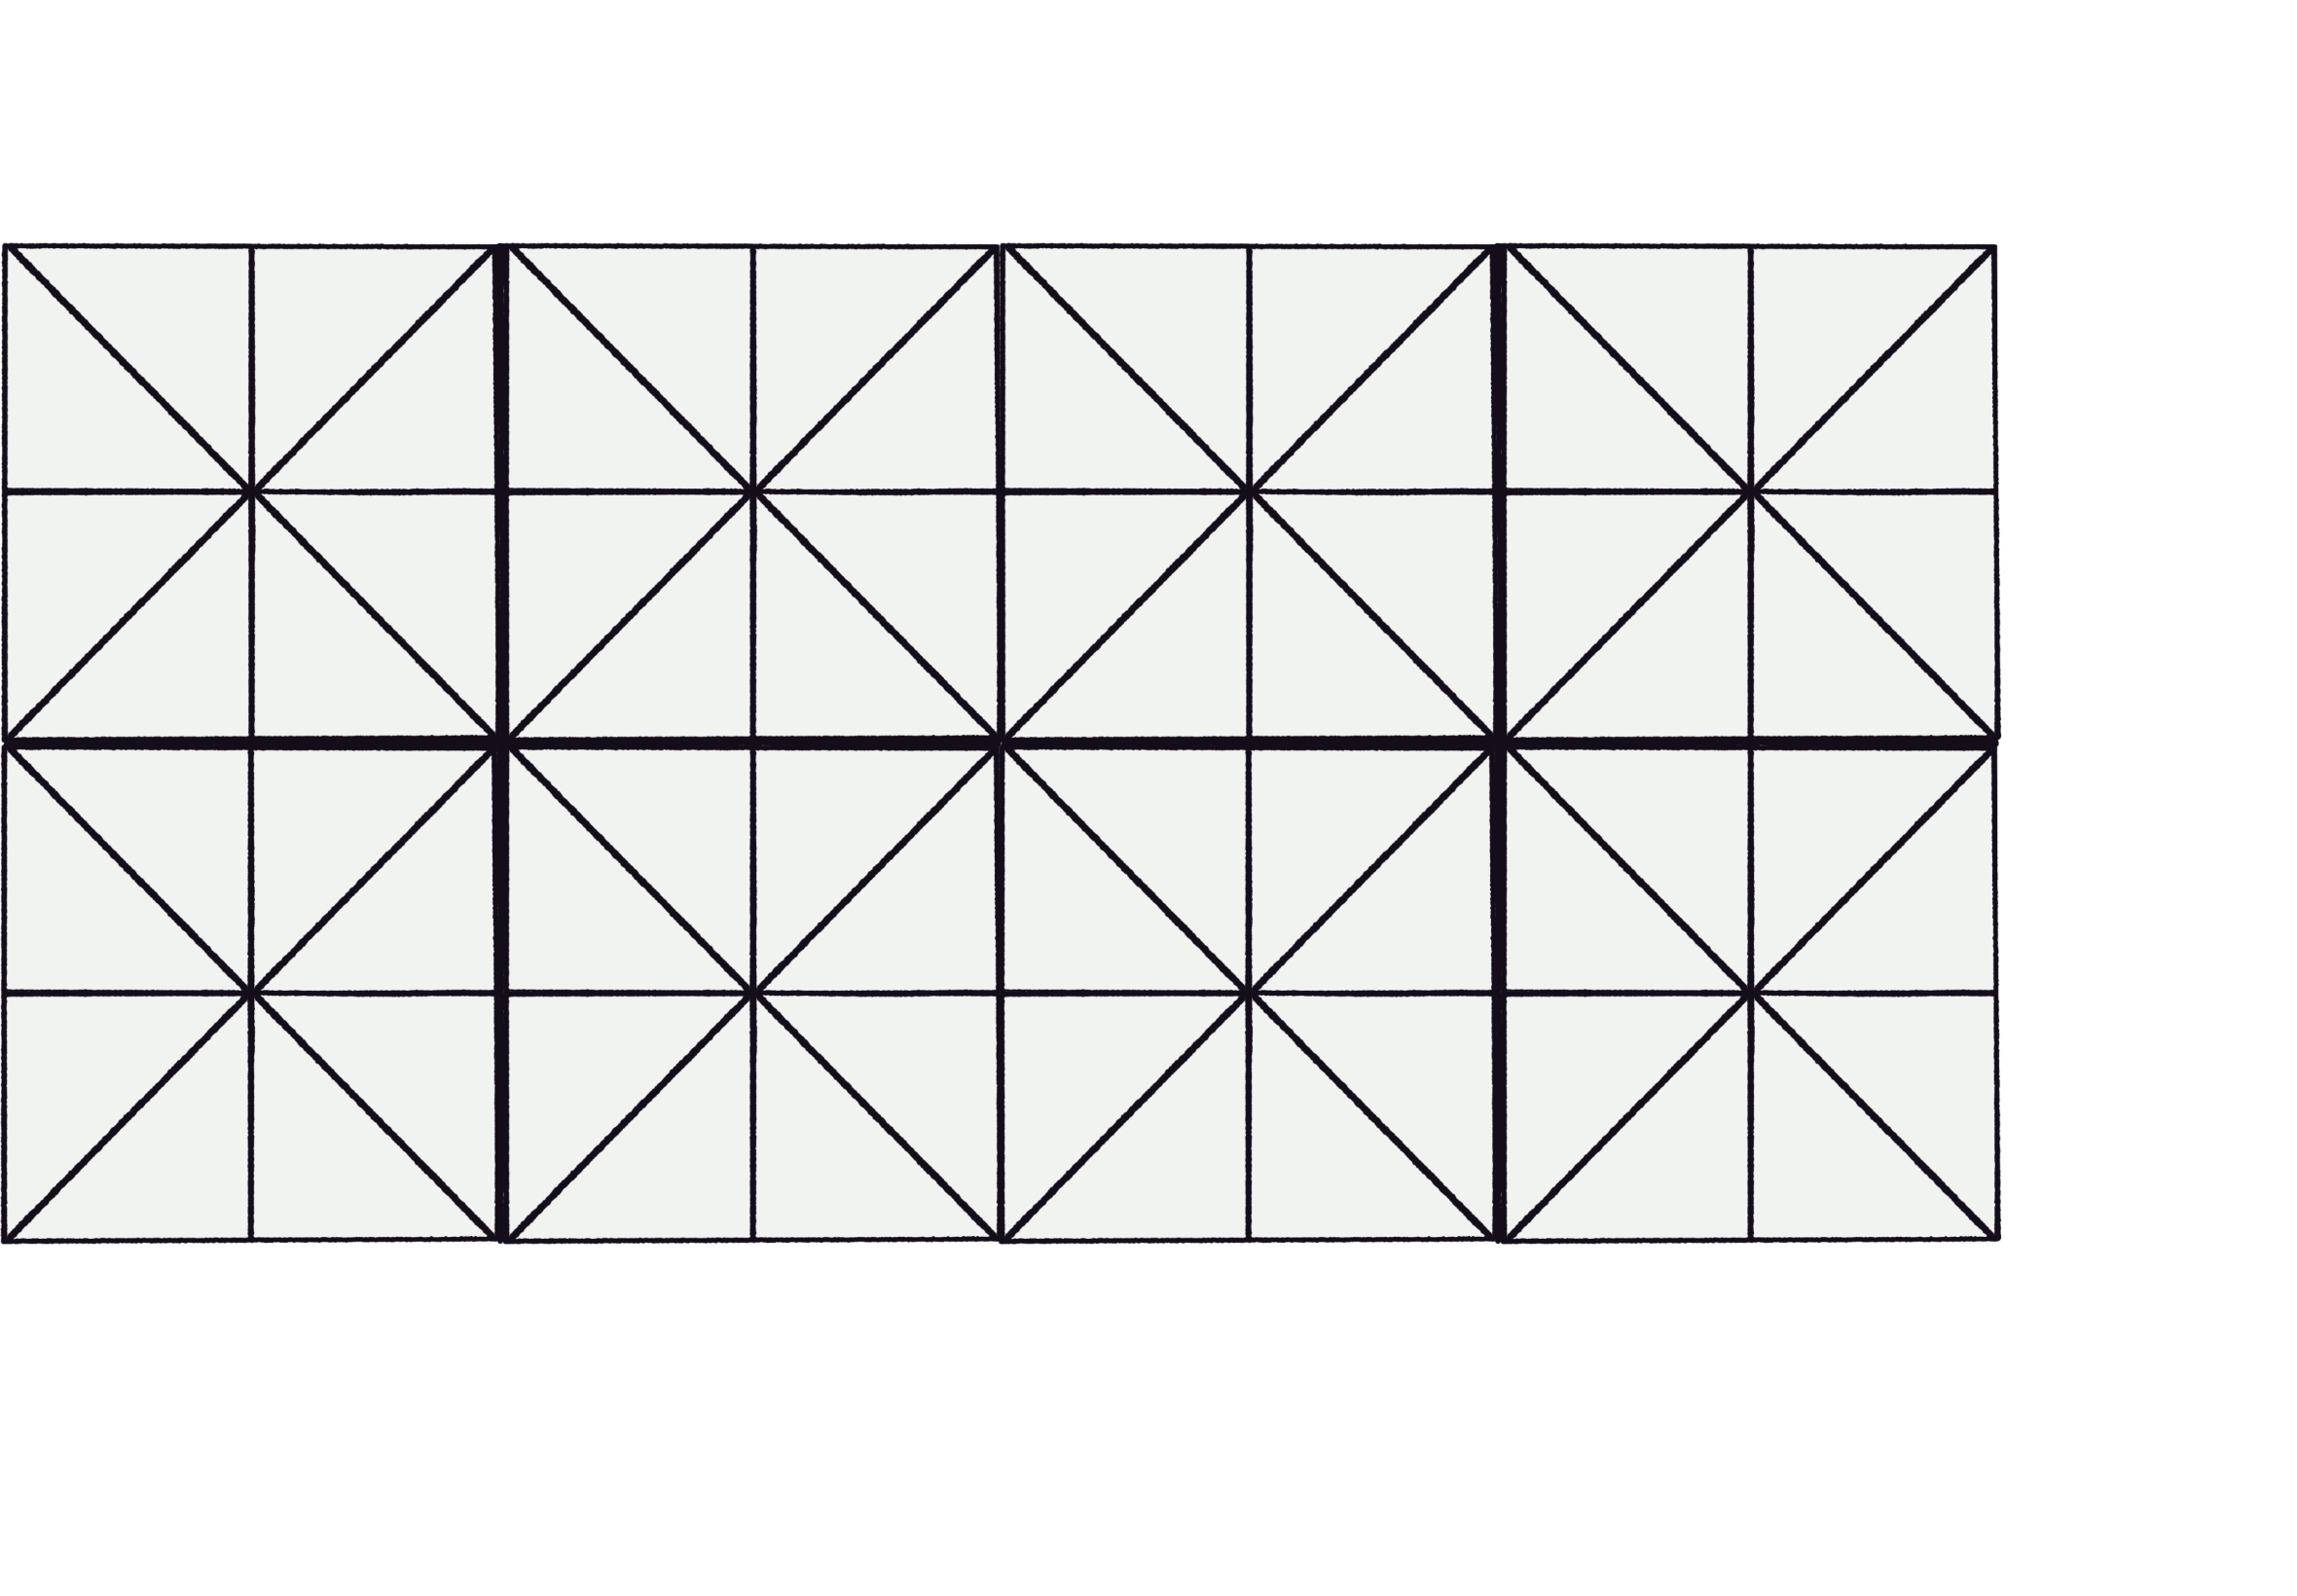
- Gather your 64 frame squares and ensure they are all oriented the same way if directional. There will be two frame squares per background square. Using the diagram below to show the direction of the diagonal side, lay out your frame squares to determine placement.
Prepare Frame Pieces
- Place one Frame square wrong side up in front of you.
- Fold the square on the diagonal with the wrong sides together, matching up two corners.
- Press. I prefer to use starch and steam for this step to get a nice crisp edge on that fold.
- You should have a triangle with two raw edges and one folded edge. The right side of the fabric should be facing out.
- Repeat with all 64 Frame squares and place them back on your laid out background pieces, ensuring the direction and order is how you’d planned.
- If any of the folds are going the wrong direction, no worries! Just unfold, press that square flat again and fold the opposite way.
Sewing the Base of the Top
We will first work on the individual background squares before moving on to create blocks of 2×2. Once we have the 2×2 blocks, we will put the base all together.
- Working through your laid out grid, grab the first background piece and its coordinating frame pieces.
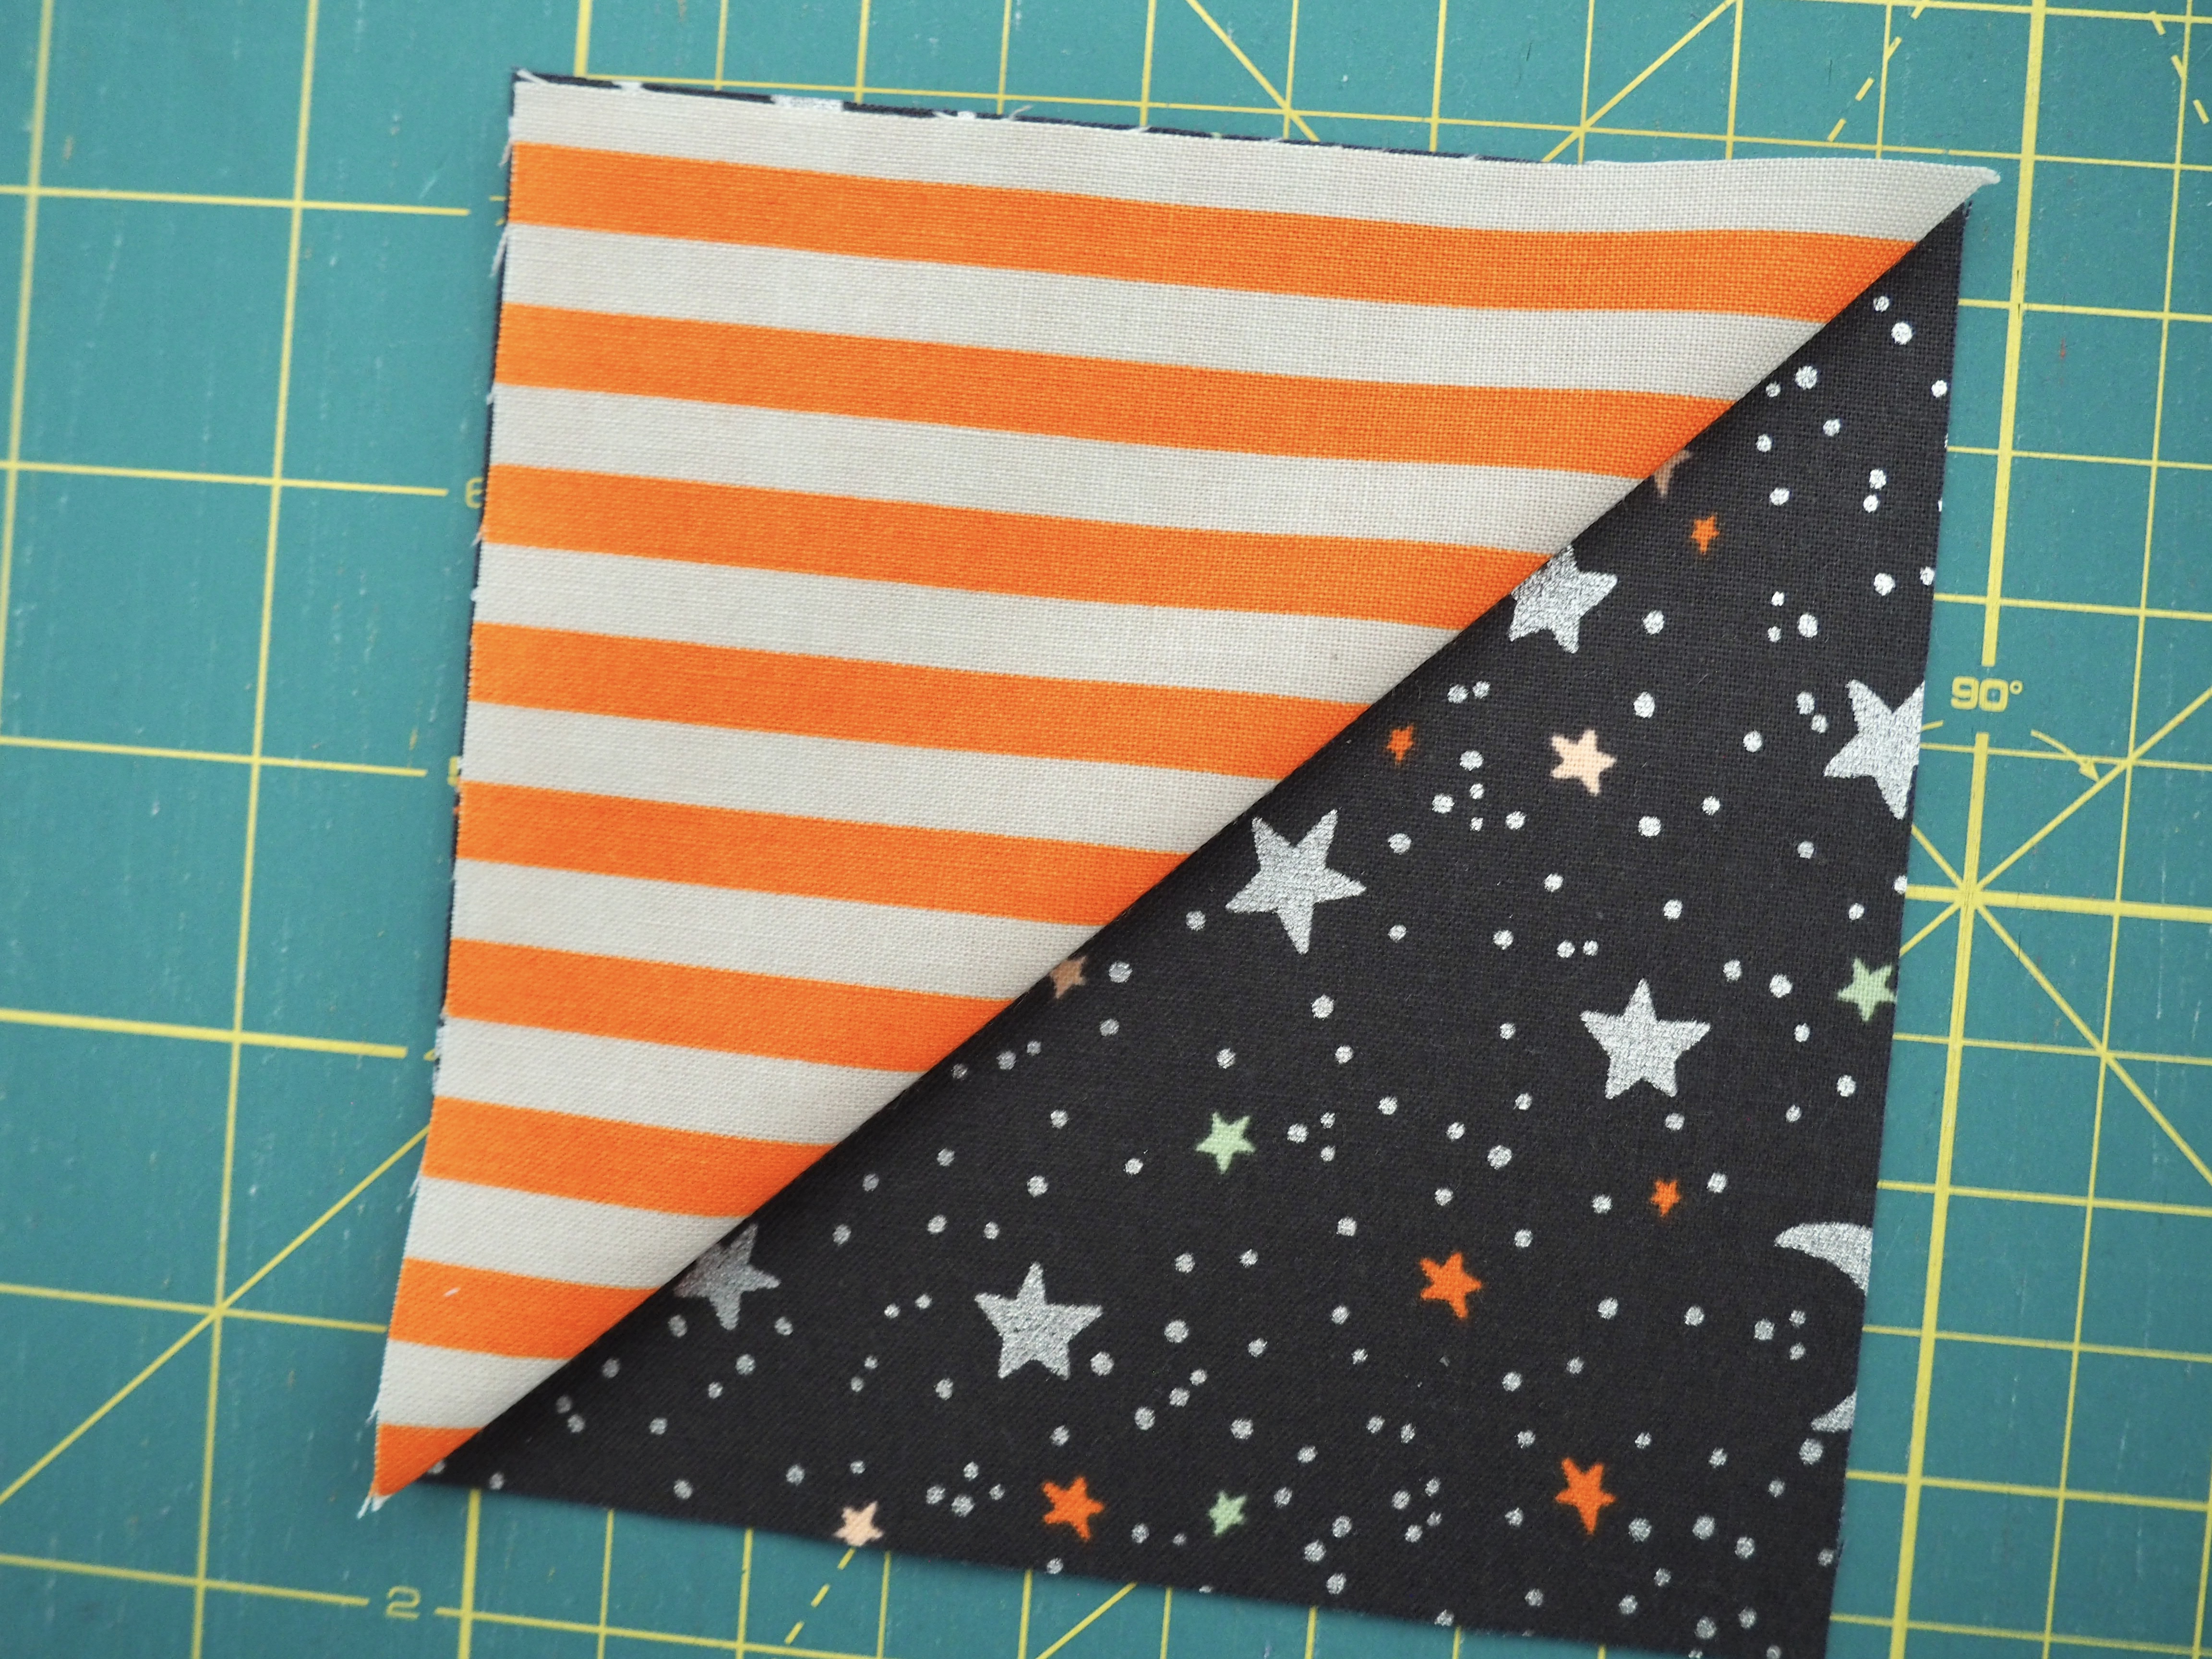
- Place the background square in front of you, face up. Place one folded frame piece on top of the background piece according to your layout and the diagram below, aligning the raw edges. The folded edge should be diagonal in the middle.
- Using a 1/4″ seam allowance, sew along the two raw edges.
- Place the second folded frame piece on the same square on the uncovered section. Ensure the raw edges are aligned and the folded edge is in the middle, parallel with the first folded edge.
- Using a 1/4″ seam allowance, sew along the two raw edges.
- Place the background square, now covered by the frame pieces, back in its spot in the laid out grid.
- Repeat for the remaining background squares. For this pillow size you should have 32 finished
squares.
Block Construction
We will be making eight total blocks that consist of four total background/frame pieces, 2 across and 2 down. Each of these blocks will be identical in orientation, with the folds making an “X” shape, rather than a diamond. If you do happen to sew your blocks in a diamond shape, you can leave them that way and still continue on with construction as long as all of your blocks are the same. You’ll only see a difference in the finished layout with where the edge windows end up
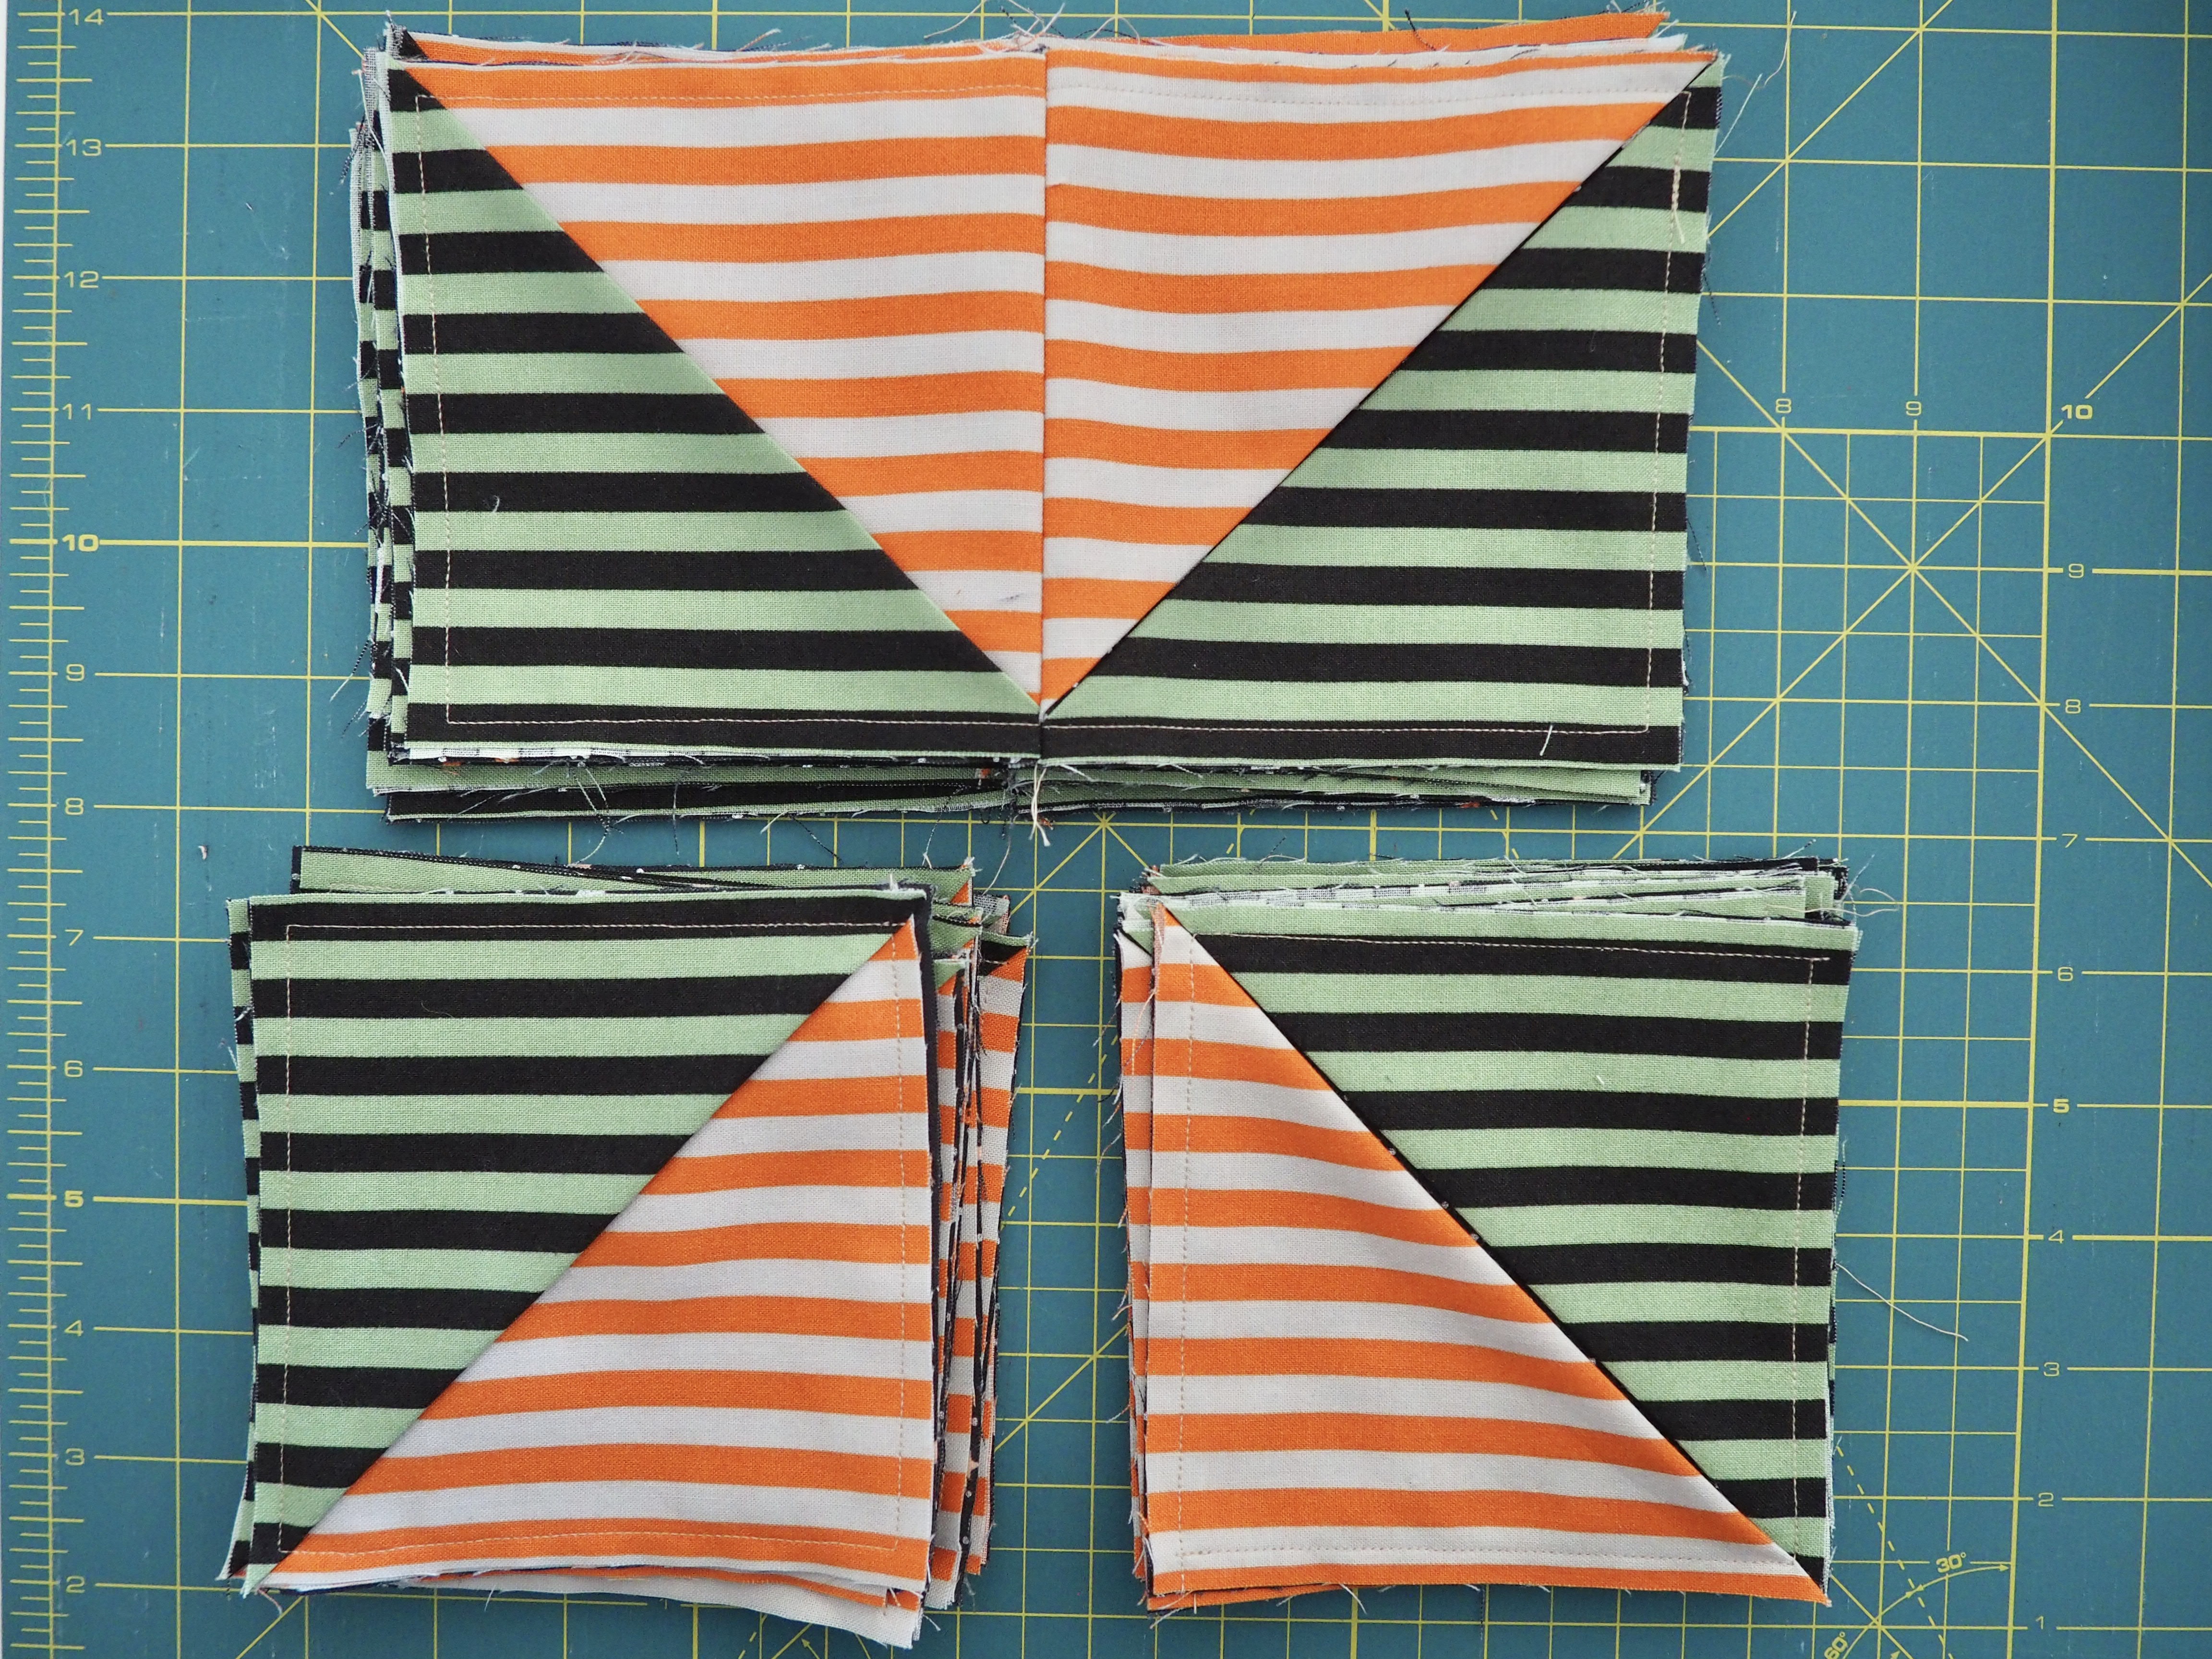
- Each block will consist of four background/frame squares. Layout your first four background/frame squares according to the diagram below.
- Using a 1/4″ seam, sew background/frame square 1 (top left) and 2, (top right) right sides together.
- Repeat with background/frame square 3 (bottom left) and 4 (bottom right). Press seams open to reduce bulk.
- Place the background/frame ½ piece and the background/frame ¾ pieces right sides together and sew with a 1/4″ seam.
- Press open.
- Repeat for the remaining seven blocks
Block Layout
Our final step for today is to piece our blocks together and create the base of the pillow top. We will sew together 4 of the blocks to make each half of the pillow and then finish up by joining those two halves.
- Arrange the finished blocks according to the diagram below. Create a space in the middle so the left four blocks are together and the right four blocks are together. We will work first with the left set, then repeat with the right set.
- Piece block 1 (top left) and 2 (top right) together using a 1/4″ seam. Press open.
- Repeat for block 3 (bottom left) and 4 (bottom right).
- Place block ½ and block ¾ right sides together and sew with a 1/4″ seam. Press open.
- Repeat with the right set of blocks.
- Sew the left and right pieces together using a 1/4″ seam. Press open.
What you might also like
One comment on “Modern Cathedral Window Pillow, Part One”
Leave a Reply
You must be logged in to post a comment.










is there a video on this technique. I have read part 1 and 2 several times and I can’t quite grasp what you are instructing. the technique looks cool but I’m not there yet