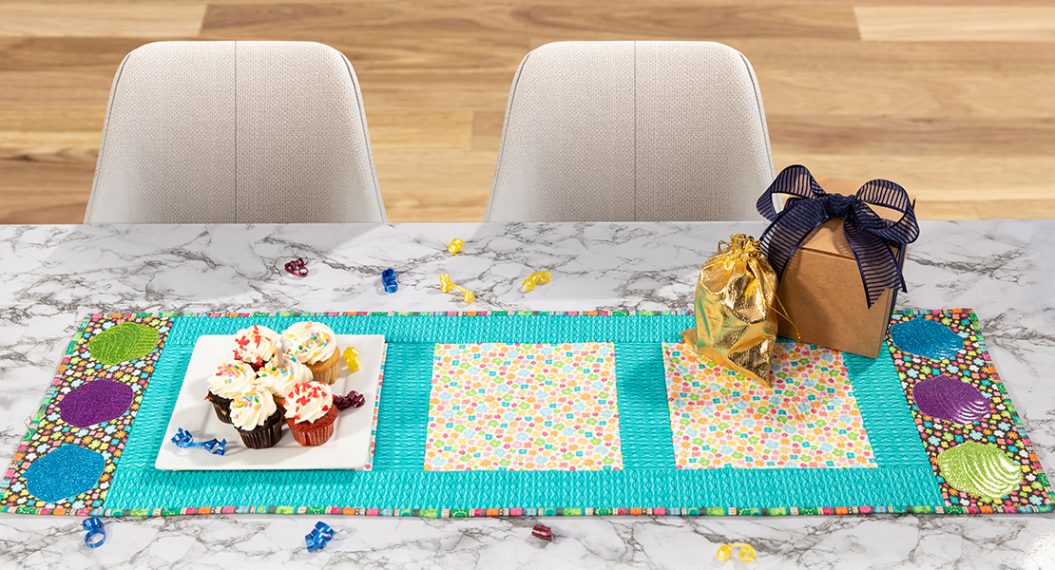
Modern Cathedral Window Pillow, Part Two
Hi friends! Welcome back to Part Two of our Modern Cathedral Window Pillow project. Candice from A+CO here to help walk you through what I think is the most fun part of this project: adding the windows!
As a reminder, in Part One we cut the fabric, decided on a layout, and then sewed the base of our pillow front. You should have a base piece that measures about 18″ x 36″ and consists of the background fabric covered by your folded frames. If you aren’t there yet, head back to Part One to catch up and then meet me back here!
In this post, we will go over adding the window fabric to our pillow front. One of the benefits of today’s approach is that we will also be quilting the top at the same time, no additional quilting needed. Now, if you’d like to skip the quilting or want to add different quilting later, that’s totally fine. I’ll make a note of which step to skip when we get there. It is important to read through this full post before making that decision so you have a great understanding of how the window step and quilting work together so you can modify as you’d like.

Materials to Sew a Modern Cathedral Window Pillow
- BERNINA 735
- Fabric (see requirements below)
- Iron
- Glue stick for basting (I use a washable school glue stick)
- Clips/pins
- Ruler and rotary cutter
- Thread
- Zipper
- Batting
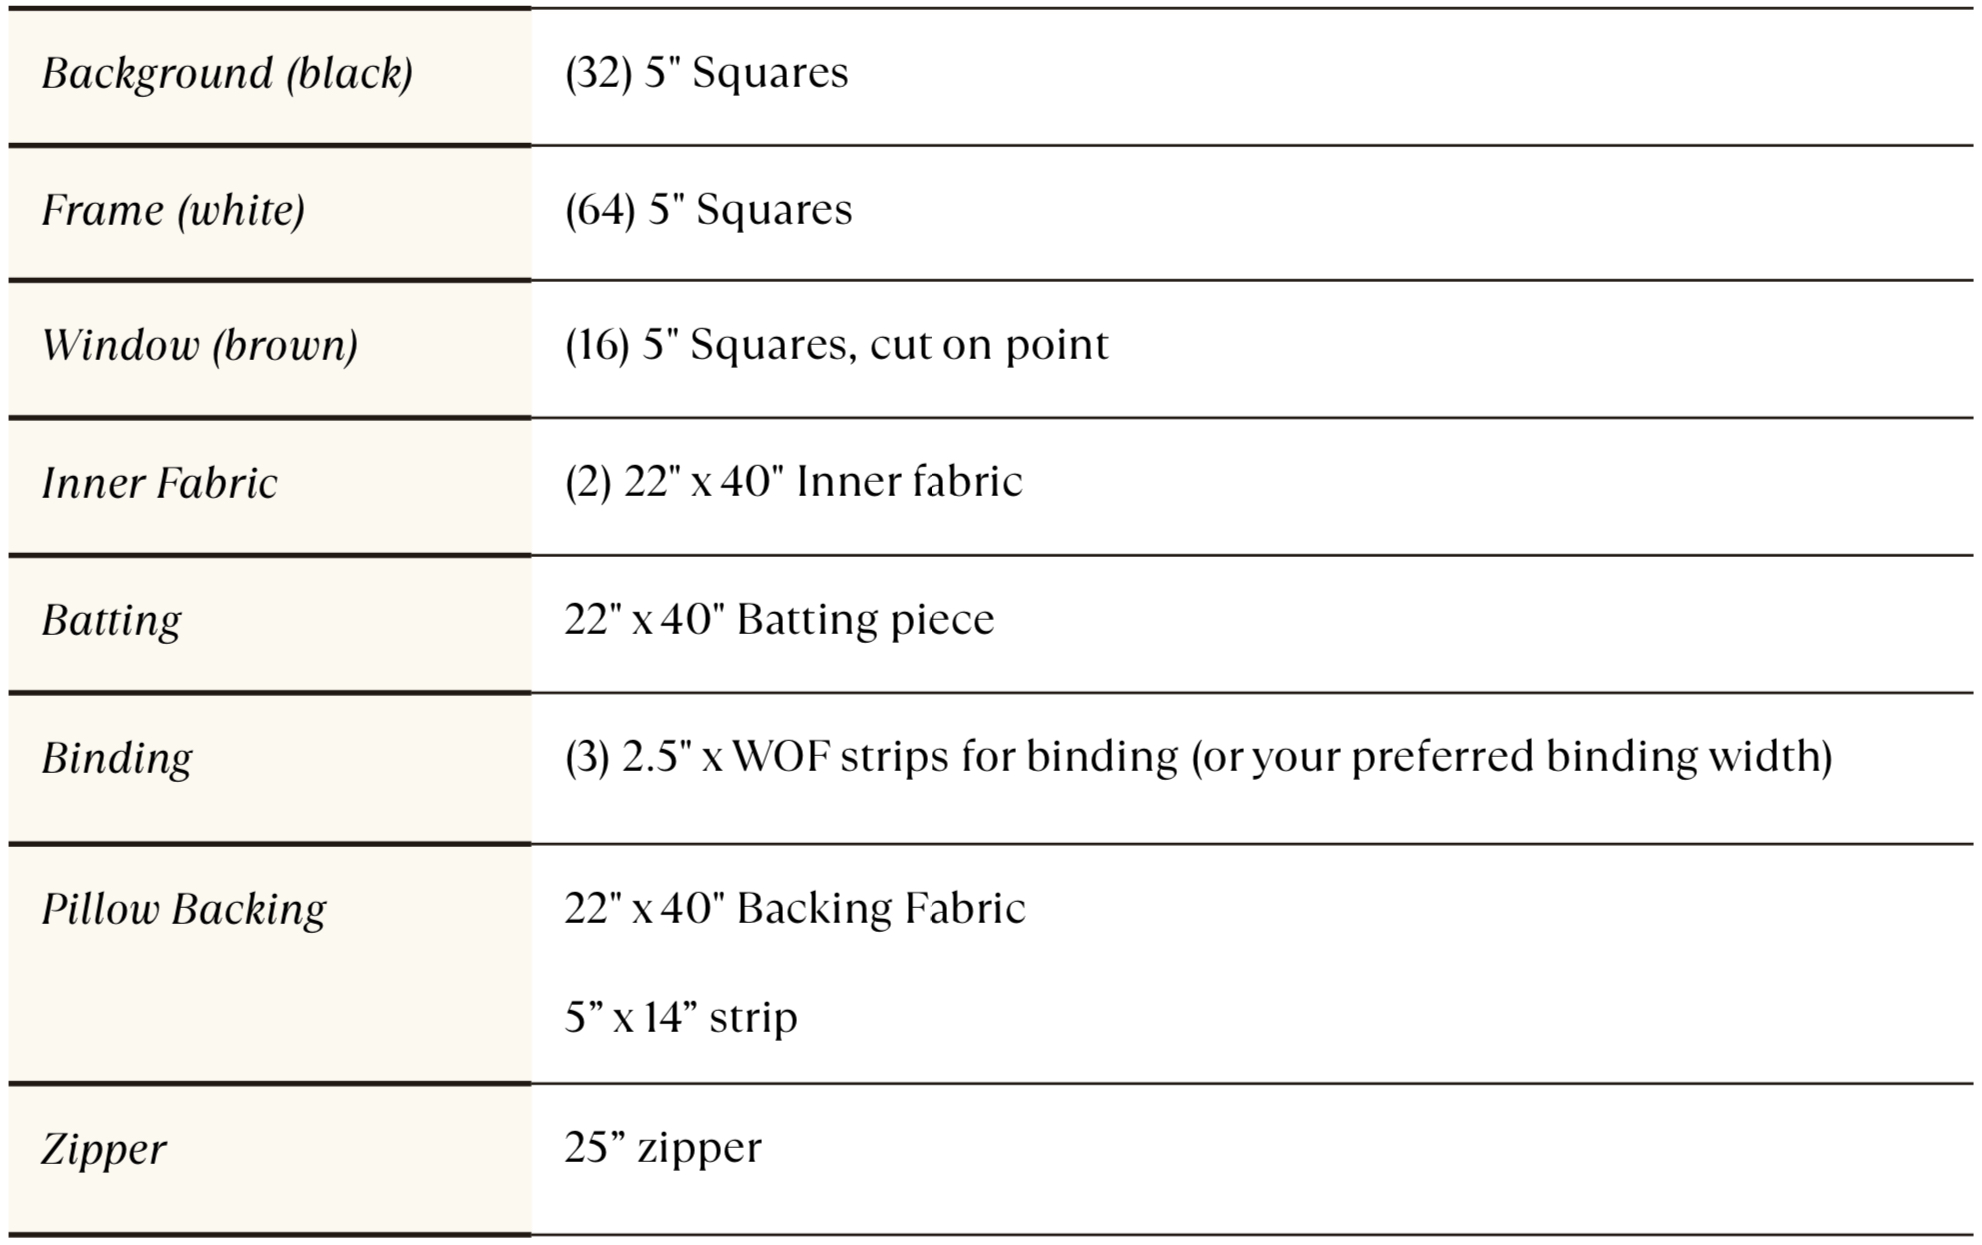
Fabric
For today’s post, we will be using the pillow top base that we made in part one, the 16 window squares, batting, and one of the inner fabric pieces for the lining.
Steps to Make a Cathedral Window Pillow
In this post, we will be creating our quilt sandwich, determining the window layout, basting the windows, and quilting it all together.
Quilt Sandwich
A quilt sandwich refers to layering the pieces of a quilt together: backing, batting, top. If you are choosing to skip quilting now, this is the part to jump past. To create your quilt sandwich:
- Lay one piece of your inner fabric in front of you, right side down (you’ll be looking at the wrong side of the fabric). Ensure the fabric is smooth with no wrinkles.
- Lay your batting on top of the inner fabric, aligning the edges. Smooth any wrinkles.
- If desired, spray baste your batting and inner fabric by gently folding back one half of the batting, spraying per the manufacturer instructions, then smoothing the batting back over the fabric. Repeat with the other half.
- Lay your quilt top on top of the batting, centering it. There should be additional batting/inner fabric around all edges. Ensure the top is smooth with no wrinkles.
- If desired, spray baste your top to the batting by gently folding back one half of the batting, spraying per the manufacturer instructions, then smoothing the batting back over the fabric. Repeat with the other half.
Note: You can pin baste here if desired. When pinning, avoid going through the folded frame pieces and instead be sure to pin in the spaces where the folds meet, going through just the background fabric.
Window Layout
Lay your completed base in front of and you ensure that it is oriented correctly if you are using any directional fabrics.
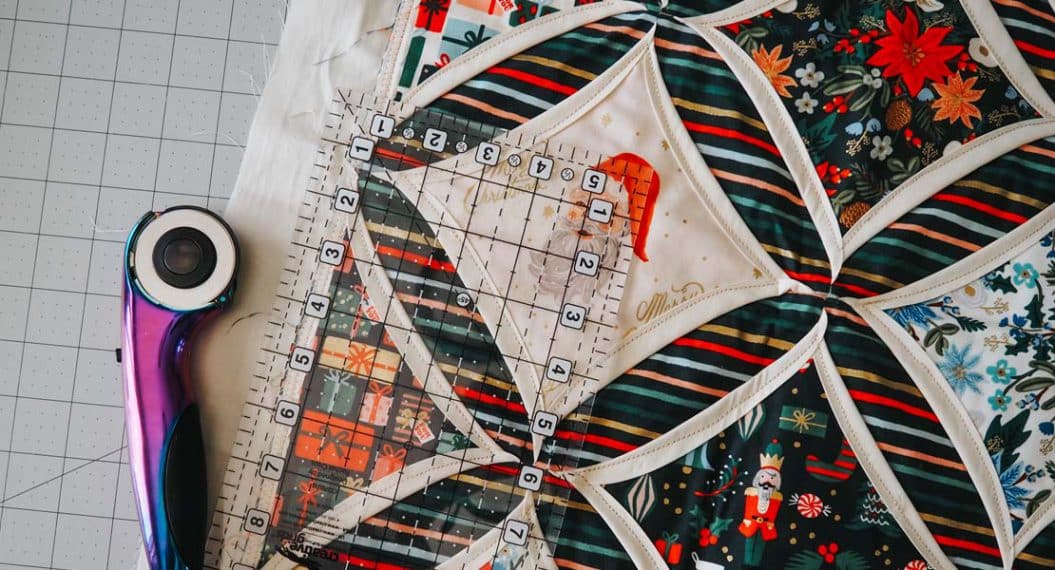
As we lay out the window fabrics, you’ll notice that along the top and side edges we will use half squares rather than the full window squares. I find it easiest to determine those edge pieces first, considering which prints or patterns will look best once they are cut. You’ll need two squares for the vertical sides and four for the horizontal sides. If your fabric is directional, it’ll be important to keep the horizontal and vertical pieces separate so they aren’t confused when you are cutting.
Once you’ve determined your side pieces, cut as follows:
- For the four horizontal (top and bottom edge) windows:
- Lay one of the squares in front of you facing the direction it would on the quilt top. The square should be “on point”, meaning the top, bottom, and two sides are points rather than the straight edges.
- Align your ruler horizontally across the fabric, matching up with the left and right points. Cut.
- Repeat for the other three horizontal window squares.
- For the two vertical (left and right side) windows:
- Lay one of the squares in front of you facing the direction it would on the quilt top. The square should be “on point”, meaning the top, bottom, and two sides are points rather than the straight edges.
- Align your ruler vertically across the fabric, matching up with the top and bottom points. Cut.
- Repeat for the vertical window squares.

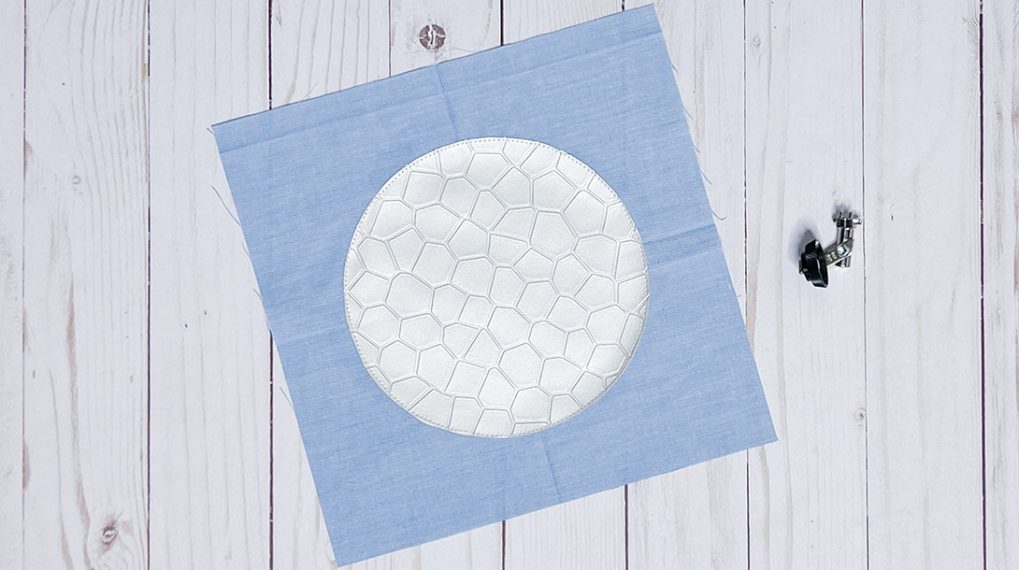
Basting Windows and Frames
When you have your final layout determined, you’ll need to baste the windows and frame in place.
- For the first window, begin by centering the window in the frame. Use the four corner points of the window to align to the seams in the frame diamond to ensure windows are centered.
- Beginning with one side of the frame, apply a thin layer of glue to the frame piece along the edge.

- Gently fold edge of the frame, over the edge of the window diamond.

- Press in place and clip or pin.
- Repeat for the remaining three sides of the frame.
- Repeat for all windows.
Quilting
This method of making the Cathedral Window combines part of the piecing with the quilting. This eliminates the need for any additional quilting. If desired, using a heavier weight of thread (like 12wt) can add a decorative touch to the finished quilt as part of this process.
- Set your machine to have a regular straight stitch and adjust the stitch length as desired. A longer stitch length tends to cover any wobbly movements as you stitch along the edge.
- Position your quilt sandwich right side up under your machine. It does not matter which window you start with or which side of the window however, I do recommend completing one window at a time.
- Remove the clips/pins from one basted frame side.
- Stitching close to the inner edge (closest to the window), sew along the curve of the frame fabric, attaching it to the window fabric.
- Continue sewing each Frame edge.

Optional: Once you have all of your frames sewn down, sew a seam all the way around the edge of your quilted piece, about 1/8″ from the raw edge. This has the benefit of locking your seams in place and tacking down the open ends of the edge windows.
If you are planning on using your Cathedral Window panel as a mini quilt, table runner, etc. rather than adding it to a pillow then you are all set! You can go ahead and add your binding and admire your handy work.
My next and final post in this series will walk through the pillow construction, be sure to check it out!