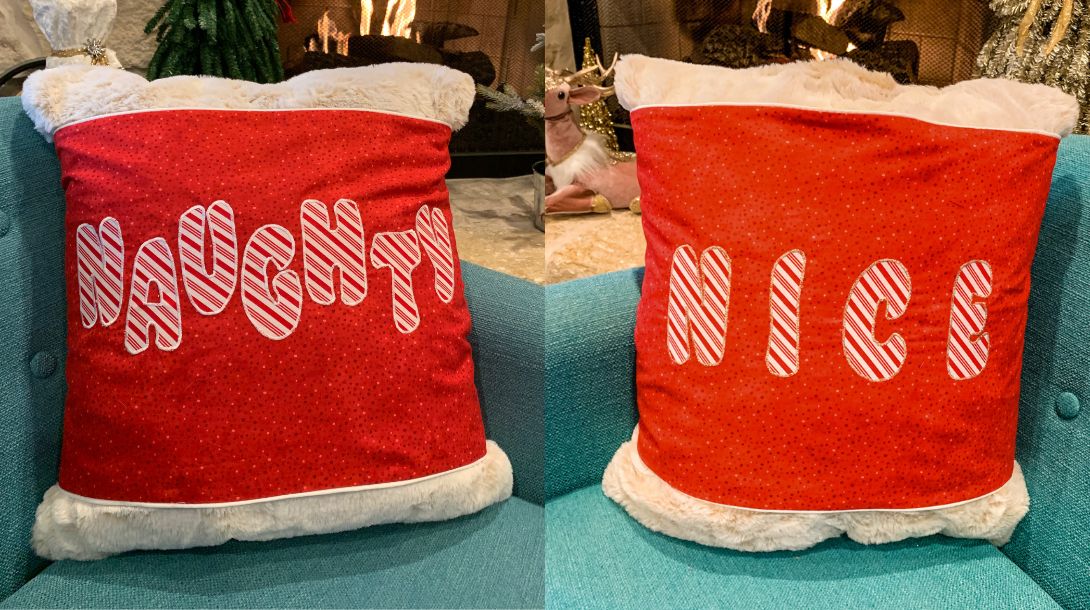
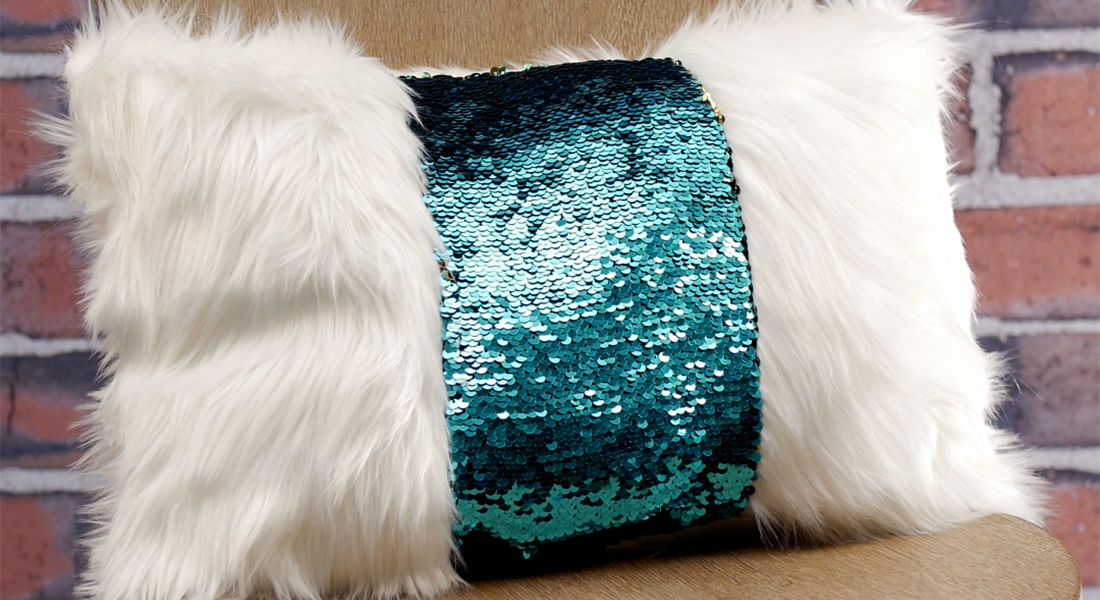
Sew a Naughty or Nice Reversible Christmas Pillow Wrap
Pillows are a great way to add color and comfort to your home. Rather than purchase (and store) pillows for the Christmas season, you can easily sew a pillow wrap to change the look of an existing pillow.
Get into the holiday spirit with this reversible Naughty or Nice pillow wrap. But you better watch out! Instead of checking his list, Santa just might change the side of the wrap to share whether you’ve been naughty or nice.
Hello everyone! It’s Sharon with Sharon Sews, and you can connect with me on YouTube, (Sharon Sews) Instagram (@TheSharonSews) and my blog, (Sharon Sews) where I share sewing tips, projects, reviews, and fashion sewing ideas.
Now, let’s sew the reversible pillow wrap!
Materials needed to sew the Naughty or Nice Reversible Pillow Wrap
- Pillow wrap fabric – two pieces 38″ x 14″
- Letter appliqué fabrics – 22″ x 9″ piece (or fabric scraps)
- 2-1/4 yards of 1/2″ piping
- Eight 7/8″ buttons
- 1/8″ elastic – four pieces 3″ each
- Coordinating thread to sew the wrap
- Contrasting thread to appliqué the letters
- Paper-backed fusible web
- Stabilizer
- Pencil
- Pins or clips
- Quilting ruler
- Scissors or rotary cutter and cutting mat
- Iron and ironing board
- Printer and paper (to print appliqué letters)
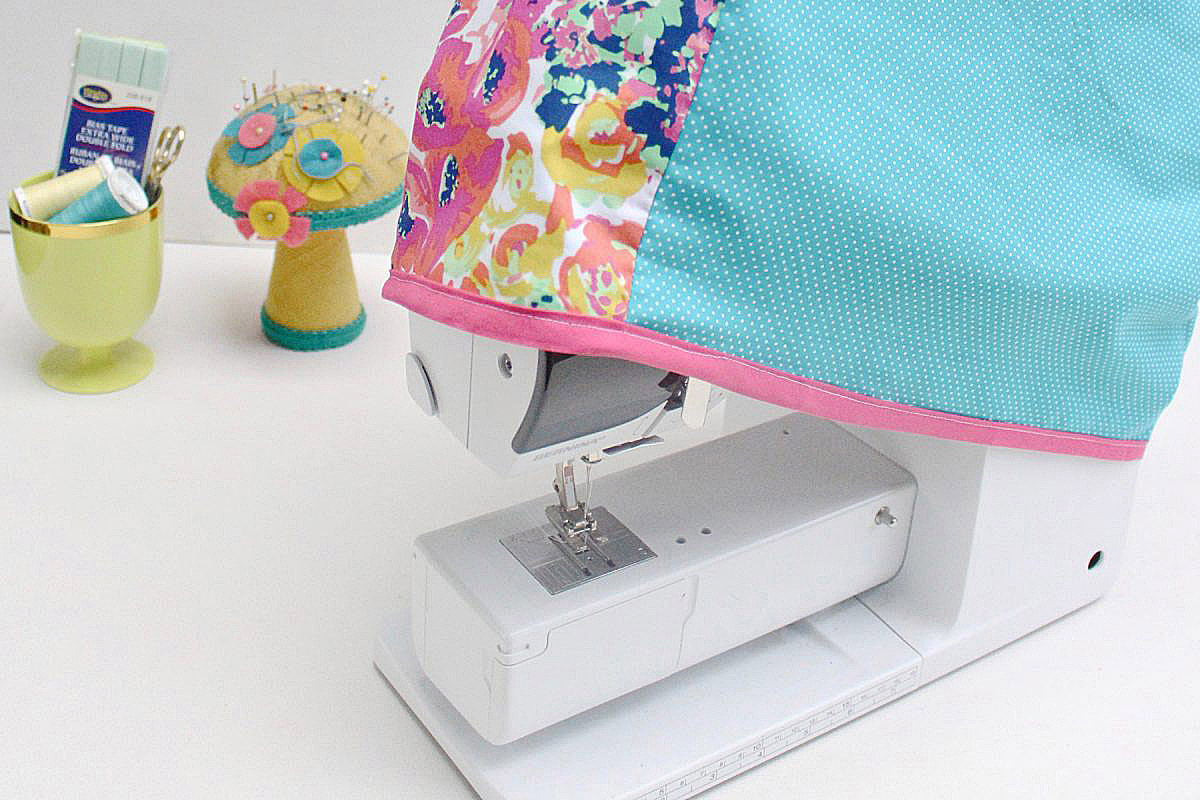
- Sewing machine – I used my BERNINA 770 QE Plus
- Purchased 20″ x 20″ pillow
How to Sew the Reversible Pillow Wrap
This pillow wrap is designed for a 20″ pillow and has a finished size of 37″ x 13″. It closes with elastic loops and buttons on the backside. If you’re using a different pillow size, you can make the pillow wrap larger or smaller as needed.
Appliqué the Letters to the Pillow Wrap

Trace and Apply the Letters to the Pillow Wrap
Tip: You can use a word processing program to choose your own letters to applique. The letters on this pillow wrap measure 4″ tall.
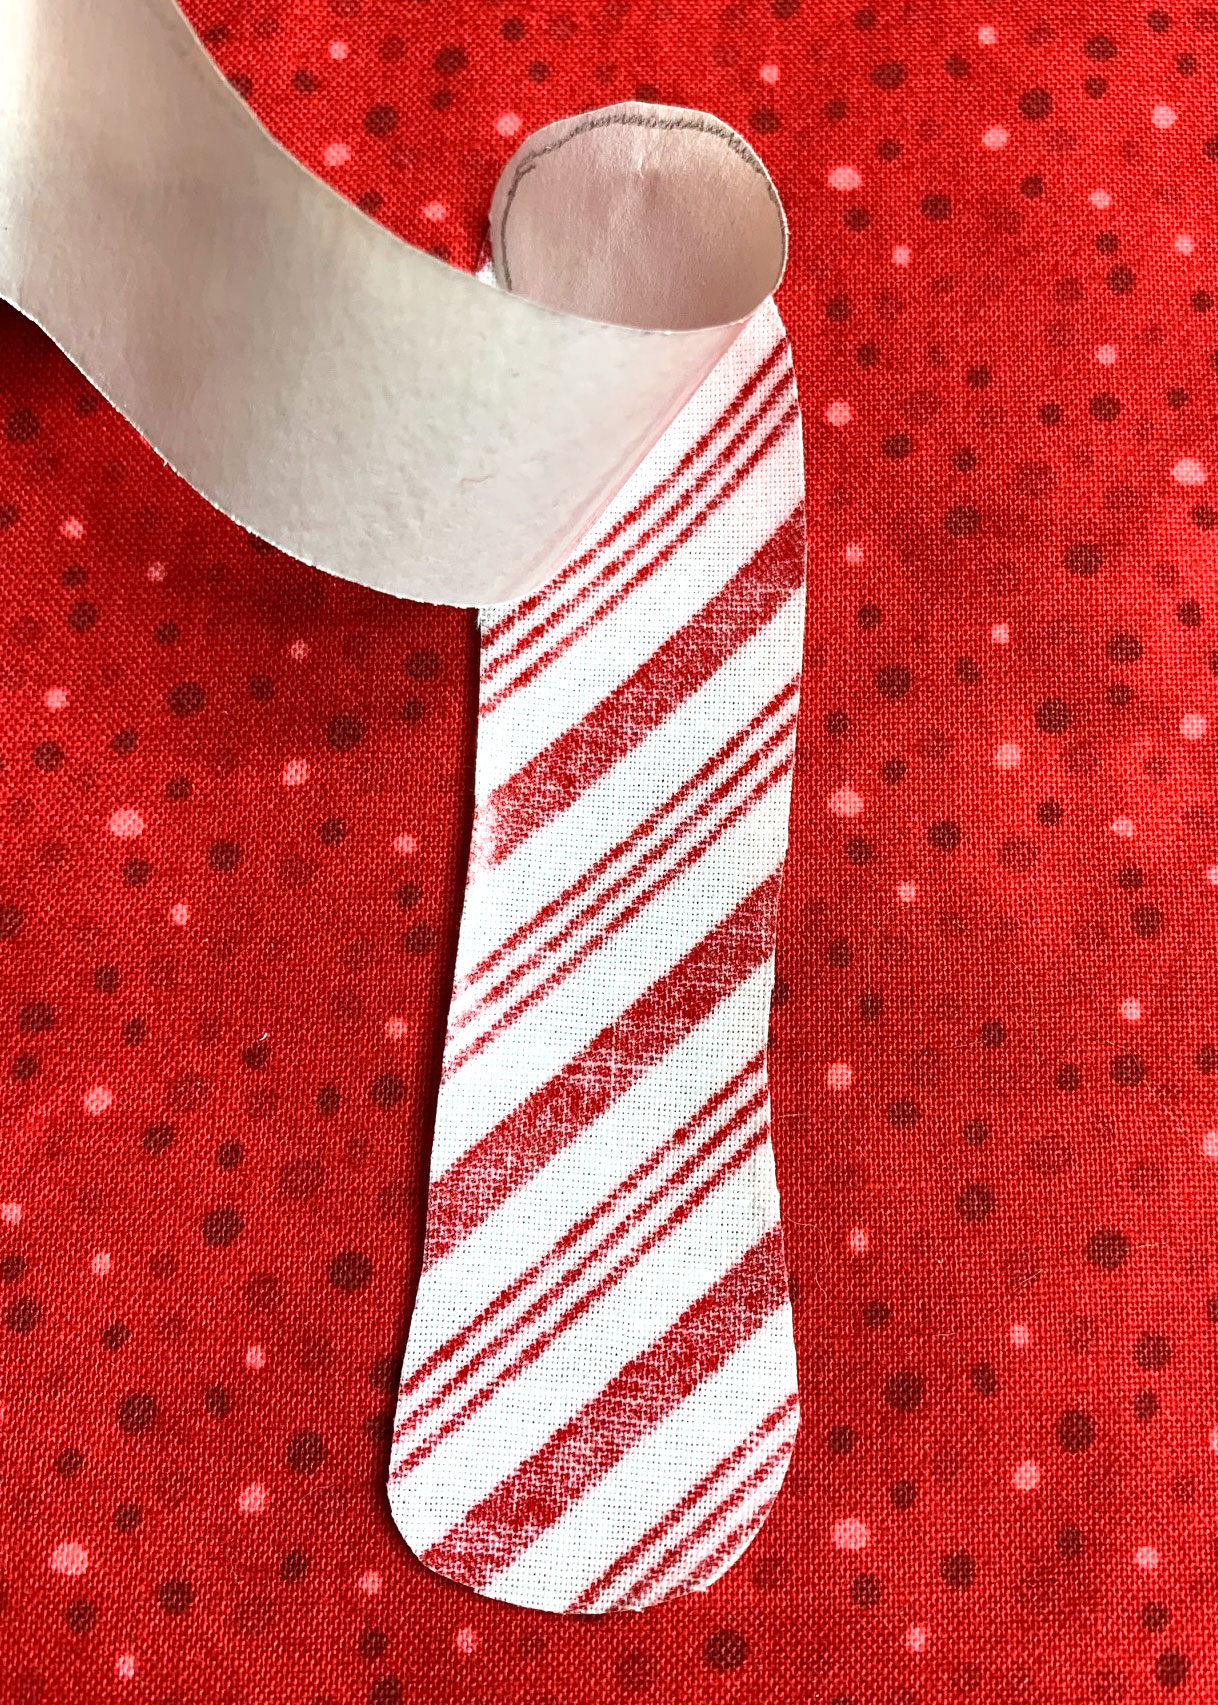
Place the fusible web paper backing with the paper side up (bumpy side will be down) over the letters. Trace the naughty and nice letters using a pencil, leaving a small space between each letter. Don’t use a pen as the ink could bleed onto your fabric.
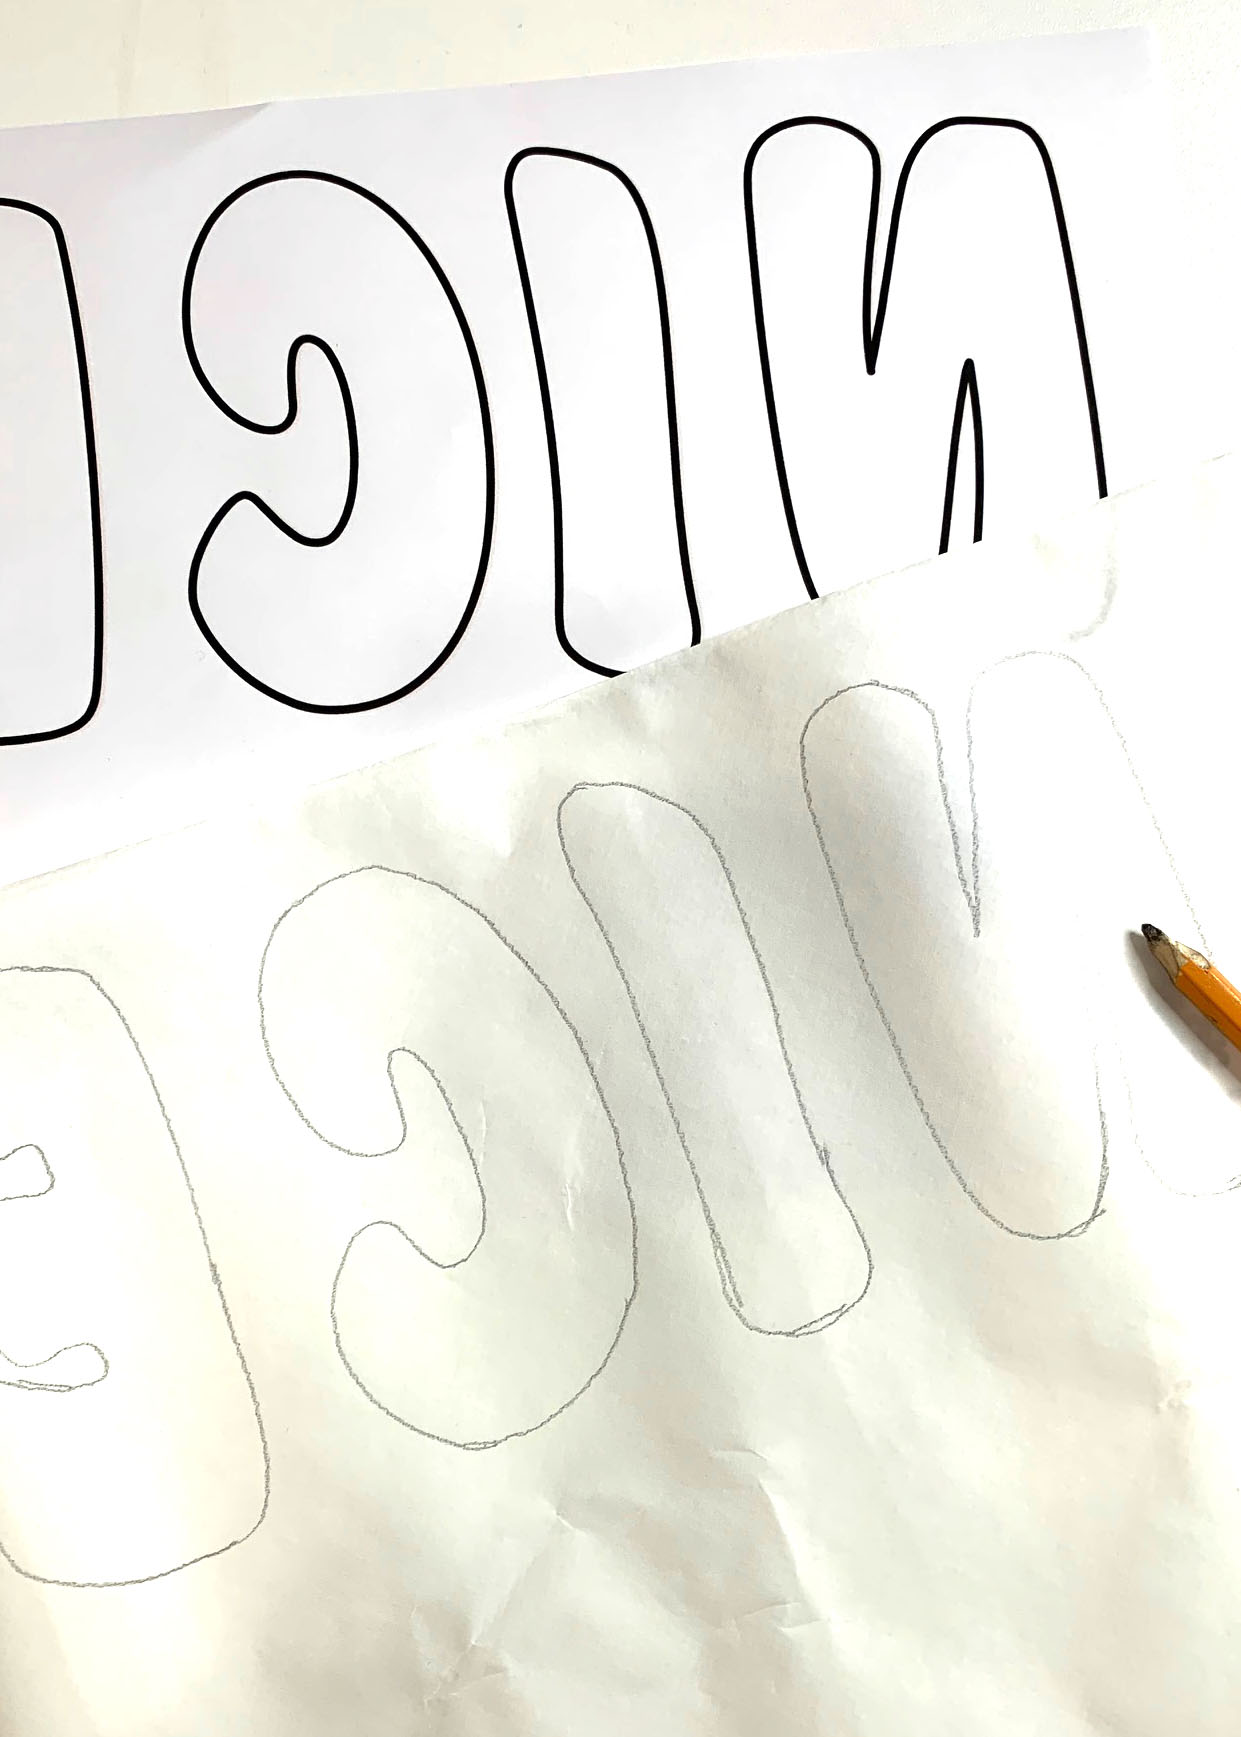
Following the manufacturer’s instructions, fuse the naughty and nice letters to the wrong side of fabric.
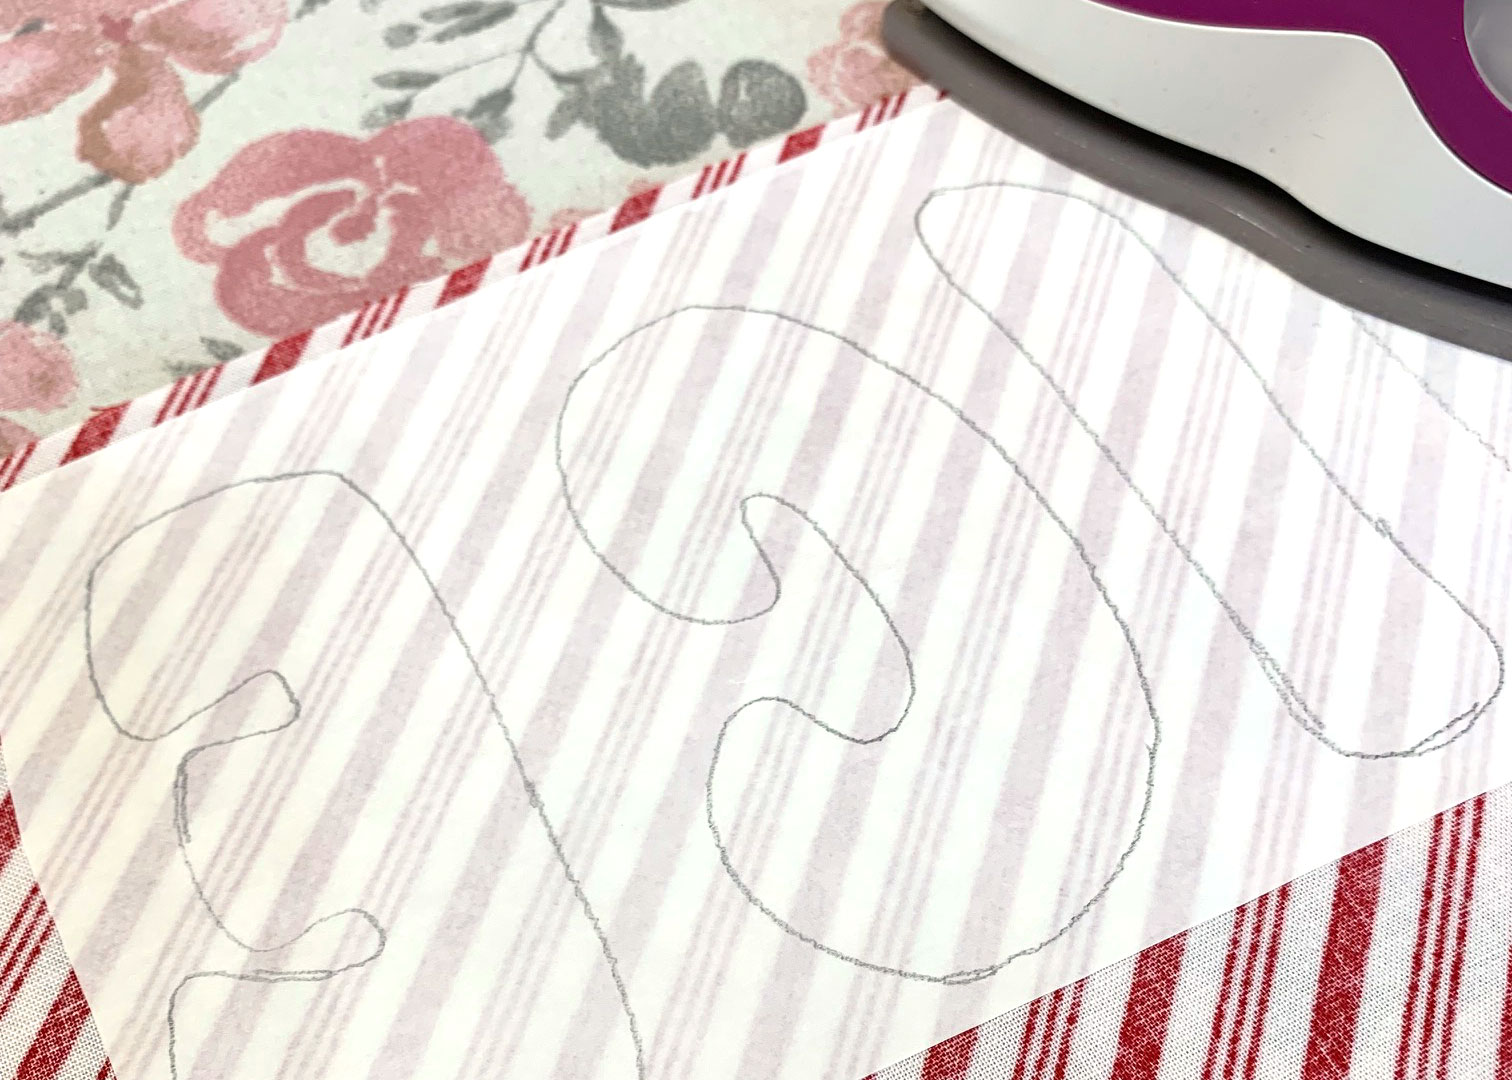
Cut out each letter.
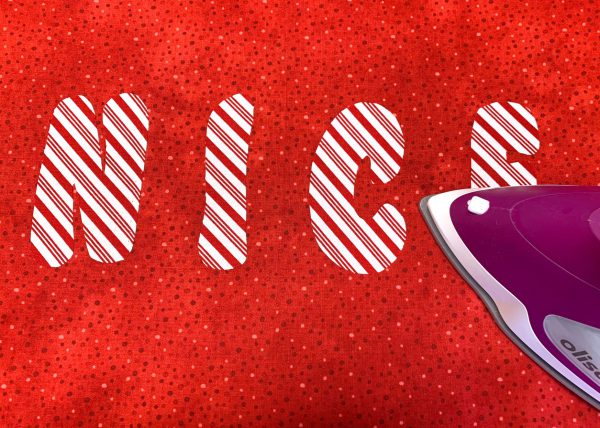
 Add the Word Nice to the Pillow Wrap

Place one pillow wrap on the ironing board right side up. Mark the center by folding it in half matching the short end, press lightly and unfold.
Center the word nice on the pillow wrap. For the nice side, the letters are placed 5″ from the bottom edge and are 1-1/2″ apart.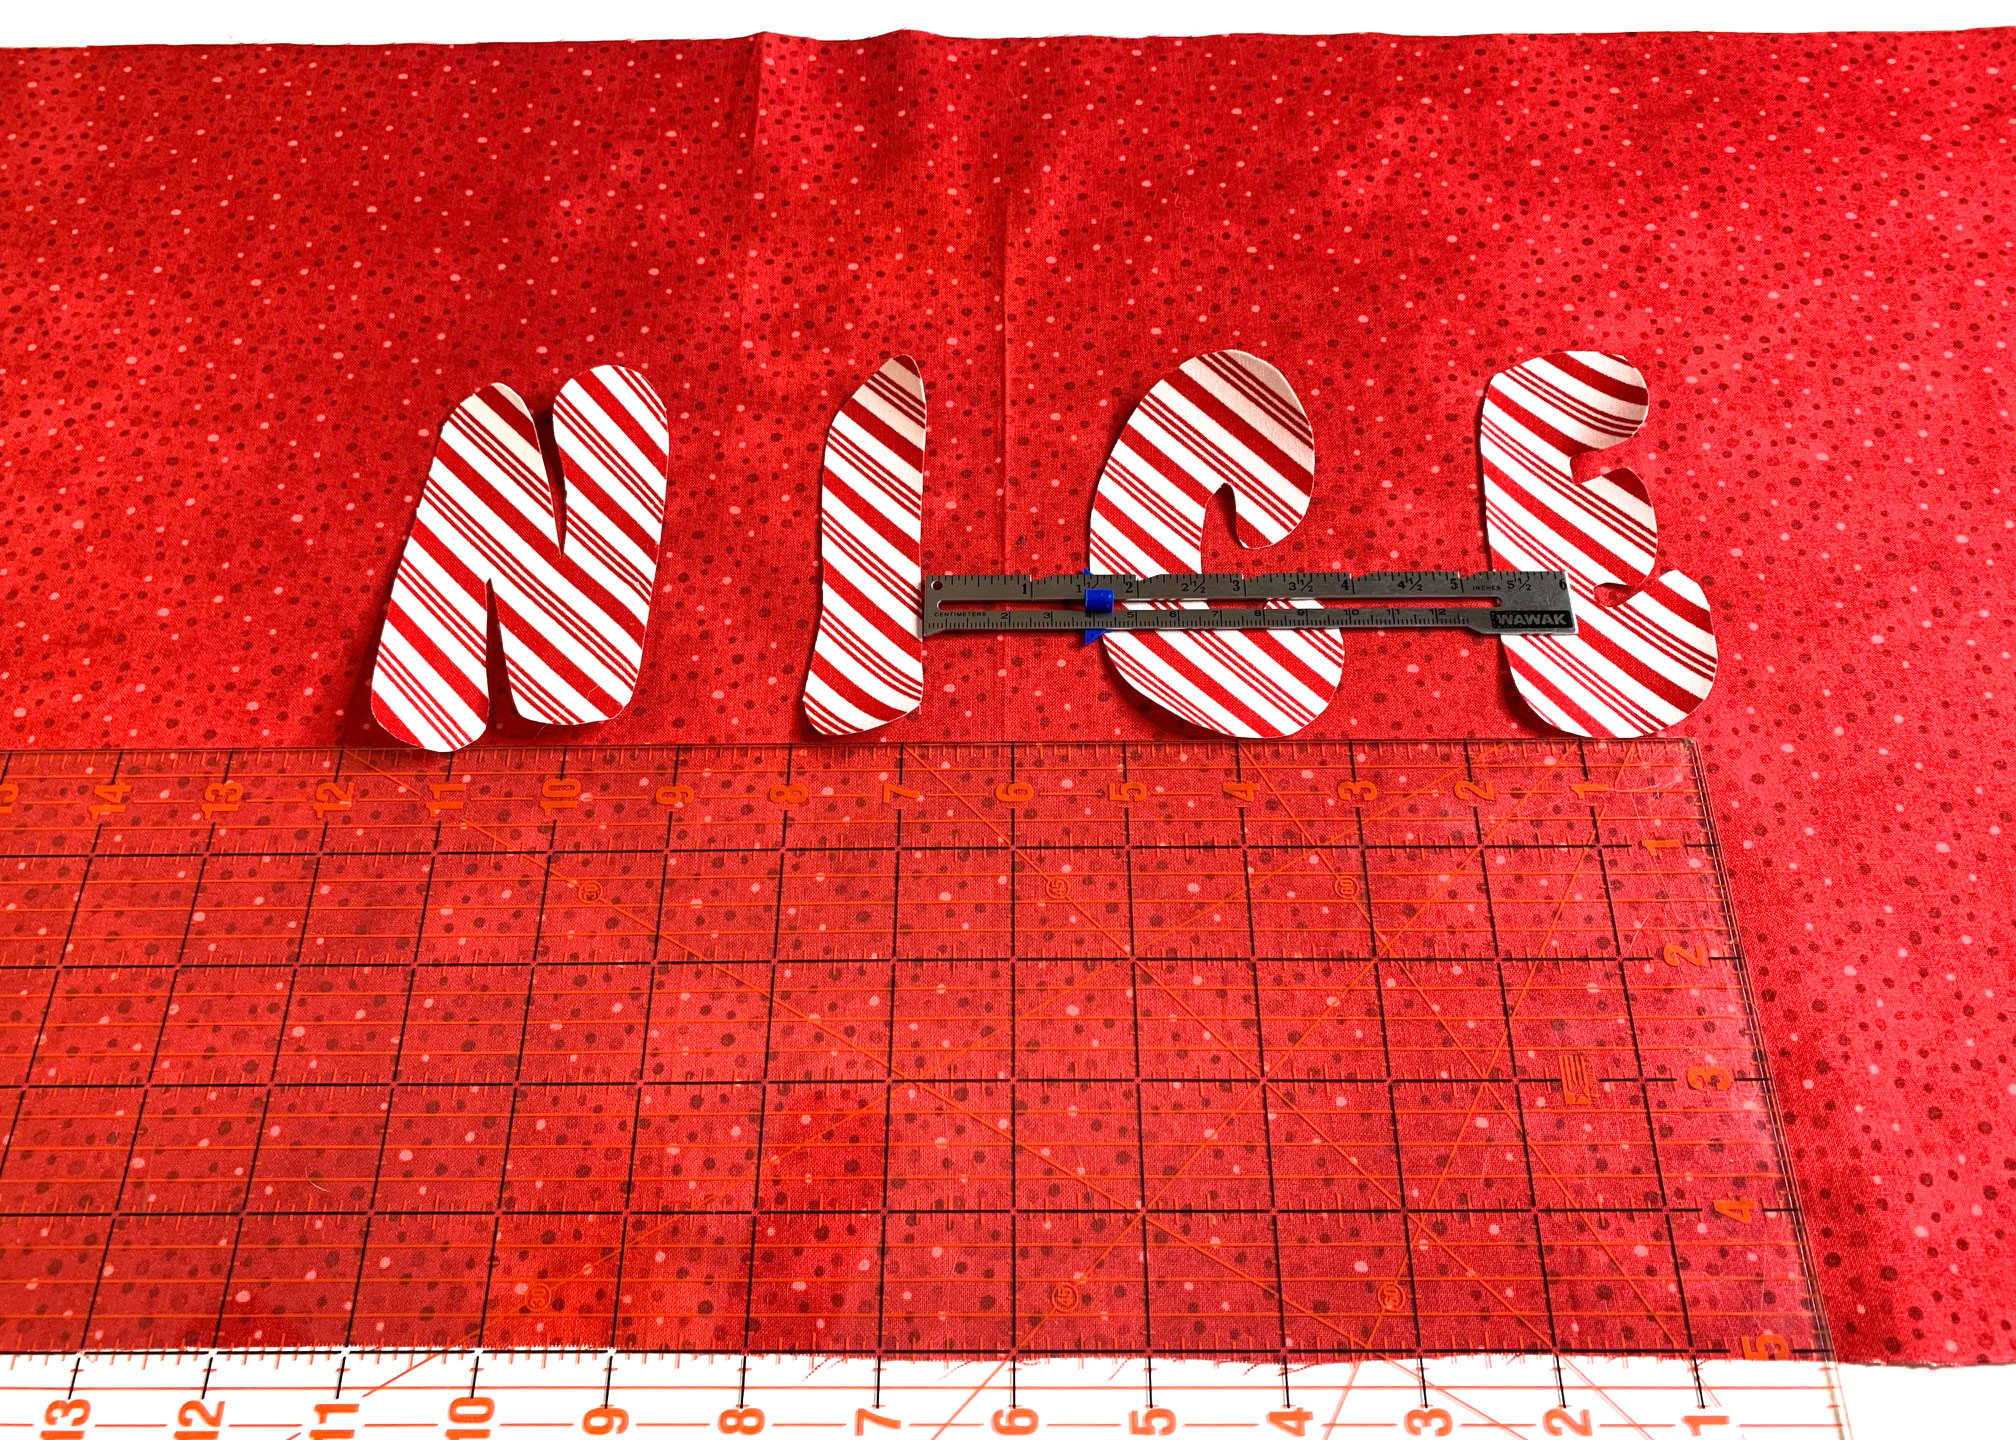
Carefully remove the paper backing from each letter and place back on the fabric.
Fuse the letters in place following the manufacturer’s instructions.
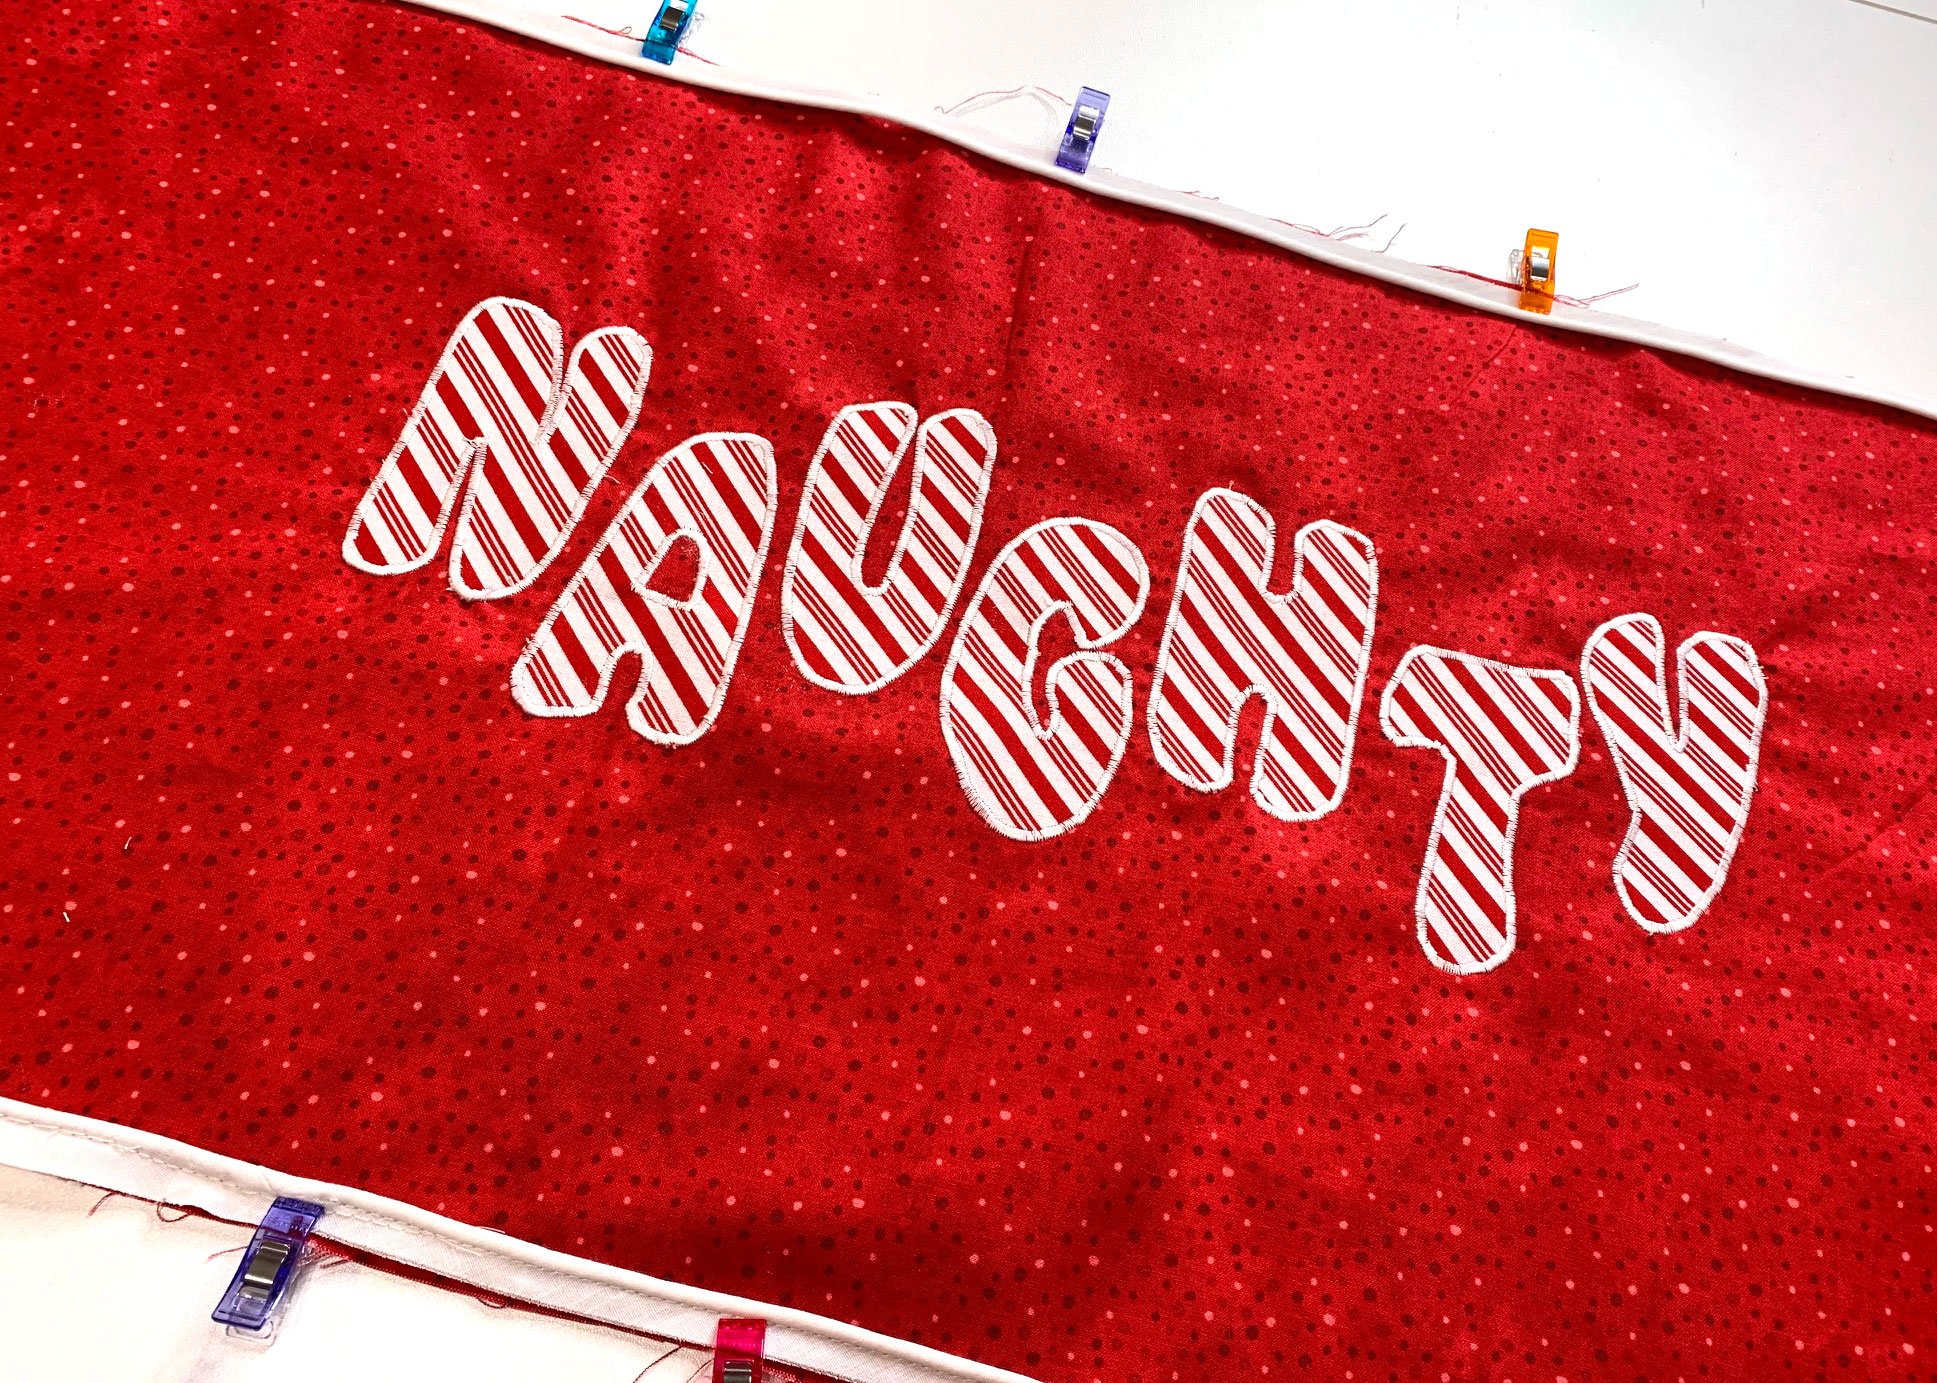
 Add the Word Naughty to the Pillow Wrap

Place the other pillow wrap on the ironing board right side up. Mark the center by folding it in half matching the short ends, press lightly and unfold.
Center the word naughty on the pillow wrap. Because there are more letters to add on this side, the letters are staggered. Begin by placing the letter G in the center 5″ from the bottom. Place N, U, H, and Y higher by 1-1/4″ and A and T 5″ from the bottom (as shown). The letters are about 1/2″ from one another.
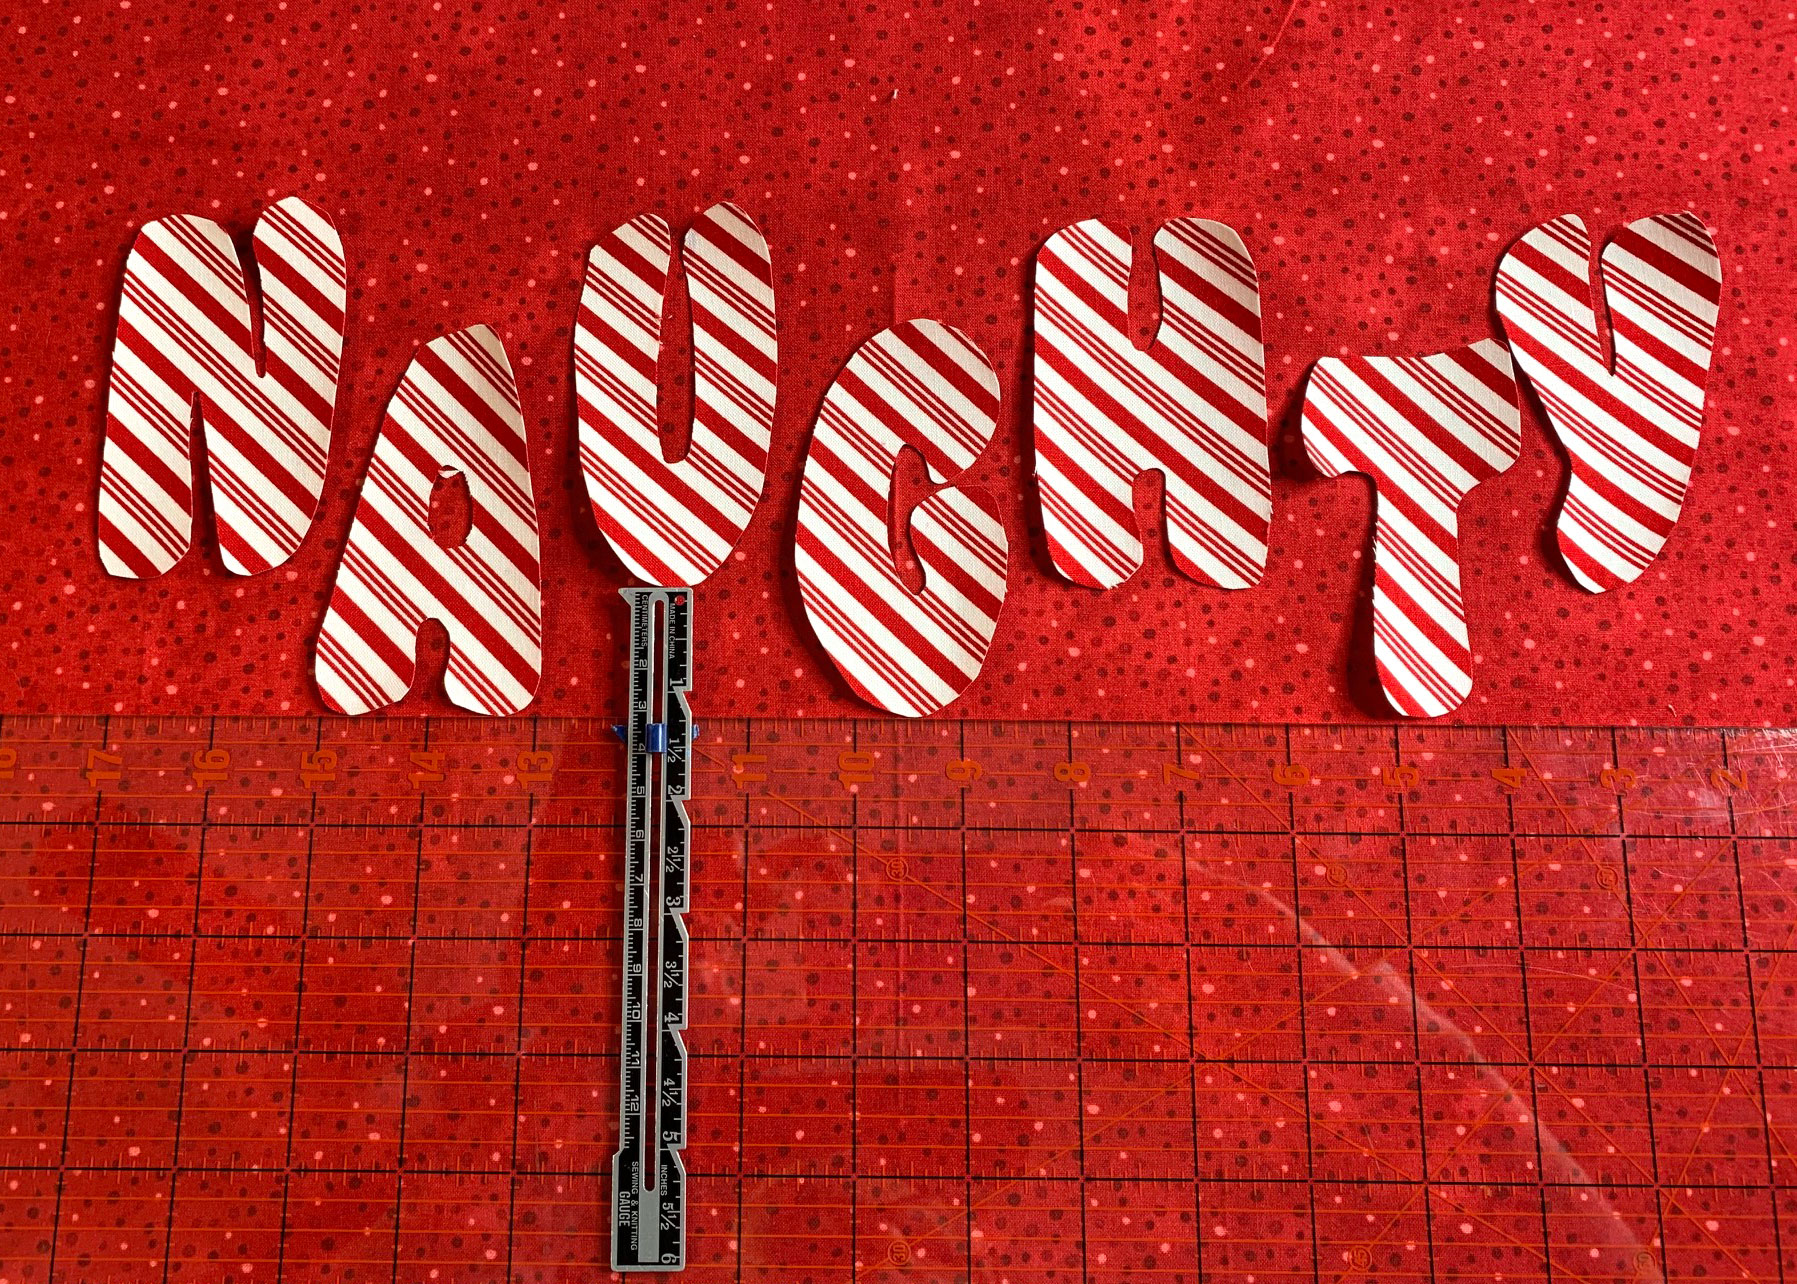
Once you’re happy with the arrangement, carefully remove the paper backing from each letter and place back on the fabric. Then fuse the letters in place following the manufacturer’s instructions.
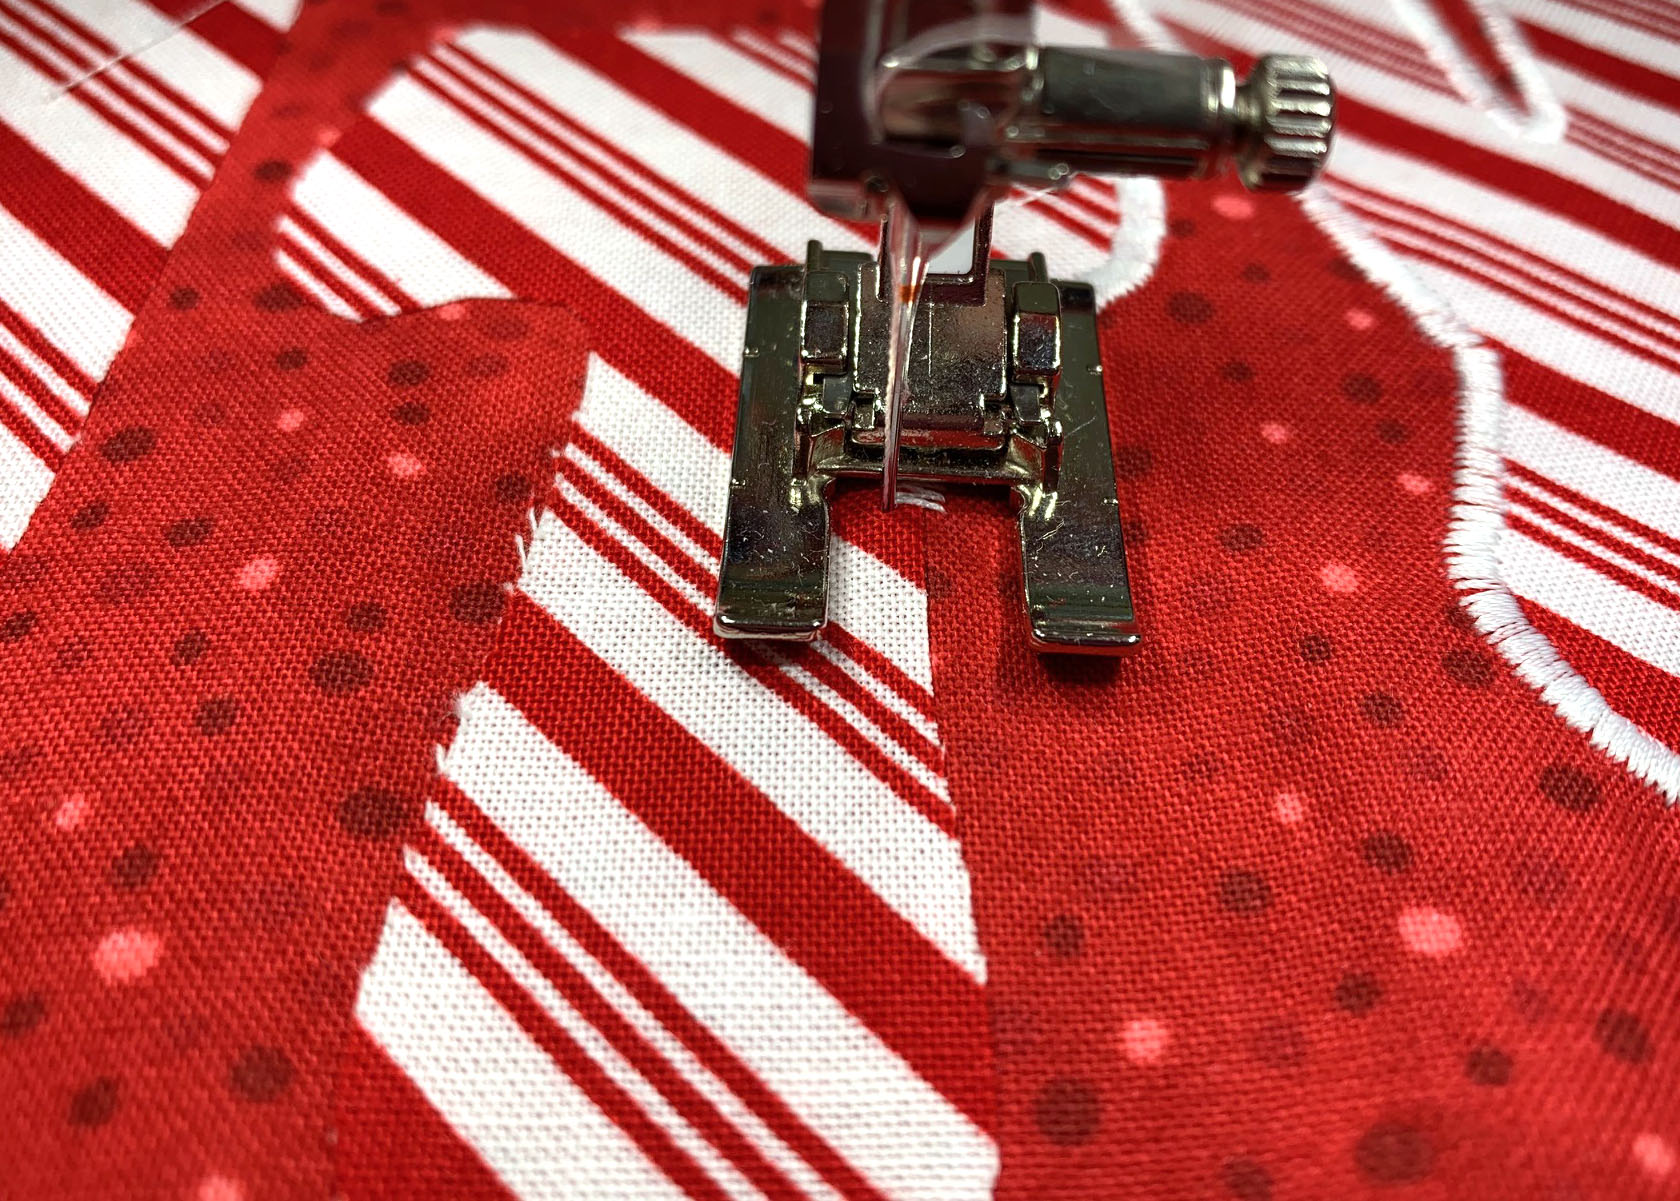
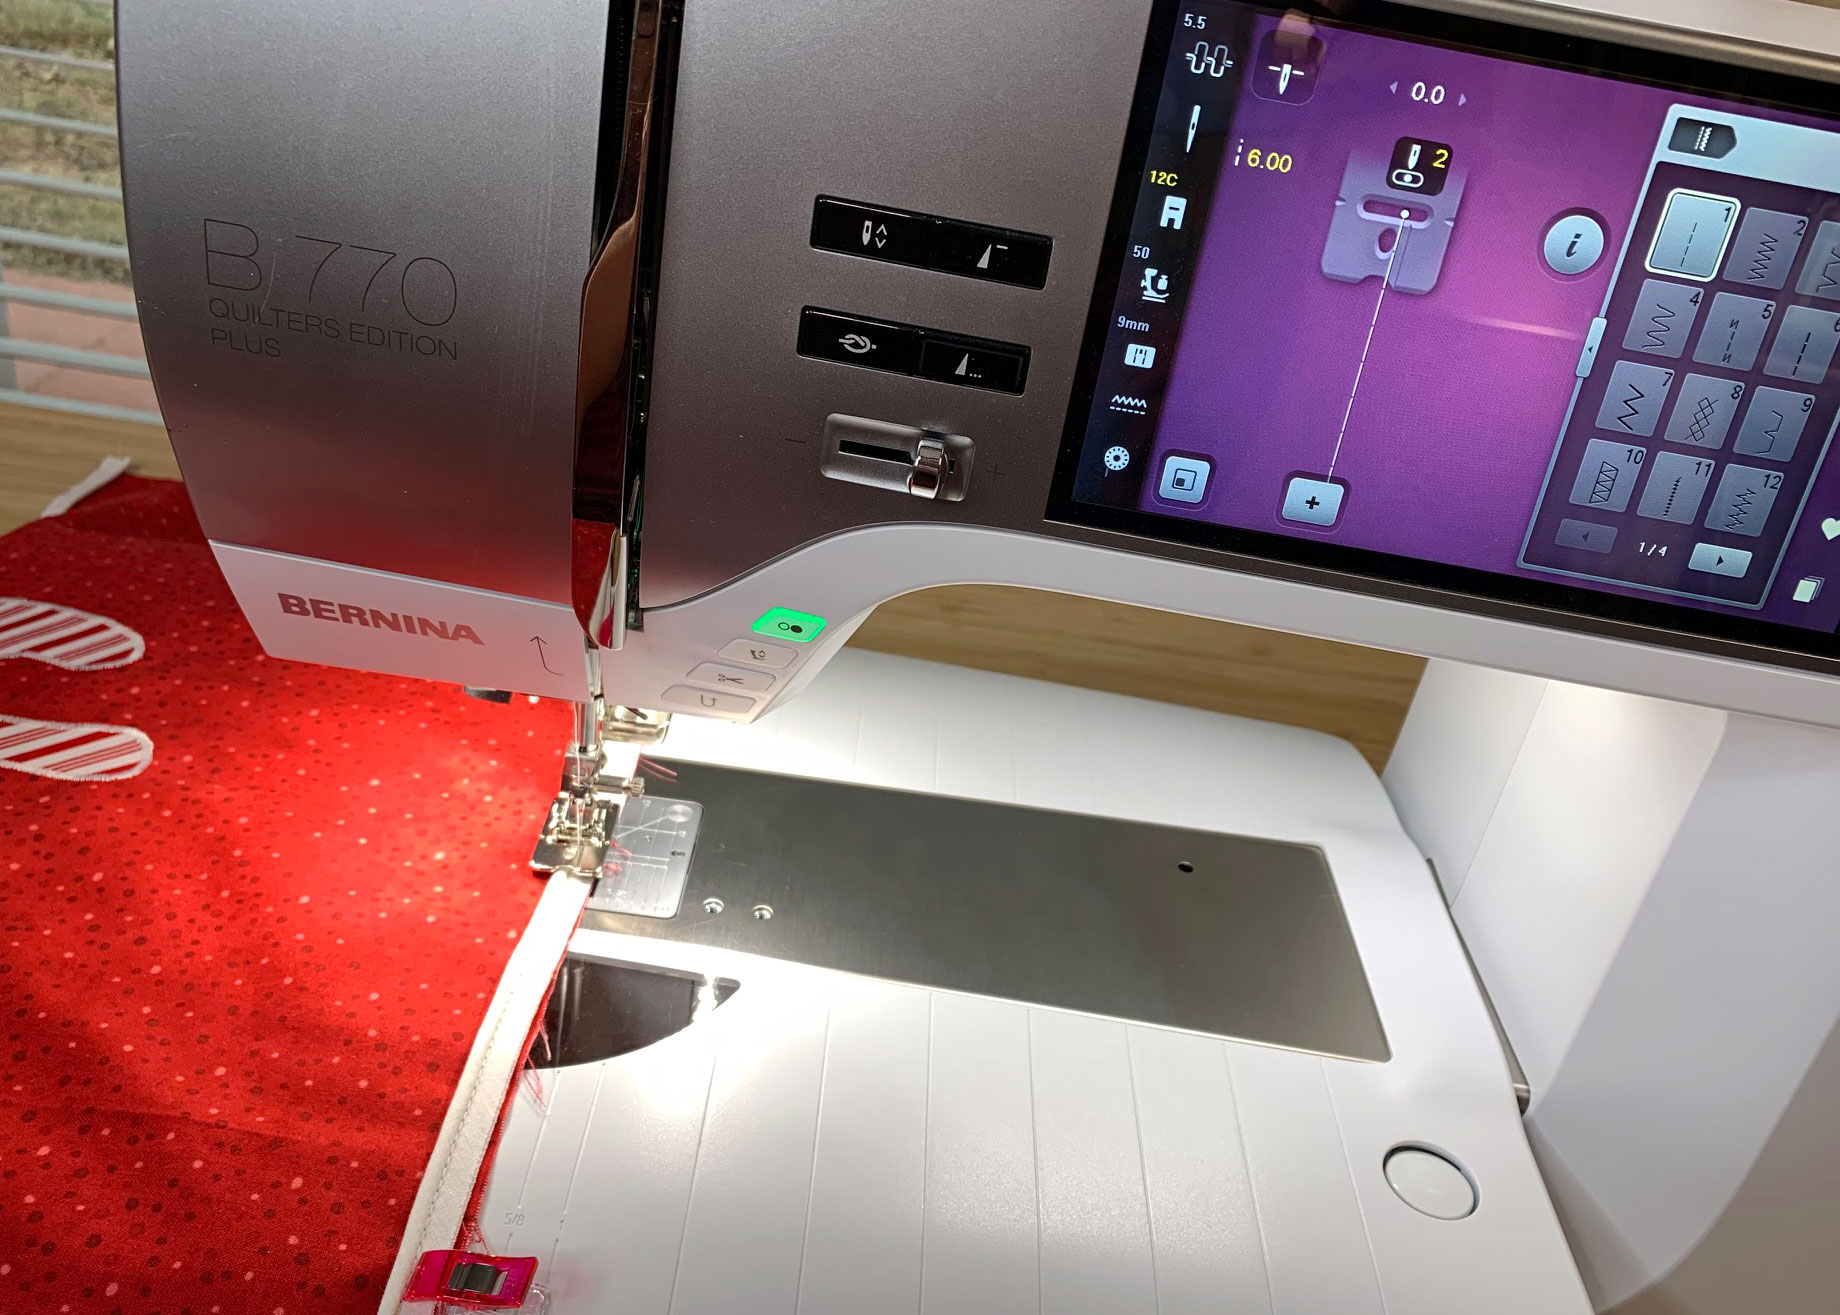
Machine Appliqué the Letters to the Pillow Wrap
Iron a piece of tear-away stabilizer to the back side of the pillow wrap to help prevent the stitches from puckering.
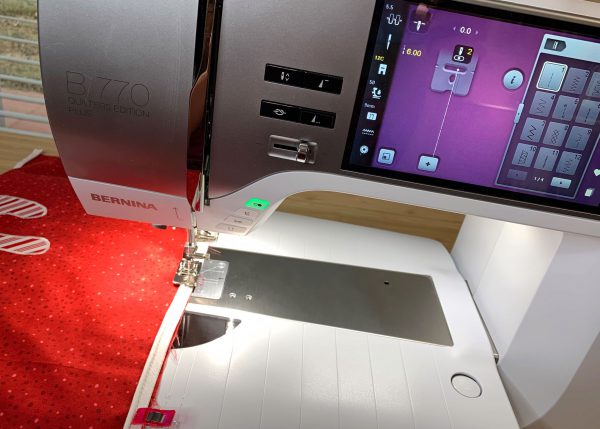
Thread your machine with a contrasting thread to appliqué the letters. I used a silk-finish cotton multi 50wt from Mettler.
Put on an open-toe appliqué foot. I used the BERNINA Open Embroidery Foot #20C. The wide opening at the front allowed me to easily see my stitching area.
Set your machine for a narrow zig-zag stitch. On my BERNINA 770 QE PLUS, I used stitch number 2, with the length set to 0.35 mm and the width set to 3.0 mm.
Make sure the left swing of the needle is on the letter and the right swing is on the pillow wrap fabric.
Tip: Experiment on a sample piece of fabric first to determine the exact zig-zag width and length to use on your machine before you begin to appliqué your letters.
Tip: Stitch slowly for more control as you applique around the curved edges.
If you prefer, change the thread color on each side of the pillow wrap. A metallic thread was used to applique the nice letters. Be sure to use a sewing machine needle designed for metallic threads.
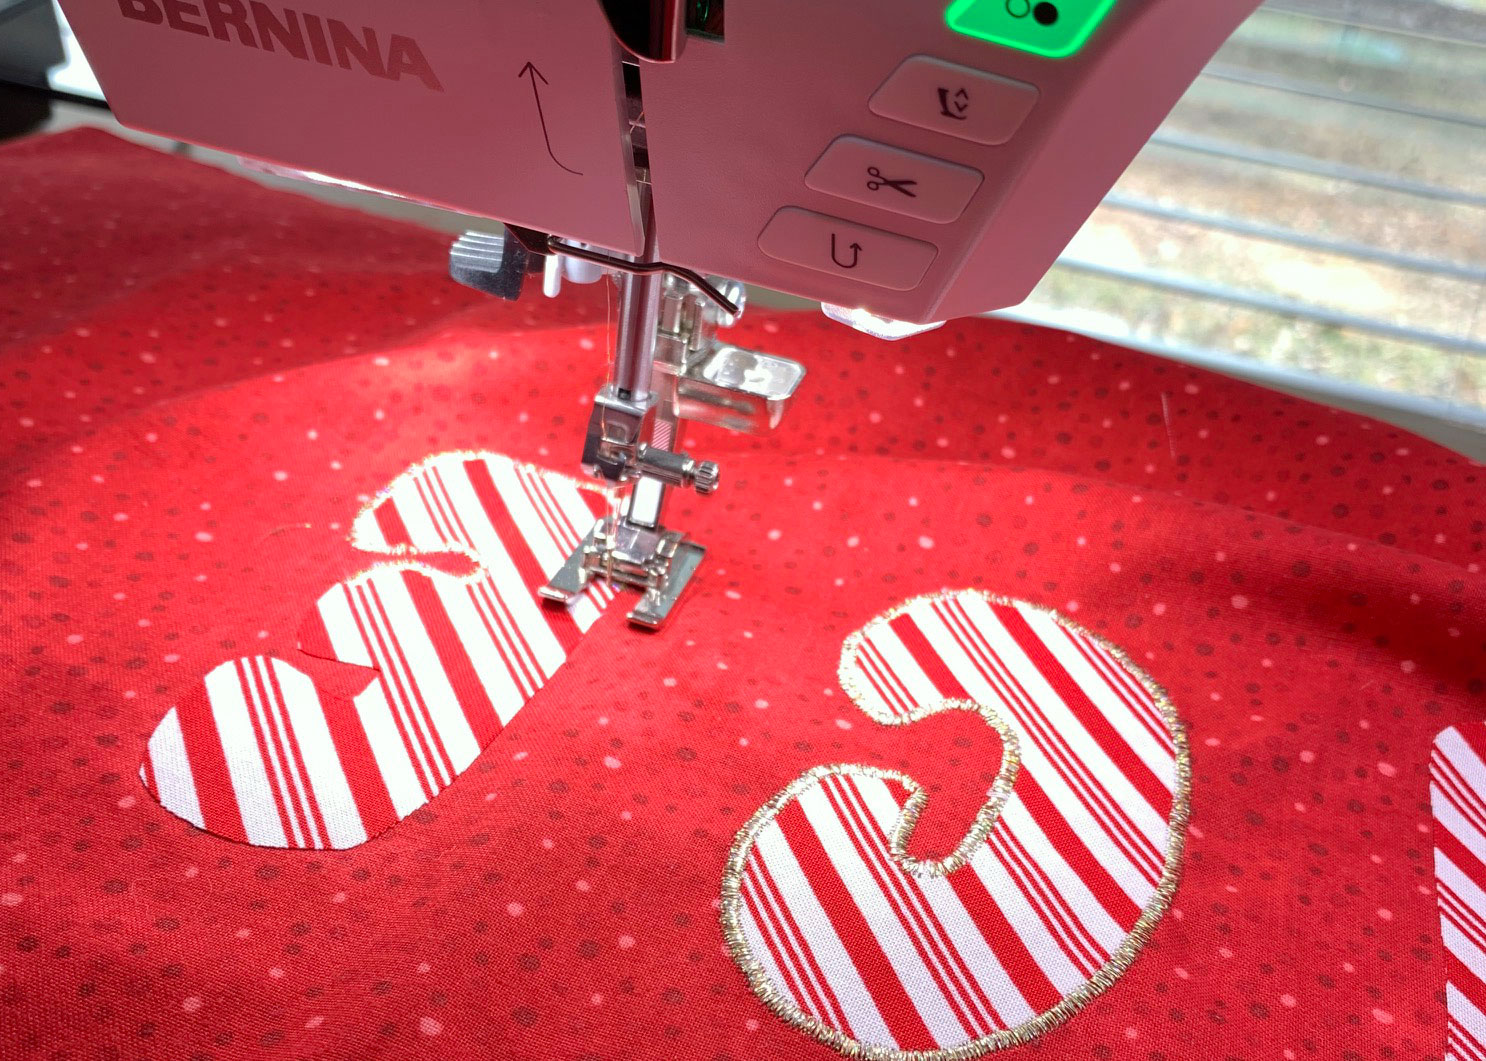
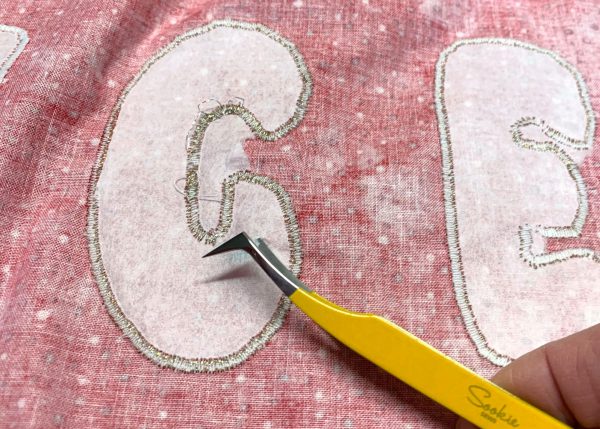
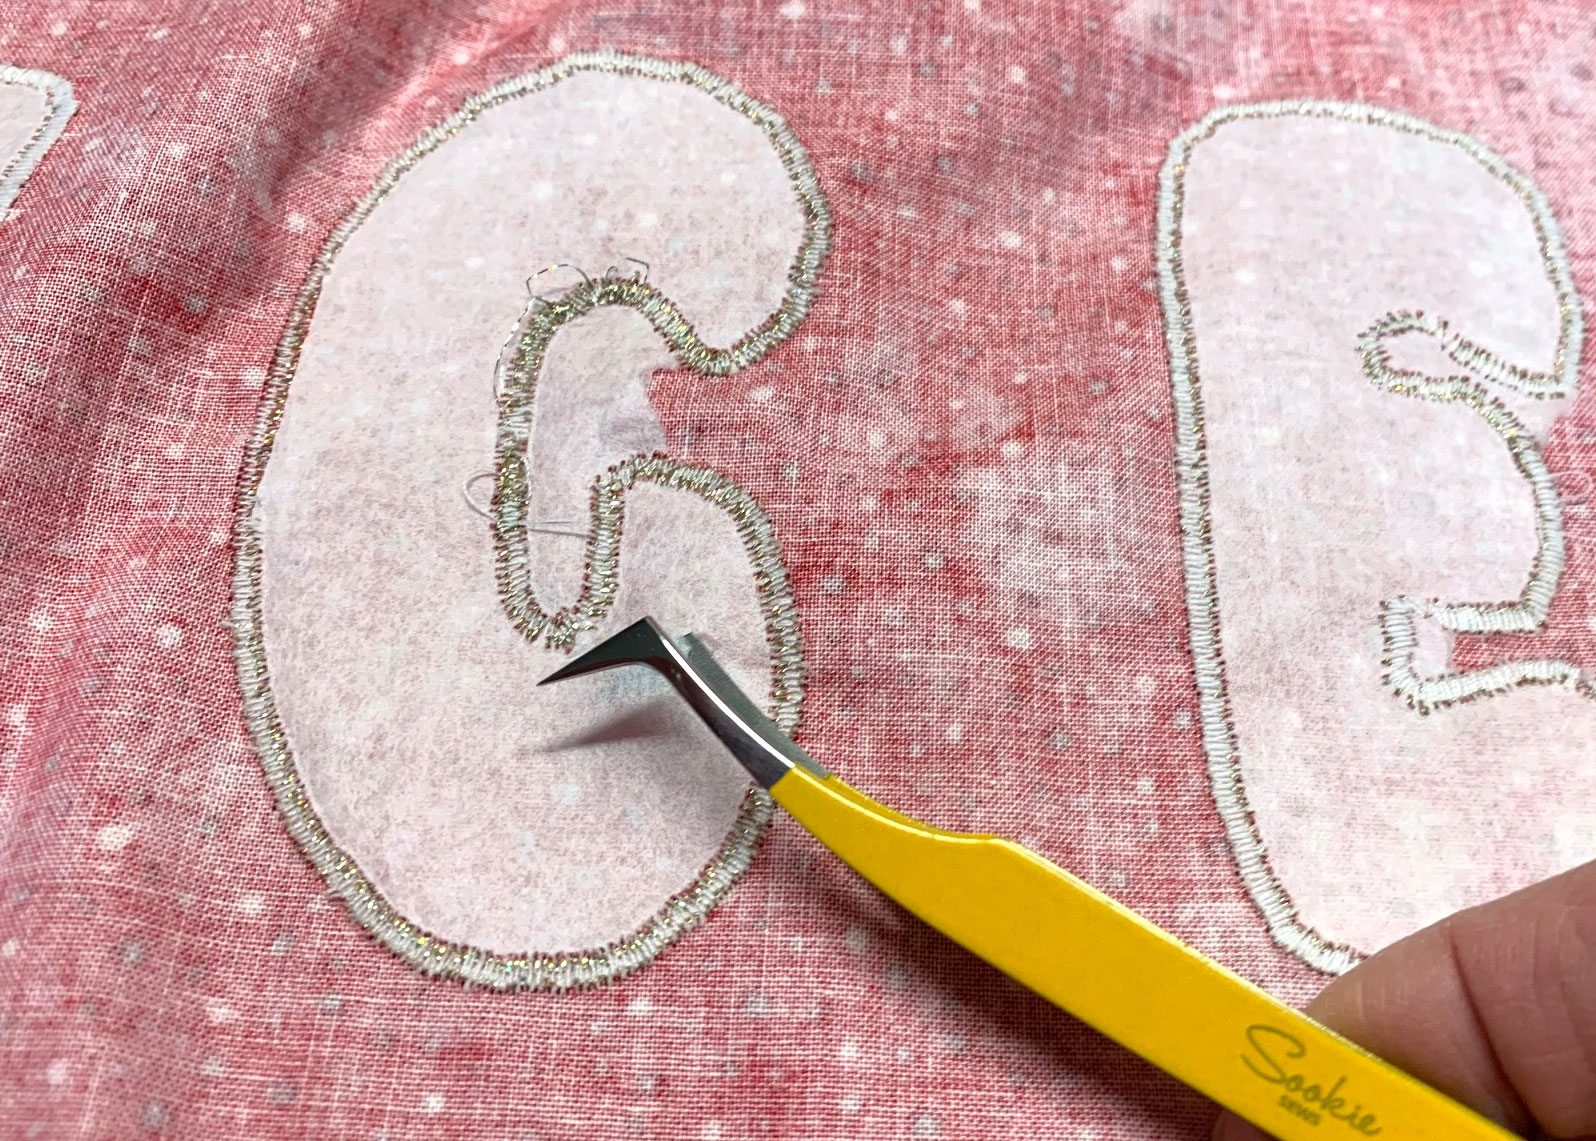
Remove the stabilizer from the back. I found it helpful to use these angled precision tweezers to help remove the interior parts by gently pushing through the paper backing. The Sookie Sews tweezers were provided by Brewer.
 Add Piping to the Pillow Wrap
On a flat work surface, place one pillow wrap right side up. Clip (or pin) piping along the upper and lower long ends of the pillow wrap, matching raw edges.
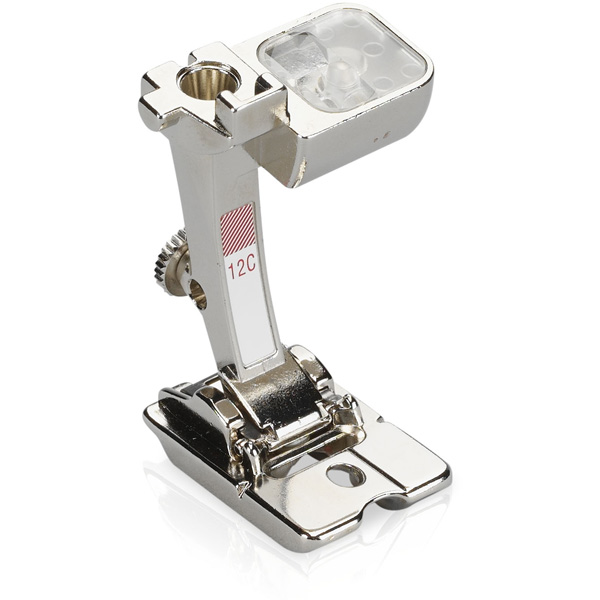
Using a long basting stitch, sew the piping in place. A zipper foot can be used, but I like to use my BERNINA Bulky Overlock Foot 12C . I can easily baste the piping in place as the cord sits neatly in the tunnel on the sole of the foot.

By moving the needle position, the stitches are close to the cord.
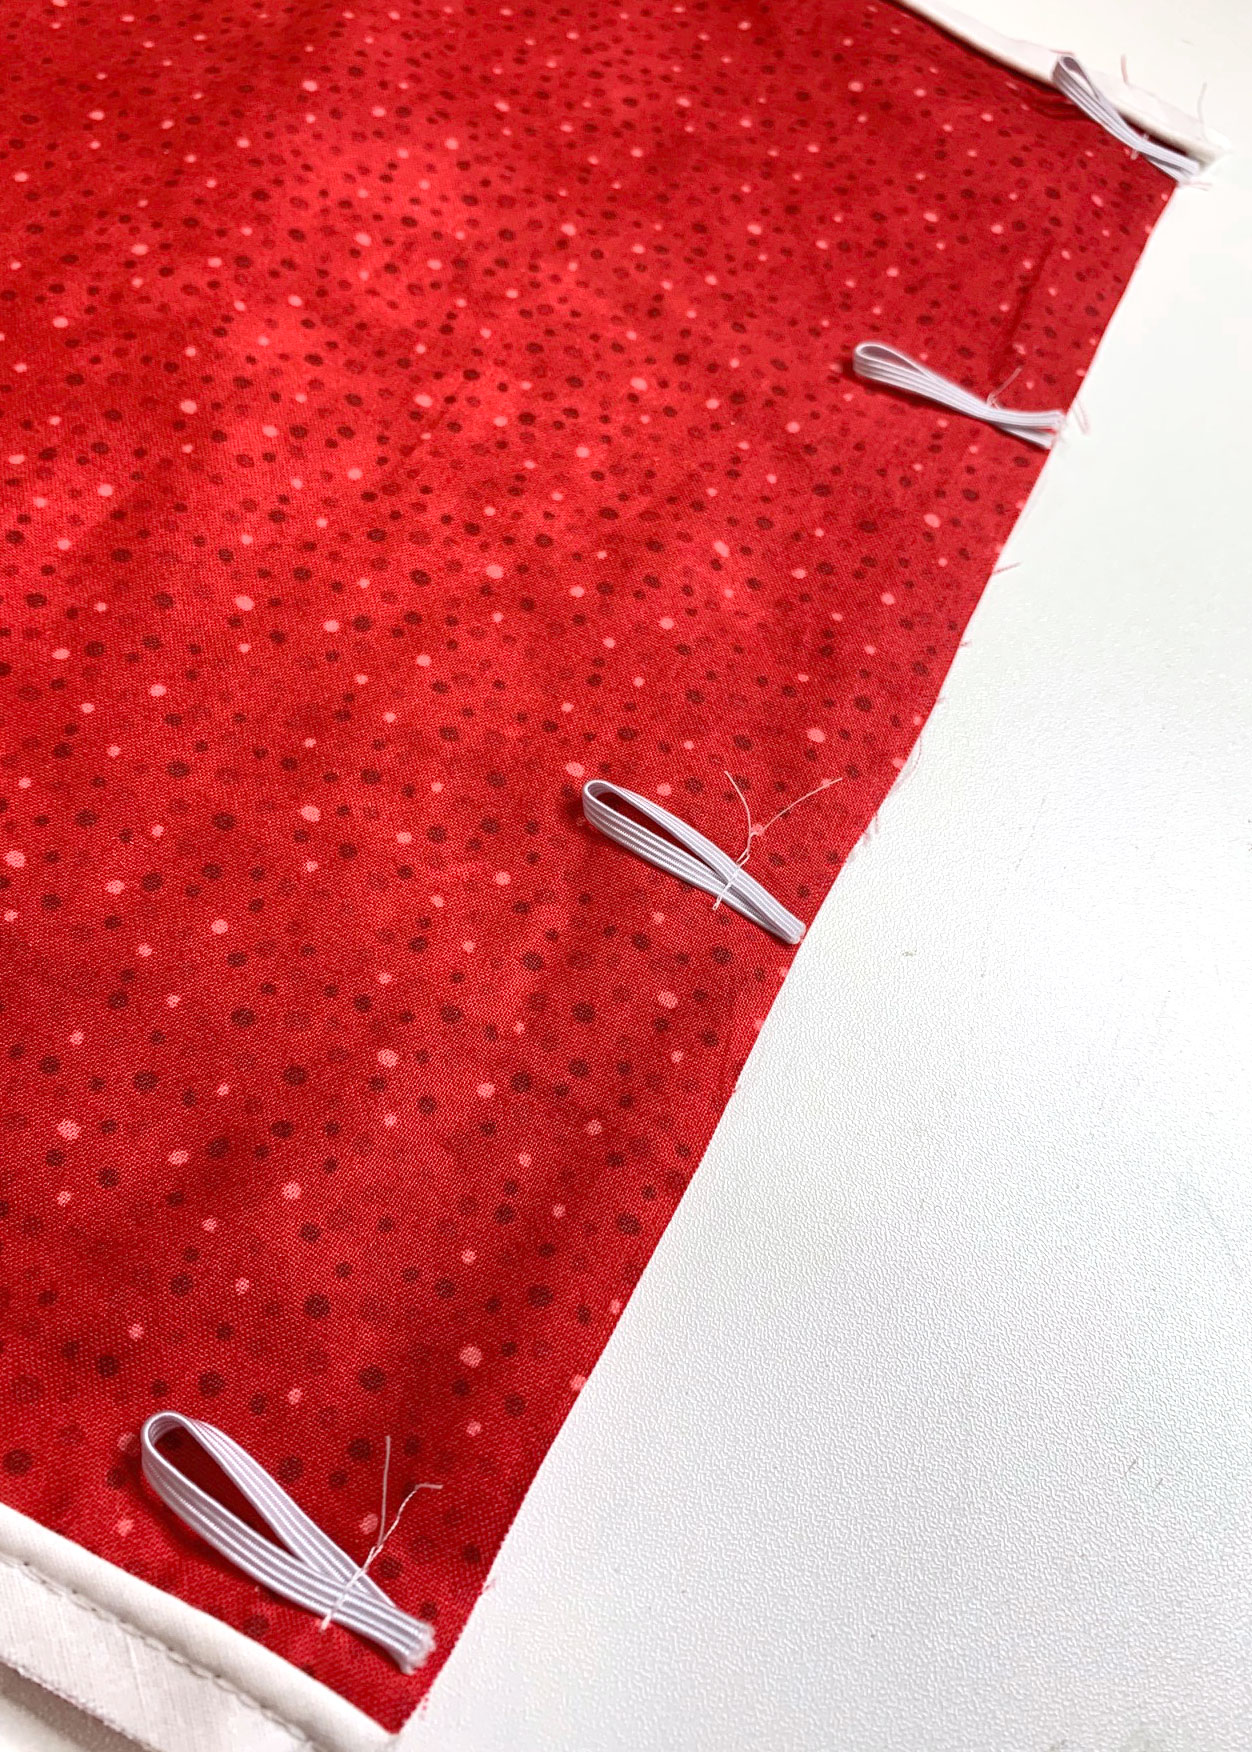
 Add Elastic Closures to the Pillow Wrap
Cut 1/8″ elastic into four pieces that measure 3″ each. Fold the elastic in half creating a small loop and pin to one short edge of the pillow wrap as shown. Evenly space the four elastic loops starting and ending just past the piping trim. Stitch in place.
Tip: You can use a colored hair elastic band in place of the white elastic.
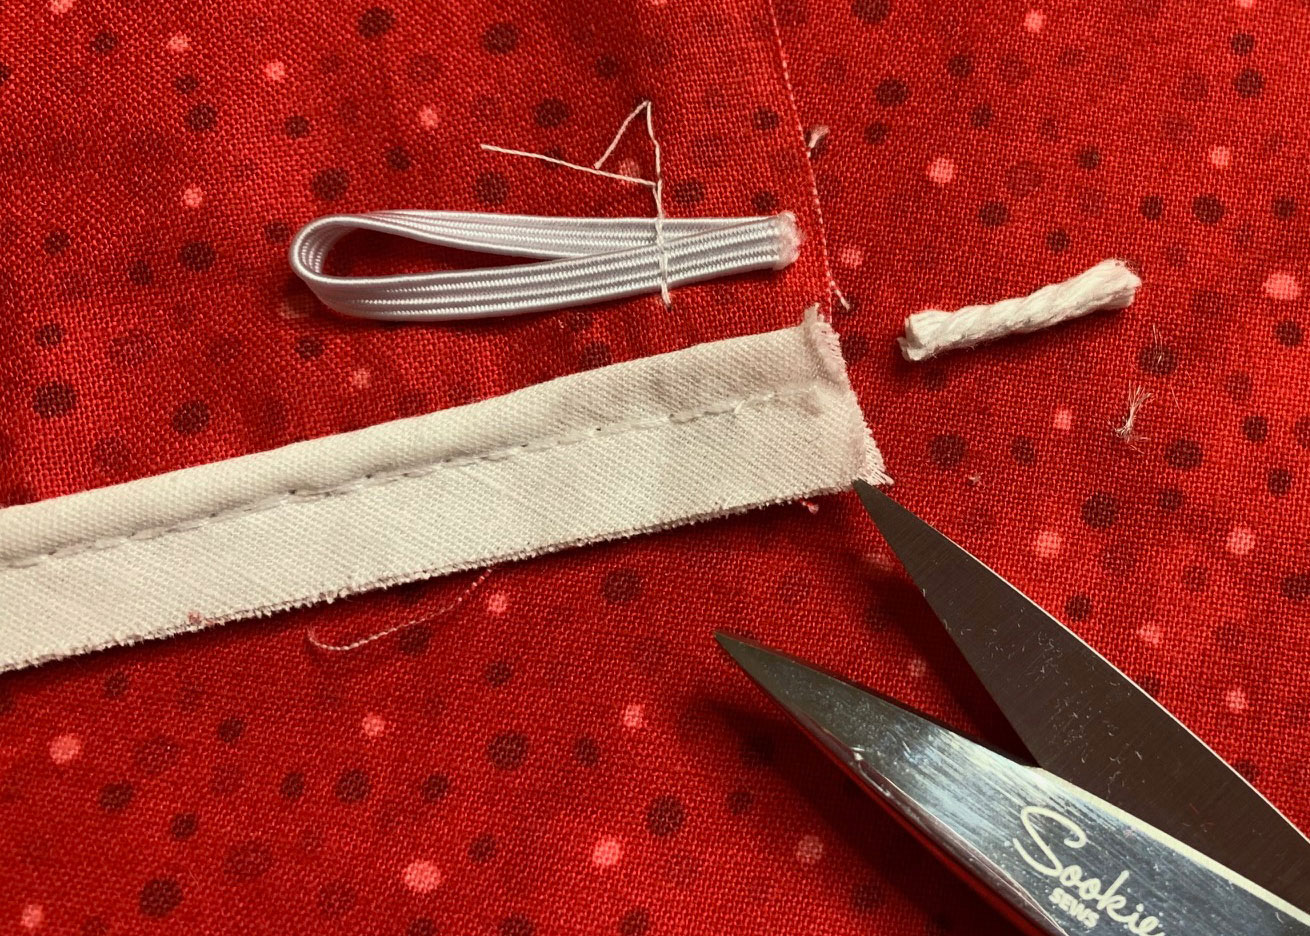
Carefully pull about an inch of the piping inner cord out and trim to reduce bulk in the seam.
Place the pillow wraps right sides together matching raw edges and pin in place. Stitch along all four edges, leaving a 6″ opening along the short edge without the elastic loops. Turn right side out and press lightly. Hand stitch the opening closed.
Stitch buttons to the short end of the pillow wrap, aligning with the elastic loops. A button will be stitched in the same location on each side allowing the pillow wrap to be reversible.

Wrap the finished pillow wrap around a 20″ pillow and secure in place by looping the elastic over the buttons.

The final step is to decide which side to display!


What you might also like


2 comments on “Sew a Naughty or Nice Reversible Christmas Pillow Wrap”
-
-
My 3 favorite feet are the 26, 72s and 97D.
Leave a Reply
You must be logged in to post a comment.

My top 3 presser feet are: 97D, 1D and 40