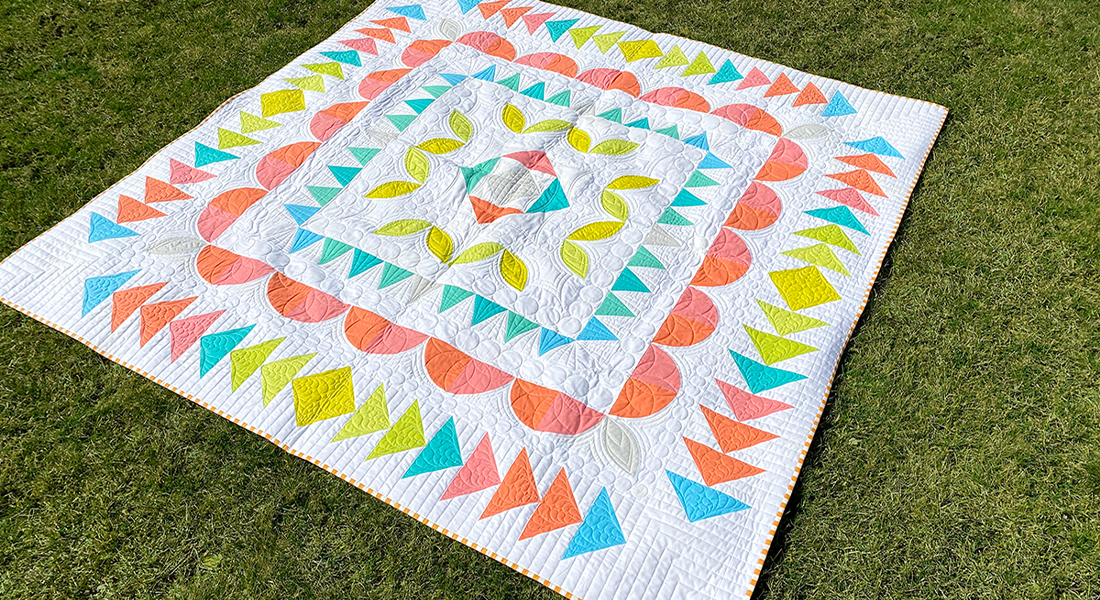
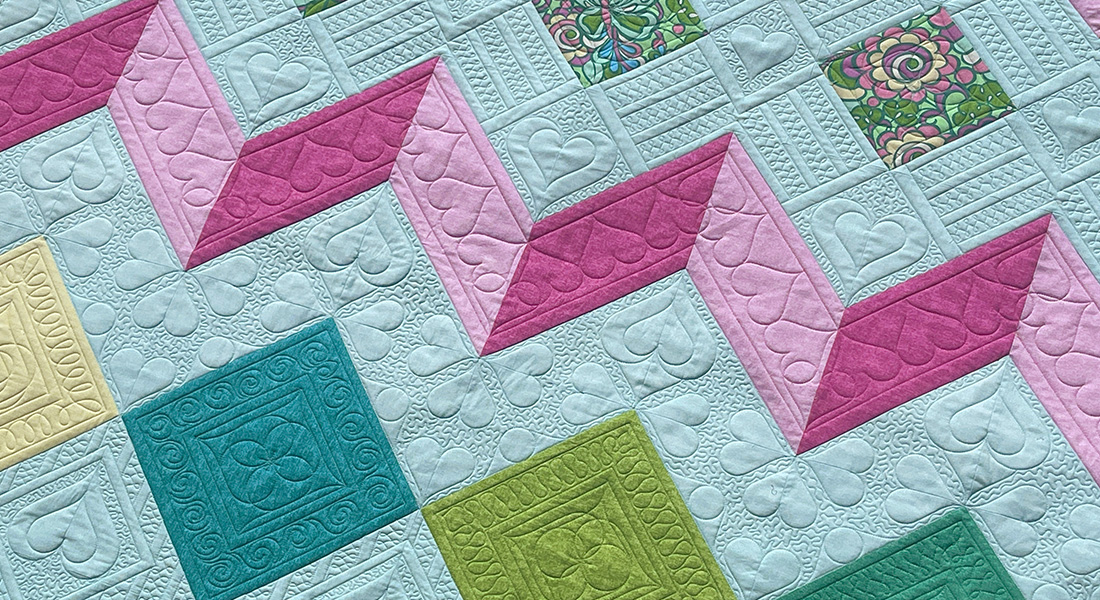
Passiflora Quilt Along, Part 6: Round Four
Welcome back to the Passiflora Quilt Along! If you’re just joining in, you’ll want to visit the previous posts in this series to catch up:
- Month 1 – Introduction + Fabric
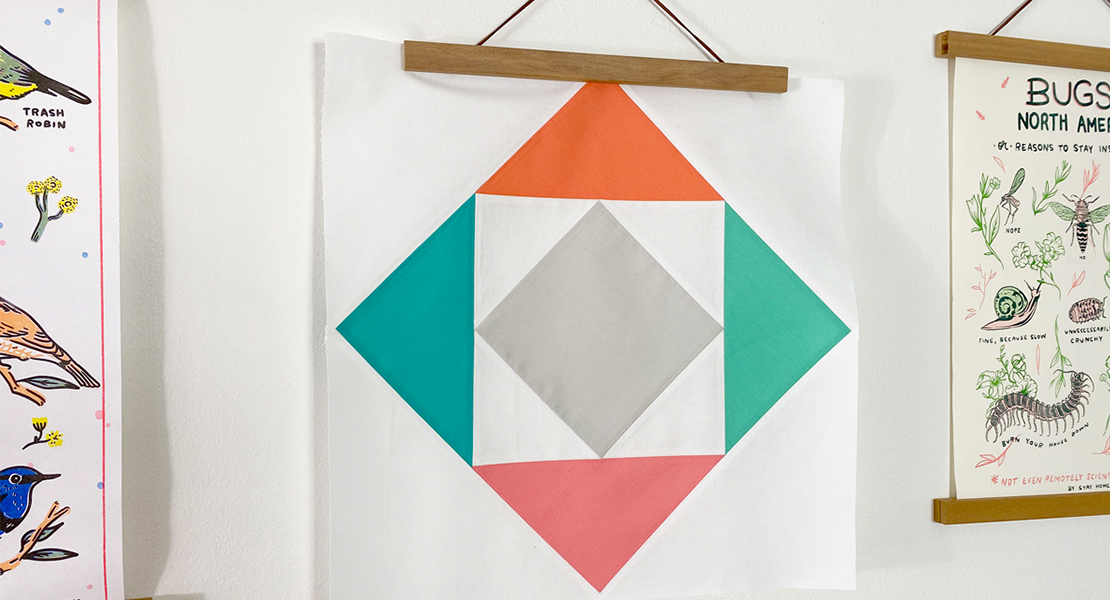
- Month 2 – The Center Block
- Month 3 – The First Round
- Month 4 – The Second Round
- Month 5 – The Third Round

-
Cut All Fabrics
Eight fabrics/colors are used to construct this row. Cut your fabrics to the following:
- Color #1 (Persimmon)
- Four 9 3/4” squares
- Color #2 (Taffy)
- Two 9 3/4” squares
- Color #3 (Pear)
- Two 9 3/4” squares
- Color #4 (Mojito)
- Two 9 3/4” squares
- Color #5 (Limeade)
- Two 9 3/4” squares
- Color #7 (Aegean)
- Two 9 3/4” squares
- Color #8 (Cerulean)
- Two 9 3/4” squares
- Background (white)
- Seventy-two 5 1/4″ squares
- Four 8 1/2” squares
- Twelve strips 2 1/2″ x WOF
-
Create Flying Geese
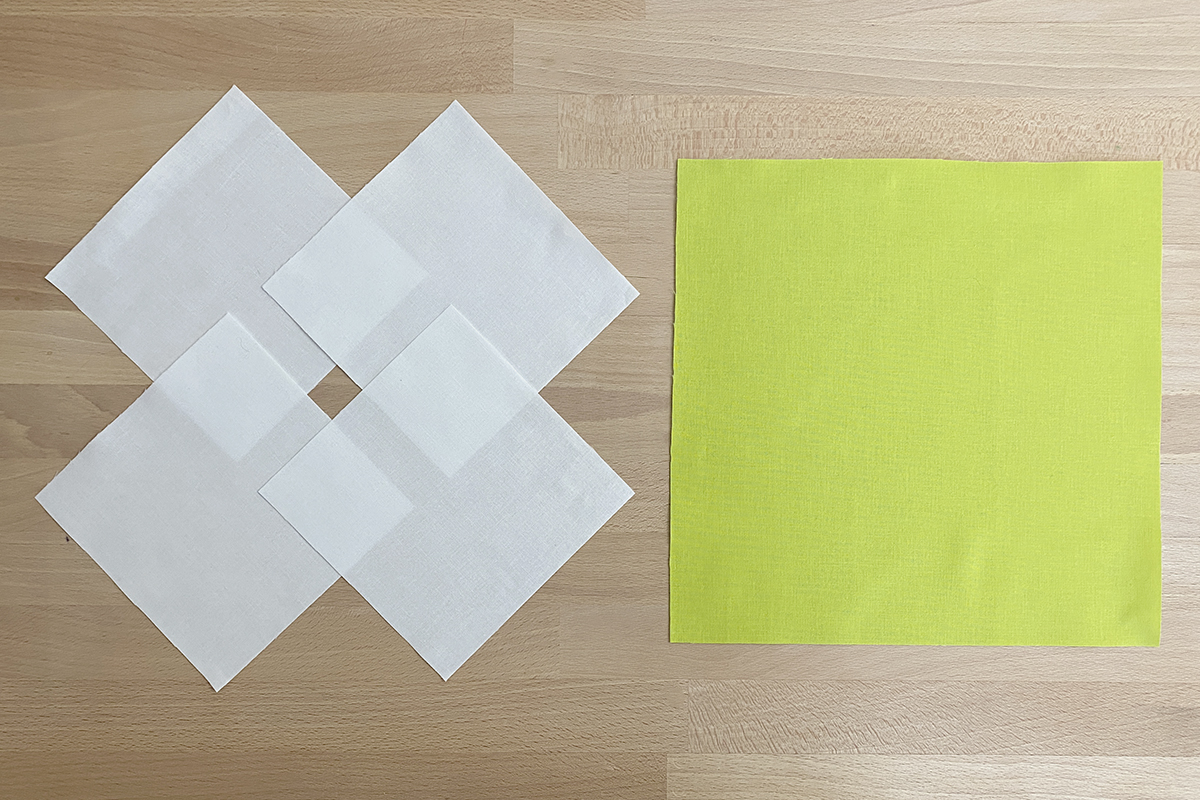
As I mentioned, we will construct the flying geese using the no-waste method. You will need four small background fabric squares for every large square (our colors).
Begin by marking diagonal lines on the wrong side of the background fabric squares using a fabric marker.
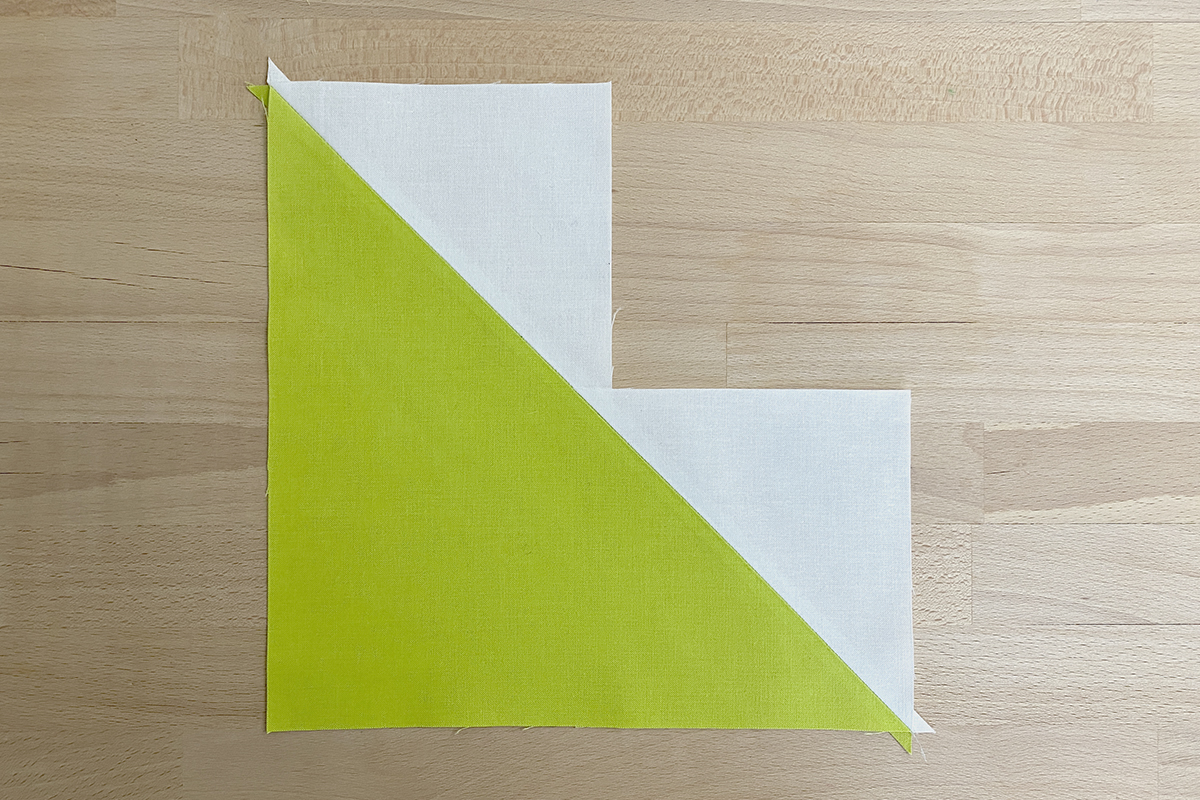
Place one of the background squares right sides together with the large square, aligning to one of the corners.
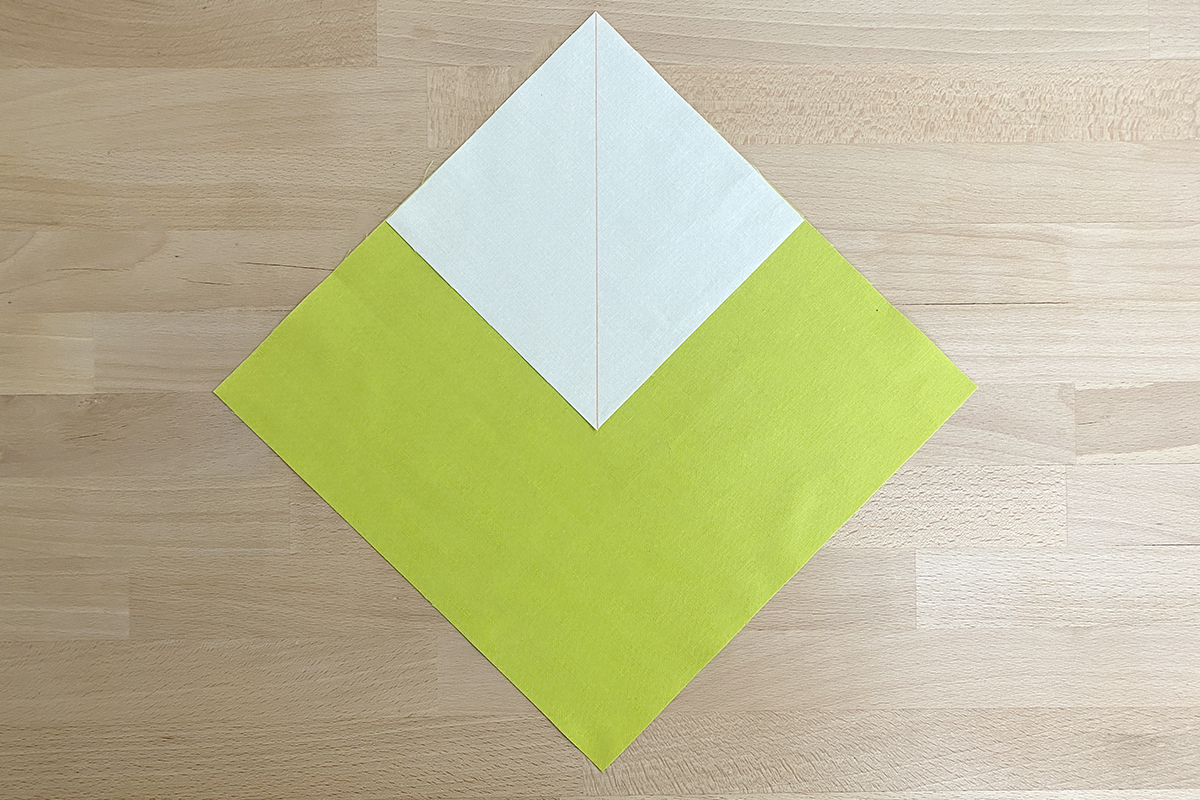
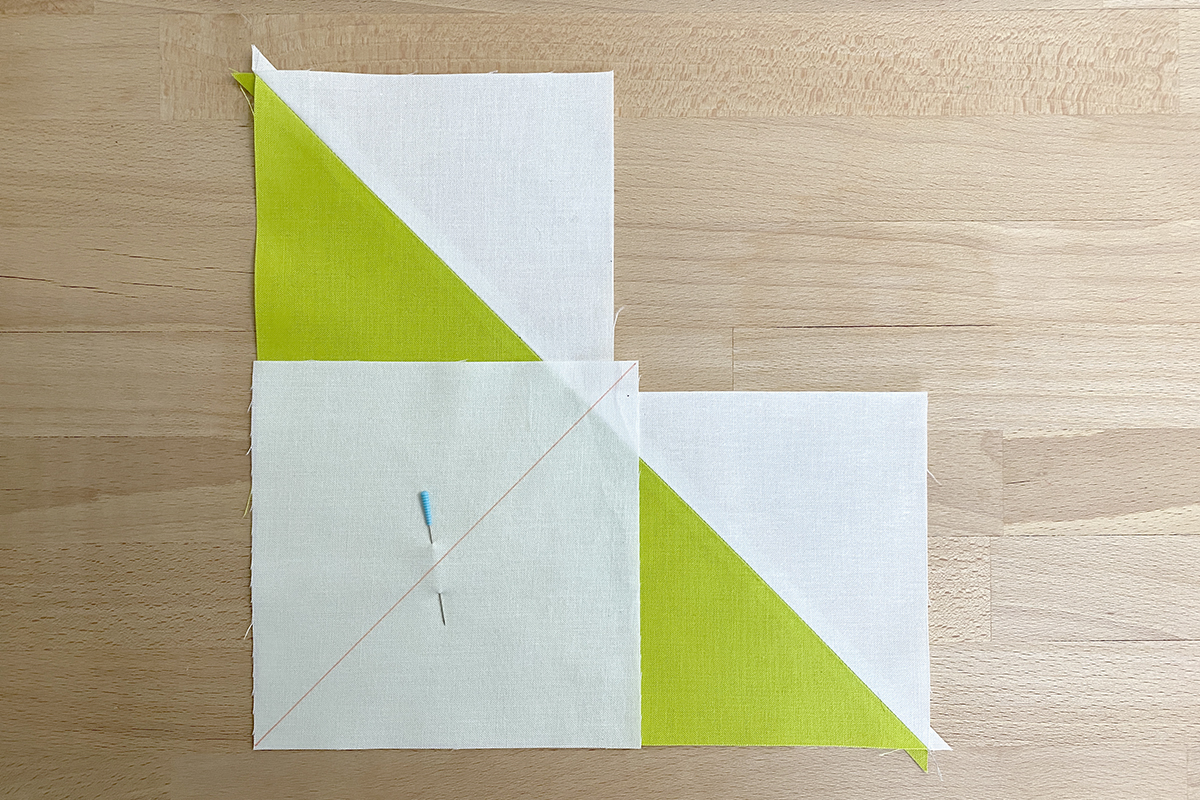
Place a second background square right side down, aligning with the opposite corner. Pin in place.
The marked lines on the wrong sides of the background squares should line up to create one long line between the two corners. The squares will overlap at the center.
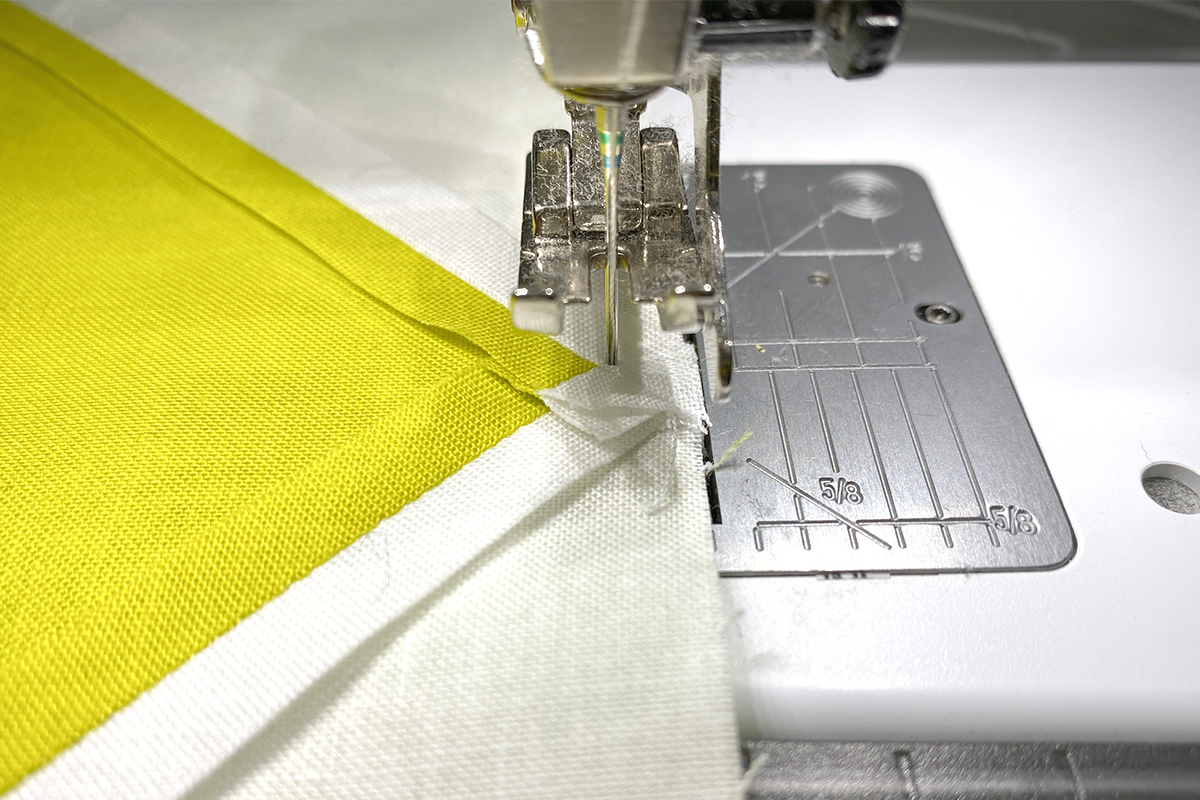
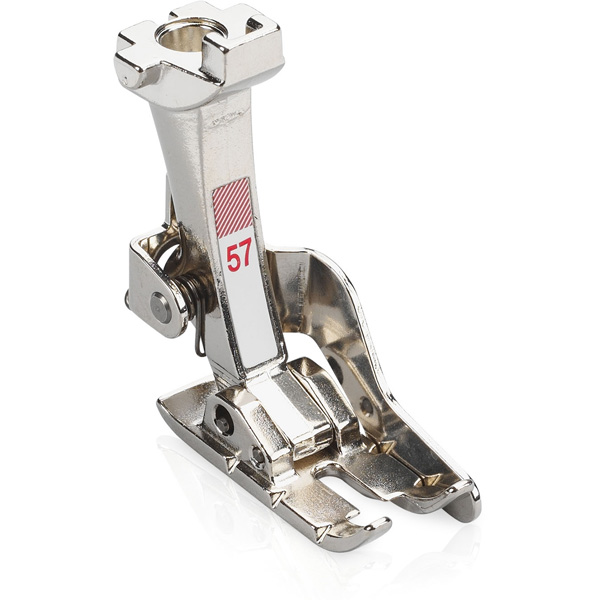
Using your favorite 1/4″ patchwork foot, sew across the squares with a seam 1/4″ on either side of the marked line. I prefer the Patchwork Foot #57 with Guide for this, as I can line up the guide attached to the foot with the marked line.

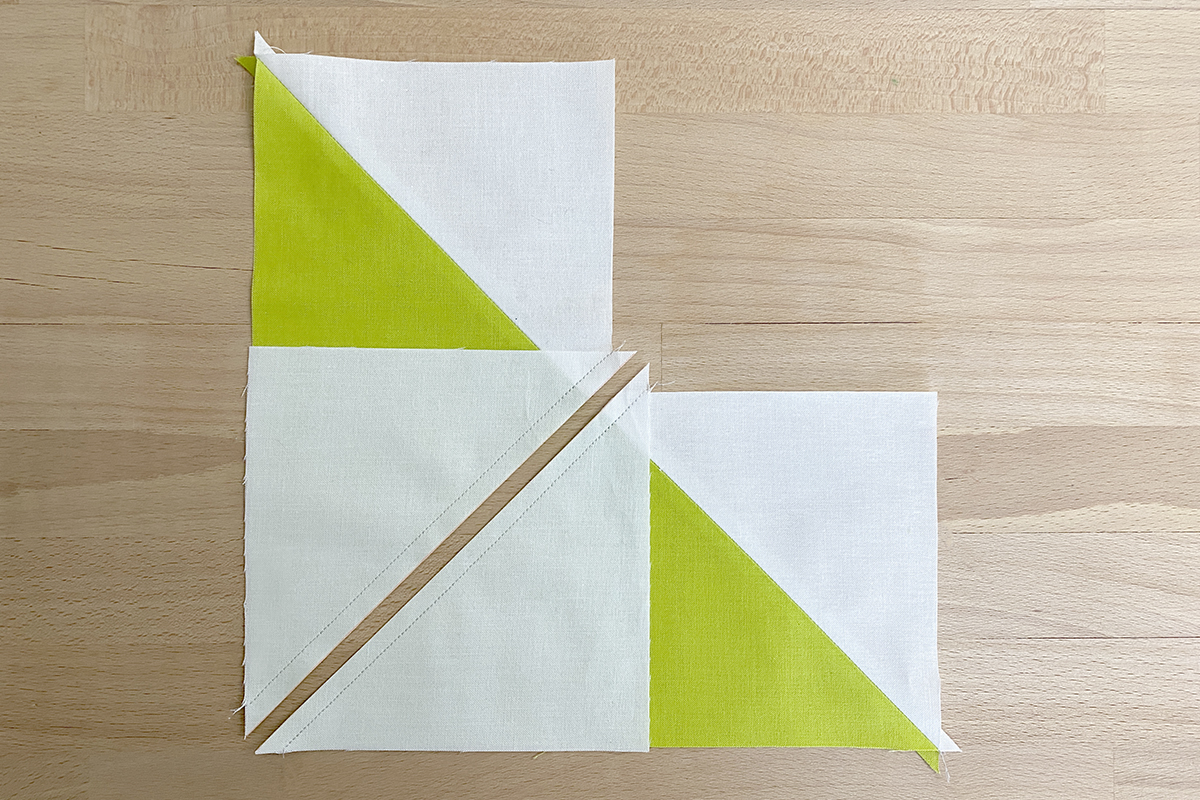
Once the two seams are sewn, cut the block in half, cutting directly on and through the marked line.

Press these two seams open.
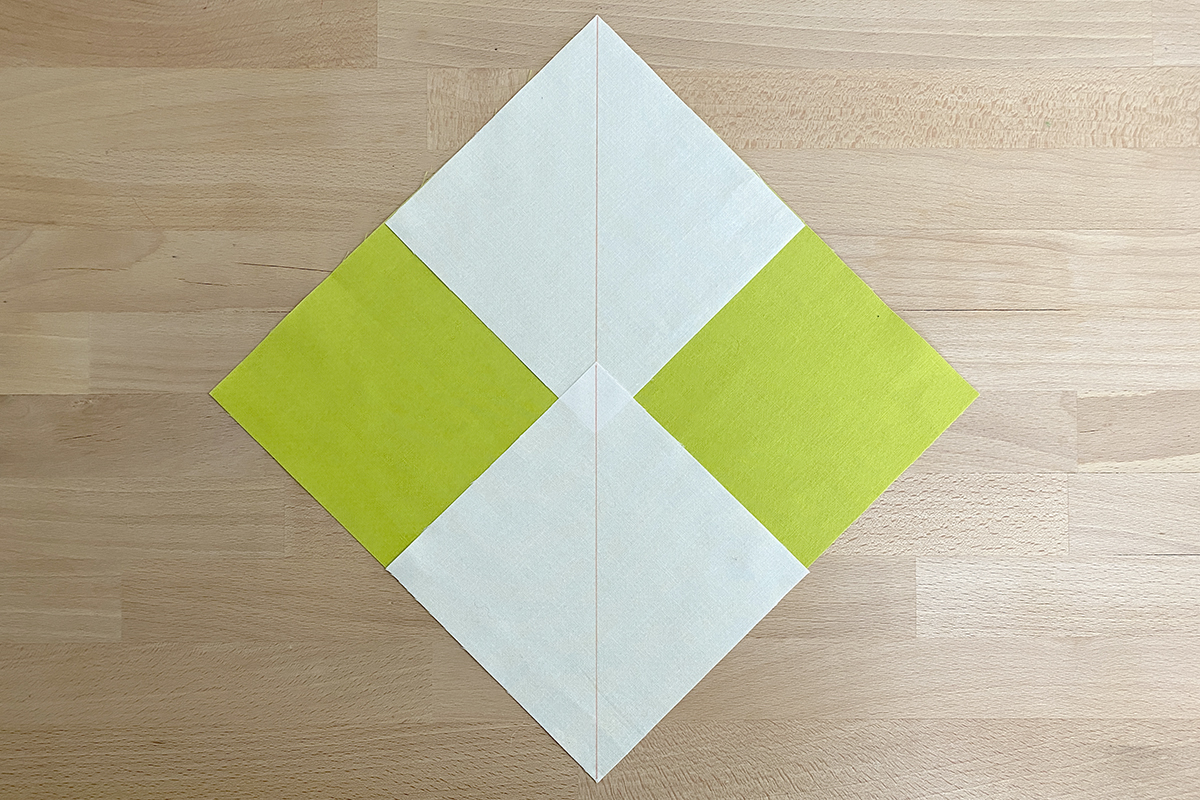
With each half of our original block, place another background square right side down on the block, aligning to the unstitched corner of the color fabric. The marked line should run from the corner through the two background pieces we just pressed open and be perpendicular to the first seam.
Again, sew a seam 1/4″ on either side of the marked line. Repeat for the other half of the block then cut directly on and through the line.
Press seams open. The result will be four flying geese blocks. Untrimmed, these should measure about 9” x 4 7/8”.
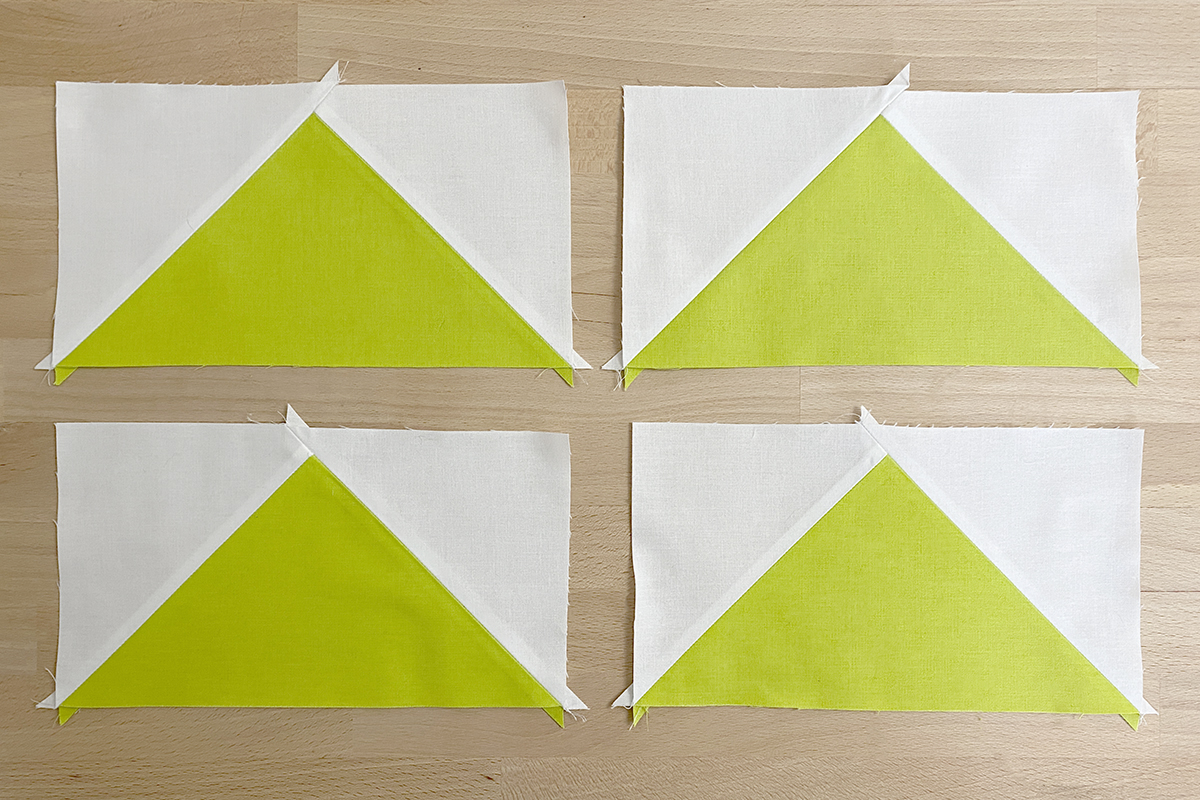
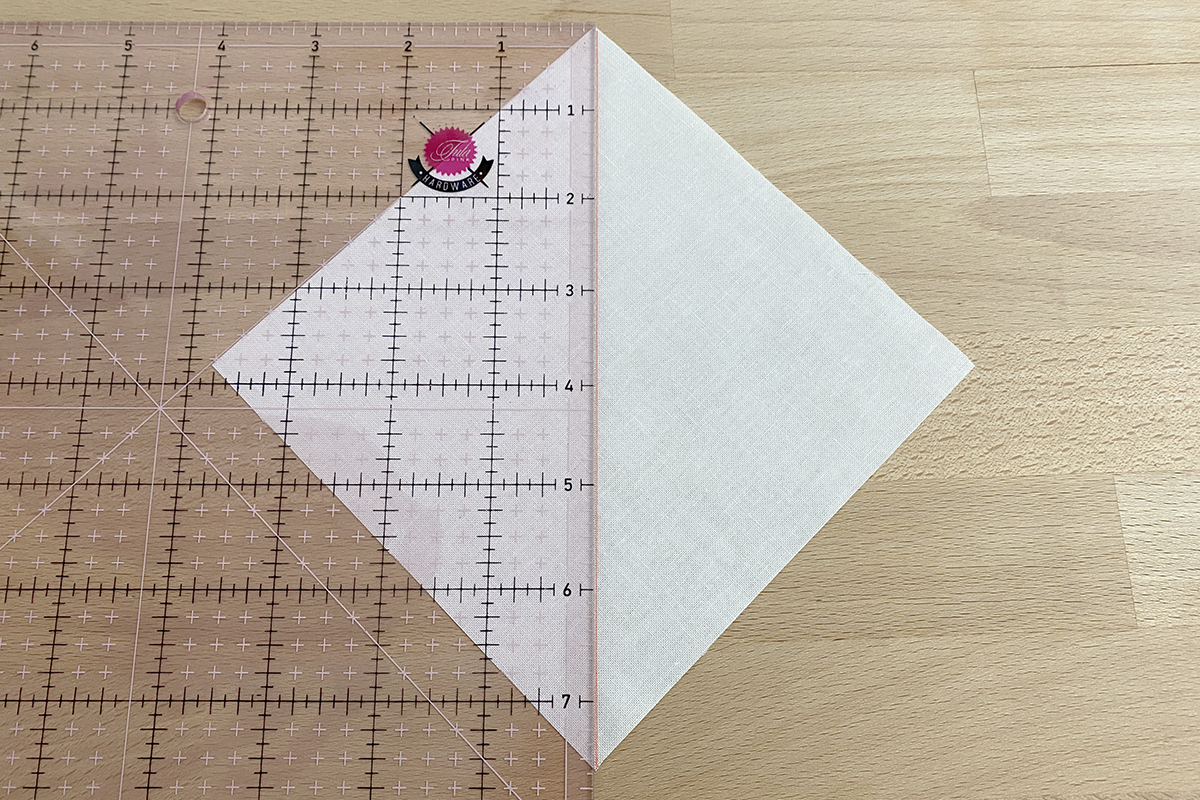
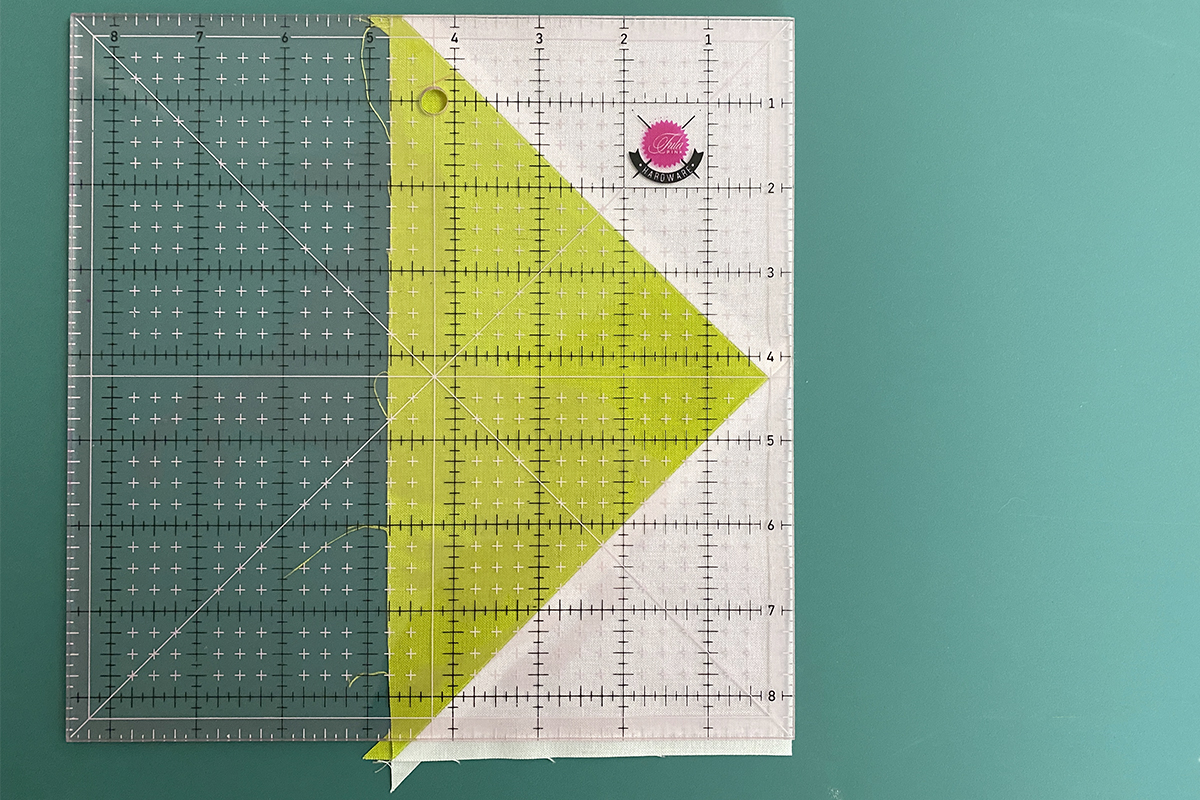
Trim each block to 8 1/2″ x 4 1/2″. To do this, place the block underneath an acrylic quilting ruler. My 8 1/2″ square ruler is perfect for this. Align the point of the triangle 1/4″ in from the right edge of the ruler and 4 1/4″ down from the top. Trim the right and top edges.
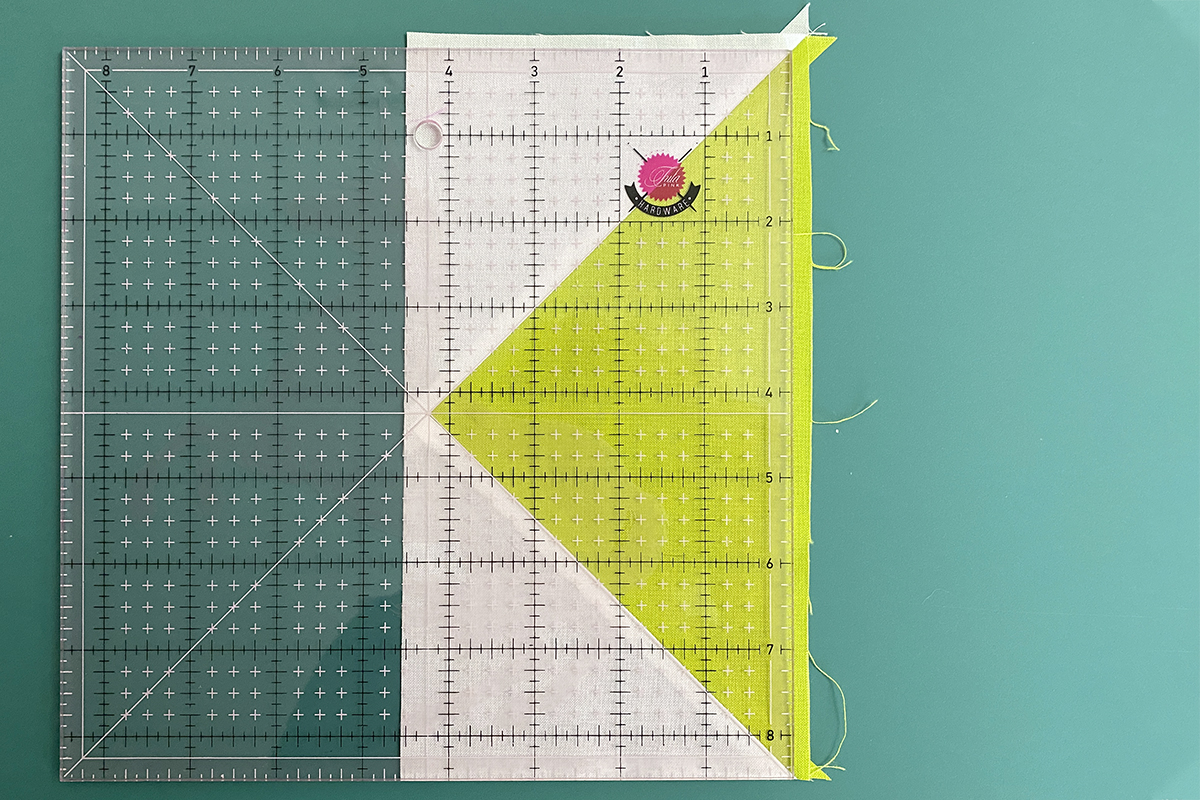
Rotate the block 180 degrees. Align the freshly-trimmed edge 4 1/2″ in from the right edge of the ruler and 8 1/2″ from the top (or in my case, with the bottom edge of the ruler.) Trim the right and top edges.
Repeat this process with all of the large color squares and small background squares. The result will be eight flying geese of every color except for Color #1 (Persimmon), of which there will be 16.
-
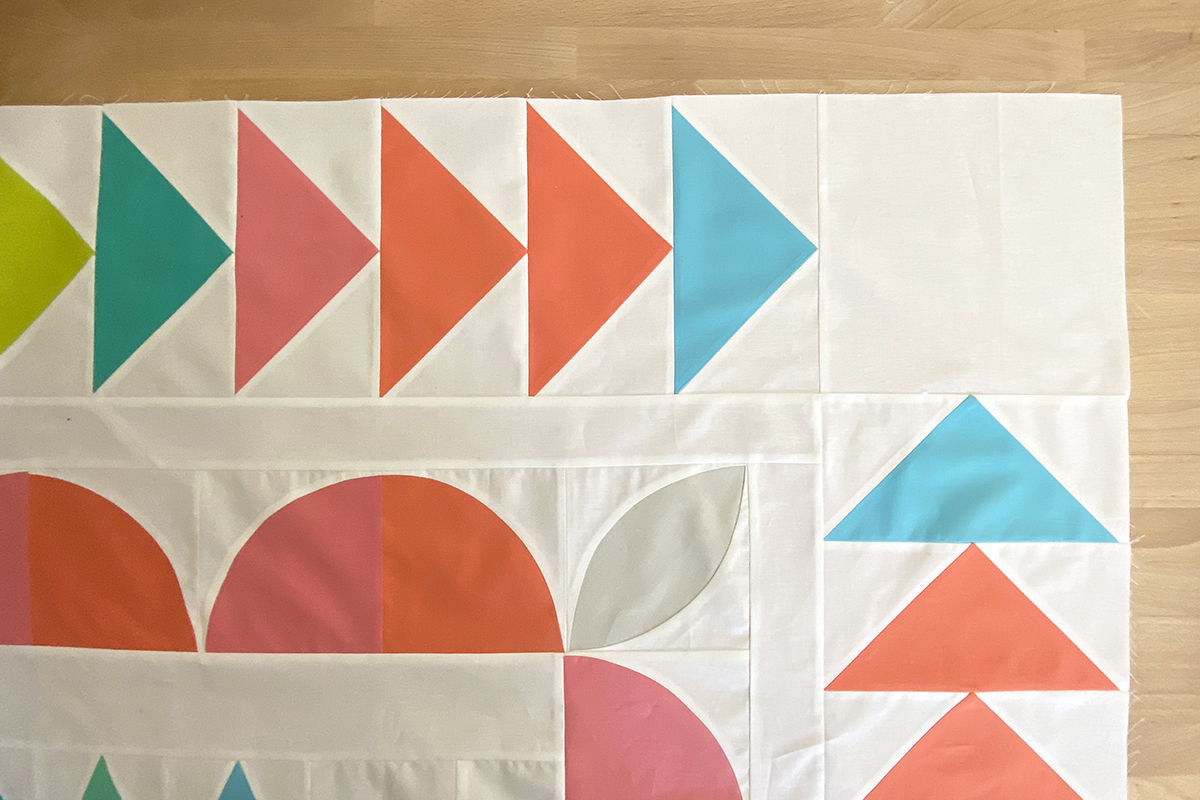
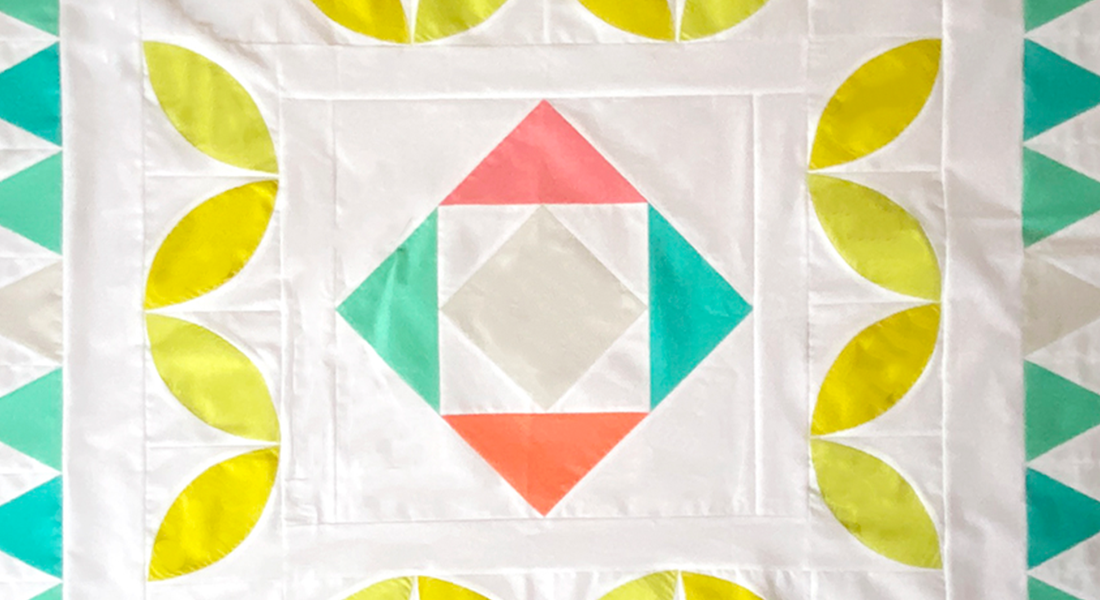
Piece Together Rows
Now we will bring our flying geese together into rows. Each side of this round is symmetrical which makes construction very easy to chain piece! We will construct eight identical segments of eight flying geese. Then, each side of the round will use two of those segments.
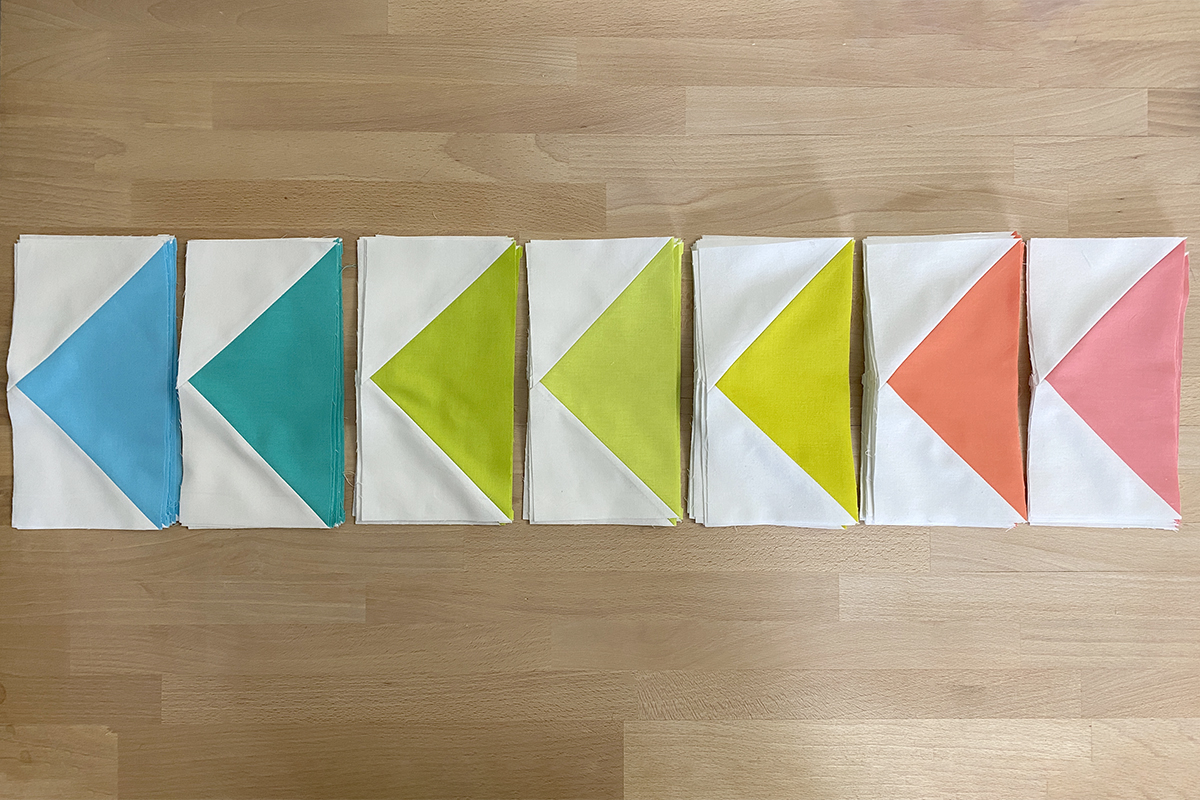
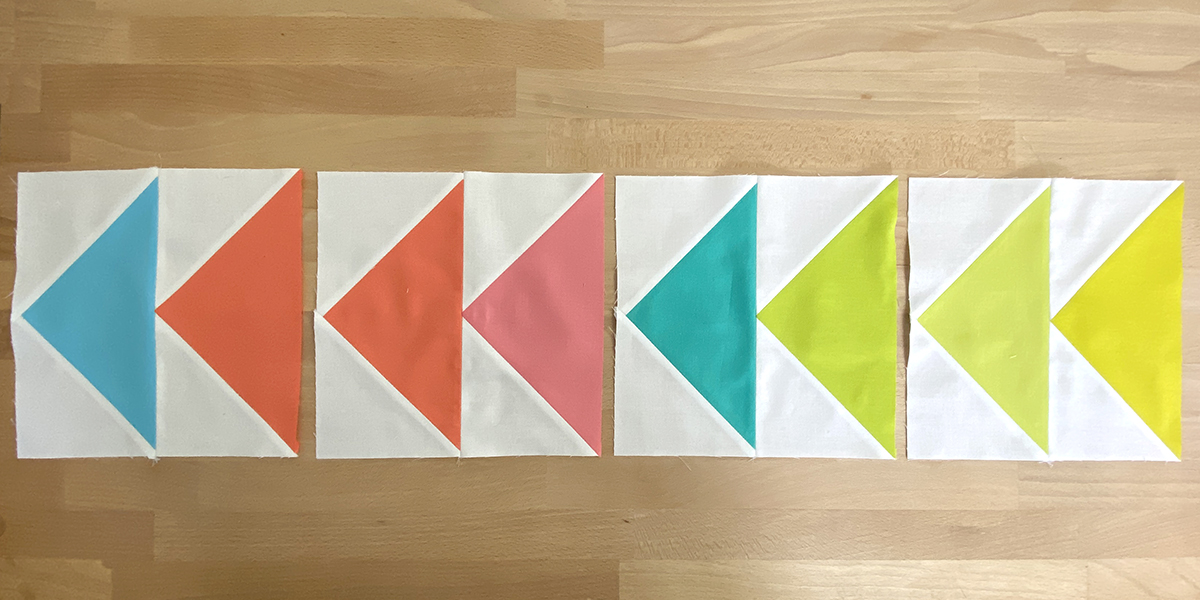
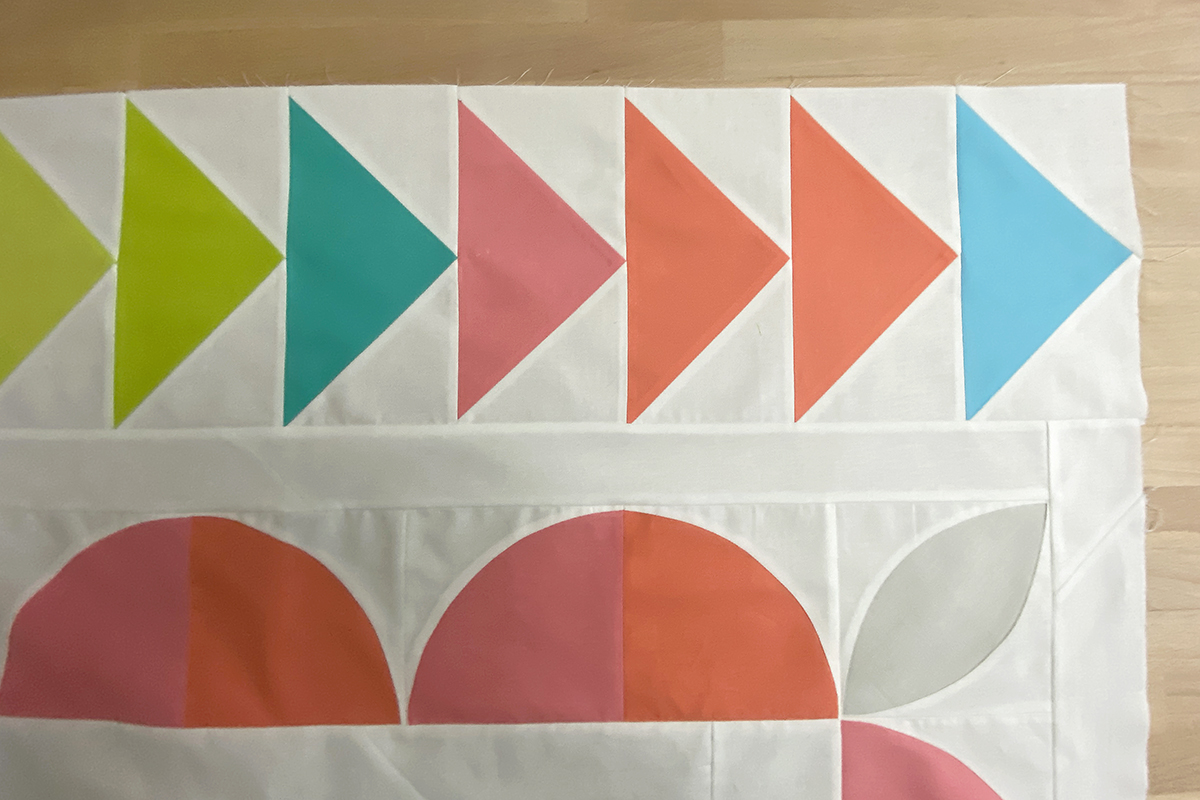
Let’s focus in on our color pattern:
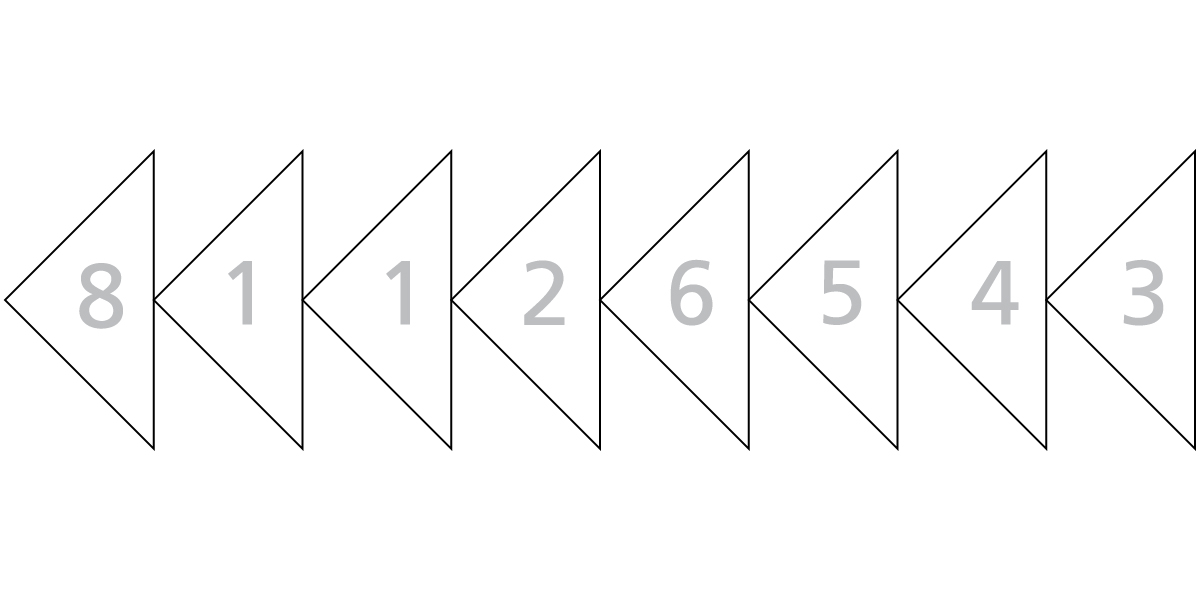
Lay your flying geese in stacks following the color pattern. Note that your Color #1 geese will be divided into two stacks of eight.
Then you can pair up your colors for chain piecing. For example, Color #8 + Color #1, Color #1 + Color #2, Color #7 + Color #5, Color #4 + Color #3.
Sew flying geese together in pairs according to the color pattern, using a 1/4″ seam allowance. Be mindful of the direction the geese are pointing as you piece. You will also want to be careful not to catch the point of your flying geese in your seam allowance. With a 1/4″ seam allowance, your needle should land right at the point on the triangle.
Press seams open.
Next, sew pairs of flying geese together according to the color pattern. Again, use a 1/4″ seam allowance and press seams open.

Repeat again for a total of eight flying geese stitched together in the color pattern.

You should now have eight identical strips, each made up of eight flying geese.
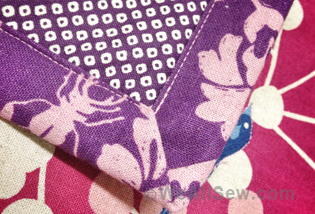
For each side of the round, grab two strips. Rotate one of them 180 degrees so that the flying geese in the two strips are pointing in opposite directions and the Color #3 geese come together in the center. Place these strips right sides together and sew together at the center using a 1/4″ seam allowance.
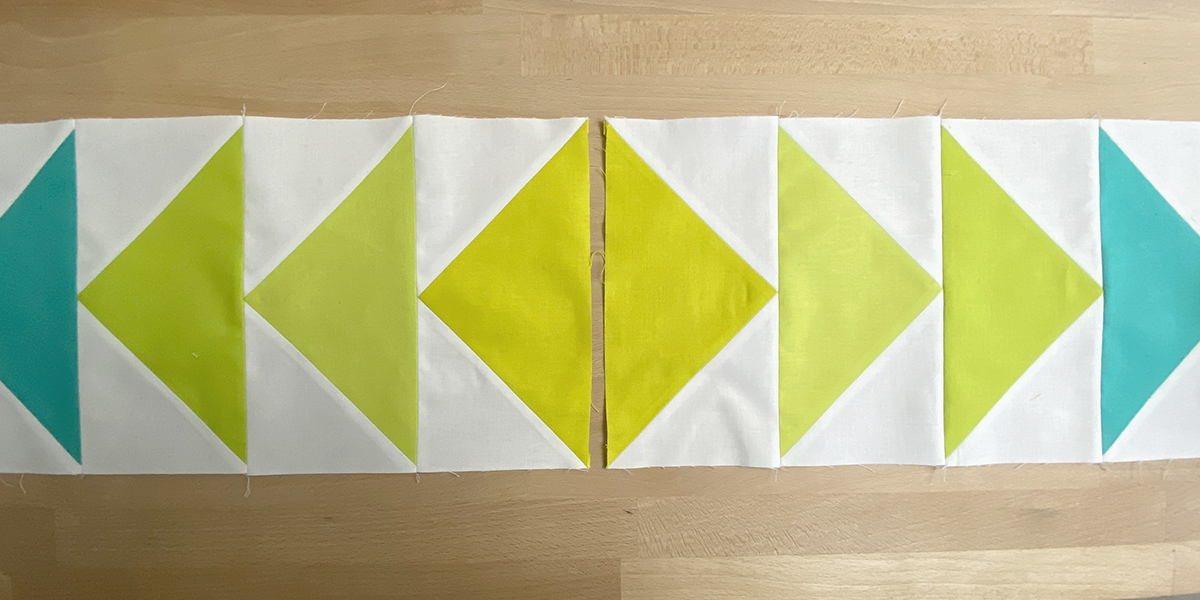
Press the seam open. Repeat to complete the remaining three sides of the round.
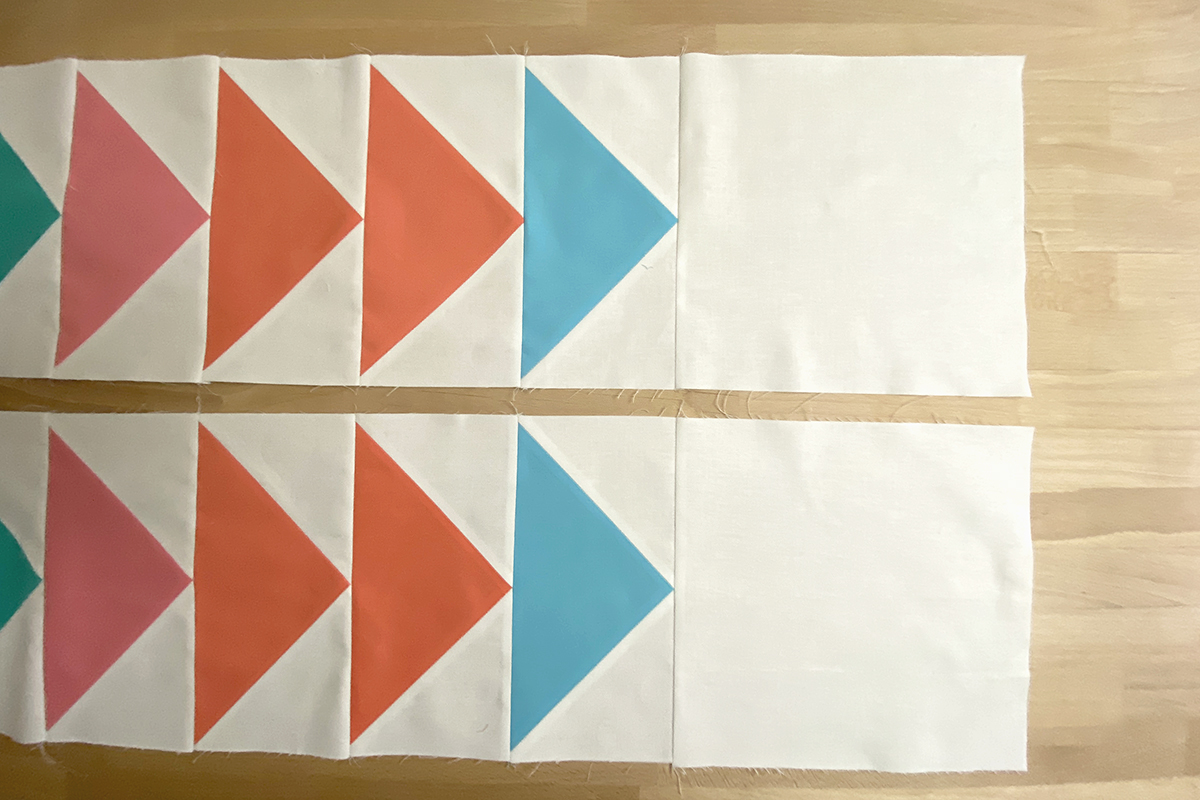
Attach 8 1/2″ squares of background fabric to both ends of two of the flying geese rows to serve as cornerstones. Press seam allowances toward the cornerstones.
-
Sashing
At this point, we have two rounds of sashing remaining—one between our Drunkard’s path curves and our flying geese, and one as the final round outside the flying geese. Both of these rounds of sashing require the same width of strips so we will prepare all of it at the same time.
Cut 14 strips of background fabric measuring 2 1/2″ x width of fabric. Seam these strips together end to end with a mitered seam to create one very long 2 1/2″ wide strip.
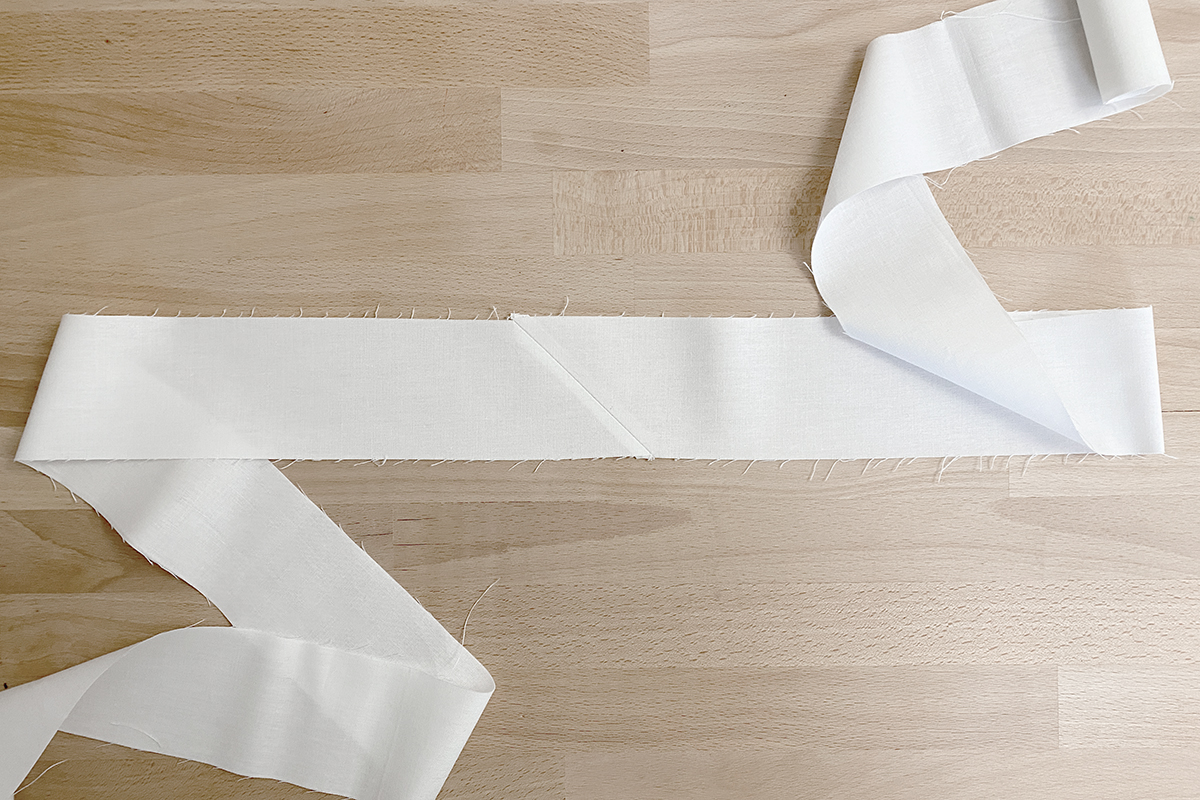
All of your sashing for the remainder of the quilt will be cut from this continuous piece of sashing.
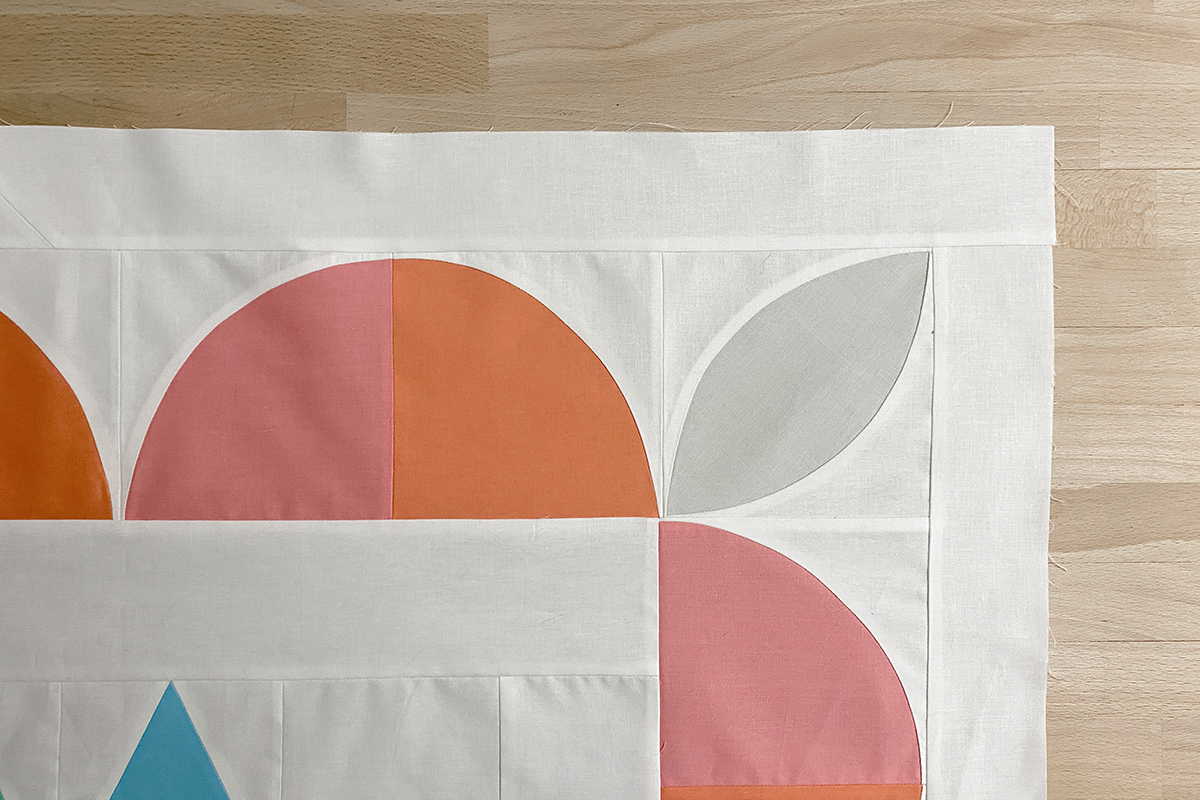
We’ll now add sashing on to the quilt top outside the Drunkard’s Path blocks. Your quilt top should currently measure 60 1/2″ square.
As always, starting with the left and right sides of the quilt top, pin sashing to the quilt top with right sides together. Working with this long, continuous strip, I like to just work using the long piece, pin along the edge, and trim the sashing with scissors when I reach the end.
Sew the sashing to the left and right sides of the quilt with a 1/4″ seam allowance. Press the seam allowance toward the sashing.
Repeat the process for the top and bottom of the quilt top. After adding this sashing, your quilt top should measure 64 1/2″ square.
-
Adding the Flying Geese Row
Pin the flying geese rows without cornerstones to the left and right edges of the quilt, with right sides together. Like with previous rows, I like to begin pinning at the middle of the row, making sure it is centered with previous rows, and then work my way out to each side.
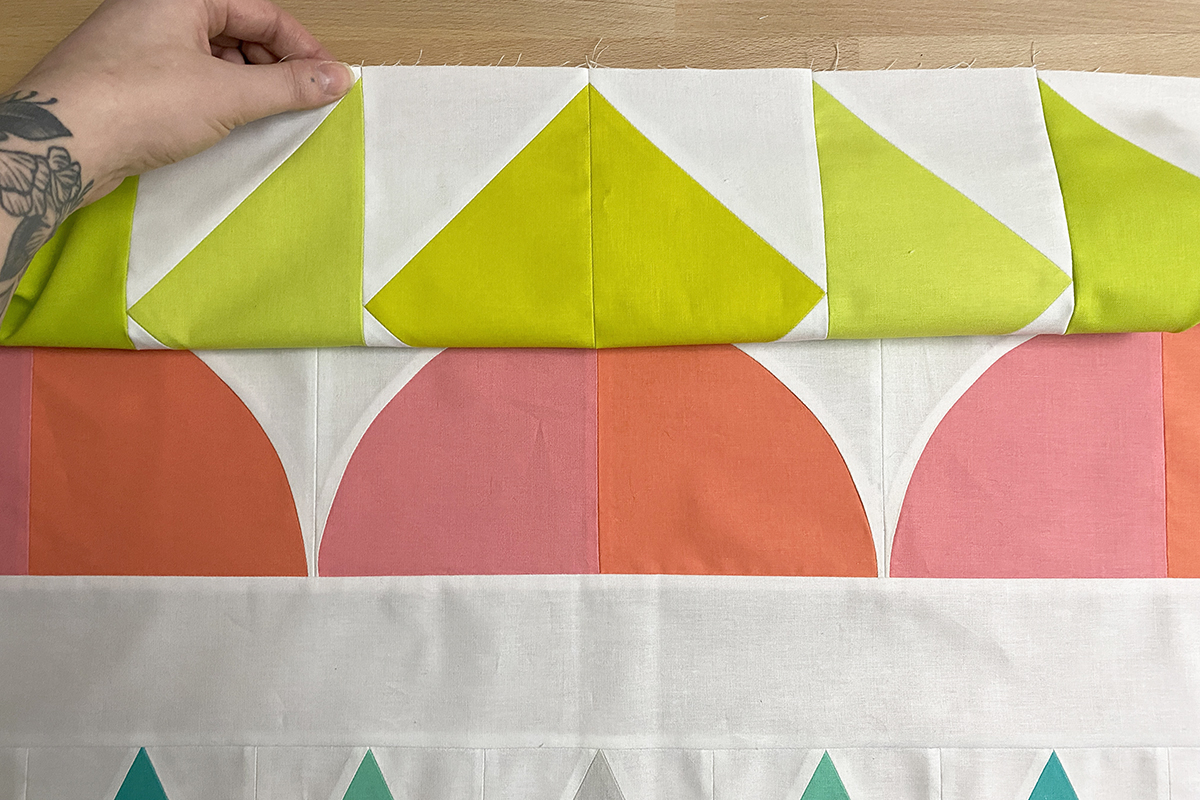
Sew together with a 1/4″ seam allowance. Press the seam allowance toward the sashing.
Repeat for the remaining two rows of flying geese, adding those to the top and bottom edges of the quilt. The seams between the outermost flying geese (Color #8) and the cornerstones should nest with the seams between the flying geese and sashing on the assembled quilt top.
Again, sew together with a 1/4″ seam allowance and press seam allowances toward sashing. Your quilt top should measure 80 1/2″ square with this row attached.
-
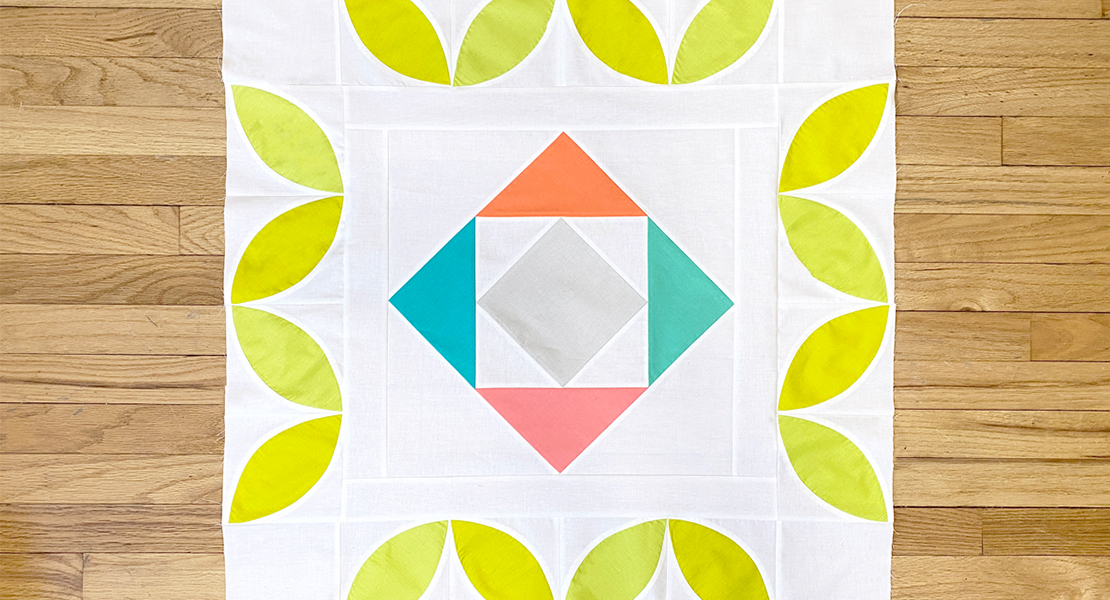
Final Row of Sashing
Our very last step is to complete one final round of sashing! Repeat the process used above to add sashing first to the left and right sides of the quilt top and then to the top and bottom. Press seam allowances toward the sashing.

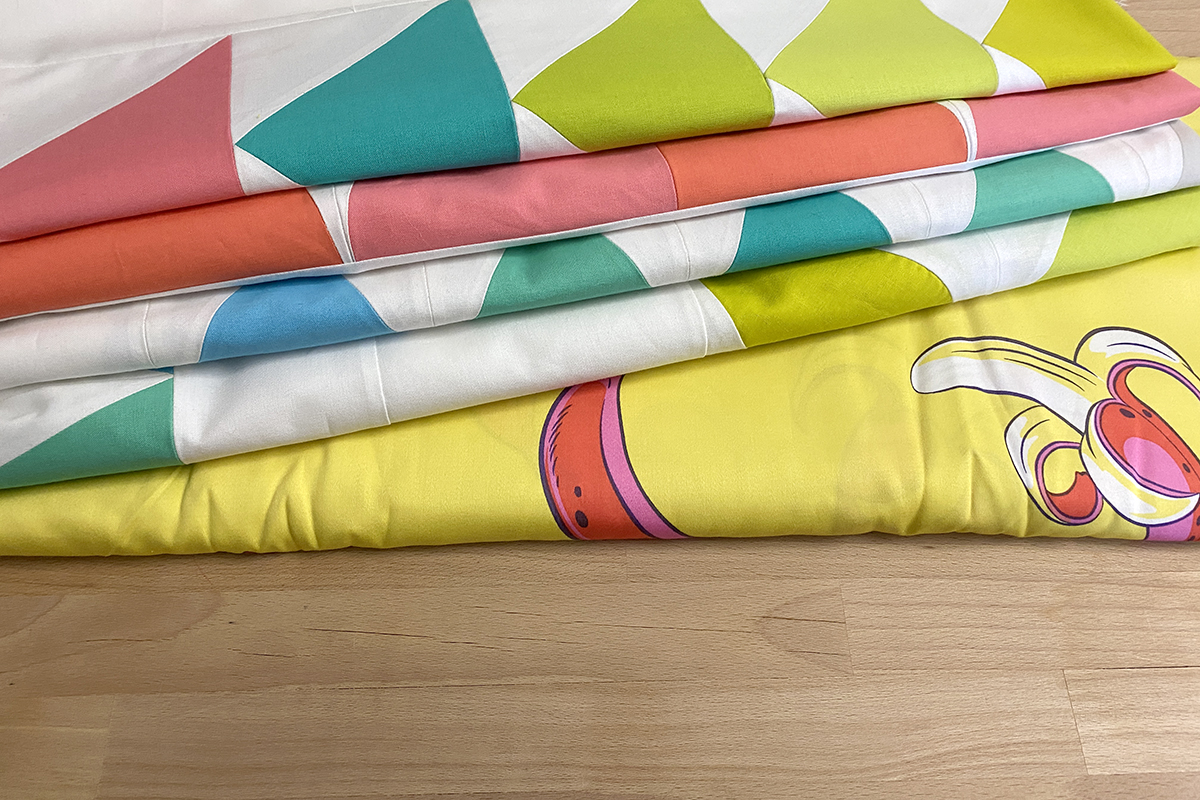
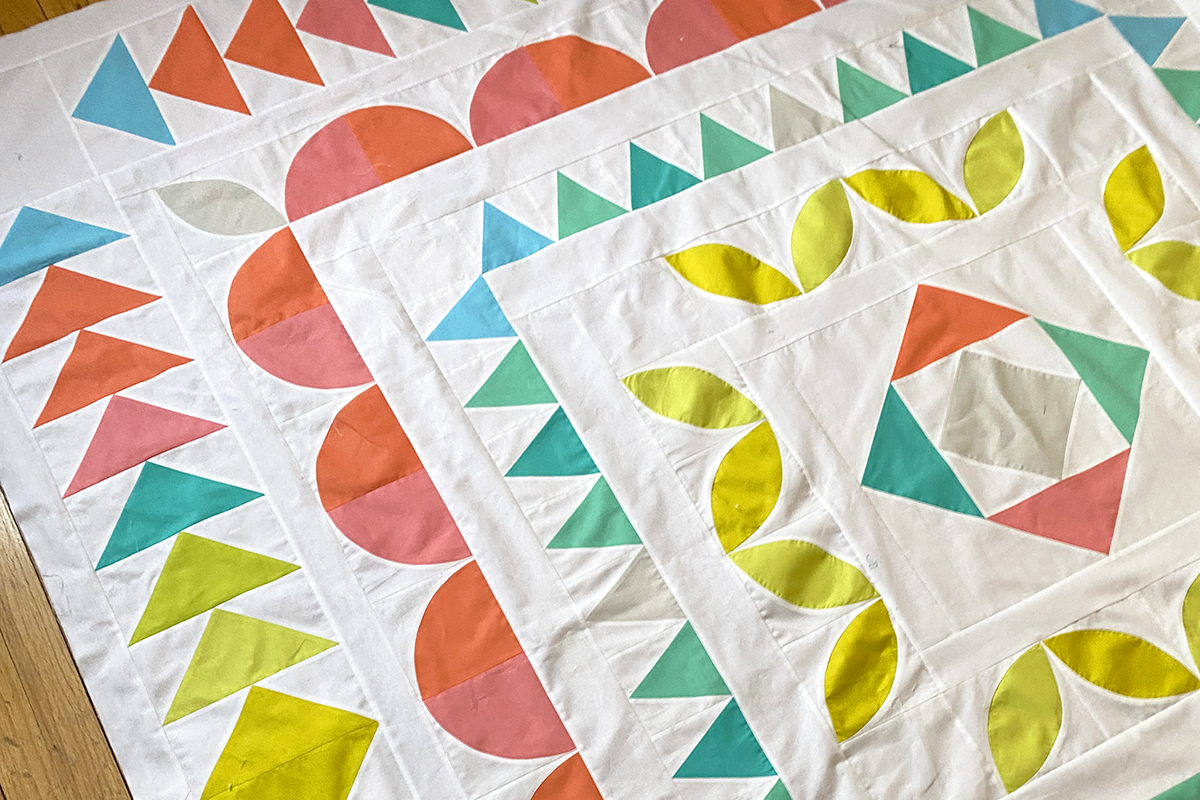
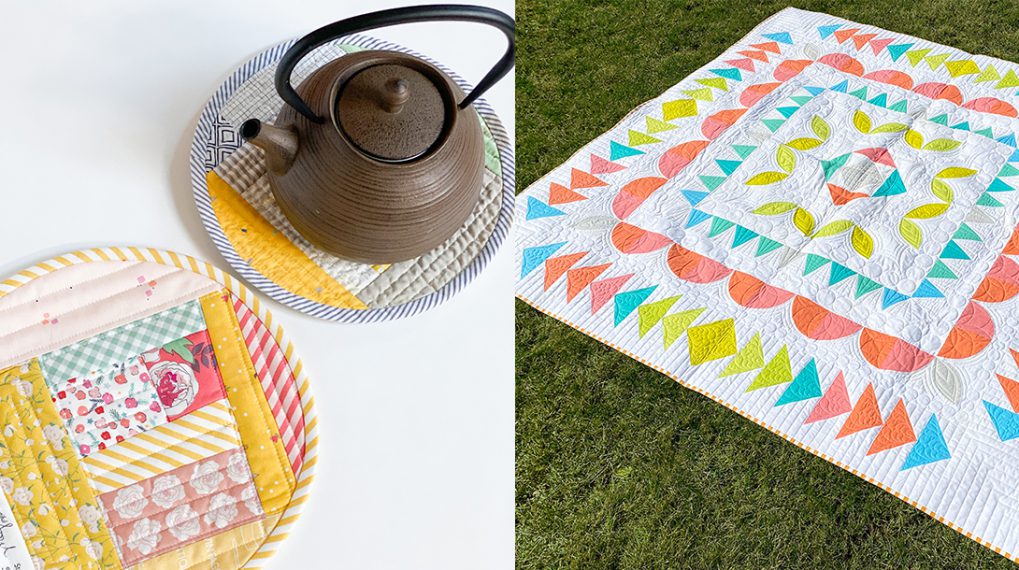
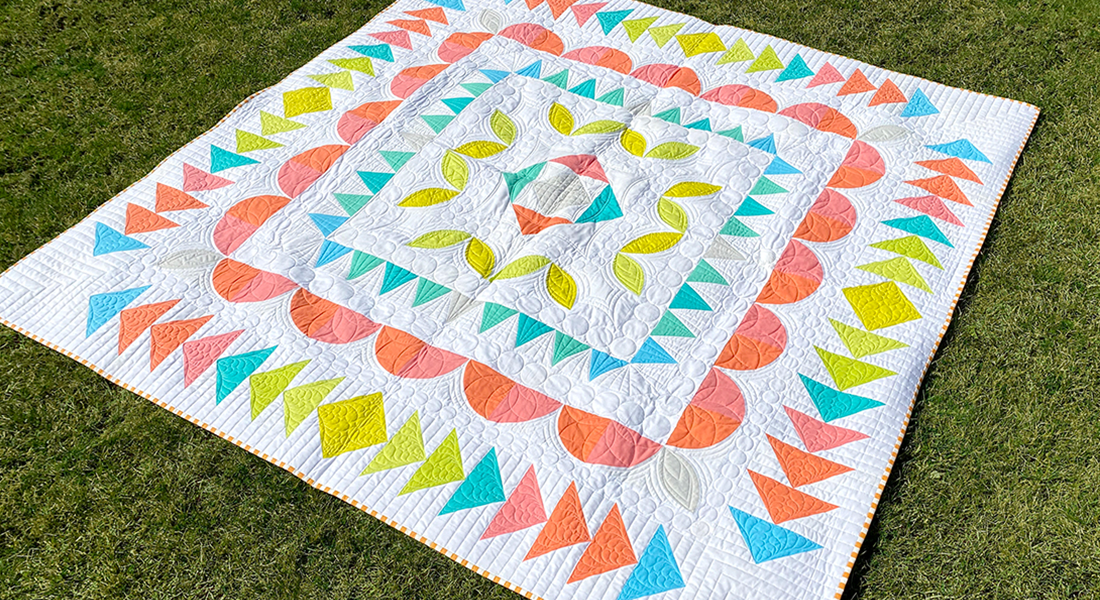
Congratulations! Your Passiflora quilt top is now complete! At this point, you just need to decide on a backing fabric and quilt the thing. I highly recommend using a 108” wide backing for quilts about this size or larger (you would need 2 1/2 yards of backing at this width.) Otherwise, you will need 5 yards of a standard 44-45” wide cotton fabric to piece together for the backing.
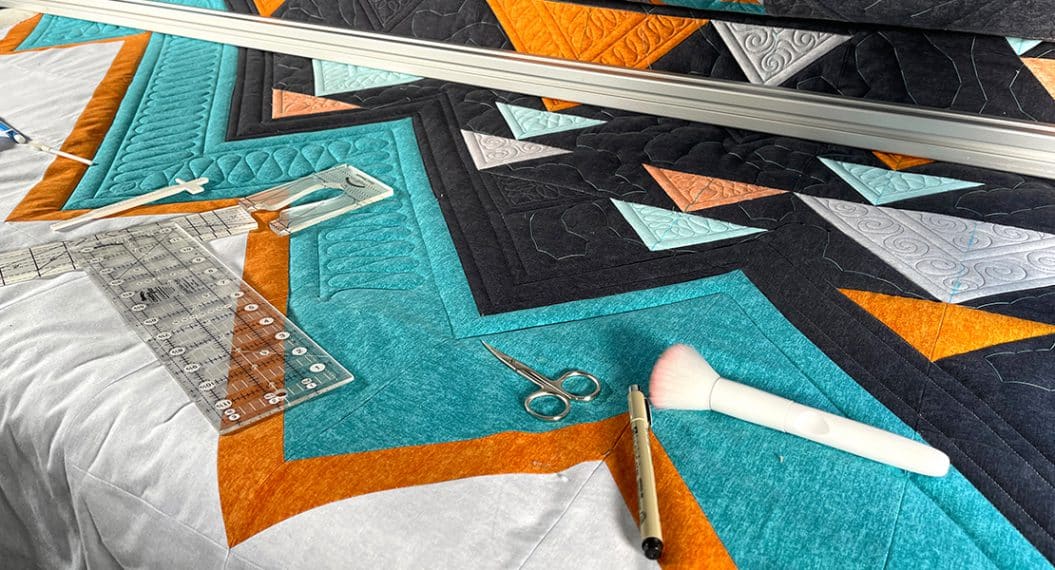
While I have reached the end of my journey leading you through this quilt along, this isn’t really the end! Come back next month for a very special bonus post in this series—quilting expert Nina McVeigh will be here to demonstrate quilting the Passiflora quilt and to bring you a bit of inspiration on how you can quilt your quilt!
Passiflora Quilt Along
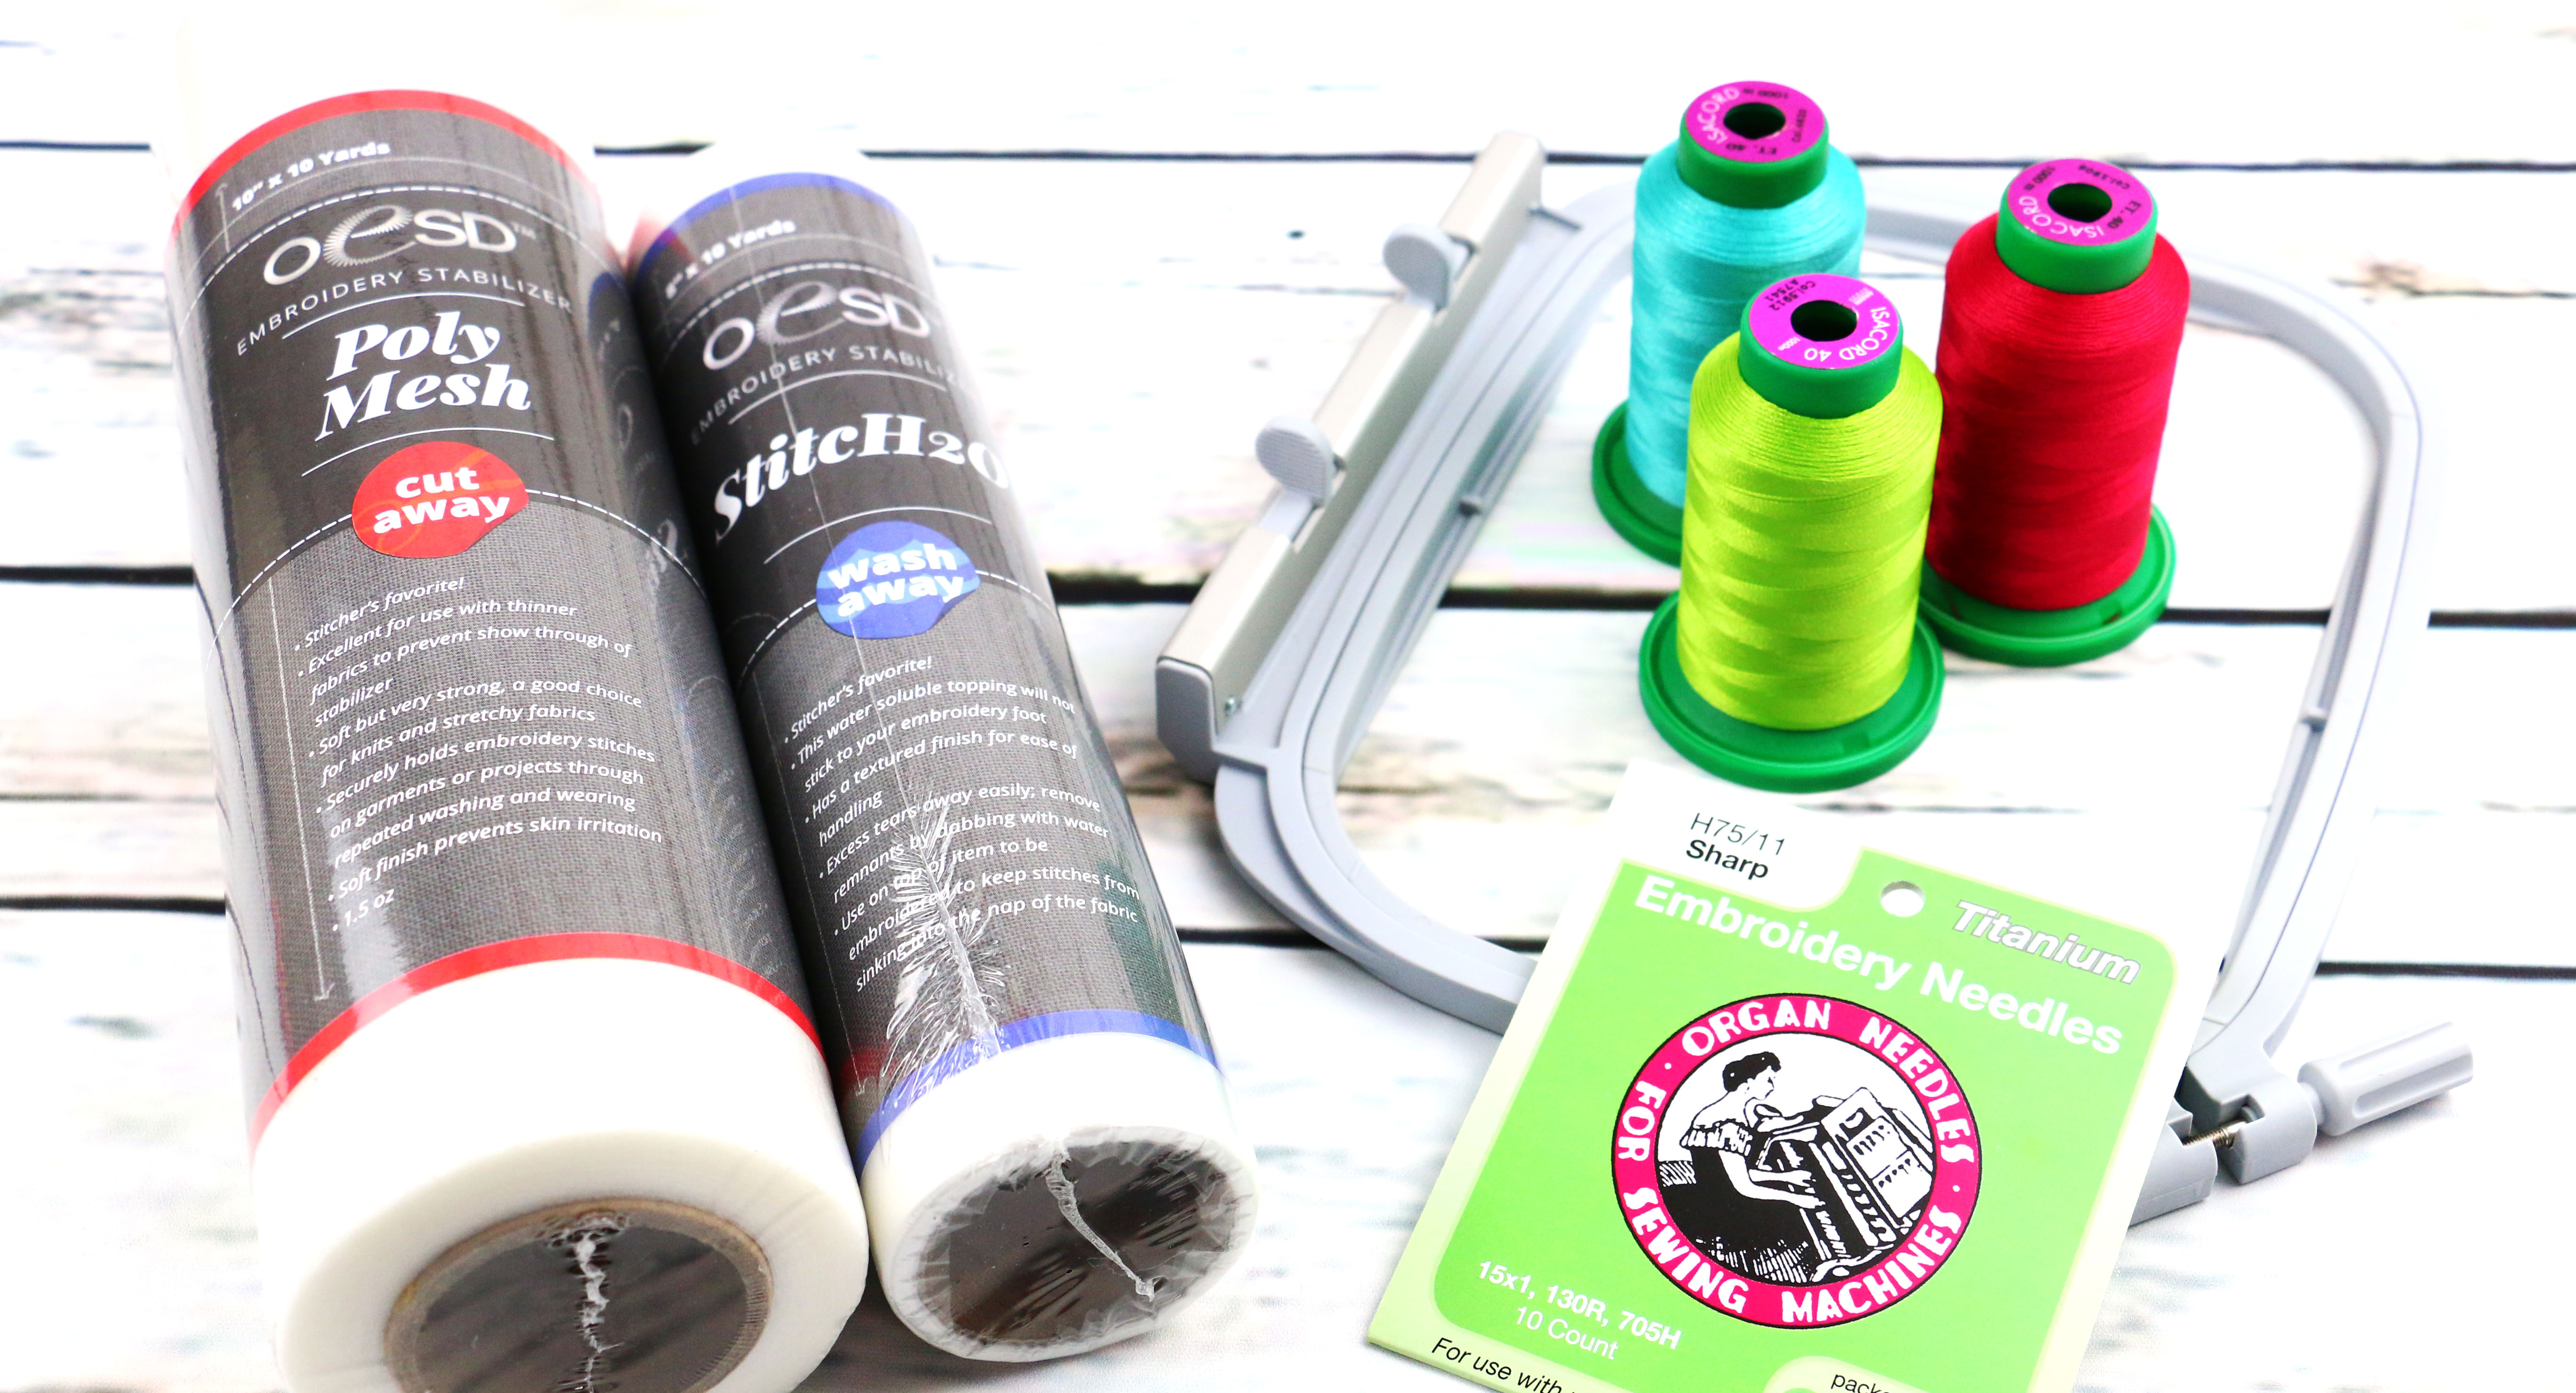
Used Products


What you might also like


6 comments on “Passiflora Quilt Along, Part 6: Round Four”
-
-
I had the same question! There must be an error in the instructions. I guess I’ll be cutting a few more background squares tomorrow! I have used the technique many times and I know it works great!
-
me too… I haven’t started this quilt top, but I have been following. I have banned myself from starting any new until I have completed UFO’s… it’s soooo hard not to start new things!!!! I plan starting this quilt top soon as I can. Hope we get an answer soon, and/or they fix the instructions b4 a newbie, like me, gets really frustrated.
-
There are 8 colors. You are supposed to cut 2 big squares of each color EXCEPT for Color #1 (Persimmon), which you are supposed to cut 4 big squares, so you have 18 color squares. Each BIG square needs 4 little squares; this yields 4 flying geese units of the same color. So my math says 4×18=72 small squares.
-
I contacted Bernina and the pattern has been updated.
-
Well, the pattern hasn’t been updated, because I have my 8 leftover blocks after I cut 72.
-
-
Leave a Reply
You must be logged in to post a comment.

I am confused by this pattern. It says 4 small squares of background to every large color square.
By my math there are 16 large color squares called for in the directions. 4 x 16 = 64 small squares not the
36 as stated in the pattern.
Am I doing this wrong?