How to Make an Easy, Casual Kimono Top
Hello everyone, this is Daniela, from On the Cutting Floor.

Today, I have an easy summer project to make. It is a basic open, casual top that can be adapted to different weather seasons by using the right fabric.
For this project, I work with 1 3/4 yard of cotton lawn and 1 yard of a light-weight denim piece from my stash.

Materials to Make the Kimono Top
- Sewing Machine (I use a BERNINA 350 PE)
- Regular needle
- Denim needle
- Contrasting color thread
- Coordinating color thread
- 1 3/4 yard of cotton lawn
- 1 yard of contrasting fabric for the cuffs and collar
- Easy Kimono Top Pattern

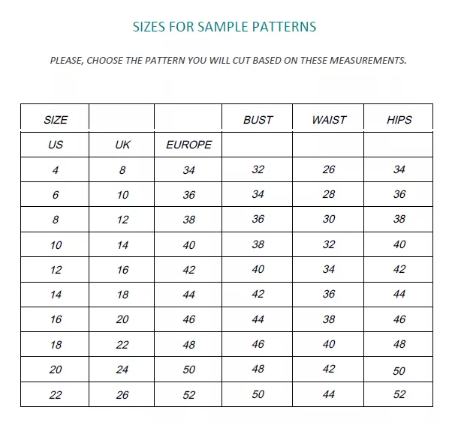
Measurement Chart
Printing Instructions
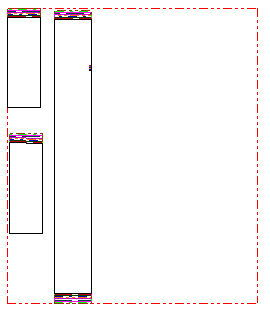
Here is an image of the pattern and how it should be assembled. You will print 24 pages that will each overlap by 1 inch. Make sure the blue diamonds on the pages are matching correctly.
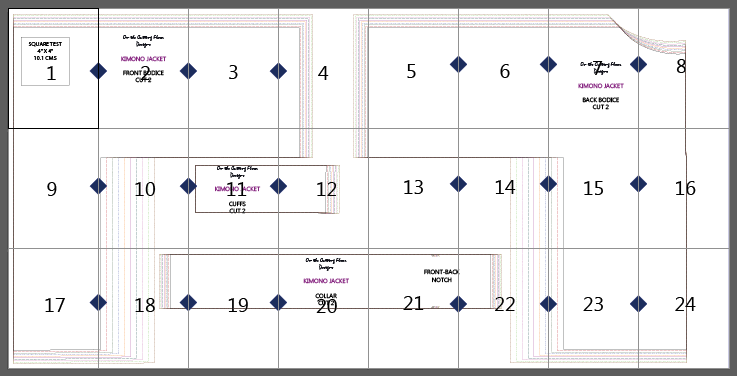
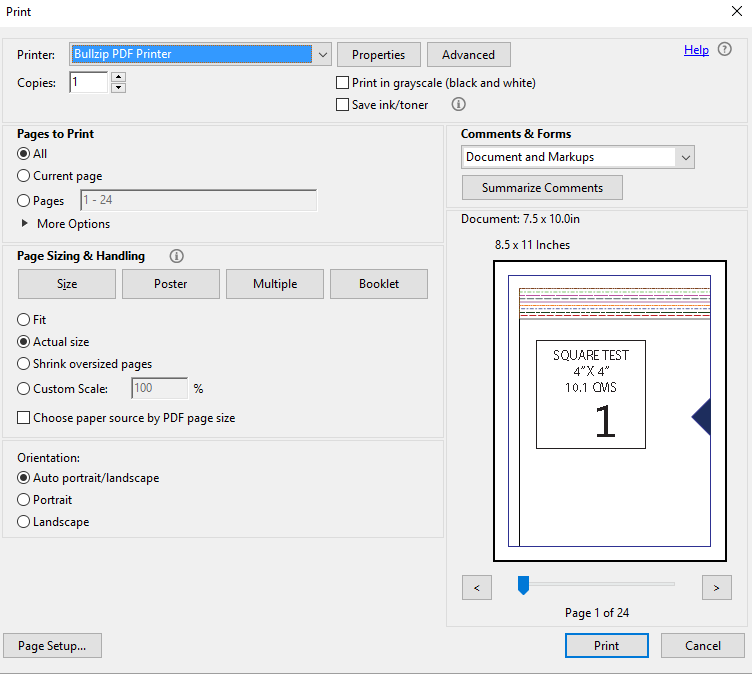
In addition, remember to select ”actual size” when printing the pattern. If you are in doubt, the pattern comes with a 4” x 4” square test on the first page.
Fabric Layout
1. If you want to use the same fabric on the collar and cuffs (60” folded fabric):
Notice that the amount of fabric will be the same since the collar and cuff pieces are placed between the front and back top pieces.
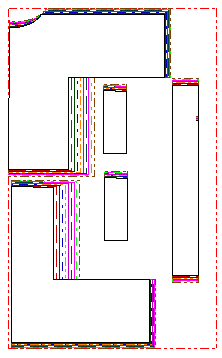
2. If you would like to use a contrasting fabric for the cuffs and the collar:

Sewing the Easy Casual Top
Please notice, this pattern has 3/8 seam allowance.
1. Place front and back bodice pieces together, wrong sides facing.

2. Sew along the sleeves and side seams 2/8 inch from the edge.

3. Make a diagonal cut on the corner of the sleeves and side seams.

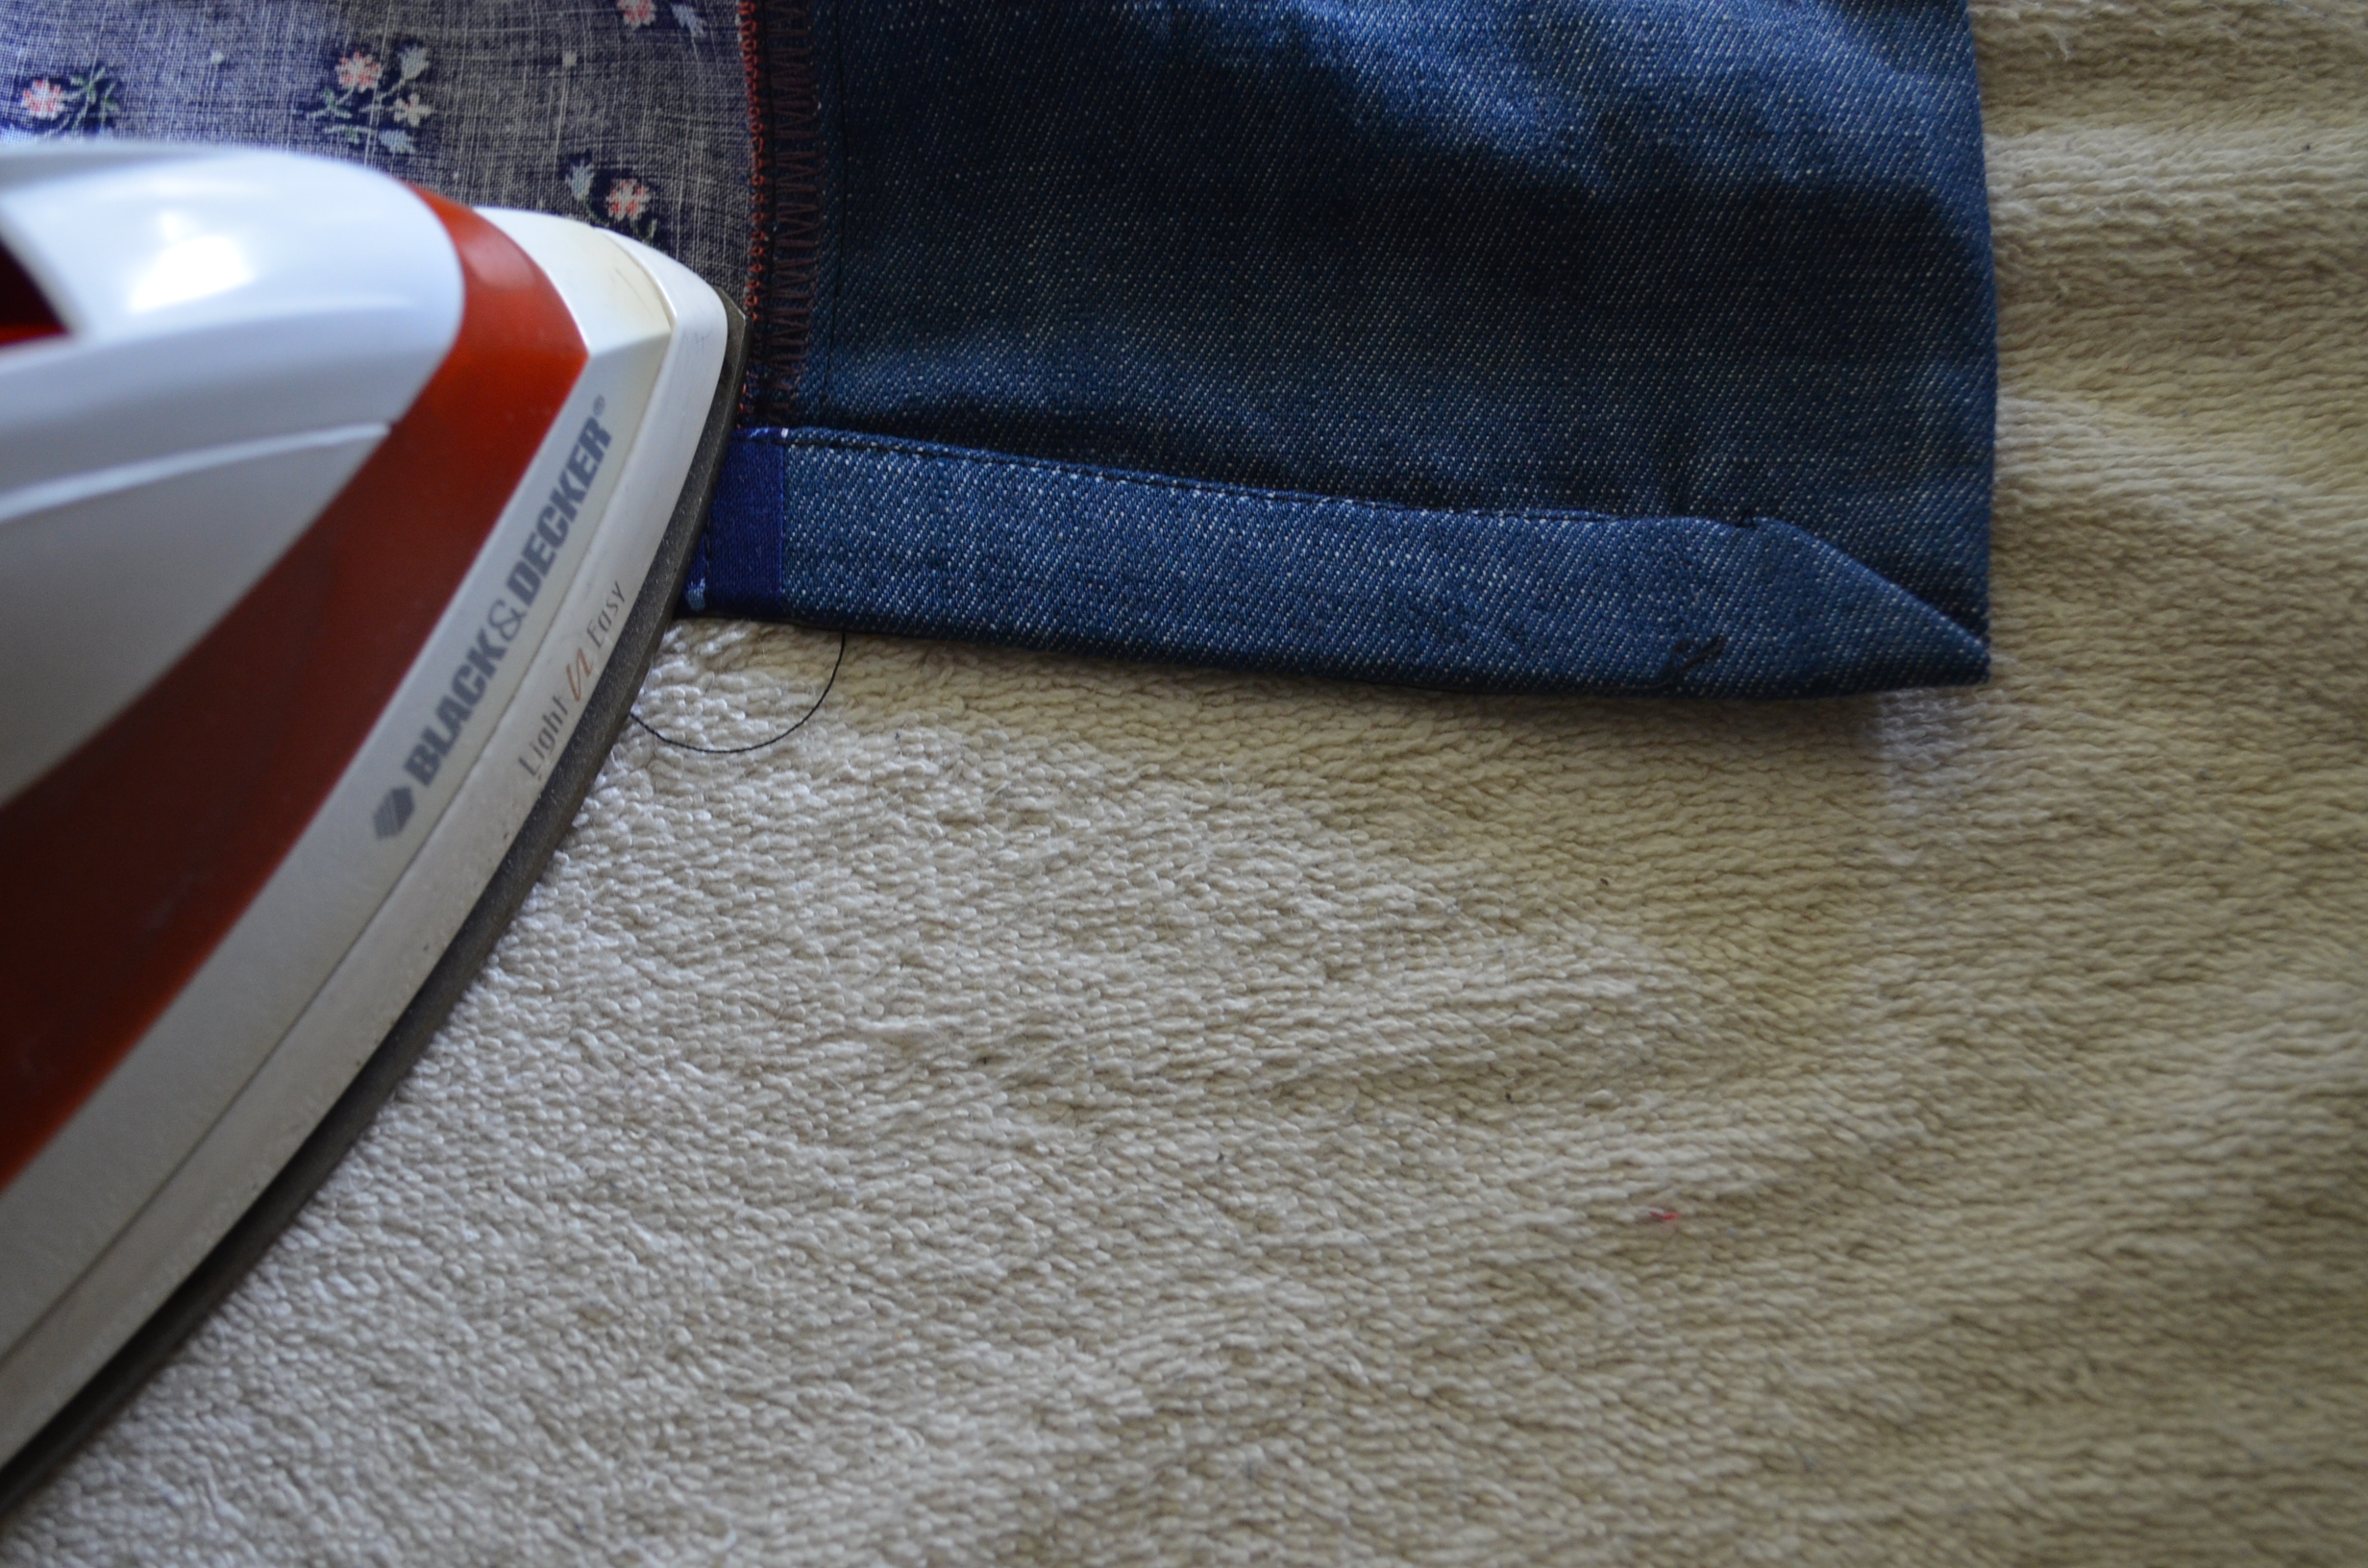
4. Turn the top to the wrong side and press.

5. Now, sew the sleeves and side seams on the wrong side 3/8 inch from the edge.

6. Press the seams again.

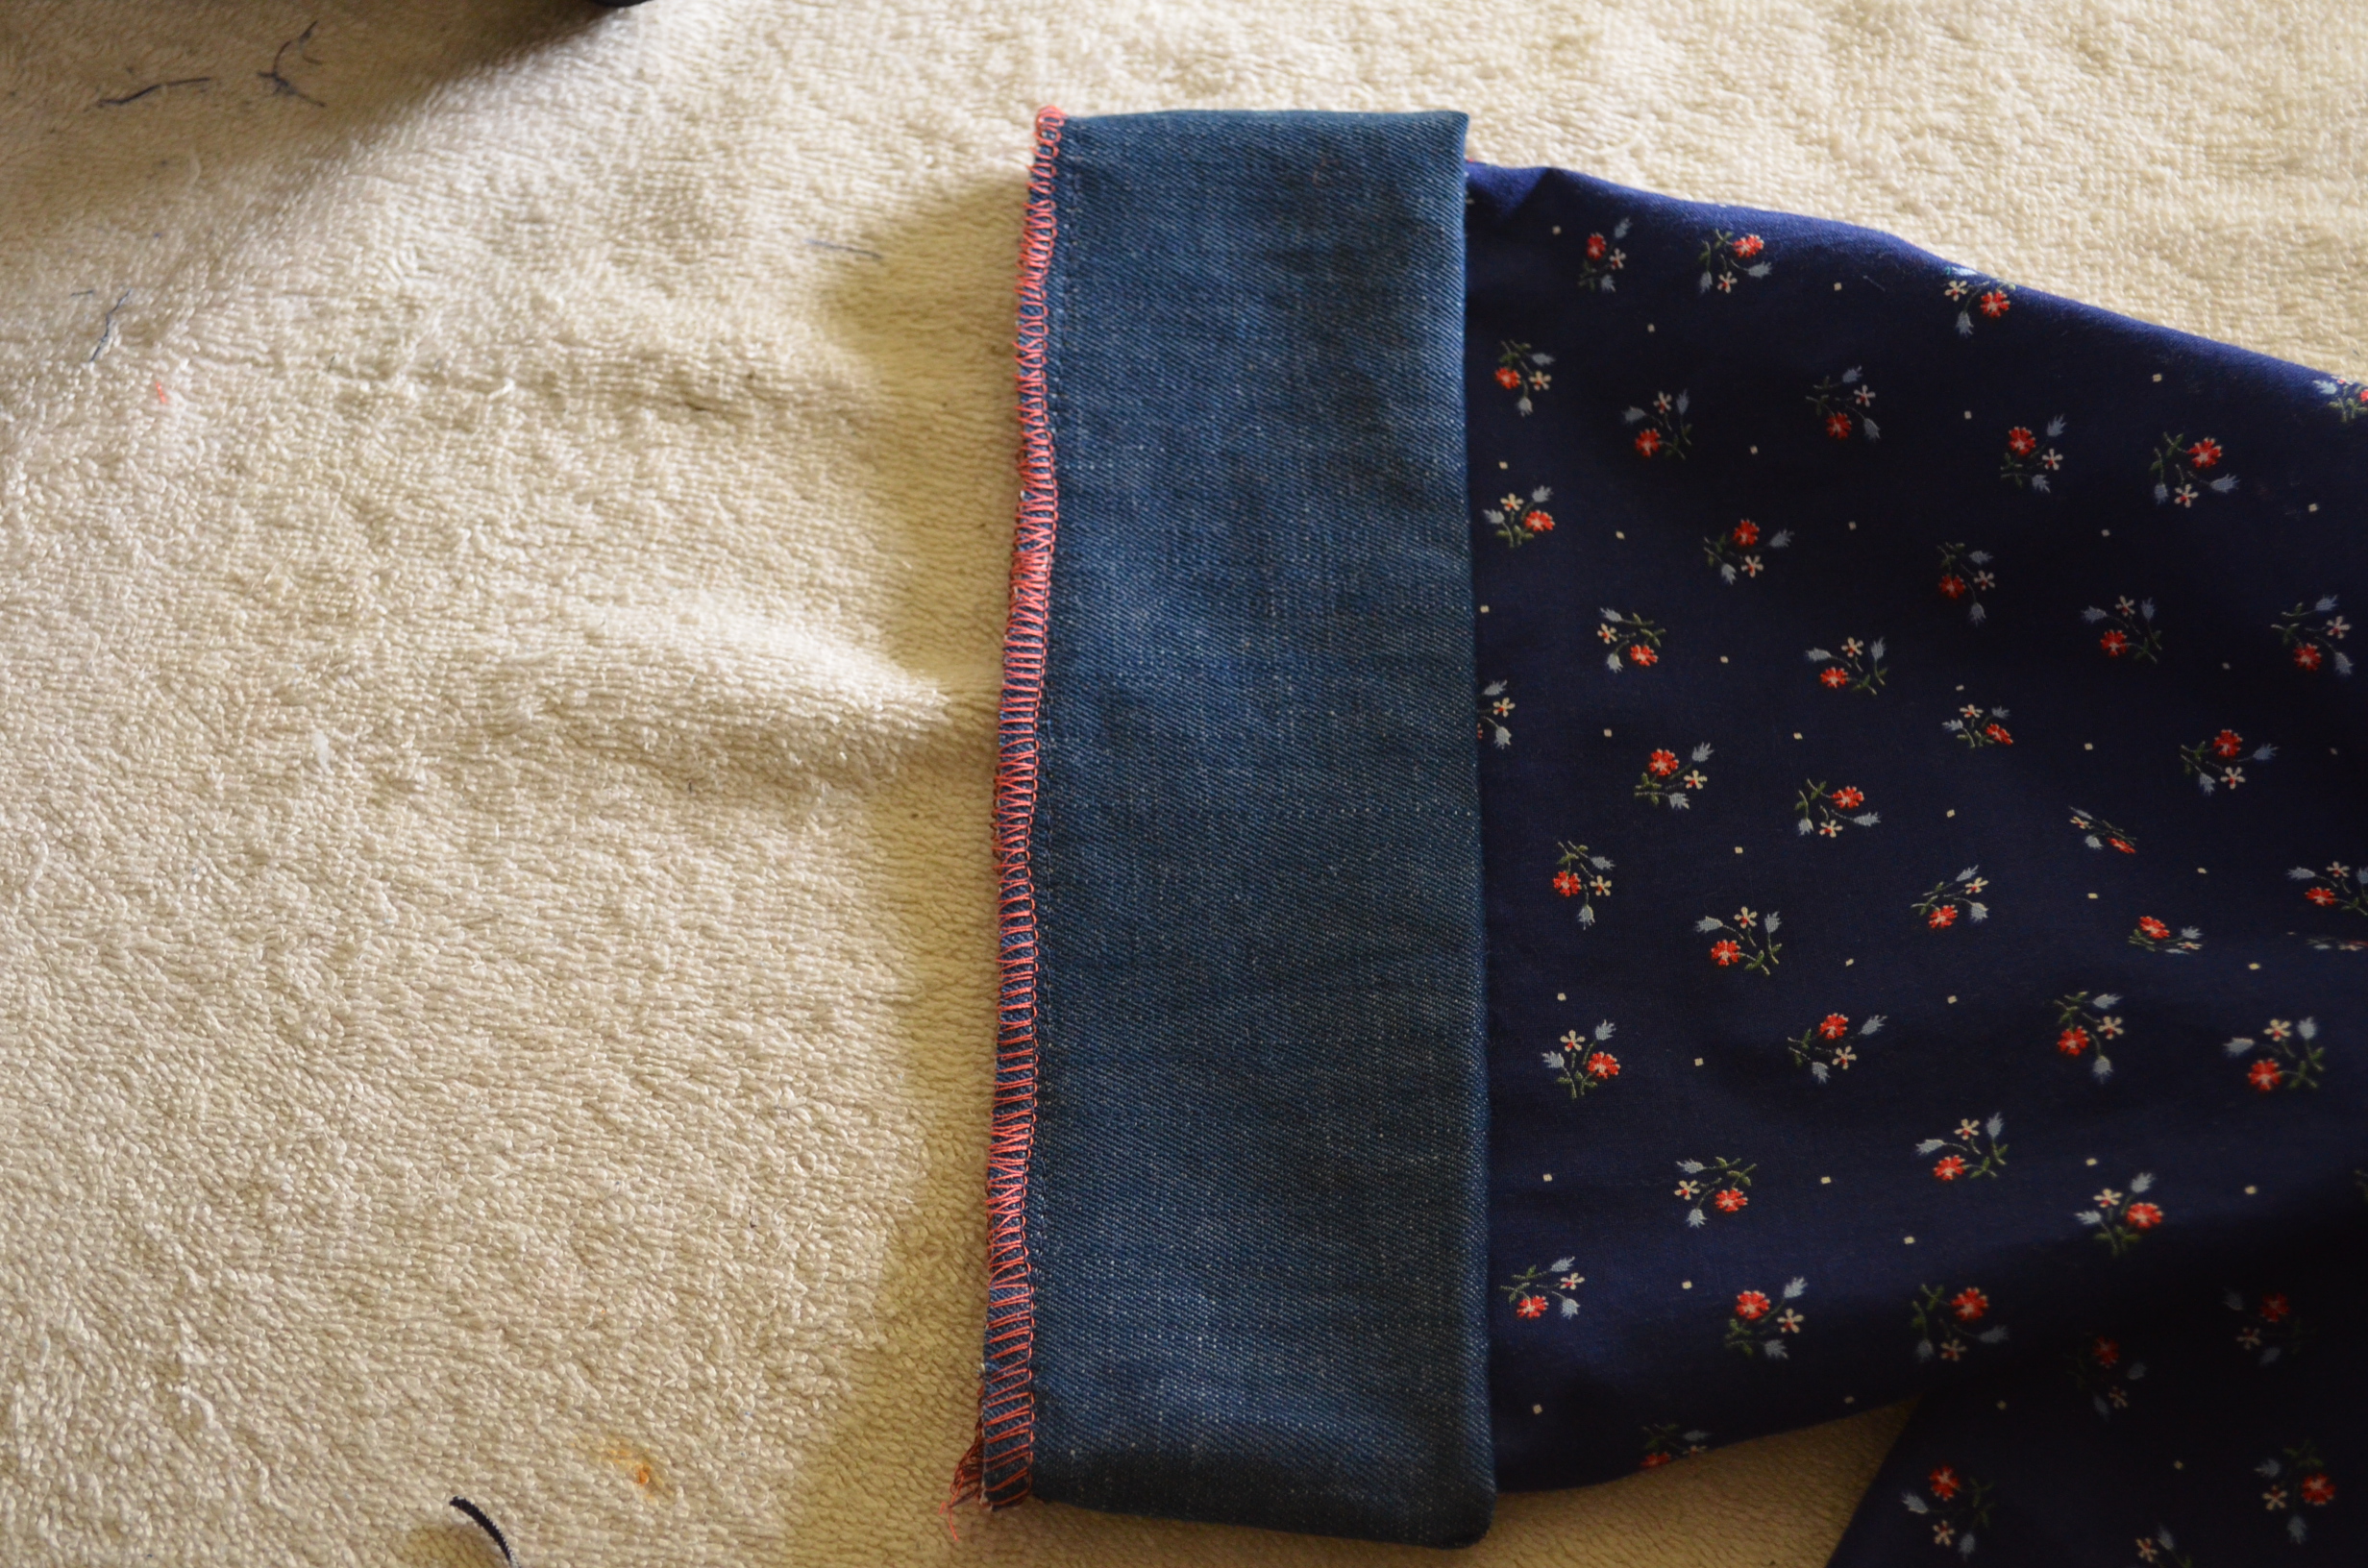
7. Cuffs: place the two pieces of the cuffs together, right sides facing and sew along the sides.

8. Then, fold the cuff horizontally and press it.

9. Add the cuff to the simple sleeves as shown below.

10. Then, attach the cuff to the sleeve. For my top I machine basted the sleeve first.

And then, serge it to the top. You can also use an overlocking stitch from your sewing machine or a zigzag stitch.
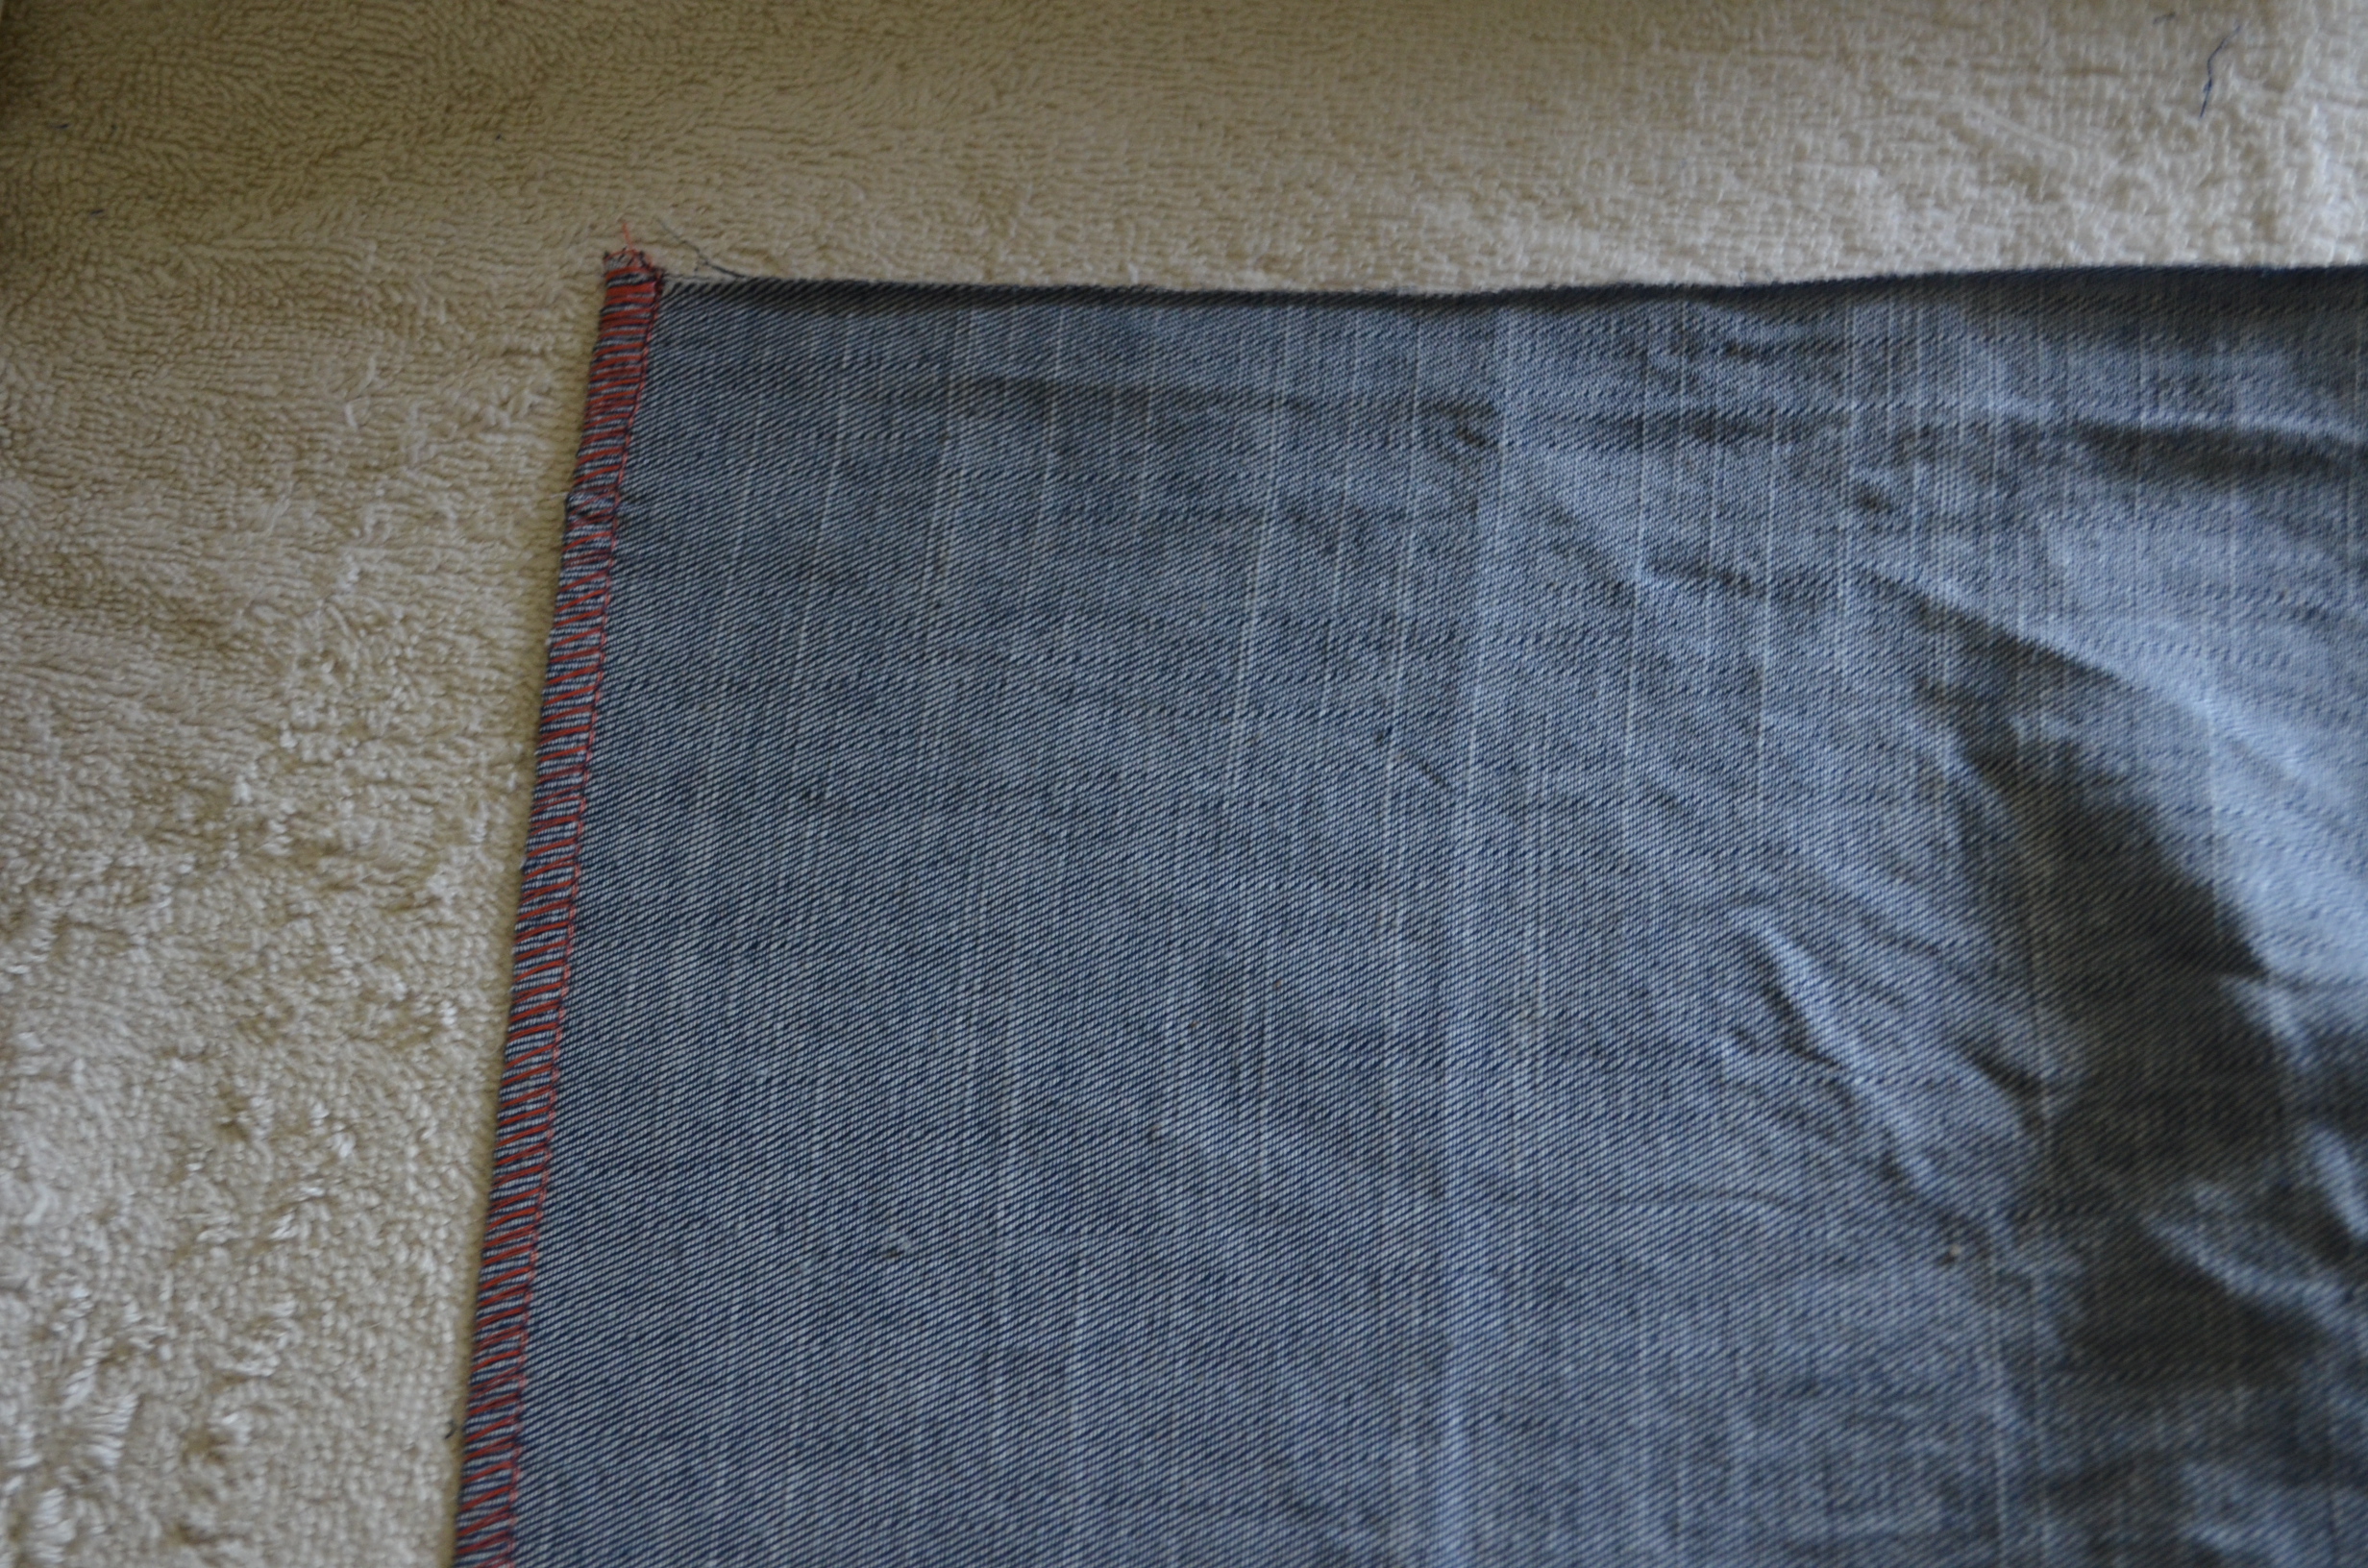
11. Press the cuff flat, making sure that the inside seams are facing the neckline.

12. After that, you will be able to topstitch the seams 1/4 inch from the seam.

13. Press and repeat with the other side of the top.

14. Now, you can do the same process with the collar. First, sew the collar pieces together, right sides facing, and fold it in half.
15. Then, attach to the back neckline and front sides. On this picture, I pin the collar to the top making sure that the collar seams matched the middle back neckline. Use a 3/8 inch seam allowance.
Machine or hand baste the collar to the top to secure. Then, you can use an overlocking stitch from your sewing machine to do so.

16. After that, I machine basted it, press and serge. You can also use an overlocking or a zigzag stitch from your sewing machine.

I finally top-stitched the collar 1/4 from the seams.

17. Hemline:
First, I finished the edges using my serger. You can always use the overlocking stitch on your sewing machine to do so or a zigzag stitch. I folded the bottom hemline 1/2 inch and press.
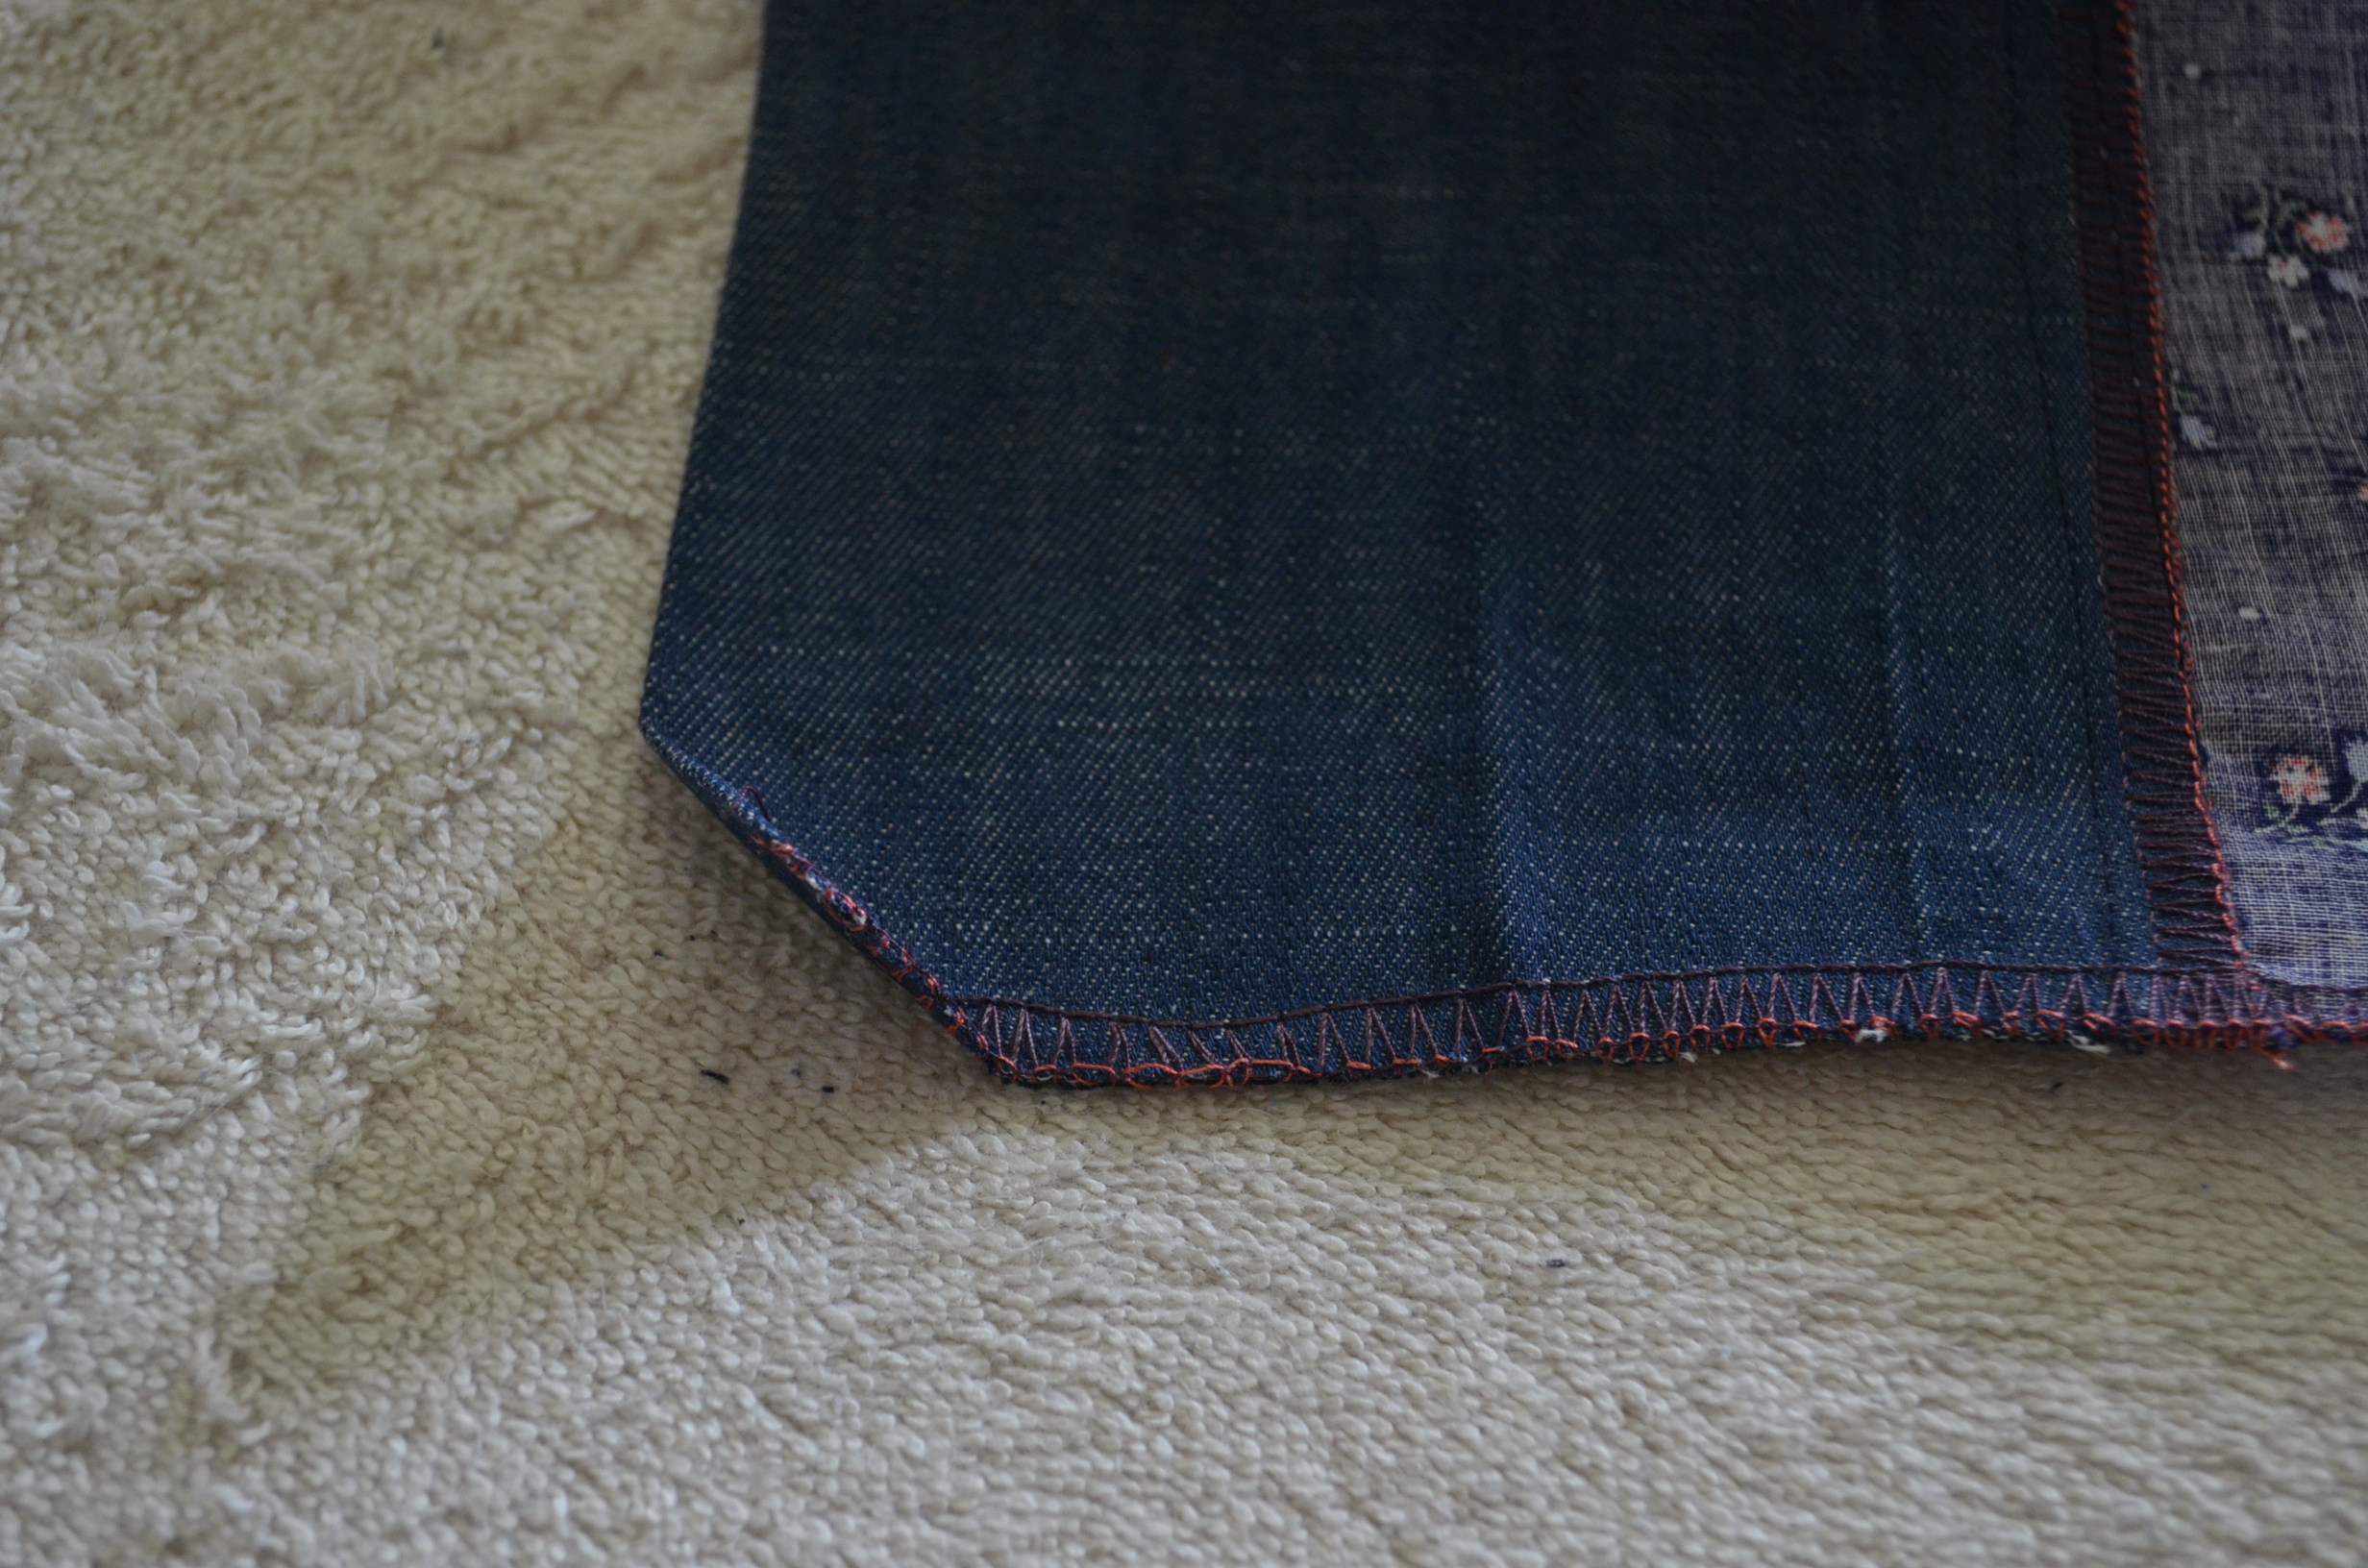
18. Then, sew along the bottom 1/8 inch from the seam.
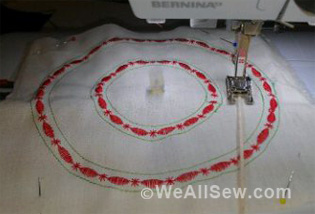
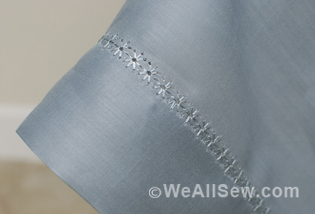
19. You can also add some decorative stitches with a contrasting thread to the cuffs, collar or hemline to make it unique.

19. In my case, I use the decorative stitch from BERNINA 350 PE number 58 on the cuffs. I am in love with the look 🙂


What you might also like


28 comments on “How to Make an Easy, Casual Kimono Top”
-
-
Thank you so much Michelle 🙂
-
-
What about the center back seam? Is there one?
-
No, it is placed on the gold.
-
Fold, I meant!
-
-
-
I can’t wait to make mine! Thank you!
-
Thank you Delighterdhands for stopping by 🙂
-
-
Hi! This pattern is definitely next on my table! However, I intend to purchase a ¼ yard more. The pattern layout shows both main pattern pieces laid in opposite directions. Won’t that cause problems? If I remember correctly, the main body parts, sleeves, plackets skirts, etc, are cut from a length of fabric long enough to accommodate pattern pieces cut facing the same direction. Lovely Jacket!
-
I would lay the pieces out with the lengthwise grain running from neck to hem. The lengthwise grain of fabric does not stretch as much as the crosswise grain. If the front goes one way on the grain and the back goes perpendicular the garment may “twist” and not hang properly. Another modification I would make to this pattern would be to round the underarm rather than having a perpendicular cut. Just a personal preference. Nice straightforward style.
-
Hi Trulyblessed,
Thanks for your reply and advice on this pattern.
-
Thank you for your comments, trulyblessed! Please accept my apologies for not explaining my question in proper form. Here it is restated: I’ve always cut the body pieces laid first from the top of the bolt (first cut). Then cut both body pieces on the grain laid necklne to hem and neckline to hem. That is how I learned to cut pattern pieces. If pieces can be cut in opposite direction then I’ve learned something new. And that’s great because I would save a lot of fabric!
-
By opposite direction, I mean laid from neck to hemline and then laid from hemline to neck. I learn so much from other sewists!
-
-
-
-
Are the sizes marked on the pattern? Wasn’t able to see it on the picture. Thanks
-
Hi Lagunamujer,
The sizes are marked by color and dotted line style. You can find the right size information on this post.
-
-
I need some advise please or explanation of the sewing of the top sleeve shoulder to the front neckline and then to the contrasting trim. I have been sewing for years and can’t figure out how the area connects since the top shoulder of the sleeve front and back are different lengths and one is a square corner and one curved. This can be seen on the graph of the pattern pieces. I know this sounds confusing but I am confused and have it cut out and started sewing it out of an expensive Liberty fabric and don’t want to ruin it. Please advise because I love the pattern and have it cut out and one side sewn.
-
Hi Bees,
The front and back sleeves shoulders are placed together at the neckline where the front bodice goes on a straight line and the back has a curve back. By adding the collar, you will create a front neckline and the collar will stand straight at the back and flat at the front.
I hope it makes sense.
If you have more questions about it, please contact me at [email protected]. I can also send you a few more pictures to clarify the way is constructed.Best,
Daniela
-
Daniela, I love the jacket but too have had the same difficulty in matching the collar piece to the jacket. The collar piece is exactly the same length as the front bodice edge so there no fabric for the curve of the back neckline. I would really appreciate your advice on how to attach the collar to the neckline.
Sue.-
I have ripped out most of my sewing to align the top of the sleeve with the neck edge. That changes the cuff on the sleeve since the length is not the same. also the collar does not extend to the length of the jacket. Advice please!
-
-
-
-
Love the pattern! I am thinking of making the sleeves and the body longer..more of a jacket type. Also thinking of making it out of a dark denim, and embroidering either a red of gold dragon on the back, with matching colored thread for topstitching the front and sleeves in one of the beautiful stitch designs on my machine. Thank you for the idea! 🙂
-
I want to use a 44″ wide fabric which has a directional pattern parallel with the selvedges. I would be grateful for any advice on the layout. I think I will have to do the sleeves separately. I have 3m of the fabric so am hoping to have enough. Hoping you can help.
Many thanks,Sue. -
The pattern doesn’t say to place the back bodice on the fold and I didn’t. I hope my $17 a yard fabric can be salvaged. Also, the instructions are not very clear and I have been sewing for 40 years. I had to do a lot of figuring it out on my own. I don’t mean to be sour grapes, but the pattern should have more detailed and accurate instructions. Thank you!
-
Well, thank goodness I want the only one!! I’m a complete beginner, read through the pattern several times just to make sure, but should have trusted my instincts. Every pattern I’ve used in the past, whether a professional or a free one off a blog, always says where to line up on a fold. This pattern does not, and in fact says to cut 2 back pieces. Wasted beautiful Jersey fabric I was saving, and can’t buy it again. It wasn’t expensive at least but had put me off using free patterns ever again.
Did you manage to salvage yours? What did you do in the end? I just couldn’t see how to fix it 🙁
-
You may be able to use a narrow seam and still have enough fabric as this is not a fitted garment.
-
-
-
Where is the link for the downloadable pattern? When I click the link on the tutorial page, it takes me to this page but I can’t find a way to download. Thanks so much!
-
Never mind! I just found it. Thank you so much!
-
-
I would like to echo Bees comment. I have sewn for many years and found this pattern to be extremely confusing. I got the cuffs on although I am sure NOT in the way you intended but I am happy with them however the collar is another issue. The picture looks like it comes down to the hem but that means sewing my collar peices at only one end and then flding which will make it very narrow. If I sew at both ends so it is wider I do not have enough length and then how is it faced? I am very disapointed- I expected better from We All Sew. I will use the email above to send this directly to you.
-
The pattern for the front and the back do I make a fold with the material and then cut? Also the sizes aren’t clearly marked. I see the different colours but it doesn’t mention which sizes they are on the chart. Could you kindly assist?
-
This pattern just doesn’t work. I ripped out most of it because I began sewing in the order in the directions. Then when I got to the collar is when I had to start ripping. Then I sewed it back together and discovered the collar piece is too short for the fronts. So I added extensions. Finally i
Tried it on and it was awful. I took it off and hung it on a hanger. I think the back needs a two inch tuck. It is too wide at the neck. That will require one more ripping session.
Has this pattern worked for anyone? I wear an 8 -10 so I cut on the 4th line in.
Leave a Reply
You must be logged in to post a comment.
Nicely done, very clean inside and out. I like that you added denim to the project.