Using the Mask Tool on Q-matic
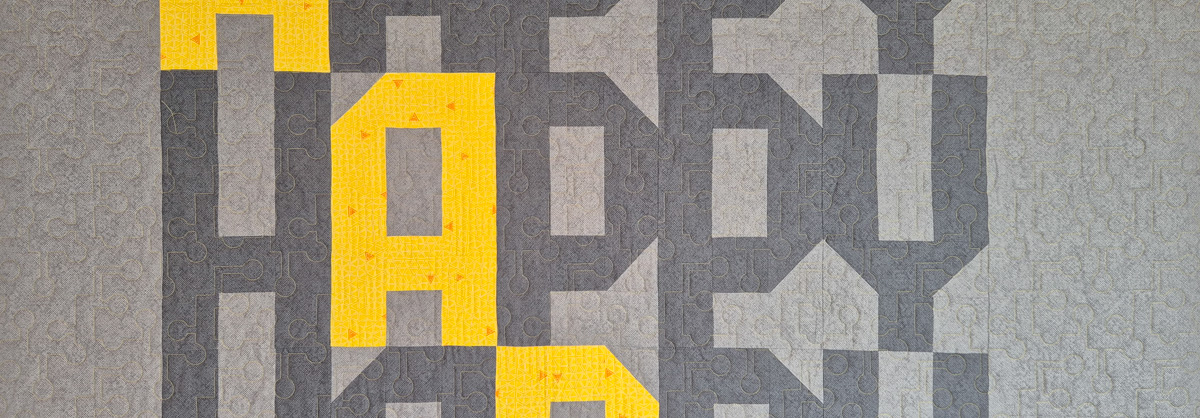
Sometimes a quilt needs more than just an edge-to-edge design. For the HAPPY quilt I knew it was time to play around with the mask tool on the Q-matic.
I picked a fun quilt pattern from the library. By masking out the HAPPY letters in the quilt, I could fill them in later to really make them pop.
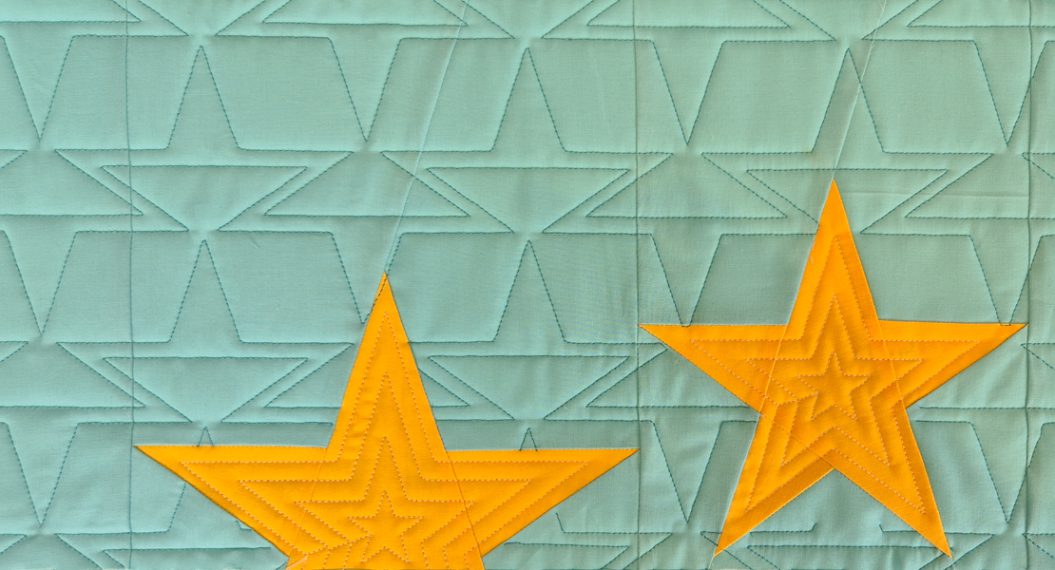
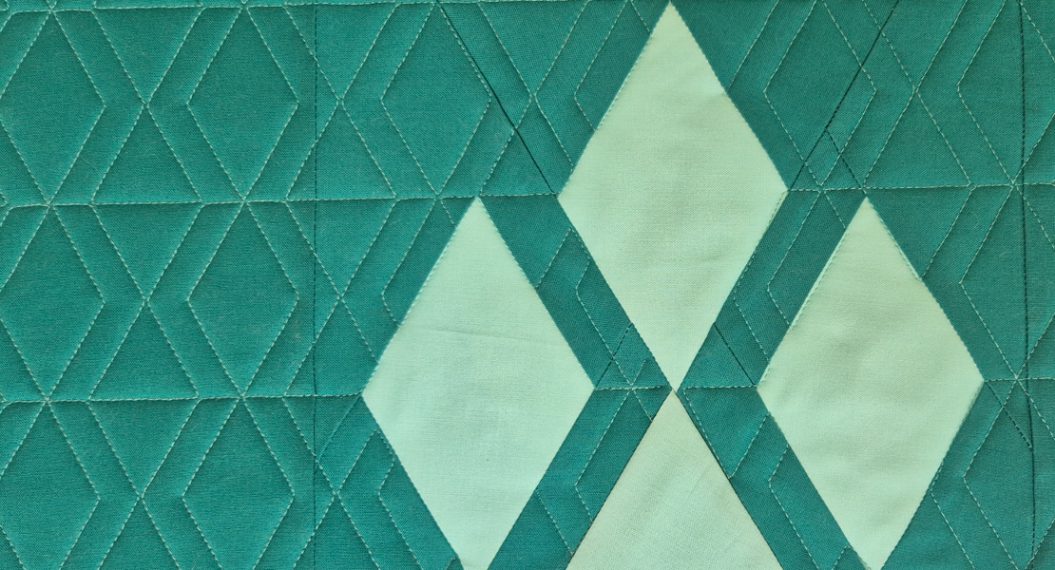
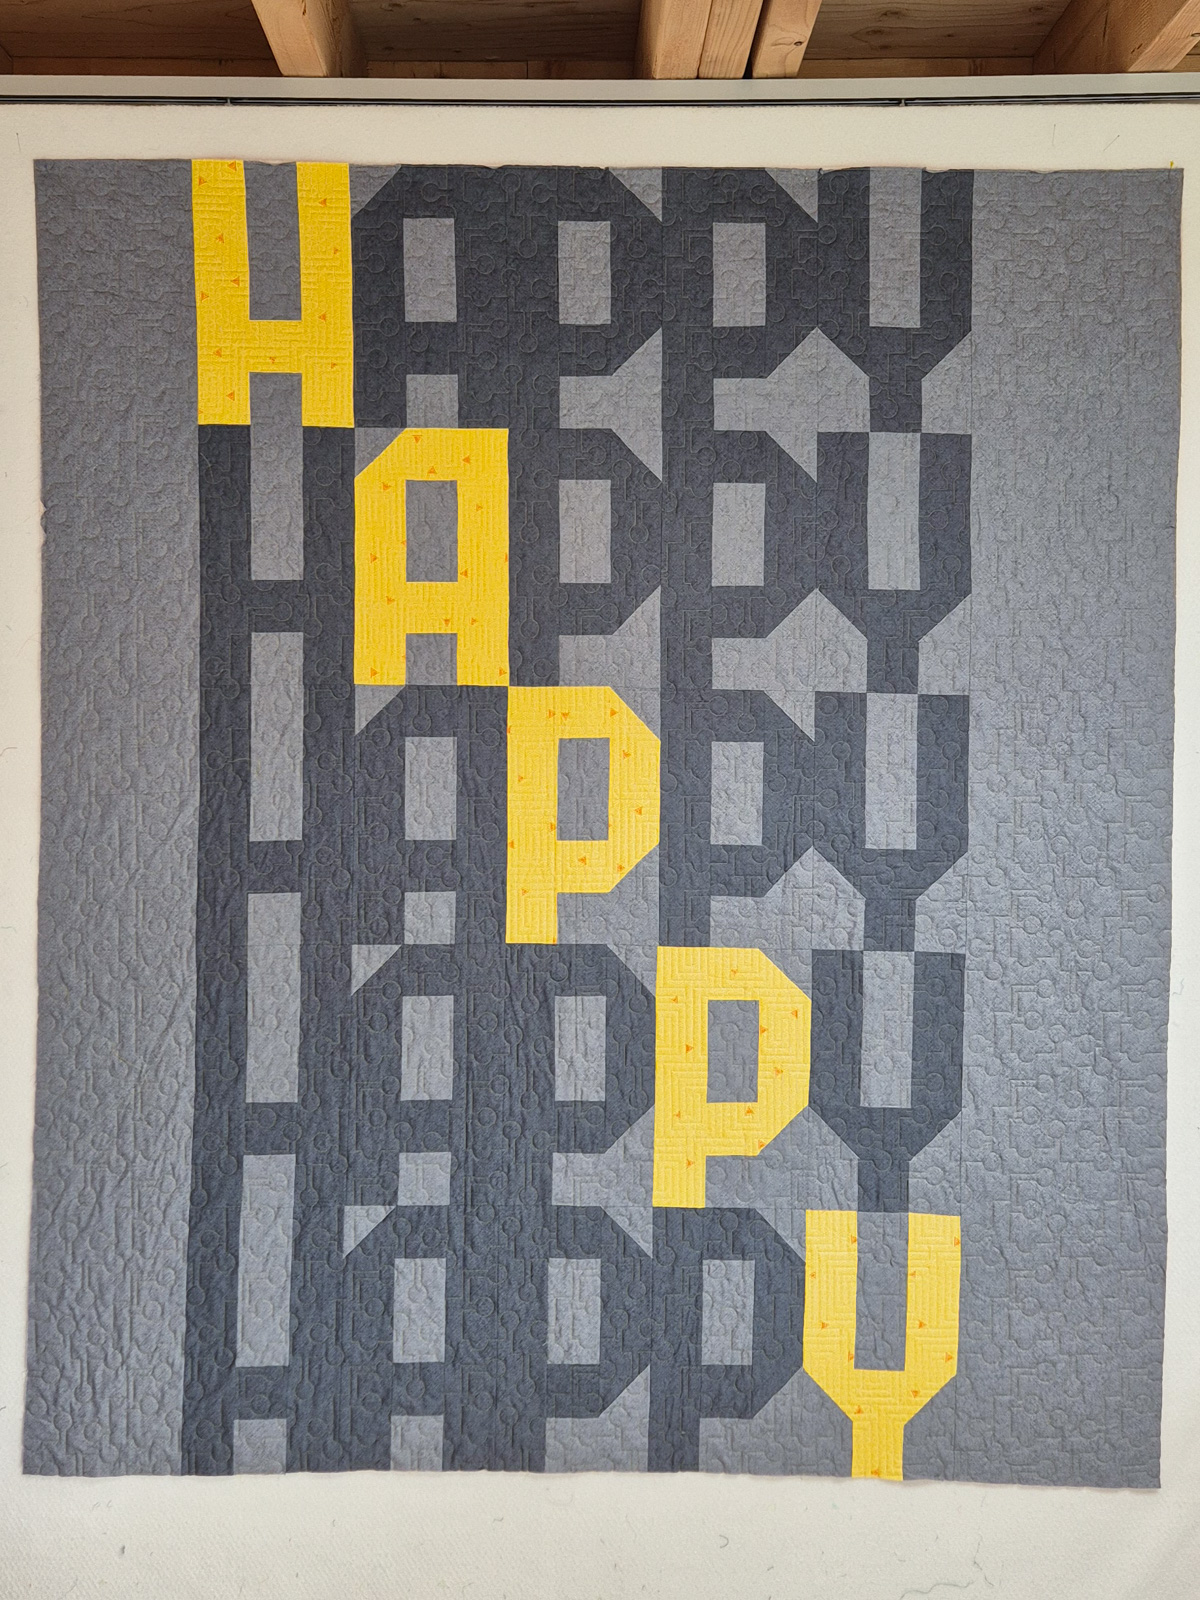
The HAPPY Quilt
I love to supersize quilt blocks. It’s so fun to see what a different scale does with a block design. In the case of this quilt, I supersized a block from my book Happy Notes.
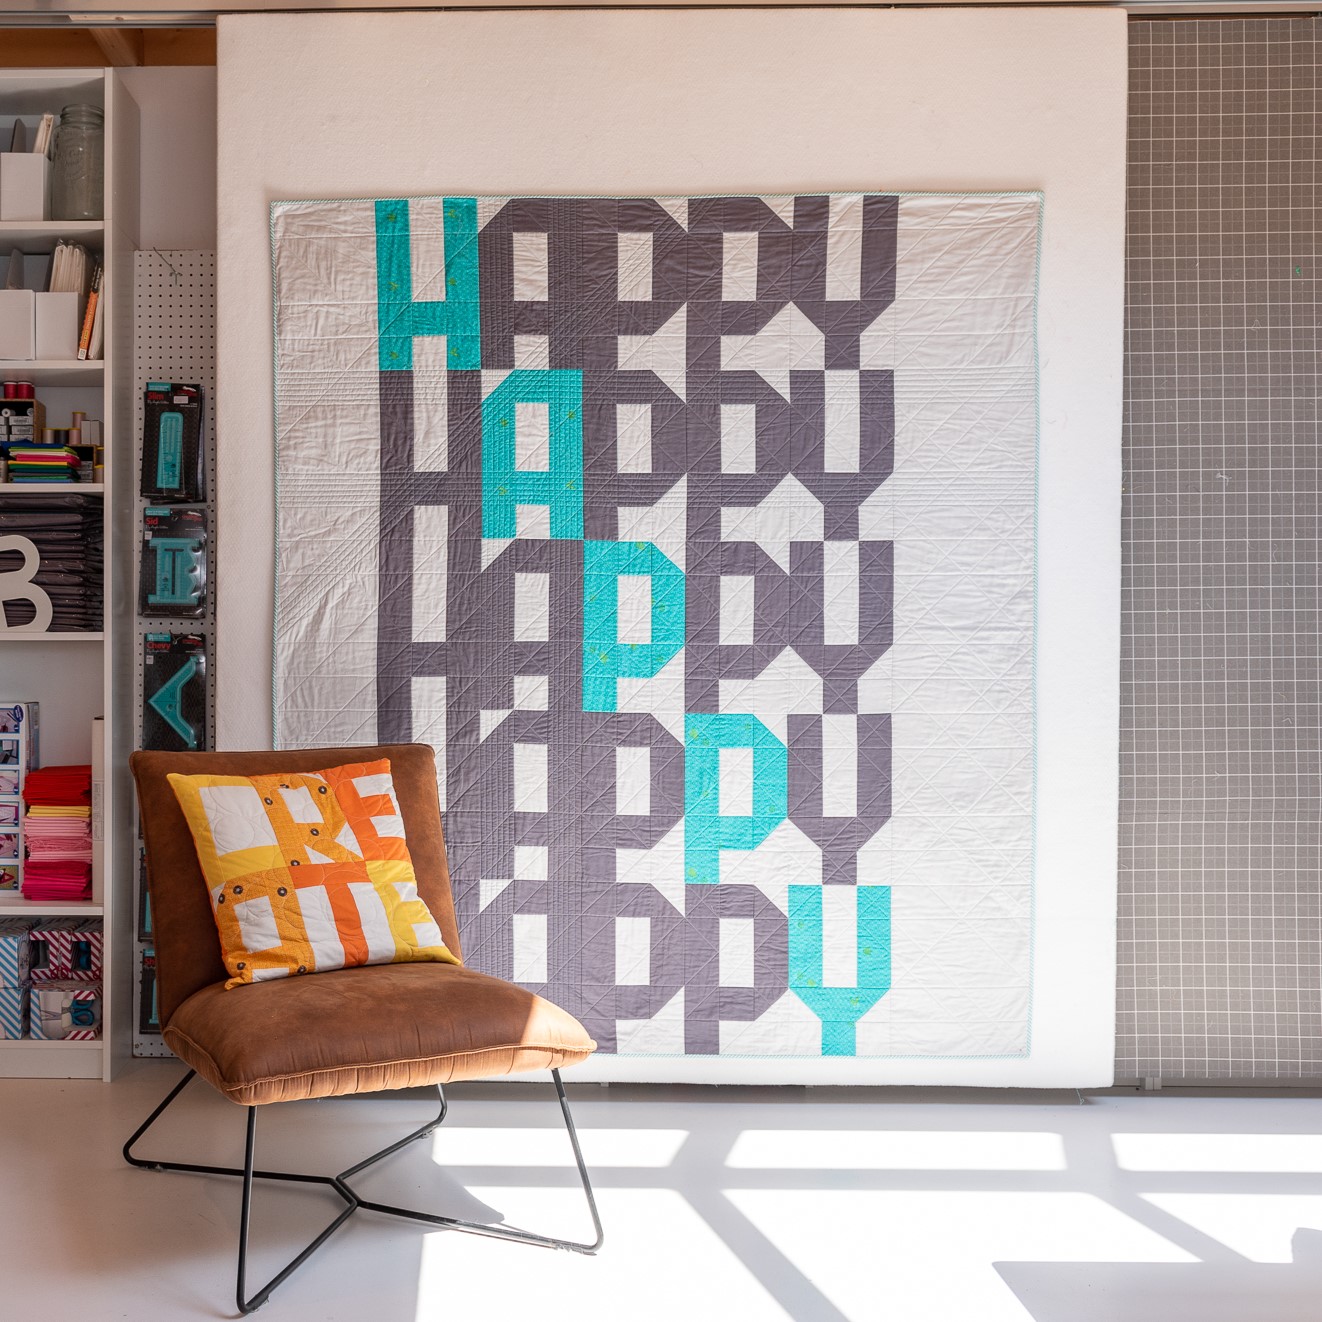
The original HAPPY block was made with foundation paper piecing. But the supersized version works perfectly as a regular pieced quilt. And that’s how The HAPPY quilt was created.
The HAPPY quilt pattern is also included in my book Happy Notes. Use the code HAPPYBERNINA for a 10% discount on all Happy Notes patterns and kits on my website. The coupon code is valid until the end of October ’24.
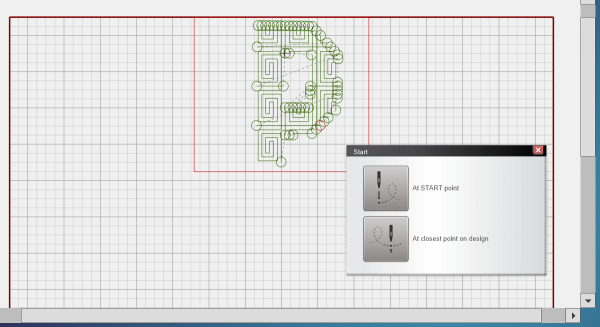
Mask tool on Q-matic
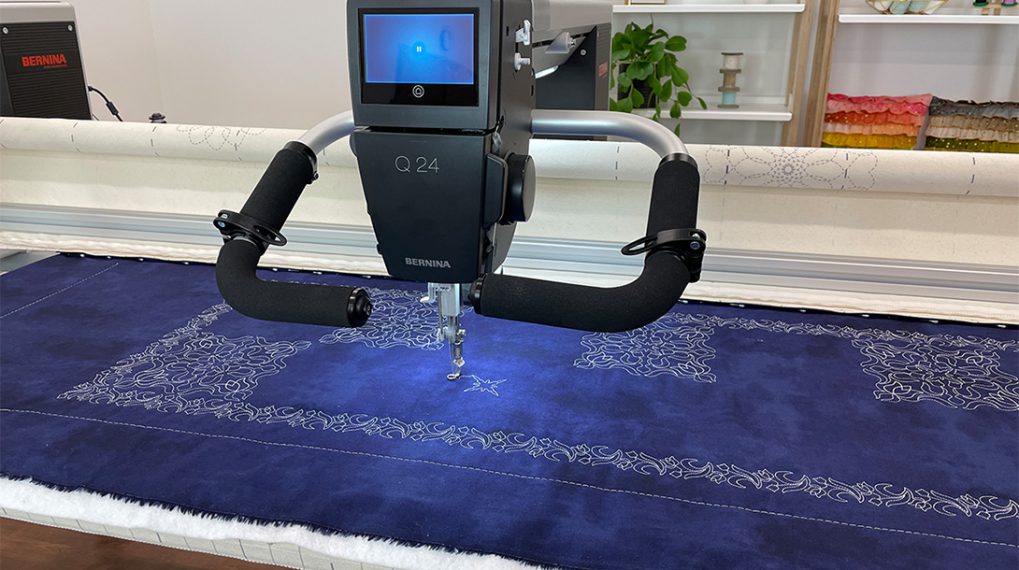
Let’s talk quilting! For the HAPPY Quilt, I wanted something fun for the letters on the diagonal. It was a perfect job for the mask tool on the Q-matic. So, what is the mask tool?
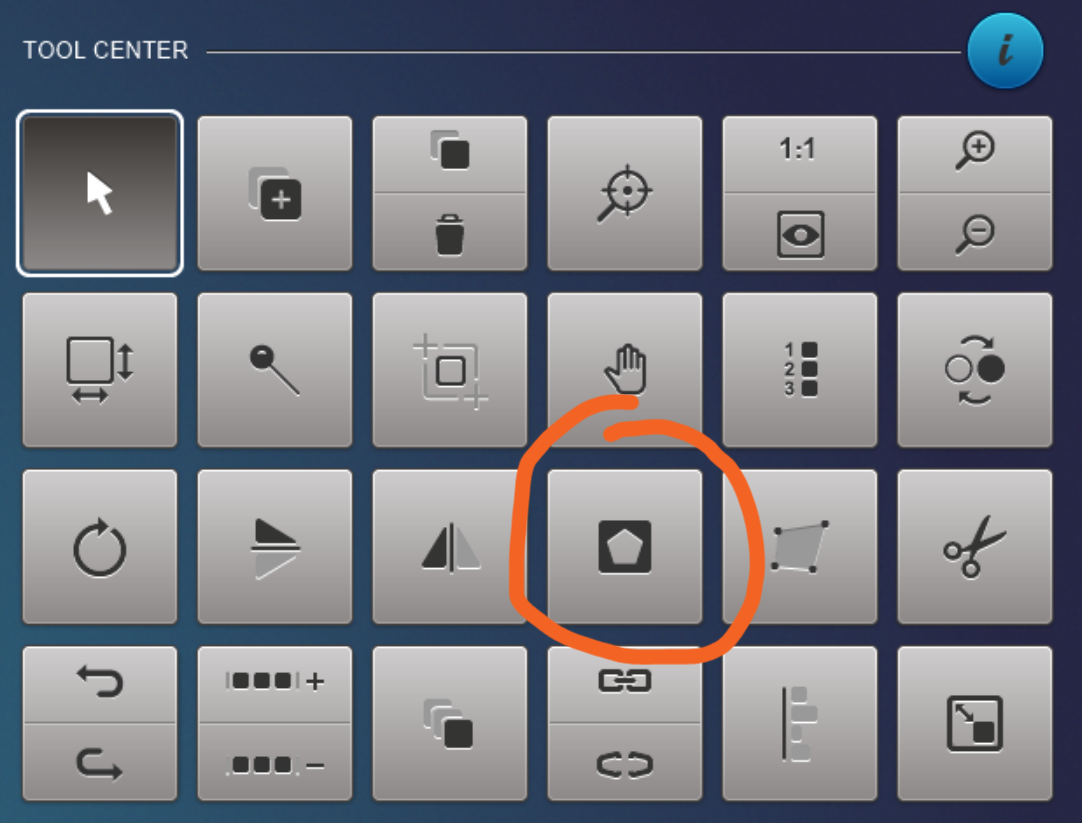
Masking is a partial concealment of a quilt design. With the mask tool you can ‘cut out’ part of your quilt design so it won’t be quilted. We will use the letters as our masks and let the Q-matic only quilt outside of them.
It also works the other way around. You can use the mask tool to only quilt inside of a mask. We’ll discuss that later in this blog post.
There are two ways to create a mask. You can use Selected Design, to turn a selected design into a mask. Or you can use Create Region to mark out a mask with the sewhead, or on the screen. We are going to use that second option.
We will use the Create Region option because the shape of the letters are not a shape that is already available in the Q-matic database. A second reason why we want to create our own region is because the lines in our quilt might not all be completely straight. Creating our own region gives us more precision in making a mask for the letters in the HAPPY quilt.
Masking the HAPPY Letters
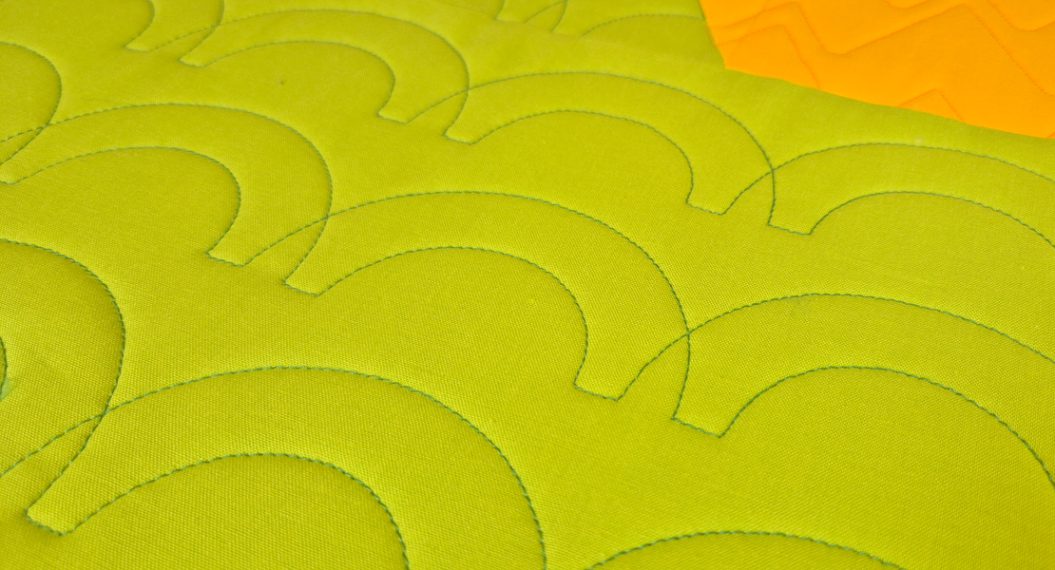
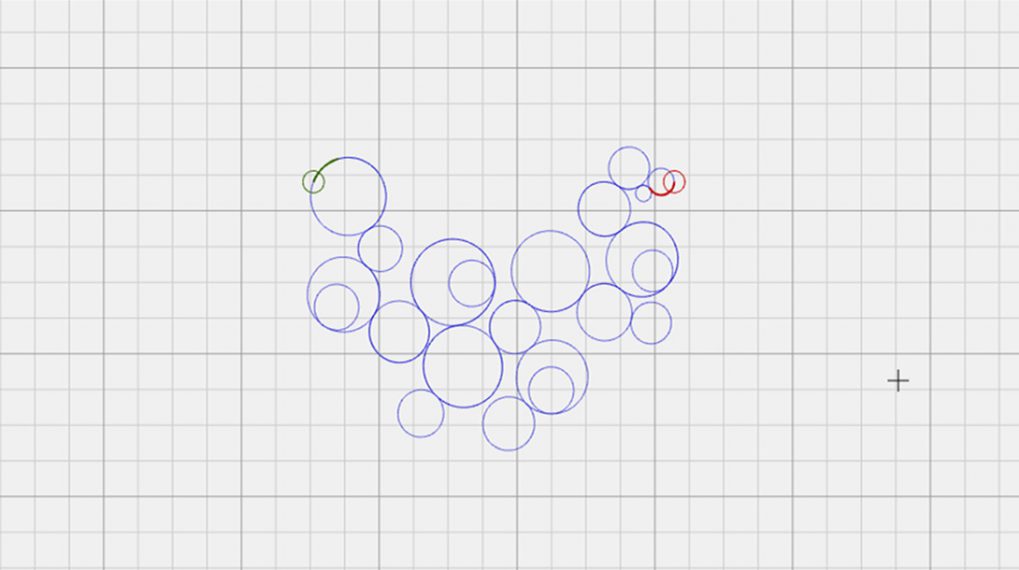
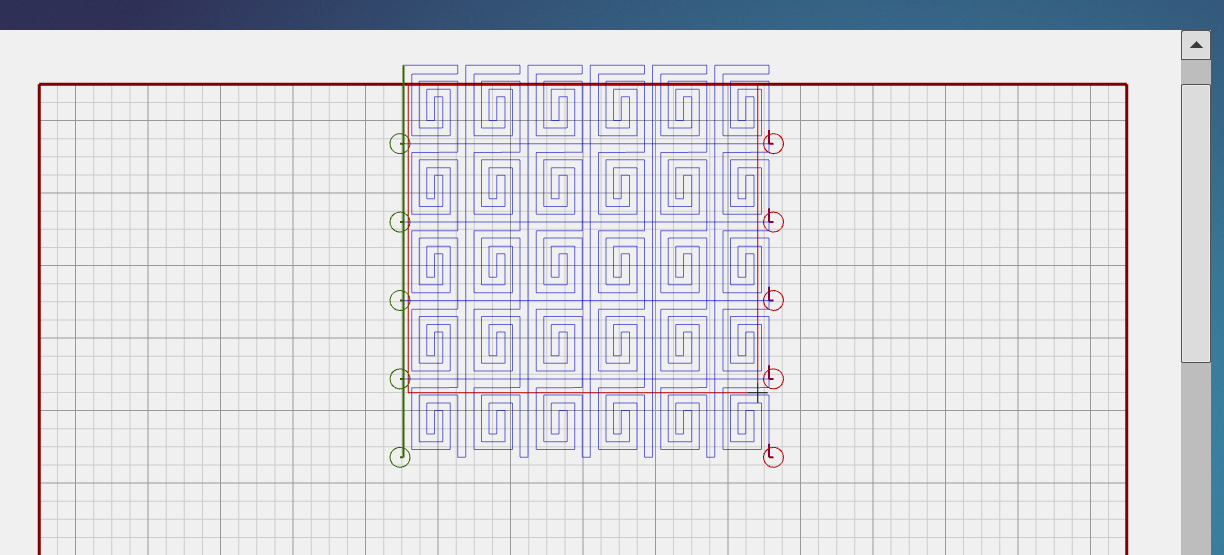
Before we set our mask, we will need an overall quilt design. I used a fun design with straight lines and circles from the library.
After you fill the whole area of your quilt with the pattern using Multiply, you are ready to set a mask.
It is important to set the overall pattern for the whole quilt before you use the mask tool, not just for the first few rows
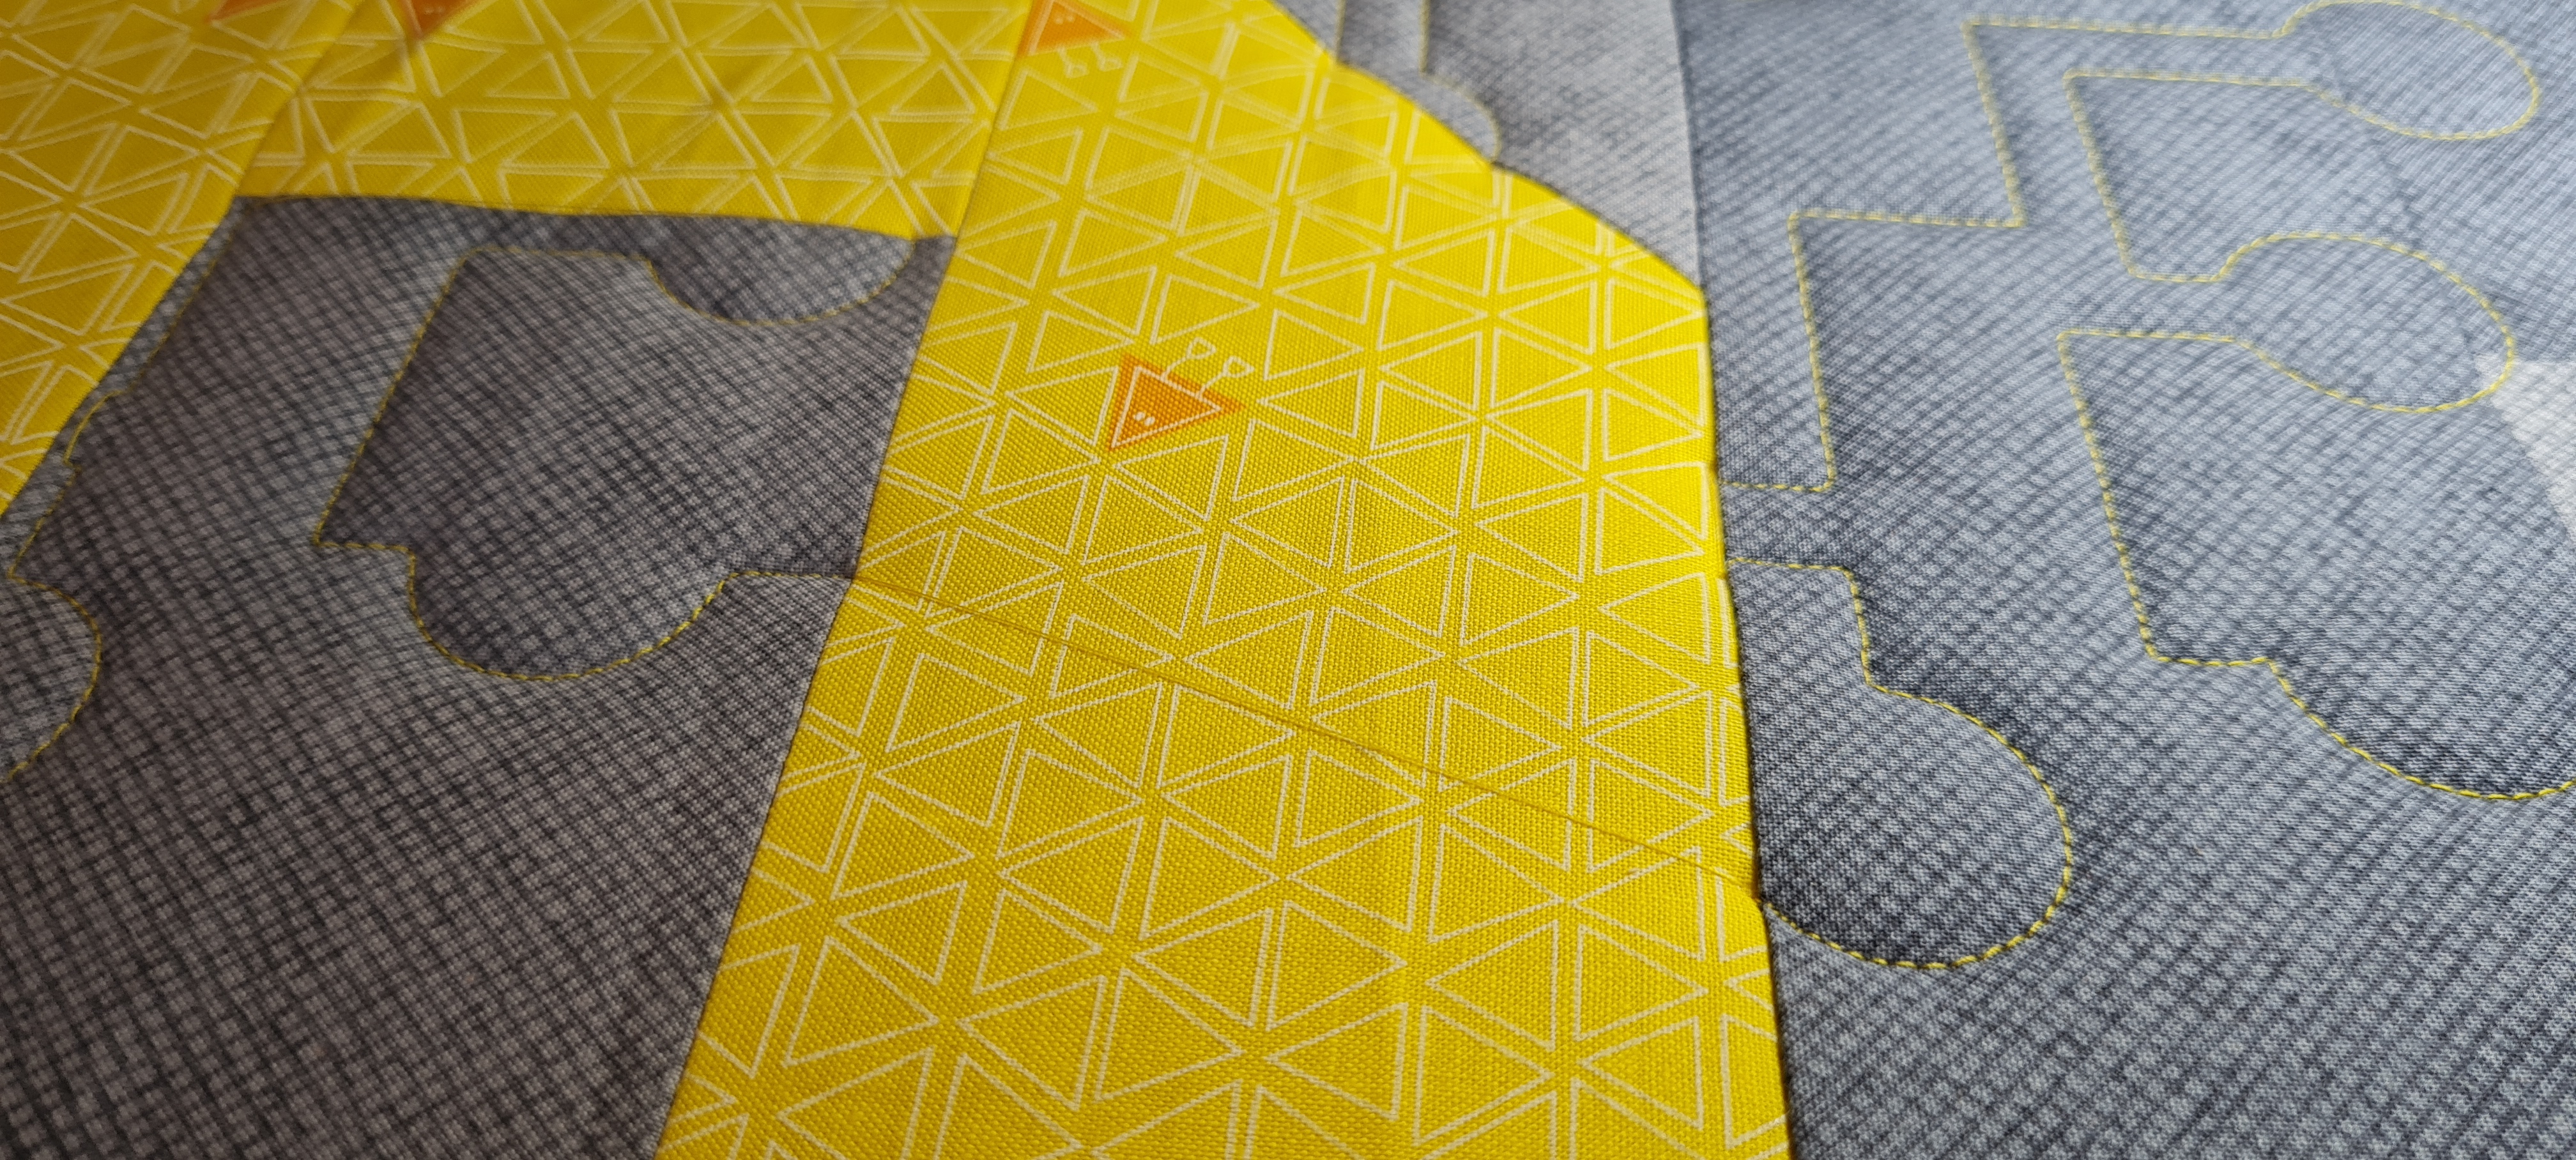
You will mask the yellow HAPPY letters along the way. Each time you move the quilt you will have to mask the letters that are in the area you are about to quilt.
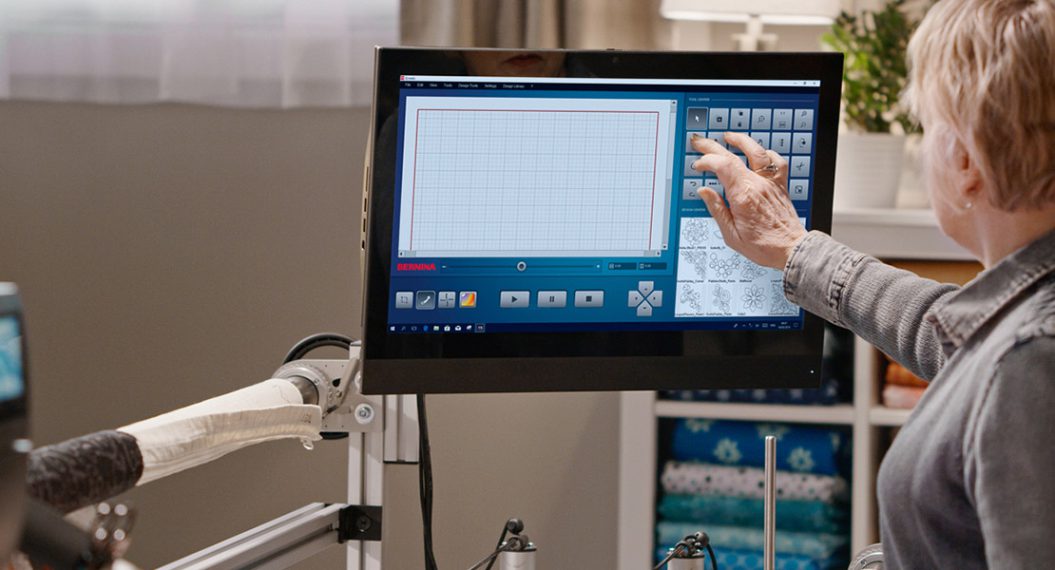
Menu Settings
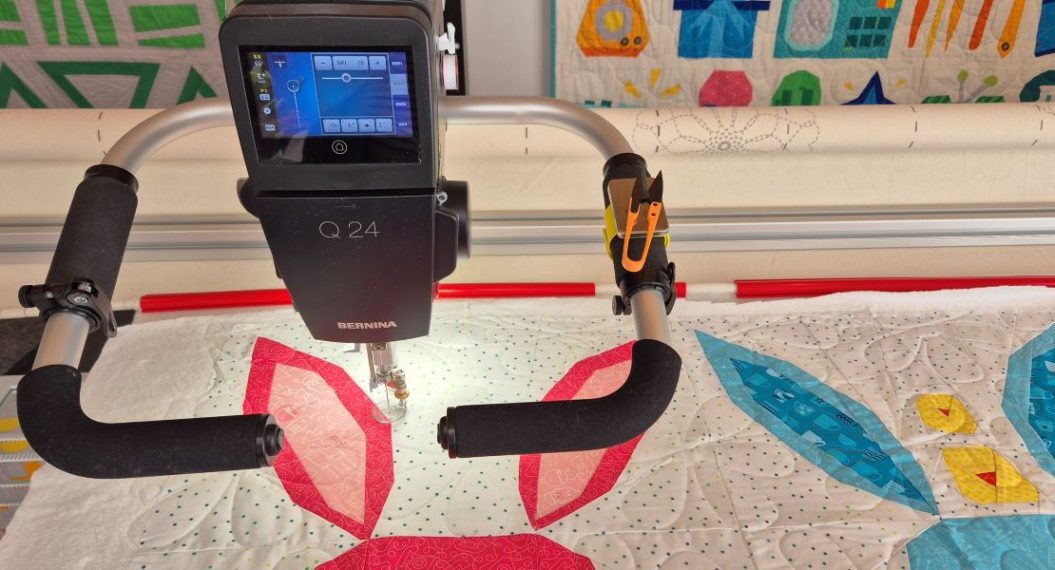
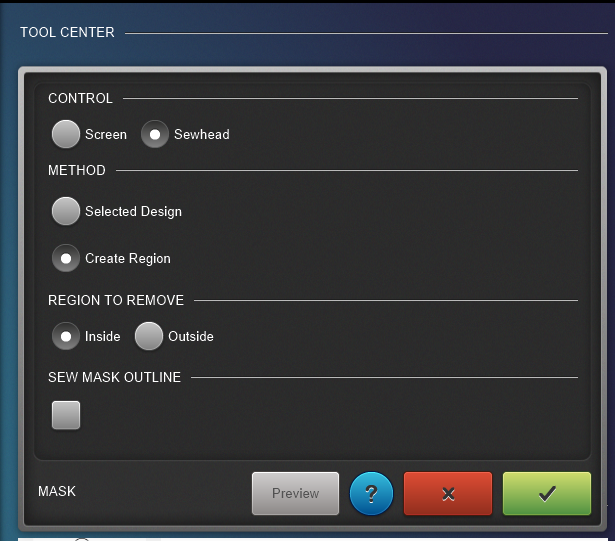
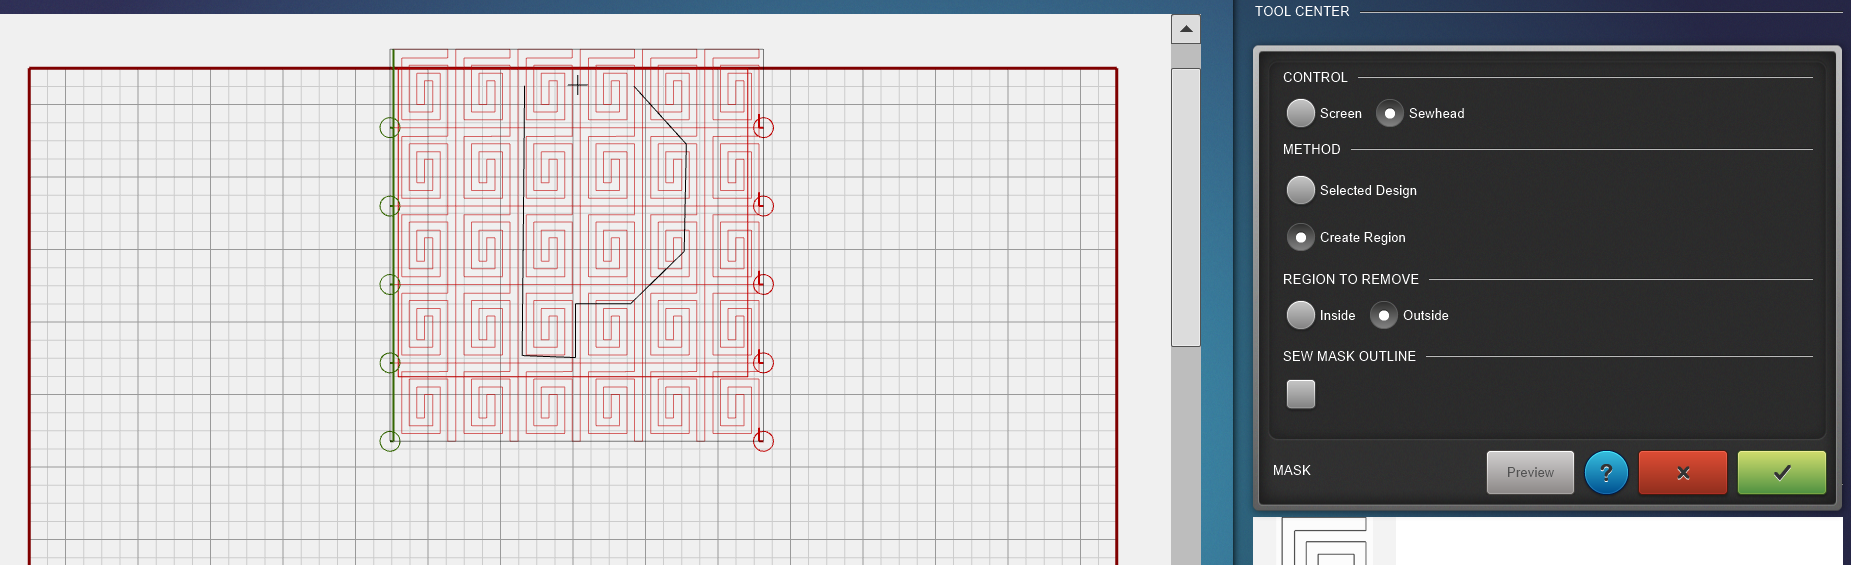
For this quilt, I used the Sewhead to mark my letters. Here are the steps I followed in the menu.
- Open the Mask tool
- Select Create Region and then Sewhead
- Region to remove should be Inside
- Choose if you want to Sew Mask Outline or not
Using the Sewhead to Mask
Now it’s time to move the sewhead to all the corners of the area you want to mask. You can move the sewhead around. Start somewhere on the edge of the letter and press Set on the display.
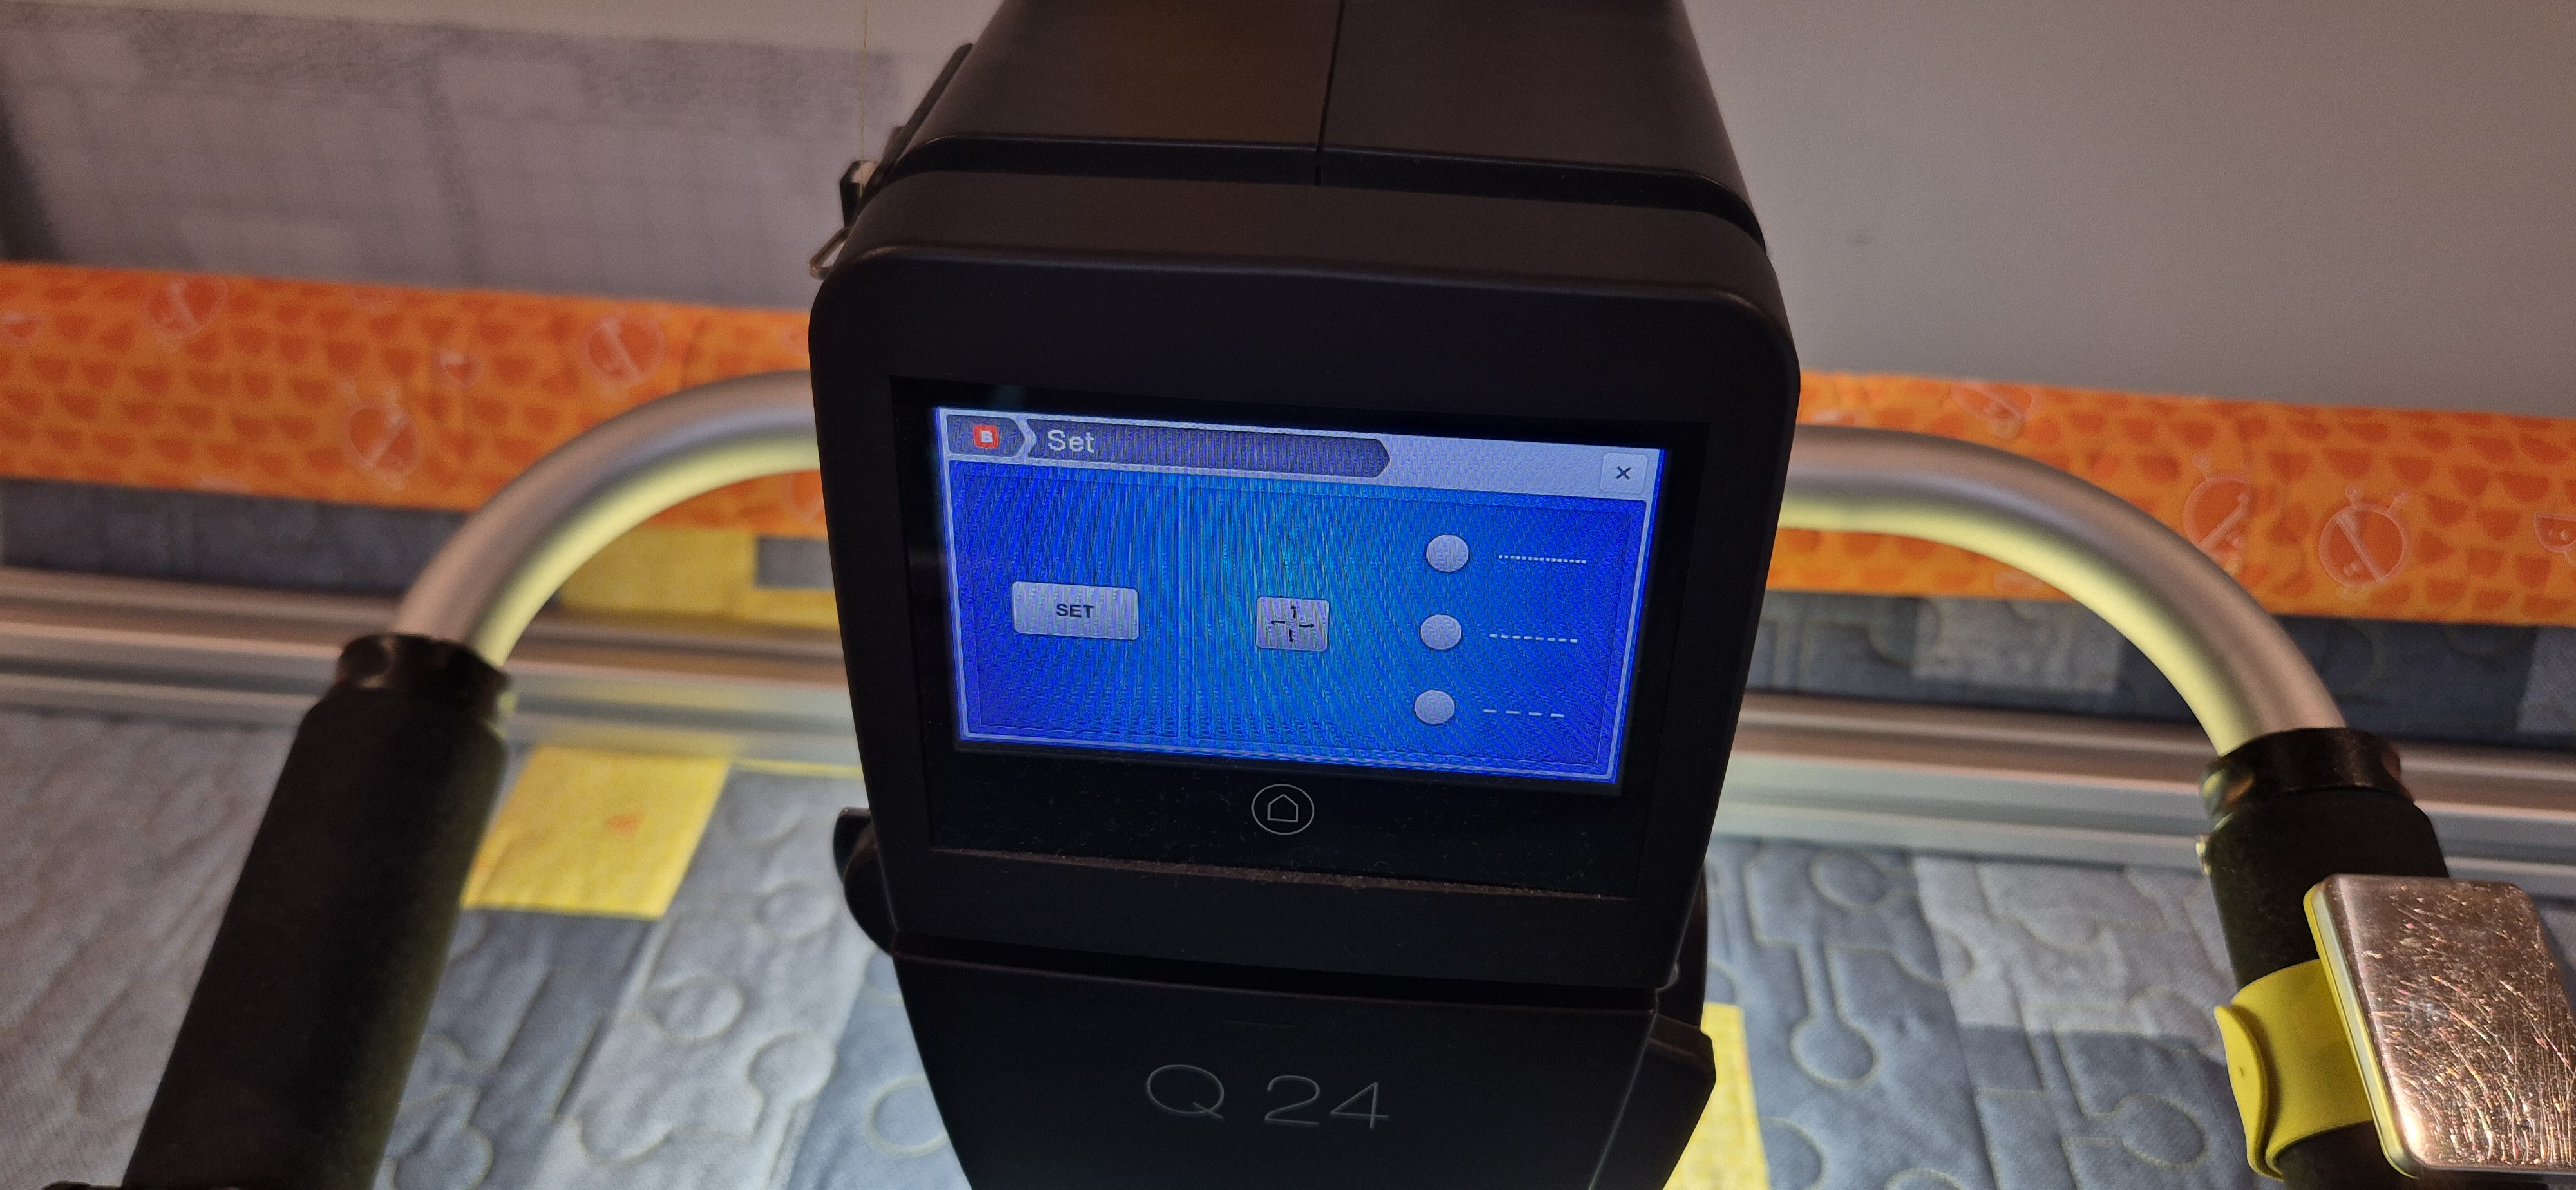
Now move the sewhead along the edge until you come up to the next corner. Then press Set again. The software will now draw a line from your current location to the starting point.
This way you can ‘draw’ all around the shape that you want to mask.
Partial Letters
We are ‘masking as we go’, so you only need to mask the parts of the letters that are on the edge-to-edge design that you’re about to quilt. Let me explain that a little bit further.
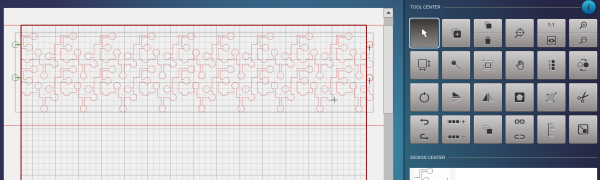
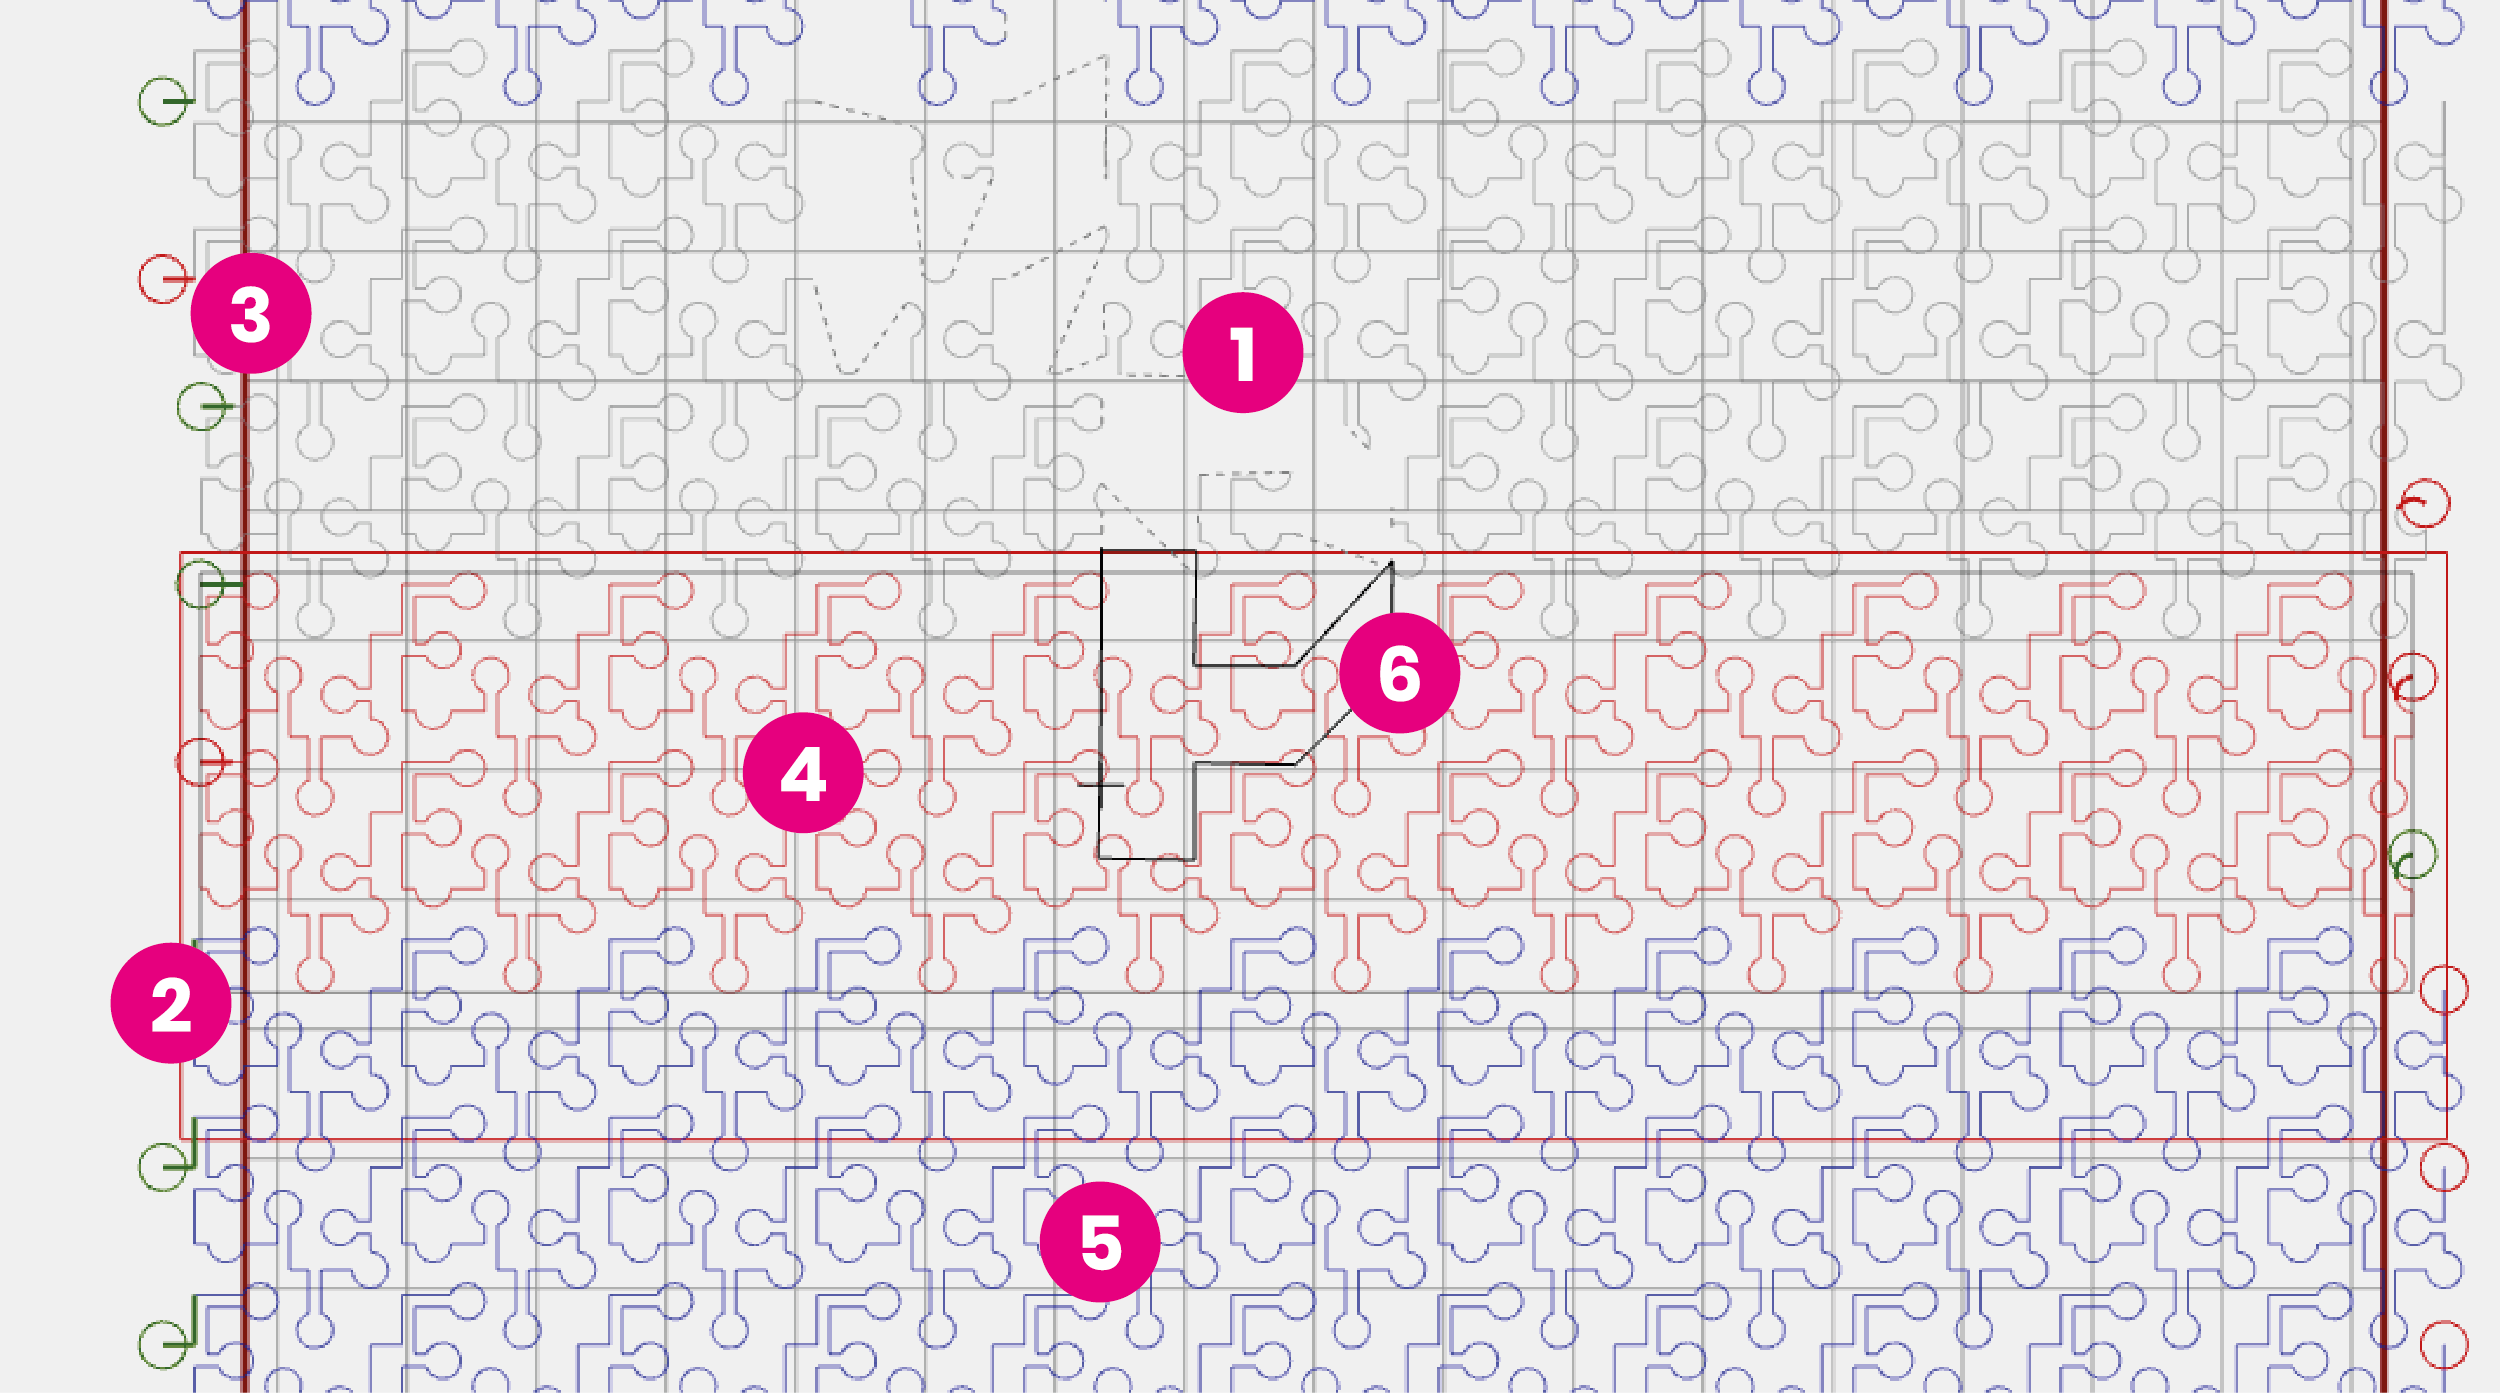
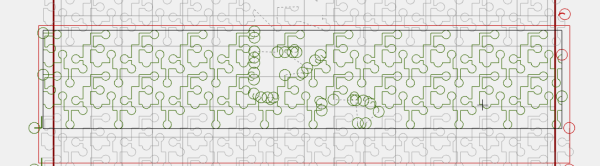
In the screenshot below you can see multiple things:
- The grey quilt lines are the part that is already quilted.
- The red rectangle marks my save area
- The dark red/black vertical lines are the edges of the quilt
- The red quilt lines are the part that I’m about to quilt
- The blue quilt lines are not selected and will be quilted later
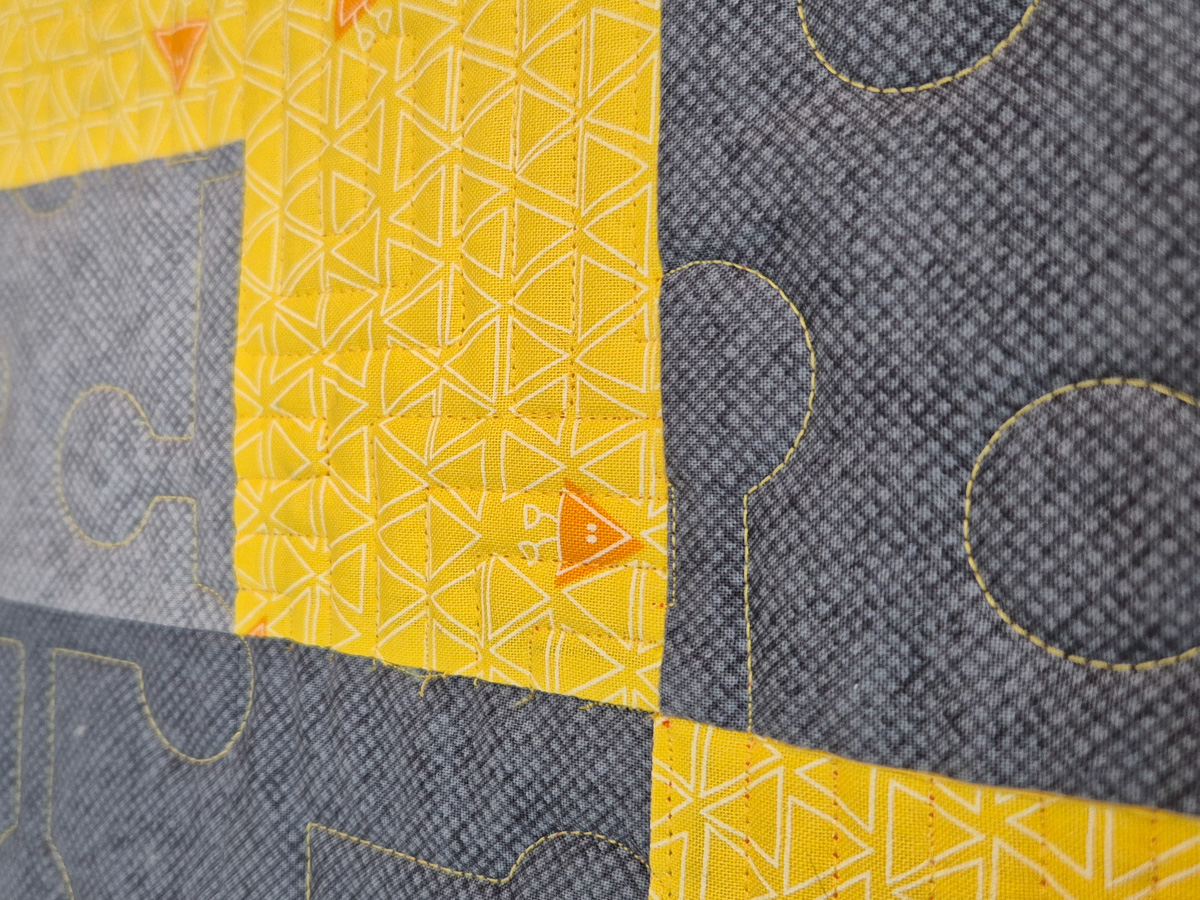
- The black lines in the screenshot are the lines of my mask
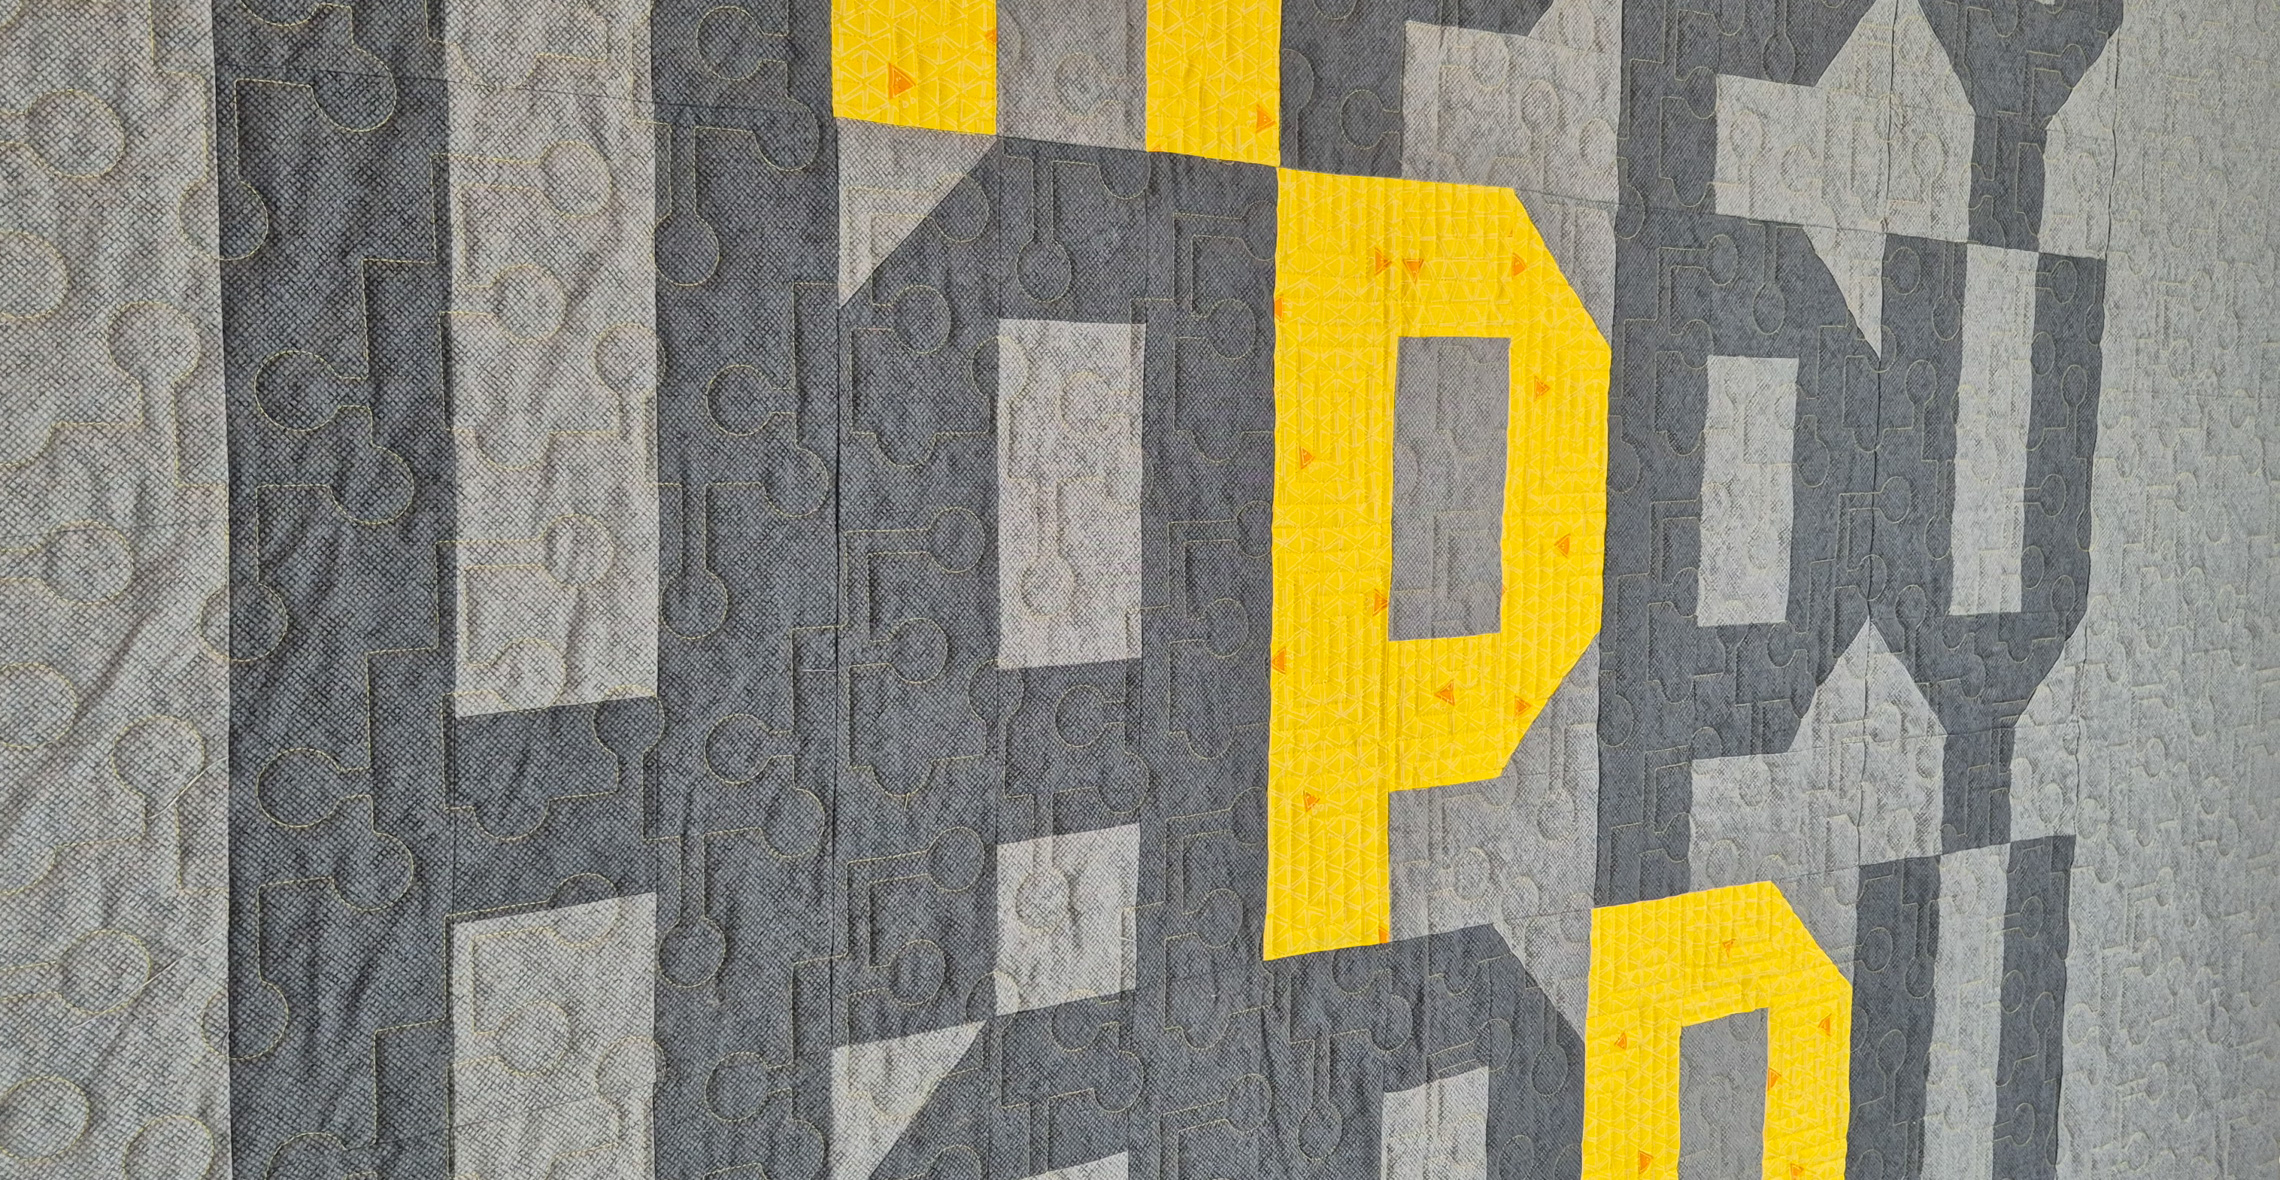
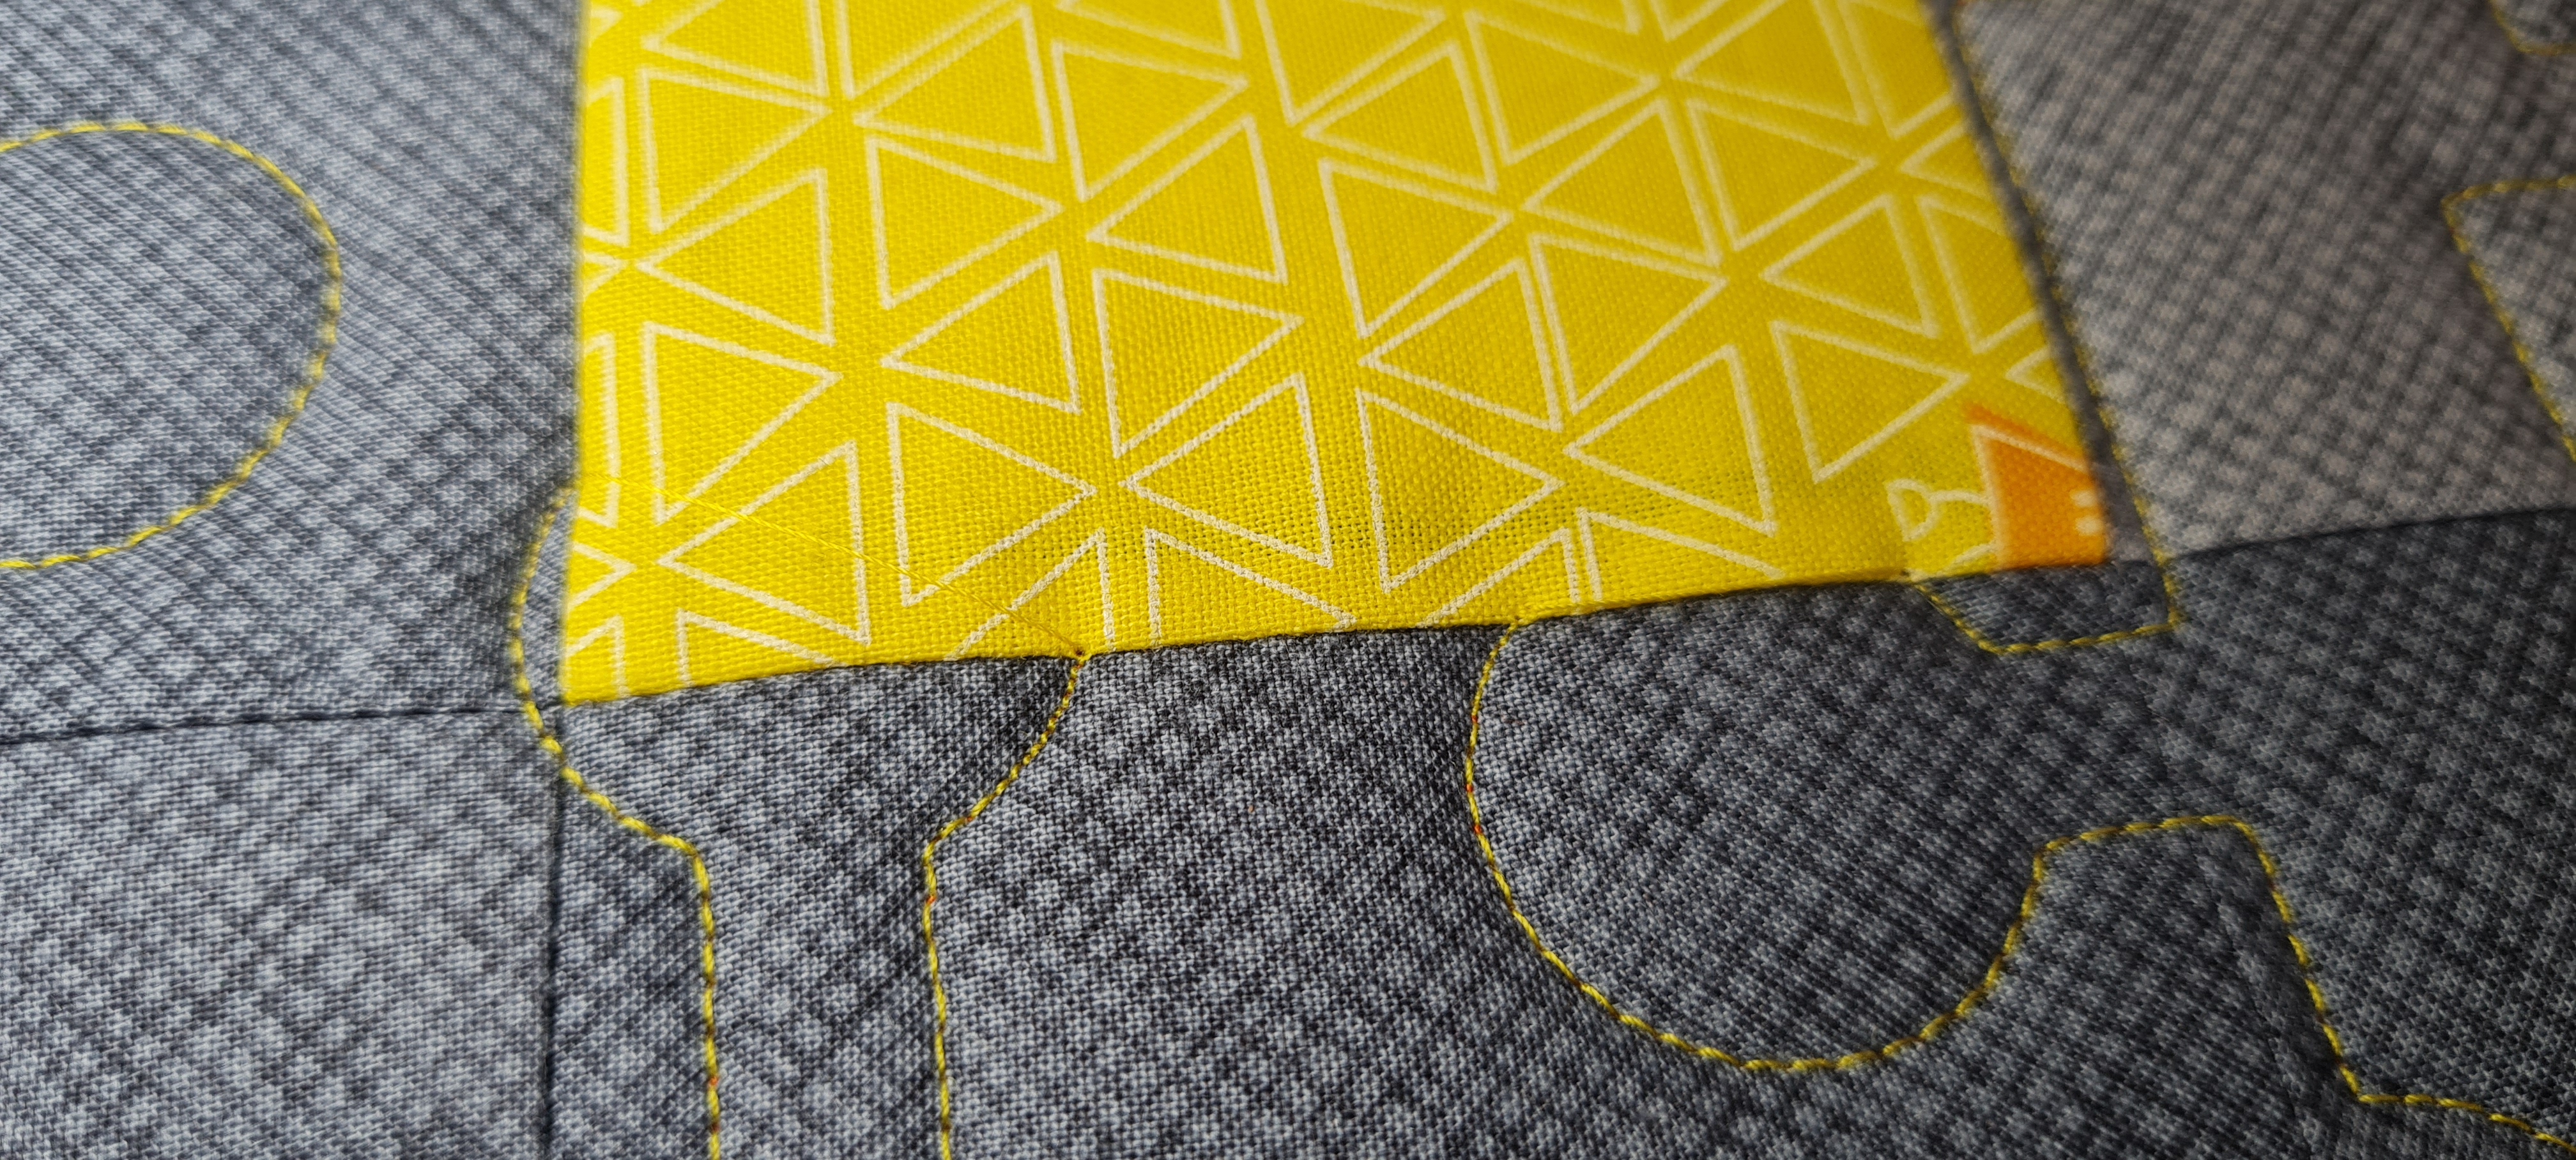
Let’s zoom in on the lines of the mask. In the middle image below, you can see the complete letter from the quilt in pink. We only need to mask the part of the letter that is on the red quilt lines. the parts of the letter that would fall on the grey or blue quilt lines are not important.
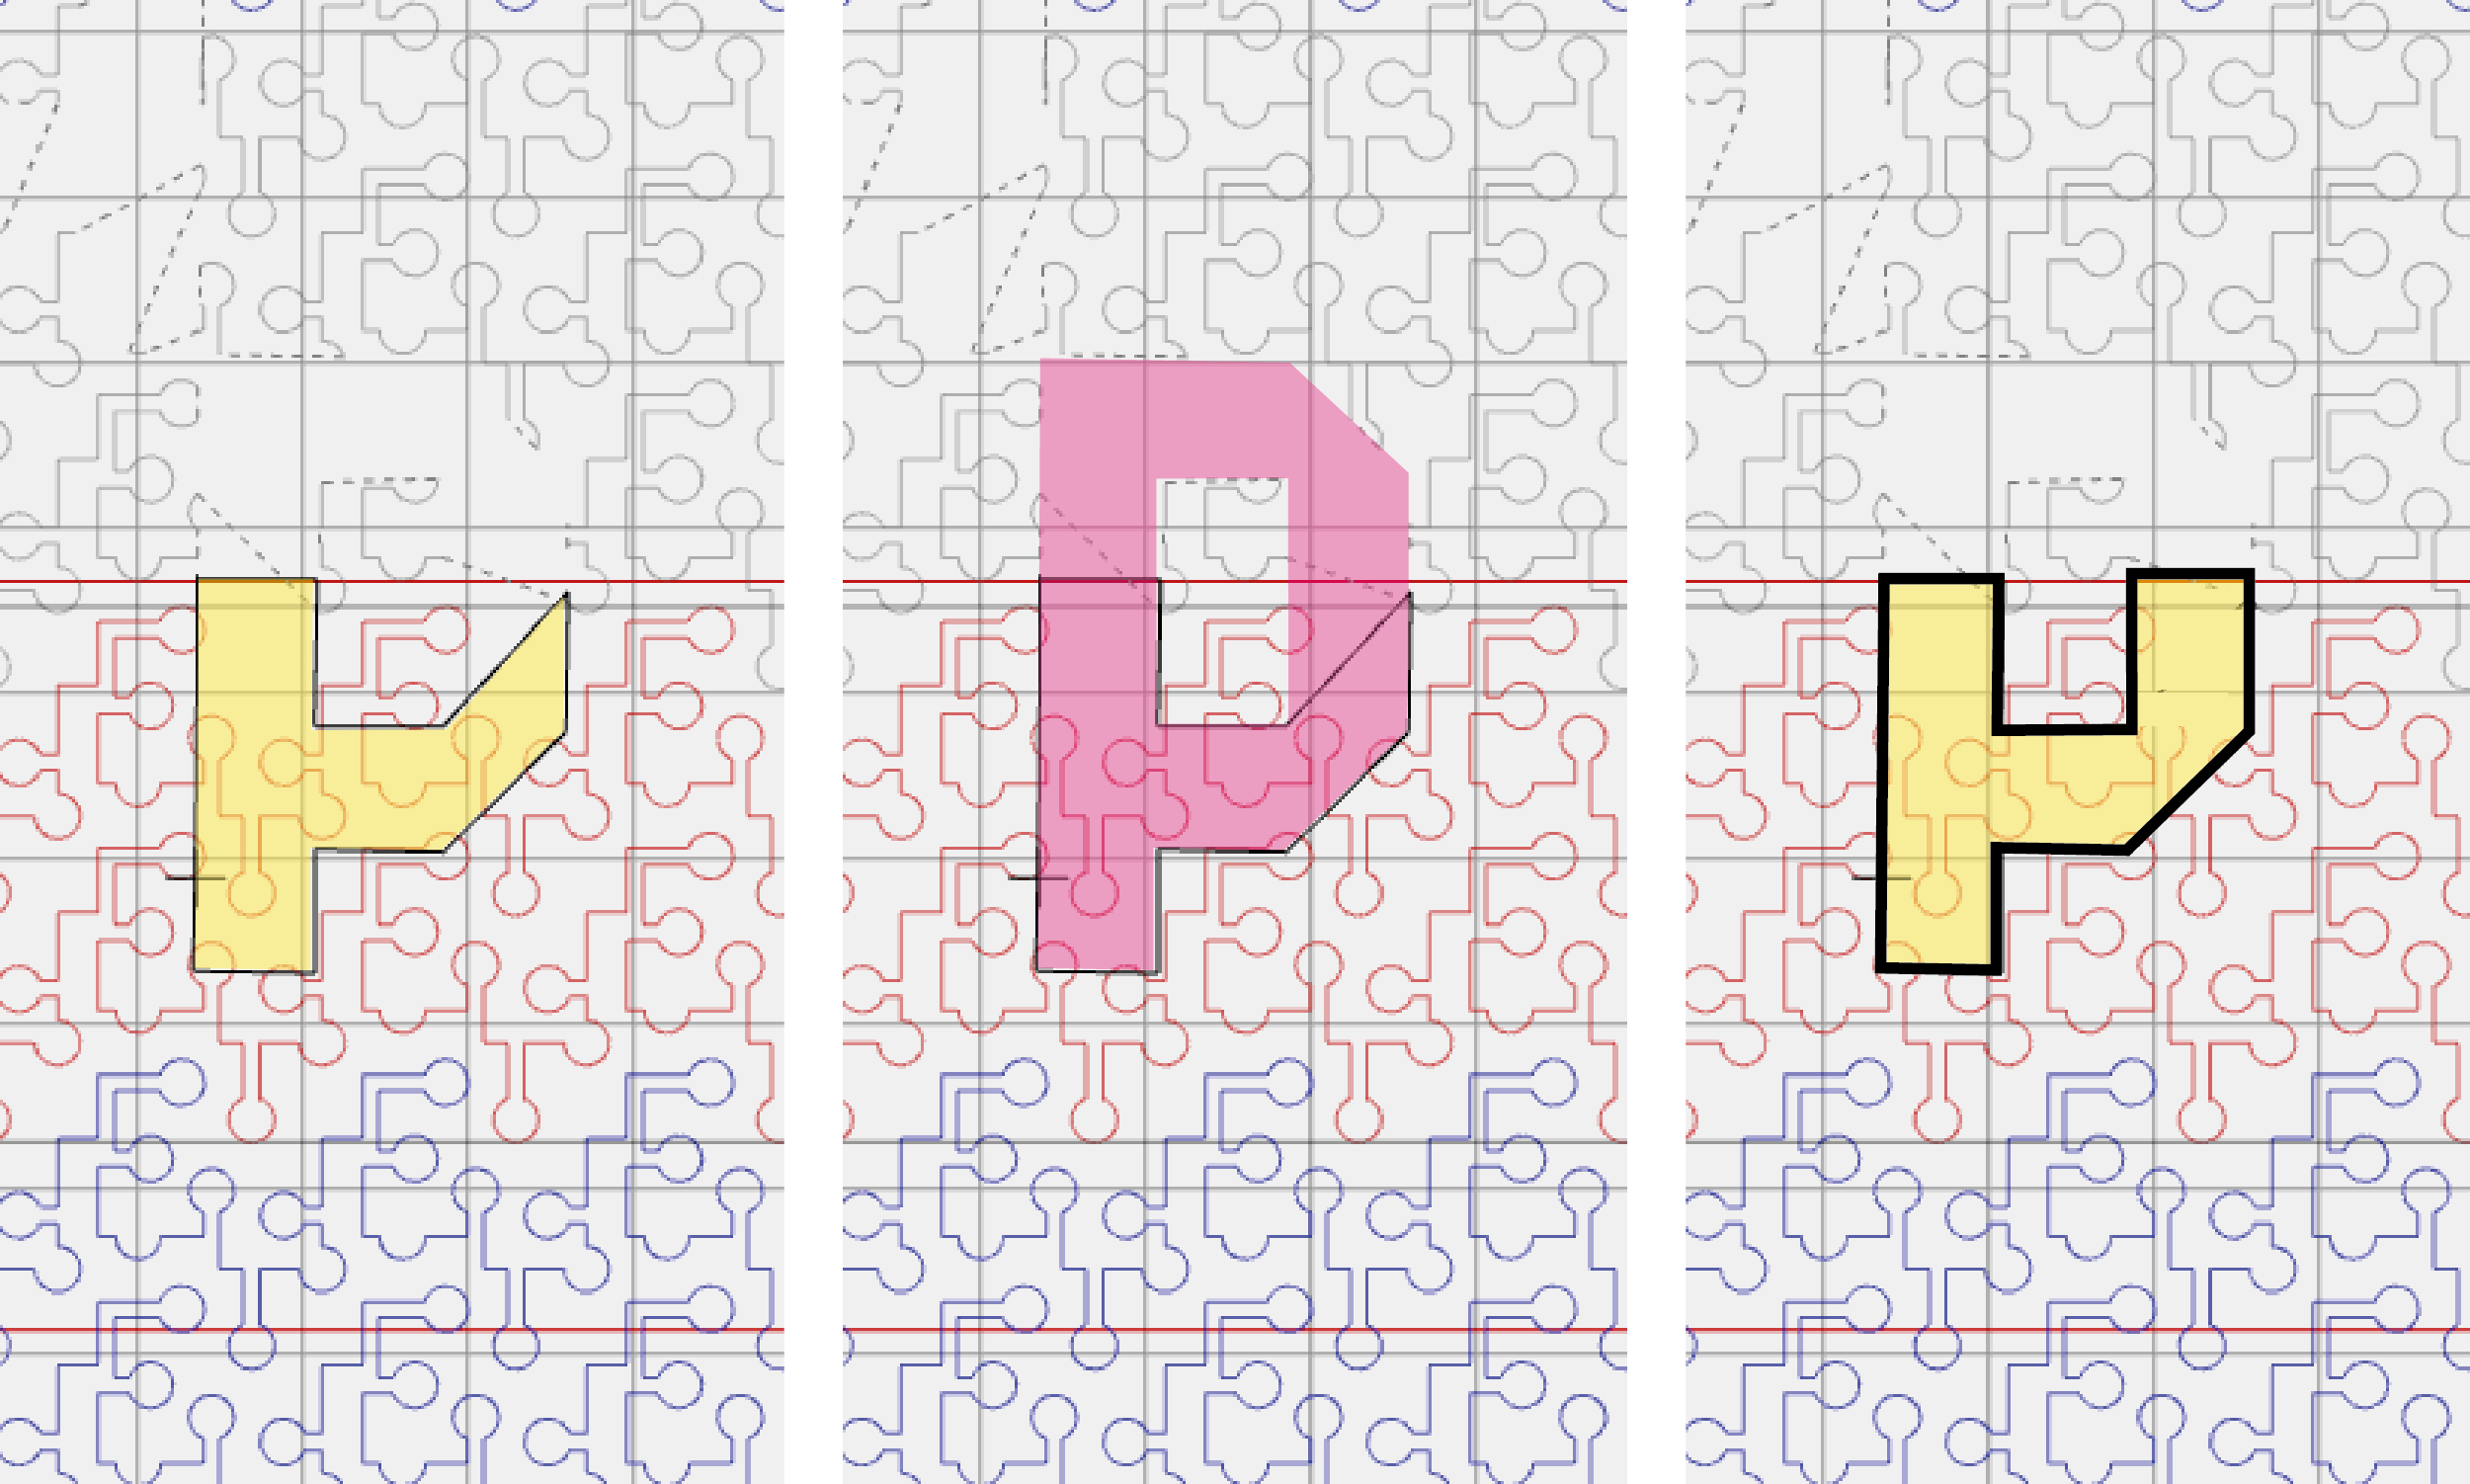
On the left side, you can see the area I masked. I only found out while it was quilting that I missed one corner of the mask. On the right side in the image above you see the shape my mask should have been. Luckily things don’t always go perfect over here so I can show you what happens if you miss a point 🙂
If I would have spotted this mistake earlier I could have just pressed the undo button in the software and create my mask again.
There is a small part of the next letter P, overlapping with the red quilt lines that we’re about to quilt. So we also need to mask that shape.
Quick Tip: if you want to check if a letter of shape falls into the red area that you’re about to quilt. Just move the sewhead over to that part on your quilt and find the little cross on your screen. If that cross is within the red area you need to mask that part.
Let’s Quilt
After checking if you masked everything correctly you can go ahead and quilt. The green lines are now going to be quilted. Do you see all the green little circles? Those are the spots where the machine will stop and go.
In the menu bar, under Settings, you can choose if you want the machine to Pause to pull bobbin. With this setting you can choose if you want to bring up the bobbin thread after each stop, or if you just want the machine to continue sewing.
Lots of Threads
I choose to let my machine just keep sewing after the stops. So with every stop, the machine hops over to the other side. Then there will be a thread on the top and the bottom of the quilt along the line that the machine skipped.
I set my machine up to secure stitches when it starts or stops with a design. Then it will be safe to just clip off all these threads when you’re done quilting.
Securing can generally be activated or deactivated in the menu, under Tools and Sew Options. Or in the Tool Center under Sew Options.
Moving the Quilt
When you quilted the rows in the save area it’s time to move the quilt. After you rolled your quilt over the new area to quilt you first need to realign the safe area. Read this blog post on how to do that.
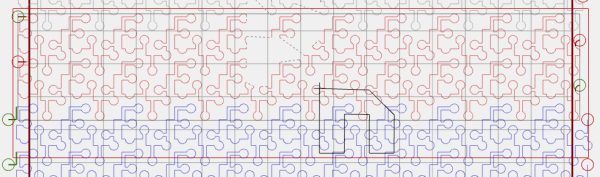
Now you can check which parts of the HAPPY letters are on the red quilt lines and need to be mask.
Quilting the HAPPY letters
When the quilt is quilted, but the HAPPY letters are not, you have a few options.
Fast and Easy
The quickest way to finish the quilt: the letters could stay unquilted. We quilted all around the letters with our over all pattern. So in theory there is enough quilting done on the quilt to leave the letters unquilted.
Rulerwork
If you’re not done quilting yet, you could quilt the inside of the letters with some ruler work. To accentuate the letters you could for example echo the outline of the letters.
Hand Quilting
Another option is to do hand quilting inside the letters. Some big stitching on the inside, along the outline of the letters would be fun!
More Masking
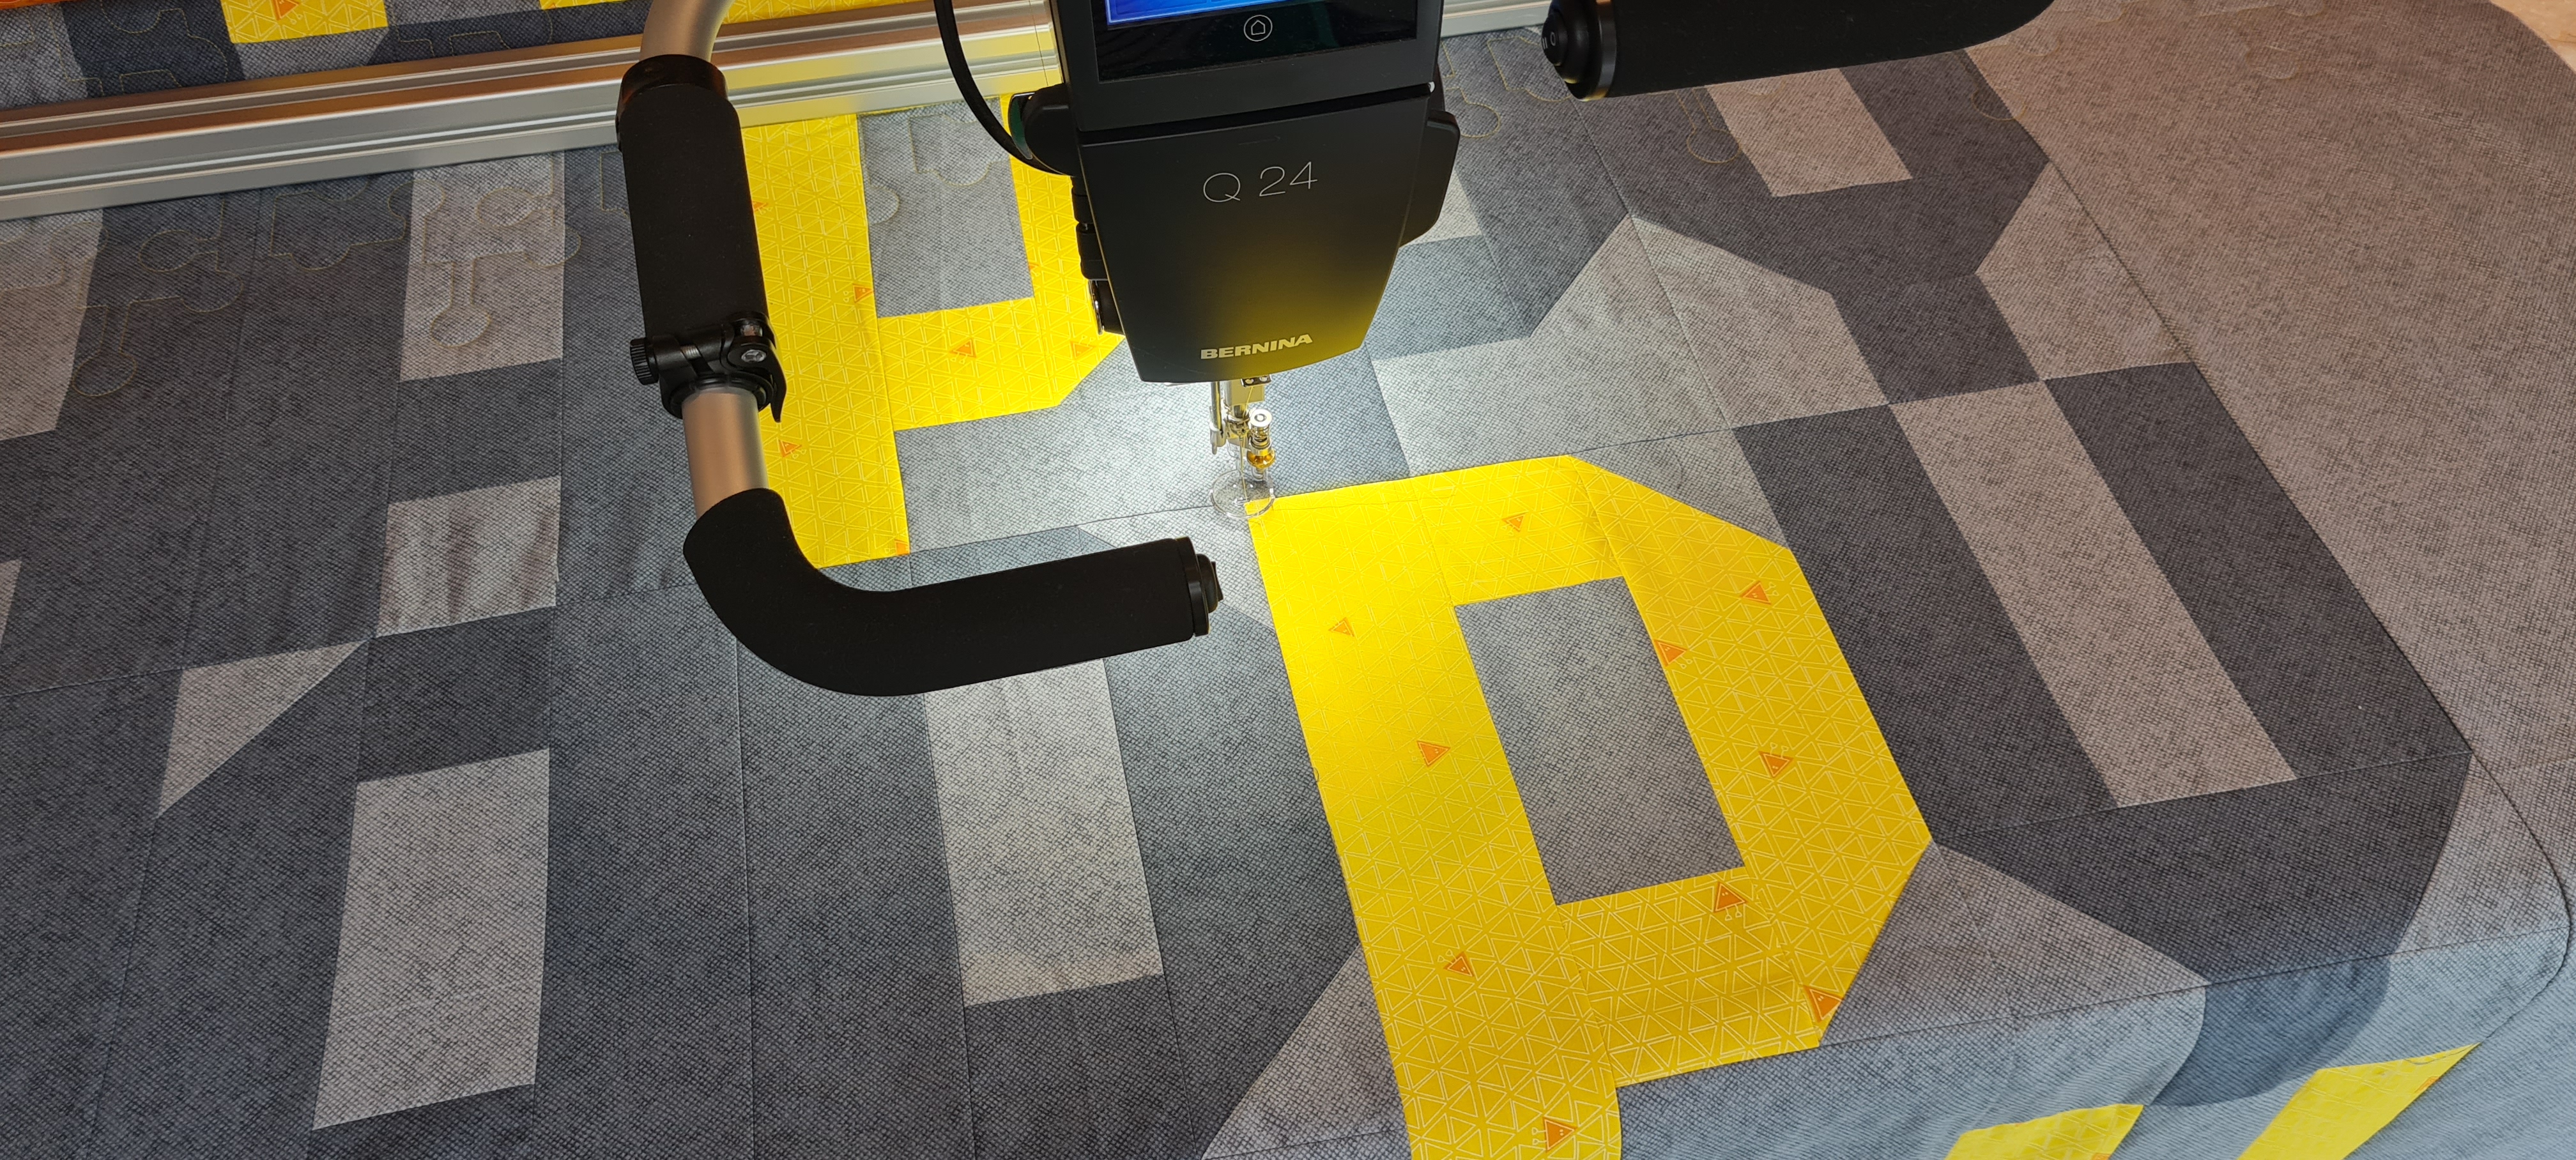
Another option is to use the mask tool again and quilt now only inside the letters. That is what I did for this quilt. The HAPPY letters fit perfectly in the Classic frame, one letter at the time.
Set your safe area around the letter and create a quilt design that fills that whole are.
I saved my project at this point, so I could open it and use this as my starting point for each letter.
Select the quilt design and then open the mask tool.
Select Create Region and Sewhead. Make sure to select Outside as the region to remove.
Now you can move the sewhead around and set all the corner points.
 The letter P has a rectangle inside the letter which needs to be removed. So we open the Mask tool again. Now select Create Region, Sewhead and Inside.
Now you can select the corners of the inside shape of the letter.
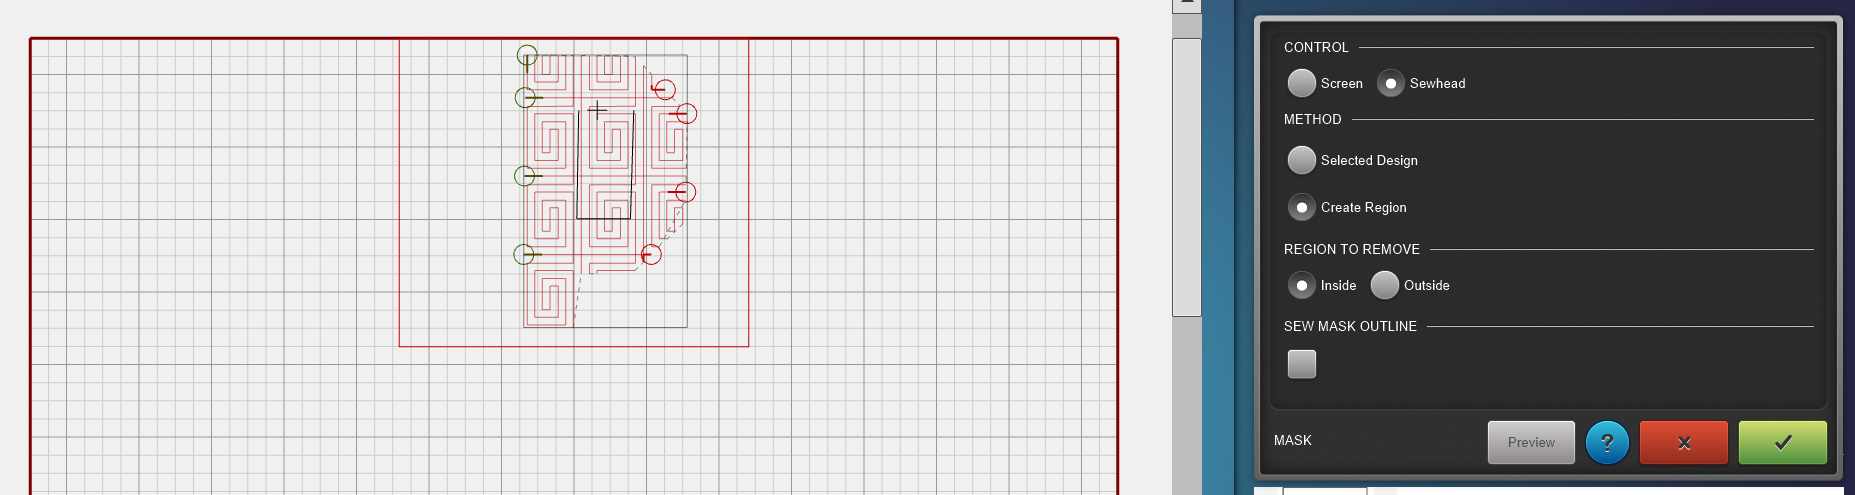
Now the letter is ready to be quilted!
Almost HAPPY Quilt
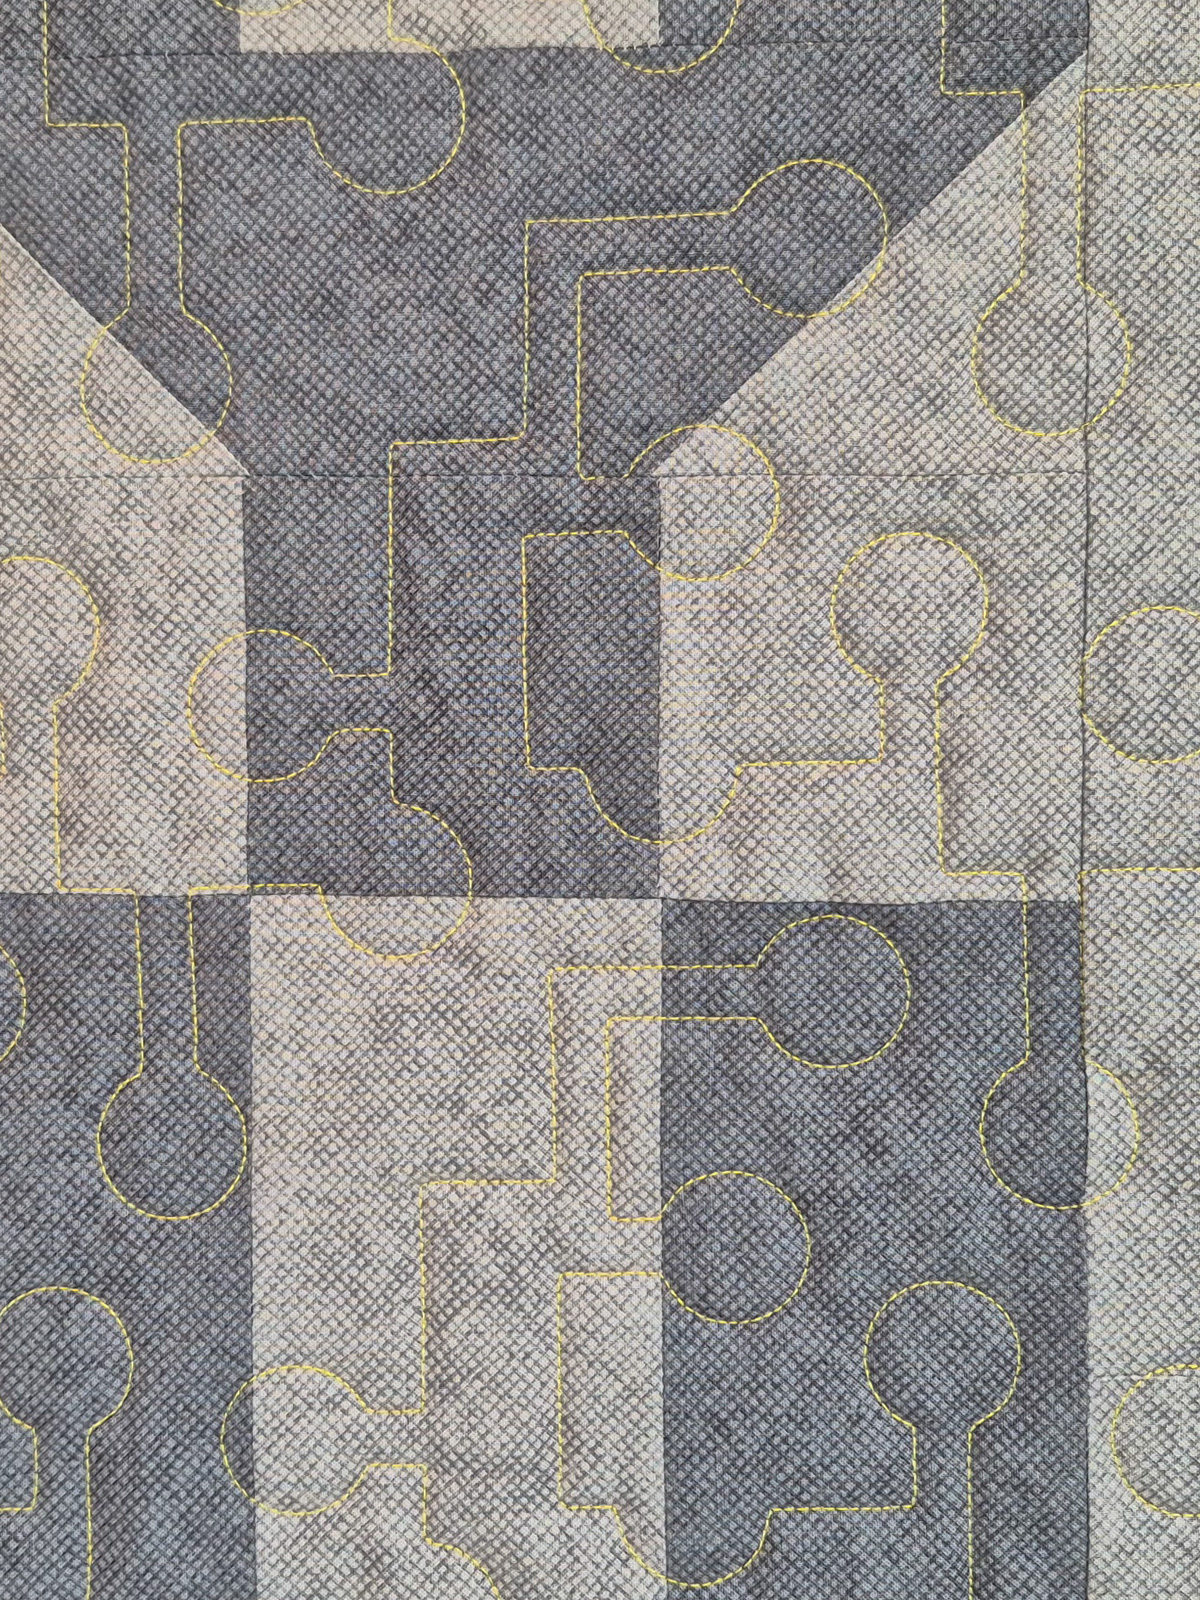
And there we have the HAPPY quilt all quilted. Now it patiently waits on my ‘it only needs a binding pile’. Hope to have it finished soon so the quilt can be a true HAPPY quilt on our couch. Autumn storms have arrived in The Netherlands, perfect weather for a new big and cozy quilt.
Hope you’ll give the mask function and the HAPPY quilt a try sometime. Don’t forget to use the code HAPPYBERNINA for a 10% discount on all Happy Notes patterns and kits on my website. Valid until the end of October ’24.
Groetjes Irene!