How to Create a Diamond Quilt Block with Freezer Paper Piecing
Hello! MJ Kinman here. I created my “En Pointe” pattern specifically for quiltmakers—beginners and experienced alike—who may not be familiar with freezer paper piecing. This is the same technique I use to create my giant gemstone quilts with my BERNINA 770 QE. I like to describe this technique as traditional piecing using freezer paper as templates because if you can put two pieces of fabric right sides together with a quarter-inch seam allowance, you can do this!
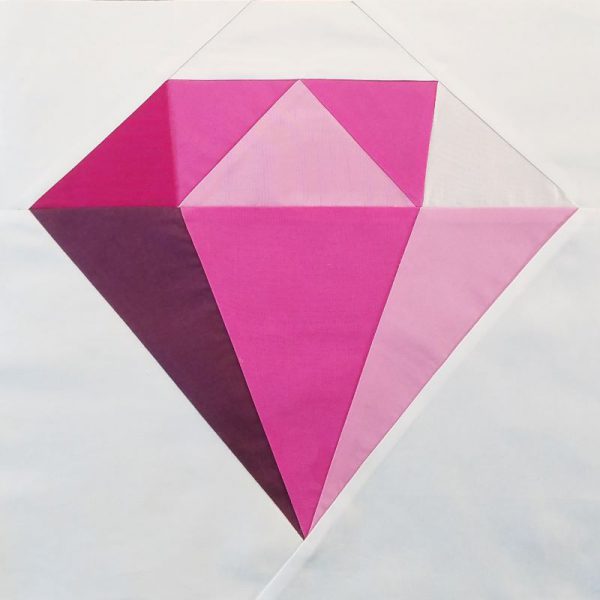
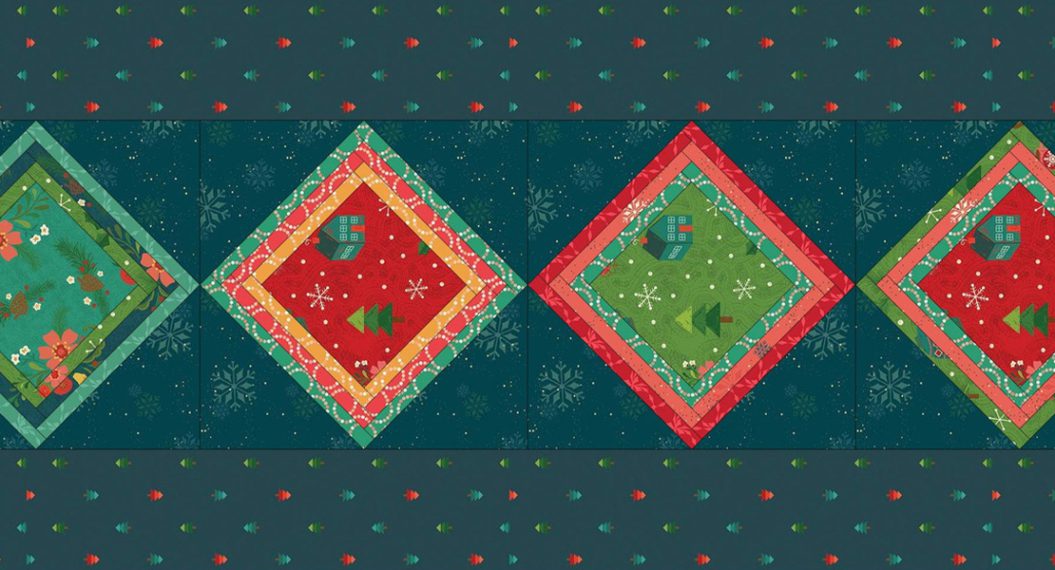
“En Pointe” is a little dancing diamond set in a 12″ block. It is segmented into quadrants, which you can then print out onto freezer paper and join together using either double-sided tape or Washi tape, a wonderful product that won’t melt under the heat of a hot iron.
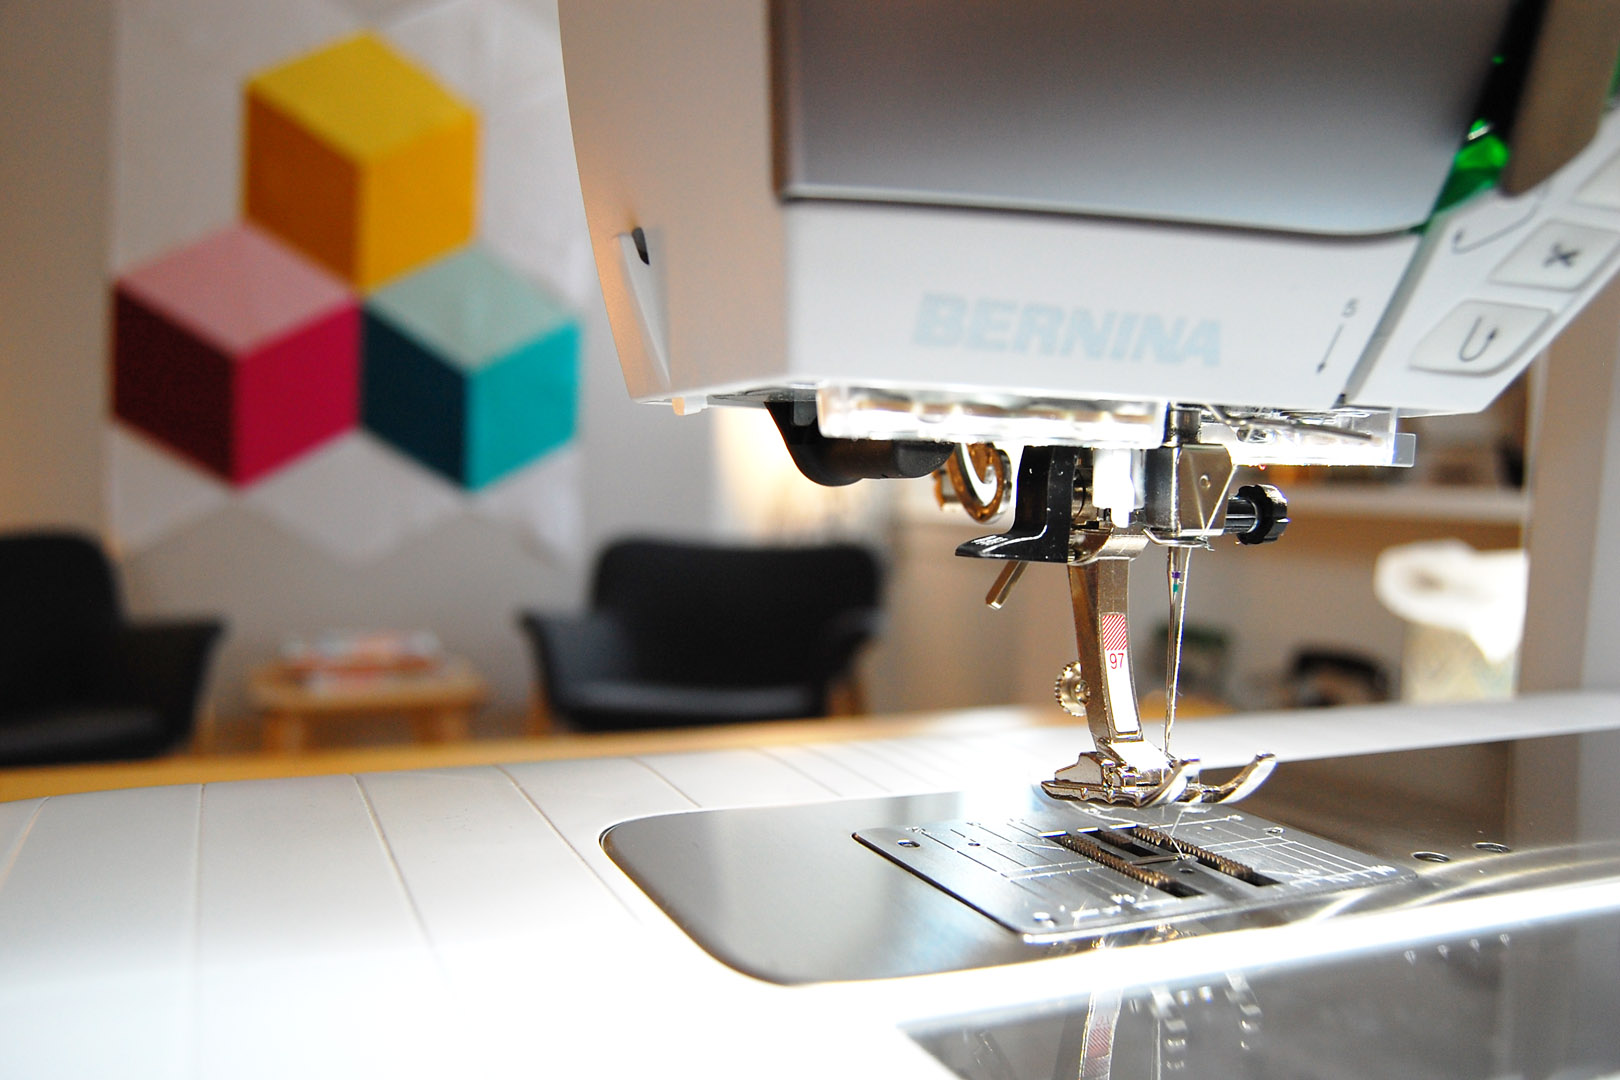
BERNINA Ambassador, MJ Kinman, with her BERNINA 770 QE.
Enjoy the process!
Materials to Create a Diamond Quilt Block with Freezer Paper Piecing
- PDF file of “En Pointe” pattern
- Freezer Paper (4 sheets 8.5” x 11”)—You have several options for sourcing freezer paper:
- You can find freezer paper in the paper goods section of your grocery store. It typically comes in rolls of either 15” or 18” widths. Be sure you select freezer paper and not wax paper or parchment paper. The magic of this product is that you can write or print on one side, but the other side has a waxy substance that adheres to fabric when you touch it with a hot iron. Cut 8.5” x 11” sheets from the roll which you’ll feed into the printer so that it prints onto the NON-waxy side. These self-cut sheets are sometimes a bit tricky to feed through a home printer. However, I usually have better luck holding onto the top edge of the sheet and guiding it through.
-
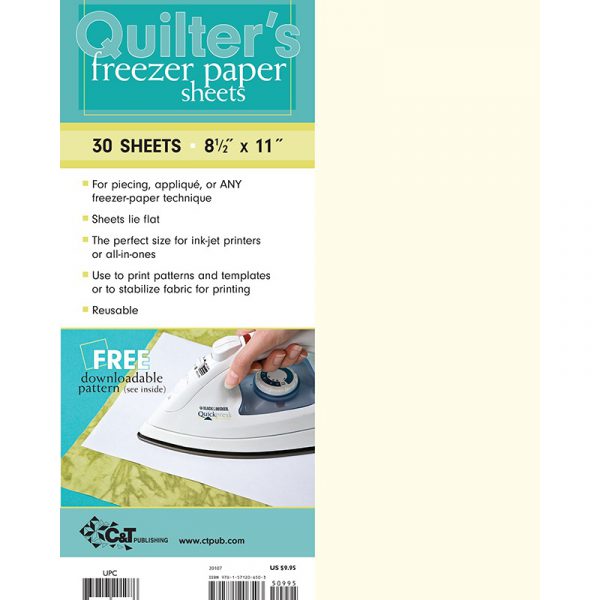
- An alternative to making your own sheets is to purchase pre-cut sheets of freezer paper in packs of 30 or 70 sheets. My favorite brand is Quilter’s Freezer Paper by C&T Publishing. You can find Quilter’s Freezer Paper at your local independent quilt shop, on C&T Publishing’s website, eQuilter.com, or on Amazon.
- Home inkjet printer
- Regular copy paper
- 2 Highlighters, different colors
- Double-sided tape or Washi tape
- Rotary cutter & rotary mat (you may want to use 2 different rotary cutters: one to cut the freezer paper pattern and the second to cut your fabric)
- 12” ruler with quarter-inch measurements (specifically 1/4″ and 3/4″)
- Basic sewing supplies, including a seam ripper and a pair of tweezers
- Fabric marking pencils for light and dark fabric
- Sewing machine (I use a BERNINA 770 QE)
- Fabric—This pattern is a great stash buster. With the exception of your background fabric (“A” color code), you will only need a square of fabric no larger than 10″ x 10″. Use a fat-quarter for your background fabric (“A” color code).
- If you are using printed fabrics with lots of colors OR ombre/gradient fabrics, consider pre-washing. Sometimes the build-up of dyes can interfere with the freezer paper adhering to the fabric.
- Do not treat your fabric with any kind of starch products. These products can also interfere with the freezer paper adhering to the fabric.
Instructions to Create a Diamond Quilt Block with Freezer Paper Piecing
Introduction to the Pattern Codes
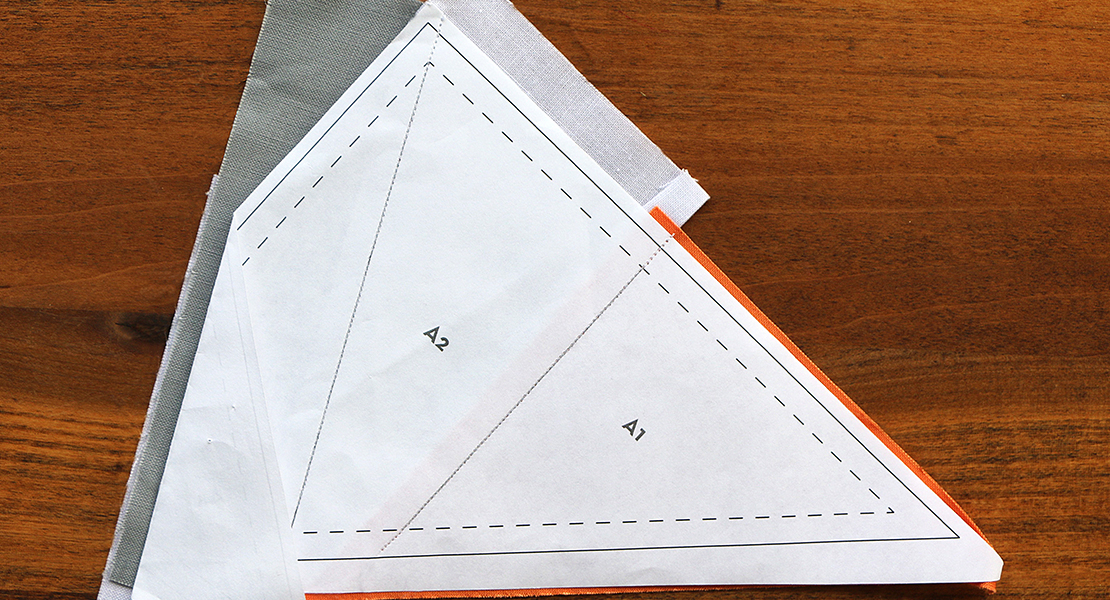
I love using freezer paper piecing to create my giant gemstones and I hope you’ll enjoy using it to create your own sparkling creation. Freezer paper is that amazing product that allows you to iron your pattern templates onto the right side of the fabric. Yet you can remove them without leaving a residue. Moreover, you can re-iron it to fabric several times.
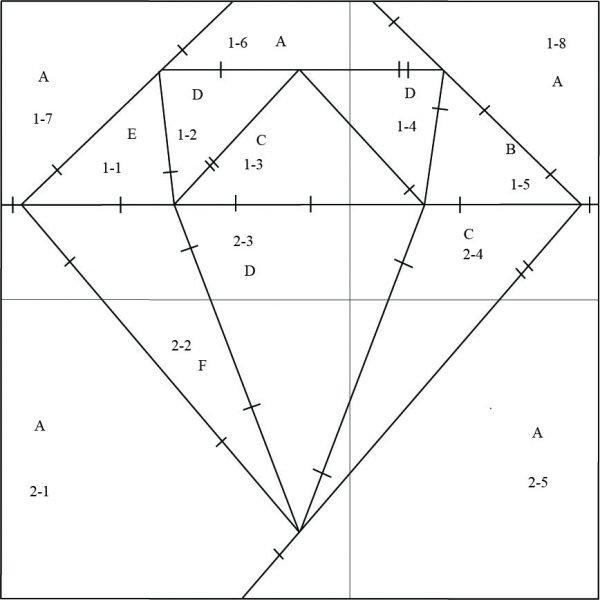
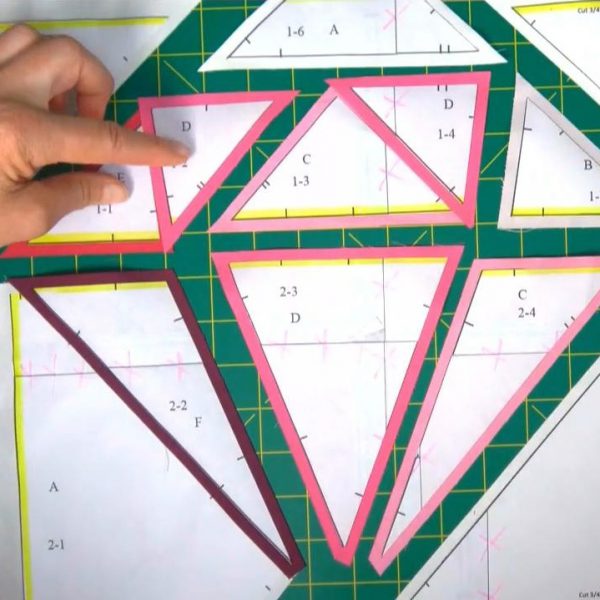
Each piece includes two codes and random hash marks along the facet lines. (See 2nd video under “Assembling the Pattern” below for more explanation of the codes.)
-
-
Unique Identifier Code
The 2-digit code is the Unique Identifier Code. No two pieces have the same Unique Identifier. The first digit is the section number. This pattern only has two sections, so the first digit of the codes is either a “1” or a “2”. The second digit is the facet number within that section.
-
Color Code
The letter code is the Color Code. This tells you onto which fabric you’ll iron this piece. This pattern requires 6 different fabric colors.
-
Hash Marks
The randomly spaced hash marks will give you confidence that you’re piecing the correct two pieces together, as well as help you piece units to other units.
-
Print out two copies of the quadrants of this pattern: one set on freezer paper and a second set on regular copy paper. The copy paper pattern is your key to sewing the pattern back together. It’s your treasure map!
Technique Overview
This method is traditional piecing using freezer paper as your pattern templates. Here’s a quick overview of the process of freezer paper piecing. All steps will be further described below and include images as examples:
- Print the pattern quadrants onto 4 sheets of freezer paper, then do the same on regular copy paper. Print on the paper side, NOT the shiny, waxy side.
- Tape the freezer paper quadrants together with double-sided tape or Washi tape, aligning the facet lines. You can use regular tape to join sections of the copy paper.
- Highlight the inside perimeter of the block and both sides of the line that separates Sections 1 & 2 with your first highlighter. This is your visual clue to consider whether you want to place these edges on the straight of grain.
- If you used double-sided tape to join your quadrants, use your second highlighter to draw little “x” marks across the lines where the quadrants were taped together. This is your visual clue that you will NOT cut on these lines. (Note: If you used Washi tape to join your quadrants, this step isn’t necessary because the Washi tape itself is your visual clue not to cut on that line.)
- Cut apart your freezer paper pattern on the facet lines, making sure not to cut on the line marked with “x’s” if you used double-sided tape to join your quadrants.
- Sort by color code, which is the letter code on each piece.
- Iron pieces to the RIGHT side of your fabric with the waxy side down.
- Place the largest pieces first.
- If a piece has an edge that is highlighted with your second highlighter color, place that edge on the straight of grain. If, however, that piece has another edge that is much longer, place the longer edge on the straight of grain instead. Bottom line: Use your judgment about which edge needs the most support from the stability provided by the straight of grain.
- Leave enough room to cut out the pieces with a 1/4” seam allowance around each side of the facet. The exception to this spacing requirement applies to all the edges of your background “A” fabric that you highlighted with your first highlighter. Be sure to add at least a 3/4” seam allowance to every edge that has been marked with your first highlighter.
Assembling the Pattern
1. Print pages 2-5 of the document with the “Actual Size” print option selected onto a piece of 8.5” x 11” freezer paper. Printing “Actual Size” will ensure that your block will be exactly 12” square. Print the pattern on the paper side, NOT on the shiny, waxy side. You can either purchase packs of pre-cut freezer paper OR you can purchase a roll of freezer paper and cut out a rectangle that is 8.5” x 11”. This is the chart you will cut up.
2. Print pages 2-5 of this document onto regular copy paper. This will be the copy you will pin or tape to your quilt room wall. It will be your key – your treasure map! — to help you put your block back together.
3. Assemble the freezer paper quadrants in either one of two ways:
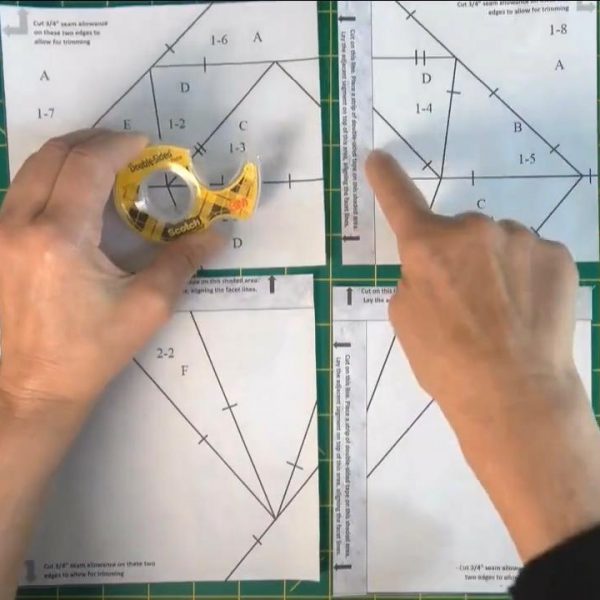
- Use double-sided tape. This tape can be placed between the quadrants of the freezer paper so that it won’t melt on your iron when you iron your facets to your fabric.
- Cut out the 4 quadrants including the tab on Quadrants #2, #3 & #4.
- Place double-sided tape on the tabs.
- Place the edge of Quadrant #1 over the tab on Quadrant #2, aligning the facet lines.
- Place the edge of Quadrant #3 over the tab on Quadrant #4, aligning the facet lines.
- Place the edge of the top quadrants (now joined with double-sided tape) over the tab of the bottom quadrant (now joined with double-sided tape). Use the facet lines to properly join the two halves.
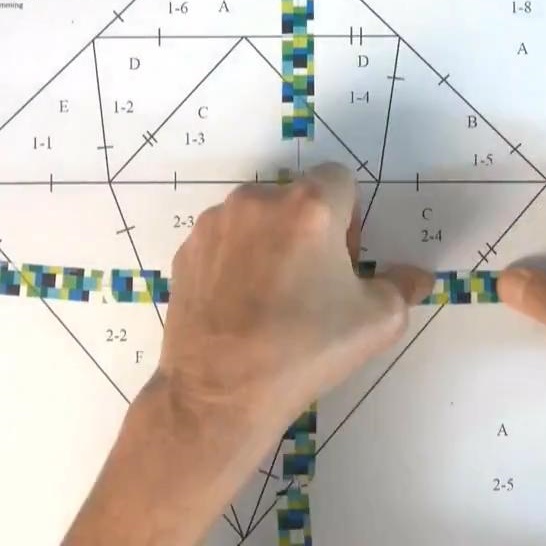
- Use Washi tape. This tape can be placed on top of the freezer paper because it won’t melt onto your iron when you iron your facets to your fabric.
- Cut out the 4 quadrants, but you can leave off the tabs on Quadrants #2, #3 & #4.
- Join the top two quadrants by aligning the facet lines; place the Washi tape over the seam where they come together.
- Join the bottom two quadrants by aligning the facet lines; place the Washi tape over the seam where they come together.
- Join the two halves of your freezer paper pattern by aligning the facet lines; place the Washi tape over the seam where they come together.
Selecting Your Fabric Colors
4. This block is a great stash buster. Identify 6 fabrics in a range of values to use in your block. I’ve provided a Color Play Chart on page 6 so you can experiment with your gem’s colors. This gem has only 5 colors, plus a background. As you select your colorway, keep in mind that gems come in all the colors of the rainbow. There is no “wrong” color for a gemstone. I’ve provided several suggestions – white diamond (with a black background), sapphire, emerald, and ruby – to get your creative juices flowing. However, you can select any hue you want. The key to my gem patterns is value contrast. As you decide on your fabrics, be mindful to select fabrics in a range of values from light to dark.
- Tip: With the exception of the white diamond colorway, I suggest using white or black as your background color for the most dramatic effect. Your background color should only be used for the facets with the “A” color code on it. If you use your background for any codes B through F, the edge of that facet that is next to the background will disappear, creating the appearance of a gap in your gem. This is the reason that I suggest that you do not use a white background if you are creating the white diamond colorway. In the sample image above, I’ve used a black background with my white diamond.
5. Attach a snippet of fabric next to each code of the corresponding value (i.e., light, medium, dark) OR label your fabric by writing the code on the selvedge edge or corner of the corresponding fabric.
Cutting The Facets
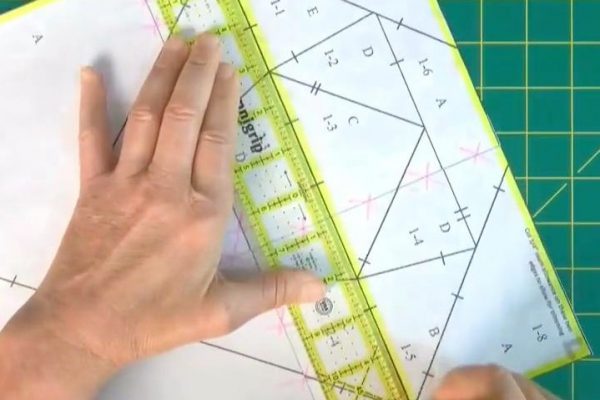
6. If you used double-sided tape to join your quadrants, use a second highlighter to draw little “x” marks across the lines where the quadrants are taped together. (See image below.) This is your visual clue that you will NOT cut on these lines. (Note: you do not need to mark these lines on your regular paper copy nor do you need to do this step if you used Washi tape to join your quadrants. The Washi tape itself is your visual clue not to cut on that line.)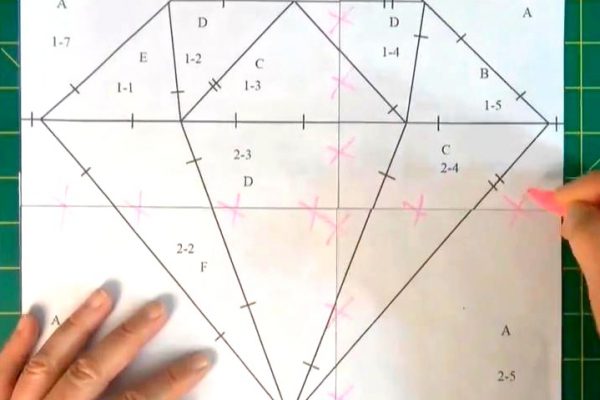
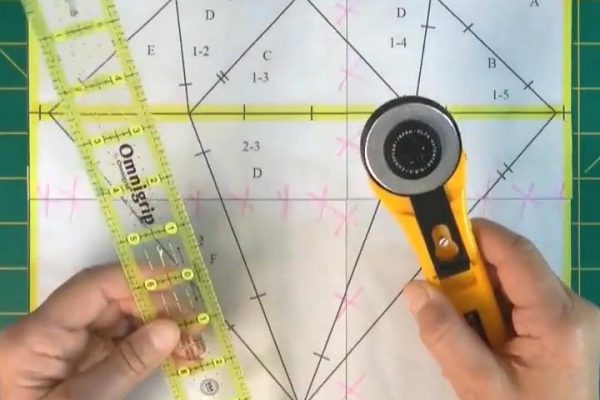
7. Highlight the inside perimeter of the block AND both sides of the line that separate Sections 1 & 2 with your first highlighter. (See yellow lines on the image below.) This is your visual clue to consider whether to place these edges on the straight of grain. (Note: you do not need to mark these lines on your regular paper)
8. With a ruler and rotary cutter you reserve for cutting paper, cut apart the freezer paper template, and sort facets by color code. (Be sure to place them where they won’t wander away or get lost. I like to use a shallow basket or envelopes.)
Tip: If your ruler slips off the line a little bit, no problem! Just don’t trim it up. Just be sure that you can still see any hash marks on either side of the cut.
9. Starting with the largest facets first, arrange facets on the RIGHT SIDE of the fabric that corresponds to their color code with enough space between each facet to allow you to cut around each piece with a 1/4” seam allowance. Position either the edges highlighted with the second color OR the long, straight edges of the facets on the straight of grain – whichever is longest and will need more support of the straight of grain. Press with a hot iron, no steam.
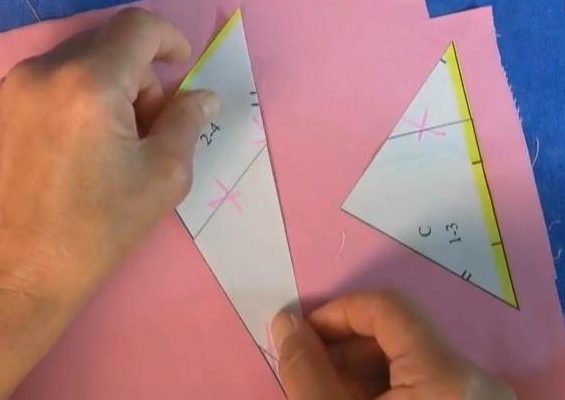
Exception: allow additional space between the “A” facet edges that are highlighted with the first color. Position those at least 1 3/4” apart.
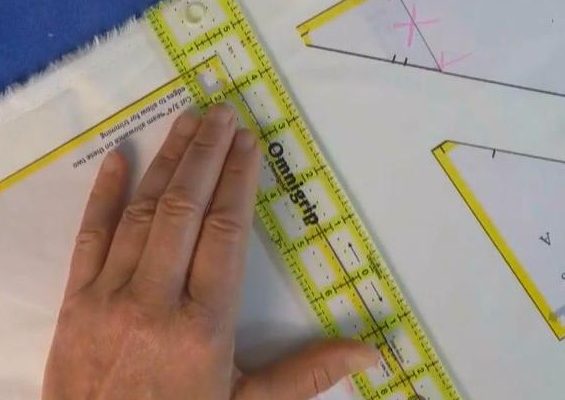
Tip: If the freezer paper isn’t adhering very well to the fabric, try heating the fabric first and then laying the freezer paper piece on top of it and press it down.
10. Using a rotary cutter and small ruler reserved for cutting fabric, cut out each facet with a 1/4” seam allowance. Take care to make these 1/4” seam allowances as accurate and consistent as possible. Place the fabric facets in your envelopes or baggies by section number (i.e., 1 through 2).(Exception: add 3/4” seam allowance next to the first highlighter color on the “A” facets. By doing so, you’ll give yourself plenty of room to trim up the outside edges of your block to 12 1/2”.)
- Tip: To reduce bulk on the back of your block, snip the long ends of the needle-nose facts to within a 1/4” of the tip of the freezer paper point.
11. Once all your facets are cut out and stored in their respective envelopes, remove the facets from the envelopes one by one and lay them out in numerical order to make sure that one hasn’t accidentally wandered away.
12. Arrange facets into their piecing order using the chart you put up on your quilt room wall as your guide.
Tip: I have created a “Piece Plan” that provides a step-by-step process to assemble the block. You’ll find it below and at the end of the downloadable instructions document.
Piecing Your Gem
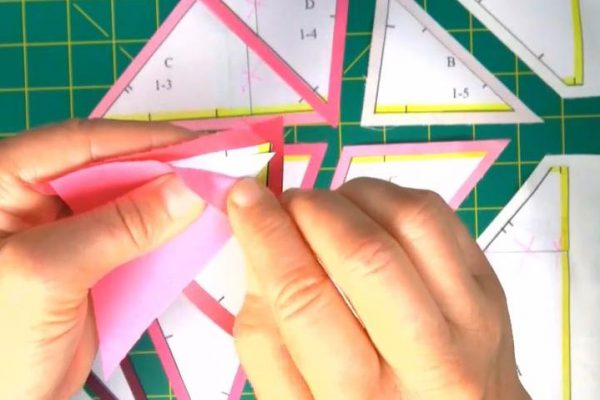
13. To piece your facets, place RIGHT SIDES together (freezer paper will be inside the fabric sandwich).
14. Peek inside the seam allowance and line up the hash marks on each side of the two pieces. Ensure that the corners of each facet line up.
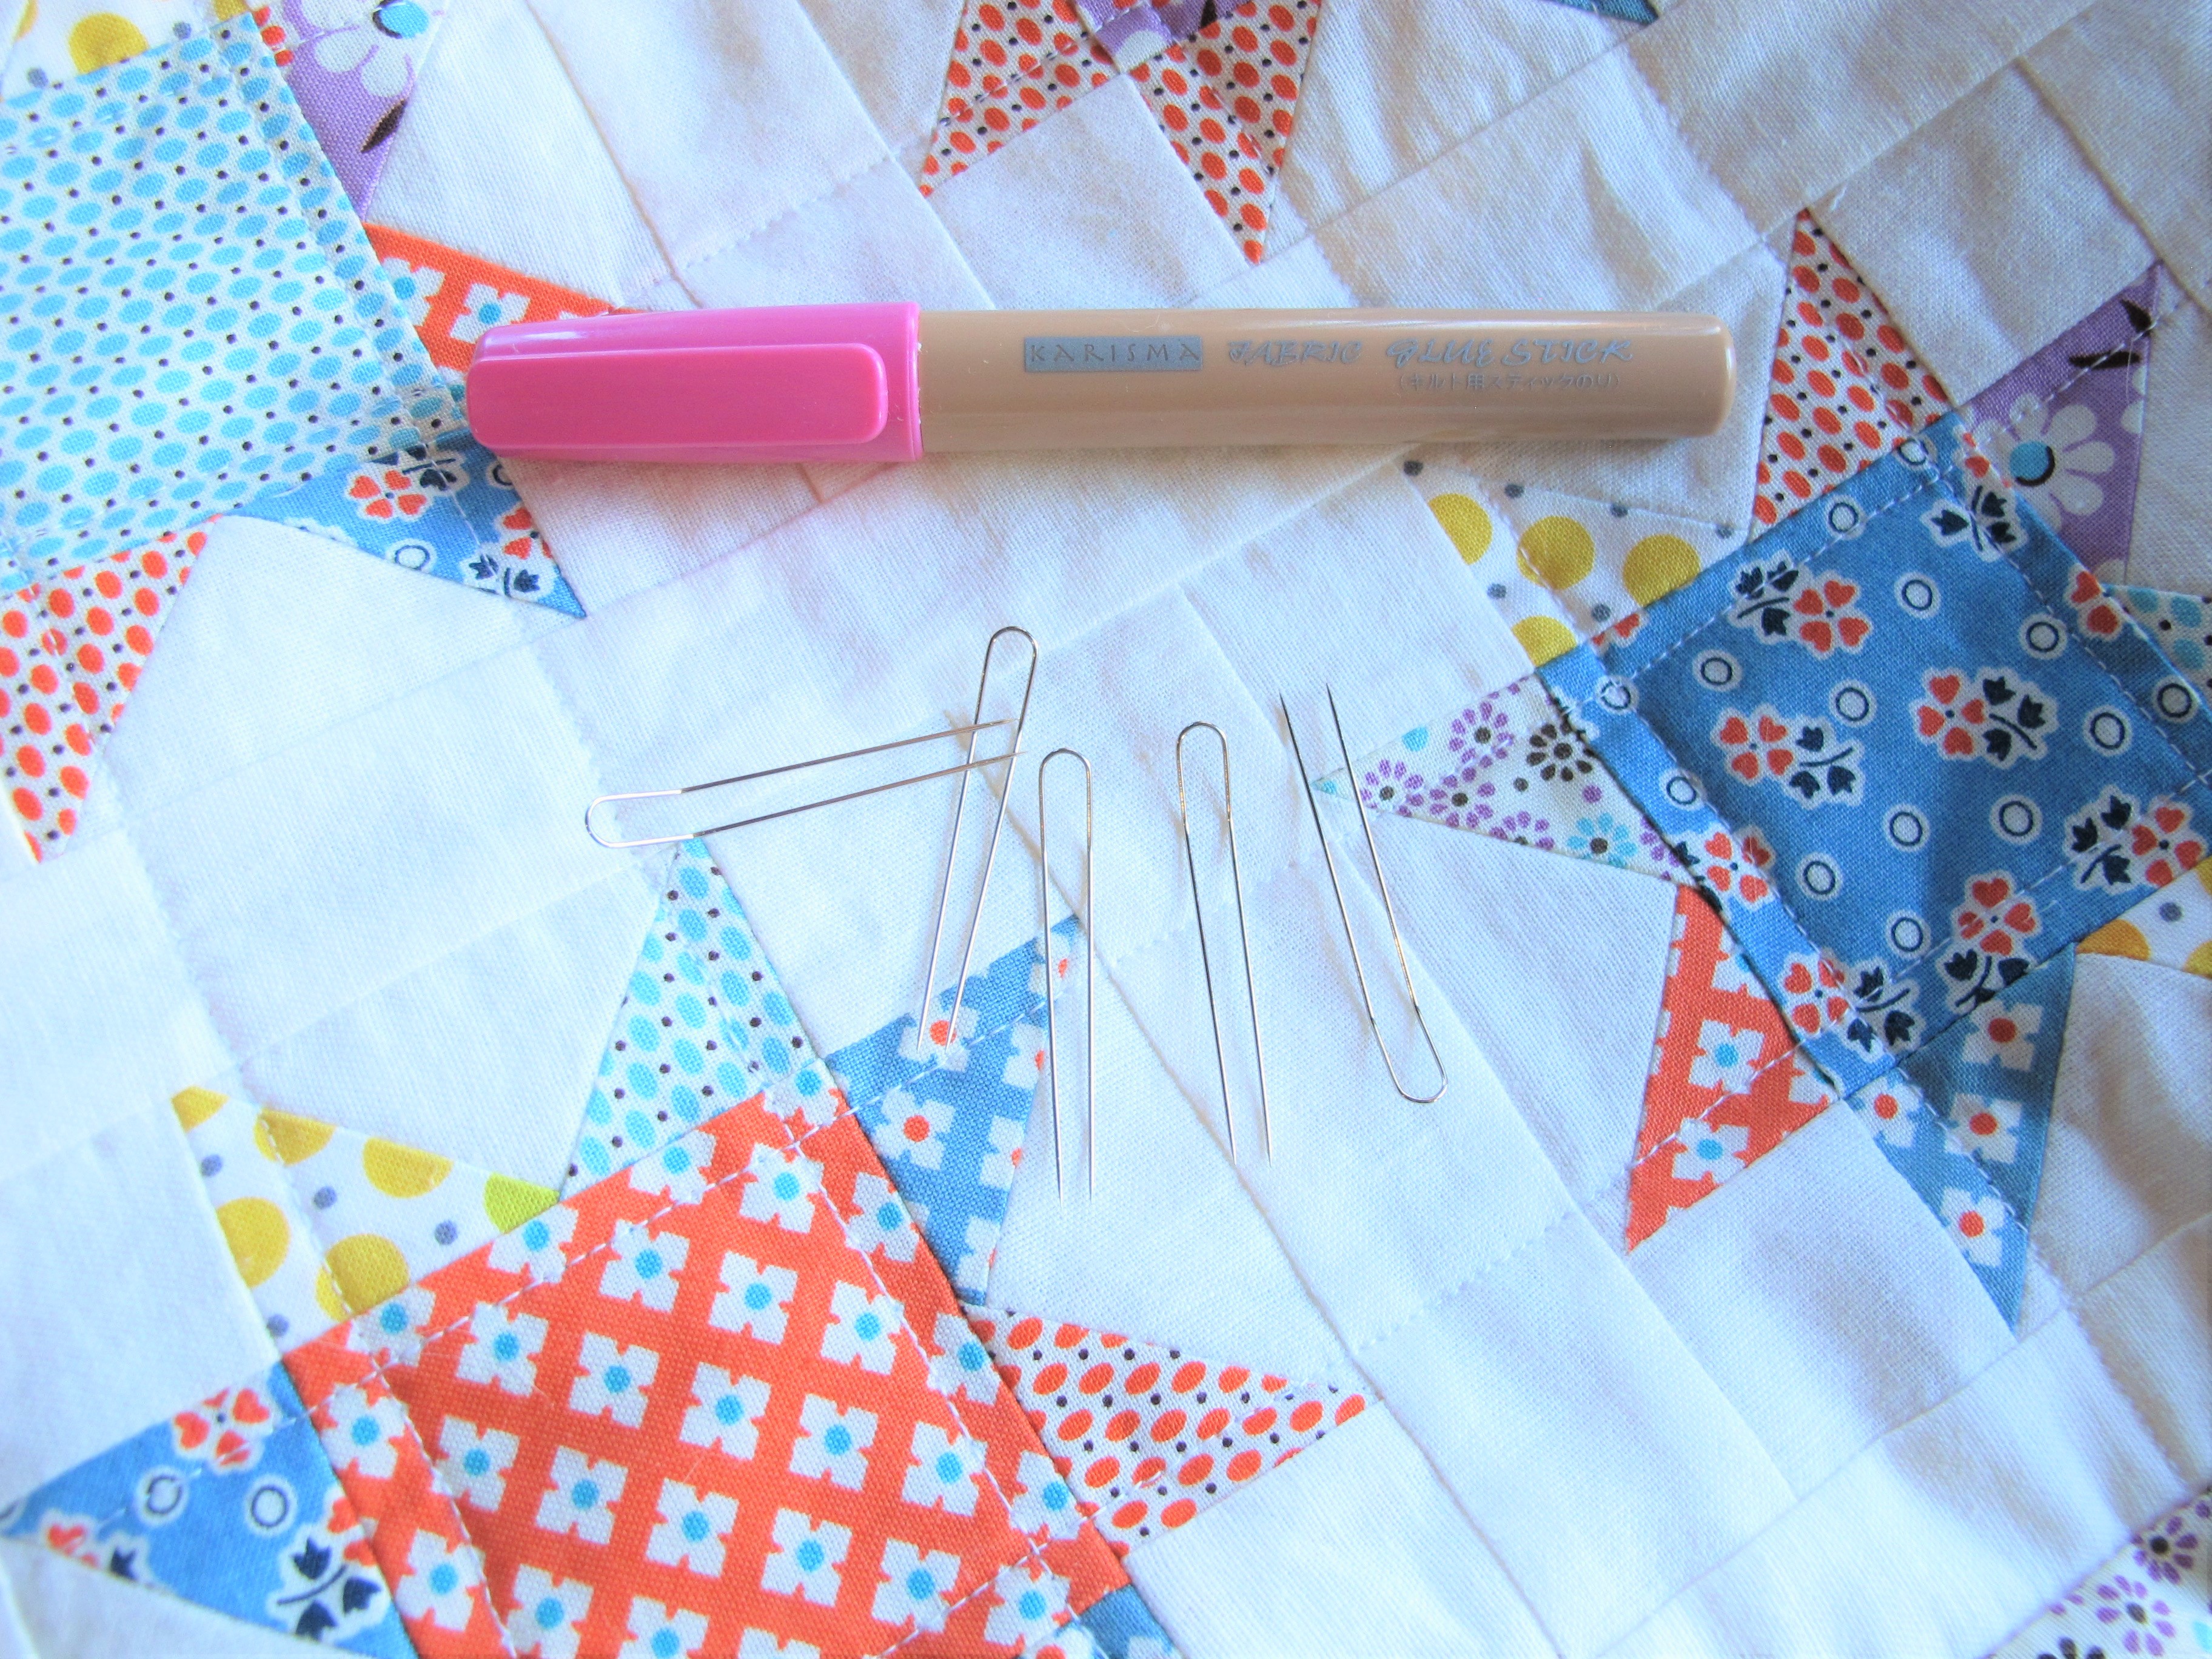
15. Pin carefully along the seam OR use a clip OR use a glue product to secure the 2 pieces together.
16. Identify the 1/4” seam guide on your machine’s plate.
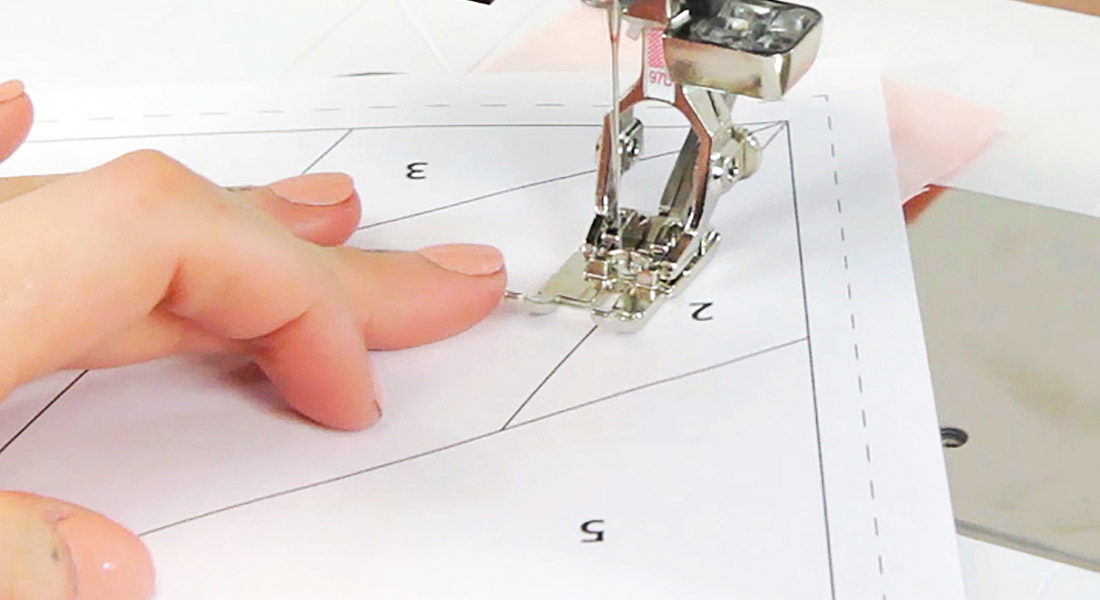
17. Position the pair of pinned facets under the presser foot so that the edge of your fabric sandwich is just a needle-width to the left of the 1/4” seam guide. This will prevent you from sewing into the freezer paper on the inside.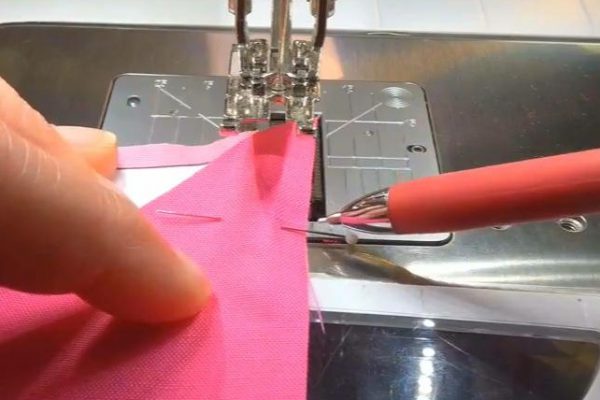
18. Stitch the seam line using a regular stitch length (i.e., 2.5). I backstitch at the beginning and the end only because it’s been my habit to do so for 20 years. Some have said that’s not a necessary step for them. Old habits die hard!
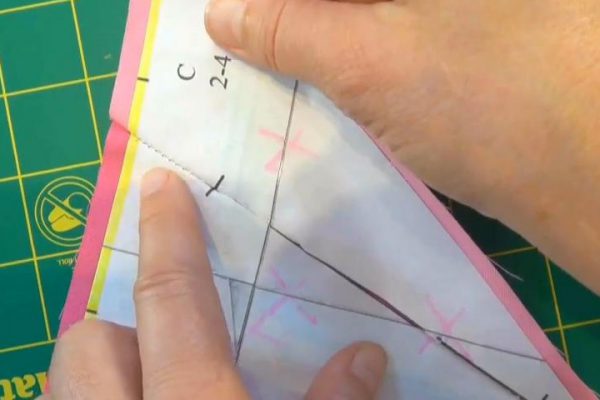
19. Open the facets. Your freezer paper should meet at the seam line without any gaps, but not be stuck in the seam line at any point. Press seams to the darkest side OR the side that has the fewest intersecting seams.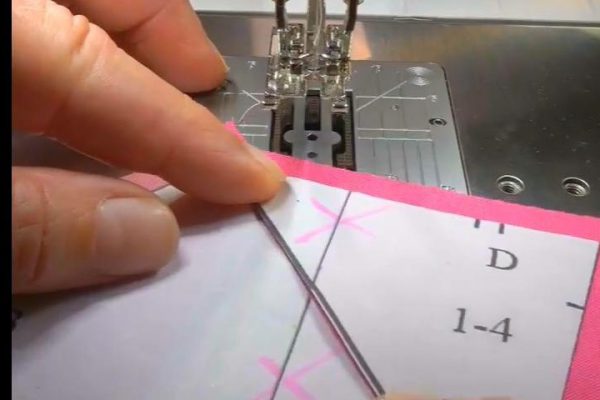
- If there is a gap between the edges of your freezer paper, you can either resew a little bit closer to the ¼” seam guide OR you can pick up one of the templates and iron it next to the seam. Just be sure to trim the seam allowance down to ¼”.
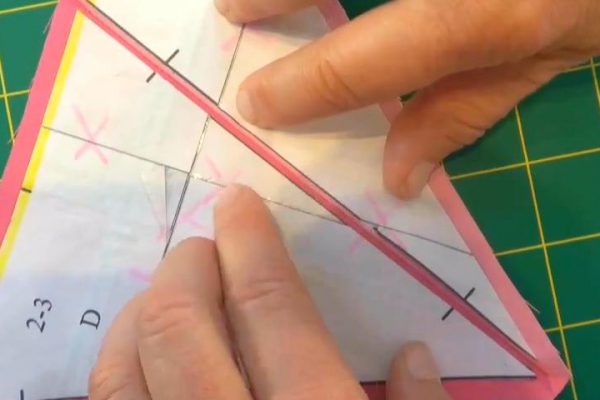
If you have sewn into the freezer paper, give the two pieces a little tug to see if this frees the freezer paper. However, if you’ve really munched the freezer paper, consider ripping that section and resewing. Gaps and tucks change the position of the hash marks along the sides of the 2 facets, which makes it a bit confusing when trying to match it up to its adjoining unit. In the end, though, perfection is NOT a priority and, once you’ve removed all the paper from your gem, no one will know the difference.
20. Continue to stitch the facets together, retaining the freezer paper on the front of each piece. If facets come loose, simply iron back on.
- Tip: If you want to remove the freezer paper after piecing a full section so you can see what it looks like, you can! Just be sure to transpose the hash marks onto the seam allowance before removing the freezer paper.
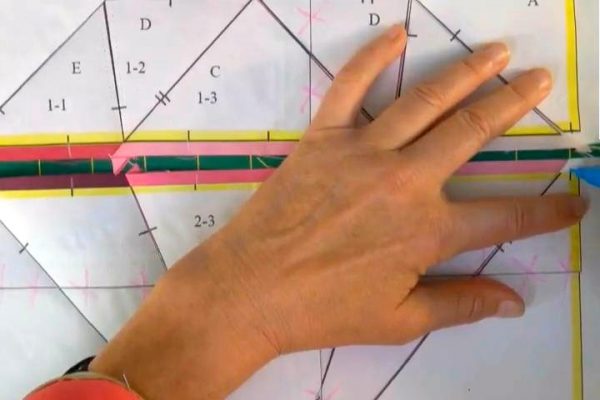
- Tip: When you sew Sections 1 & 2 together, focus on carefully aligning the seams at the edges of your gem.
21. Once the gem is complete, remove the remaining freezer paper pieces and store them in your envelopes or baggies by color code if you plan on using them again. You can typically get 2 uses out of regular freezer paper.
22. If little bits of freezer paper are stuck in the seam line, use a pair of tweezers to remove. If they are stubborn, try using seam ripper to remove them by pushing the bit of paper from the front to the back side of the fabric. Use tweezers to pull from between the seams.
23. Trim your block to 12 1/2″ square.
Congratulations! You’ve just mastered freezer paper piecing!
Piece Plan for “En Pointe”
Section 1
- Sew together 1-1 and 1-2 (to create Unit 1:2)
- Sew together 1-3 and Unit 1:2 (to create Unit 1:3)
- Sew together 1-4 and Unit 1:3 (to create Unit 1:4)
- Sew together 1-5 and Unit 1:4 (to create Unit 1:5)
- Sew together 1-6 to Unit 1:5 (to create Unit 1:6)
- Sew together 1-7 to Unit 1:6 (to create Unit 1:7)
- Sew together 1-8 to Unit 1:7 (to complete Section 1)
Section 2
- Sew together 2-1 and 2-2 (to create Unit 1:2)
- Sew together 2-3 and Unit 1:2 (to create Unit 1:3)
- Sew together 2-4 and Unit 1:3 (to create Unit 1:4)
- Sew together 2-5 and Unit 1:4 (to create Unit 1:5)
Final Step
- Sew together Section 1 and Section 2
