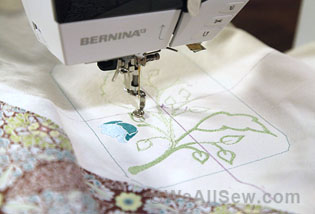
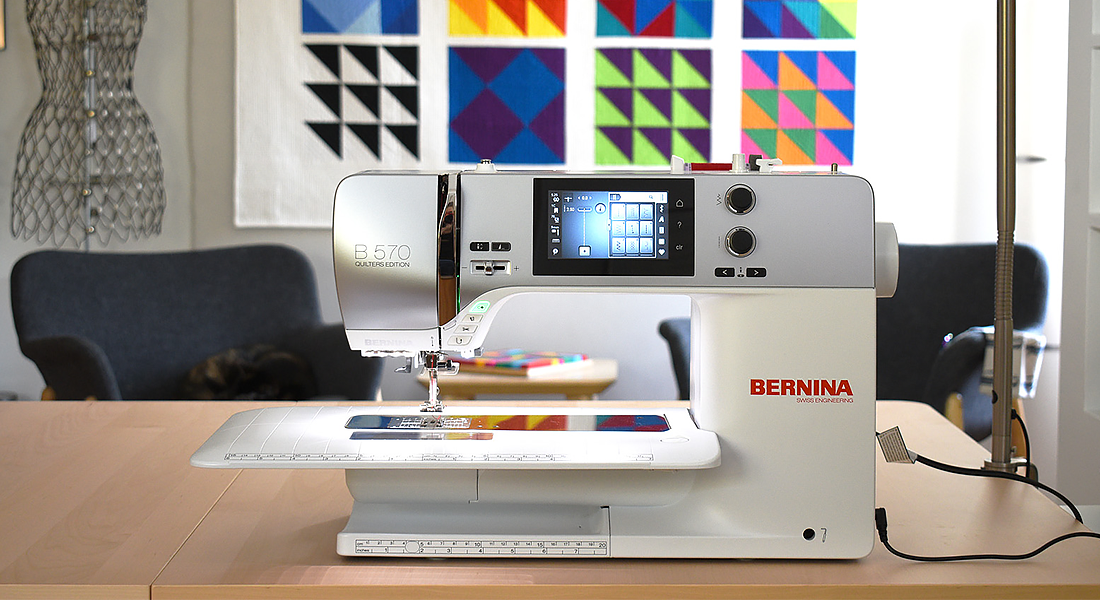
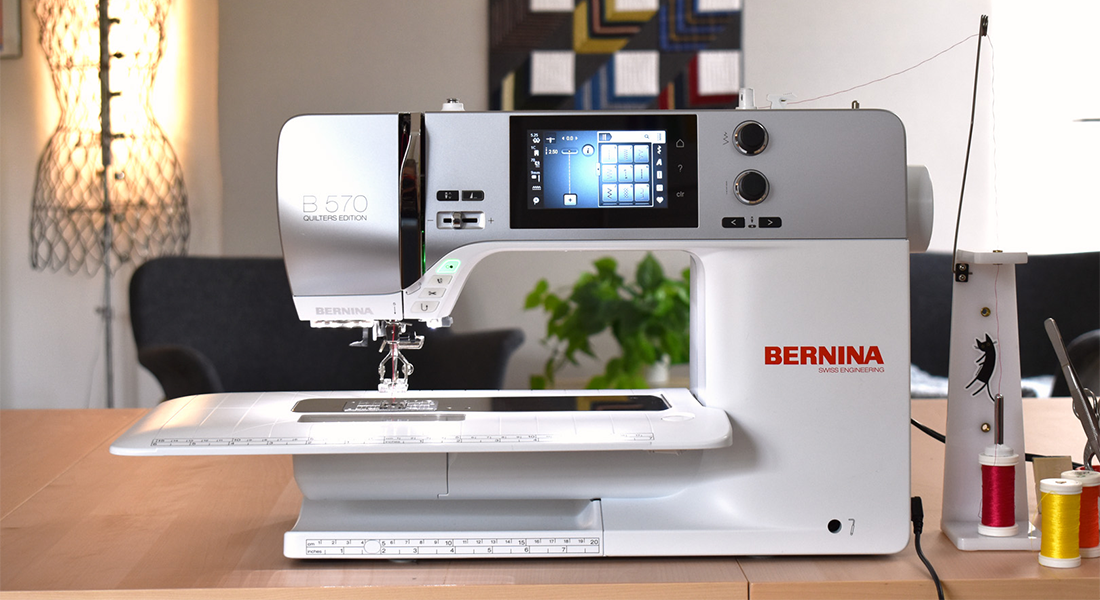
BERNINA 7 Series Machine Maintenance
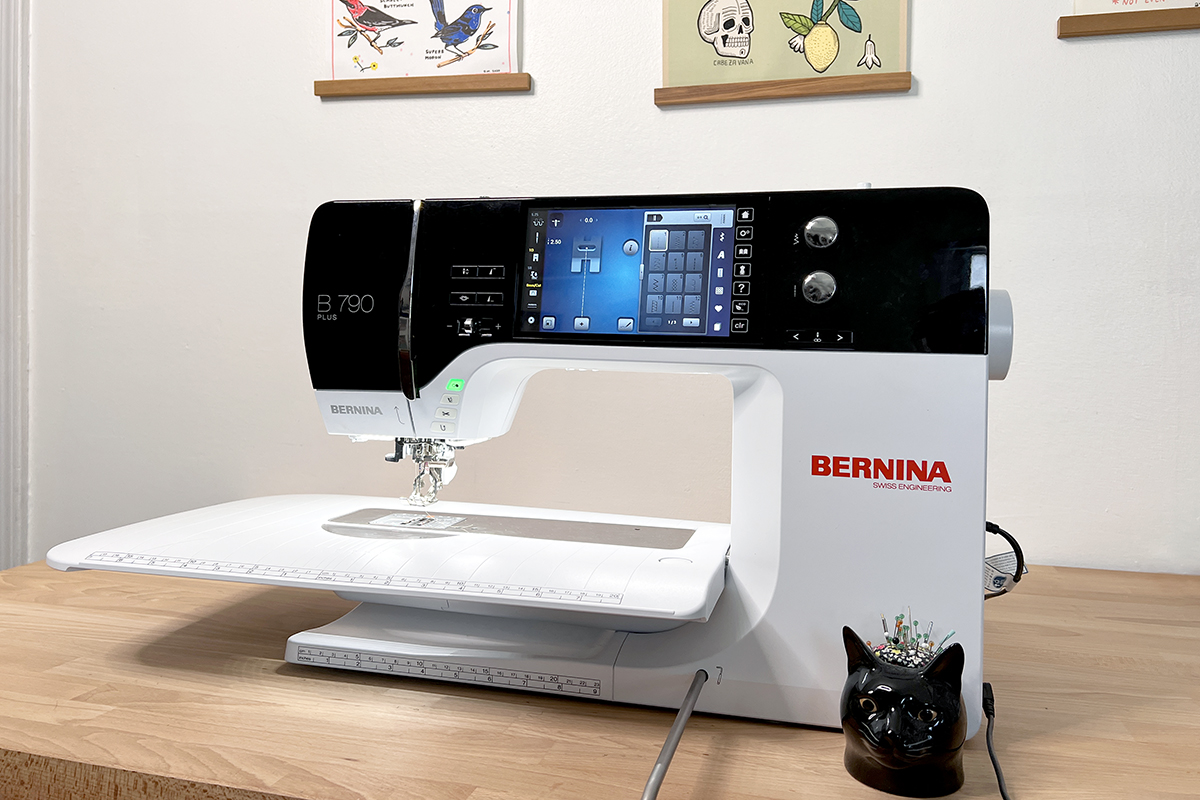
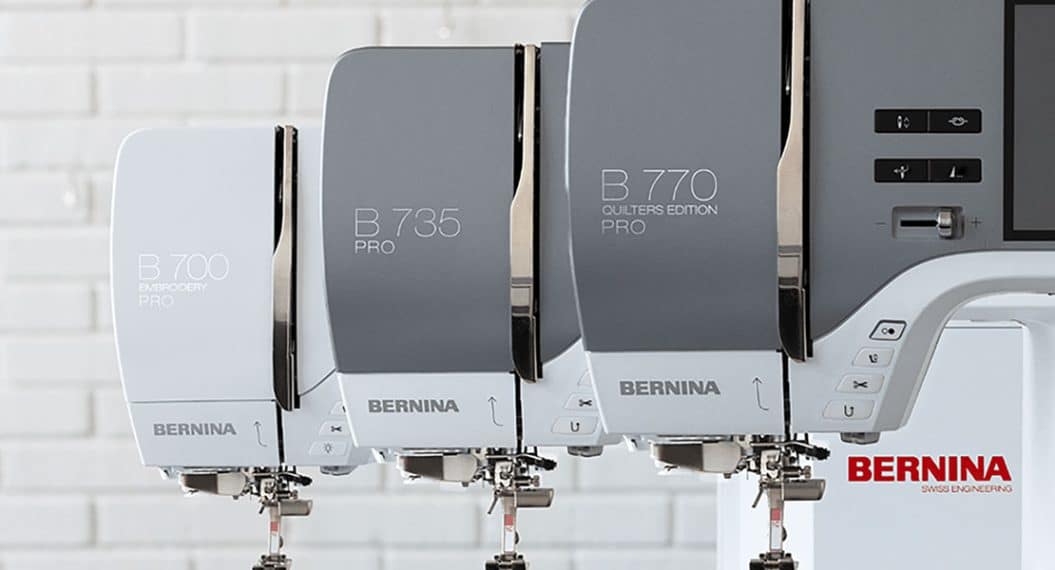
Let’s talk machine maintenance! Properly caring for your machine is key to making sure it stitches just like the day you brought it home. The 7 Series is our most beloved range of machines with the BERNINA 790 PLUS, B 770 QE (and new PLUS!), B 740, the new B 735, and B 700. Let’s take a look at how to best care for and maintain these machines.
My rule of thumb is hit all my cleaning and maintenance checkpoints every time I finish a bobbin. These are quick and easy to do, usually in about the same amount of time it takes me to wind a new bobbin!
-
Sweep the lint
Use a soft brush to sweep any lint or stray threads from the machine. Always work from the top down, starting up at the needle bar and finishing at the bobbin—that dust will continue to fall! Raise and lower your presser foot and rock your needle down to expose more of the needle bar. When we’re working, sometimes lint gets caught higher up than we realize.
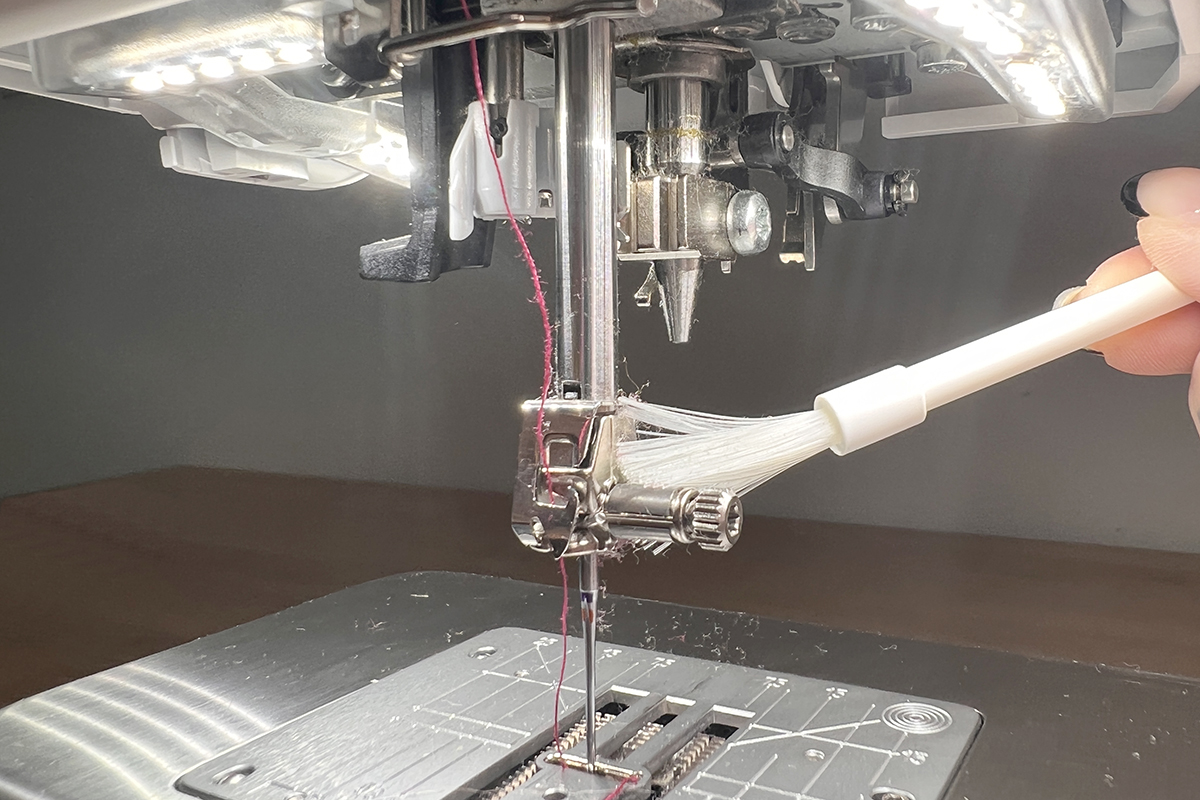
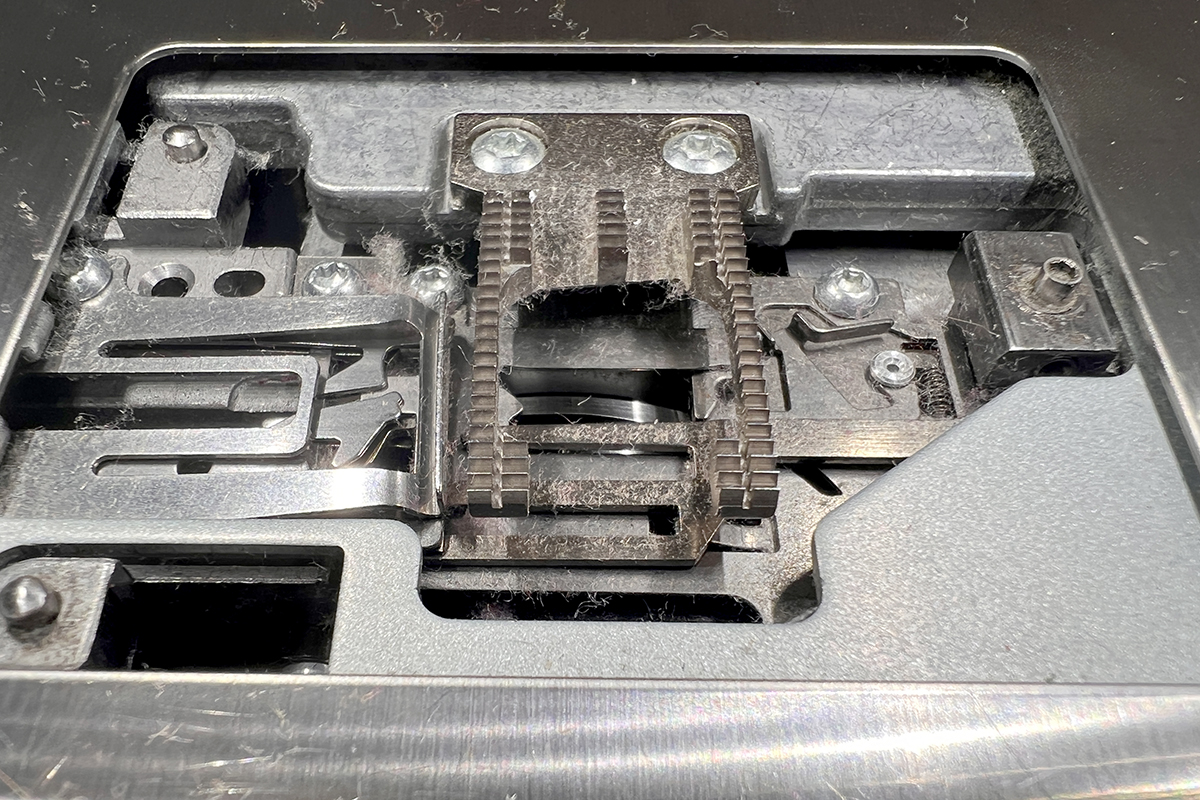
Then remove the stitch plate from the machine. Lots of lint gets trapped under here, especially if you’re using a straight stitch plate, 100% cotton, or fluffy, plush fabrics.
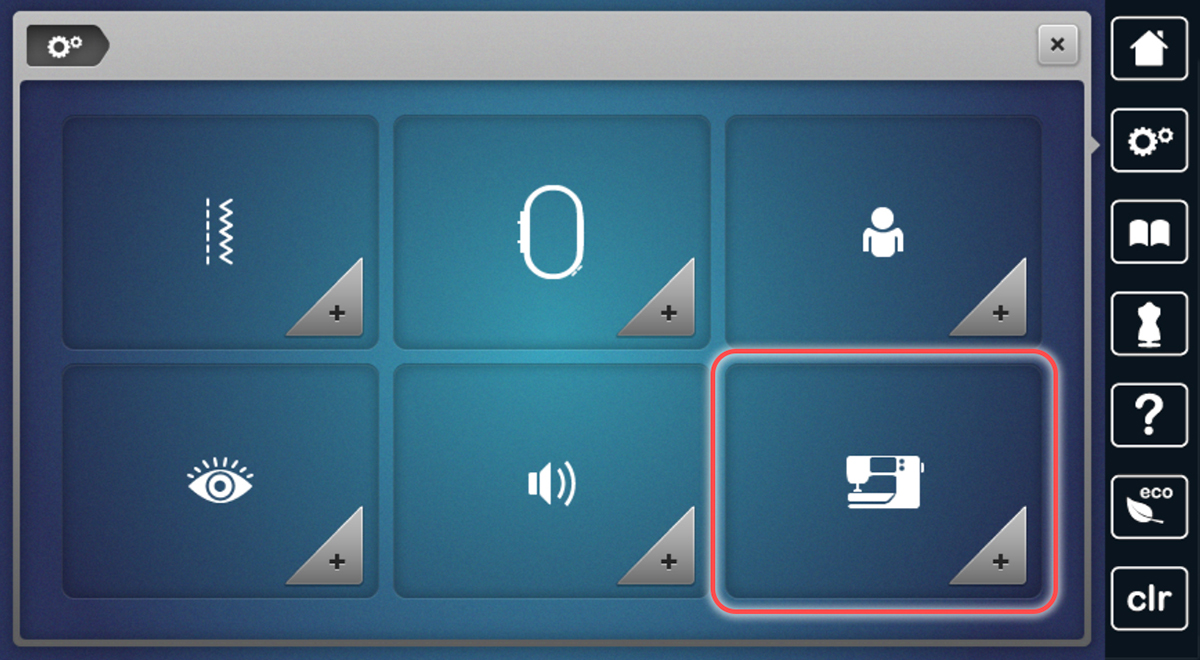
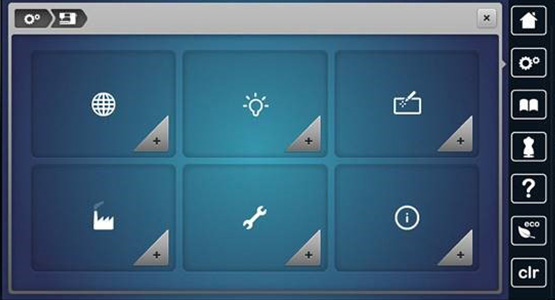
While you’re in here, you can also clean the thread cutter! To do this, select the Settings (gear) icon to go to your Settings menu.
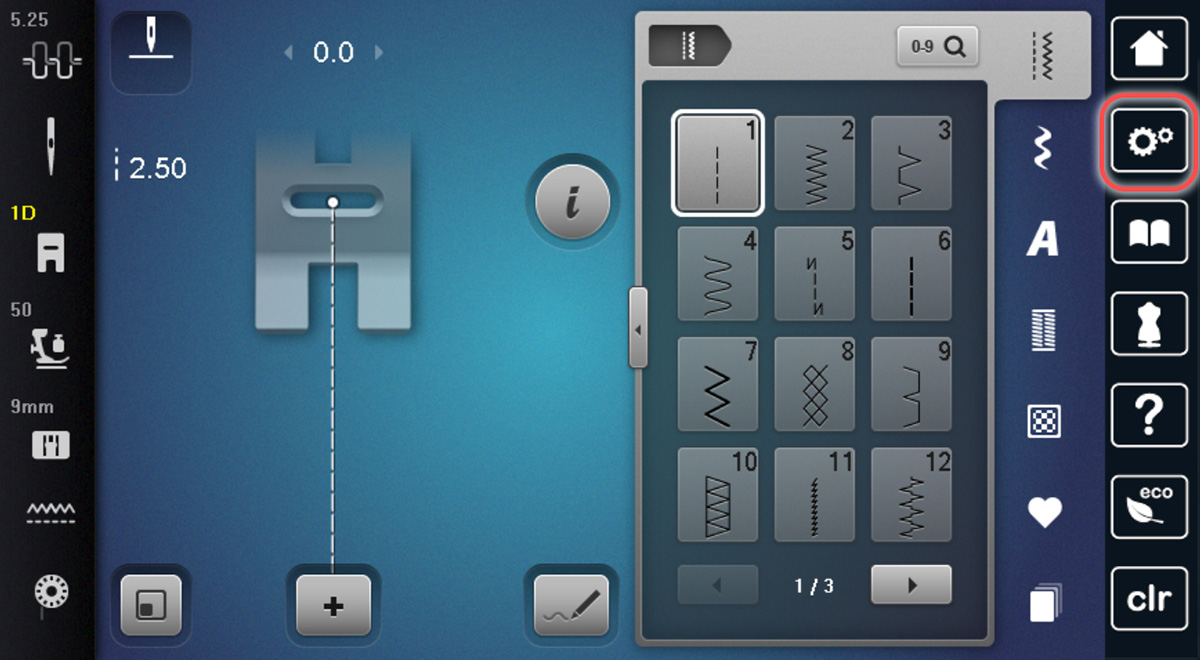
Select the lower right sewing machine icon to go to Machine Settings.
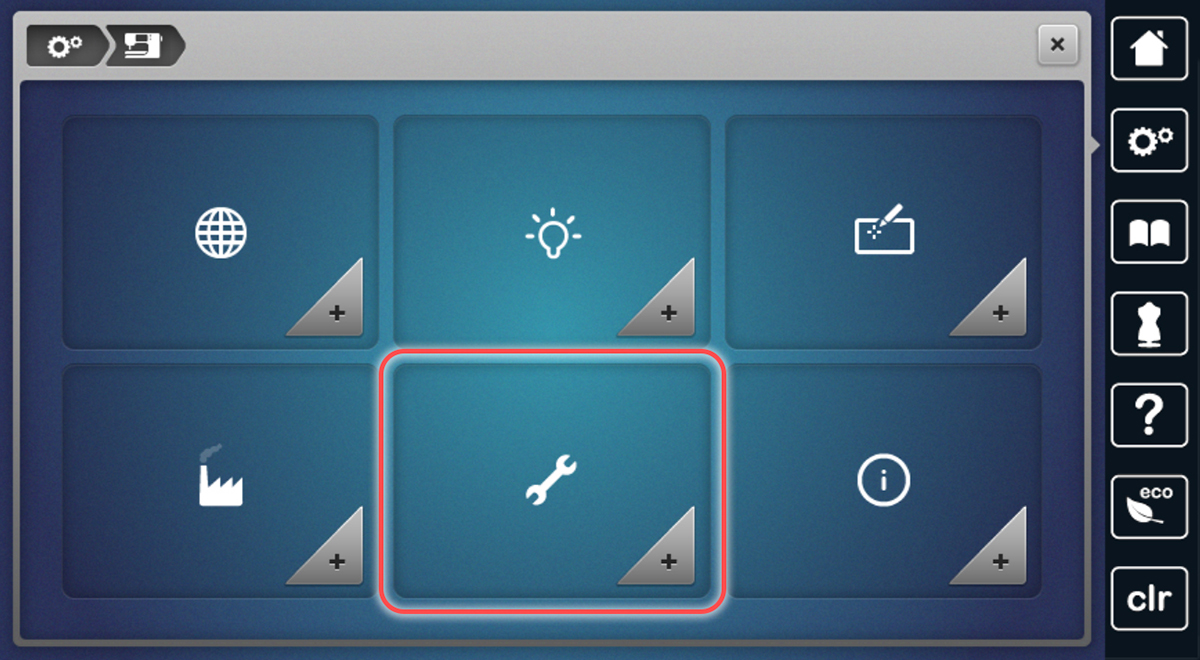
Select the Maintenance/Update (wrench) icon to go to Cleaning/Updates.
Finally, select the Cleaning the Thread Catcher (broom) icon to clean the thread cutter and catcher.
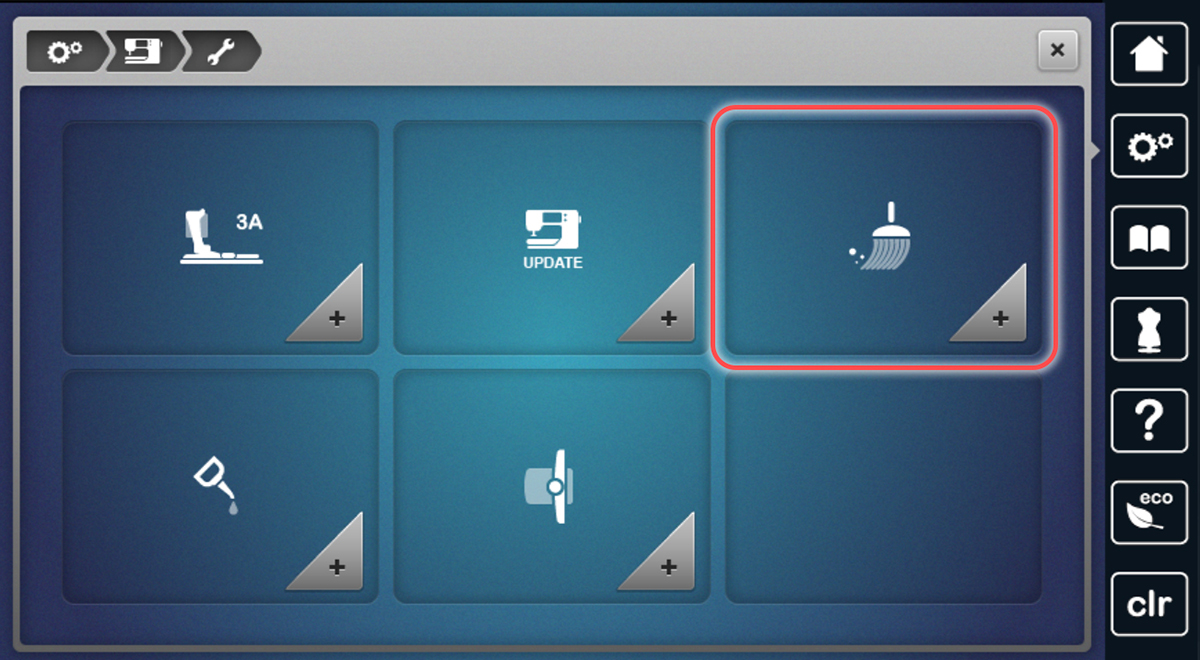
When you navigate to this menu, the machine screen details the steps to this process. You need to remove the presser foot, needle, and stitch plate then lower the feed dog. Then tap on the blue, underlined text (a link) and press the Automatic Thread Cutter button. When you do that, the thread cutter will open up, allowing you to grab any loose threads trapped in the Tread Catcher. Most of the time you won’t find much here but it’s good to check!
And don’t worry if this isn’t something you clean often. The machine keeps track of how many times you use that thread cutter and after a certain amount of time, will prompt you to clean it. After you clean the thread catcher, follow the prompts to move it back in and finish the process.
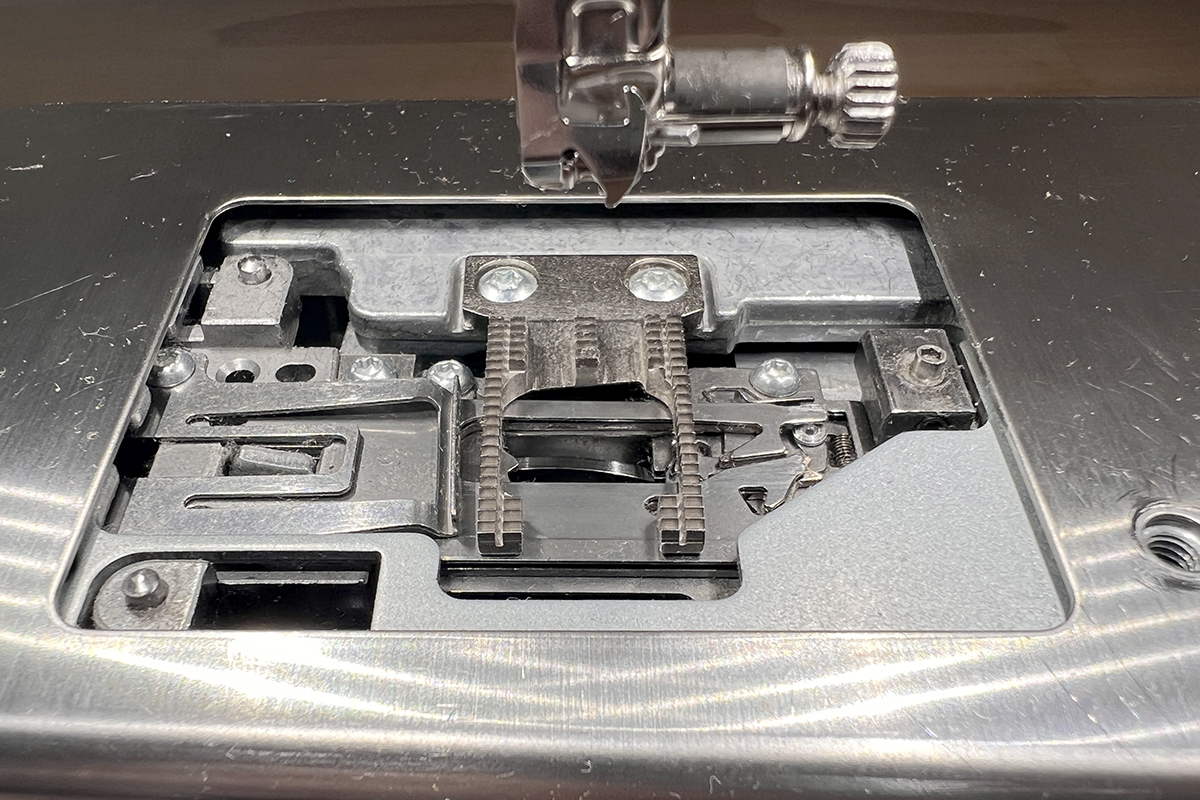
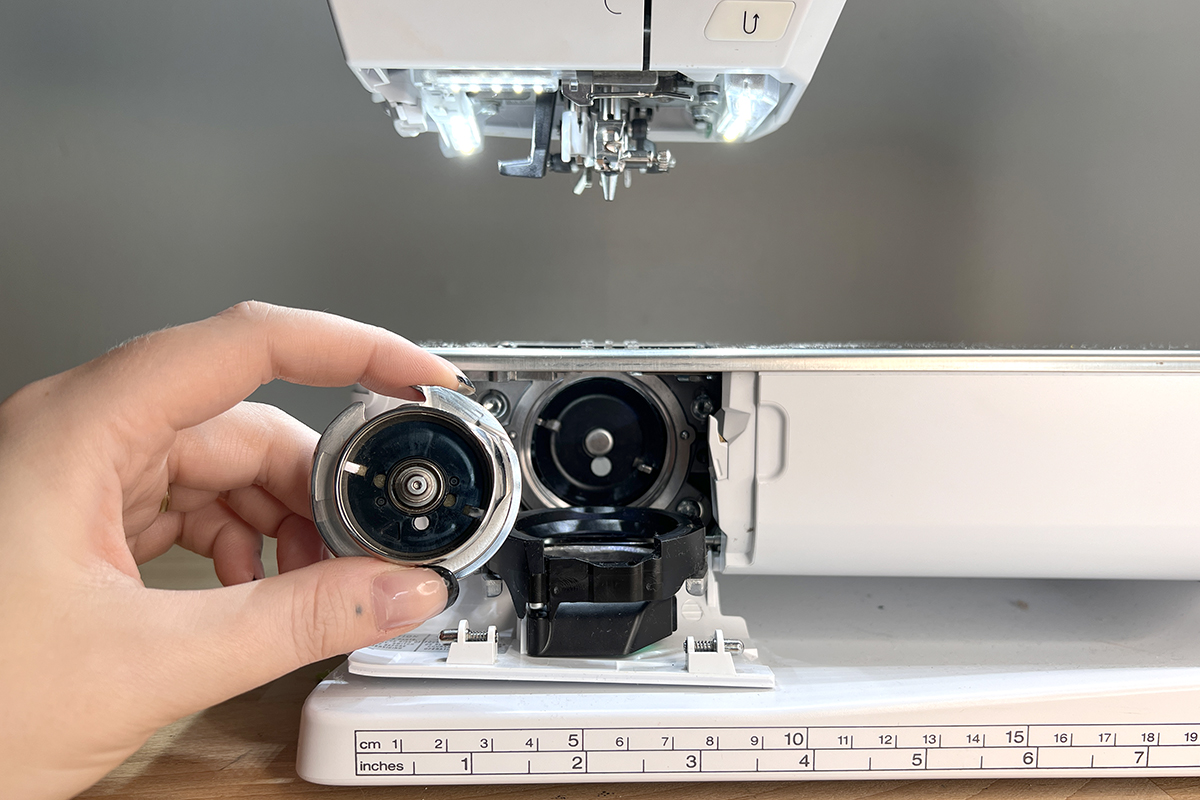
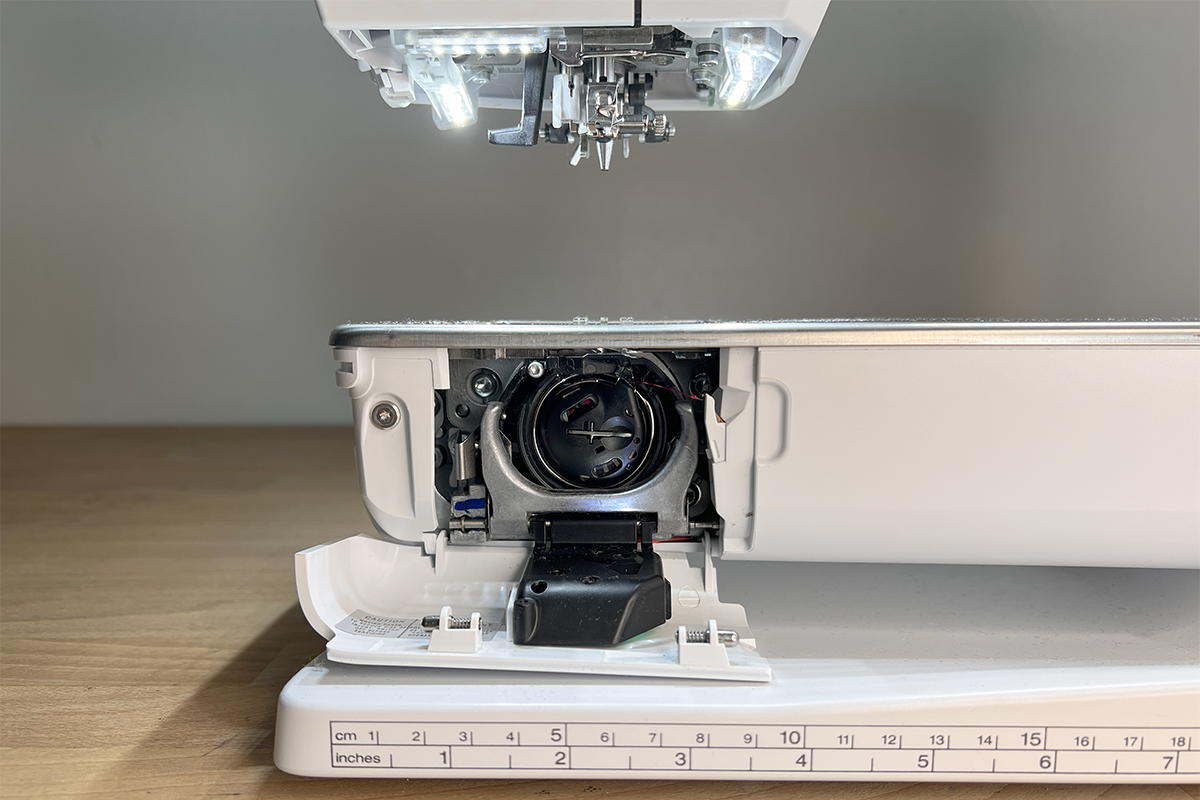
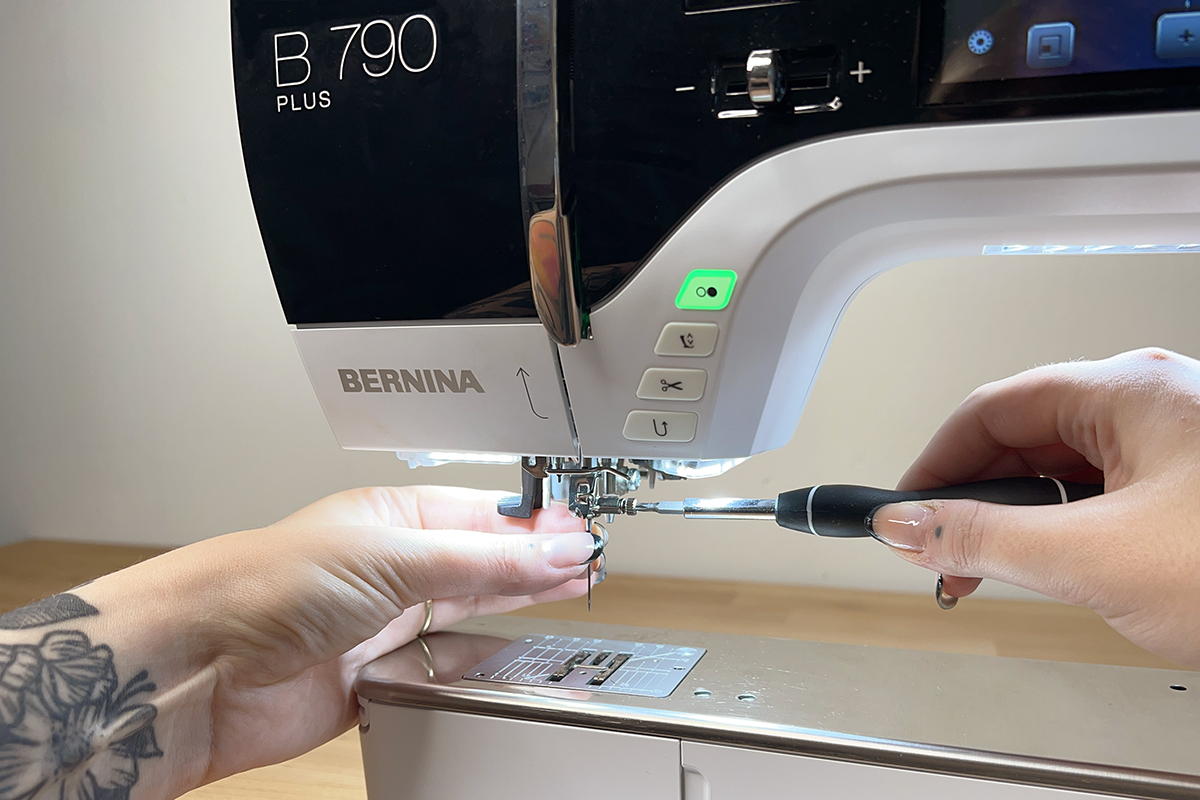
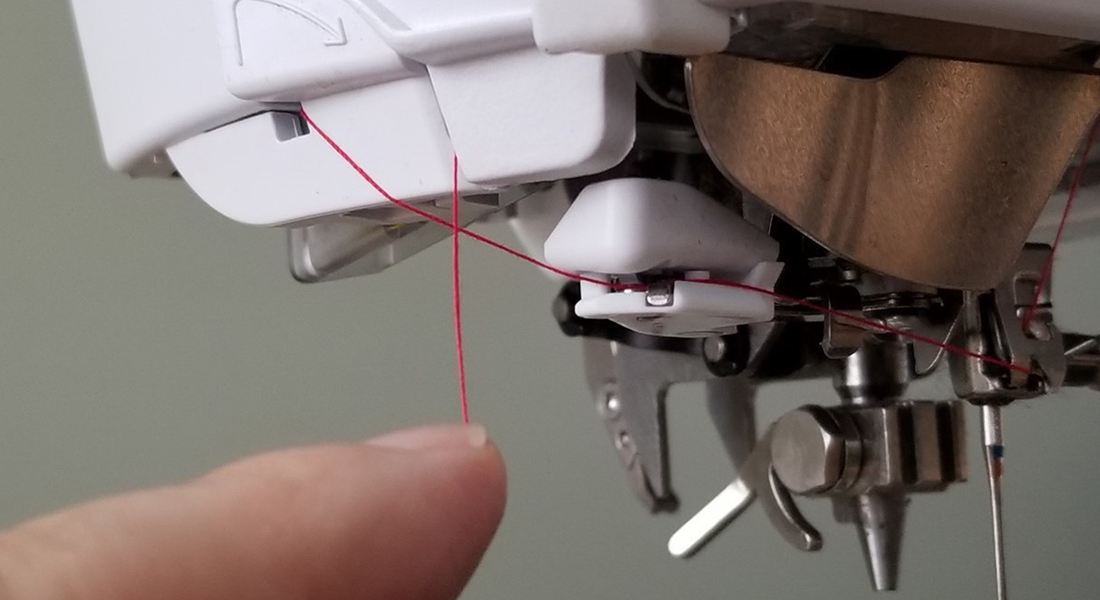
Finally, clean the bobbin area. Remove the bobbin and bobbin case if you haven’t already and then release the latch to access the hook.
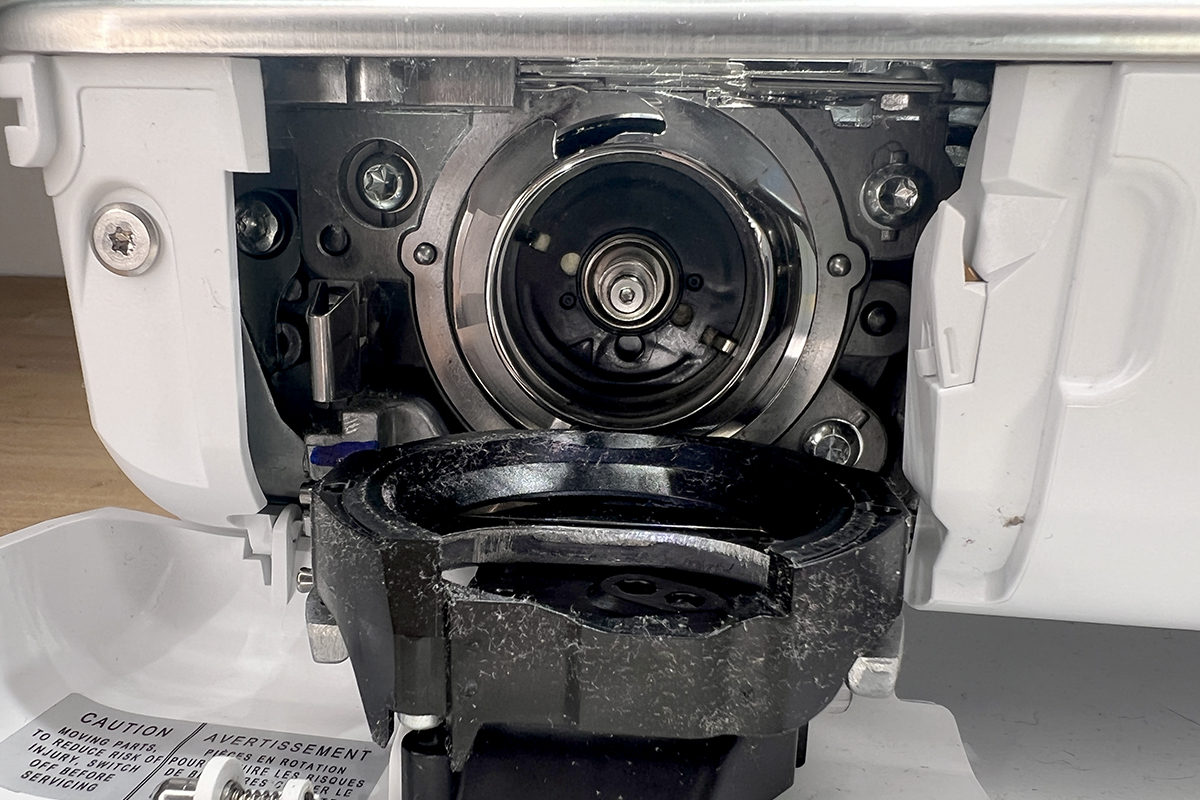
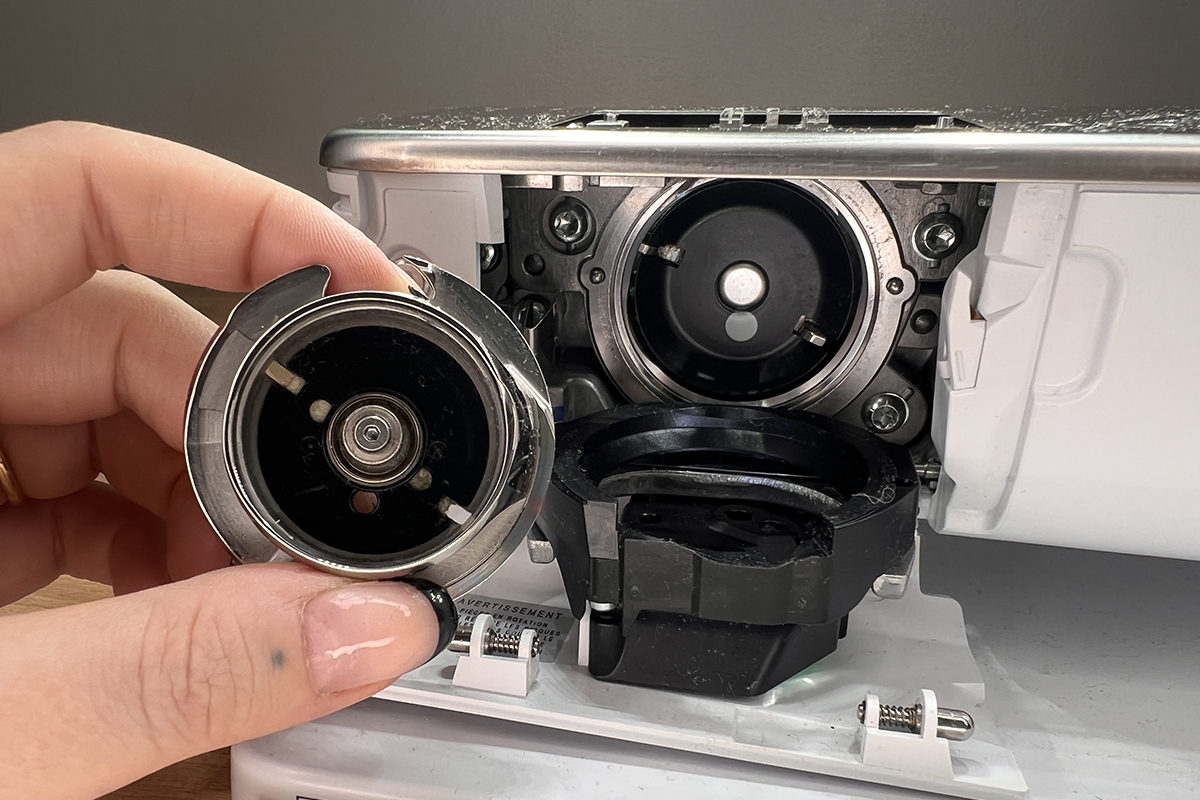
Our all-metal BERNINA Hook can be easily pulled out as it is held in place by a strong magnet. Remove the hook and wipe with a microfiber cloth.
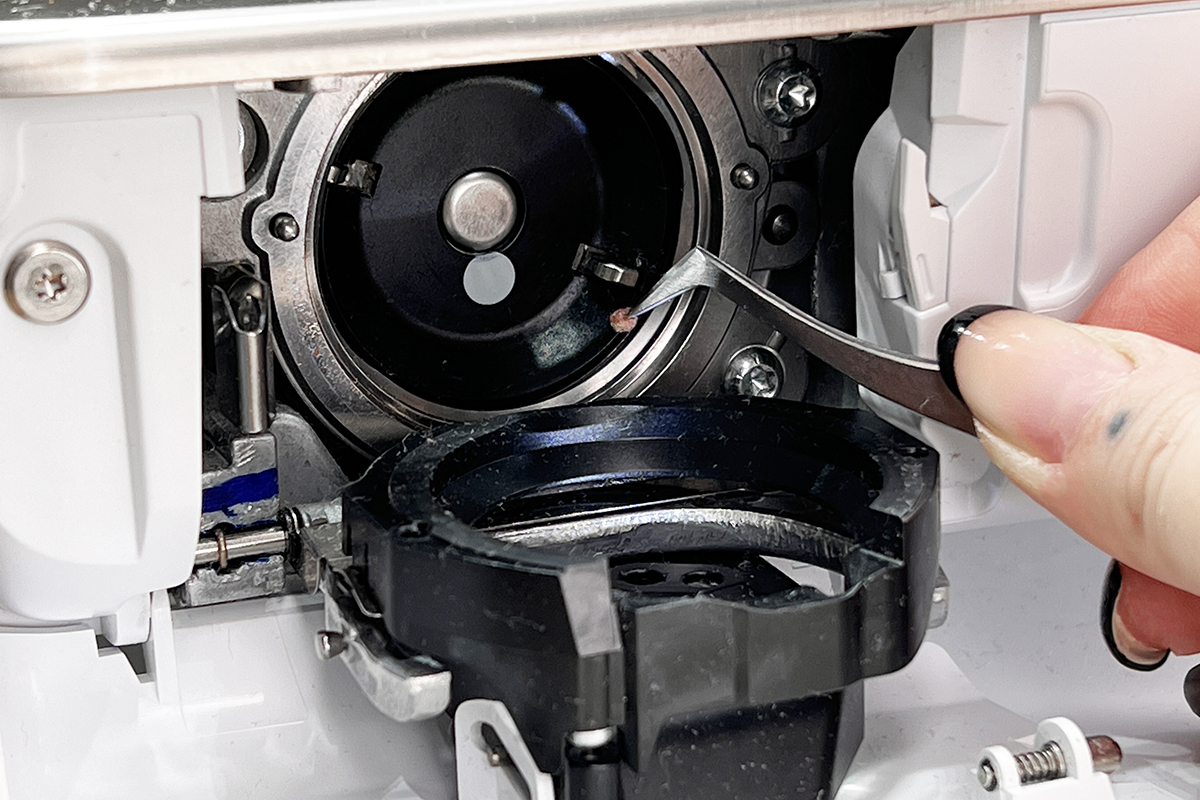
Sweep the hook and race with your lint brush. Check closely as sometimes lint can get caught in the hook race. Whatever isn’t swept out cleanly can either be grabbed with tweezers or wiped with a microfiber cloth.
Please remember that the best way to remove lint from your machine is to truly remove it from the machine, by sweeping, wiping, or vacuuming. Never use compressed air to clean your sewing machine! This air does not pull lint out but actually forces it deeper into your machine and can create more problems than it solves.
-
Oil
Your machine probably requires less oil than you realize! There are only two points for you to oil regularly.
First, is on the Hook Race. This is the groove along which your hook rotates. Add just one drop of oil along the groove here.
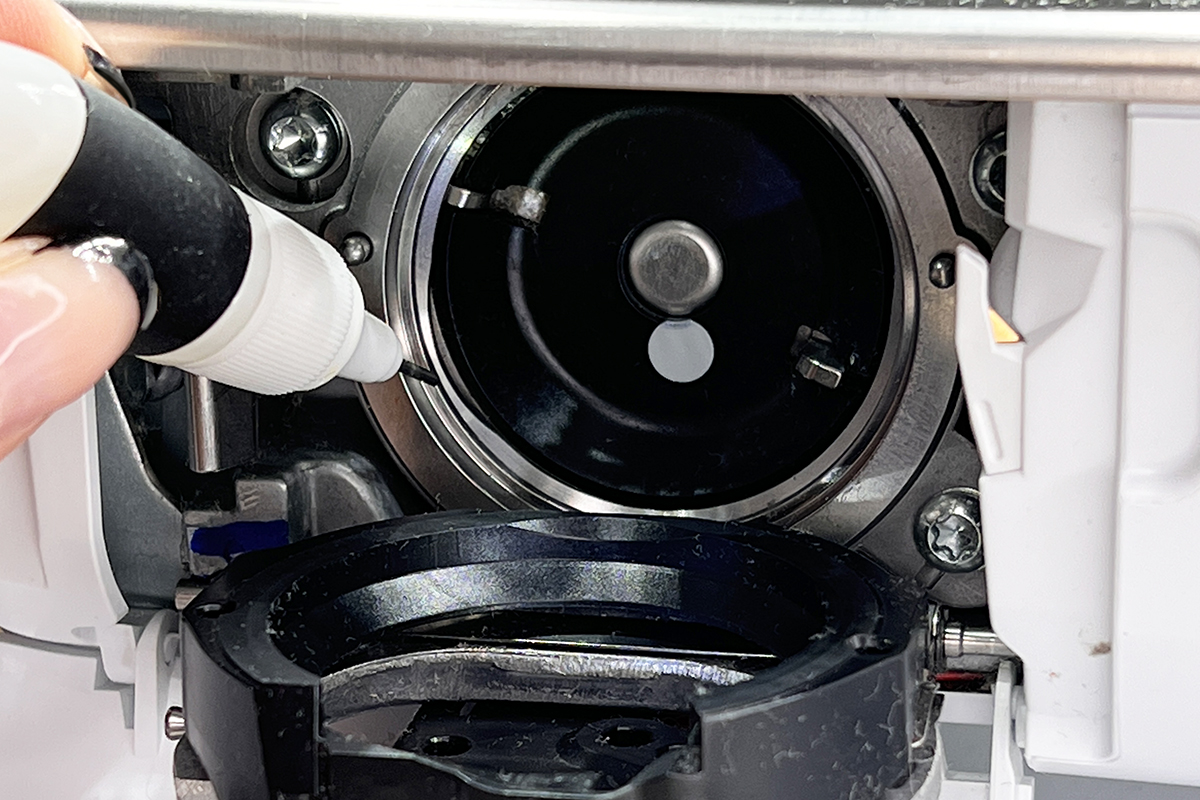
Second is within the hook itself. In the center of the hook is a felt pad accessed from two dots. Add one drop of oil to the felt through each dot.
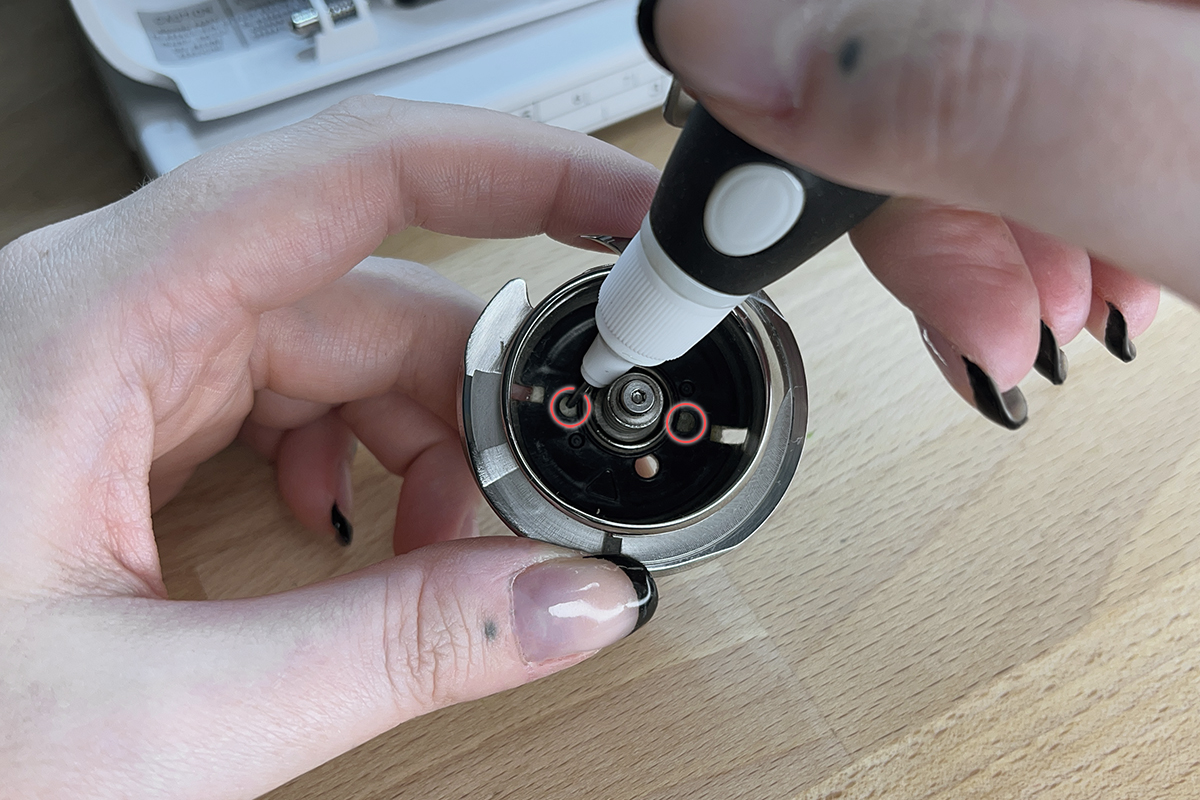
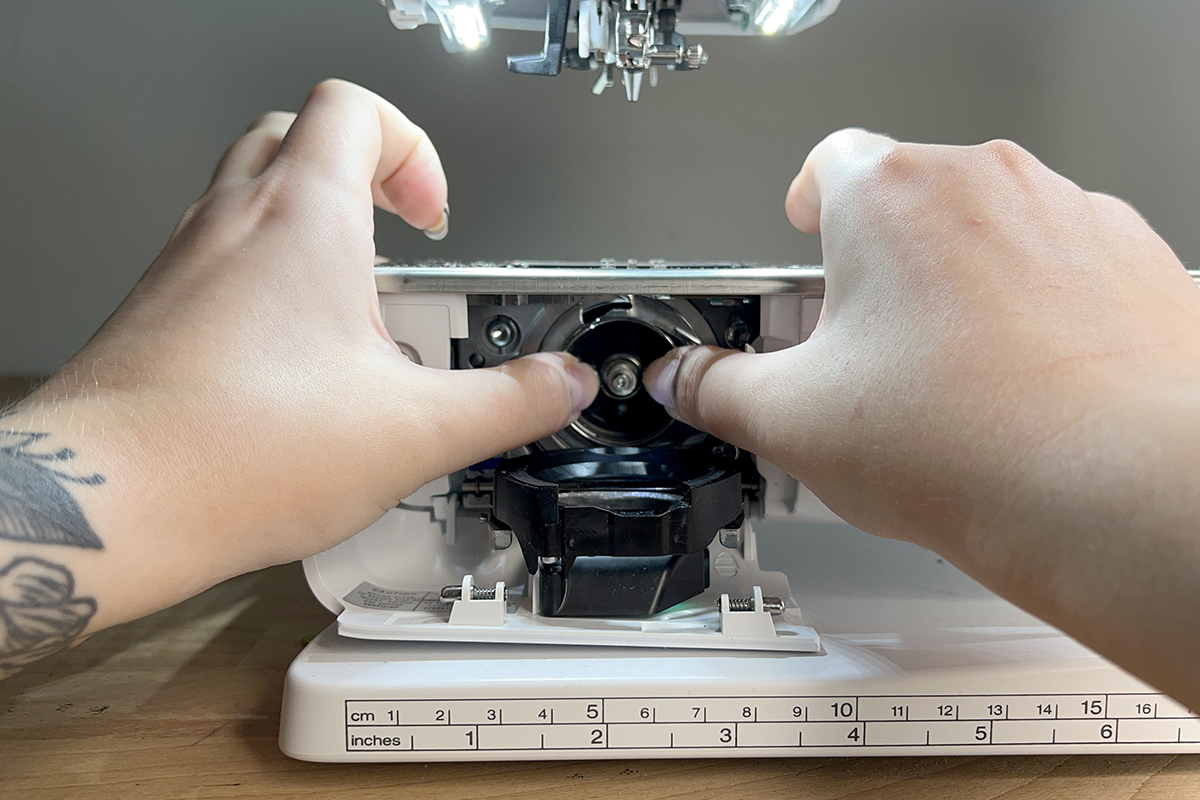
Re-insert the hook. To do this, and to make sure that magnet grabs the hook to hold it in place, you will need to align the white dot in the machine with the hole though the middle of the hook.
With these aligned, the hook should snap into place.
Remember to only use the oil provided with your machine. The packaging may vary, depending on when you purchased your machine, but this oil is a lighter weight designed to perform best in our machines.
One other note I will add about oiling with the 7 Series is that at one point, you may have been instructed to add oil to a reservoir underneath the stitch plate. This instruction has changed in the past couple of years. Through further testing and user experience, oiling here often lead to there being too much oil in the machine. This can cause one of two potential problems.
One is simply an excess of oil that can come through to your fabric and thread. Tiny oil stains are not what anyone is looking for!
The other thing is that even if the oil is used/released at the proper rate, if it sits in the reservoir too long, it can discolor your thread and fabric. You may not notice this too much if you work with many dark colors or primarily in sewing but if you’re an embroiderer, you might see segments of your embroidery stitches discolored by oil.
-
Replace Parts and Close the Machine
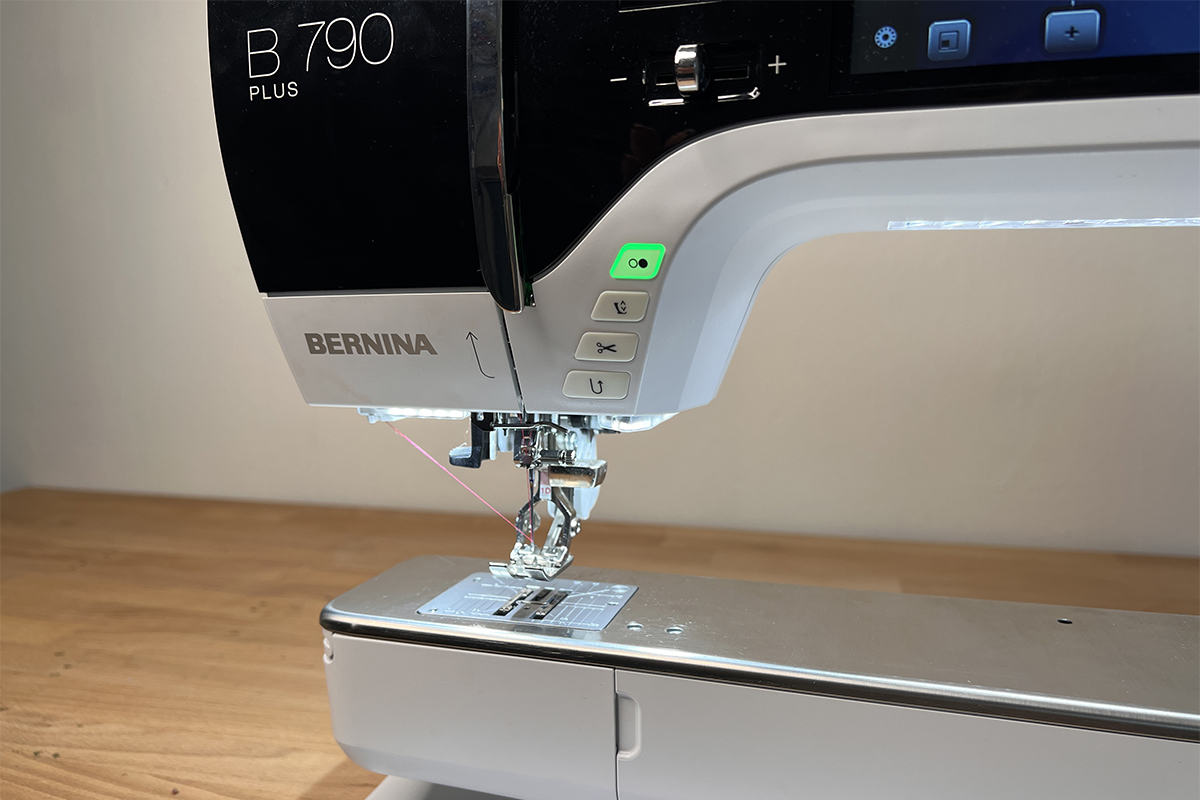
Once everything is dusted and oiled, insert your freshly wound bobbin with the bobbin case then close the bobbin area.
Reattach your stitch plate and insert a new needle. Many minor issues (skipped stitches, unbalanced tension, and small thread nests) are caused by a dull needle or improper threading. Use this time to insert a new needle and prevent potential headaches.
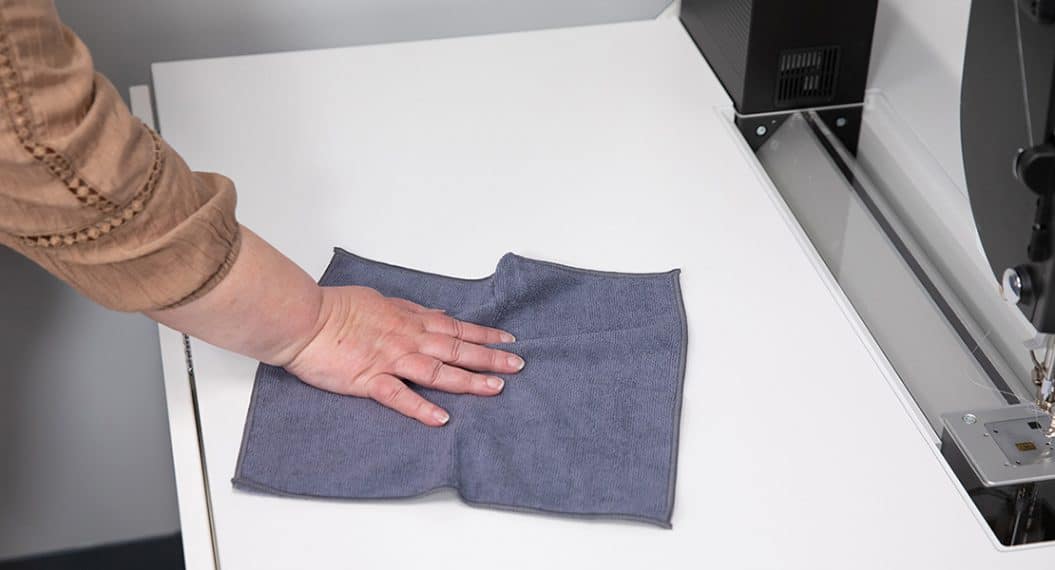
Give your whole machine a quick wipe down, from the top at the bobbin winder down to the freearm, using a microfiber cloth.
Finally, rethread your machine!
Remember to cover your machine when not in use, either with the soft cover provided with the machine or one you create yourself! It’s important to keep your machine protected from dust or from any animals in your home (don’t ask me how I know.) I love this pattern from BERNINA Ambassador Annie Unrein—it’s designed specifically to fit BERNINA 3, 5, and 7 Series machines (labeled small, medium, and large respectively) and even includes pockets for your BERNINA Foot Control and slide-on extension table.
-
Check Your Firmware
BERNINA occasionally releases updates to keep your machine’s firmware running smoothly. This can include things like simple bug fixes or updates to accommodate new presser feet or accessories. It’s a good idea to make sure your machine is using the most current version of firmware. This is easy to do at home, but if you don’t feel comfortable doing this yourself, your local BERNINA dealer may do it for you.
To see what version of firmware your machine is operating on, go to your Settings menu and select Machine Settings.
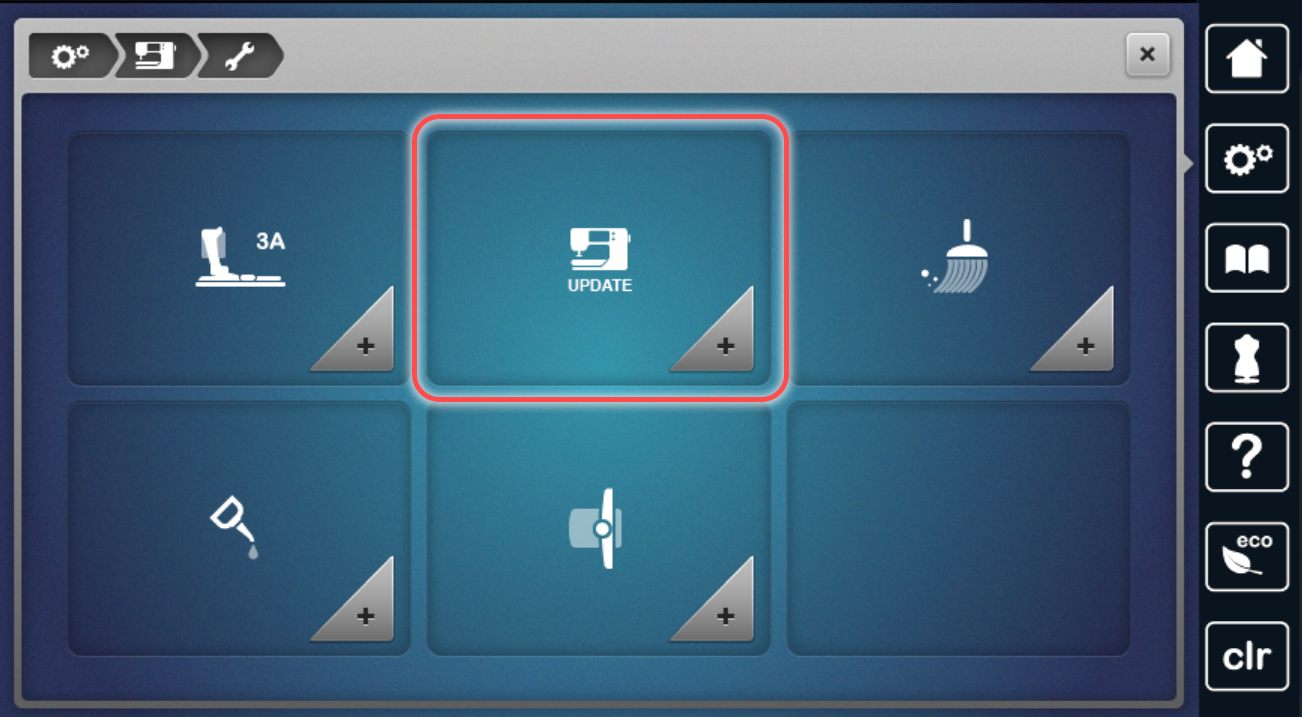
Select the Cleaning/Update menu, at the center bottom.
Then select the machine icon with the word UPDATE beneath it.
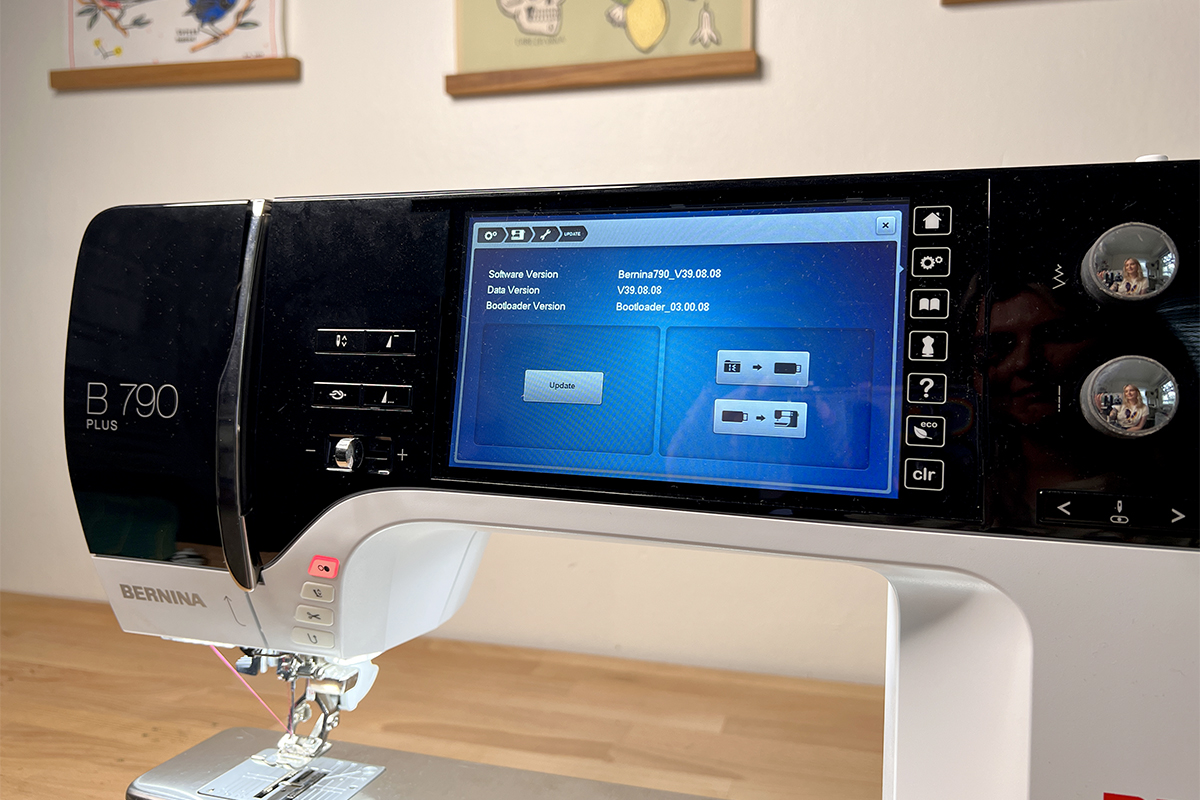
At the top, the machine will list software version number your machine is currently operating on.
Now, visit the support page on bernina.com. Under “Search support info for BERNINA models”, locate your machine model.
Here you will find important tools like the machine manual and simulator. In the Firmware section, there will be three items: 1) instructions on how to download and install firmware, 2) release notes indicating what has changed in the most recent firmware release, and 3) the firmware files themselves.
Check the firmware version number listed—is this number higher than what’s installed on your machine? If so, it’s time to update!
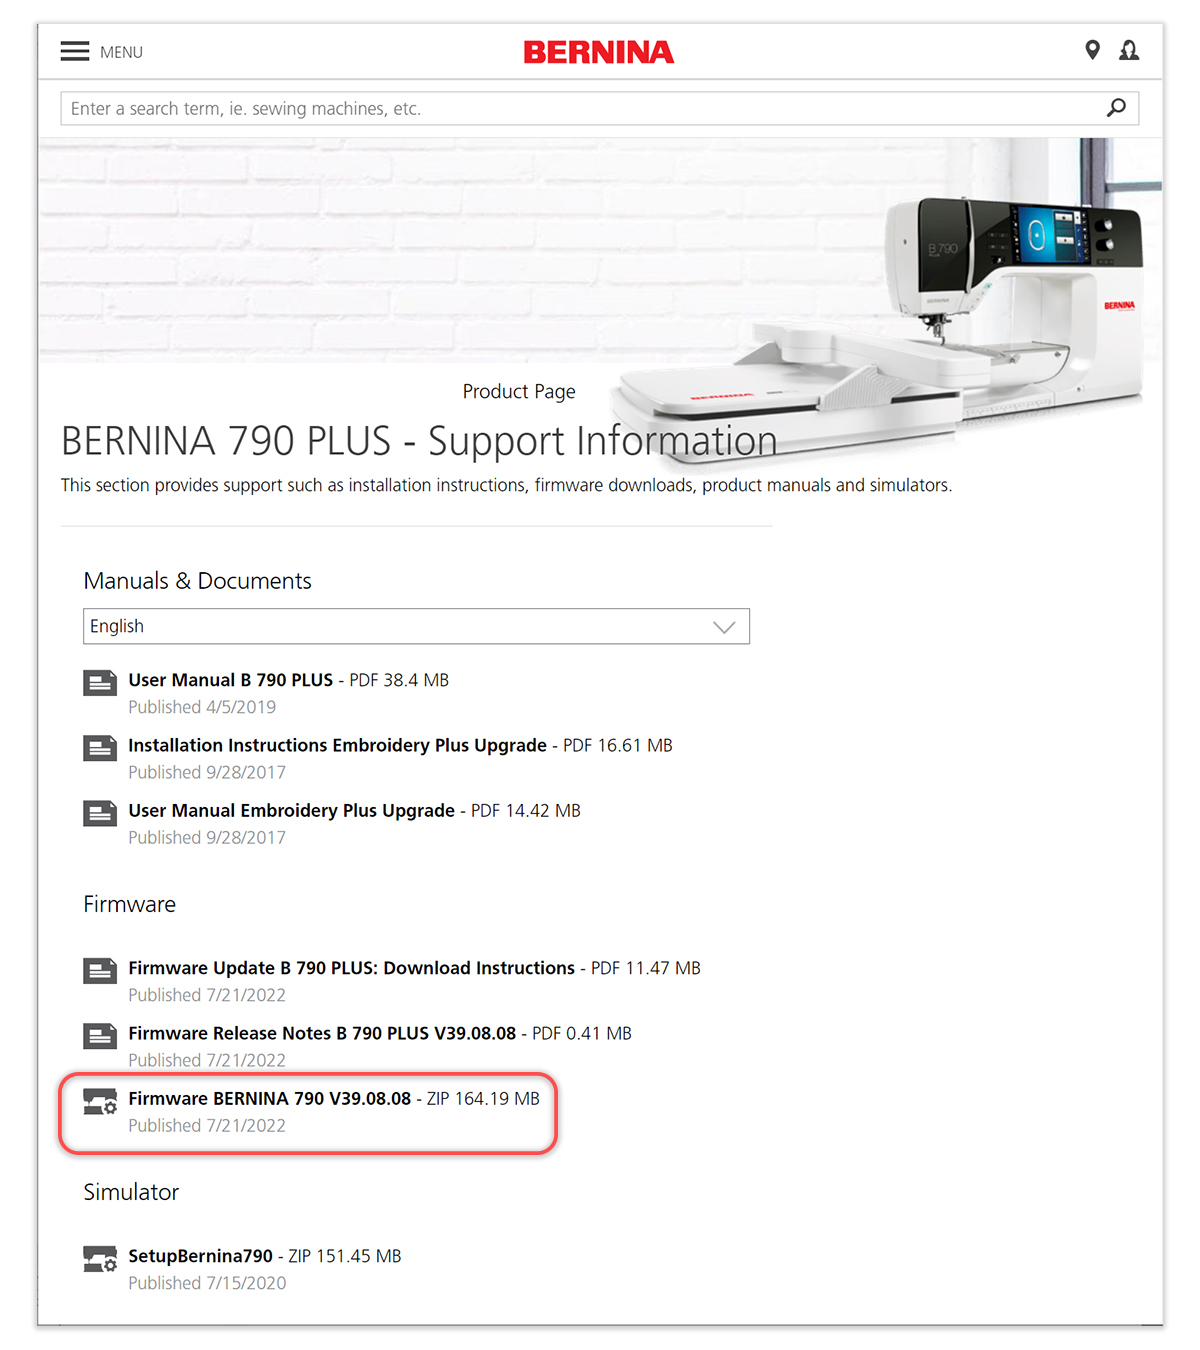
Open or download the first item (the installation instructions) and the zipped firmware files. Follow the instructions to extract the files for use on your machine.
-
Schedule Your Machine for a Spa Day
Don’t forget to take your machine in for regular service and maintenance! Regular cleaning at home will keep your machine stitching but a certified BERNINA service technician will keep it in tip-top shape. They have the ability to access more of the machine to clean, will check the machine’s tension, make sure your Dual Feed is calibrated, and update the firmware if you haven’t done so yourself. We recommend taking your machine in every 12-18 months, depending on use.
Looking for more machine maintenance tips? Check out more posts for help with your CB Hook machines, overlockers, and technical frequently asked questions.


What you might also like


One comment on “BERNINA 7 Series Machine Maintenance”
Leave a Reply
You must be logged in to post a comment.

I have a 770 plus….i am having an awful time with winding the 60 weight thread in the bobbin….please suggest something.ha.