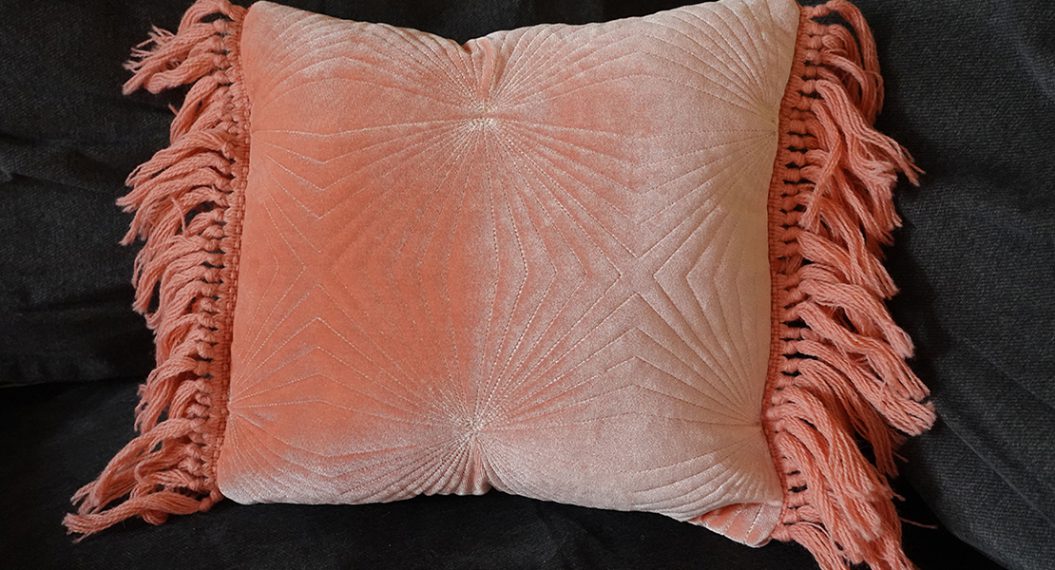
Dimensional Computerized Quilting
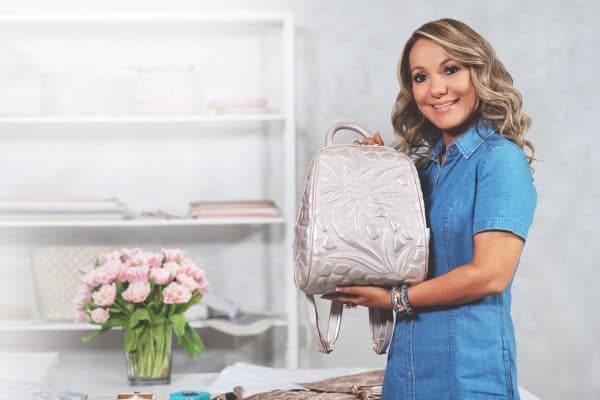
Have you seen the backpack we have featured with our new BERNINA 770 QE PLUS campaign? This sophisticated backpack was designed and made by Valentina Bukeeva, who is from Russia, for BERNINA. She has developed and refined the techniques for creating beautiful and sophisticated fashion accessories. In this post, I am going to show you the process used to make the beautiful and dimensional fabric panels that Valentina used in her projects.
Before I get into the details, let me give you a little more insight into Valentina Bukeeva. Valentina started with a vision to make ecological bags instead of using plastic. She also wanted to make a better bag than what could be purchased in shops. She feels if a sewist spends more time and pays attention to details they can create something very sophisticated and exquisite.
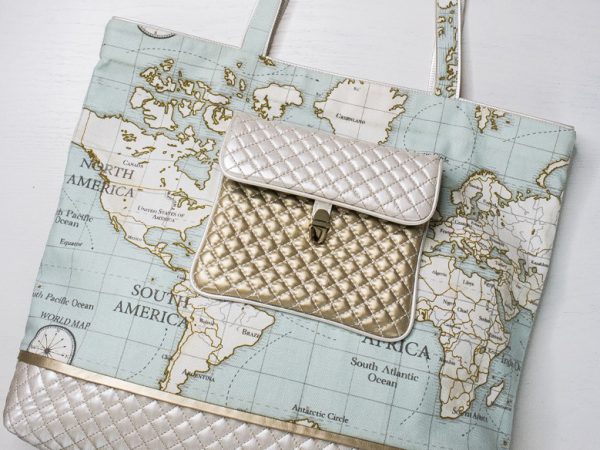
With both of these objectives in mind, she created this Eco Bag to use when shopping. She added dimensional quilting to the pocket and bag bottom to give it some class and sophistication. From this Eco bag, she has expanded her bags and fashion accessories
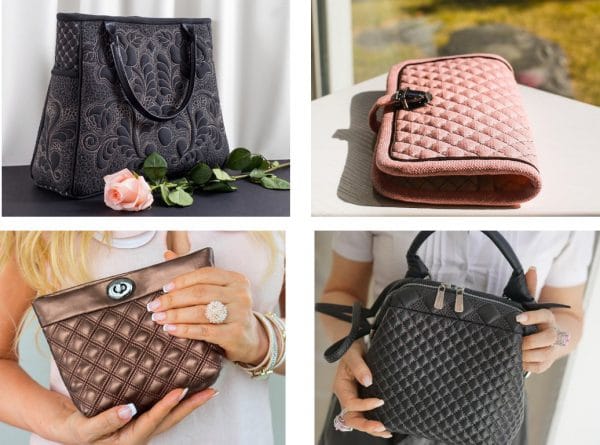
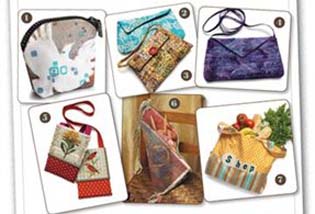
Here are images of a few of her bags. As you can see they are all exquisite and beautiful and are all accessories that you can make. But, where do you get started?
A great starter project is her Eco bag (pictured above). She has made this pattern available and free to all and it includes her instructions for making the dimensional faux leather panels. If you are interested in starting with Valentina’s Eco bag you can visit her website. However, do you notice that it is in Russian?
Not to worry as most browsers will translate. You can set up an account and then have access to the Eco bag course at no charge. Her courses consist of very detailed videos with great close-ups that walk through the construction steps and sewing tips. Note: The videos are in Russian. However, just by watching them, you are able to watch and understand the process. She also has courses for many other bags and accessories you can take. Two of them are in English and the others like the Eco bag have wonderful videos to enable you to follow along and complete the bag.
If you are interested in seeing more of Valentina’s fashion accessories, follow her on Instagram for great inspiration.
Good Luck Backpack by Valentina Bukeeva
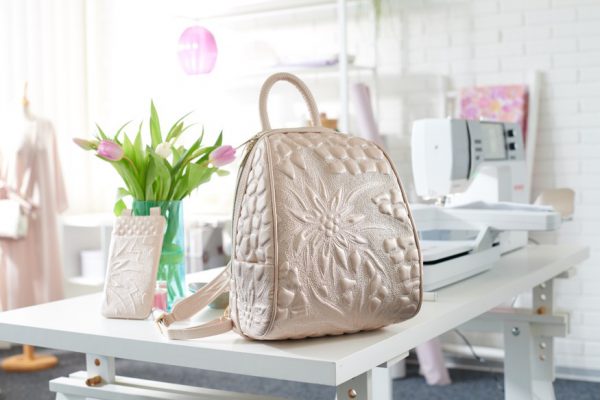
Another place to start is with the backpack that is featured with our B 770 QE PLUS machine. On the BERNINA website, there is a free download with the pattern and instructions:
Just like with her online courses, Valentina’s instructions are very detailed (50 pages). They explain not only how to make the beautiful dimensional panel but also how to construct the backpack. With permission from Valentina, I have taken her instructions and developed a secondary instruction sheet that details the layering process and products found in the states that are used in order to get the beautiful dimensional effect. Her techniques are a combination of embroidery and quilting which is actually the Computerized Quilting technique that I have been showing in my Facebook Live presentations.
Dimensional Computerized Quilting
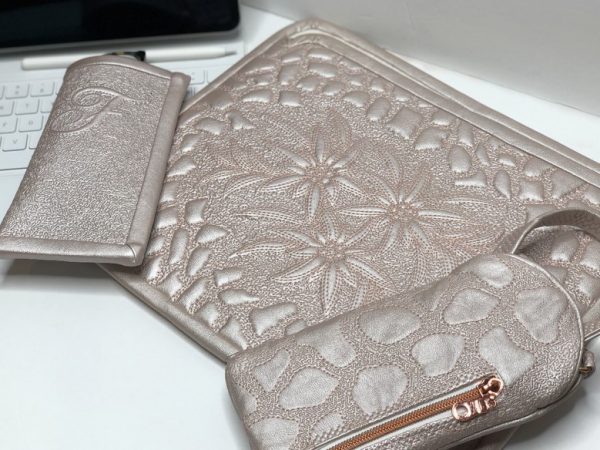
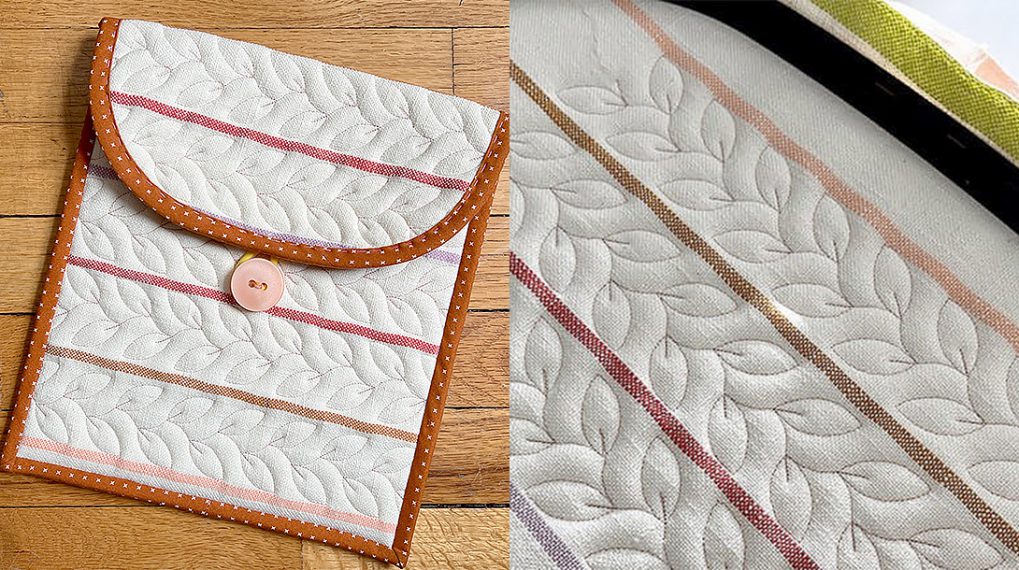
Rather than starting with the backpack, I choose to begin with smaller accessories such as an eyeglass case, iPad case and cell phone cross-over bag. Each of these projects started with the dimensionally quilted faux leather that was then constructed into the project according to the project instructions. Let’s take a look at how I made the panel.

Many of Valentina’s projects use faux leather which adds to the elegance of the project. Most faux leather does have stretch to it therefore we begin by fusing non-woven fusible interfacing to the back of the faux leather. At this point, it is recommended to steam the back of the faux leather in case of shrinkage. You will want the shrinkage to occur before embroidering the faux leather. To get a lot of steam I use the Laurastar iron and have had beautiful results. The next step is to place fusible fleece on the interfacing and fuse. Now the faux leather can be embroidered.
A variety of embroidery designs can be used for this technique. Choose one that does not have a lot of dense fill and is primarily an outline. Start with quilt designs that are triple stitched for the best effect.
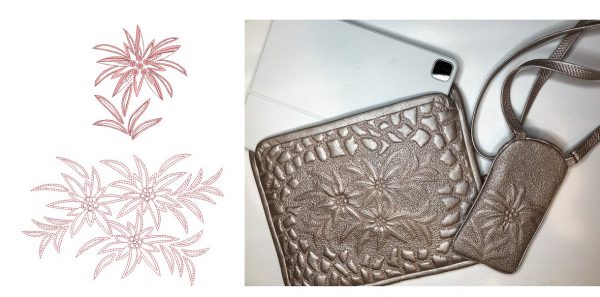
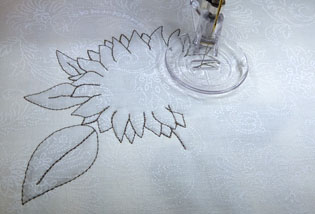
The Edelweiss design that I used on my projects is a design built into the new B 770 QE PLUS and also included in the PLUS Upgrade for the B 770 QE.
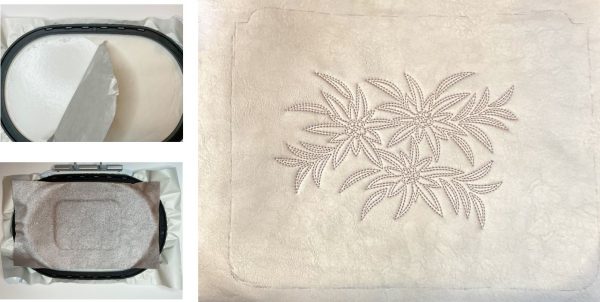
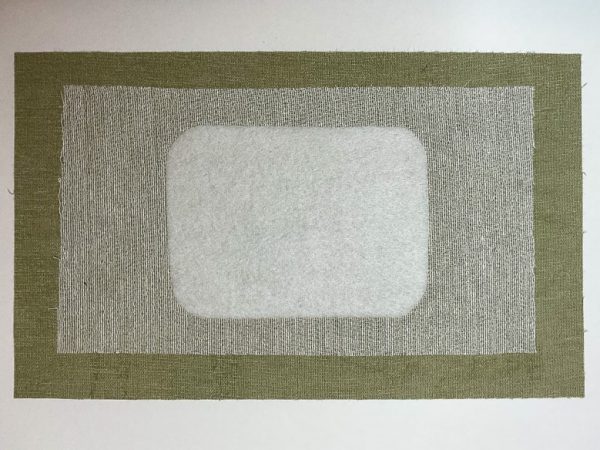
After the design is chosen and the faux leather has non-woven interfacing and fusible fleece fused to the back, the next step is to hoop OESD Stabilstick tear-away stabilizer, score the paper on the inside of the hoop, remove the paper to expose the adhesive. Place the faux leather with the interfacing and fusible fleece on the adhesive. The fusible fleece should be cut the size of the pattern piece of the project you are making and when it adheres to the stablistick, you can easily see the outline of the fleece. This is perfect for placing the embroidery or quilt design where you want it to be. Now we are ready to stitch the design. After the design is stitched press. When pressing, do a test on a sample. If needed you can place parchment paper on the faux leather to protect it.

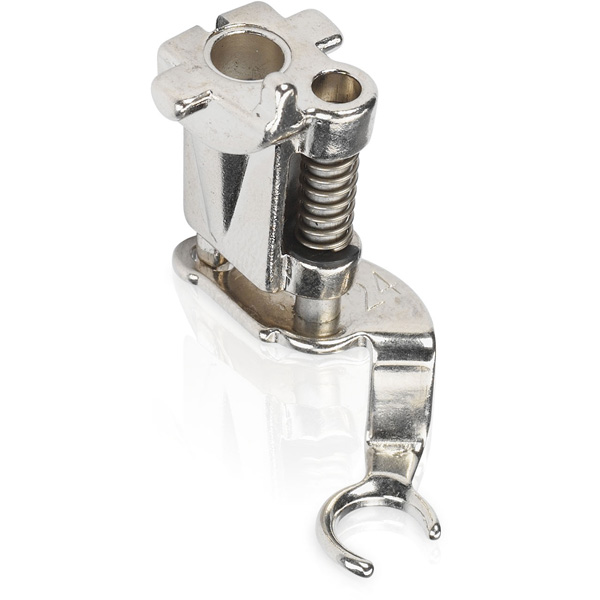
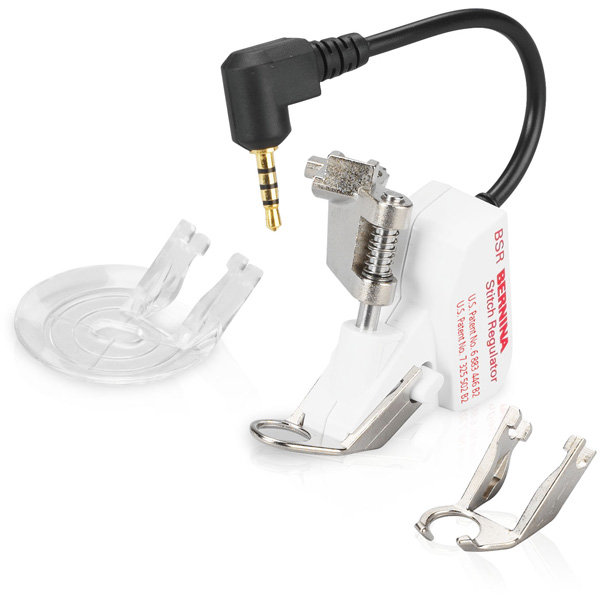
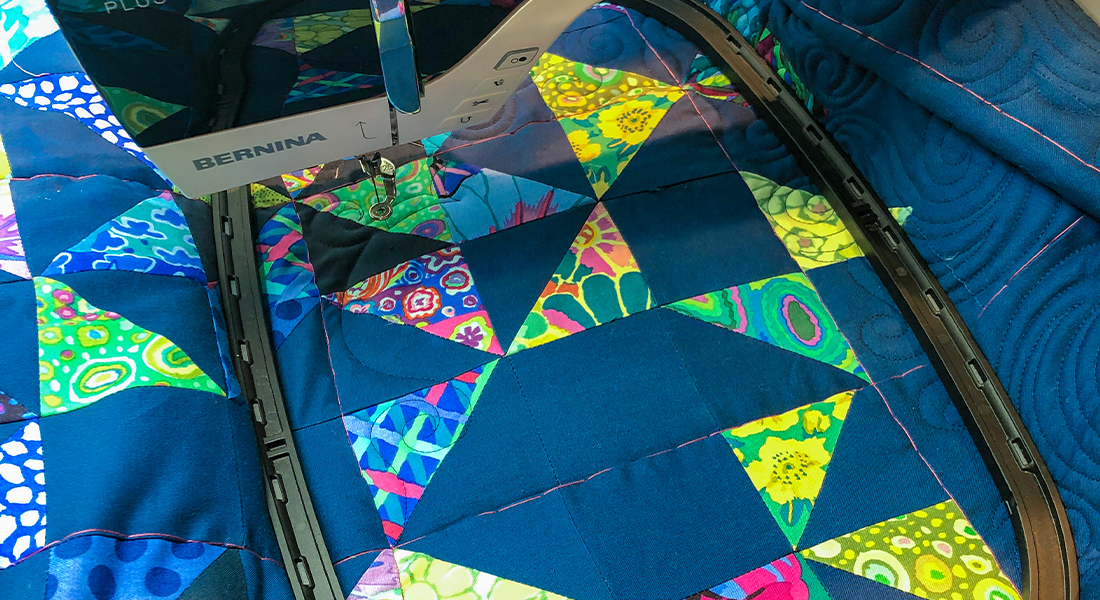
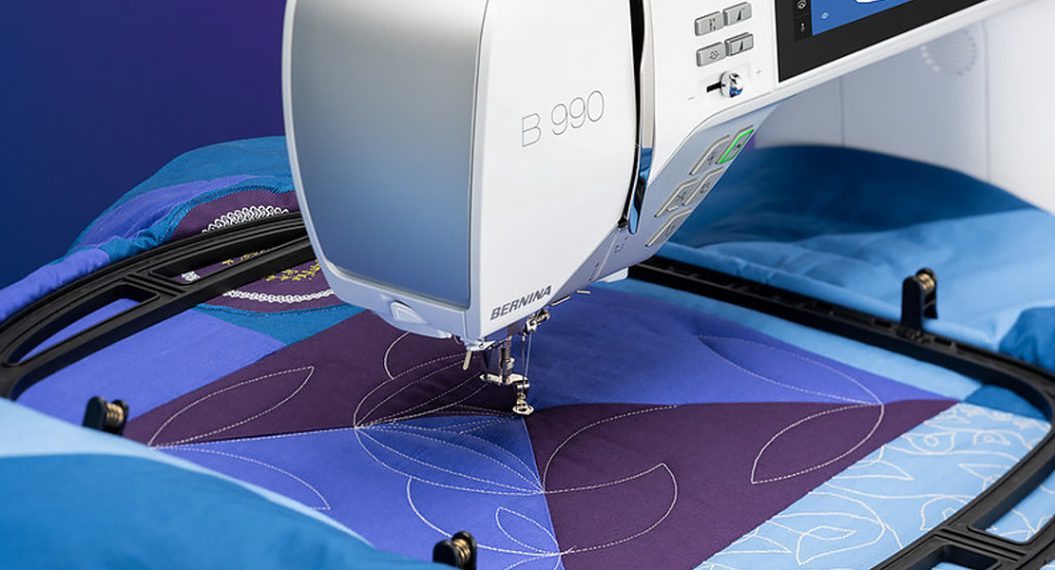
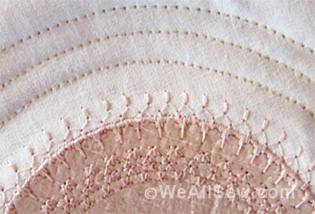
Now we start adding dimension to the design. Place a layer of low loft fleece to the back of the faux leather with the design. Tape in place using OESD tear-away tape. Using the BERNINA Stitch Regulator (BSR) or BERNINA Free-motion Embroidery Foot #24, stitch 2-3 mm away from the outer edge of the design. Depending on the design you may want to stitch some lines inside the design. When complete, trim the fleece close to the stitching.
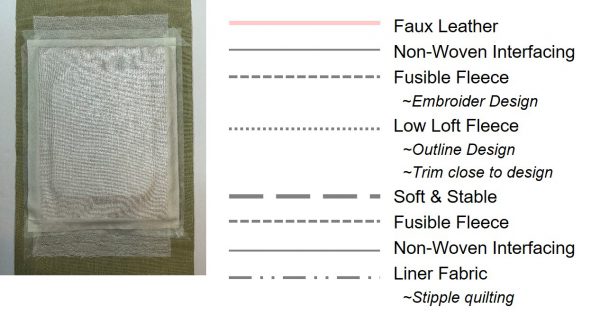
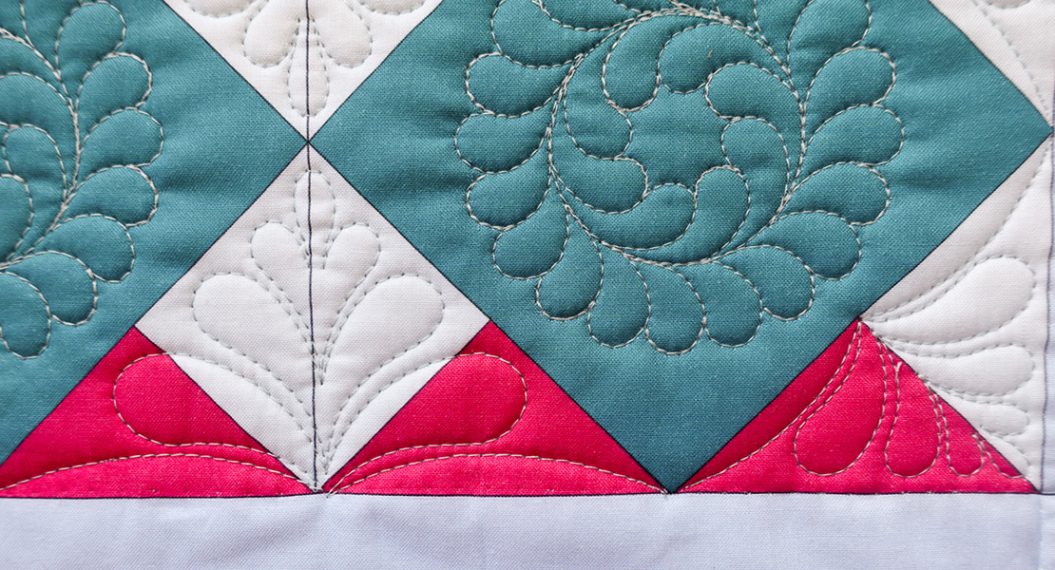
After stitching the outline stitch we add an additional layer of Fusible Fleece and Soft & Stable and a liner that has Non-Woven Interfacing fused to it. With all the layers together it is time to add the micro stipple stitching around the design. This is what adds the beautiful dimension to the faux leather. Outlined above are the layers in the order in which they are placed on the backside of the faux leather.
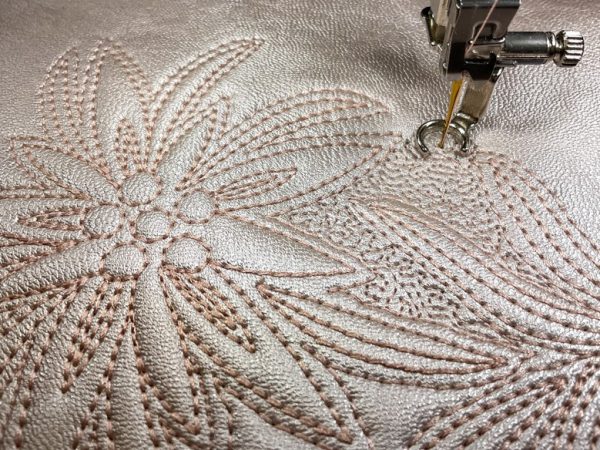
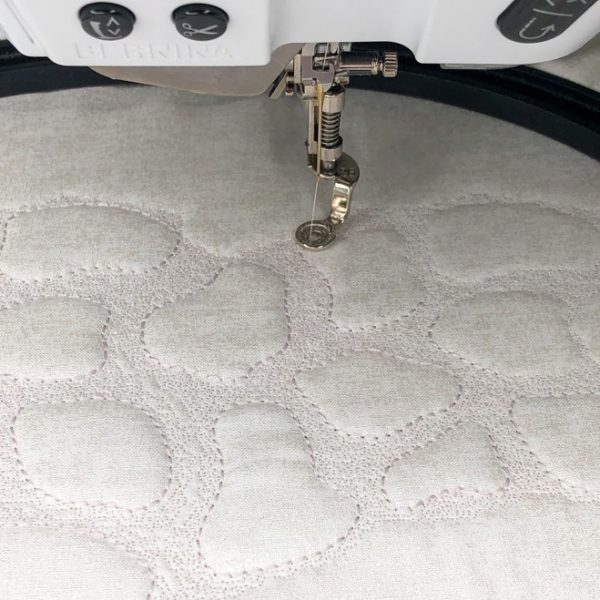
Now add micro stipple stitching around the design. This is very thick with all the layers and I found it necessary to adjust my presser foot pressure. At times I had it at negative 15. As you micro stipple, the layers will flatten and you will need to change your pressure accordingly. I have used both the BERNINA Stitch Regulator and Free-motion Embroidery Foot #24 for this stippling. Both work very well; however, when I used the Free-motion Embroidery Foot #24, I reduced my sewing speed so I could press all the way down on my foot control to keep an even speed. The reduced speed allowed me to have more precision when staying around the lines of the design.
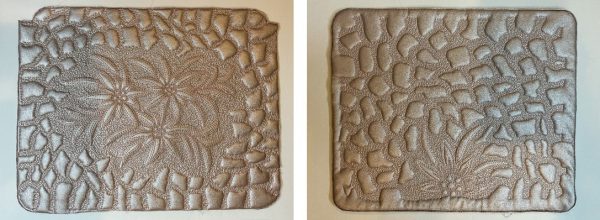
Once the front and back are complete, lay the pattern piece on the faux leather and trace. Stitch on this line and cut close to the line.
For the inside of the projects, I did line them and the lining had interfacing and fusible fleece fused to the back then I embroidered the design. The design used for this (pictured above) is another design that is built into the B 770 QE PLUS and also included in the PLUS Upgrade for the B 770 QE.
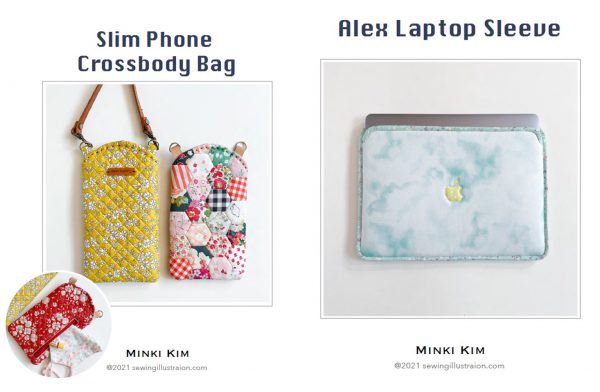
The patterns I used for the projects are from BERNINA Brand Ambassador, Minki Kim. Her patterns work very well with dimensional computerized quilting due to the way she finishes many of the projects with binding, as in the laptop sleeve. Her zipper insertion is similar in technique to what is taught by Valentina in which more detailing is added to give the projects a sophisticated look and feel. Patterns by Annie also work well with these techniques.
In Valentina’s Good Luck Backpack pattern, she gives detail on how to insert zippers, make straps and add the binding. Refer to them and combine the techniques with your chosen pattern!

What you might also like


7 comments on “Dimensional Computerized Quilting”
-
-
Hello! Yes, the stippling technique can easily be done in the V9 DesignerPlus Software using the Quilting Background Feature. Happy stitching!
-
-
Would ultra suede be suitable for these projects?
-
I haven’t tried this technique with ultra suede to see if the results would be similar but would suggest to use a lightweight ultra suede to get the most dimensional effect.
-
-
This is beautiful and I would like to try but on a much smaller scale, like the eyeglass case. Do you a list of sources for good quality faux leather? And what fabric di you use for the lining?
-
There are many sources for faux leather and typically the sources carry faux leather that varies in quality and price. The best way to tell is to actually look at it and feel it. If you are looking online rather than in a store, I would suggest purchasing a sample prior to purchasing yardage. For lining, 100% cotton was used on the featured projects but a wide variety of fabrics will work for the lining.
-
-
I fell in love with this backpack as soon as I saw it. However, I had just purchased the B790+, not the 770+ and I understand that this flower design on the back was only included on that model.
How can I obtain that design? Could it be made available through OESD for purchase to those of us who want to replicate that exact bag?
Leave a Reply
You must be logged in to post a comment.

This technique is outstanding. Do you think the stippling could be done in V9 software, using the quilting backgrounds technique?