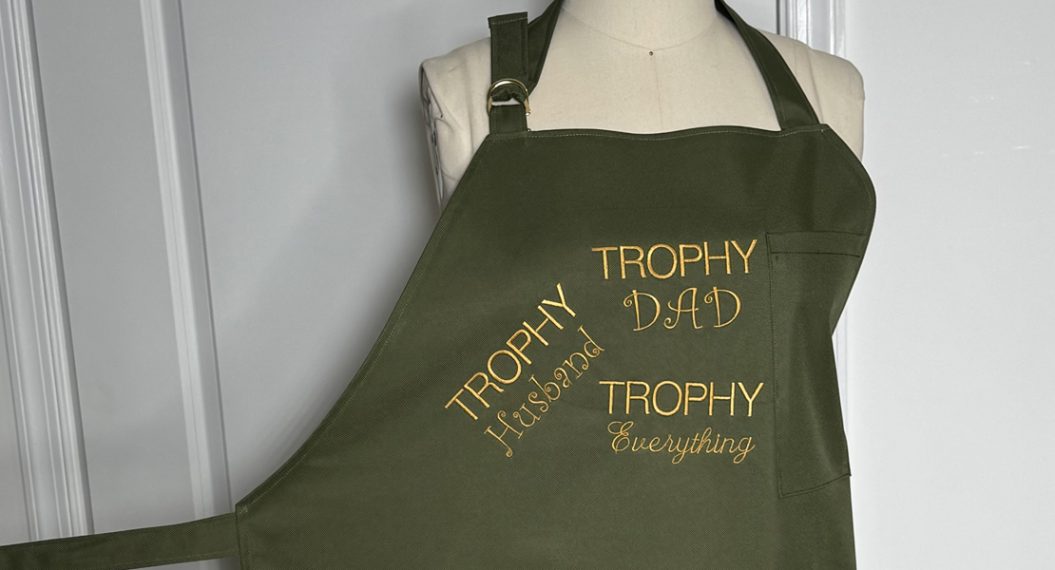
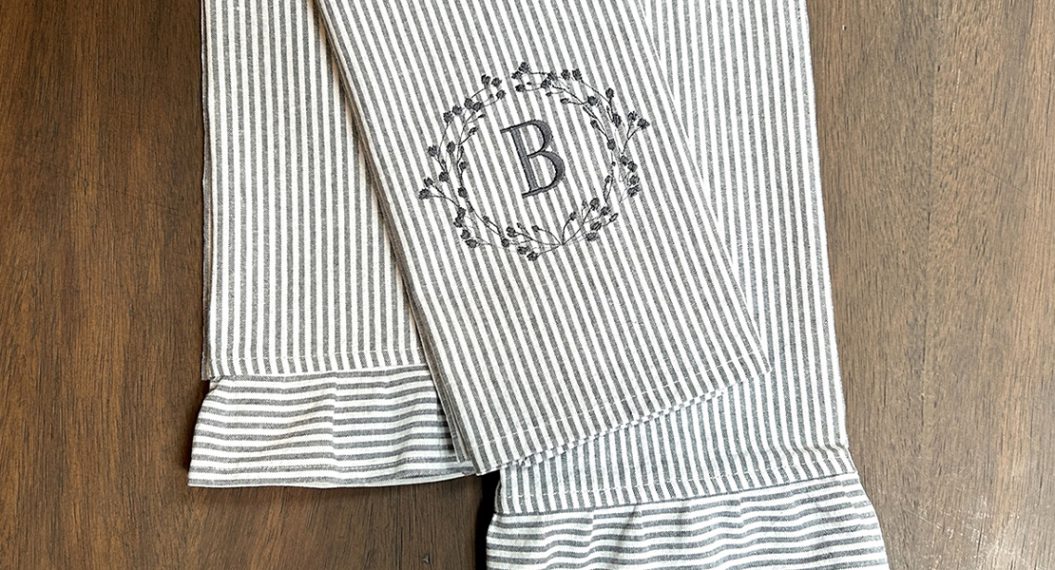
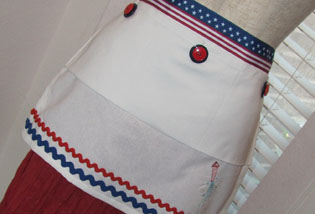
Easy Kitchen Towel Apron
When I’m cooking I almost always wear an apron and almost always have a kitchen towel close by, so why not combine the two and make a kitchen towel apron?!
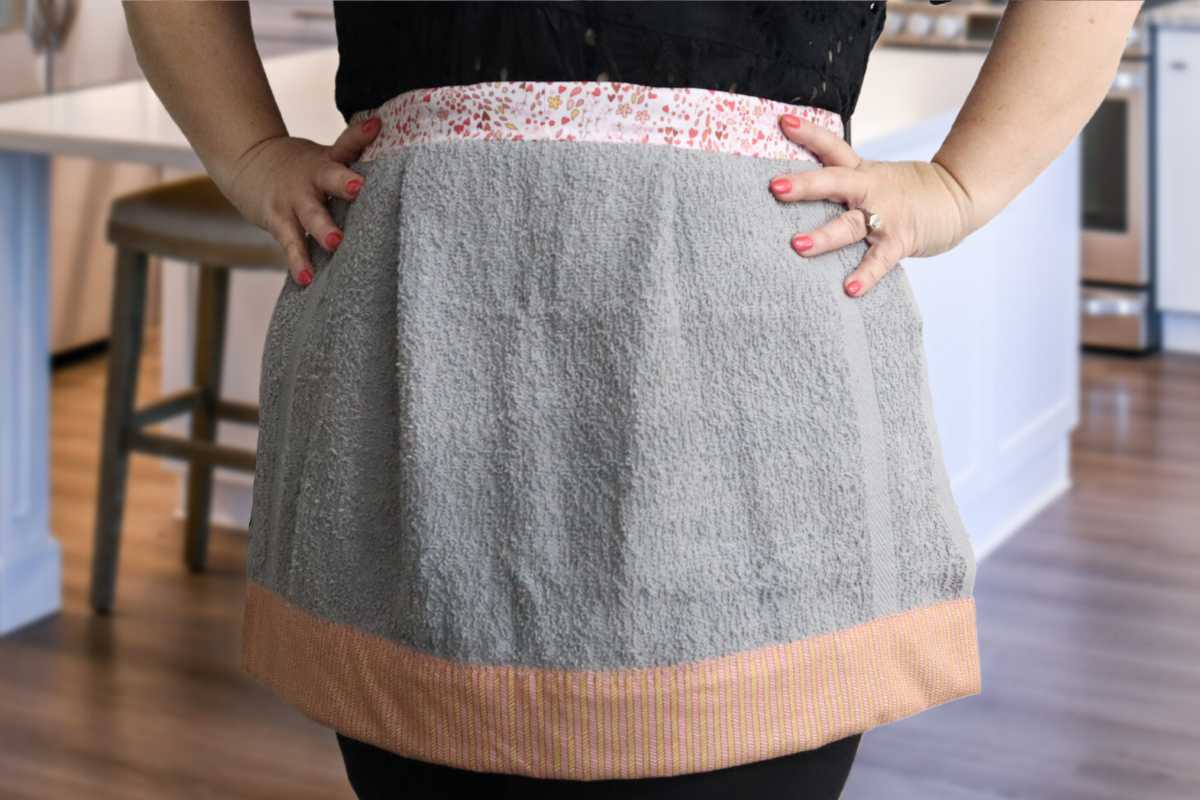
In today’s blog post, I’m going to teach you how to take a simple kitchen towel, add some pleats, add a finished bottom edge, and create a beautiful tie along the top. These make great last-minute gifts for friends and perfect craft fair items to sell.
Hello my Sewing Bees, my name is Sue O’Very owner of Sookie Sews and BERNINA Expert. You can find me on Instagram at @SookieSews, my website SookieSews.com, and on my YouTube Channel SookieSewsTV.com where I have hundreds of sewing projects, machine sewing patterns, embroidery designs and In-the-hoop projects. Ok, let’s get stitching!
Materials and Supplies to Make an Easy Kitchen Towel Apron
Measurements are Width by Height
- Sewing machine (I used my bernette 79)
- Standard presser and Open Toe Foot
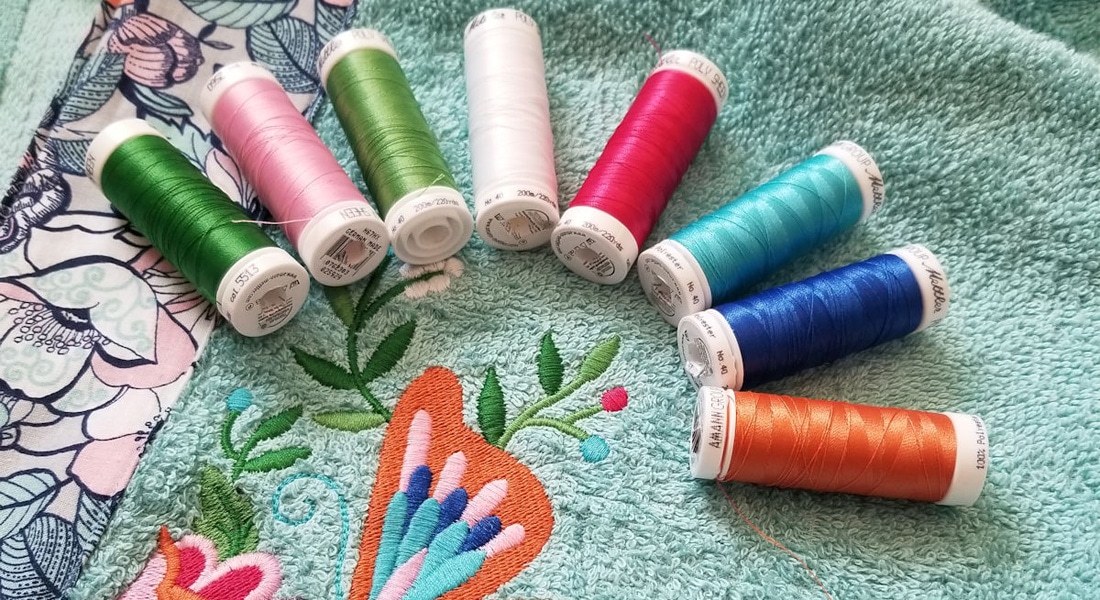
- (1) spool of standard sewing thread and bobbin to match
- Universal 80/12 needle
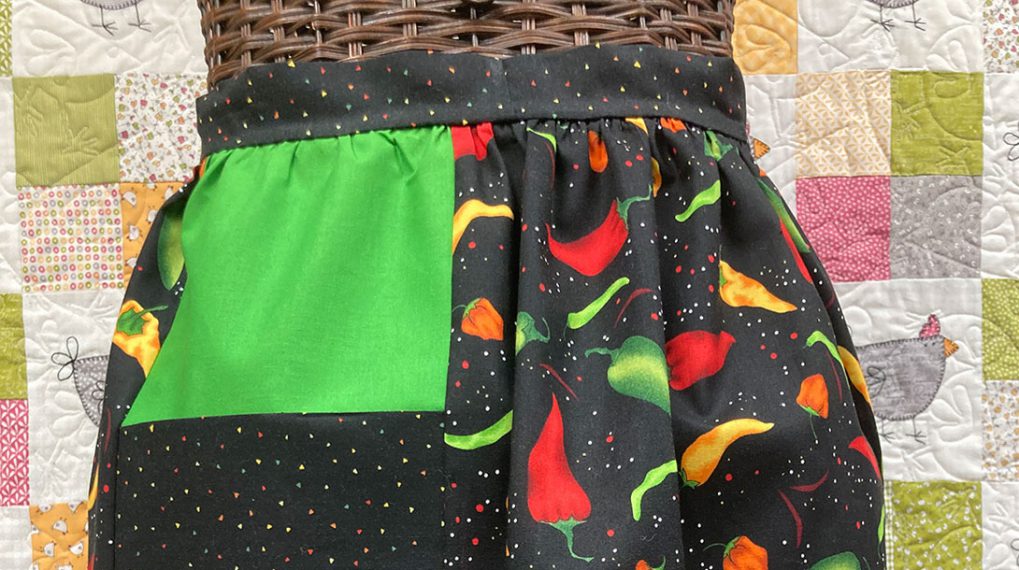
- (1) Kitchen towel measuring 16″x26″
- (1) 27″x 6″ Bottom Band (I used Birdsong Benartex Fabric)
- (2) 40″x4″ Waistband (I used Birdsong Benartex Fabric)
- Wonder Clips
- Straight Pins
- Rotary Cutter, ruler, and mat
- Thread snips (Sookie Sews EZ Hook n Snip)
- Fabric Shears
- Iron and pressing station
- Point Turner
- Tape measure
- EZ Point and Turner by Sookie Sews
Steps to Make an Easy Kitchen Towel Apron
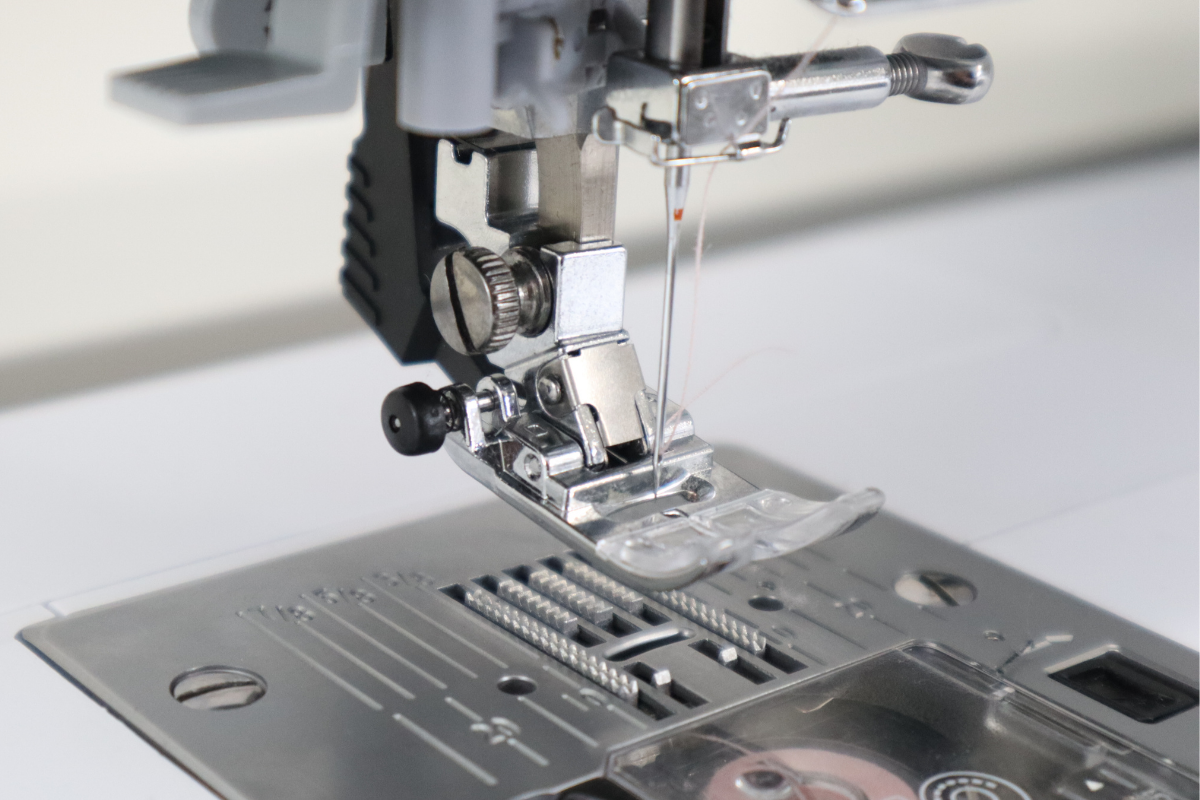
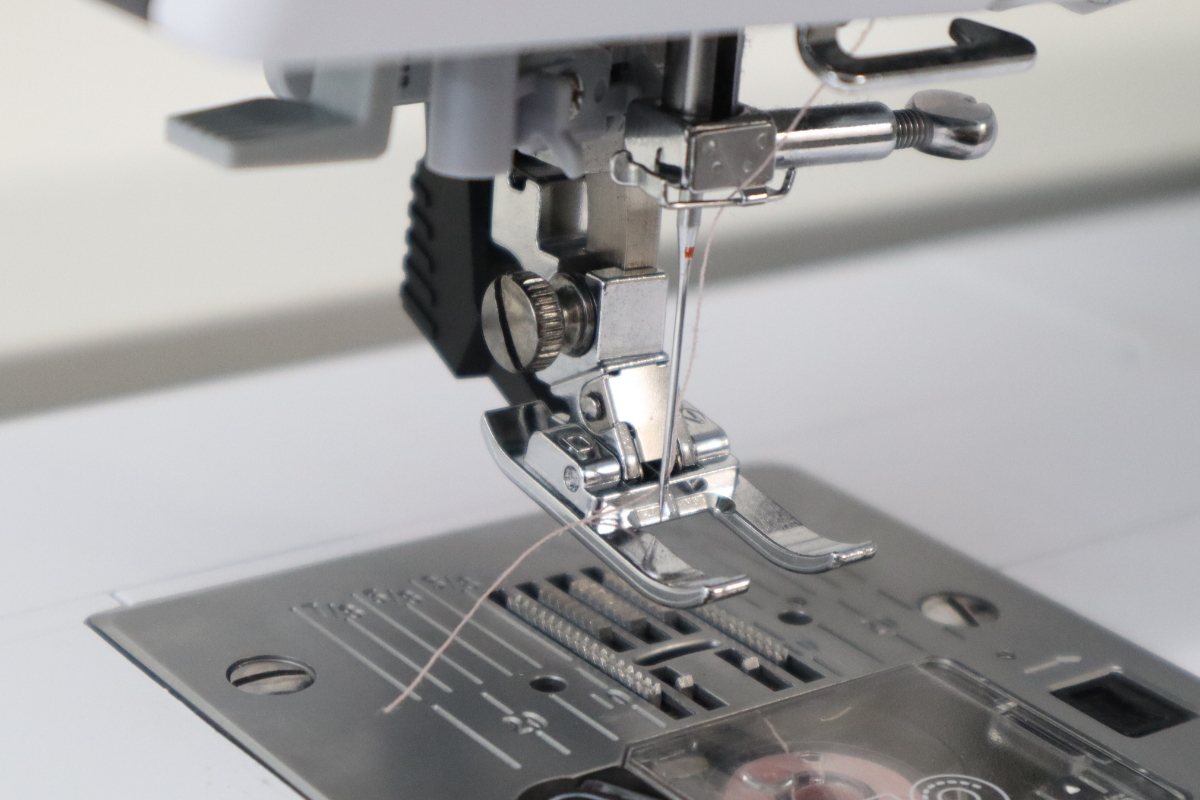
1. Set sewing machine up with matching thread in the top and bobbin, universal sewing needle, standard presser foot (with duel feed engaged), and a straight stitch 2.5 length.
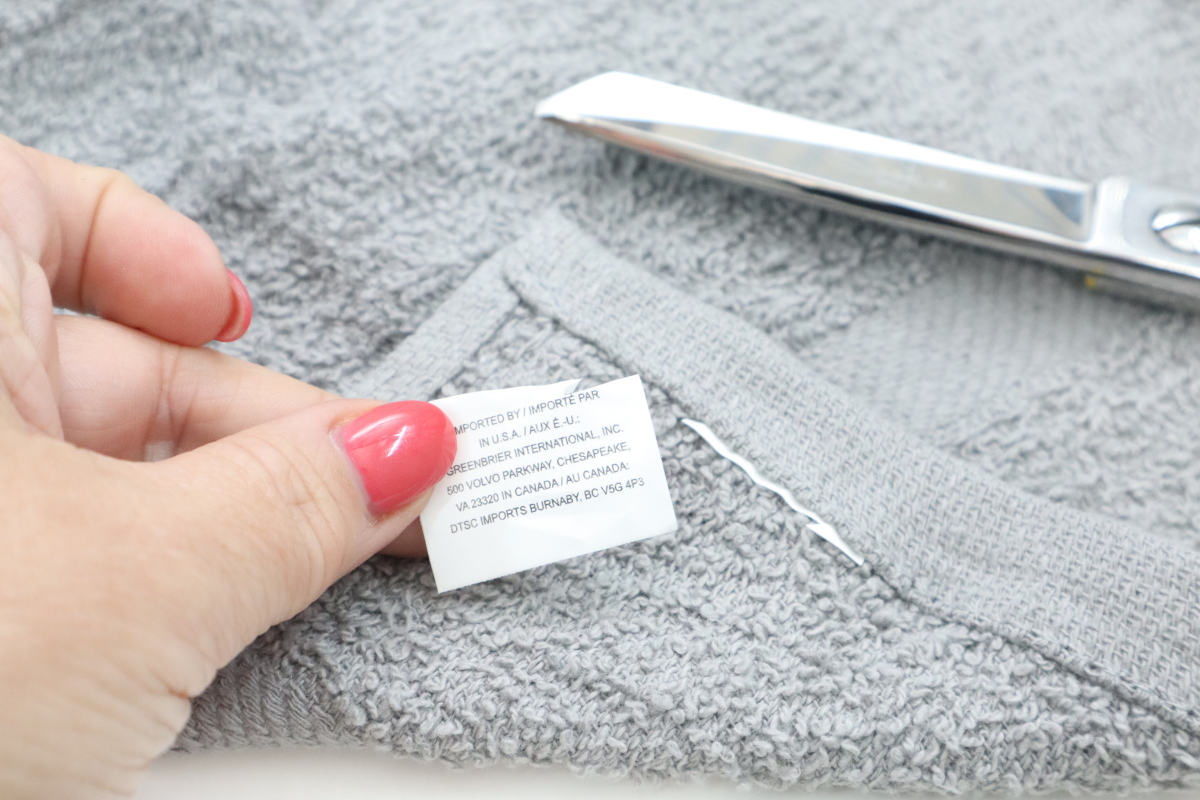
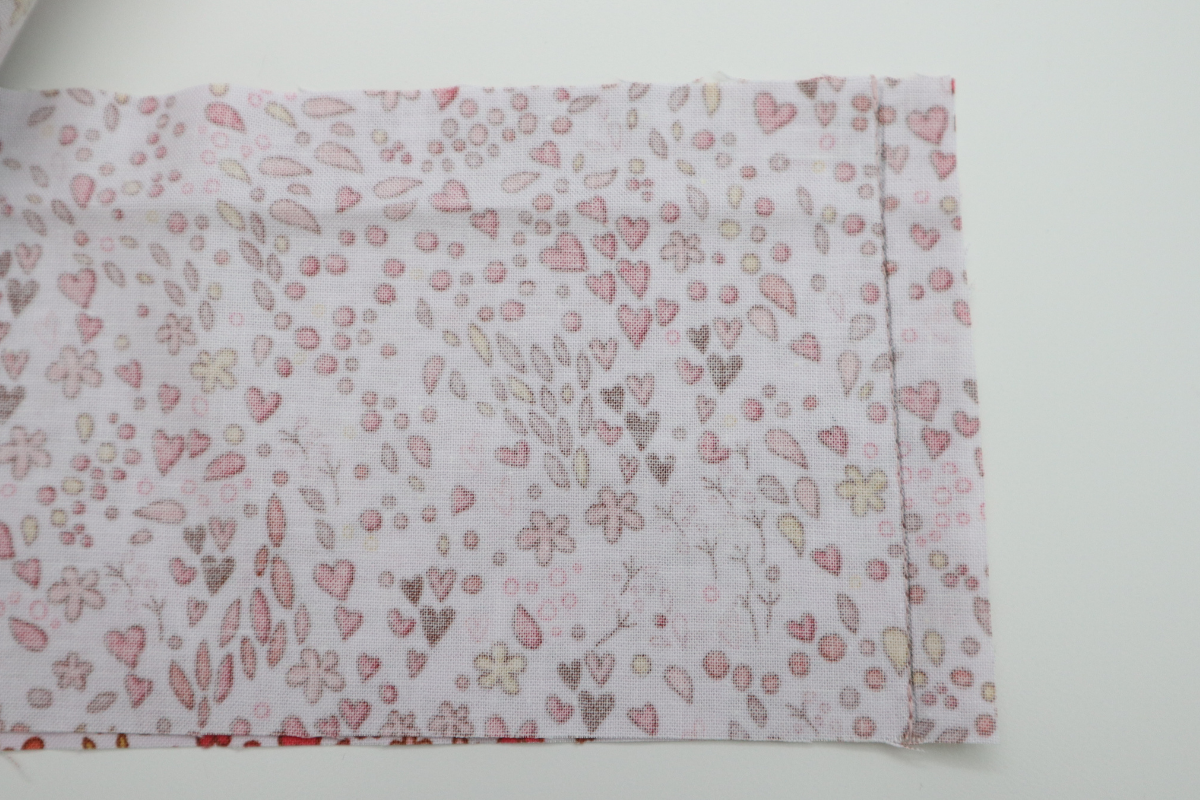
2. Press the towel and remove the label from it.
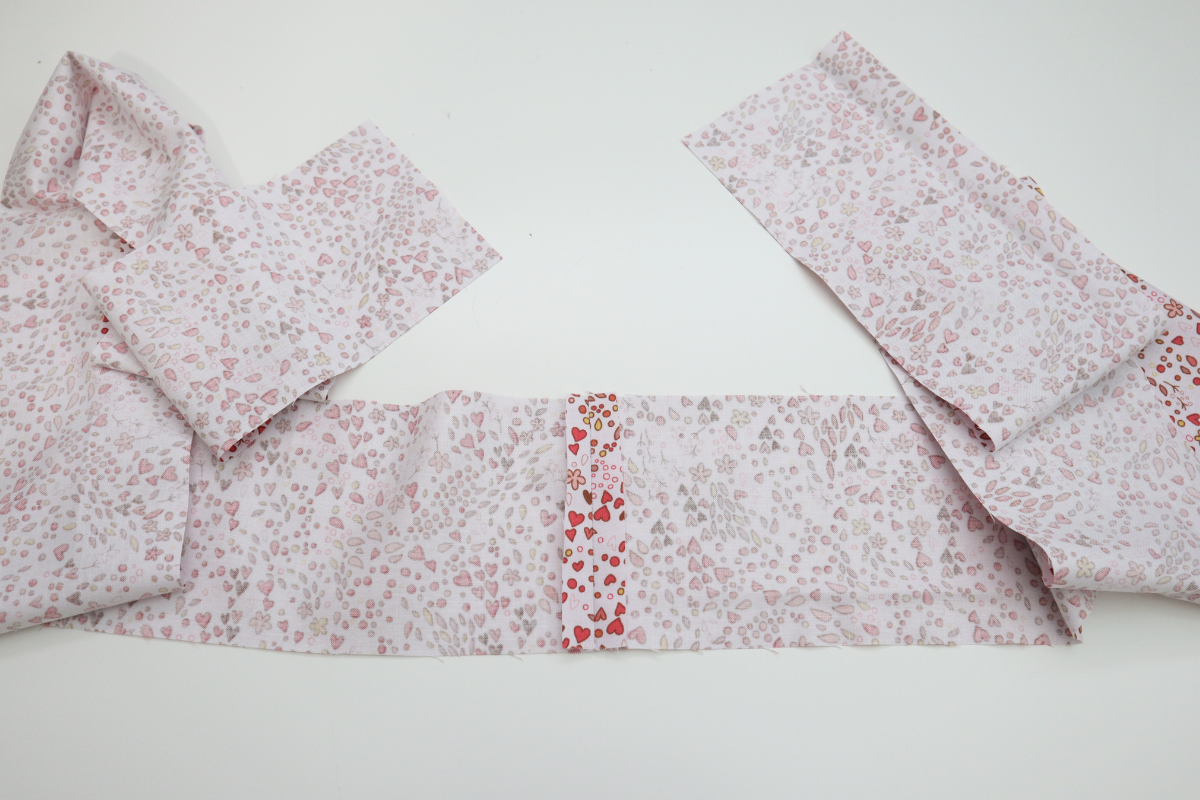
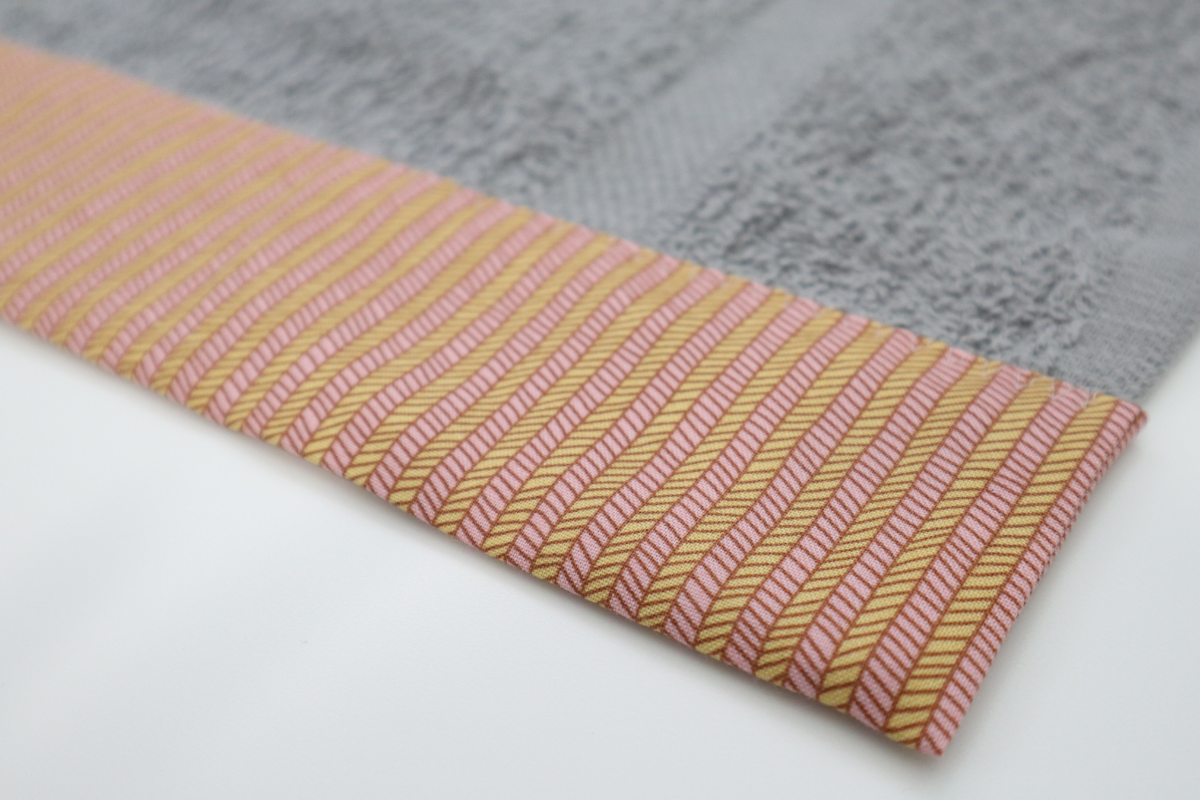
3. Fold the Bottom Band in half lengthwise right side together and sew both the short ends at 1/2″ seam allowance. Press seam flat.

4. Use a point turner and poke out the corners and press.
5. Fold and press both long edges on the Bottom Band under 1/2″.

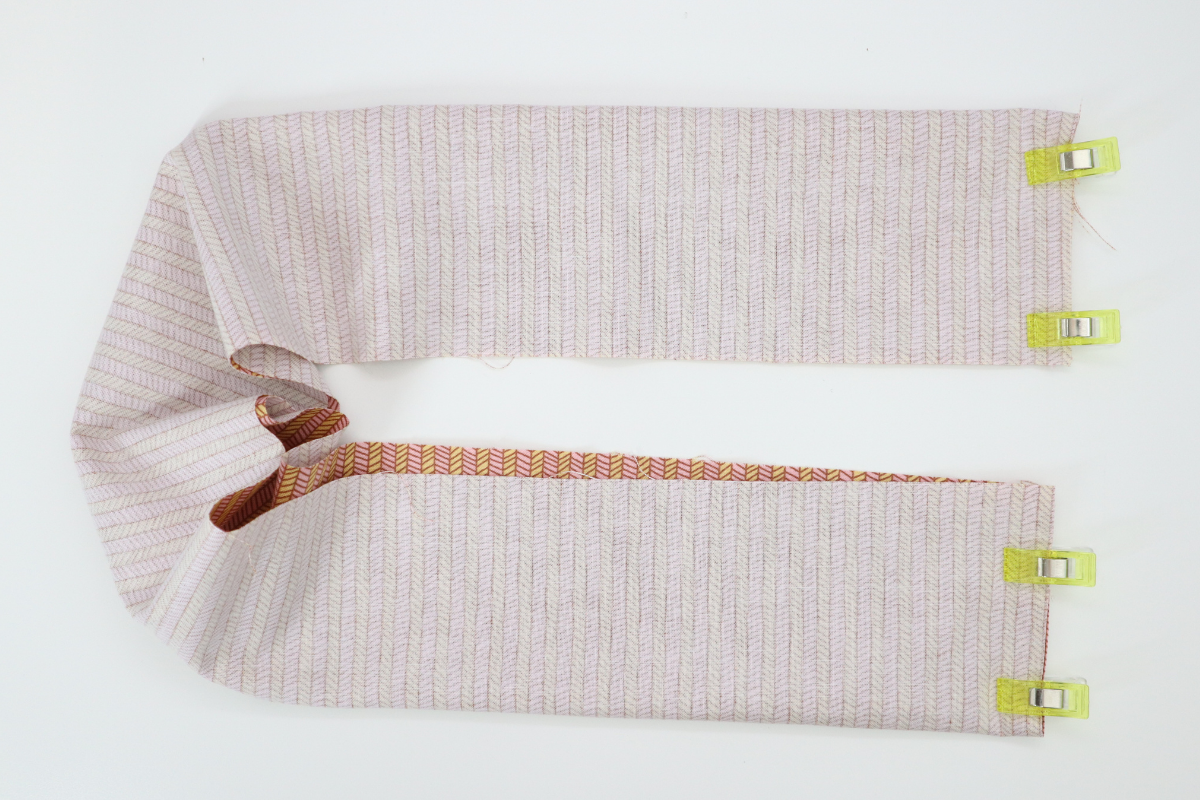
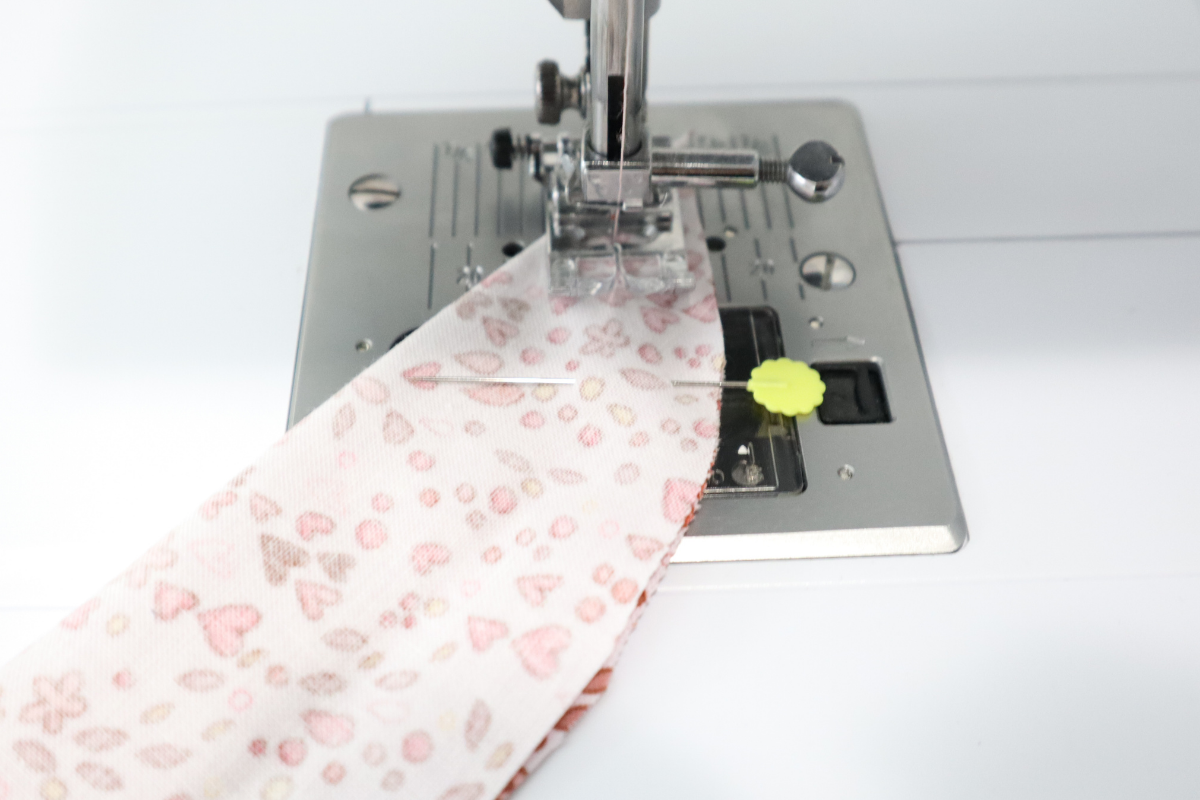
6. Place the two Waistband pieces right side together along one short edge. Pin and sew 1/2″. Press the seam open.


7. Fold the Waistband in half lengthwise aligning the long raw edges and pin.
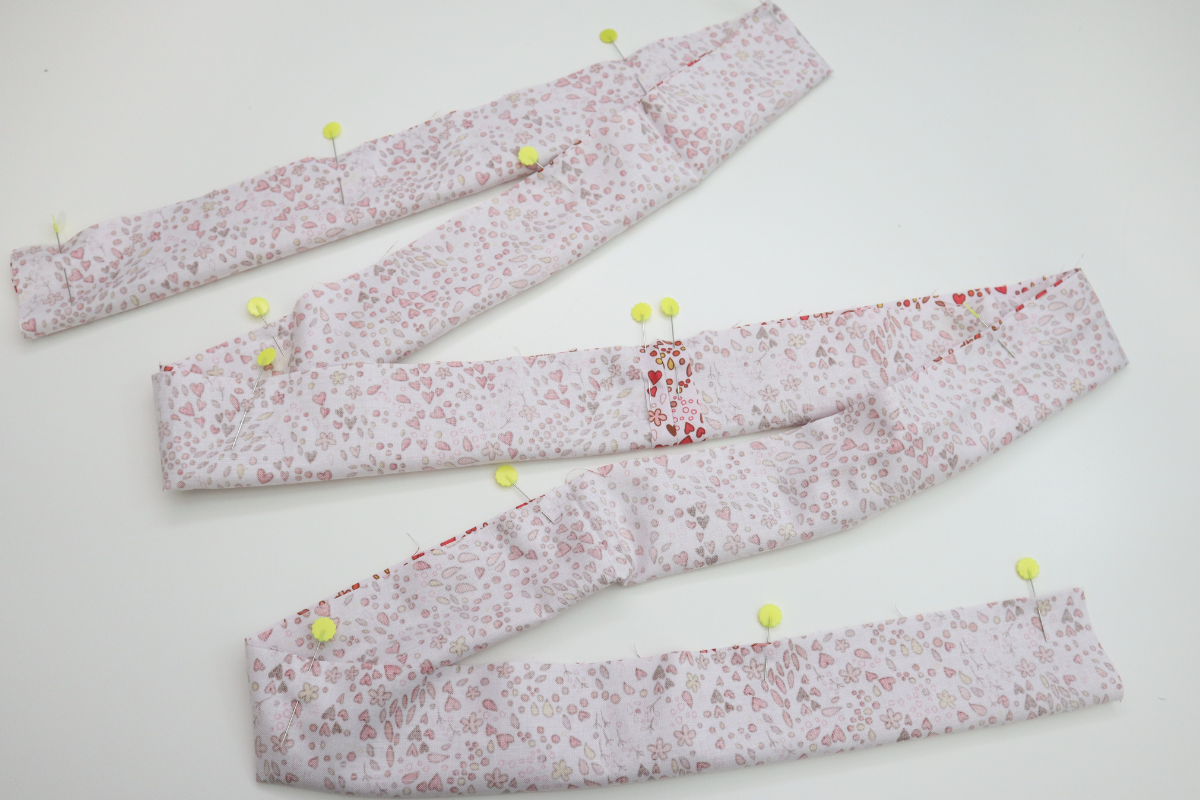
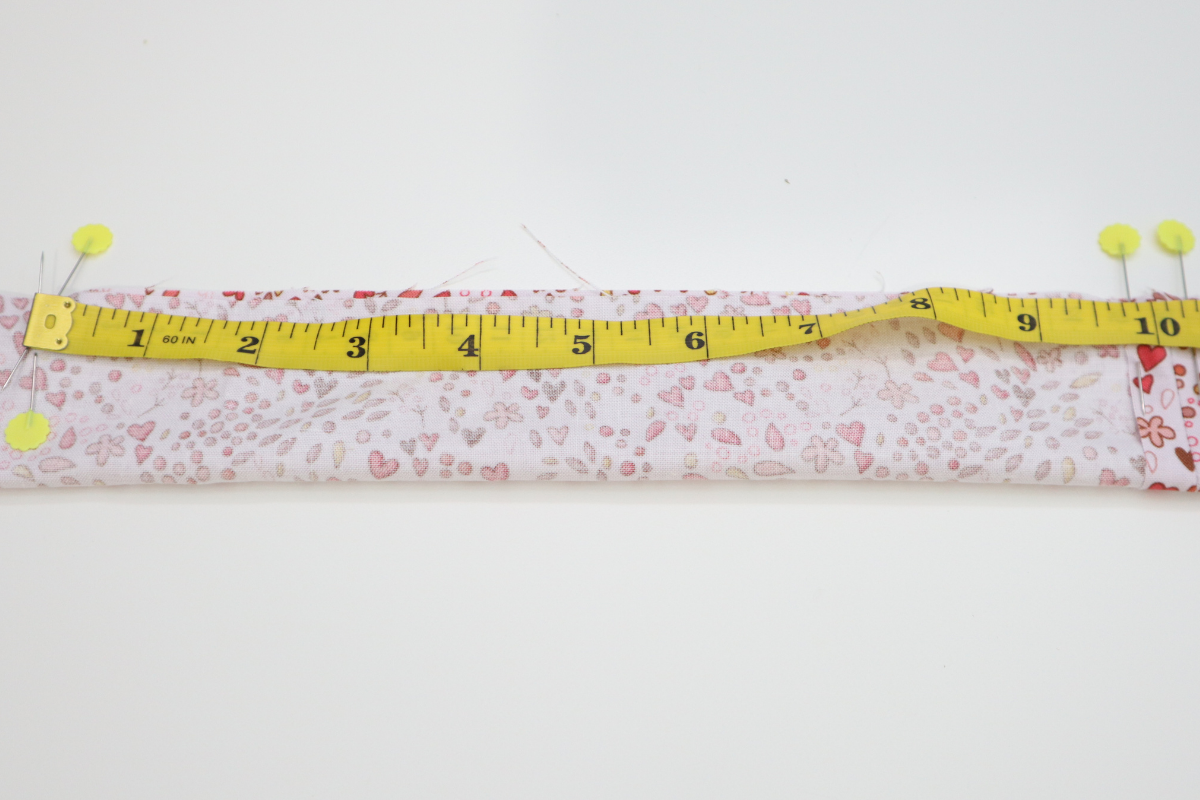
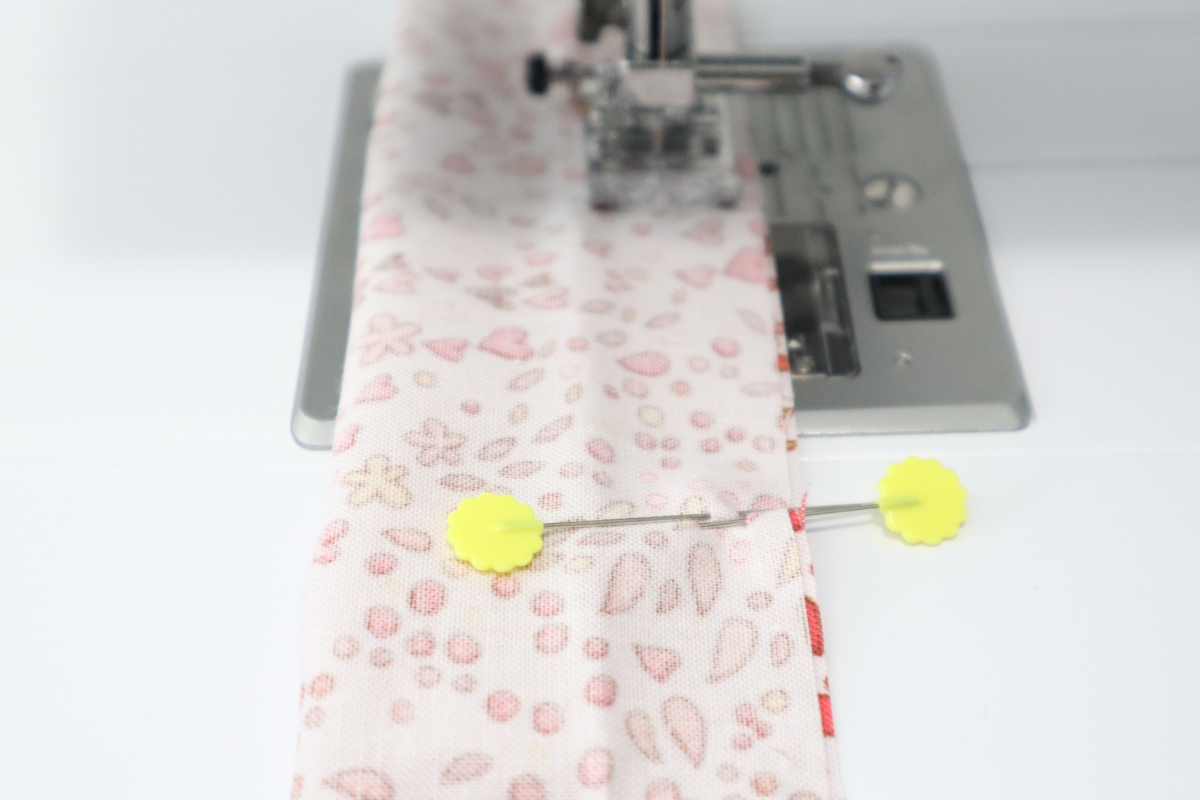
8. From the center out measure 10″ on each side of the center and place double pins to indicate the 10″ on each side of the center.
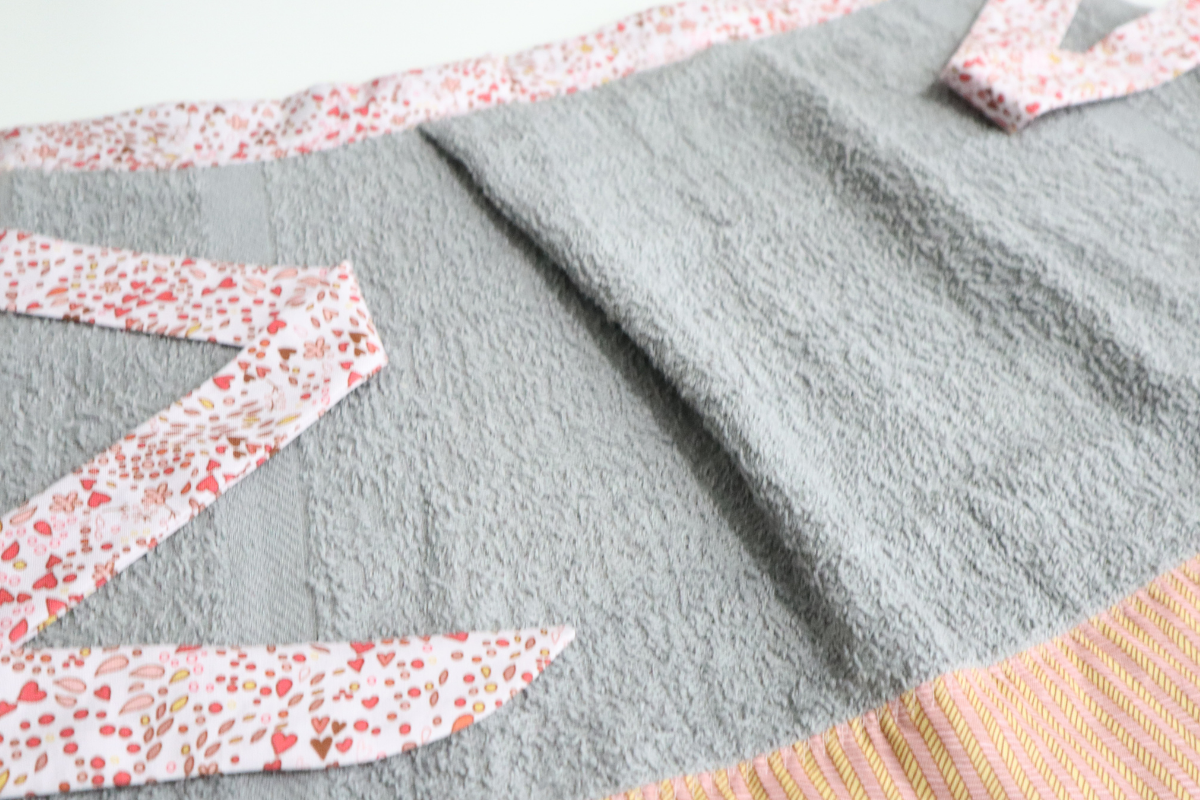
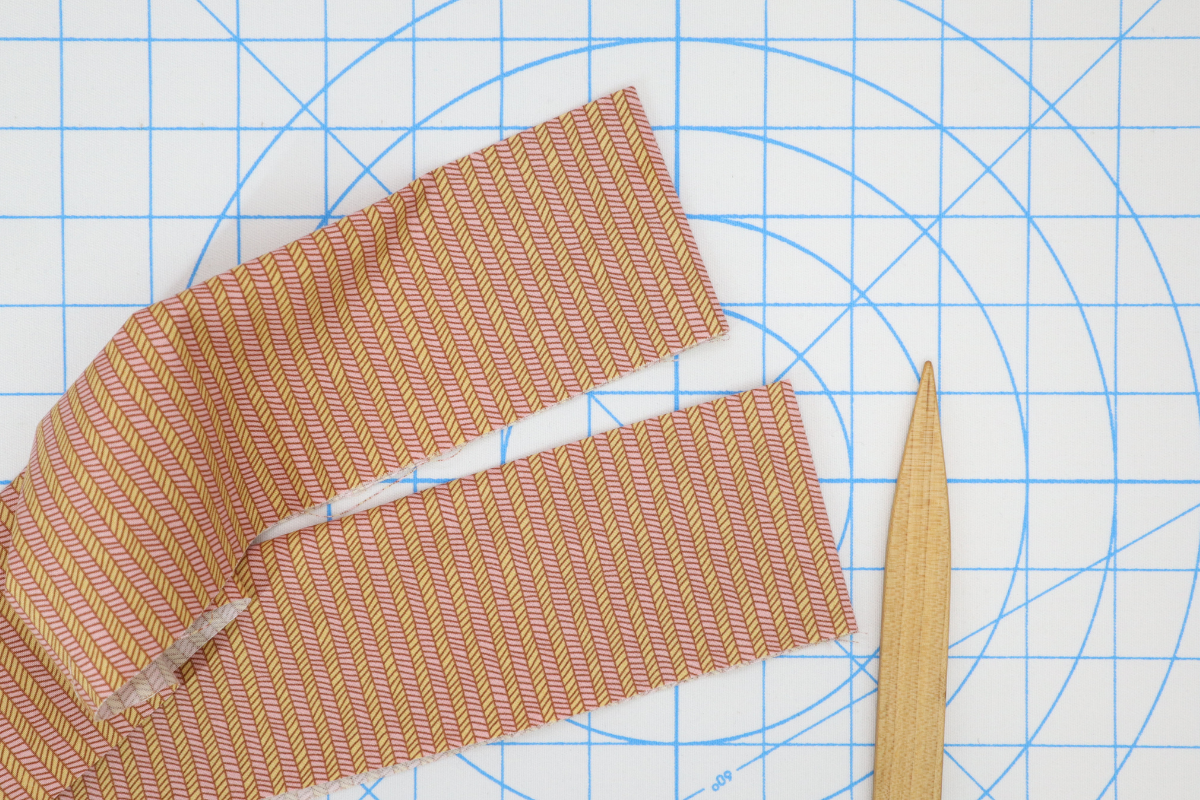
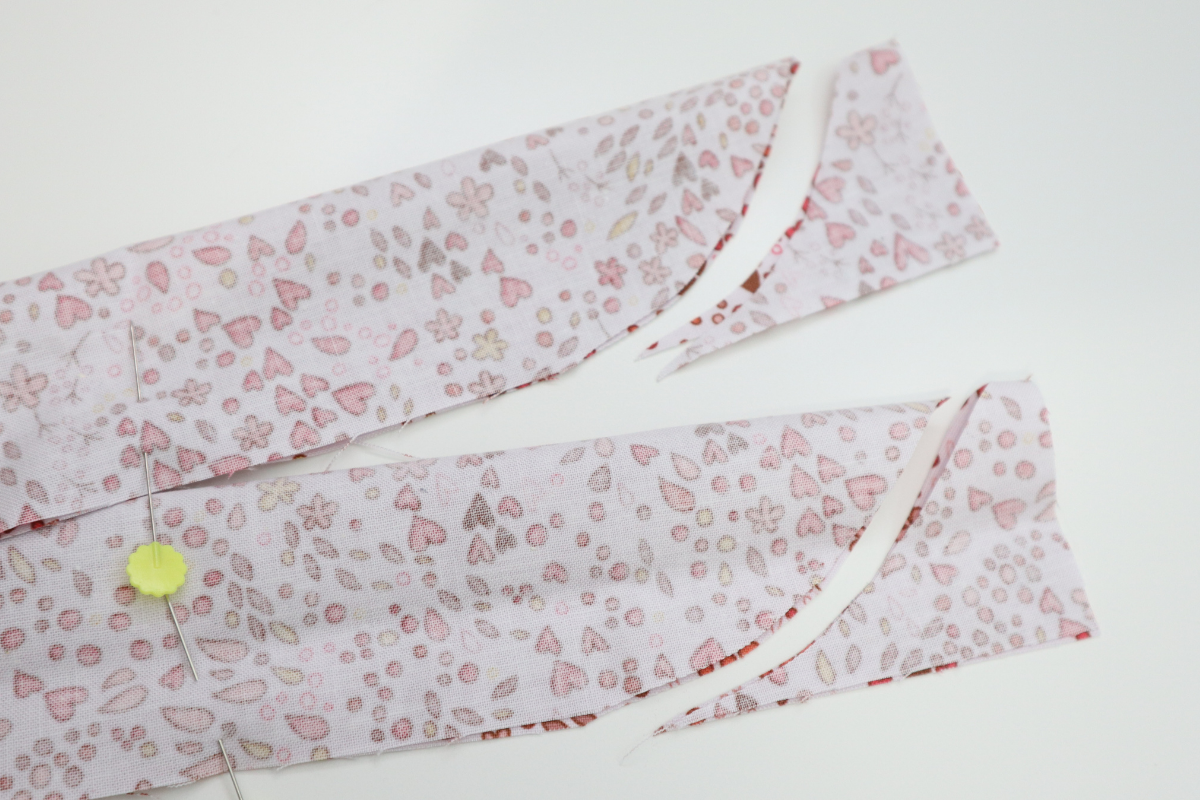
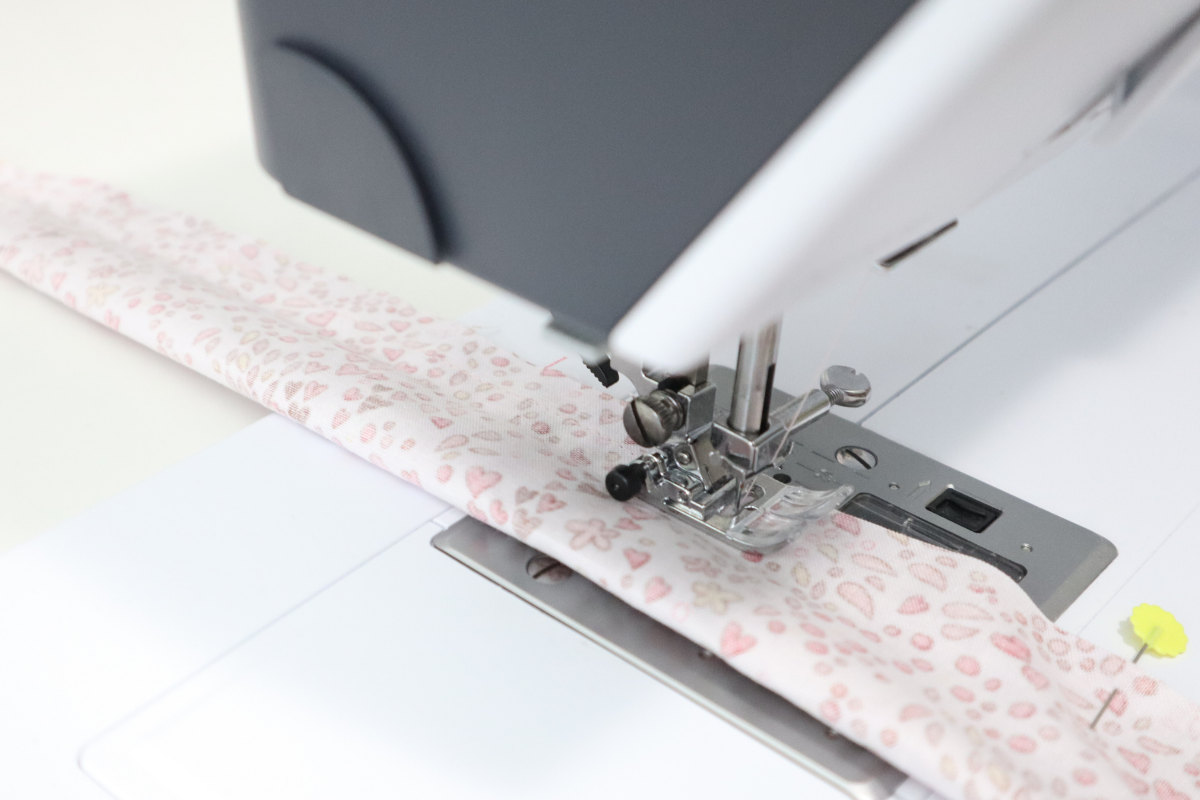
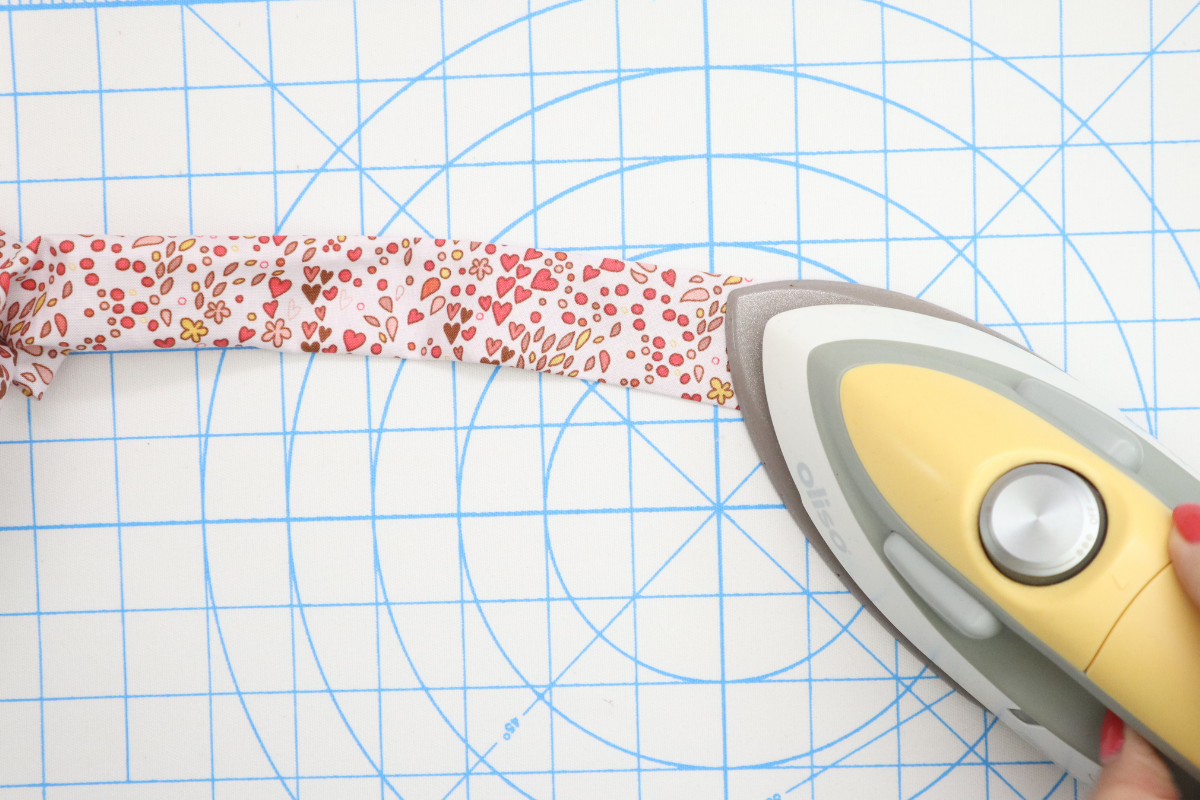
9. On the folded ends cut a gentle curve to a pointed end for the Waistband ties.
10. Sew 1/2″ seam allowance on the raw edges of the Waistband from the pointed ends until the 10″ and backstitch, repeat on the other side. This will leave a 20″ opening in the center. Backstitch at the beginning and end of each stitch. When finished stitching clip your thread tails and trim down the seam allowance only at the tail ends.

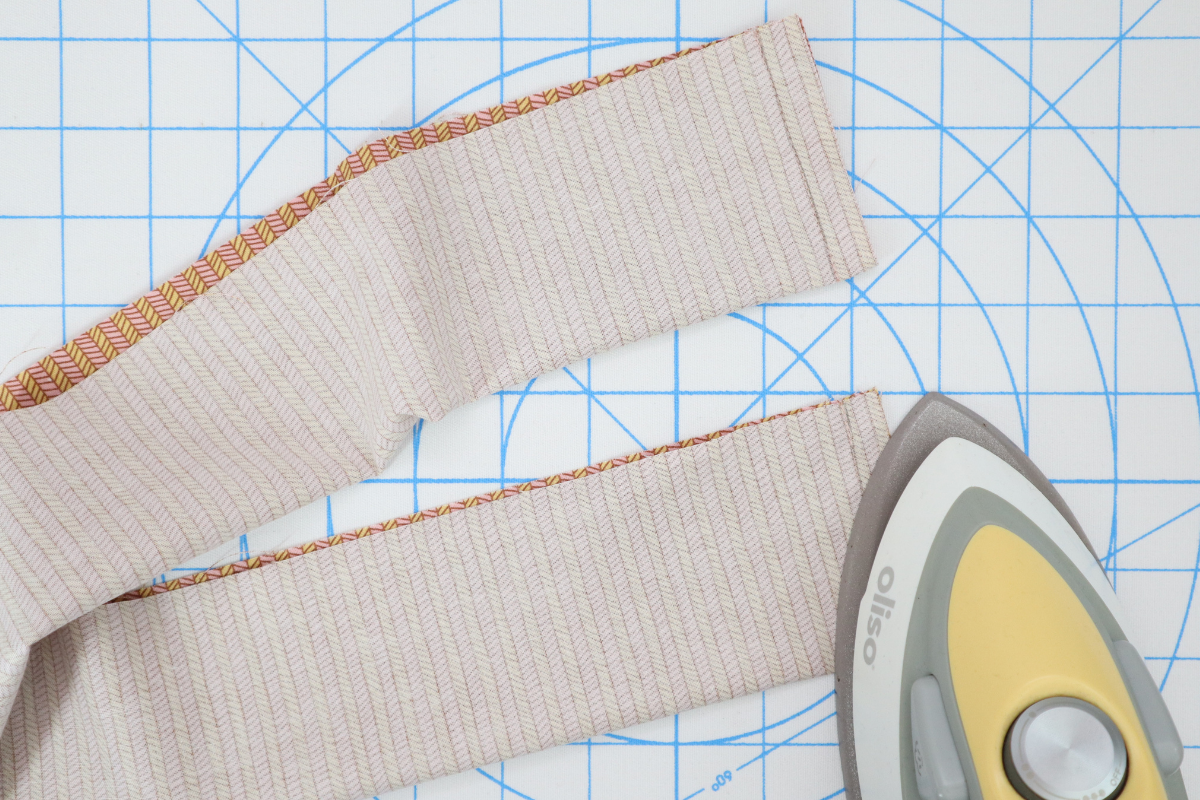
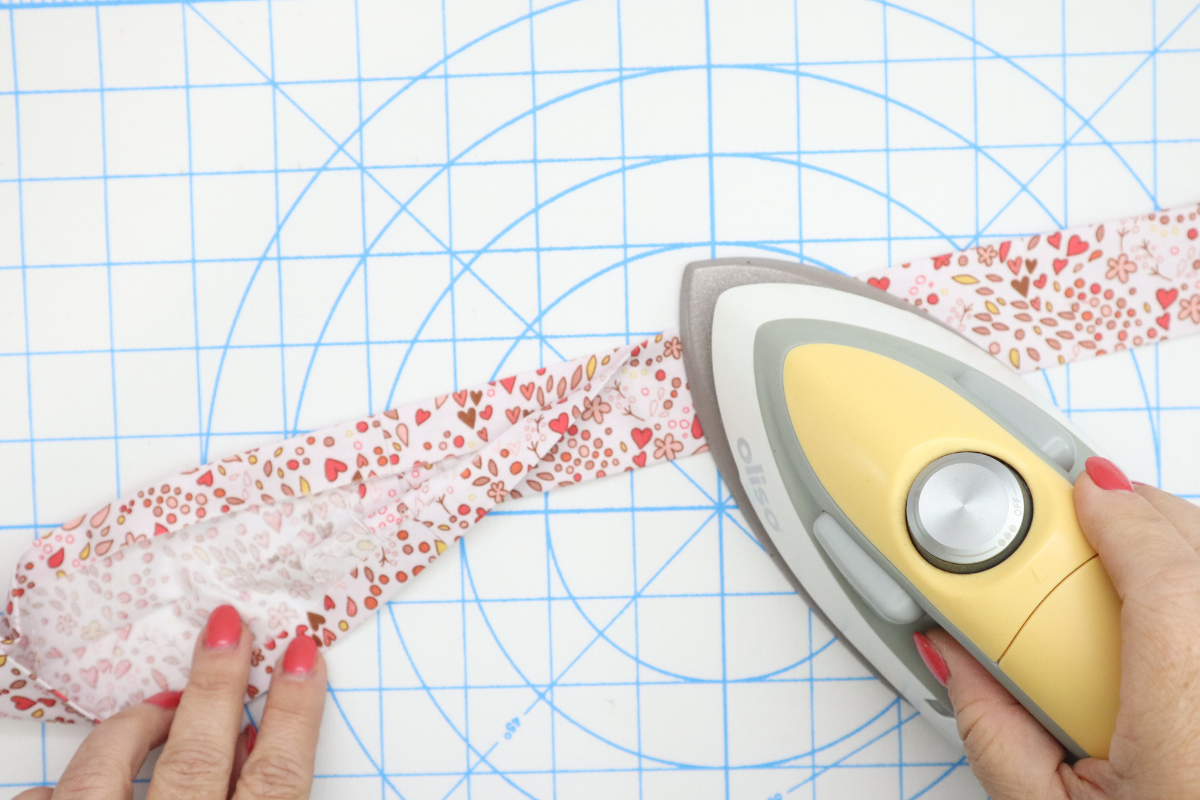
11. Turn the end tails right side out with the EZ Point & Turner.


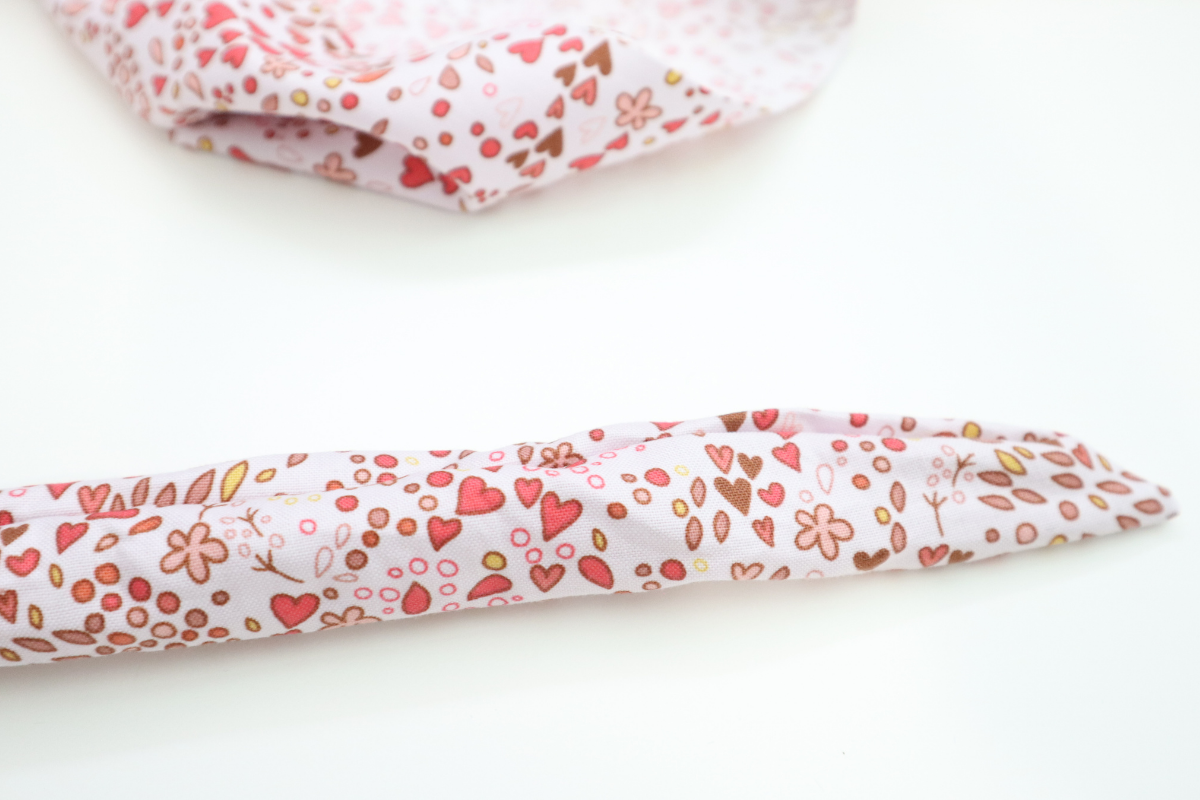
12. Press the Waistband and tuck the 1/2″ seams inside at the 20″ area.
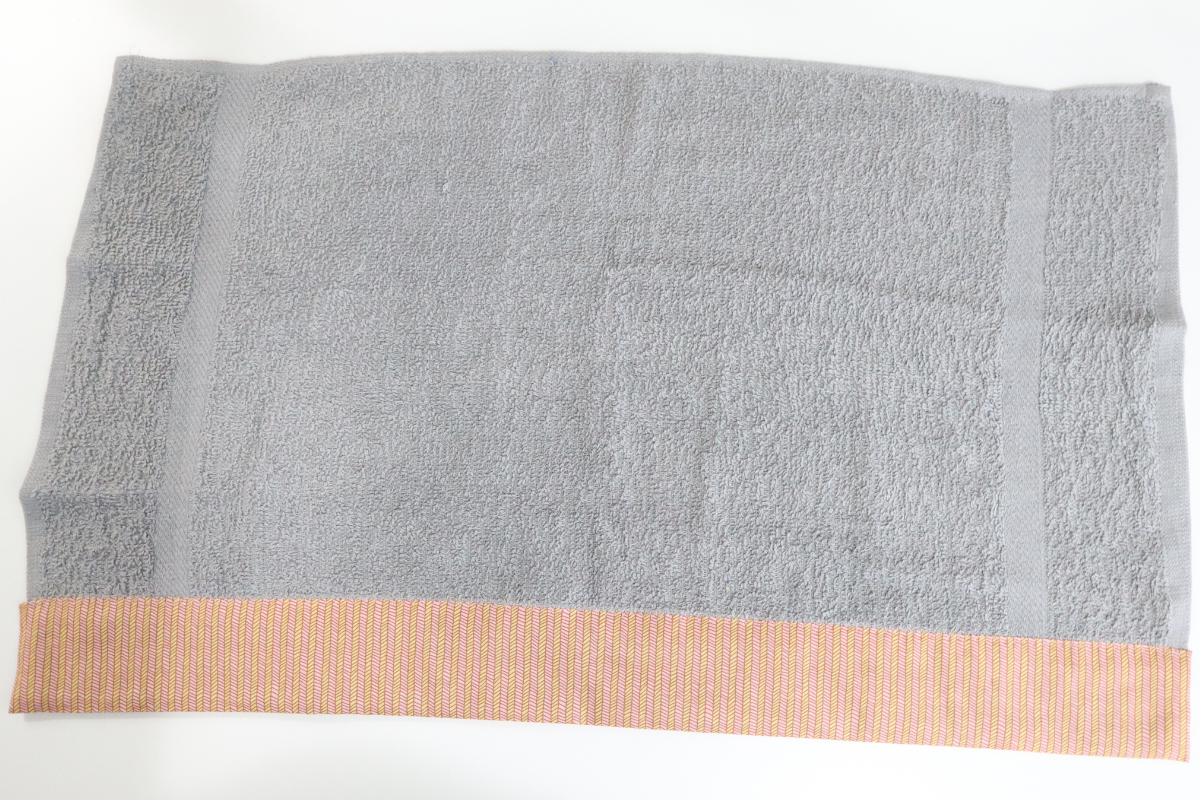
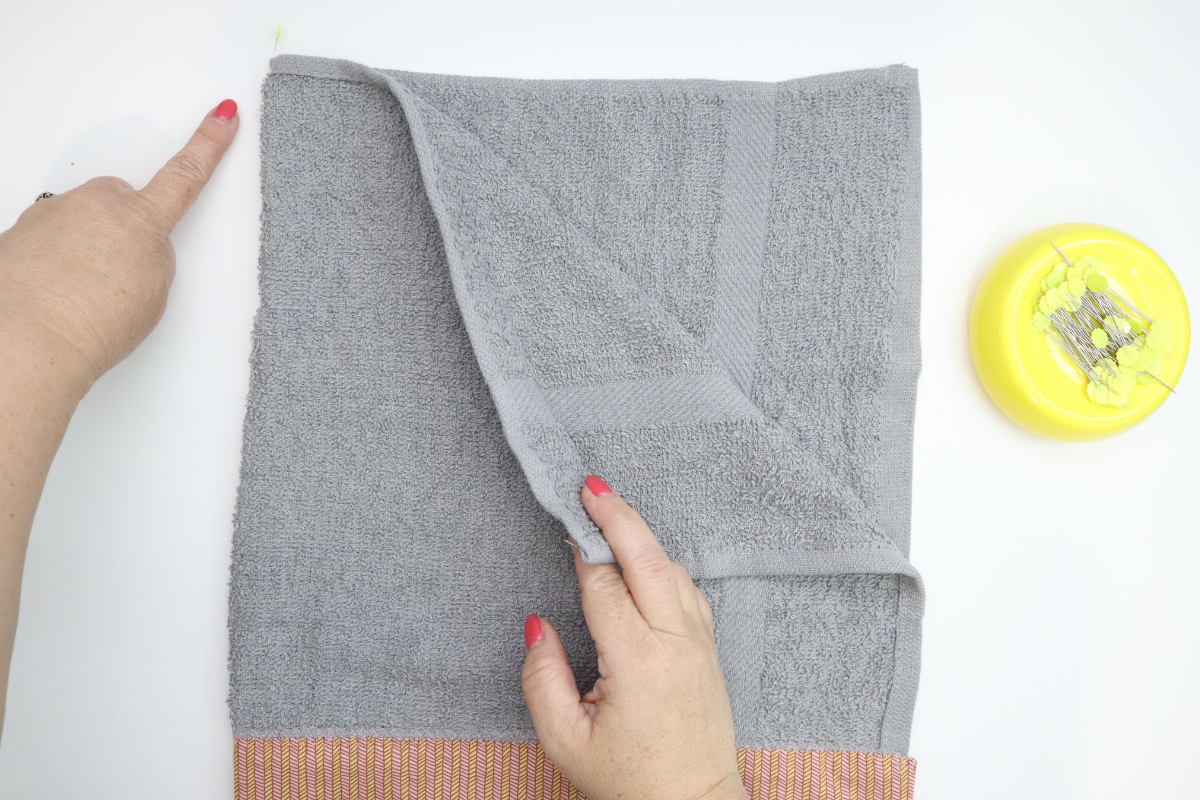
13. Sandwich the Bottom Band around one long edge of the towel and secure with straight pins.
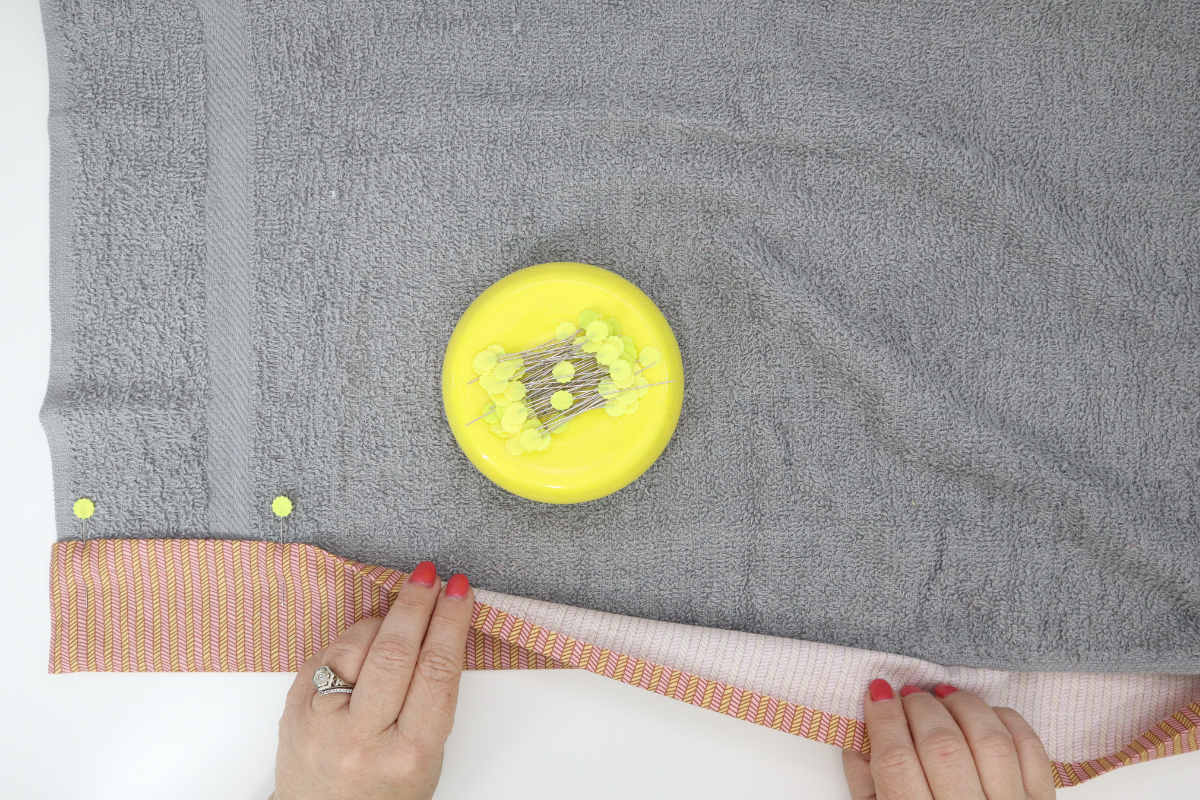
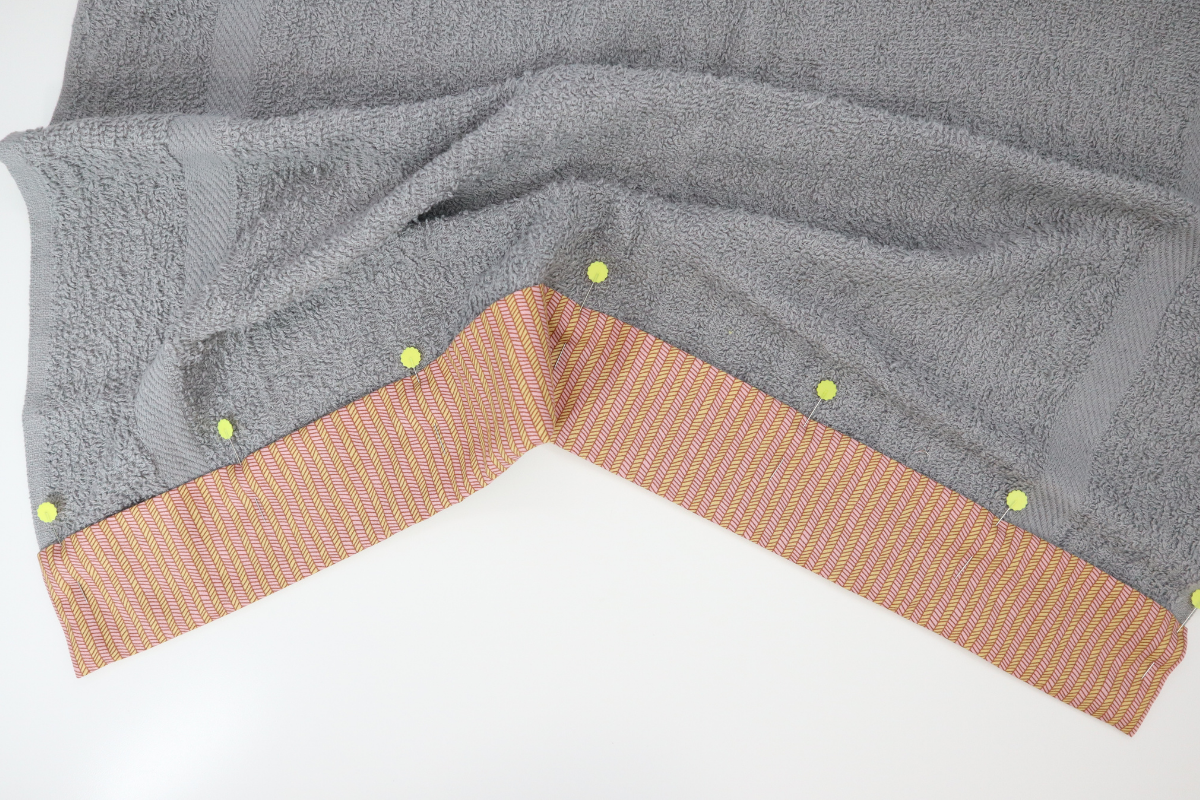
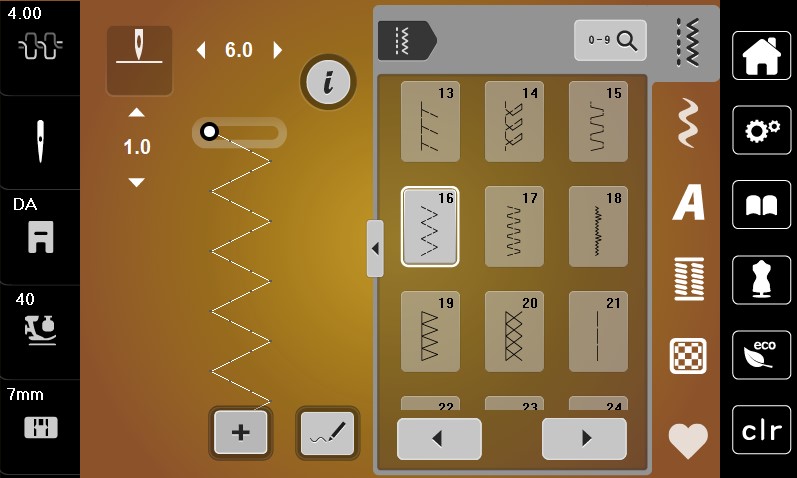
14. Set sewing machine up with the Open toe foot (with dual feed engaged), stretch zigzag stitch, sometimes called triple zigzag stitch. It has three stitches within the zig and three stitches within the zag. On my bernette 79 it is stitch #16.
15. Center the folded edge of the Bottom Band under the opening of the Open toe foot. Stitch over the folded edge catching some towel and some band with the zigzag stitch.


16. Find the center of the top of the towel and place a pin along the top.
17. From the center measure 4-1/2″ and place a pin and then at 3″ from the center place a second pin. Repeat on the other side.
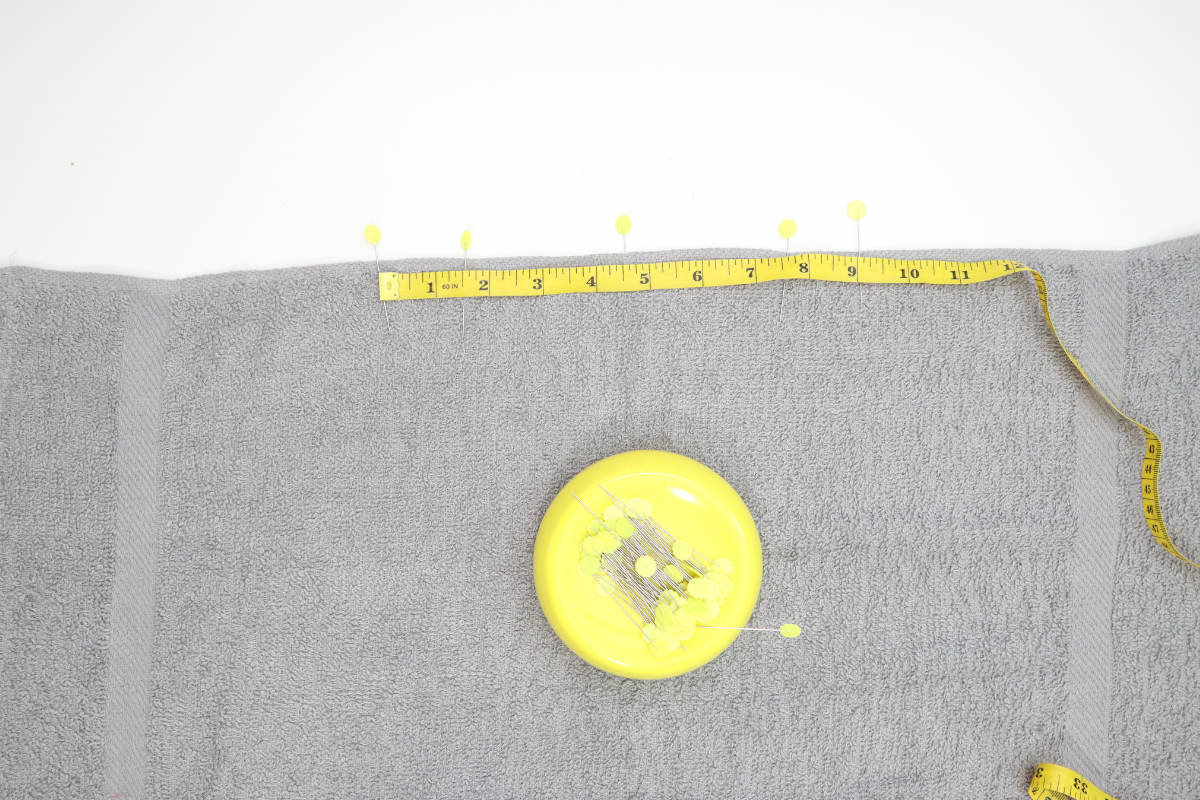

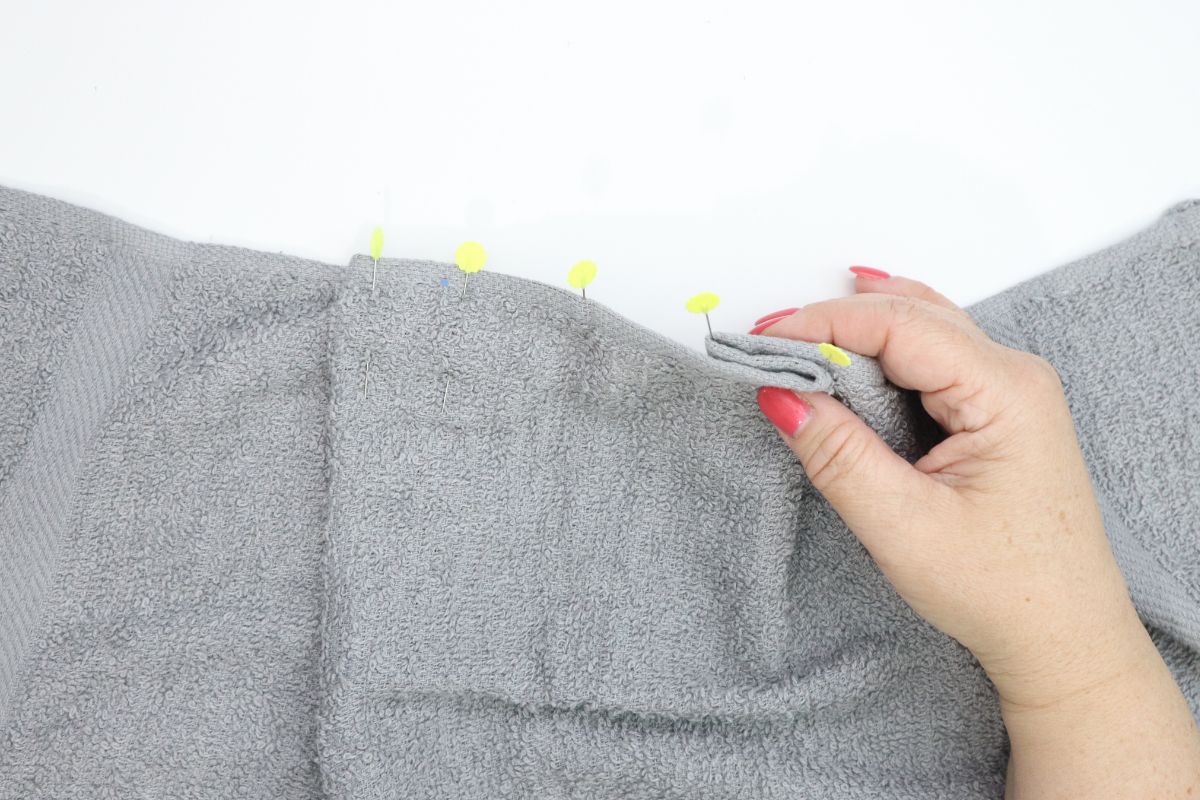
18. There are now (5) pins along the top edge, 1, 2, 3, 4, 5. Create a pleat on each side of the center using the two outside pins as guides and re-pin to secure in place. Reposition the pins so the pin head is inside the body of the towel making room to pin the top edge sandwiched inside the waistband.

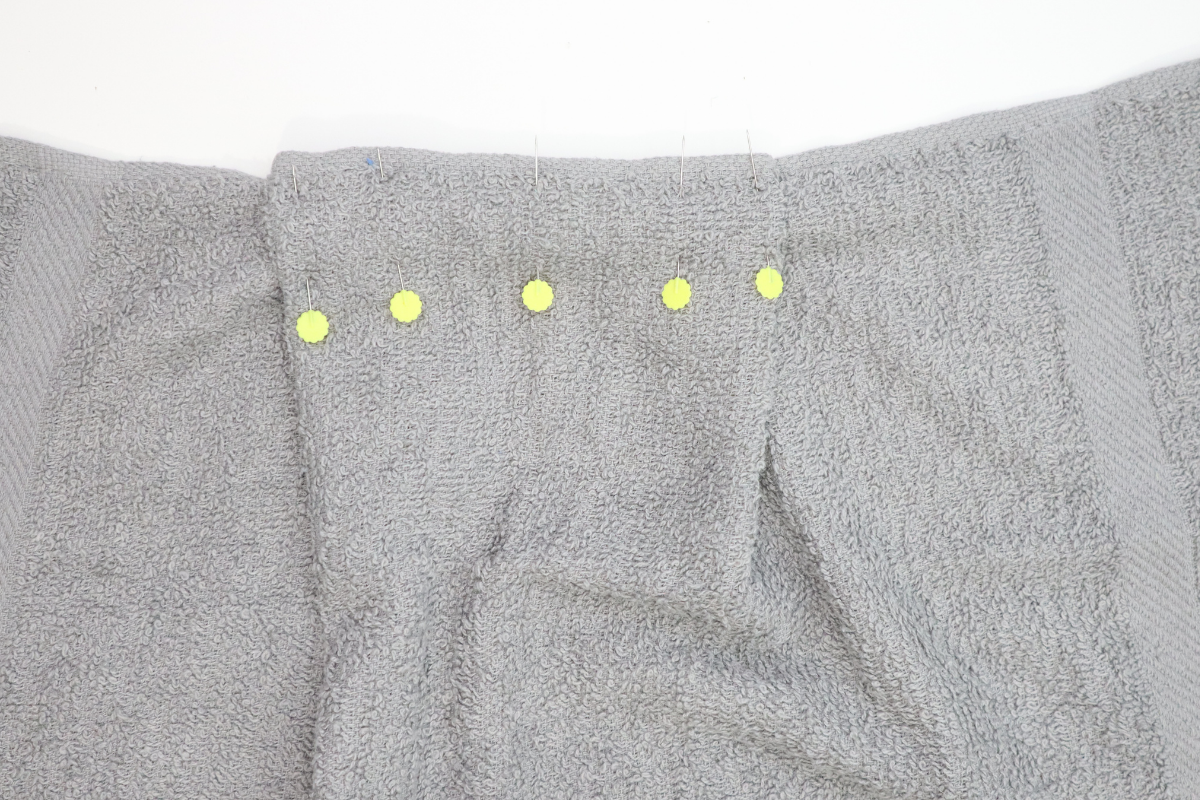
19. Sandwich the waistband around the top “pleated” edge and re-pin with the pins on the inside of the towel.
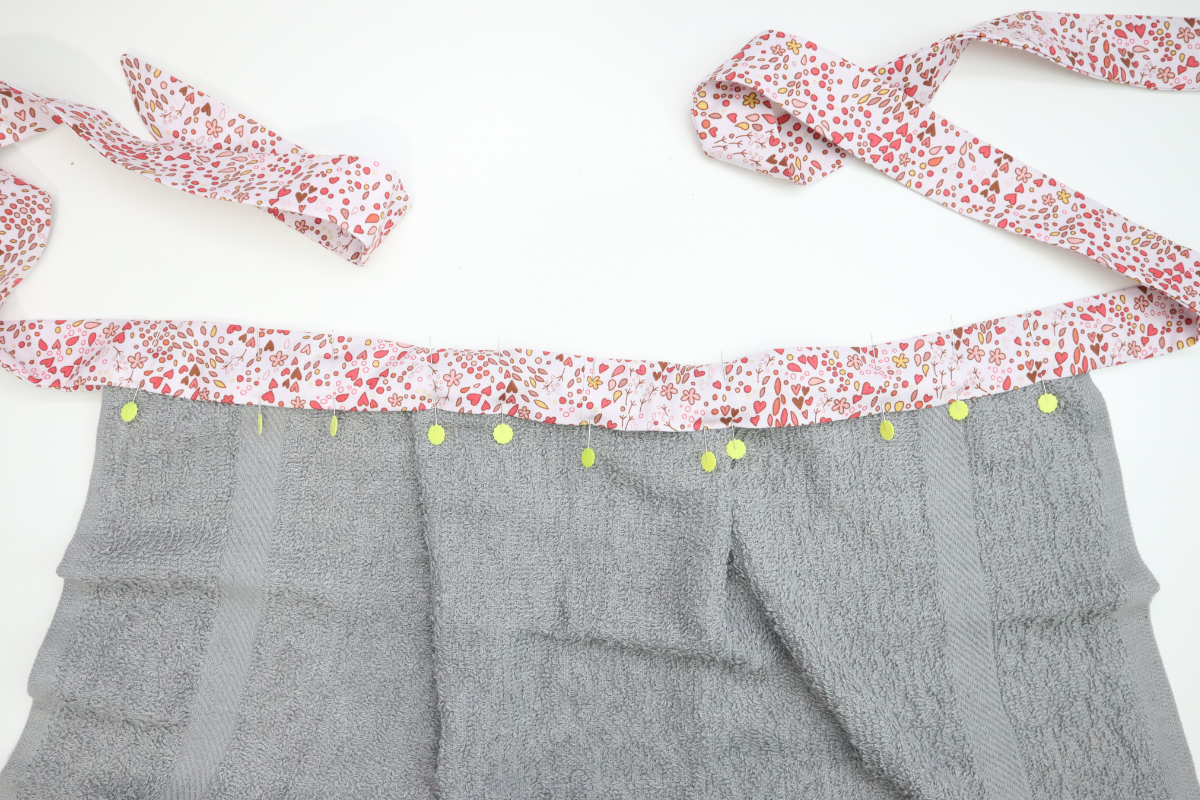
20. With the same stitch #16 sew the waistband to the towel.
21. Give your towel apron a good press and you are finished! Congratulations on creating a functional and useful gift for someone else or yourself.
I hope you enjoyed this easy sewing project and enjoy making all of my projects here on We All Sew! When you make yours, please snap a shot and tag me @SookieSews and @BERNINAUSA!!