Embellished Denim Jacket
BERNINA Ambassador Heidi Lund shows you how to take a plain denim jacket and turn it into “Art to Wear” using some simple techniques that include surface design, fused appliqué and BERNINA free-motion stitched cording.
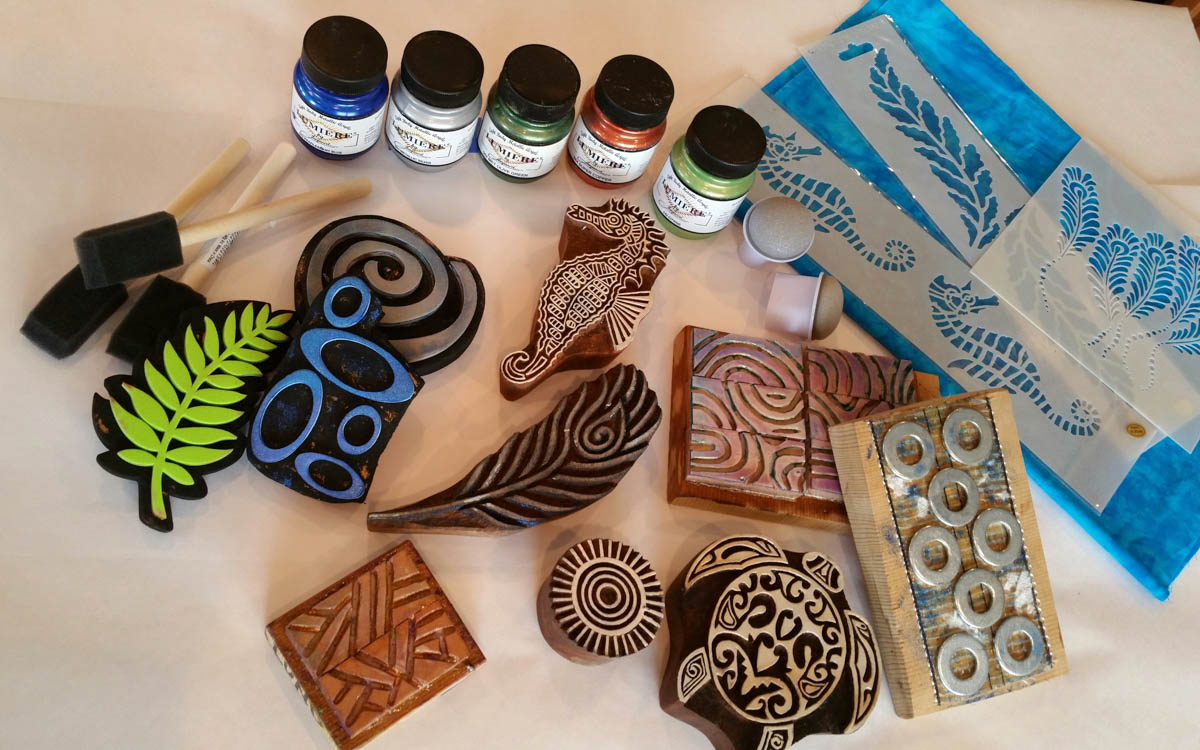
Materials to embellish a denim jacket:
- Stencils
- Brushes
- Fabric paint
- Cording
- Your sewing machine, I sew on a BERNINA 770 QE
- BERNINA Free-motion Couching Foot #43
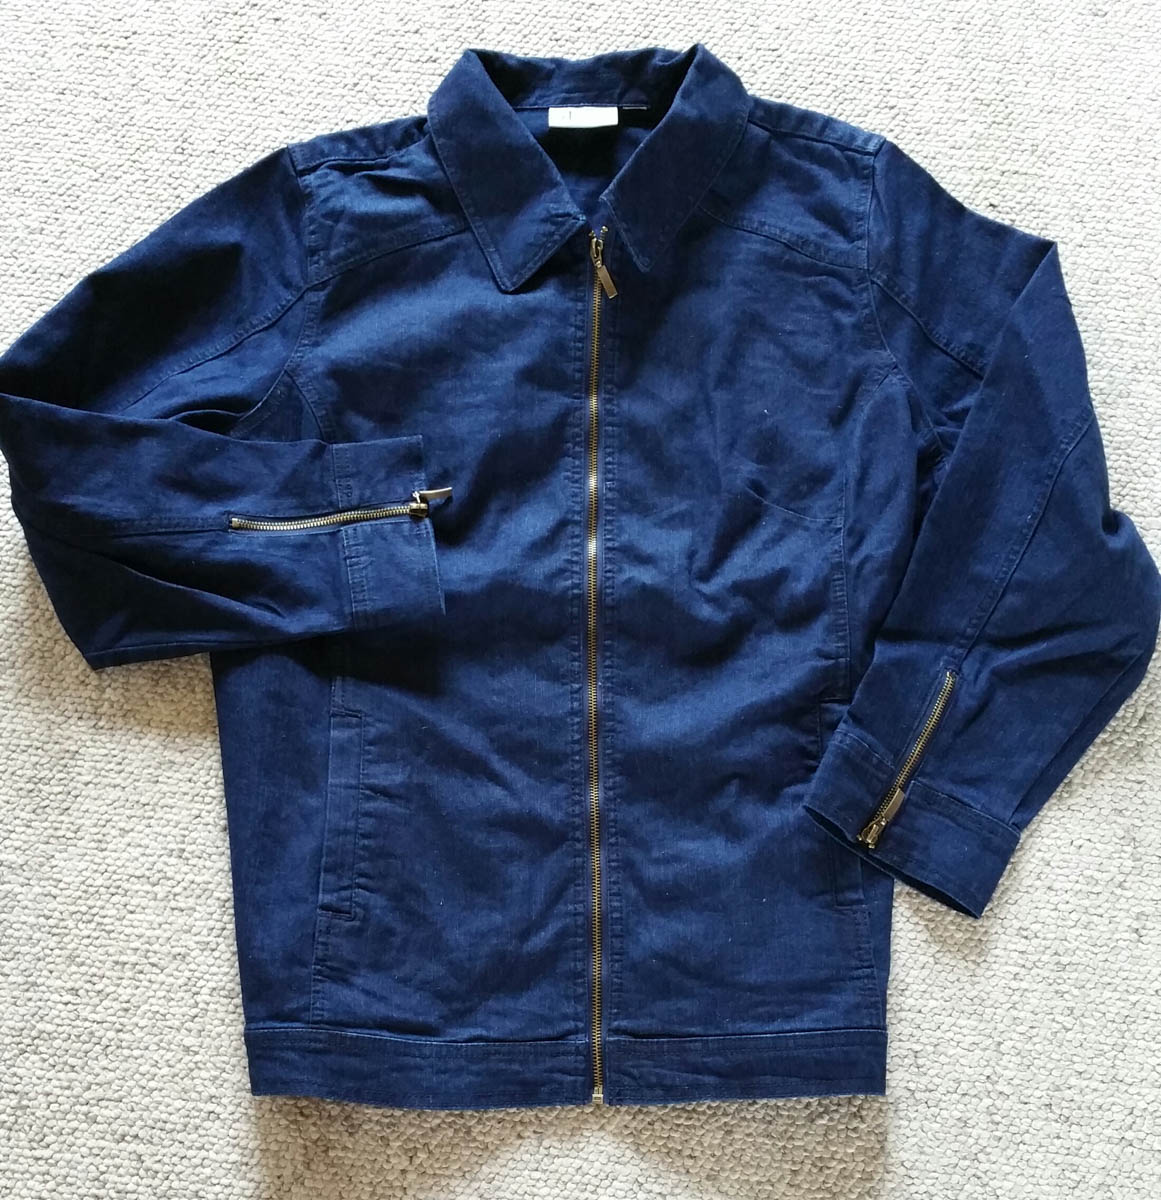
Use a plain denim jacket that has been washed and dried. In this case, I have chosen not to disassemble the jacket, but to embellish it as ready to wear.
Use a variety of fabric paints or acrylic paints that you add a fabric medium, go ahead and add surface design to your jacket using stamps and stencils.
Since the surface design will be in the background, be sure to paint the entire jacket. This picture shows that I added surface design to the sleeves.
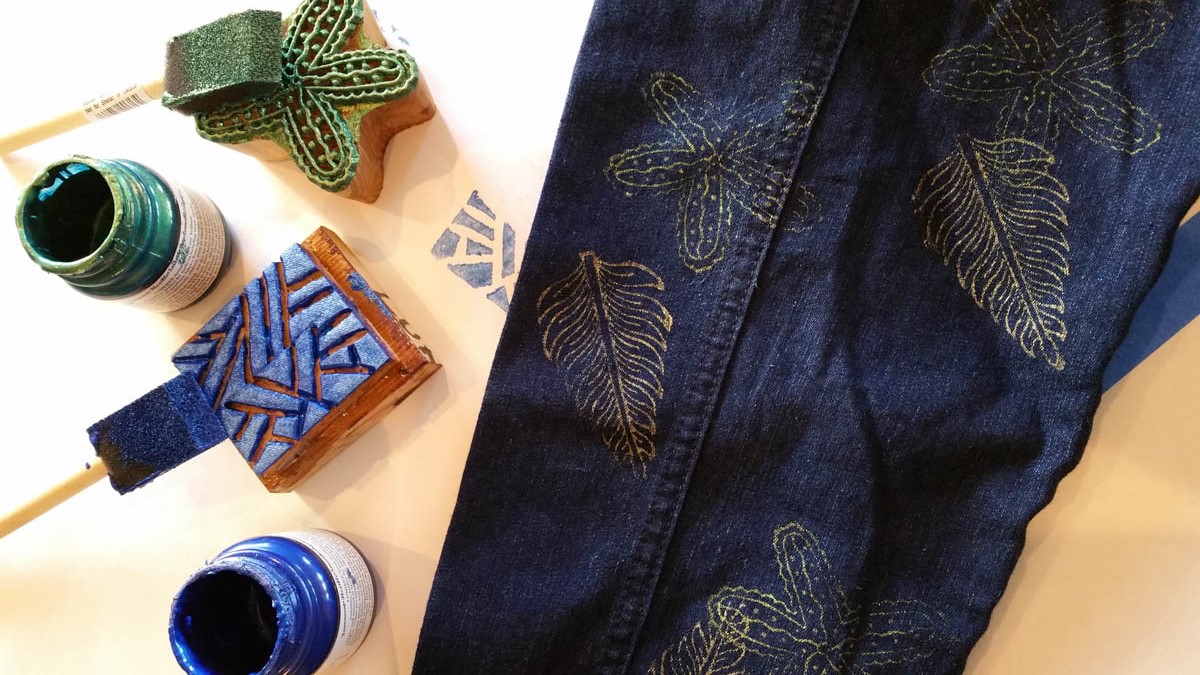
Here is the jacket with the surface design completed and air dried. Once paint is dry, I recommend that you heat set it. Just fold up the jacket and lay it on a foil tray on your oven rack. Preheat your oven to 170 degree, and bake for 15 minutes. This is ambient heat and will set the paint thru the layers of fiber.
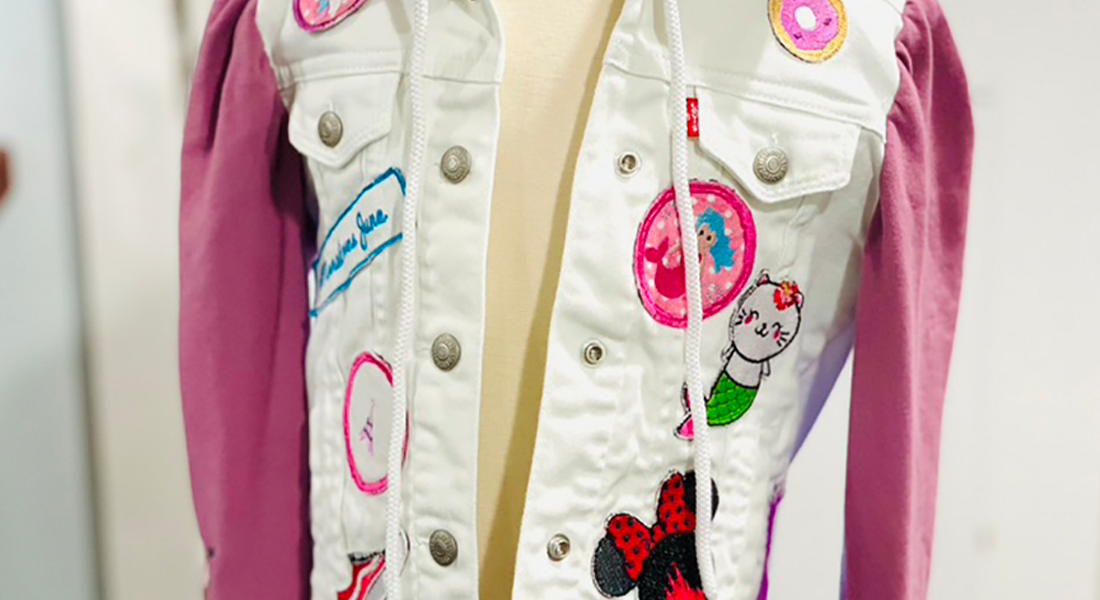
The next step is to add fused appliqué shapes. In this case, I chose a commercial print fabric that has some great circular designs and added some batik circles that she cut from fused scraps from another project. When placing your designs on your jacket, there are a few key things to remember.
- a) Consider which shoulder you carry your purse or tote bags on. I choose not to embellish that side, as there is a lot more wear.
- b) Consider placement of your appliqué designs. You probably don’t want a big flower or bulls eye design hitting you over the chest area nor would you want it across your rear on the back.
- c) Rather than appliqué all over the jacket and have to undo factory seams, Ichose to have my design start at my right shoulder and cascade over the back at an angle.
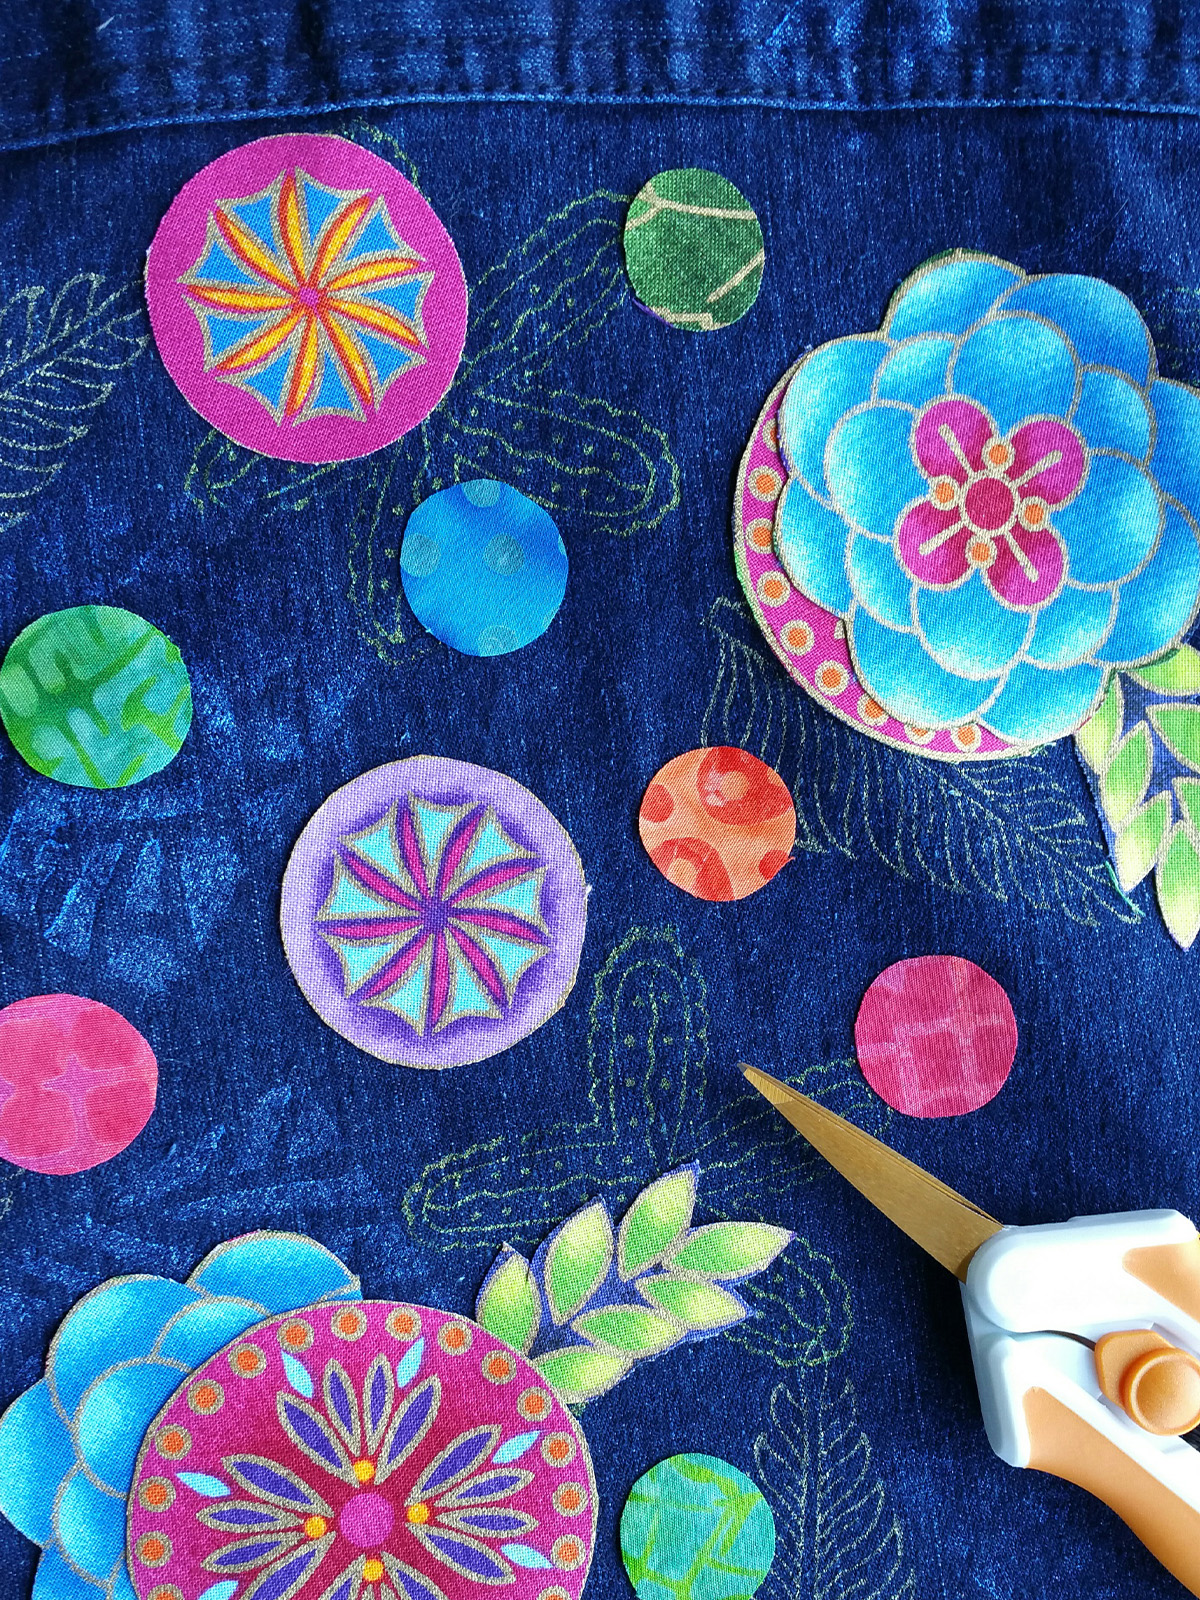
Free-motion stitch your appliqués in place. In this case, the denim was hefty enough that I felt I did not need to use a stabilizer inside.

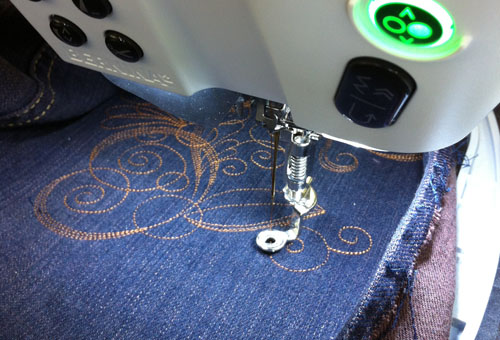
There is a wonderful BERNINA presser foot called the Free-motion Couching Foot #43. It comes with the foot, a cording threader and thread guides for both the newer or older models of BERNINA.

Set up your machine by using a size 80/12 needle in your machine, load your machine with a rayon or cotton thread choice in both top and bobbin. Drop the feed dogs and thread your free-motion cording foot using the cording threader, before attaching it to the machine.
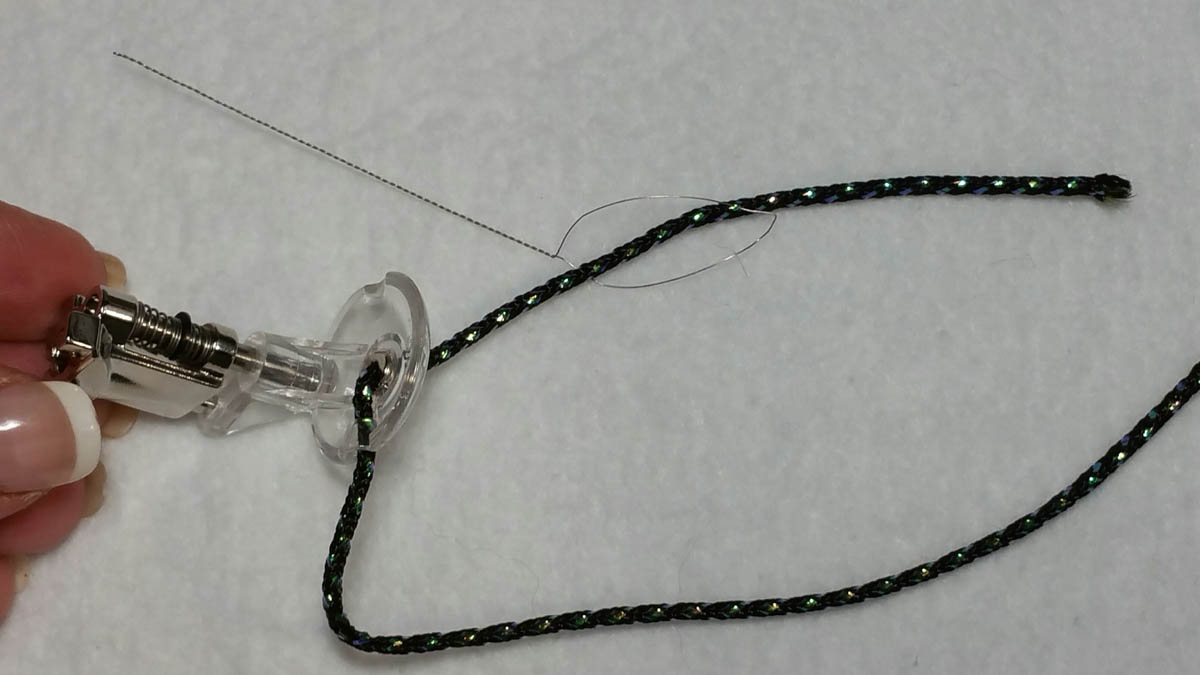
This photo shows the thread guide attached to the side of my BERNINA 770 QE with the cord inserted into the guide and running thru the Free-motion couching foot #43.
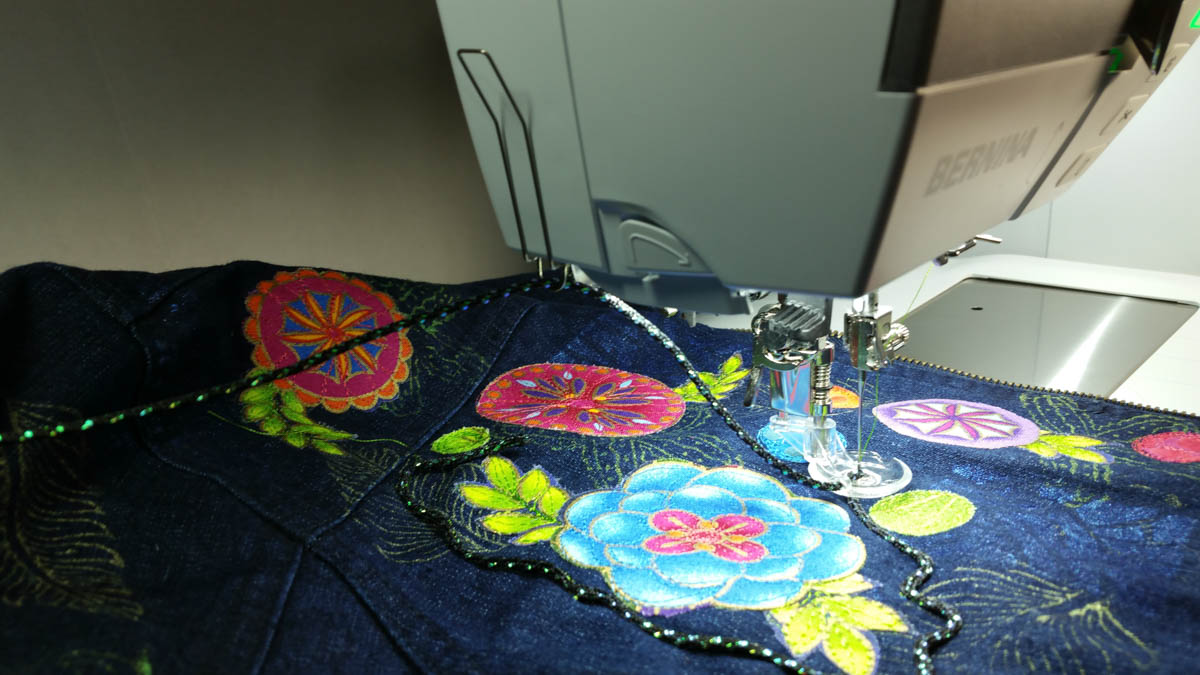
Directions for using this foot are to stitch slowly and don’t jerk your project around while under the needle or you will skip hitting your cord with your needle and thread.

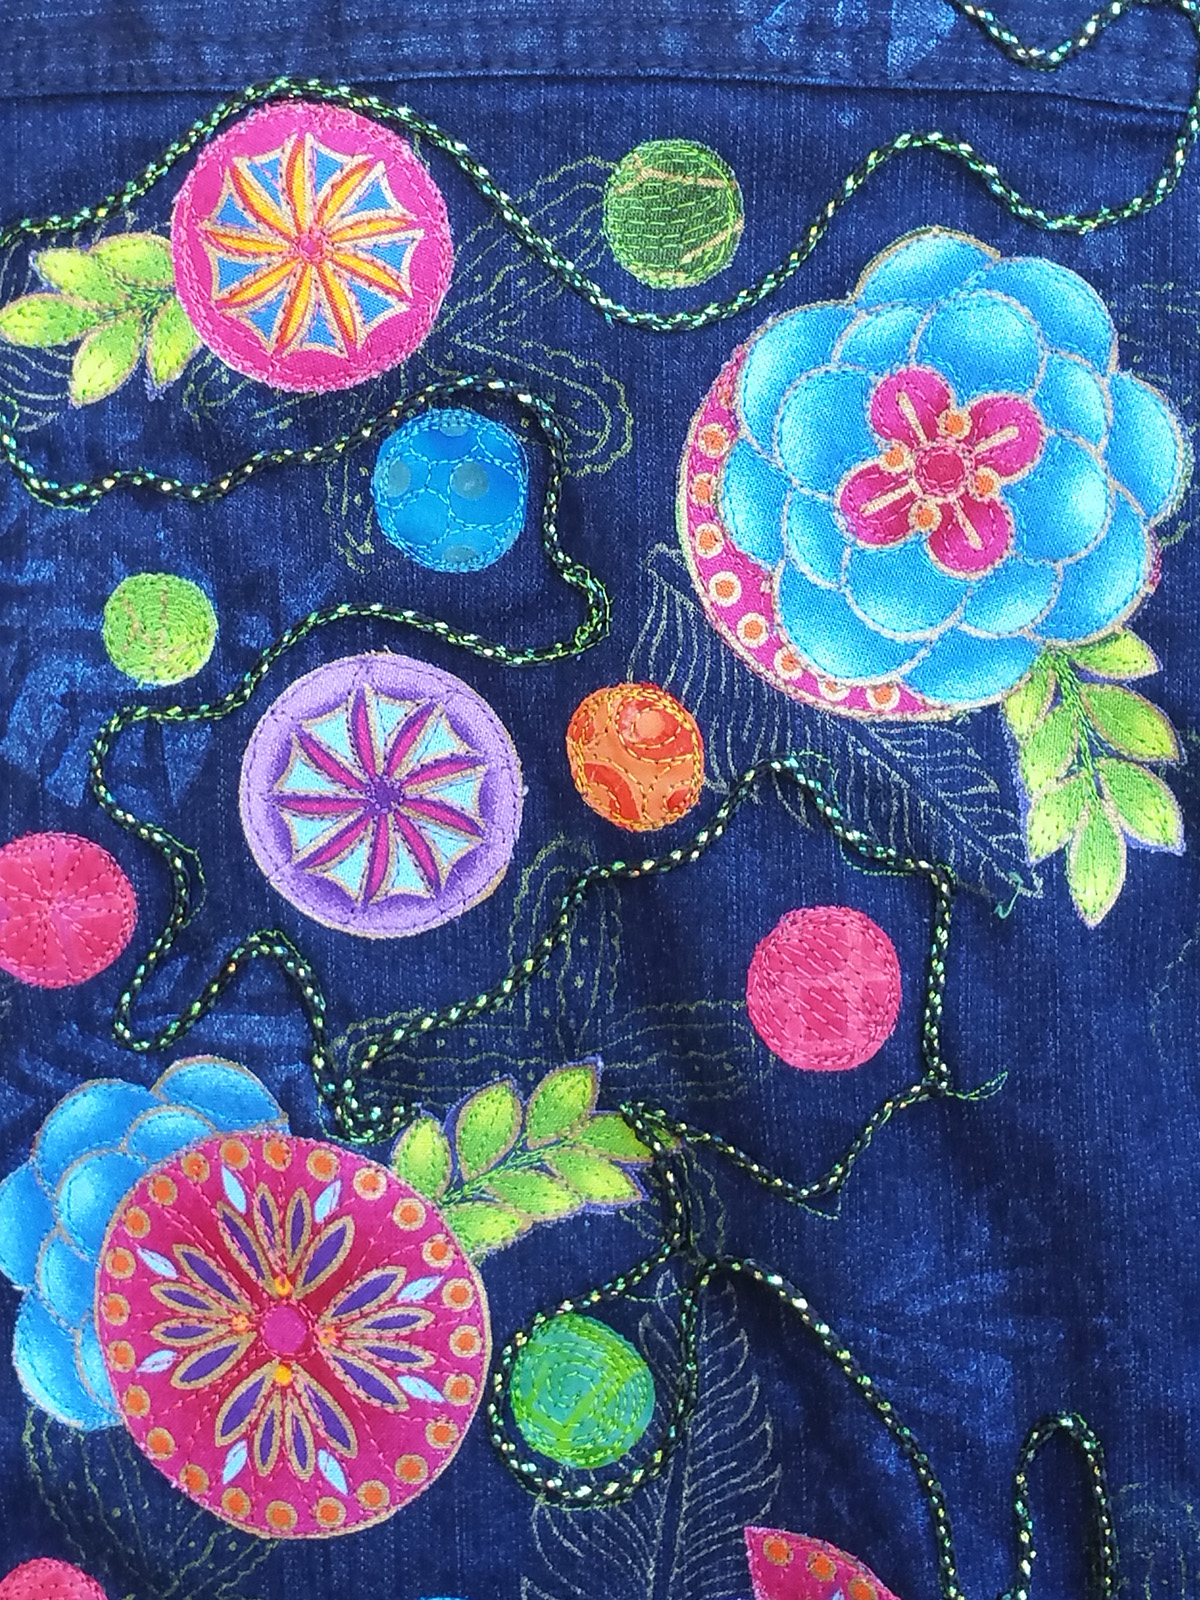
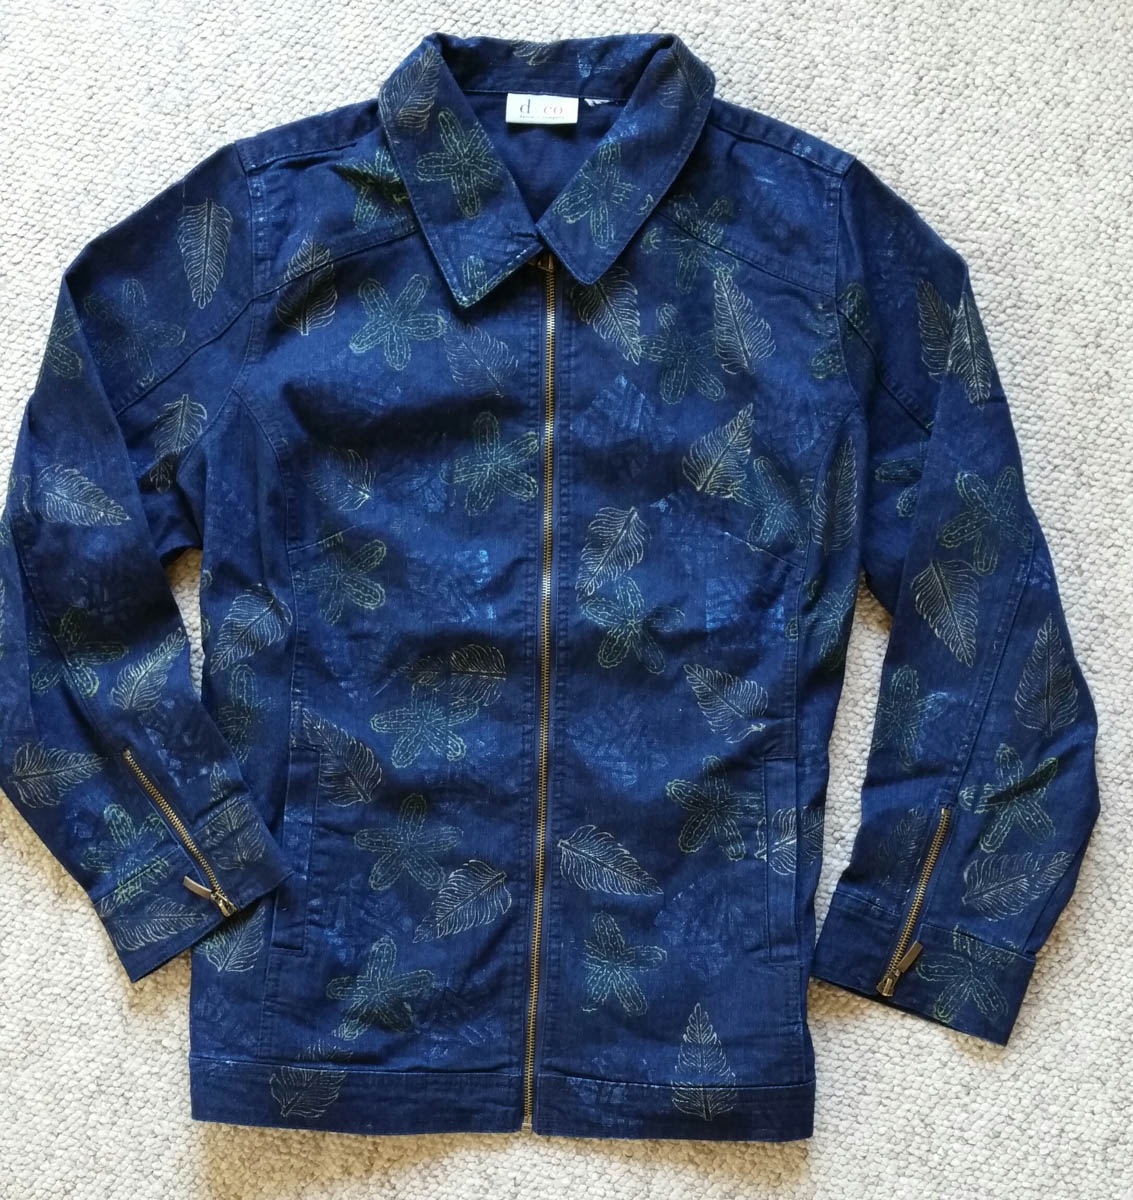
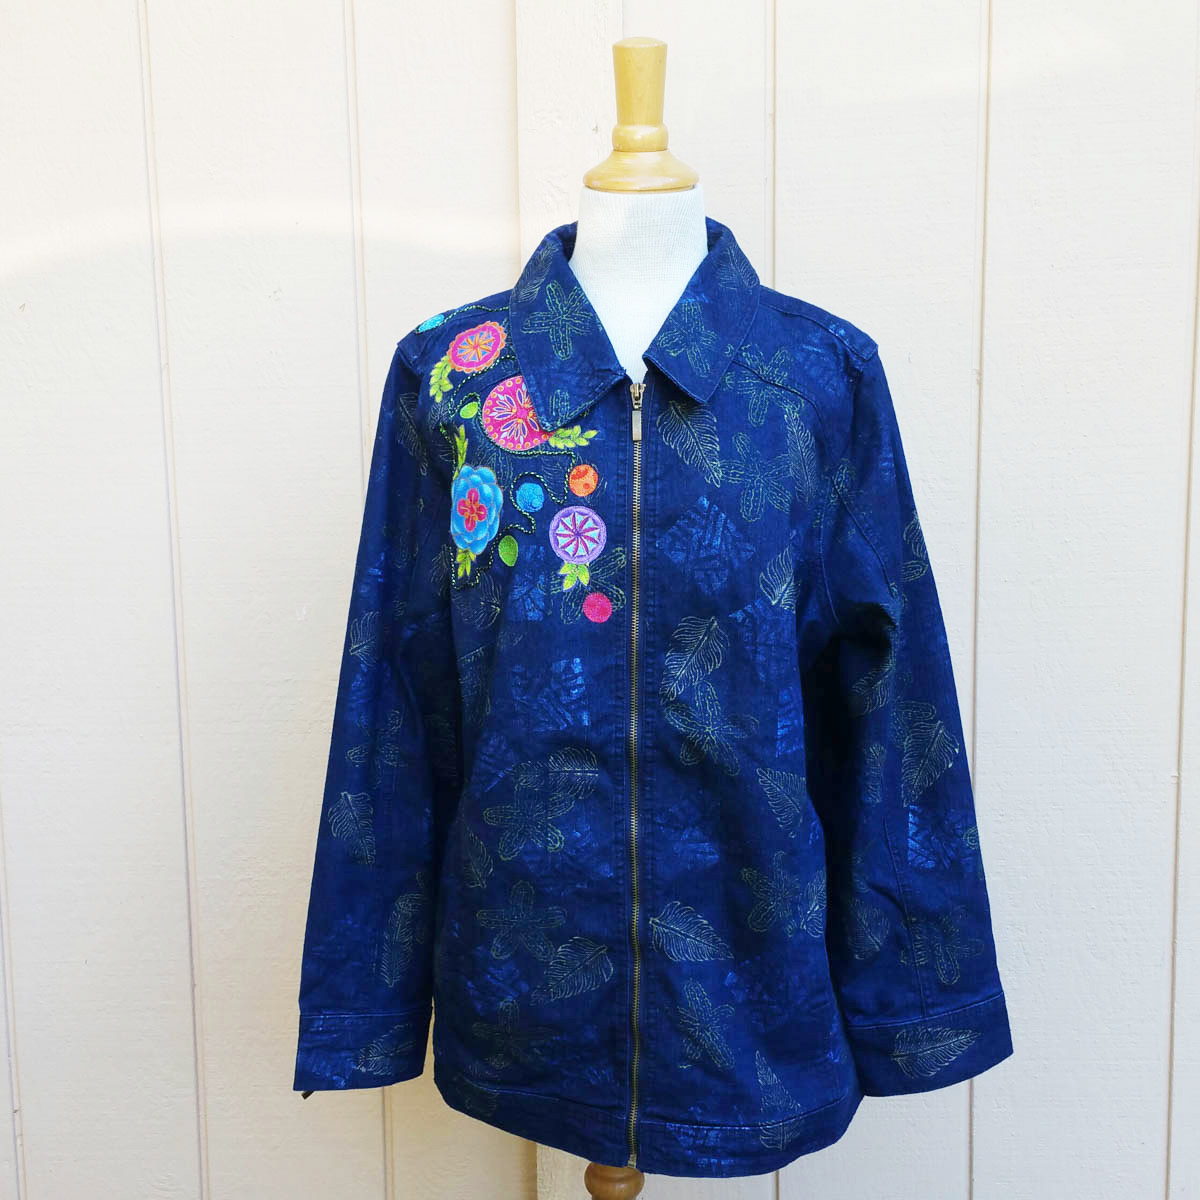
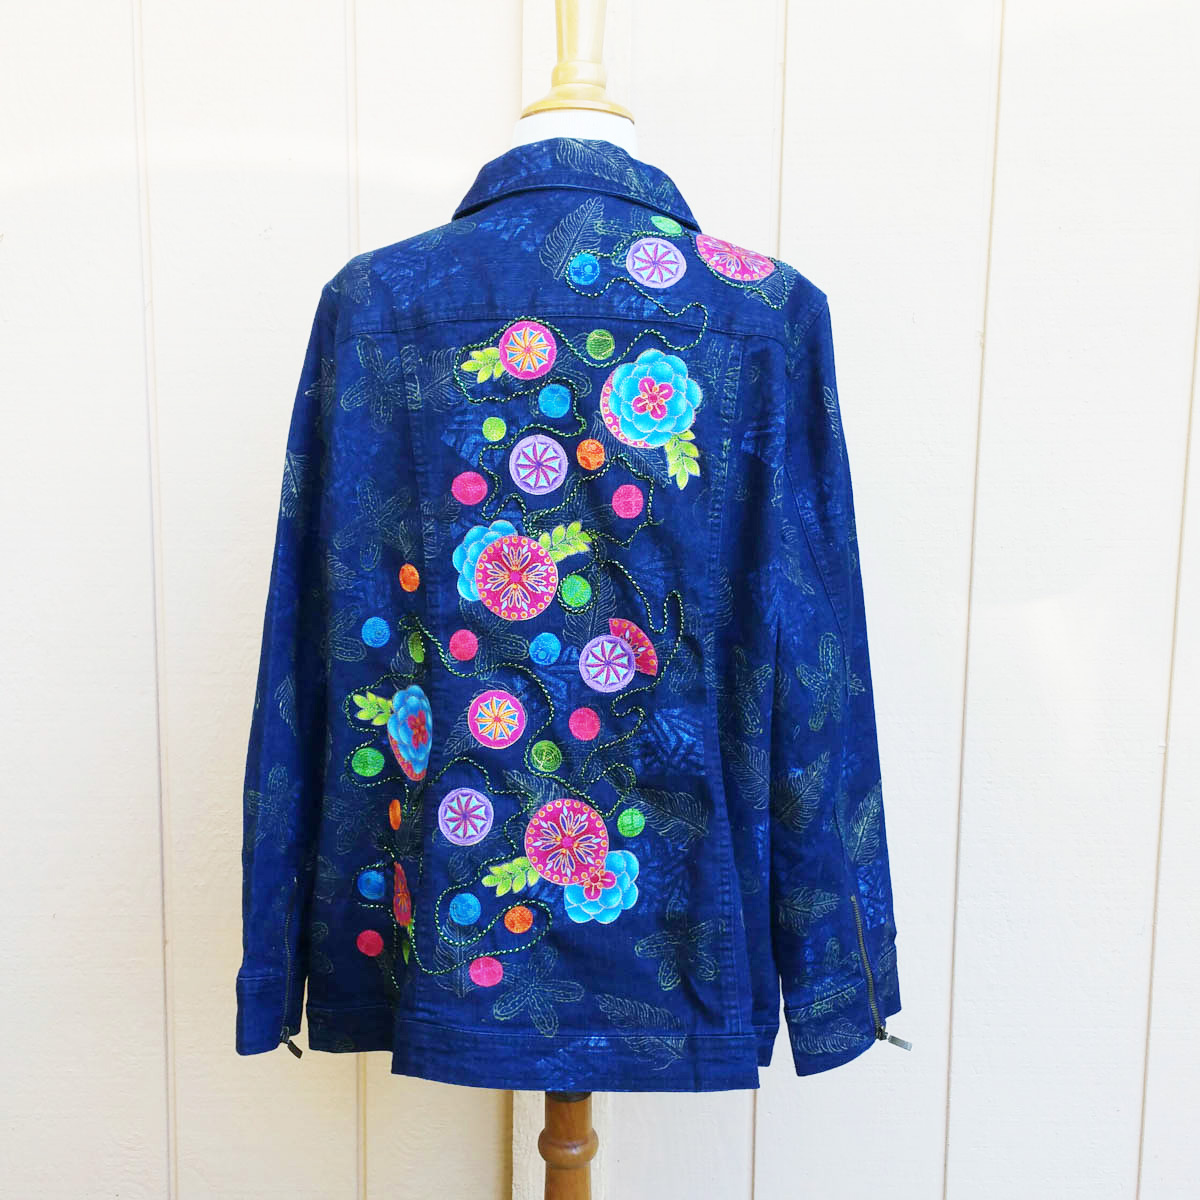
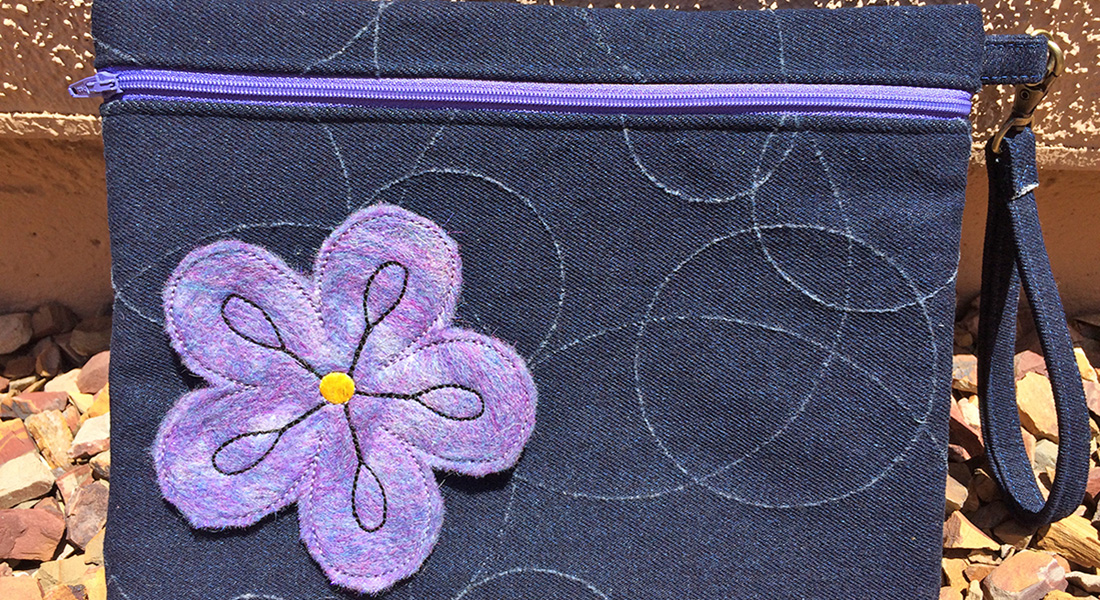
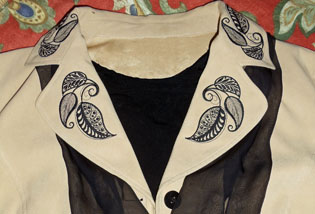
Here is my new “Art to Wear” jacket both front and back.
Used Products


What you might also like


2 comments on “Embellished Denim Jacket”
-
-
Thanks Denise, this is 1 of about 7 ready made denim jackets that I have transformed. My favorite is one that I collaged fish and floral fabrics over a spring striped one. It is amazing what a little fabric, thread, fibers, beads, buttons and crystals can do to spruce up a wardrobe.
-
Leave a Reply
You must be logged in to post a comment.

very “on trend” and beautiful! I’m old enough to remember the early 70’s jean jackets that were highly embellished by hippies ( back then by hand)… every thing old is new again.