Embroidery Basics: How to Make Free-Standing Lace
Creating free-standing lace with the embroidery machine is one of those techniques that look very difficult to create, but are really SO easy.
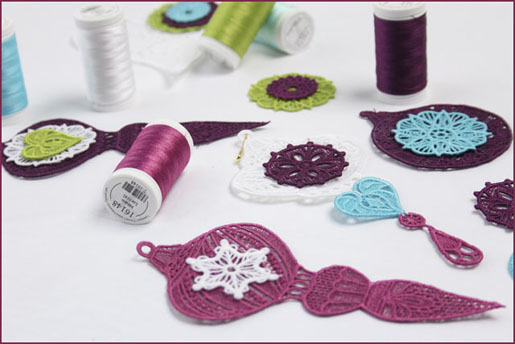
The ornaments below are from OESD Embroidery Collection #12469, Holiday Ornaments & Charms, and you’ll find instructions for these Traditional Ornaments with Modern Charm on their DIY embroidery blog.
Here’s how to create lace with your embroidery machine.
Put pretty thread (I like Isacord) in the needle and wind a bobbin with the same thread.
Insert a brand new 75/11 needle. A dull needle might have burrs. A burr can really damage the stabilizer during the embroidery process and if so, then the lace won’t hold together. So it is better to start off with a new needle and you won’t have to worry about it.
Hoop a couple of layers of AquaMesh Plus (my favorite) or BadgeMaster in the hoop by itself.
Tighten the screw on the outer ring of the hoop as tight as you can get it. This is REALLY important. If the stabilizer is not held firmly between the inner and outer rings of the hoop, the lace will not stitch out very well.

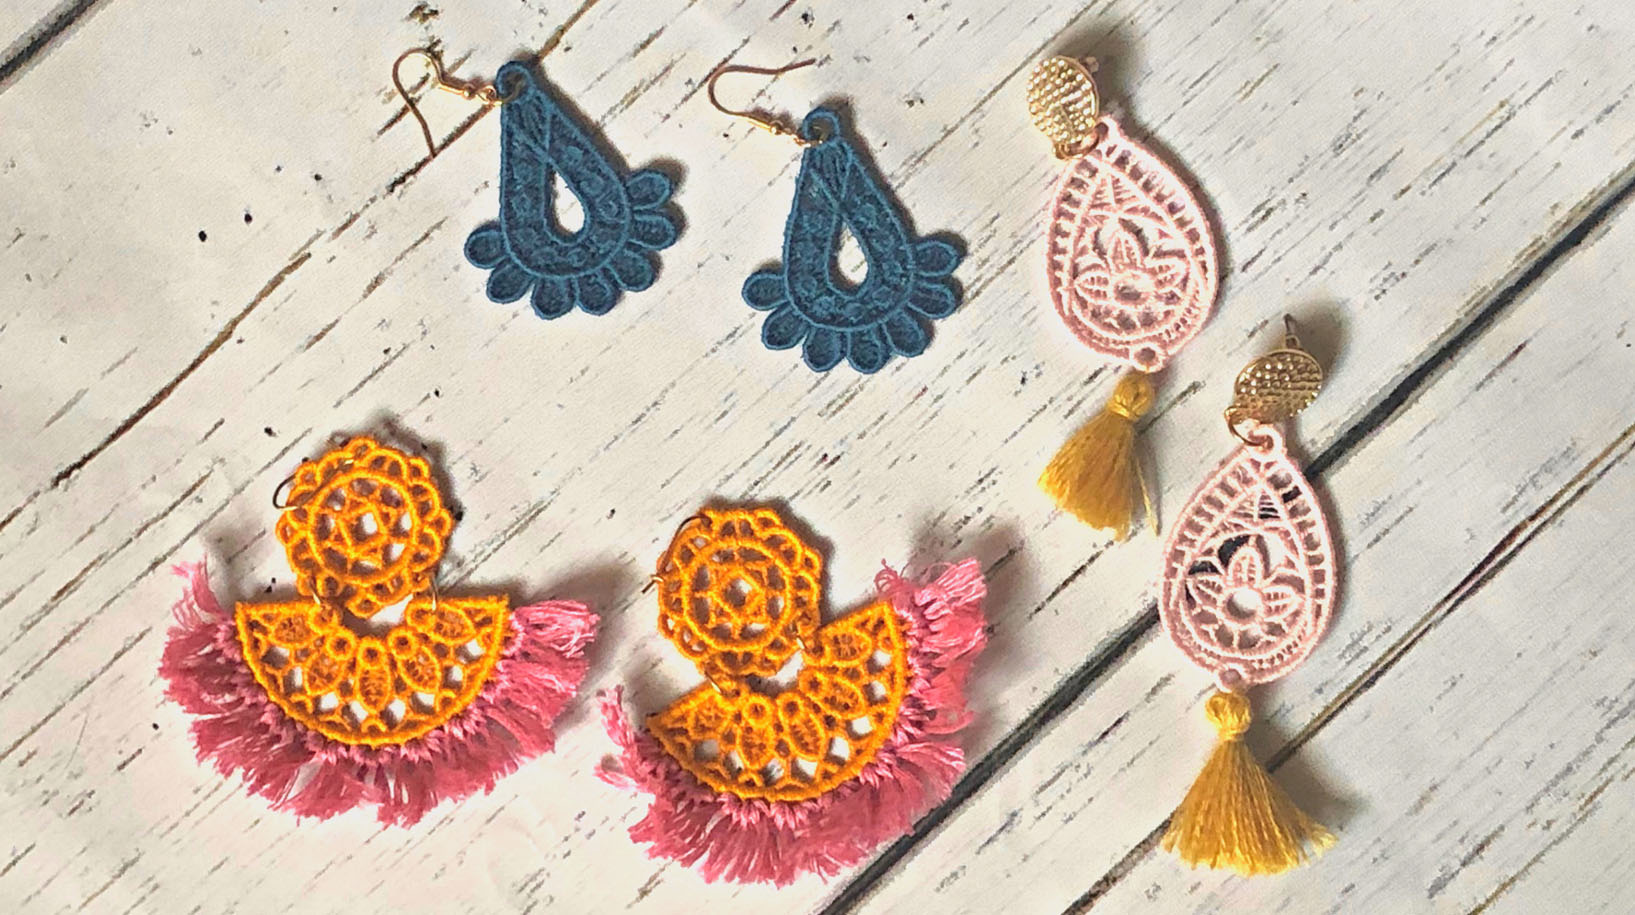
Pick a free-standing lace design. Make sure that somewhere on the description is the word “free-standing” or “stand-alone.” It may look like lace in the picture, but if it isn’t specifically stated that the design is free-standing, then the lace will not hold together properly when the stabilizer is rinsed away.
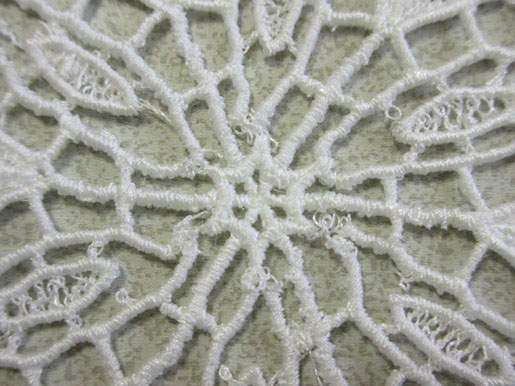
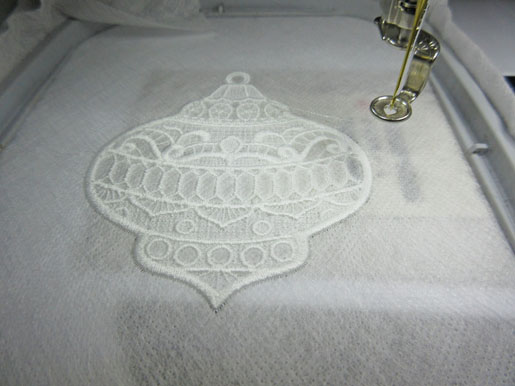
Stitch the design. There are a lot of stitches in lace designs so this may take a good while to stitch out. But you can just sit back, have a cup of coffee, and relax as the lace is created.
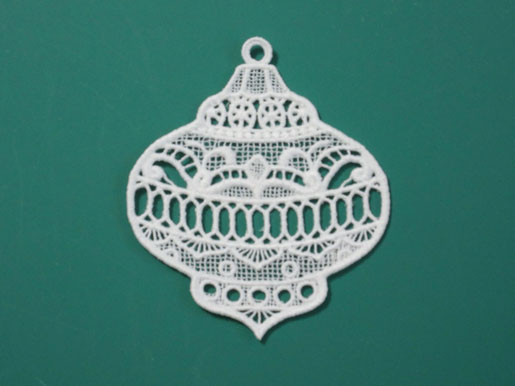
This design is from OESD Holiday Ornaments and Charms Collection #12469, FSL Ornament 3
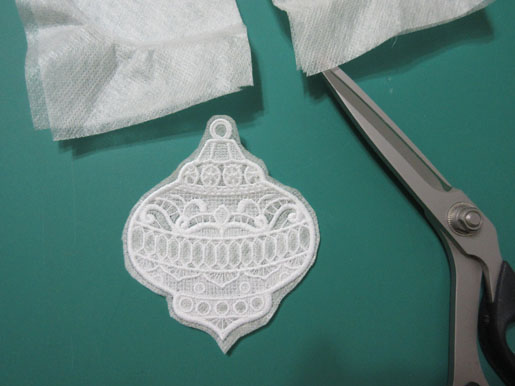
When the stitching is completed, remove the stabilizer from the hoop and cut away the bulk of the stabilizer.
Rinse the lace under warm water to remove the remainder of the stabilizer. If you want the lace to be on the stiff side, don’t wash all the stabilizer out.
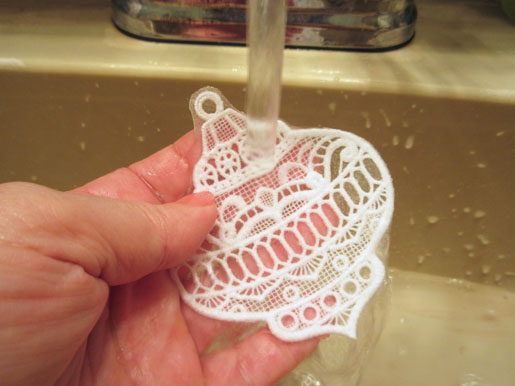
If you want the lace to be soft, rinse it for several minutes. You can let it soak for a while, but don’t let it dry out until you are sure that all the stabilizer is gone. The water-soluble stabilizer seems to be harder to remove the second time.
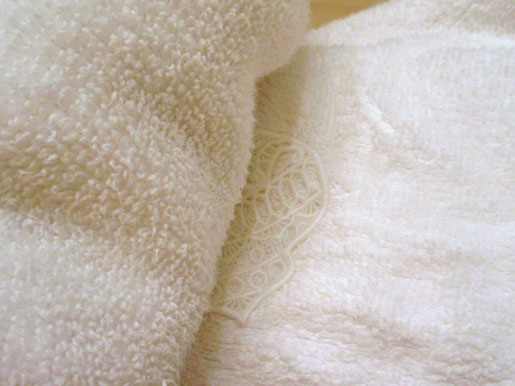
A good way to tell if there is still stabilizer remaining in the design is blot the lace between two layers of a towel to squeeze out most of the moisture.
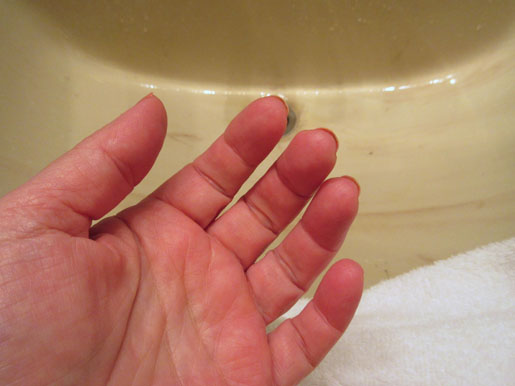
Pick up the lace and squeeze it in your hand.
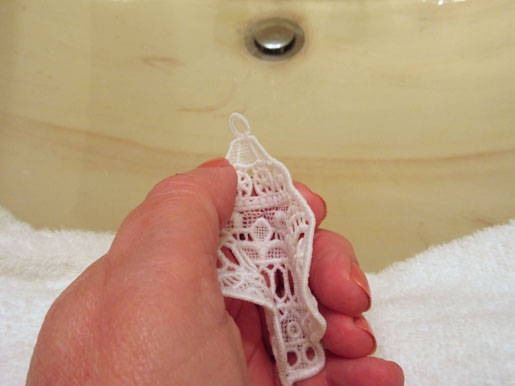
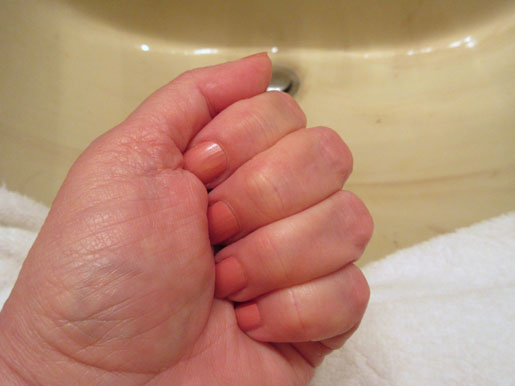
Put the lace down and make a fist. If your hand feels tacky when you open your fist, rinse some more.
You may want to pick up extra thread next time you are at the store. Lace-making can be addictive!


What you might also like


One comment on “Embroidery Basics: How to Make Free-Standing Lace”
Leave a Reply
You must be logged in to post a comment.
I pour boiling water over it in a plastic bowl placed in the sink. Let it cool to room temperature and rinse.