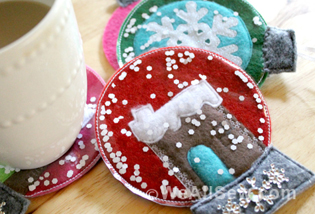
How to Digitize and Personalize Coasters
Hello Everyone! I’m Kate of Tough Kitten Crafts and I empower sewists to become fearless with machine embroidery.
I am super excited to help you digitize machine embroidery! These coasters are a quick and simple project that is great to help you get into your BERNINA Embroidery software, either as a first project or as a fun way to get to play around and flex your skills.
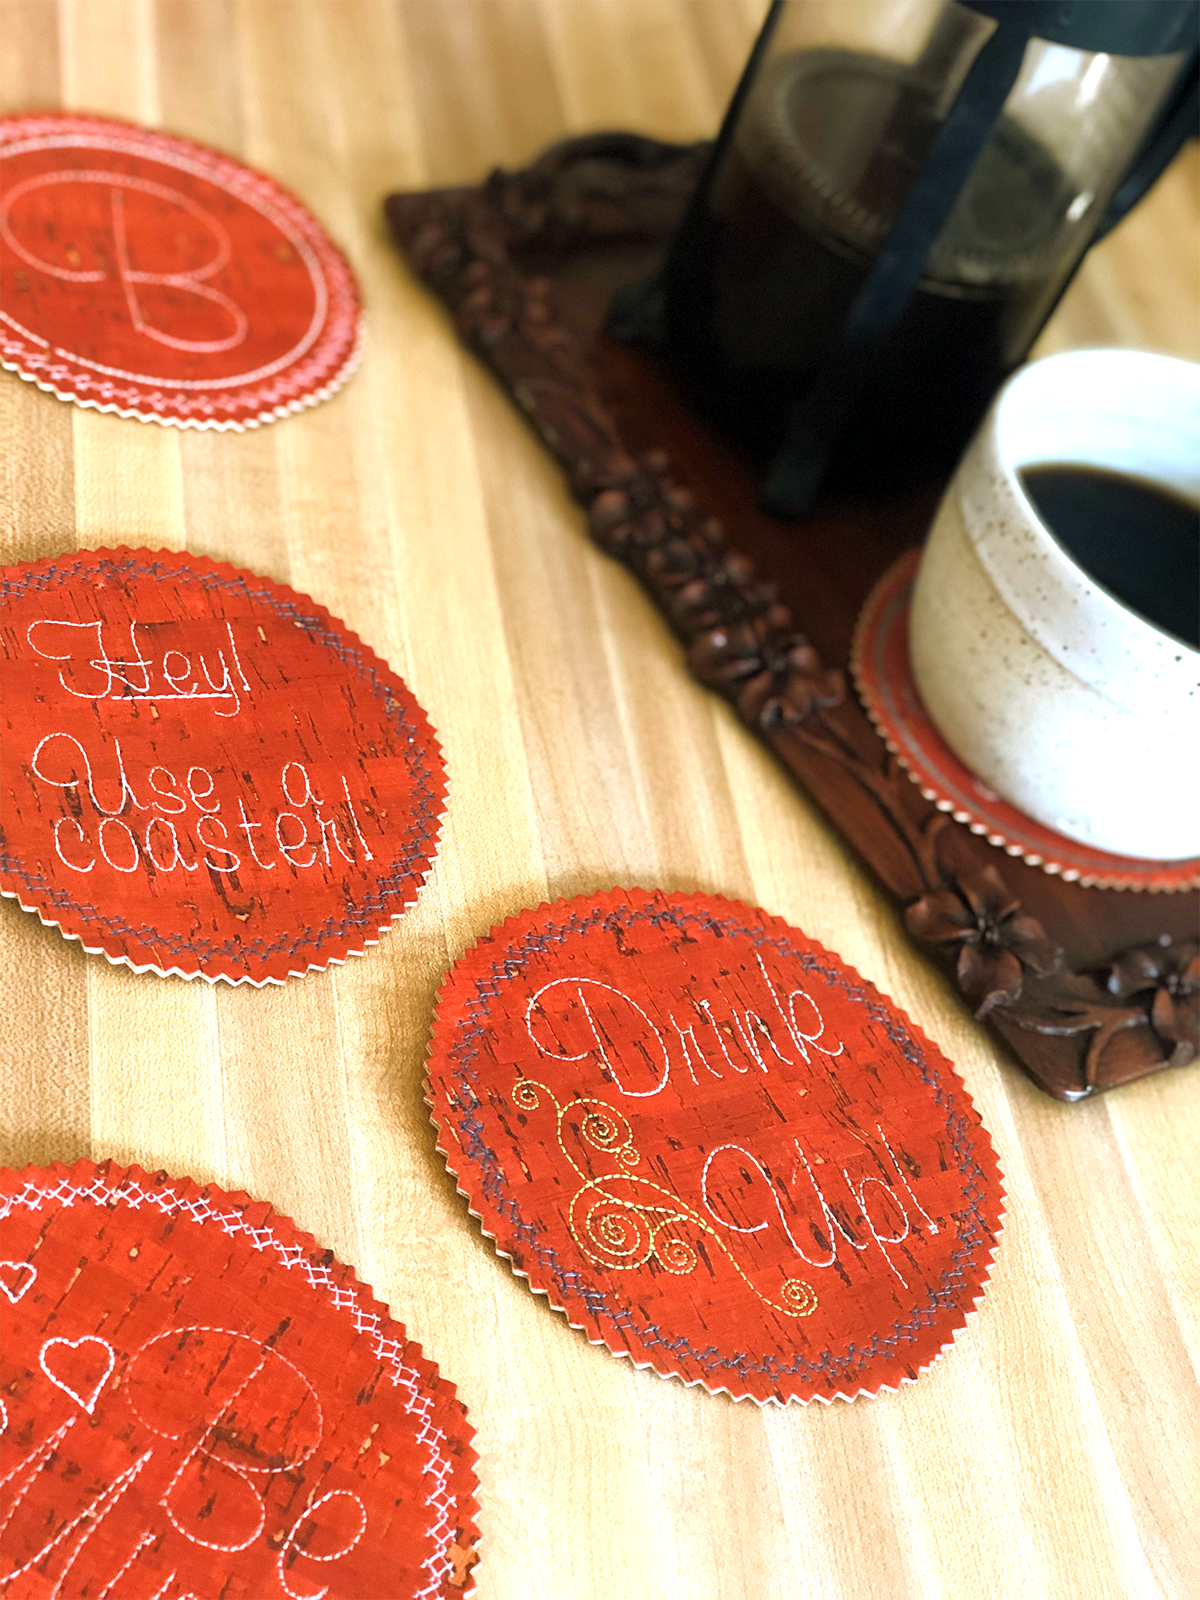
Once you start making coasters, I wouldn’t be shocked if suddenly you started digitizing new ones for every holiday, season, special event, or hey…just cause you feel like it.
Here’s what ya need:
Supplies to Create Your Personalized Coasters
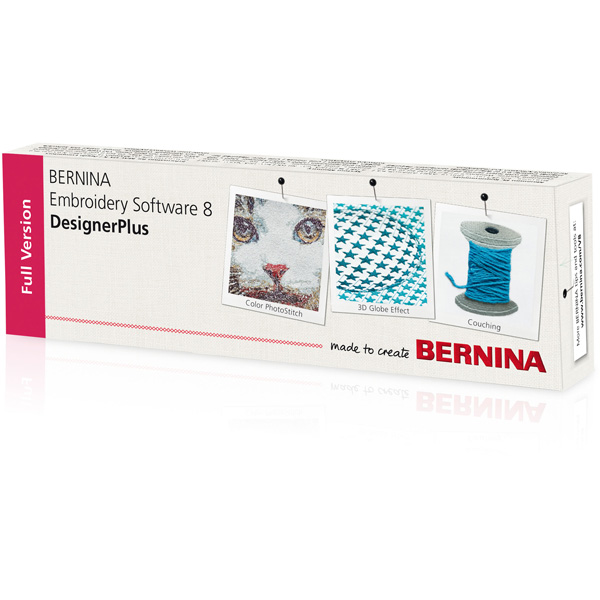
- Bernina Embroidery Software Version 8.2
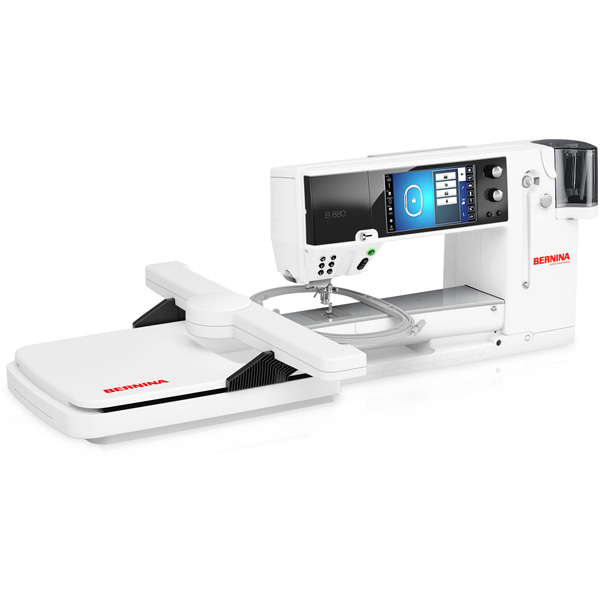
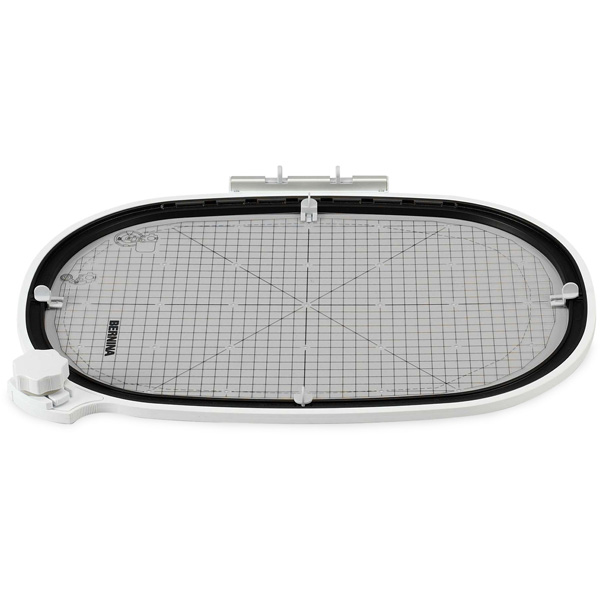
- Embroidery Hoop (I used the BERNINA Jumbo Embroidery Hoop)
- Cork fabric (available in many different styles and colors)
- OESD StabilStick TearAway Stabilizer
- OESD Expert Embroidery Tear Away Tape
- 40 weight Aurifil thread in various colors
- Embroidery Needle 75/11
- Pinking Shears (Or regular dressmaker shears)
Software Directions
Starting off with a new canvas, right click on the Show Hoop icon.
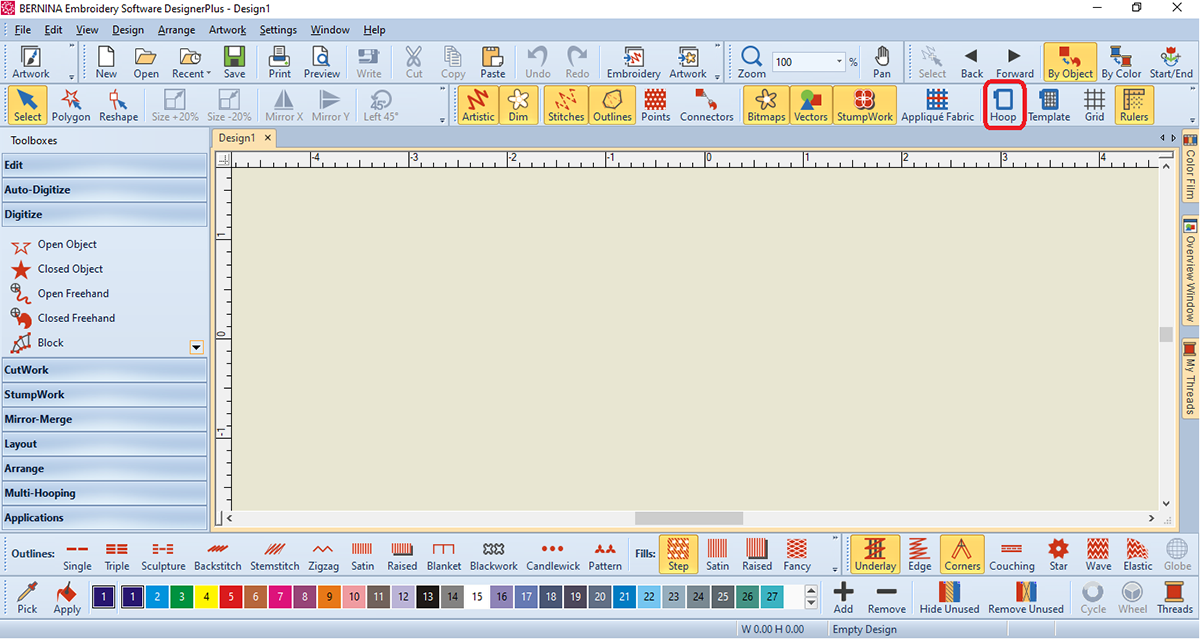
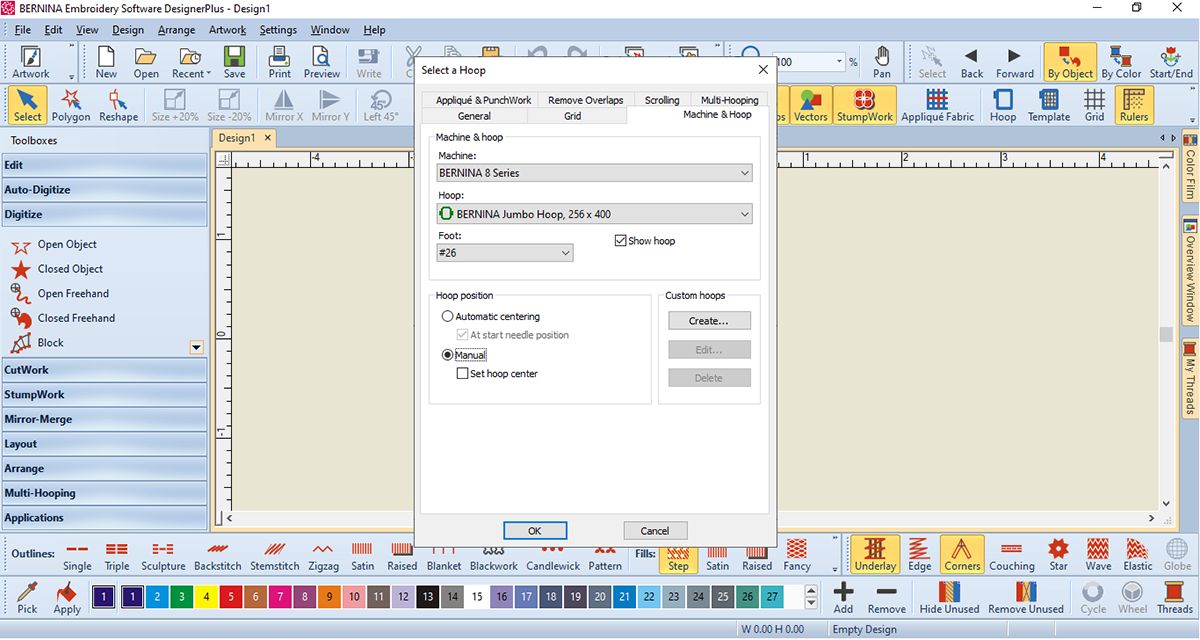
Choose the settings for your machine and hoop. I am working in the Jumbo Hoop on a B 880 PLUS, so I can make as many coasters as possible in one hooping. Tick the box for Show Hoop and Manual for Hoop Position. Click OK.
This will zoom into the center of the hoop. To change this, select To Hoop on the Zoom toolbar.

Now that we see the whole hoop, we are going to make our first circle. Under the Digitize toolbox, select Ellipse. Use the down arrow to find Ellipse if needed.
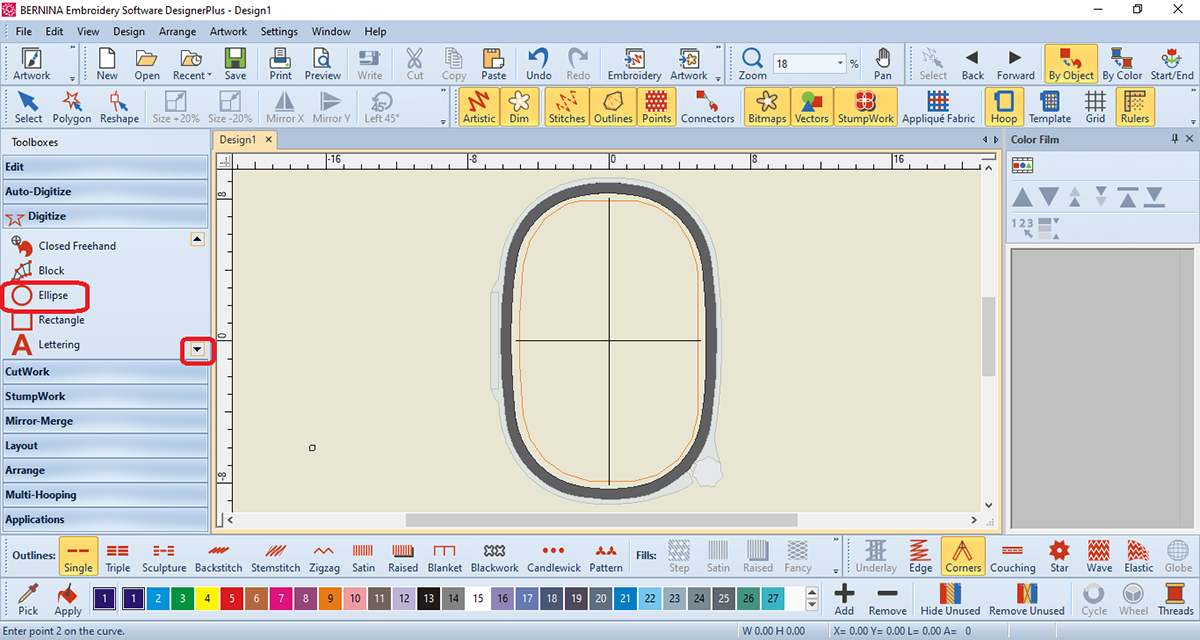
Once you choose ellipse, put your cursor at the crosshairs of the hoop and click, drag the line out and click again. You will see a straight line; press enter on your keyboard and suddenly a perfect circle will appear. If your circle fills in with stitches, select the circle and just click Single on the Outlines toolbar near the bottom left and it becomes just an outline of the circle.
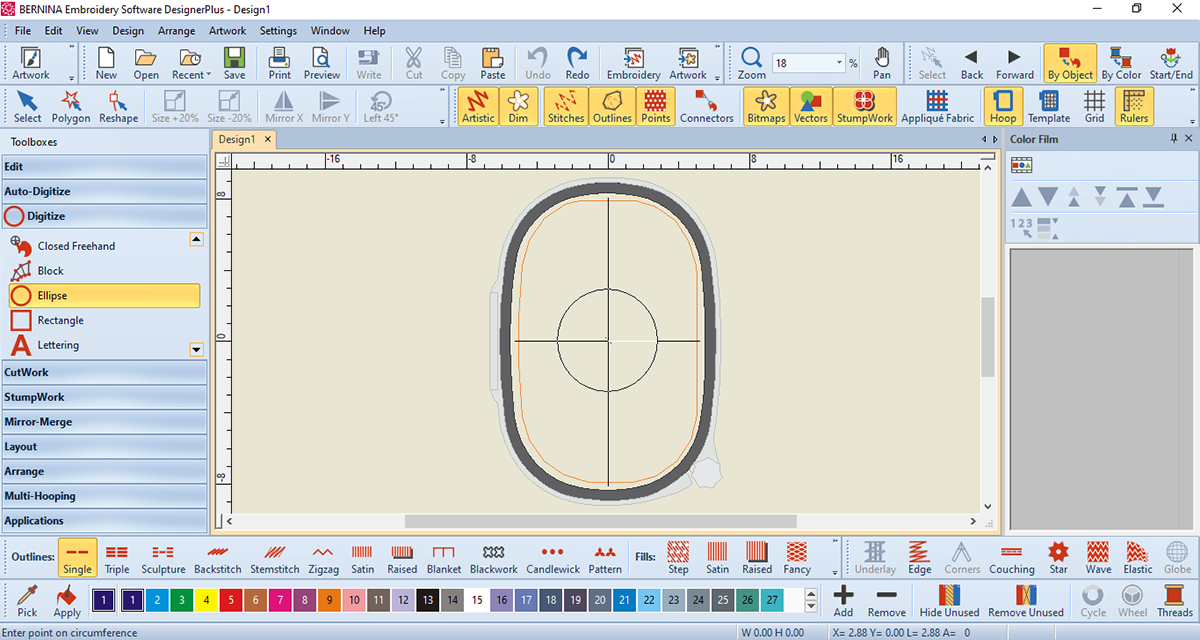
Choose the Select icon near the top left corner of your screen. Click on the circle we just made and use one of the corners to drag your circle until it’s roughly 4.25 inches (Don’t stress on making it perfect. Anything between 4 and 4.25 inches will be great)
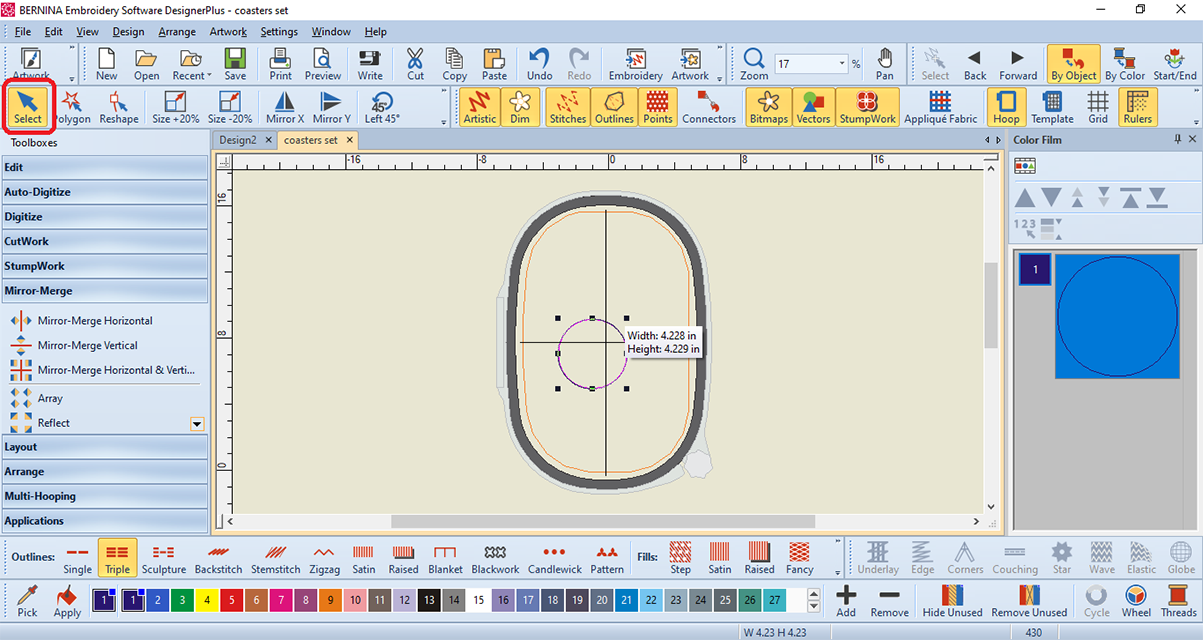
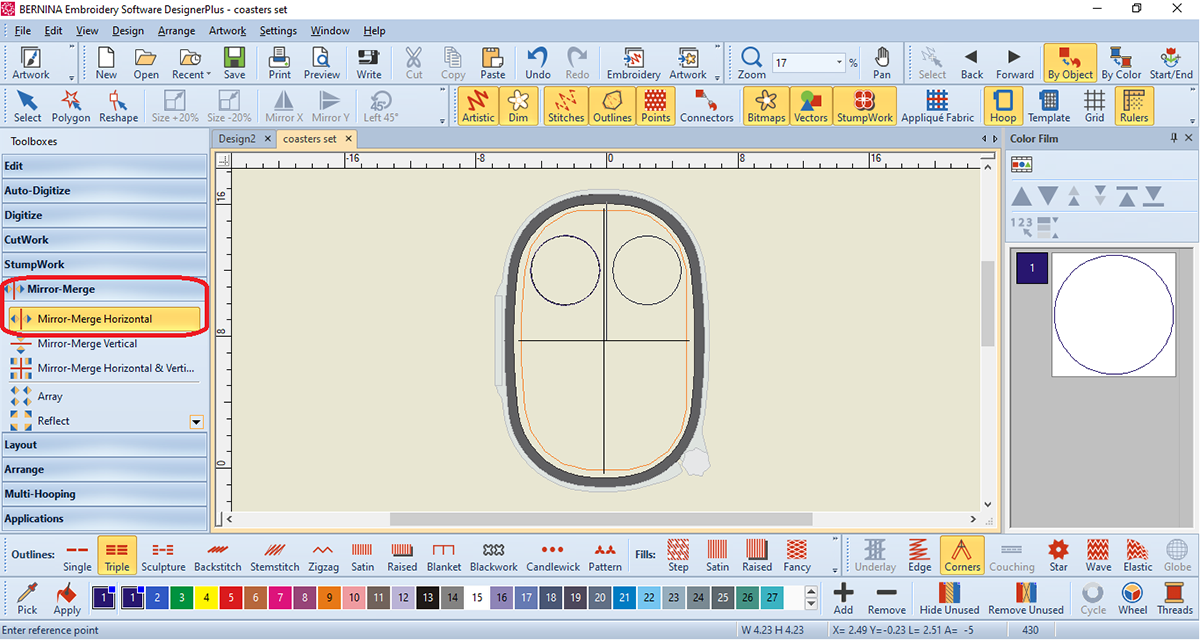
Move the circle to the upper left of the hoop, select the Mirror Merge toolbox and choose Mirror-Merge Horizontal. Now by moving your mouse side to side you can choose how far apart the circles will be. Give yourself some space between the two circles, at least a half inch. Click when you are happy with the placement.
Select both circles by dragging a box around them.
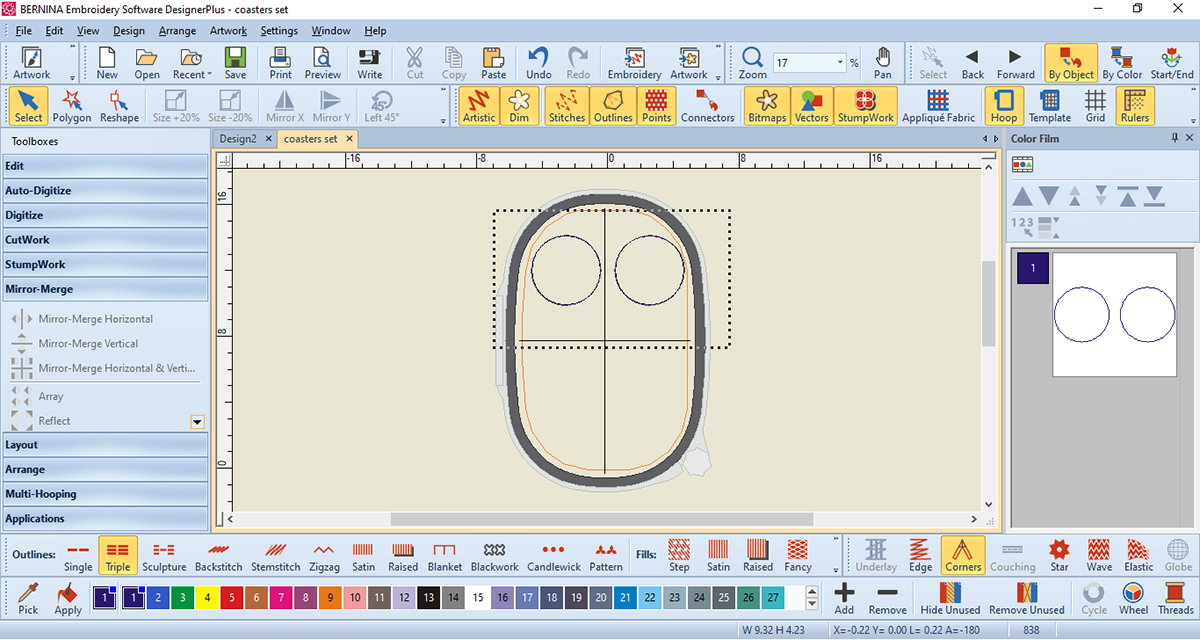
Select mirror merge vertical and move the duplicates below the original circles. Once the circles are at least a half inch apart, you can confirm the spacing by clicking the mouse or hitting enter on the keyboard.
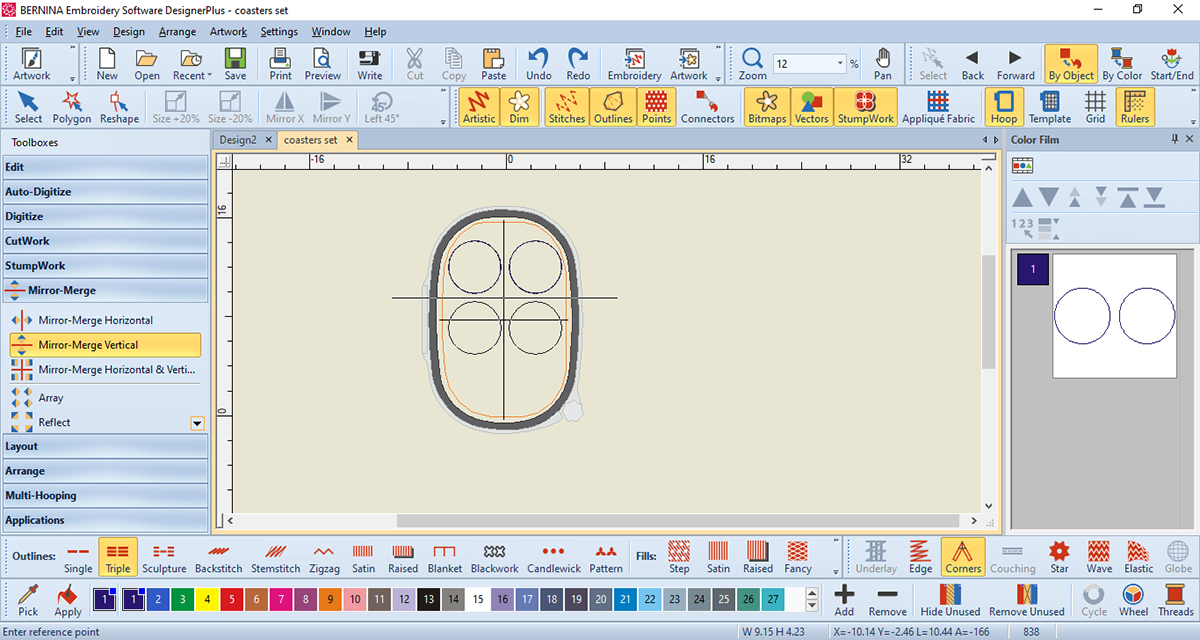
Feel free to move the circles around your hoop individually so that they fit within the stitch field (inside the red line) and are at least a half inch apart each. Once they are well spaced in the hoop as you would like them to be, select all the circles by dragging a box around them. They will turn pink and you can right click and select Group, then right click again and select Duplicate.
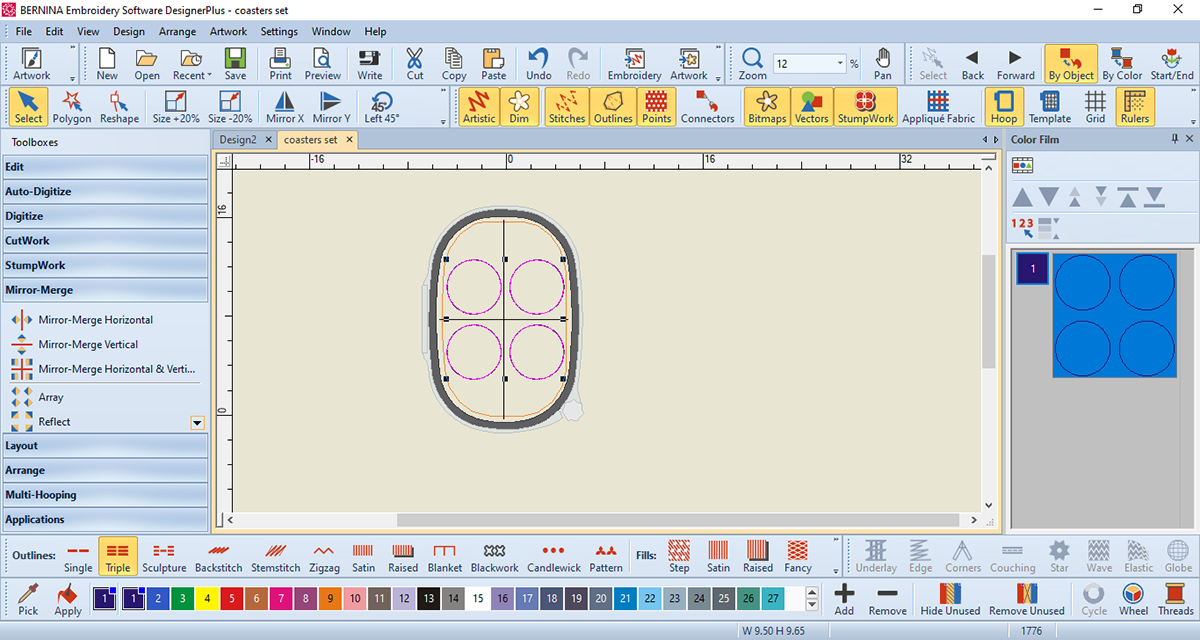
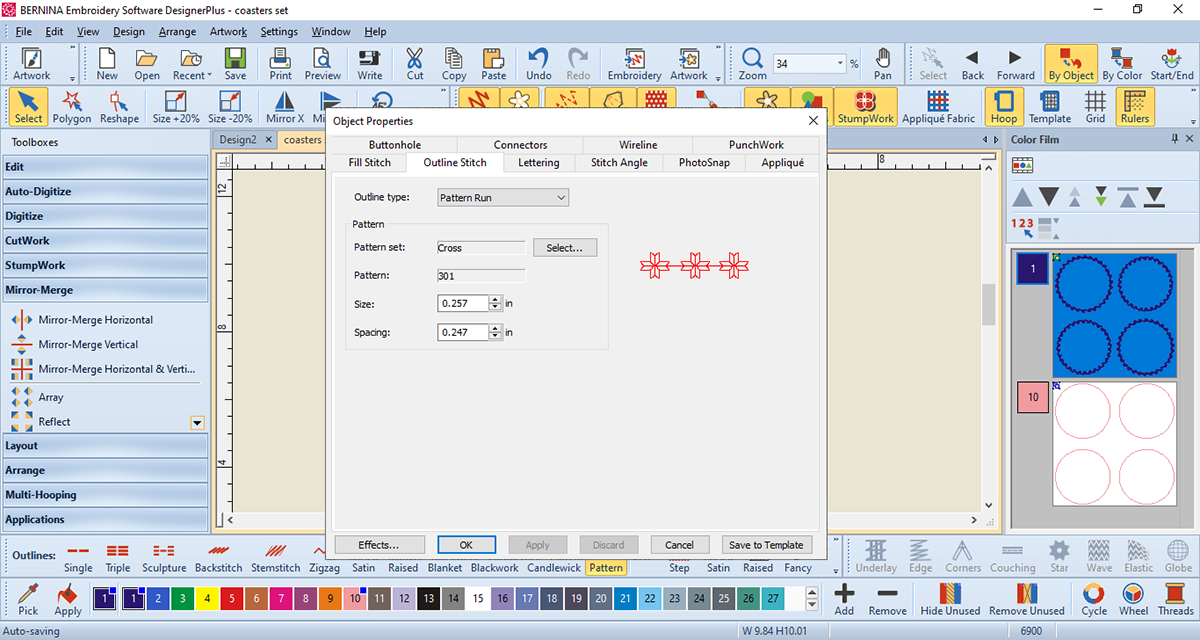
The duplicated layer will be selected. Since both the original and duplicated circles are both the same color, you will only see one layer in the Color Film docker. (If you do not see the Color Film docker, go to Window > Dockers > Color Film in your Menu bar.)Tap any one of the colors on the Color tool bar, I chose 10. (We will change the color later so the color doesn’t matter right now. We just need each layer to be a different color). You can now see two layers on the side Color Film docker. Select the top layer (Color 1) in the Color Film docker, and then right click pattern on the outlines toolbar.
When the Object Properties window pops up, click select.
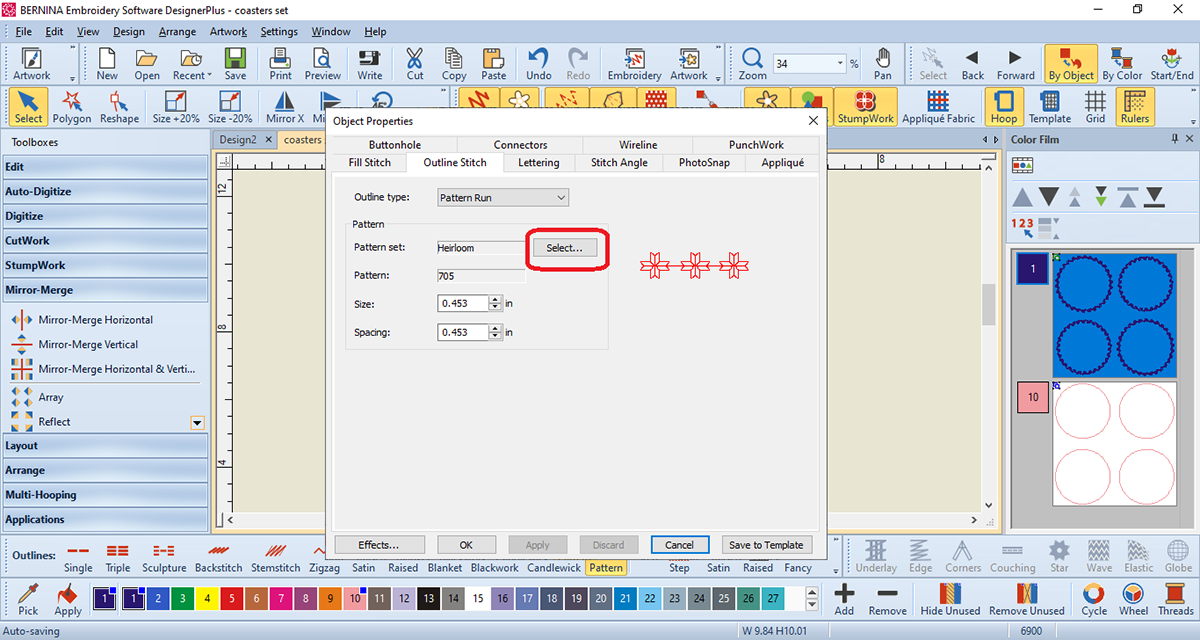
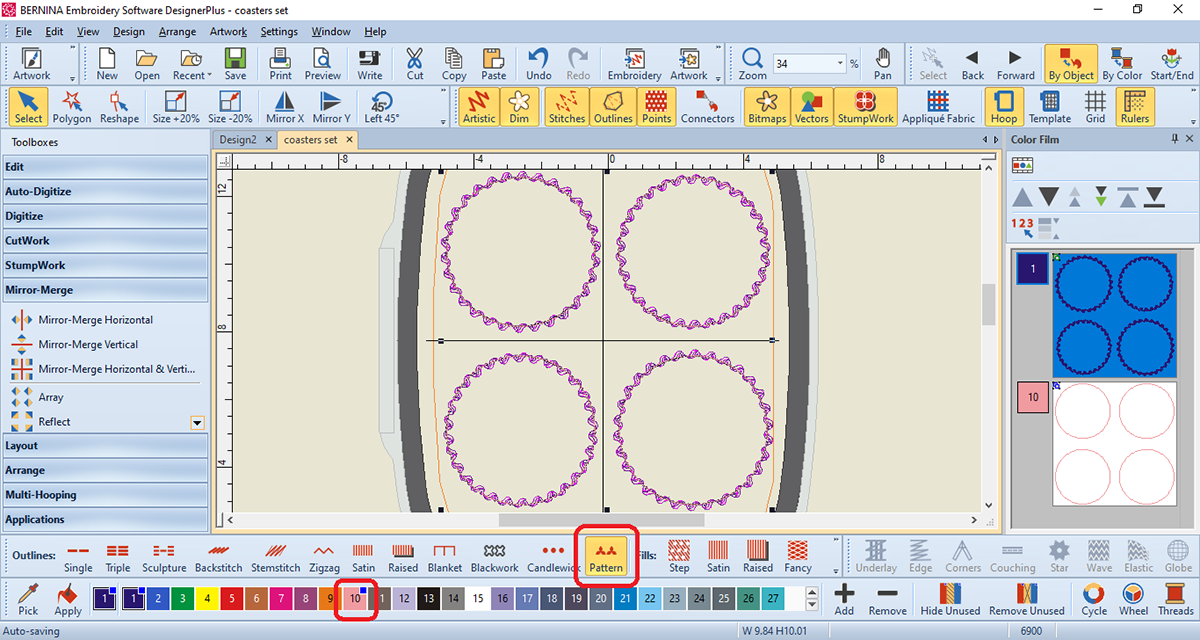
When the Select Pattern window pops up, choose Cross from the drop down menu next to Pattern Set. Select stitch 301 and then click OK.
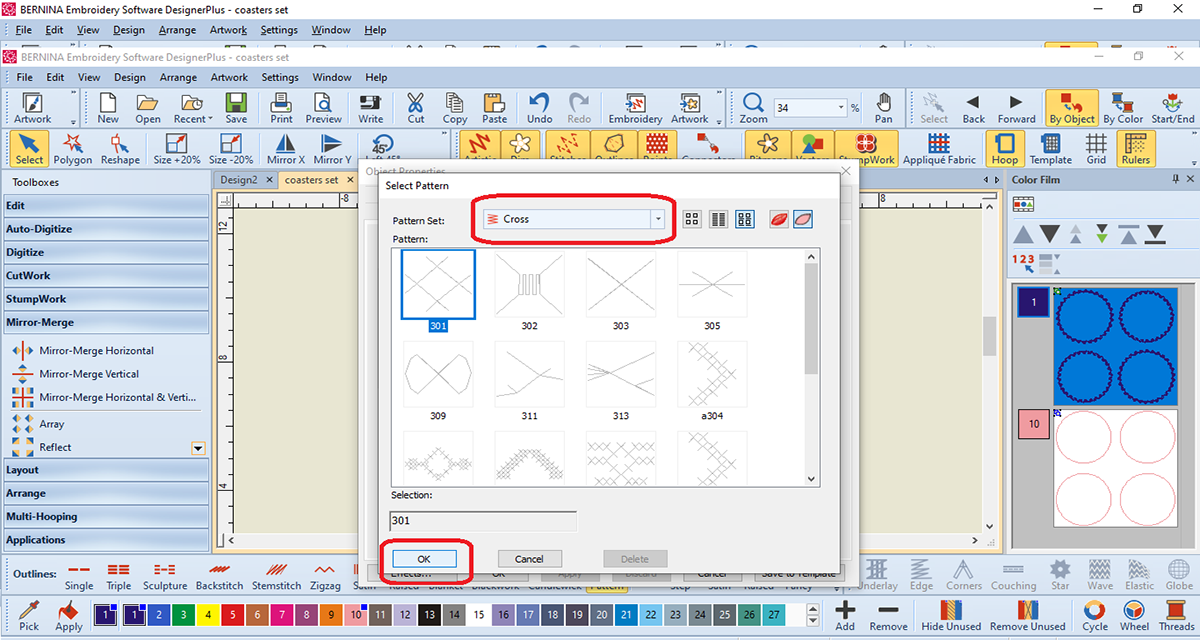
If you’d like to see what it looks like, move the Object Properties bar to the side and click apply; this will give you a chance to see the design and change it before committing.
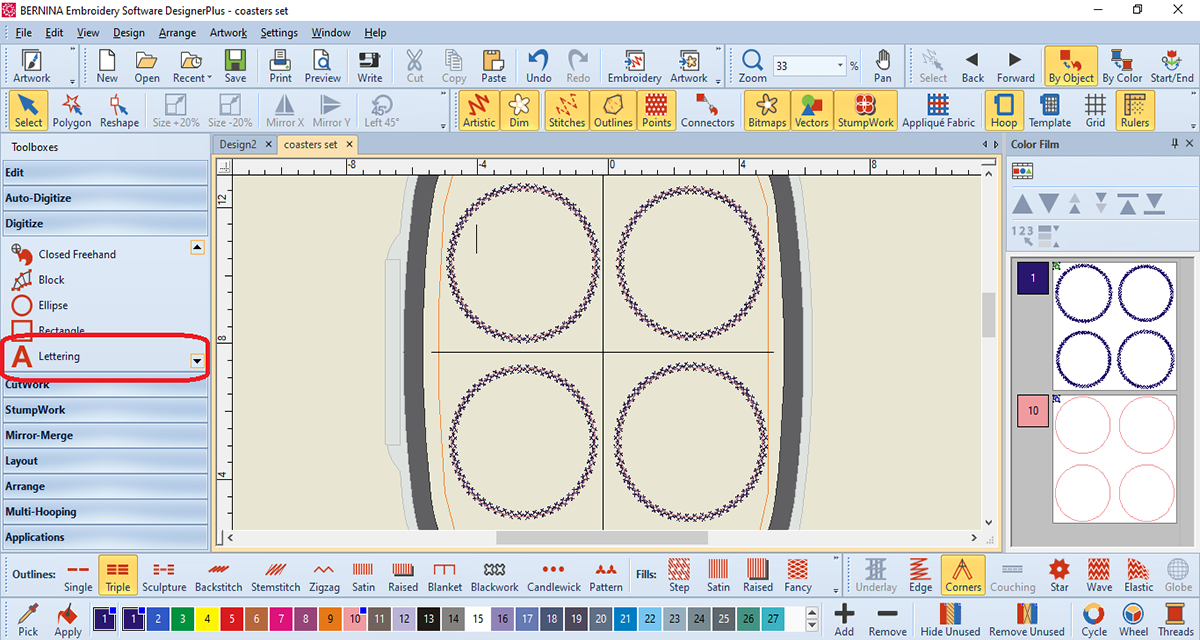
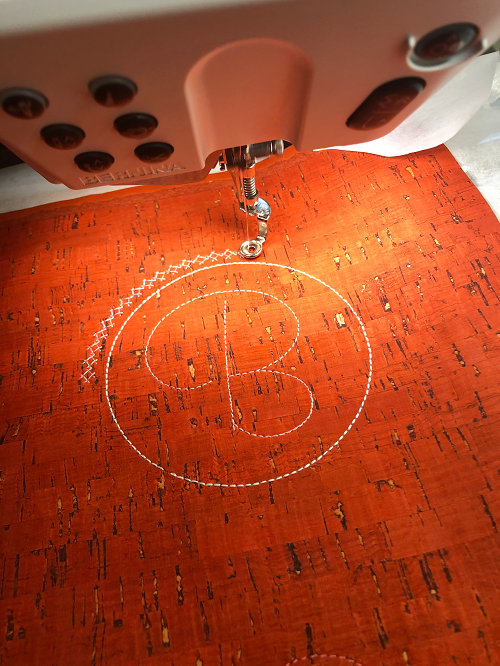
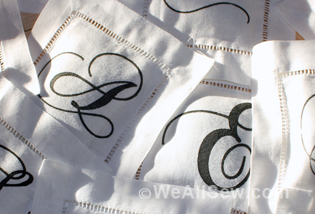
Under the Digitize toolbox, right click on Lettering.
Select the font “Run Murray Hill” and type what you’d like on the coasters in the dialogue box. You can try out your lettering by dragging the Object Properties box out of the way; click Apply and touch inside one of the circles to see how your phrase looks. Once you like the way it looks, click OK. From there you can drag the lettering where you’d like it and even change the size via the black handles around the lettering.
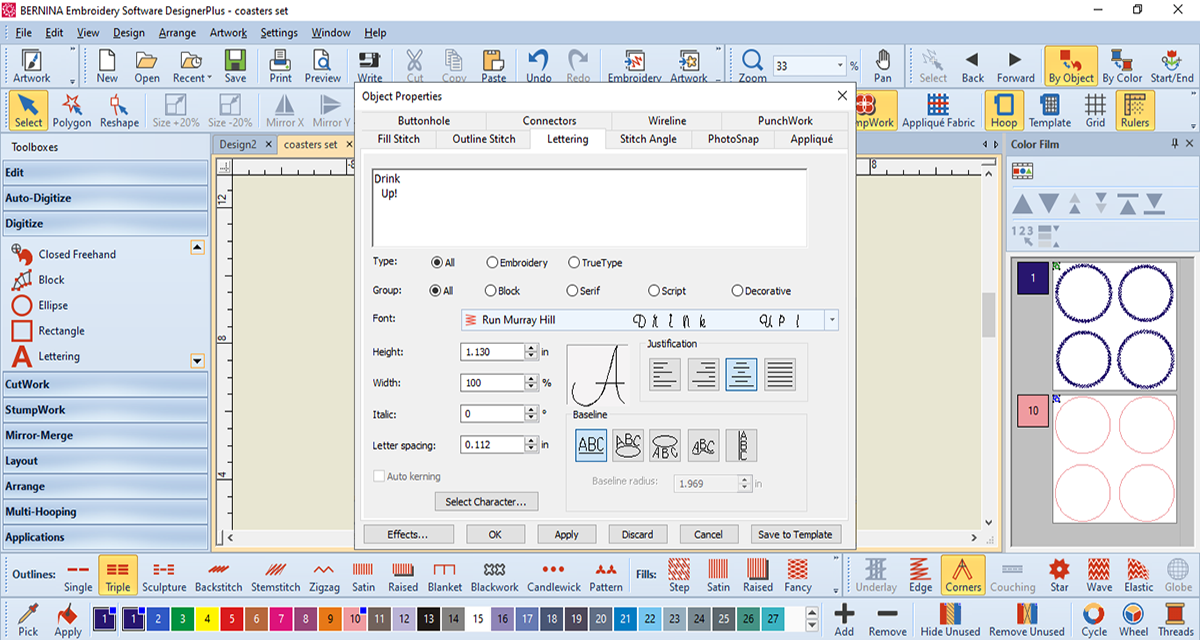
Note: I chose this font because I knew it would stitch out easy without much fuss over stabilizer and be easy on the cork. If you’d like to choose another font, then go for it! Just remember you may have to change what stabilizer you are using, and make sure to test stitch on your cork before making your final coasters.
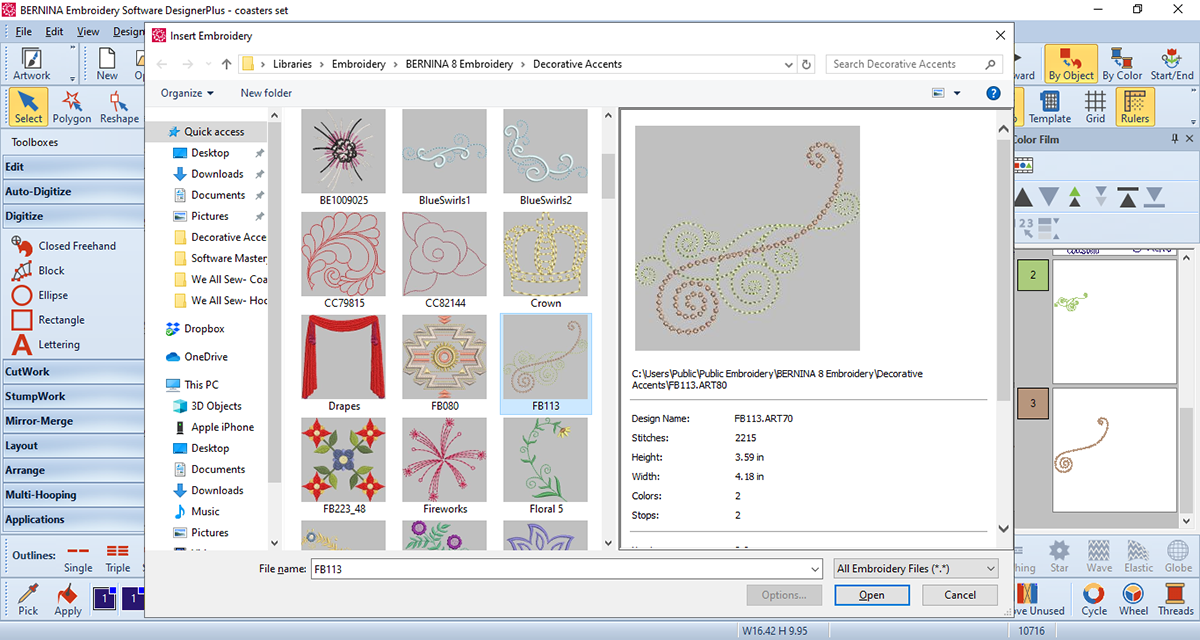
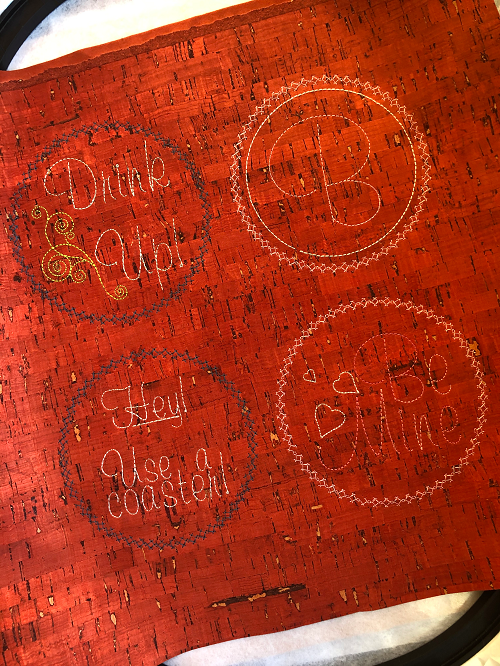
Add whatever you’d like on your coasters: holiday greetings, family name, clever phrases. Once you like your lettering and you’re happy with how it looks, we can add some embroidery designs to our coasters. Click Insert Embroidery.
I chose FB113 from the Decorative Accents folder. I liked this one because it’s a triple stitch and will keep my embroidery from being dense. Once again, feel free to choose something else but you will want to reevaluate your stabilizer and test stitch.
With your design off to the side, select it and right click; select Ungroup from the menu. This will break up the candle wicking design on top from the triple stitch design underneath. From here, you can select only the candle wick design and delete it; we only want the triple stitch swirls below for our coasters. Once the candle wick is deleted, draw a box around the remaining parts to highlight the remainder of the design, right click and choose Group. Now we can move the triple stich swirls as a whole, again.
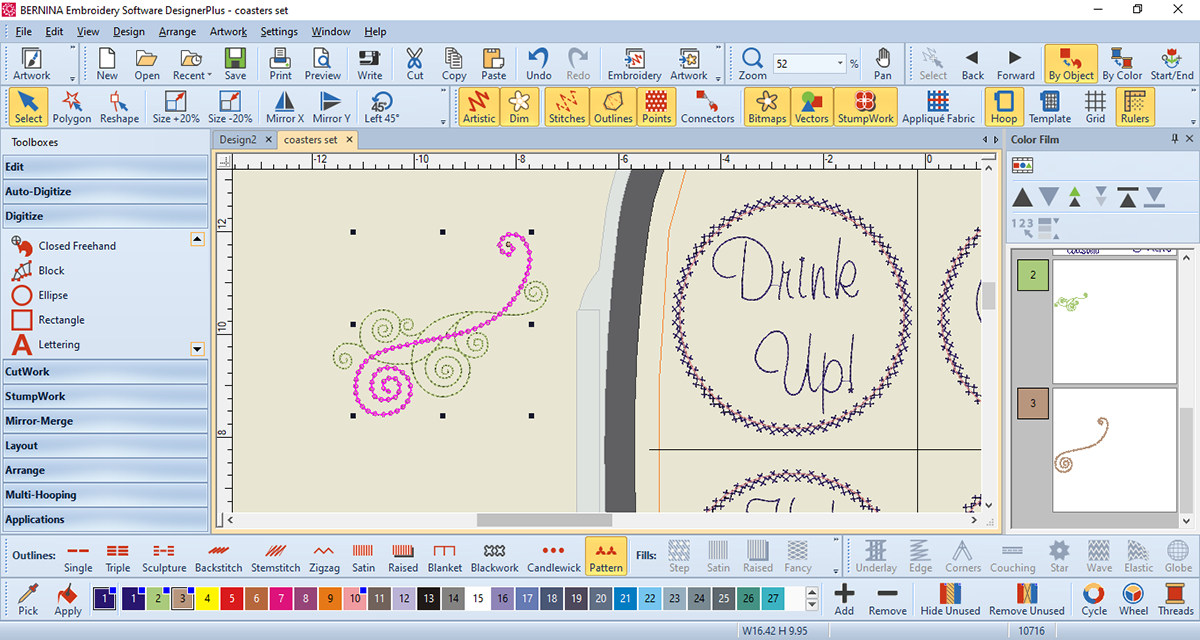
When you click on a design and see the black handles around it, you can move it freely and resize it. When you click once more, you get white handles which will allow you to rotate your design via the corner handles. Get your design placed exactly how you like it.
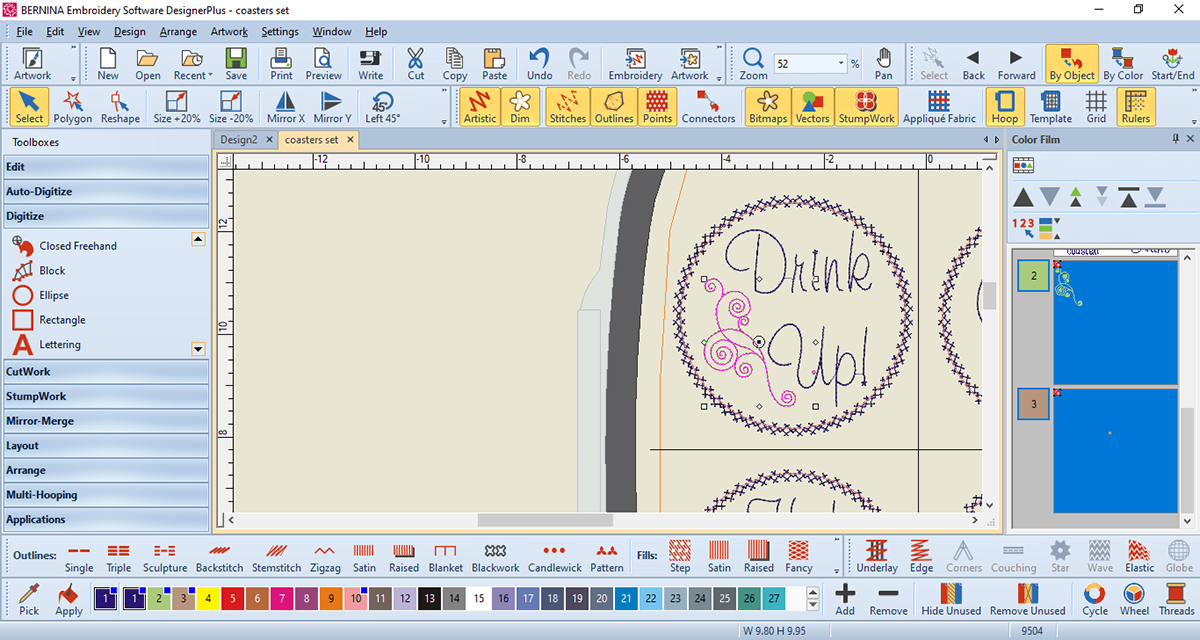
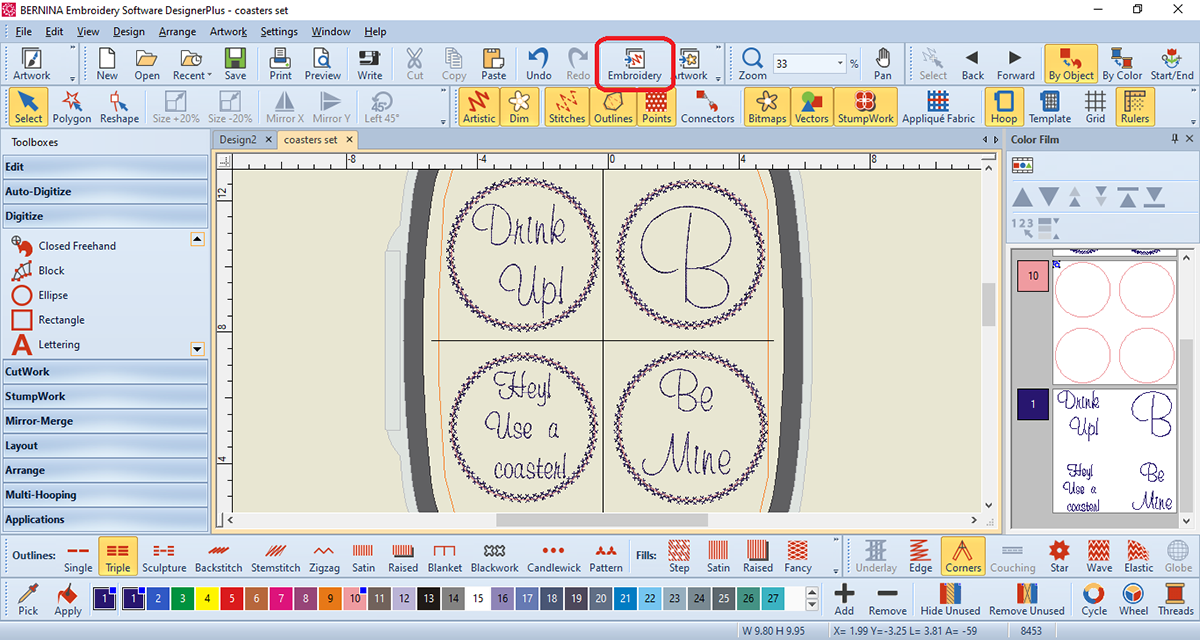
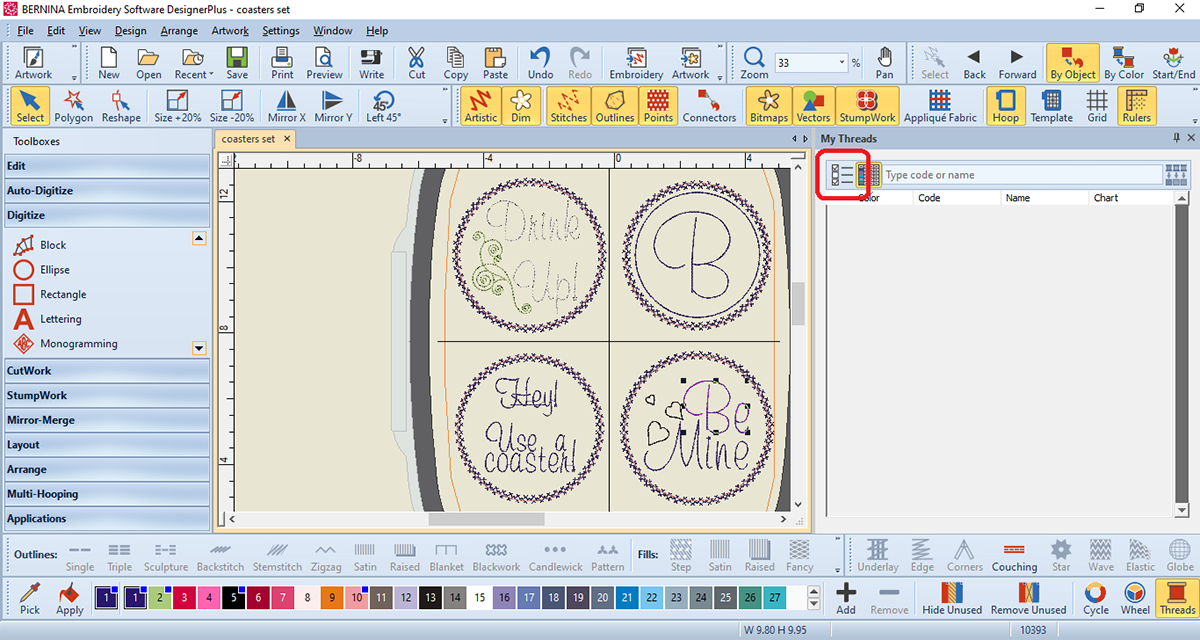
Decorate your coasters as much as you’d like. On the “B” coaster, I just added another circle and made it a triple stitch. Have fun and get creative! Once your coasters are good to go, let’s click on the Threads icon at the bottom right.

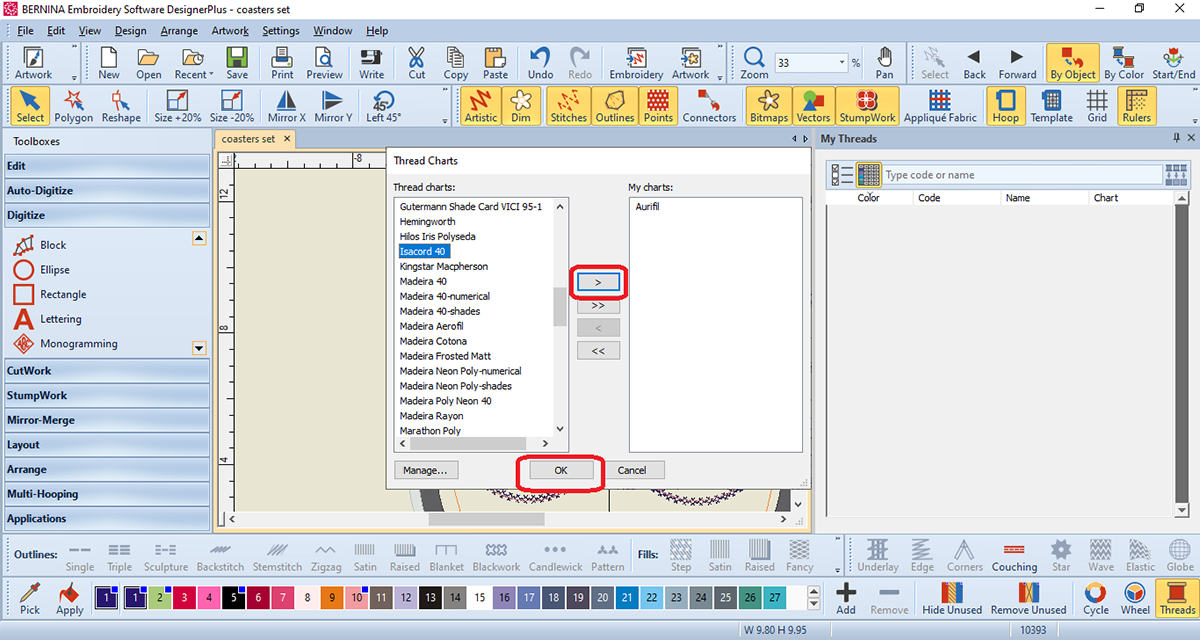
If you don’t already have your threads set up, let’s do that now. Click the My Threads Chart icon.
The Thread Charts window will pop up and you can choose the thread brands that you have at home; then hit the > button to send it into the My Charts box. I mostly use Aurifil, but I also have Isacord in my thread stash, so I sent both over to My Charts. When you have selected your preferred brands, click OK.
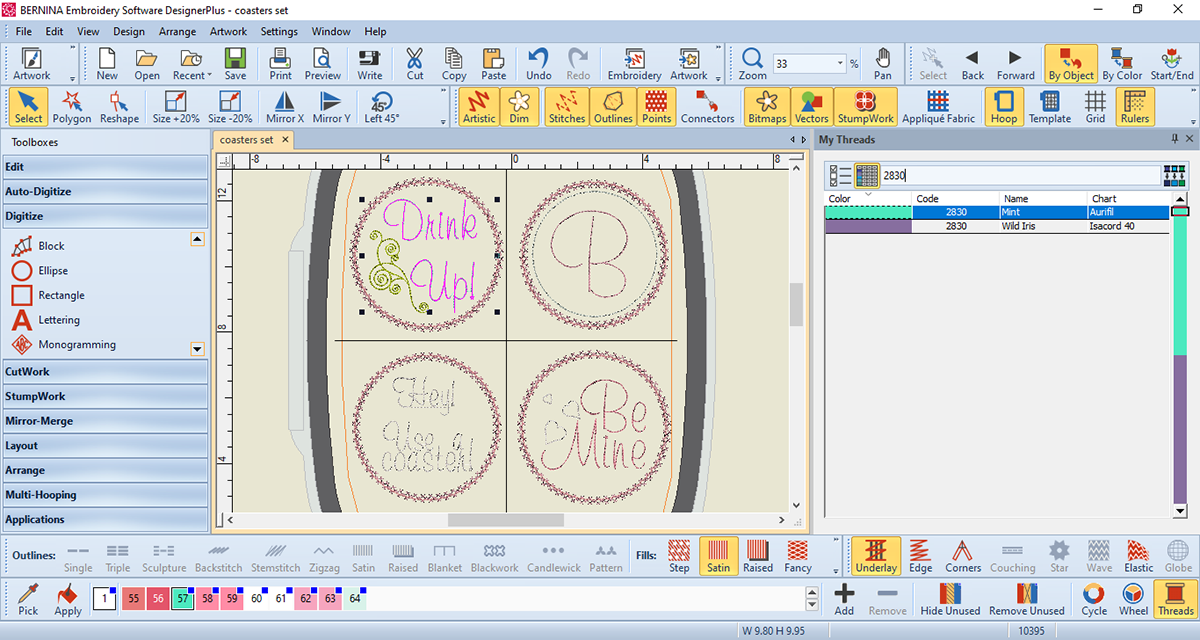
Now you can click on each piece of the design and choose the desired thread color by typing the color number from the thread spool into the search. Double click the thread color you’d like to select on the list. Make sure that your placement stitch (the first circles we made) are a different color than anything else on the coaster. If you’d like the decorative stitch circles to be different colors, you can select them and ungroup them then choose colors individually.
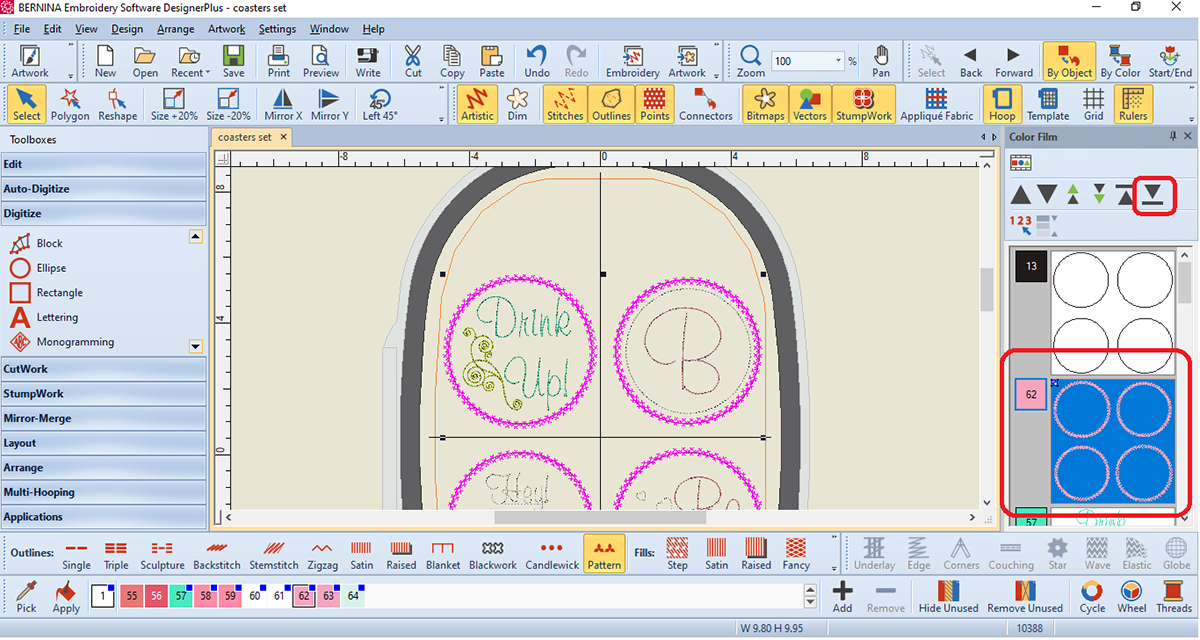
Before saving and stitching out our coasters, we need to make sure our placement circles stitch out first and the decorative circles stitch out absolutely last. If your Color Film toolbar isn’t showing, then you can go to Window > Dockers > Color Film to get it to show up. In your Color Film docker, select the decorative stitch circles and click the Move to End icon. This will ensure they stitch absolutely last. Double check that your single stitch circles are at the very top of your color film (therefore they will stitch first as a placement stitch). If not, highlight their layer and click the Move to Start icon.
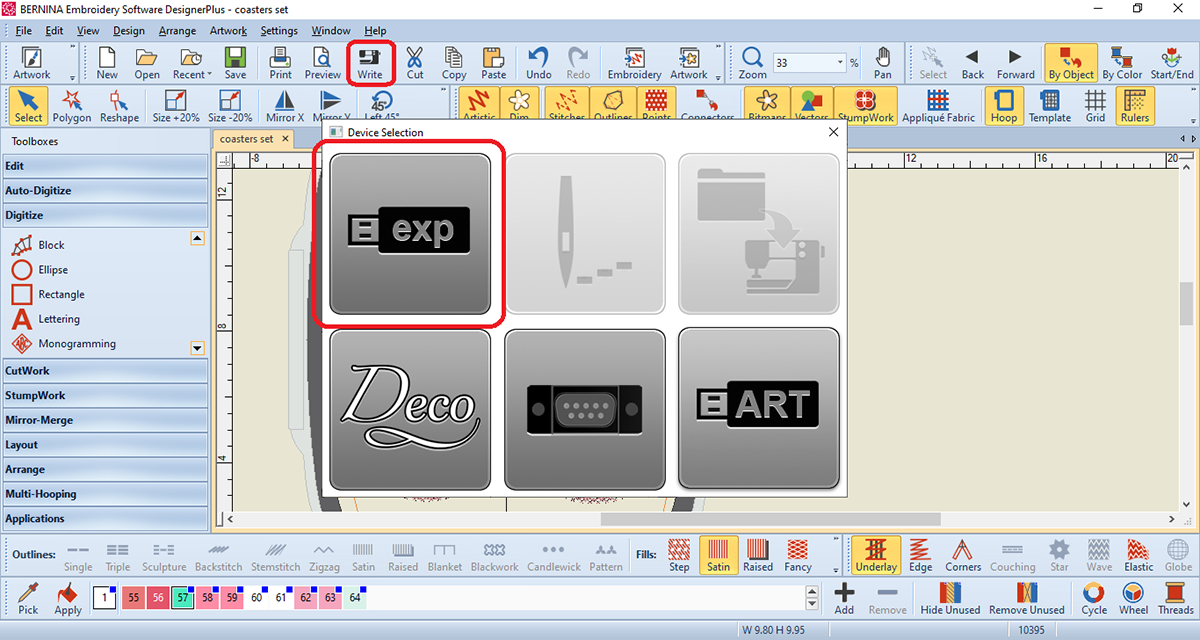
Don’t forget to save your design via File > Save As so you can come back and edit it later if you’d like. Then, with a USB in your computer, click the Write icon, then the EXP icon to save to your USB stick. Now you can take the USB to the machine and you can stitch it out. Yay! You did great! Let’s get these coasters made!
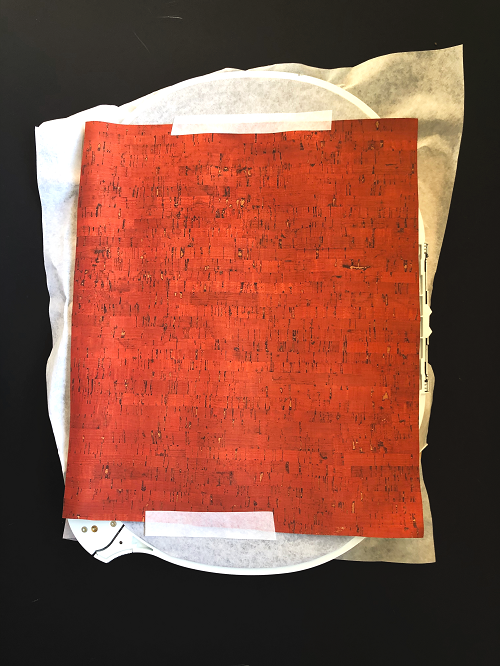
Hoop OESD StabilStick TearAway in your Jumbo Hoop. When using bulky fabric like cork, I like to hoop the StabilStick by cutting myself a piece of stabilizer from the roll and peeling the paper backing from the whole piece, then hooping my stabilizer with the sticky surface fully exposed. It also makes the StabilStick easier to hoop as it tends to be pretty bulky.
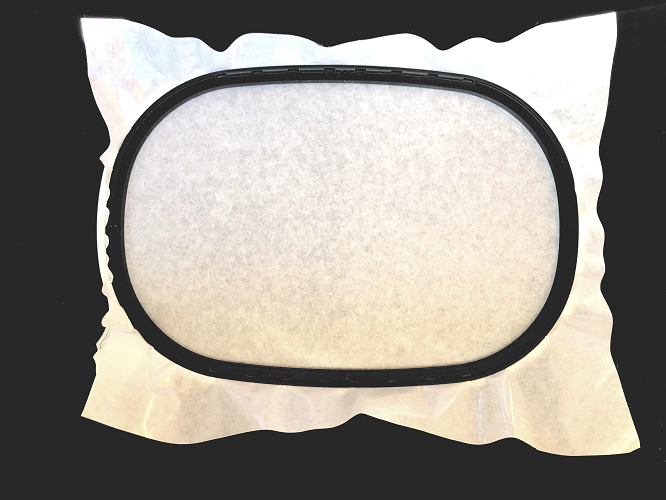
Once hooped, we can stitch out our placement stitches. I like the placement stitches because I often use scraps of cork to use them up, and even when I’m using a whole piece of cork like I did here, I don’t like to waste it.
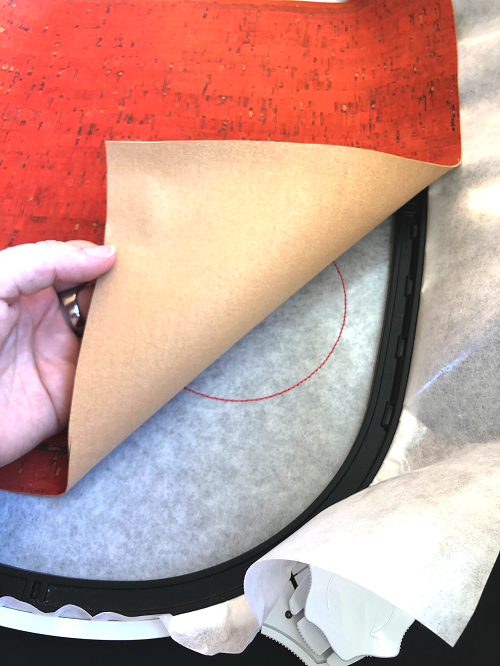
Once you have your placement stitches, you can place your cork on top and press it firmly onto your sticky stabilizer. Be sure to bend the edges of the cork so it lies flat against the stabilizer and sticks well. If you are using scraps, please note that you will need about a half inch around each one if you will be pinking the edges.
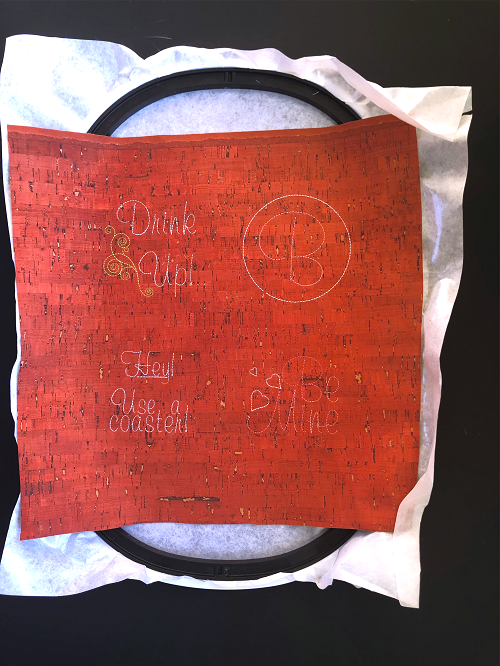
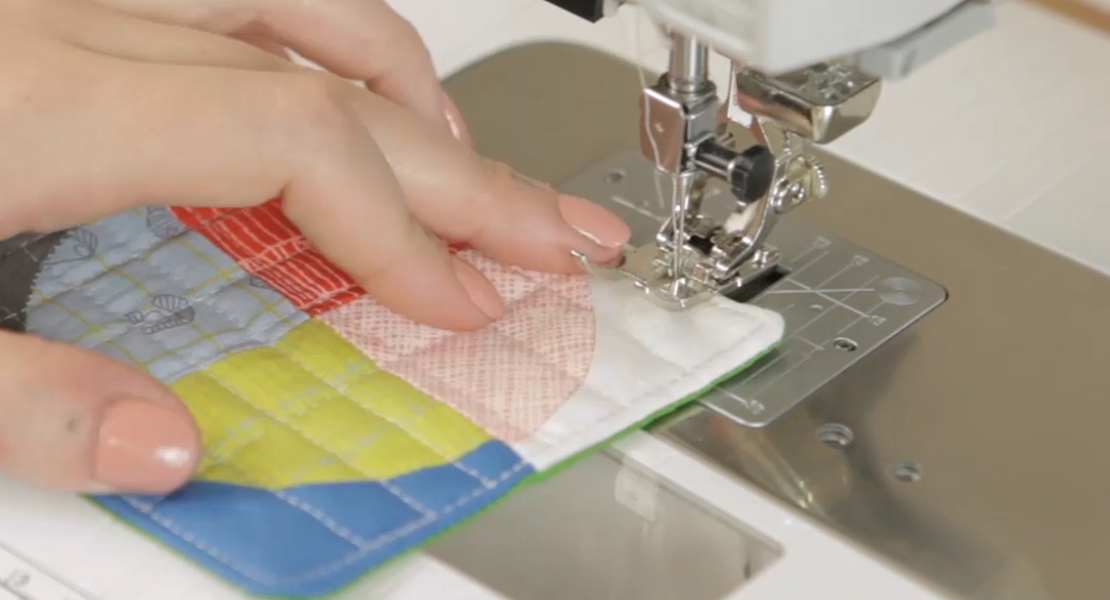
Stitch out all your coaster designs. I am using a brand new 75/11 gold embroidery needle and 40 weight Aurifil thread. I wasn’t sure if this needle would hold up, but I wanted to try it and it stitched great! However, I did forget to change the needle before my next project and instantly broke the thread. This needle was definitely shot after one set of cork coasters which is impressive since gold needles tend to last longer than regular needles.
Once our designs are done, remove your hoop from the machine, but DO NOT remove your coasters from the hoop. With the stabilizer and cork still in the hoop, turn the hoop over and tape another piece of cork, right side out, with tear away embroidery tape from OESD. Make sure it is taped well and take care not to let any corners fold back when putting the hoop back on the machine.
Now we stitch out our decorative stitch circles. This will hold our coasters together and be the only stitching visible on the back of our cork, so you may want to switch to a bobbin that matches your top thread, if you haven’t got one already.
Hoorayyyyy! The embroidery is done! Pull your hoop off the machine and your finished coasters out of the hoop.
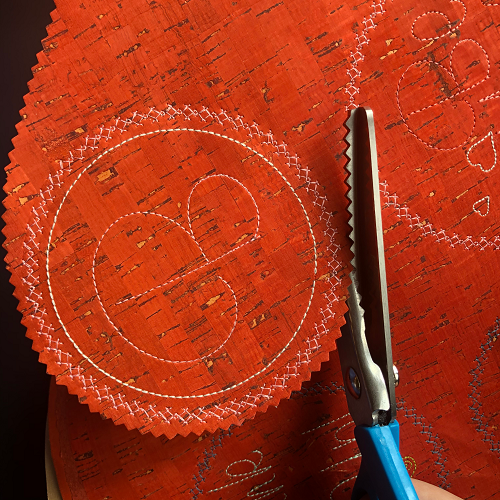
Support your stitches as you tear away your StabilStick from in between the cork layers extending beyond the decorative stitches.
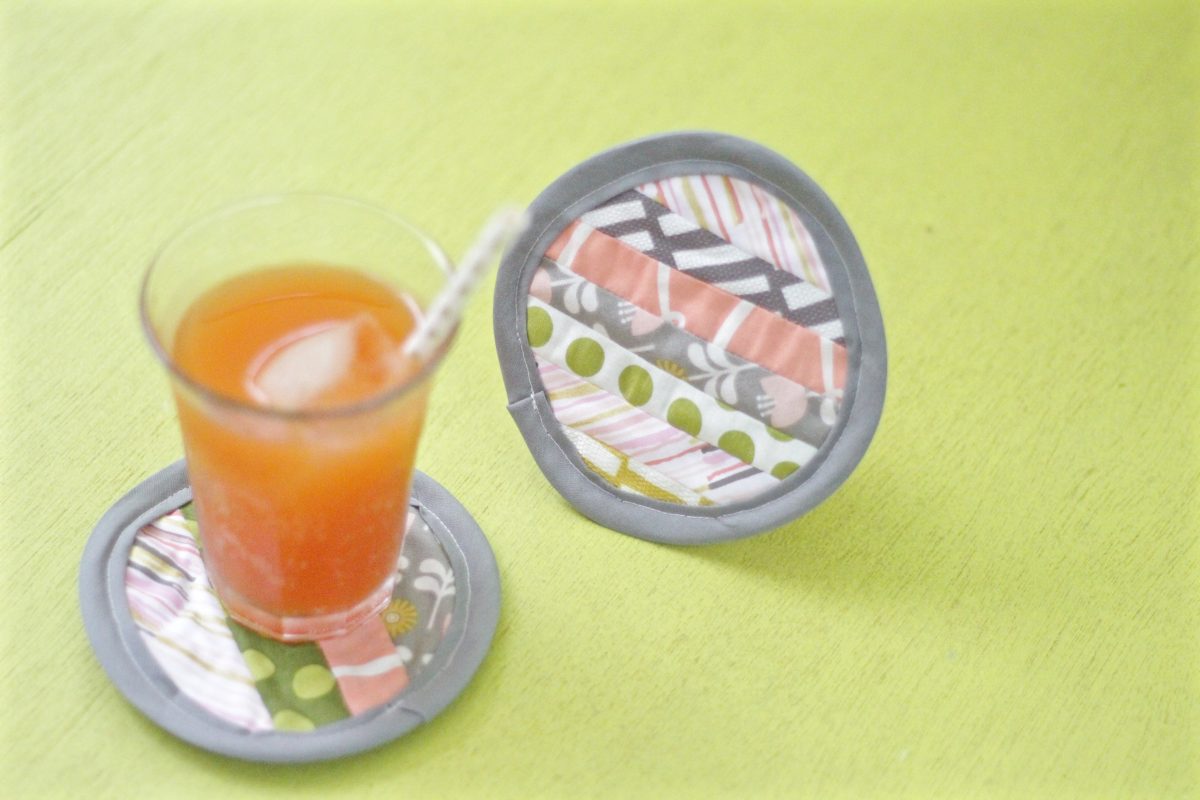
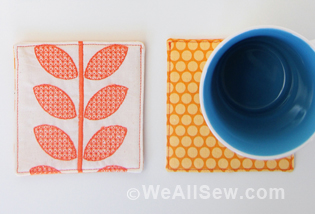
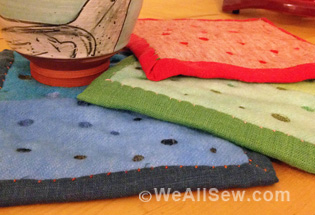
I liked using my pinking shears to cut out each of the coasters, but you can cut them out in any way you’d like. If you do use your pinking shears, be mindful of how much space you have in between each coaster and be careful to keep your great zig zagged points.
Viola! Great coasters done so quickly! And look at you…you even digitized them yourself. Absolutely impressive, and now you can make some for every occasion.
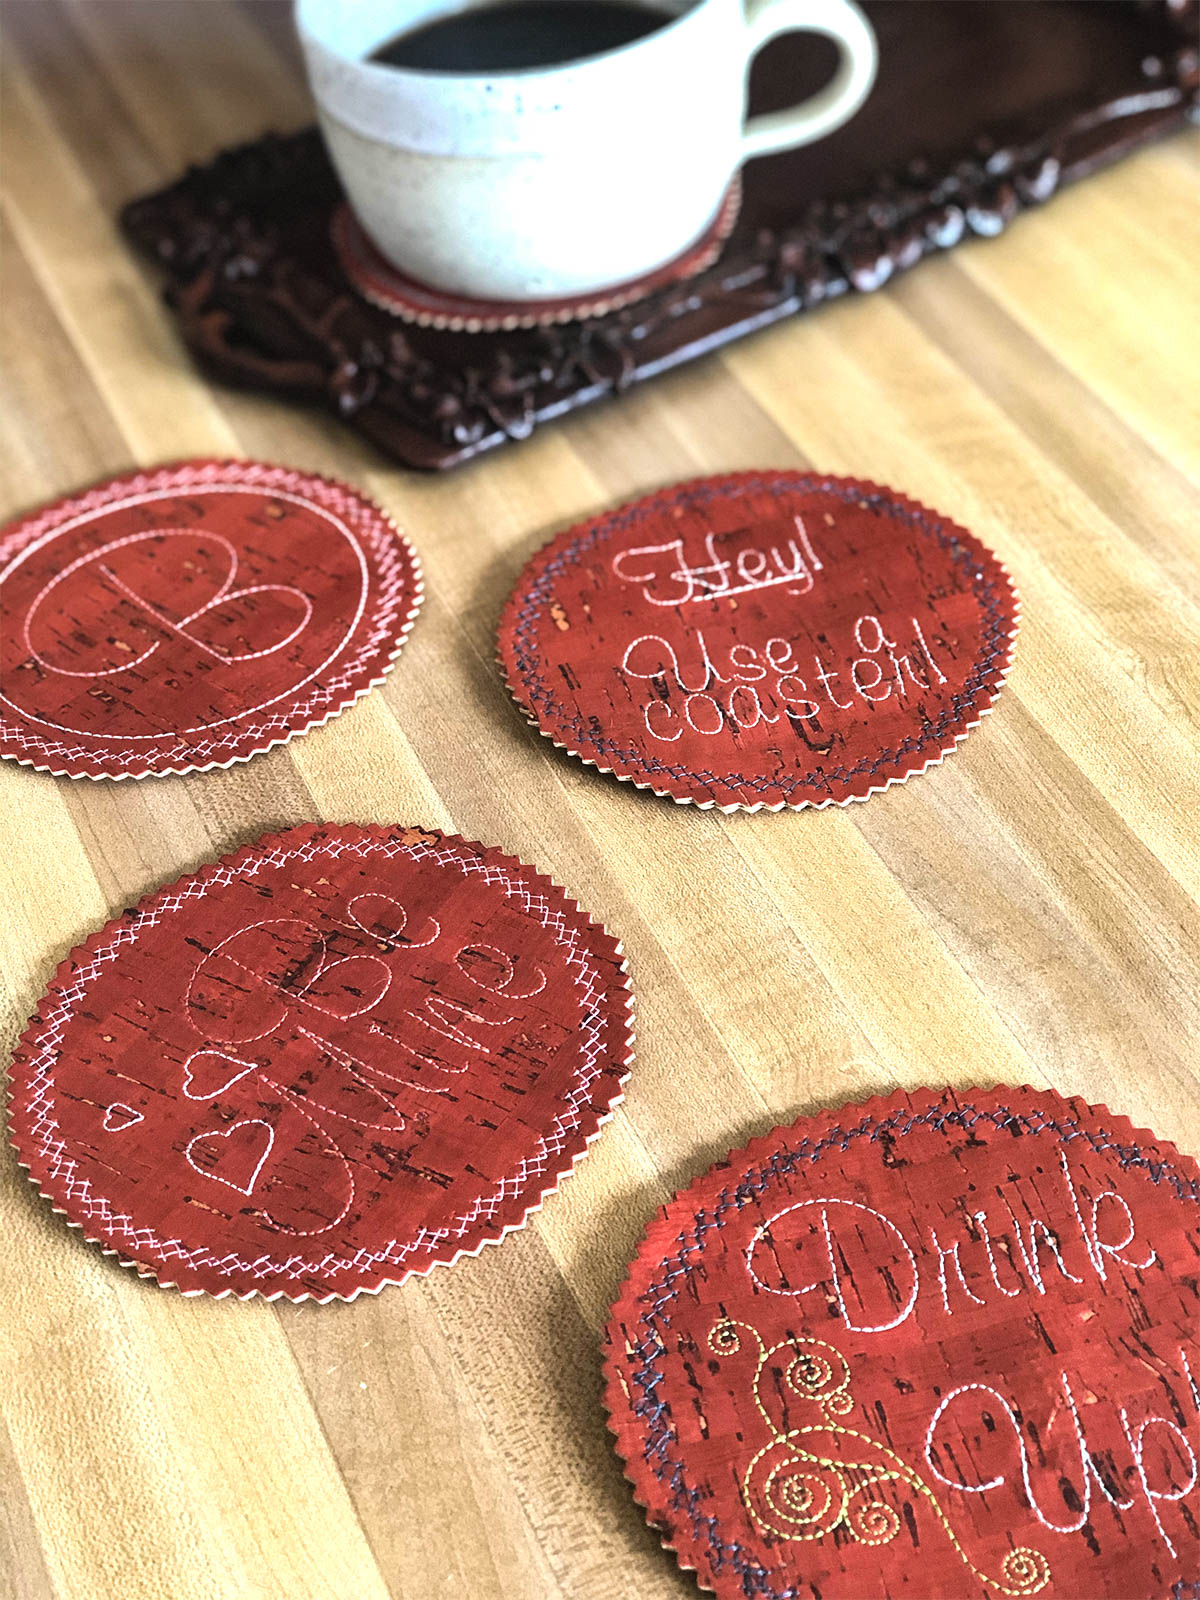
These make a great addition to your own home and an even better last minute hostess gift. I love a useful hostess gift that is quick, simple and uses up scraps and this one ticks all the boxes.
Please tag me @ToughKittenCrafts on Instagram if you share your coasters, I would love to see what you create!
Used Products
What you might also like

3 comments on “How to Digitize and Personalize Coasters”
-
-
Can this be created in Bernina Embroidery Editor Plus software Version 7? thank you.
-
So fun Kate! These would be great for custom coasters at graduation and birthday parties!
Leave a Reply
You must be logged in to post a comment.
can I save this project to my PC? My Wifi is spotty at best.