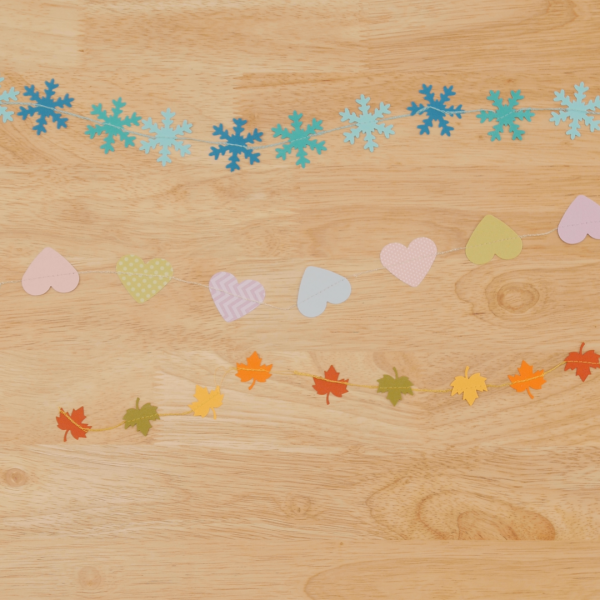
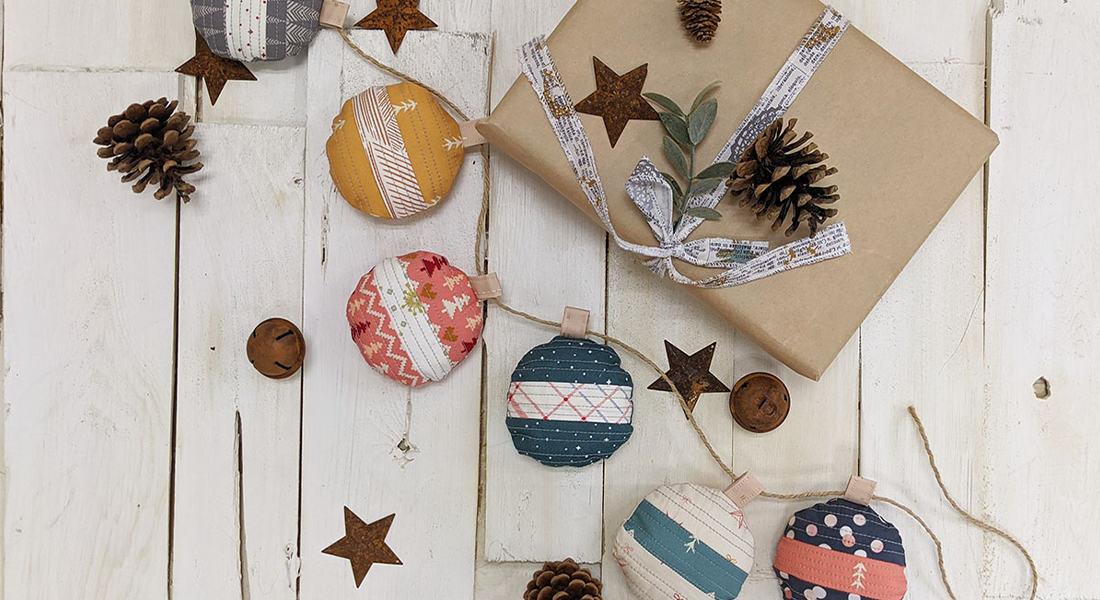
How to Make a Chainstitch Garland
Are you someone who loves to decorate for every single holiday there is? I love decorating for dinners, parties, seasons, events, and every holiday imaginable. With the chainstitch garland, I now have a simple project that I can use to make a decoration for any event that might come my way. The garland can be hung on the wall or wavy on a table, is small enough to store easily, and quick enough to make in less than an hour!
Supplies to Make Chainstitch Garland
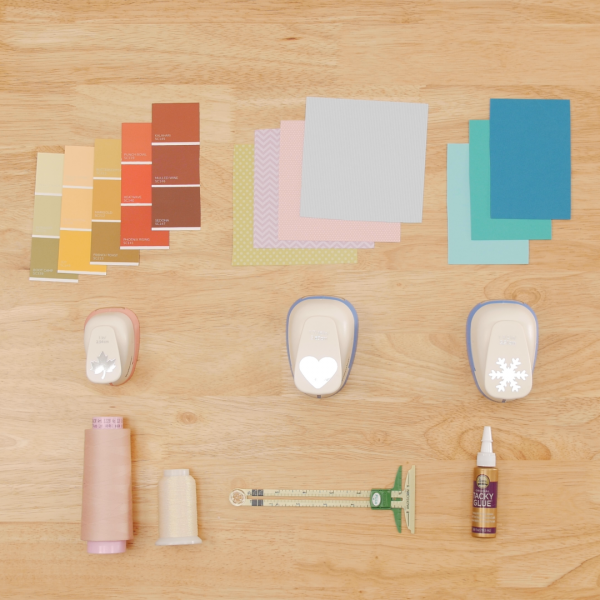
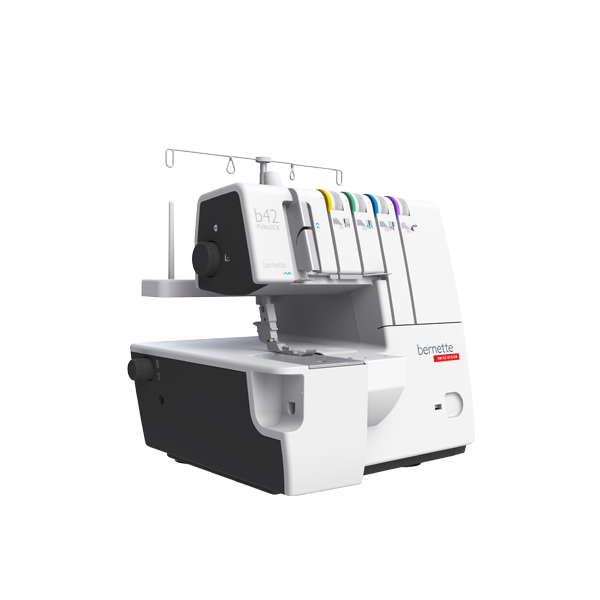
- bernette 42 FUNLOCK
- Mettler Seracor thread
- Yenmet Pearlessence metallic thread
- Schmetz Microtex or Universal needle size 80/12
- Paper medium (I used construction paper, craft paper, and paint samples)
- Paper punch
- Seam gauge
- Tacky glue or Fray Block
- Thread snips
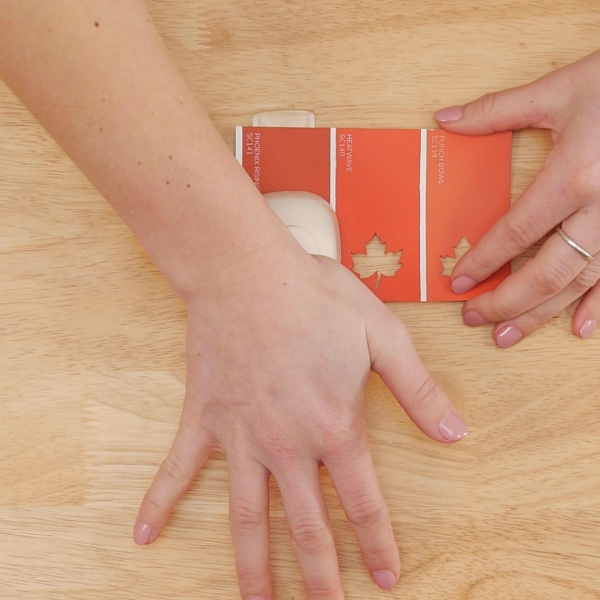
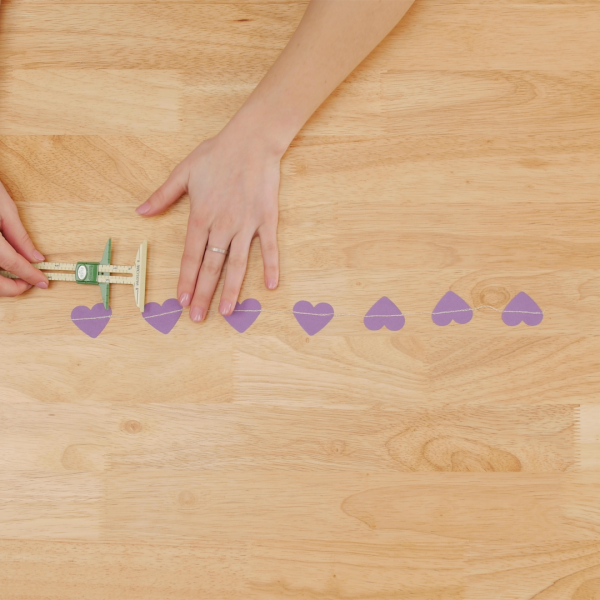
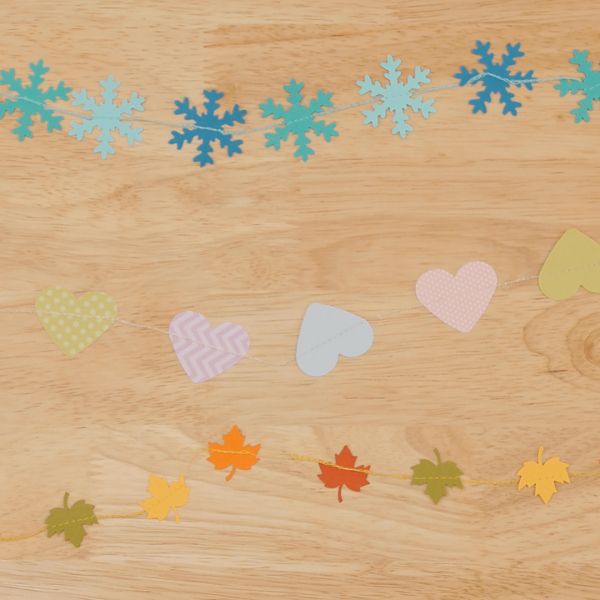
The first step is to pick out the shape. Craft and scrapbooking stores have several different punches, all in different sizes. I picked three different shapes and sizes. The leaves are 1”, the hearts are 1 7/16”, and snowflakes are 1 1/2″. I found that the heart shape can be used for several occasions, and any color of paper works well.
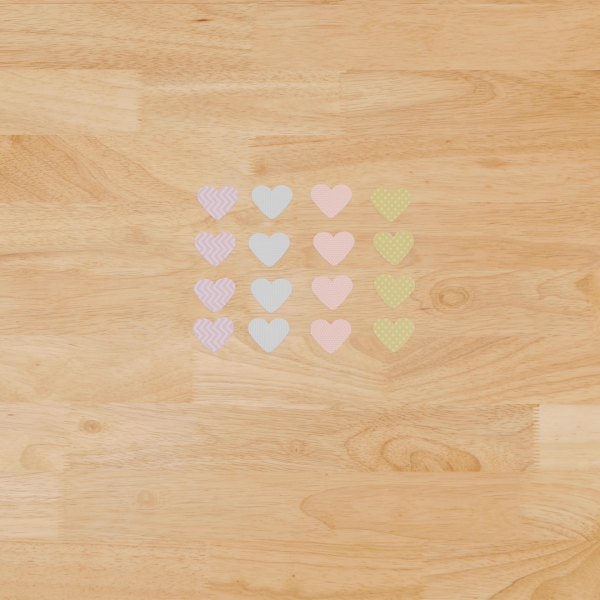
Next, pick out the paper medium. Paint samples have beautiful fall colors, so of course, I had to punch out leaves. I chose shades of blue for the snowflakes, that way the garland can stay up all winter long. Experiment with prints, as I did with the hearts. Be sure to also grab spare paper to test the stitch on. Be sure it is the same thickness as what will be used for the garland.
The last choice is thread. Two threads are required to form the chainstitch. Keeping the focus on the hearts, I chose a light pink Seracor thread, along with a Pearlessence metallic thread to add a little flare and sparkle.
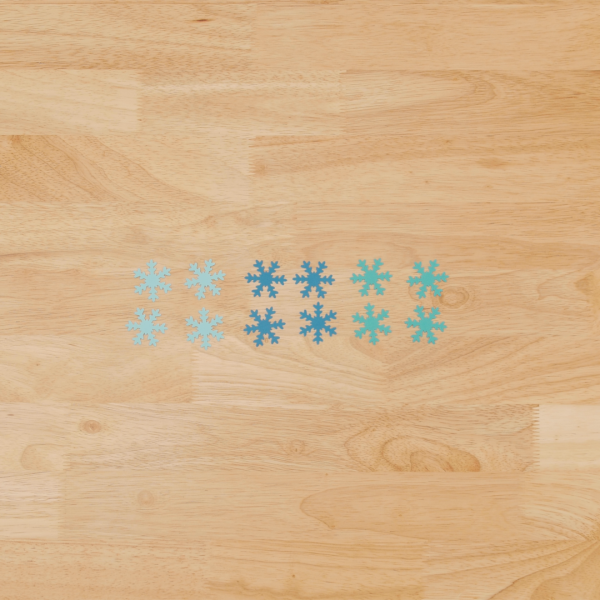
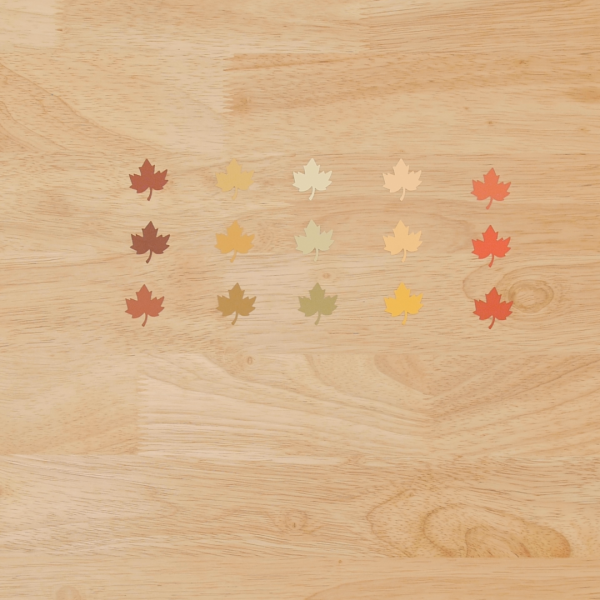
With all of the paper punch decisions made, it is time to punch out the shapes. Punch as many shapes out of the paper as possible. To give a rough estimate, I punched twelve shapes out of four different colors of paper. When stitching, I left approximately 1 1/2″ between each shape. This resulted in a 10’ garland. Punch out five to ten additional shapes from the spare paper to test sew with.
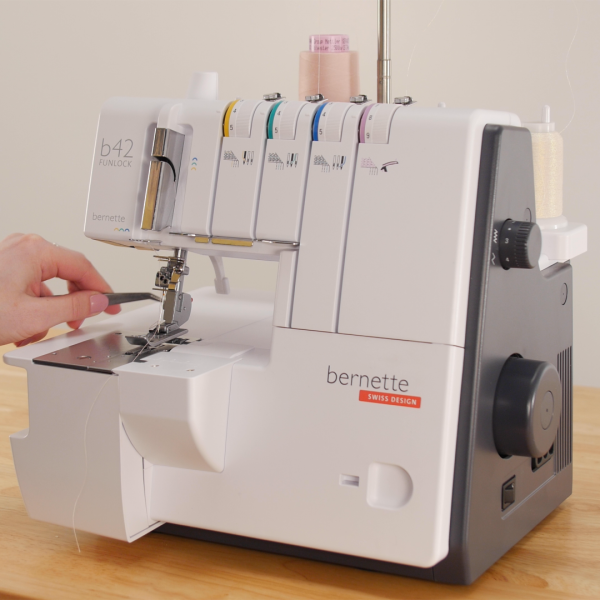
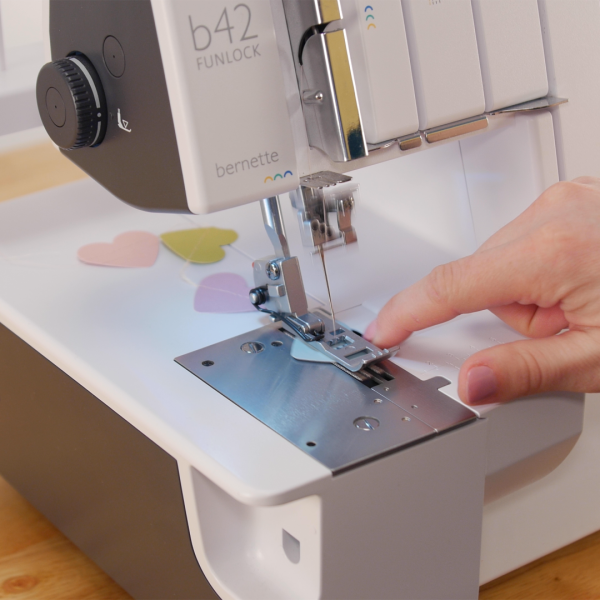
Time to thread the machine! To sew the garland, I used the bernette 42 FUNLOCK. This is a coverstitch machine that forms a beautiful chainstitch, even through paper! Make sure the presser foot is raised to begin. Thread the chain looper with the Pearlessence thread. Then thread the center needle with the Seracor. With the b 42, there are built-in tools in the front cover of the machine to assist with threading. If using a decorative thread in the looper, increase the tension to between 6 and 8.
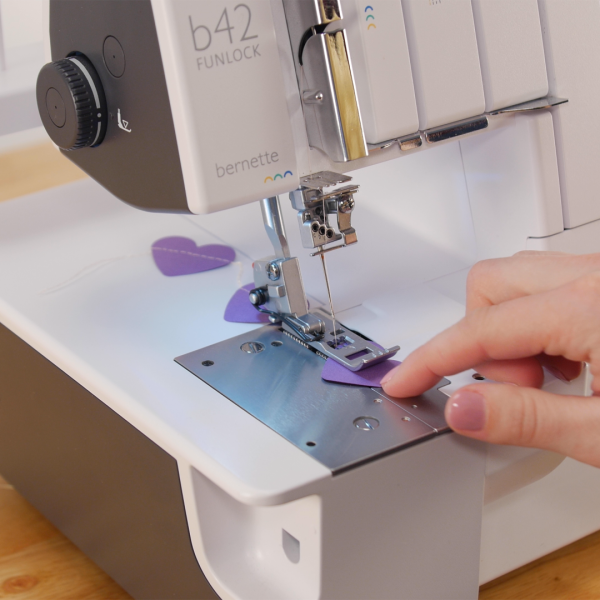
I always suggest a test stitch, even more with the garland because stitches do not come out of paper well. This will also help determine if more tension adjustments need to be made. Slowly chain off. Once the thread tails are long enough to grab, begin feeding the shapes through. Maintain a spacing of approximately 1 ½”. Use a seam gauge for precise spacing. Once a couple of shapes are sewn together, chain off and cut the threads.
Things to look at from the test are how the chainstitch looks, the spacing between the shapes is consistent, and the stitching between shapes is forming properly. Adjust the tensions and stitch length as needed, and test sew again. Once you like the look of everything, it is time to stitch the real deal.
To make things go a little faster, pre-stack the shapes according to the stitching order. As I mentioned, I used four different paper colors for the hearts, so I alternated them in a stack. Begin the garland by chaining off approximately 24”. I will show you my method for finishing after the garland is stitched together. With the long chain to the back of the machine, begin feeding the shapes through just as it was done with the test garland. If the paper has a print, make sure it is facing right side down to show the chainstitch after being sewn. When the stack is gone, chain off another 24” and cut the threads.
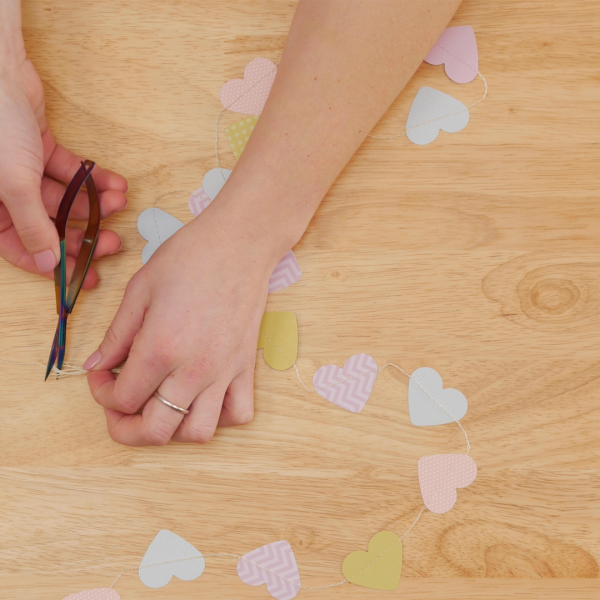
There are a few ways to finish the ends of the garland. The easiest would be to snip the threads close to the shapes on each end. If using this method, I would suggest adding a dot of craft glue or Fray Block to prevent the stitch from unraveling. If you chained off more thread, you can create a tassel. To do this, place the beginning of the chain in a hand. Grab the end and begin wrapping it around the hand to form loops. Make sure that the end of the thread tail is even with the loops formed on the hand.
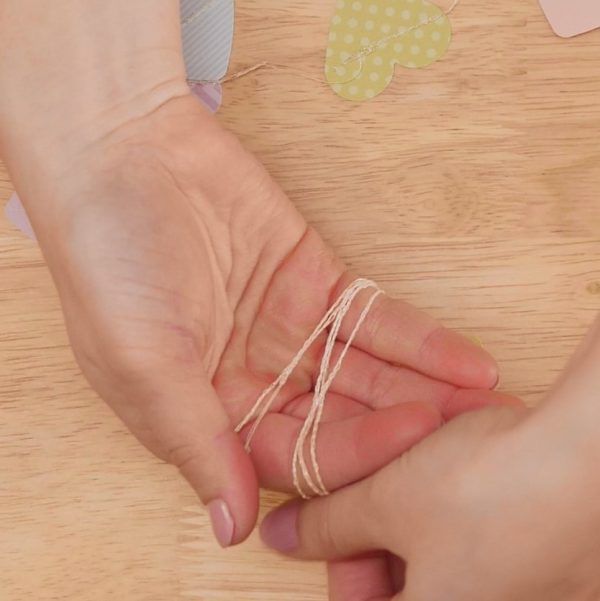
Carefully remove the loops from the hand. Take the end, one length of a loop, and wrap it around the top of the all loops, leaving approximately 1 cm of loop showing at the top. Secure the end in place with tacky glue or Fray Block. Once this is dry, clip the loop ends on the opposite end of the wrap. A simple tassel is formed!
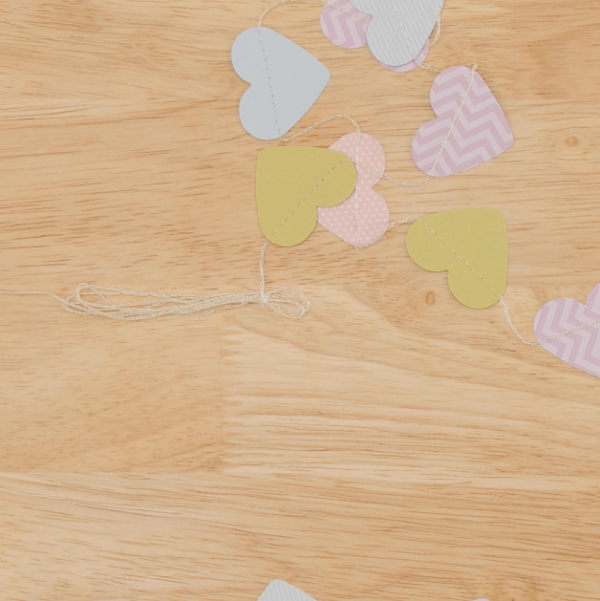
And just like that, chainstitch garland is created. The garland can be made longer or shorter, and changed for each season with a different shape or paper choice. My heart-shaped garland will be featured at a dinner party as table décor at the next gathering!
Used Products
What you might also like


2 comments on “How to Make a Chainstitch Garland”
-
-
You can by using the straight stitch on your machine, since the chainstitch is unique to the overlockers!
If you want to use the same threads, I would recommend test sewing first. Try the Pearlessence as the top thread, and wind the bobbin with Seracor. Increase the stitch length slightly to 3.0.
Hold the thread tails taut at the beginning as you begin stitching. This will ensure that the ‘chain’ is still formed between each of the punched shapes. I would also recommend using your BERNINA Free Hand System to raise the presser foot when the next shape is ready to be positioned and stitched.
-
Leave a Reply
You must be logged in to post a comment.

Can I use my regular sewing machine 570?