How to Refashion Denim Jackets with Embroidered Patches
A little about me, besides being a Mom to three adult children, I’m also a grandmother to three granddaughters. ‘Nana Lynn’ is my official title. This past year, like many of you, I haven’t been allowed to see them like I usually would. The truth is, my youngest granddaughter Brooklyn was born in December, and because of the pandemic, I just met her for the first time last week. So to stay connected with them, besides FaceTime, I created two refashioned jean jackets with embroidered patches. The patches are all sentimental and personalized, letting them know Nana is thinking about them.
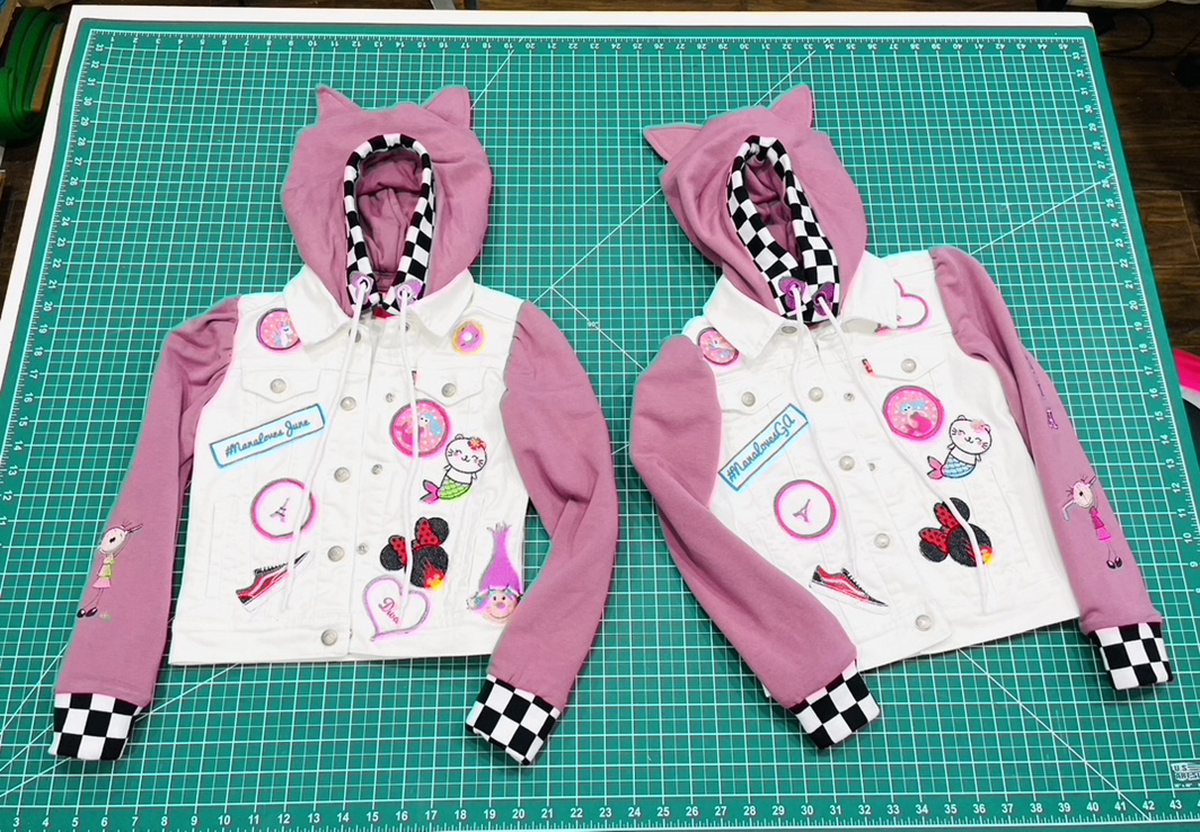
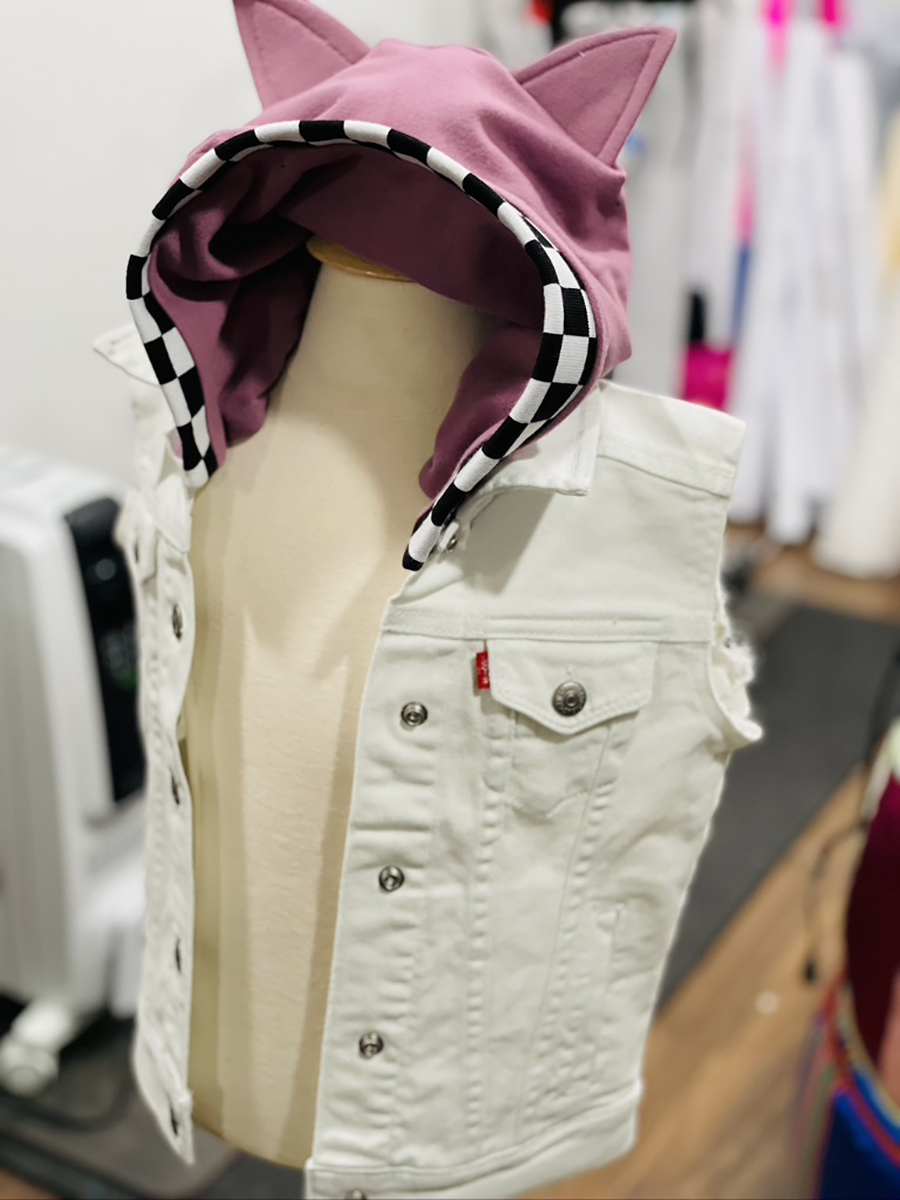
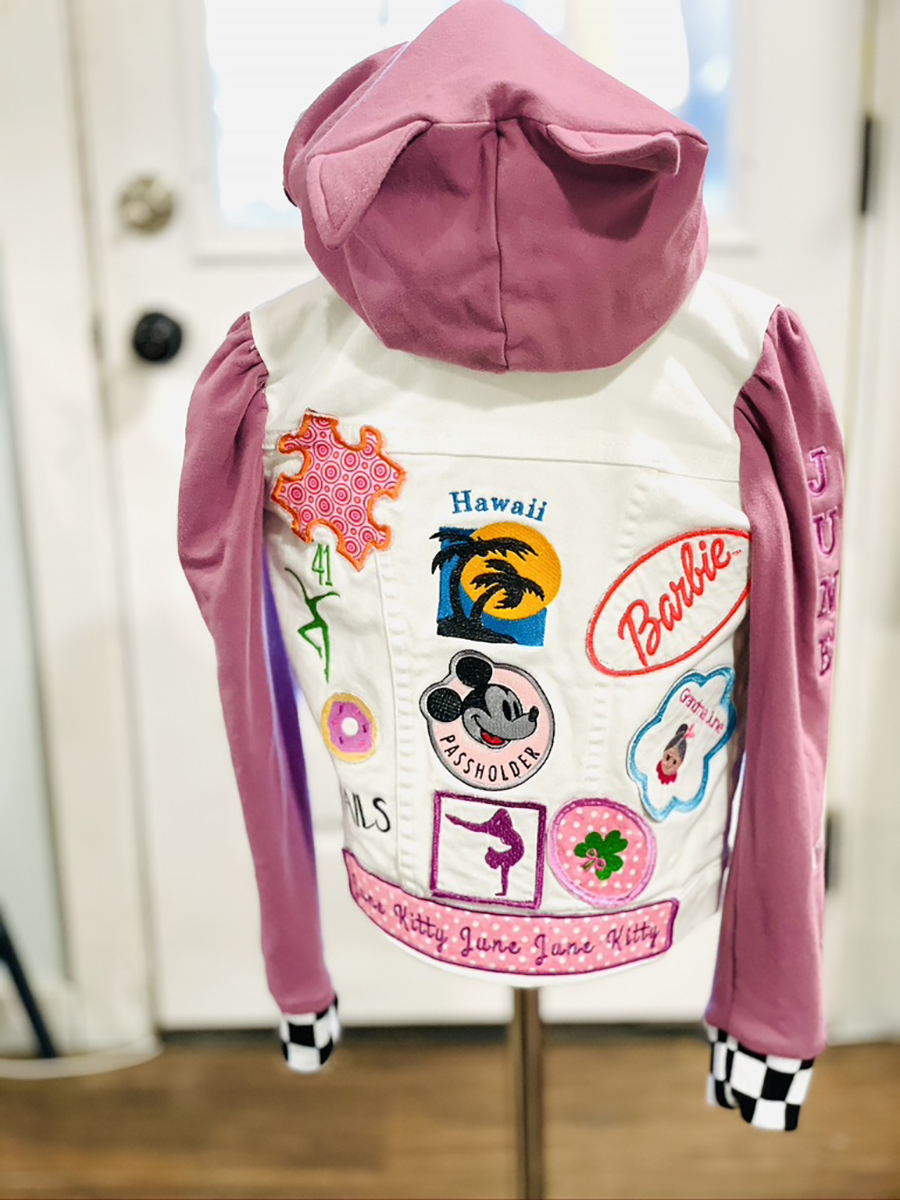
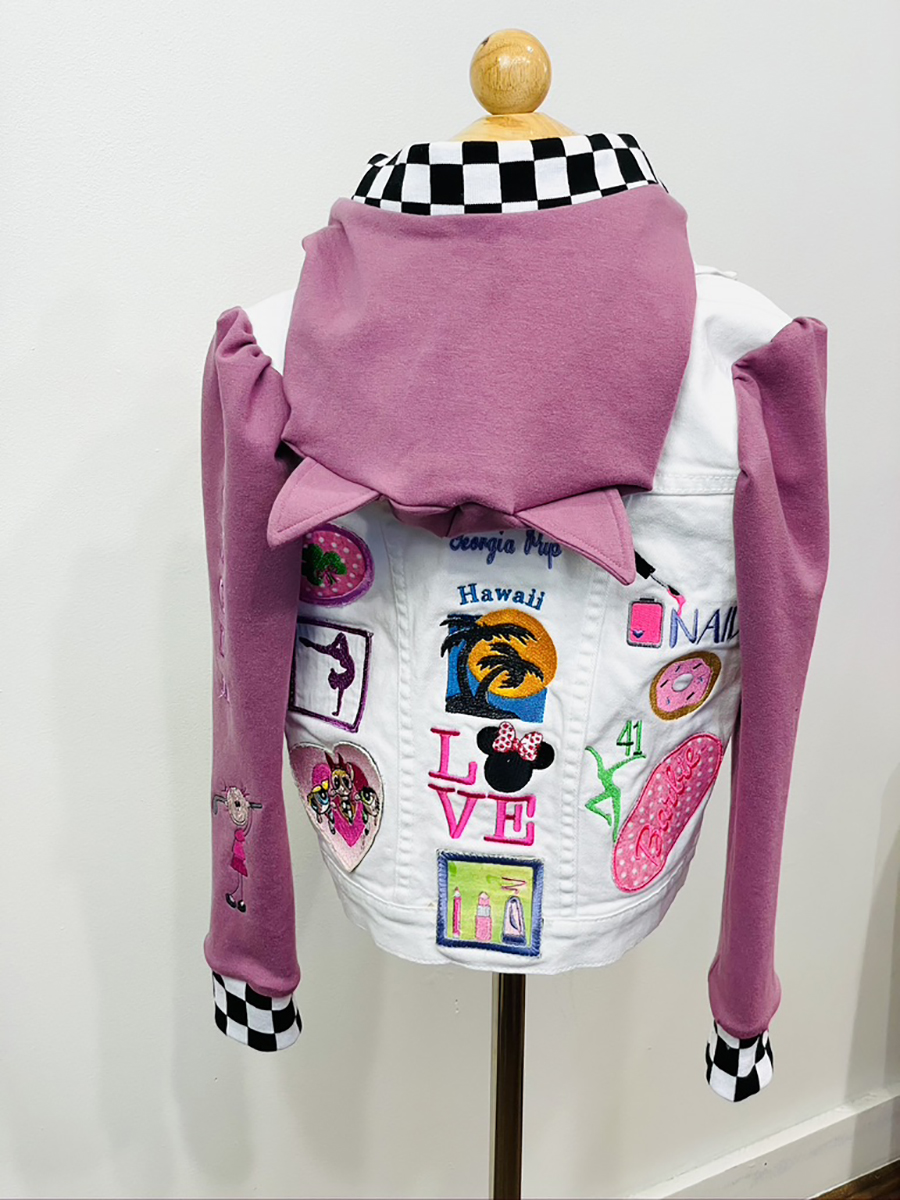
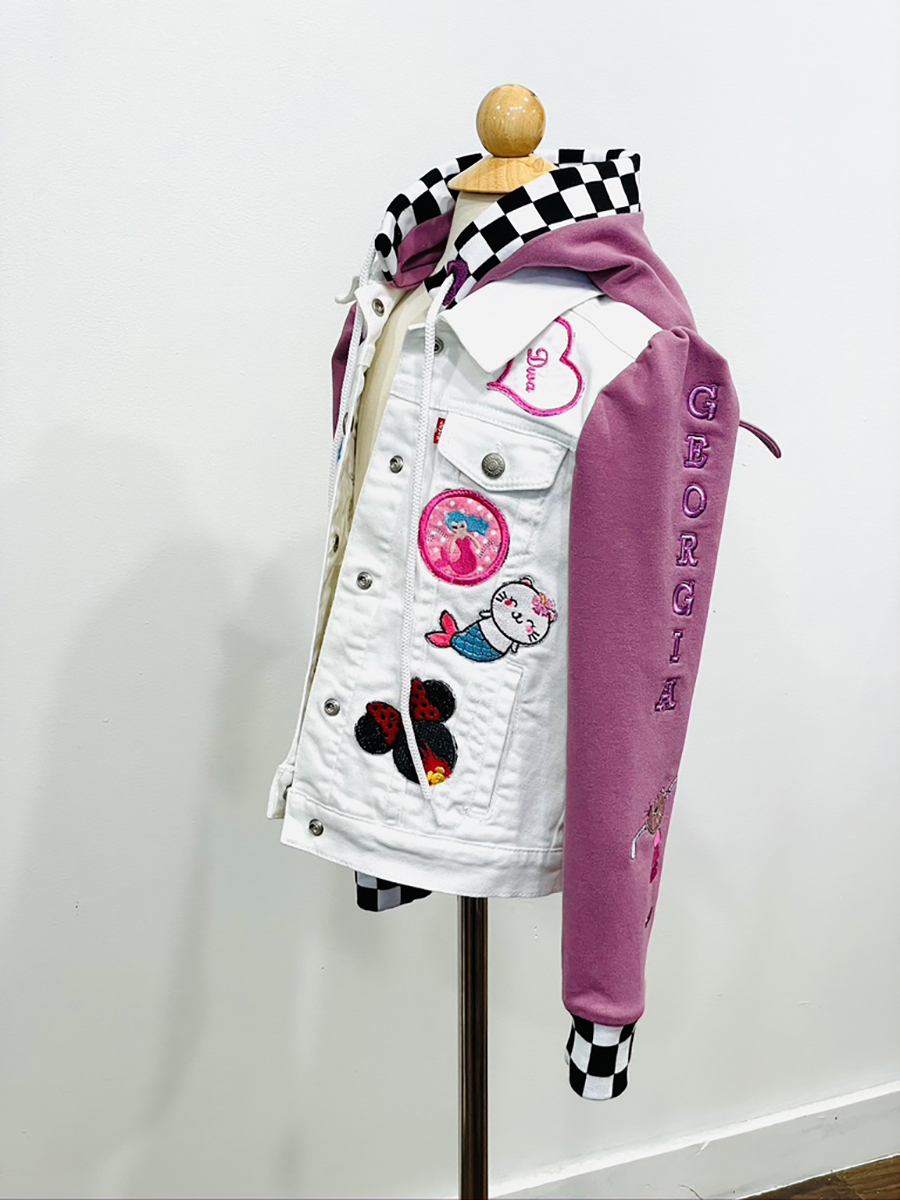
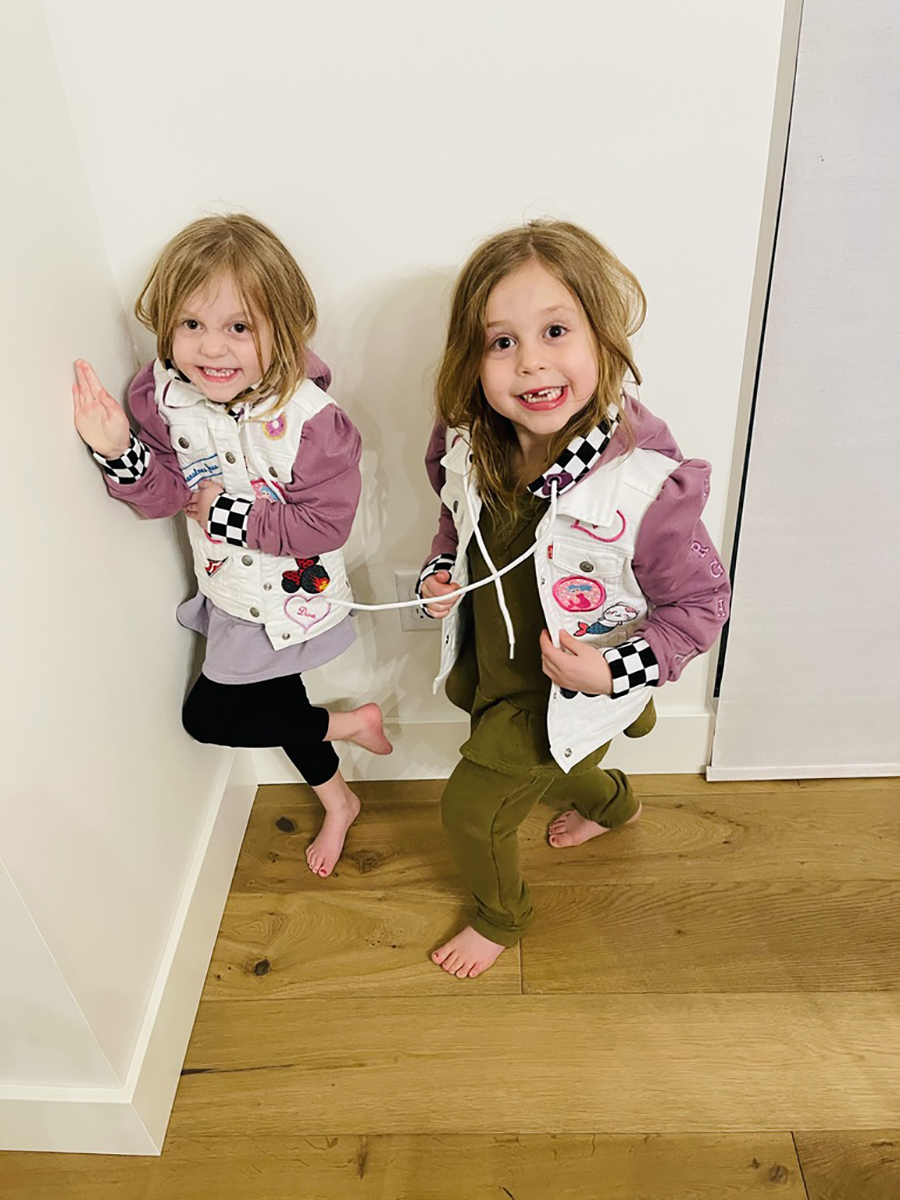
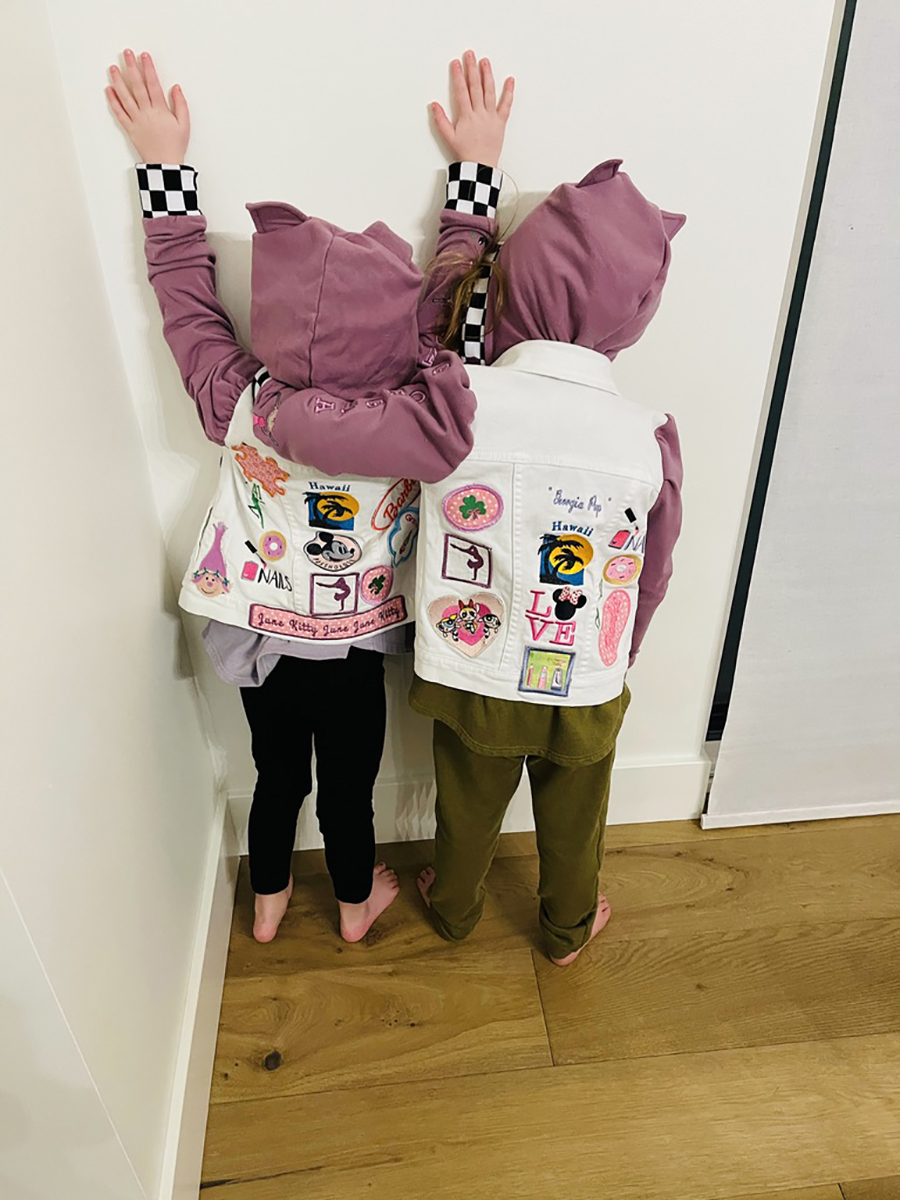
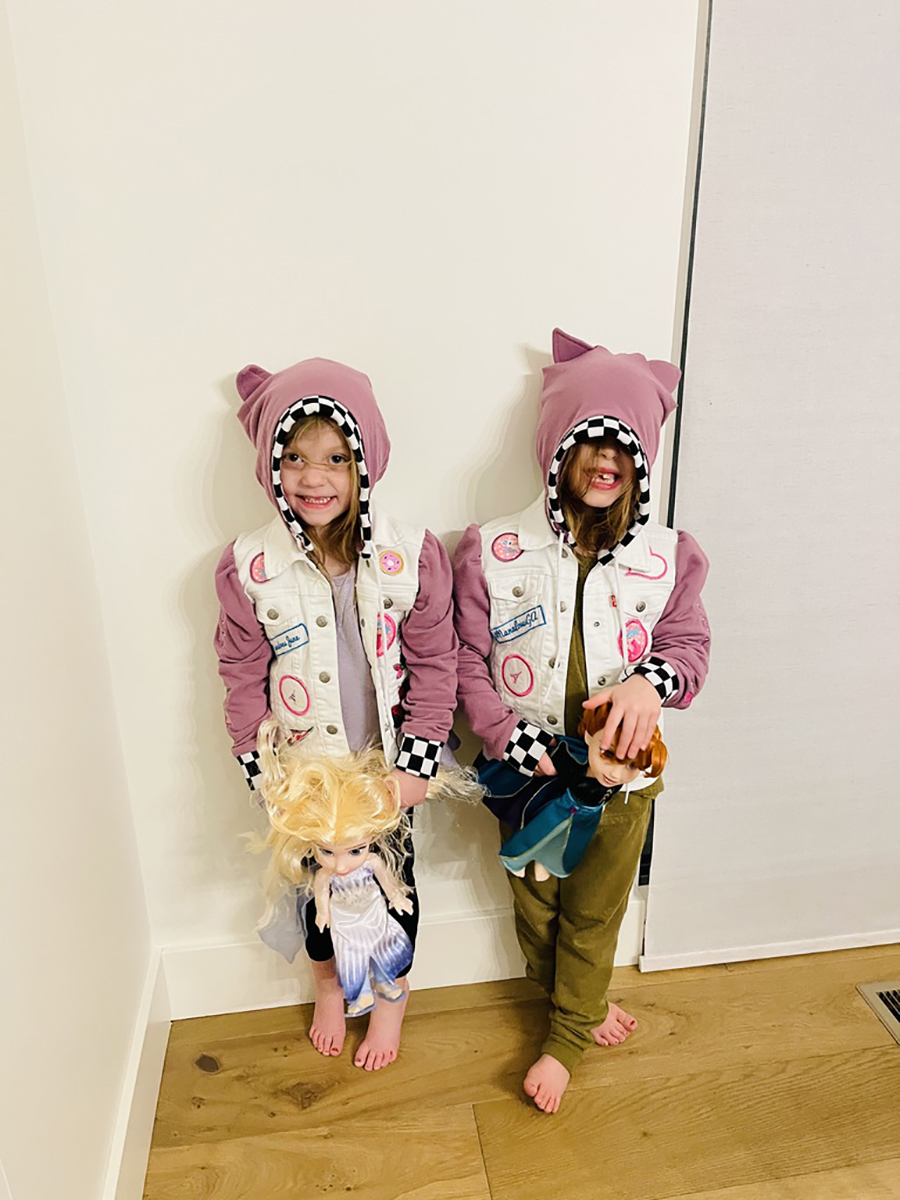
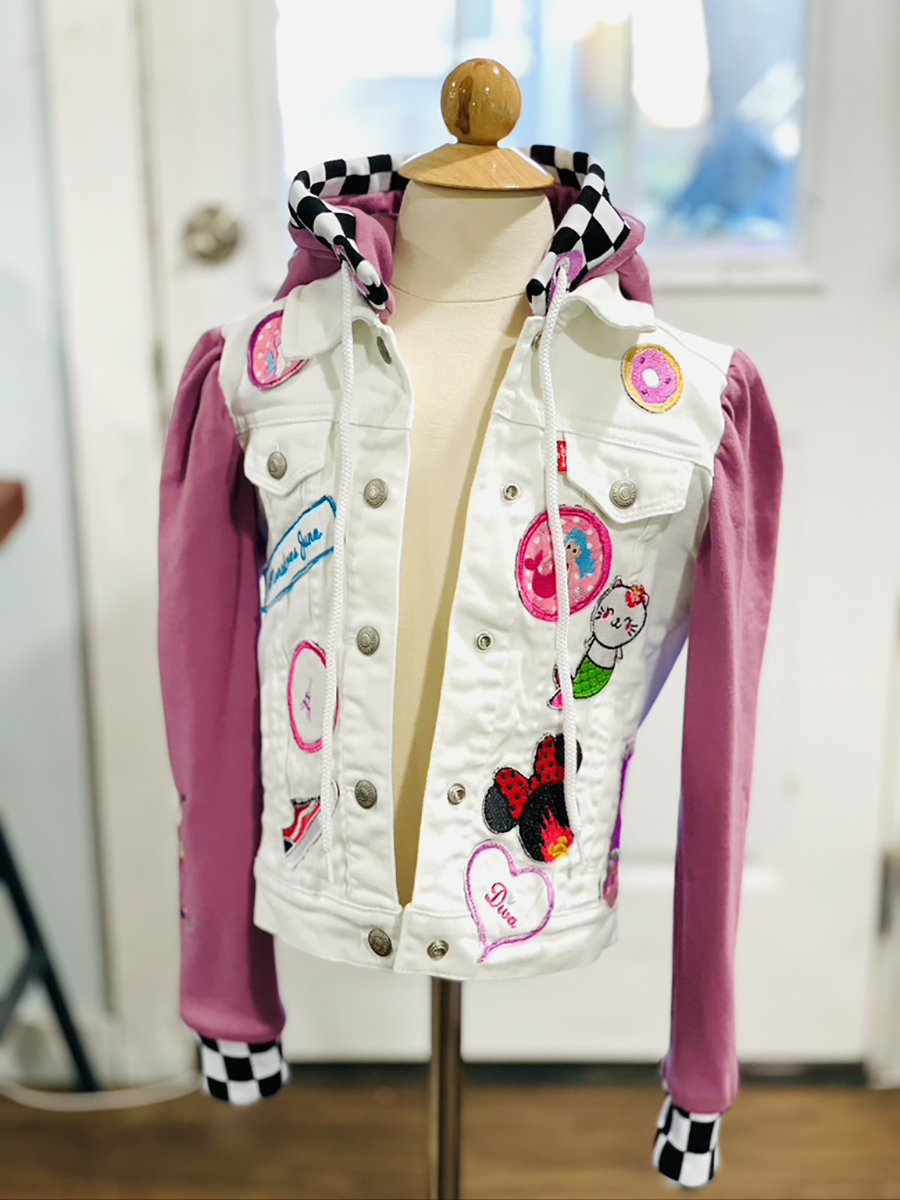
I call this project the “Favorite Things” patched jean jackets. My two oldest granddaughters, Georgia, 6, and June, 4, sisters, are typical in liking all sorts of things, like mermaids, Disney, and getting their nails painted. I refashioned two white Levi’s jean jackets, changing out the sleeves and adding a drawstring hood with ears, and then machine embroidered an assortment of patches and embroidery designs showing all their favorite things.
Materials to Refashion Denim Jackets and Embroider Patches
- 2 RTW jean jackets, thrift stores are also a great place to find an inexpensive jacket
- 1 1/2 yards Ponte knit in deep plum from Melanated Fabrics
- 1/4 yard of checked knit ribbing from Trimming Wholesale Productions in Los Angeles in the Fashion District
- 1/4 yard white cotton twill fabric (for patch base)
- 1 print quilted cotton fat quarter (for patch base)
- Medium weight cutaway stabilizer
- Adhesive Tear away stabilizer
- Sulky KK 2000 temporary spray adhesive
- Schmetz embroidery needle size 14
- An assortment of thread colors of Coates & Clarke machine embroidery thread
- Schmetz Denim needle size 14 (for attaching sleeves and hood to denim jacket)
- Schmetz Stretch needle size 14 (for assembling the sleeves and hood)
- Vintage Simplicity 0373 Hat Pattern hacked for hood (children view A)
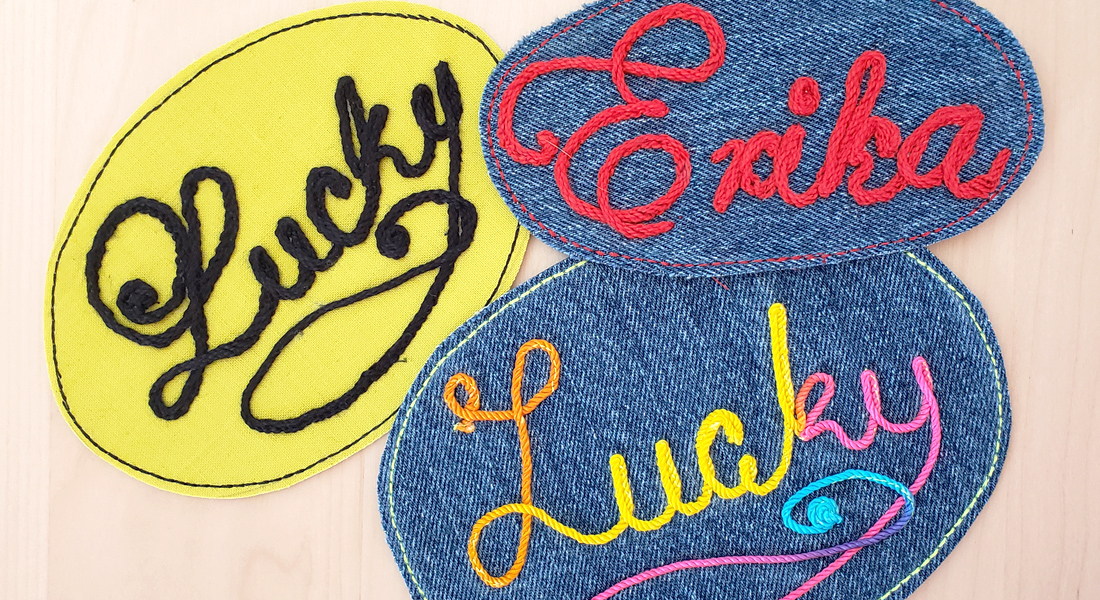
- Multiple embroidery designs downloaded from Etsy including patch outline satin-stitched “frames” and decorative embroidery eyelet holes for drawstrings
- Gutermann 100% polyester thread
- BERNINA Stitch Regulator (BSR)
- BERNINA 590 E
- BERNINA Embroidery Software 8.2
- 2 extra-long nylon shoelaces from the dollar store for the hood drawstrings
Steps to Refashion Denim Jackets and Embroider Patches
Step 1: Remove Sleeves
Unpick and remove sleeves from the jacket.
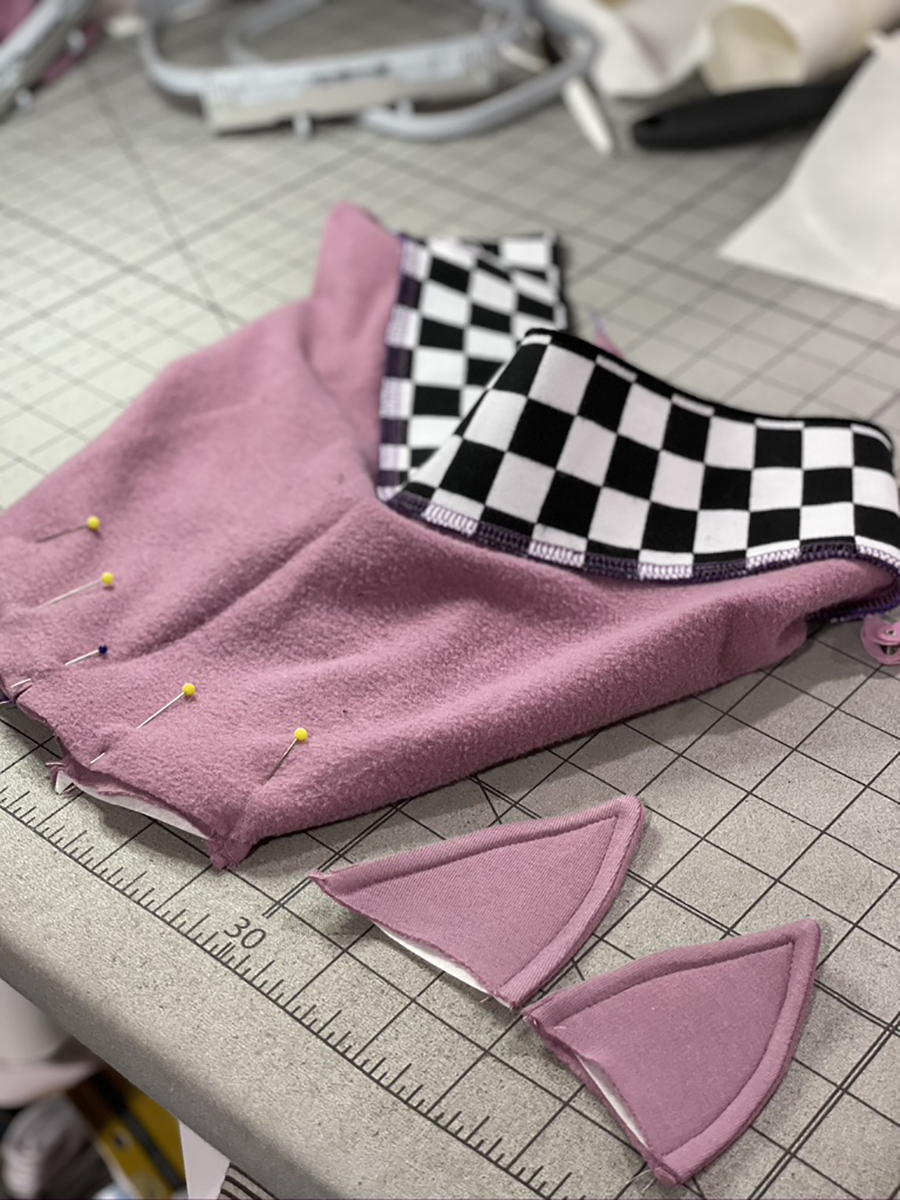
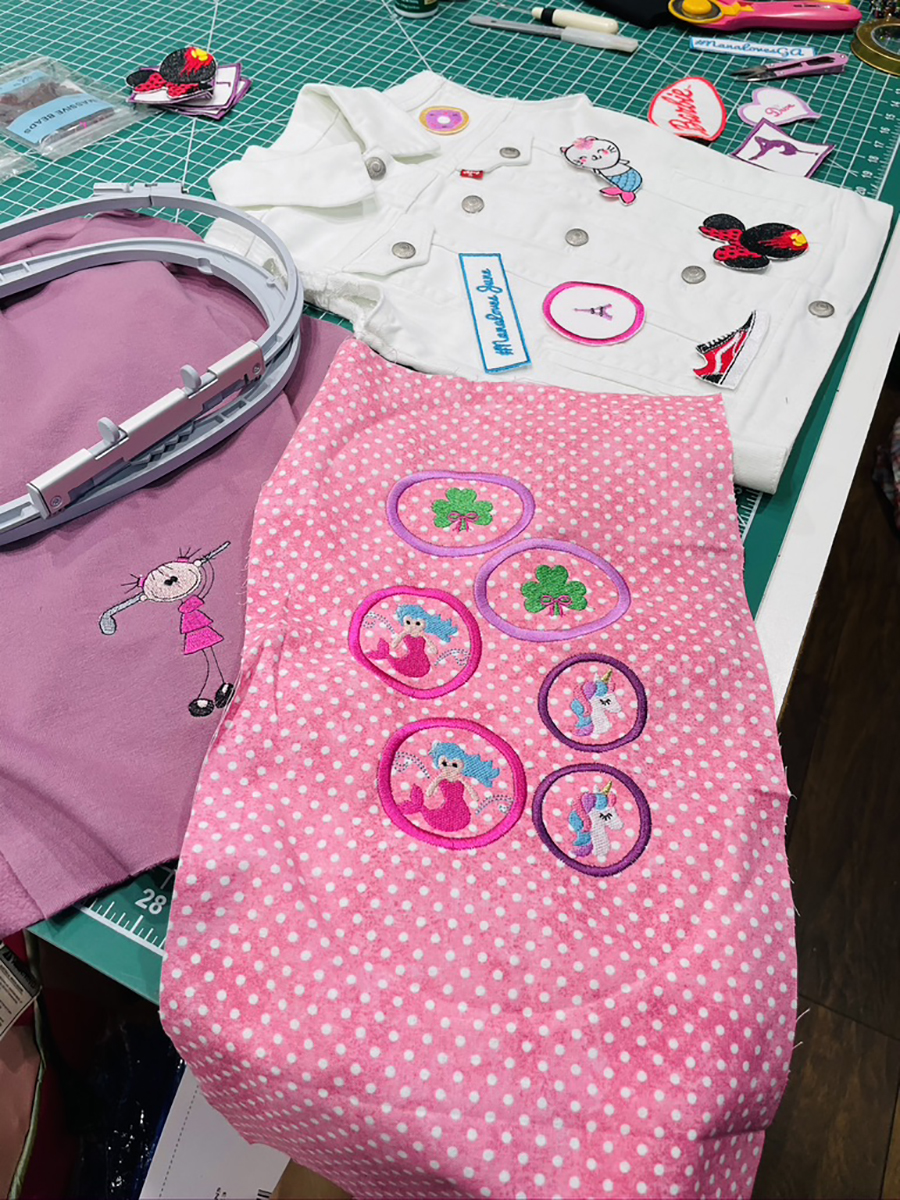
Step 2: Cut Sleeves, Hood, and Ears Out of Knit Fabric
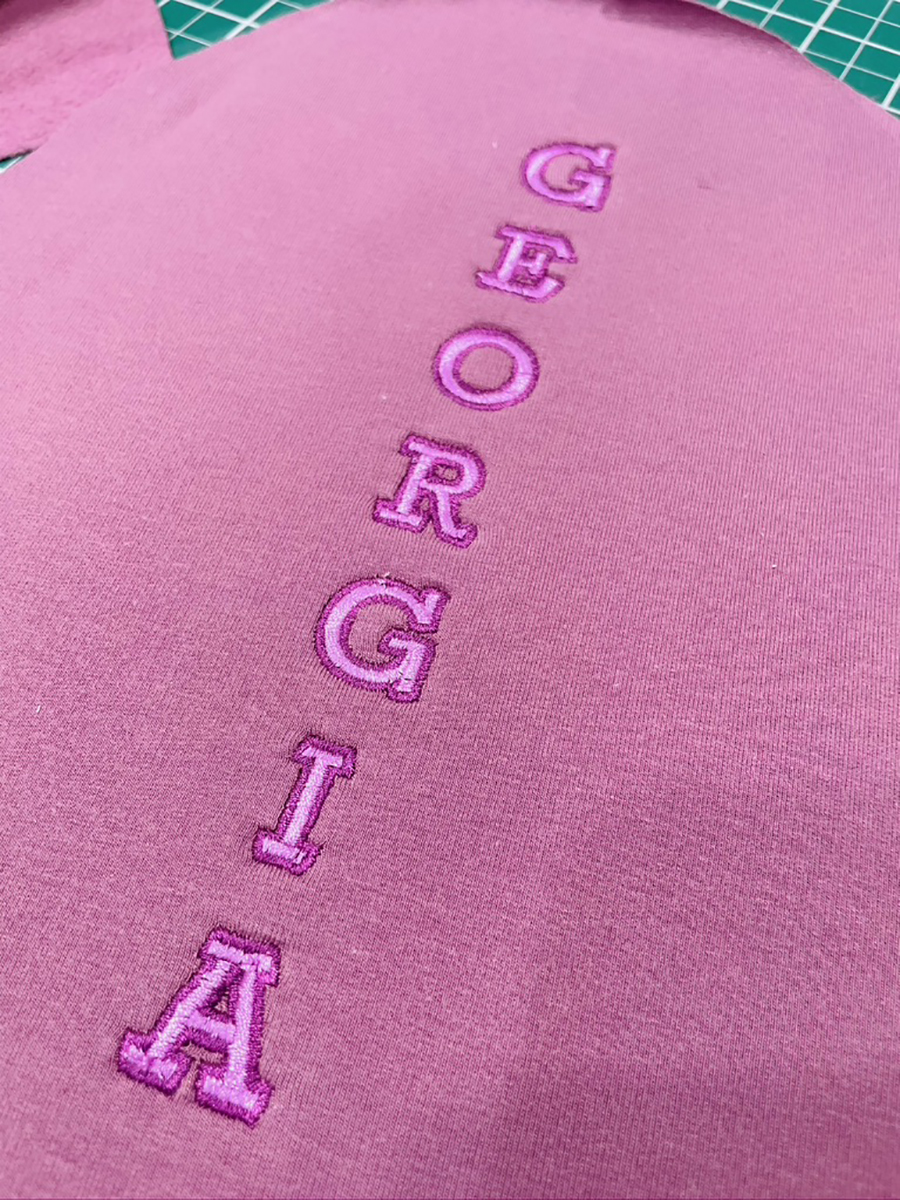
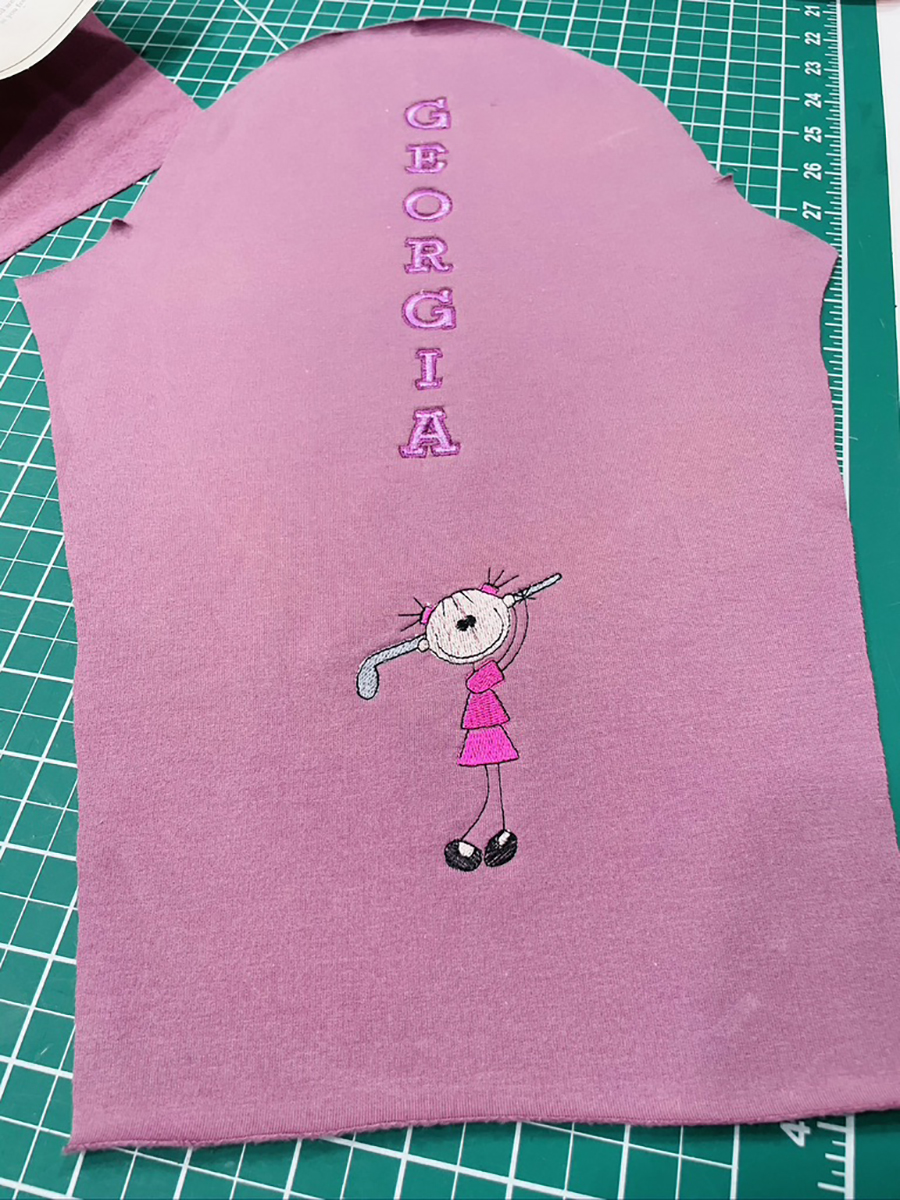
I used the Ponte knit but you can use any knit fabric you chose. French terry, stretch velour, pretty much anything with a minimal amount of stretch. I drafted my sleeves pattern, but you can use most patterns for a set in sleeved sweatshirt, so long as it’s the size coordinating with your jacket size. I embroidered their names on the length of the sleeves using the cut-away stabilizer in the hoop.

Also, cut your sleeve cuffs out of the checked knit ribbing.
Step 3: Sew Your Sleeves
Sew your sleeves from the bottom of the arms eye to the wrist. My ribbing has a finished edge, so it’s single ply. Fold the cuff right sides together, overlock finish the seam allowance and pin cuff to wrist right sides together and sew attaching the cuff to the sleeve. I then sew two rows of basting stitches on the sleeve cap to ease it into the denim jacket arms eye. I purposely made min gathered at the sleeve cap a little “puff” because that’s more girly to me. Attach your sleeve and overlock finishing your seam allowance.
Step 4: Sew the Hood/Hat Pieces
Sew the hood/hat pieces following the instructions. I then created the drawstring casing by cutting a piece of ribbing twice the finished width and length of the face front opening chin to chin, so mine was 3″ wide by 12″ long. Before I attach the casing to the hood, I mark where the drawstring eyelet holes need to be on the right side.
Step 5: Embroider Eyelet Holes
Using the downloaded decorative eyelet hole design, I embroider the eyelet holes on the ribbing at my markings. I use the sulky temporary spray adhesive to attach it to the cut-away stabilizer and hoop it in my embroidery hoop. Embroider, trim cut away and cut open eyelet hole.
Step 6: Sew the Casing
Fold the casing piece right sides together length-wise and sew each end with 1/2″ seam allowance. Trim down the seam allowances and turn the casing right side out. Baste the non folded edges together and then pin that blasted edge to the right side of the hood face edge (make sure your embroidered eyelet holes face out).

Step 7: Attach the Hood
Pin the neck edge of the hood to the inside of the jacket where the jacket collar meets the jacket body and sew in place.
Step 8: Download Embroidery Designs
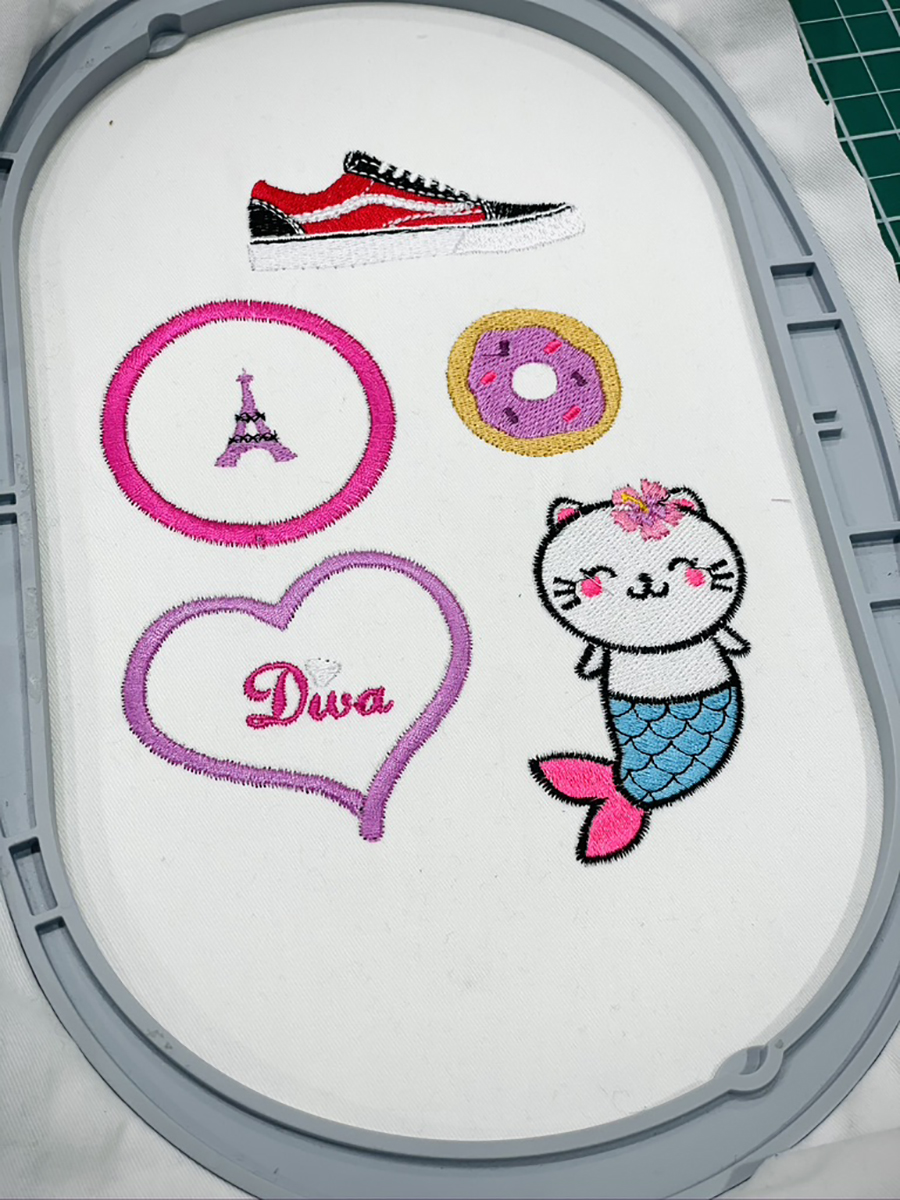
Now you are ready to embroidery all your custom patches. The fun part. I downloaded several different embroidery designs. All from multiple indie designers on Etsy, I enjoy supporting artists and small businesses. Here is the list of designs:
- Applique patch frames
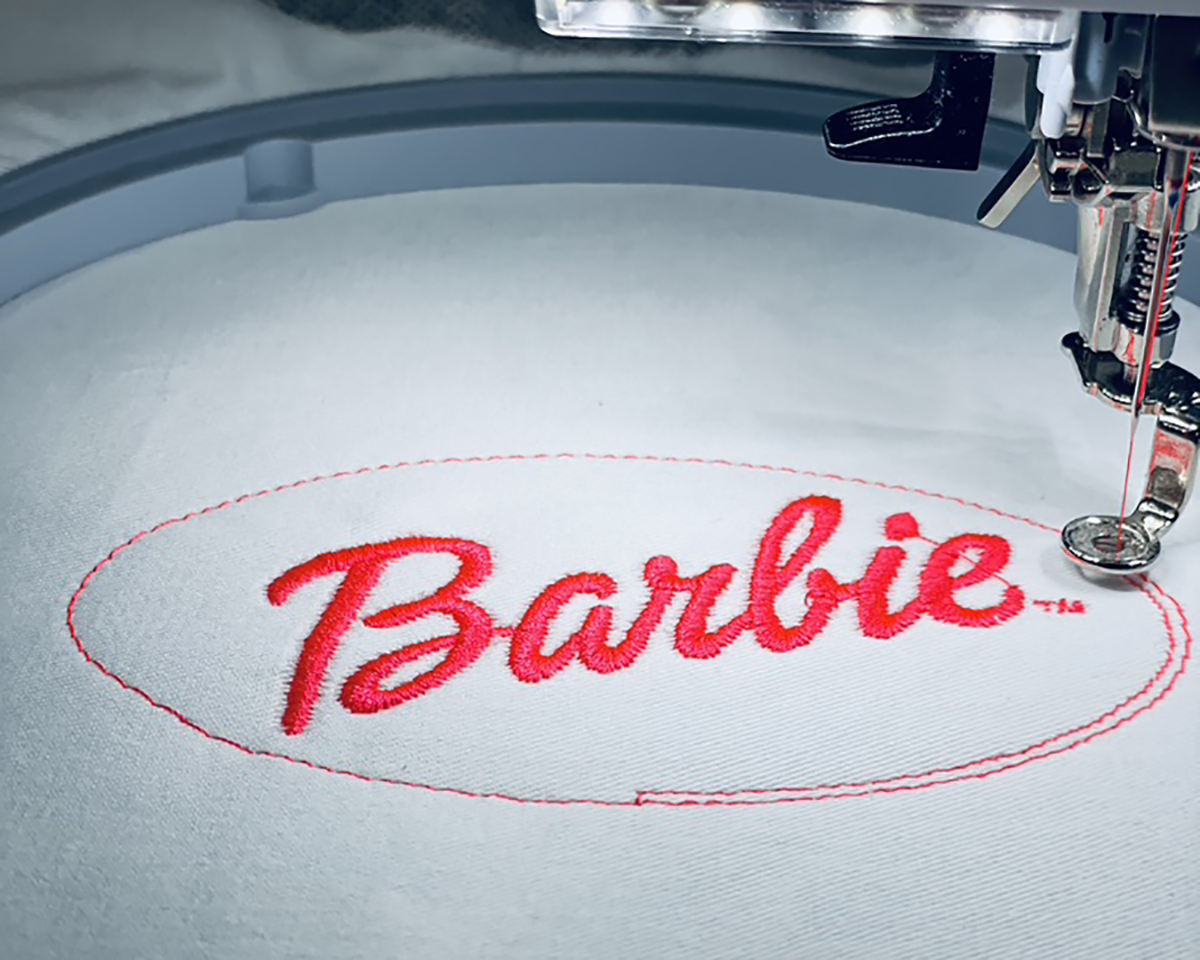
- Barbie logo
- Mini unicorn head, mini mermaid, mini grandma face
- Donut with sprinkles
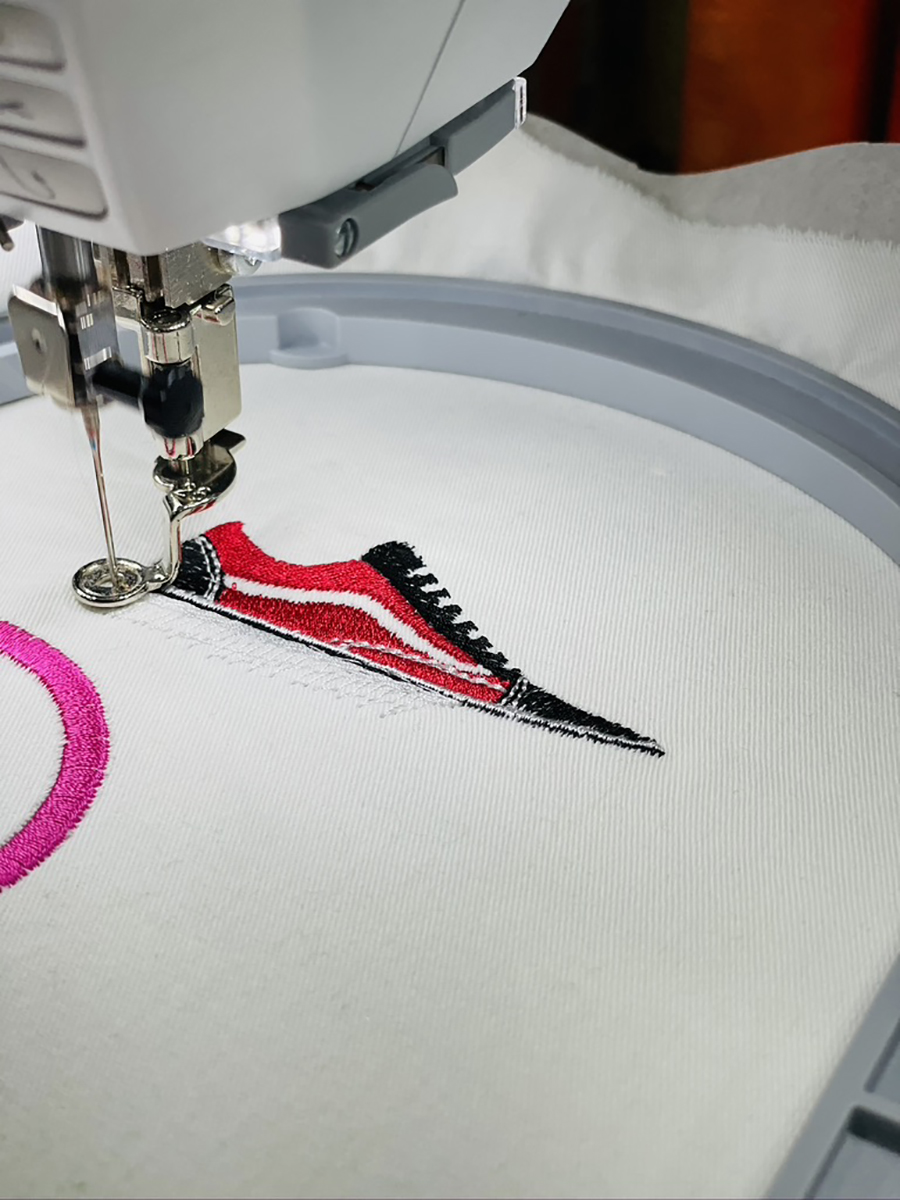
- Vans sneakers
- Disney embroidery designs
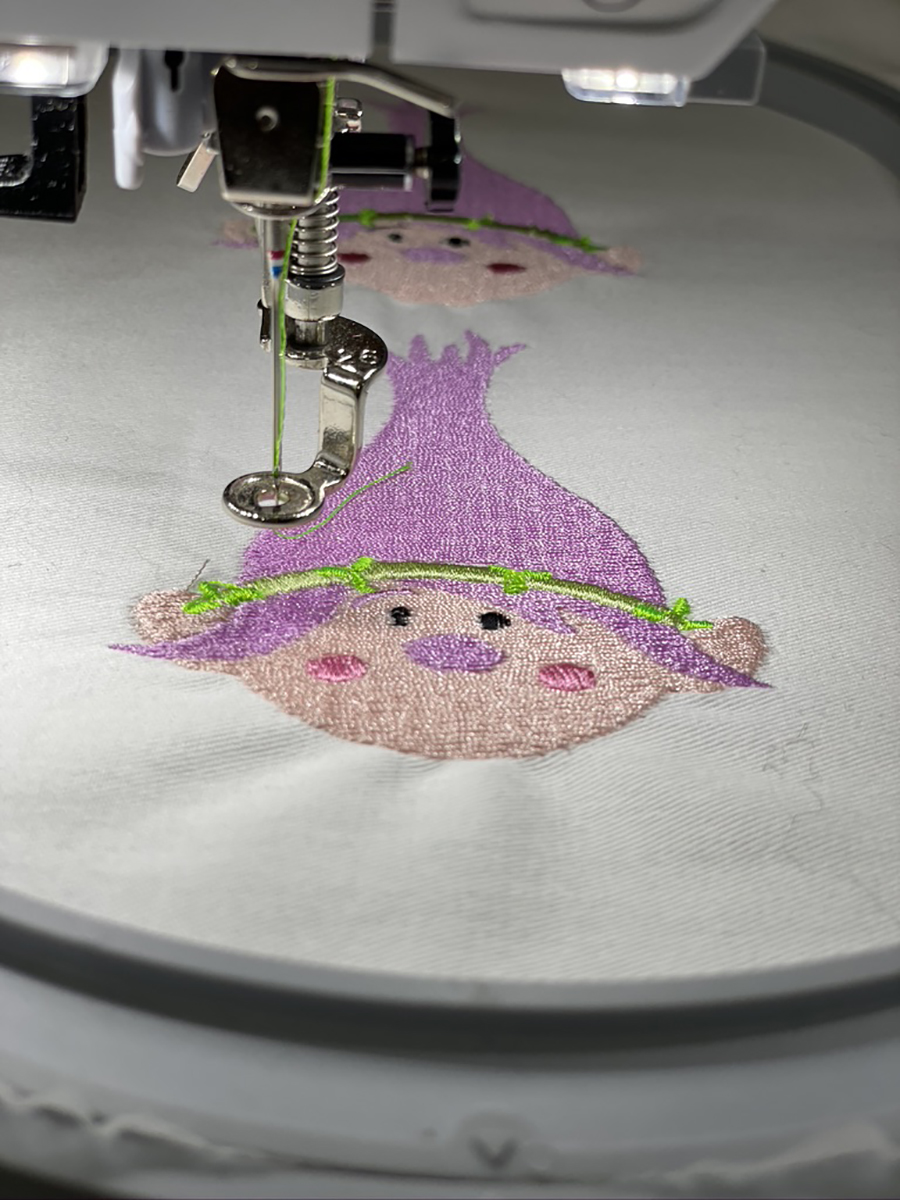
- Queen Poppy
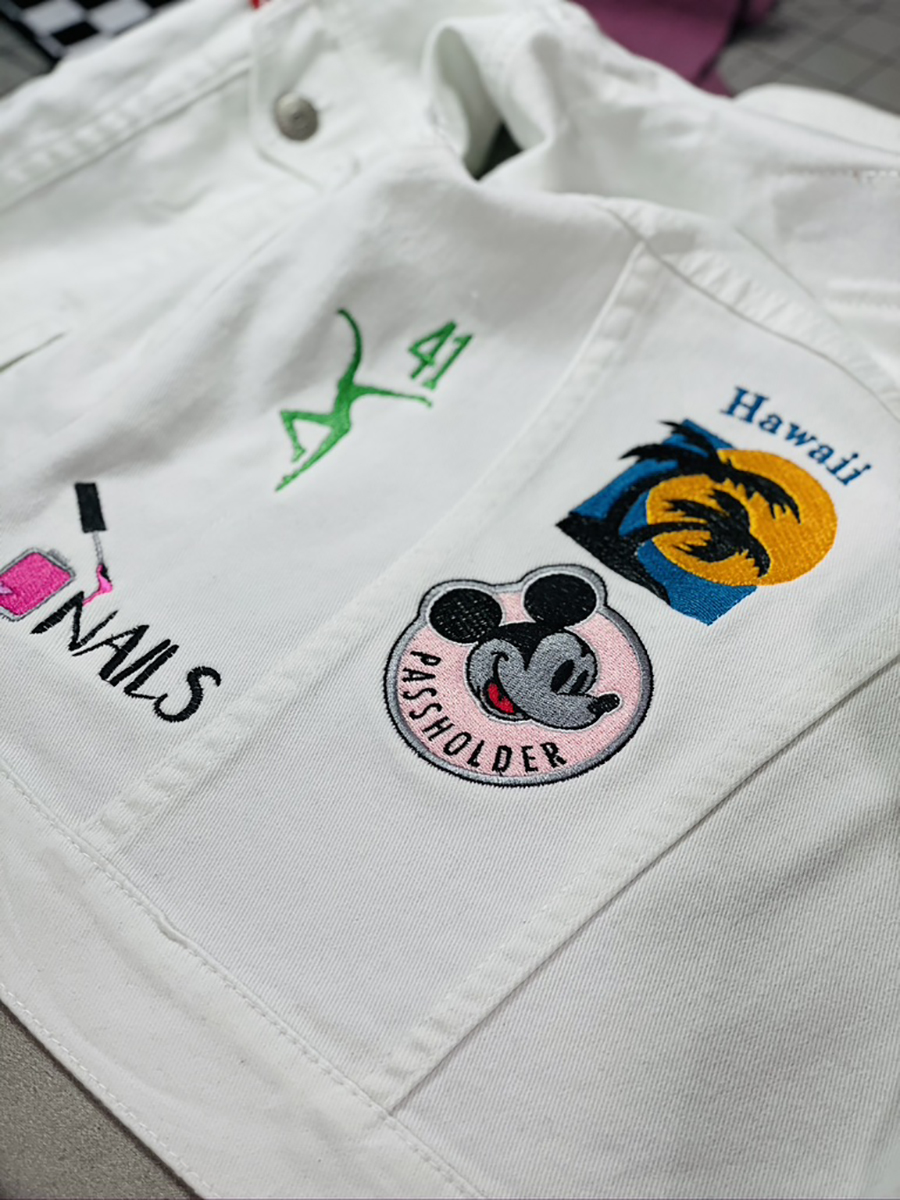
- Hawaii sunset
- Small shamrock
- Powerpuff Girls
- Lip Stick & makeup
- Mermaid cat patch
- Nails & nail polish
- Gymnast
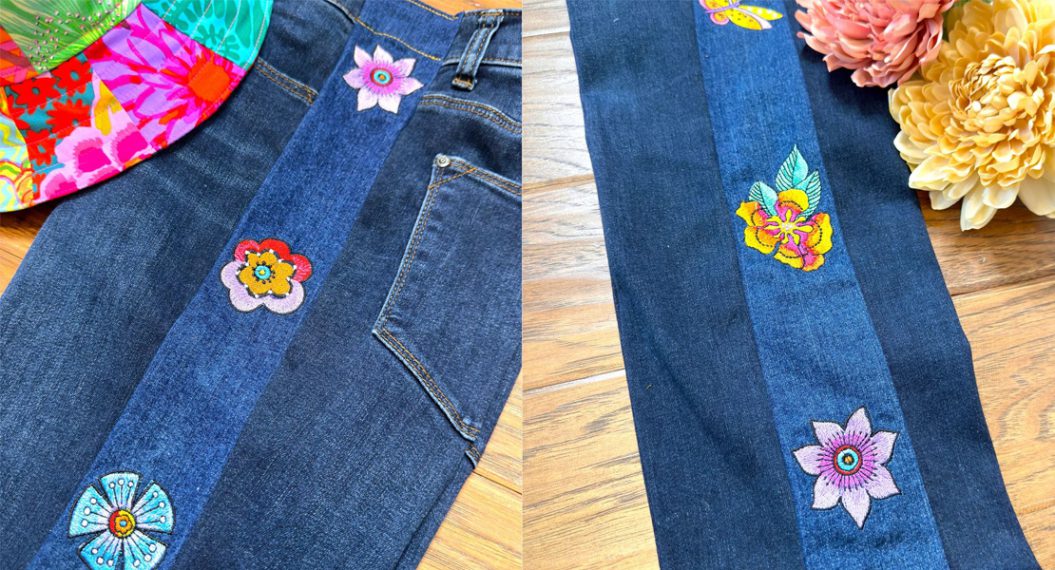
Step 9: Embroider on Denim
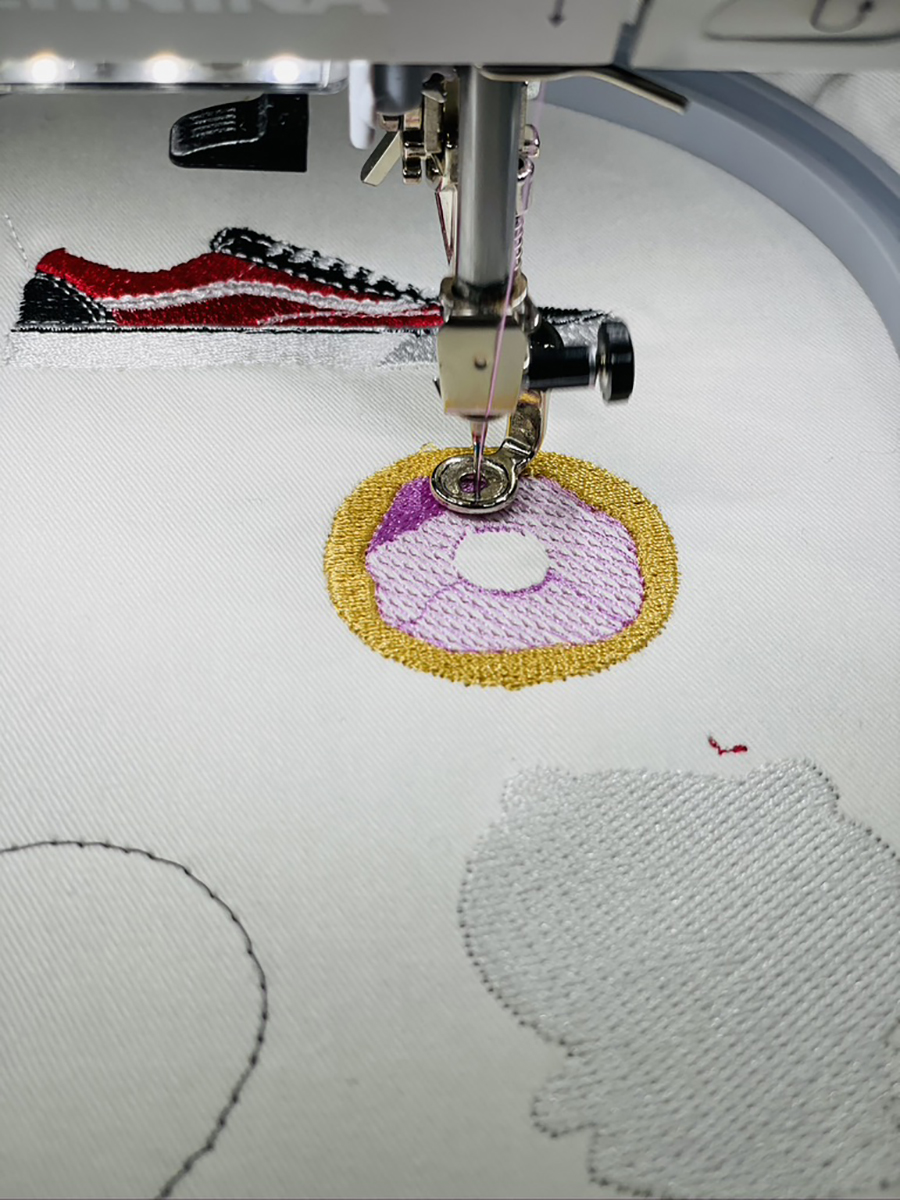
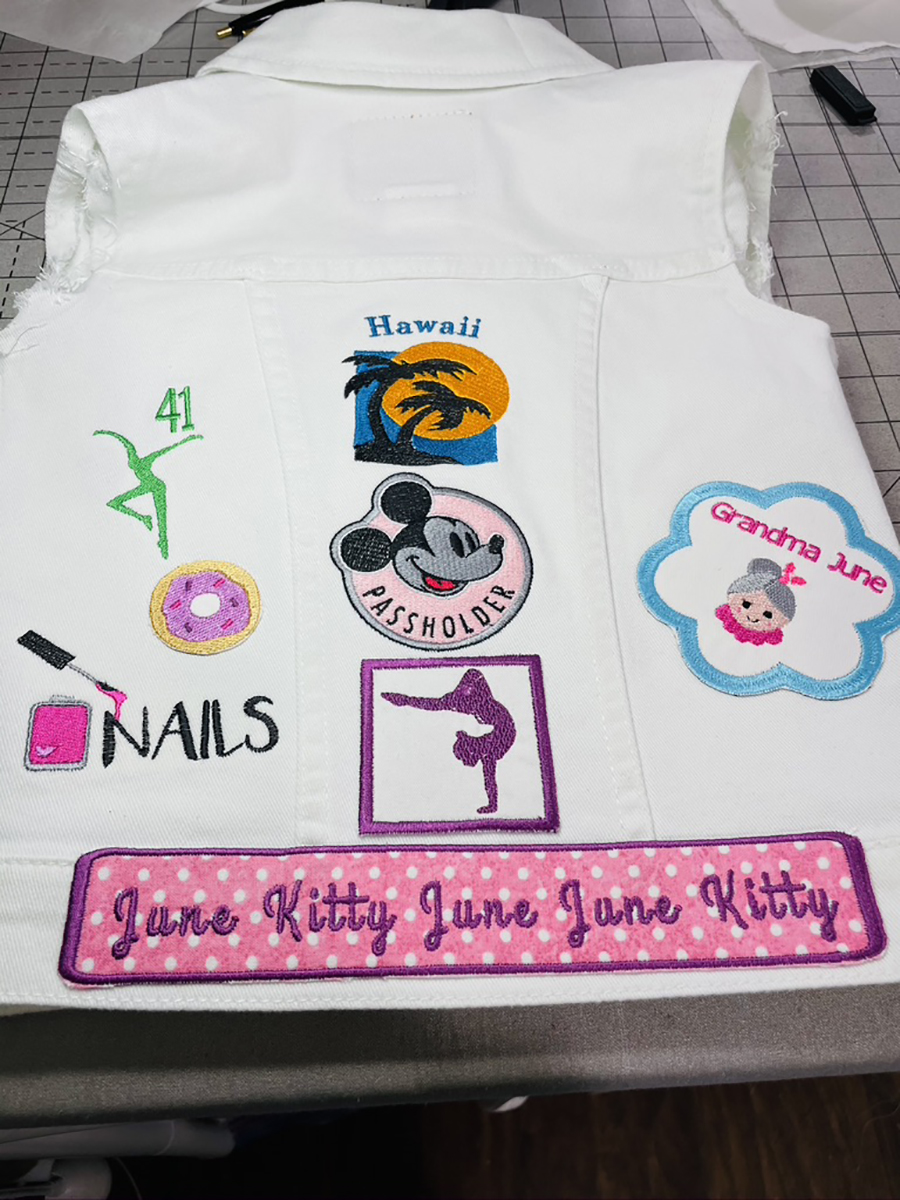
I embroidered the designs Hawaii sunset, Disney Pass holder, and Donut with sprinkles directly onto the jacket by adhering the adhesive tear-away stabilizer directly to the bottom of the outside hoop, sticky side facing up. I laid the jacket directly on top, right side facing up. I then used the basting frame feature on my BERNINA 590 E and embroider the design following the color changes as my machine tells me to do. When finished tear away the stabilizer.
Now we design the embroidery for all the patches. I open multiple patch designs in my file using the BERNINA Embroidery Software 8.2 on my computer.
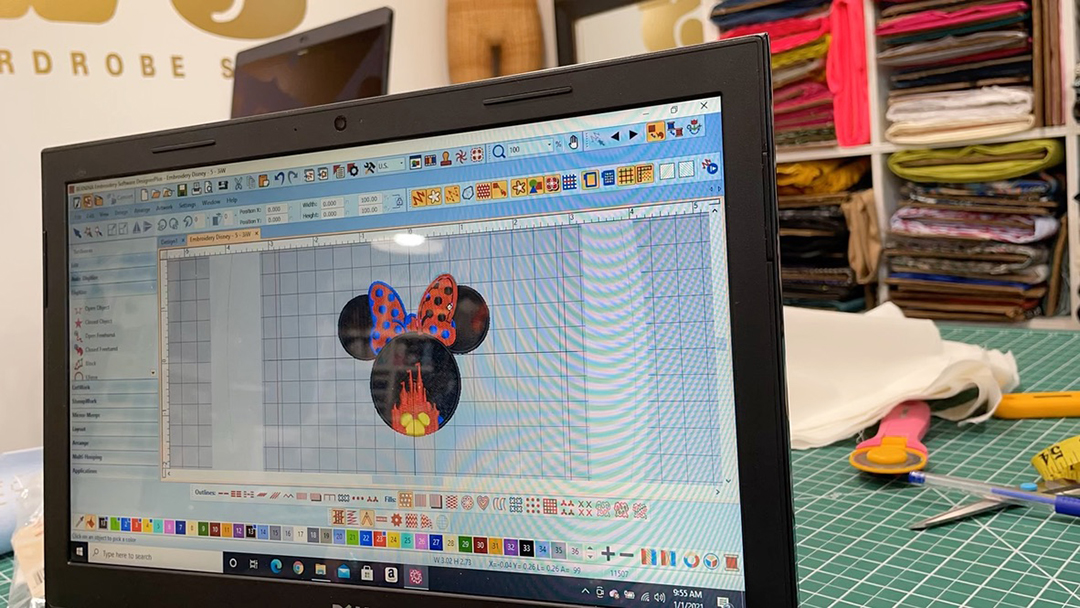
Step 10: Set Up Embroidery Designs
Fill your design file with as many designs as you can fit in your hoop. Under the design tab in the software select “optimize color changes” to do the least amount of thread color changes, another great feature. Send the finished design to your machine.
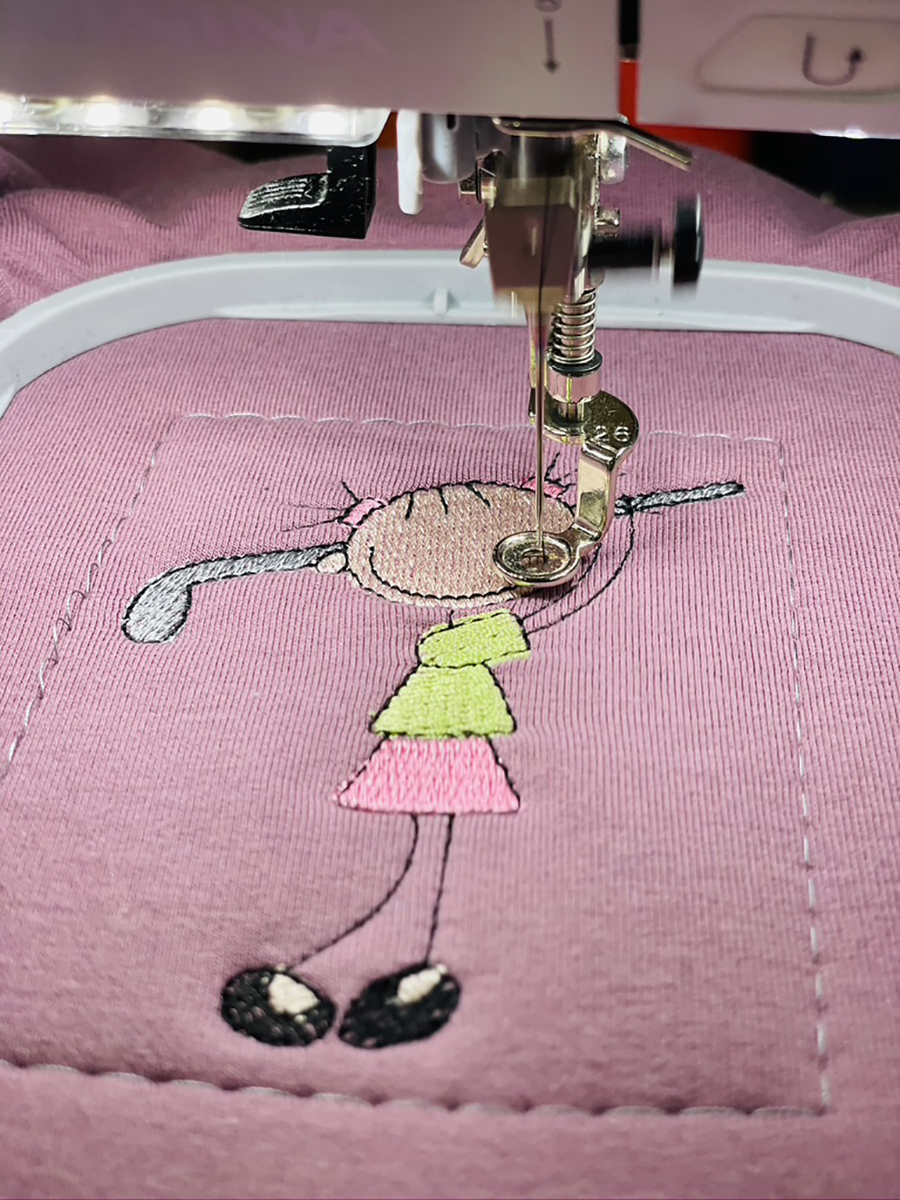
Step 11: Embroider
Hoop your base fabric and your cut-away stabilizer. Embroider your patches.
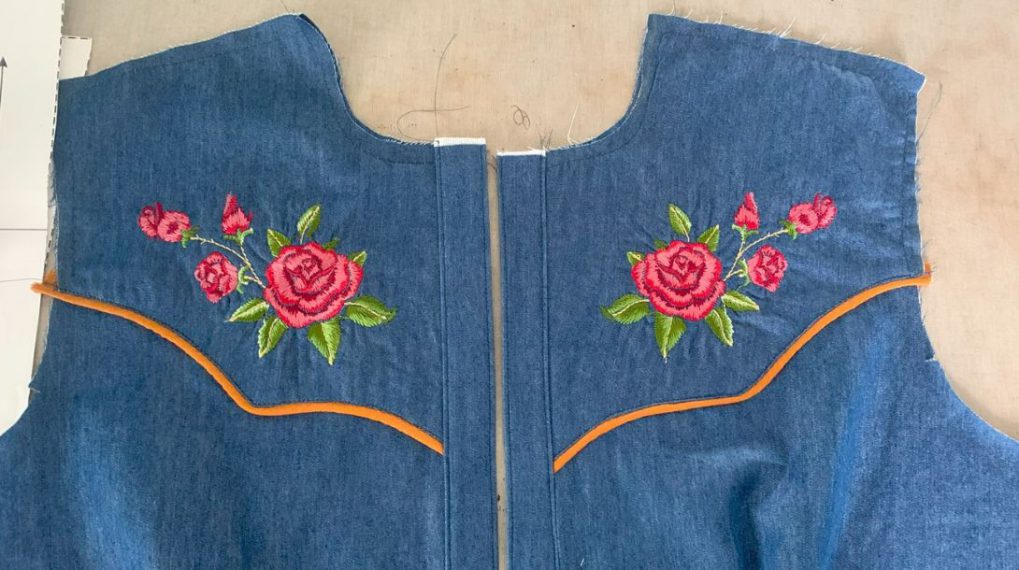
Step 12: Cut Out Patches
Cut out your patches and design your placement of each patch on the jacket.

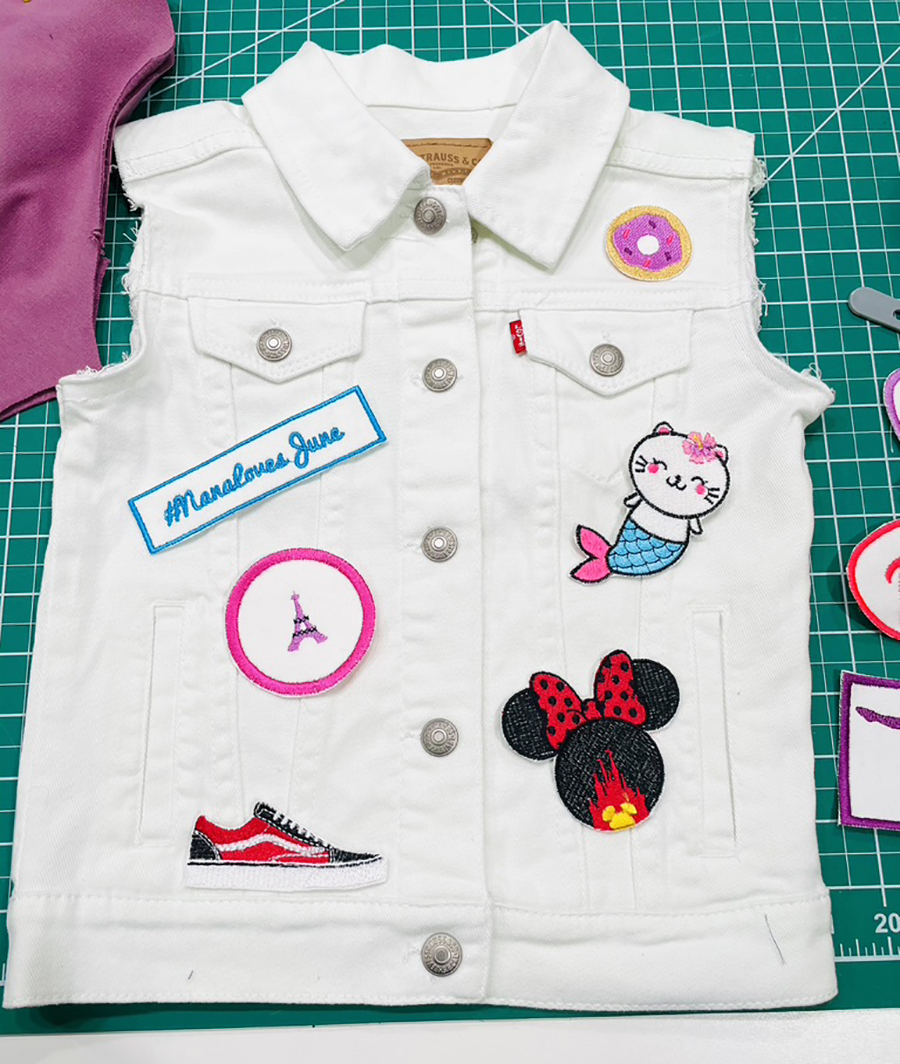
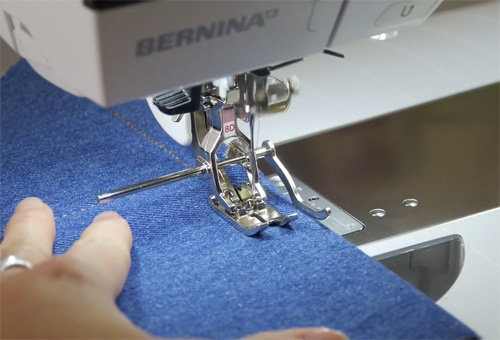
Step 13: Attach Embroidered Patches
Use your Sulky KK200 temporary spray adhesive on the back of the patch, place your patch, and using the BERNINA Stitch Regulator (BSR), sew on all patches using a straight stitch at about 3.0 length.

All done! My granddaughters love their special jackets filled with inside jokes, nicknames, favorite places, and all their favorite things.
Used Products


What you might also like


5 comments on “How to Refashion Denim Jackets with Embroidered Patches”
-
-
The golf girls Stick Figure embroidery designs is from Etsy a company called starlight dreams LLC
-
-
Hello many of the links you have to the patch images are not working.
-
Hm I need to look into that because they were all working when this originally posted all of the designs though have come from Shops on Etsy
-
-
Great idea!
Leave a Reply
You must be logged in to post a comment.
Love the jackets. Where is golf girl design from ? Where did you find black n white checked knit?