How to Sew a Kids Busy Book, Part 4: Cookie Jar Tic Tac Toe
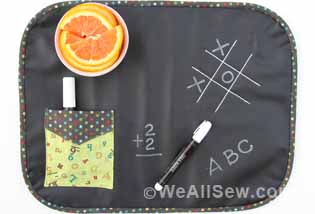
Welcome to Month 4 of our BERNINA Busy Book Series. This month, we are filling up a cookie jar with two kinds of cookies – sugar cookies with frosting and chocolate chip cookies – and making a game of tic tac toe. We are going to explore decorative stitches, directional couching, and free-motion couching. If you’ve never tried couching, you’ll be amazed! It’s easier than it looks. We will be working with felt, yarn, stabilizer, double-sided fusible, and of course the hook and loop tape we are all familiar with – Velcro. When we’ve completed the page, let’s kick back, play a game of tic tac toe and eat real cookies!
Note: You can find links to the previous Busy Book posts at the end of this tutorial.
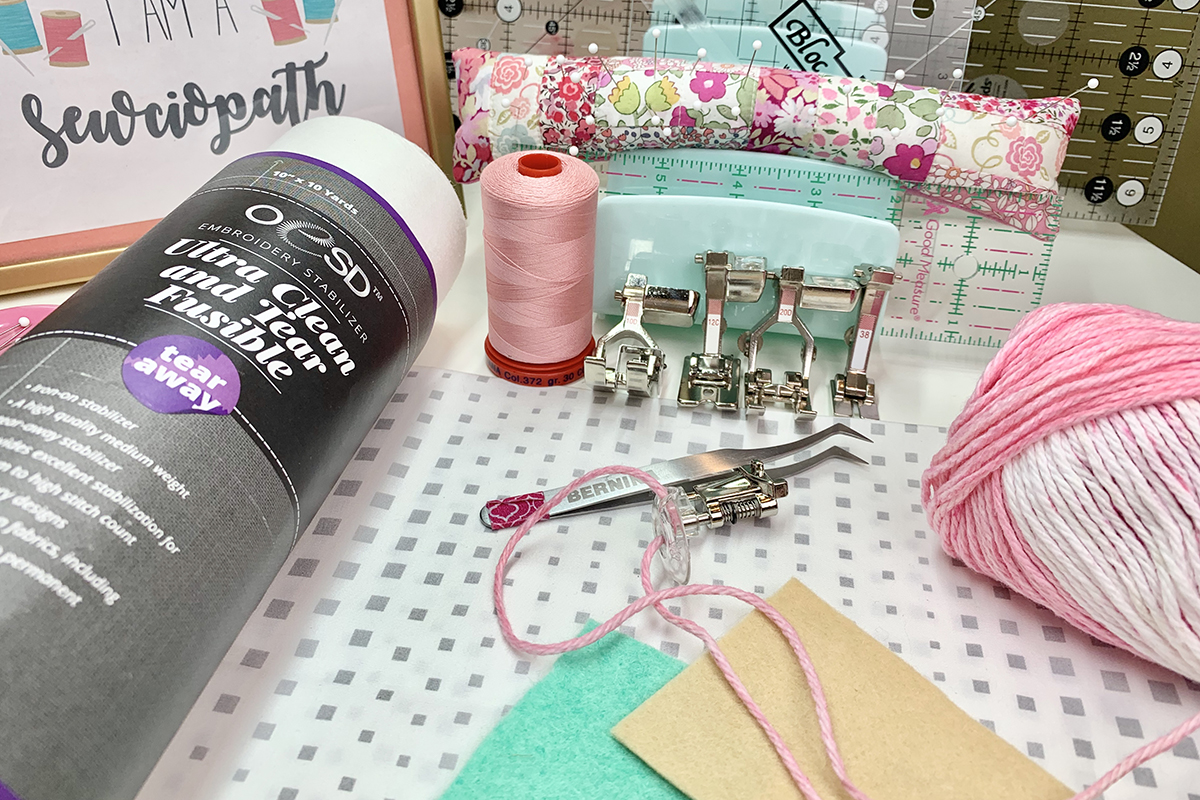
Materials for Every Page
- 10” x 10” background fabric (purchase 3 yards if making all backgrounds the same)
- 10” x 10” OESD Ultra Clean and Tear Fusible Stabilizer
- 50 weight thread
- Rotary cutter & ruler
- Rotary cutting mat
- Scissors
- Iron and pressing mat
- Roxanne Glue-Baste-It or similar glue stick/pen
- Temporary fabric marker
- Pins
Additional Materials for Cookie Jar
- Yarn in white (tic tac toe lines) and pink (frosting) – I am using Lily Sugar n Cream yarn
- Felt in green, white, and tan
- 50 weight thread in white, green, brown and pink
- Microtex Needle 80
- ¾” wide Velcro roll (hook and loop tape)
- Heat N Bond Lite
- Optional: 1/4” Stitch Witchery
BERNINA Machine and Feet
- BERNINA 590 E
- Edgestitch Foot #10/10C/10D
- Bulky Overlock Foot #12C
- Open Embroidery Foot #20/20C/20D
- Piping Foot #38
- Free-Motion Couching Foot #43
Choosing Background Fabric for Each Page
Here are a few options when choosing background fabric for your busy book pages. The simplest option is to use the same fabric for every page. Purchase 3 yards so you have plenty if you decide to use it for binding or you make additional pages in the future. Another option is to purchase a Layer Cake or other pre-cut 10” square sets. This precut comes with 42 coordinating pieces of 10” x 10” fabric, usually from the same fabric collection. Your third option is to buy coordinating fat quarters. Around 10 fat quarters will be plenty, as you can cut at least 2 pages from each fat quarter. I purchased black and white fat quarters for my busy book. Lastly, if deciding everything up front is not your style, select fabric one page at a time. Sometimes it’s fun to see how the project evolves.
Choosing Felt for Each Page
If you have been sewing and crafting awhile, you probably have felt laying around. Collect your felt and get ready to use them! If you need more felt or don’t have any, browse the felt selection on etsy.com. I found some nice felt color collections in a wool/rayon blend that is resistant to pilling and pulling, easy to cut, and affordable. Also, the blend does not stretch as much as some of the other felt out there.
Background Page
Press your 10” x 10” fusible stabilizer to your background fabric with a dry iron for a few seconds according to the manufacture directions. Continue pressing until the fabric adheres to the stabilizer. I am using OESD Ultra Clean & Tear Fusible Stabilizer.
One side of every page will have buttonholes to insert ribbon or binder rings to hold the pages together. As a reminder, add a strip of temporary adhesive tape down the left or right side (depending which way the page will face in the book). The tape will remind you to leave this area clear of embellishments. I am using OESD Expert Embroidery Tear Away Tape, which also will help secure the buttonhole stitches.
1 – Cookie Jar
This page will go on the backside of My Family page from Month 3, so add the tape along the right edge of page so you remember to keep it clear from stitching or embellishments. You might want to mark your tape with an up arrow if your fabric is non-directional.
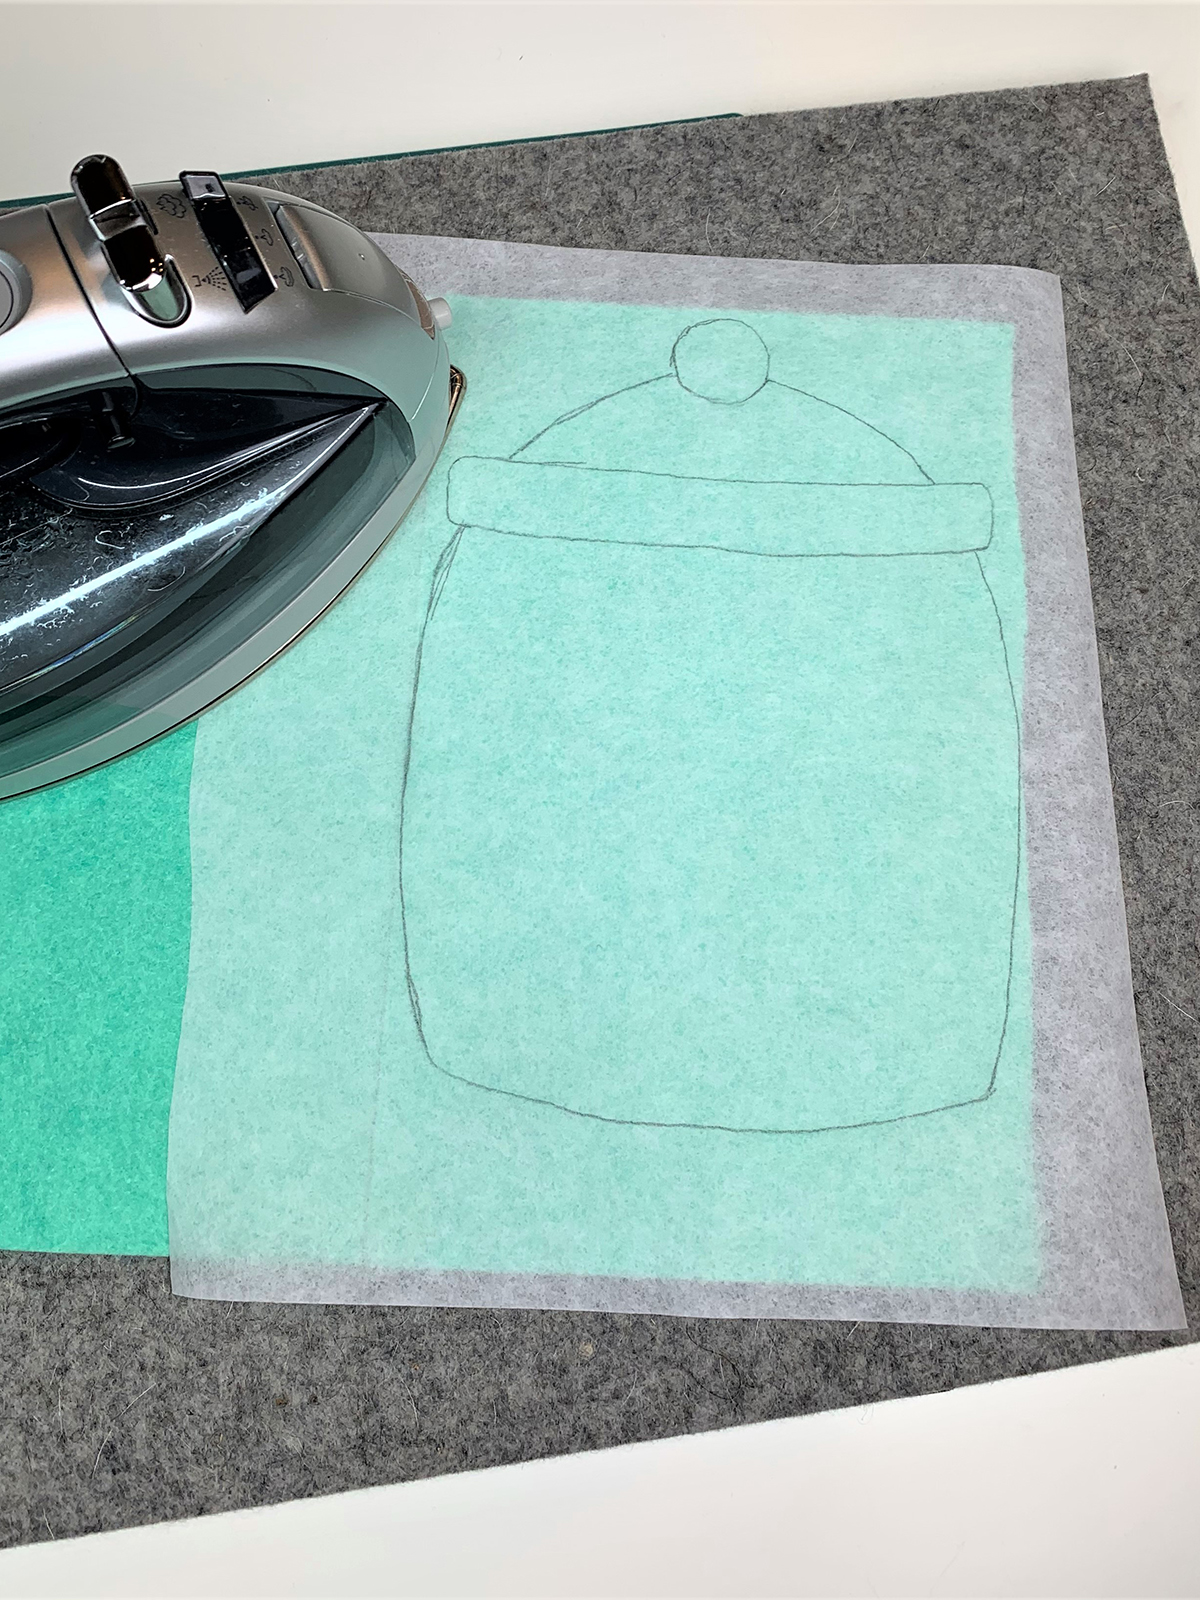
Do a Google search to find a free cookie jar template that looks similar to the one pictured below. I enlarged the cookie jar until it was about 6” x 7 3/4”. You could draw a cookie jar similar to this one if you have freehand drawing skills. I do not.

Place OESD Ultra Clean & Tear Fusible stabilizer over the template and trace the outline onto the paper side with a pencil. (Do not use a Frixion pen; the lines will disappear when using the iron.) Set your iron to medium without steam. Place the adhesive side of stabilizer onto the green felt. Press for a few seconds at a time until the entire adhesive has bonded to the felt.
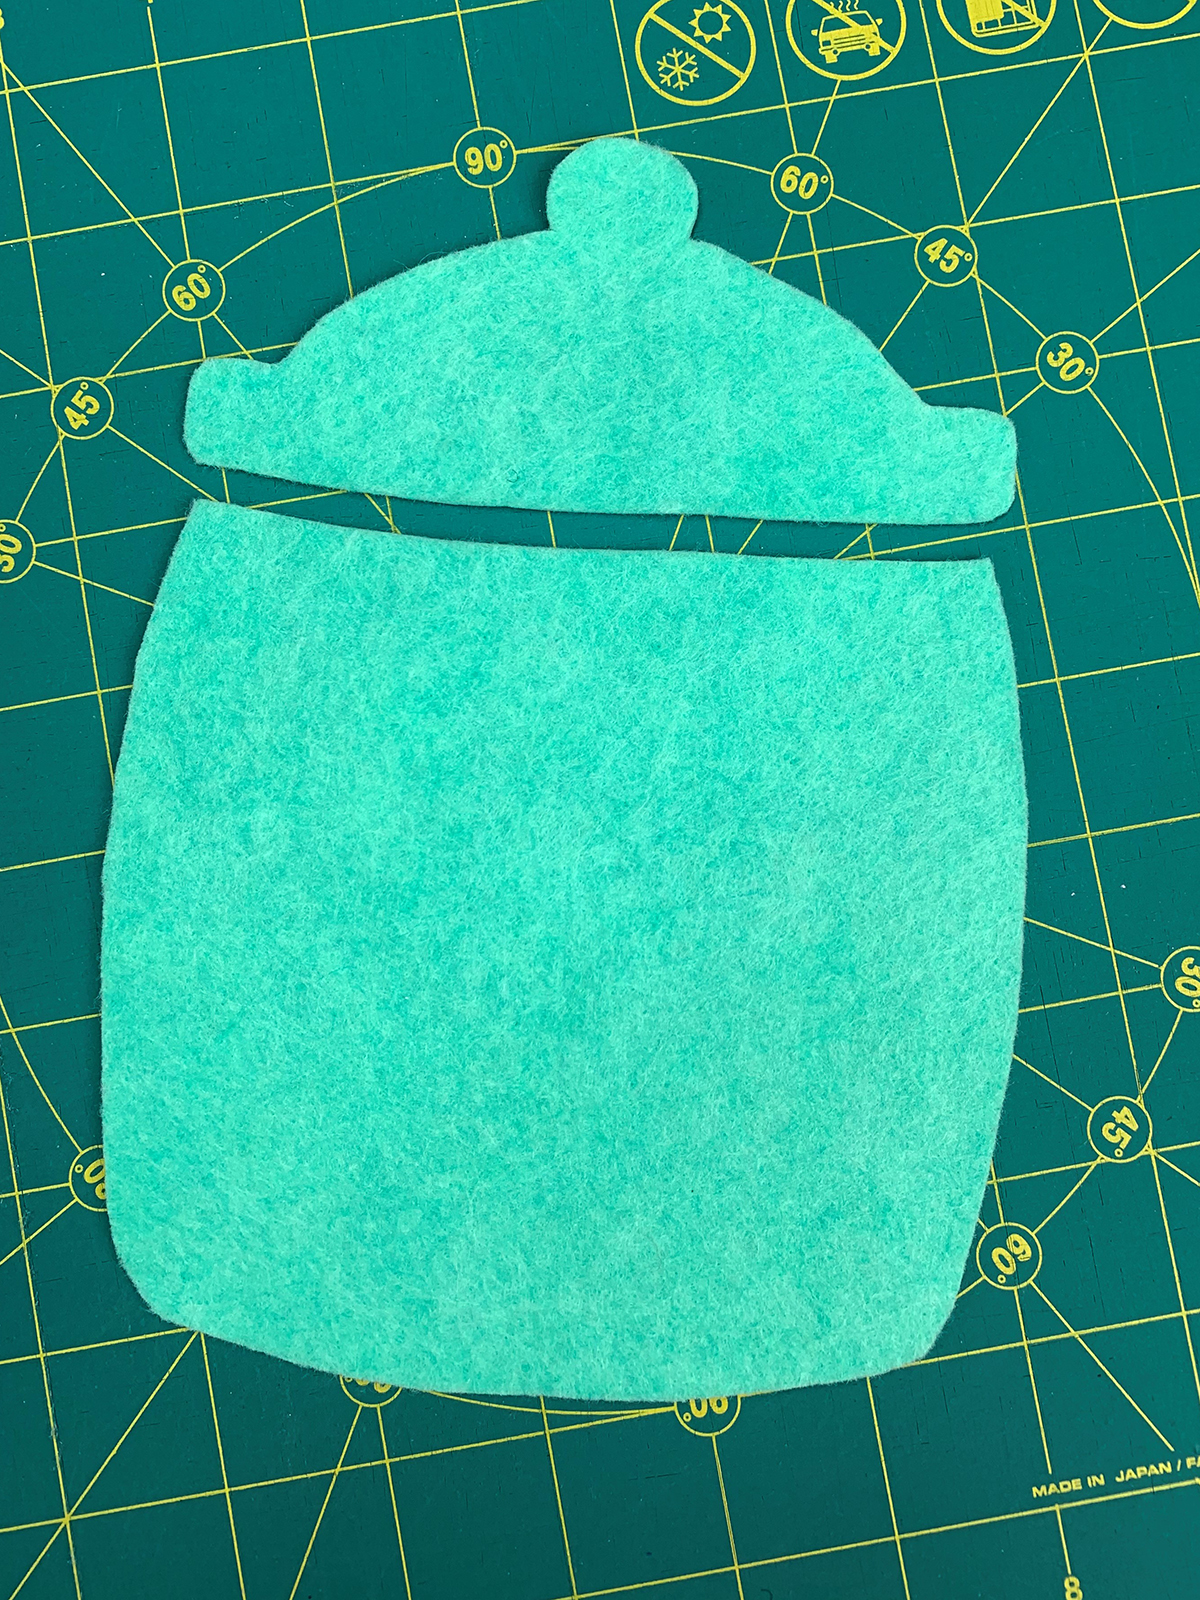
Cut out the cookie jar outline and cut into two pieces – one jar and one lid. Set the lid aside.
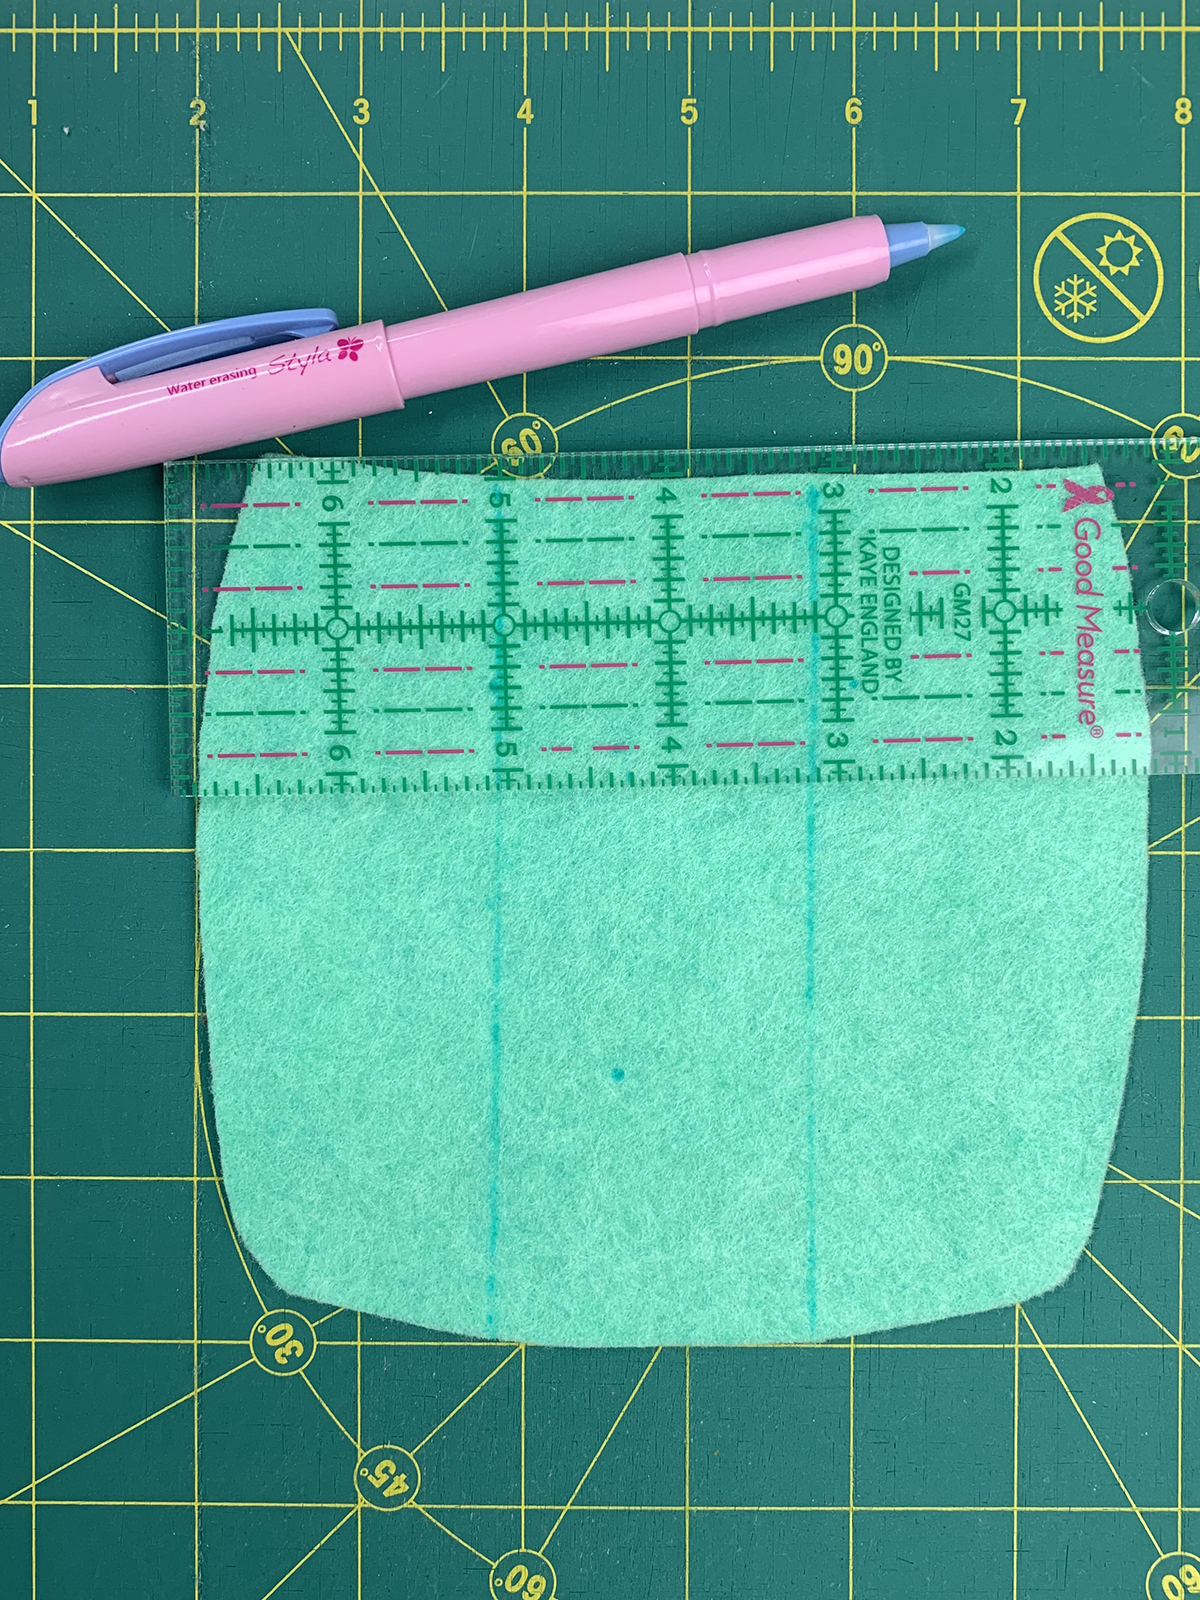
Now we need to mark the jar with placement lines for our tic tac toe game. The game consists of 4 lines, 2 vertical and 2 horizontal, evenly spaced apart. The easiest way I found to mark my lines was to take the jar length and divide by 3. This gives you the distance between lines. Do the same for the width. With a temporary marker and ruler, make your lines. I am using the Sewline Styla water erasing pen. Do not press too hard or you might have to douse your felt with water to remove it. There are many different kinds of felt today, so do a test area first. I found that I preferred the Styla pen with my wool blends and the Frixion pen with acrylic.
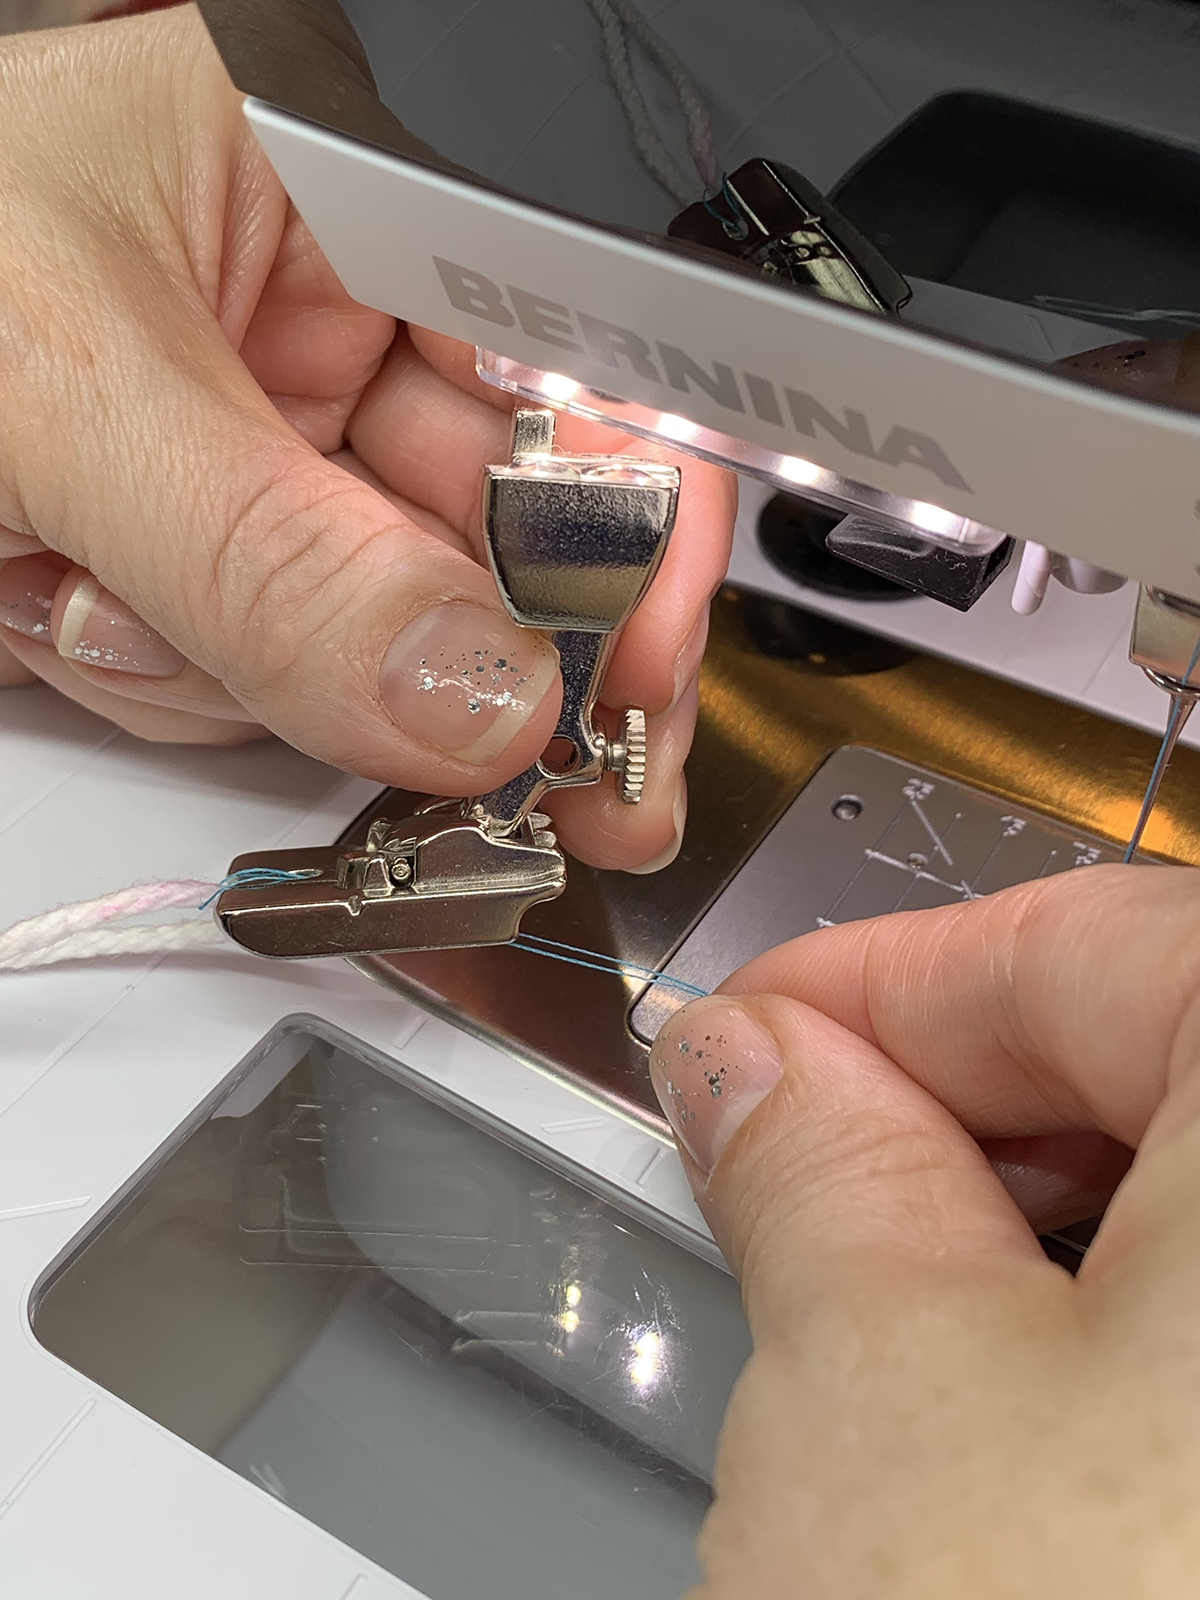
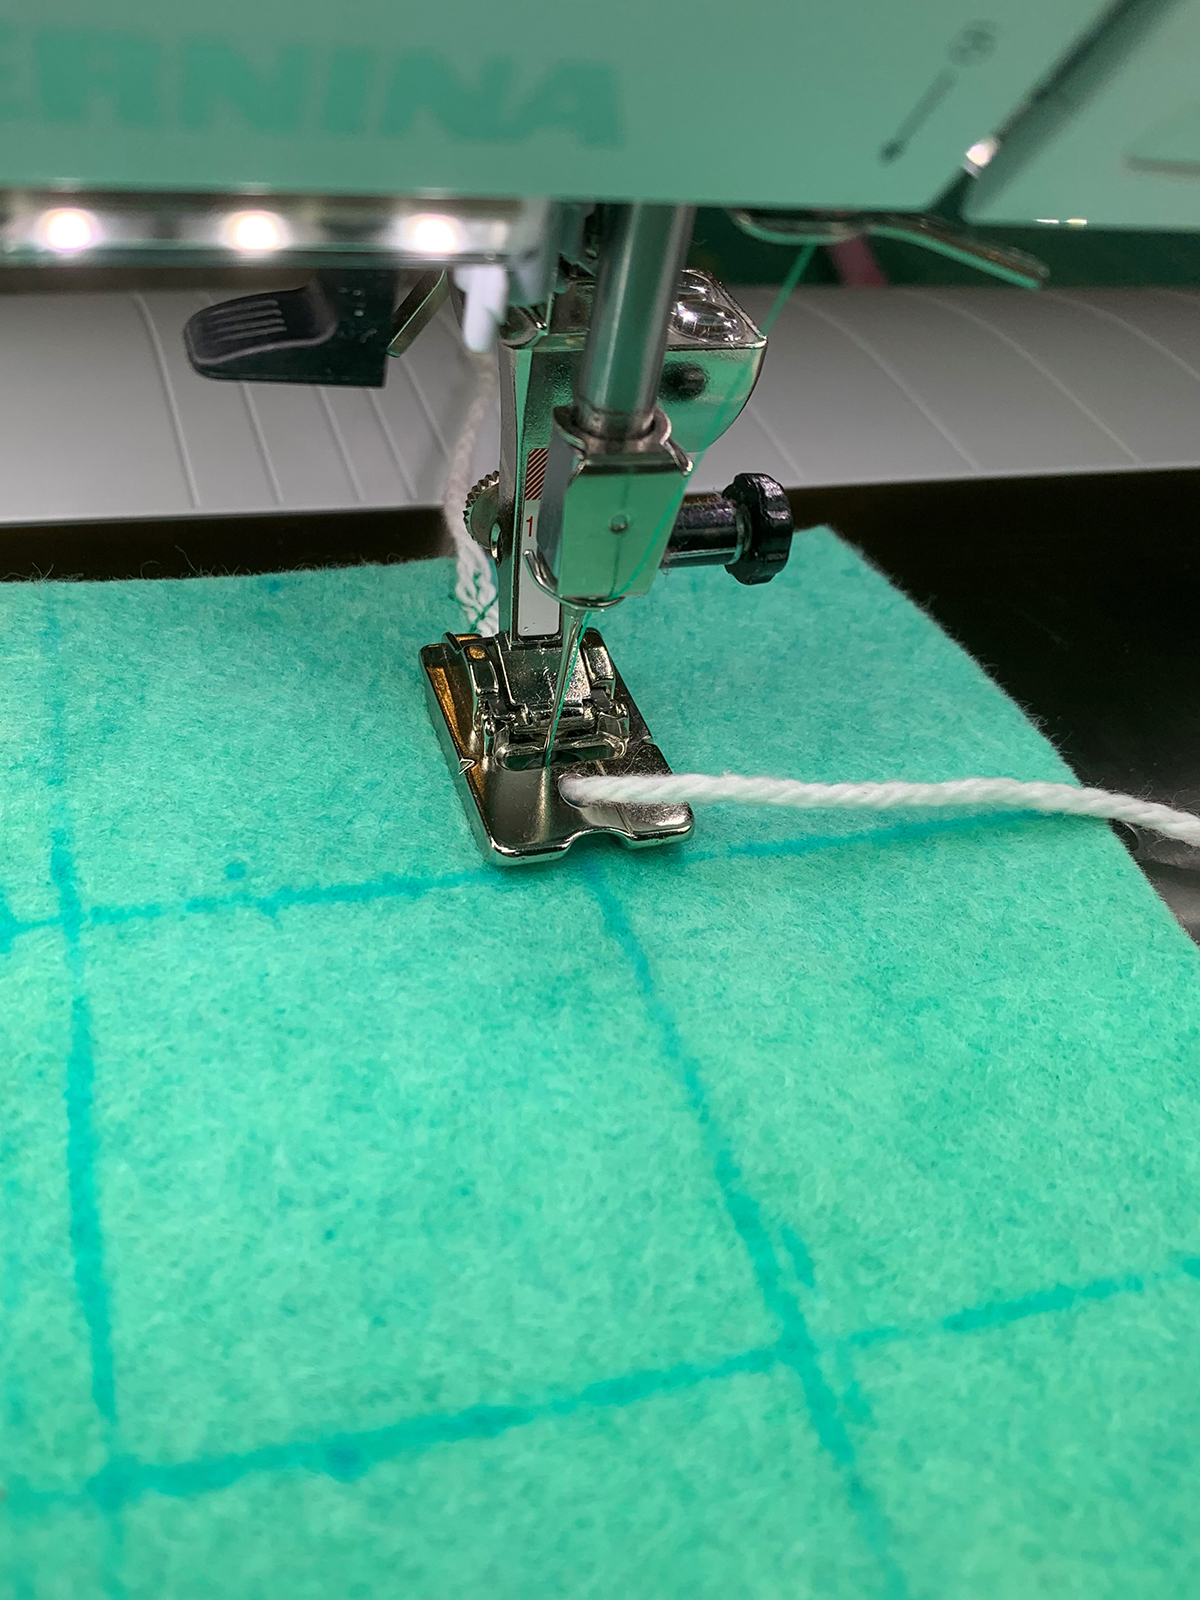
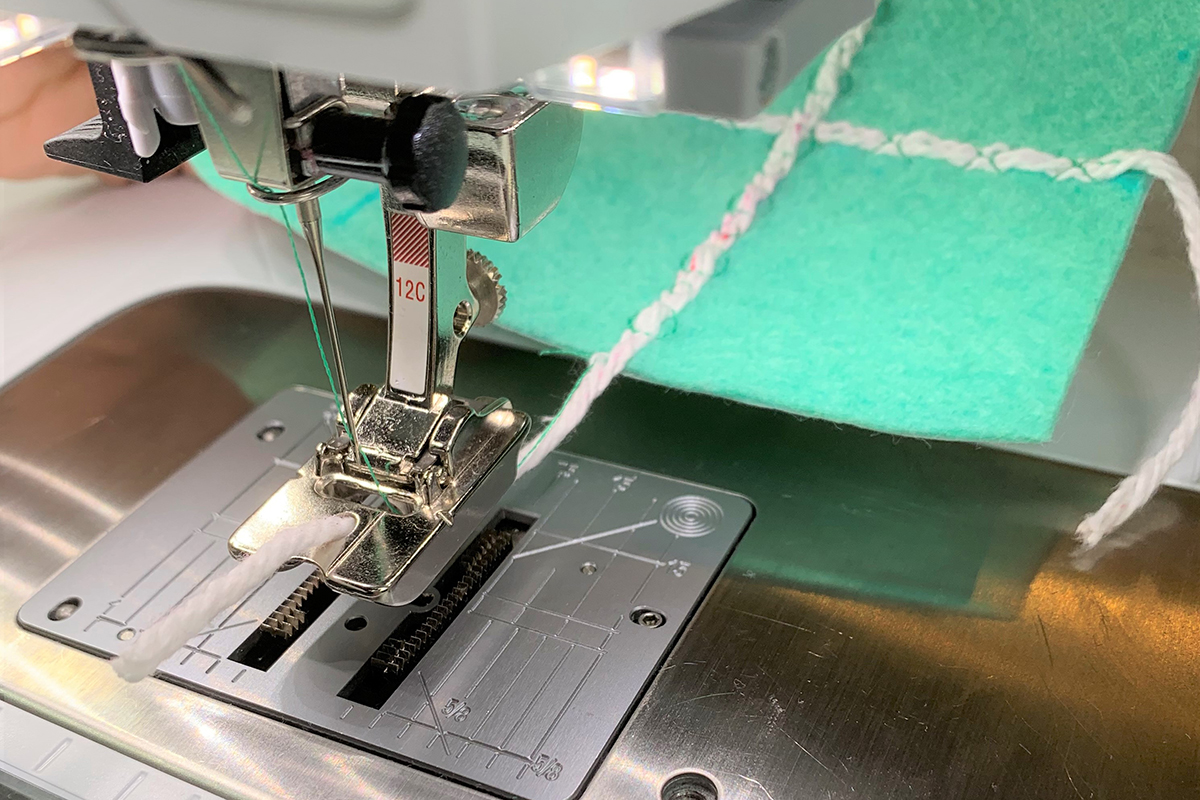
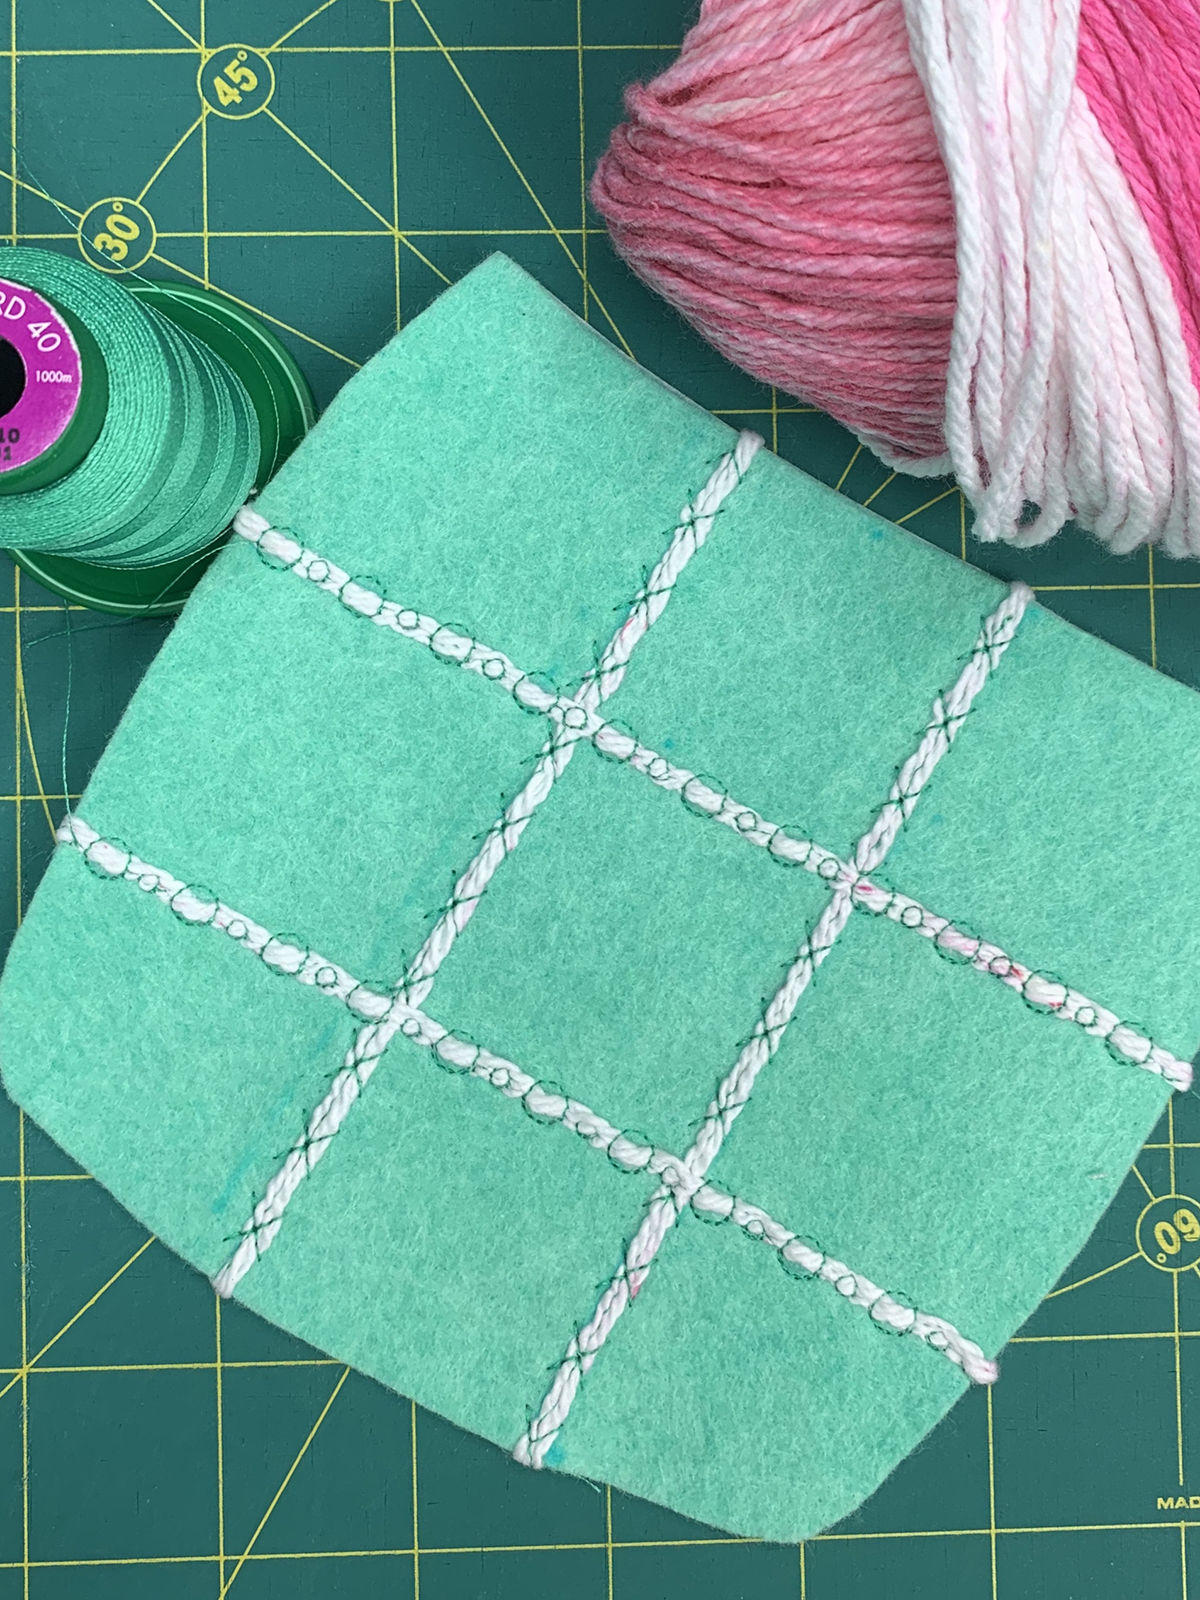
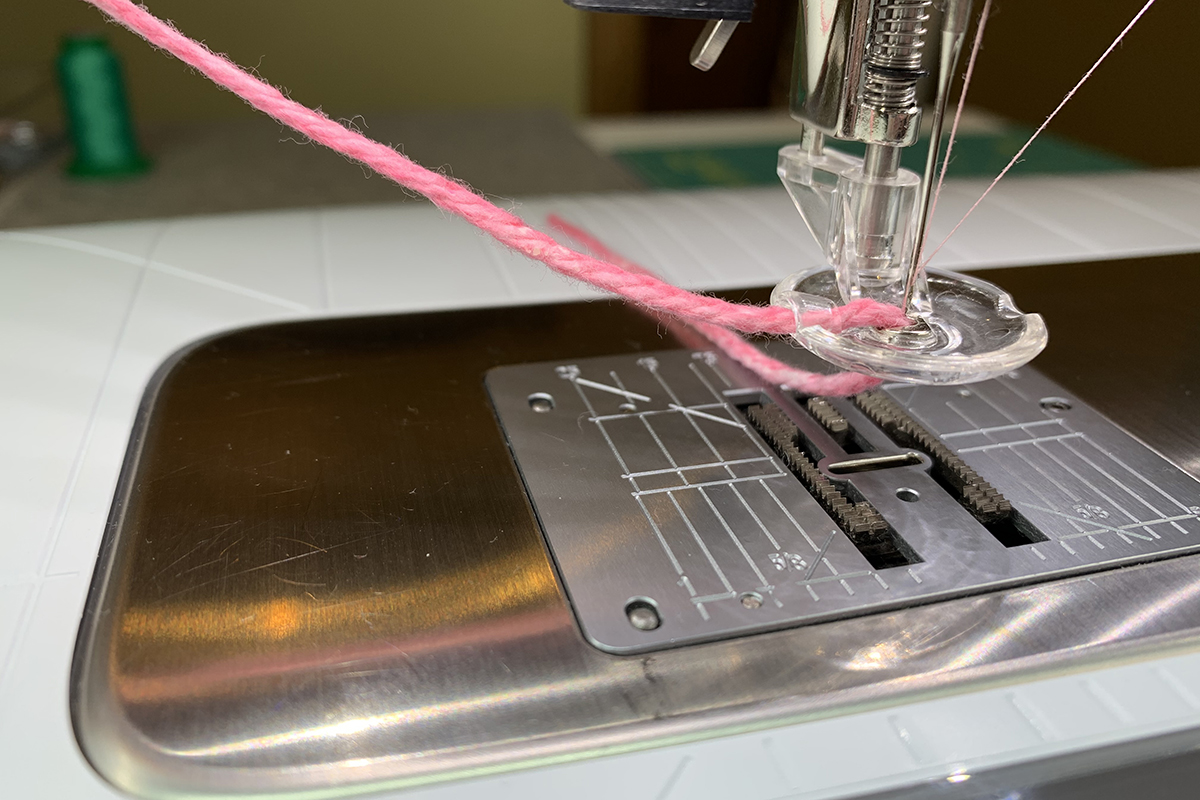
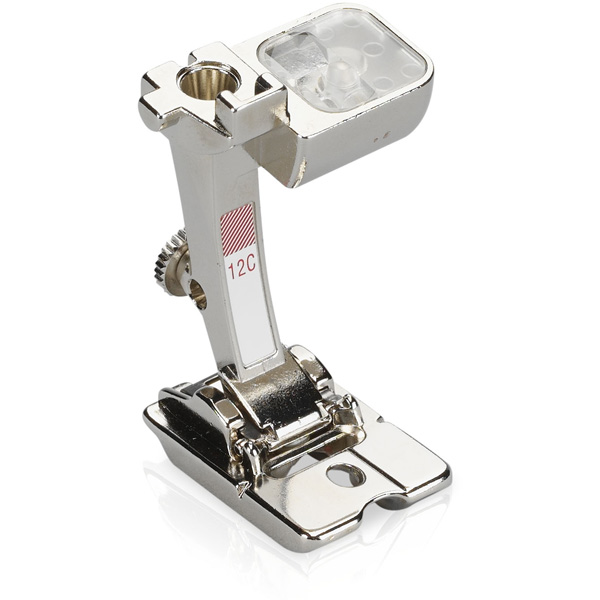
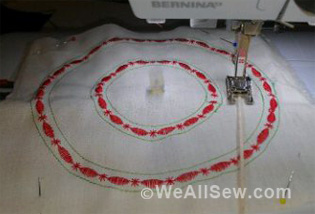
Couching time! We are going to practice some directional couching with BERNINA Bulky Overlock Foot #12C. This foot will stitch up to 9 mm and has an opening in the foot to hold yarns and cord. This foot is a hybrid of Bulky Overlock Foot #12 and Braiding Foot #21. Cut 2 pieces of your white yarn the length of the jar plus 2”. Do the same for the width.
Select a needle that is appropriate for the thread you are using to couch. I am using a green Isacord thread and a Microtex 80 needle. Holding your foot and the yarn, insert the yarn in the circular opening of the foot and pull the yarn through to the back. If you are using thick yarn, you can loop the yarn between a length of thread folded in half and pull the thread ends through the hole with the yarn following.
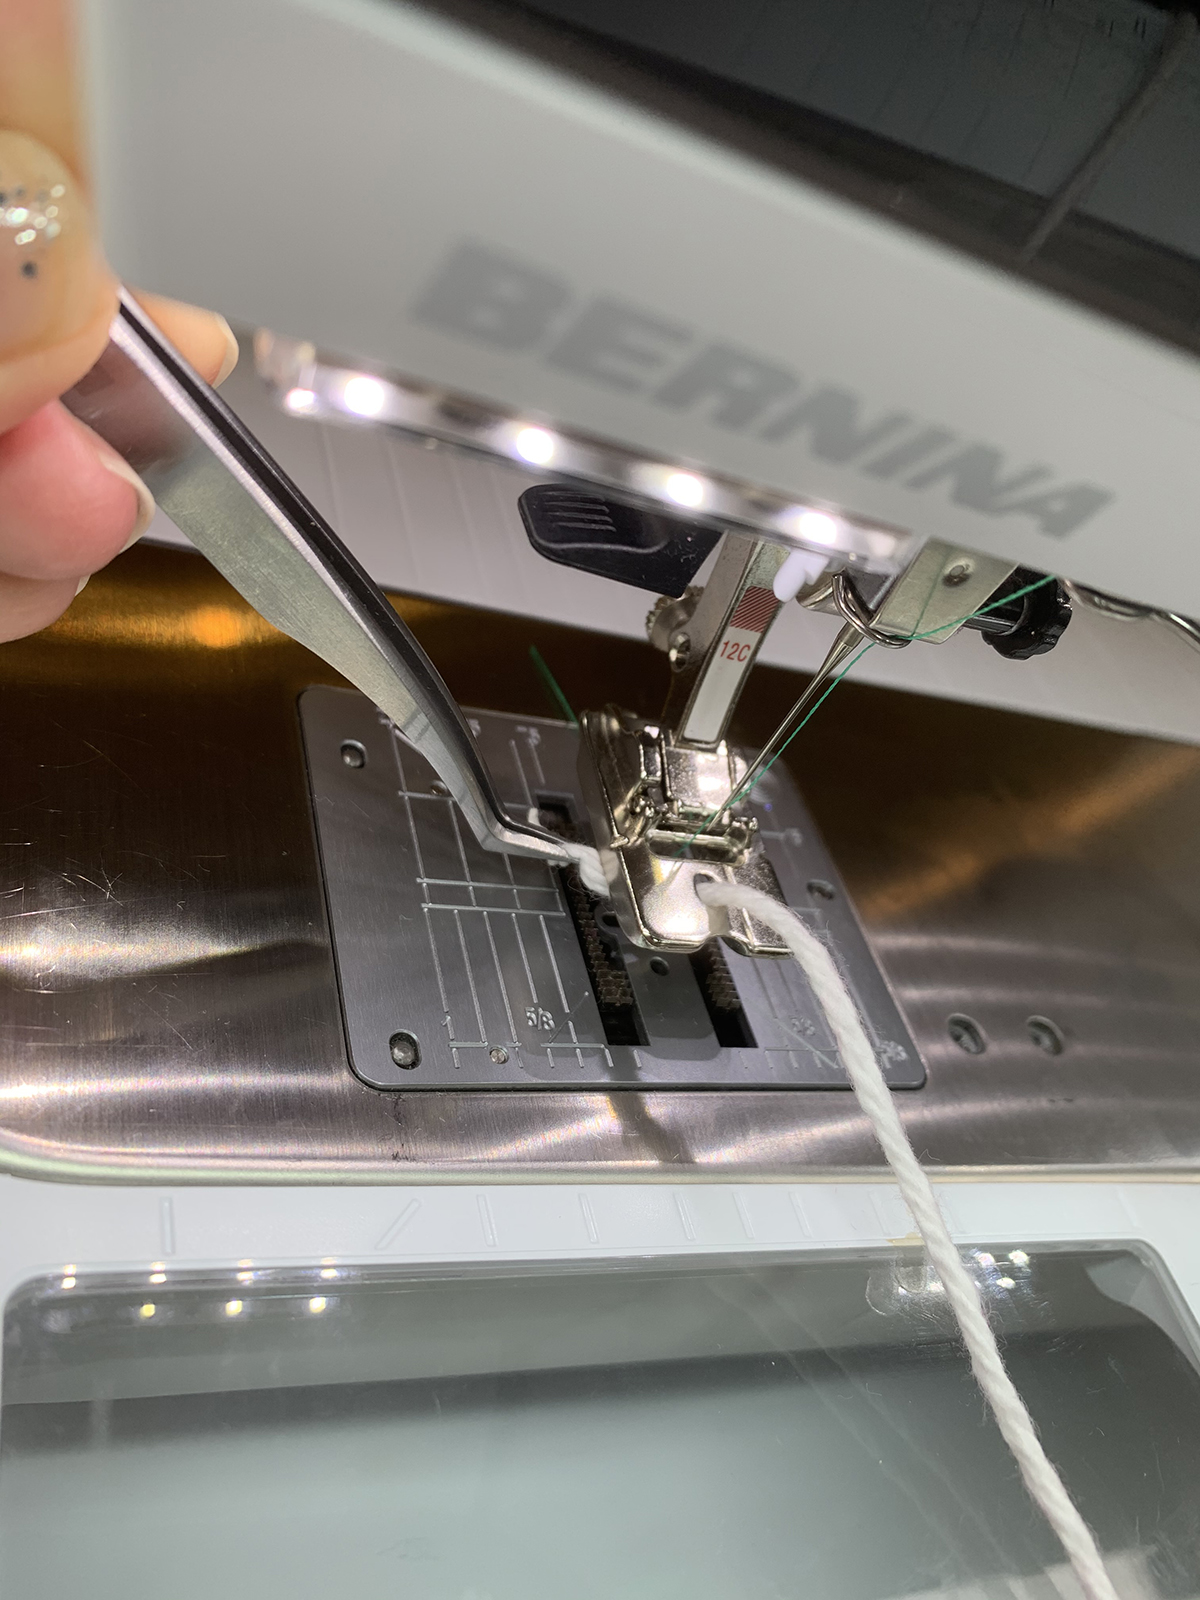
Or you can push the yarn through the hole using tweezers with the foot on the machine.
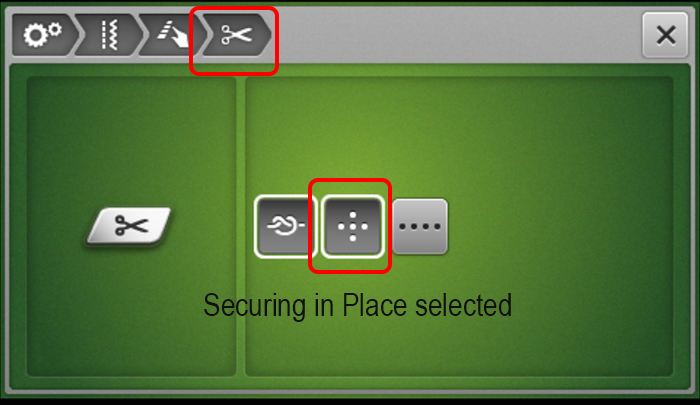
When playing with decorative stitches, I like to turn on the securing stitches in my machine. Go to the Setup Program and select Sewing Settings. Make sure the Securing Stitches at Pattern Begin icon is turned on (1). Then, in the same screen select Program Buttons & Icons (2).

Select the Automatic Thread Cutter (scissors) icon and turn on securing stitches. For decorative stitches, I usually select the securing stitches in place rather than in a row.
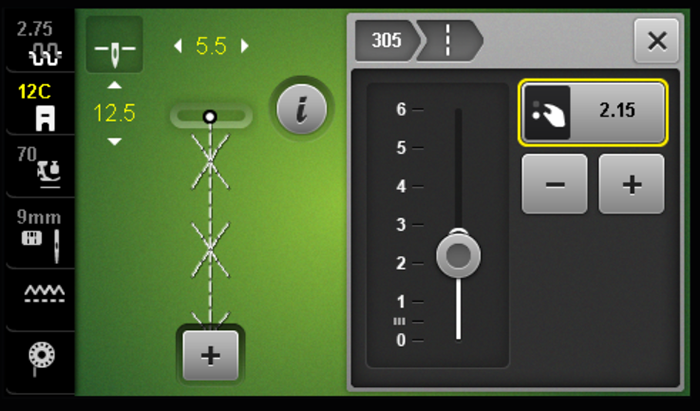
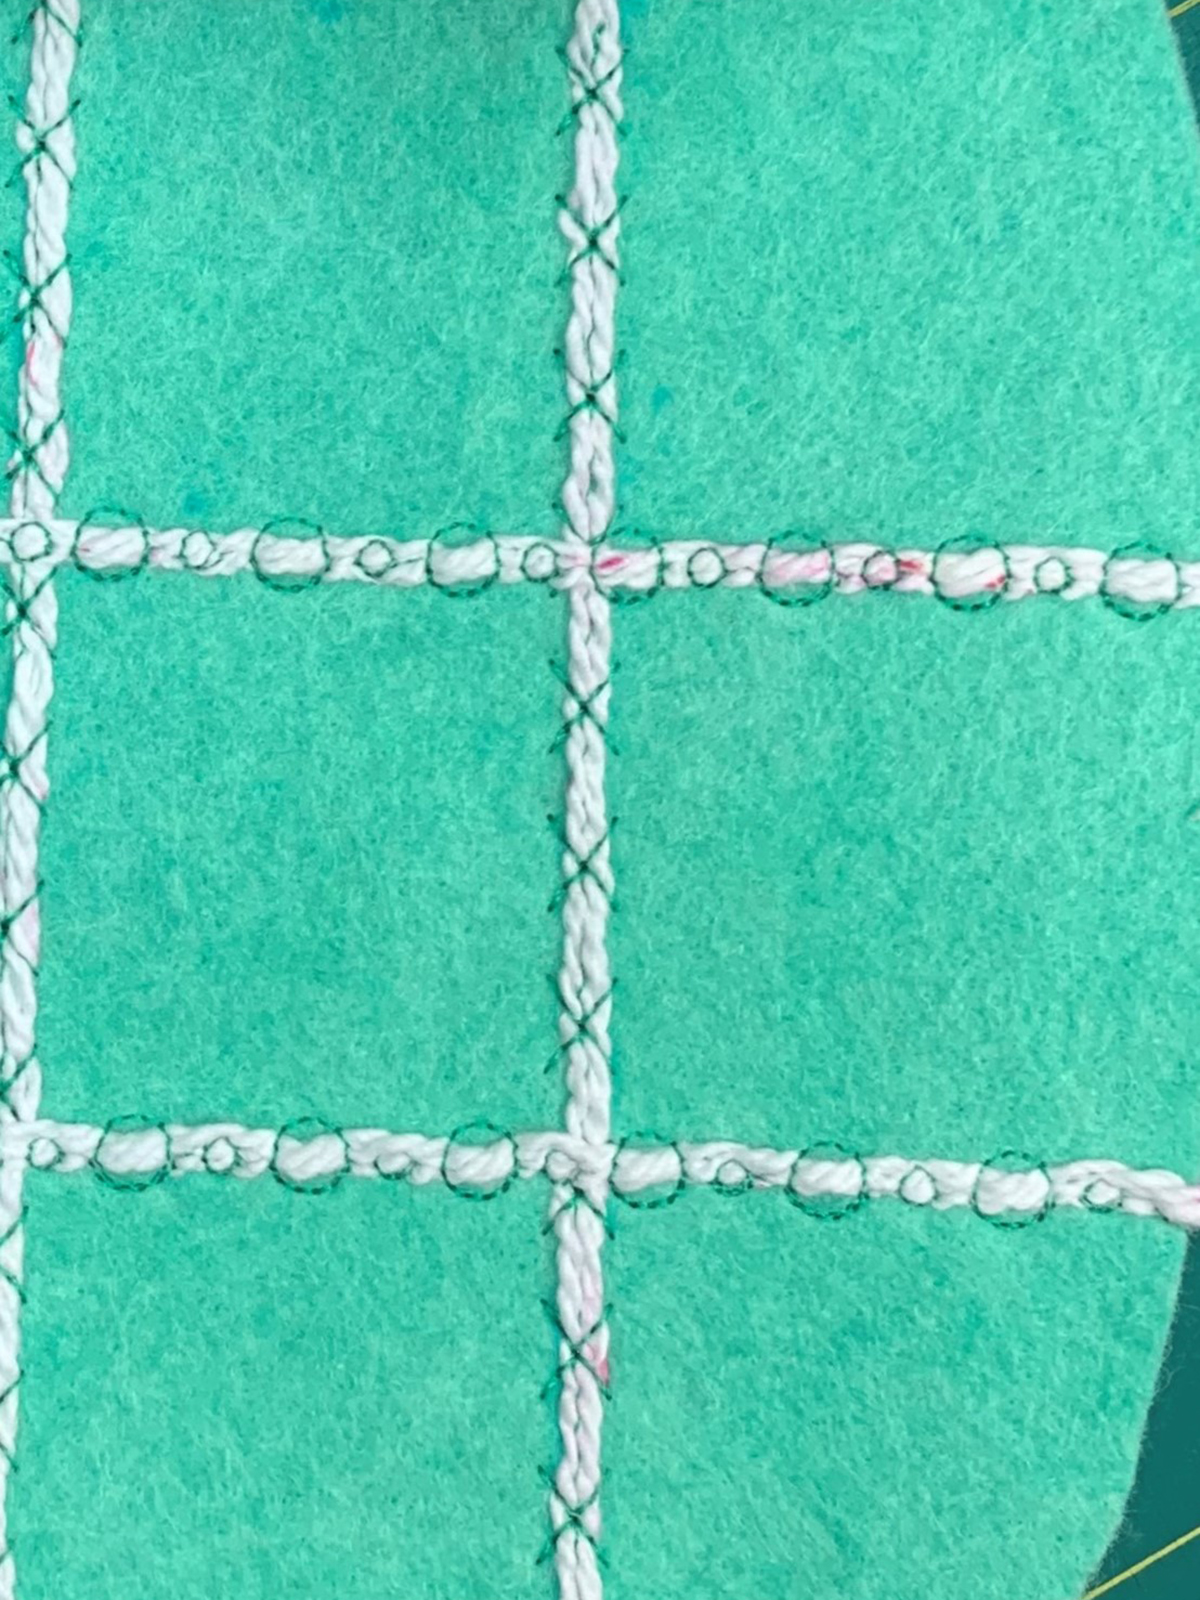
BERNINA 590 E has hundreds of decorative stitches and they are all wonderful. For this project, I found one with X’s and one with O’s. Select Stitch #305. Change stitch width to 5.5 mm and stitch pattern length to 12.5 mm (or 2.15 stitch length). Notice 12.5 mm is the stitch pattern length and 2.15 mm is stitch length.
With the foot attached, make sure you have about an inch of yarn through the back. Starting at the top of a marked, vertical line, start sewing onto the yarn. Keep the marked line in the center of the foot as you sew. Move the yarn slightly to the side if it is in the way but keep it clear of the needle. If the needle catches the yarn that is on top of the foot, you will have big mess. The yarn is feed through and under the foot by the machine and the Feed Dog so you don’t need to control the yarn. Just focus on keeping the marked line centered with the foot. You are couching!
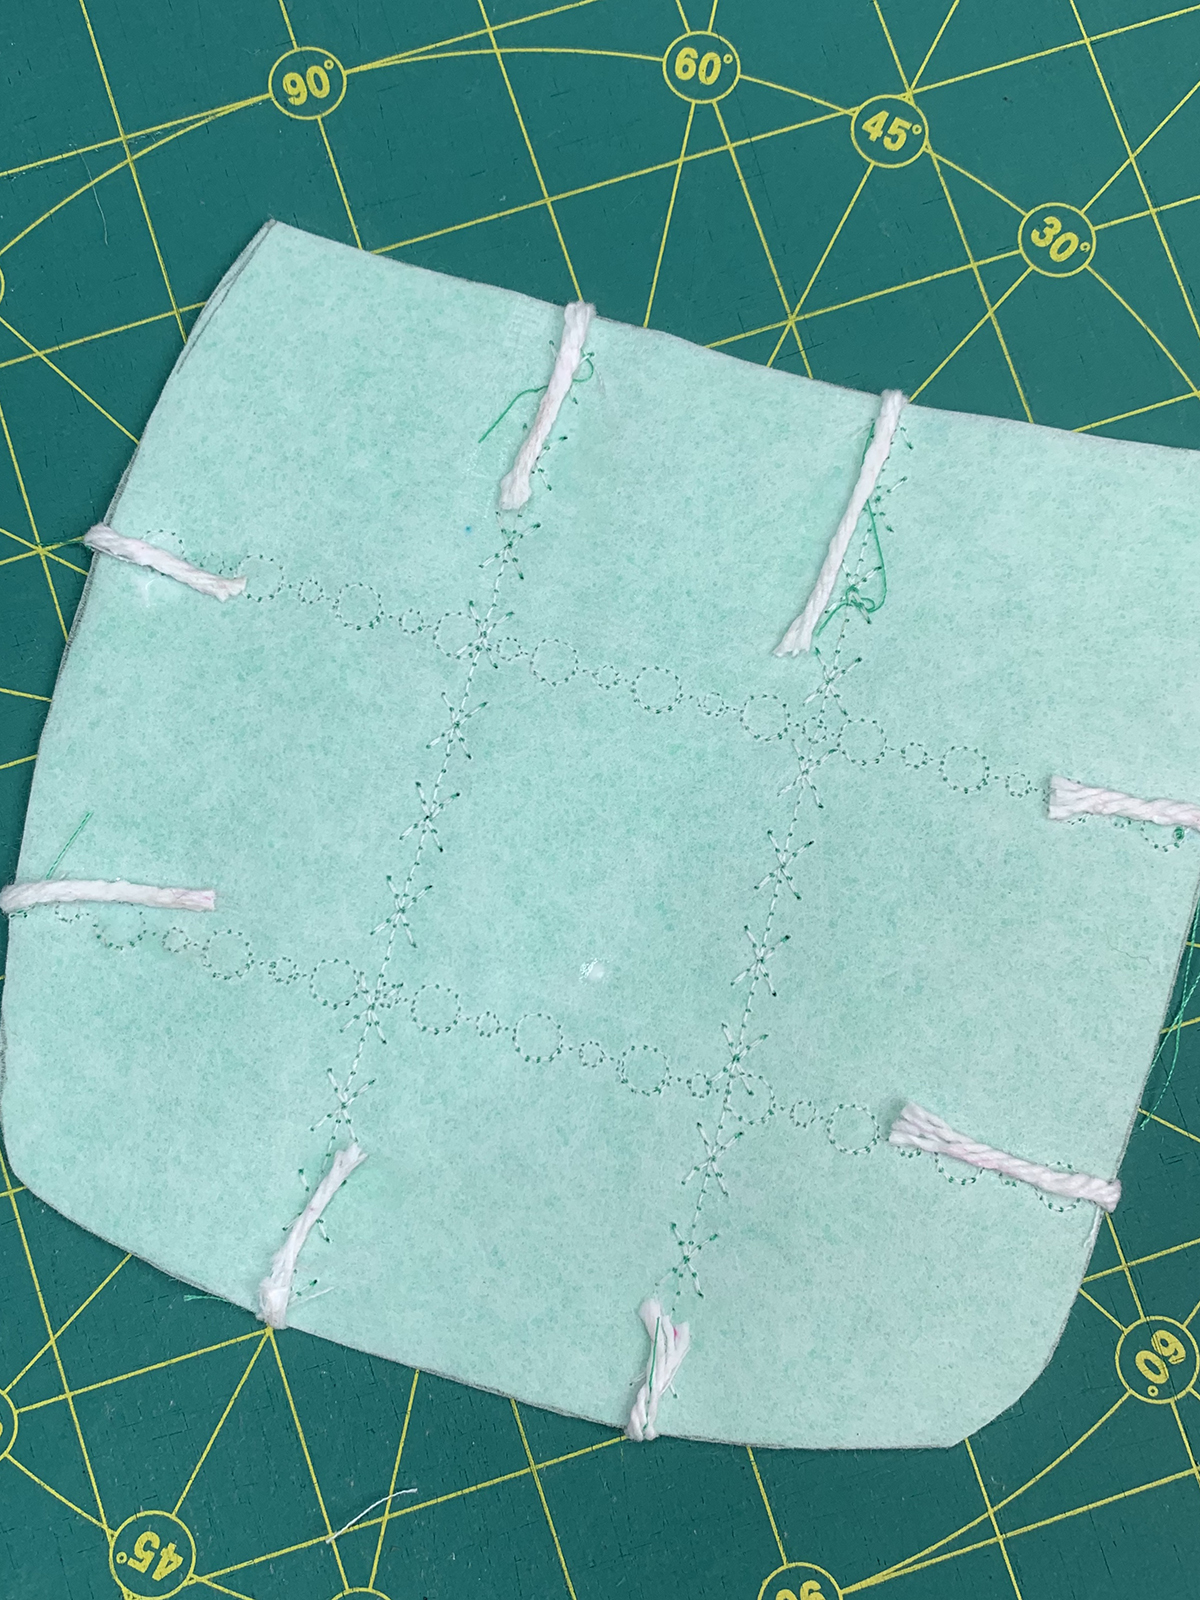
When you reach the bottom of jar, cut your thread with the Thread Cutter button and pull the extra yarn out of the foot. Do not cut the extra yarn.
You can select any stitch for couching from a simple straight stitch to a dense decorative stitch. You can use a thread that blends or contrasts with the yarn. It depends on the project and the look you are trying to achieve.
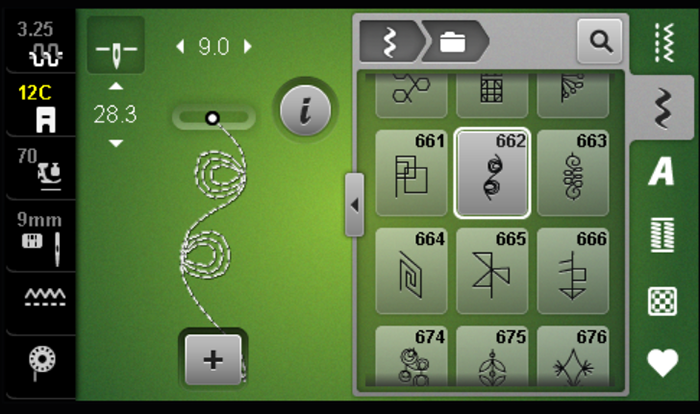
My favorite is stitch #662.
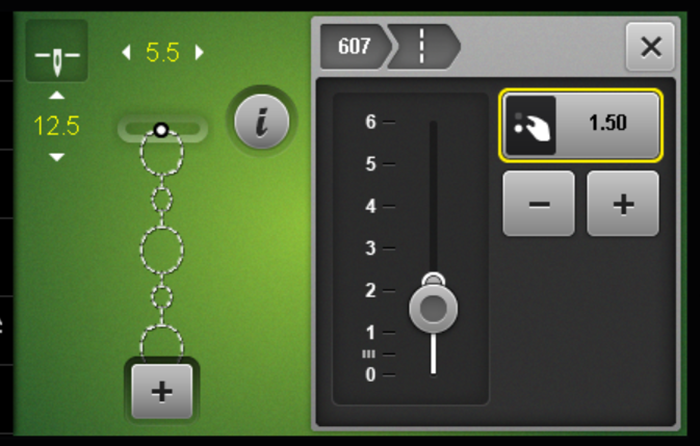
For the horizontal lines we are using stitch #607. Change stitch width to 5.5 mm and stitch pattern length to 12.5 mm (or stitch length to 1.5 mm).
Follow the same steps leaving about an inch of extra yarn at start and end of stitching lines and keeping the marked line center with the foot. Coming along…

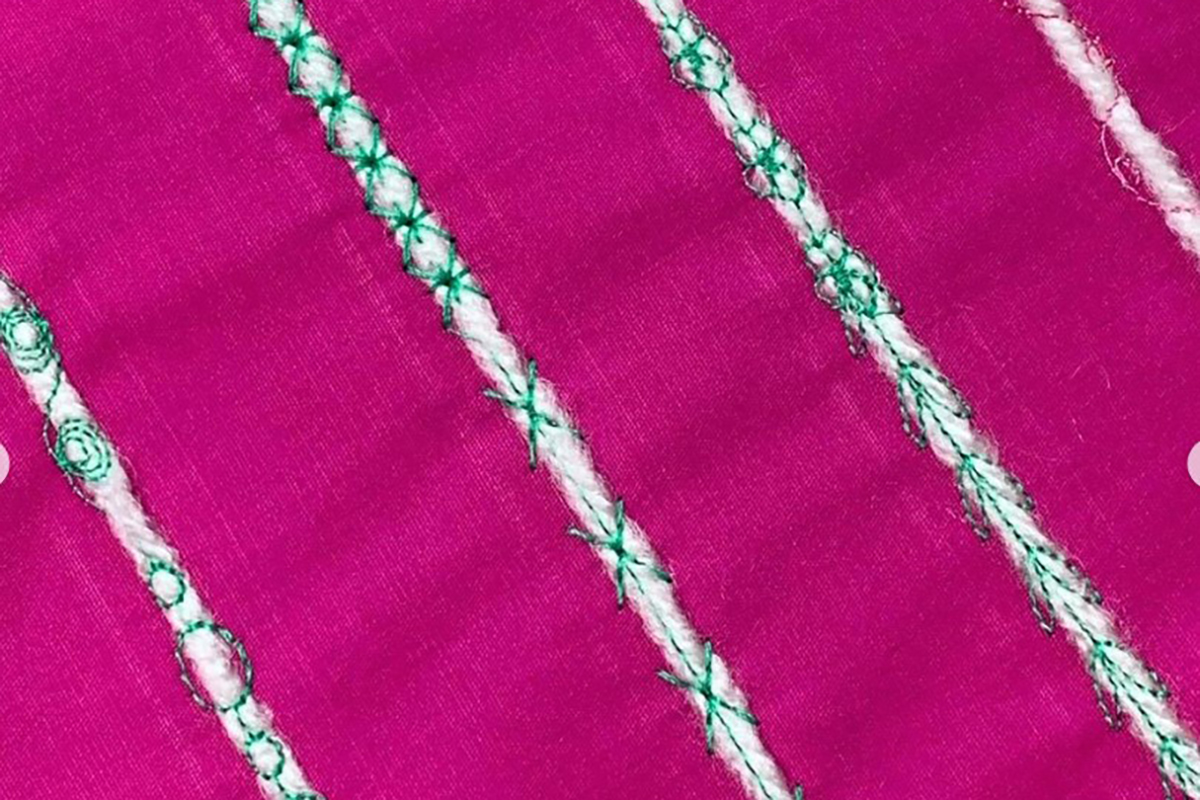
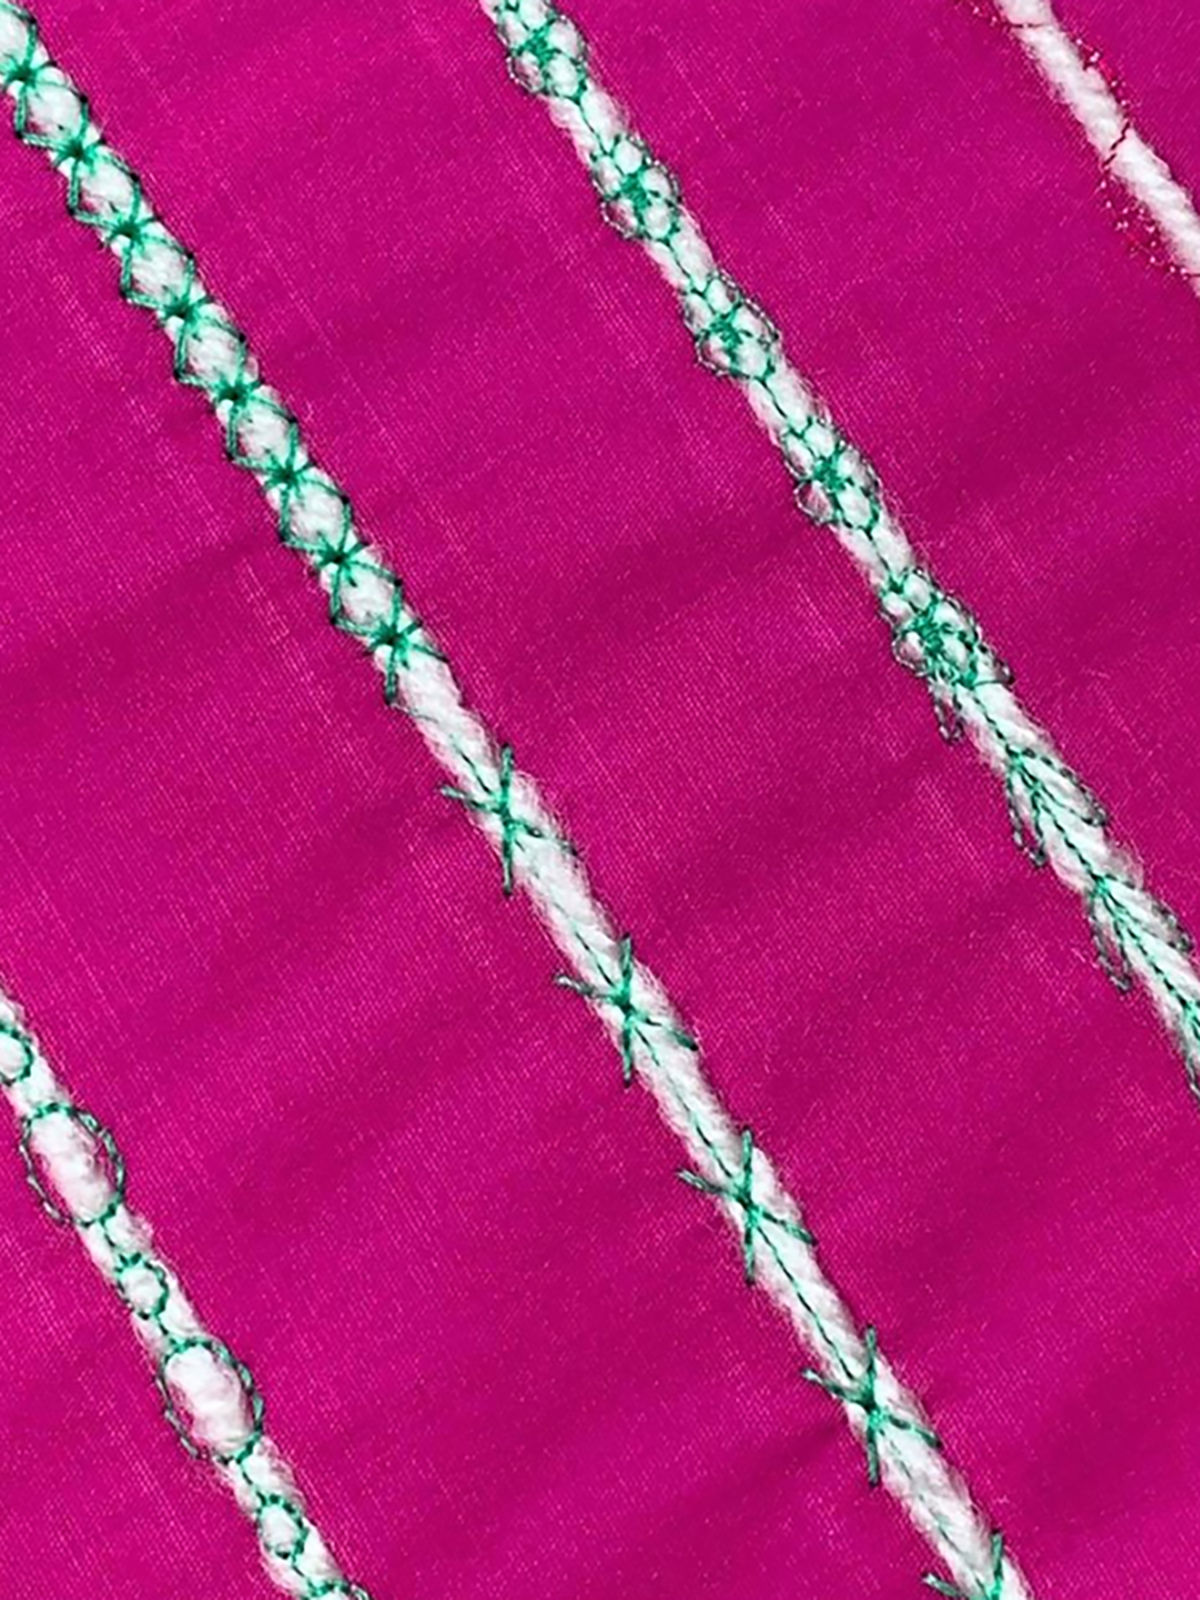
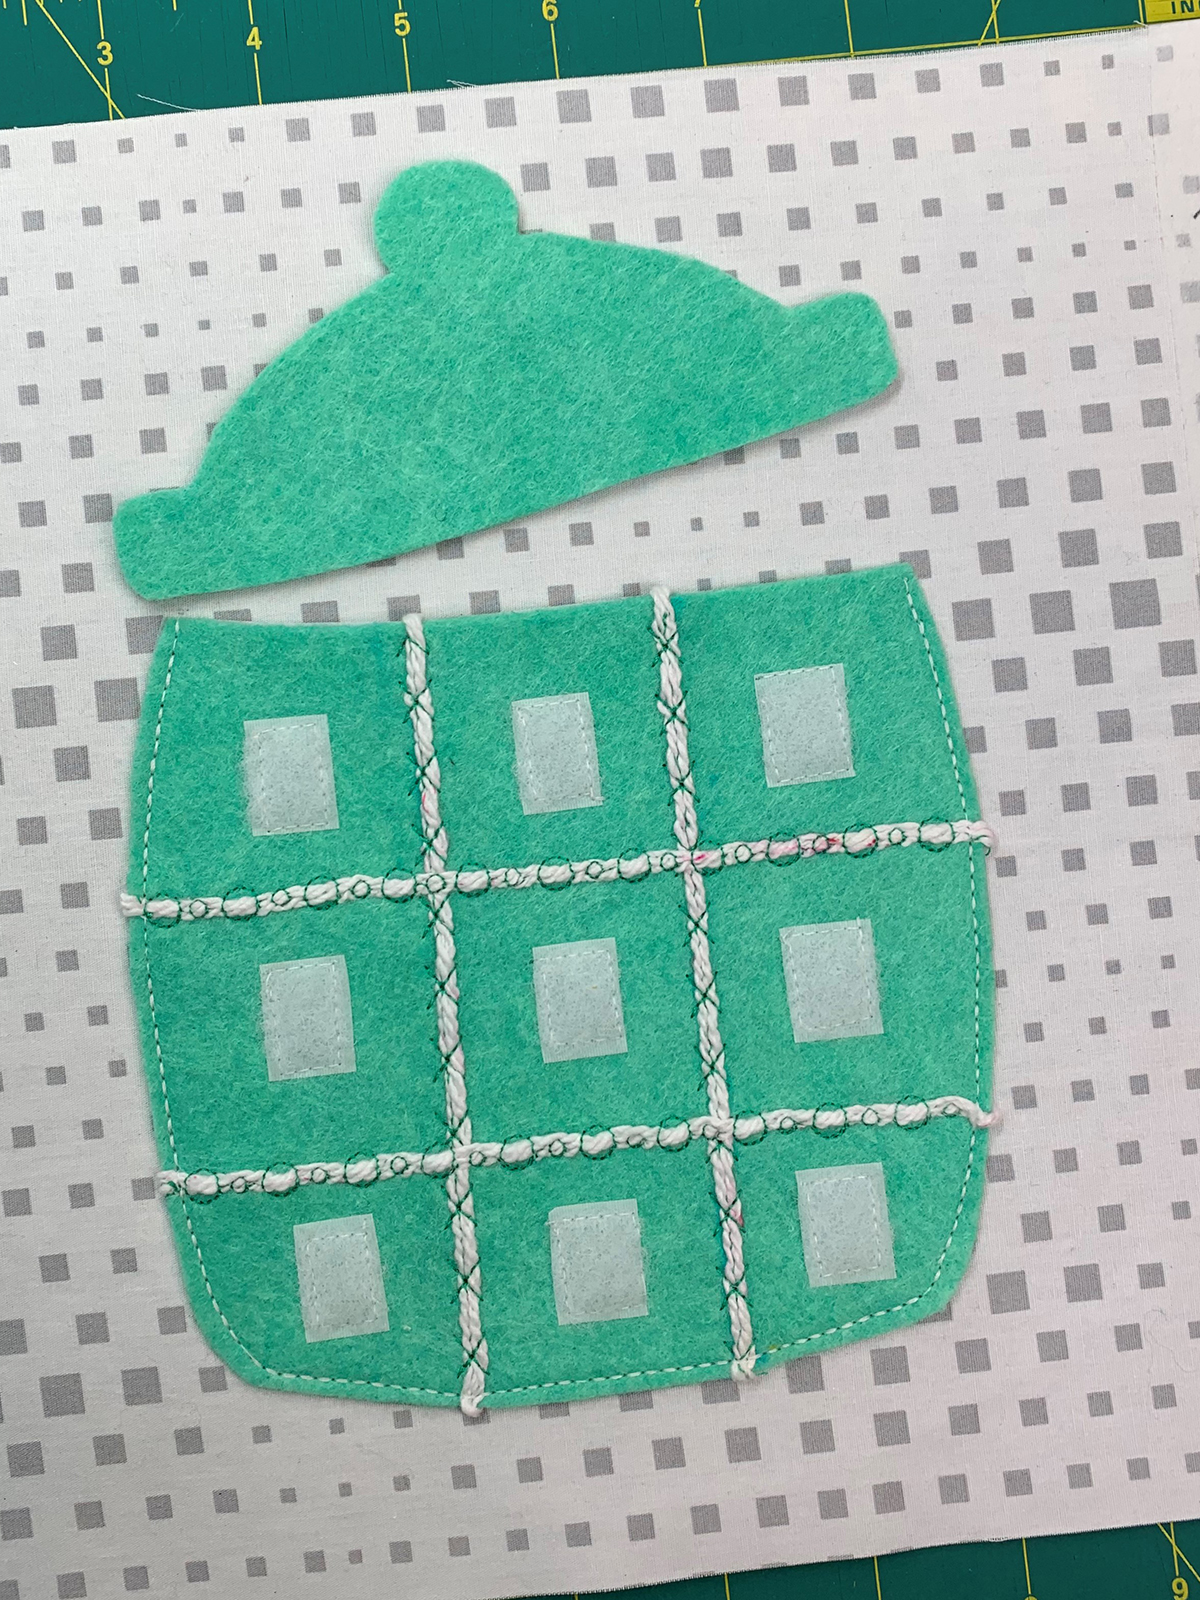
I mentioned earlier how you will get different looks depending on the decorative stitch and color of thread. A third variant is your yarn. Notice a difference in the two pictures below? The one at the top is acrylic, and the one at the bottom is the one I am using for this project and is cotton. The yarn fibers and density achieve different looks.
Grab Roxanne’s Glue-Baste-It and glue down the tail ends on the back. Let dry for a few minutes. My yarn is cotton so it worked well with the glue and a good finger press. If you are using acrylic or wool blend, use OESD Embroidery Tear Away Tape or similar tear away tape to hold down the yarn ends.
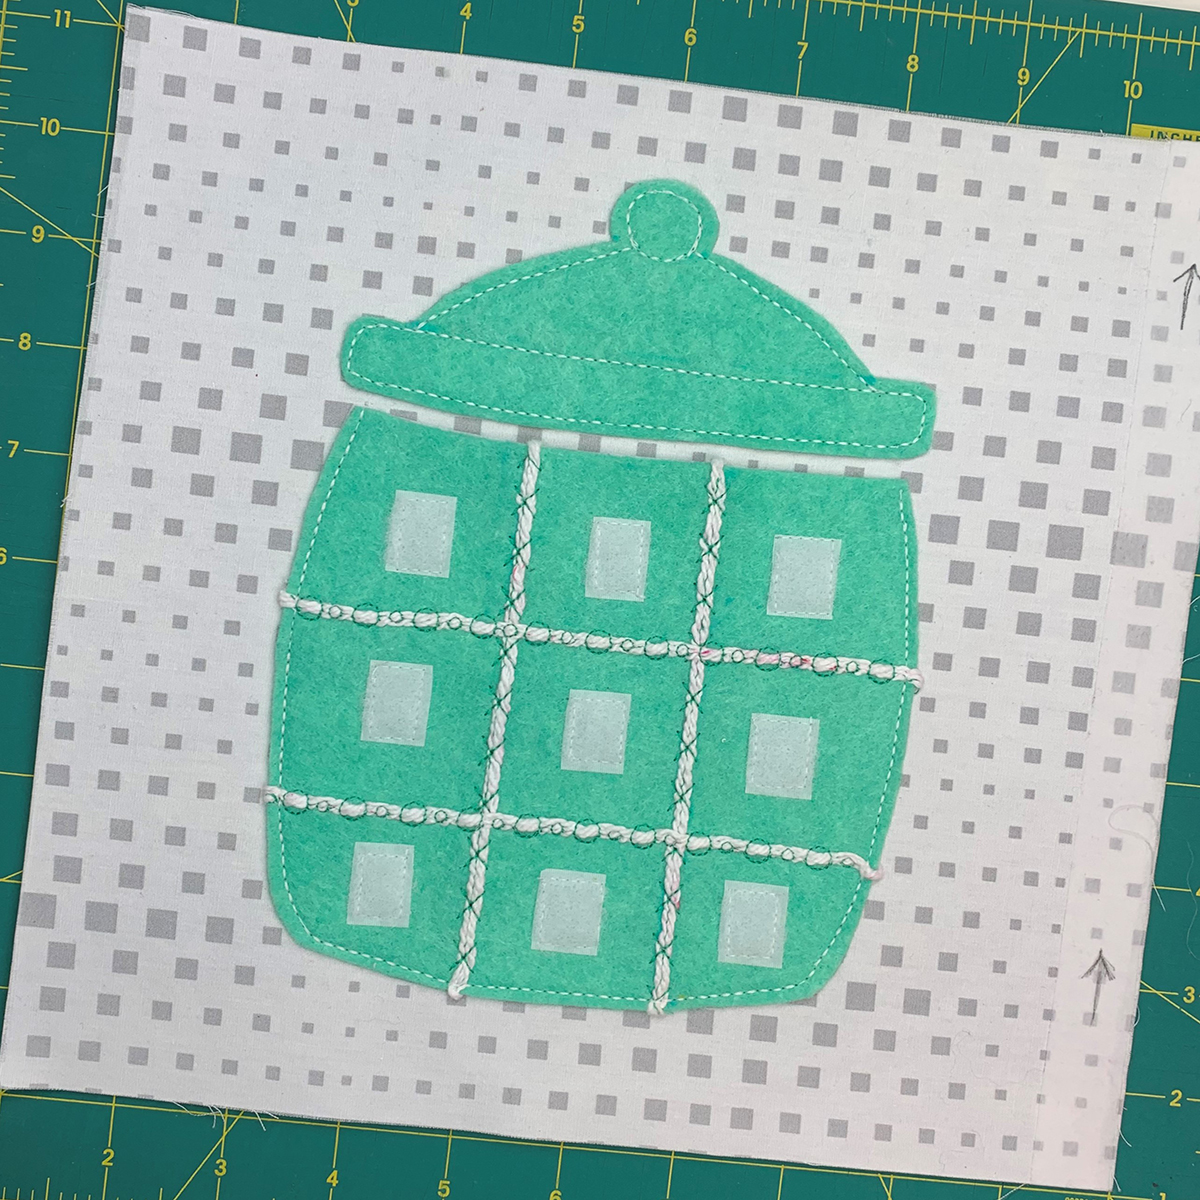
Looking good…
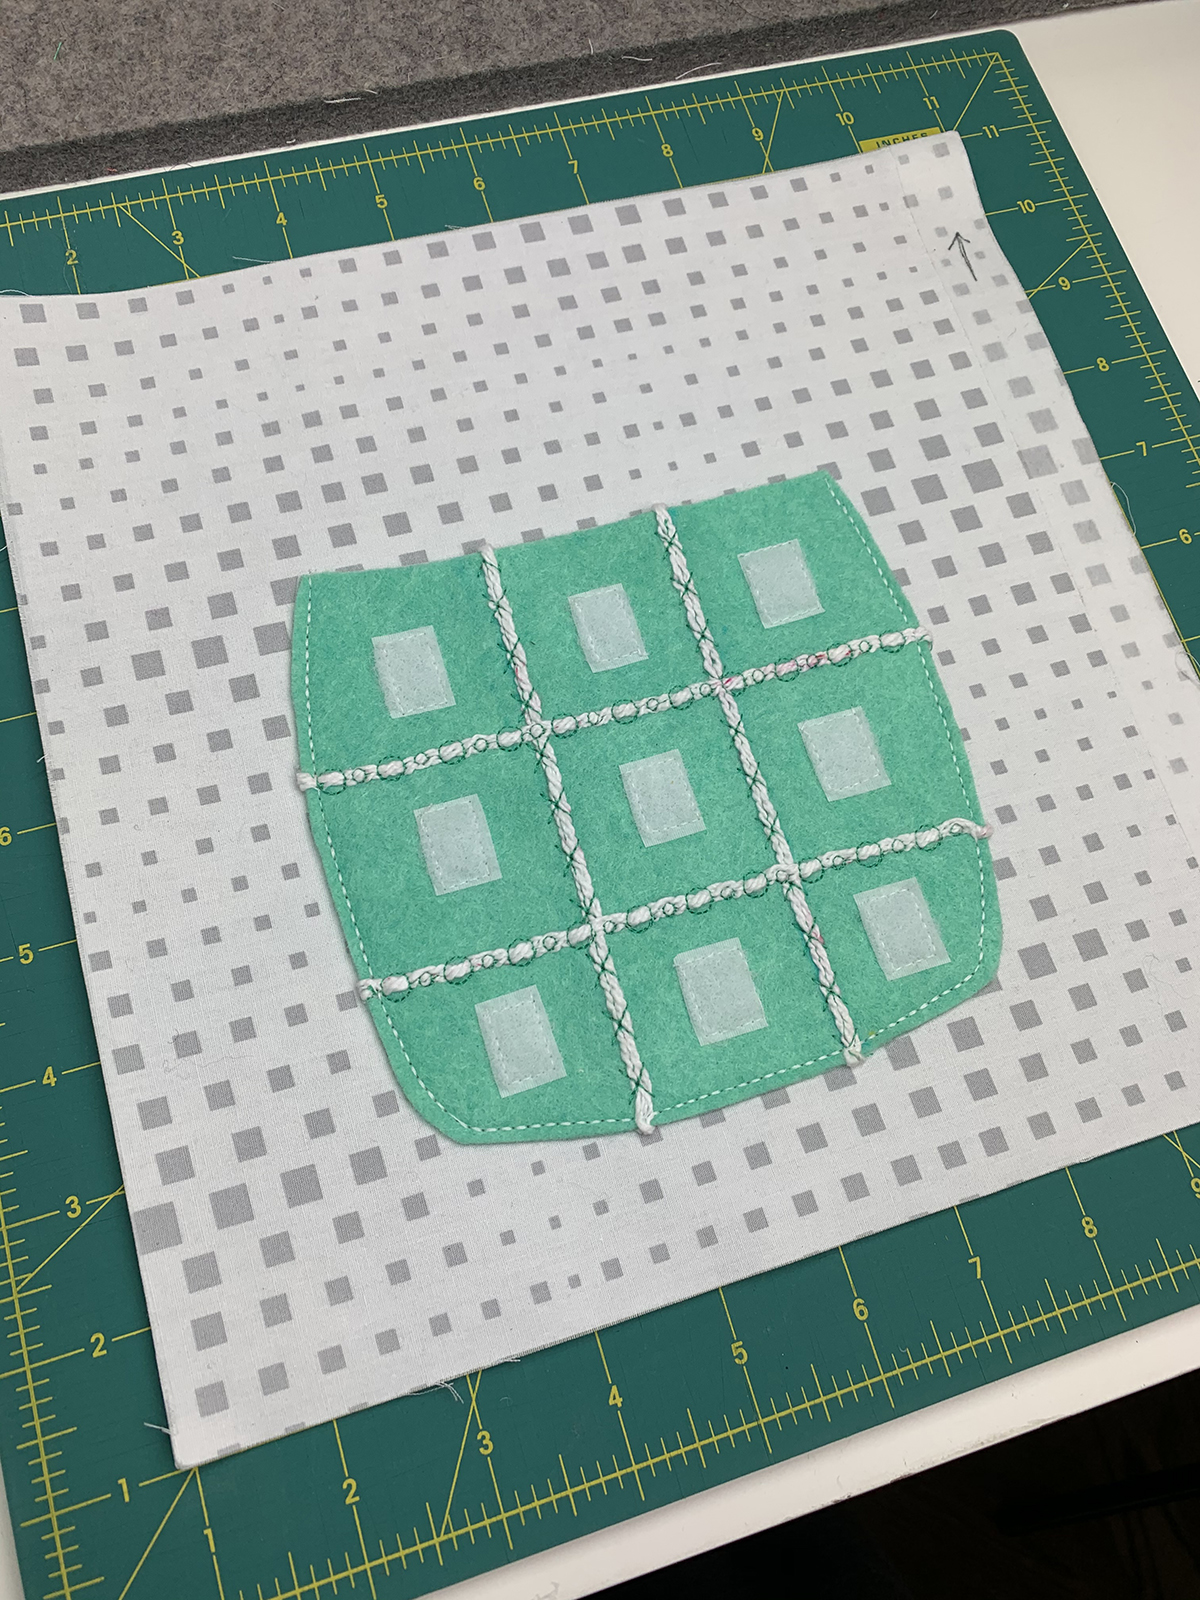
Don’t put away the glue yet. Cut 9 loop hook and loop pieces about 1/2” in length and glue the loop portion in the center of each section. This will help secure the pieces in place while sewing them down.
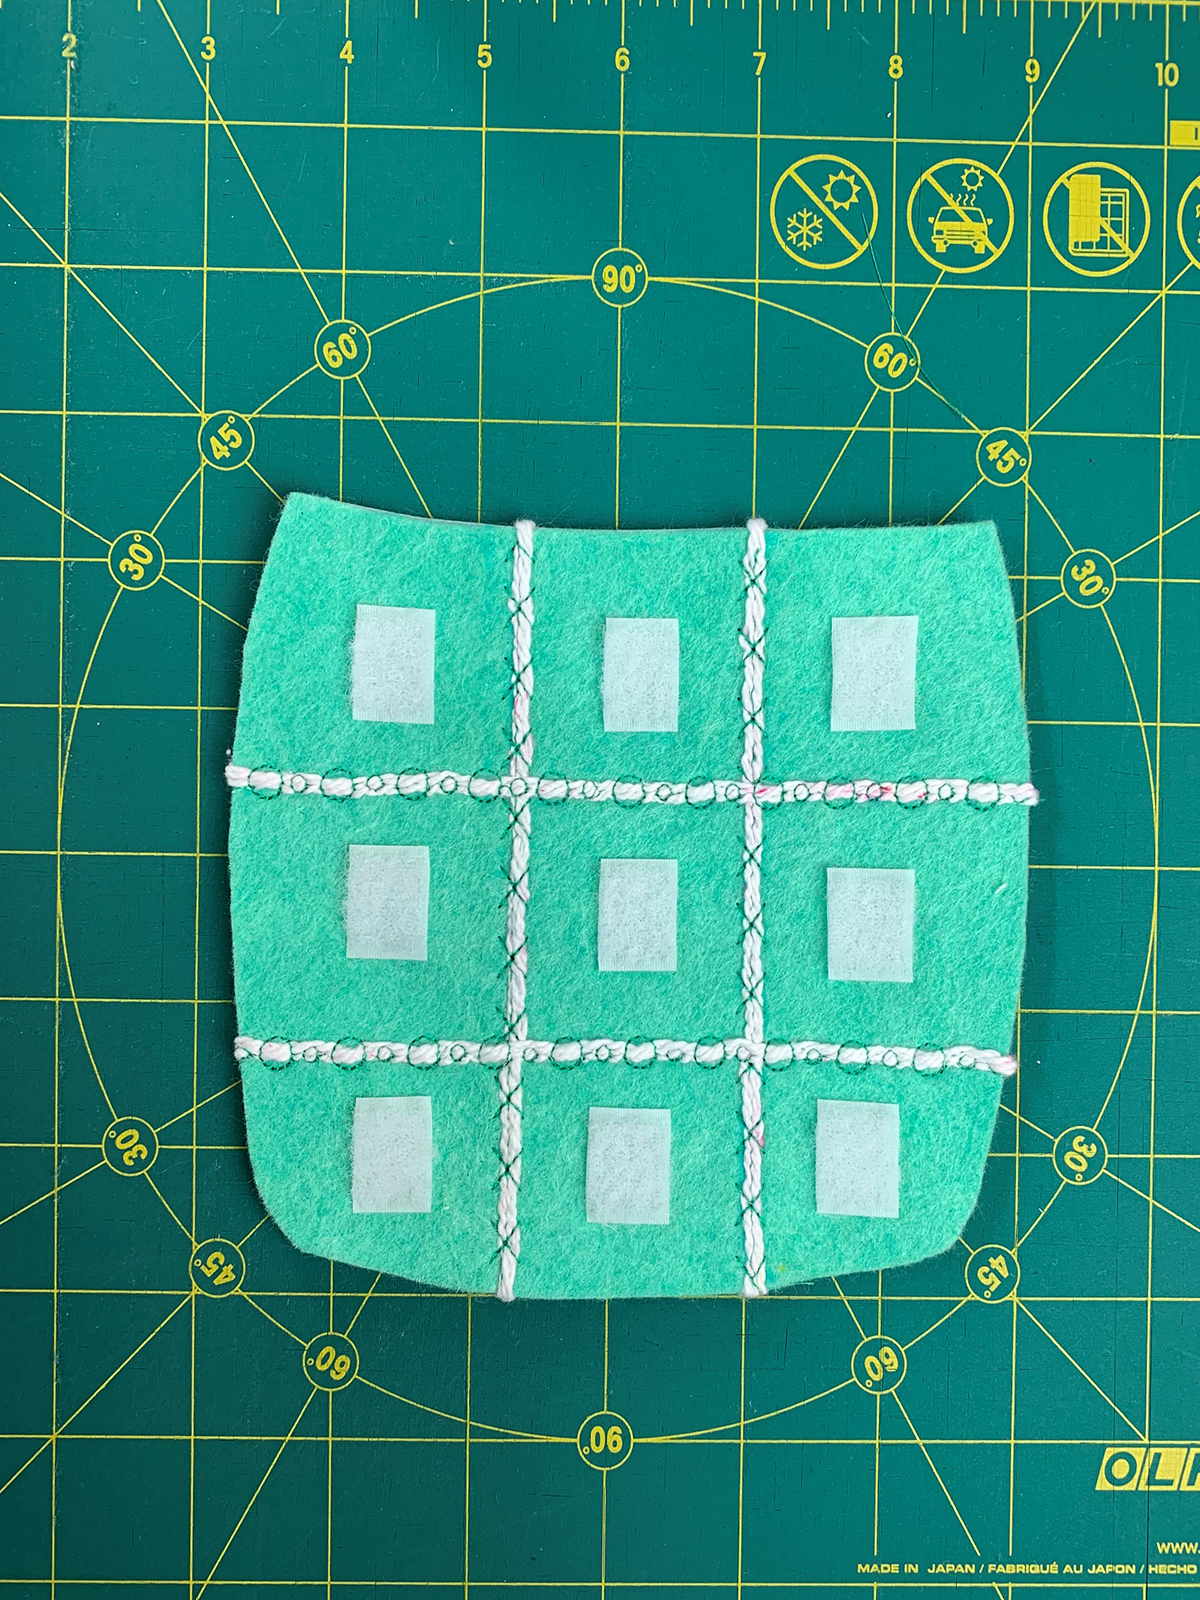
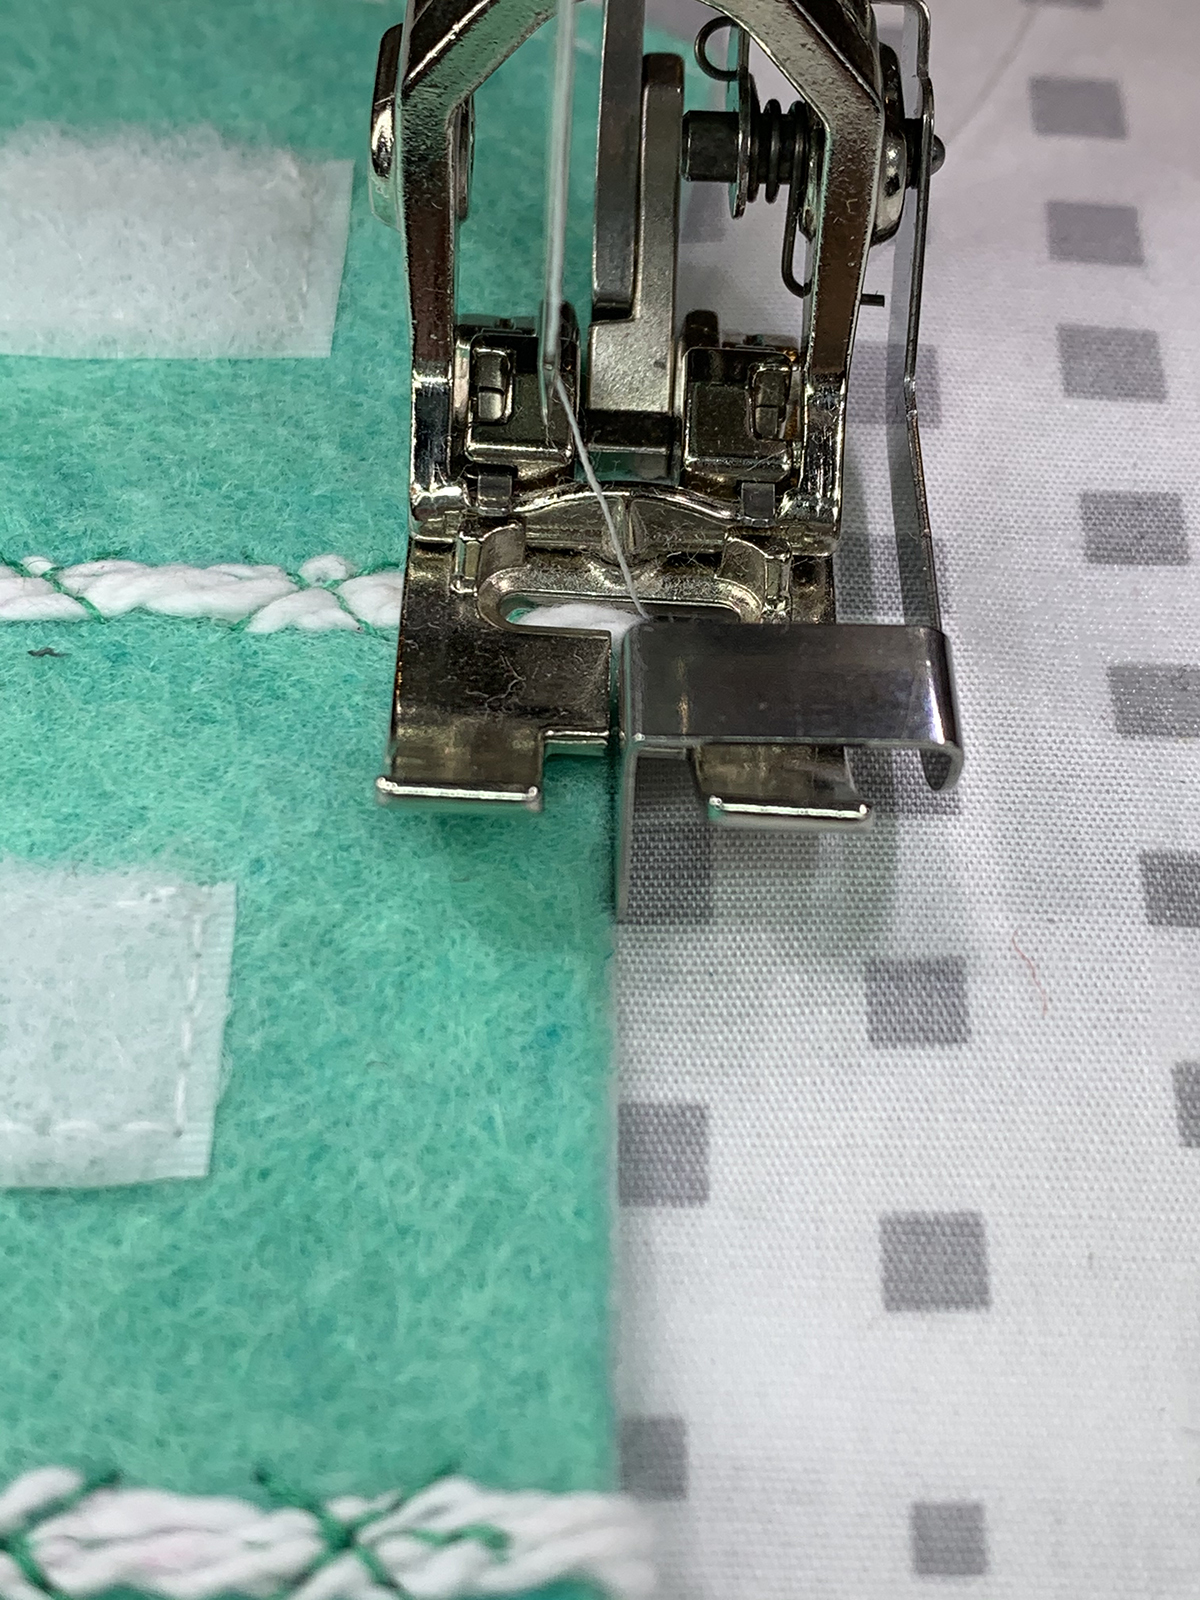
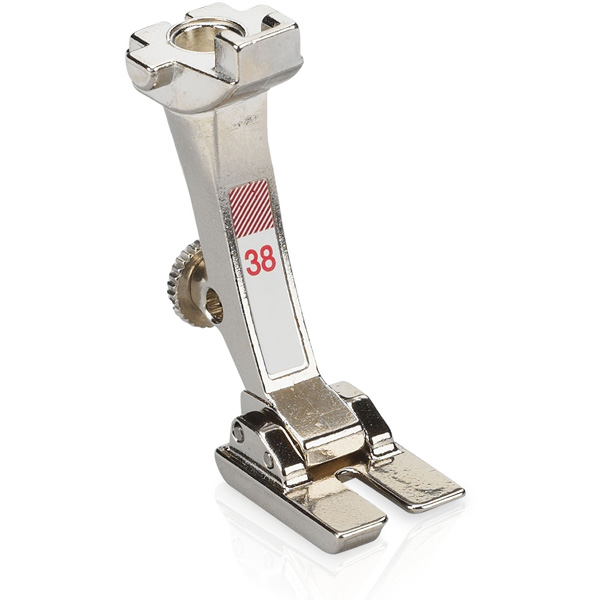
Attach Piping Foot #38 to your machine. This foot is sometimes called the “uneven foot” because the right toe of the foot is higher than the left toe, which makes it great for sewing uneven surfaces. Piping, thick trims, and Velcro are easy to sew with this special foot. With white thread, we are going to sew the Velcro in place. The glue should be dry by now; this really helps so the pieces don’t end up crooked. Place a Velcro piece under the foot with the Velcro up against the inside of left toe. The left toe of foot should not have anything Velcro under it. See why the left toe is designed so it is lower than the right toe?
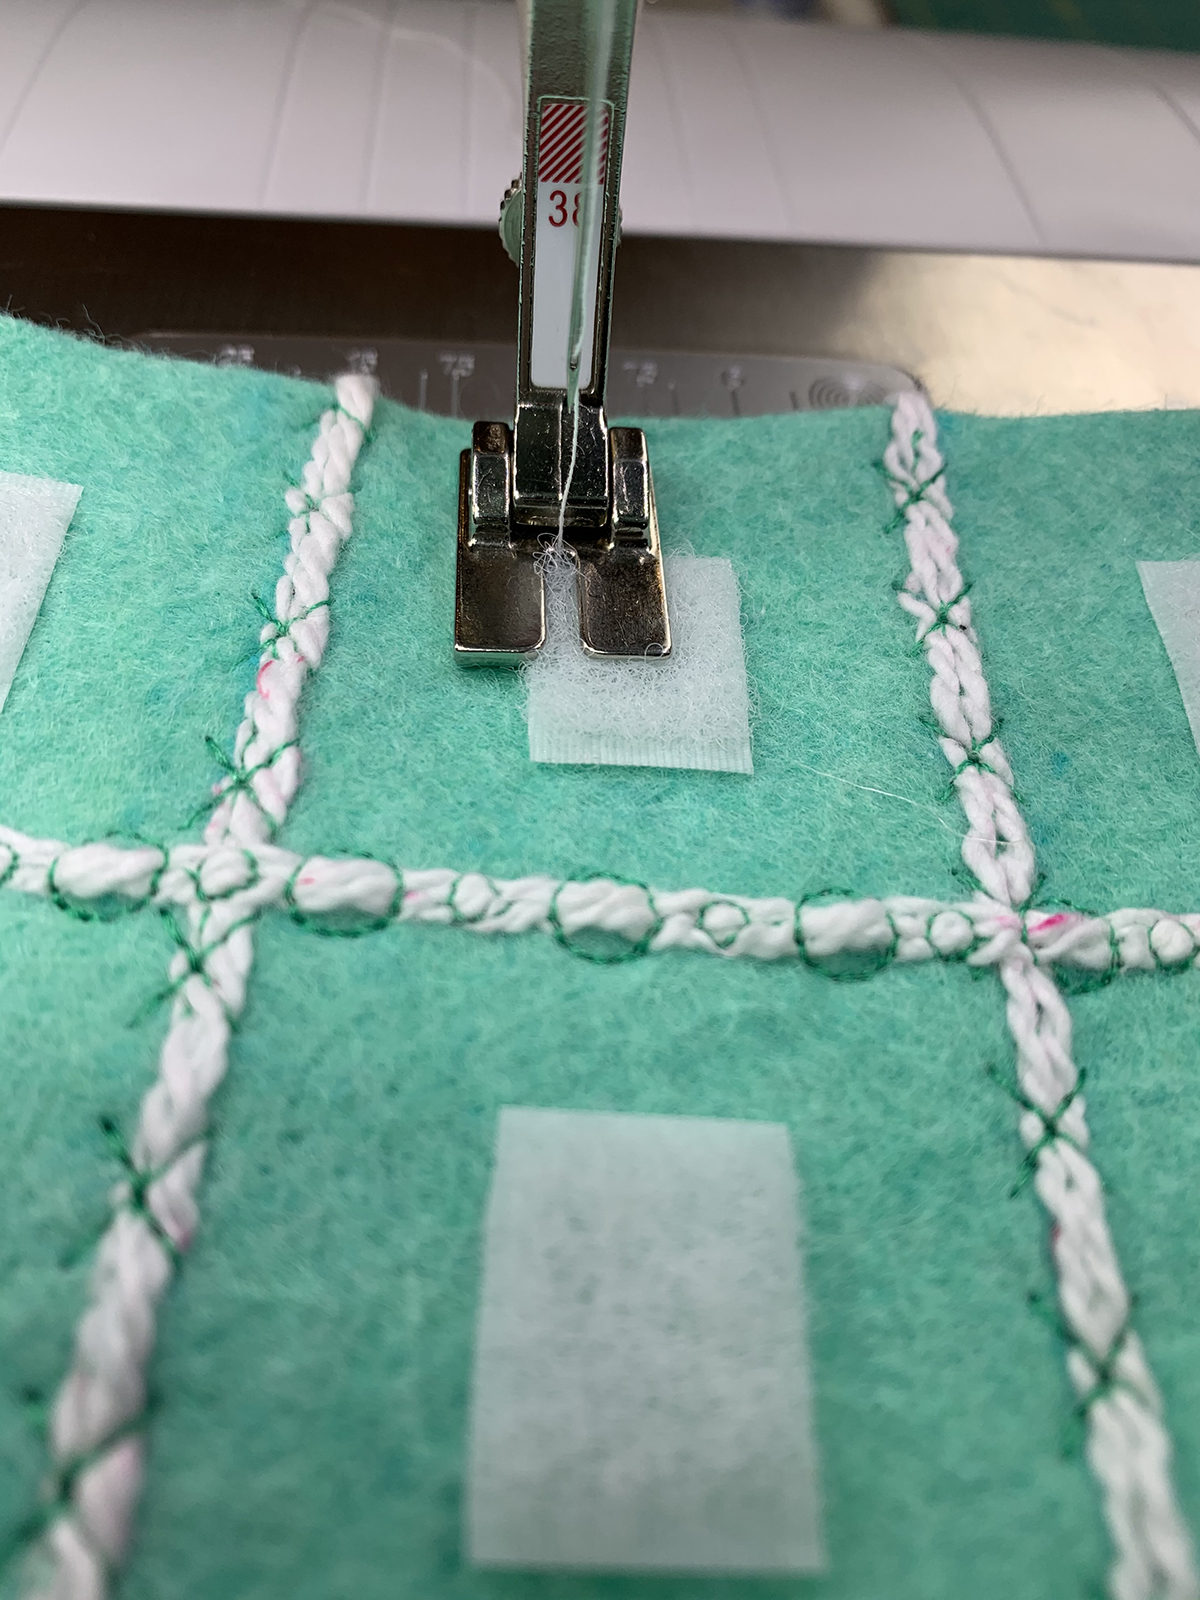
Make sure Needle Stop is in the down position and sew all four sides. Use your Freehand System to pivot at corners. If you did not set the machine securing features (so that stitches are automatically secured at start and end of sewing), make sure to backstitch. Sew all Velcro pieces.

The last step for our jar is to sew it to the background page. First, secure the jar with pins, glue, or Stitch Witchery. To use Stitch Witchery, follow these steps. Place 1/4” Stitch Witchery along the sides and bottom on backside. Do not apply along top of jar! Apply steam to activate fusible so it will stick to the felt. Don’t touch it with your iron. Then, center the jar onto background page (remember to leave room at the top of the page for the lid). To adhere fusible, you will need to press with iron on backside. Carefully flip over page and press.

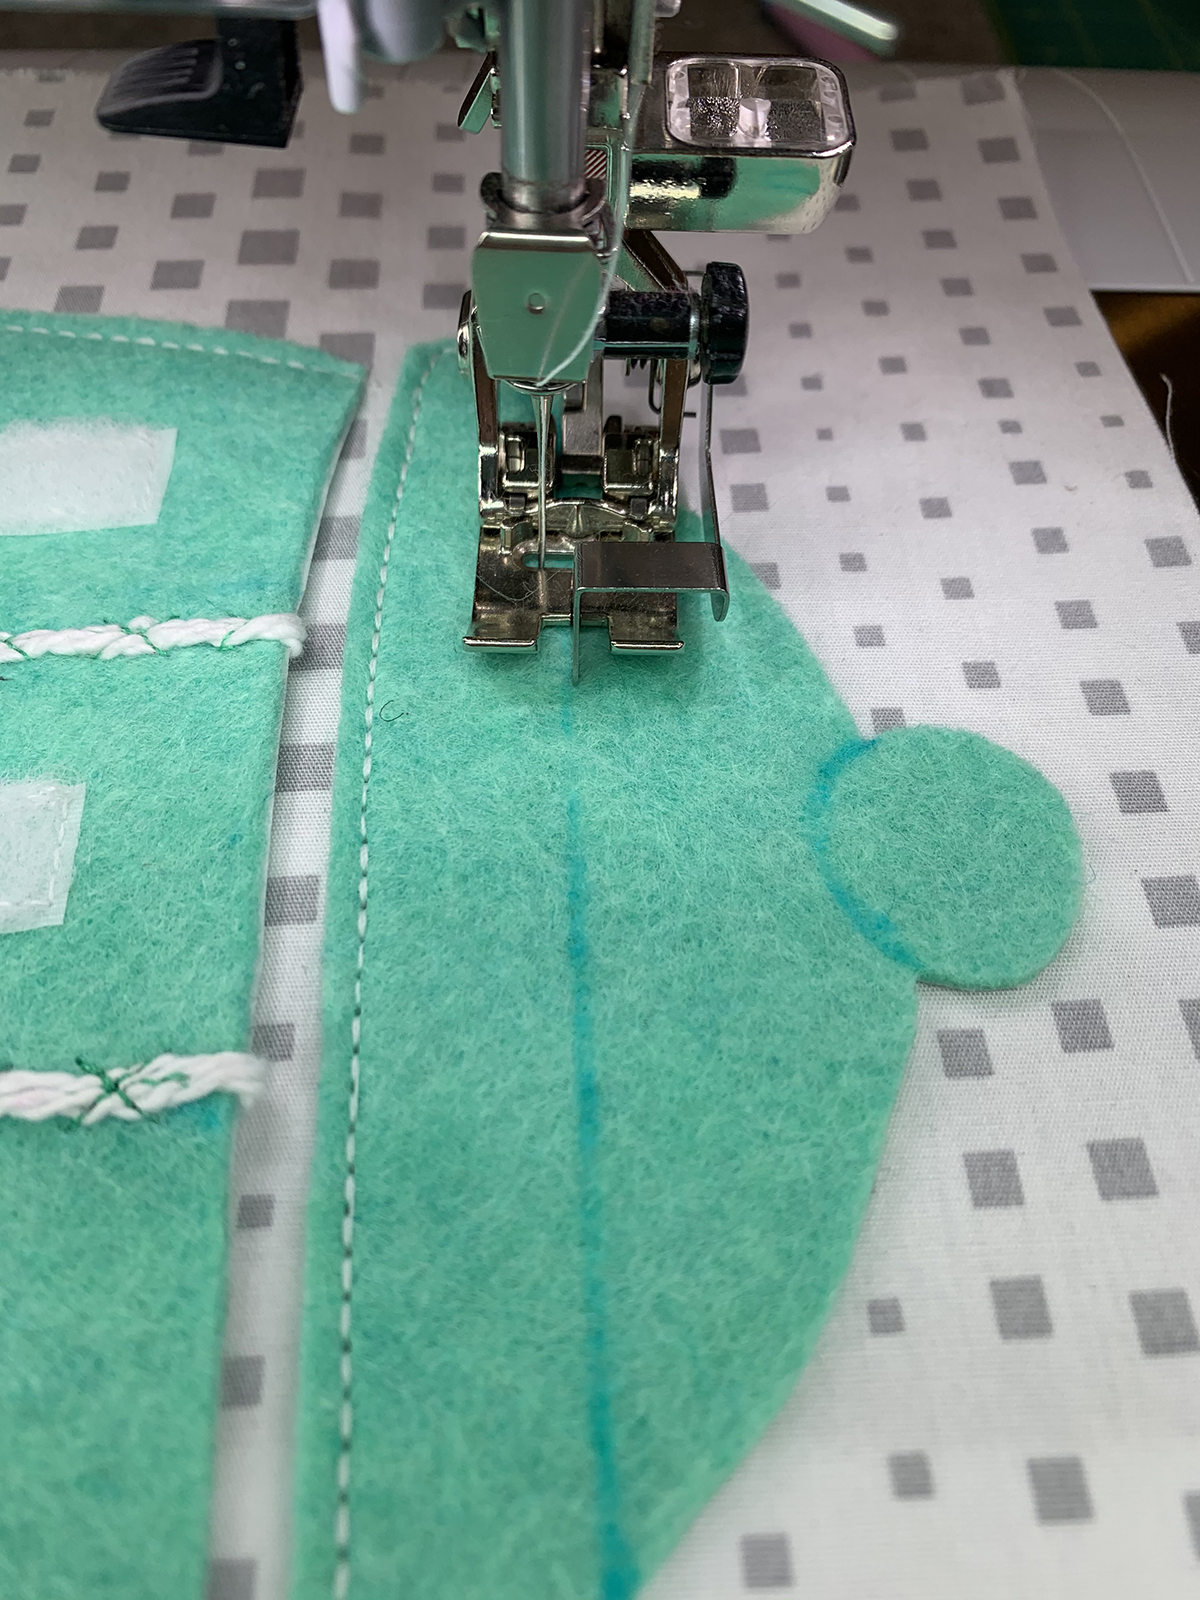
Attach BERNINA Edgestitch Foot #10/10C/10D and keep white thread in machine. Select Triple Stitch #6 and move needle position to -4.
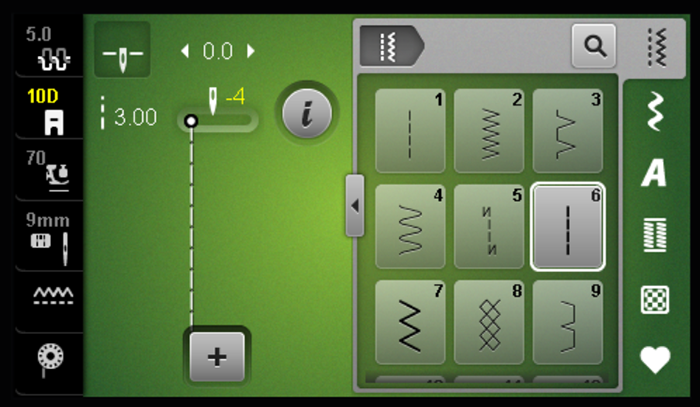
Line up the guide on the foot against the edge of felt starting at top of jar. Sew down one side, along bottom and up the other side. Use your Freehand System to slowly pivot around the bottom corners. Do not sew the top of jar! Secure the stitches at the start and end.
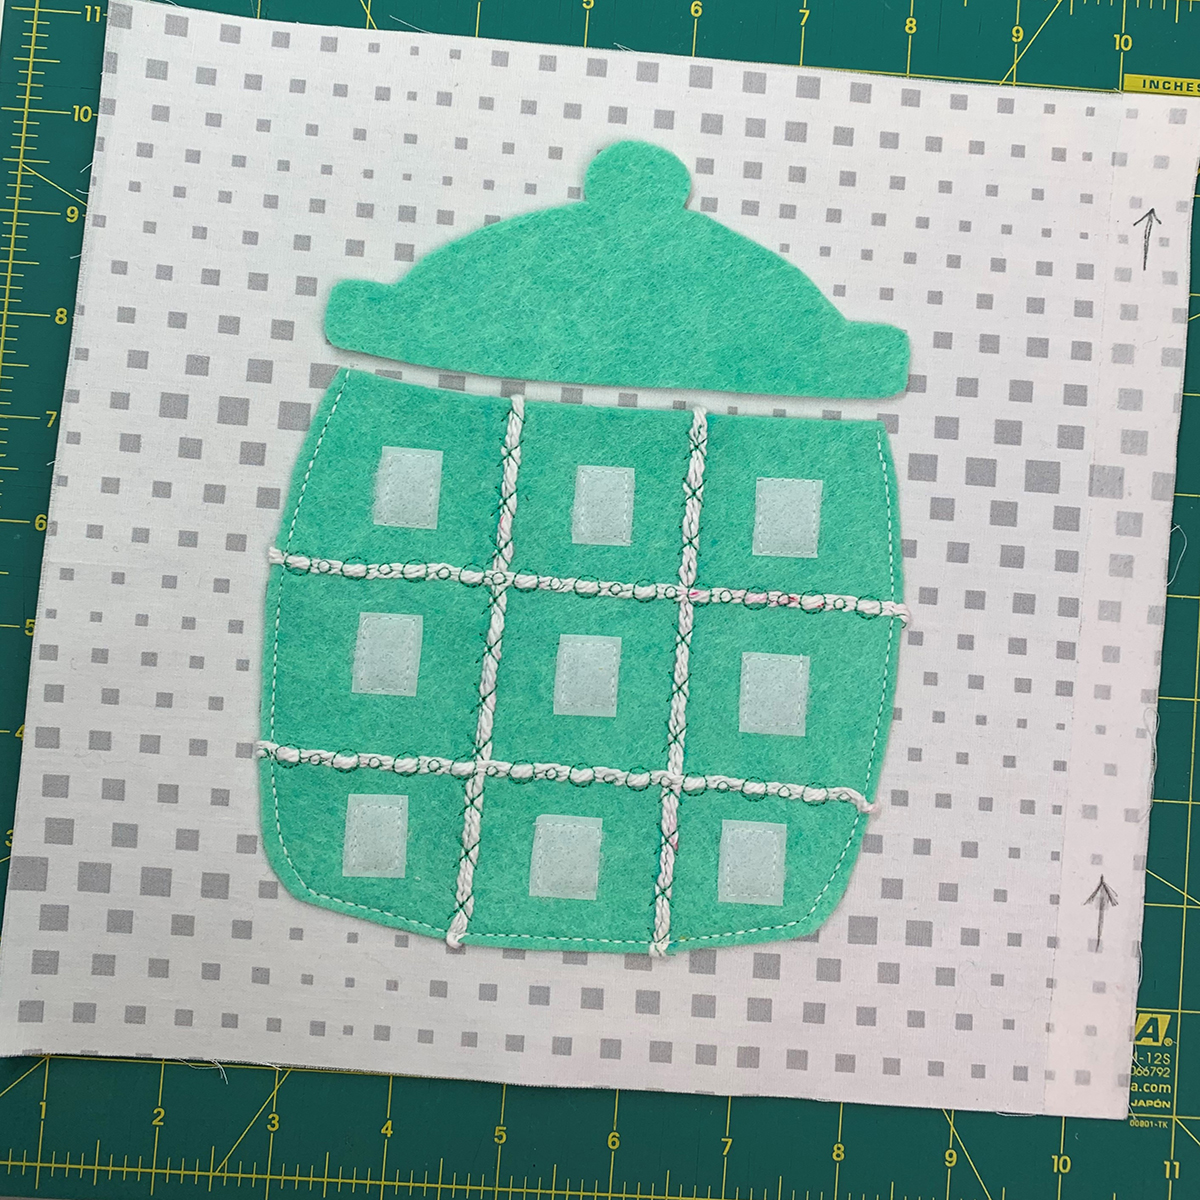
Lid
Place your lid about 1/4” above the jar. Apply glue to back and secure in place for stitching. You can place the lid askew for fun also.
With a temporary marker, draw a line across the lid and form a circle as pictured below.
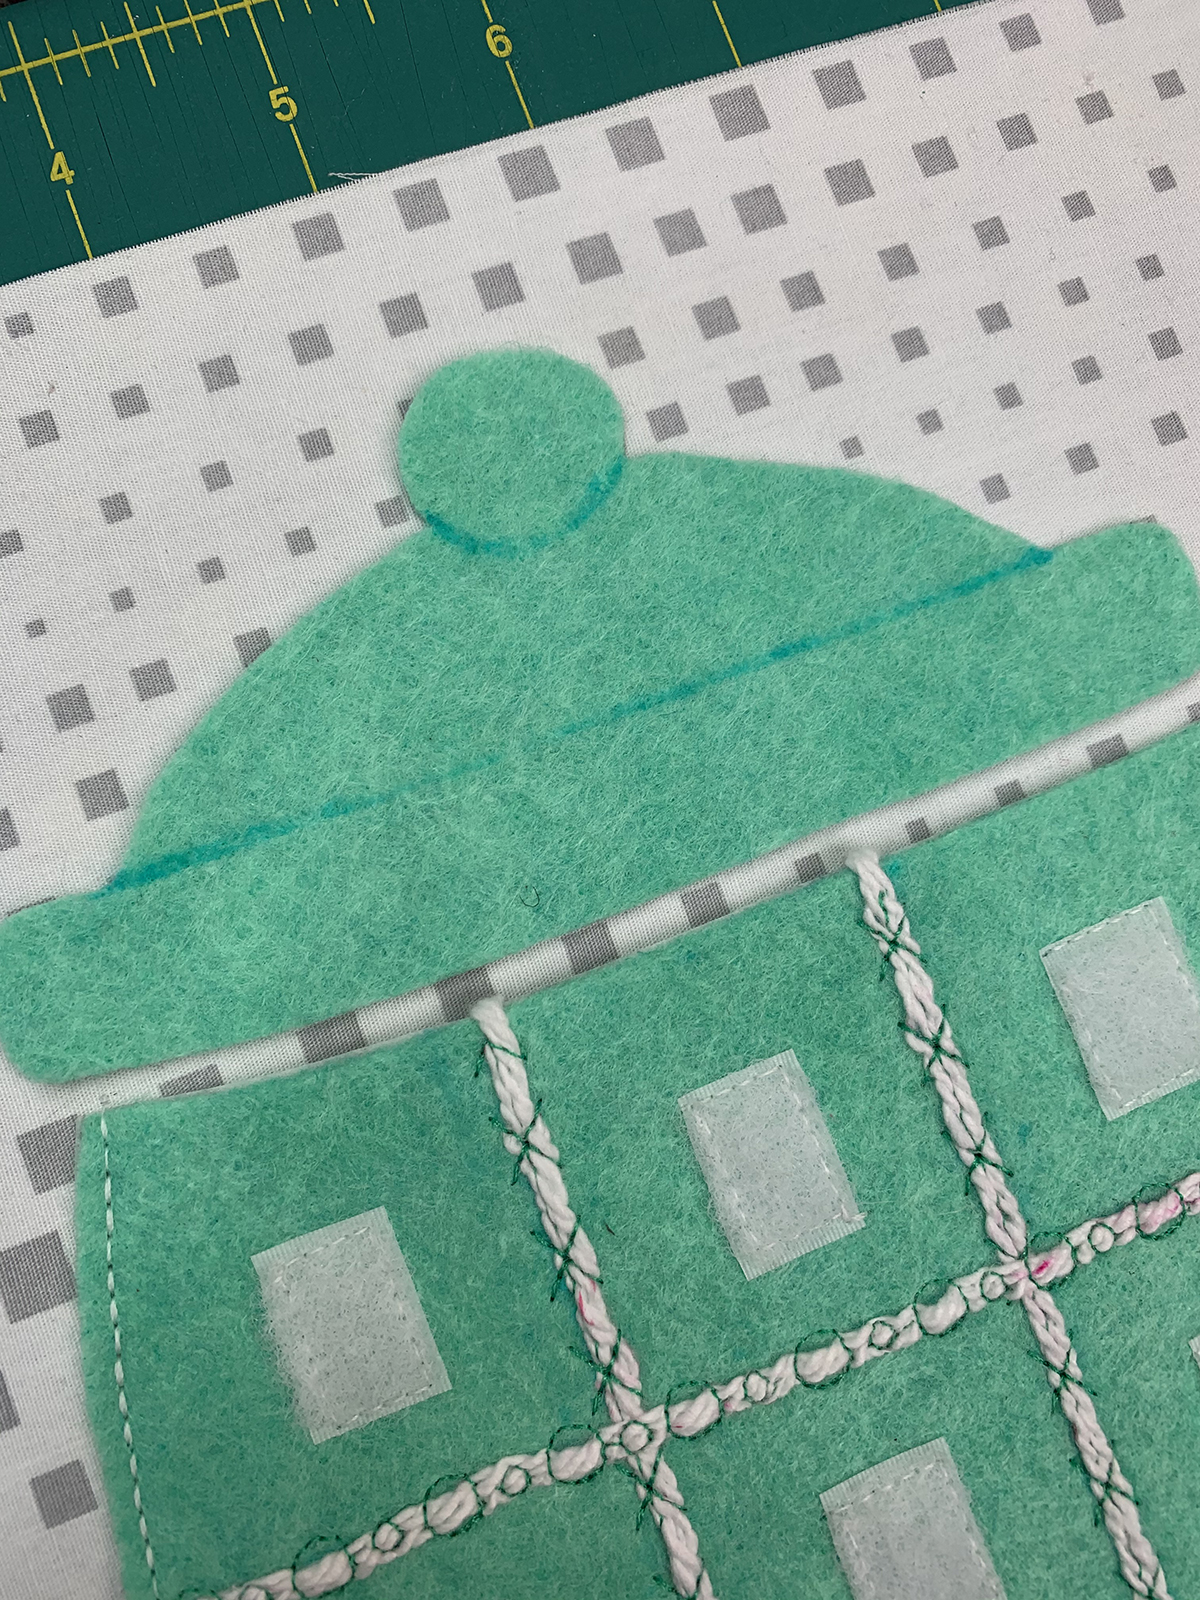
Stitch the lid using the same method we used for the jar using Edgestitch Foot #10/10C/10D, Triple Stitch #6 and Needle Position -4. The marked lines on the felt are not your stitching lines! The guide on the foot will ride on top of the marked line.
If you want the stitches to line up nicely, make sure you treat the marked lines as a placement for the foot guide.
You might prefer to use BERNINA Open Embroidery Foot #20/20C/20D for the circle. BERNINA gives you options, and most of the time, you’ll find you can use more than one foot for a technique. If you use the Open Embroidery Foot, change your Needle Position to 2 and line up the inside right toe of the foot against the felt edge. Remember to treat the marked lines as a placement mark for the foot, not the stitching line! The circle is a challenge but go slow and use your Freehand System to pivot. Another option is to add a white felt circle and sew on with matching thread.
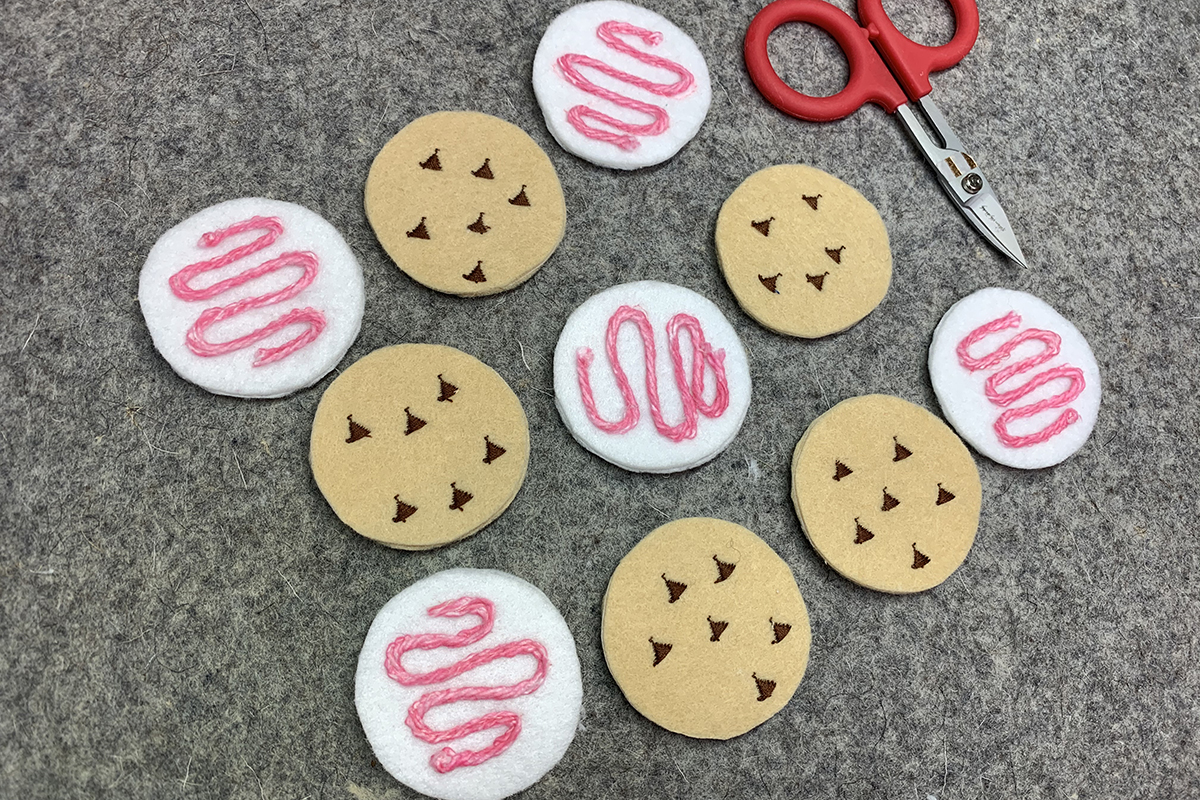
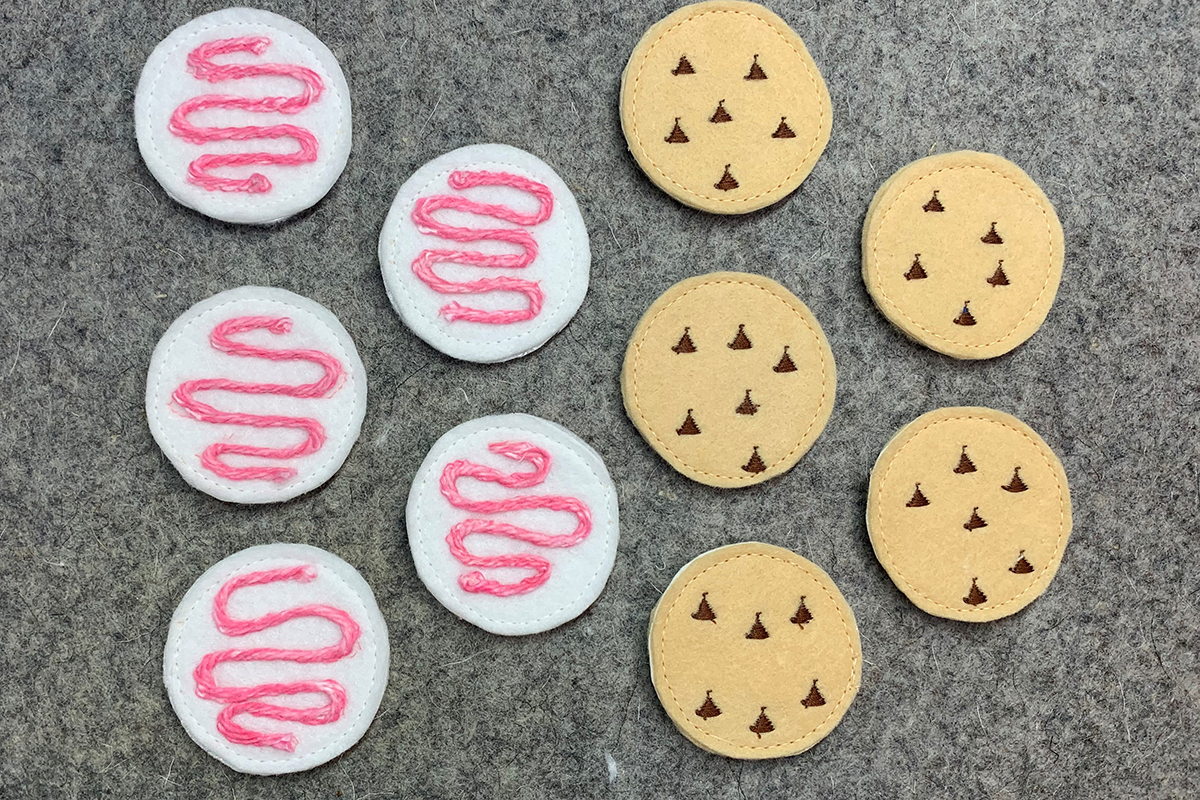
Cookies
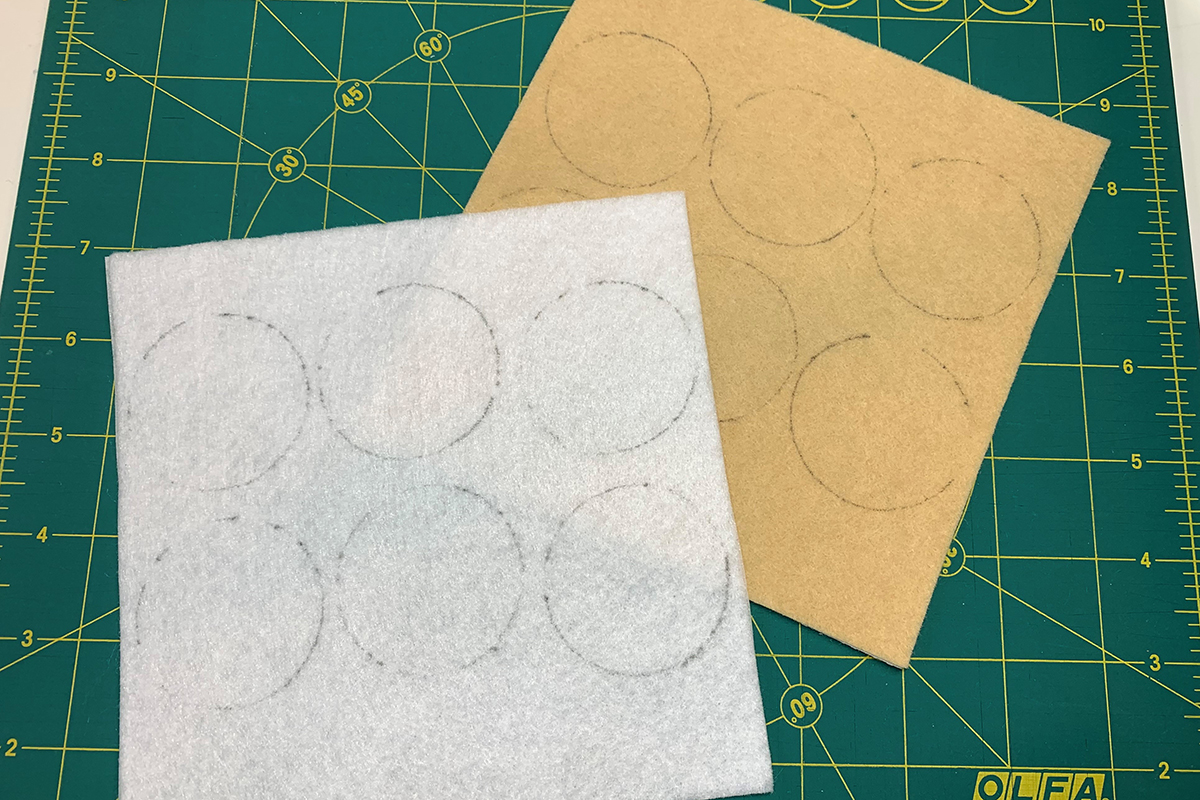
You will need 2 pieces of 6” x 6” Ultra Clean and Tear Fusible stabilizer and 2 pieces of 6” x 6” felt – one white and one tan. Like we did with the jar, set your iron to medium without steam, place the adhesive side of stabilizer onto the felt and press until the adhesive has bonded. Find a circular object about 1 3/4” in diameter, such as a thread spool. I used an Isacord spool. Place the base of spool on top of the white felt and trace 6 circles with a temporary marker. (You only need 5 but it’s always good to have an extra in case one doesn’t cooperate J) Then, draw 6 circles on tan felt. I used a Frixion pen. If using the Styla pen lightly draw on felt so the blue is easy to remove. The reason we are drawing on the front and not the back is so we know where to stitch in the next step. We could draw the circles on the back and cut them out first but it would be hard to manipulate small pieces of felt under the presser foot. This will make sense soon.
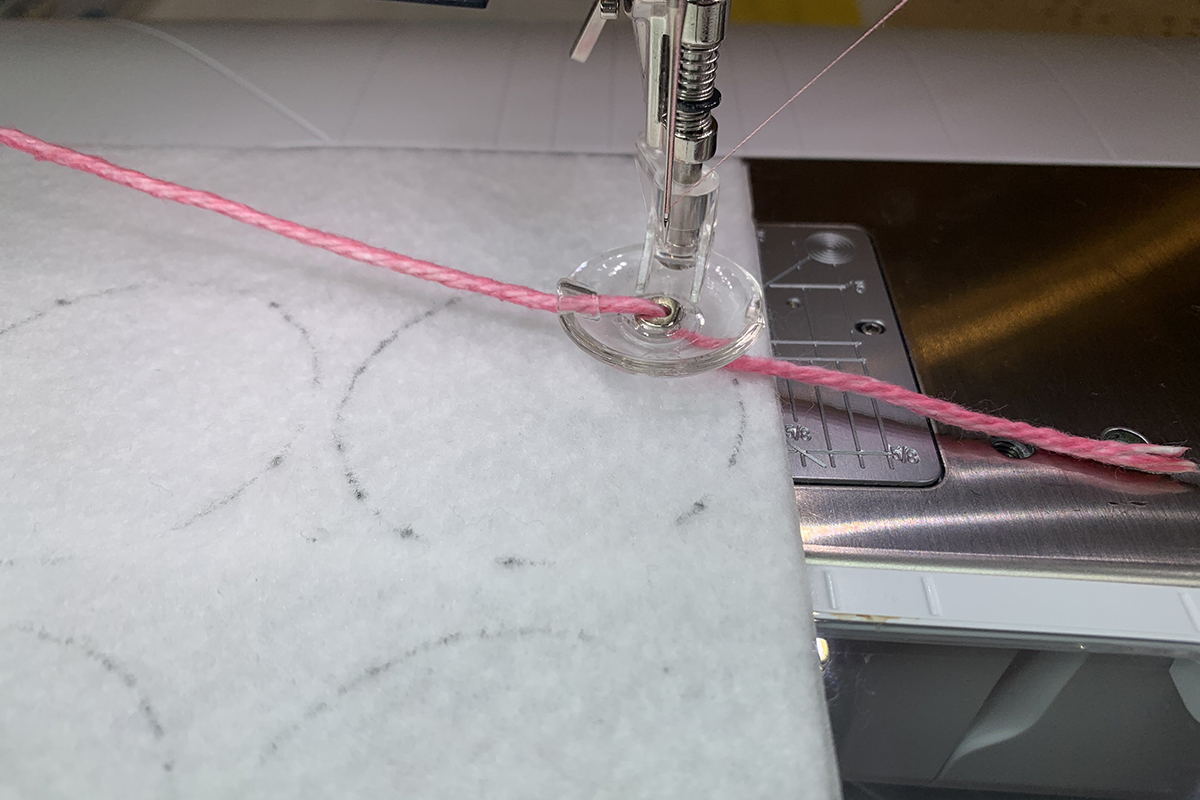
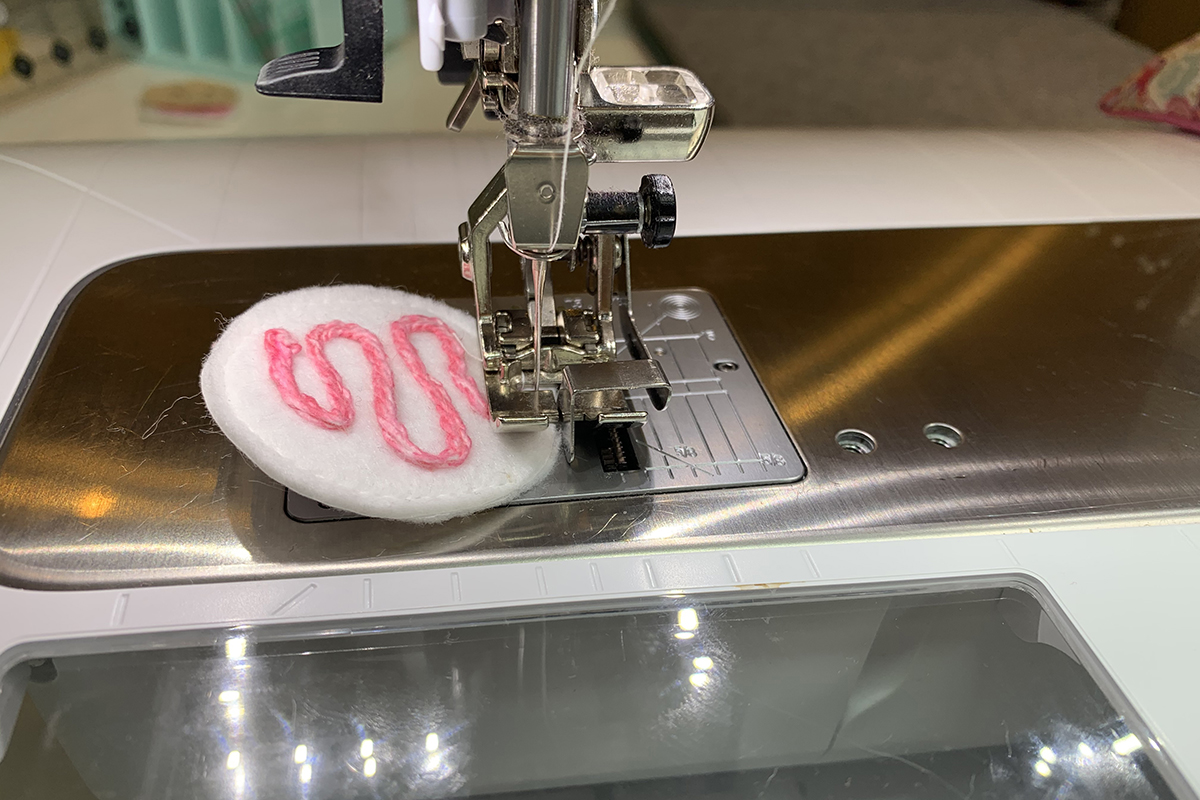
Time for free-motion couching! Let’s start with the white felt. Grab some pink yarn and the BERNINA Free-Motion Couching Foot #43. There is a tunnel at the left side of the foot that guides the yarn into place. Also, the foot comes with two metal guides that attach to the side of the machine and keep the yarn up and out of the way of the sewing area. Use the guide that fits your machine. Before you attach the foot, insert yarn into the side tunnel and down the needle opening. The foot comes with a wire loop threader if you need to use it. Now attach the foot. Add pink thread to your machine to match your yarn.
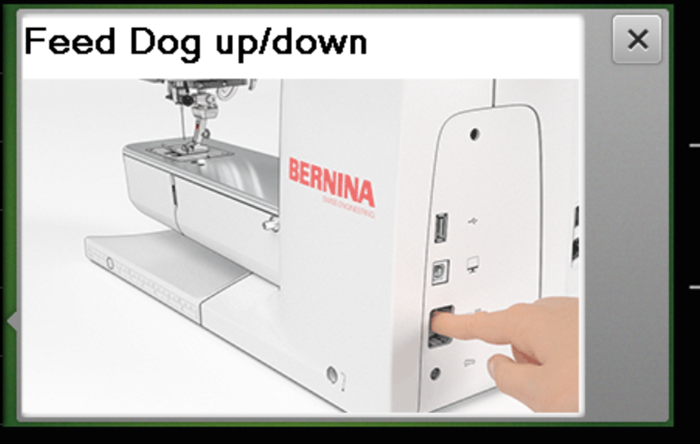
Your couching foot is set up and ready to go, but first we need to set the machine. Make sure the couching foot is selected on the screen and select a straight stitch. Notice what happens if you try and select a zig zag stitch or any other stitch… nothing! This is a safety feature of the machine. The foot is designed for a straight stitch in center position only. Make sure your thread securing functions are turned on. One last but very important step when free-motion sewing is to lower your feed dog!
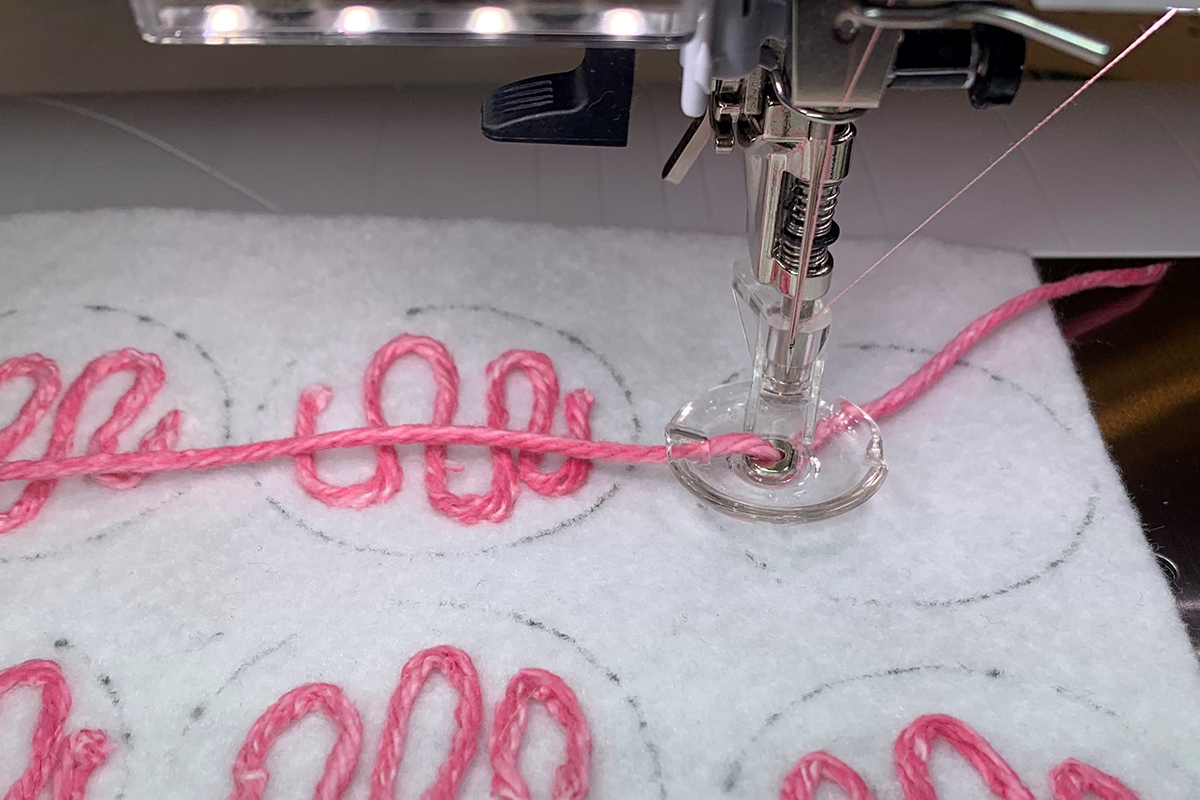
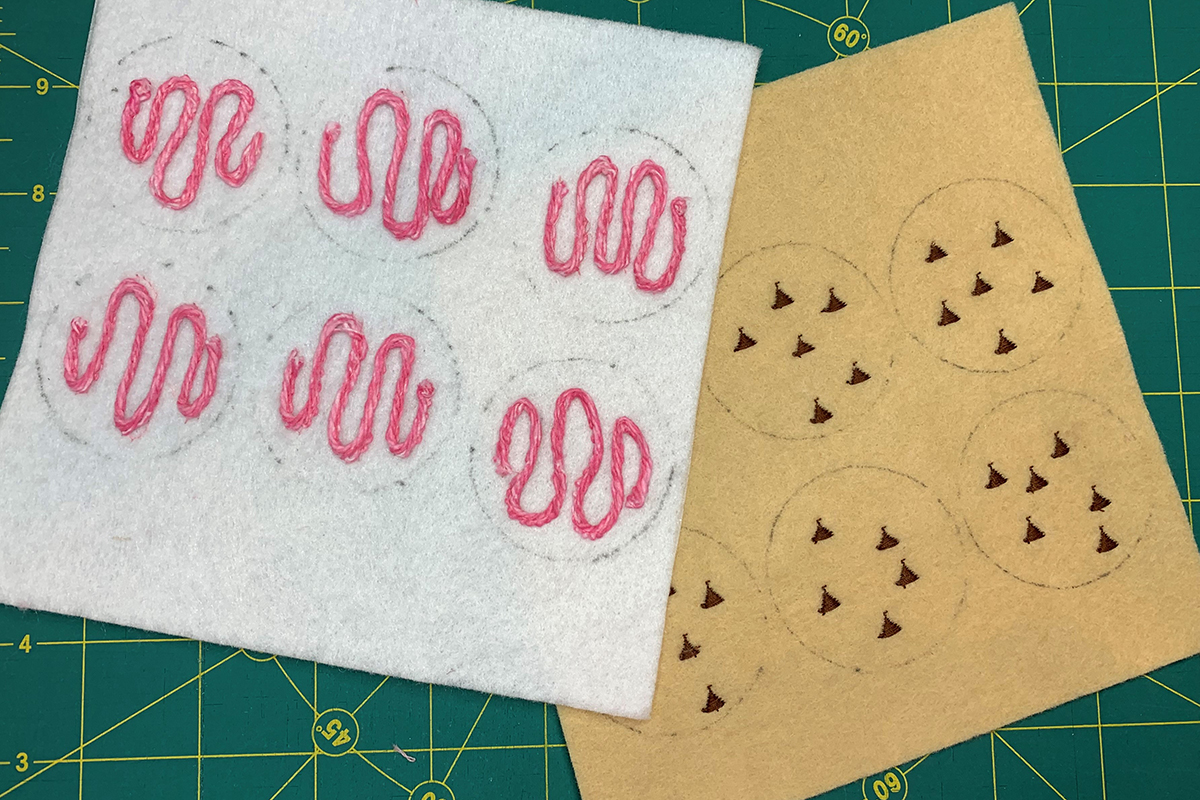
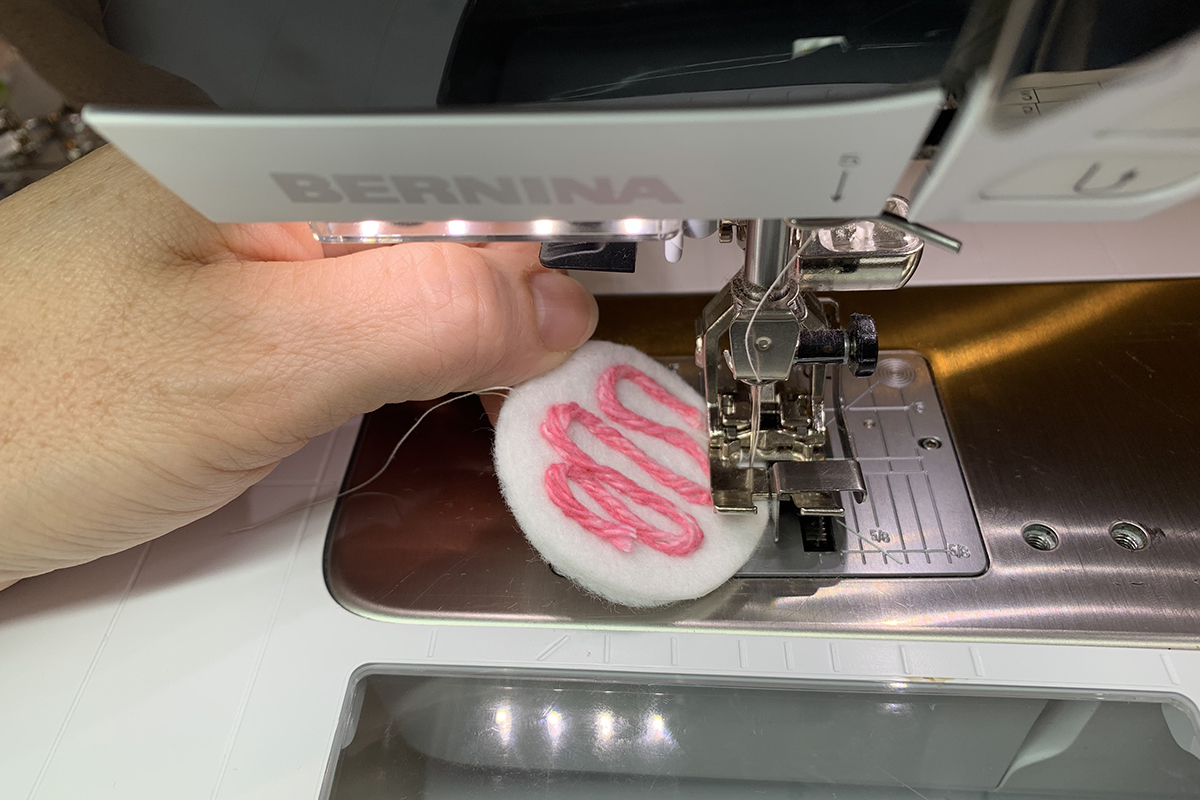
Place the felt under the foot where you want to start. You might want to move your sewing speed dial to the left to slow it down. Secure and start stitching forming curvy lines that mimic tube frosting.
Play around with it and have fun! At the end of each design, secure your stitch.
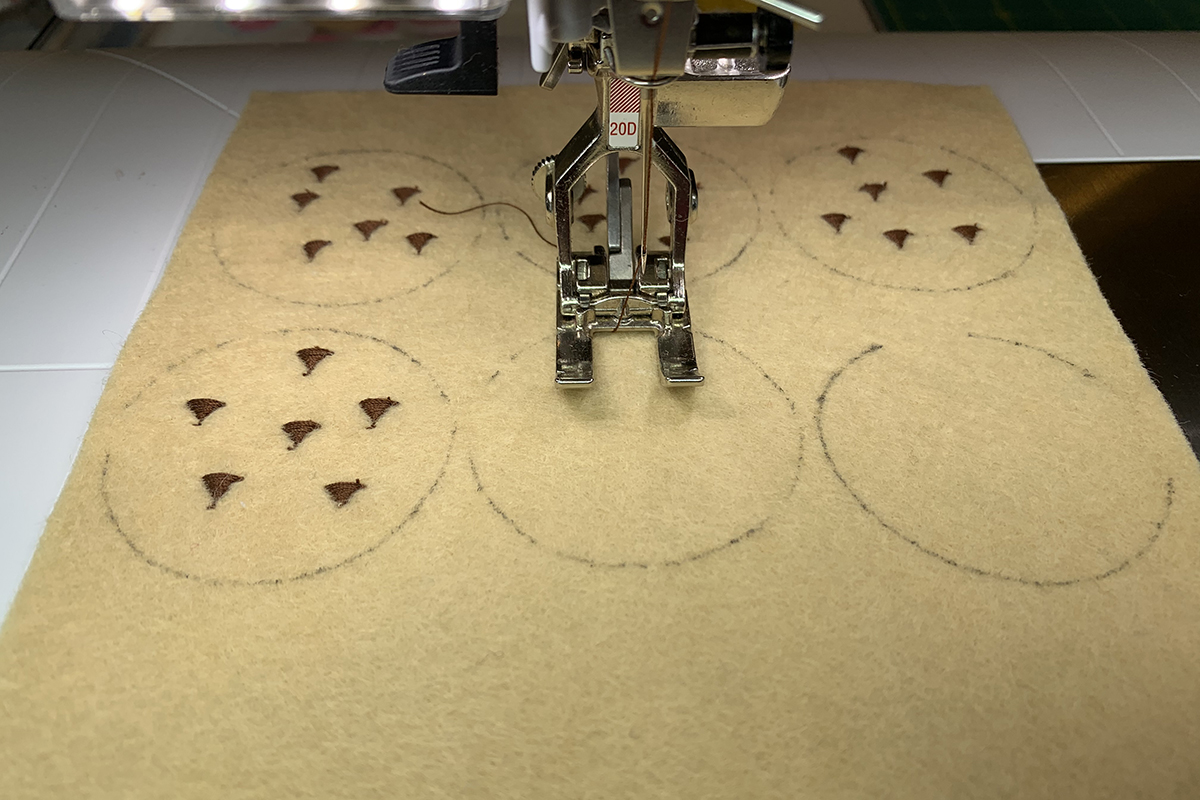
Grab the tan felt with your drawn circles. We are going to add chocolate chips to these cookies. Attach BERNINA Open Embroidery Foot #20/20C/20D and brown thread. Select Decorative Stitch #401 and change stitch pattern length to 3.8 (or stitch length to .20). Go into the Information Menu, select Pattern Repeat icon and enter 1. This will make one stitch pattern.

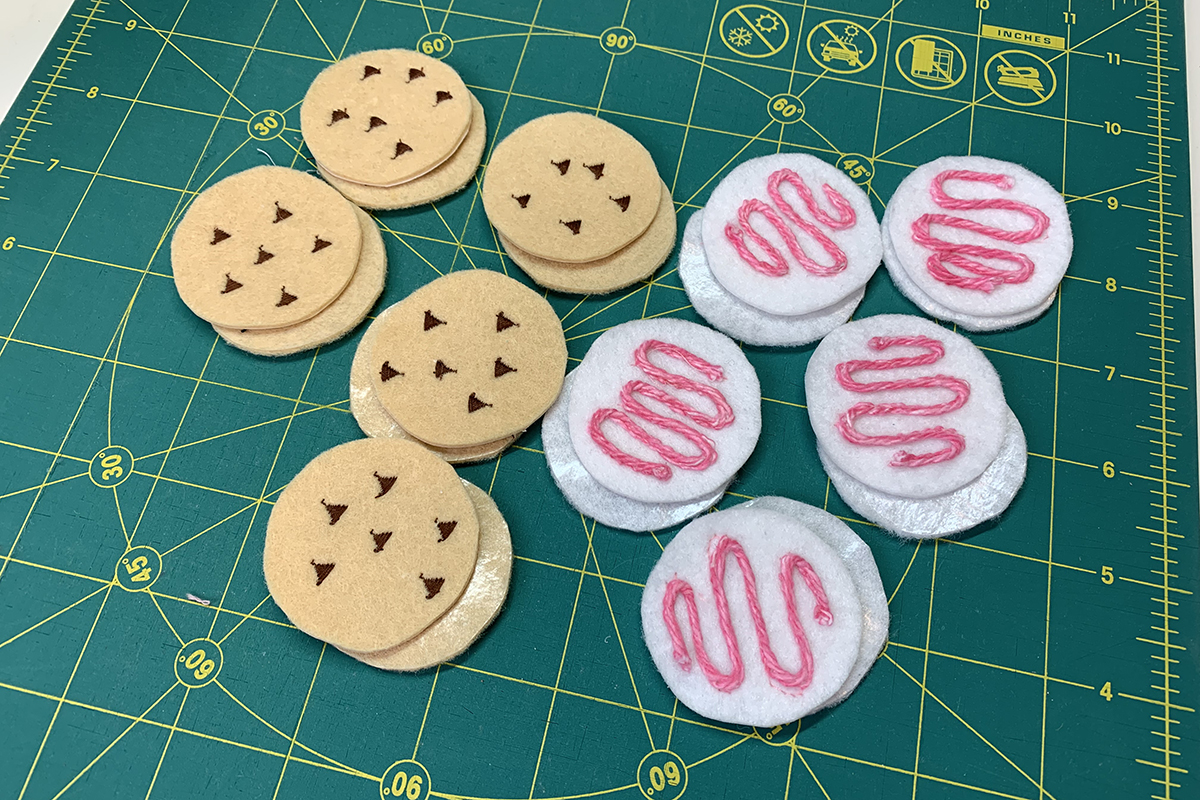
Now, place a circle under the foot and randomly stitch 5 – 6 chips in each circle.
These are starting to look like cookies! Cut out your 10 best looking circles (5 white and 5 tan) on the drawn lines. Remove any remaining marked lines. Styla pen is removed with water and Frixion pen is
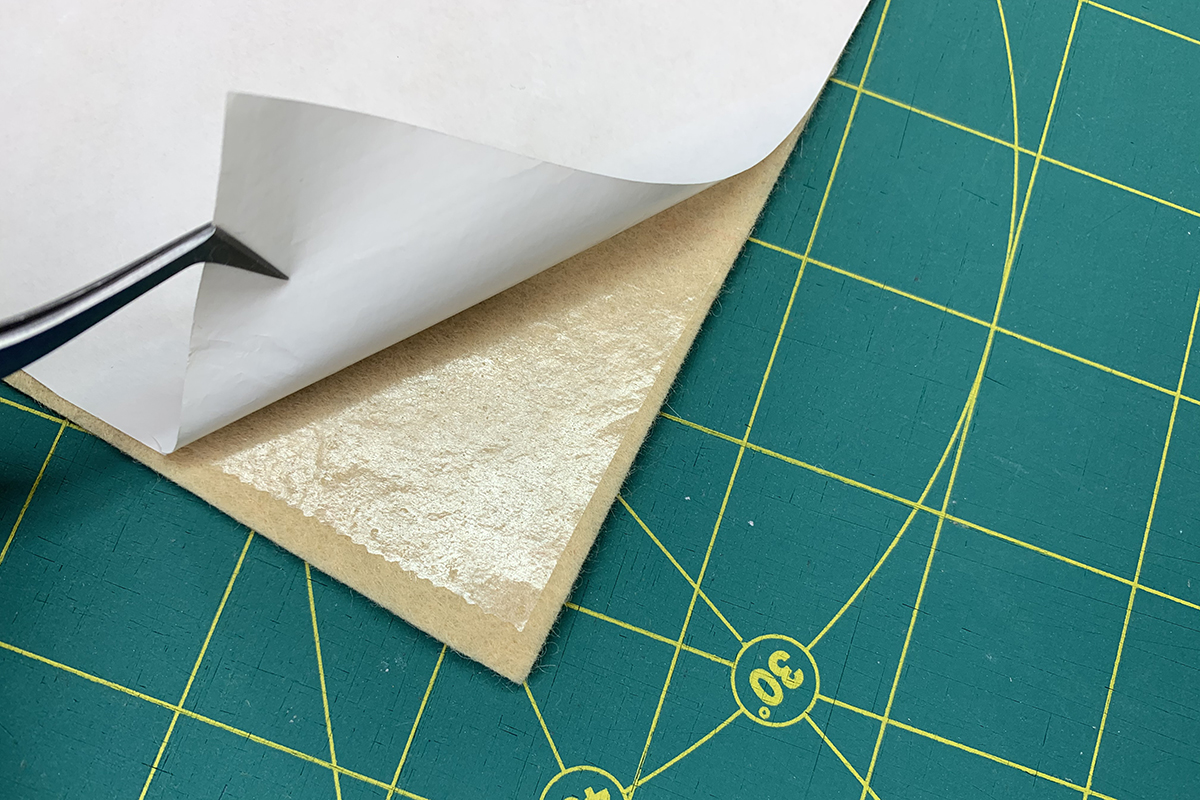
Cut 2 felt pieces 2” x 10” – 1 white and 1 tan. Cut 2 pieces of Heat N Bond Lite same size – 2” x 10”. Set your iron to medium without steam. Place the adhesive side of Heat N Bond Lite onto the felt. Press for a few seconds at a time until the entire adhesive has bonded to the felt. If you bonded the adhesive correctly, the paper liner will come off easily. But don’t take it off yet!
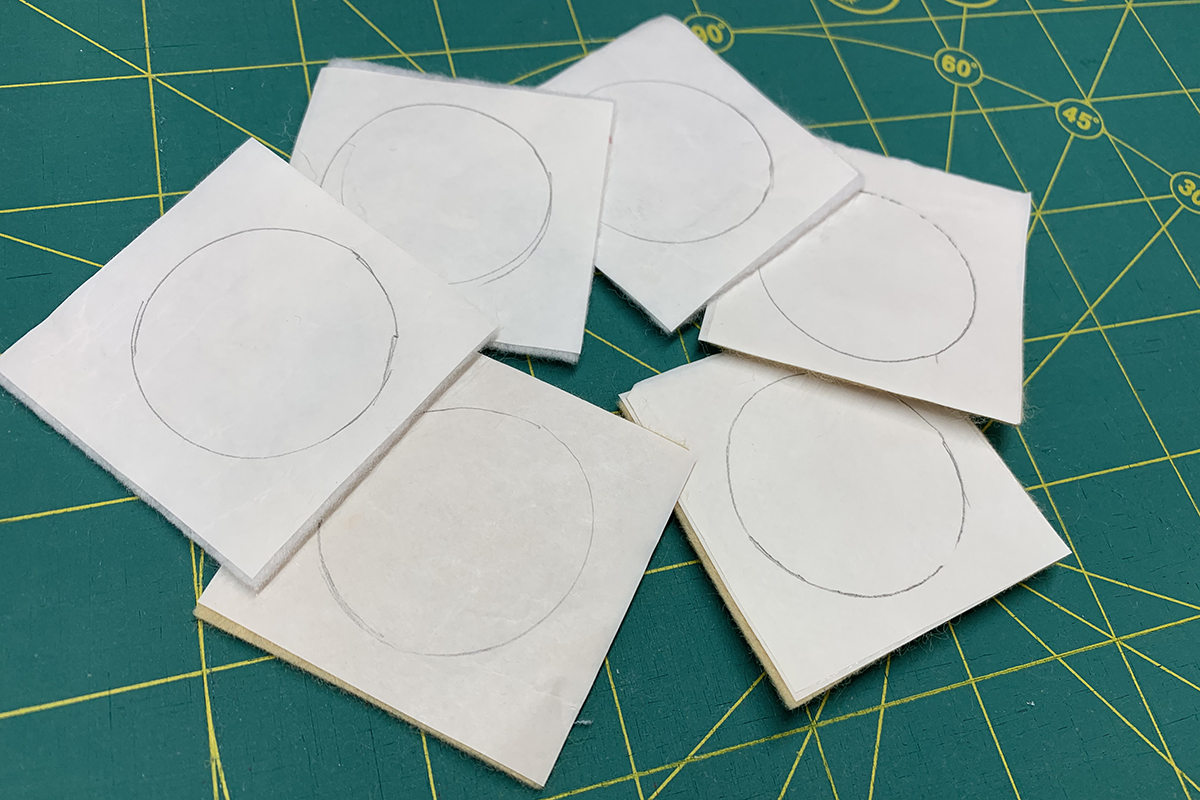
Cut bonded felt into 2” x 2” squares so you end up with 5 white squares and 5 tan squares. Draw a circle centered on each square using the same thread spool but this time draw on the paper side.
Attach BERNINA Piping Foot #38 and white thread. Select Straight Stitch #1 and Needle Stop Up/Down icon in the down position. Cut 10 hook Velcro pieces about 1/2” long from your 3/4” Velcro roll. Center one Velcro hook side piece onto each felt square. Sew the Velcro with the right side of the foot on top of the tape and the left side on felt. If needed, use a stiletto to keep the Velcro in place while sewing. Also, take advantage of your Free Hand System when turning corners.
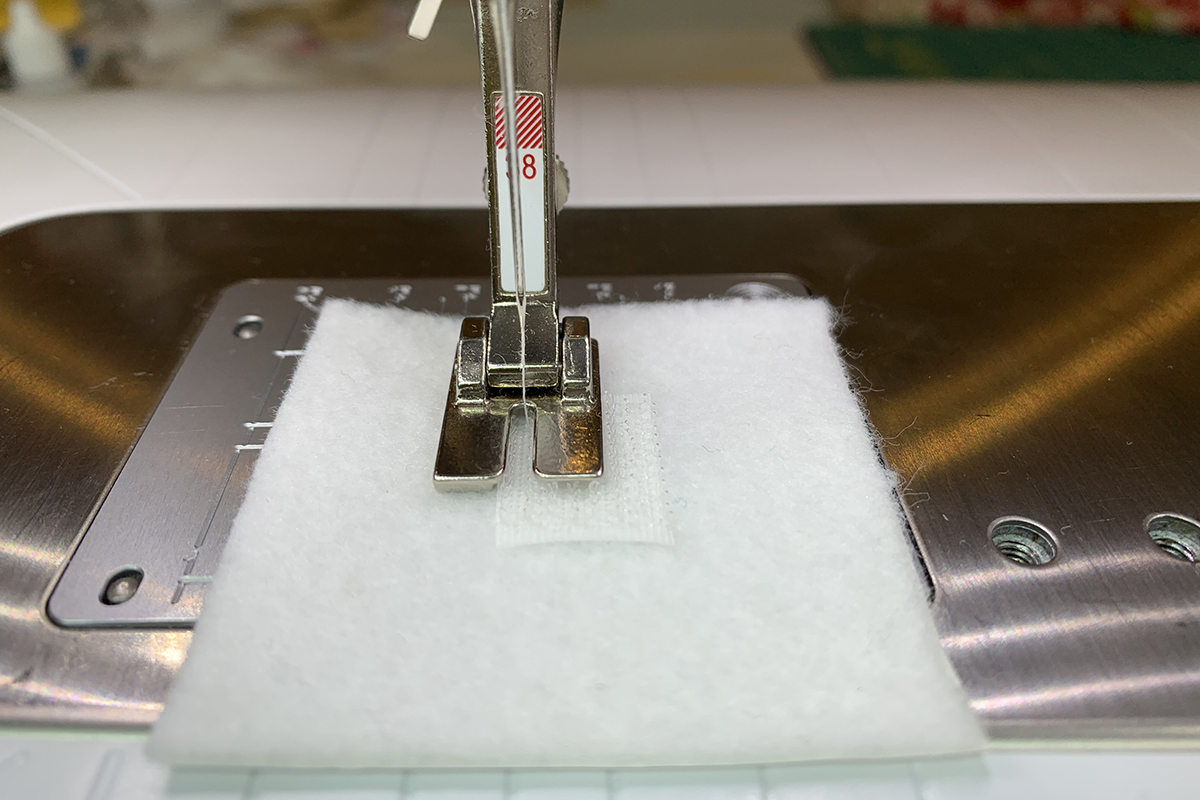
Sew all Velcro pieces onto felt squares.
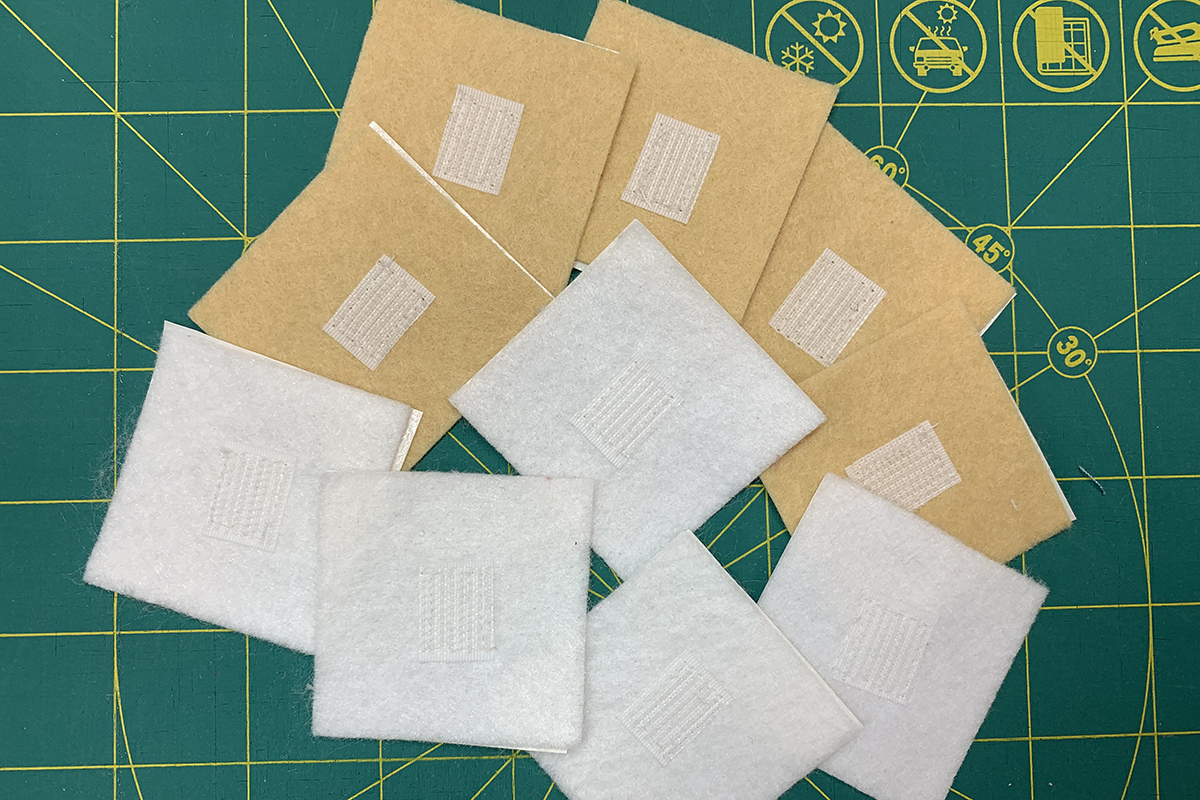
Cut out the circles. Place your circles with Velcro side down. Remove the paper lining. If you bonded adhesive correctly, the paper liner will come off easily. We’ll be pressing around the Velcro, so don’t worry about the paper in the center inside the stitching. Match the cookie tops and bottoms to make 10 sets.
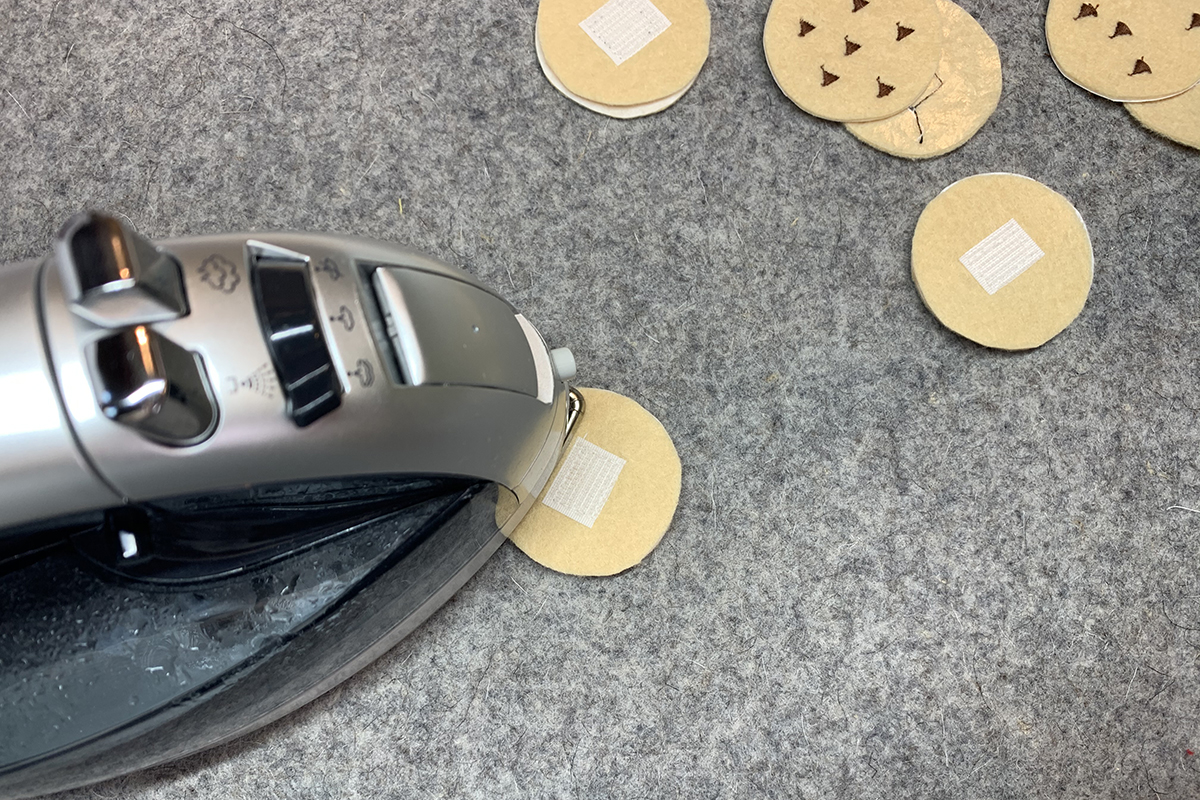
On the back of cookie, press around the Velcro until the pieces adhere. I gave a good press for 6-10 seconds around all four sides of Velcro.
Your felt cookies are ready to go in the cookie jar or for a game of Tic Tac Toe.
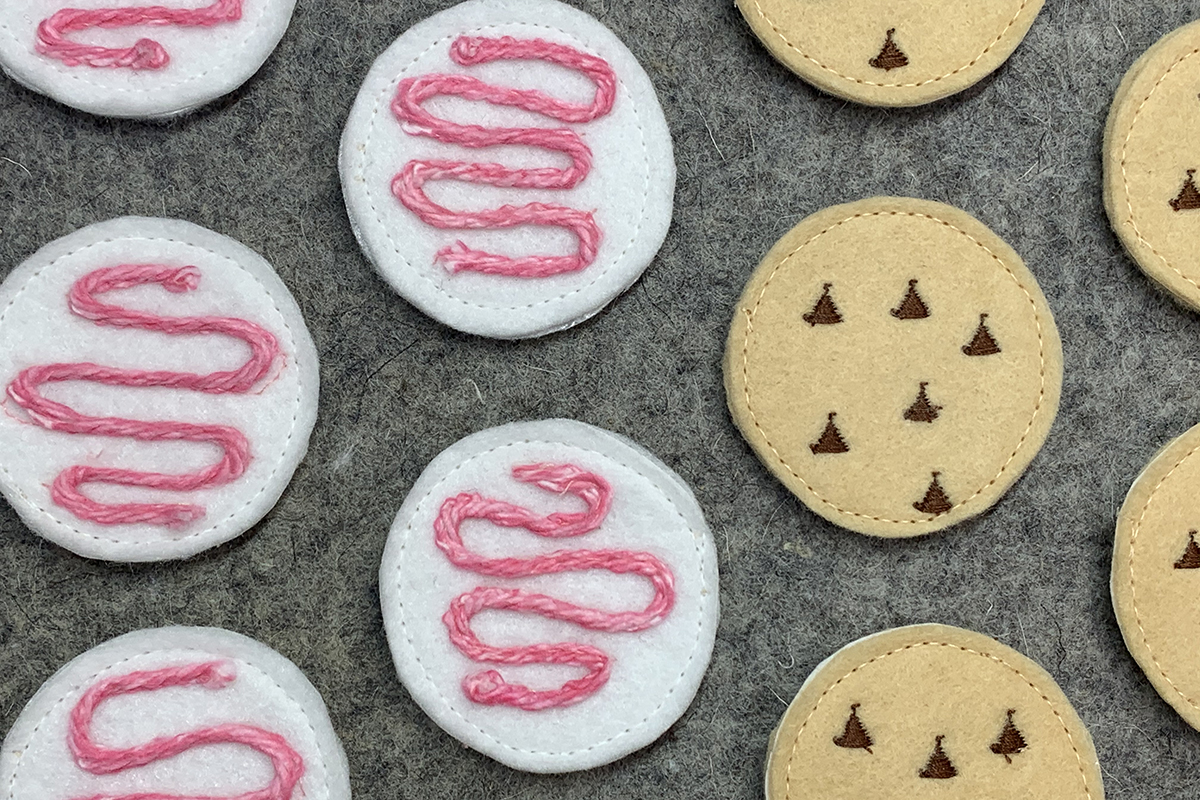
But wait, I like to add one last finishing touch by sewing an outline around the perimeter of the circle. Attach BERNINA Edgestitch Foot #10/10C/10D and thread matching the felt or a shade darker. Select Straight Stitch #1, change stitch length to 3 mm, and needle position to -3. Place the felt edge up against the foot guide. Lower your needle and see if you like the placement. If not, adjust your needle position. Very slowly, edgestitch the circle keeping the edge of the felt against the inside right toe. I used the Freehand System to lift the foot every 3-4 stitches to slightly pivot.
I found it helpful to hold the left side of the cookie while I stitched the outline.
Another foot option for the outline is BERNINA Clear Embroidery Foot #39/39C. Because this foot is clear, the entire stitching area is visible. Also, the indention in the sole is wider at the back of the foot making it easier to stitch smooth curves. With this foot, I lined up the felt edge with the inside right toe, changed stitch length to 3 mm, and needle position to 2.

The edgestitch gives the cookies a nice, finished look.
Cookies anyone?
Place your cookies in the cookie jar.
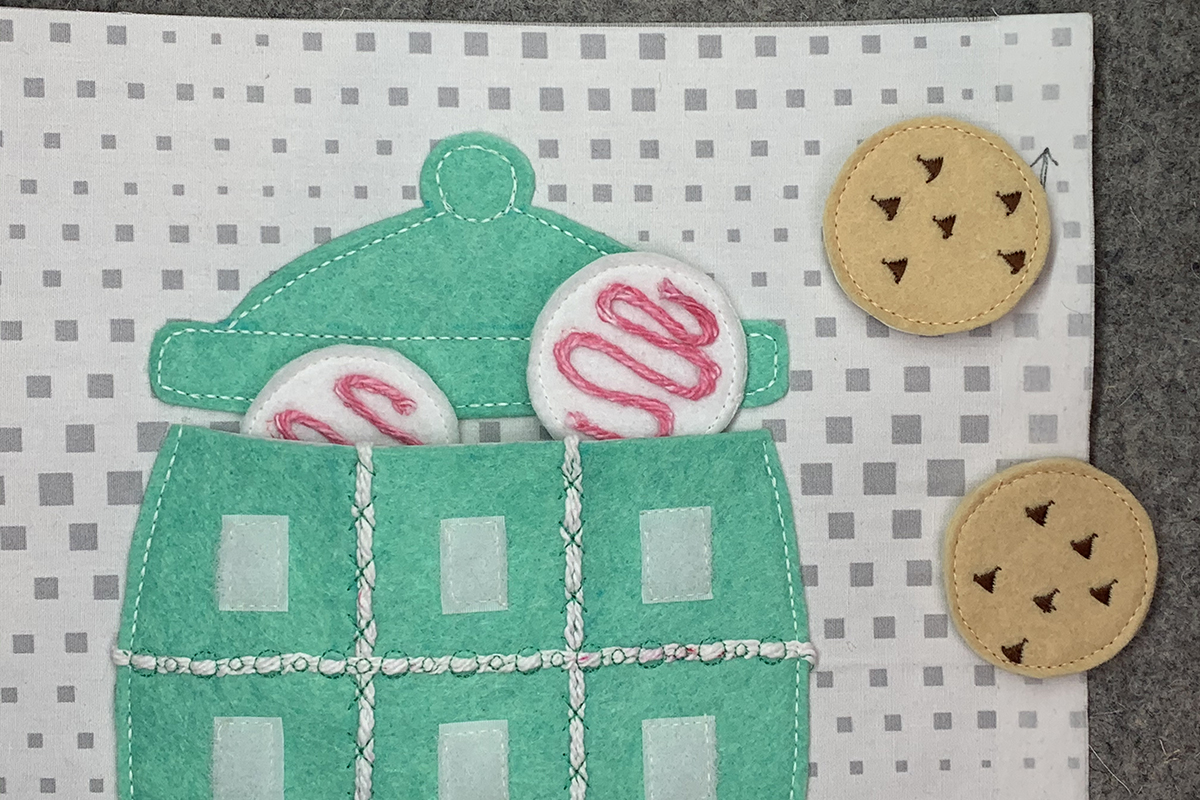
Get ready for a game of Tic Tac Toe.

Congrats on your BERNINA Busy Book page. I hope you enjoyed making Cookie Jar Tic Tac Toe and continue creating more pages. Also, I hope you learned something new that you can use in future sewing projects. My goal is that is you learn at least one new thing for every page you create. Let me know what one thing you learned in the comments section! I love to hear from my social media sewists!
Stay safe, stay home and sew something!
Here are the links to the prior posts in this series.
Kids Busy Book Series
Part 4: Cookie Jar Tic Tac Toe
Used Products


What you might also like


8 comments on “How to Sew a Kids Busy Book, Part 4: Cookie Jar Tic Tac Toe”
-
-
So glad you are looking forward to starting this page! Have fun!
-
-
This just darling! A game that’s not on the phone! ? I will need to study the instructions carefully..I have a Bernina 1130 that my mom gave me 30yrs ago. Not all the bells and whistles…but a solid piece of machinery! I have a fair amount of feet. I’m going to give it a go!!
-
Great! Have fun with it and make your own variations that work for you!
-
-
This is the cutest thing I have ever seen! I just finished 2 Busy books for grand kids from a store bought pattern, they took MONTHS! I said I would NEVER make another one….well never say never! I have 2 new grand kids and I am making this book for sure, times 2 of course, it looks sew easy, and is absolutely adorable!!! Will there be a cover coming?
-
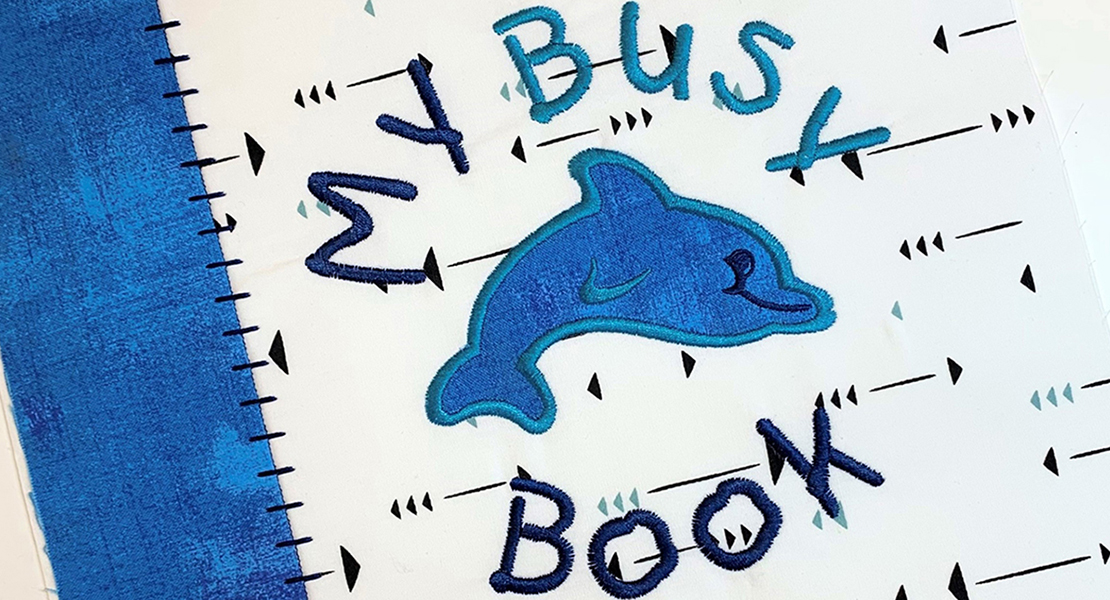
Yes, I will make a title page. Look out for it!
-
-
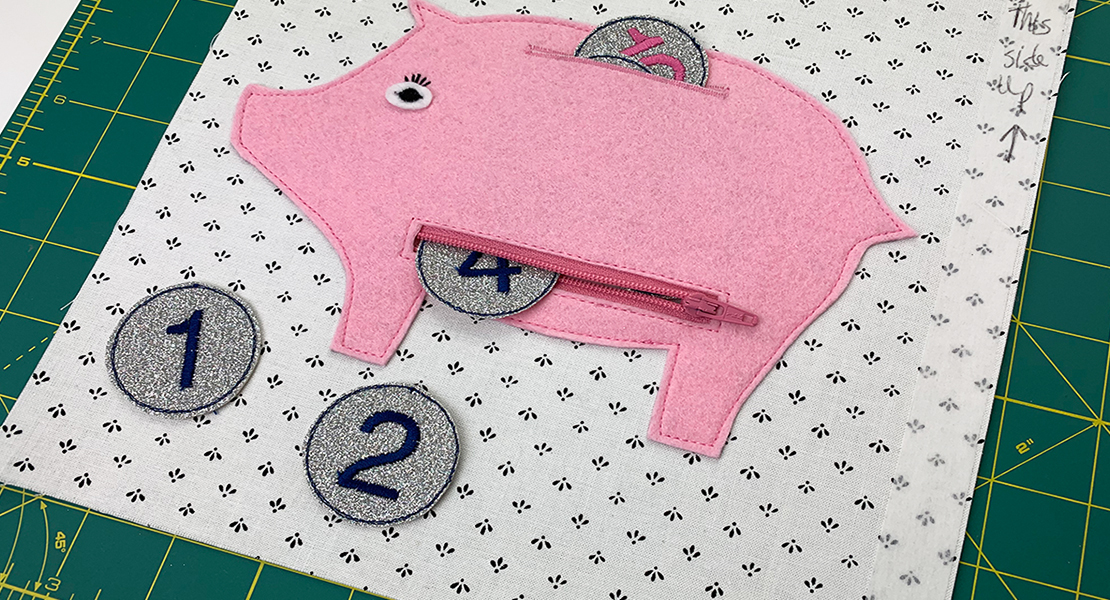
Such a cute project. My niece has 3 young kids and they just got a camper this year. This would make a fun game for the camper. I’m trying to think of fun things for the camper for them for Christmas this year… I like the pig with the coins too, that would be another fun thing for them to play with.
-
Camper sales have skyrocketed this year! Busy book pages would be great for long rides!
-
Leave a Reply
You must be logged in to post a comment.
OMG–this is SO cute! I can’t wait to get started! I want to eat one of those cookies!