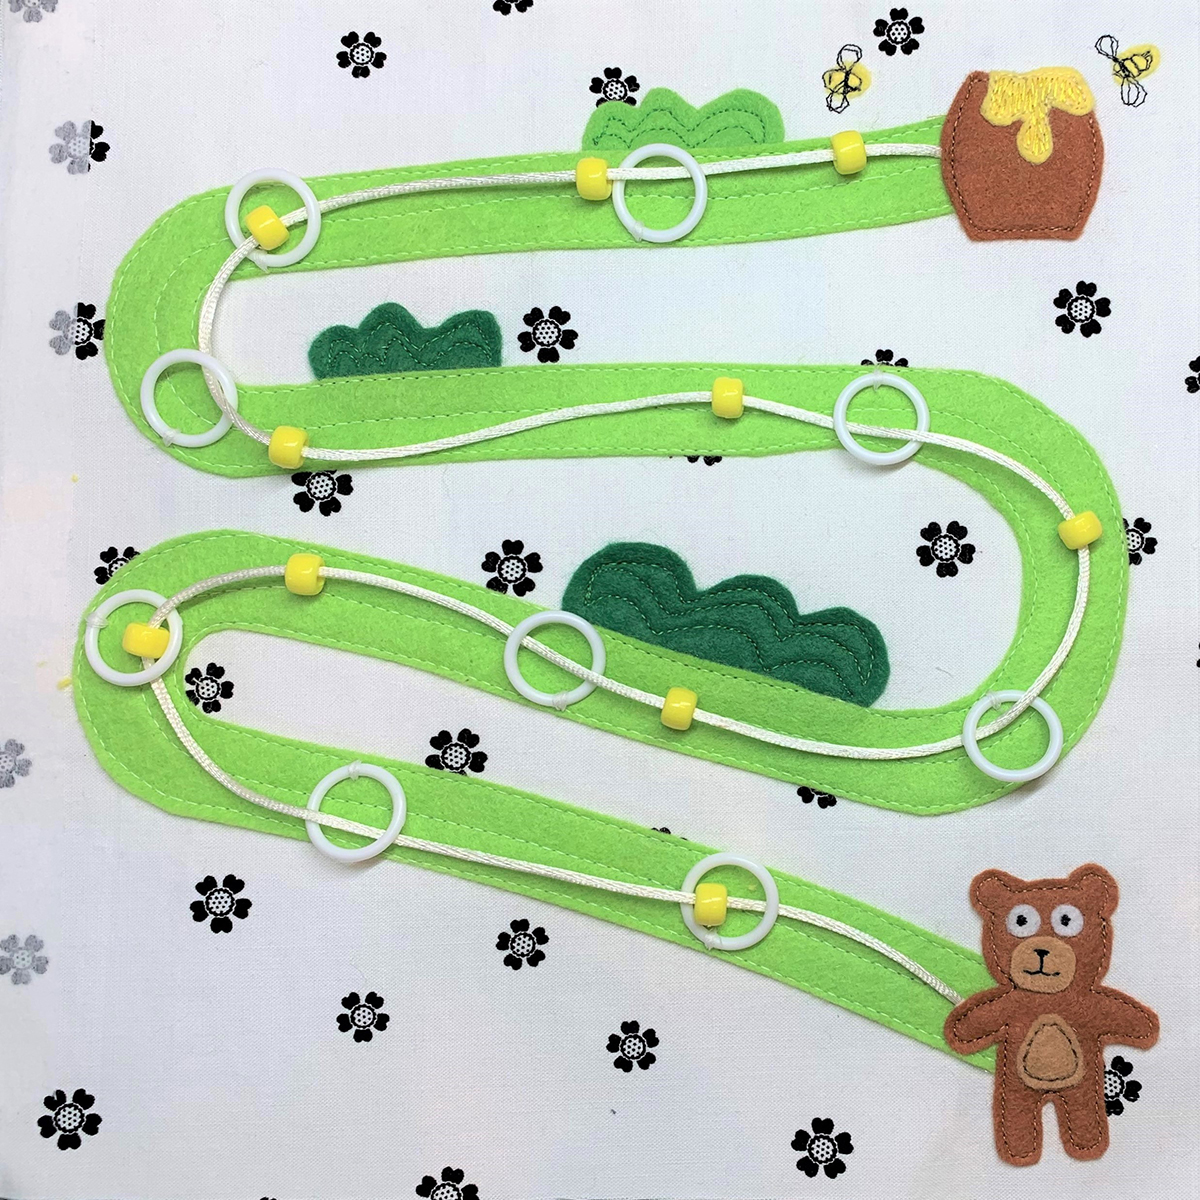
How to Sew a Kids Busy Book, Part 5: Bear and Honey Pot
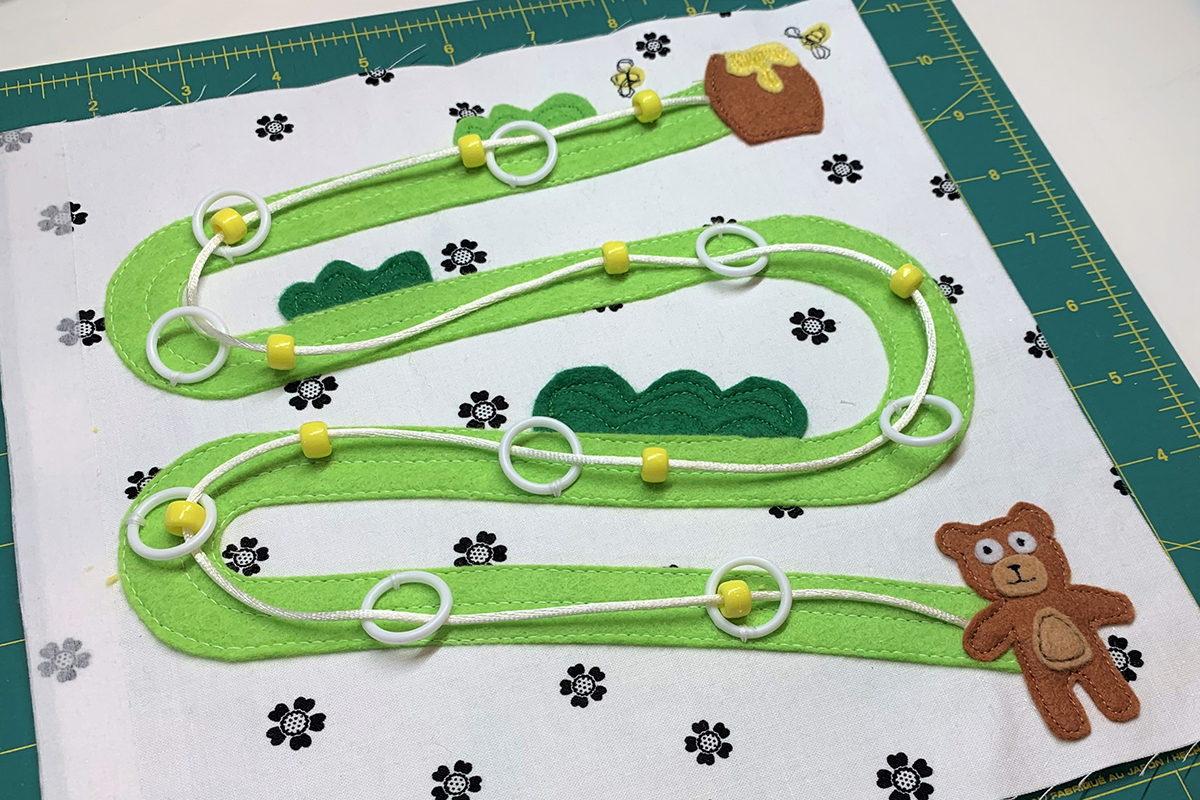
Welcome to Month 5 of our BERNINA Busy Book series. If you want to start at the first busy book page, you can find links to previous posts at the end of this tutorial. Let’s start this month with Bear and Honey Pot. We will create a pathway to help Bear follow the bees to the Honey Pot. This activity involves fine motor skills for little hands. In this tutorial, you will learn how to use the Button Sew-On Foot #18 – it’s not just for buttons! Also, you will learn how to use the BERNINA Leather Roller Foot #55 to do echo quilting and the BERNINA Free-Motion Quilting Foot #29/29C to do free-motion quilting. No Velcro this month! I thought we might need a break from hook and loop tape! Let’s get started!
Materials for Every Page
- 10” x 10” background fabric (purchase 3 yards if making all page backgrounds the same)
- 10” x 10” OESD Ultra Clean and Tear Fusible Stabilizer
- 50 weight thread
- Rotary cutter & ruler
- Rotary cutting mat
- Scissors
- Iron and pressing mat
- Roxanne Glue-Baste-It or similar glue stick/pen
- Temporary fabric marker
- Pins
Additional Materials for Bear and Honey Pot
- Felt in shades of brown, green, and yellow (bear, honey pot, and bushes)
- 9” square piece of green felt (pathway)
- 1 yard of white or ivory satin cord
- 8-9 white plastic rings about 1/2” – 3/4” in diameter
- 10-12 yellow pony beads
- Freezer paper
- Dritz Wash Away 1/4” Wonder Tape
BERNINA Machine and Feet
- BERNINA 590 E
- Button Sew-On Foot #18
- Open Embroidery Foot #20/20C/20D
- Free-Motion Quilting Foot #29/29C
- Leather Roller Foot #55
Choosing Background Fabric for Each Page
There are a few options when choosing the background fabric for each busy book page. The simplest option is to find one fabric for all the pages. Purchase 3 yards so you have plenty if you decide to use it for binding or you can make additional pages in the future. Another option is to purchase 10” square pre-cut fabrics (sometimes called layer cake). This precut set comes with 42 coordinating pieces of 10” x 10” fabrics, usually from the same fabric collection. Your third option is to buy coordinating fat quarters. Around 10 will be plenty, as you can cut at least 2 pages from each fat quarter. I purchased black and white fat quarters for my busy book. Lastly, you can choose fabric as you go. If deciding everything up front is not your style, select fabric for one page at a time.
Choosing Felt for Each Page
If you have been sewing and crafting awhile, you probably have felt laying around. Collect your felt pieces and get ready to use them! If you need more felt or don’t have any, browse the felt selection on etsy.com. I found some nice felt color collections in a wool/rayon blend that is resistant to pilling and pulling, easy to cut, and affordable. Because the blend didn’t stretch as much as other felt, it was much easier to sew.
Background Page
Press your 10” x 10” fusible stabilizer to your background fabric with a dry iron for a few seconds until the fabric adheres to the stabilizer. I am using OESD Clean and Tear Fusible Stabilizer. One side of each page will have buttonholes to insert ribbon or binder rings. Add a strip of temporary adhesive tape down the left or right side, depending which way the page will face. The tape will remind you to leave this area clear of embellishments.
Pathway and Bushes
Let’s start with the pathway and bushes. Get out your freezer paper. If you do applique, then you are probably very familiar with freezer paper. It is great for cutting out shapes on fabric and felt. If you are going to do a lot of heavy stitching or decorative stitching, freezer paper is a good option.
Freezer paper has a shiny or waxy side and a paper side. Take a small piece and place the shiny side on some scrap fabric and press on medium heat. It sticks… and it peels off… easily!
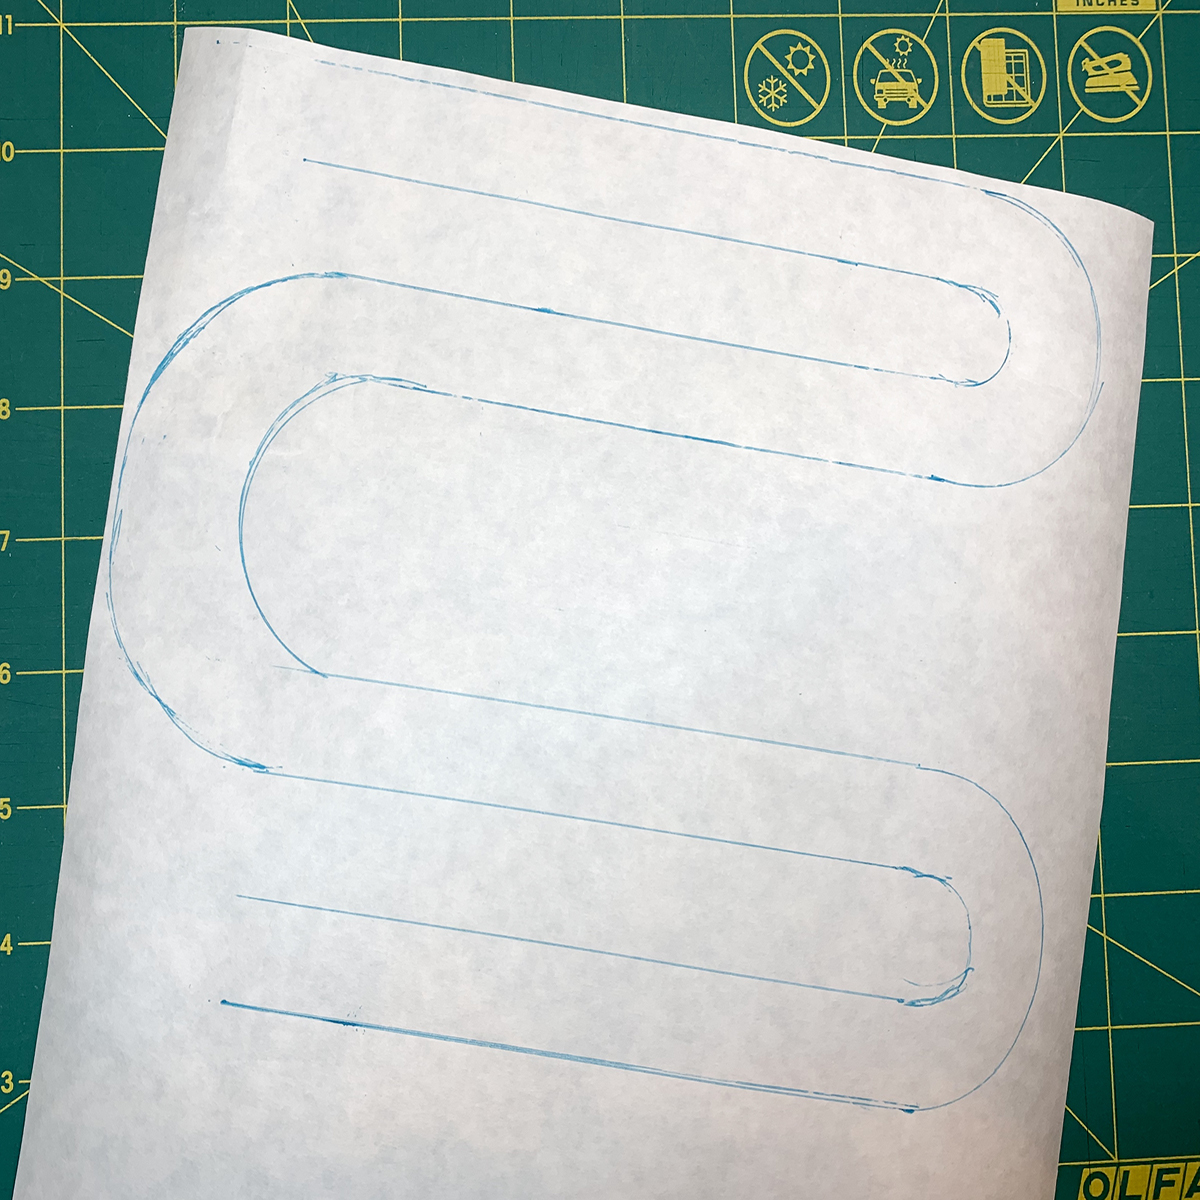
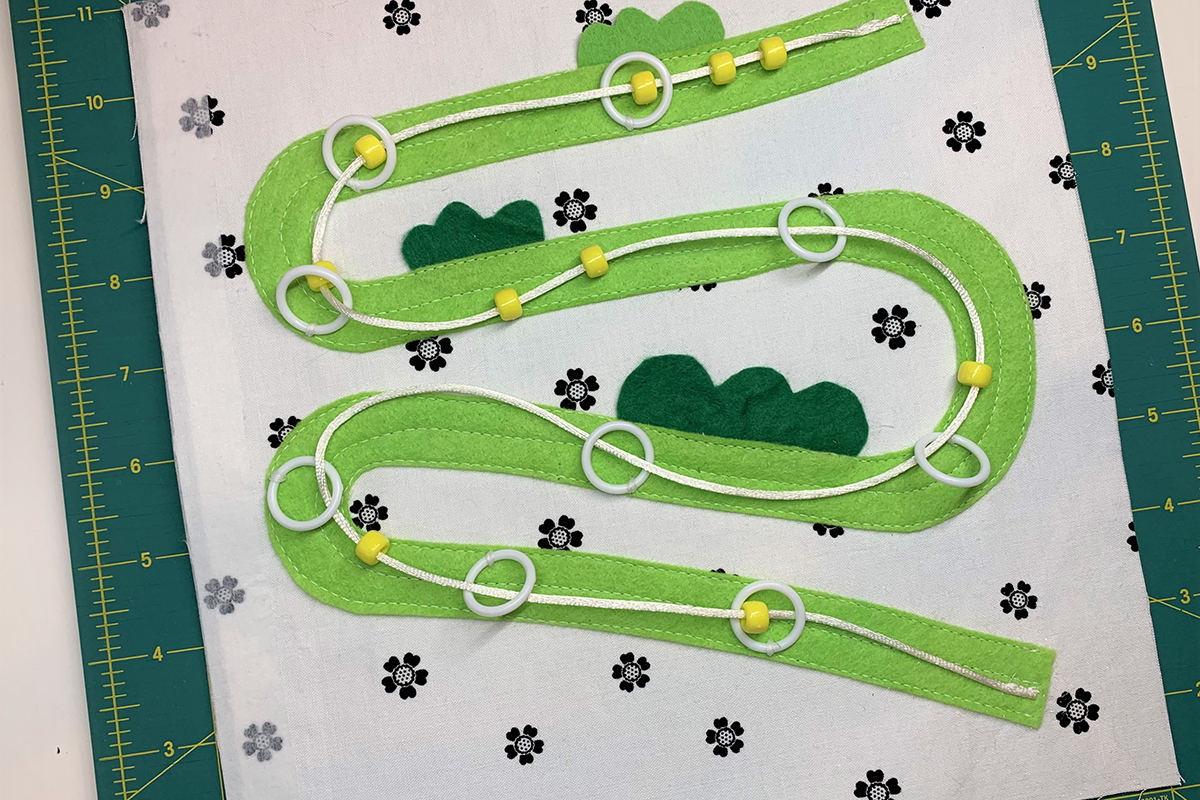
For the pathway, find your 9” square piece of green felt and cut a piece of freezer paper to match. Draw the pathway similar to the one pictured below which is about 6” – 7” from top to bottom and 8” wide. The actual path is about 3/4” wide. I used a ruler and some round objects to get a nice, winding path. Tip: Don’t use Frixion pen on freezer paper or your drawing will disappear from the heat of the iron.
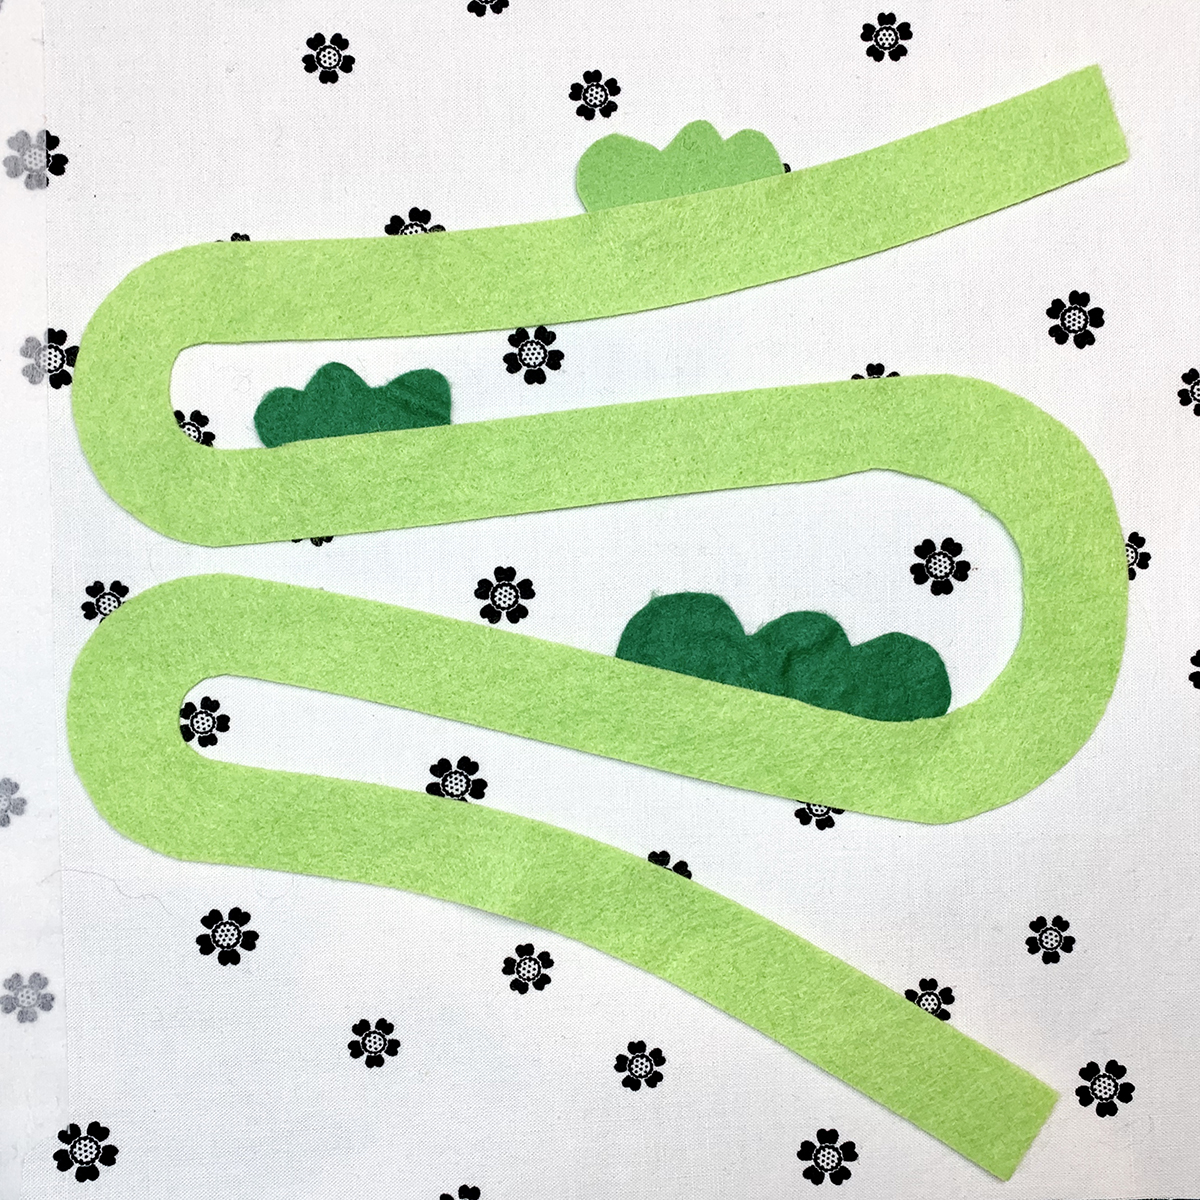
Adhere the freezer paper onto the green felt with your iron on medium heat. Cut out the pathway and place on the background page. Felt is somewhat flexible so I curved it for interest. Cut some bushes with scraps of green felt and place them along the pathway. The bushes look better if you place them about 1/4” under the pathway to cover the bottom edges.
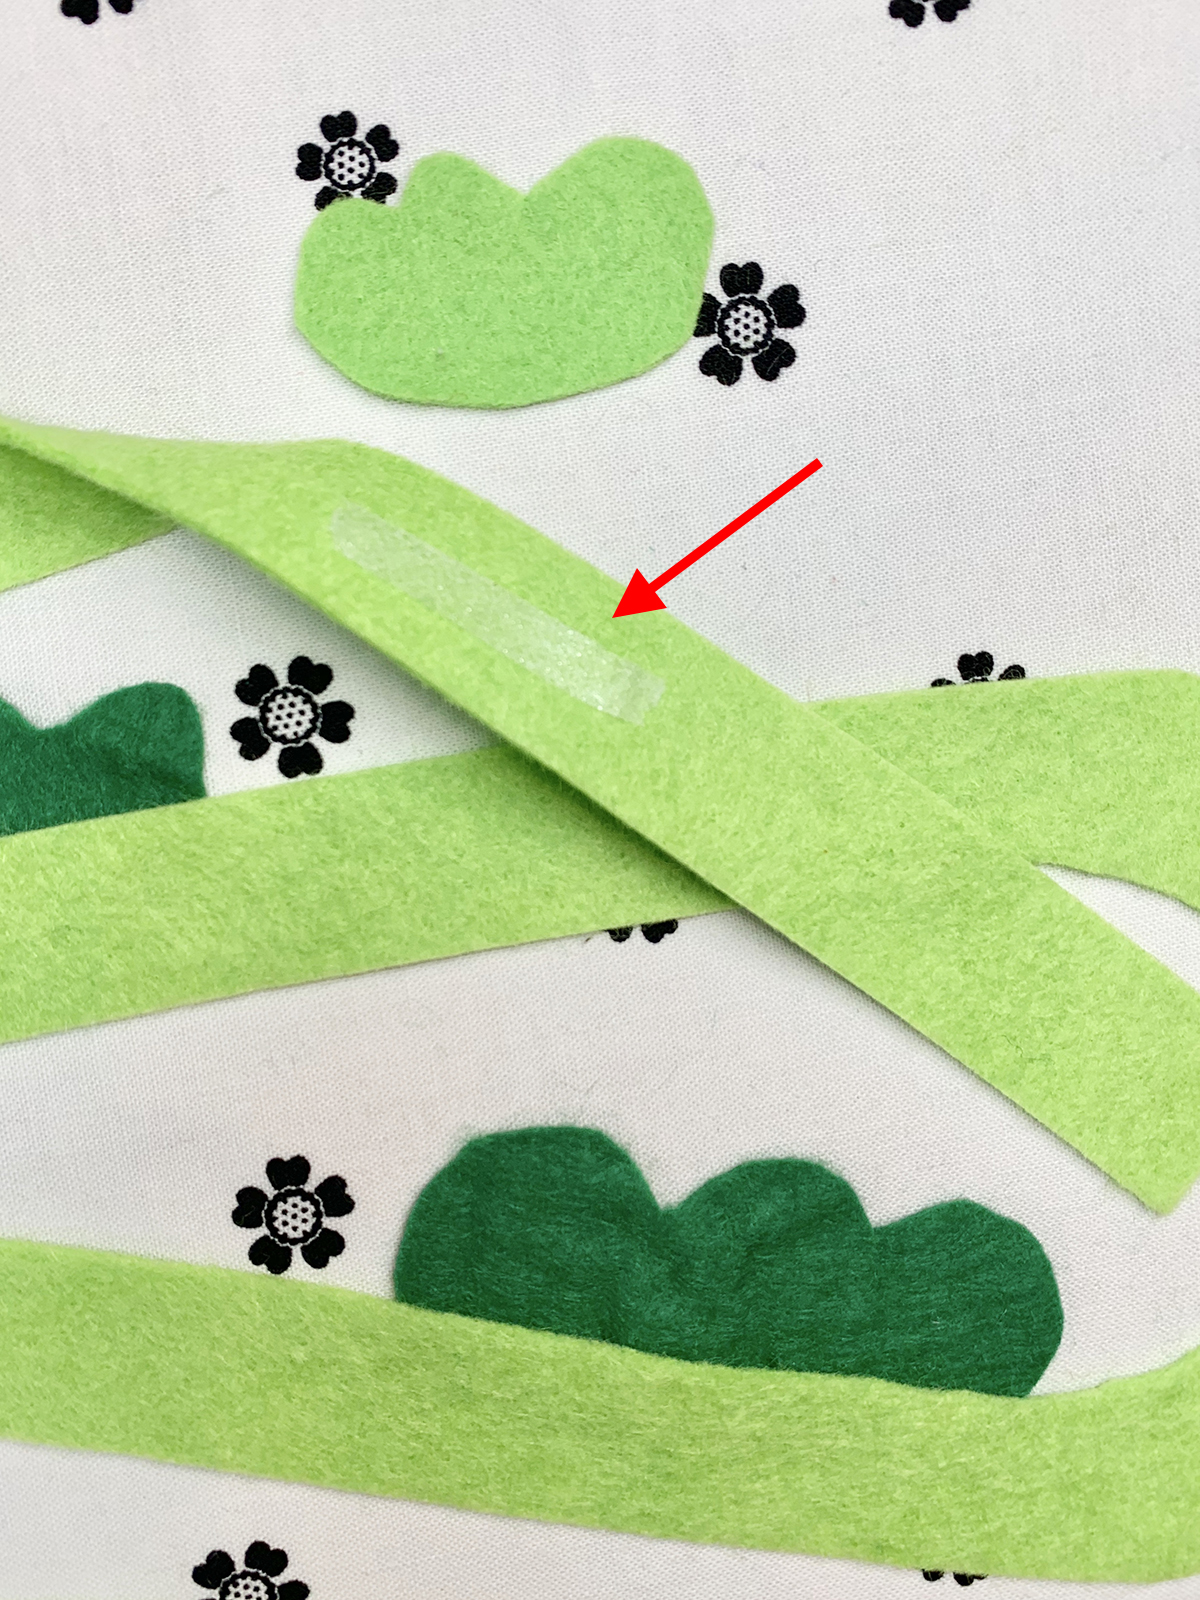
Next, we need to secure the pathway and bushes temporarily before we stitch them down. I am using a product called Dritz Wash Away Wonder Tape. It is 1/4” double sided tape that disappears when washed. Cut a few pieces about 1” in length. Peel off the paper backing to expose the adhesive. Adhere along backside of pathway and bushes to hold in place.
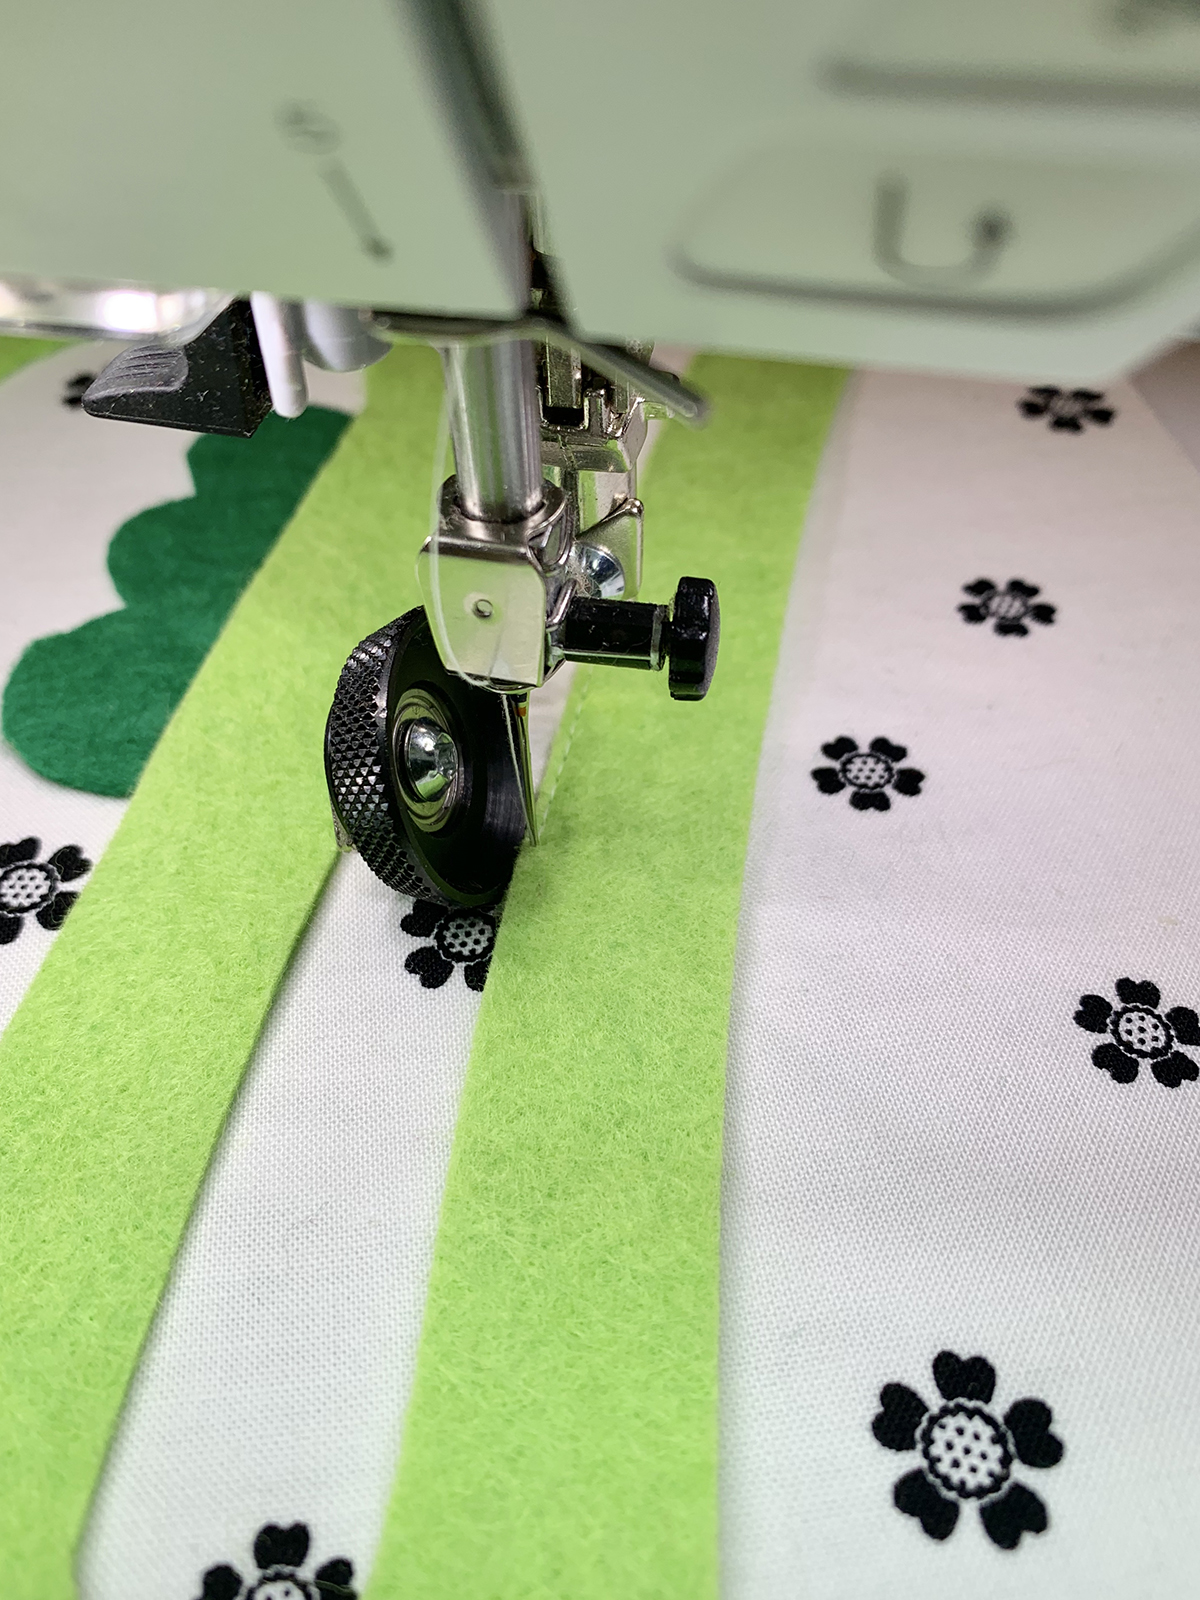
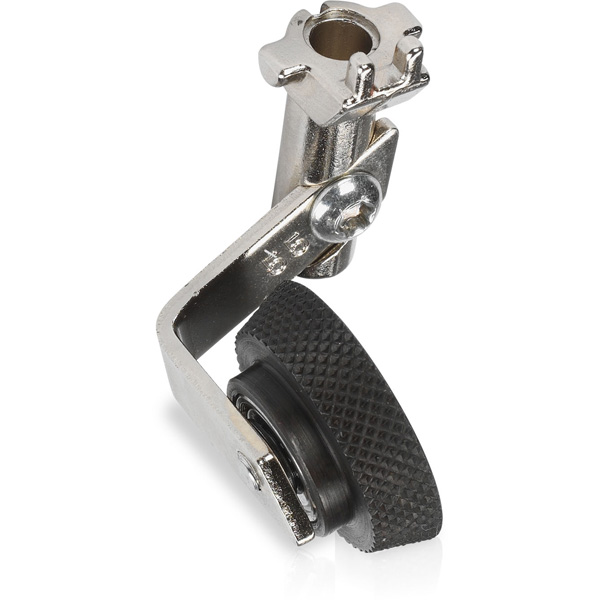
Now it’s time to stitch down the pathway and bushes. We are going to experiment with BERNINA Leather Roller Foot #55. Originally designed for stitching leather gloves, the roller allows you to steer the fabric in any direction, making it perfect for curves. Echo quilting and outline quilting are a lot of fun with this foot! Attach the foot to your machine and move your needle position to far left at -5.
Lower the foot so that the roller is up against the felt. Make sure you have the Needle Stop Up/Down icon in the down position. Also, this is a good time to use your BERNINA Freehand System. The roller is great at curves, but I still stopped and manually turned the fabric a couple times for the inside curves. Most likely, this is because I am new to the foot and did not rotate my fabric enough while sewing. With a little practice, I bet I could do the inside curves without stopping. If you are new to the foot, try a practice piece first and get comfortable with the roller. It’s like riding a bike… once you get it, you’ll never forget how!
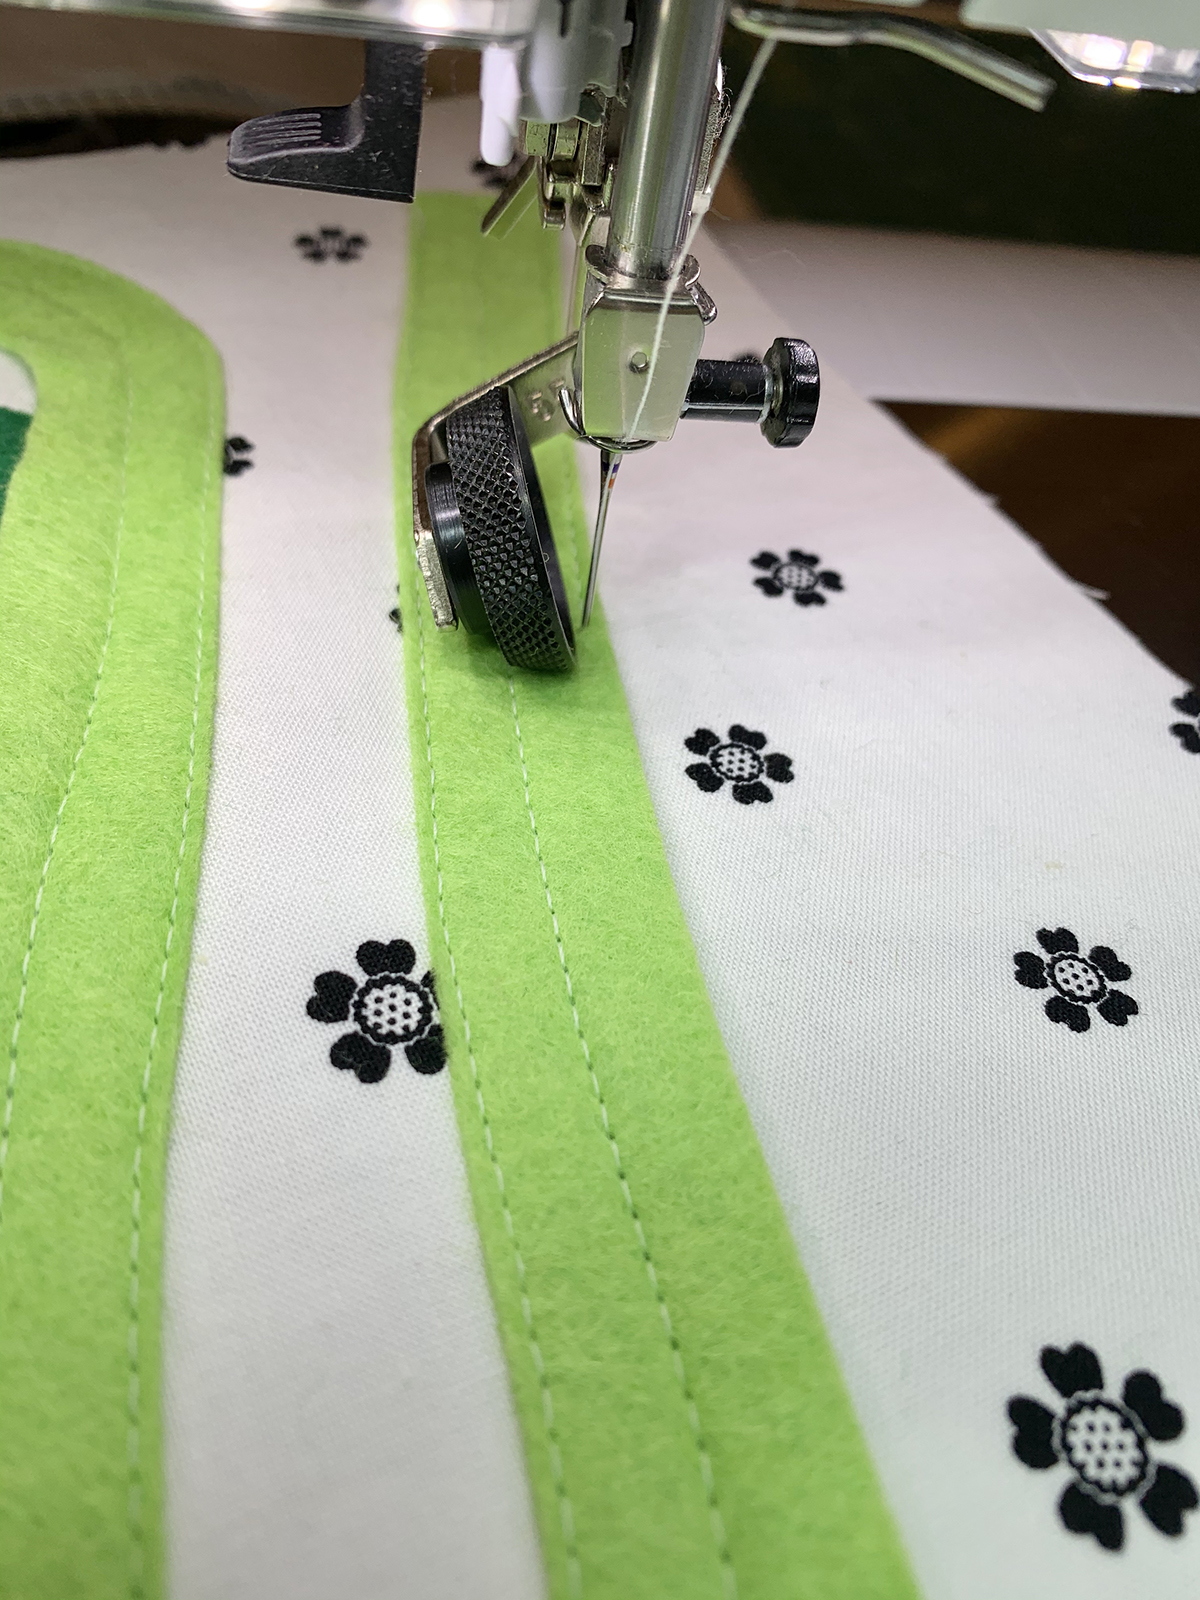
Sew along the pathway and cut threads at end. Go back to your starting point and position the roller to the right of the stitched line. Sew along the pathway until you reach the end keeping the roller slightly to the right of the stitched line.
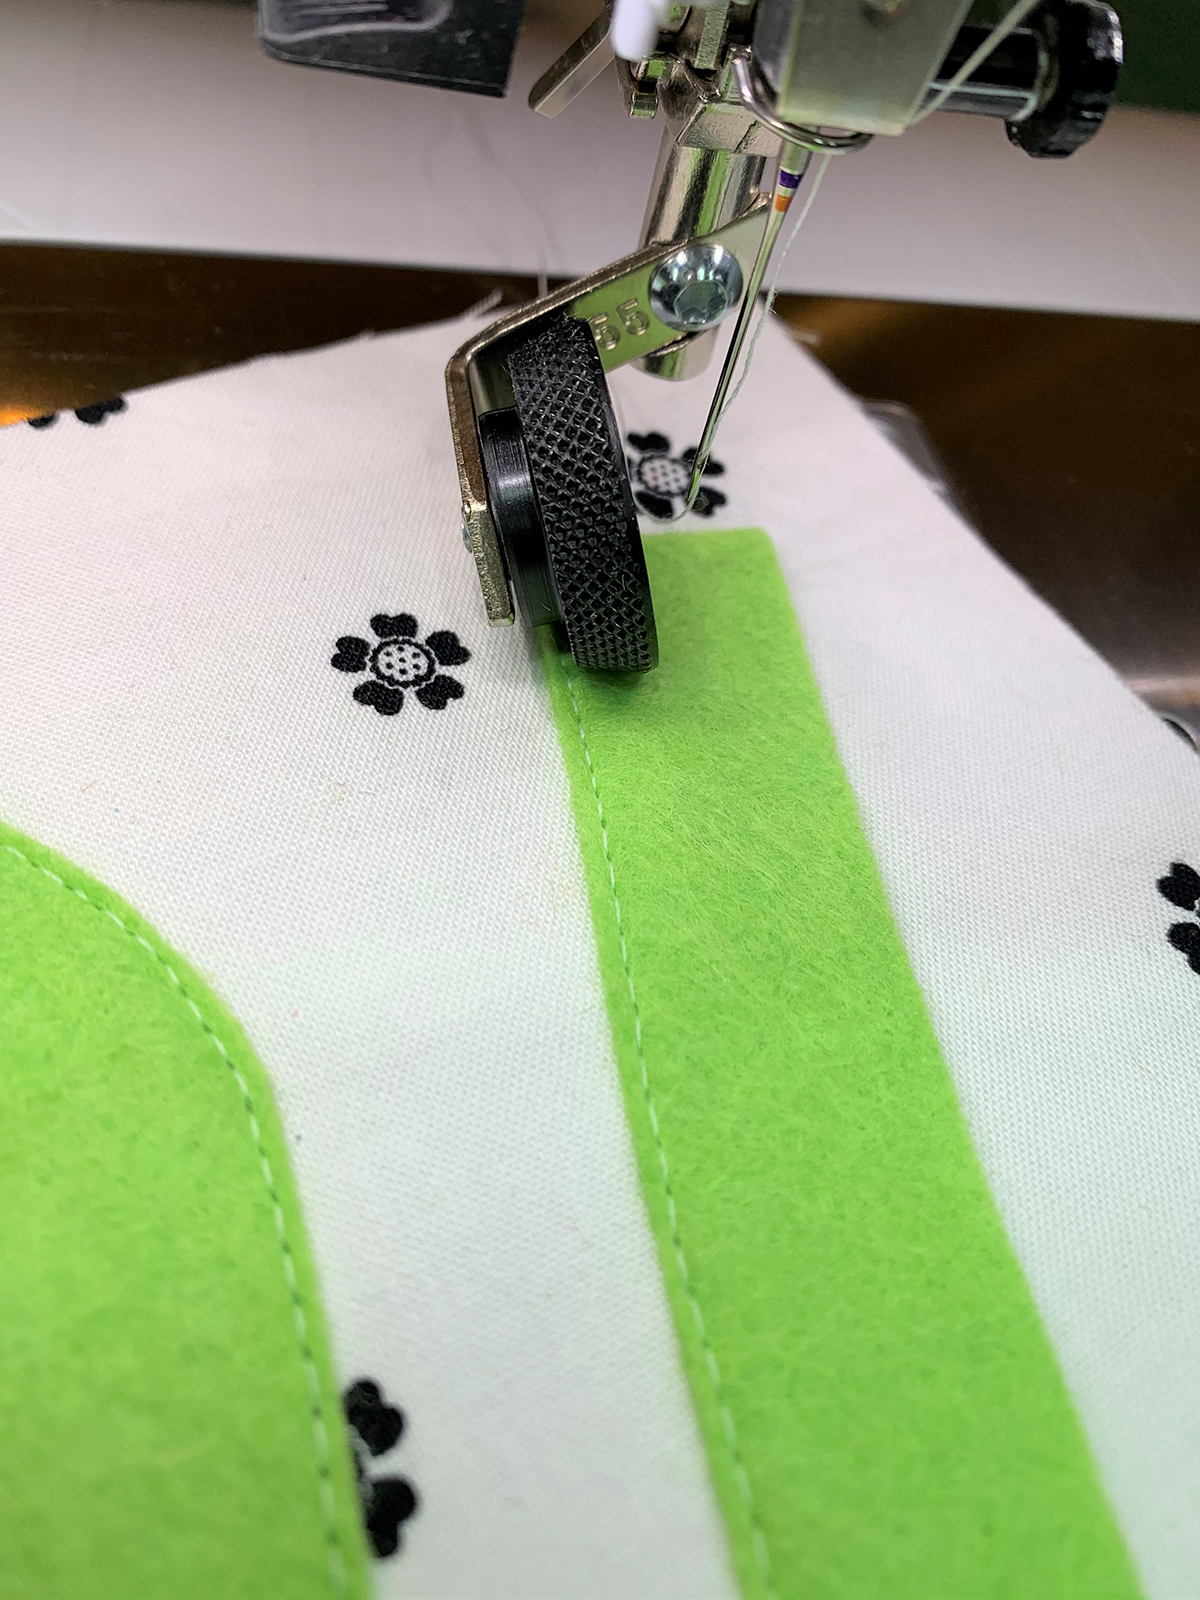
Wasn’t that fun! You are echo quilting! Now do the same with the next quilting line, except this time position the roller to the right of the second stitched line. If your pathway is 3/4” wide, your stitches will fall along the edge of the felt. If your pathway is wider, you can sew additional echo quilting lines or you can start at the end of the pathway with the roller up against the felt like we did for the first stitching line.
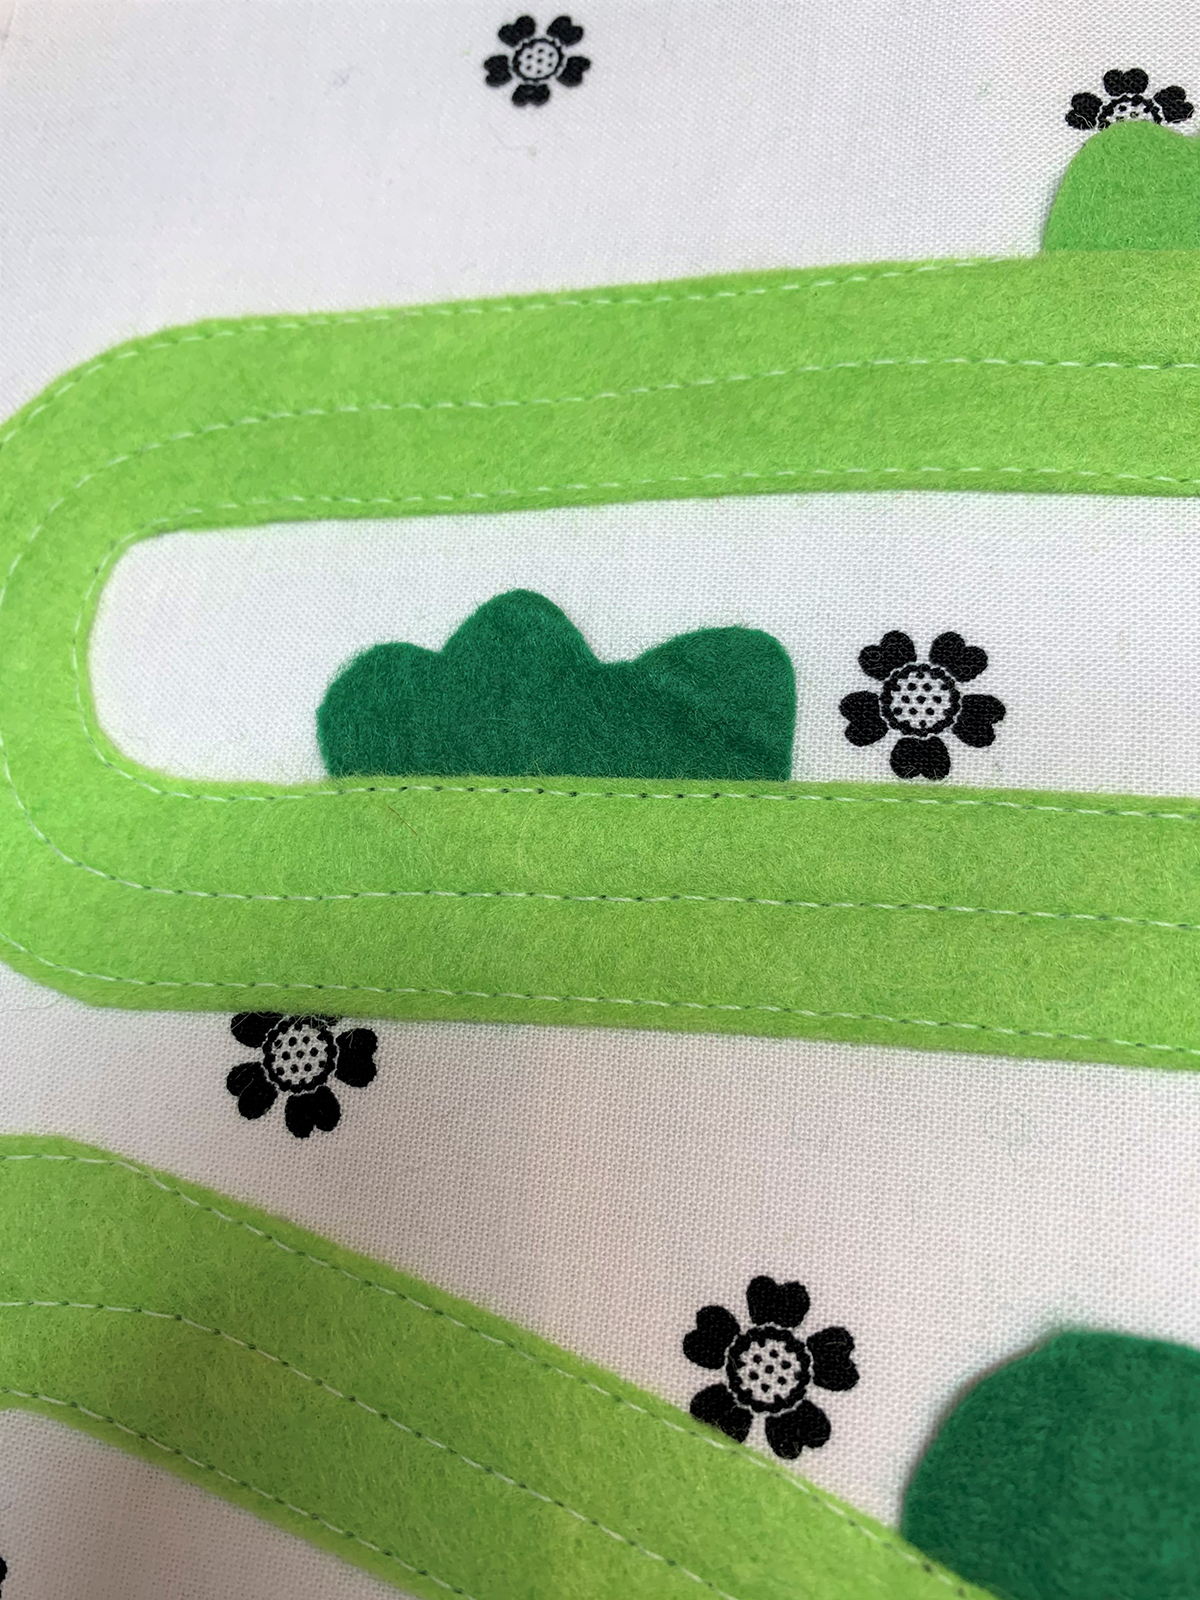
Either way, make sure to catch the bushes in your last stitching line to secure them in place.
Bear and Honey Pot
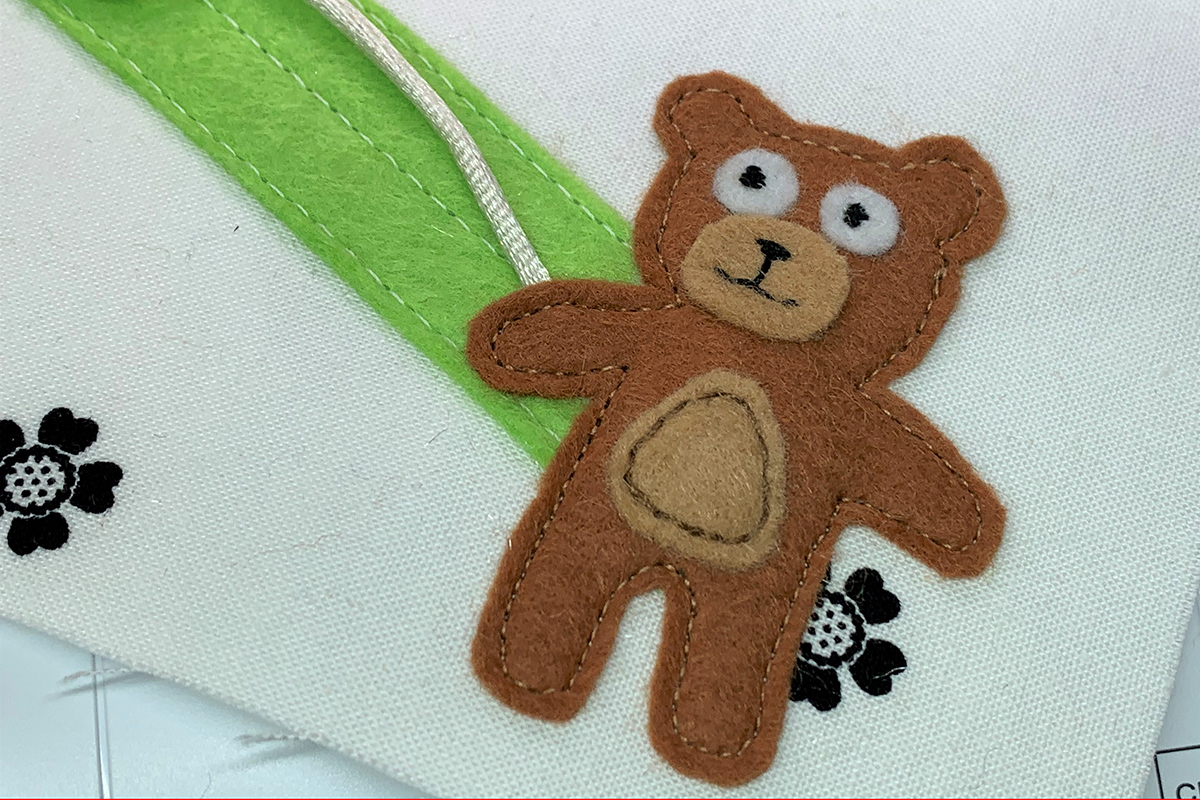
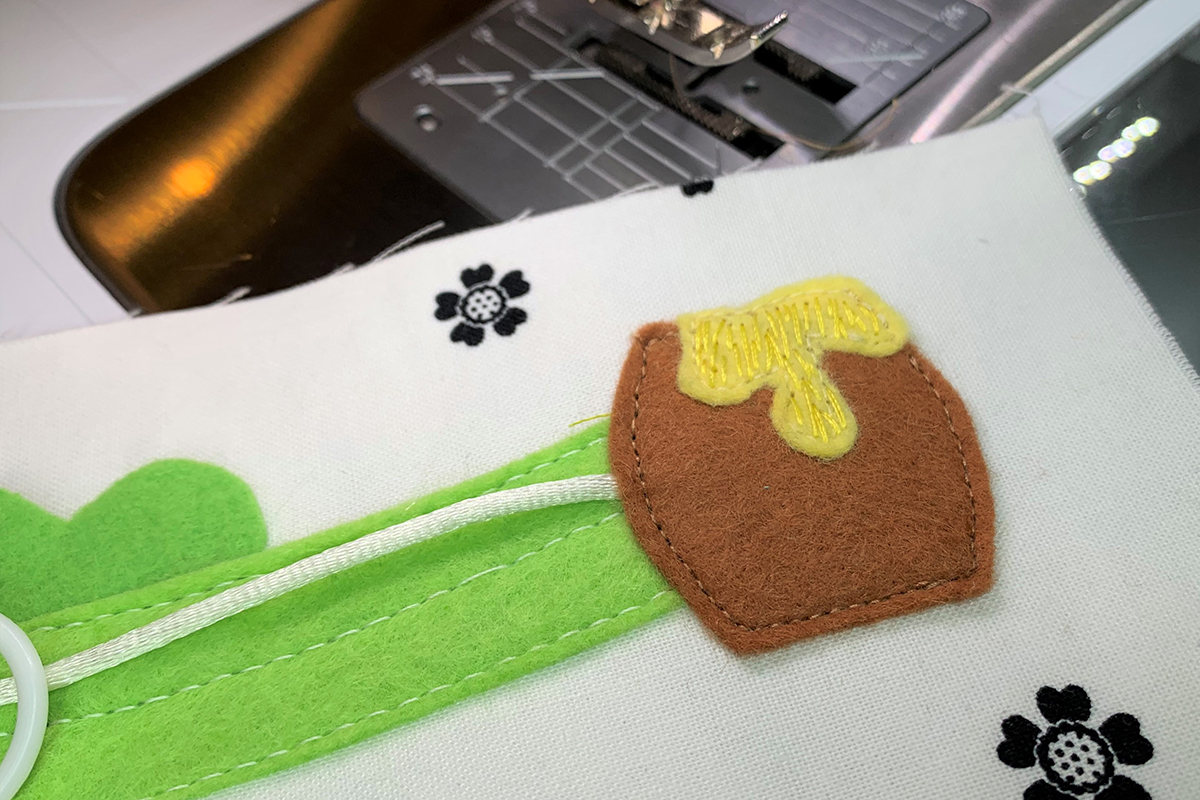
Time for bear and honey pot. Search for images online or draw them yourself. I am not a sketch artist, so I found a bear and a honey pot online that looked simple. Draw the bear and honey pot parts on your OESD Clean and Tear Fusible Stabilizer. Adhere the stabilizer to your felt colors and cut out (I didn’t use stabilizer on eyes or parts I knew I would hand stitch). If you have been following along since the first busy book page, I hope this stabilizer has become your #1 product!

Using temporary glue, add the bear and honey pot parts.
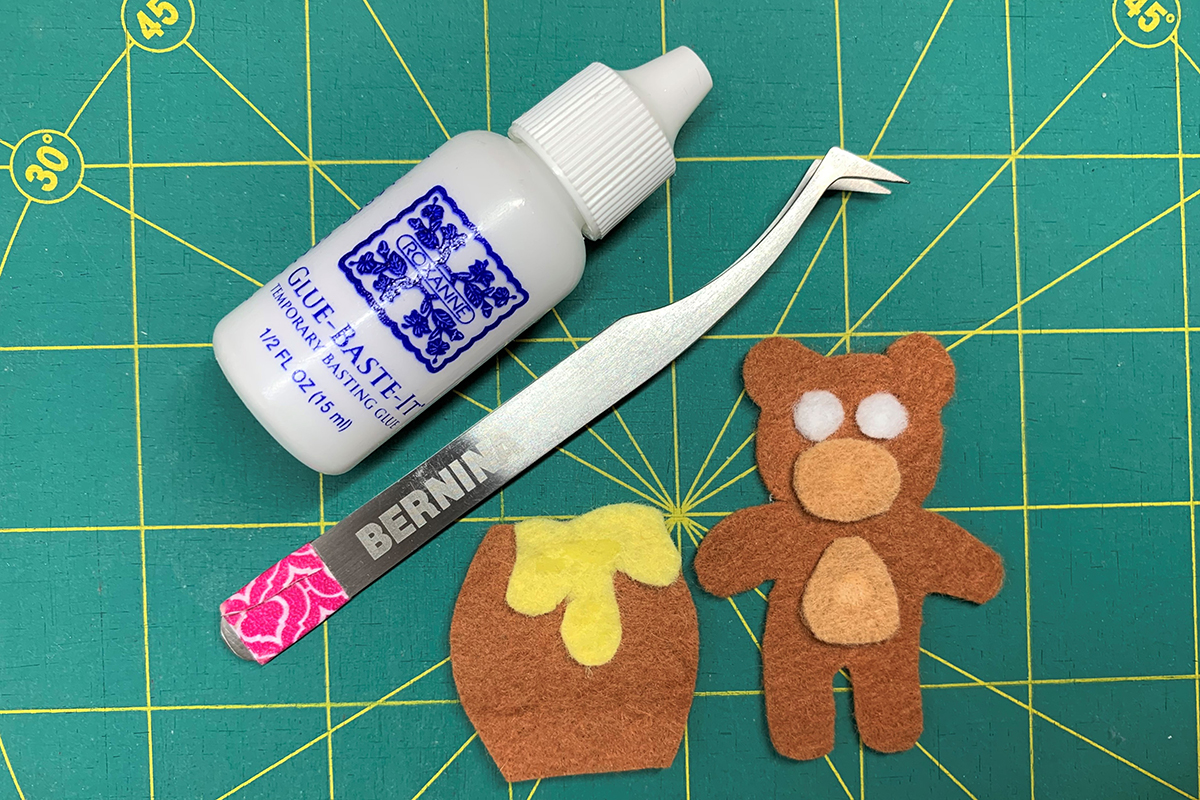
Hand stitch bear and honeypot as you wish. Set aside.

Plastic Rings, Satin Cord & Pony Beads
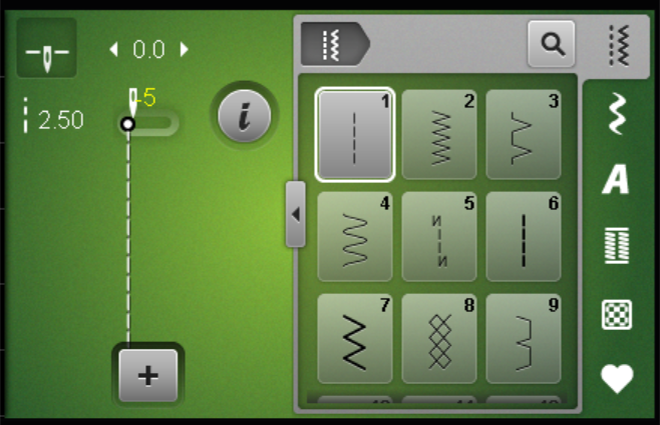
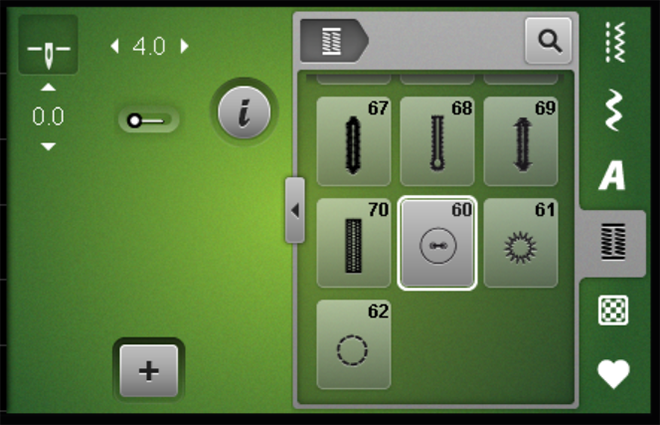
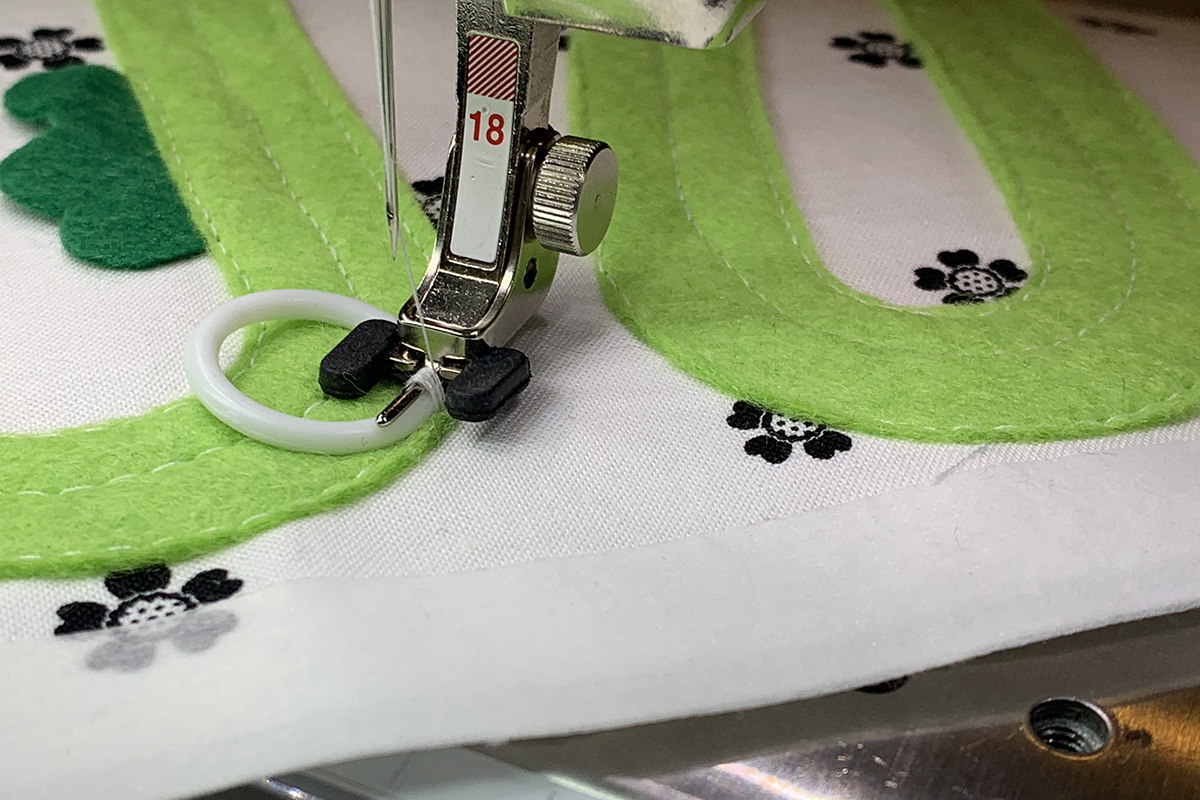
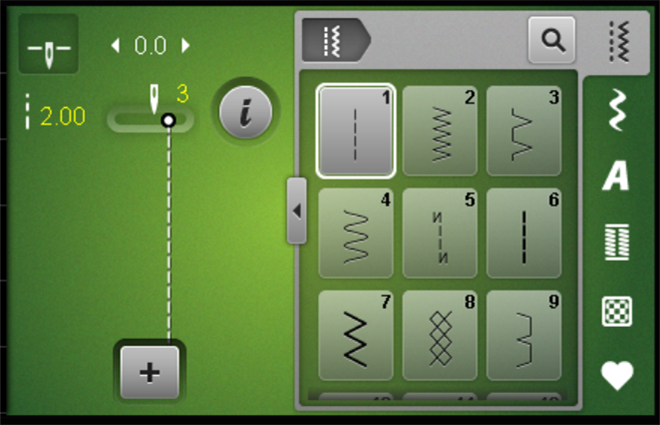
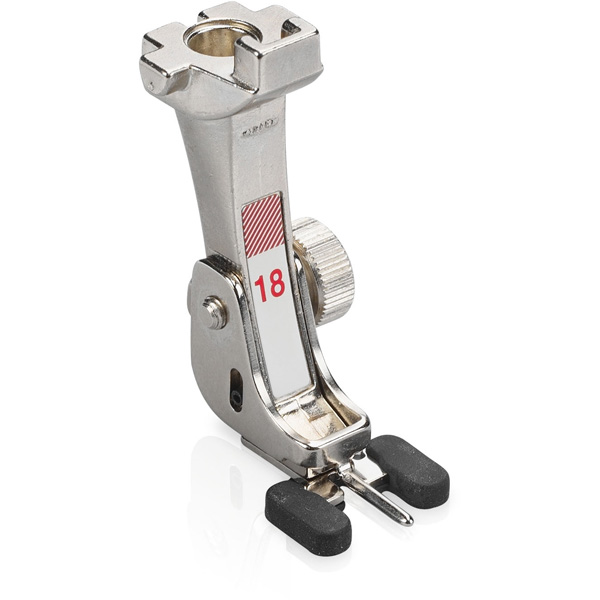
Time to put the activity together. This is a great one for fine motor skills. Lay out the plastic rings along the pathway to get a rough idea of where you want to place them. Make sure you use two for each curve so that the satin cord will follow along the curves nicely. Now, add white thread to your machine and attach your BERNINA Button Sew-On Foot #18. This foot has a sole with a rubber covering to prevent slipping. The center toe is adjustable allowing you to sew more than buttons. A variety of embellishments can be sewn on using this foot. On your machine screen, select the Buttonhole Menu. Then, select the Button Sew-On Program #60. This is a buttonhole stitch which automatically stitches and ties off in one step. Lower the feed dog so that the selected stitch sews in place.
Place the toe of the foot on top of the plastic ring.
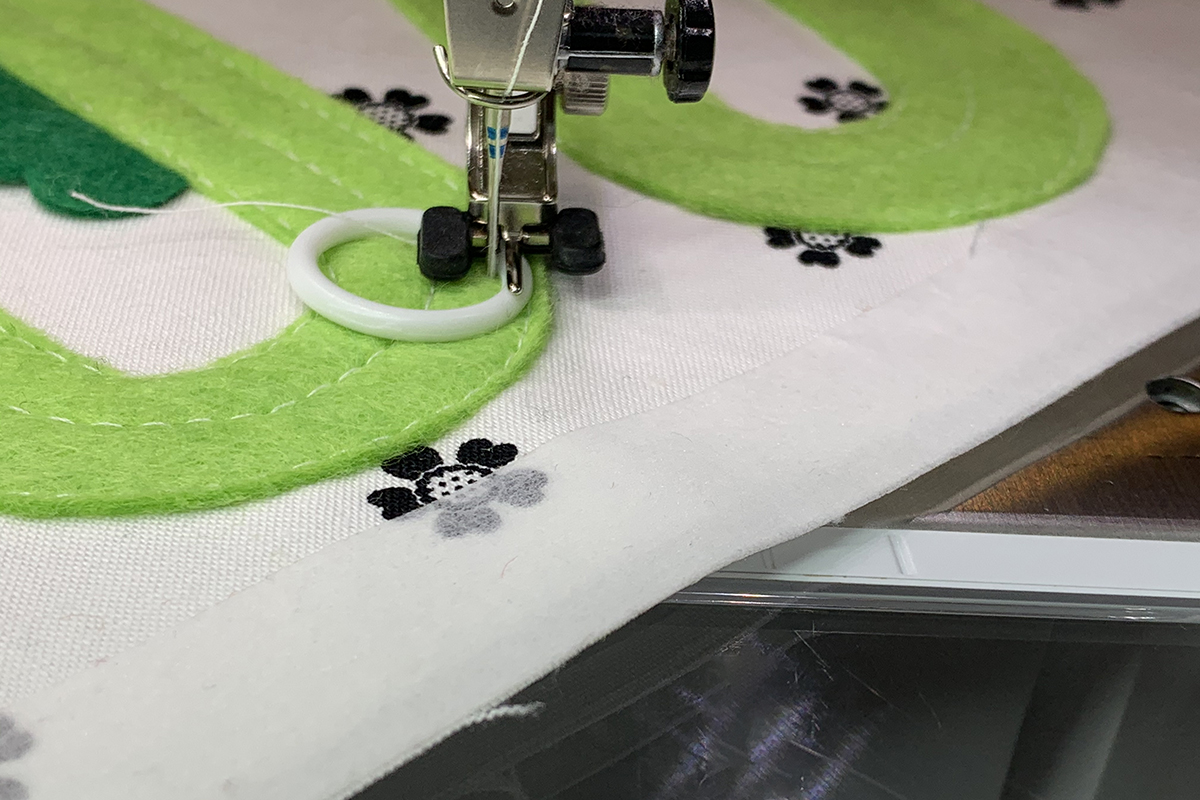
Turn the handwheel to check that the needle falls to the left and the right of the ring. If it does not, increase the stitch width.

Once you are in position, finish the Button Sew-On Program #60 stitch.
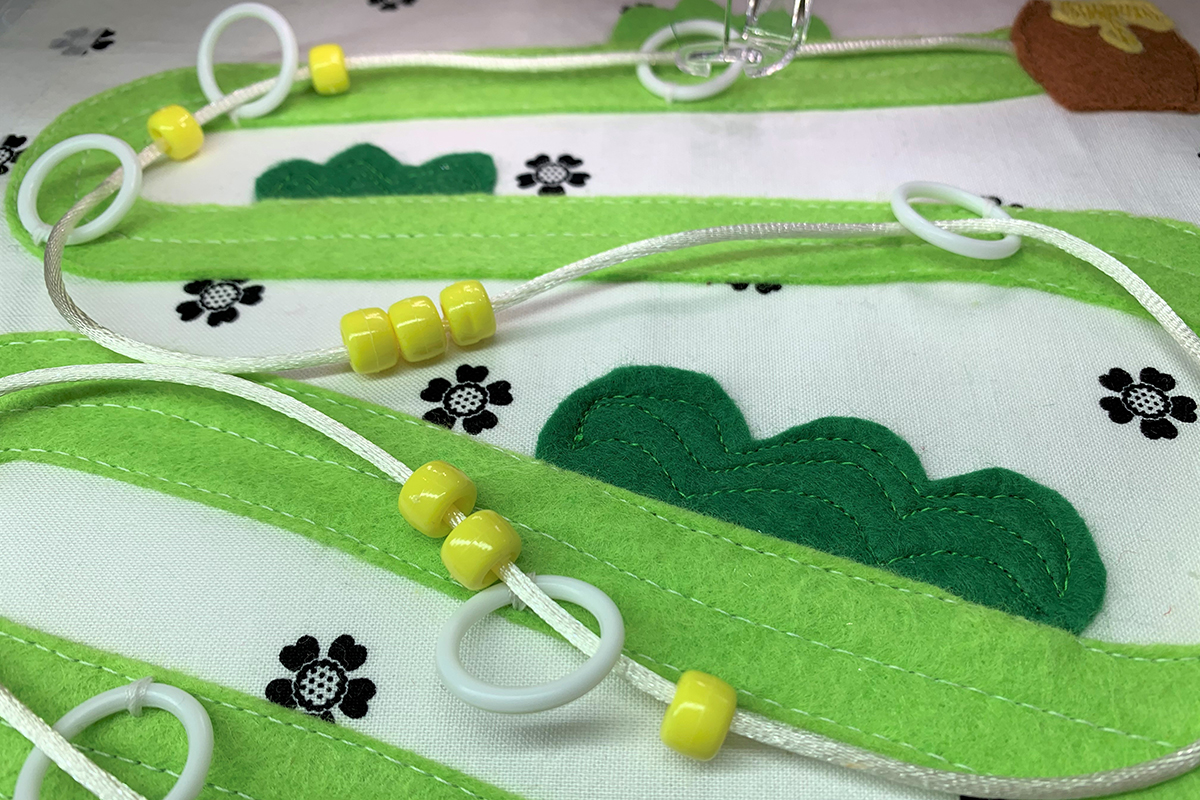
Do the same for all the plastic rings. Alternate the side of the pathway where you attach the rings (see picture below). BERNINA Button Sew-On Foot #18 is a fun, fast foot that is not just for buttons!
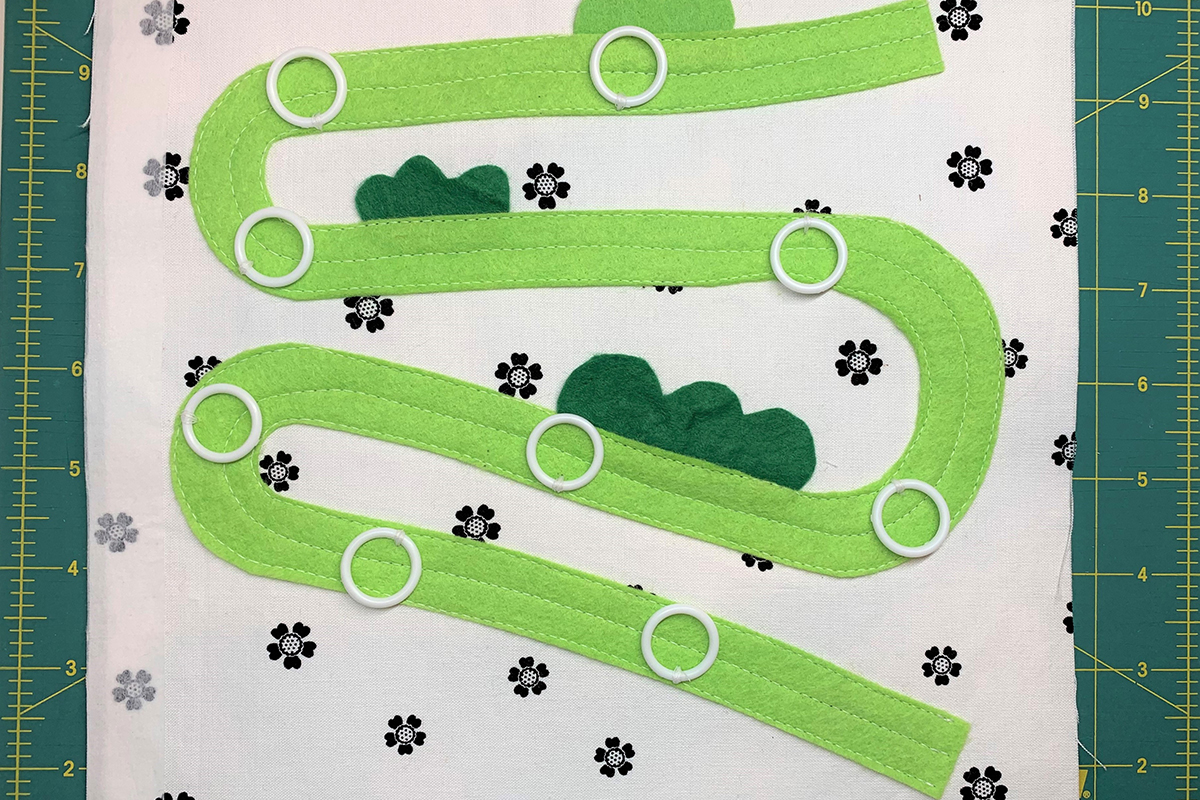
Find your yard of satin cord and add the yellow pony beads. Make knots at the ends to prevent your beads from falling off while working with the layout. Thread the cord through the plastic rings following the pathway and leaving a little slack in the cord.

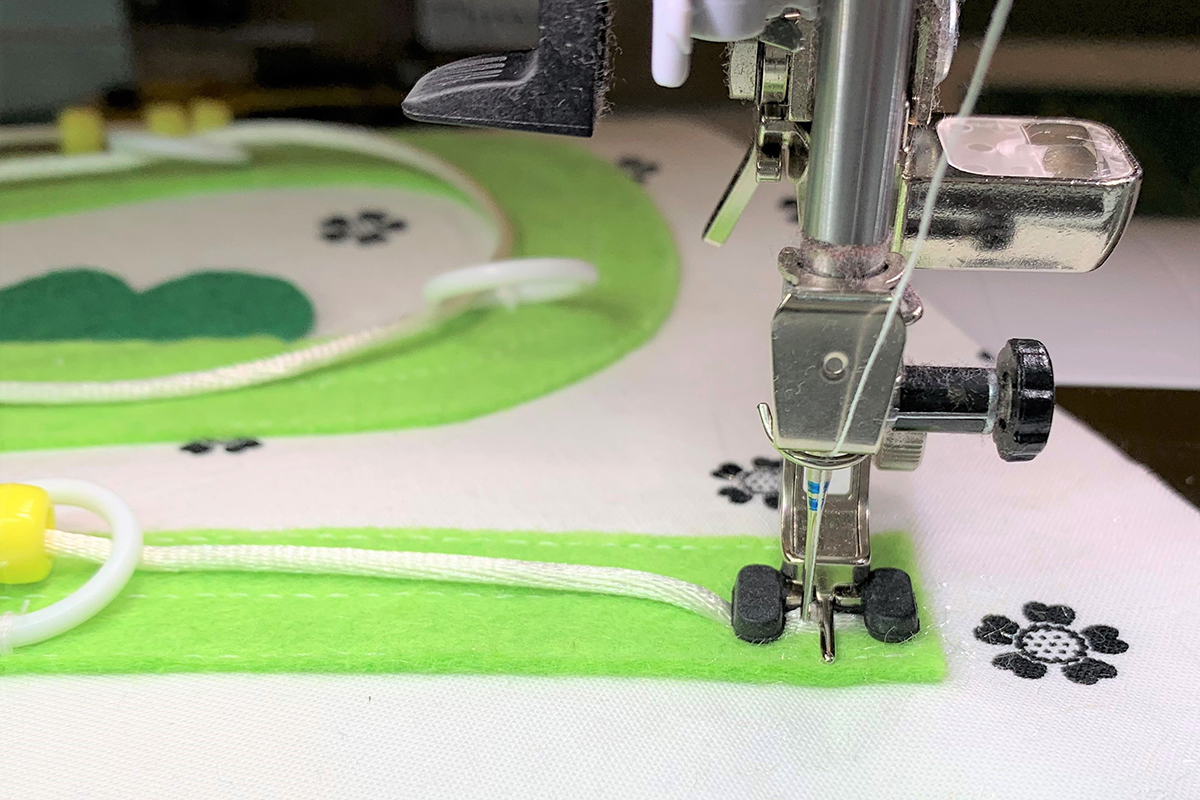
To secure the ends of the cord, you can use Button Sew-On Foot #18 as pictured below and the same Sew-On Program #60 stitch.
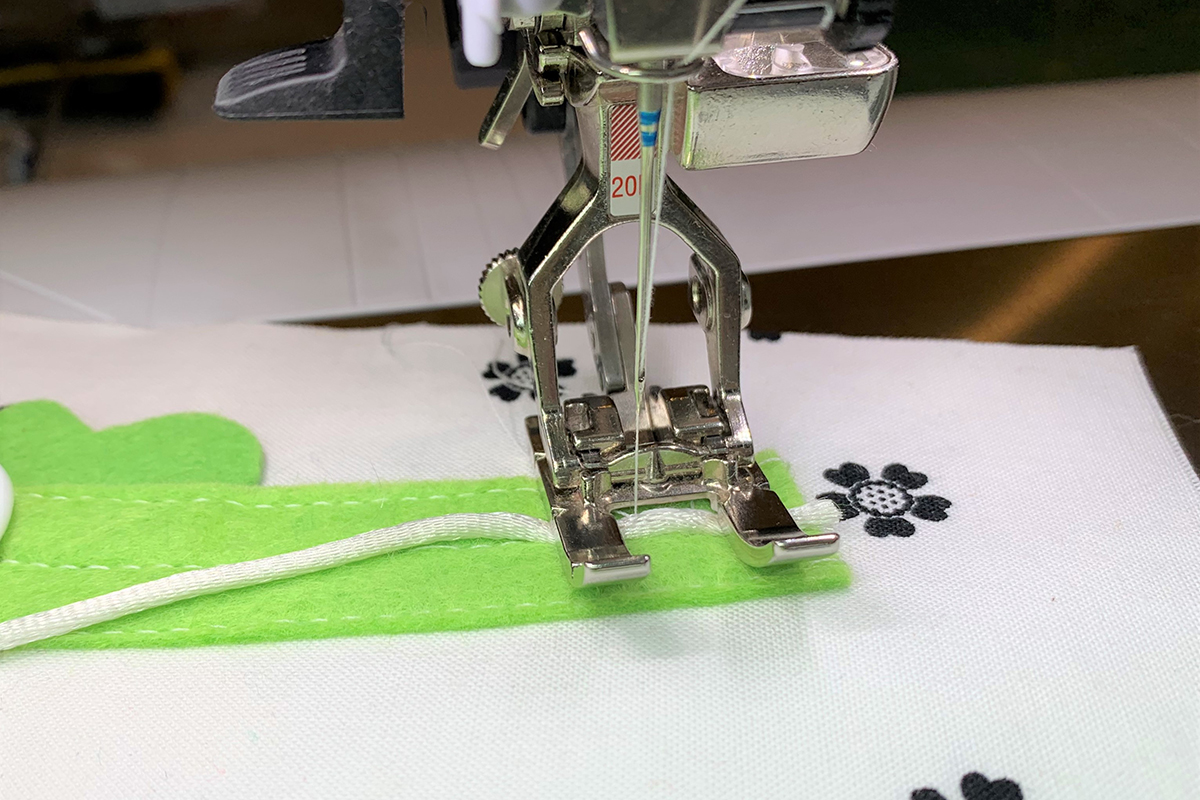
Or you may prefer to use BERNINA Open Embroidery Foot #20/20C/20D to stitch the cord. Either way will secure the cord and when we add bear and honey pot, the cord will get additional reinforcement.
Coming along…
Bear and Honey Pot
Time to add Bear and Honey Pot. Attach BERNINA Open Embroidery Foot #20/20C/20D and brown thread. Move the Needle Position to 3 and change the Stitch Length to 2.
Position the bear and honey pot at the start and finish of the pathway over the satin cord. Pin in place. Starting with Bear, place the felt up against the inside right toe of foot.
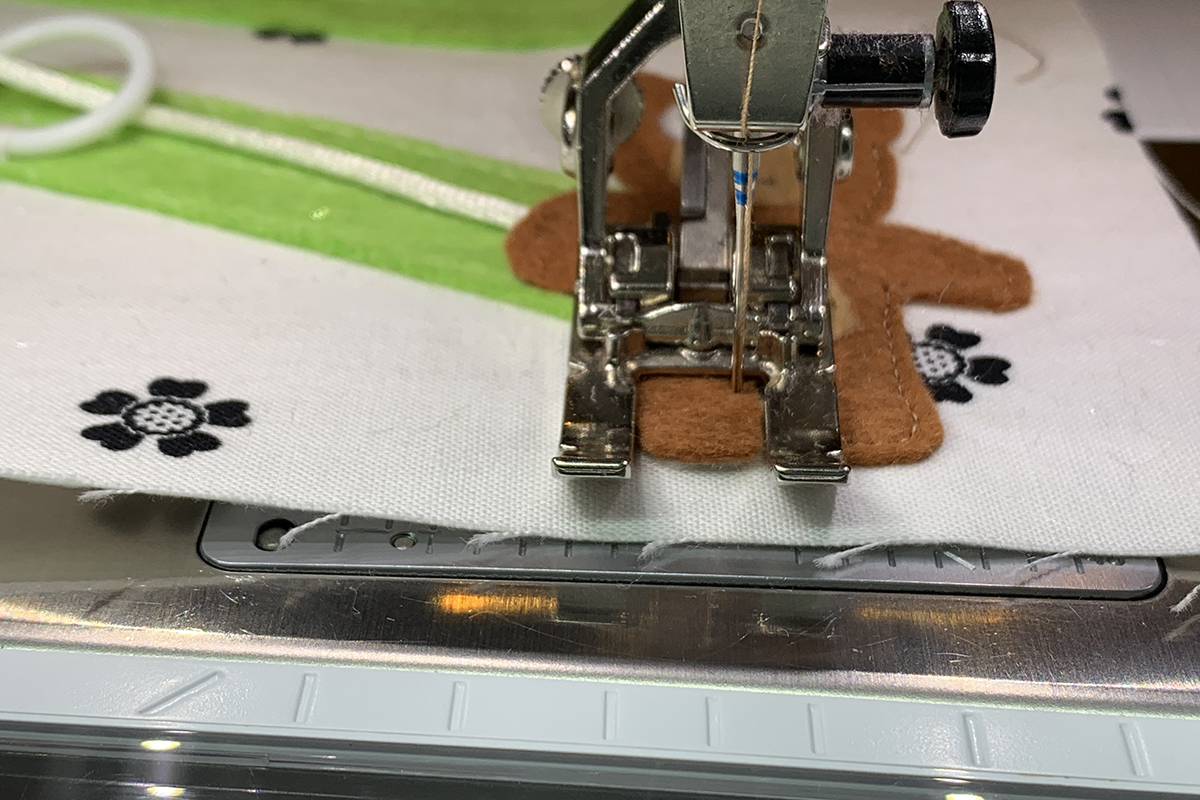
Stitch around the outline of Bear keeping the inside right toe up against the felt when possible. Make sure Needle Stop Up/Down icon is set in the down position, and use your Freehand System to pivot around curves. You might want to slide your speed dial to the left to slow down stitching. Bear has small curves to get around that will look better if you take your time.
Do the same for the honey pot.
You’re almost at the finish line!

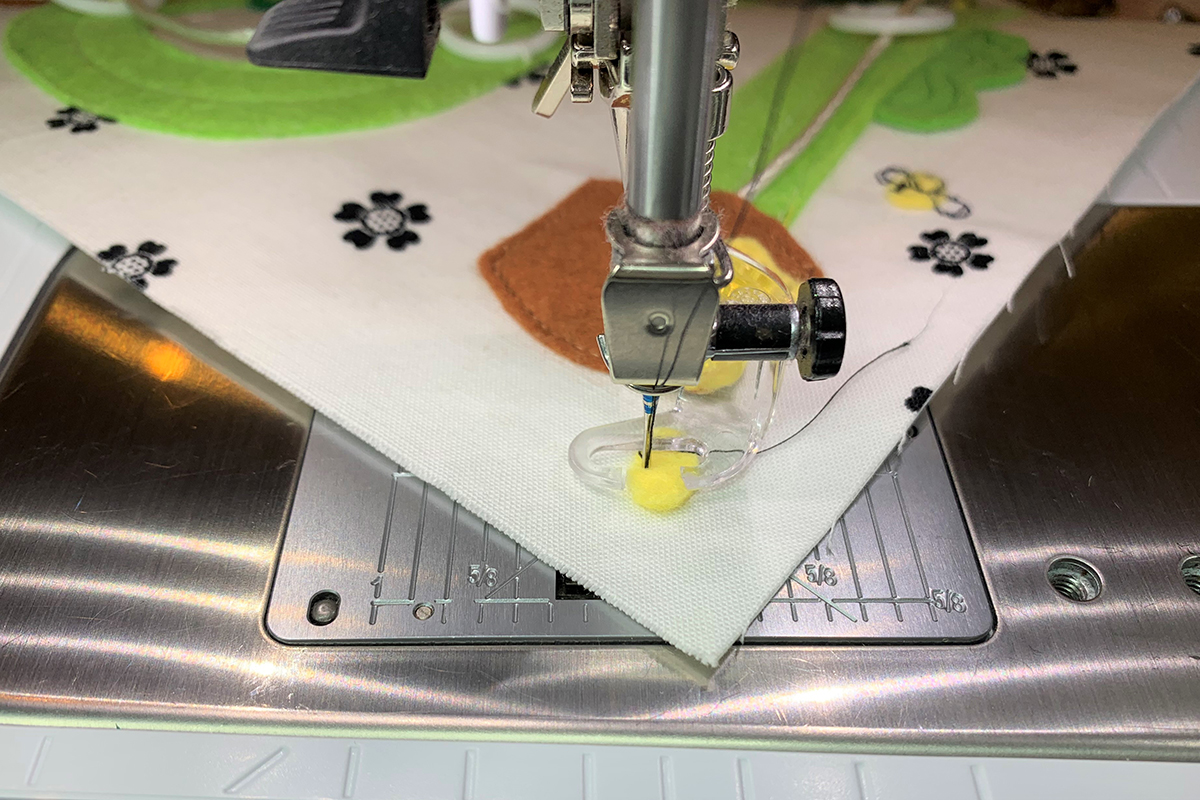
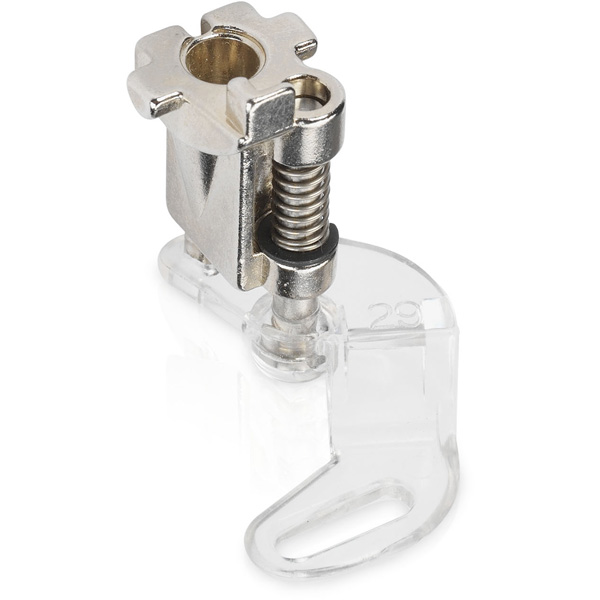
We are going to practice free-motion stitching with BERNINA Free-Motion Quilting Foot #29/29C. This foot has a clear sole for better visibility and a built-in spring attached to the shank of the foot. Quilting feet with a built-in spring are sometimes referred to as “hopping” feet because they hop with each stitch. The foot makes just enough contact with the fabric to form a nice stitch, while still enabling you to move the fabric freely in all directions. Add matching green thread to your machine and lower the feed dog. Position the foot over one of the bushes in the lower left corner. Pull up the bobbin thread and secure the stitching by sewing 3-4 tiny stitches. Once your thread is secure, continue to stitch by echoing the curves of the bush. Create two to three curvy lines making sure the needle stops in down position.

Continue echo stitching the bushes. If you have never played around with free-motion stitching, you might want to practice on some scrap fabric first.
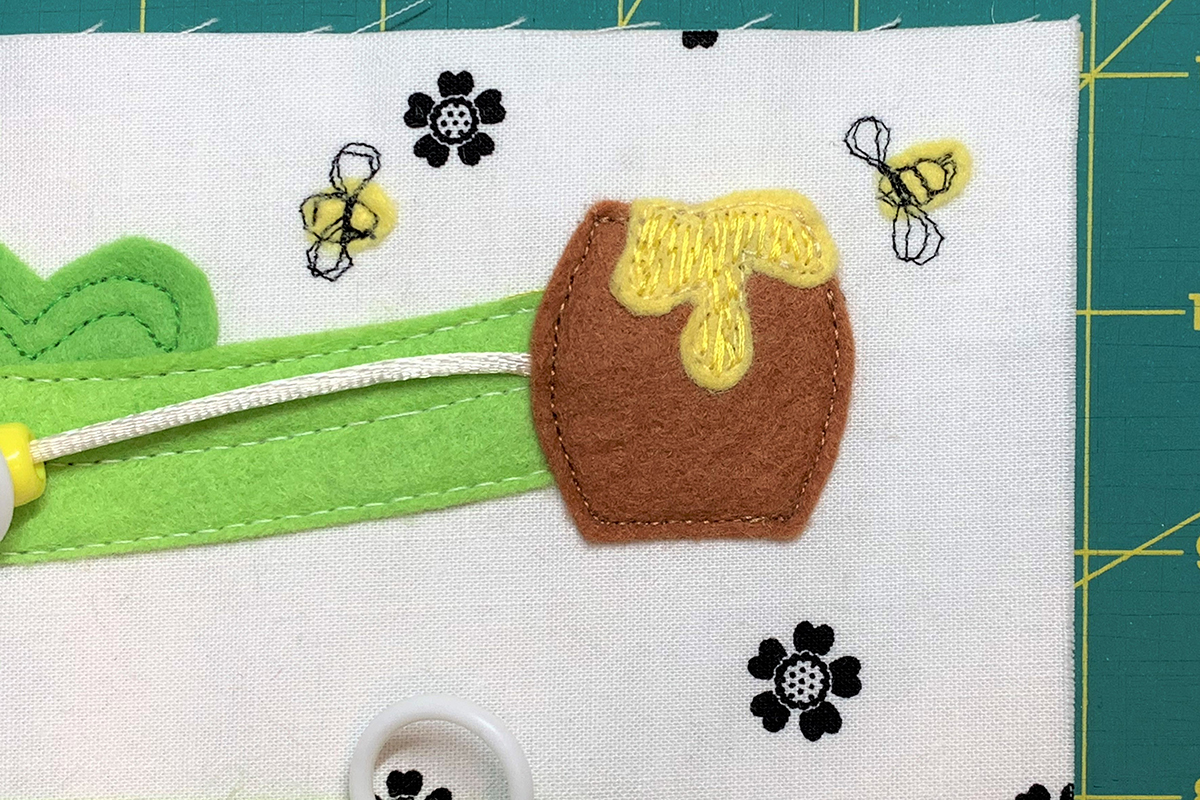
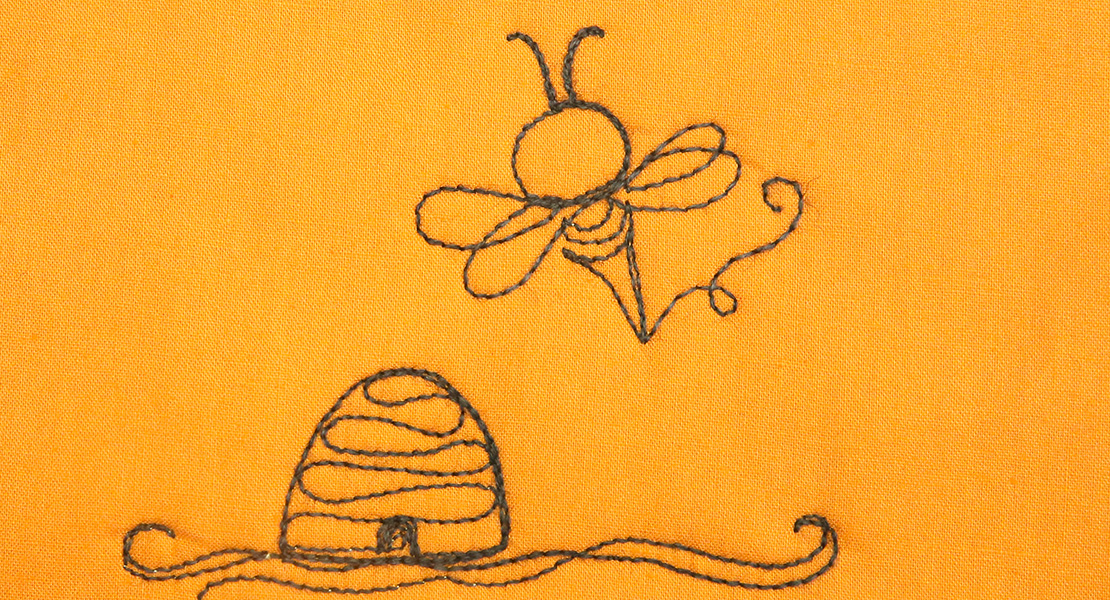
Just for fun, I made a couple bees buzzing around the honeypot. I cut yellow felt into ovals and glued them into position. Then using black thread, I did some micro free-motion stitching to create the body and wings.
I think the bees add a nice finishing touch.
Congrats on your completed Bear and Honey Pot page. I hope you enjoyed creating this page and learning how to use BERNINA specialty feet. Also, I hope you learned a new technique that you can use in future sewing projects. Let me know which busy book page is your favorite so far! I love to hear from my online sewing friends!
Here are the links to the 1st four posts.
Kids Busy Book Series
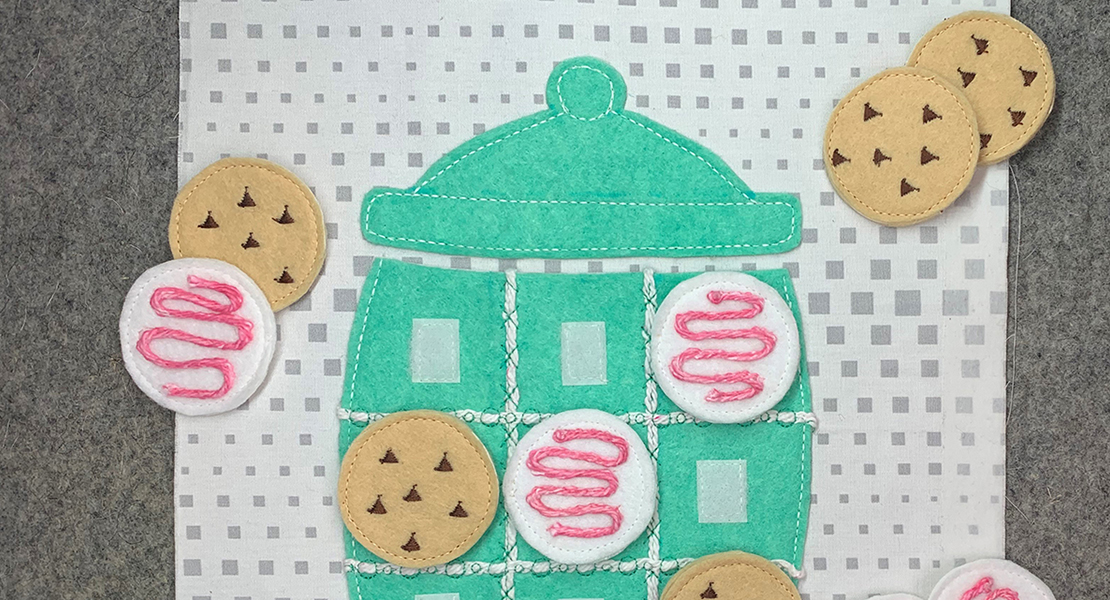
Part 4: Cookie Jar Tic Tac Toe
Used Products


What you might also like


14 comments on “How to Sew a Kids Busy Book, Part 5: Bear and Honey Pot”
-
-
Hello! Select the print option on your computer screen (mine is in the 3 dots icon at top right corner) and you should have the option to print as pdf.
-
-
You referenced leaving a margin on either the left or right side of the page, depending which way it will face. Will there be a backing on the back side of each page or will Page 2 be the back of Page 1, etc.?
This is an exciting project. It is an excellent way to stretch our creativity, explore and utilize the myriads of applications that our wonderful Bernina machines offer. Thank you for this creative project.-
Thank you! The busy book pages will be constructed back to back. The directions for this will be coming up next month!
-
-
I have really enjoyed trying new techniques and presser feet while working along with this project. Hope a new set of instructions and inspirations is released soon!
-
Hello. It’s so good to hear that you have been enjoying the busy book pages! The next tutorial will be posted in September. Stay tuned!
-
-
I note that you intend to do 10 pages for this project . The last 1 one part 5 was in July20. When is the next part coming
Margaret-
Hello! We will be posting it soon! So glad you are enjoying the pages!
-
I got all 5 pages done. Has the next page been posted yet? Have I missed it?
-
Hello. The next page posted today! Enjoy!
-
-
-
-
Greetings,
I am having a lot of fun making these pages. Thanks so much for your detailed instructions and pictures. I am a new Bernina owner…what a difference a great machine makes.
Looking forward to the next page!!!
-
Hello. Nice to hear you are having fun creating the pages! I agree – what a difference a machine makes!
-
-
I’m sorry if I am a little dense! I am not clear on the purpose of this activity. Are you supposed to move all the beads through the rings from the bear to the honeypot? Or is the bear supposed to “find” the honeypot? It looks like the bear is stitched down.
-
Hello. The bear is stitched down. This page is for fine motor skills to move the yellow “bees” to the honeypot.
-
Leave a Reply
You must be logged in to post a comment.
It would be very nice to have PDF instructions and patterns for each book page. Thanks!