How to Sew Reusable Pull-on Potty Trainers
In this tutorial, we will work together to learn how to sew reusable pull-on potty trainers. We will literally learn together as this is my first attempt! ? Both of our daughters use eco-friendly reusable cloth diapers and LOVE the soft cloth for baby’s bum, soft hit on the budget and soft impact on the landfill when compared to using disposable diapers.
As one sweet granddaughter is now ready to be potty trained, we all got to thinking that this milestone shouldn’t mean a trip to the store for disposable training pants. So, in collaboration with my daughters, here goes! Literally and figuratively. (Sorry, I couldn’t help myself ??♀️)
Note: Just as you wouldn’t use only one cloth diaper set, you will need to make a few sets of these trainers. To add to the potty training motivation, you may want to allow your child to help choose the fabrics. I would recommend at least three sets so you have one to wear, one spare and one drying after you wash it out. It might be a little more work than disposables, but I believe the benefits outweigh any inconvenience.
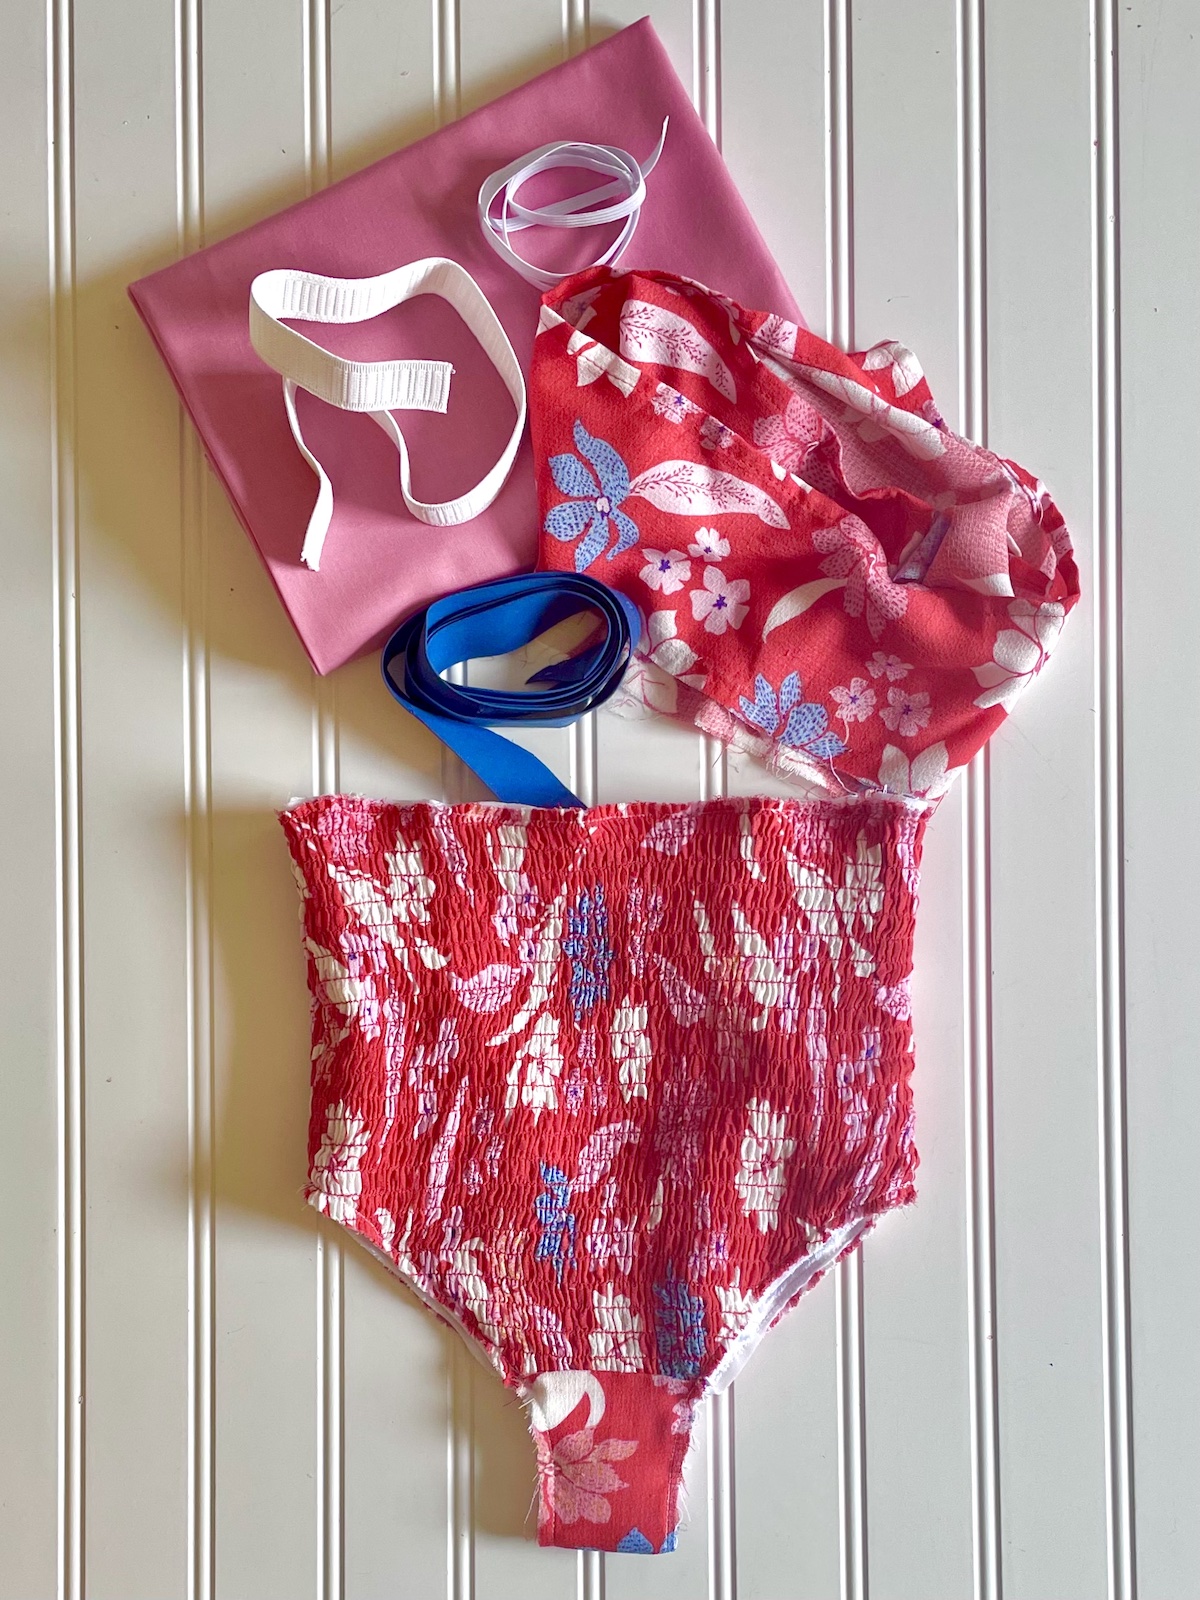
Materials to Sew Reusable Pull-on Potty Trainers
Fabric 1: Outer Fabric of Choice
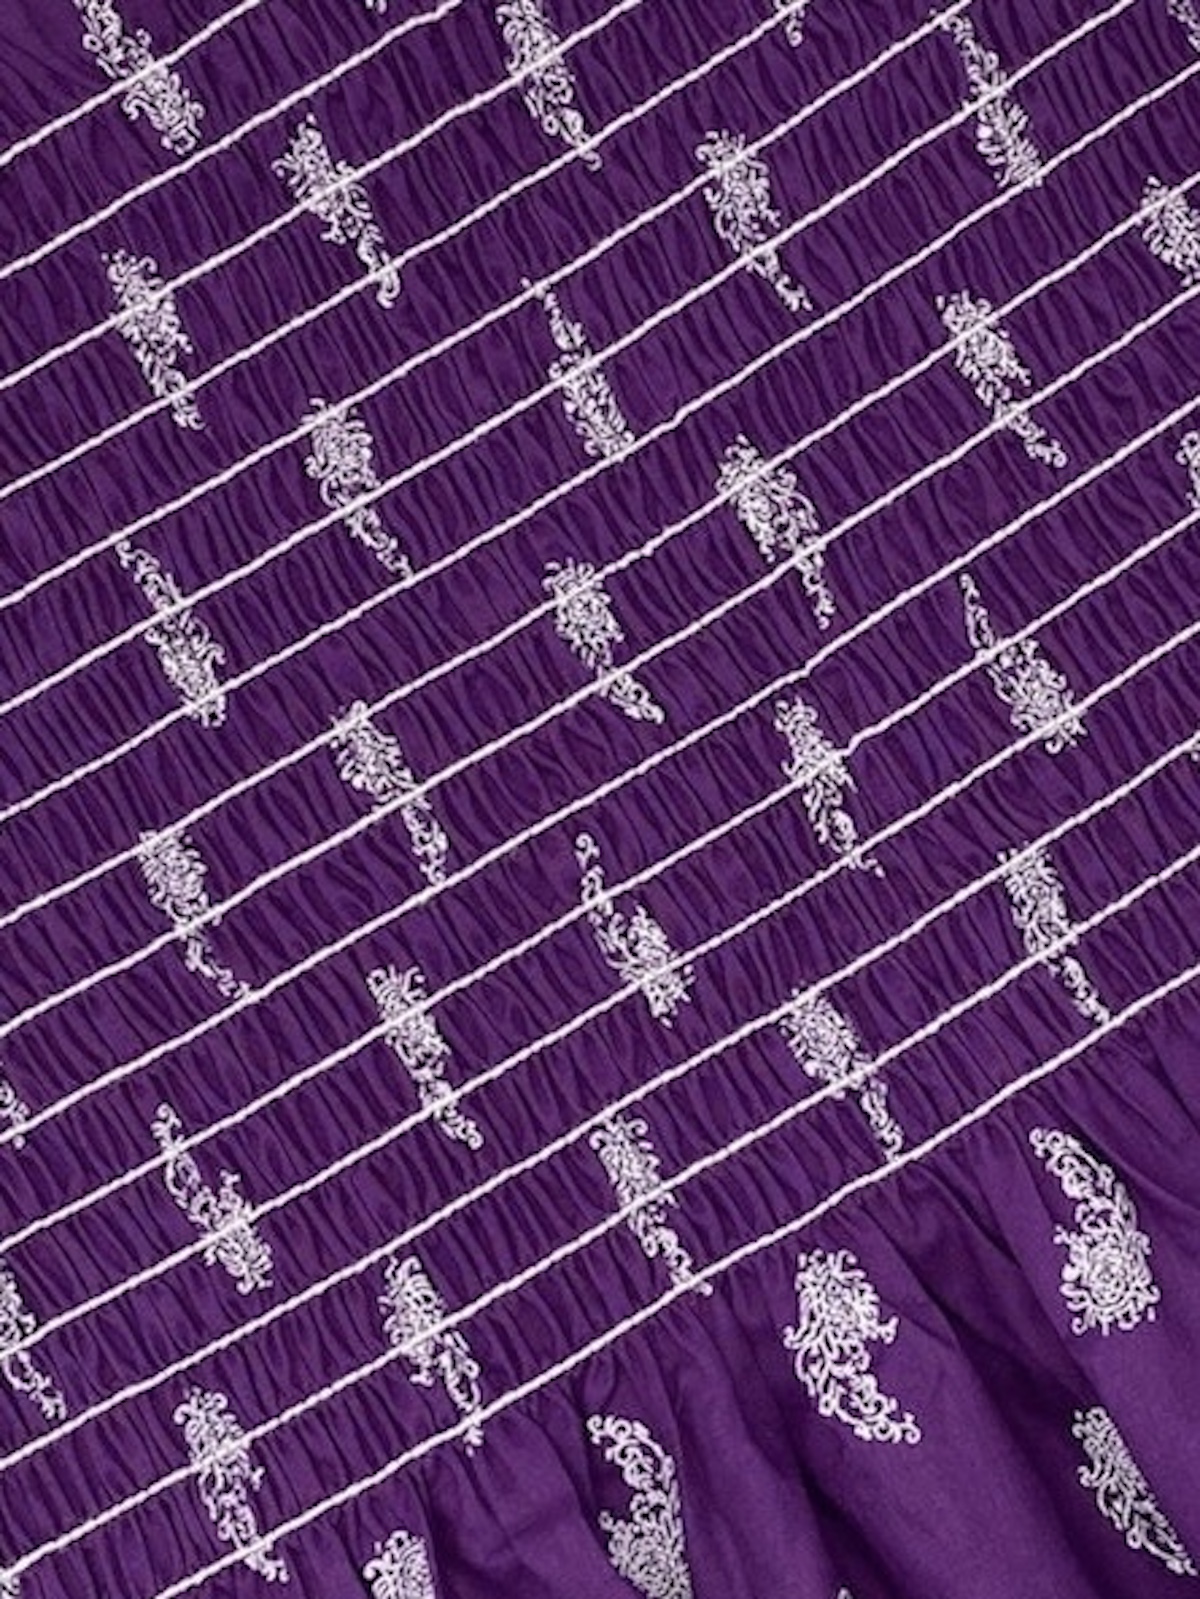
I am actually upcycling a top from the clearance rack at our local TJ-something discount store. I stopped by the fabric store hoping to find that iconic “tube top” fabric we all know and love. Apparently while the fashion-world is taking off with cute throw-back-to-the-70s garments, the fabric stores have some catching up to do. My research shows it is called “shirred” or “frill shirred”, and I found some on Etsy. Drop a note below if you find a store that sells it. Please and thank you!
Another option would be to use a standard fabric of your choice and create your own shirred fabric. Here is a great tutorial on how to do this! This option is obviously more labor intensive, but then your fabric options will be literally endless.
- Amount: 1/2 yard
Fabric 2: Additional Fabric for Waist and Leg Openings
You will need extra regular (non-shirred) fabric for the waist and leg elastic casings. You can choose a contrasting fabric or a coordinating fabric if one is available. Many shirred dress fabrics already have a section of regular fabric that is not shirred at the bottom, so you can literally sew one seam and make a dress. If you find this option, you will have plenty of fabric for the casings.
- Amount: 1/2 yard
OR
Option: you can use purchased bias tape for this part of the project to save some time if you don’t mind having a solid color contrast on the waist and leg openings.
- Amount: 1 package of Extra Wide Double Fold (1/2 inch wide) Bias Tape or Quilt Binding for this project.
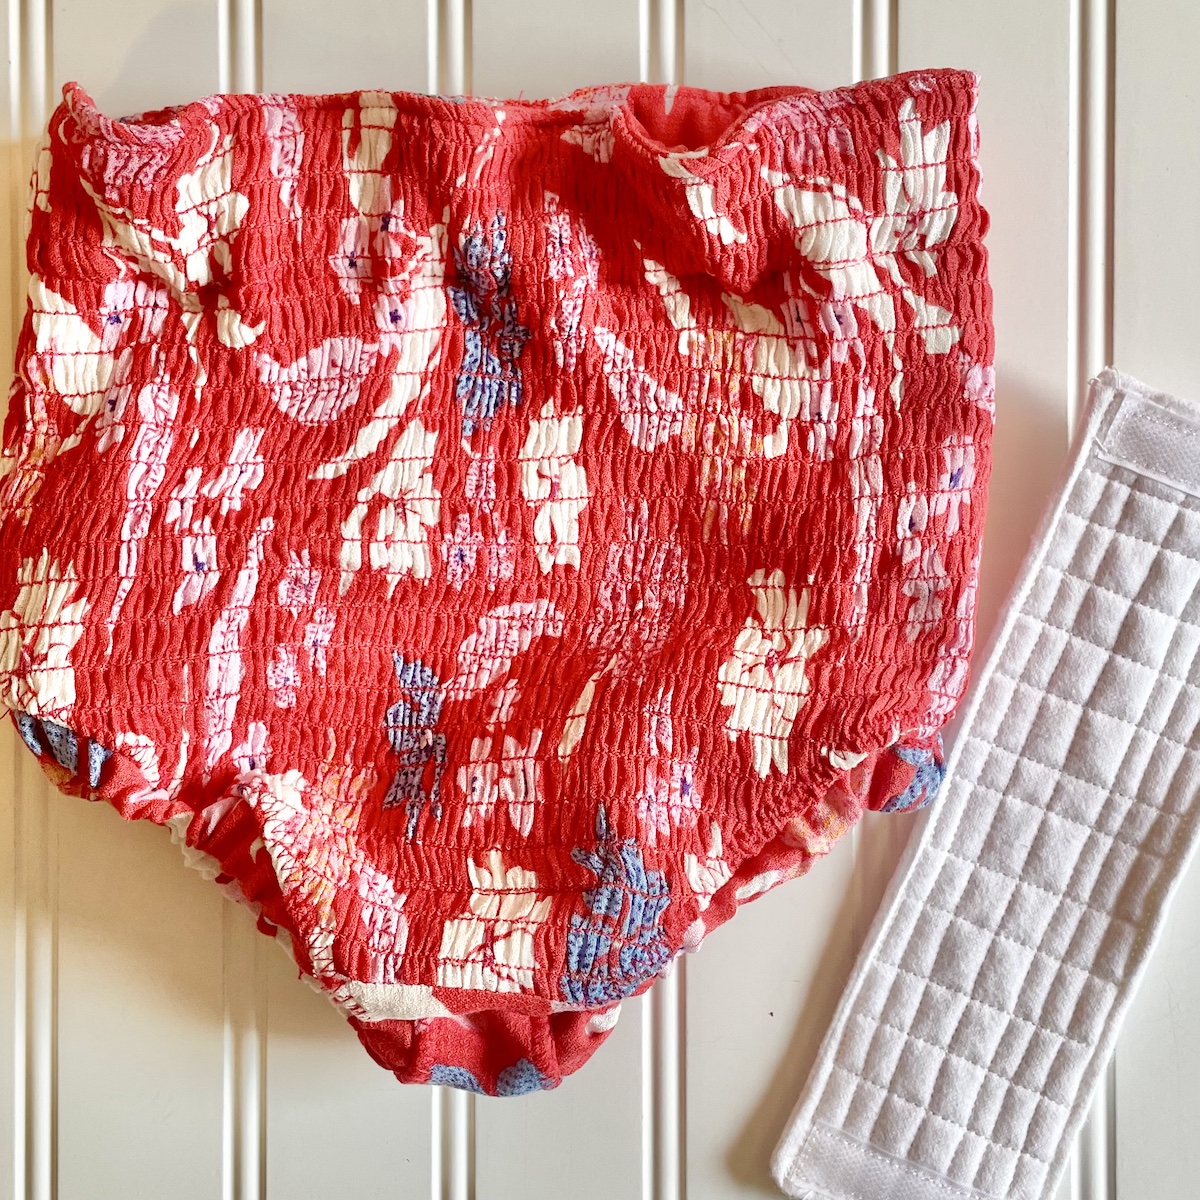
Fabric 3: Diaper Cloth
This fabric is a super soft, durable fabric for the inside lining next to your child’s body. I was able to find this in the utility fabric section during my visit to our brand-new JOANN store here in Knoxville. Here’s a link to the online product description.
- Amount: 1/2 yard
Fabric 4: Inner Lining Fabric
The helpful person at the store showed me two different choices for a soft, non-crinkly, waterproof fabric to use as the inner liner (between the outer stretchy fabric and the diaper cloth) of the trainers. This will not touch the skin and is what will help avoid leaks. The first option she showed me is a Polyurethane Laminate Fabric. It is found in the Children’s Fabric section and is meant for use in making cloth diapers. She also showed me a Cosplay option, found in the novelty fabric section. I thought it was pretty nice too, so I purchased some of each.
- Amount: 1/2 yard
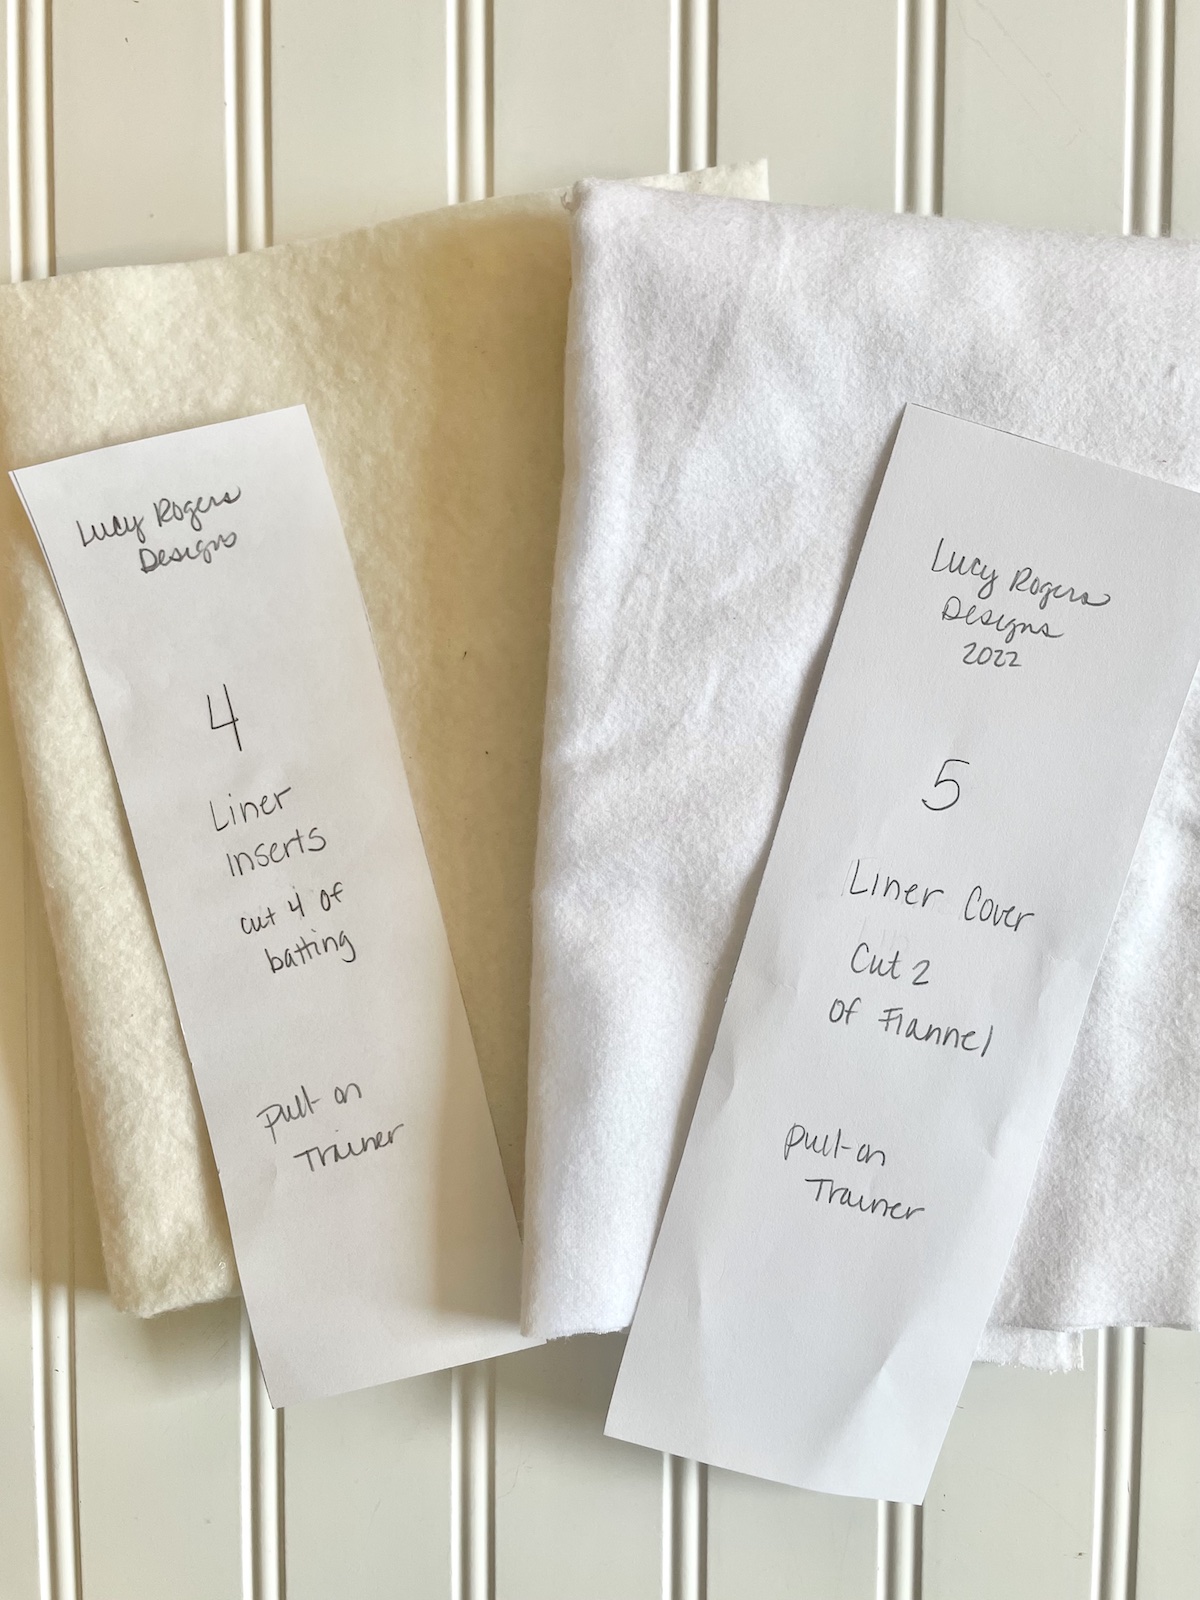
Fabric 5: Flannel for Covers for optional Inserts
I chose to use a super soft solid white flannel for the insert covers to be comfortable next to your child’s skin and to make the liners more durable.
- Amount: 1/3 yard
Batting for Inserts (optional, but recommended for new trainees)
I decided on bamboo batting for the inner layers of the inserts. This batting is needle punched with a scrim layer for increased durability over regular batting. This is important due to the frequent (but hopefully not TOO frequent) washing of the liners.
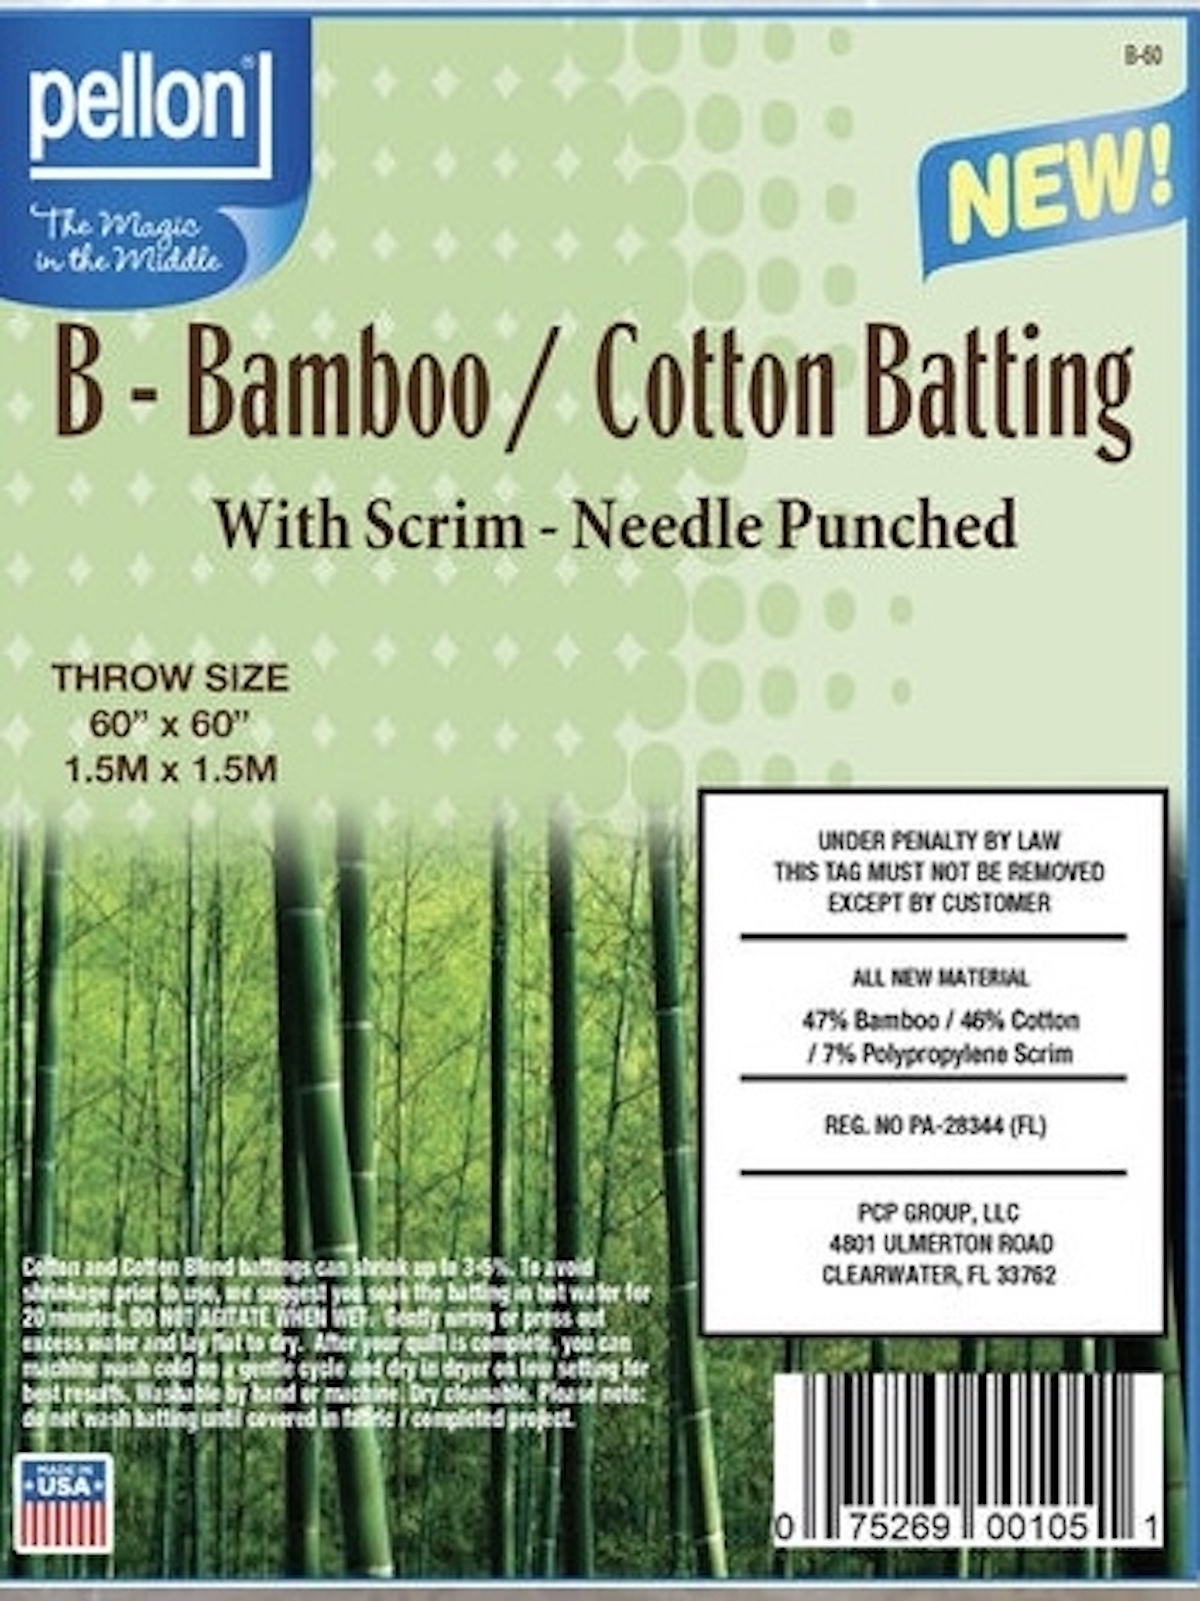
I recommend the bamboo liner because it will add extra absorption for accidents and the fabric cover for the liner will allow the child to feel wet. This is unlike a disposable training pant which pulls the moisture away from the body and doesn’t feel much different than a diaper. Our experience is that the potty training transition goes more quickly if the child can feel the difference between being wet and dry. The other upside of the liner is that you can swap it out for a fresh one in the event of a small accident and continue using the same training pants. It also gives you the flexibility of advancing to no liner as the child gains more control and confidence.
- Amount: smallest package (craft size 34 x 45 inch) or a 1/3 yard cut
Elastic for Waistband
I like to use 1 inch wide pajama and underwear elastic because it is more comfortable and doesn’t roll. It is a little more expensive, but worth it.
- Amount: one 1.25 yard package or 1 yard of by-the-yard
Elastic for Leg Openings
I prefer 1/4 inch knit elastic because it offers comfort without the bulkiness of a wider elastic. For a size 2T, I am using 9 inch lengths of elastic and will adjust the length if needed in a final fitting.
- Amount: 2/3 yard of by-the-yard
Sew-In Velcro
It is really important that you purchase the soft & flexible variety of sew in Velcro/Hook & Loop Tape. Because your goal is to gradually eliminate the need for the liner, you want the very soft part of the velcro to be what touches your child’s skin on the inside of the trainer. The less soft side of the tape will be attached to the underside of the liner.
- Amount: two 1.5 inch pieces
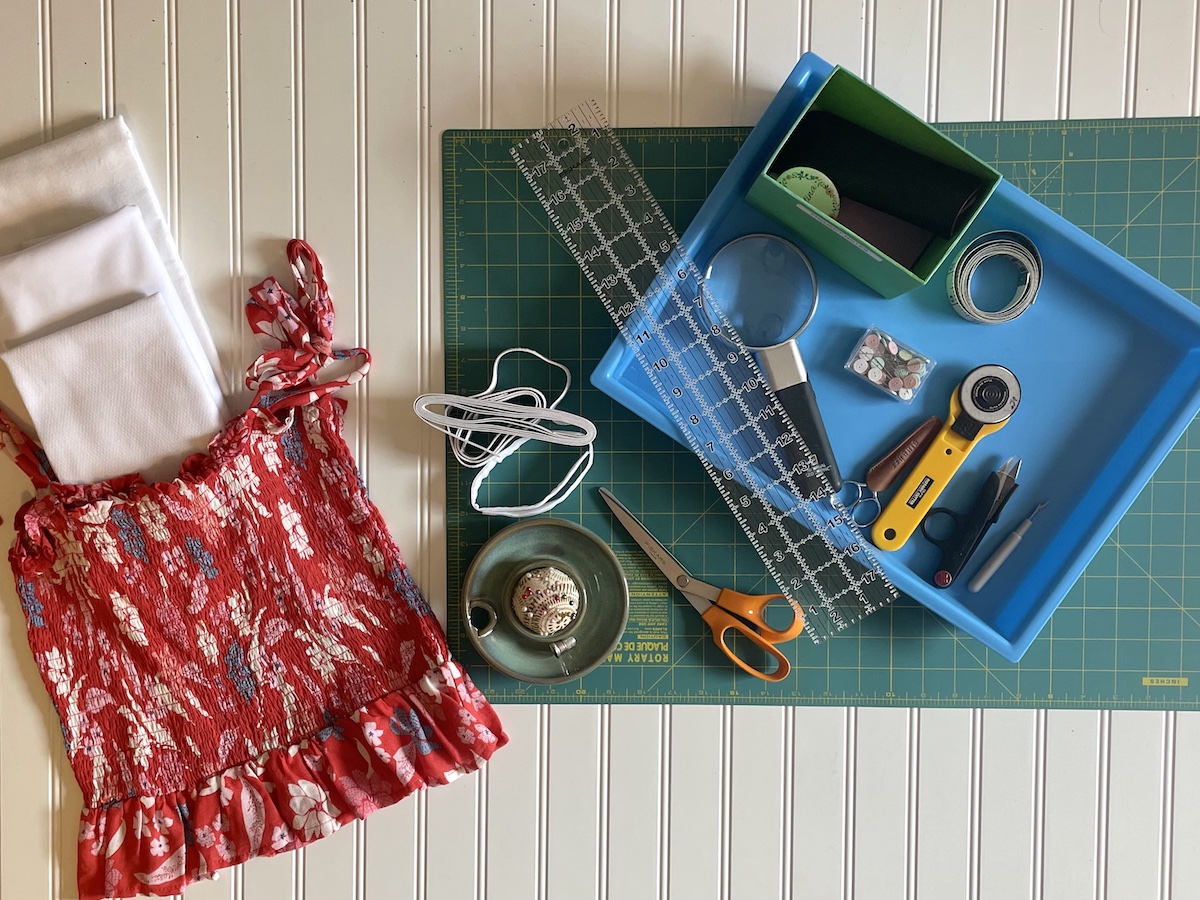
Other Helpful Tools to Sew Reusable Pull-on Potty Trainers
- Flexible Measuring Tape
- Seam Gauge
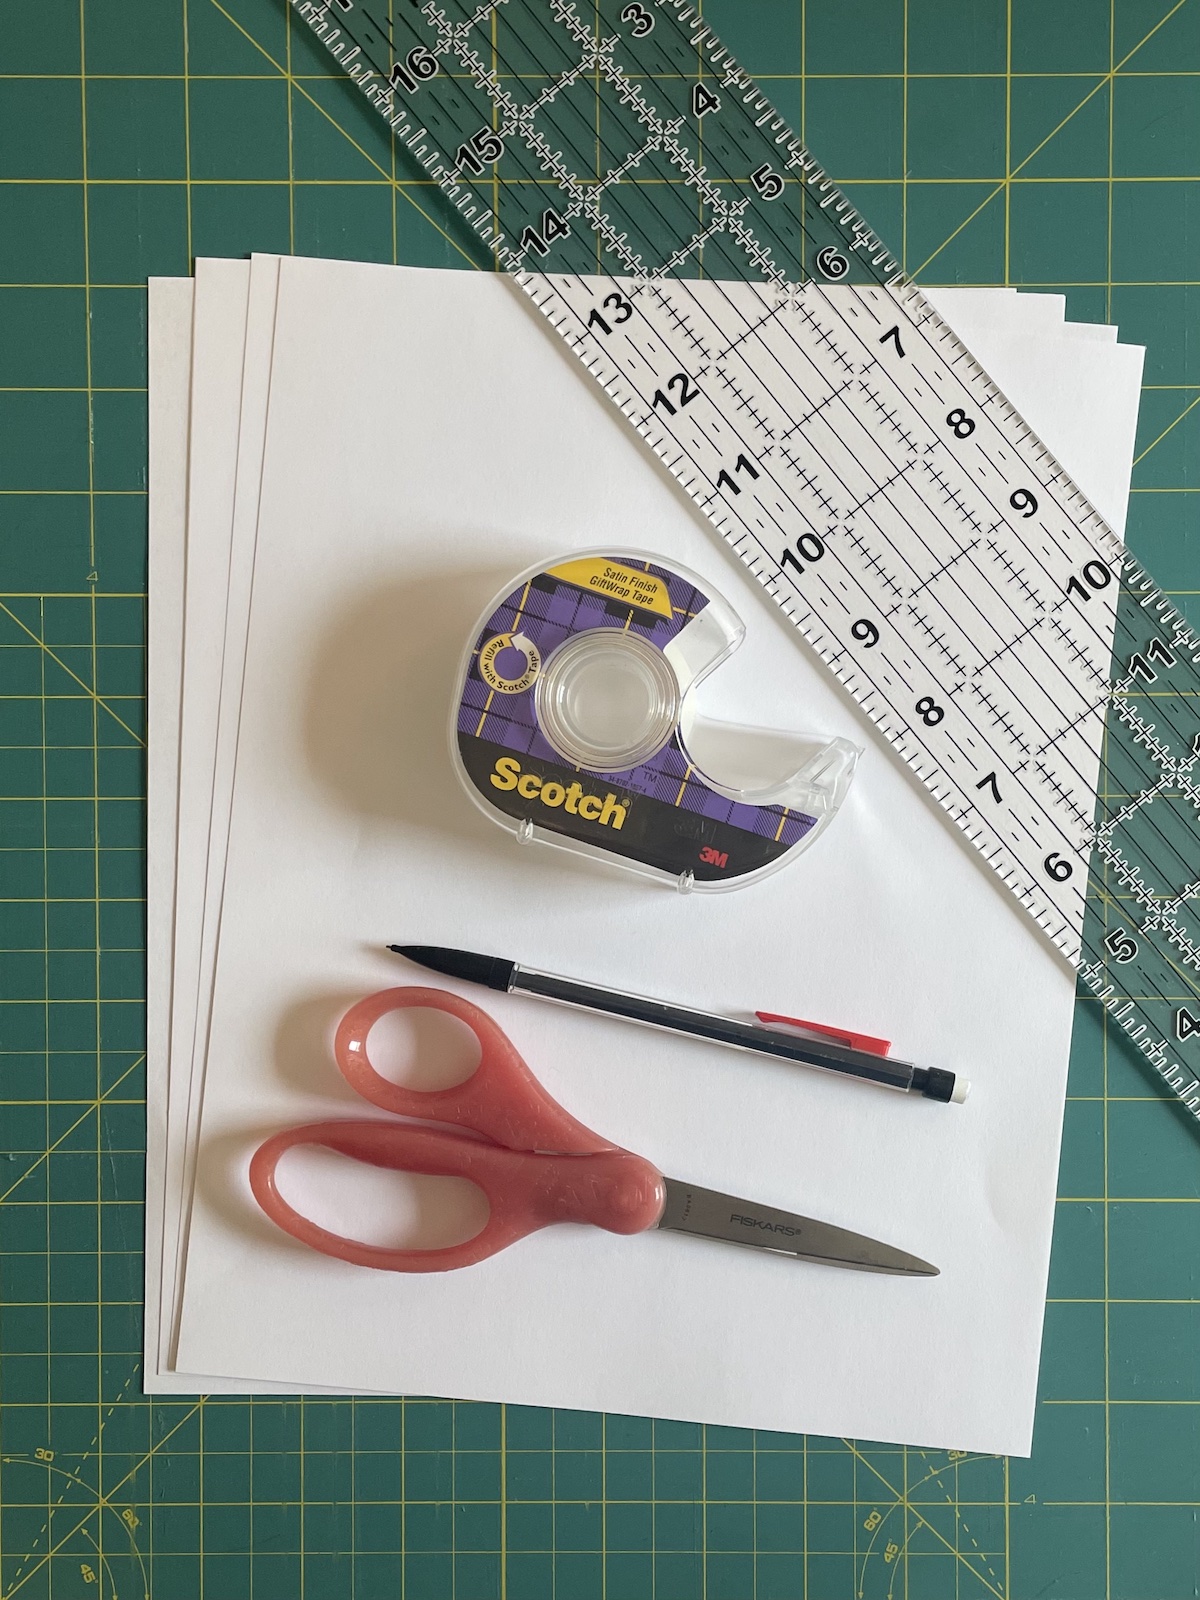
- Pattern Making Supplies (Paper or Tissue, Transparent Tape, Pencil, Craft Scissors)
- Fabric Marker
- Sewing Pins
- Safety Pins
- Fabric Shears
- Thread
Instructions to Sew Reusable Pull-on Potty Trainers
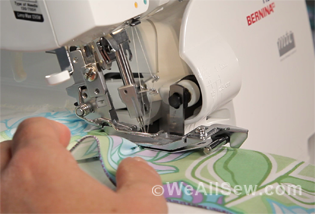
Unless otherwise noted, you will use a 1/4 inch seam allowance. Seam finishes (serged or zigzag) are optional on the outer and inner layer and not necessary on the inner waterproof fabric.
Part One: Outer Layer of Reusable Pull-on Potty Trainer
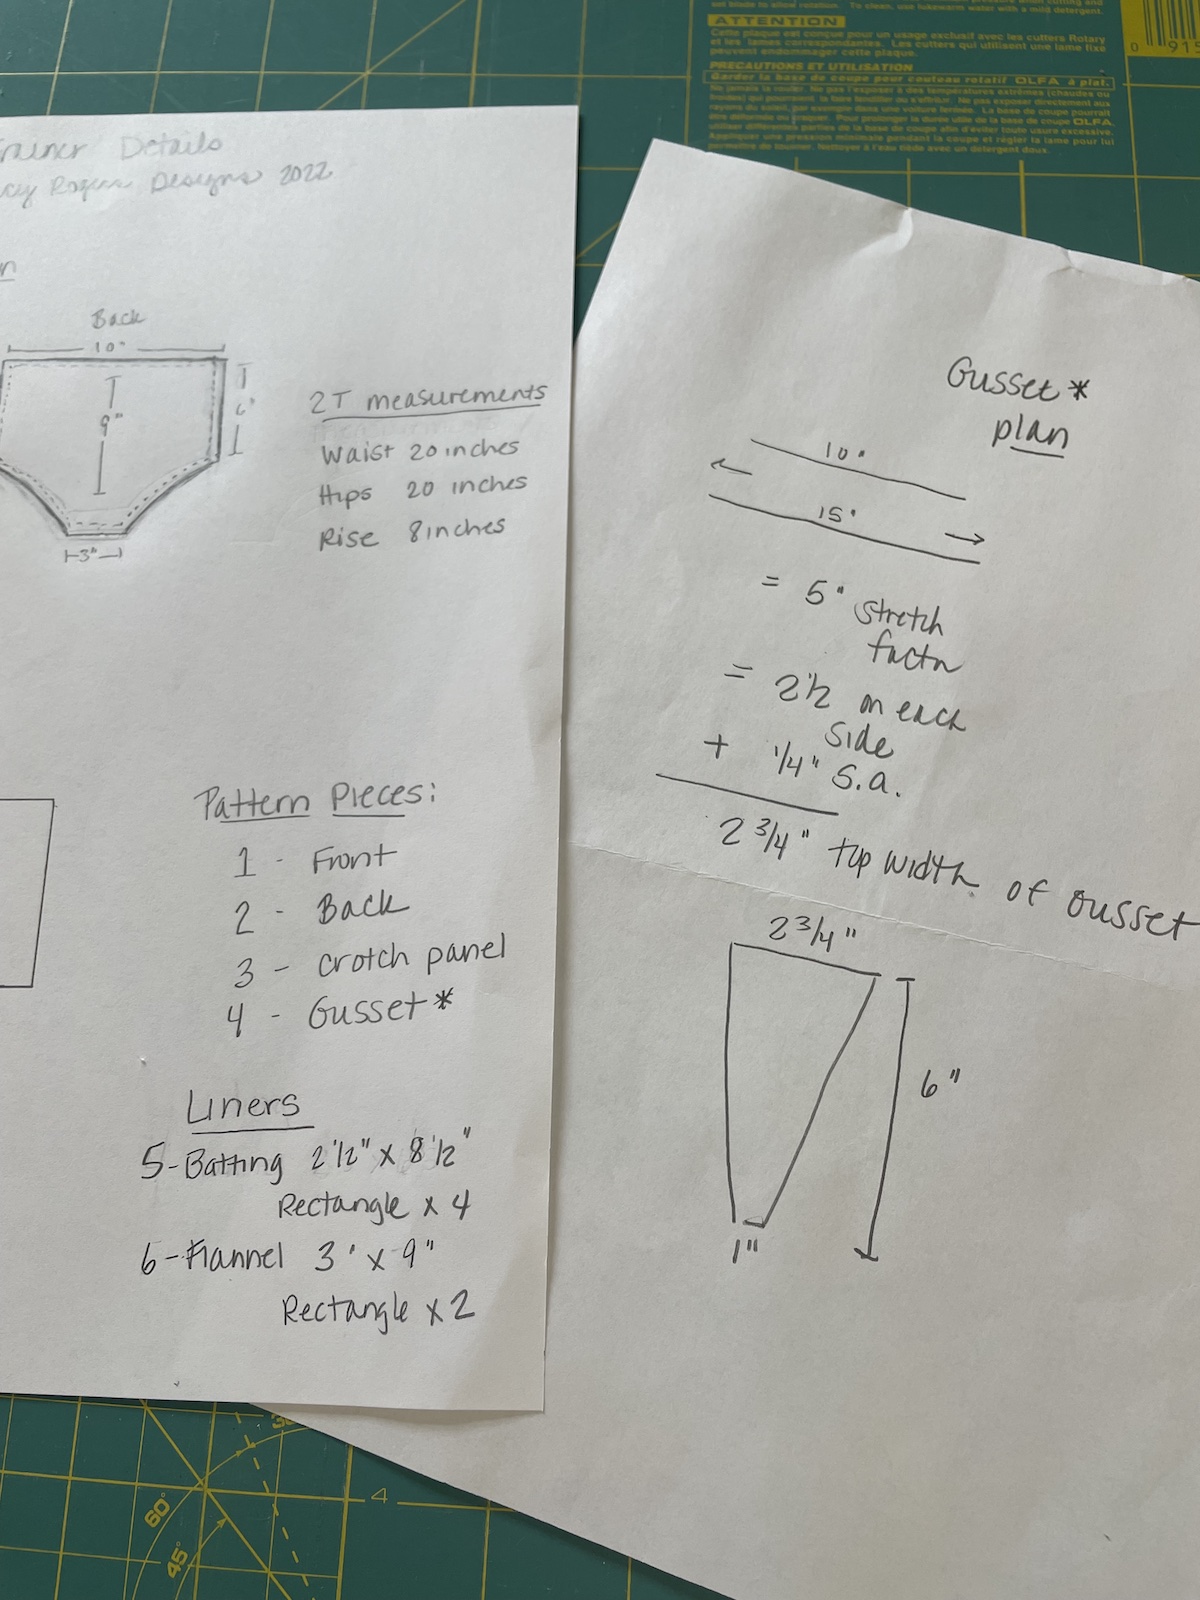
Step 1. Take Measurements and Create Pattern
If possible, obtain waist, hip and rise (crotch to waist), and leg measurements. Based on these measurements, you can create a simple pattern as shown. If taking the measurements yourself is not possible, you can refer to these sample measurements, found on the Garnet Hill website
- 2T waist: 20 inches
- 2T hips: 20.5 inches
- 3 T waist: 20.5 inches
- 4 T waist 23 inches
Use 9 inches as the rise measurement.
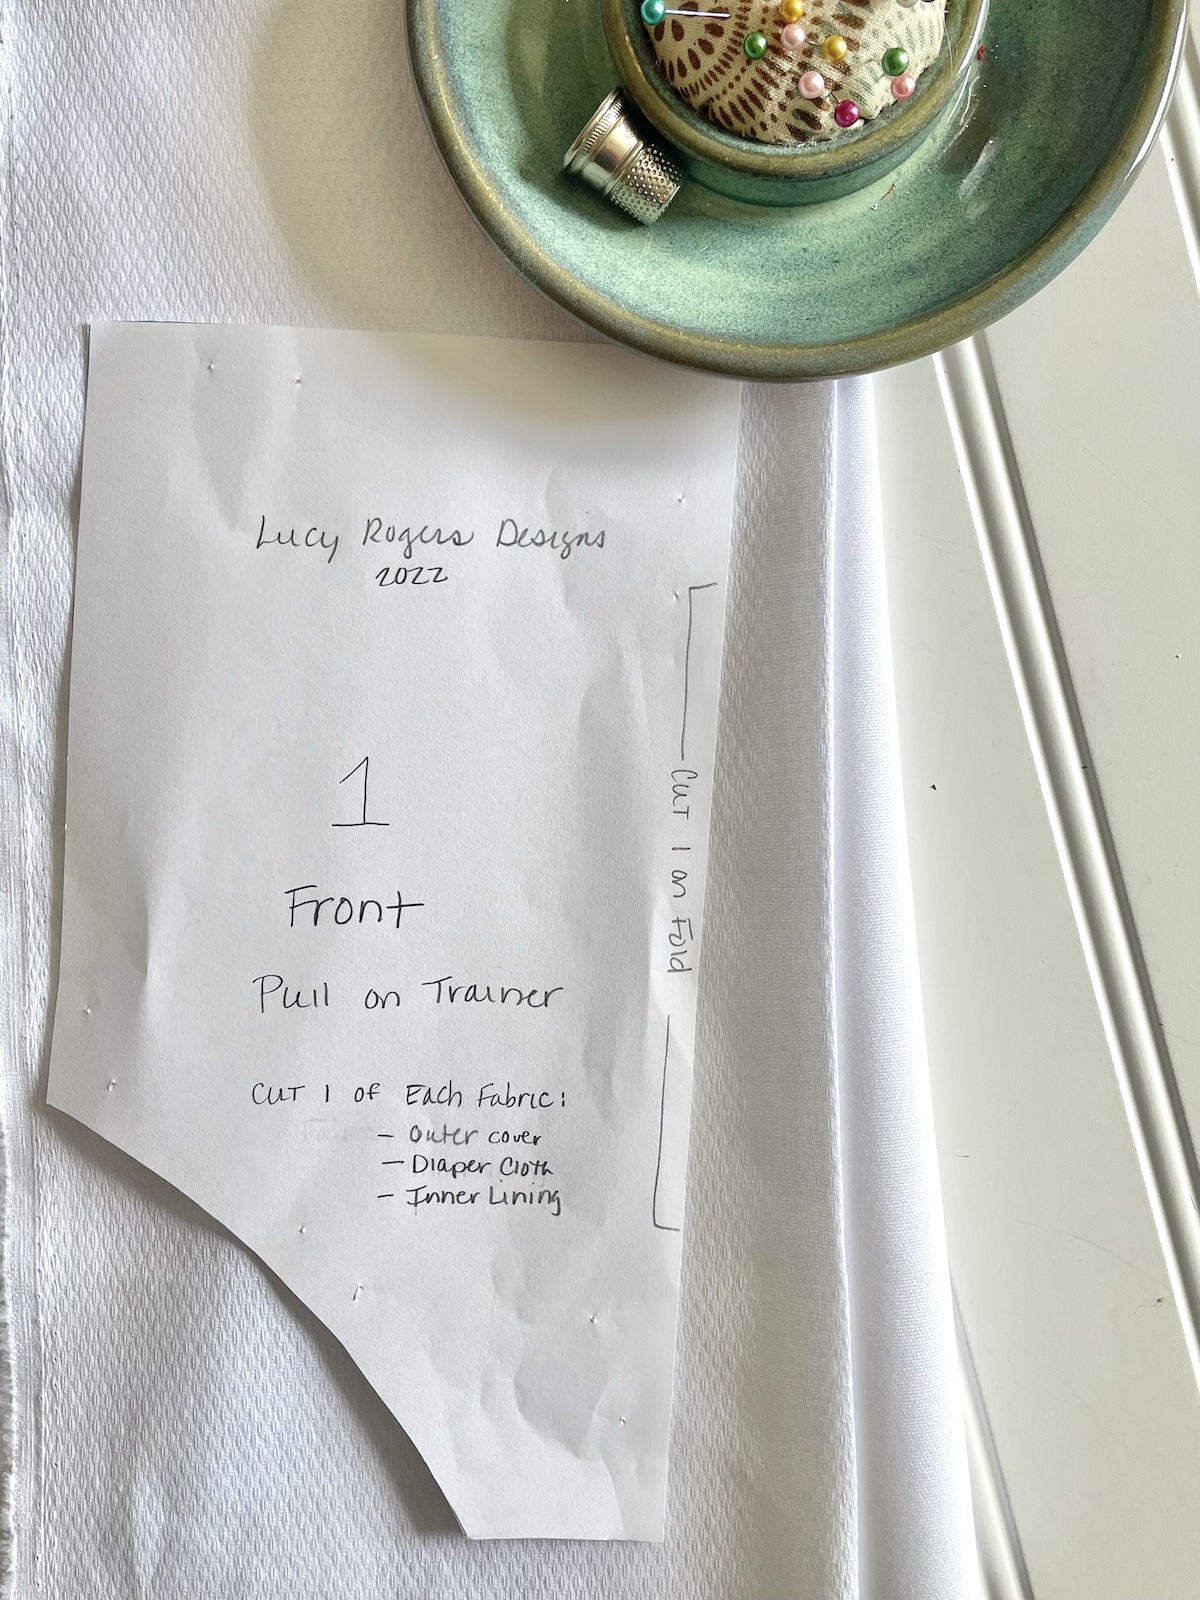
You will create FOUR pattern pieces for the main trainer: front, back, gusset*, and crotch sections. If desired, you can create TWO additional pattern pieces for the liner, or you can just measure out the rectangles and mark directly on your fabric when you get to that step in PART 3.
Using the details in the photos below, draft a simple pattern. I chose to create pattern pieces that would be placed on the fold and cut double as a mirror image. If you prefer, you can draft a pattern with full-size pieces and cut each section separately in one layer of fabric. In this case, you will need to tape your paper together to have a large enough area to draft your pattern.
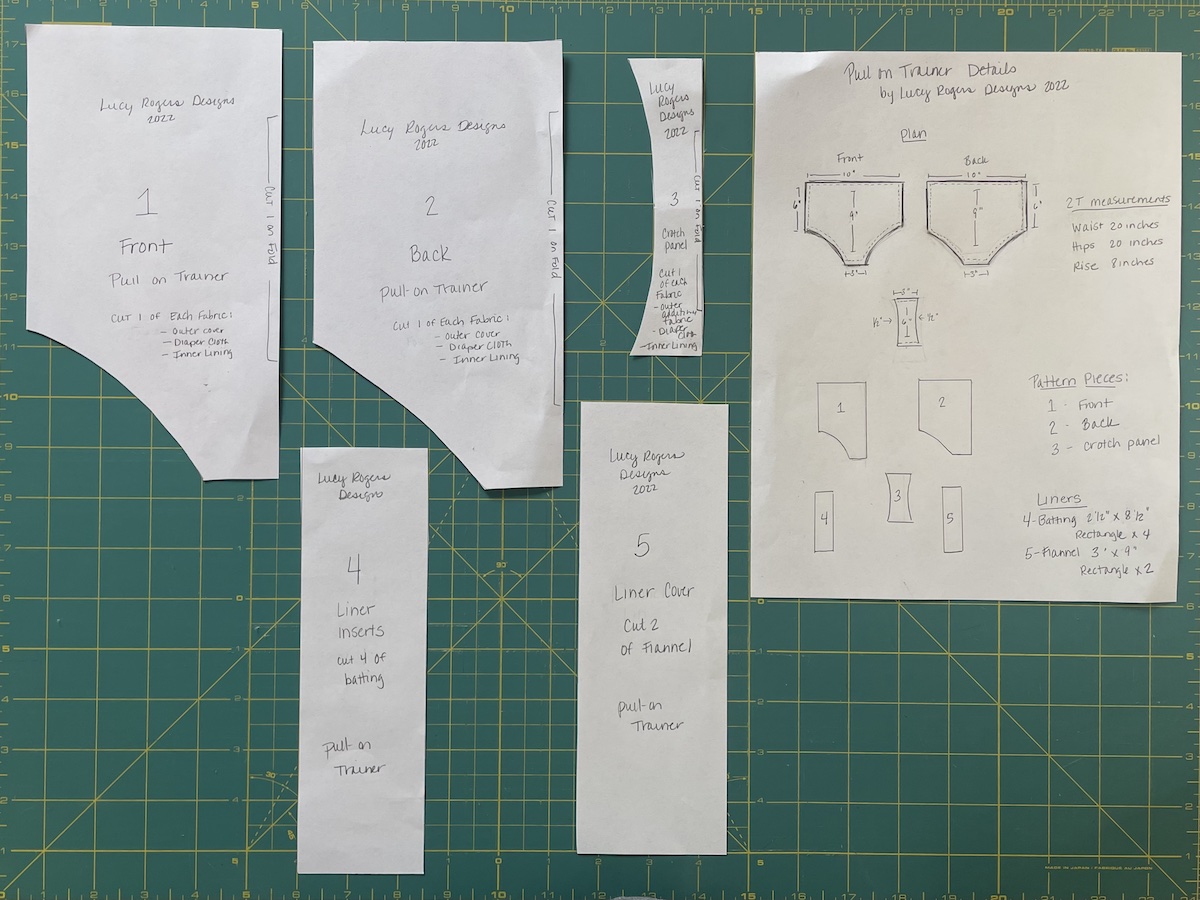
Notice in the photo above that the leg curve on the BACK pattern piece is slightly less curved than on the FRONT. This is done on purpose to create a little more coverage in the back when being worn.
*Below is the addition of the GUSSET pattern piece. Remember at the beginning when I said we’d be learning together? Ask me how I decided this project needed a gusset. Turns out that when stretchy fabric is lined with non-stretchy fabric, you end up with a non-stretchy garment! (I actually knew that, but got so excited about this project I forgot to add it.) Aren’t you glad you didn’t have to learn this one on your own? I’ve done the math for you in the photo below for a size 2T trainer. To learn more about gussets and how to add more fabric to a garment that’s too tight, check out this video. Note: The gusset will NOT be cut from the elastic fabric, but only from the diaper cloth and the waterproof inner layer as shown in PART 2 STEP 5.
Step 2. Pin Pattern and Cut Out Front and Back of Outer Elastic Fabric
Note: Because I am upcycling for my outer fabric, my next step is to deconstruct the garment.
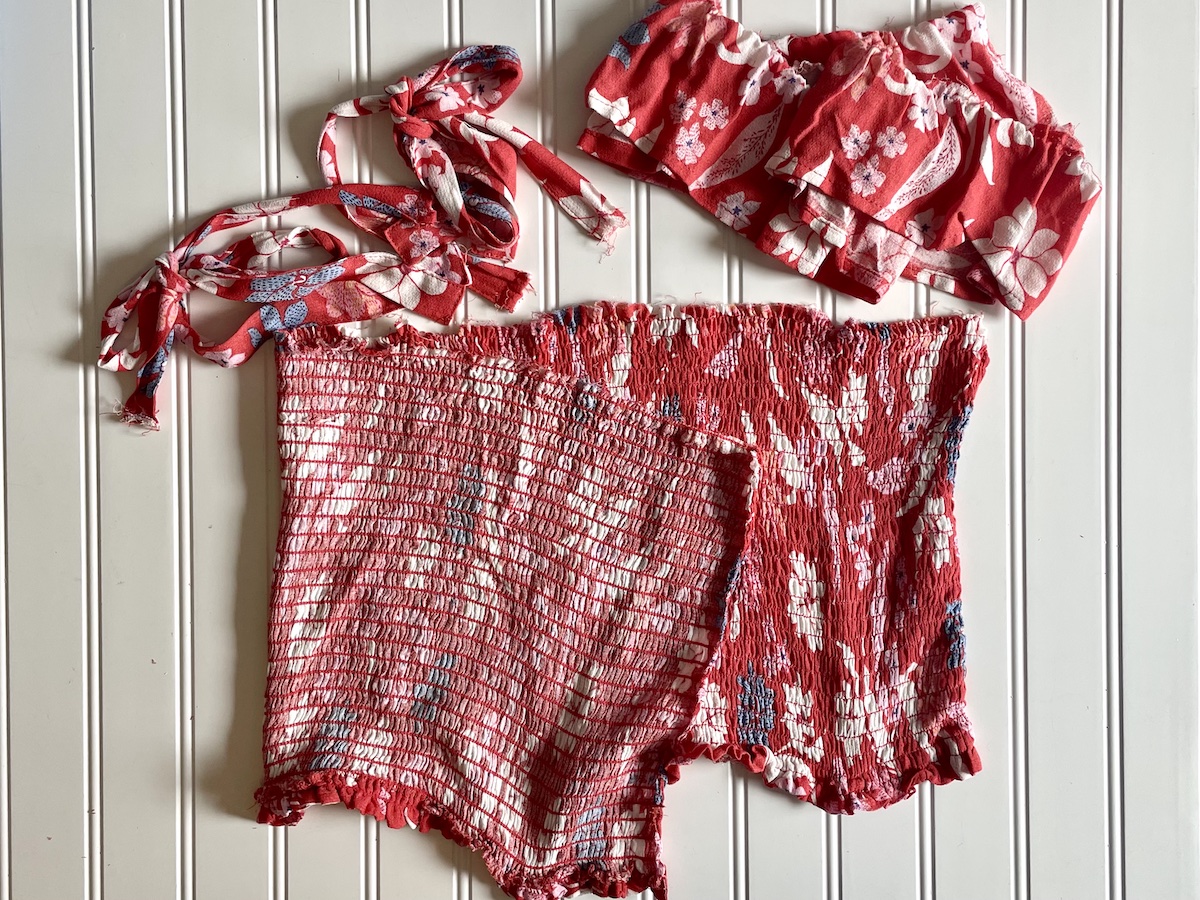
Cut fabric and place a safety pin on the BACK section to distinguish it from the FRONT.
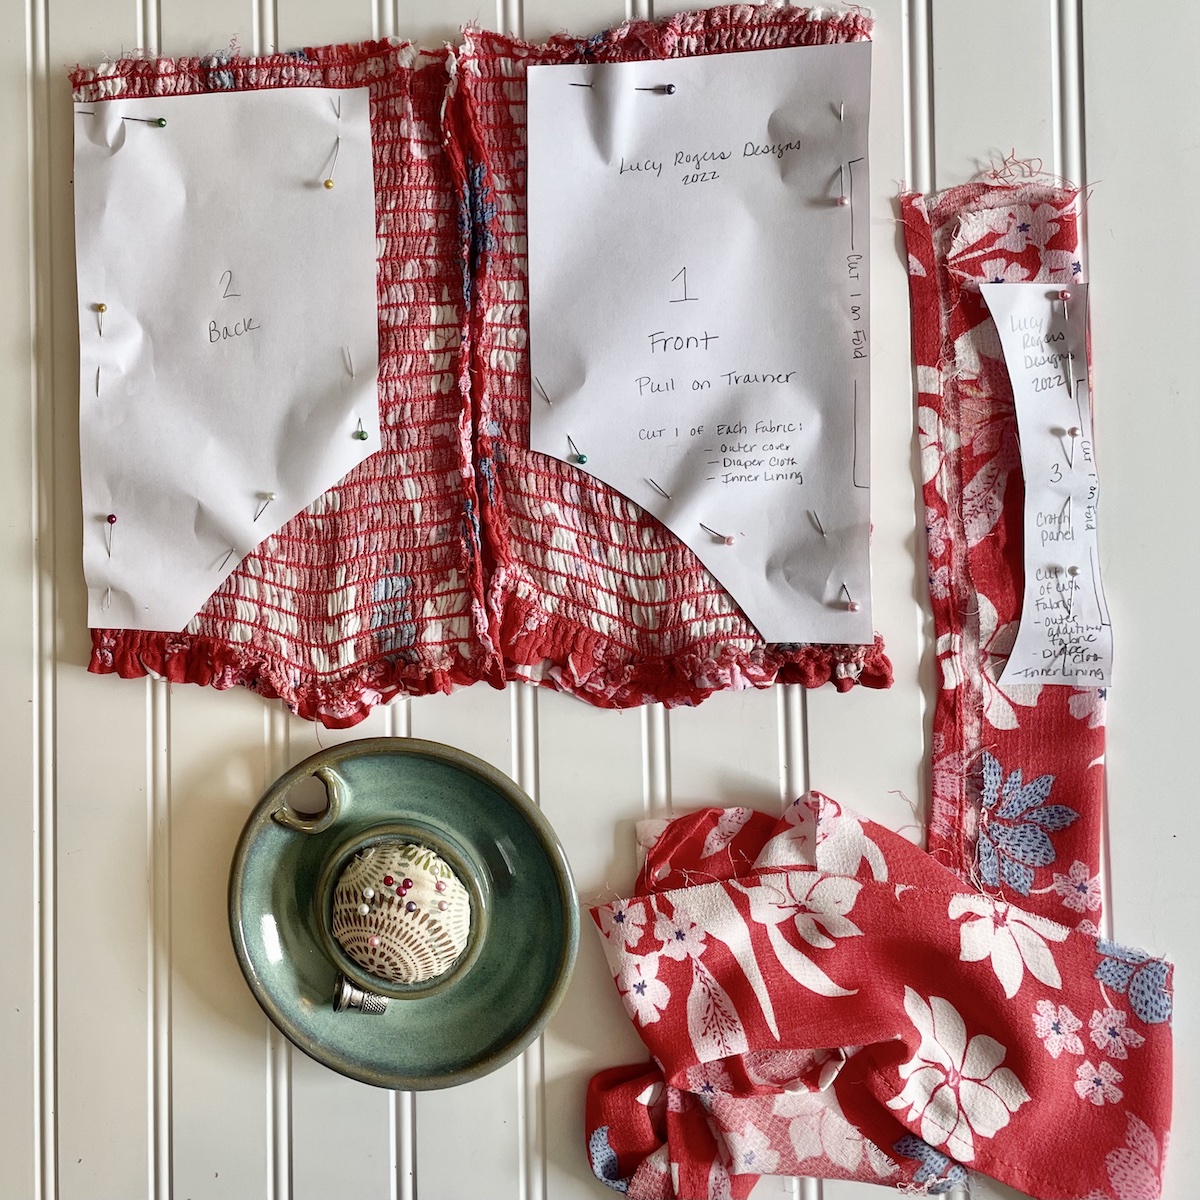
Step 3. Cut the Crotch Section From Additional Fabric
The crotch section is to provide additional length between the front and back of the trainer in order to accommodate the bulk of the multiple fabrics and liner.
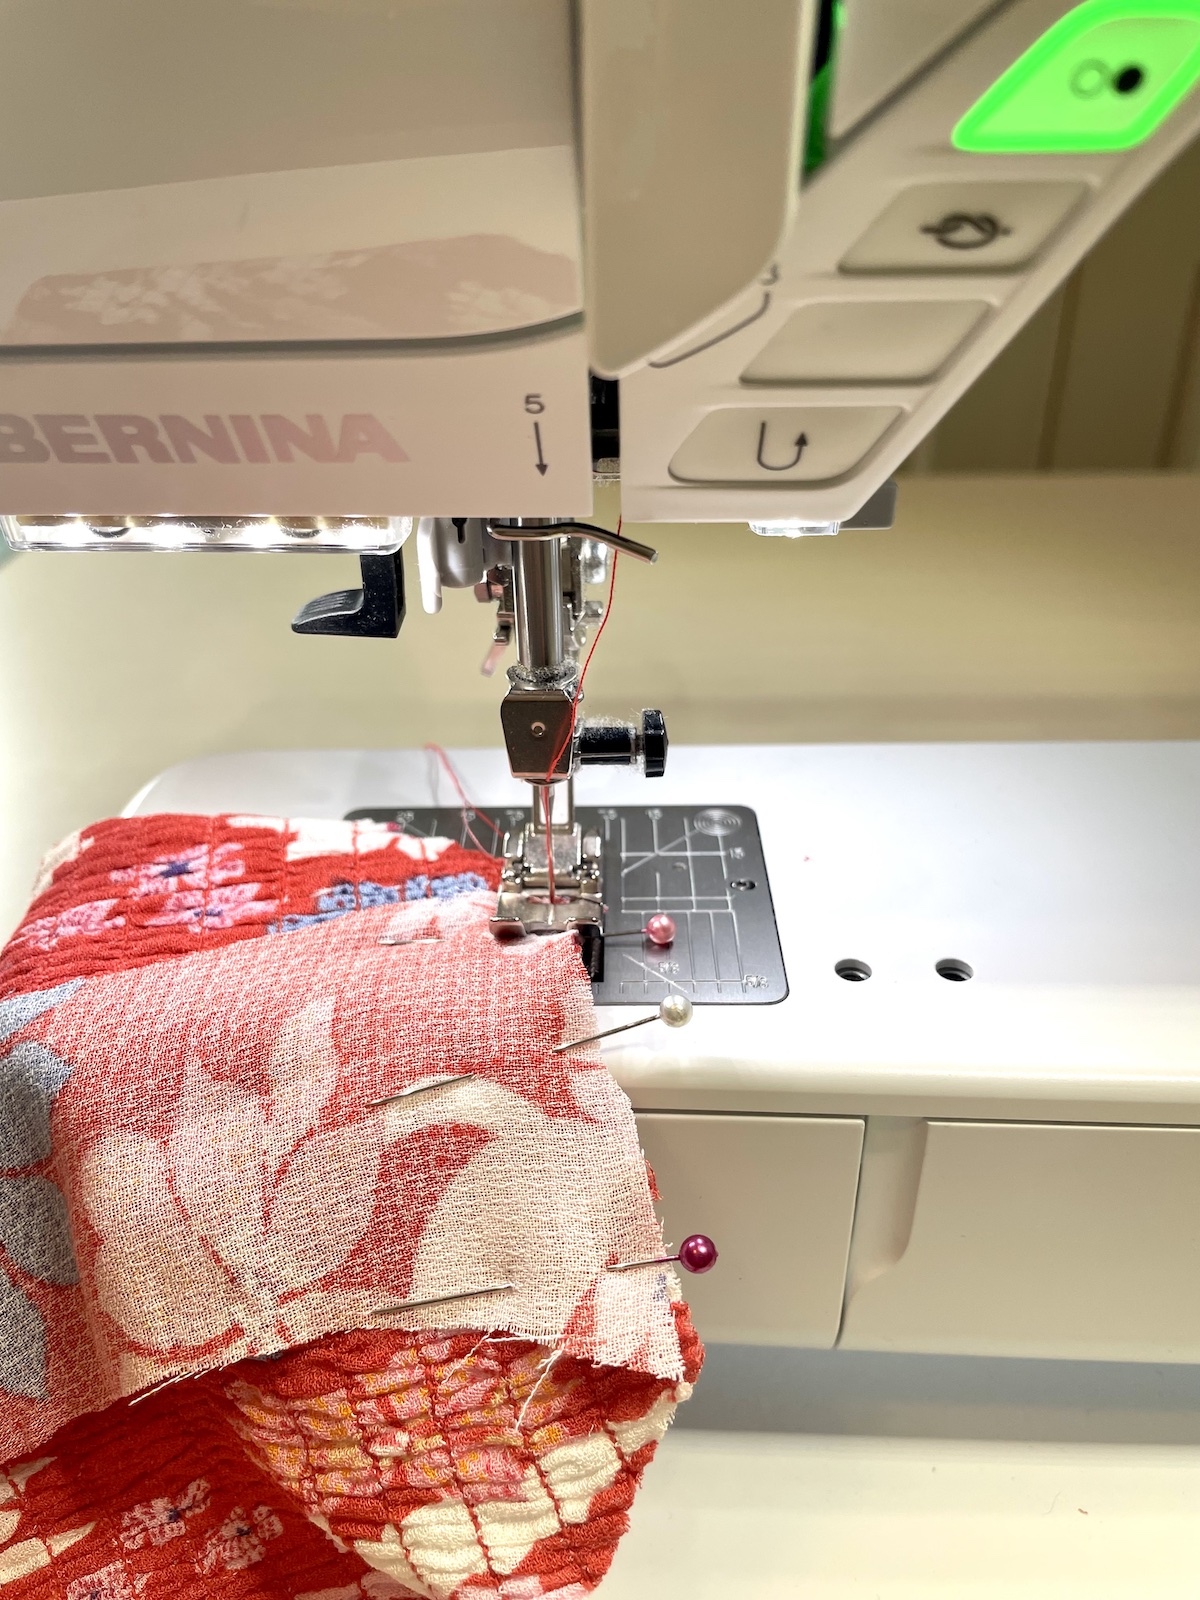
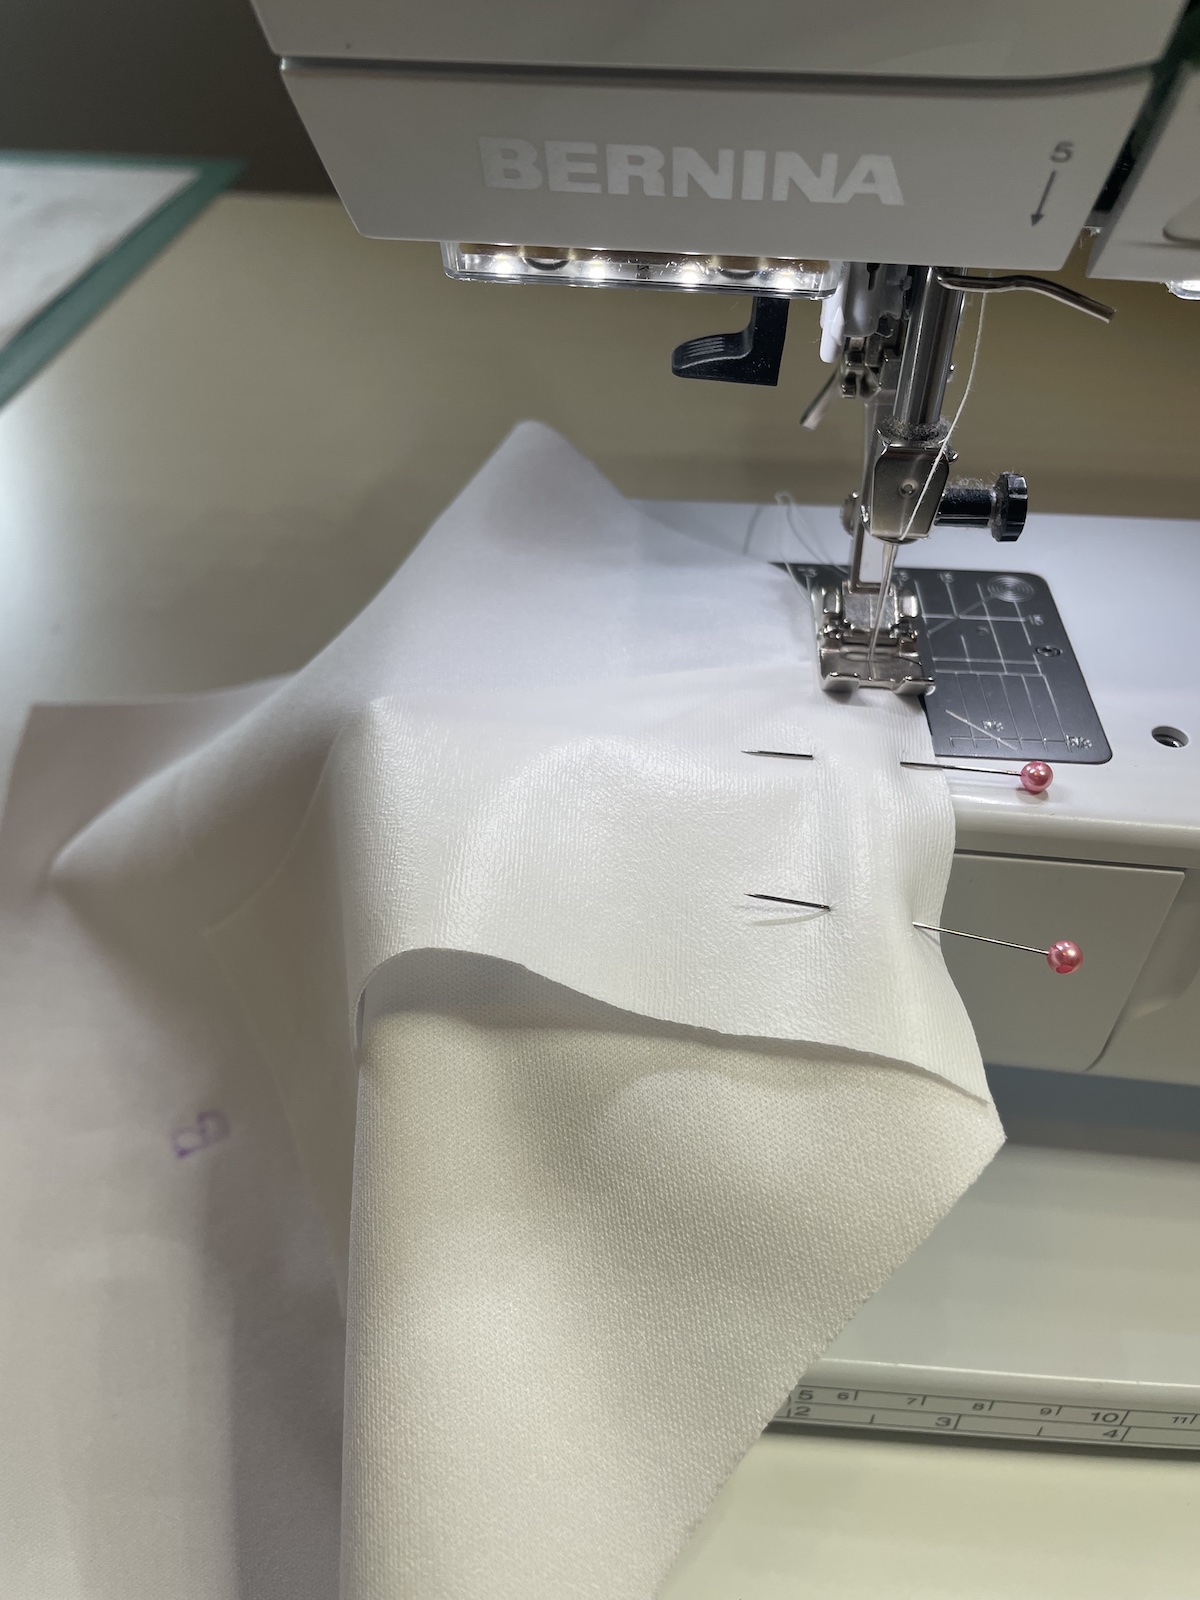
Step 4. Stitch Crotch Section to Front and Back Sections
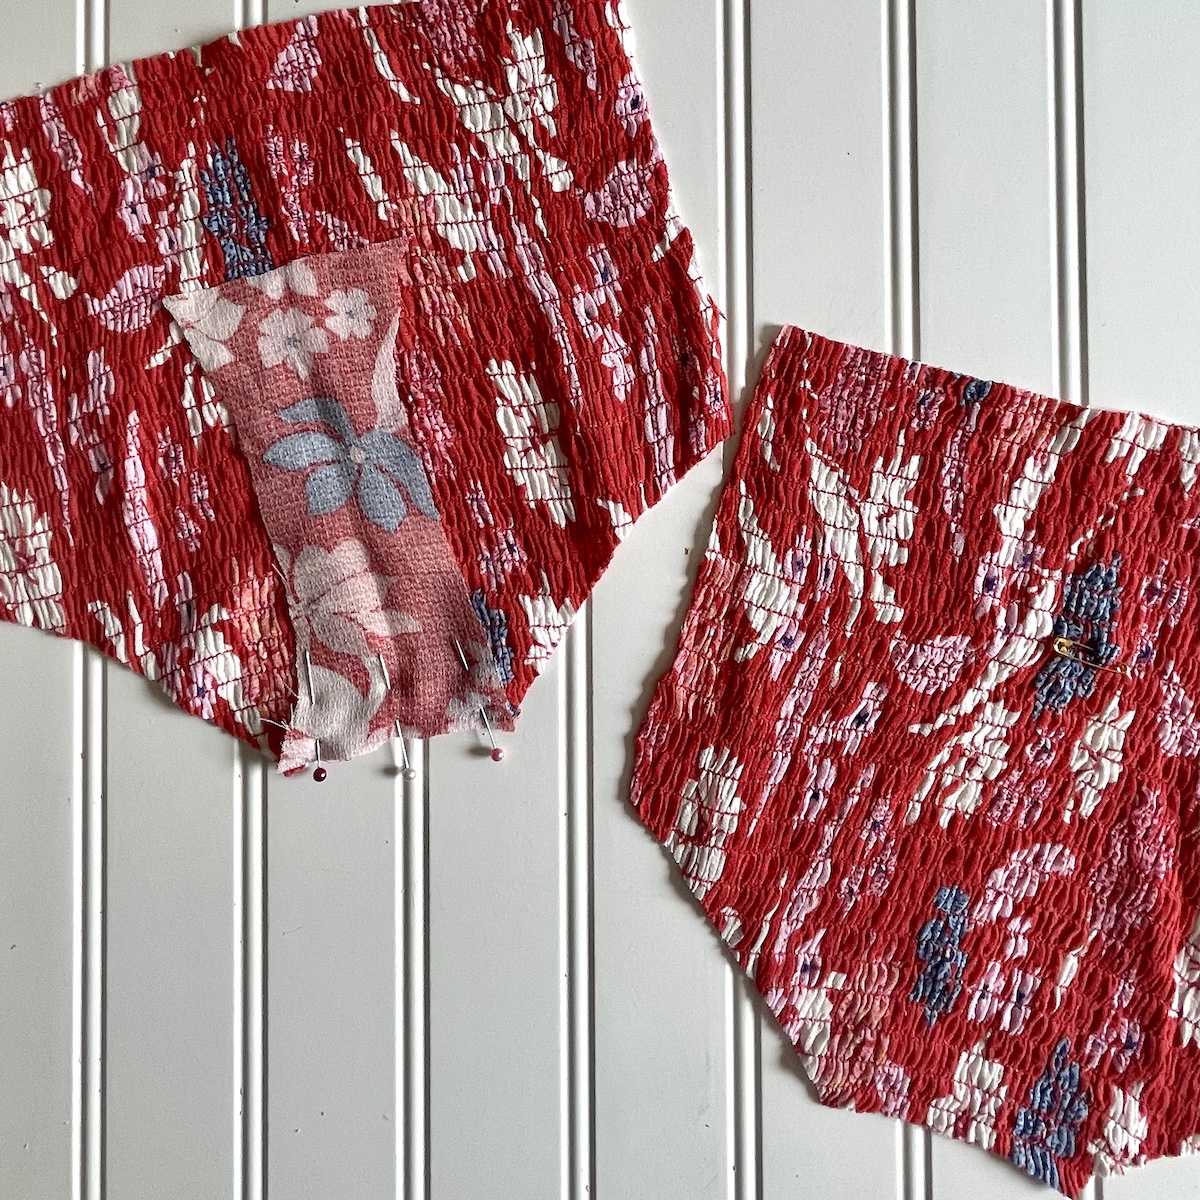
Pin crotch to front and stitch as shown. Repeat and stitch the other end of the crotch section to the back.
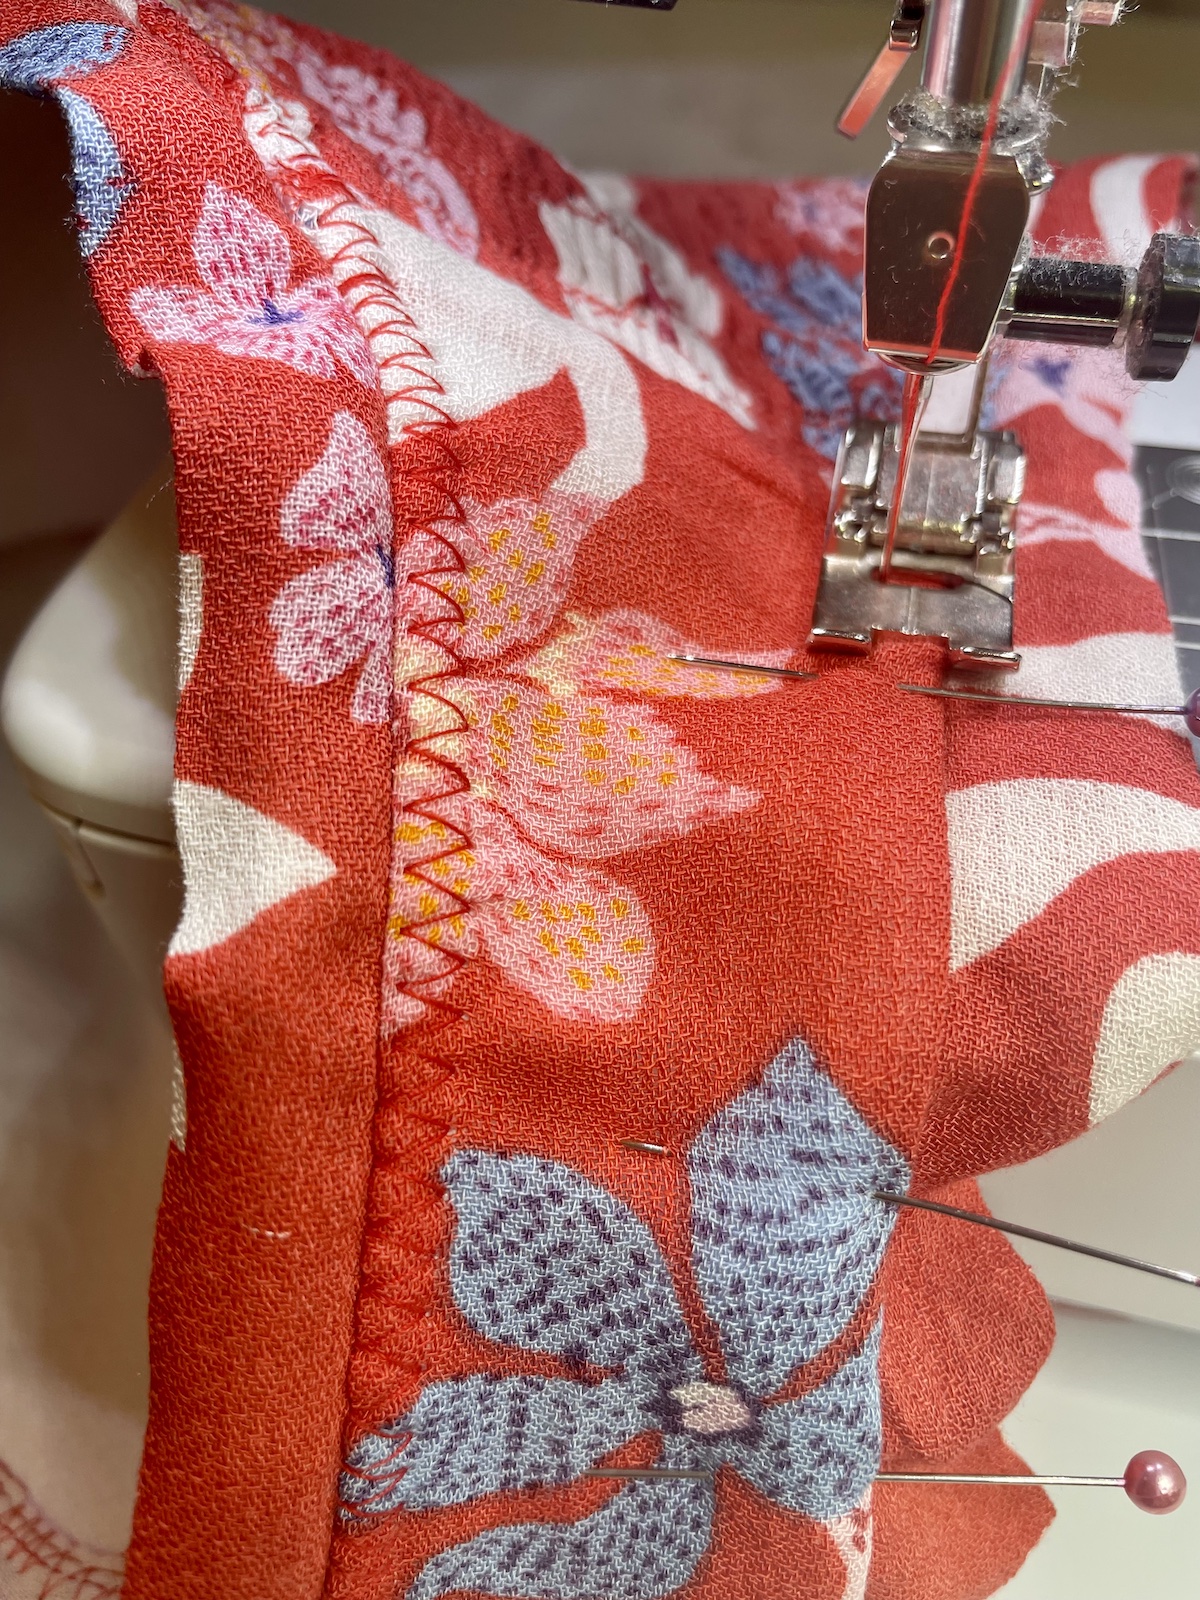
Step 5. Stitch Front and Back Together at Side Seams
Sew side seams together and set this outer layer aside.
Part Two: Inner Layers of Reusable Pull-on Potty Trainer
Step 1. Layer Diaper Cloth and Inner Lining Fabric Together and Fold
As you did with the outer layer, fold fabric before pinning pattern. I like to save time by layering the two remaining fabrics together and cutting all layers at the same time. Using the pattern pieces as your guide, fold over only far enough to accommodate your pattern because this will save fabric. Depending on the width of the fabric you chose, you should be able to cut more than one trainer from 1/2 yard of fabric.
Step 2. Pin Pattern and Cut Fabric
Remember to mark the backs of each layer. I like to mark an F and B with my disappearing ink marking pen just to keep things straight.
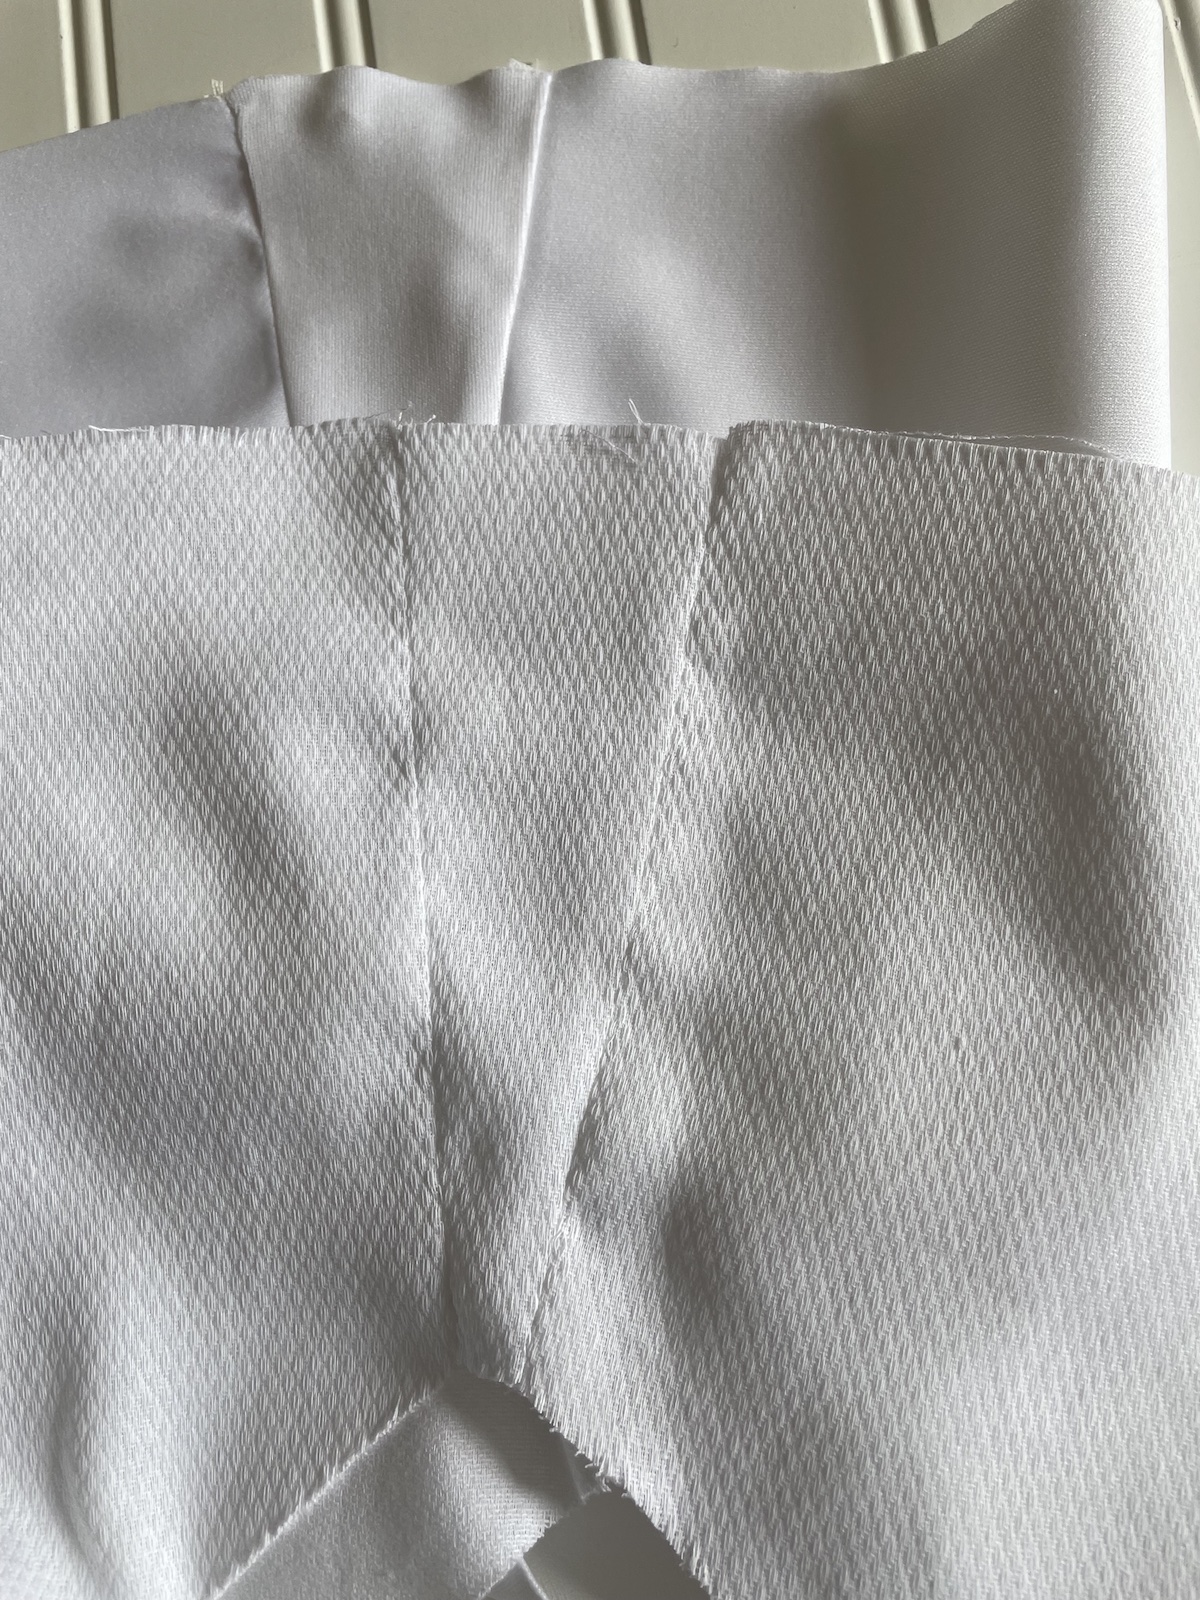
Step 3. Sew Crotch Seams on Diaper Cloth
Press seams open. Thinking ahead: do NOT use an iron directly on the waterproof layer. It will melt.
Step 4. Sew Crotch Seams on Inner Lining Fabric
Repeat as in STEP 3 above, but just finger-press the seam open or use a pressing cloth.
Step5. Sew Gusset Sections
Each of the inner layers will have two gusset sections, one on each side seam. Here is what it looks like once sewn.
Step 6. Assemble the Two Layers with Wrong Sides Together
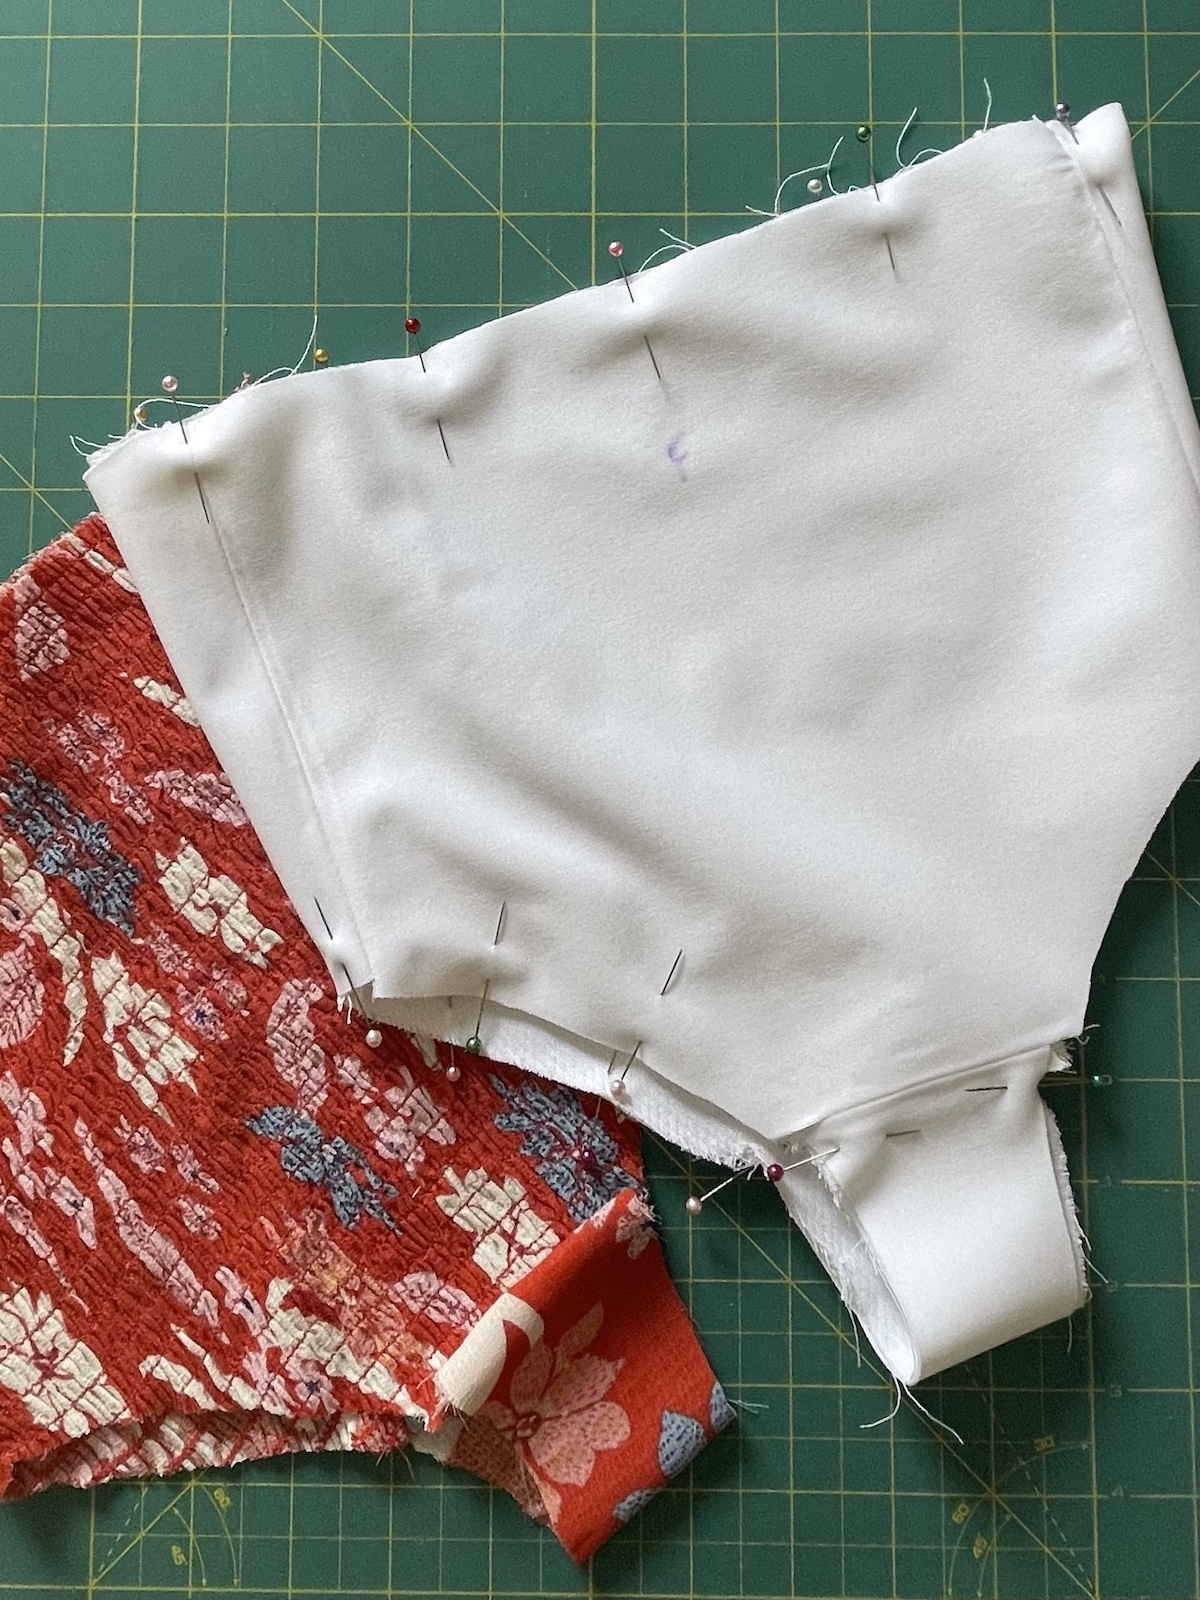
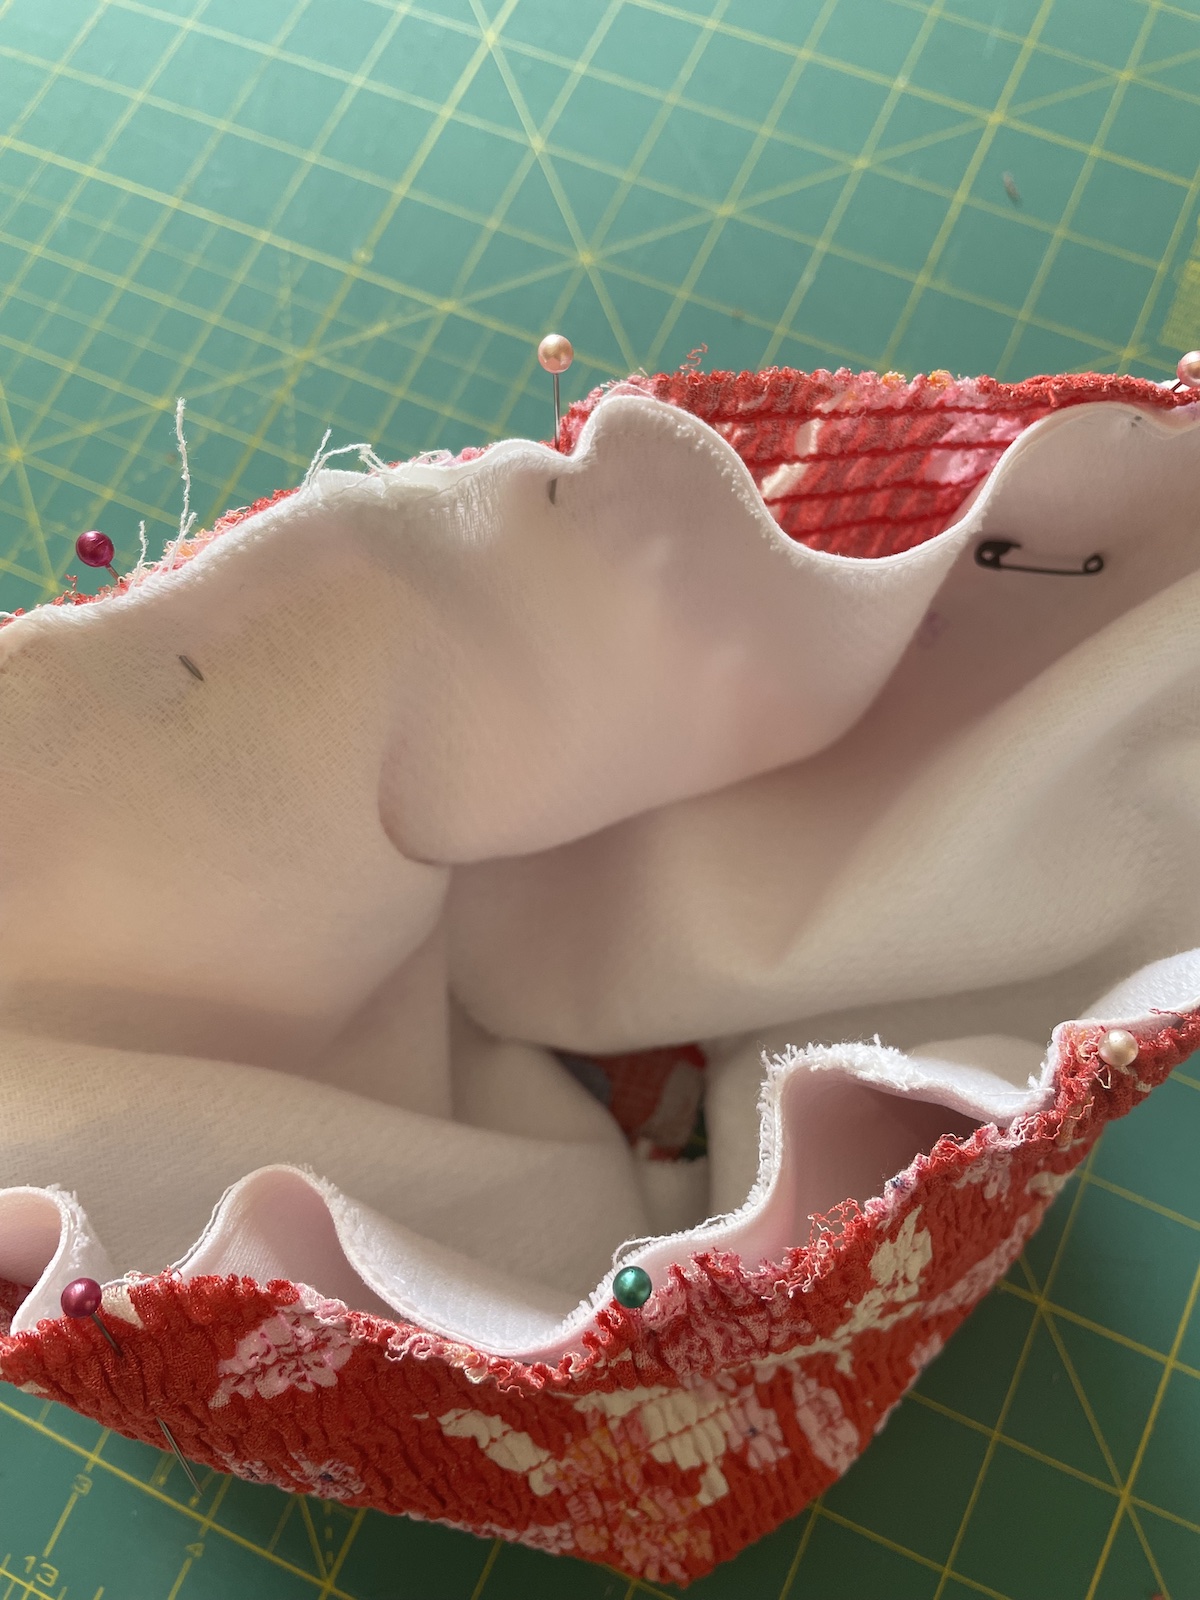
For this step, you will turn the Diaper Cloth layer inside out and place it inside the waterproof layer, matching up seams and fabric edges. Pin together at seams first, then add additional pins around the openings.
STOP! Double-check that you have a right side showing on the inside and outside of these two layers. In other words, the seam allowances should be matched up and sandwiched between these layers never to be seen again. All good? Carry on.
Stitch these two layers together at waist and leg openings using a 1/8 inch seam allowance. This step is recommended because it will make fitting it to the outer layer easier.
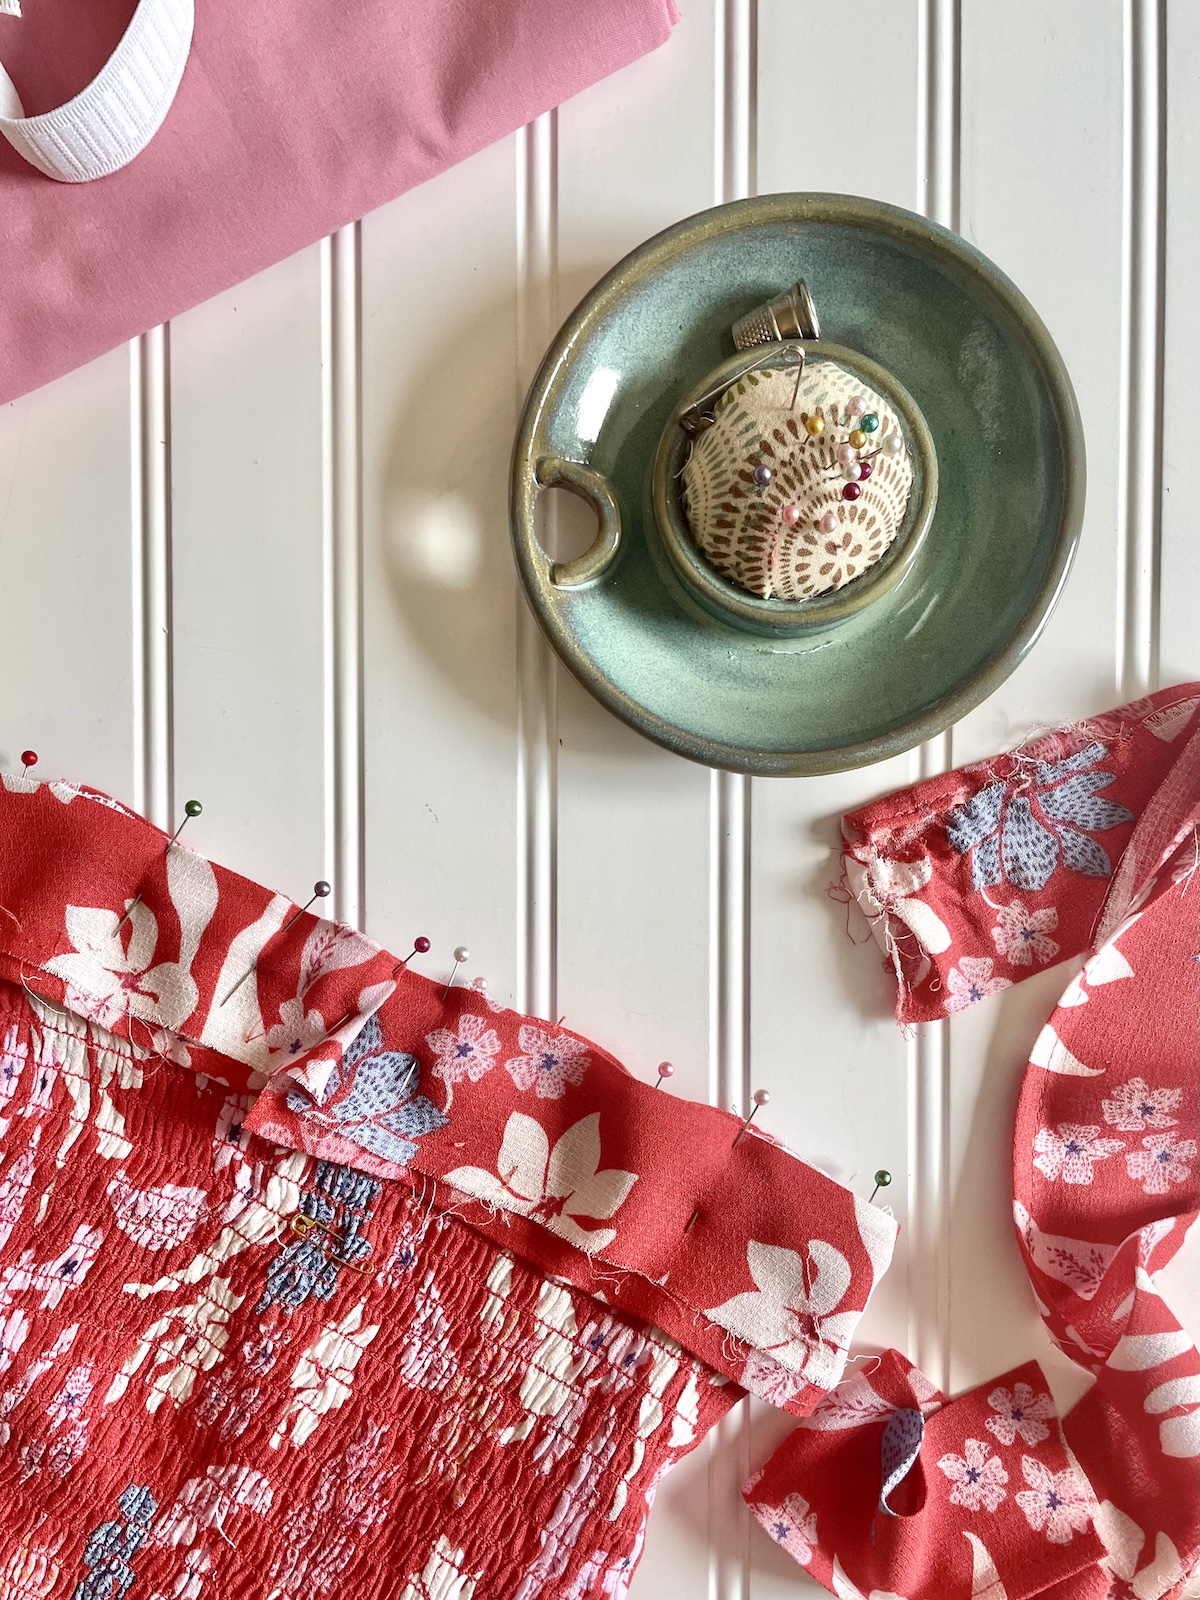
Step 7. Insert the Combined Inner Layers into the Outer Elastic Layer
This step isn’t difficult, it is just a little awkward for a minute. First, lay the inside set flat with the gussets at the sides. Find the center of each gusset panel and mark with a fabric marker or pin. Second, find and mark the centers of the front and back by matching the two gusset markings. Third, find and mark the centers of the front and back of the outer layer. Lastly, insert the inner layers into the outer layer, matching front and back markings and gusset center markings with side seams of the outer layer.
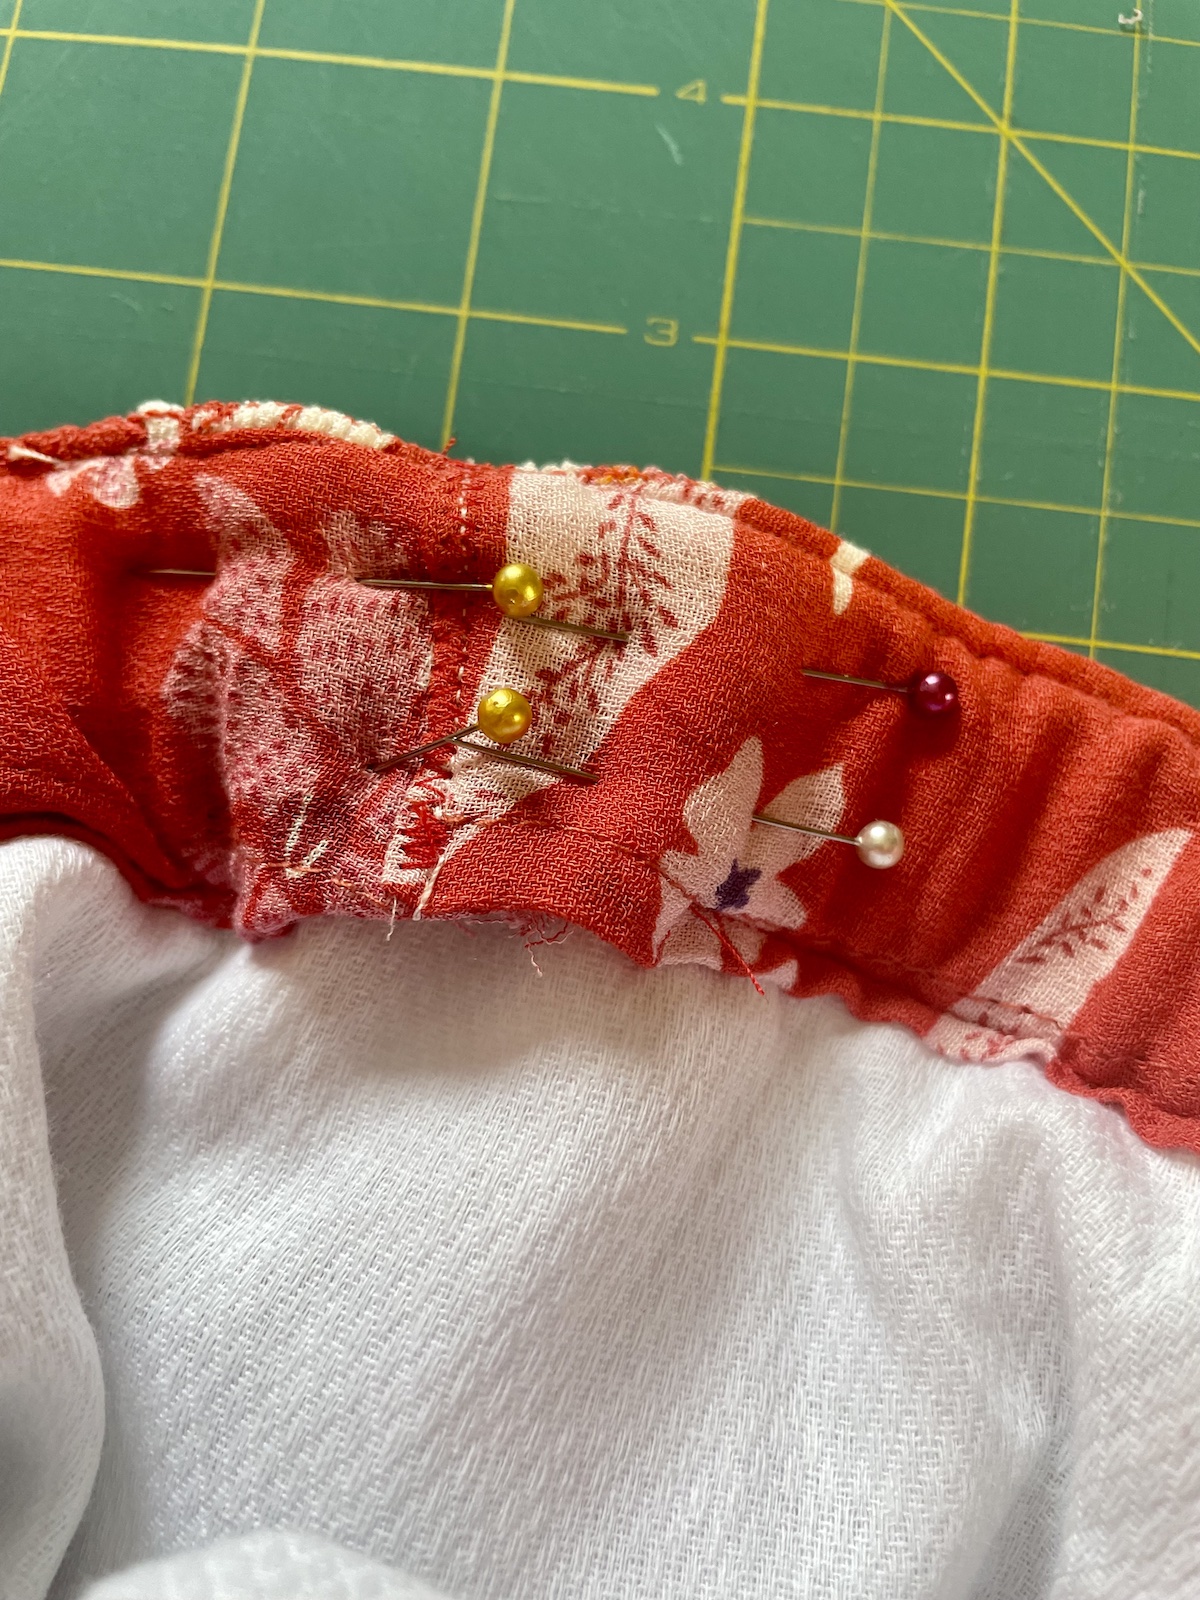
Step 8. Pin and Baste Openings
The last step in PART TWO is to stitch all the layers together. I recommend sewing the leg openings first because they should be an exact match-up for all three layers. Pin around the openings as shown and stitch. I recommend using a 3/16 inch allowance and a 5 mm stitch length. I also recommend only pinning one leg at a time and sewing it before you pin the other leg because there’s no sense in getting stuck by pins you don’t even need yet. You’re welcome.
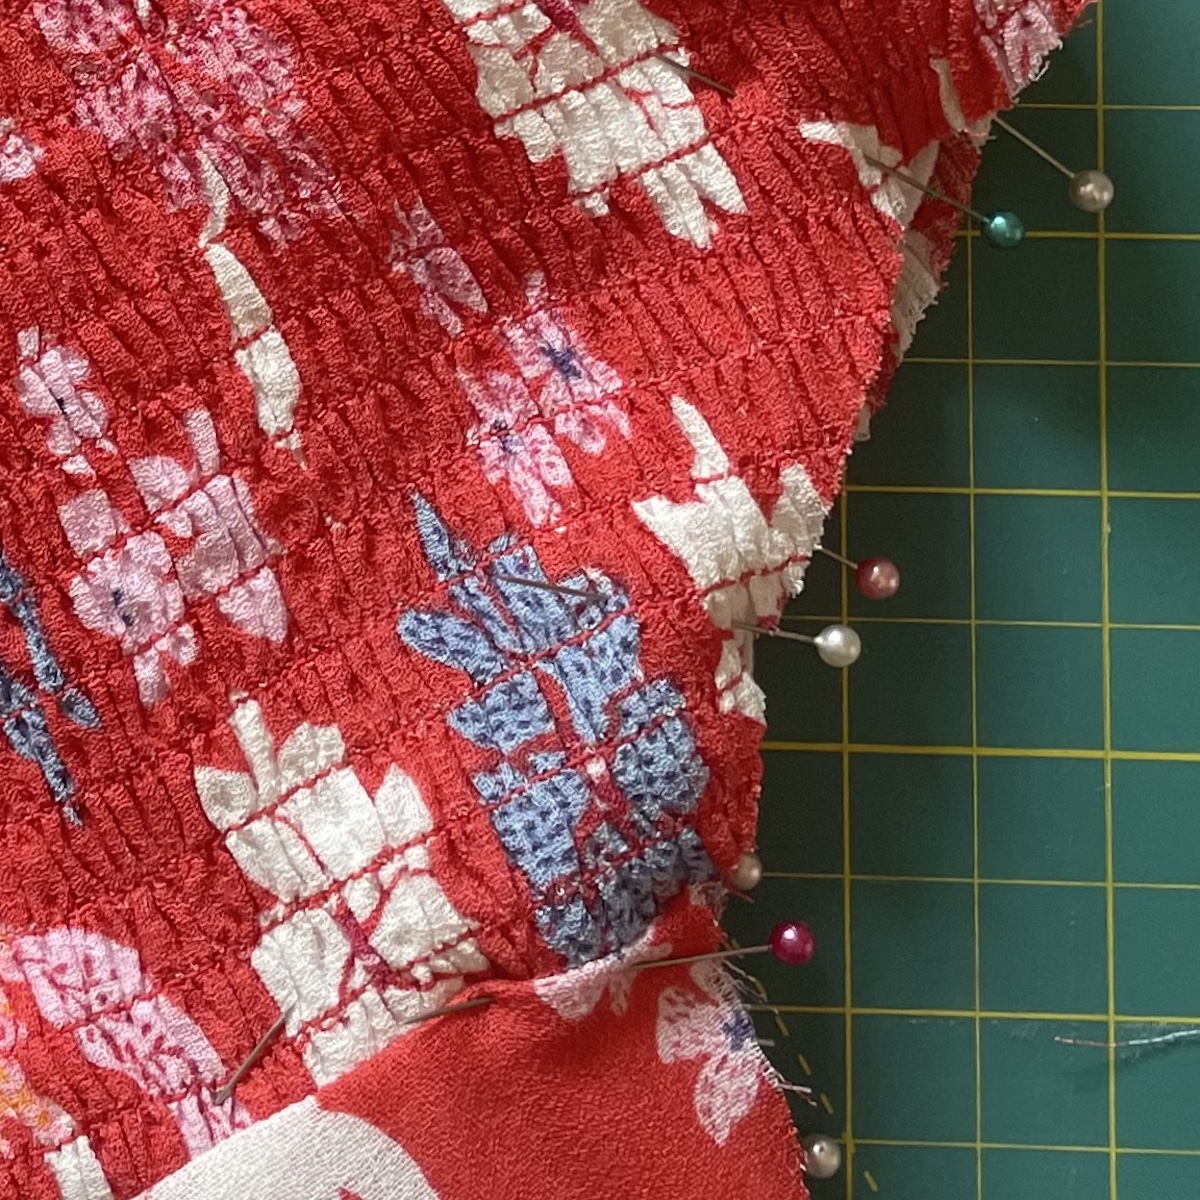
You’ve hopefully already noticed that the waist has extra fabric. You’re right! That’s because we added the gusset so when that outer fabric is stretched, there is enough fabric to move with it. Before sewing the waist opening, add additional pins to help you evenly distribute this extra fabric as you stretch the outer layer. As you begin to sew, gently stretch the fabric until the layers lay smoothly together between pins. Stop with your needle down before you reach each next pin, remove it and continue on until you get all the way around the waist.
 Since I wasn’t sure my upcycled garment would have enough non-shirred fabric, I had a back-up solid waiting in the wings for my binding. I ended up with enough, but I think the solid would’ve been a cute contrast. Maybe I’ll use it on the next one!
You did it! Ready for Part Three!
Part Three: Finishing the Reusable Pull-on Potty Trainer
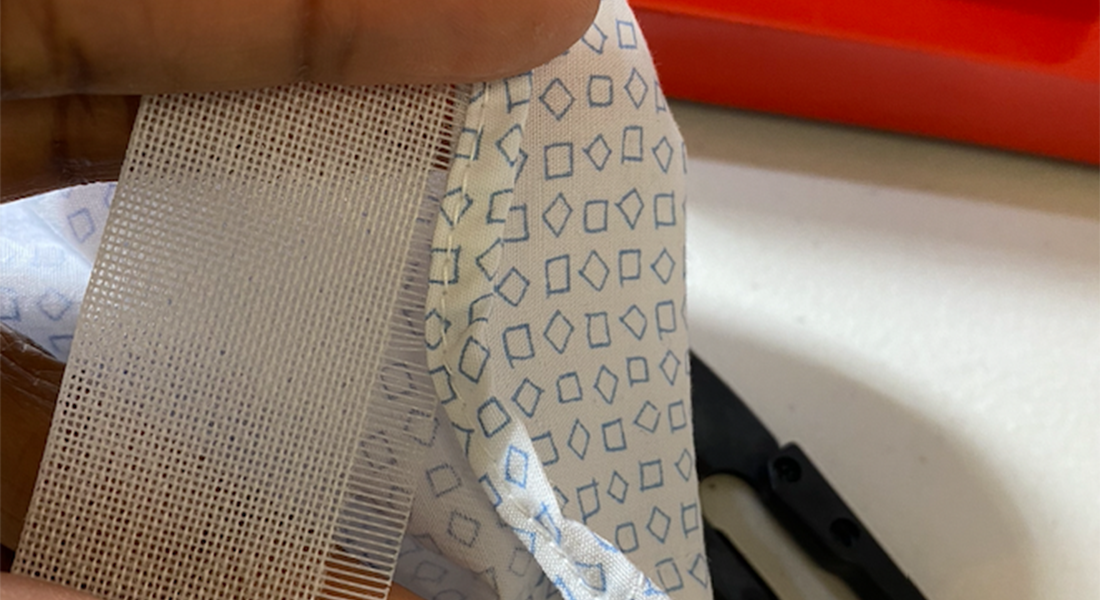
Step1. Create DIY Bias Tape from Additional Fabric
As described in the MATERIALS LIST above, you have three options for creating the strips you’ll use for the elastic casings for the waist and leg openings of the trainer:
- Purchased Bias Tape: This option is quick, inexpensive, and easy, but the colors are limited and the fabric is not always the best quality. Since this is not an heirloom garment, I think you’re fine to use it if you prefer. This is a no-judgment-zone!
- DIY Bias Tape: I recommend this method if you have enough fabric because it is good practice for any other time you’ll need to cut fabric on the bias. If you need some review on how to do this, refer to my previous binding tutorial for a refresher.
- DIY Non-Bias Tape: I used this option because the upcycled garment did not provide enough extra fabric to cut my strips on the bias. This is not always ideal, but works in this case because the fabric will be gathered in by the elastic, so any inconsistencies in how the fabric lays will not be at all noticeable.
Step 2. Attach Bias Tape to Leg Openings
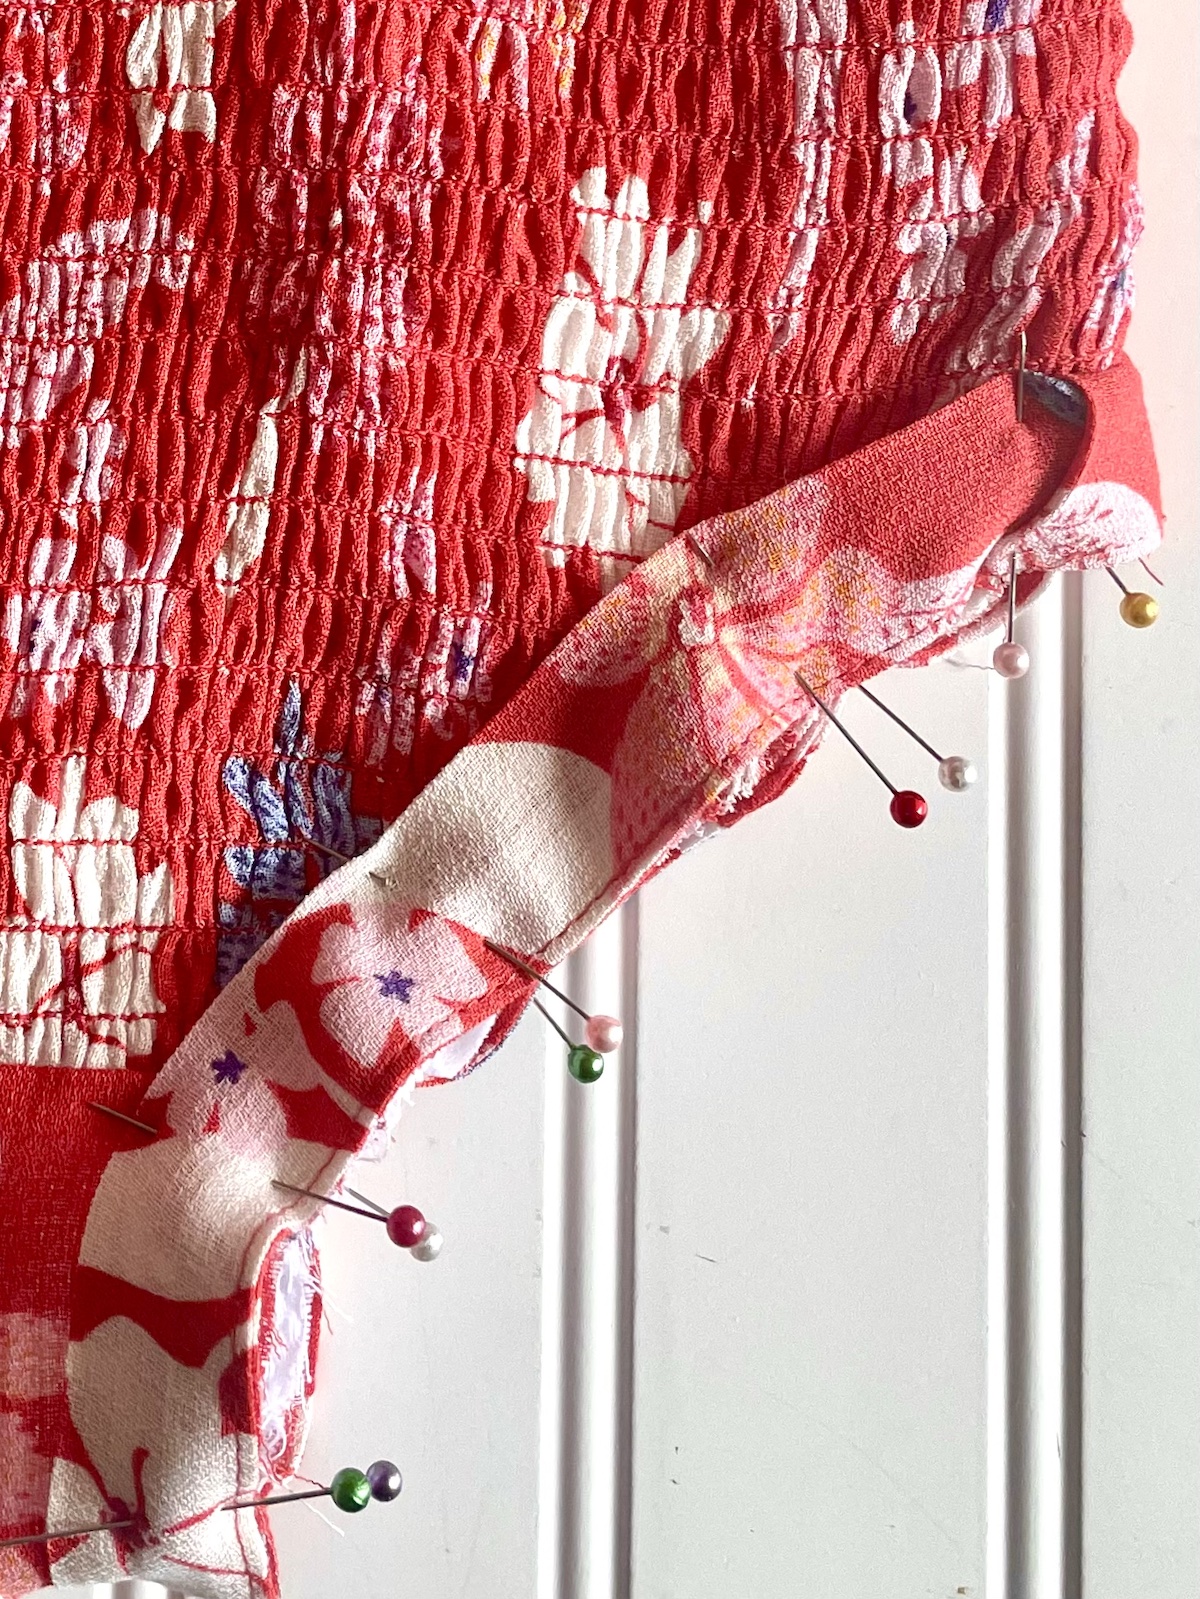
Regardless of which option you chose in PART 3 STEP 1 above, you will open the strip and press it flat. Then press the strip again so you have a single fold in the center. Pin to edge of leg opening with unfinished edges together. Because the outside of the binding will be visible on the outside of the finished garment, fold the beginning end 1/4 inch toward the inside as you pin it.
Step 3. Stitch Binding
Stitch through all layers, removing pins as you reach them.
Step 4. Fold Binding Out, Pin and Topstitch
NOTE: for the LEGS ONLY, the binding will be folded to the outside and add extra width to the crotch area. The binding for the waist is different, so please read the instructions carefully. I chose to topstitch with a zigzag stitch to hold the seam allowance toward the center of the crotch and to add a little more stability to this area. I think it looks cute too!
Step5. Insert 1/4-inch Elastic into Leg Casings
Use a safety pin to pull the elastic through the casing. Place a second safety pin on the other end so it doesn’t accidentally disappear into the opening. Once it gets close, use that safety pin to secure elastic to fabric as you continue threading the first end through.
I am using a 9-inch length for each leg opening. This gives room for overlap when joining the elastic ends and also allows a bit of room to adjust the length at the last minute. If you have the opportunity for a personalized measurement, that is best. Another option is to do a final fitting on the child before you stitch the elastic ends together and close up the casing. In this case, use the safety pin to temporarily secure the ends of the elastic together and tuck inside the casing for fitting.
Once you are set with the elastic sizing, you can finish this step. Hand stitch the two ends of the elastic together, making sure the elastic is not twisted. Allow the elastic to lay flat inside the casing and stitch the opening closed*. I like to add one small vertical row of zigzag stitching where the ends of the bias tape are joined to make sure the elastic is extra secure.

Step 6. Attach Bias Tape to Waist
As you did in PART 2 STEP 8 above, in order to keep the top of the trainer stretchy, you will need to cut your binding strip longer than the measurement of the un-stretched garment and stretch as you sew. I allowed 4 inches extra. An easy way to do this is just to cut an extra-long strip and start stretching as you sew. As in PART 2, STEP 2 above, fold over the end of the beginning of your strip about 1/4 inch so you’ll have a finished edge on the outside. When you get the end, allow some extra to overlap as you finish your seam. Cut the excess length, but don’t worry about folding the edge of this end. It will be on the inside of your casing.
Step 7. Turn Binding to Inside, Press, Pin and Stitch
Note: For the WAIST ONLY, the binding will be folded to the inside to create the wide casing for the elastic. Pin in place and stitch close to the fold of the binding, about 1/8 inch. You will need to stretch while you sew as you did in PART 2 STEP 8. Leave a 2-inch opening at the center back where you will insert the elastic. I like to place pins in such a way as to remind me to stop when I get all the way around so I don’t accidentally stitch the opening shut. I also chose to topstitch the very top of the waist to help the layers to stay flat.
My pins to make sure I STOP before sewing the opening shut. It achieved the intended purpose!
Step 8. Insert 1-inch Elastic and Finish Waistband Casing
Follow the elastic recommendations in PART 2 STEP 5 above and finish the waistband*.
*I added a care label and size tag prior to stitching the opening closed. Because I sell my handmade clothing and accessories, I need to follow labeling requirements for children’s products. If this is news to you, like it was for me when I started out, this resource has been extra helpful to me. It feels like a whole can of worms at first, but if you are selling your children’s items, you don’t want to skip this step.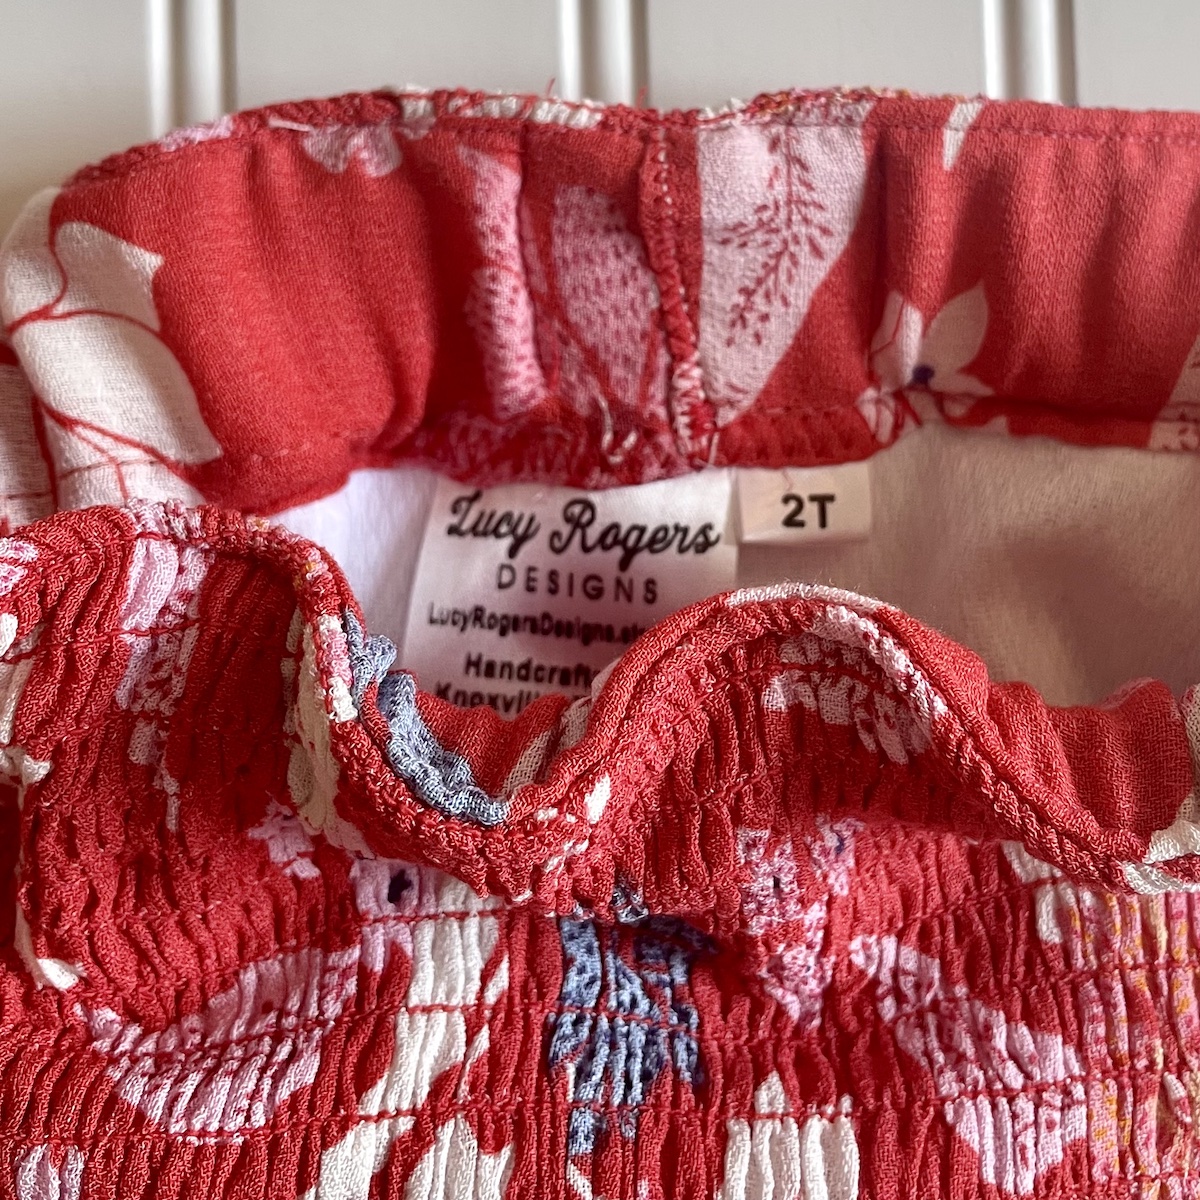
Whew! We’re getting there… Remember, this is not difficult, just lots of easy steps. ? You’ve got this!
Part Four: Reusable Pull-on Potty Trainer Liner (Optional)
This step is optional, but recommended, especially for the first steps in potty training.
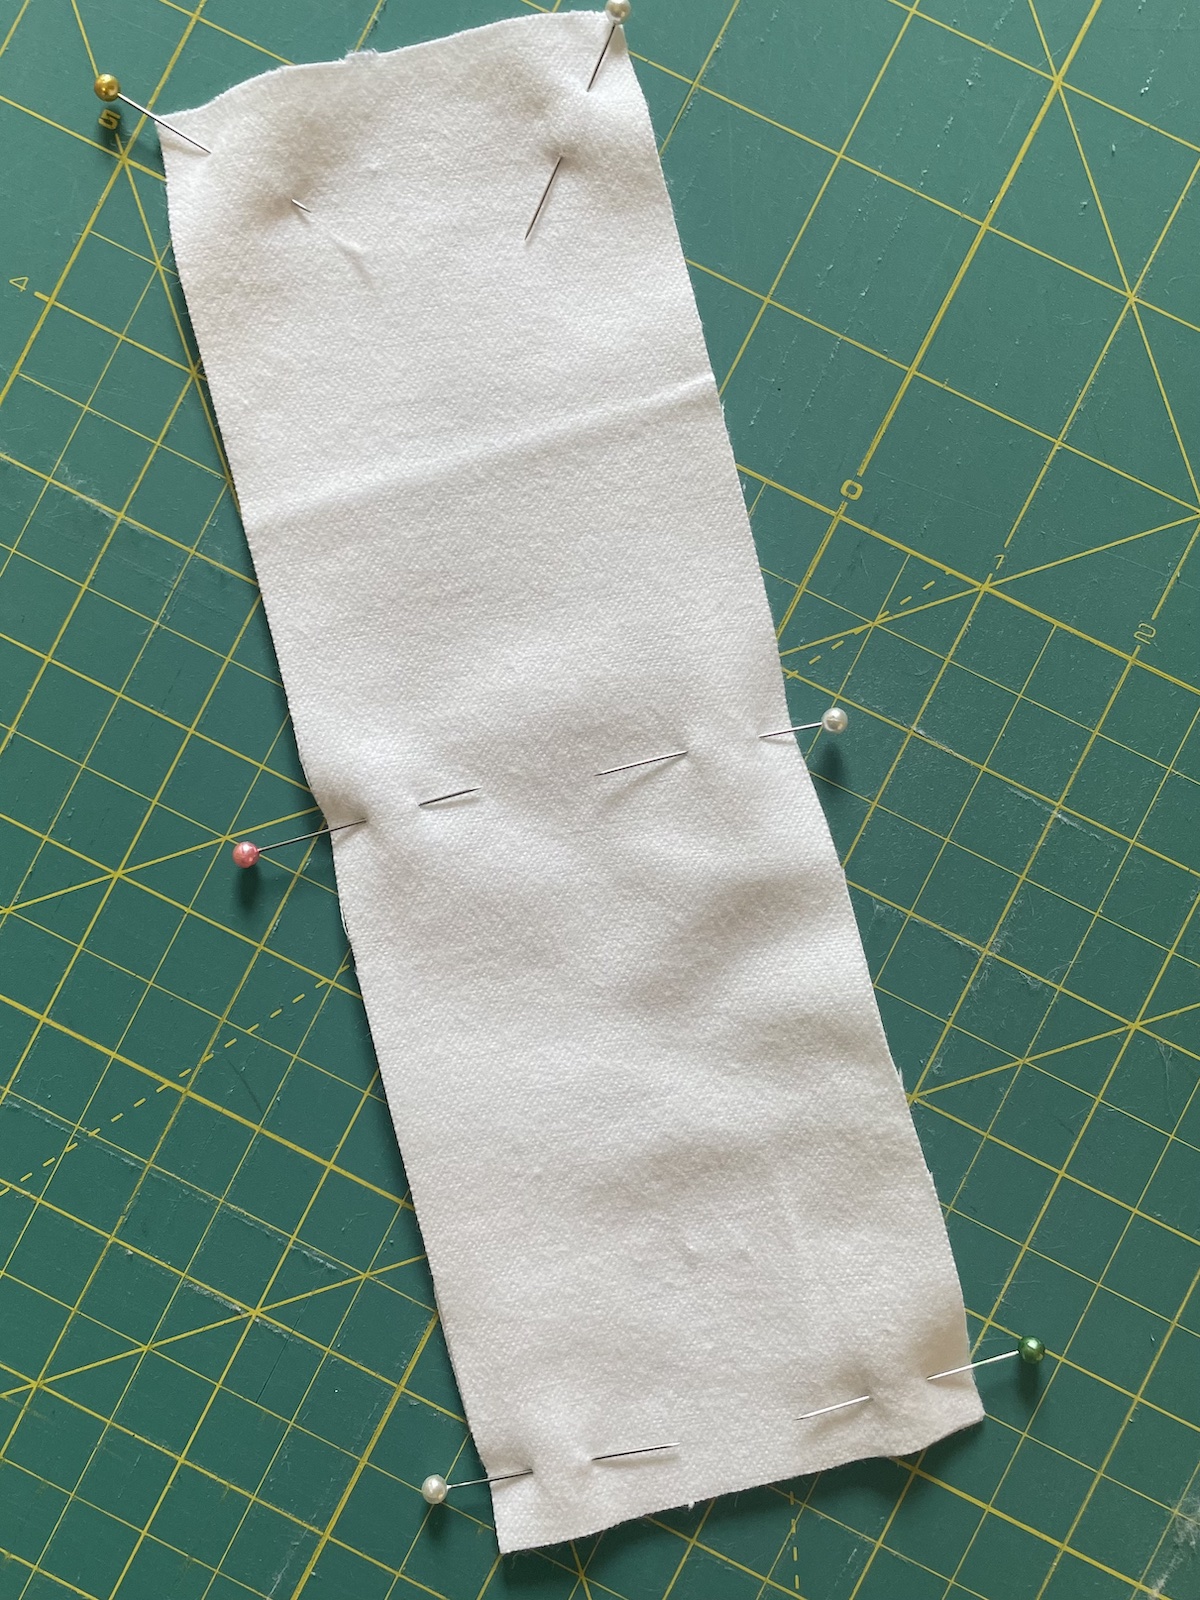
Step 1. Cut Batting
Fold batting into four layers. Pin pattern or measure and mark your fabric with a 2.5-inch x 6.5-inch rectangle. Cut your fabric. Note: You will have FOUR layers of batting. Set aside.
Step 2. Cut Flannel
Fold flannel in half and pin pattern or measure and mark your fabric. Cut a 3-inch x 7-inch rectangle. Note: You will have TWO layers of flannel.
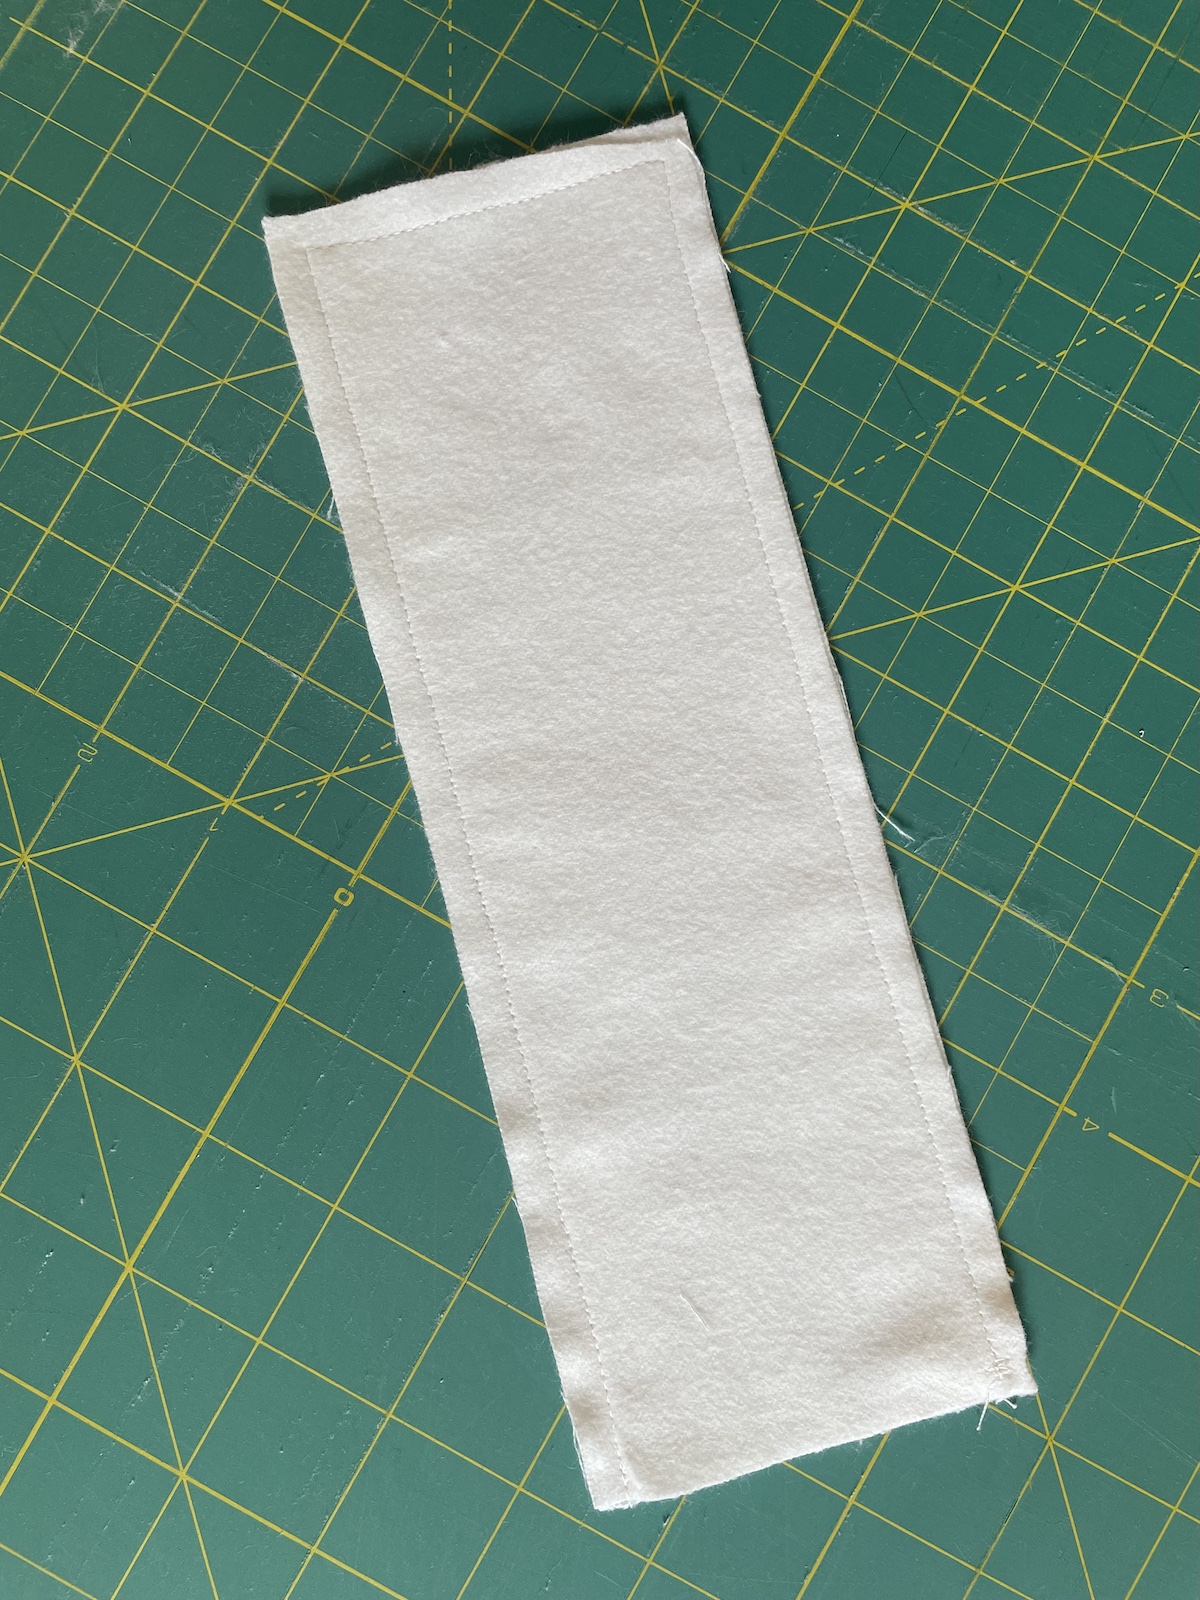
Step 3. Pin, Stitch and Turn Flannel Layers
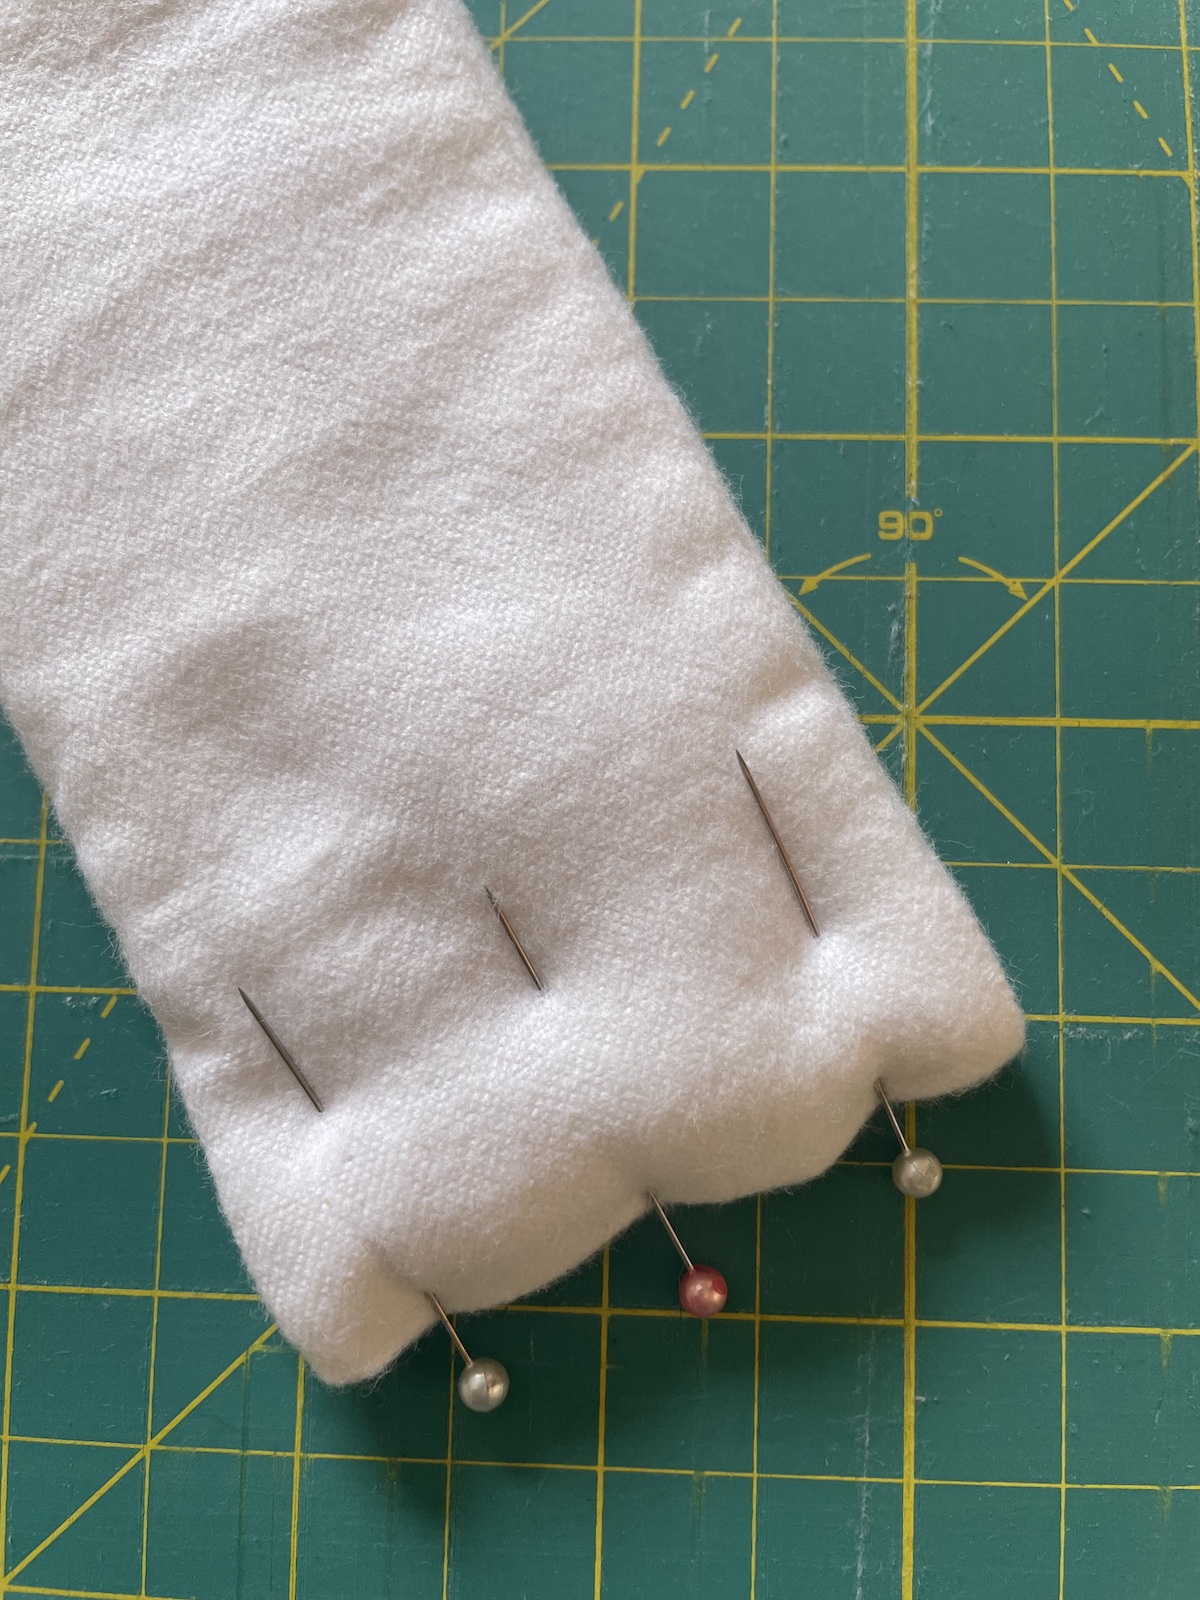
Stitch three sides leaving one end open for inserting batting layers. Turn and press.
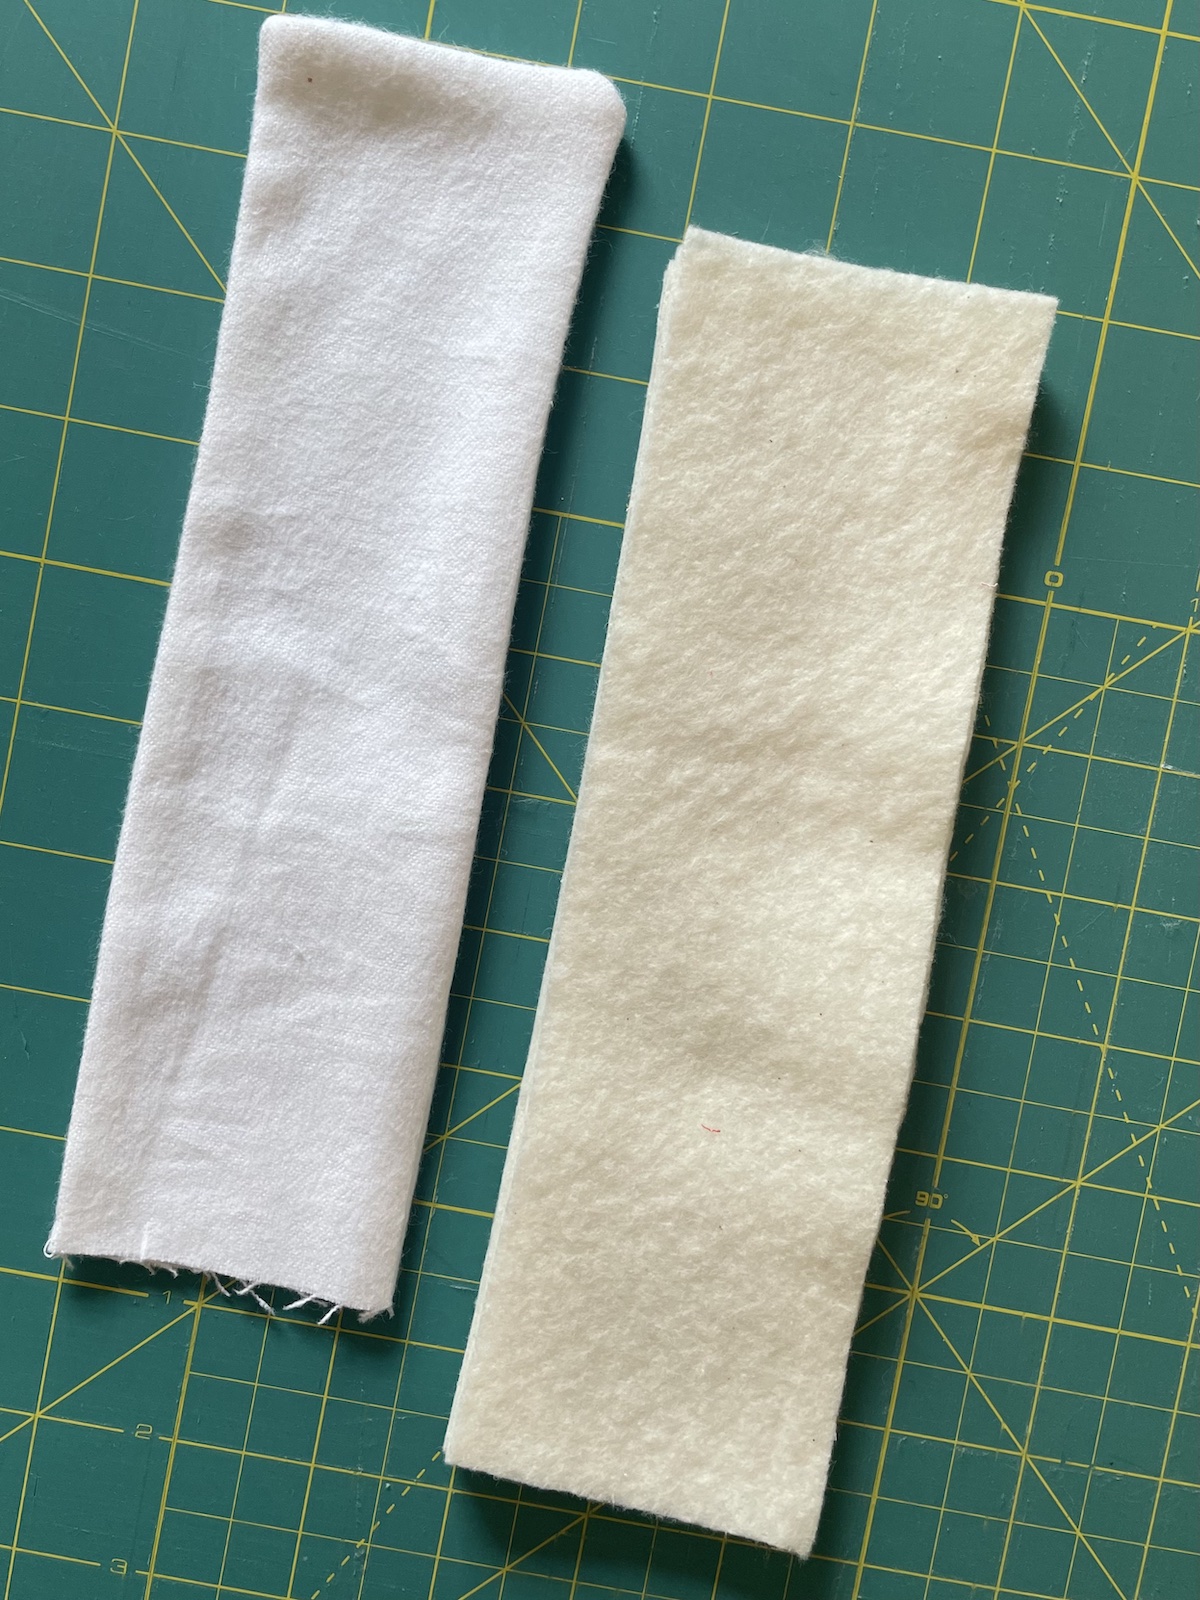
Step 4: Insert Batting Layers into Flannel Pocket and Stitch Opening Closed
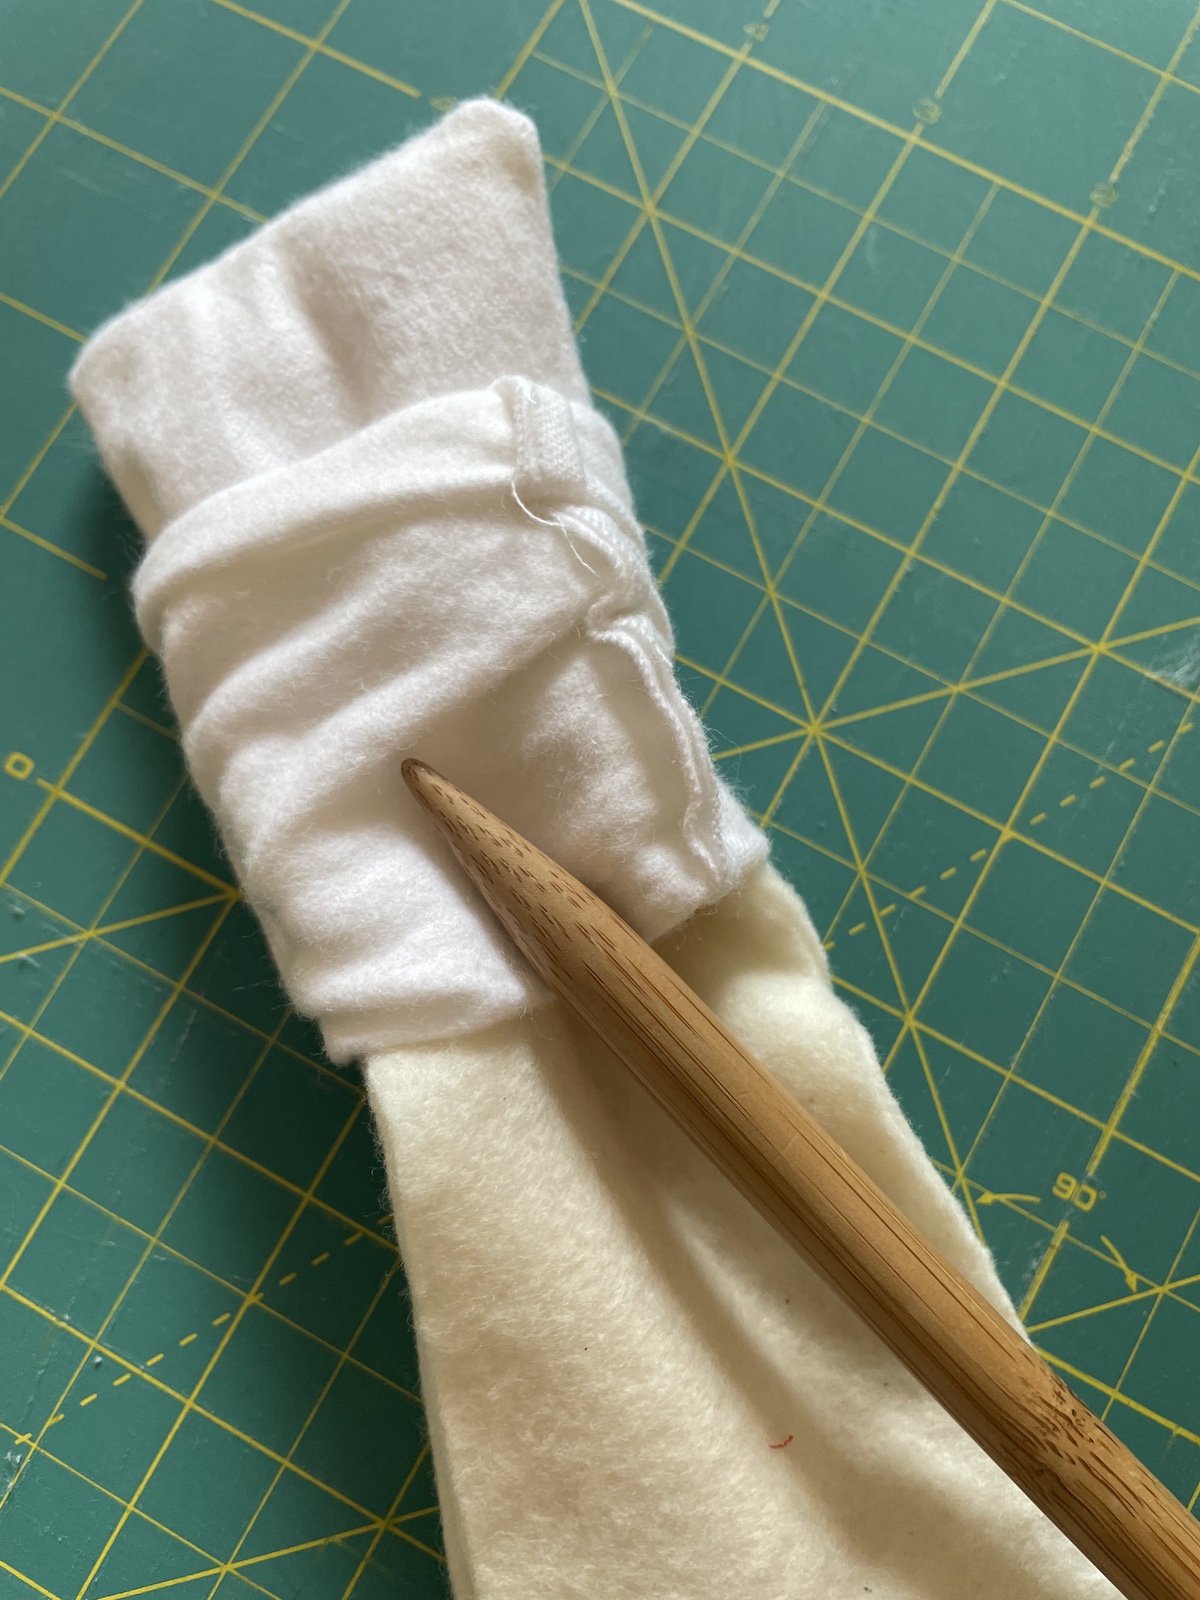
This step might bring back memories of putting on pantyhose, but be patient and wiggle that stack of batting inside the outer flannel layer. I used a blunt knitting needle to help me get the corners right and smooth out the layers.
After you have it smoothed out, fold in the open end, pin and stitch closed. I stitched around the entire perimeter at this point, pivoting at the corners.
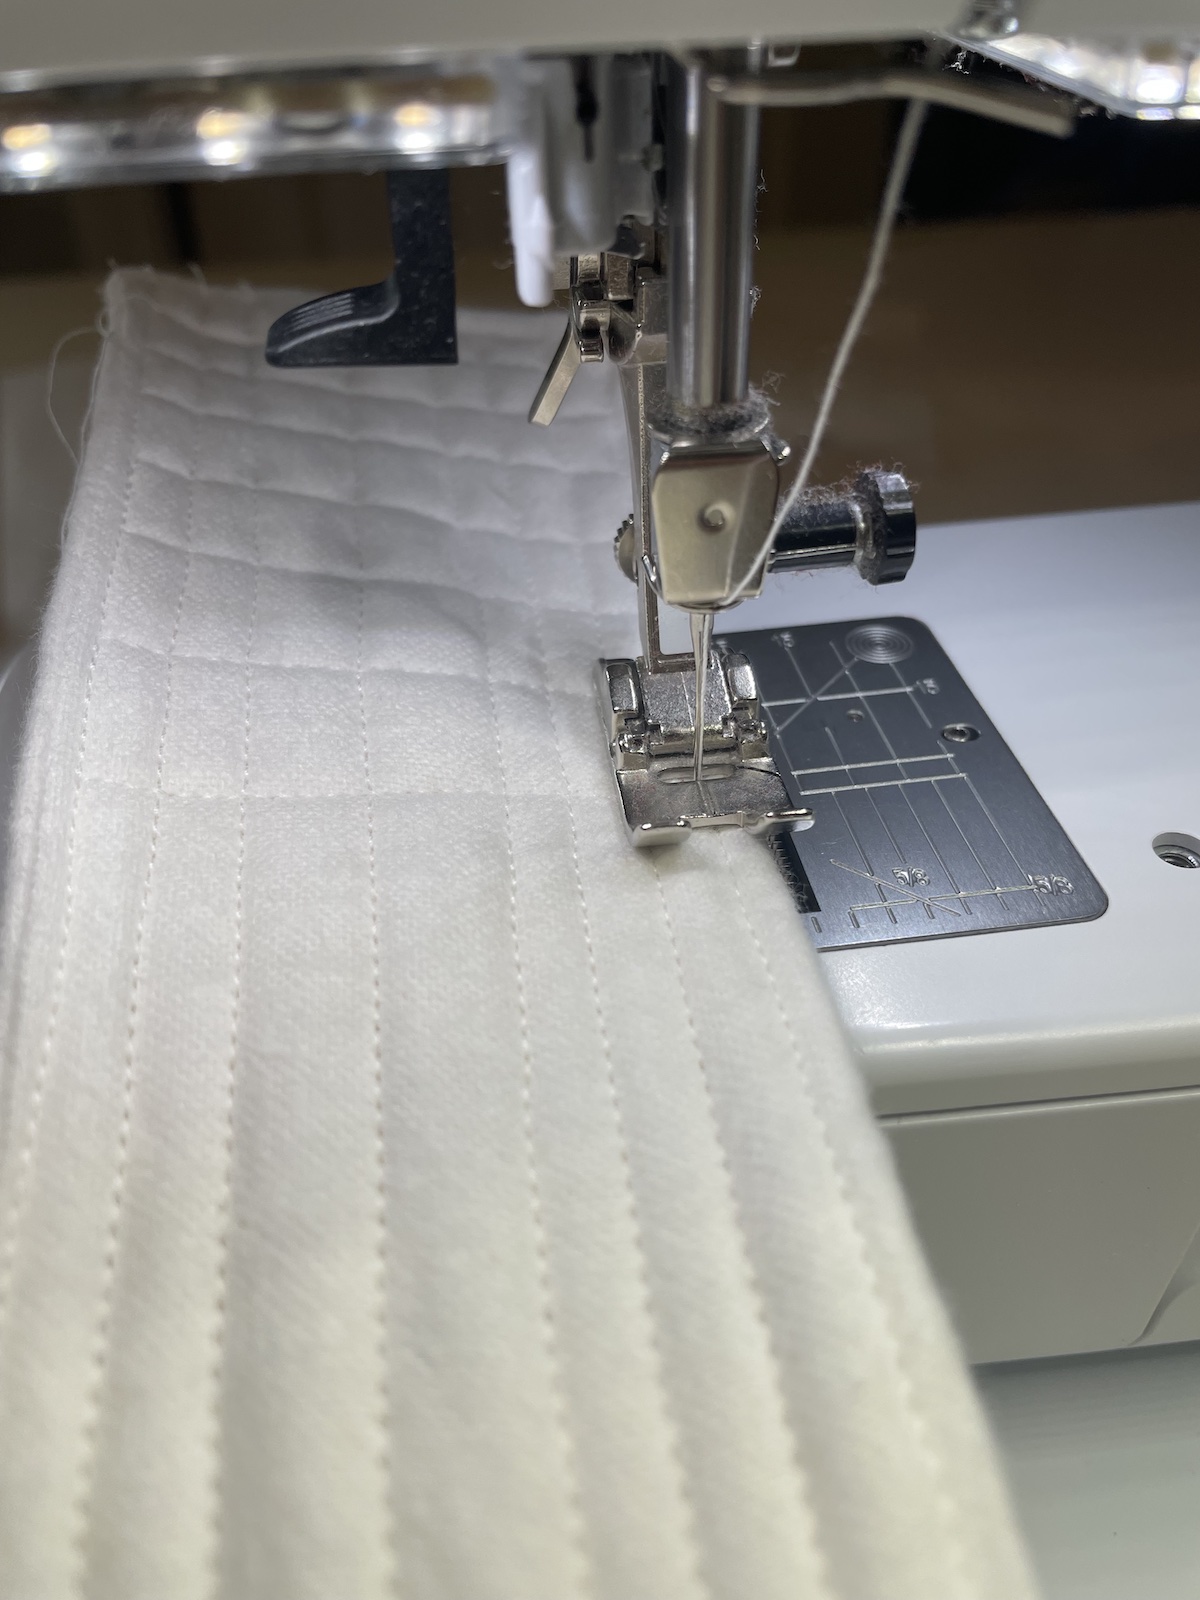
Step 5. Stitch Through All Layers in a Gride Pattern as Shown
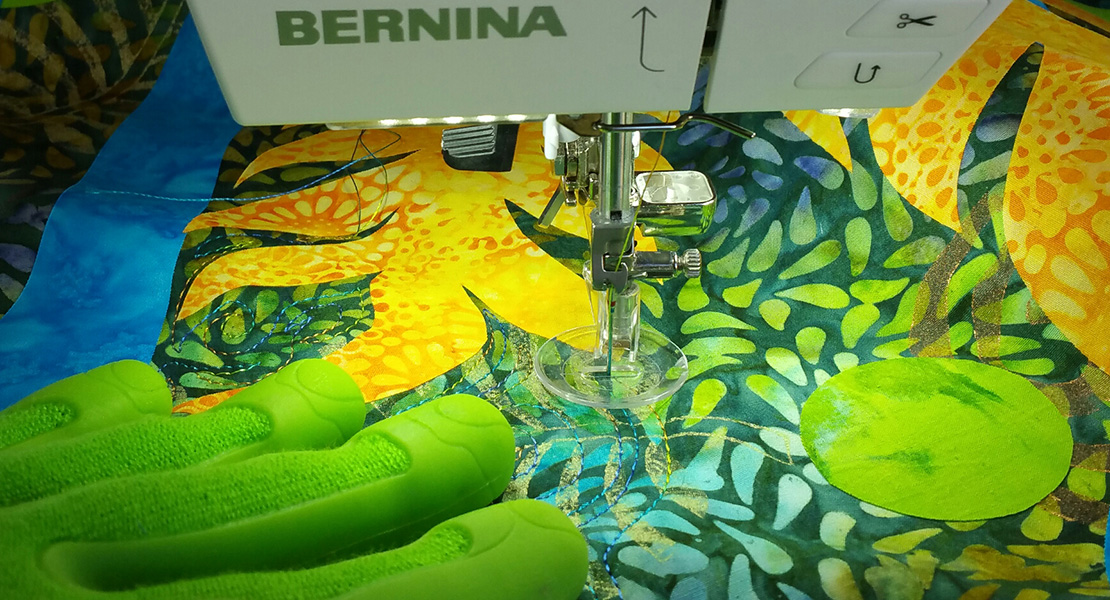
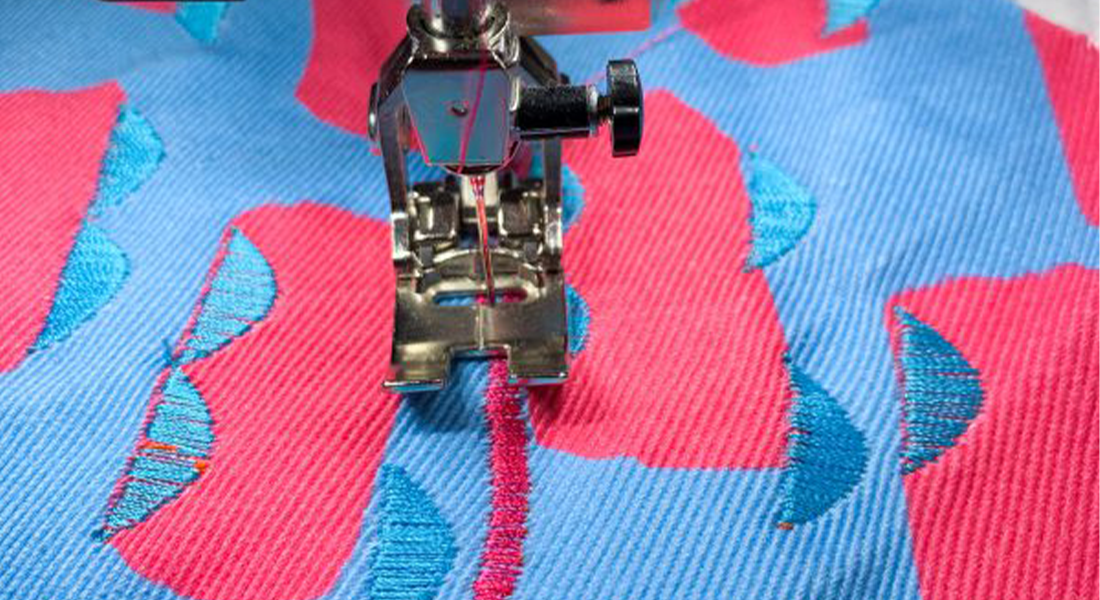
True Confessions: Since quilting is in my “future skill set” I just made up a semi-random grid pattern to create a quilted liner. You have permission to do the same, or you can get fancy and precise here if you want. And yikes, I promise I clean my machine between projects. This one got pretty fuzzy! If yours is starting to look like mine, take a look at this tutorial for maintaining your machine between tune-ups.
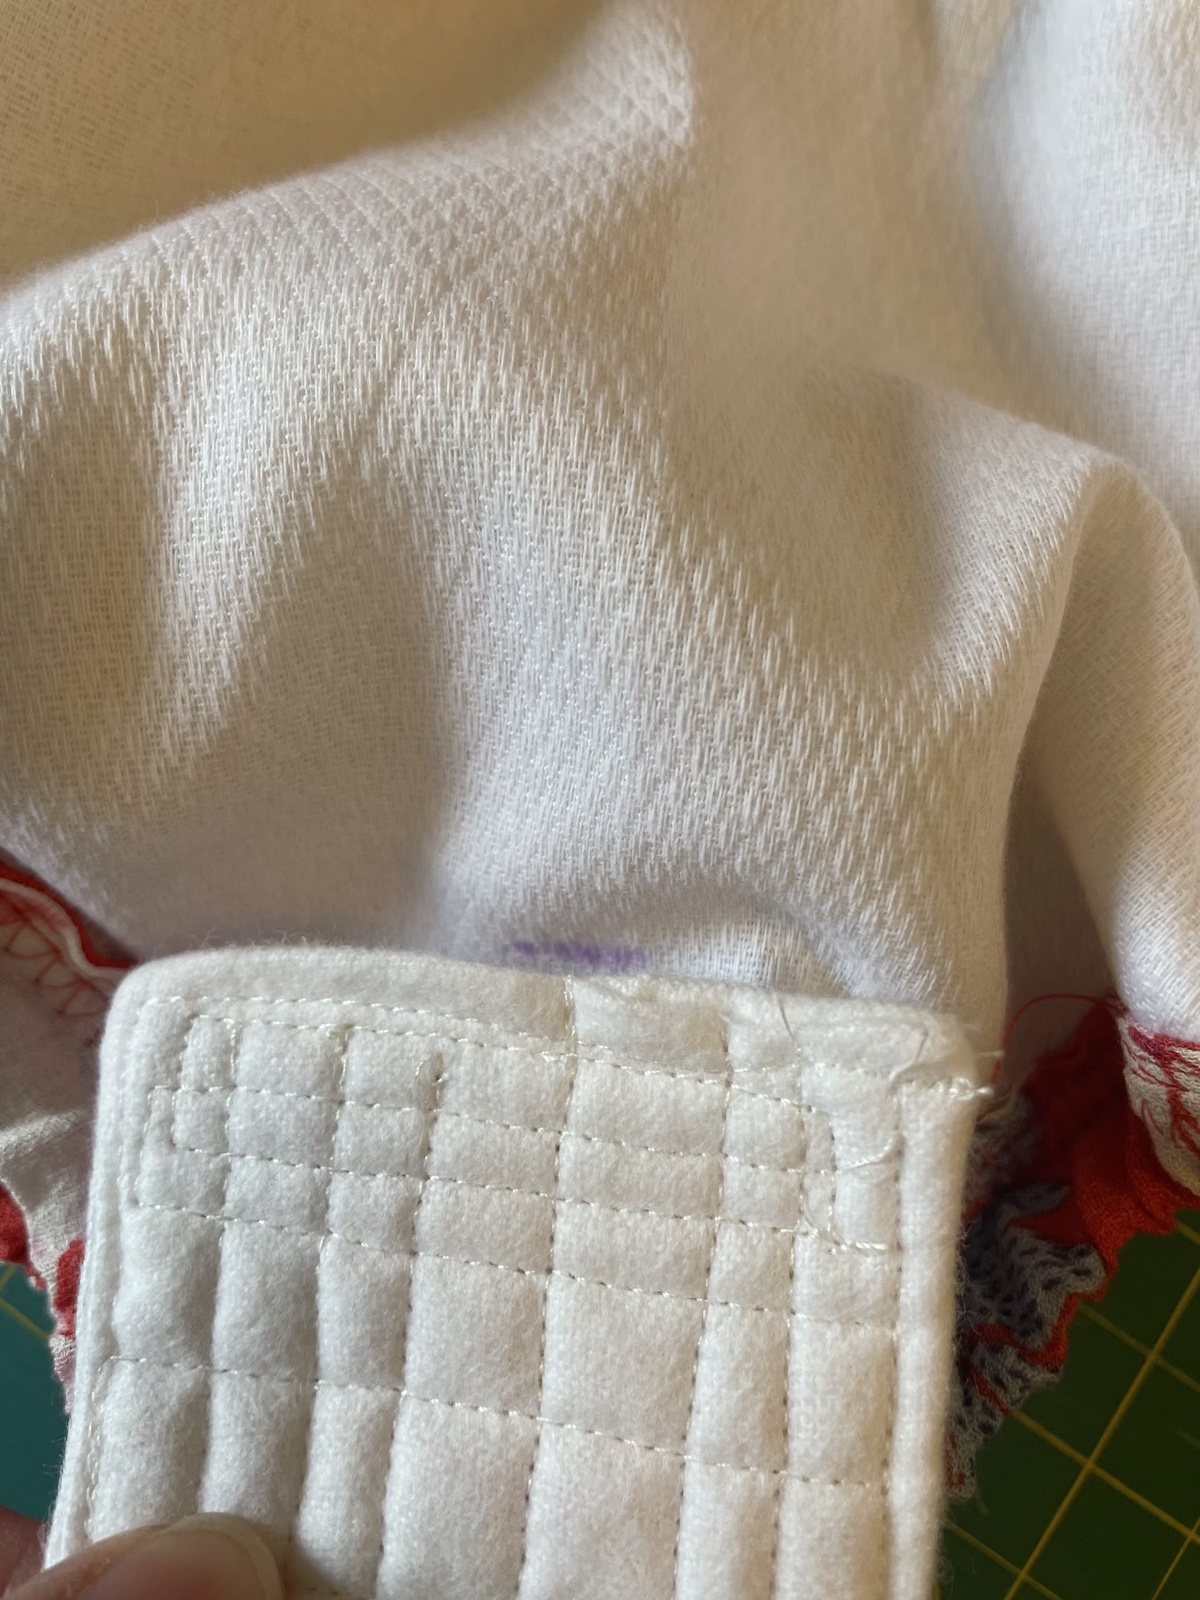
Step 6. Attach Velcro to Insert and Trainer
Reminder: Be sure to sew the rougher side to the back of the liner and the softer side to the inside of the trainer as explained in the MATERIALS LIST.
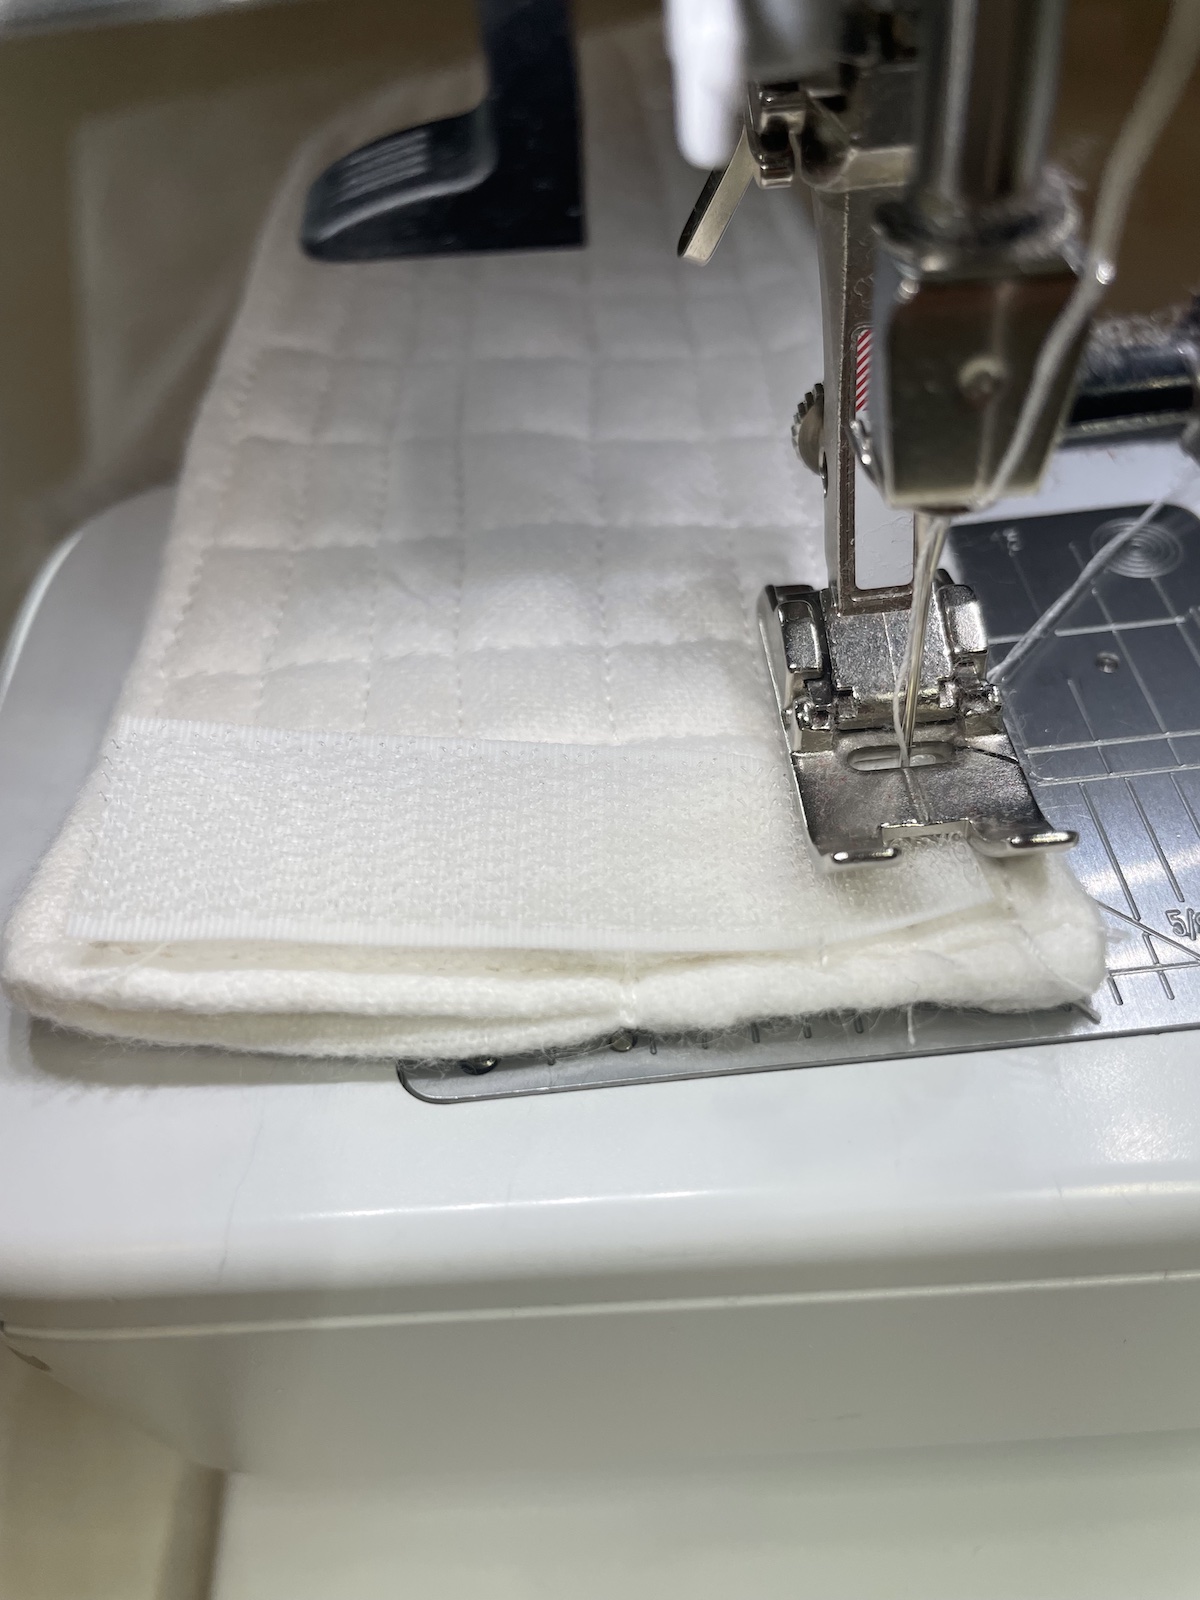
After stitching the rough strips to the liner, turn the trainer inside out and mark desired placement for the liner with your fabric marker. Since this trainer is for a girl, the liner will be centered. You may want to place the strips slightly higher in the front if you are making a trainer for boys. Sew the matching soft strips to the trainer, stitching through all layers. This will not show because of the shirred outer fabric and will be stronger than if you had only sewn through the Diaper Fabric.
Step 7. Assemble Trainer

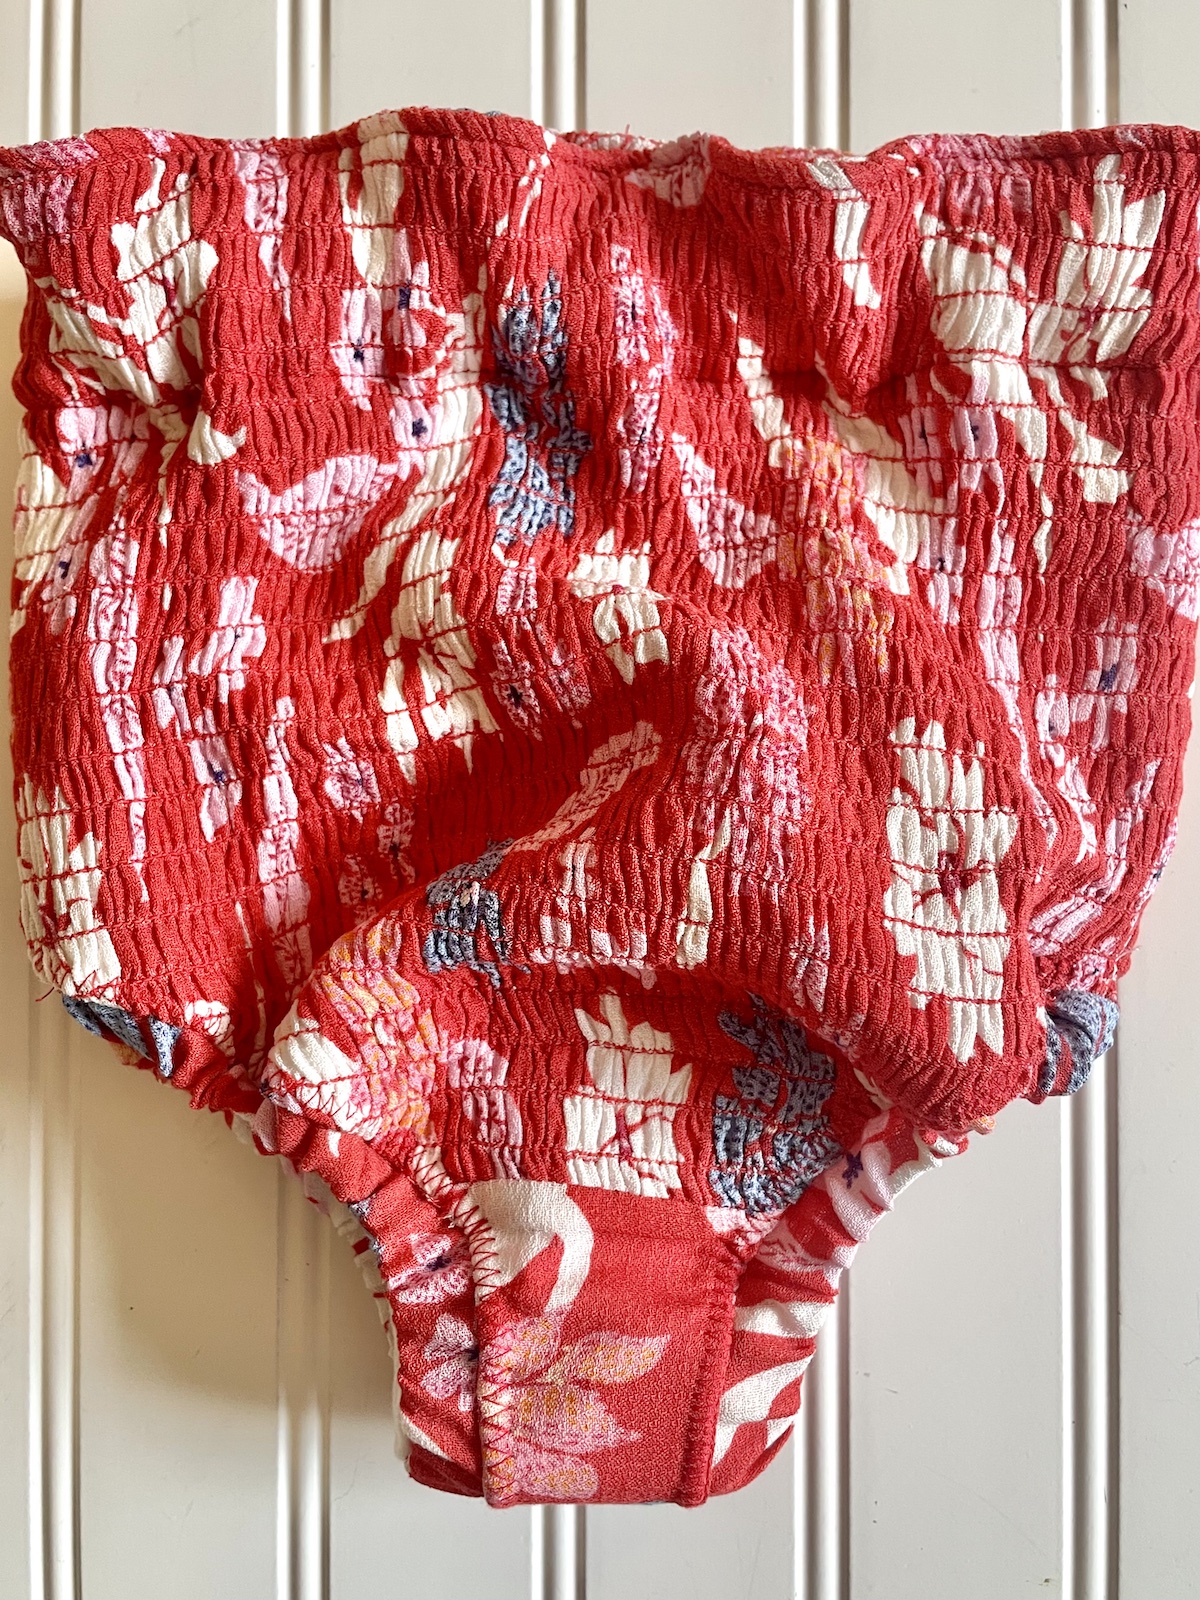
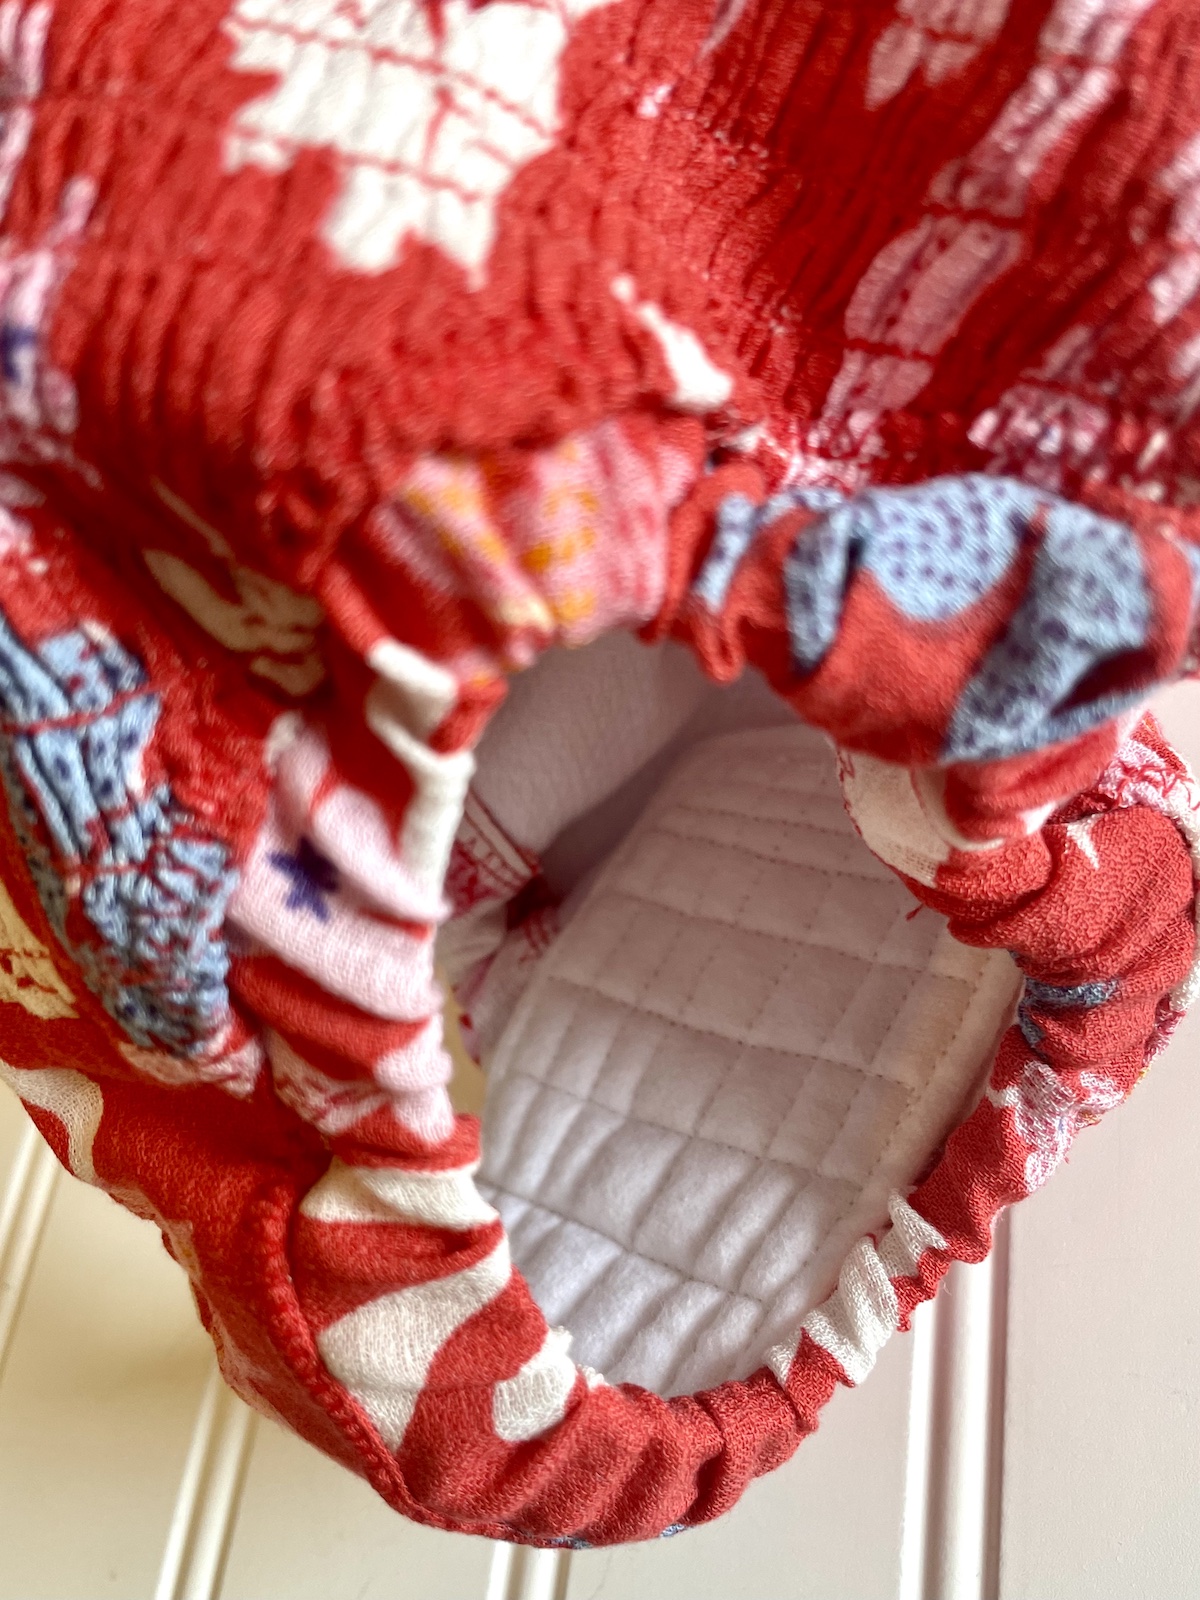
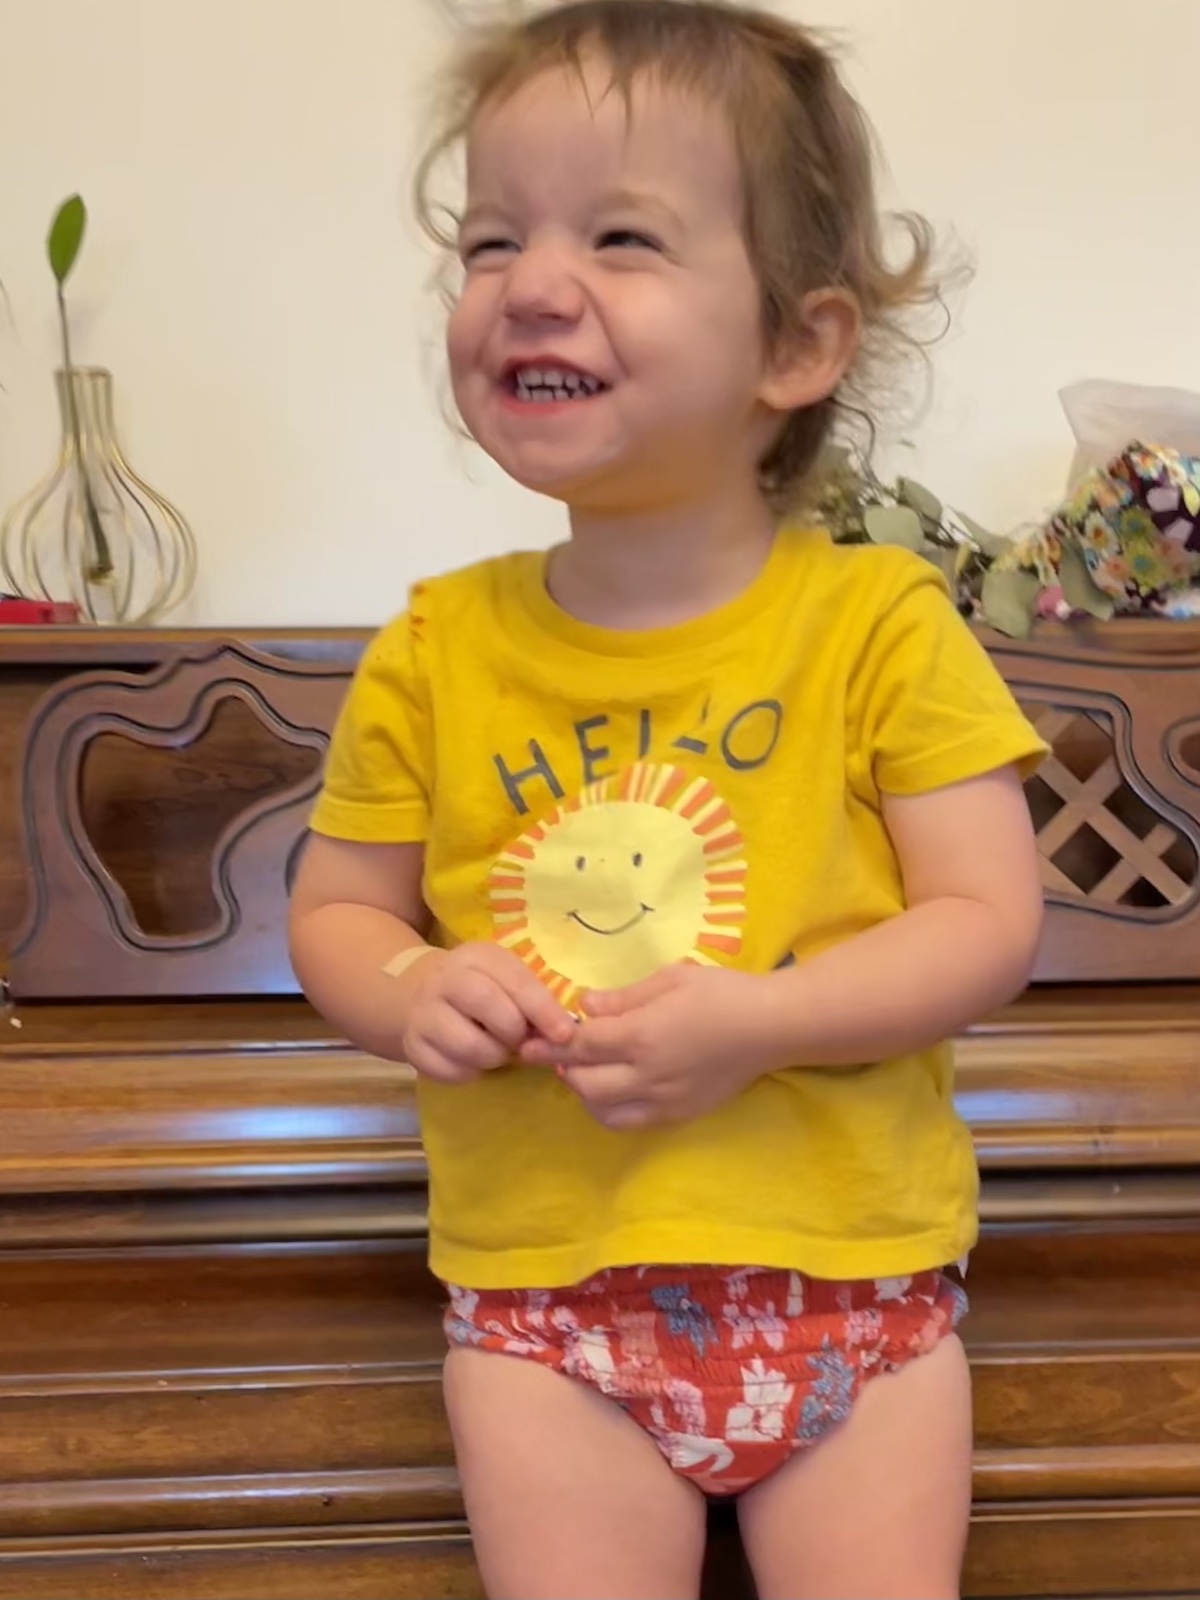
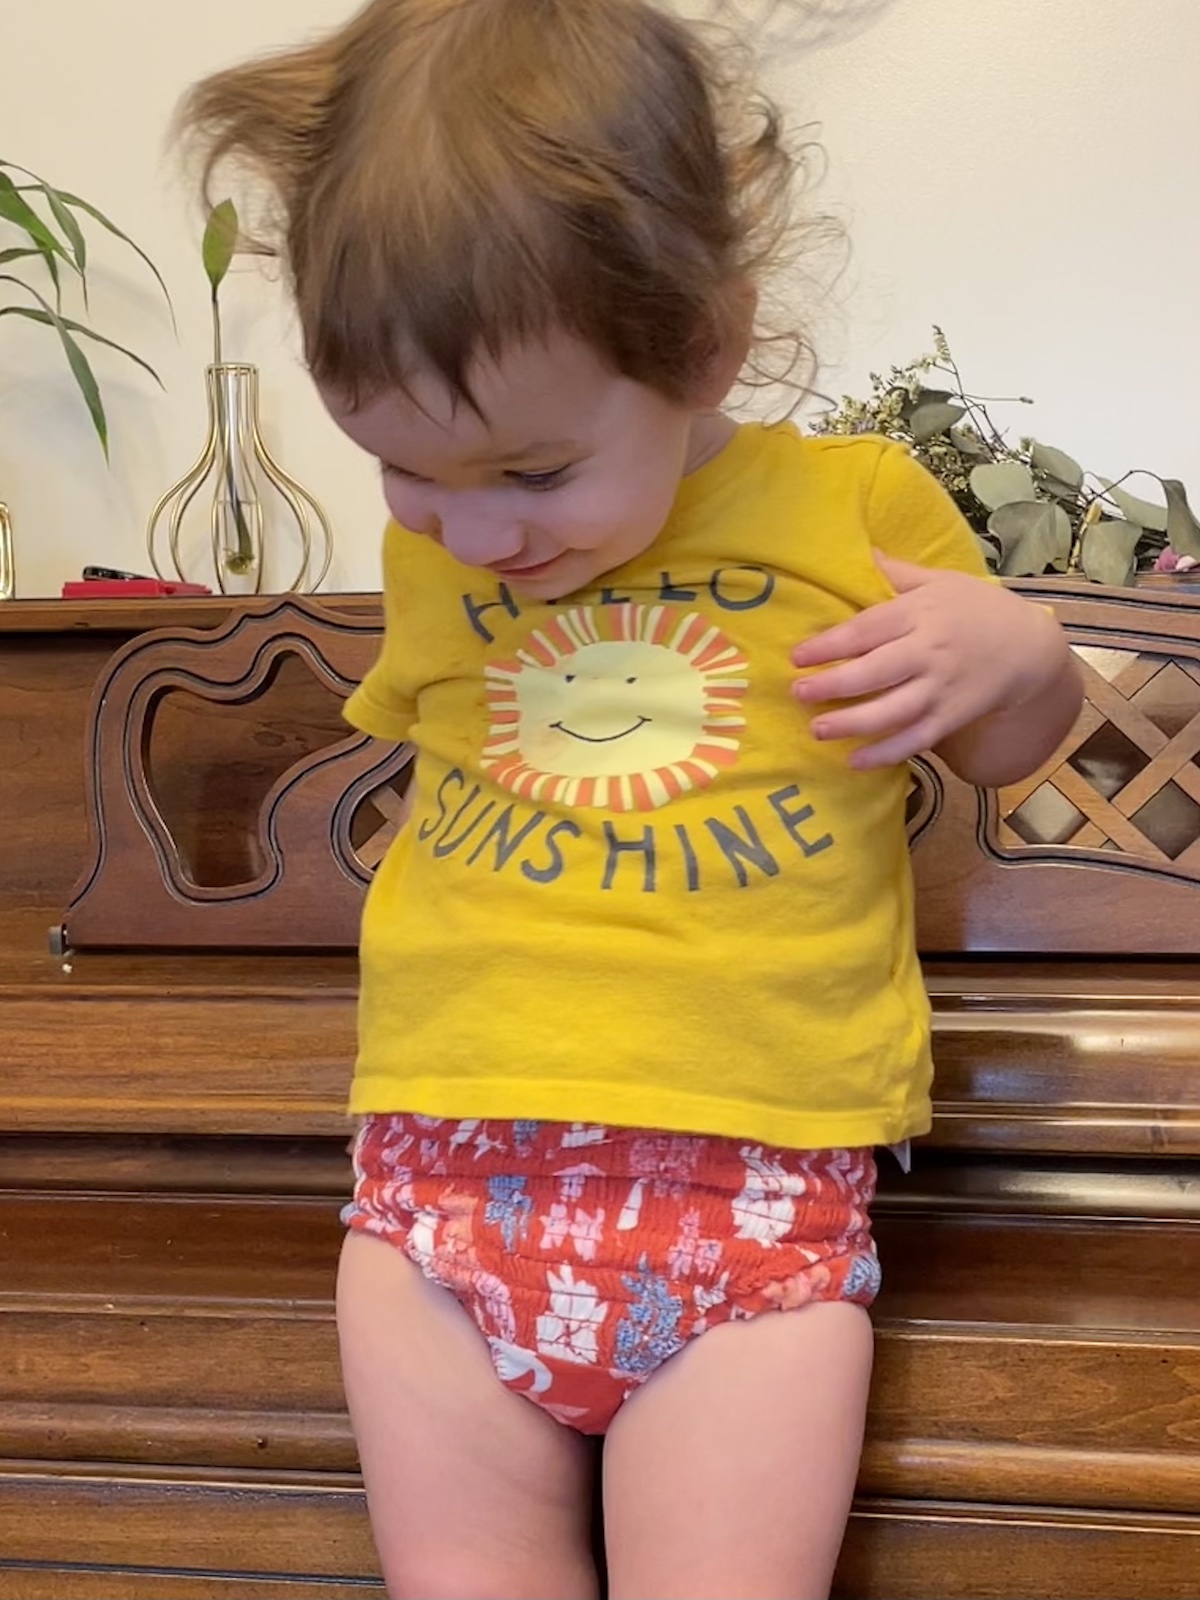
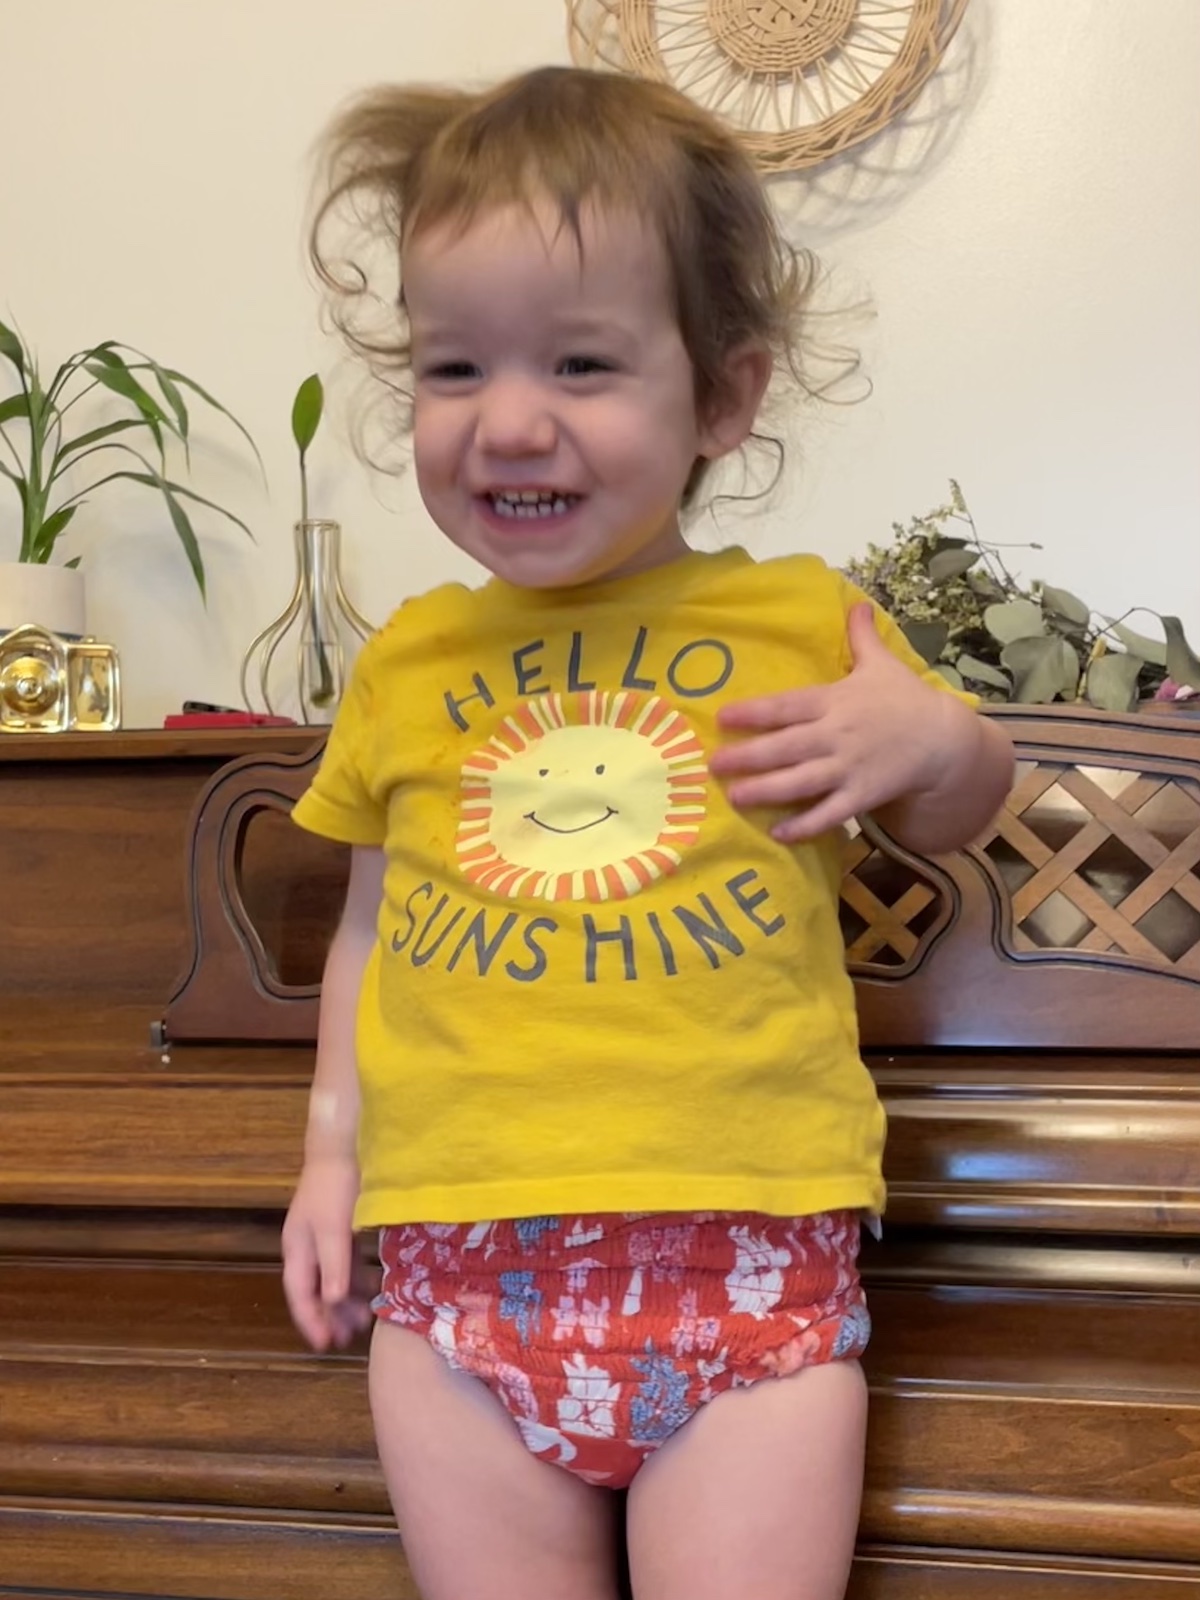
How CUTE is this?
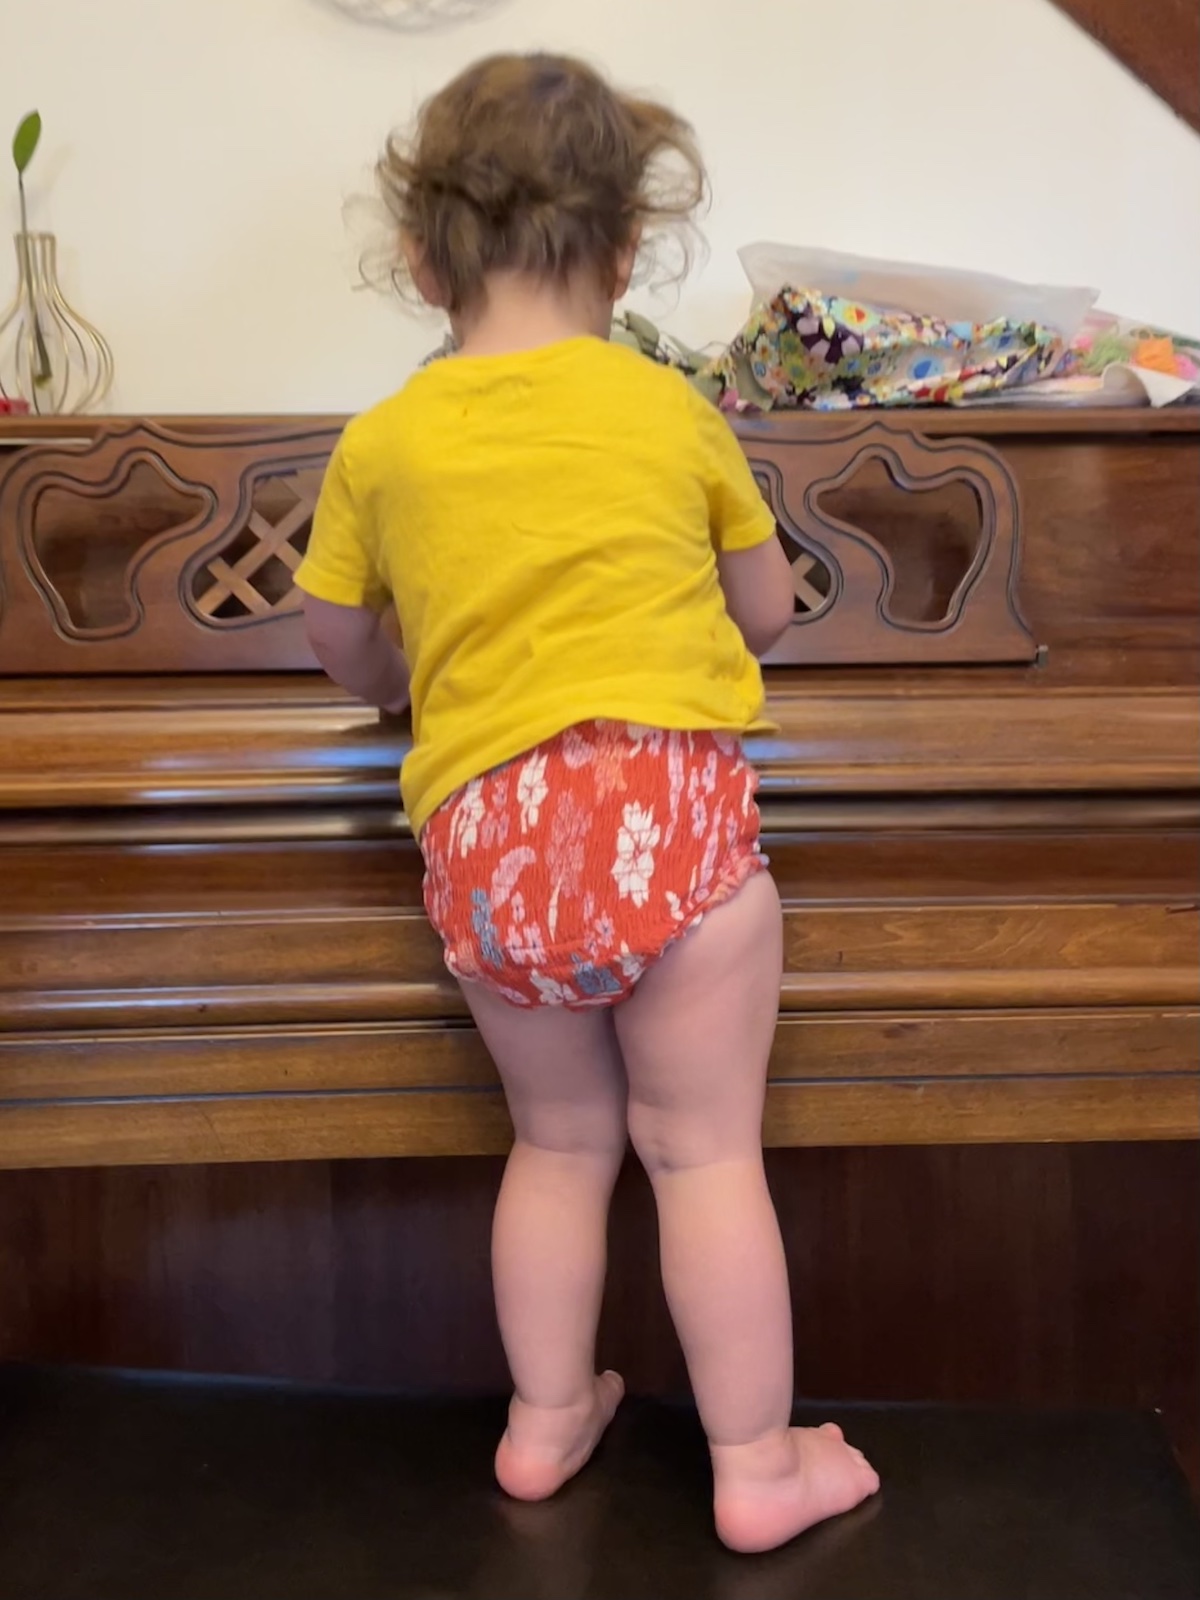
It was tough to get her to stand still, but someone loves her new big girl undies! It’s hard to believe this sweet baby has grown up so quickly since she made her debut in my Wedding Dress to Christening Gown Tutorial.

Still a bit of a ham and just as cute and sweet as ever! ☀️