How to Repair a Wool Pullover
It was a sad day last fall when I plucked my favorite wool pullover from a drawer to find that moths had made a feast of the fibers. The holes were too tiny to repair with the BERNINA mending program. It would be impossible to repair invisibly. I researched visible mending techniques, but nothing really appealed to me. My pullover sat in the “to-do” pile for weeks while I mulled over the repair options.
One day, while creating needle felting samples for my store, Thread Play, it dawned on me that covering the holes in my pullover with dots of wool roving was the perfect combination of flair and function I was looking for.
Here’s how I did it . . .
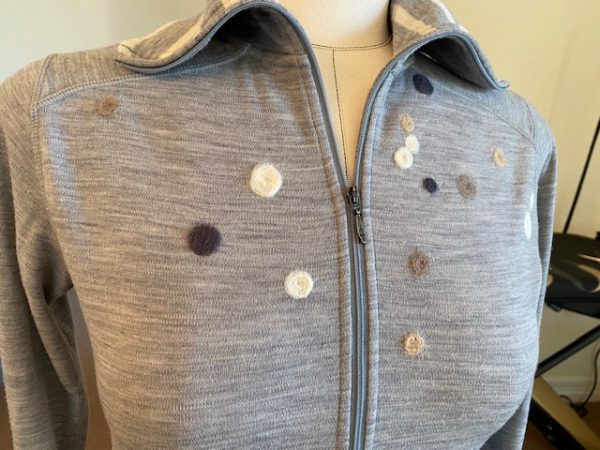
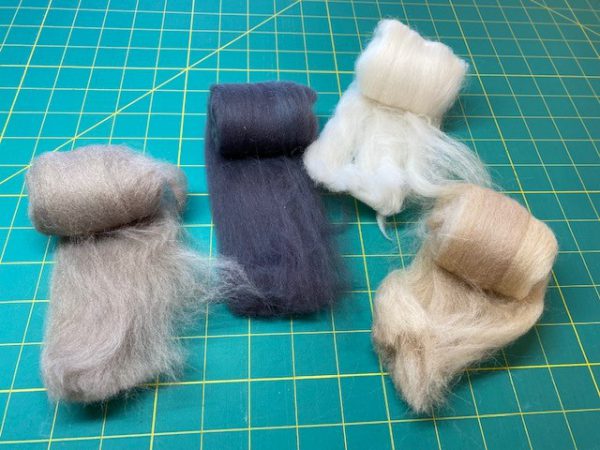
The gray pullover suggested a neutral color scheme for the dots. I chose taupe, dark gray, cream, and tan roving.
I started by pulling a small piece of roving free. I typically prefer pulling the roving, rather than cutting it, to leave a softly feathered tail that blends seamlessly into the shapes I felt.
![Pulling Roving[1]](https://weallsew.com/wp-content/uploads/sites/4/2022/02/Pulling-Roving1-600x450.jpg)
I used narrow whisps of roving 2”- 3” long. The roving was spiraled, beginning with a tight center.
![Winding Roving 1[1]](https://weallsew.com/wp-content/uploads/sites/4/2022/02/Winding-Roving-11-600x450.jpg)
Continue spiraling to form a circle.
![Winding Roving 2[1]](https://weallsew.com/wp-content/uploads/sites/4/2022/02/Winding-Roving-21-600x450.jpg)
Here’s the finished circle with the feathered tail disappearing into the outer edge.
![Roving Circle[1]](https://weallsew.com/wp-content/uploads/sites/4/2022/02/Roving-Circle1-600x450.jpg)
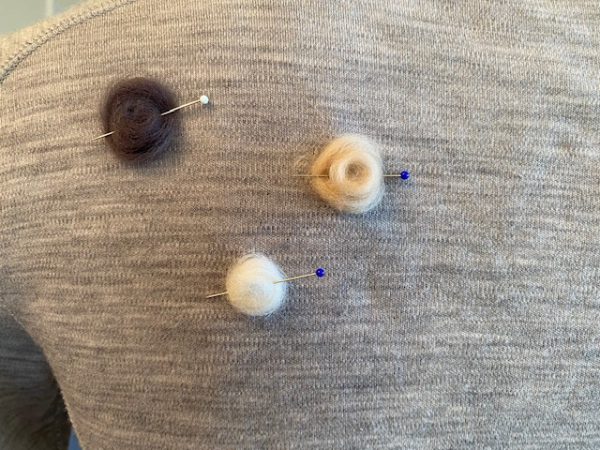
The roving circles were then pinned over the holes in the pullover. I tested color combinations and varied the circle sizes until I was happy.
I found it easiest to work in about 8” x 8” sections of the pullover at a time. This avoided dealing with too many pins and risking my dots unraveling and shifting before they were felted.
Machine Preparation
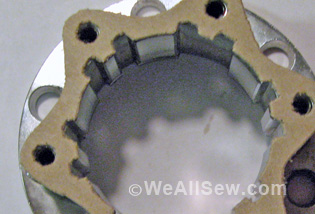
The BERNINA PunchWork Tool and proper throat plate were placed on the machine using the instructions in the box.
![Machine with Attachment[1]](https://weallsew.com/wp-content/uploads/sites/4/2022/02/Machine-with-Attachment1-600x450.jpg)
I adjusted the slide speed control to about 50%. Reducing the maximum speed allows me to “floor” the foot control while maintaining a consistent speed that isn’t so fast that I risk over felting the dots.
![Speed Control[1]](https://weallsew.com/wp-content/uploads/sites/4/2022/02/Speed-Control1-600x450.jpg)
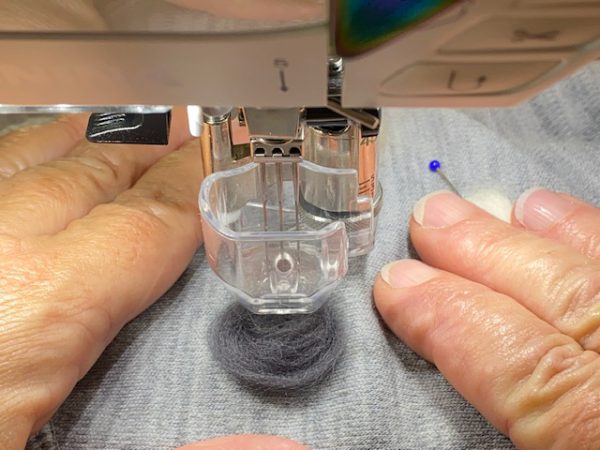
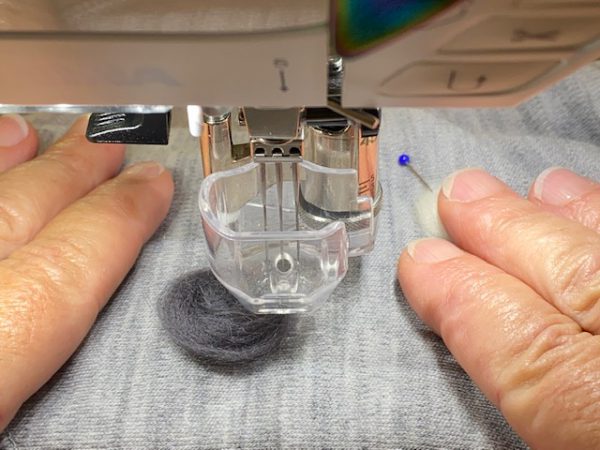
I next placed a roving dot under the felting attachment, lowered the presser foot, and removed the pin.
![Pulling Pin Out[1]](https://weallsew.com/wp-content/uploads/sites/4/2022/02/Pulling-Pin-Out1-600x450.jpg)
Tacking the Edges
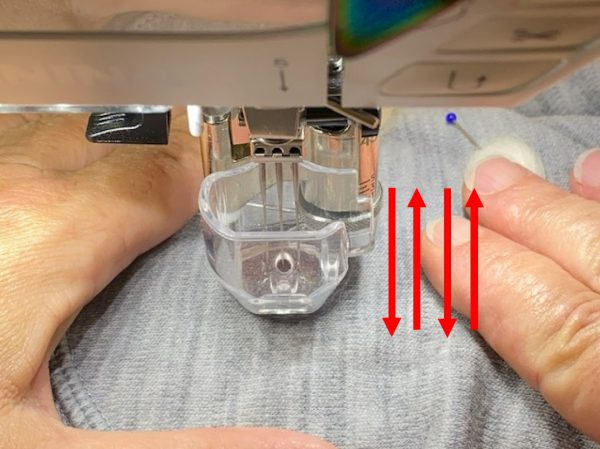
The dots tend to distort if I immediately begin needle felting back and forth at a high speed. It’s easiest to maintain the circular shape by first “tacking” the edges with single punches. The single stitch function built into the BERNINA foot control, or the needle up/down function, allow tacking to help prevent distortion before the shape is secured.
I prefer using the single stitch function on the foot control so I can keep both hands on my project. Notice my entire foot is placed on the foot control. My heel is not resting on the floor. This allows me to tap the front end of the foot control to take only one stitch, or punch, at a time. (Yes, I operate the foot control with my left foot so my right leg is free to use the Free Hand System, aka knee lift lever.)
![Needle Up Down[1]](https://weallsew.com/wp-content/uploads/sites/4/2022/02/Needle-Up-Down1-600x450.jpg)
Alternatively, we can touch the needle up/down button twice. The first touch will first lower the needle, the second brings it back up, effectively taking one stitch, or punch, at a time.
I begin by taking one “stitch”, or punch, at the back of the dot, then move the dot under the presser foot to tack the front edge, then tack both sides. Tacking just four times is sufficient to secure dots up to about 1” in diameter. Larger dots require more tacks around the perimeter to secure the shape before thoroughly punching the shape.
#1 Tack Back Edge
#2 Tack Front Edge
![Tacking 2[1]](https://weallsew.com/wp-content/uploads/sites/4/2022/02/Tacking-21-600x450.jpg)
#3 Tack Right Edge
#4 Tack Left Edge
![Tacking 4[1]](https://weallsew.com/wp-content/uploads/sites/4/2022/02/Tacking-41-600x450.jpg)
Using the Free Hand System to raise the presser foot while moving the still puffy circles helps avoid distorting the shape while tacking.
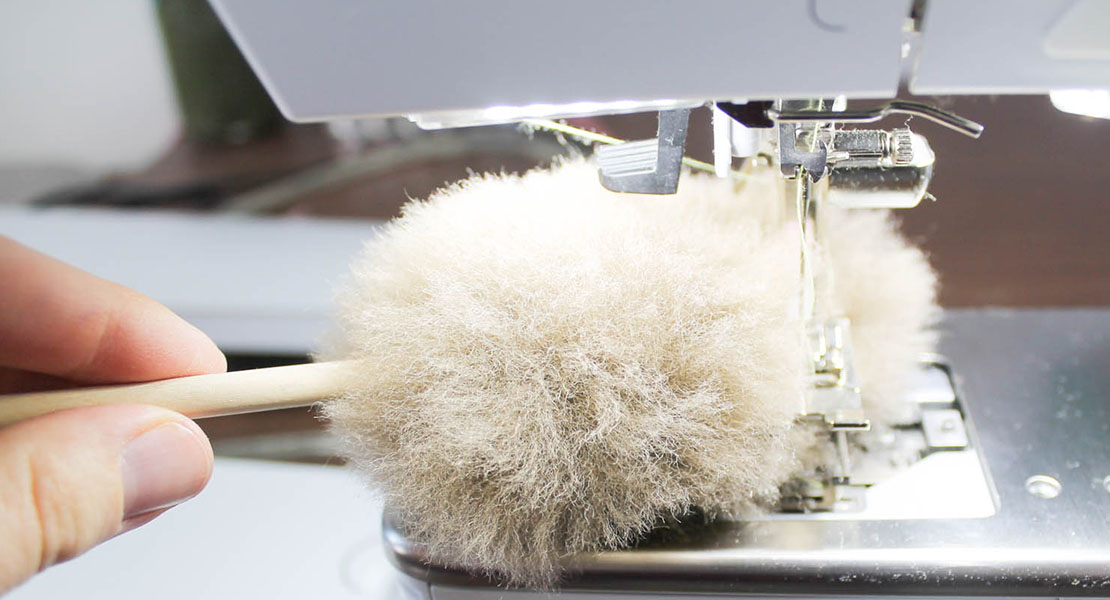
Felting the Roving Dot
Once the edges are tacked, press the foot control to the floor and move the dot back and forth under the presser foot, thoroughly felting it to the garment fabric.
Setting the Fibers
Give the finished dots a good steam to help set the fibers. I liked the dimension in the dots so I didn’t touch the iron to my fabric. I held the iron about ½” above and let the steam pour out.
The Laurastar ironing system, with its suction ironing board, is ideal for techniques like these. Other steam irons simply bounce the steam off the surface of the fabric. Laurastar’s system suctions the steam though the fabric to ensure thorough steam penetration.
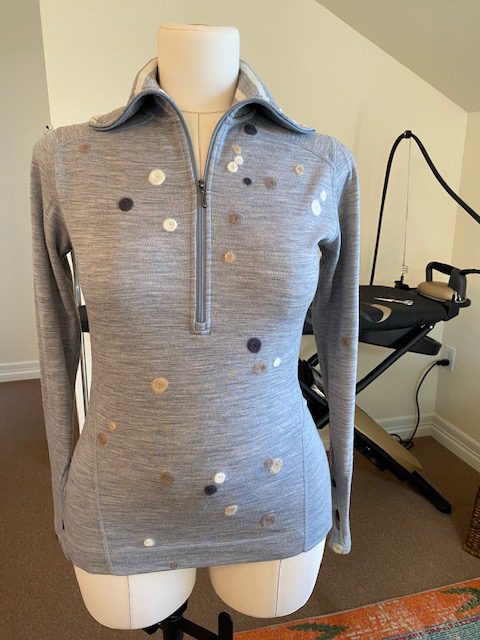
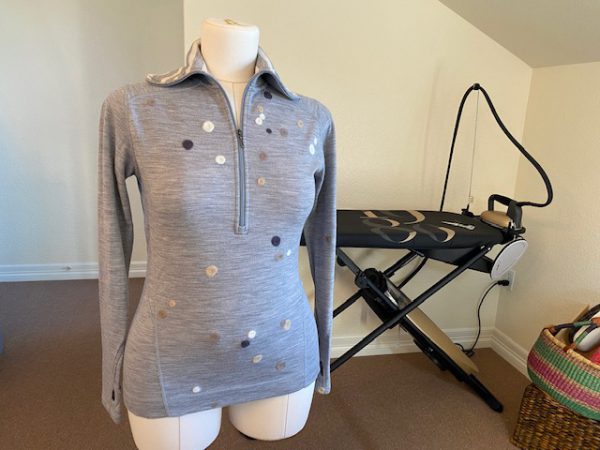
Here’s the finished pullover. It turned out to be a fun opportunity for embellishment.
I never thought I’d be thankful for moth munch, but I think I like this new version even better than the original.


What you might also like


7 comments on “How to Repair a Wool Pullover”
-
-
Yes, embroidery is another great option for salvaging favorite garments! I’ve even seen embroidered moths over moth holes? Do give the BERNINA Needle Felting Tool a try. You can create many different shapes. Maybe felted moths? You’ll have a lot fun with it.
-
-
I’m celebrating embroidery month with a new 570 with embroidery! I put a monogram on a blanket, I’m making 2 shirts for my two granddaughters with a Daniel tiger and freinds applique!
-
You go Gurl!!! Welcome to world of 5 Series embroidery. You’re in for a world of fun.
-
-
I’ve got a QE750 Bernina probable about 11 or 12 years ago and I do love the things I can do on it. Went to classes to learn what I could do all except embroidery. Well I finally got the unit for embroidery but now I need to learn how to do that. I wish I had more guts to try it but I’m sort of scared to. I guess I’ll have to drive about 90 miles to take classes.
How are you celebrating National Embroidery Month? I’m going to sign up for classes and maybe they can do a couple of classes together for me so I can stay over night or whatever. I do love to sew. I started in school back when I was in 7th grade which would of been about 1963. -
I am so pleased to find procedure to repair a wool sweater. I have the wool and I have the felting tool for my Bernina 830. Really excited and need to find the time. I am not a technical gal so most likely I won’t be sending a photo Many ‘thanks’ for the idea.
-
I’m delighted that you’ve found inspiration in this article. There’s a good chance you’ll end up with a repaired sweater that you like even better than the original version.
-
Leave a Reply
You must be logged in to post a comment.

Several years ago, my mom accidently poured out something she was dying and it splattered all over one of my favorite sweaters. There were blue dots all over a soft pink sweater. Then she made it worse by taking a que-tip with bleach. Then I had a soft pink sweater with orange dots all over it. I loved the sweater and didn’t throw it away, just wore it around the house. Then I saw an article about embroidering on knits. Out came the pink sweater with orange dots and a group of embroidery snowflakes. I was able to position the snowflakes over the dots to cover them. I now have a beautiful soft pink sweater with white snowflakes all over it. I get so many compliments on the sweater and I wear it whenever I can. I’m going to try the technique above on another sweater the moths have gotten to. This is a great way to keep our clothes that we really enjoy wearing.