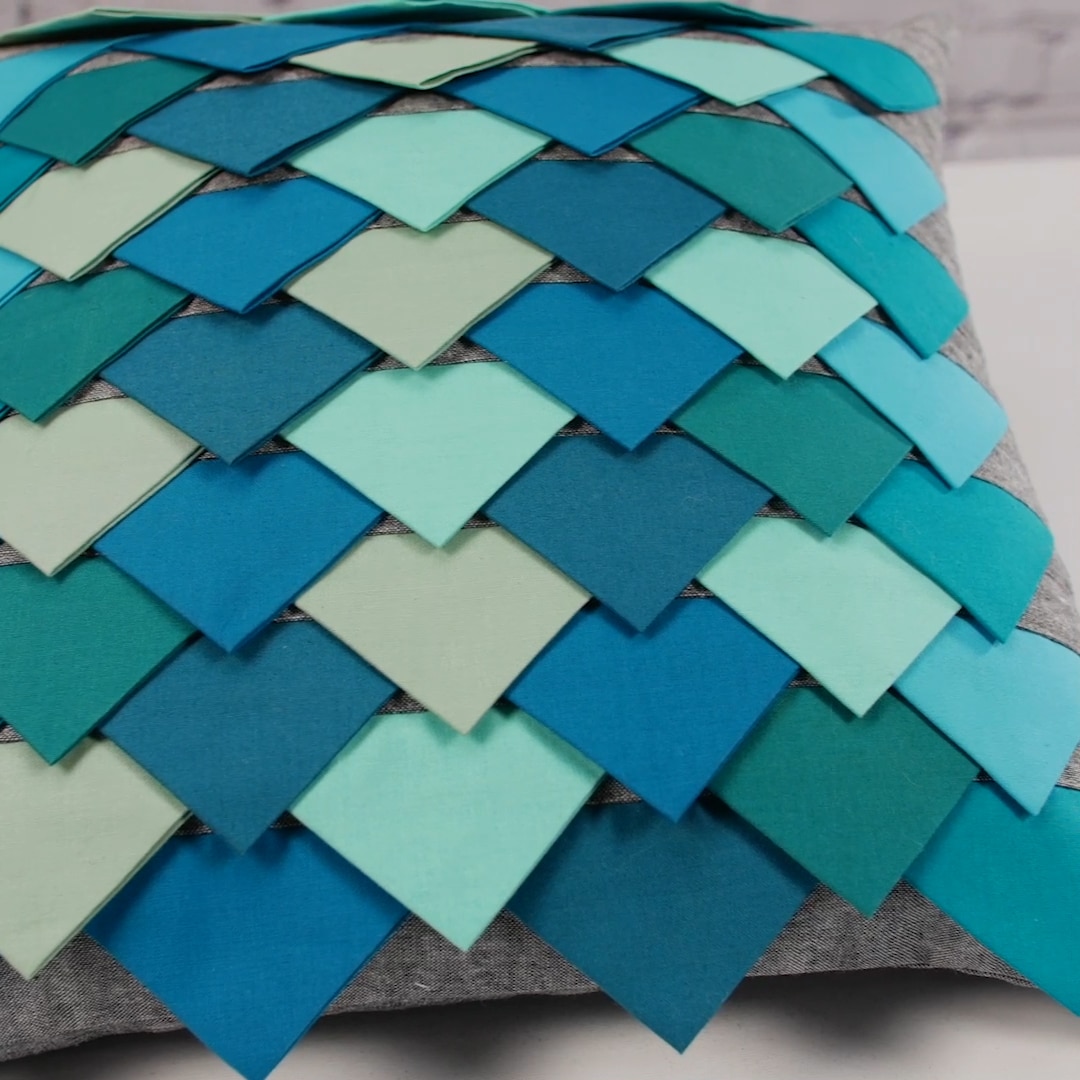
Prairie Points and How to Piece Them
Prairie points are a classic way to add unconventional texture and dimension to quilts and other projects. While often seen as an edge finish, I wanted to give this technique a new life! Today we’ll learn how to create prairie points but ultimately stitch them up into a contemporary mermaid-scale throw pillow top.
If you’re looking for tips on how to use this technique as a quilt edge finish, don’t despair! I have that for you too. The majority of the steps to create the prairie points will be exactly the same. Keep following along and I’ll show you where things branch off and let you know how to tackle that quilt.
Supplies to Create a Mermaid-scale Throw Pillow
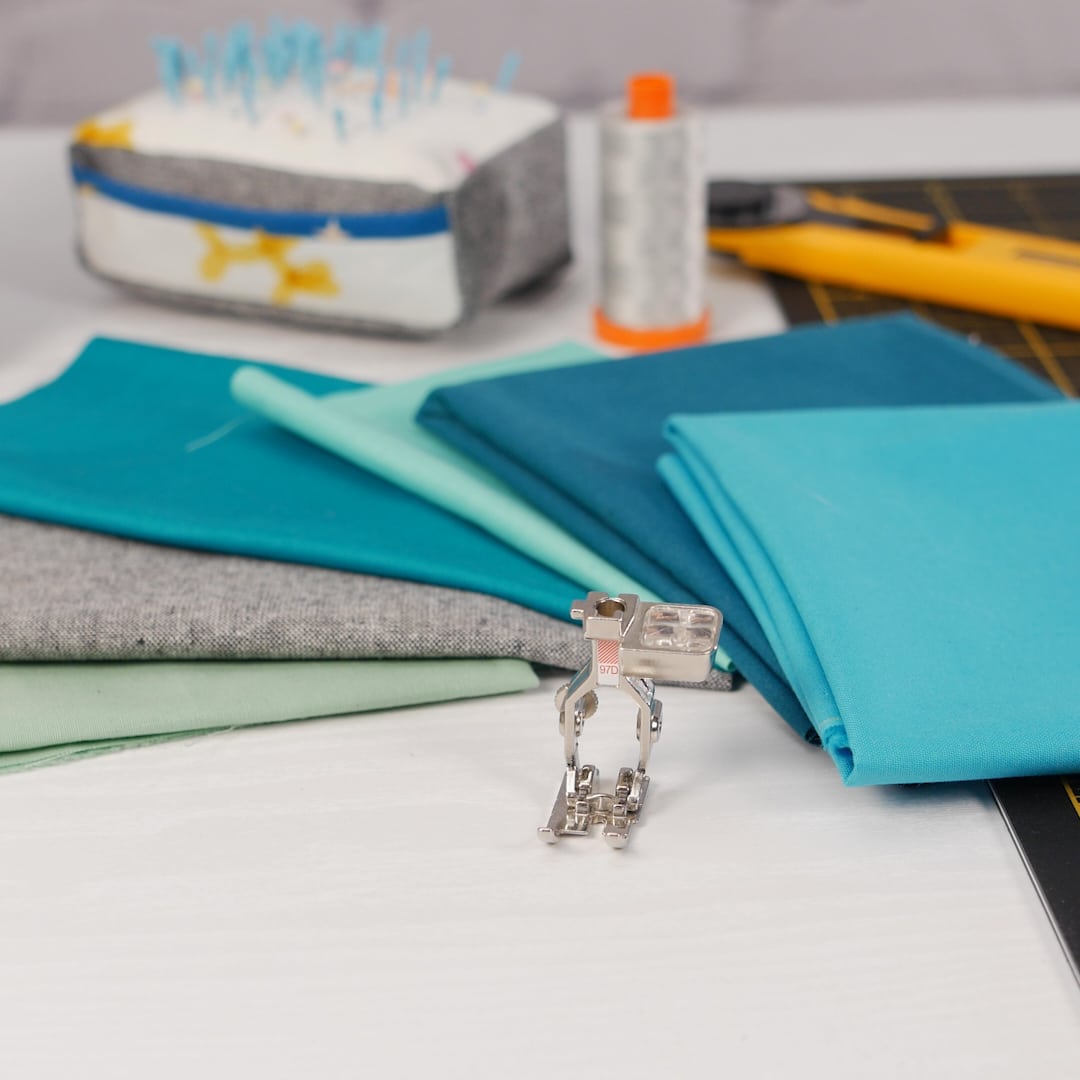
- Quilting weight fabric (cotton and/or linen)
- Piecing thread
- Ruler
- Rotary cutter
- Cutting mat
- LAURASTAR Lift Plus iron
- Pressing mat
- Pressing spray
- For a softer hold, starch-alternative like Flatter or Best Press
- For a more firm, crisp hold, try Terial Magic
- Pins
- Stiletto
- Patchwork Foot #97D
- BERNINA 570 QE
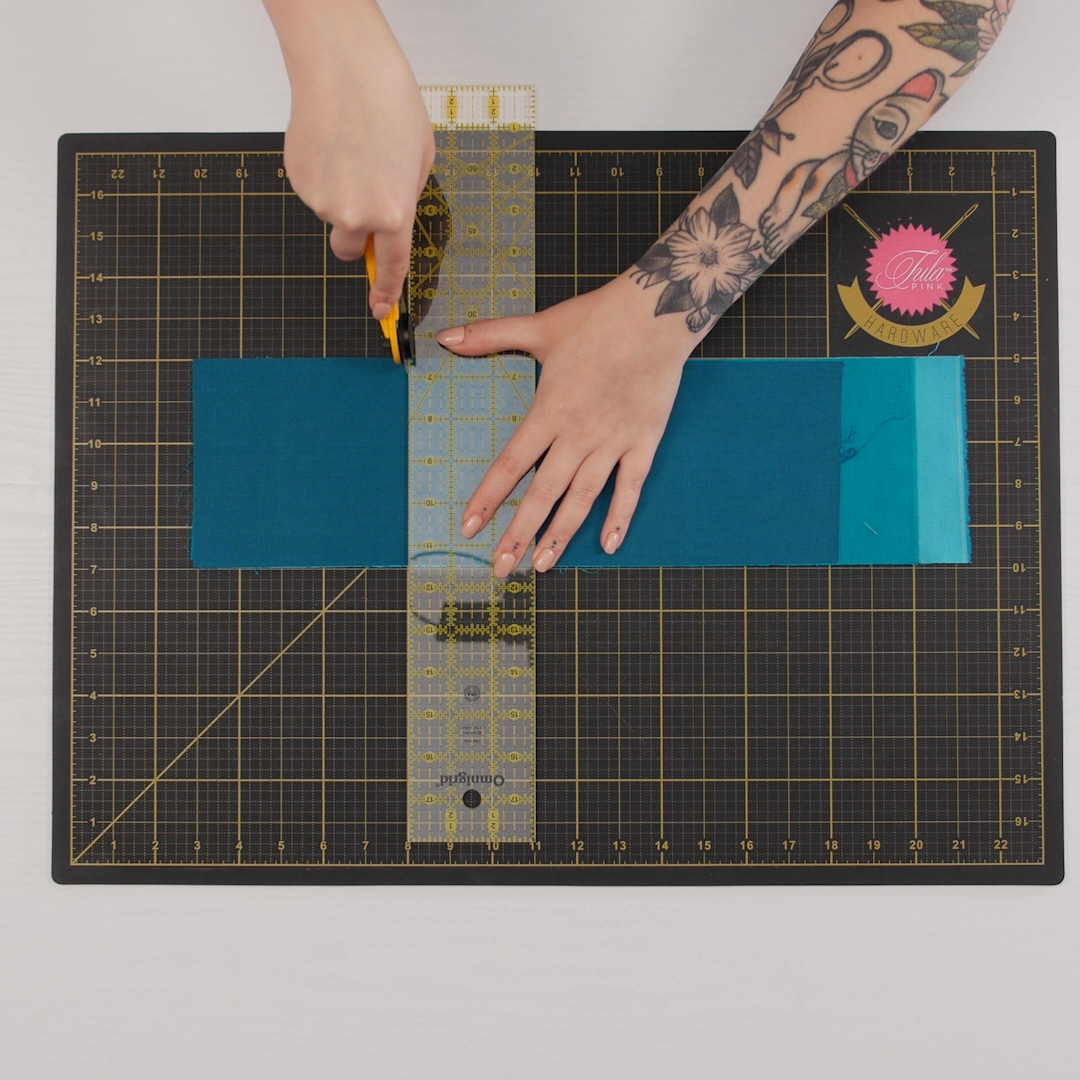
Step 1. Pre-cut fabric
Start by cutting your fabric for the prairie points. Cut 5” strips from your yardage and sub cut those strips into 5” squares.
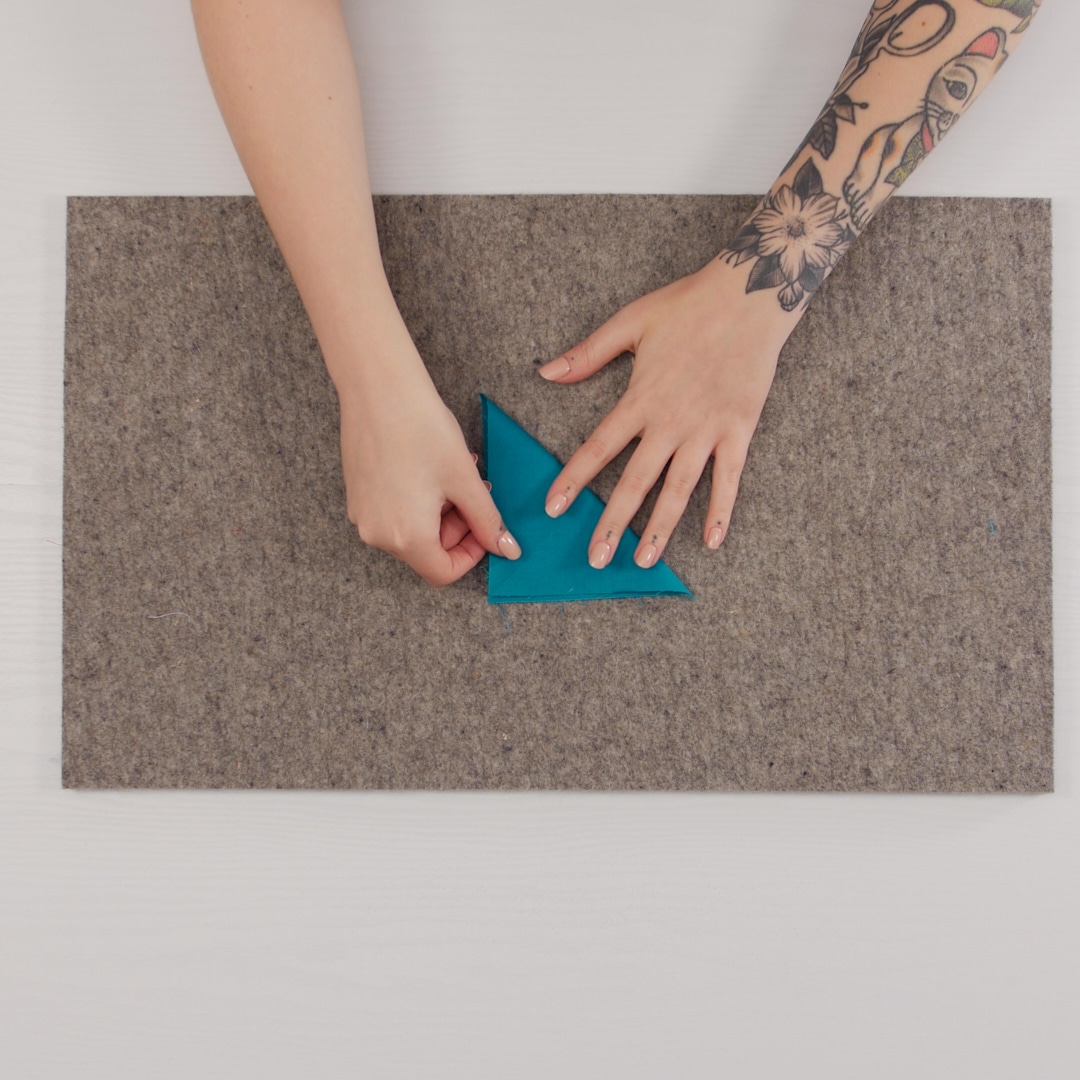
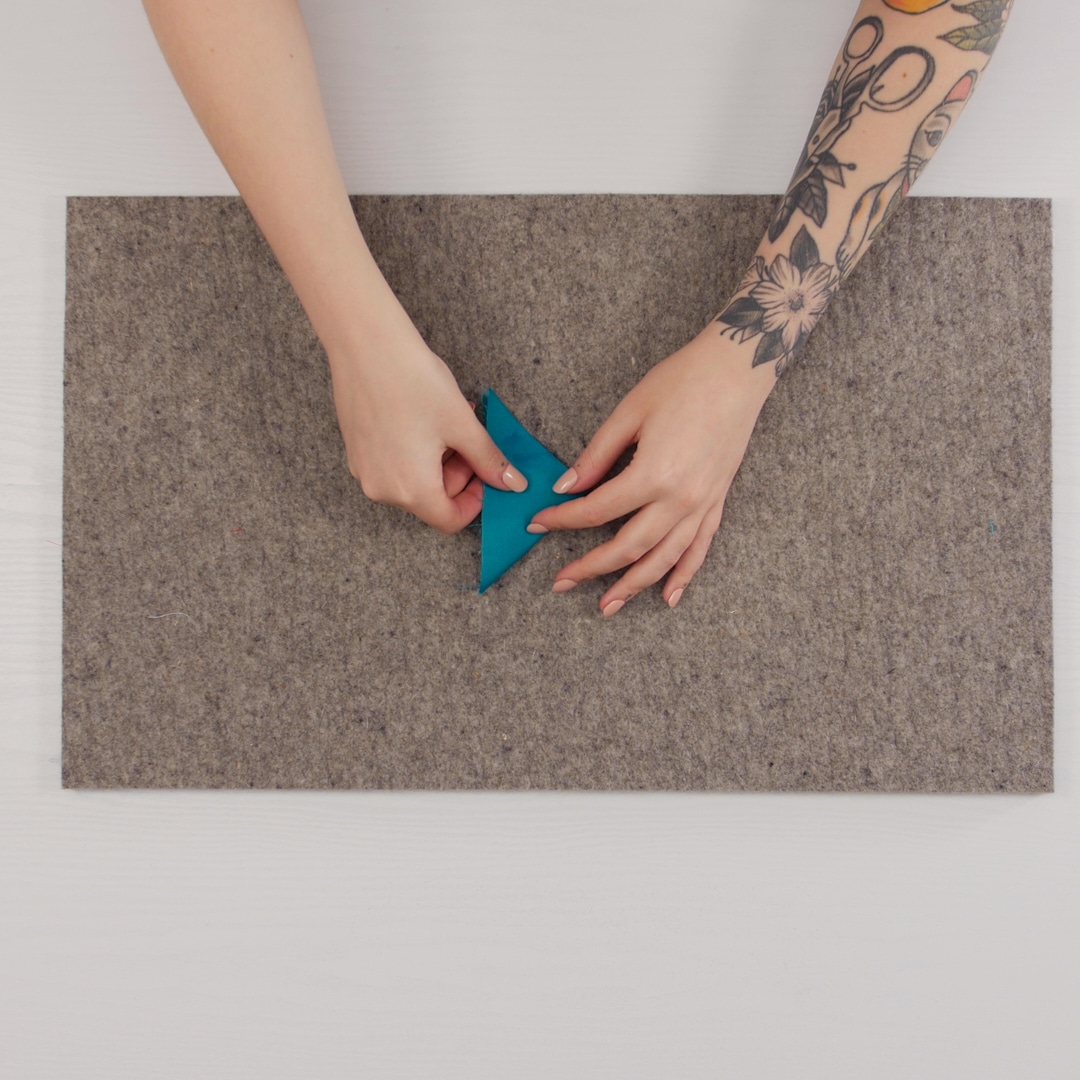
Step 2. Press points
Next, we’ll press them into their signature triangular shape. First, fold the squares in half diagonally with wrong sides together, and press.
After your squares have been pressed diagonally, fold them in half again and press.
As you’re pressing your points, I highly recommend using some form of pressing spray to help the fabric hold its shape. For a softer hold that will just give the fabric a little bit more body, use a product like Flatter or Best Press. I personally prefer Flatter—I prefer the scent choices, the fragrance isn’t as intense, plus it’s eco-friendly and safe for sensitive skin.
If you want a stronger, more crisp hold, try Terial Magic. This stuff is serious business. It’s more than just a pressing spray, it’s actually a liquid fabric stabilizer. It will make your fabric truly crispy while you’re working with it but will wash out cleanly when you’re done.
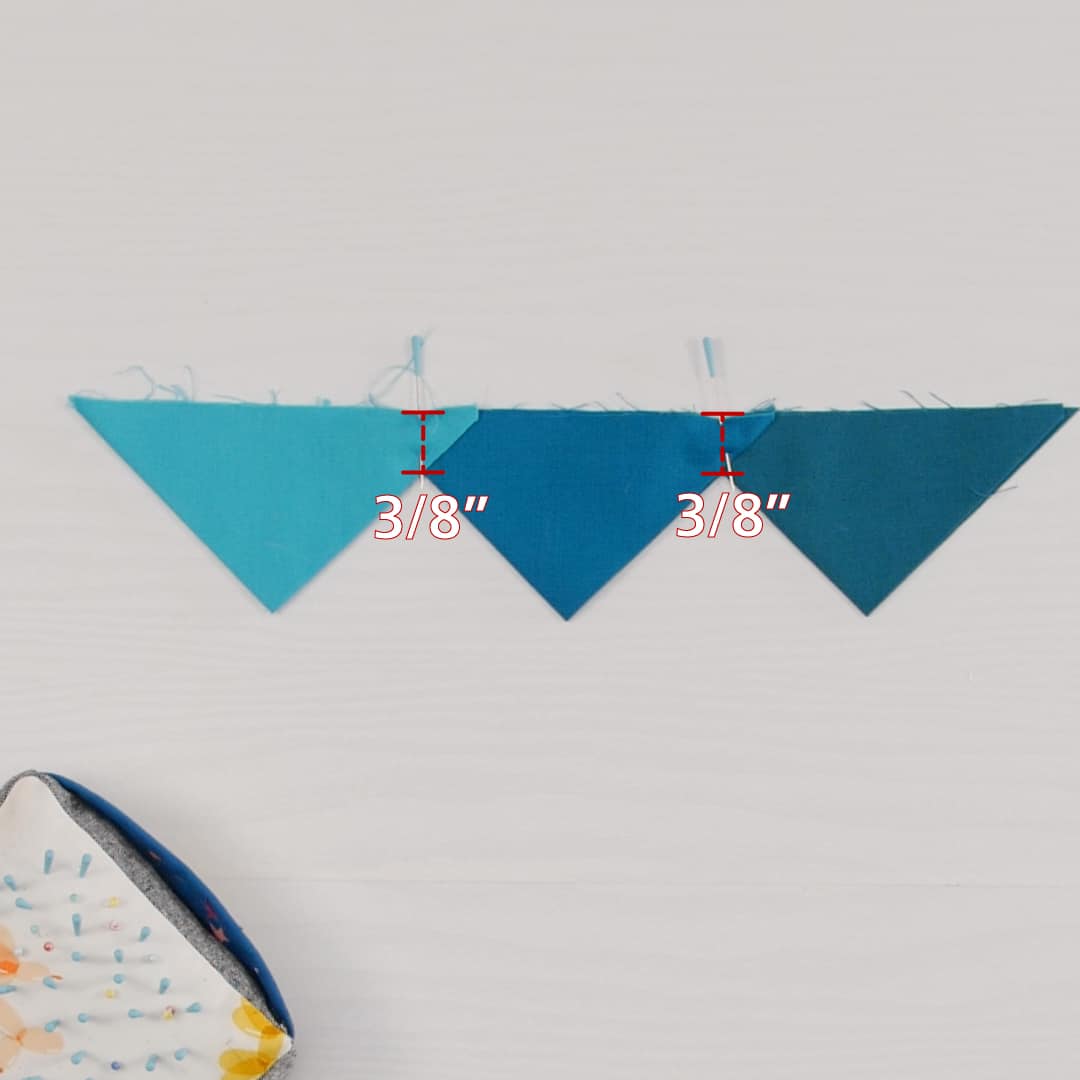
Step 3. Prepare and pin
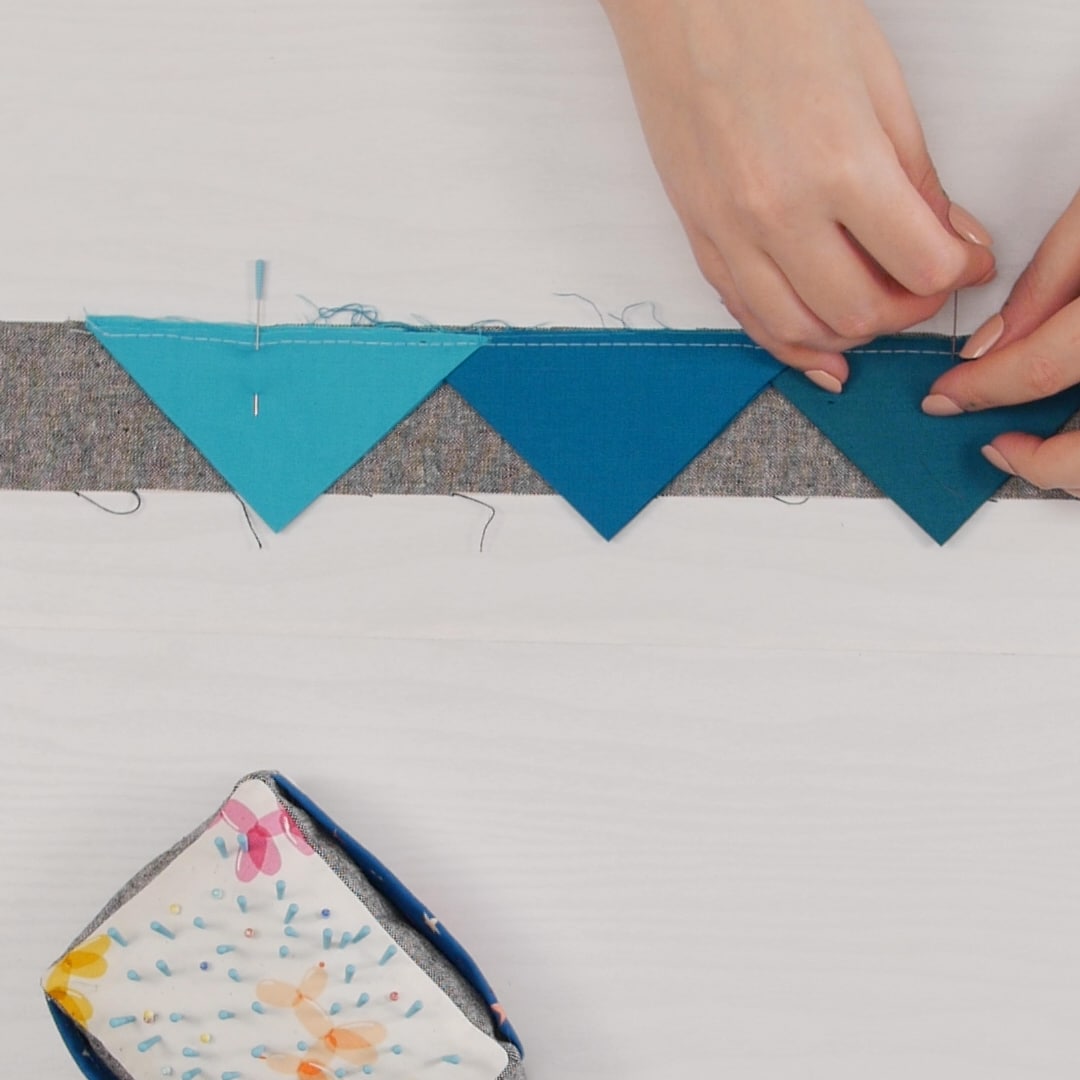
The next step is to line up our row of points. Open one side of one of the triangles and lay the point of the next triangle on top of it, overlapping slightly. The long raw edges should create one long, straight line.
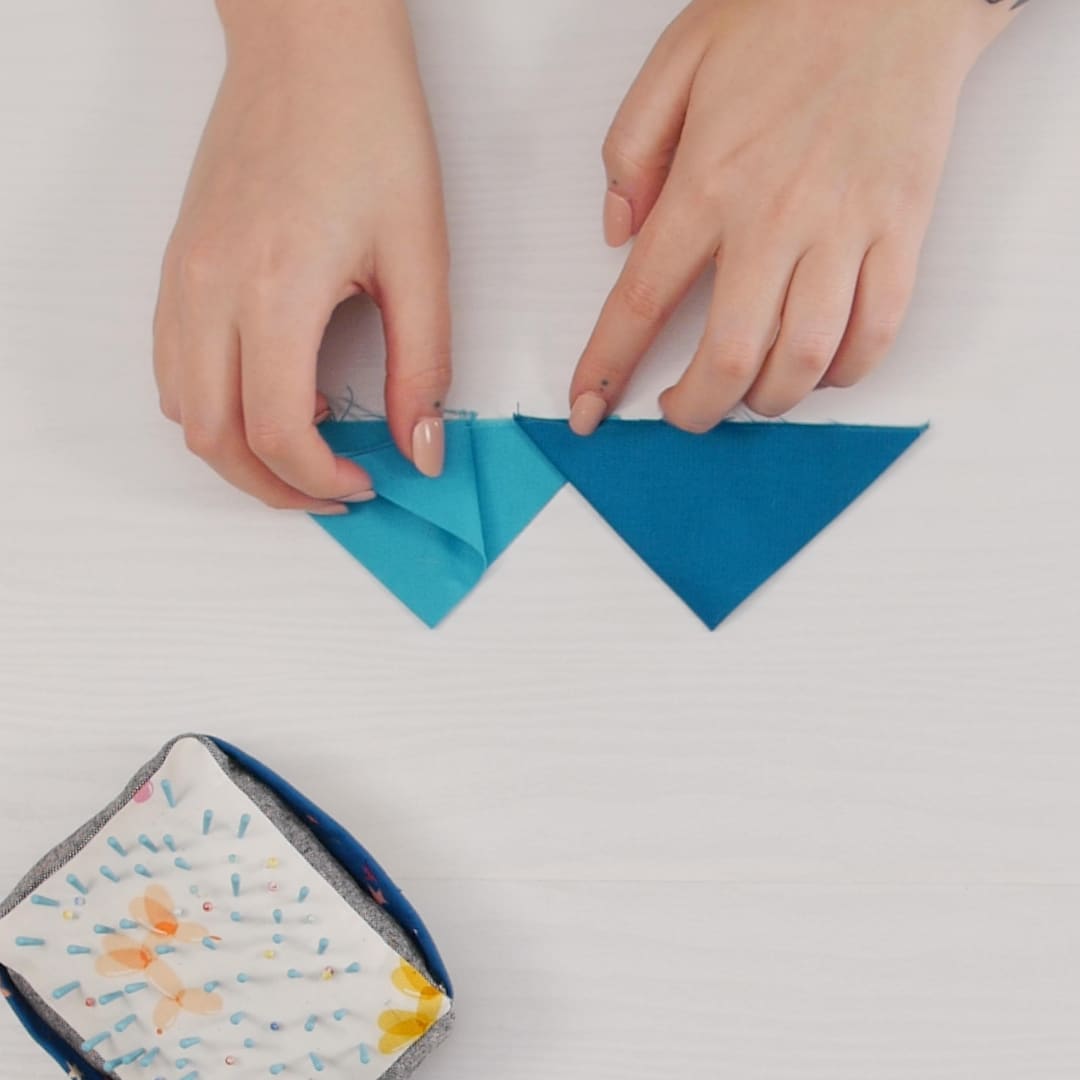
Pin all the layers together. Repeat on the next sequential triangle, opening one side, layering in the next point, and pinning.
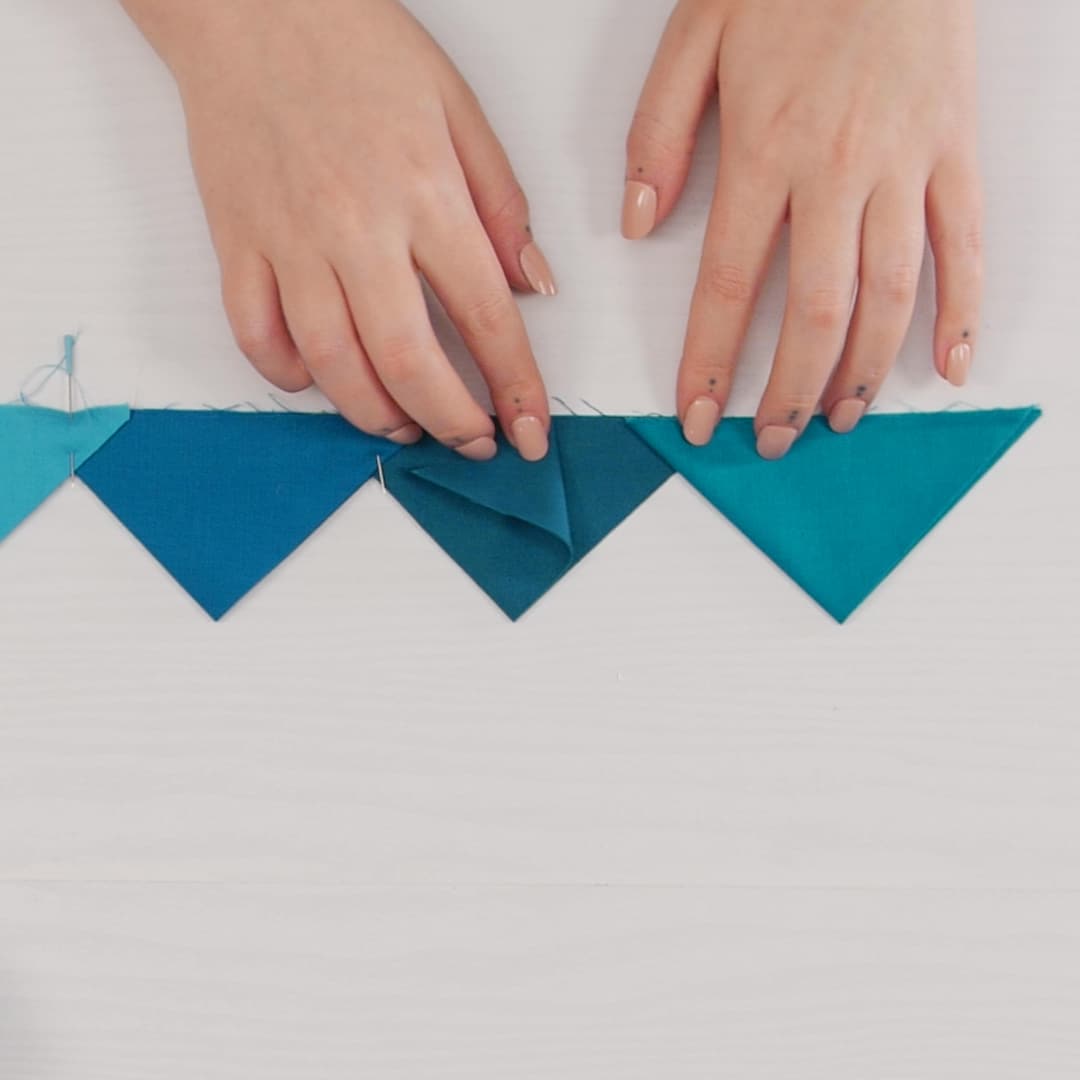
Make sure your points are spaced evenly by measuring the overlap between each of the triangles. It’s up to you how far apart you want them placed (different distances can give different effects, visually) but make sure they’re consistent. I recommend about 3/8” of overlap to have the points sewn into a typical 1/4″ seam.
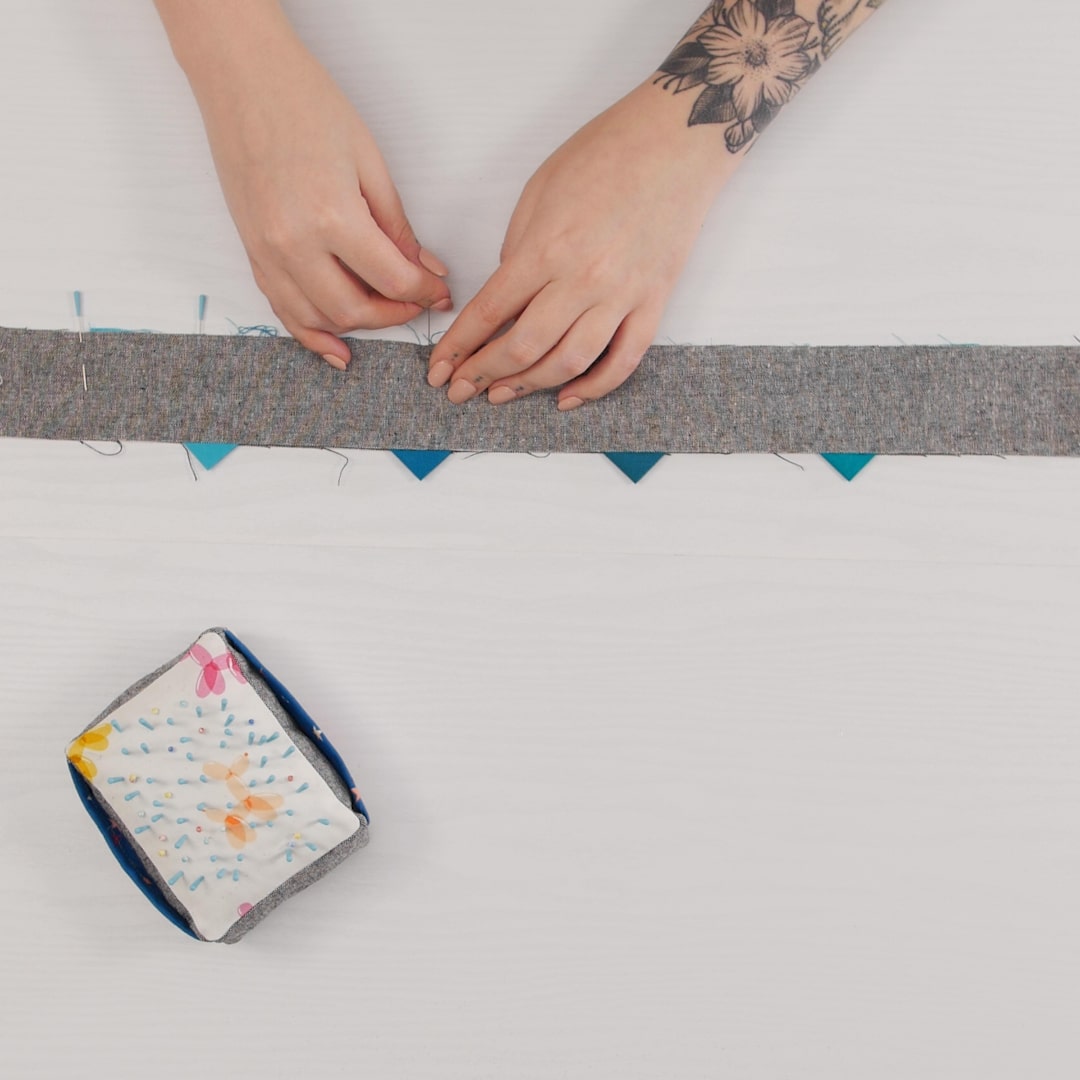
Repeat this process until you have a row of prairie points as long as your desired seam.
Step 4. Baste
To hold all these carefully tucked pieces together, we’ll sew them together with a basting stitch. Start by attaching Patchwork Foot #97D to the machine.
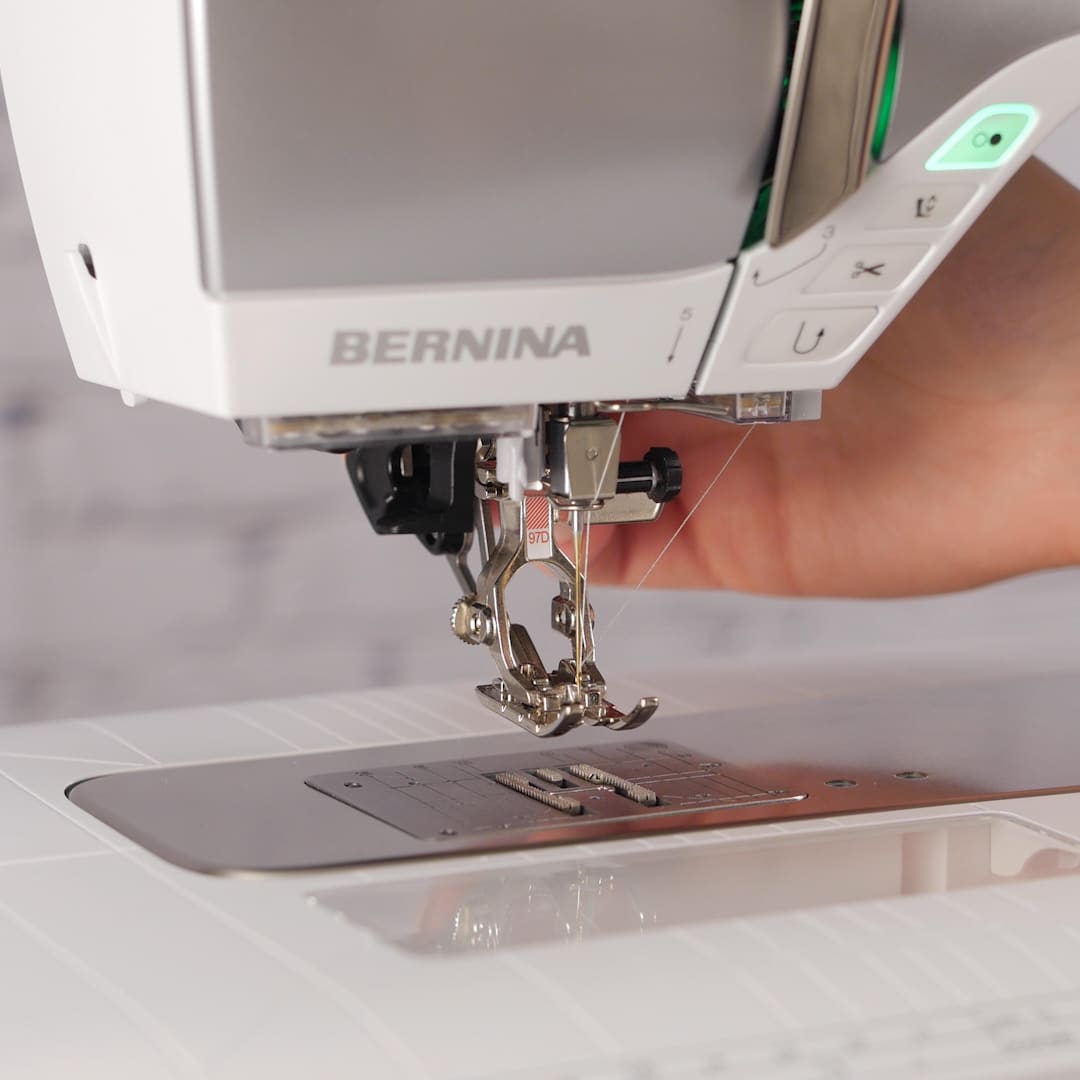
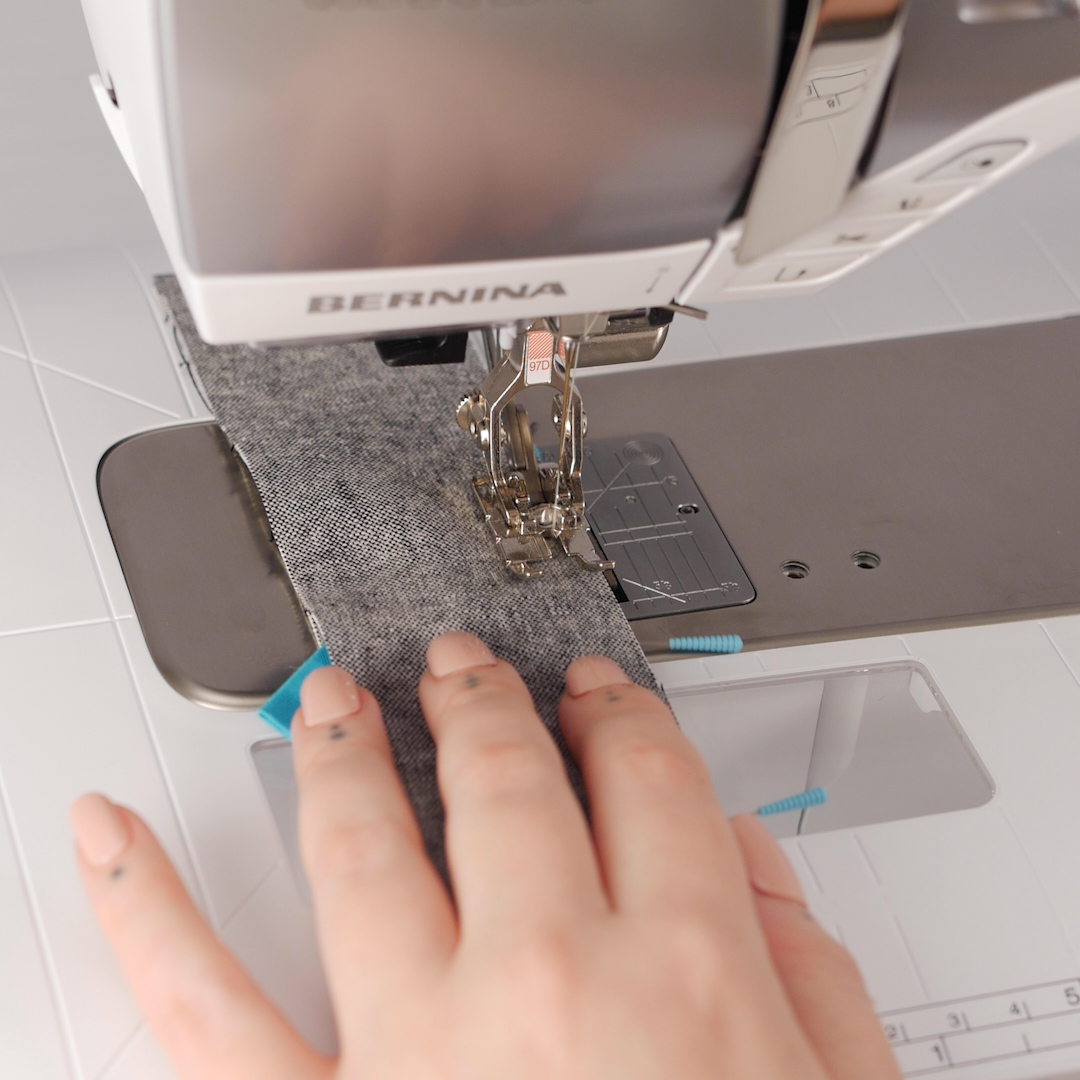
Then, lengthen your straight stitch to 5 mm.

Baste the row of points together with a 1/8” seam allowance. On the #97D foot, a 1/8” is indicated by the notch on the inside of the right toe of the presser foot. Keep the raw edge of the fabric aligned with that and you’ll have a consistent seam allowance. Using an awl or stiletto to keep your fabric in place as it sews can be a huge help.
Your prairie points should now be assembled into one continuous strip.
Step 5. Sew in place
Now we’ll attach them to the project. For the pillow top I created, I simply pieced strings of prairie points between rows of solid fabric and ironed them so they would fall the same direction. In this tutorial, I’ll be showing you this process.
However, if you’d like to add prairie points to your quilts as an edge finish, use the information in this blog paired with my Easy Quilt Facing tutorial. I’ll give you some more notes about that later.
To create this pillow top, I cut 1 1/2″ wide strips of linen for my background fabric and then trimmed those to 18” long.
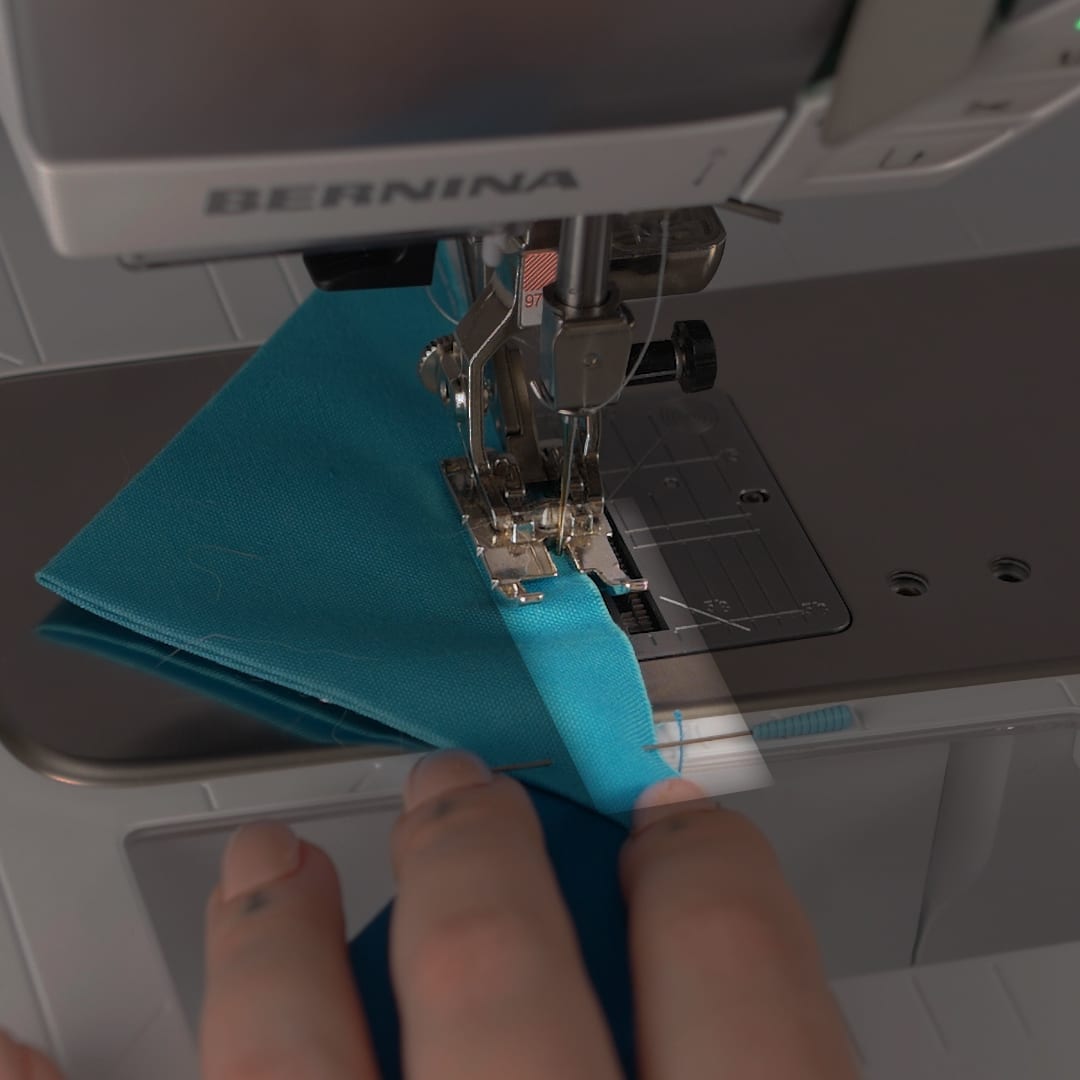
Lay one of the background strips right side up. Align the raw edge of one of the prairie point sections with the long edge of the background strip. Pin in place.
Now place a second background strip right side down on top of the prairie points. Pin all three pieces together.
At the machine, press the “clr” button to return the straight stitch to its default settings.

Sew the three layers together with a 1/4″ seam allowance. Because of the amount of layers we’re stitching together, and their ability to shift around, you may want to adjust your presser foot pressure for this.
With this seam assembled, press the points toward one of the background strips. For the first section, it doesn’t matter which direction you press but for all the pieces after this, it will.
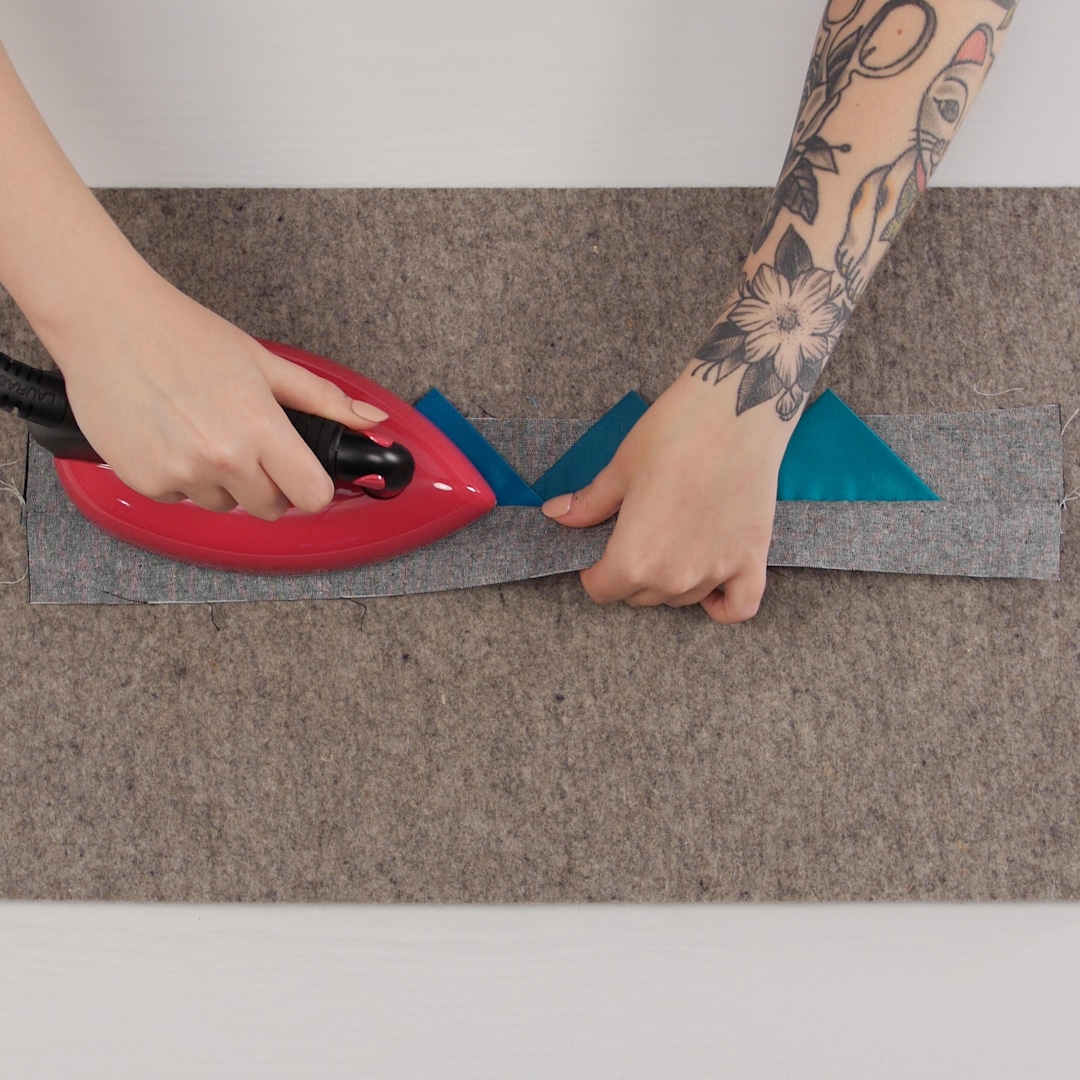
For the remaining rows, lay another section of prairie points onto the already assembled piece and then another strip of the background fabric on top (with the right side down). Repeat the process to pin and stitch together. Then, press the points all in the same direction.
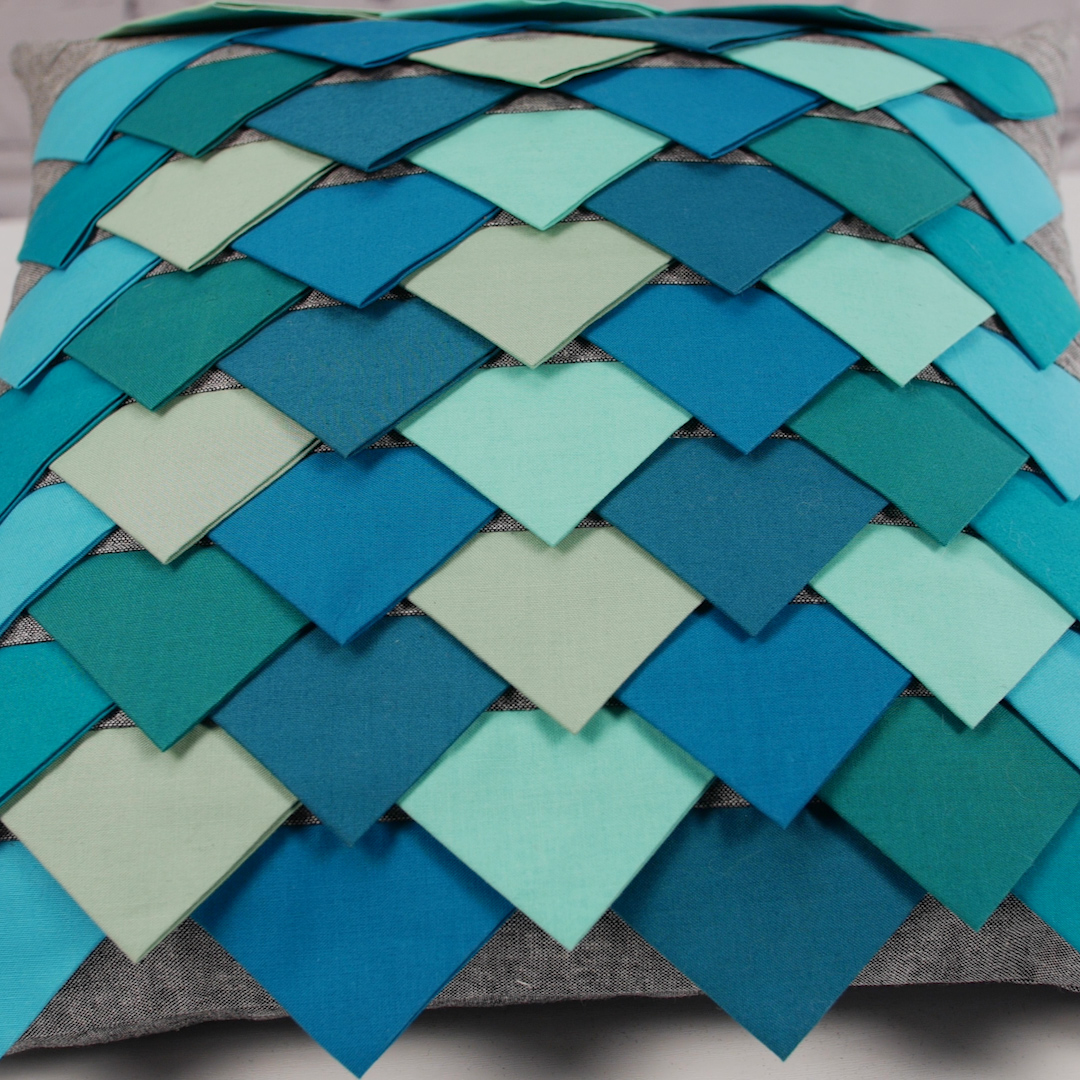
To complete the pillow top, I stitched together 14 rows of prairie points, each separated by one strip of background fabric, and added a 3” wide strip of background fabric to the top and bottom.
Then I created a back to the pillow (I opted for a lapped zipper, but you could do a simple envelope back if that’s more your speed). With the front and back placed right sides together, I did a quick 4-thread overlock stitch on my L 460 around all four sides for a tidy finish.
If you’d like to use prairie points as a quilt finish…
As I mentioned previously, if you wanted to apply prairie points to an edge finish for a quilt, there is a small difference. Rather than sandwiching the points between two strips of a background fabric, you would take your basted strips of points and place them along the edge of your quilt top, with the points pointing in toward the middle of the quilt. You could pin this step but I recommend basting.
Then, follow the previously mentioned quilt facing tutorial to attach the binding strips to the front side of the quilt on top of the prairie points. When the binding is pulled to the back, the points will extend out from the quilt top.
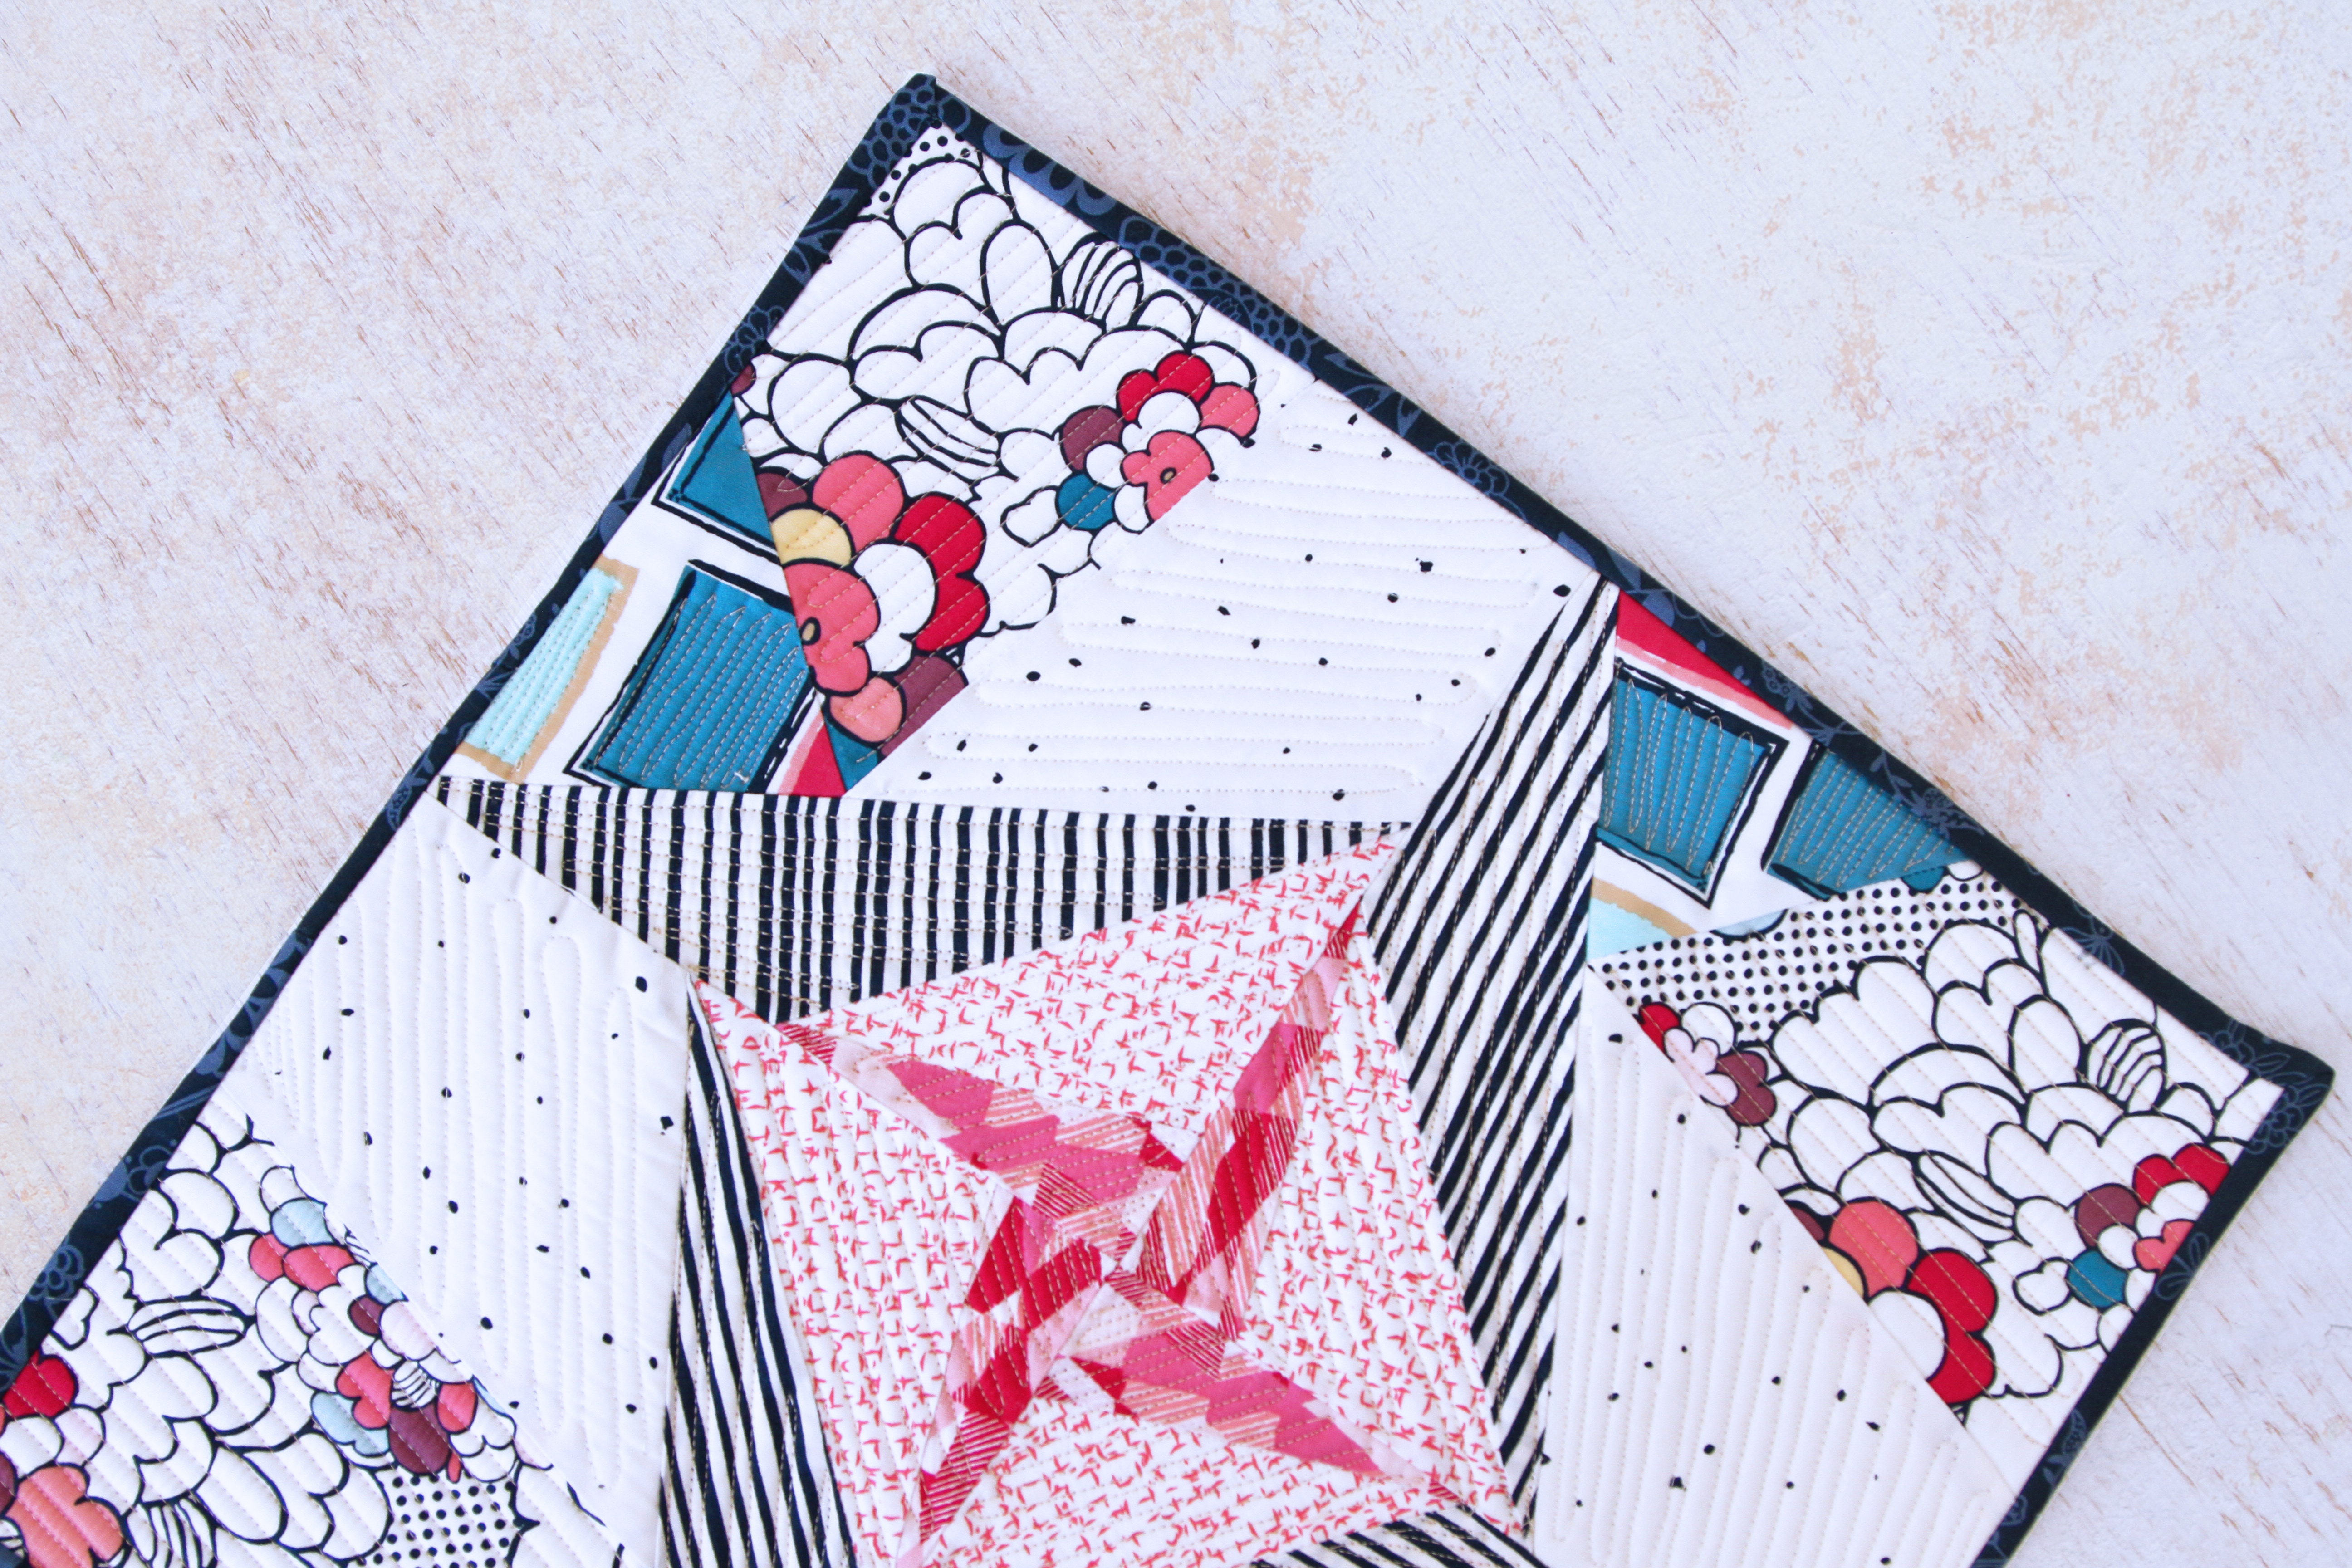
You can see how color placement and staggering the points can put a whole new spin on prairie points. I love the texture and dimension they can give a pillow or wall hanging. Will you try adding prairie points to your next project?