Saving and Sending Designs to Your Embroidery Machine
In this article, we will review the key difference between files that are SAVED on your computer by BERNINA Embroidery Software 8 versus stitch files that are EXPORTED for your machine.
Files That Are SAVED On Your Computer
These files contain all the work that went into creating the embroidery design. They can include the following elements and information (as applicable for any particular design):
- Embroidery objects: e.g. flower petals and center, lettering, lacework, monograms, outlines, etc.
- Includes stitch types, densities, angles, etc.
- Fabric Settings: woven, knit, etc.
- Artwork used to create the design (when applicable).
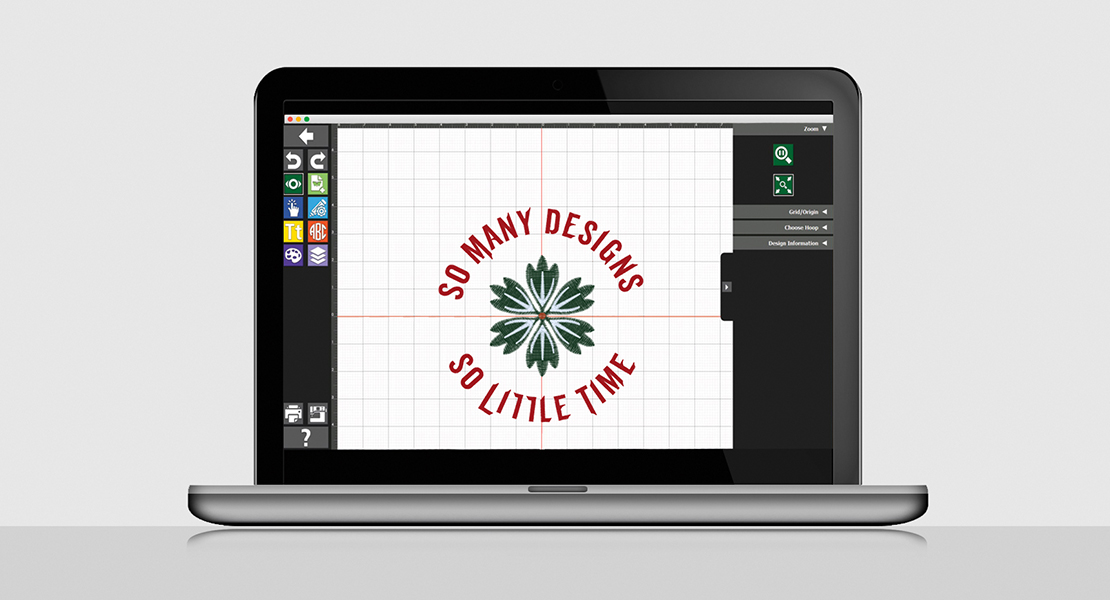
NOTE: The current state of a design results in a stitch “snapshot”, listing all the colors used in the design in a sequence, as well as the stitch (X-Y) coordinates needed to stitch out each color. The Color film to the right of the screen gives a preview of that color sequence.
Basically, all the work that yielded the current embroidery design is stored in a file that is SAVED. These files are referred to as All-in-One files for that reason.
So, when using the File > Save or File > Save As commands, the software will offer to save files in ‘All-in-One’ formats, as seen in the screen sample below.
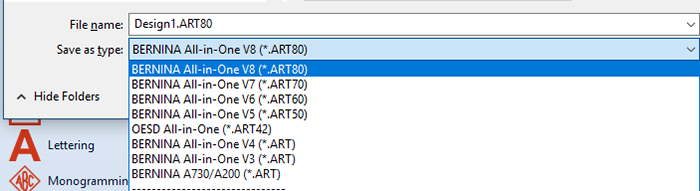
These are the files you will want to reopen when you want to edit a design, as they contain all the information needed to manage the design elements and properties. However, when it’s time to stitch out your design, your embroidery machine doesn’t need all that info. All it needs is the stitching information. This is where the next command comes in handy.
Exporting A Machine File
The File > Export Machine File command will extract the current stitching information only:
- Sequence of colors
- Color names (if supported by the machine format)
- X-Y coordinates for stitches for each color in the sequence
- Starting position of the design in the hoop (if supported by the machine type)
Basically, the Export a Machine File command takes a snapshot of the stitching sequence from the current design and packages it for the selected machine (format).
NOTE: This file will be smaller than a SAVED file and will not contain any of the underlying design info. This means that an exported file will be significantly limited in terms of future editing ability.
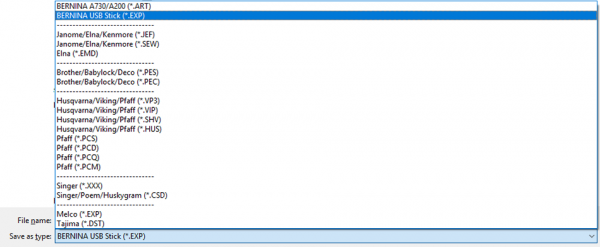
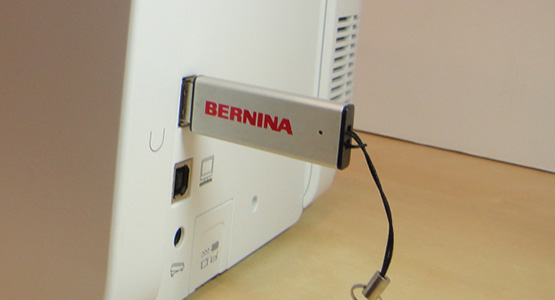
Typically, nowadays we save such files to a USB stick and take the stick to the machine.
In the following screen sample, you can see that the BERNINA USB Stick (*.EXP) file type is selected. This format works best for all BERNINA embroidery machine. The most common home embroidery machine formats are also listed so you can use your BERNINA Embroidery Software 8 with other machine brands.
Practical Tips

- Always SAVE your work (designs) on your computer first, and then Export a Machine File to take to the machine.
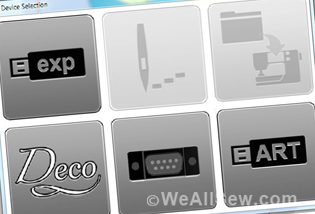
- If you own a BERNINA embroidery machine, you can use the File > Write to Card/Machine command to send a design directly to your machine. When you use this command, additional options open up in a dialog box, letting you select the method of transfer for the machine file.
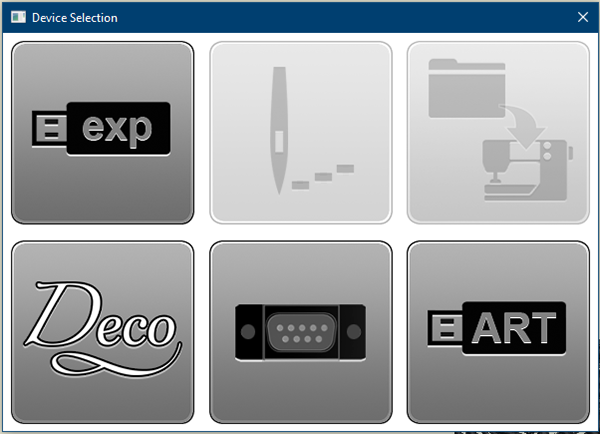
NOTE: One of the options is exporting the file to a USB stick (first on the top left). Other options include:
- Direct transfer to the machine if connected by cable
- Store the design in the machine (e.g. Heart folder on a BERNINA)
- Export the design for a Deco 340
- Direct transfer to an artista 180/185 with Serial port
- Export an artista 200/730 compatible ART file
Bonus TIP: If you own an artista 200 or 730, you can use the Export a Machine File command and use the BERNINA USB Stick (*.EXP) file type to export designs to a USB stick to be taken to your machine. This is especially useful if you don’t plan on editing the design at the machine. The exported EXP (stitching) file, being simpler and smaller, will make it faster to open on your machine and will require less memory than the other option, sending an *.ART file.


What you might also like

11 comments on “Saving and Sending Designs to Your Embroidery Machine”
-
-
This is usually a Windows 10 related issue with configuring serial ports for legacy (aka ‘previous generation’ devices). You can open a support ticket at bernina.com/help for assistance.
-
-
Because of COVID19, I have discovered more time to invest in my passion and craft. I am glad there is a forum which feeds my need as I personally own 3 eight series machines, an old Bernina 930, a 570 QE and quilt motion plus for the long arm with the 820 in it. I finally have the time to open those WE ALL SEW emails that I earmark for later and never get to. Thanks for being there.
-
I cannot transfer designs to a usb that will work on my Deco. The USB says they are there, but machine won’t find them.
-
I am also having the same type of issue. Previously, never had any problems when exporting machine file to USB in a .PES format when using Designer Plus. The design works ok when saving to same USB for Bernina using Write to Machine. Now I’m having a problem when using Export Machine File. It exports, shows on the USB, but other machine and other PES software does not find or see it. I have saved it to the computer, noting the specific format, machine type and hoop. Then exported. It’s not showing when opened by other software or machine. Any suggestions are appreciated!
-
I recommend you open a support ticket on bernina.com/help to get assistance with troubleshooting this issue.
-
-
Is there a way to use Cutworks on an Artista 200 embroidery machine? Which package with minimal expense works? Thank you.
-
I have kept a computer with Windows 7 to run my Bernina software version 6. I upgraded to 8.2 and now my designs on my usb stick are not recognized. I have not found any instructions to upgrade to Windows 10 – but am wondering if that is the issue. I can create designs but nothing will load on any of the USB sticks (small or large capacity, new or used). So what is the official word on this – does version 8 require windows 10? Newer usb sticks? Magic wand?
-
There should be no issue for you to use existing USB sticks with either versions of your embroidery software. I suggest you open a software support ticket at http://www.bernina.com/help.
-
Leave a Reply
You must be logged in to post a comment.

On my third generation of Bernina machines with embroidery. On my Artistas (185 and 730), I transferred files to my machine via a cable. My V8 software won’t recognize my 765 when connected by cable. Works fine with USB stick. Any ideas?