Rulerwork Quilting
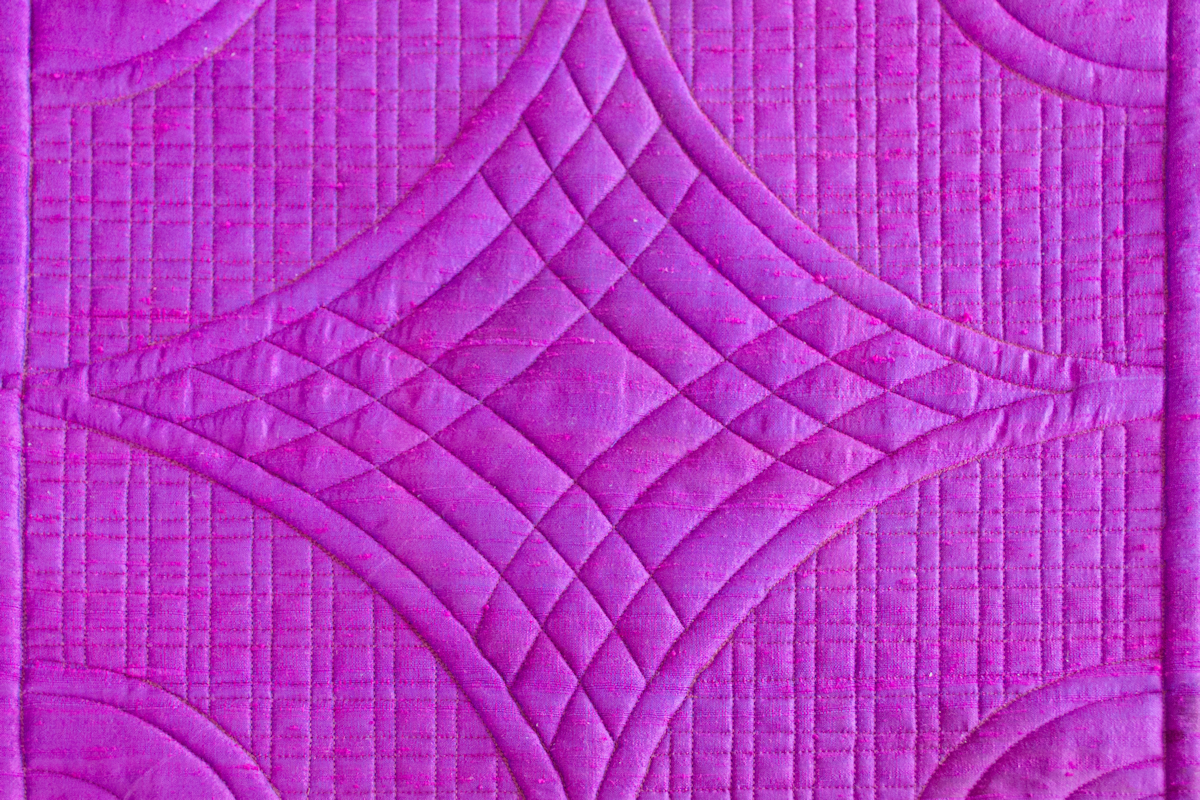
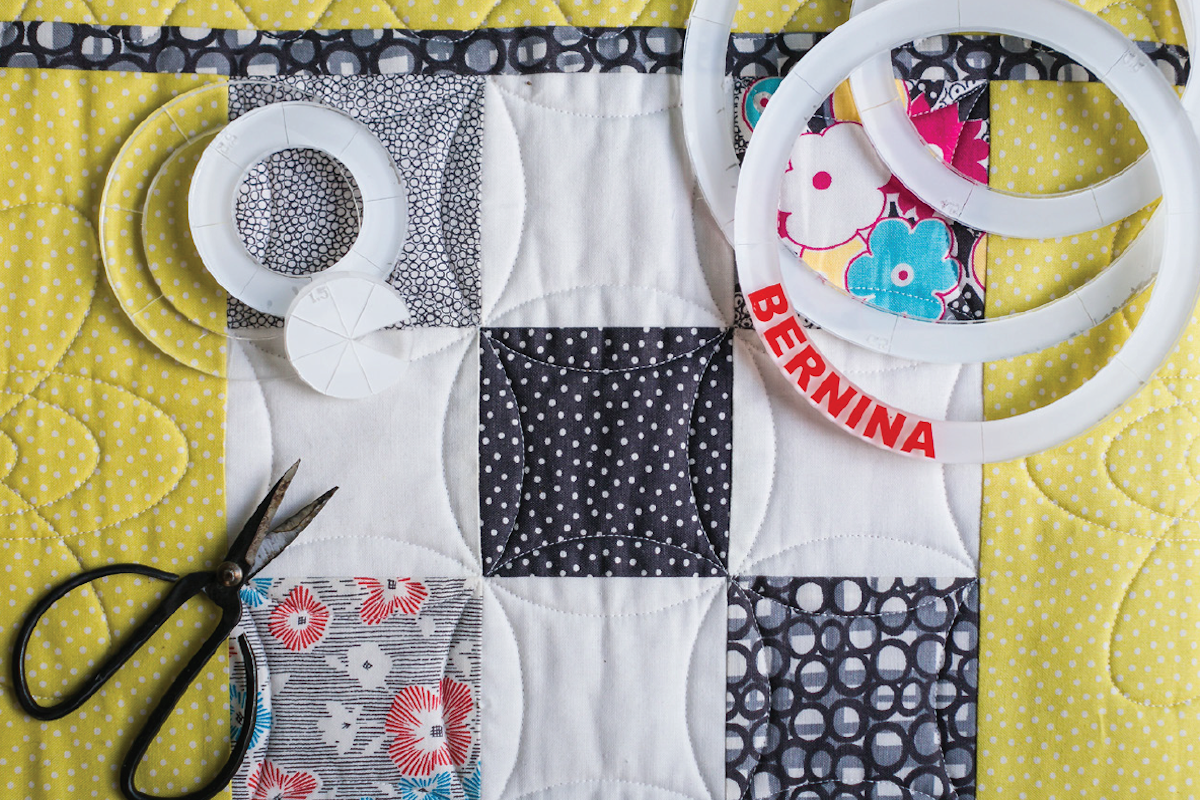
What do you get when you combine free-motion stitching with rulers? A beautiful style of quilting made up of precisely shaped patterns designed to fit the space you are quilting. Straight and curved rulers are used in a variety of ways to form patterns such as diamonds, bricks and piano keys as well as clam shells, spirographs, and scalloped motifs. Originally a longarm technique, you can now do rulerwork quilting on your home sewing machine. The ruler is placed against the presser foot and the foot follows the edge as the needle stitches. The ruler is then repositioned, so the stitches form the desired patterns.
Free Goodies!
This post is loaded with free goodies! You get an eBook, a pattern, and loads of videos to show you exactly how to use Adjustable Ruler Foot #72 for beautiful quilting techniques. The first one is the eBook by BERNINA Educator, Nina, and you can click here to download it. It walks you through the ruler quilting process including terminology, machine setup, preparation and tools, and includes table runner instructions so you can practice. The rest of the goodies are at the end of the post, so keep reading!
Adjustable Ruler Foot #72
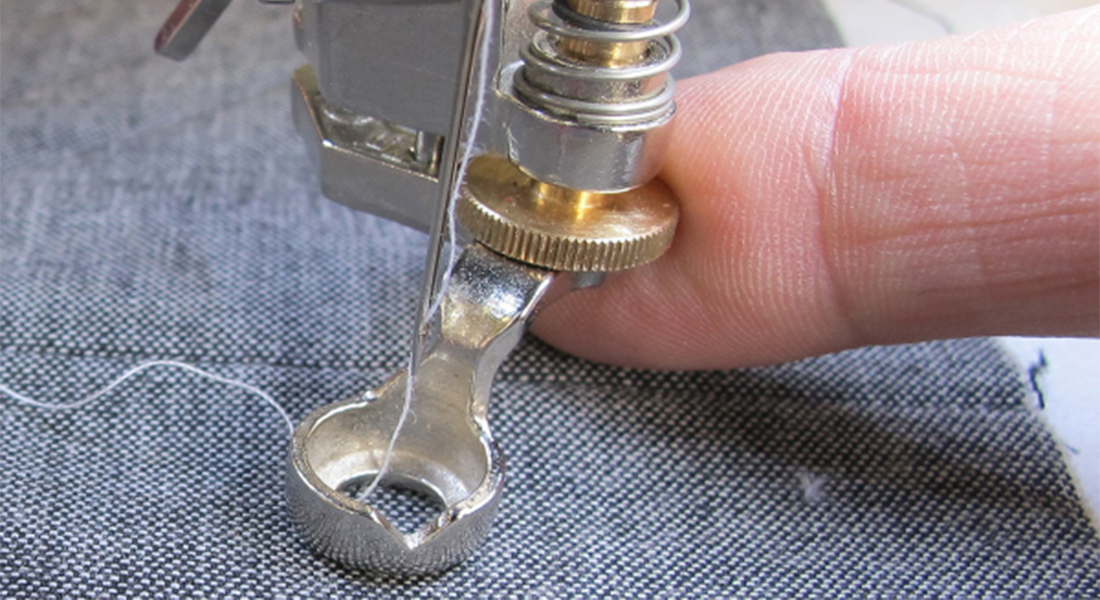
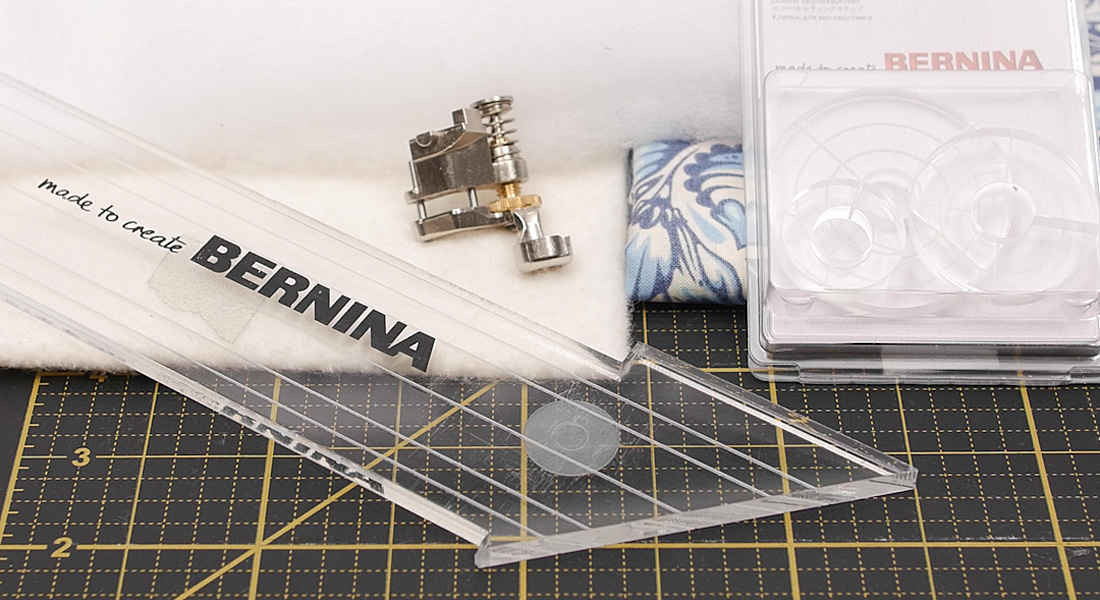
There is a special presser foot for rulerwork. Adjustable Ruler Foot #72 is unique in that its sole is ¼” thick. Known as the “fence”, this thick sole keeps the ruler from sliding over or under the foot as you stitch. Foot #72 has a height adjustment dial so you may adjust it to accommodate different thicknesses of batting. The sole should sit just above the surface of the quilt, leaving enough room to move the fabric under it.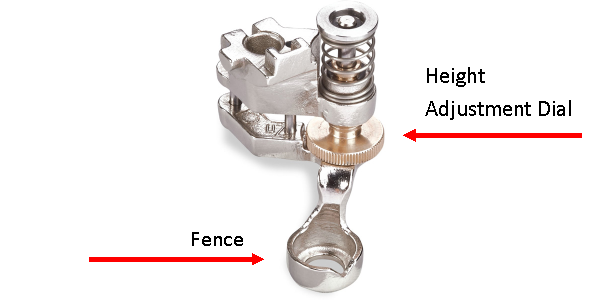
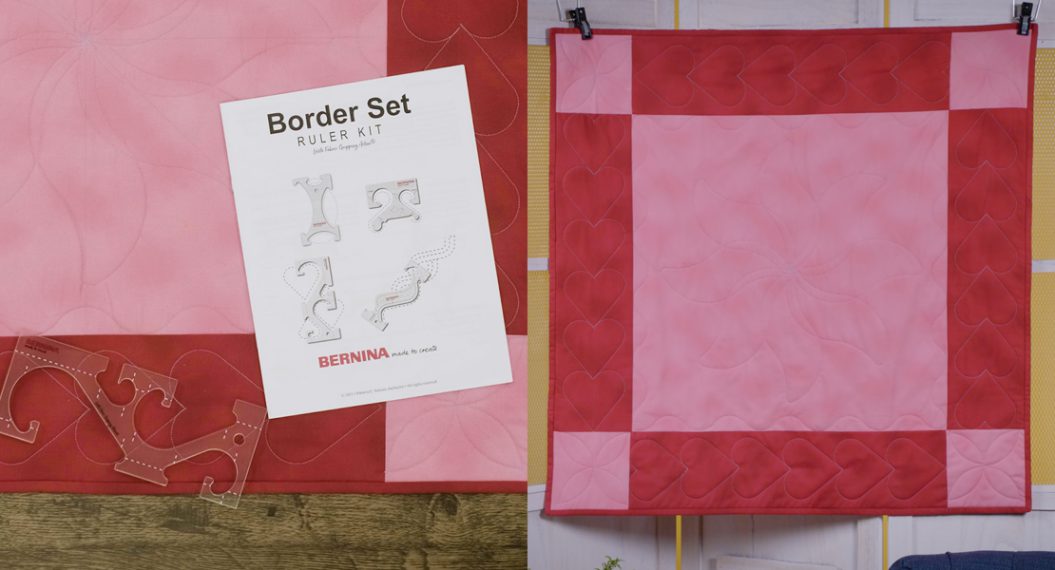
Rulerwork Rulers
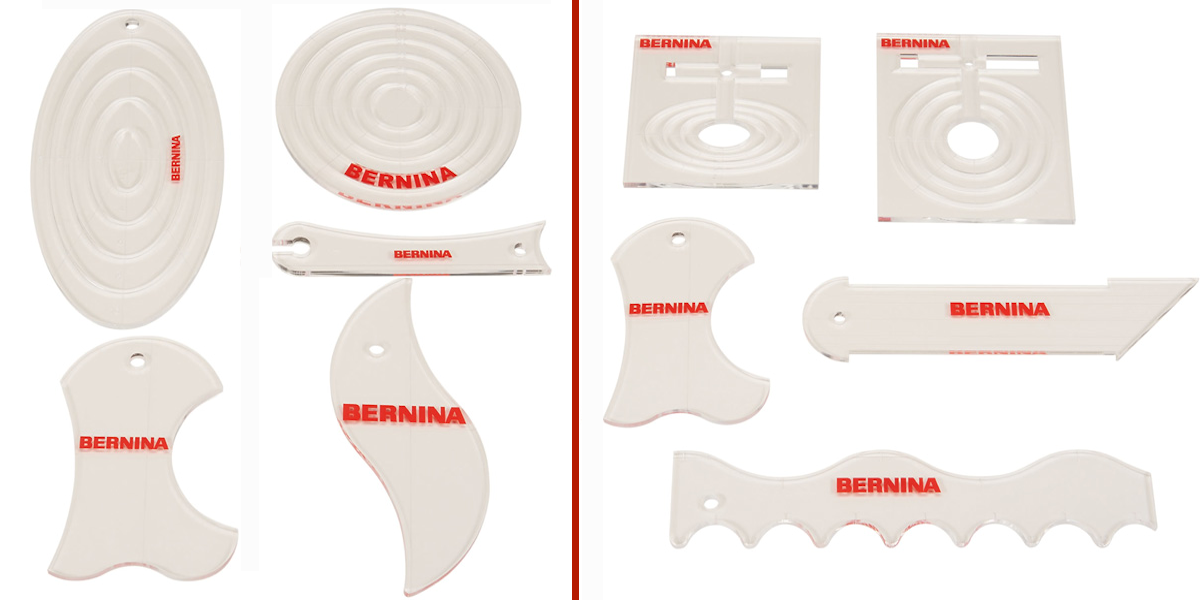
Rulerwork rulers are also ¼” thick so they match the foot. Typical rotary cutting rulers are not acceptable for this type of quilting technique because they may easily slide under the foot, causing a broken needle and the possibility of machine damage. BERNINA has two ruler sets that offer a variety of templates for stitching straight lines, curves and shapes in multiple sizes. The set on the left includes Nested Ovals, Nested Circles, Mini 4-in-1, S-Shape, and Starter Tool. The set on the right has a Mini Line Tool, Squiggle Template, Nested mini Ovals, Nested Mini Circles, and Mini 4-in-1.
Machine Set-Up
Rulerwork requires a similar machine set-up as for any free-motion quilting: Straight stitch, Center needle position, Straight stitch needle plate, and the Needle down function engaged. You will also need Adjustable Ruler Foot #72, rulerwork rulers to stitch the patterns of your choice and your prepared quilt or fabric (more about that later). I do rulerwork on my BERNINA 790 PLUS, but it can be stitched on any BERNINA model.
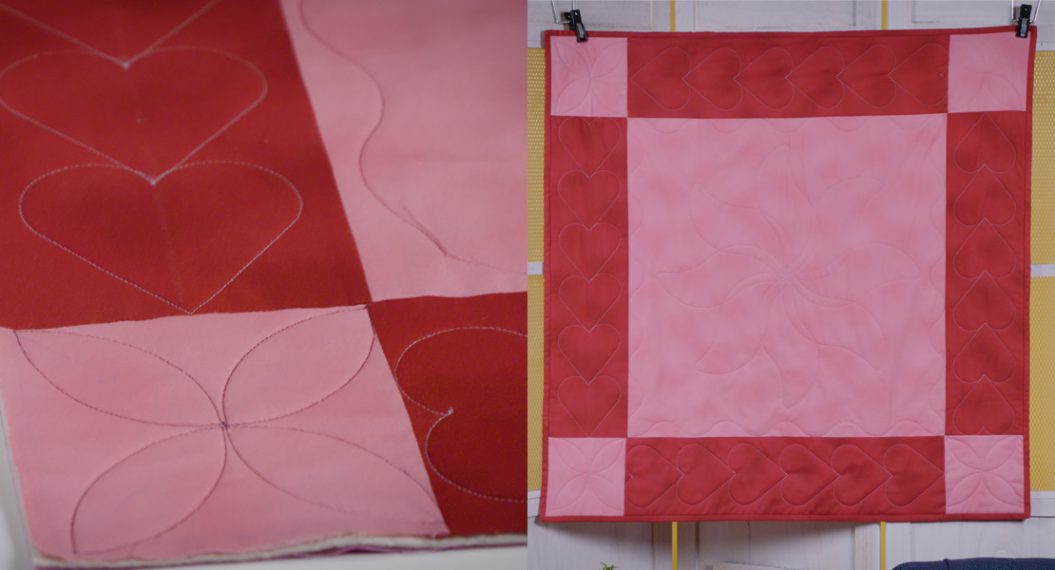
Stitching a Pattern
Each pattern stitched on a quilt has guidelines and specific points that need to be marked on the fabric. Use a water-soluble marker because all of the markings will be removed after the stitching is complete. For markings needed for specific patterns, keep reading – there’s a great downloadable guide waiting for you.
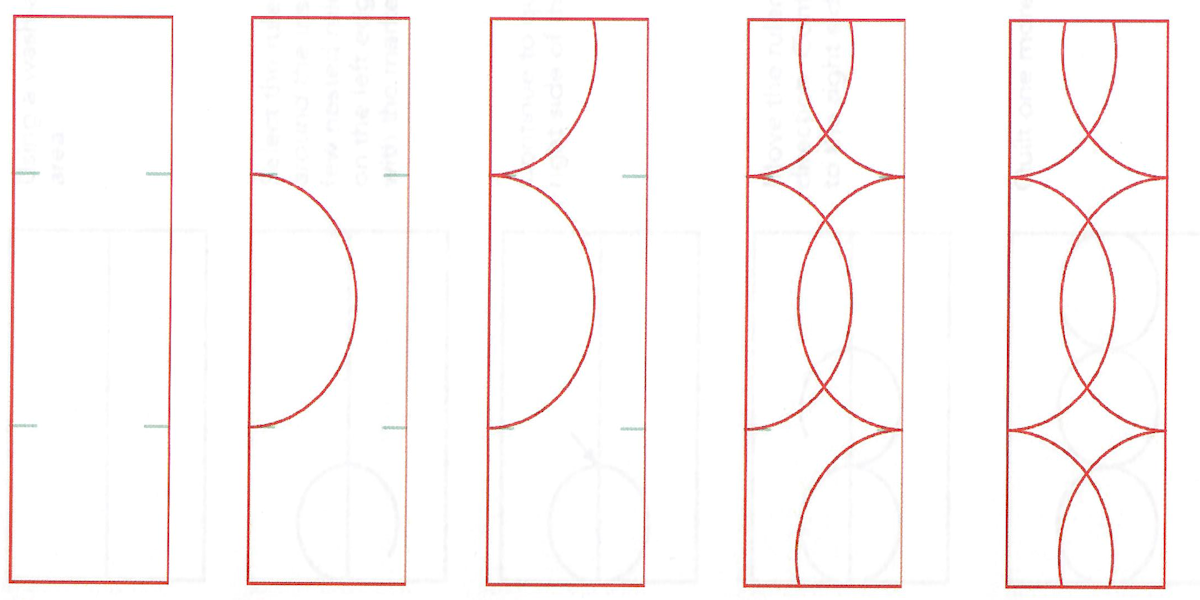
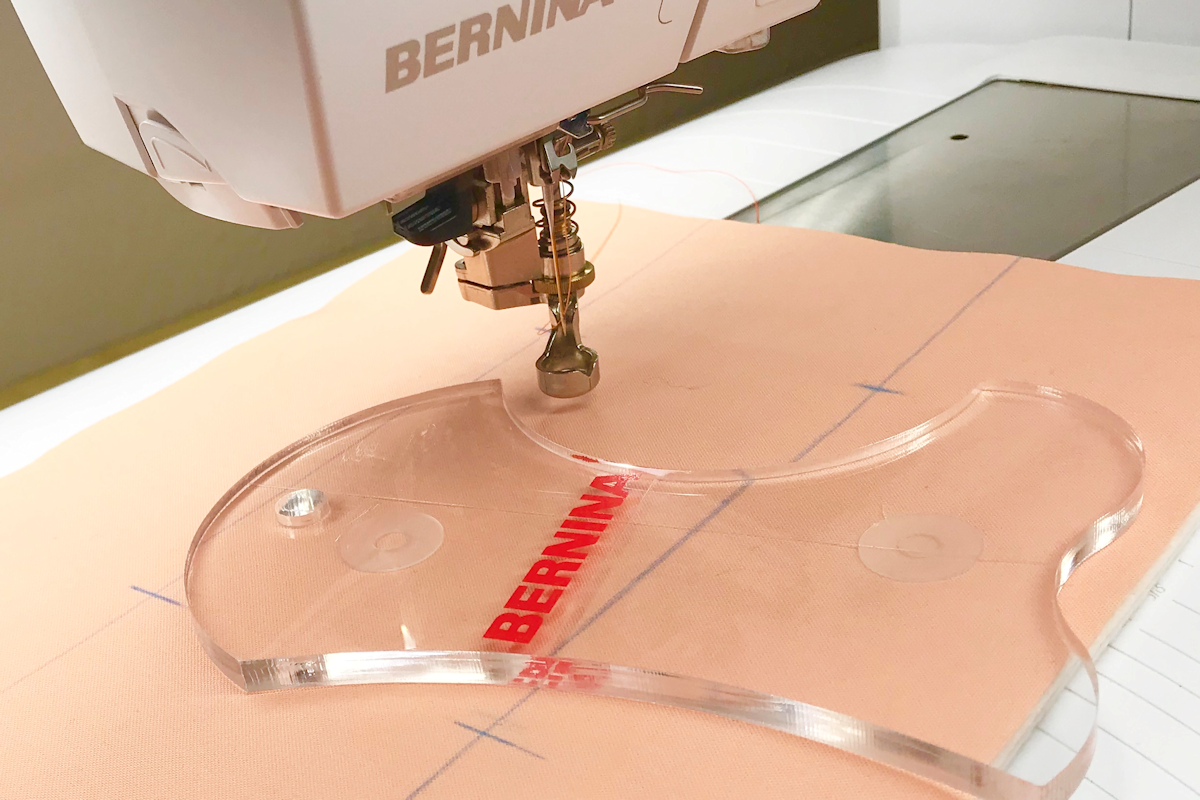
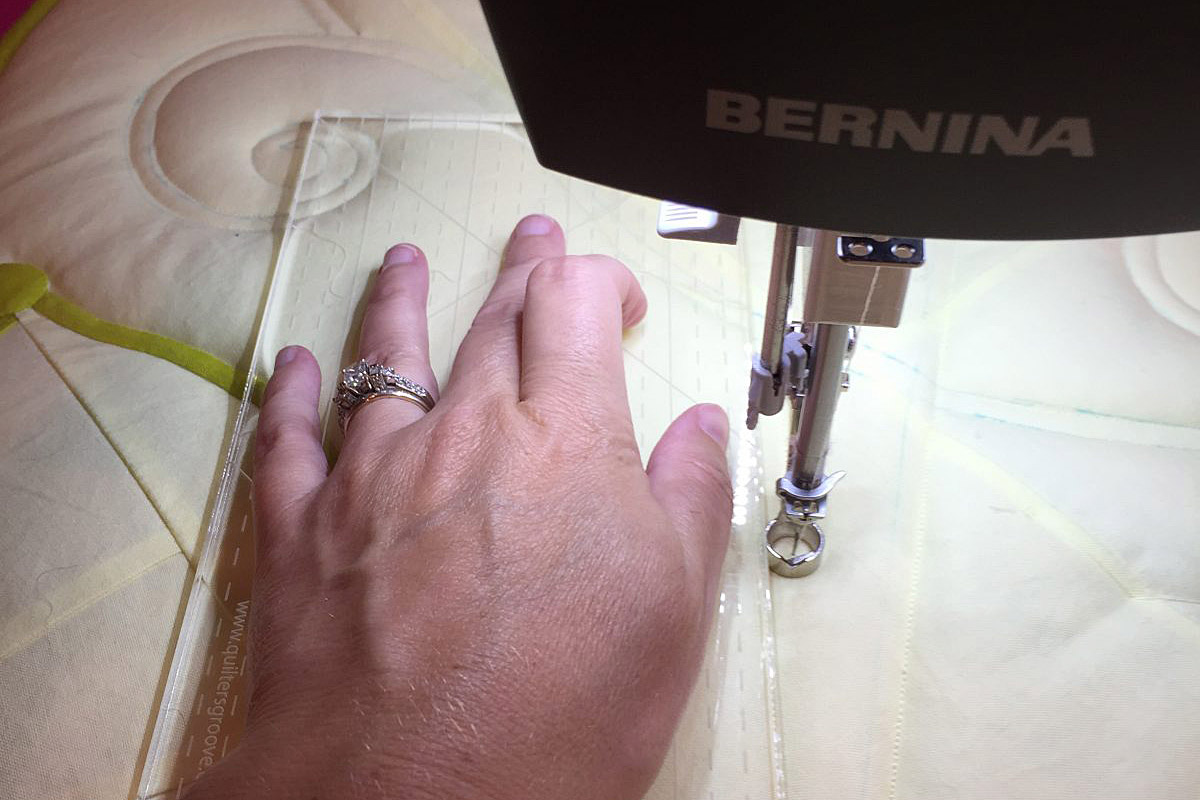
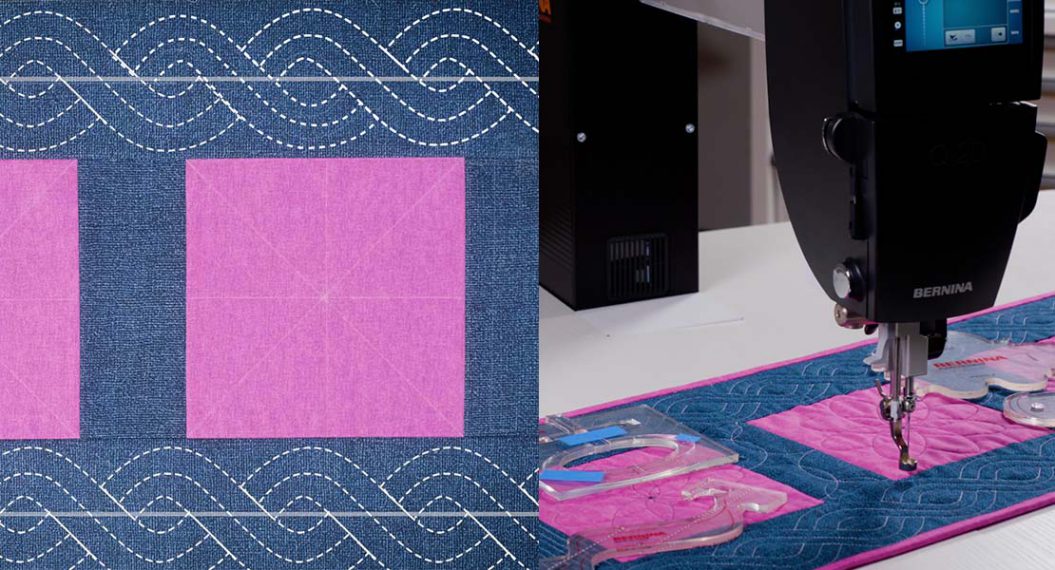
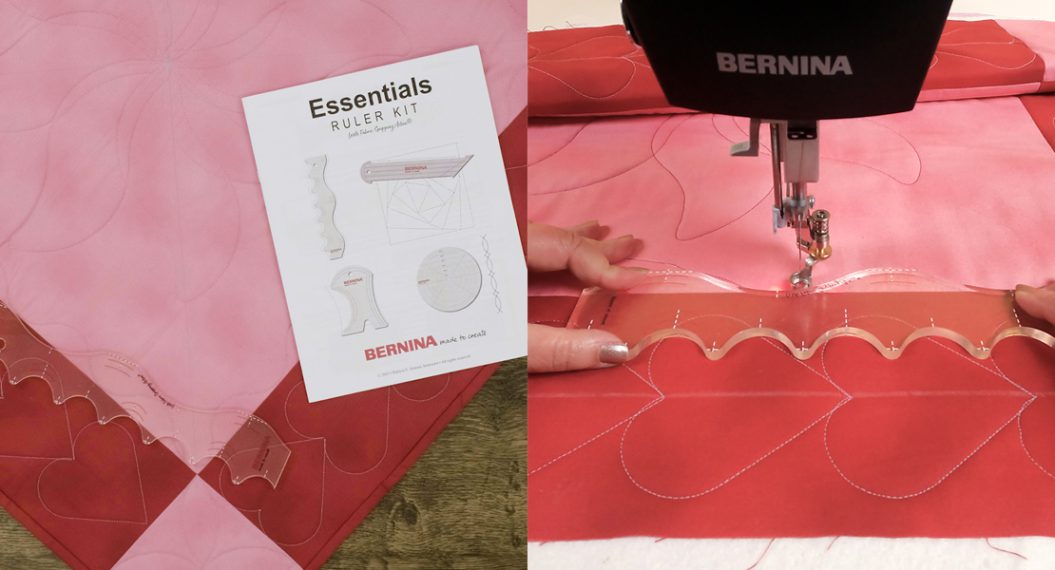
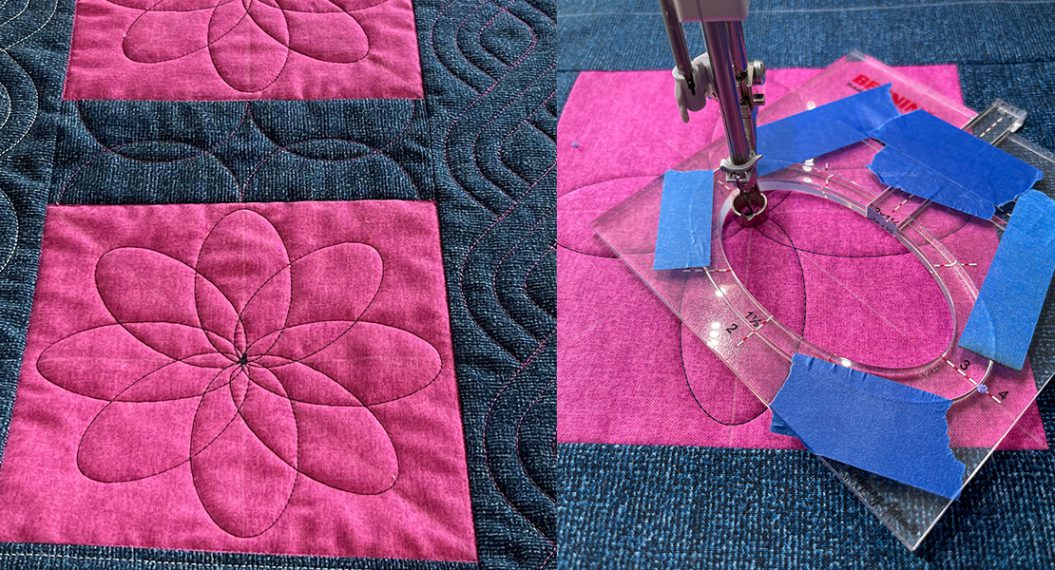
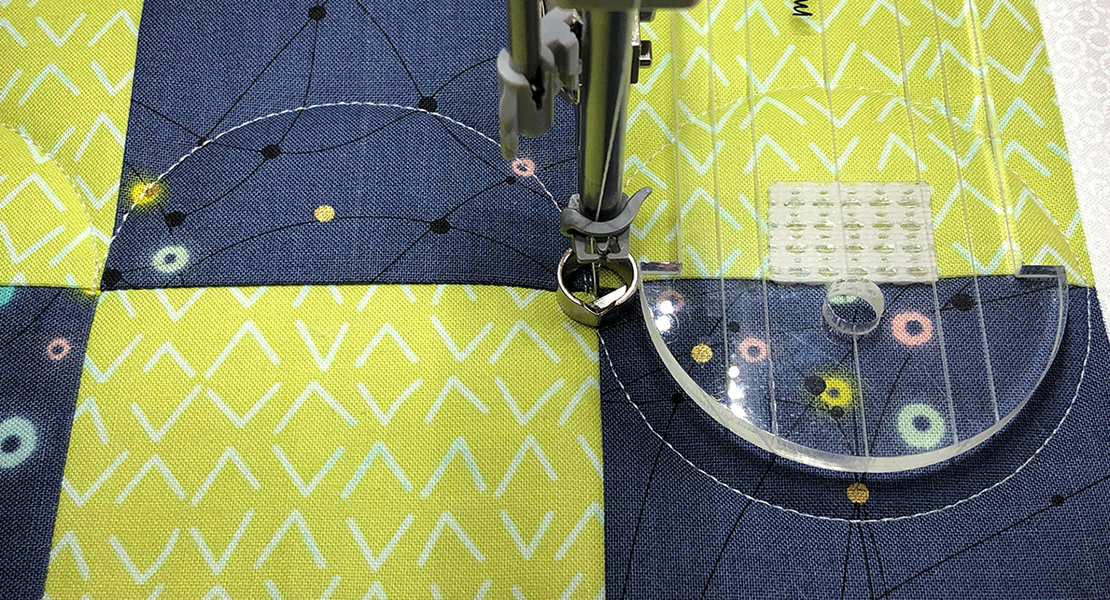
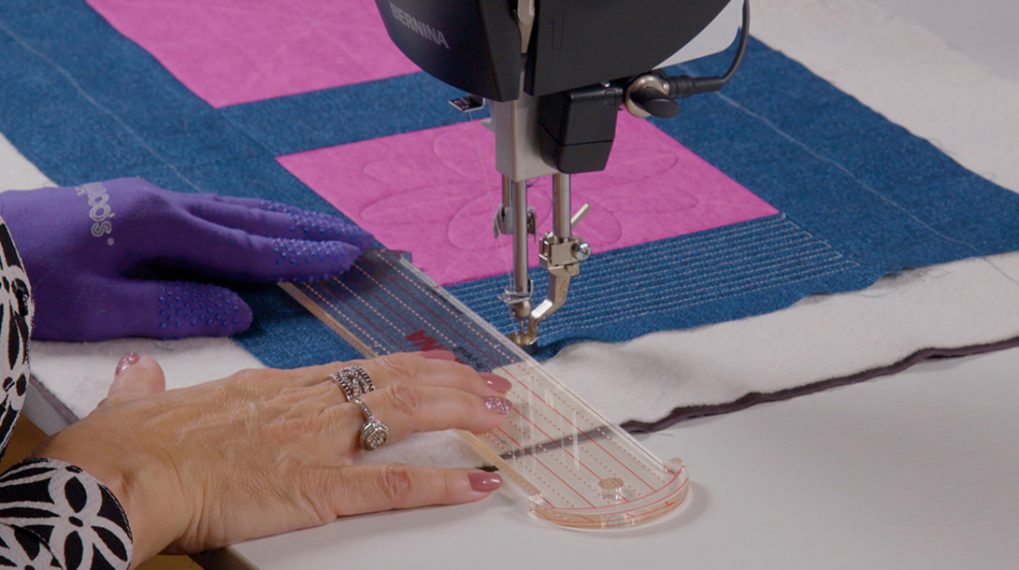
Make a quilt sandwich of your top and backing with batting between them, using your favorite method of basting. To start stitching rulerwork, place the fabric under the needle and lower the foot. Before starting to stitch, pull the bobbin thread up to the top of the fabric and take a few small stitches to secure the thread. Slide the edge of the ruler up to the foot.
Move the fabric to sew along the edge of the ruler. Hold the ruler with your fingertips, applying enough pressure to gently guide the fabric. When near the end, stop the machine. Slide the ruler to the next position so you can continue with the desired pattern.
How to Learn Rulerwork
If you are new to rulerwork, here’s a 2-part plan to understanding and practicing this fun technique. First, click here to see a 6-minute video that gives you an overview of the rulerwork process. It’s a great introduction that explains the concept and shows you the process in a simple way.
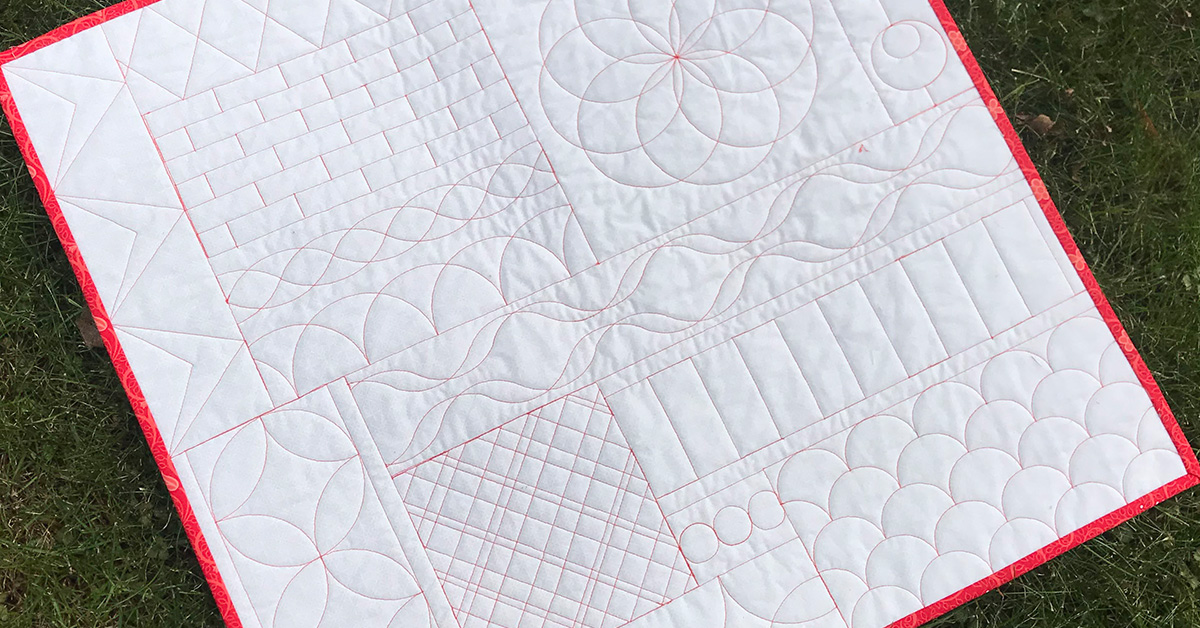
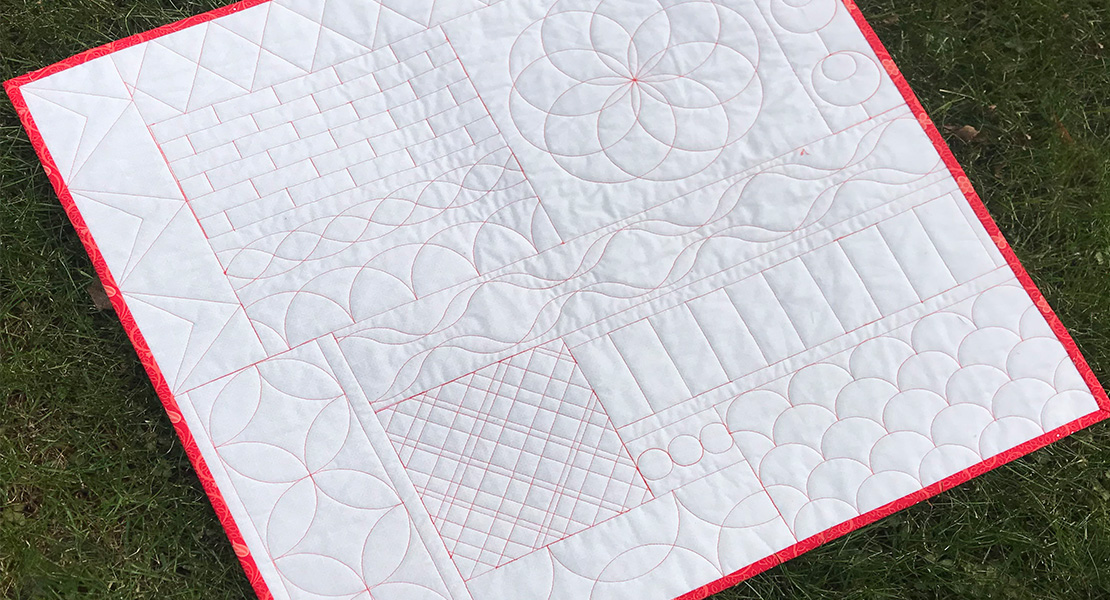
BERNINA Rulerwork Quilt-along
If you want to try rulerwork but aren’t sure where to start, here’s the second part of the plan. We All Sew has a 4-part post by Amanda Murphy, an author and expert in rulerwork quilting. She has created a sampler with 13 unique patterns of rulerwork. She will lead you through each one by video and has included an 18-page downloadable PDF with very clear instructions for marking and stitching each one. Click on the links below for the videos and downloadable pages for each of the four parts. Once you have made the sampler, or even a part of it, you’ll be ready to add rulerwork quilting to your next quilt!
BERNINA RULERWORK QUILT-ALONG PART 1
BERNINA RULERWORK QUILT-ALONG PART 2
BERNINA RULERWORK QUILT-ALONG PART 3
BERNINA RULERWORK QUILT-ALONG PART 4
For more information on Adjustable Ruler Foot #72, see The Big Book of Feet at your local BERNINA store.
Used Products


What you might also like


8 comments on “Rulerwork Quilting”
-
-
Need is a strong word. Do you want to quilt with rulers? If the answer is yes, then you need the foot to do so, no other foot can be used for that safely. If you don’t want to use rulers to quilt, then there is no reason to buy the 72 foot.
-
-
I agree with getting the Big Book of Feet for no cost. I have purchased two Bernina machines, 830 Limited Edition and the 880 Plus. With that much invested and the additional feet I have purchased, it would be a good gesture for Bernina to offer the book at no cost for Bernina owners. It just sells more feet when looking through it!
-
Agreed! It’s like asking you to pay for Bernina marketing materials.
-
Quite agree, they would sell a lot more feet with the catalogue available, it does not have to be a heavy tome, just an image and description for each foot.
-
Absolutely unnecessary to charge for the book with information on Bernina feet.
-
-
I was excited to see this article…until I realized they are reposts. I’d love to see more about ruler work on home machines.
-
I am not sure which pressure foot to select on my 790 as foot #72 does not appear in the listings on the screen. I am selecting straight line stitching and have the feed dogs down but there is no sign of foot 72. So presumably I have to select another that has a central round shape, possibly #48 can someone advise please?
Leave a Reply
You must be logged in to post a comment.

Do I need the adjustable ruler foot with the new 570qe? I’ve seen mixed info.