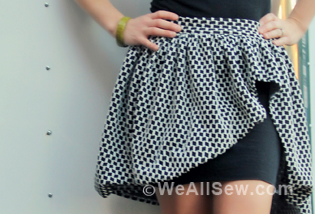
How to Sew a Wrap Skirt

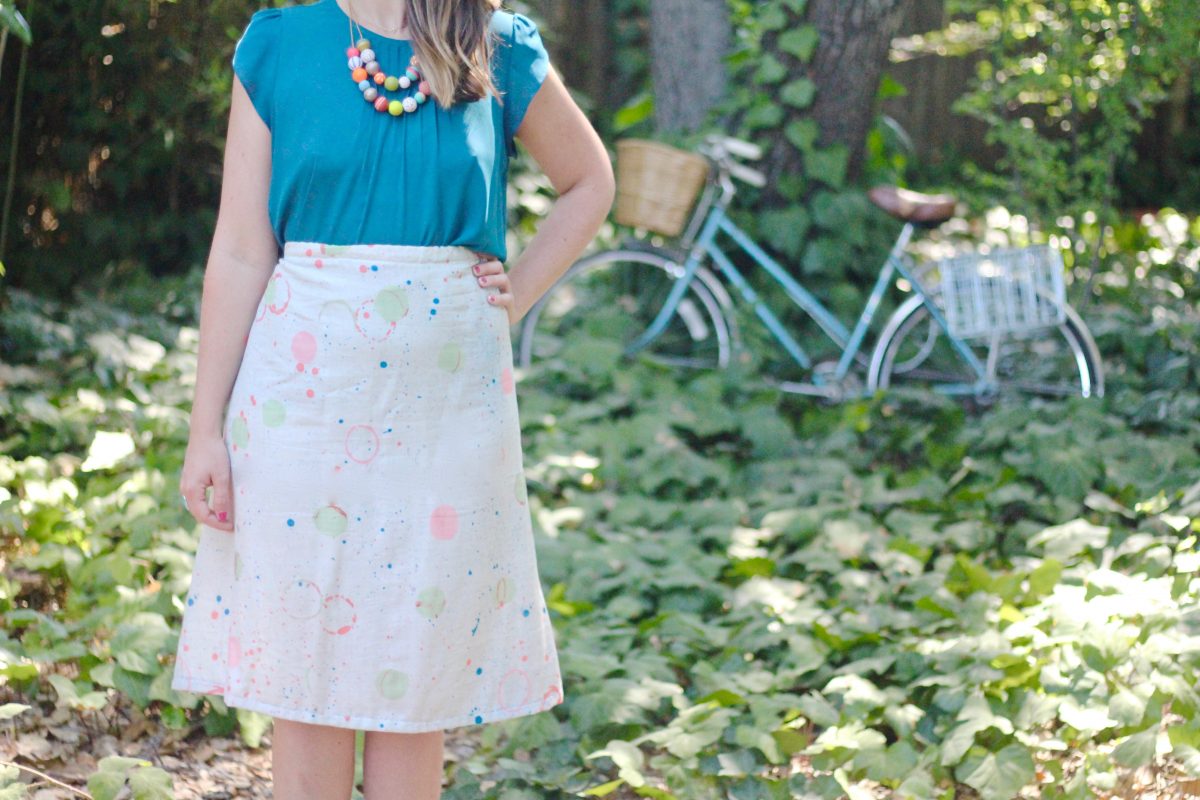
Every spring I head to Ventura, California for our annual Craftcation: Business + Maker’s Conference. Ventura is one of my favorite California beach towns because the temperature is pretty much in the mid 70s year round, it has a great downtown filled with restaurants, shops, bars and historic buildings and somehow it’s still held onto this old-school relaxed artsy California beach town vibe. Despite the fact that I spend almost two weeks there every spring, I don’t get to really experience the town the way other tourists do because I’m working long hours for Craftcation. So, last year I decided to have my 40th birthday there so I could finally have a chance to experience the awesomeness of Ventura first-hand (instead of via our Craftcation attendee’s Instagram feeds).
I rented a house right on the beach and packed everything I could possibly need (ie: half of my closet, all of my board games and (of course) a TON of art supplies. At the end of the week, I realized that although I had used most of my art supplies, most of the clothing I’d brought was still in my suitcase. Aside from my bathing suit, the thing I wore every single day was a vintage wrap skirt. It was the perfect thing to throw on for morning beach walks, watching the sunset at night and everything in between. This summer I’m headed back to Ventura (I’m making this trip an annual occasion with family and friends) and now that I know what actually gets not only taken out of my suitcase but worn daily, I’ve created this simple pattern for a DIY easy to sew wrap skirt. I LOVE this pattern because it’s easily adjustable to any size body (even kids), quick to sew and only requires basic sewing skills!
Materials to Sew a Wrap Skirt
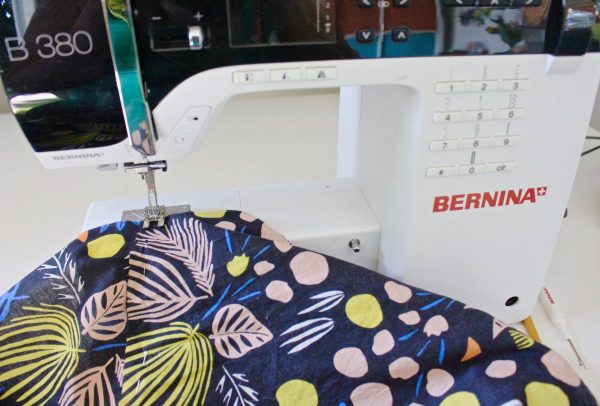
- Sewing machine (I used my BERNINA 380) and also can recommend the BERNINA 350 PE
- Open embroidery foot #20
- Skirt fabric 2-4 yards (depending on your measurements)
- Thread to match your fabric
- Iron and ironing board
- Pins
- Scissors
Instructions to Sew a Wrap Skirt
*The directions are lengthy and may seem a bit complex but if you’re a visual learner, just follow my diagrams and skim the directions and you’ll be in good shape!
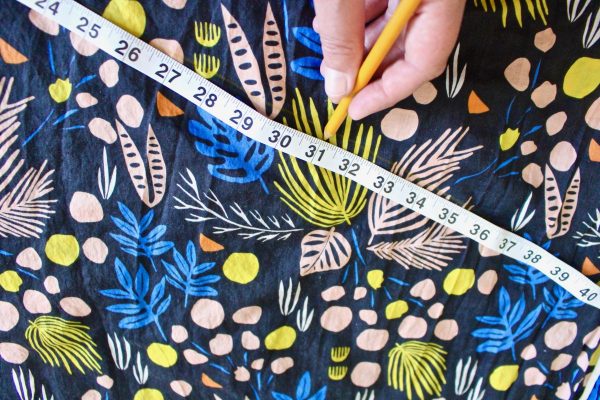
We’ll start by taking our measurements to create our pattern. Although I didn’t make an actual pattern for my skirt, it’s a good idea to make one if you think you’ll want to make more than one skirt.

Find your measurements for the back panel of the skirt:
1. Find the measurement for A by measuring your waist then dividing it by 2 and adding 2″. *For example: if your waist is 30″: 30 divided by 2 = 15 + 2 = 17 so A = 17
2. Find the measurement for B by adding multiplying A by 2 *For example: B = 17 (A) x 2 so… B = 34
3. Find the measurement for C by deciding how long you want your skirt then adding 3″. *These extra inches are for the waistband and the hem. *I made my skirt 30″ which falls a few inches below my knees and I’m 5′ 10″.
Find your measurements for the two front panels of the skirt:
4. To find your D measurement, subtract 3 from your A measurement. *For example: A = 17 – 3 = 14 so… 14 = D
5. To find your E measurement, subtract 4 from your B measurement. *For example: B = 34 – 4 = 30 so… 30 = E
Find your measurements for the waistband:
6. To find your waistband length (F), multiply A by 6.5 *For example: A = 17 x 6.5 = 110.5 so… F = 110.5
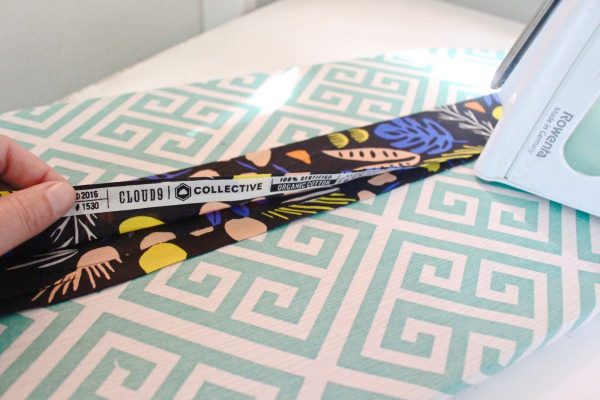
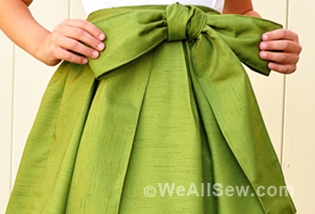
7. I like a thick waistband, so I made my G measurement 6 inches. If you want a thinner one, just make your G measurement smaller. Using the measurements we’ve been using in the example, our waistband would be 6″ x 110.5″.
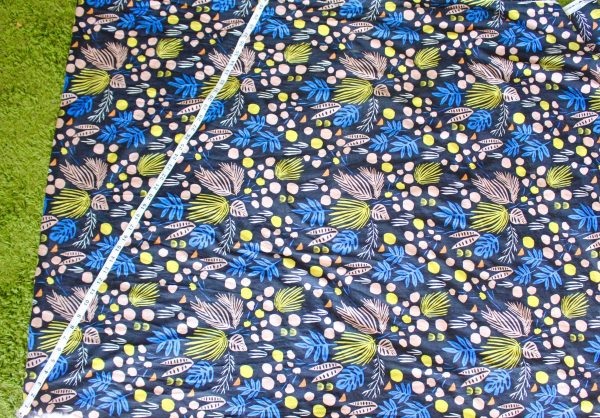
NOTE: If you’re creating a paper pattern follow steps 8-20 on paper then place the pattern on your fabric, trace it and cut out your fabric. If you want to skip making a paper pattern (like I did) follow steps 8-20 and mark directly on your fabric. Be sure to wash and dry your fabric before you begin and always mark on the wrong (non-printed) side of the fabric.
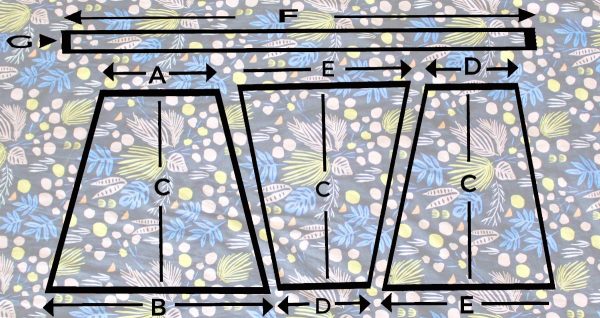
Create the back panel for your skirt:
8. Draw a line at the bottom of the fabric the length of B.
9. Fold the fabric in half widthwise to find the middle of B and use your fingers to create a crease down the length in the middle of B (this is the C area in the drawing).
10. Unfold the fabric and measure on the fold up from the center of B the length of C.
11. The top back of your skirt will be at the top of C. Divide A in half (8.5 for the example) and draw half of A on one side of C and the other half of A on the other side of C.
12. Using your tape measure, draw a slanted line connecting 1 and 3 do the same for 2 and 4. These will be the sides of your skirt.
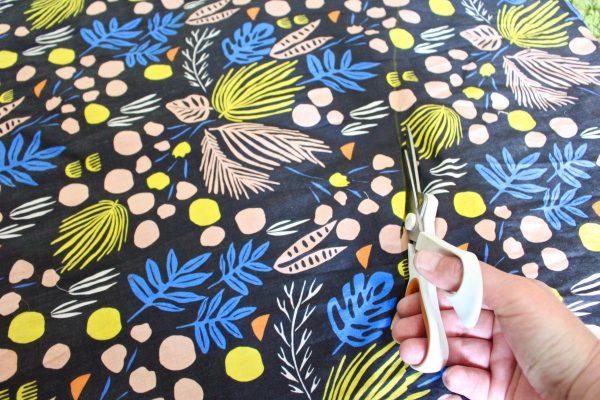
13. Cut along your lines.
Create the two front panels for your skirt:
14. Draw a line at the bottom of the fabric the length of E.
15. Fold the fabric in half widthwise to find the middle of E and use your fingers to create a crease down the length in the middle of E (this is the C area in the drawing).
16. Unfold the fabric and measure on the fold up from the center of E the length of C.
17. Divide D in half (7 for the example) and draw half of D on one side of C and the other half of D on the other side of C.
18. Using your tape measure, draw a slanted line connecting 5 and 7 do the same for 6 and 8. These will be the sides of your skirt.
19. Cut along your lines.
Create the waistband for your skirt:
20. Using the measurements from step 6, draw the outline, trace and cut out the waistband for your skirt.
Start sewing:
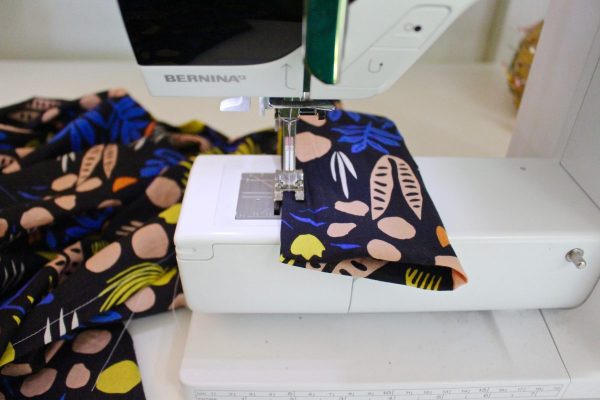
21. Place your cut pieces of fabric on top of each other with the wrong (unprinted) sides of your fabric facing in. 1 and 5 + 3 and 7 should be on top of each other on the left and on the right 2 and 6 + 4 and 8 should be on top of each other. Pin the fabric in place if needed.
22. Sew down the length of the sides of your skirt.
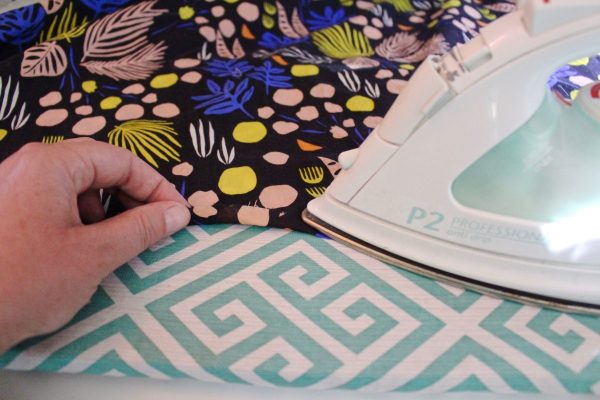
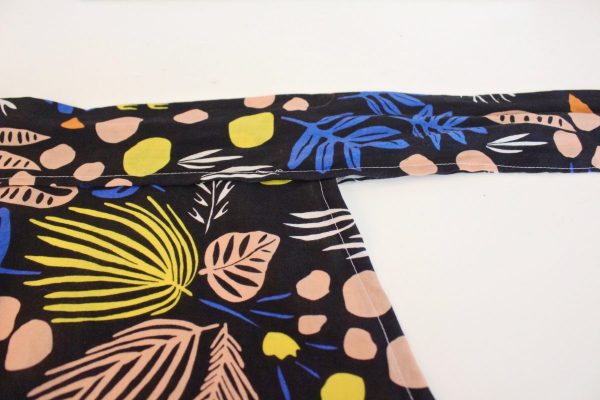
23. Add a side hem for the open edges of the skirt where the wrap will overlap. For the right side it will be from 6 to 8 and for the left side it will be from 5 to 7. Fold over the fabric .25″ then iron and then fold it over again .25″ and iron. Then sew down the folded side hem.
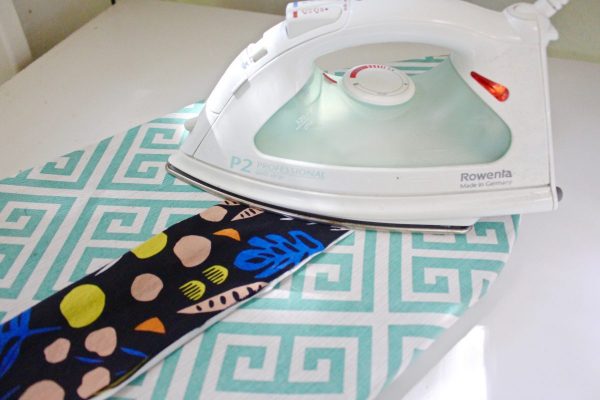
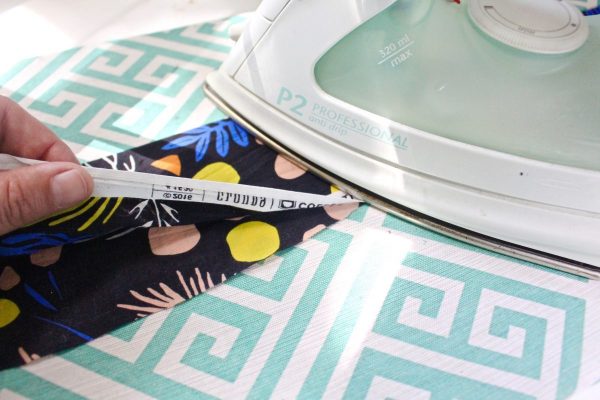
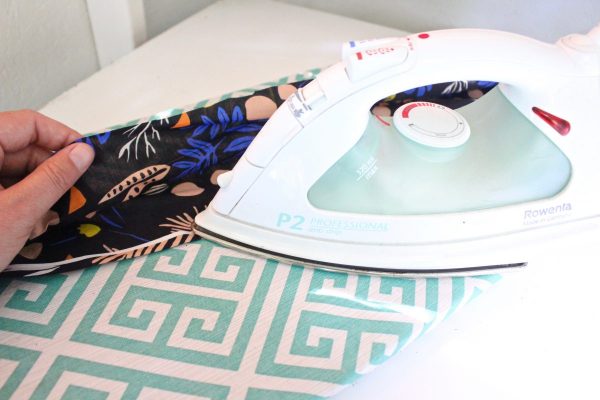
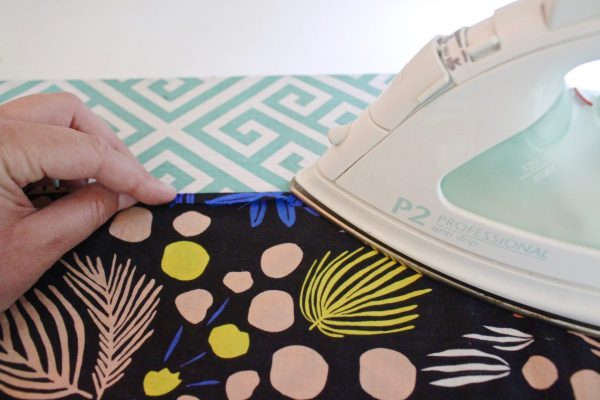
24. Prepare the waistband by folding in half lengthwise and ironing. Then fold over the raw edge of each side .25″ then iron, then fold it over .25″ one more time and iron.
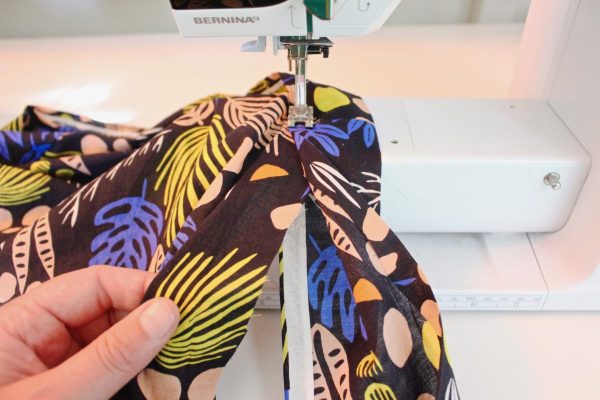
25. Insert the top of the skirt into the waistband you just created (this will be A and both sides of D) about .2″. Fold the skirt and the waistband in half and crease with your fingers to find the middle, then match up the middles.
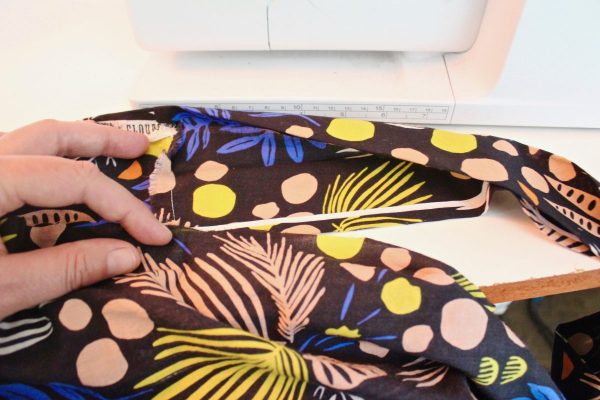
26. Start sewing your waistband and skirt together from the crease in the middle. Make sure you’re catching the top of the skirt in the waistband as you sew. Continue sewing even after you reach the end of the skirt on both sides and then fold over the raw edge end of the waistband and sew the end closed.
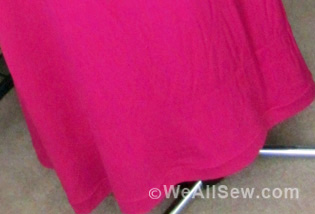
27. To create the bottom hem, fold the bottom of the skirt over 1″ and iron, then fold it over 1″ one more time and iron again.
28. Sew the bottom hem.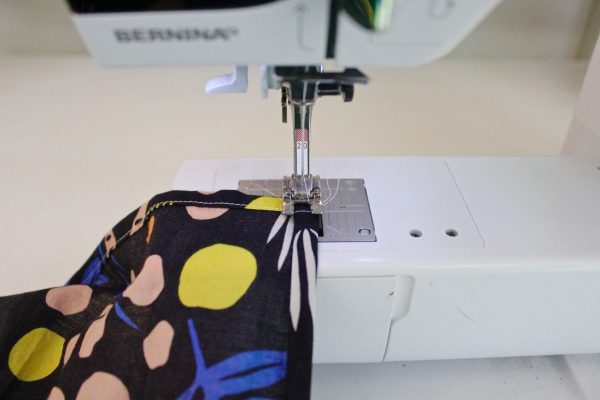


Used Products


What you might also like


8 comments on “How to Sew a Wrap Skirt”
-
-
I’m confused about the side seams–you say to sew them together with the wrong sides facing. Are you missing a step to create French seams by sewing those seams together with the right sides facing? Or should it read right sides facing? Are you using 5/8 inch seams (which I usually use for garments) or a 1/4 inch seam? I love this pattern, and I plan to try it, but it makes a difference depending on which way the seams are constructed. Thanks!
-
I understand your construction details but how do you fasten the skirt to wear? Do you tie the waistband or use velcro or button and buttonholes?
-
I understand that you used a fabric that you had on hand, but for the tutorial photos, I wish you would have used a plain fabric, really hard to tell what you are actually doing.
-
Great skirt with some adjustments!
1. I made a french seam down the side seams.
2. Added a hole on one of the side seams to pass the tie through. I simply cut through with my rotary cutter, then zig zag stitched the edges of the cut parts like a buttonhole.
3. I didn’t center the skirt on the waistband, otherwise the tie would have been too long on one side and short from the other. I decided which front panel would be dominant (on the outside front), then made the tie longer on the side that would go through the hole in the side seam and then wrap around the back to tie on the side.
4. The hem was a little wonky, but I trimmed the part that jutted out at the edge of the front panels.
The skirt fits great! I’m sure I’ll be making many more in different lengths and fabrics! So fun. Thank you!!-
I appreciate your tips. I will do French side seams and add a hole in a side seam of the waist band. Also I will do my waistband centering as you did. I plan to curve the bottom front edge of the front panels. I am hopeful this will become a skirt I can make many times for myself and for others.
-
-
Loved this pattern! The end result was beautiful!
Thank you for your time to post it. -
When I went to hem I noticed that the edges did not fold up and left a king of wonky asymmetrical hemline, which is fine but I wondered if that was correct or if I did something wrong?
Leave a Reply
You must be logged in to post a comment.

I’m really confused with Step 21 and how you are making this seam without raw edge showing. Are you folding the raw edges over and top stitching? ‘m used to putting right sides together to sew a seam so it’s left me a little confused. Thanks