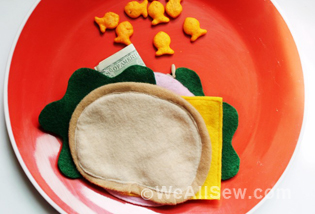
Reusable Fabric Lunch Bag Tutorial
Despite the fact that she worked full-time and was a single mom in my early elementary school days, my mom was good at school lunches when I was a kid. REALLY good. No sloppy slapdash PB & J’s. She always found the time to show her love with apples that were never bruised, crackers that were always crispy and never forgot heart-covered napkins on Valentine’s Day.
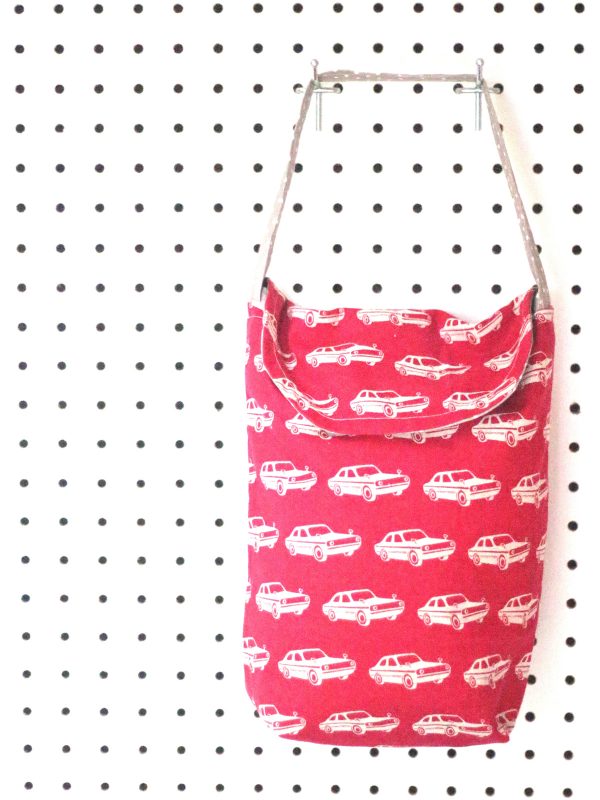
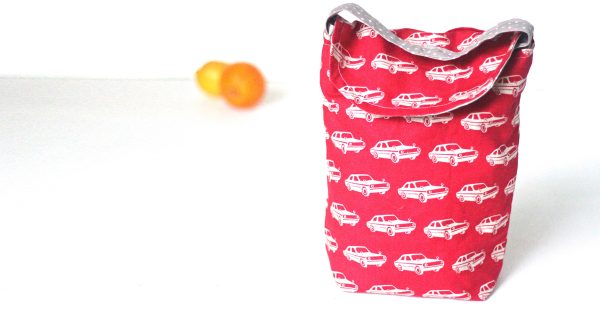
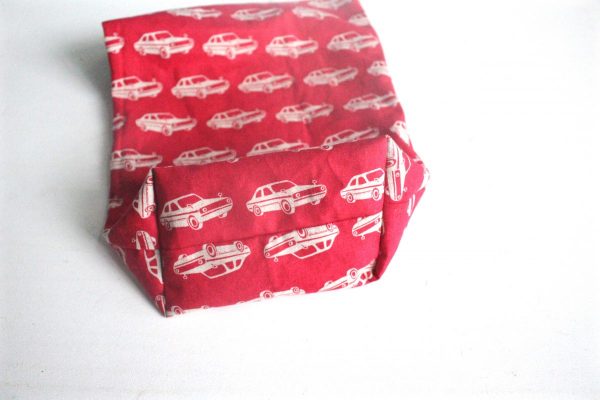
Lunch is STILL an event for me—even though I work from home. Taking time to cut tomatoes with the right knife and spread that nice grainy mustard is relaxing and helps me slow down during busy work days and be present. I know I could eat standing in front of the fridge (and obsessing about my next work task) but taking that minute to do it right is kind of a meditation for me. Because lunch should be about taking a break, right? So in this spirit, I created this washable, eco-style lunch bag. Use a fabric you love. I hope it will remind you to take a deep breath—and really enjoy your break!
Materials to make a Reusable Fabric Lunch Bag
- Sewing machine (I used my BERNINA 380)
- Pins
- Pencil
- Scissors
- Thread
- Iron and ironing board
- Velcro (2″)
- Fabric
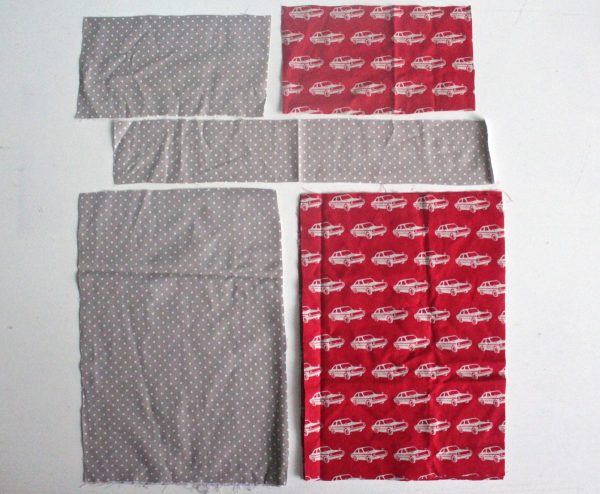
1. Main fabric for the outside of lunch bag: two 11″ x 15″ pieces (outside of bag) and one 10″ x 5.5″ piece (outside of flap)
2. Secondary fabric for lunch bag lining: two 11″ x 15″ pieces (lining), one 20″ x 3.5″ piece (strap) and one 10″ x 5.5″ piece (inside of flap)
Instructions to sew a Reusable Fabric Lunch Bag
*All seam allowances are 3/8″ unless otherwise noted.
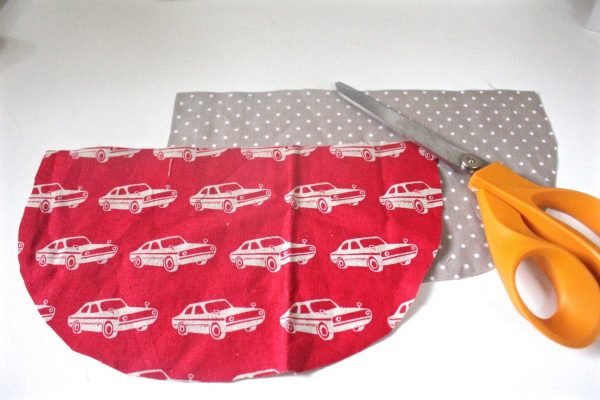
1. Cut one of the long side of 10″ x 5.5″ pieces of the main and secondary fabrics into a half circle. You can eyeball it (like I did) or trace a large bowl.
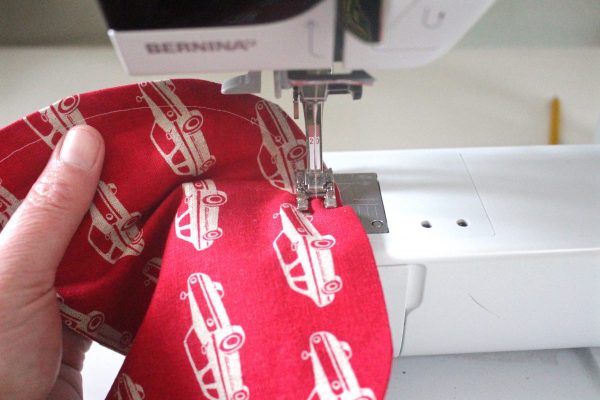
2. Put the two 11″ x 15″ main fabric pieces together with the right sides facing in and sew them together on three sides. The open side will be the top (one of the short sides).
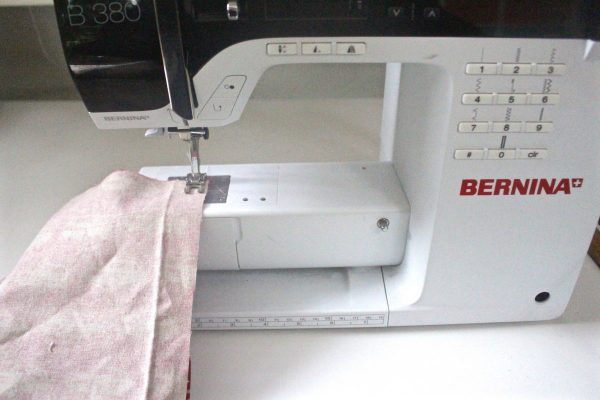
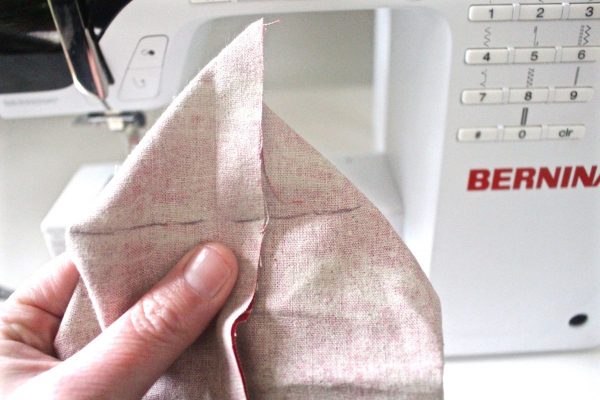
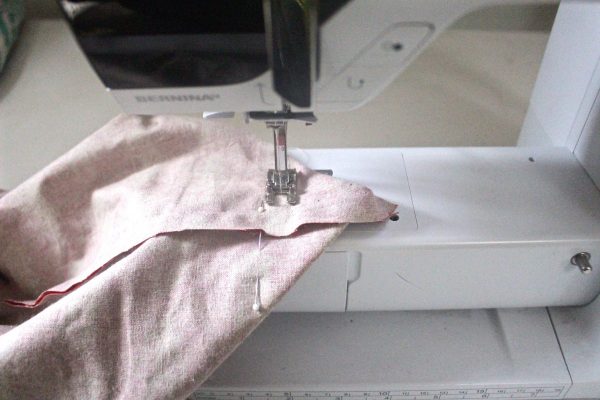
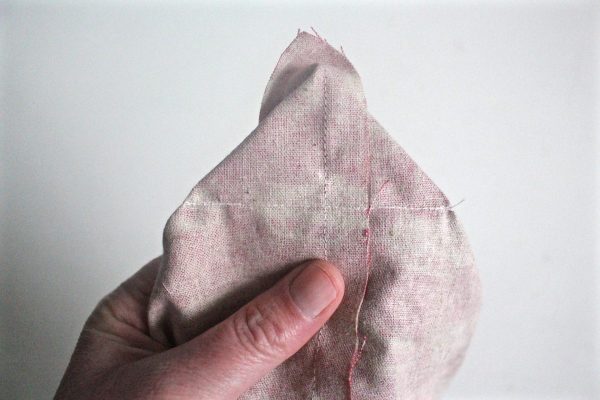
3. Add a gusset to box out the corners at the bottom of the lunch bag by folding the bottom of the bag into a triangle (aka aligning the side seam with the bottom seam). Draw a line perpendicular to the seams across the “triangle” 1.5″ from the point of the triangle. Then sew across the line. Repeat for the other side of the bottom of the bag.
4. Turn the bag right way out.
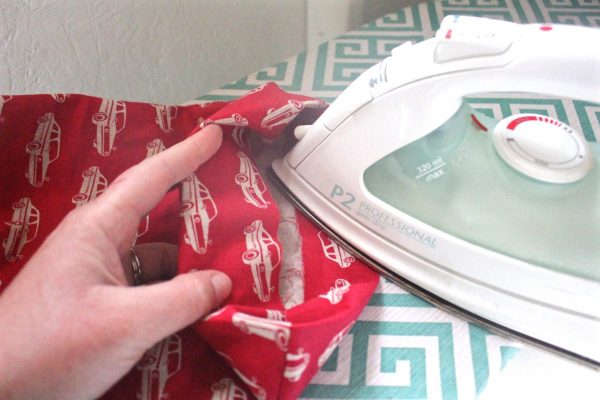
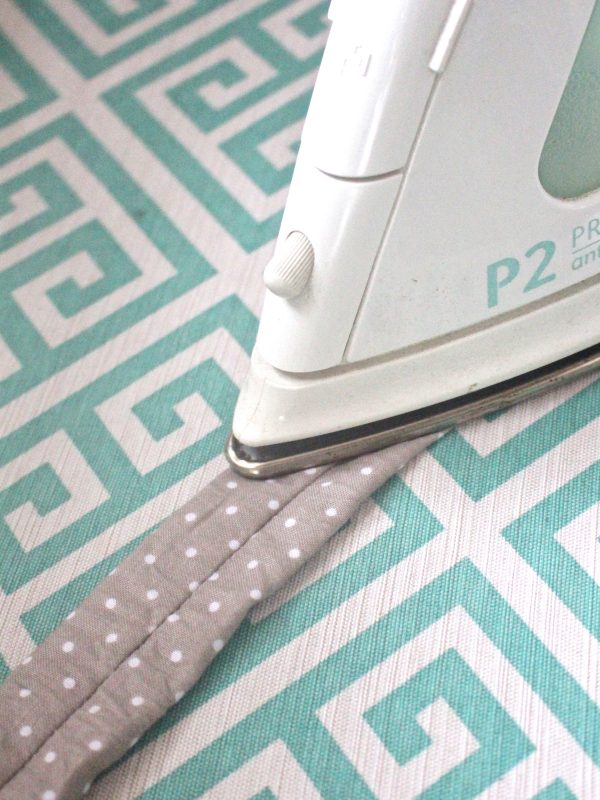
5. Fold the top of the bag inside 1.5″ and iron to keep the fold in place.
6. Repeat step 2 for the 11″ x 15″ pieces of the secondary (lining fabric).
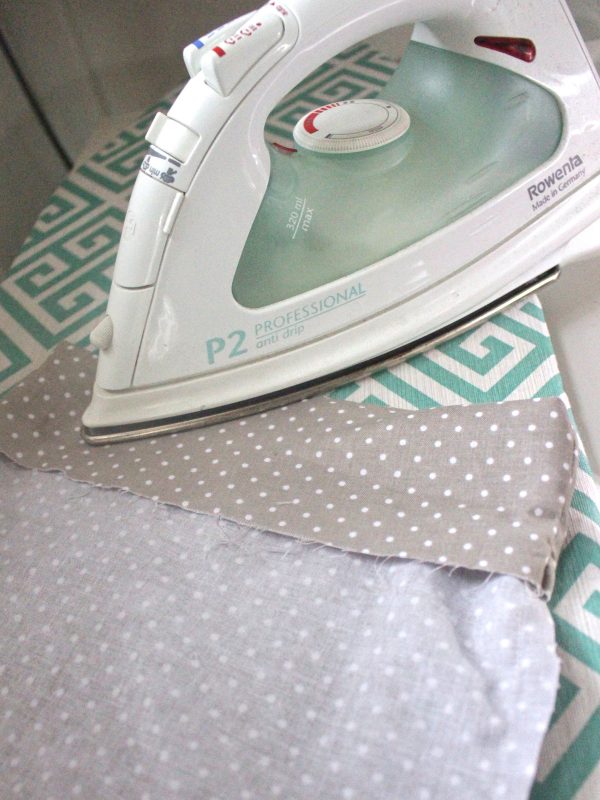
7. Keeping the lining fabric wrong side out fold the top over 1.5″ and iron to keep the fold in place.
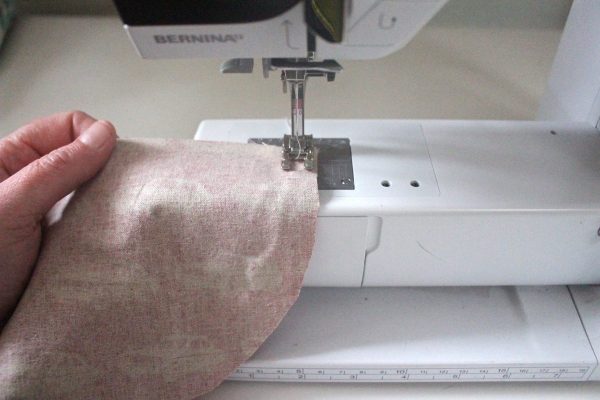
8. Sew the round flap pieces together by placing them wrong sides together and sewing across the rounded edge leaving the straight edge open.
9. Turn the flap right side out and sew the piece of Velcro to it in the middle about 2″ from the bottom of the rounded side of the flap.
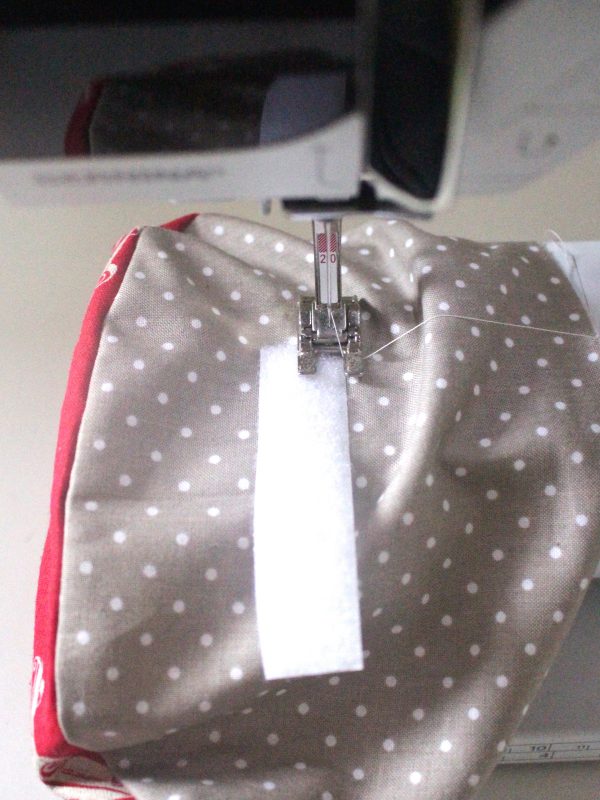
10. Iron the flap edges.
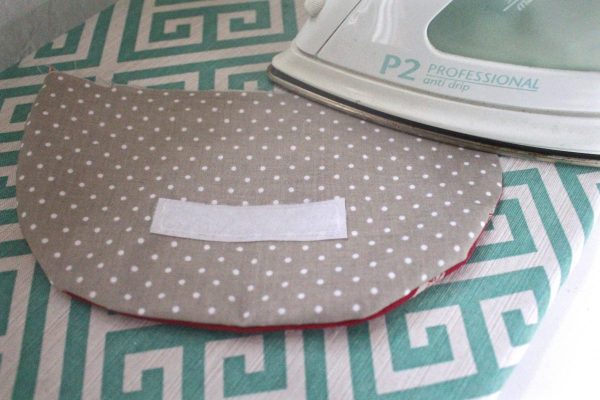
11. Topstitch around the rounded side of the flap.
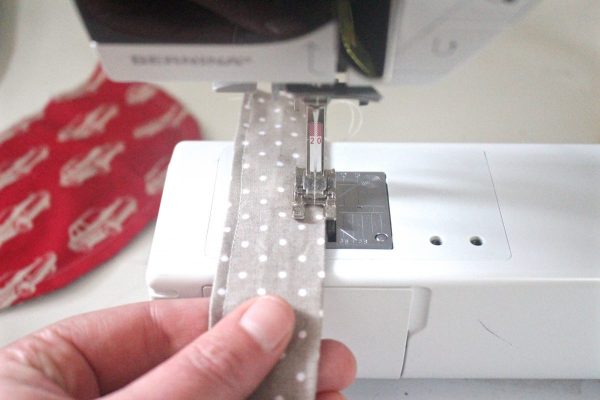
12. Fold the 20″ x 3.5″ strap piece in half longways with the right side facing in and sew a seam down the open long side.
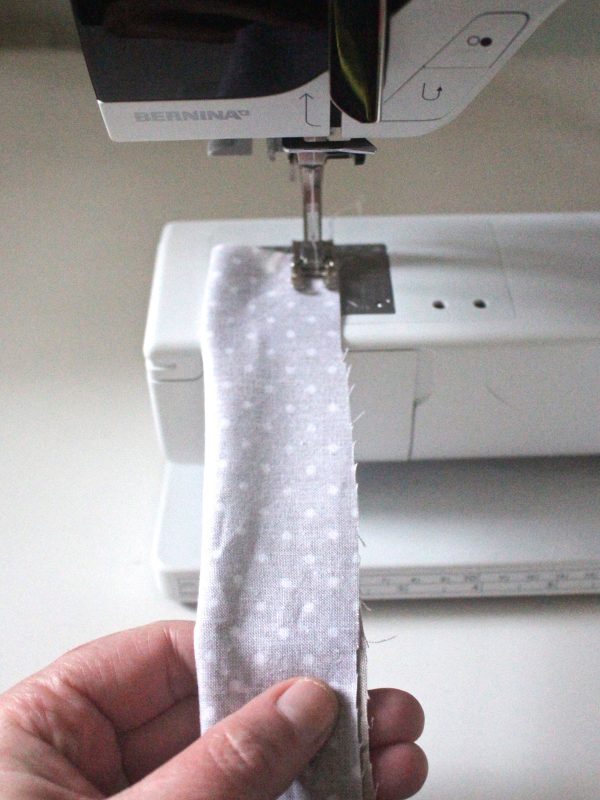
13. Turn the strap right way out.

14. Roll the strap until the seam is in the middle and iron it.
15. Topstitch down each long side of the strap.
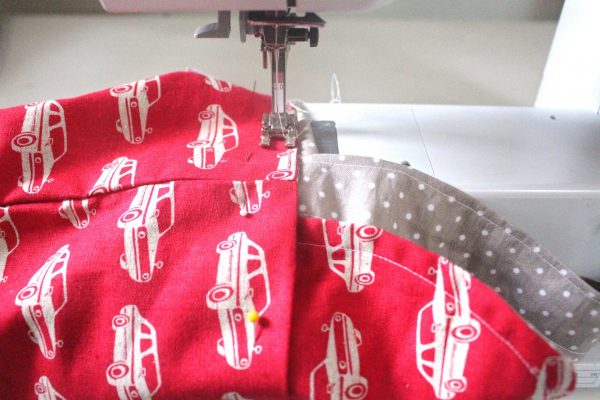
16. Place the lining of the bag inside the outside of the bag. Then insert the straight edge of the flap in between the lining and the outside.
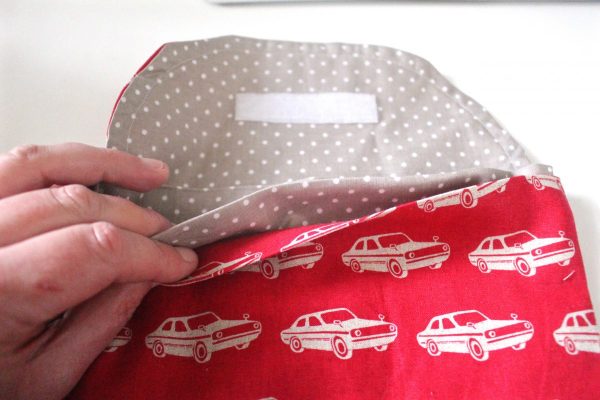
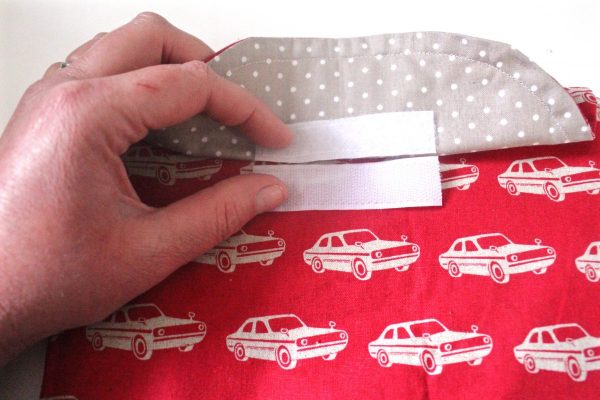
17. Fold the flap over and mark the space where the Velcro on the flap meets the outside of the bag. Then sew the second piece of Velcro on the outside of the bag so that it meets up with the Velcro on the flap when you close it.
18. Insert the strap into the sides of the bag between the lining and the outside of the bag. Secure the lining, outside of the fabric, flap and strap in place with pins.

19. Sew the bag together at the top making sure that none of the pieces move as you sew.
And enjoy packing a lunch in your new, reusable bag!
Used Products


What you might also like


3 comments on “Reusable Fabric Lunch Bag Tutorial”
-
-
Nice to sharing such a simple guideline for making a reusable bag. I notice that I can use my old T-shirt fabric for the reusable bag. Your Red bag looks very stylish, Great idea. Thanks
-
Great bag! I would fuse vinyl to the lining of the bag so it can be wiped clean though. There are a couple of fusible vinyl products on the market. The one I use is a Pellon product that is super simple to use. Just cut to size from the roll, peel off the release paper and place the vinyl, sticky side down unto the right side of the lining fabric and press each section for 8 seconds to fuse. Great stuff!!
Leave a Reply
You must be logged in to post a comment.

There is now fusible Insul-bright insulated fleece…this would be a great addition to this bag, to give it some structure and also retain the warm or cool temperature of the lunch. Fuse the insul-bright to the exterior fabric…in addition I would also stabilize both interior and exterior fabrics, prior to doing anything, with SF101, to give the cotton some body – the end result would be very attractive in addition to being functional.