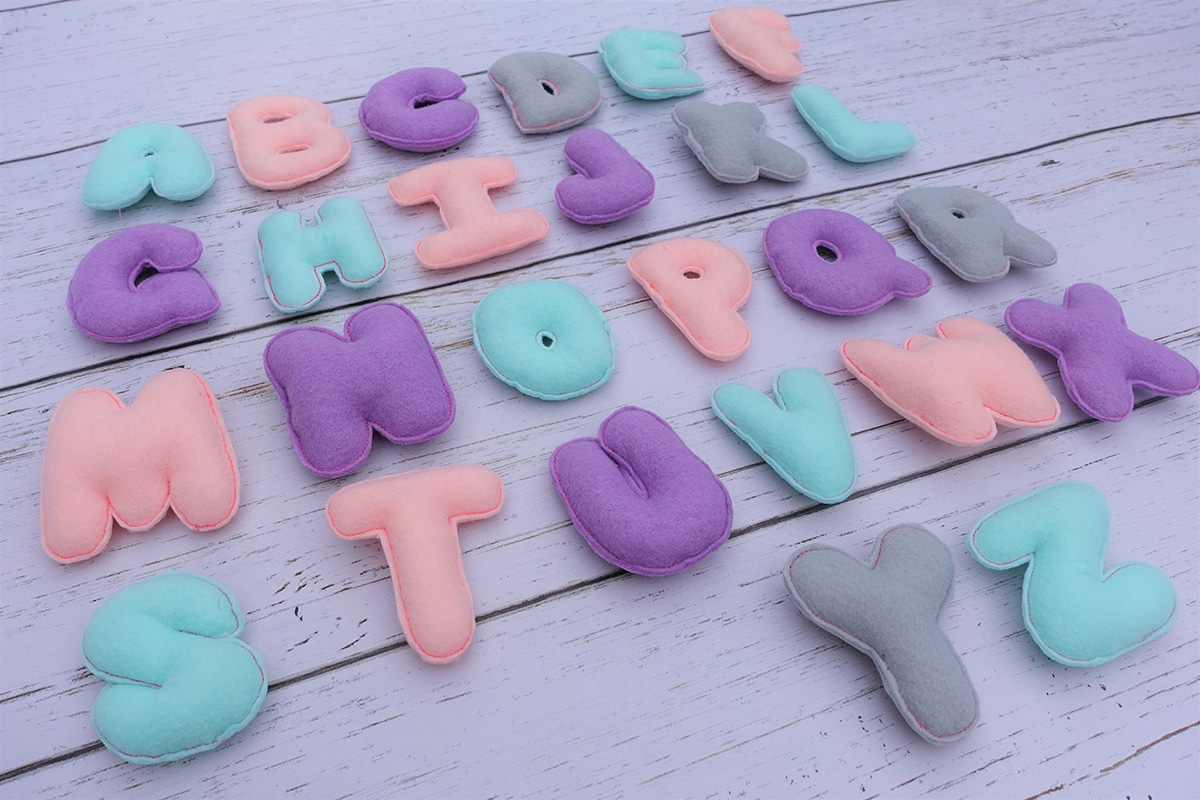
Embroidered Felt Alphabet
This project has been on my “to make” list for the longest time, but I always put it off thinking it was going to be really time-intensive or tedious. I am so pleased to say I was wrong! Each step moves along quickly and the final product is so cute that making them gets a little addictive.
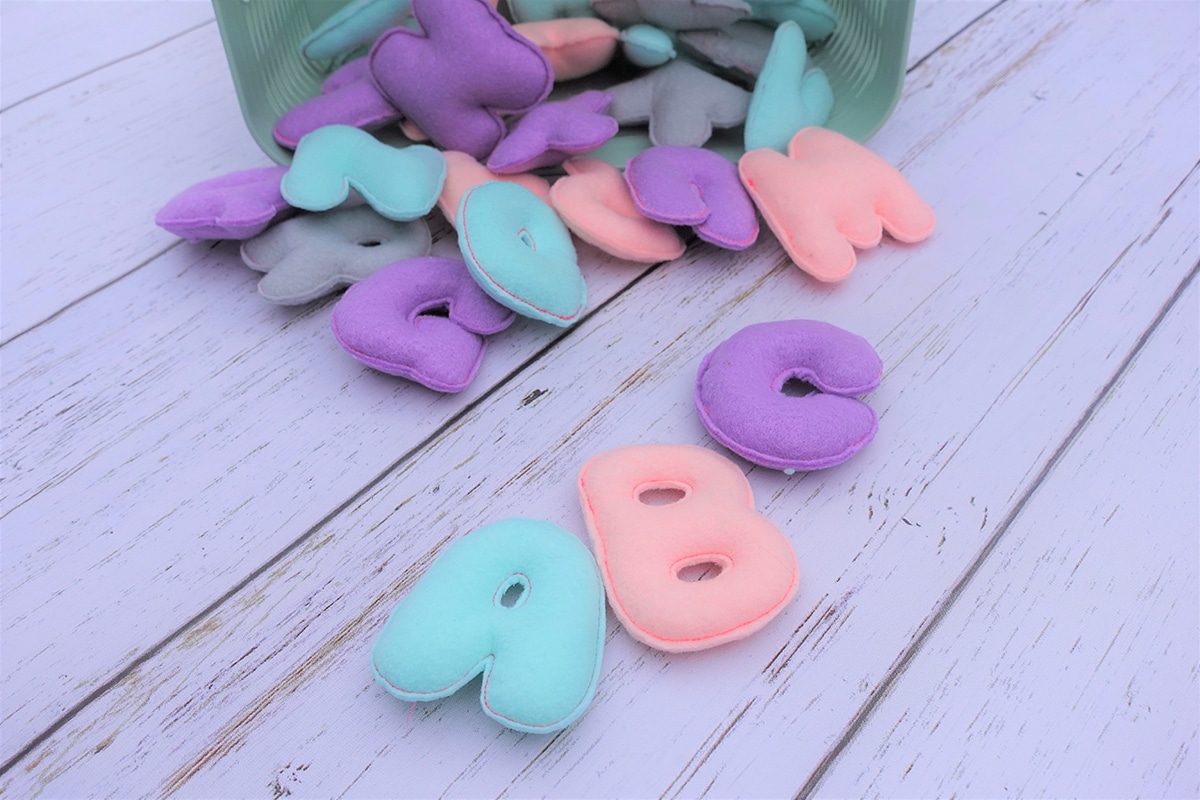
This fun, tactile alphabet is sure to be a hit with the little ones in your life. Make them in an array of colors or all the same colors, make full alphabets or just make enough letters to spell out your loved one’s name. Whatever you do, I hope you play around and enjoy making these cutesy stuffed letters as much as I did!
Want to digitize this alphabet yourself using your BERNINA software? Great! I will show you how in this tutorial.
Don’t have BERNINA software or don’t want to digitize on your own today? That’s okay! Download the .EXP Embroidery files and skip to step two. Each design will have multiple letters.

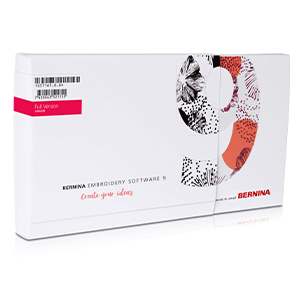
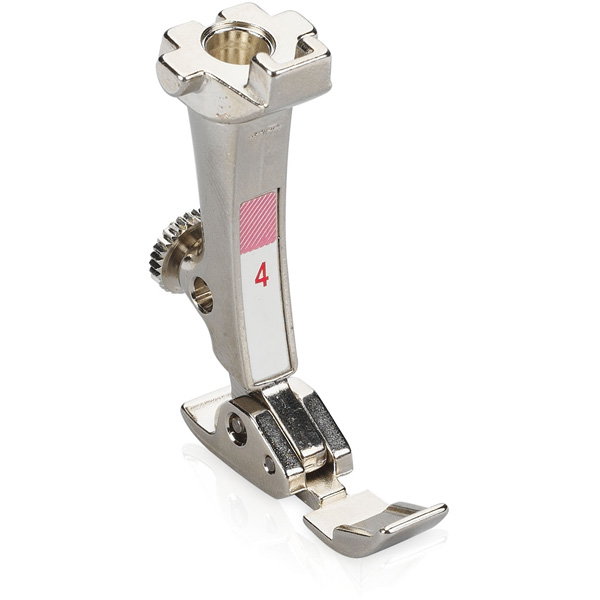
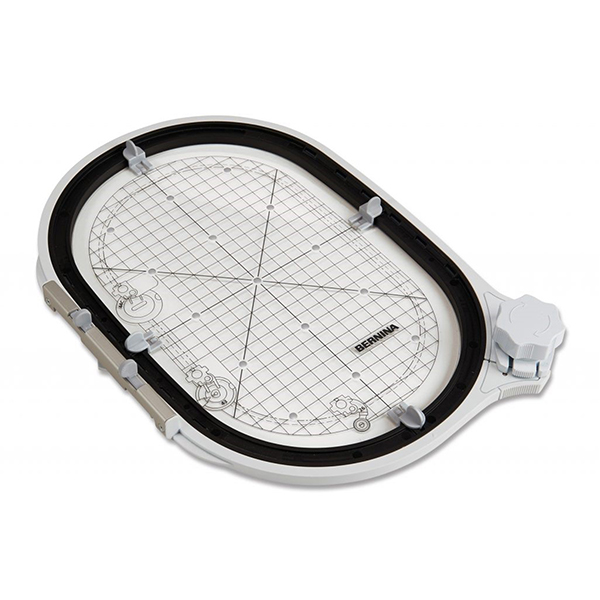
Machine and Products Featured
Materials for Embroidered Felt Alphabet
- (14) 9” x 12” pieces of felt in assorted colors
- Poly Fiberfill
- You will need the chopstick that comes with the poly fiberfill or a similar tool
- OESD AquaMesh Wash Away or OESD Ultra Clean and Tear
- OESD Expert Embroidery Tape TearAway
- 75/11 Embroidery Needle
- Embroidery Thread
- Embroidered Felt Alphabet Designs
Tip: I used Ultra Clean and Tear Stabilizer on my first set of letters and Aquamesh on my second. Both worked great and had their own pros and cons.
I loved that Ultra Clean and Tear was so easy to tear away from the stitching, but it did leave some fiber behind that I had to pick away if I wanted it all completely gone.
Aquamesh left the back of my letters looking great but it took time to wash away the stabilizer from the stitching.
In the future, I would use Ultra Clean and Tear from projects for myself (the fibers wouldn’t bother me personally) and Aquamesh for gifts (the fibers would bother me in a gift that I wanted to look perfect.)
Steps to Make Embroidered Felt Alphabets
Step 1: Create Design
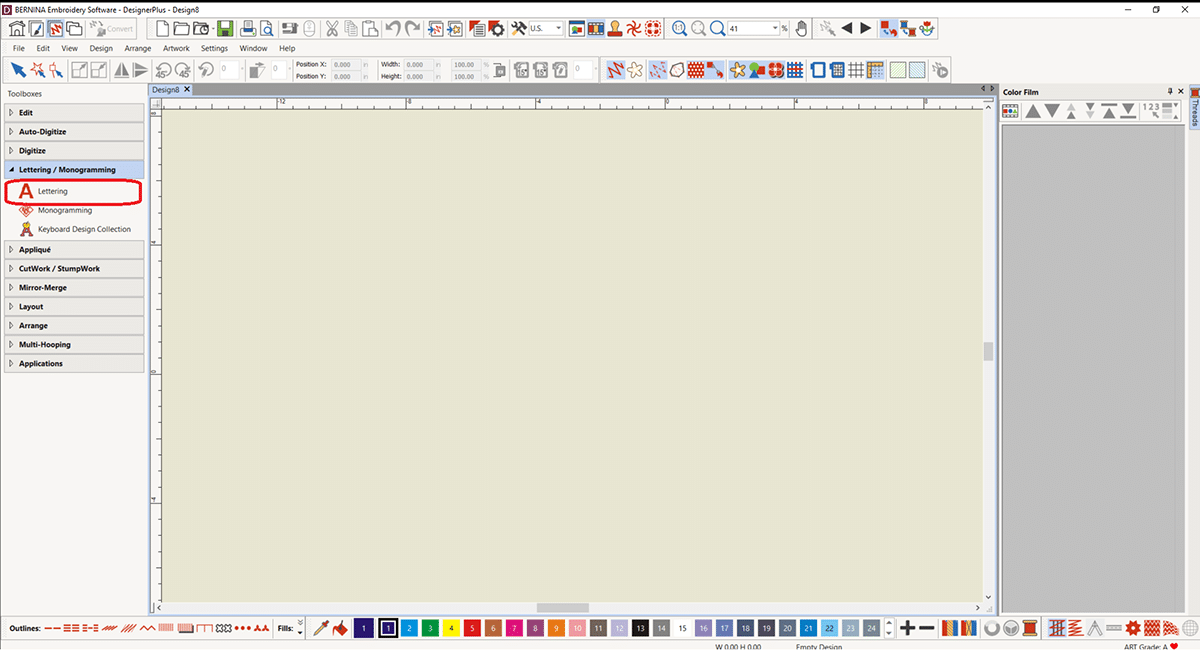
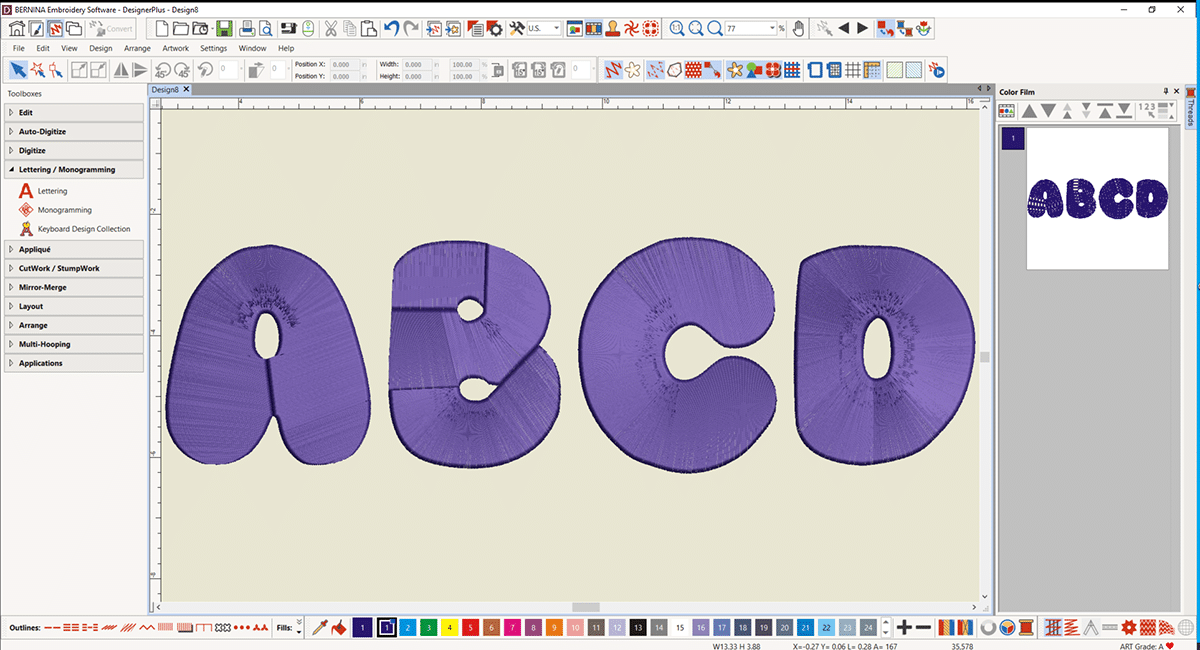
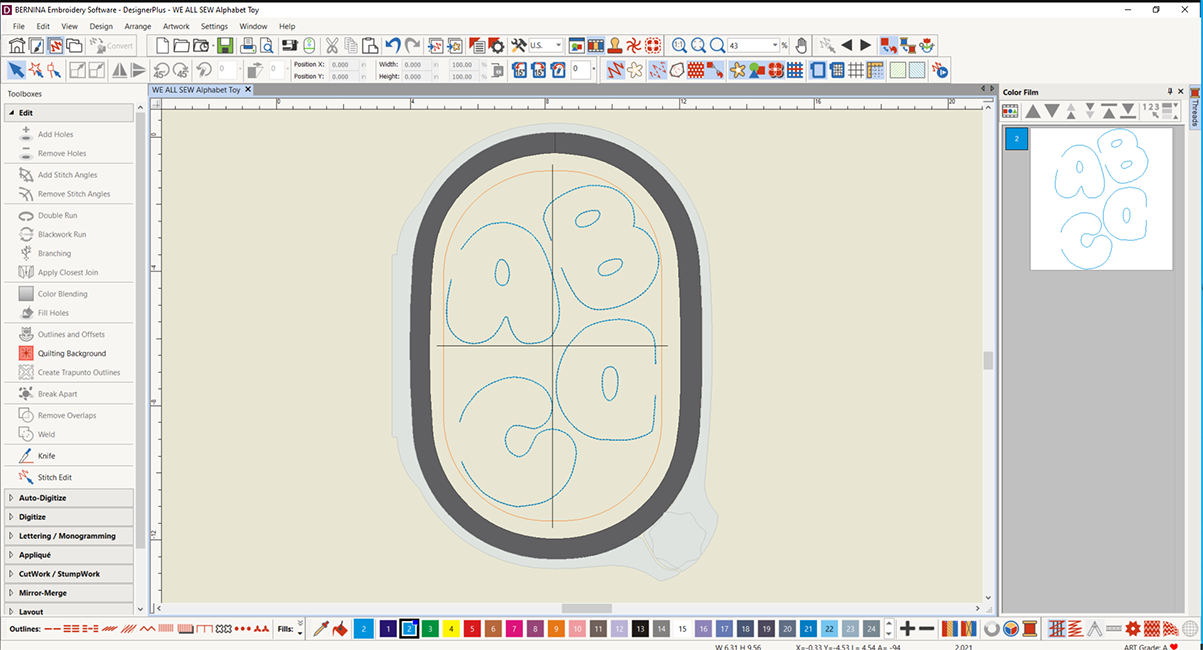
With the DesignerPlus Software open, select lettering by clicking on the icon or tapping “A” on your keyboard.
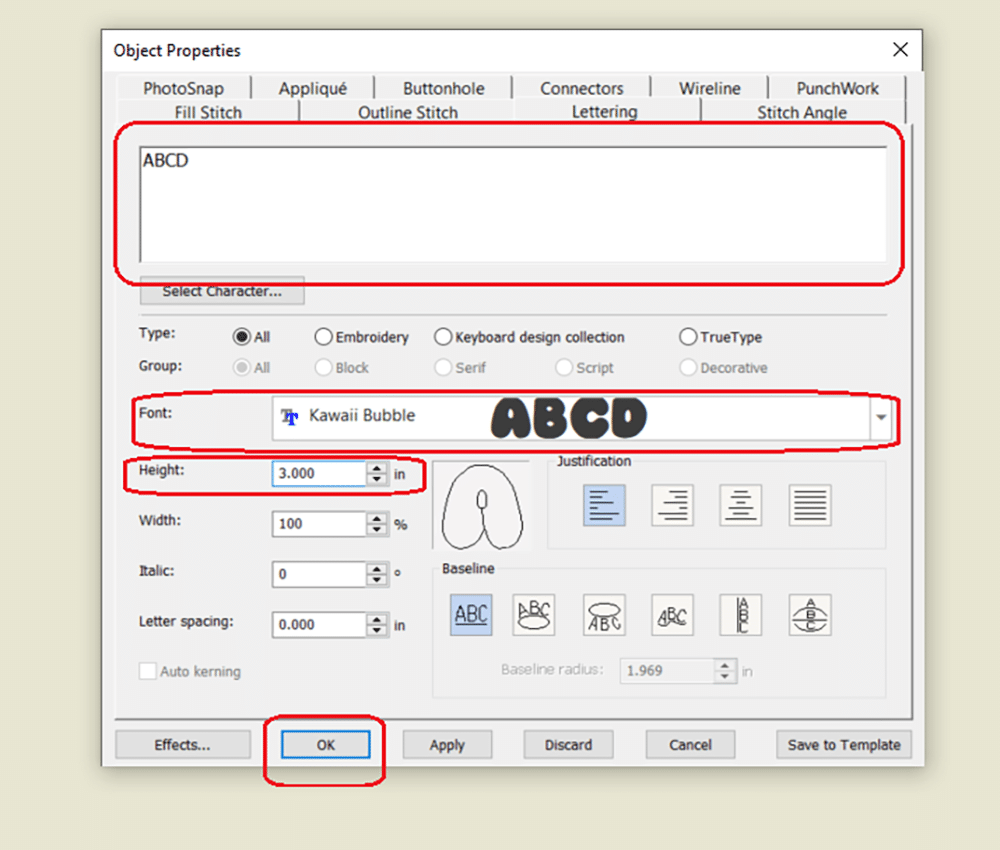
Type the letters you want to stitch out first in the dialogue box. Next, we will change the letter height to 3” and select the font you think will work best for your design. I downloaded this True Type font off a website and it’s called “Kawaii Bubble” but you can use any font you like. Worried the font you chose won’t work? Try out a few different fonts you like and do a test stitch out.
Click “OK” When you’re ready.
Tip: You may want to vary the letters per hooping to create even spacing of your felt colors throughout the alphabet. In this tutorial, I use “ABCD” as an example but when making my alphabet I actually created the hoopings as follows:
AHOV, IPW, CJQX, DKRY, ELSZ, BTMF, GNU.
Nothing on your screen? That’s okay! You did it right. Click the center of the screen with your mouse and your letters will appear. Tap the zero key to get your letters full screen like mine.
Tip: This would be a great time to select File>Save As and save your work! Don’t forget to save frequently!
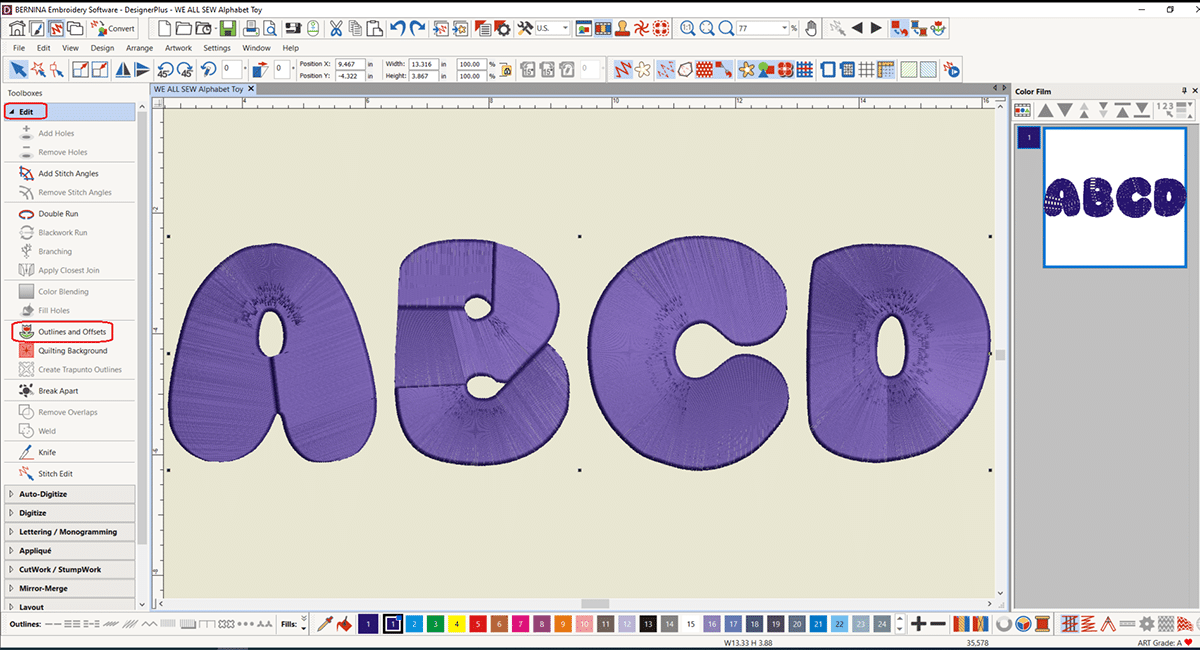
Select the design. You will know you selected correctly when you see the little black squares around the design. Go to the “Edit” section of the Toolboxes and select “Outlines and Offsets”. A dialogue box will open.
If you cannot select “Outlines and Offsets” that means you haven’t selected the design. Simply tapping on the letter will make this option available to you.
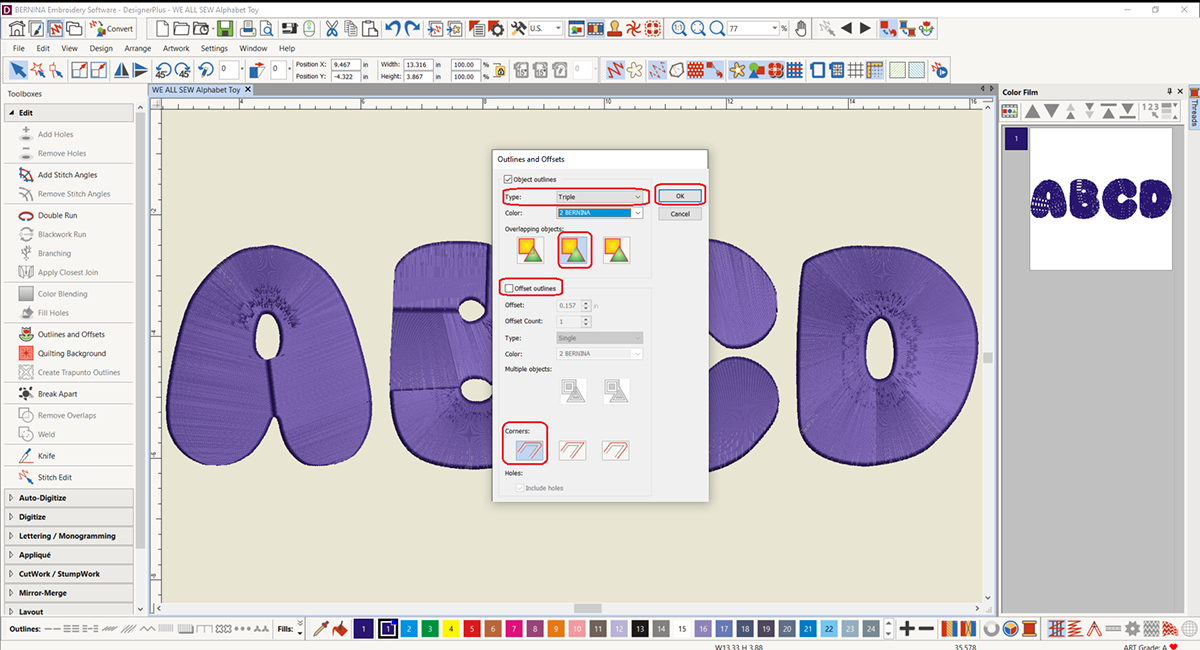
When the dialogue box opens select the first drop down box and change the selection to “triple”.
Next, we will make sure we have “Common outlines” (center option) chosen for the “Overlapping Objects” section.
Be sure to deselect “Offset Outlines”.
Last we will choose “Round Corners” (Left option) in the “Corners” section.
Click “OK” When you are ready.
Now there will be two layers to the design, the original satin stitch layer and an outline layer.
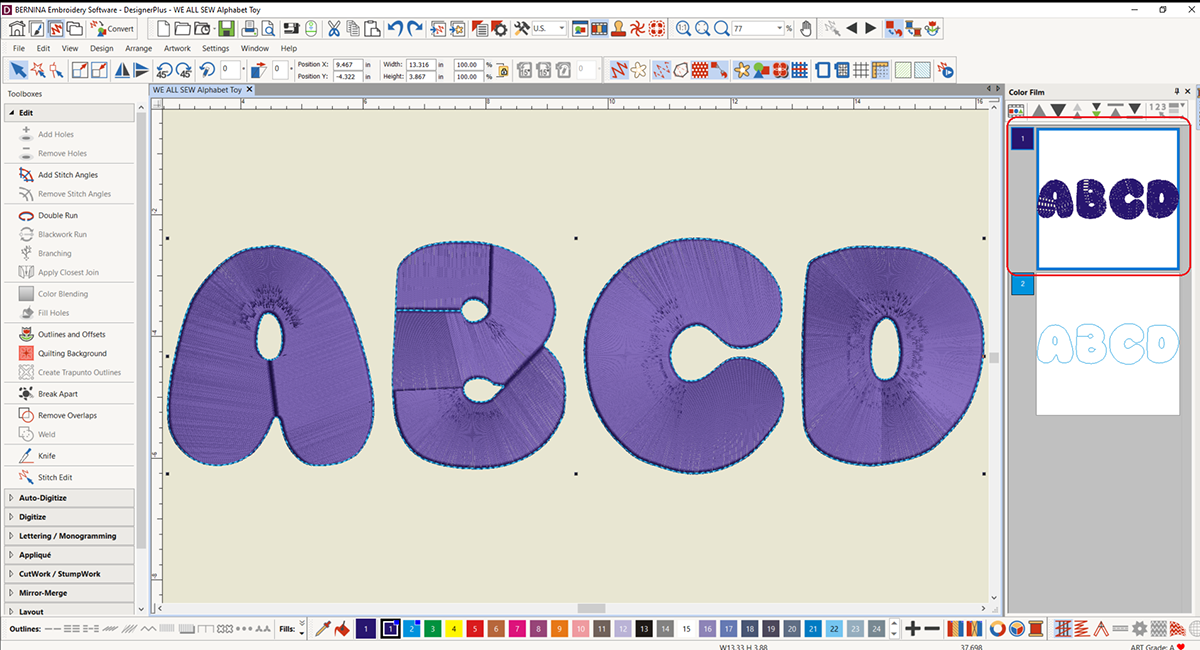
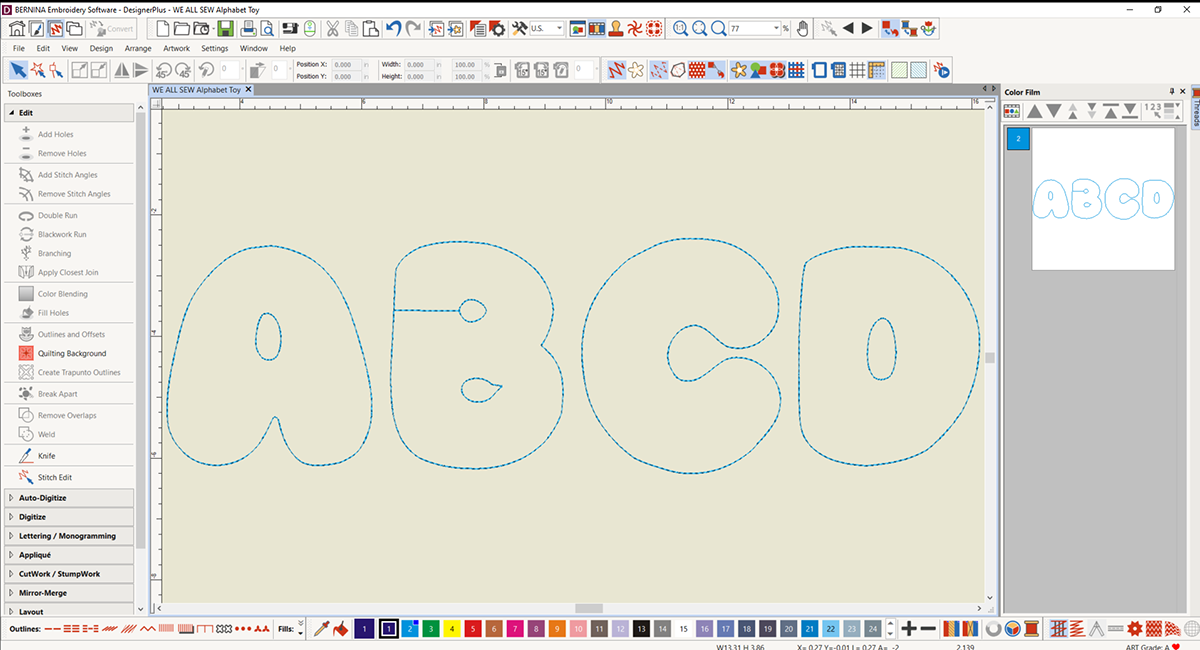
Great Work! Now let’s focus on the letter ‘A’.
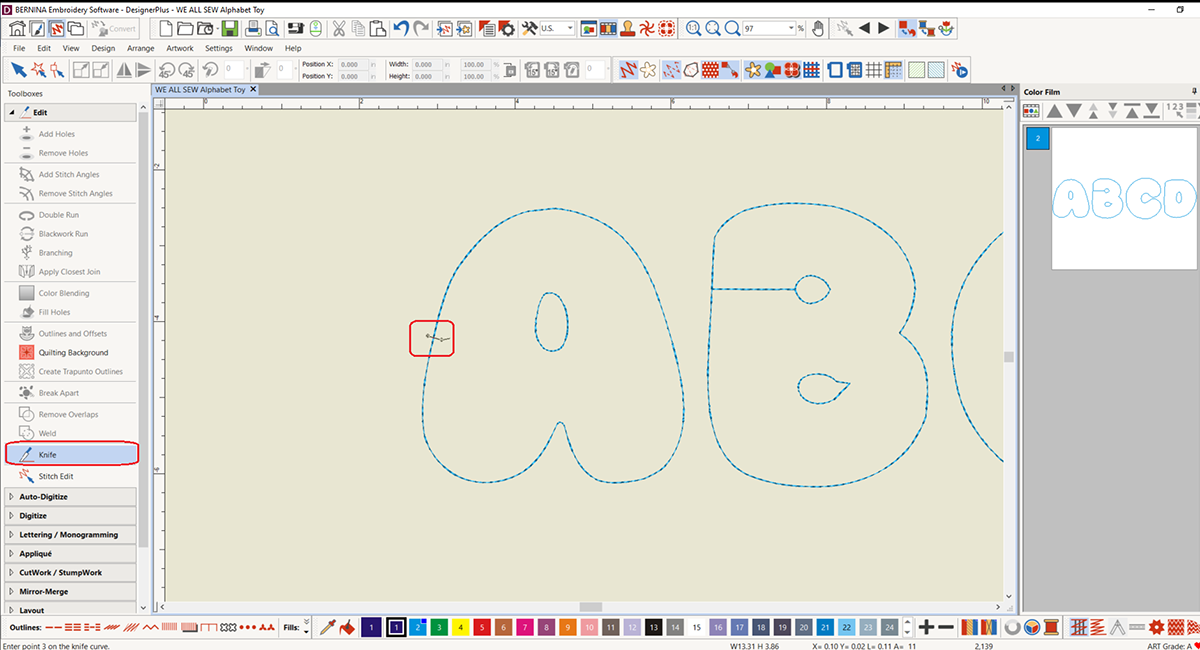
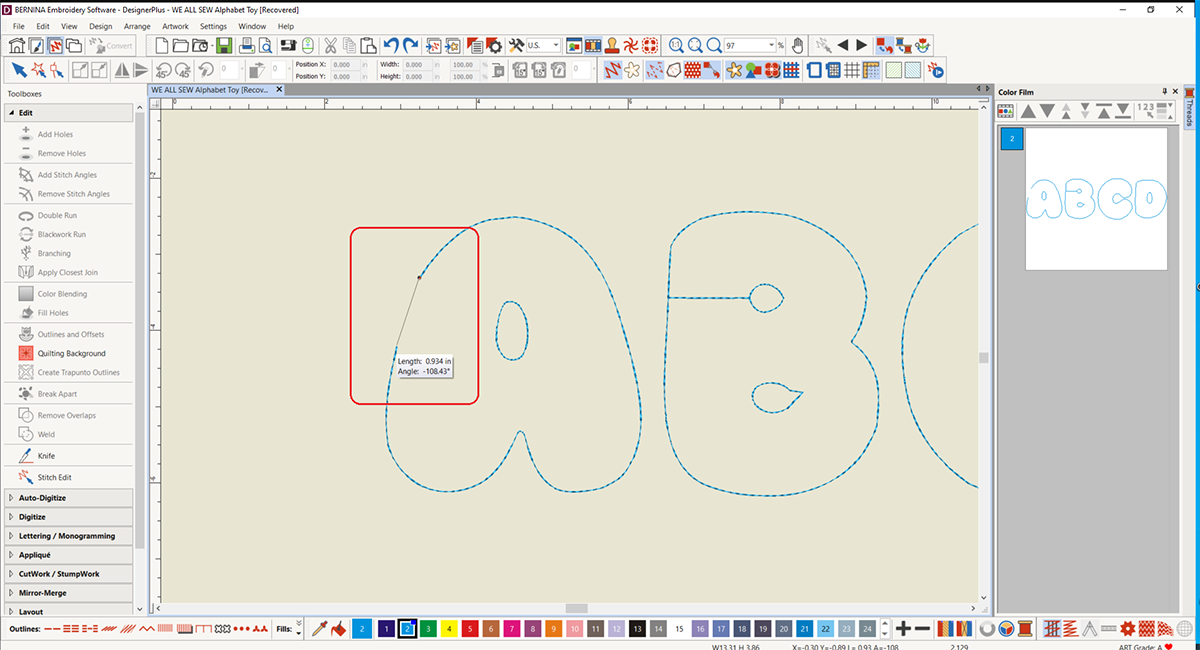
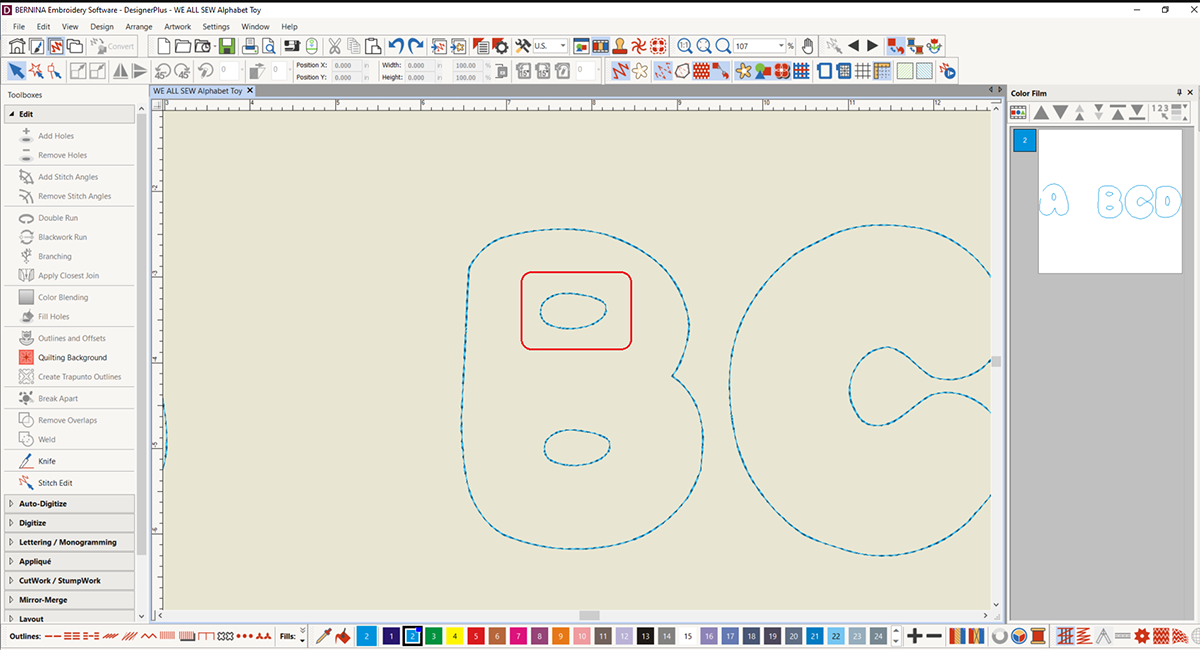
Select “Knife” from the Edit toolbox. This function will make a cutout (gap in the stitching) on the side of our letters to allow for stuffing after embroidering the letters.
To create the opening, we will click once on one side of the stitching line, then click on the other side of the stitching line. Tap enter when finished.
Tip: Try to make the opening on the flattest/straightest part of the letter. This will make stitching it up much easier when we finish the letters.
Repeat the knife cut roughly .75”-1” away from the first marking.
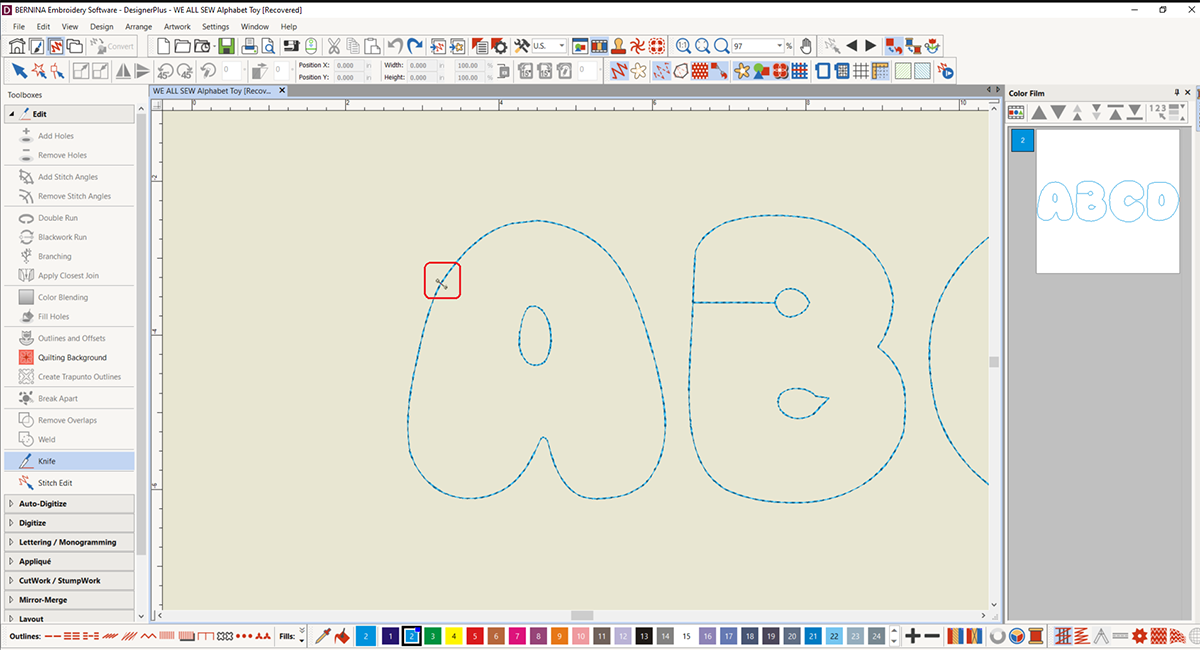
Now the cut out section can be selected by itself. Select this section and tap the ‘delete’ key (not backspace) to remove this section
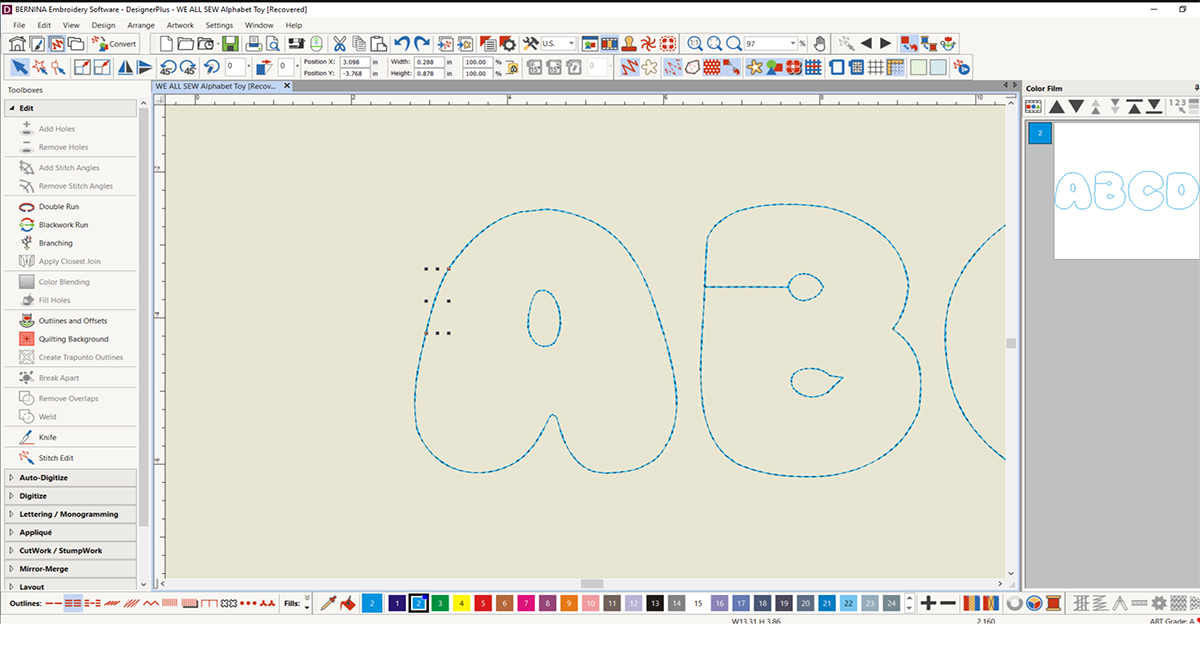
Want to check the size of the opening? Tap M on the keyboard to use the Measure Tool. Click one side of the opening, then move the cursor to the other side to see exactly how big the cut out is. Hit ESC key to clear the tool. From here you can adjust as necessary but don’t be too picky! Anywhere between .5” to 1” is great.
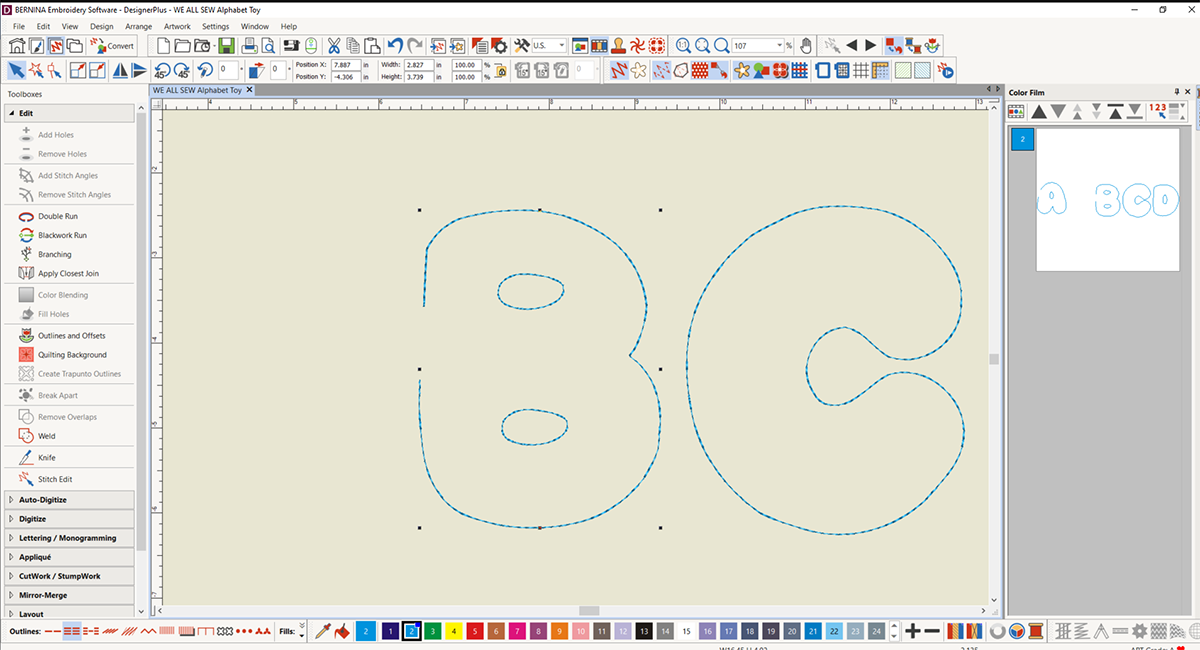
Before we finish the A, select the center of the letter and right click. Choose Duplicate with offset and move this center to above the letter B. We’ll use that in a minute.
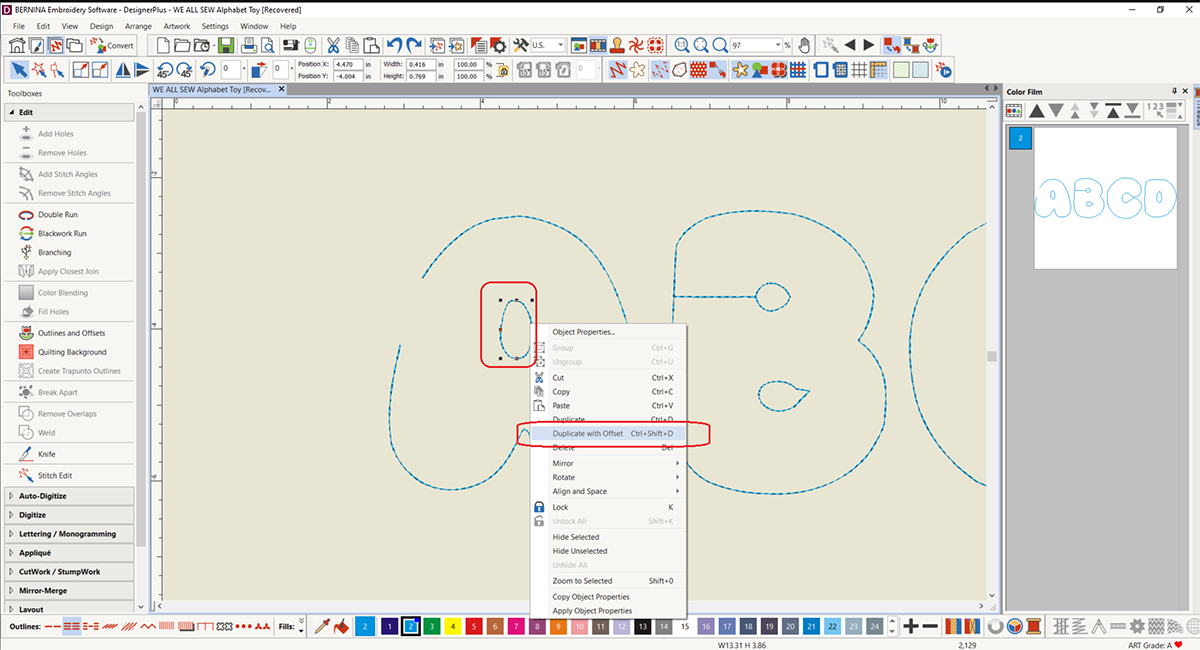
Now use the selection tool to drag a box around the letter A by itself. This will select every part of the letter. Right click inside the selection box and select “Group” from the drop down menu.
With the whole letter grouped it will move as one piece. I dragged it away from the letter B to clear some space and create a visual reminder that I already finished that letter.

Let’s look at the bottom cutout on the letter B-this shape didn’t come out as I would have wanted so I am going to change it. Select the shape and tap the ‘delete’ key to remove.
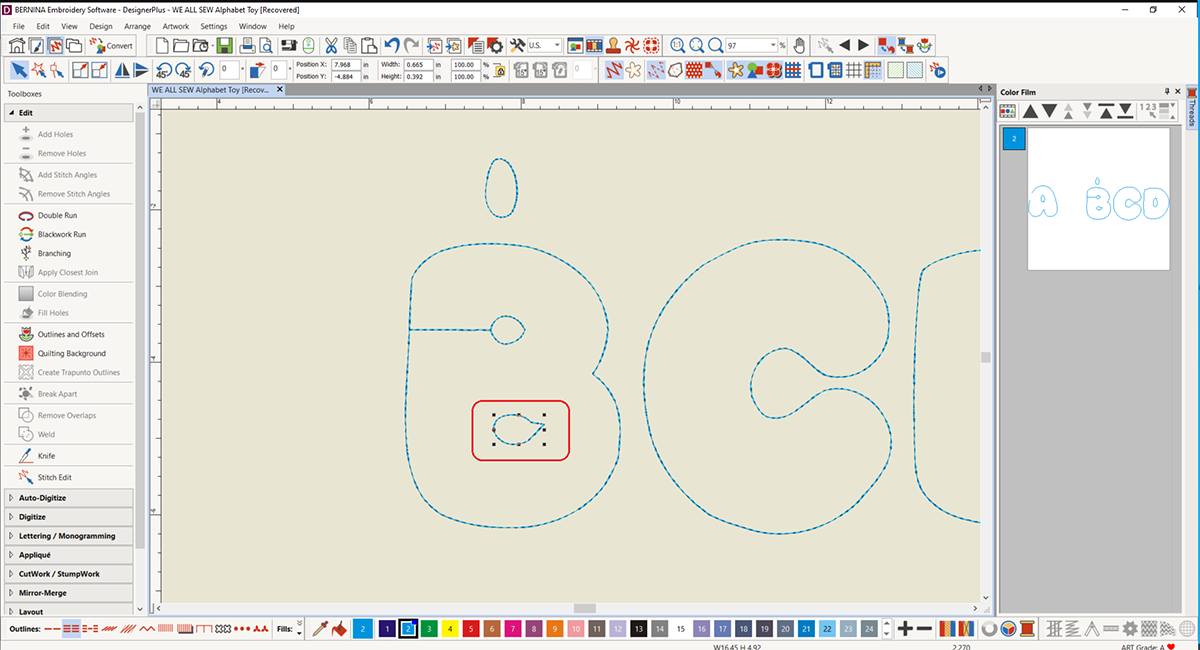
Remember the shape we saved from the A? We are going to use this for the letter B as well. Select the shape and move in into a position you think looks good. To rotate, use the rotate buttons in the toolbar.

For the next part of the letter B, we will have to go back to the knife tool. Sometimes you may have to edit the letters because they don’t digitize as well as you hope they would, but that’s okay! With some clever editing, we will make everything look exactly how we want.
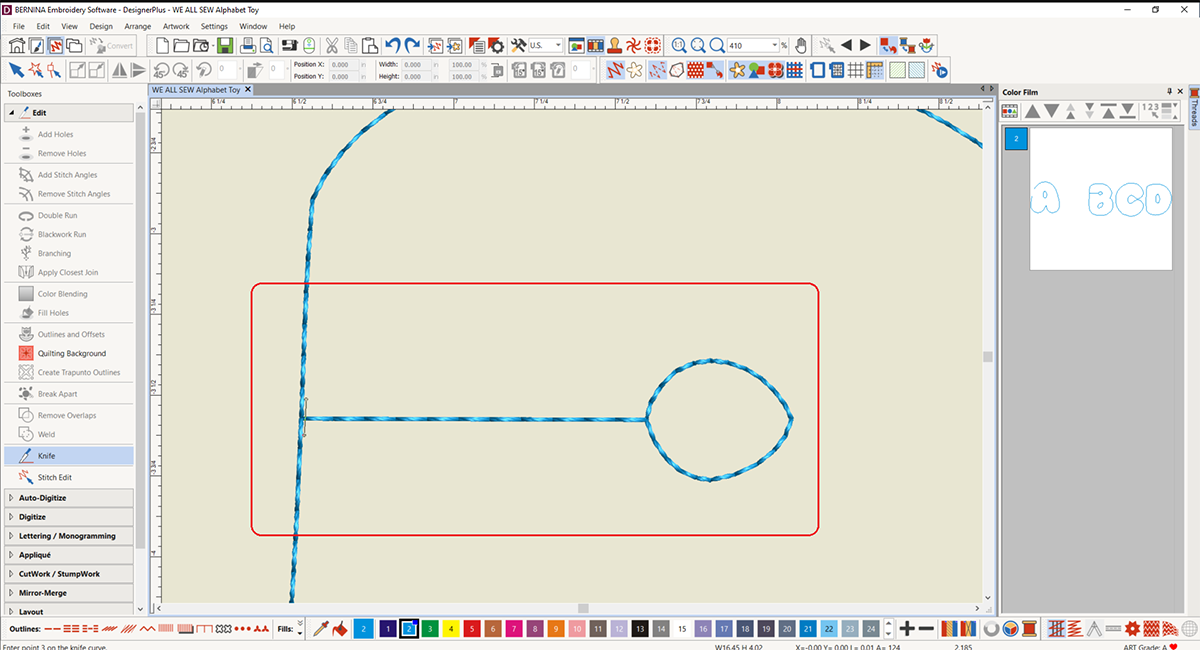
Zooming in close, we will use the knife tool to get rid of this extra line attached of the center cutout by using the knife tool as close as possible to the side of the letter. Delete the shape.
Next, select the bottom cutout shape. Right click the shape and choose “duplicate with offset” Drag the shape where you want it at the top center of the B.
Looks fantastic! Now it’s time to create the opening in this shape, just as you did with the A. Once the opening out is finished, select the whole design and group it just as you did with the letter A!
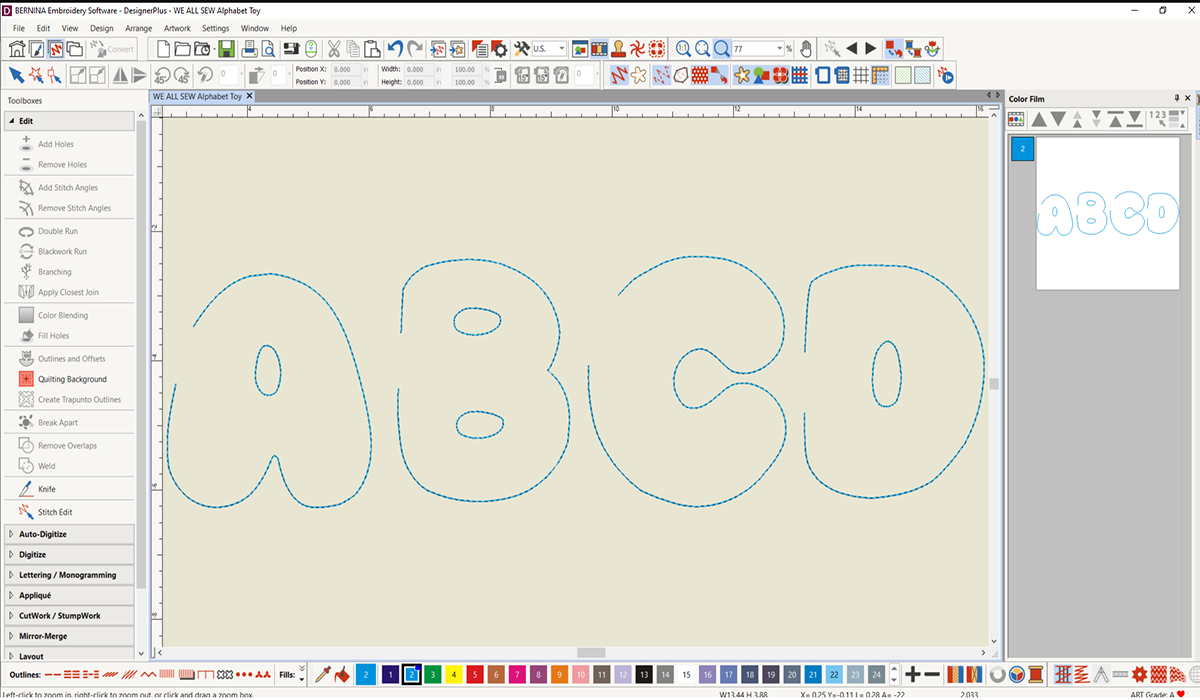
Repeat steps to edit and create openings for every letter on screen.
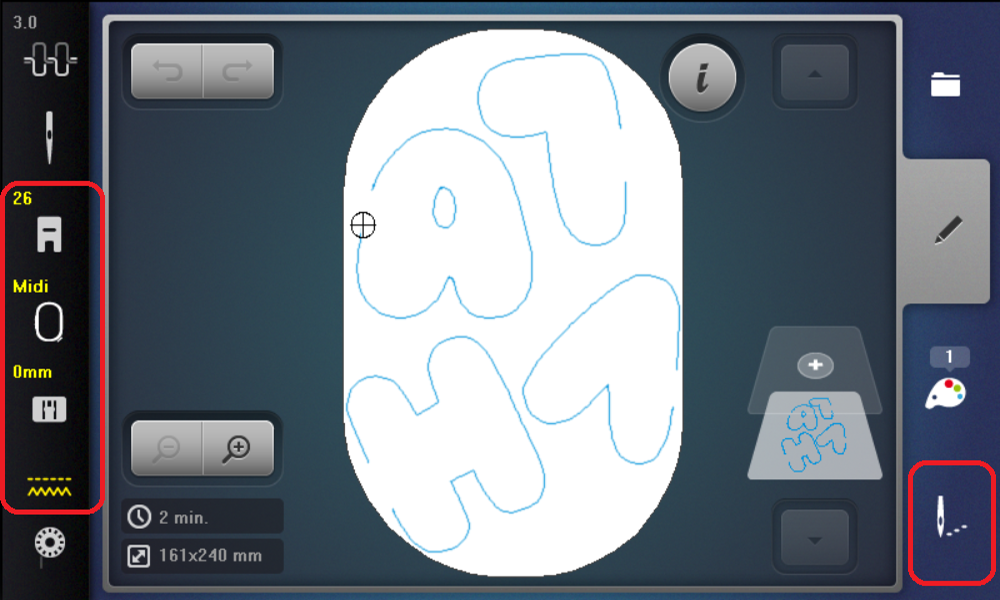
Tap the Show Hoop icon from the toolbar.
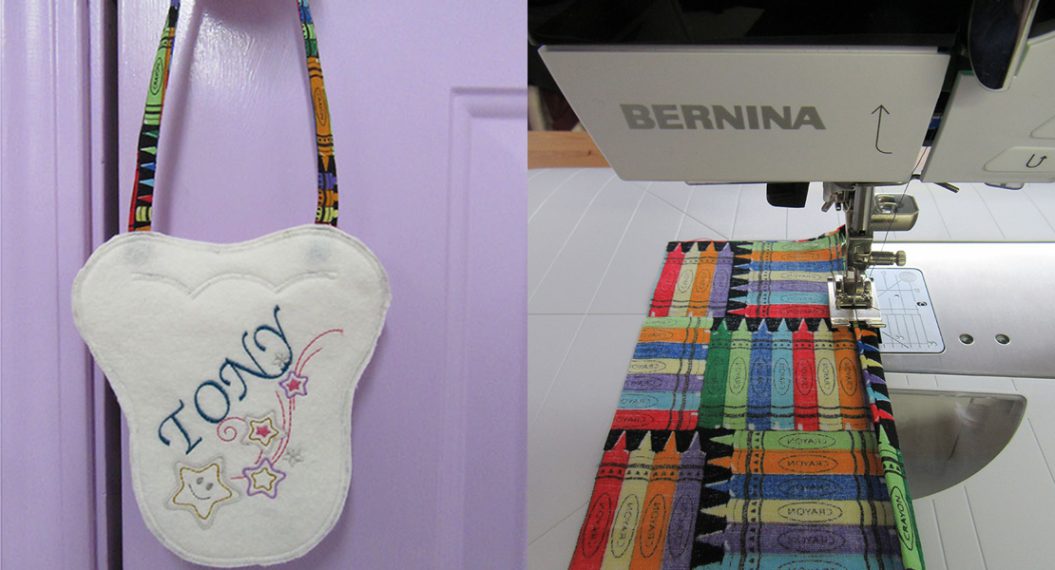
Right click the Show Hoop icon to select the correct hoop that you will be using- I am using the Midi Hoop today. I love my Midi Hoop for the size and it’s twist lock closure.
Enter all your information then click ok.
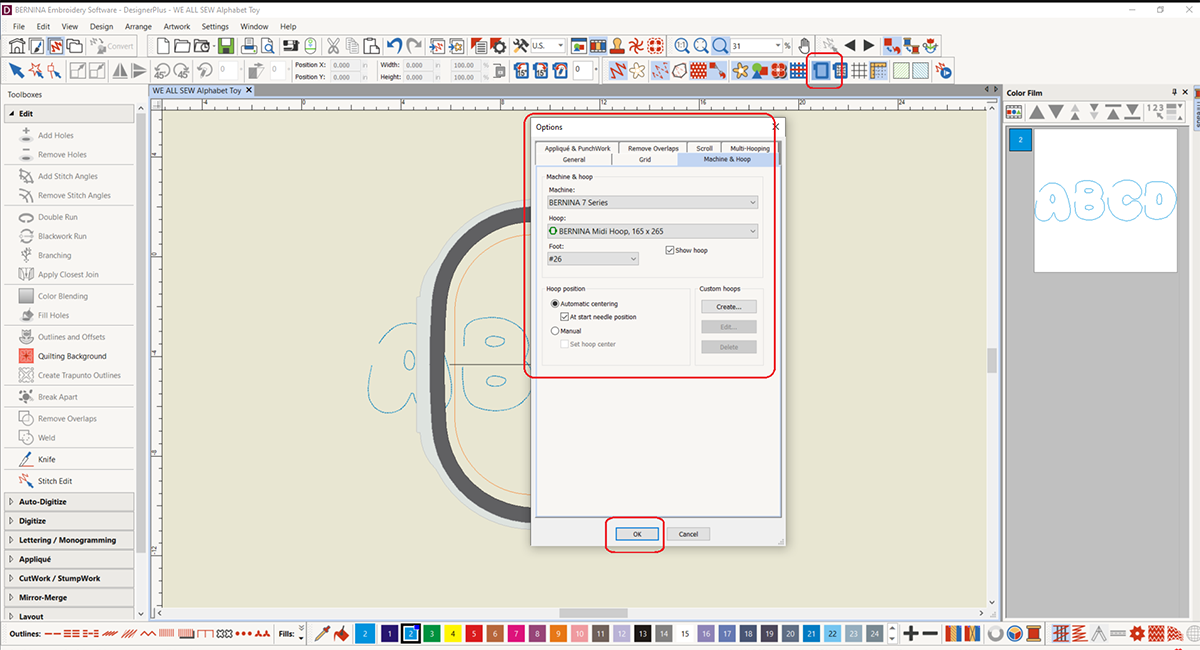
Arrange the letters in the hoop so they all fit. Don’t forget to leave at least ¼” between letters to make them easier to cut out. This may take some careful maneuvering and also may require rotating your letters to make the shapes fit well within the stitch area.
Once you like the placement of your letters, you can save your design and send it to your machine or USB stick.
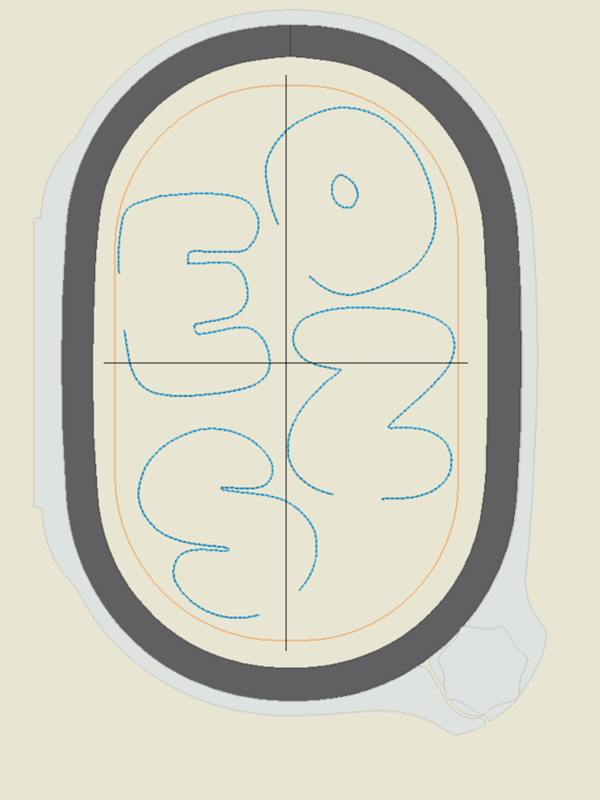
Repeat the creation and editing of all the letters in the alphabet. Remember how I varied my letters per hooping for a multi-color alphabet? Here is one of the hoopings I created.
Step 2: Prepare for Embroidery
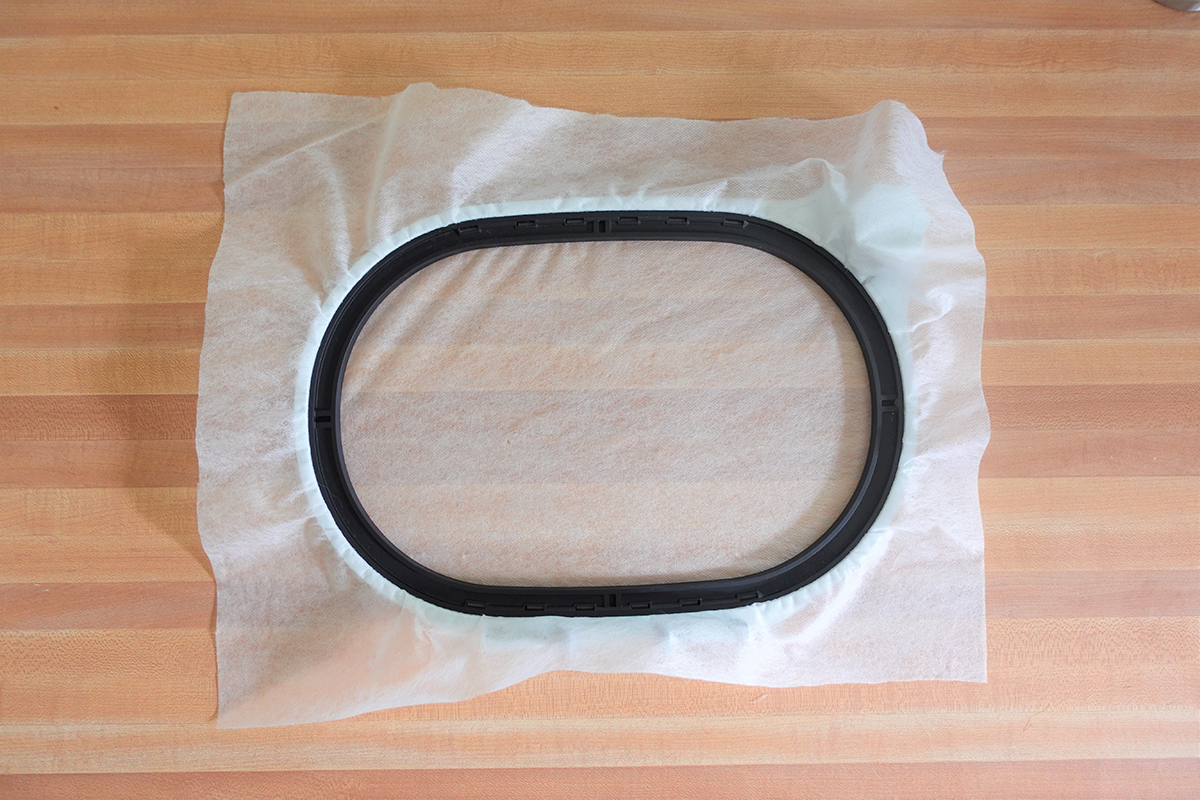
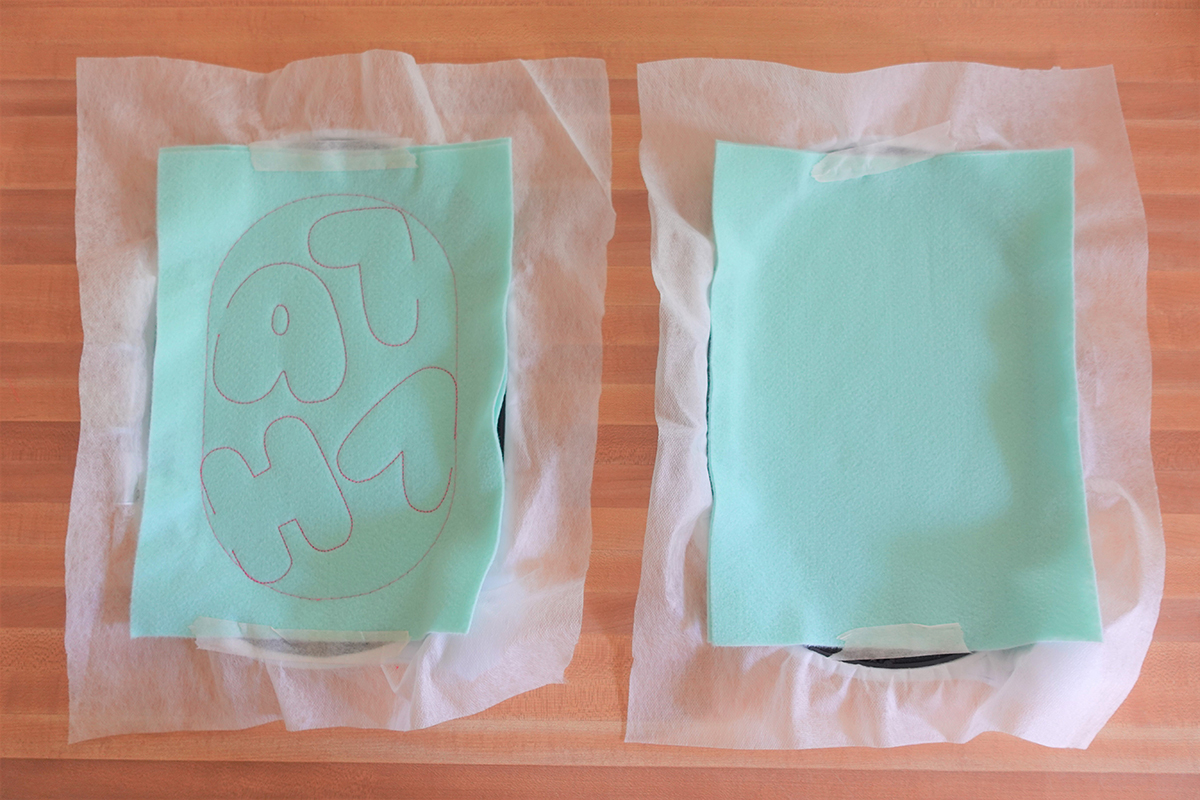
Cut a piece of Aquamesh to fit the hoop, giving yourself at least 2 inches on every side. Hoop the Aquamesh
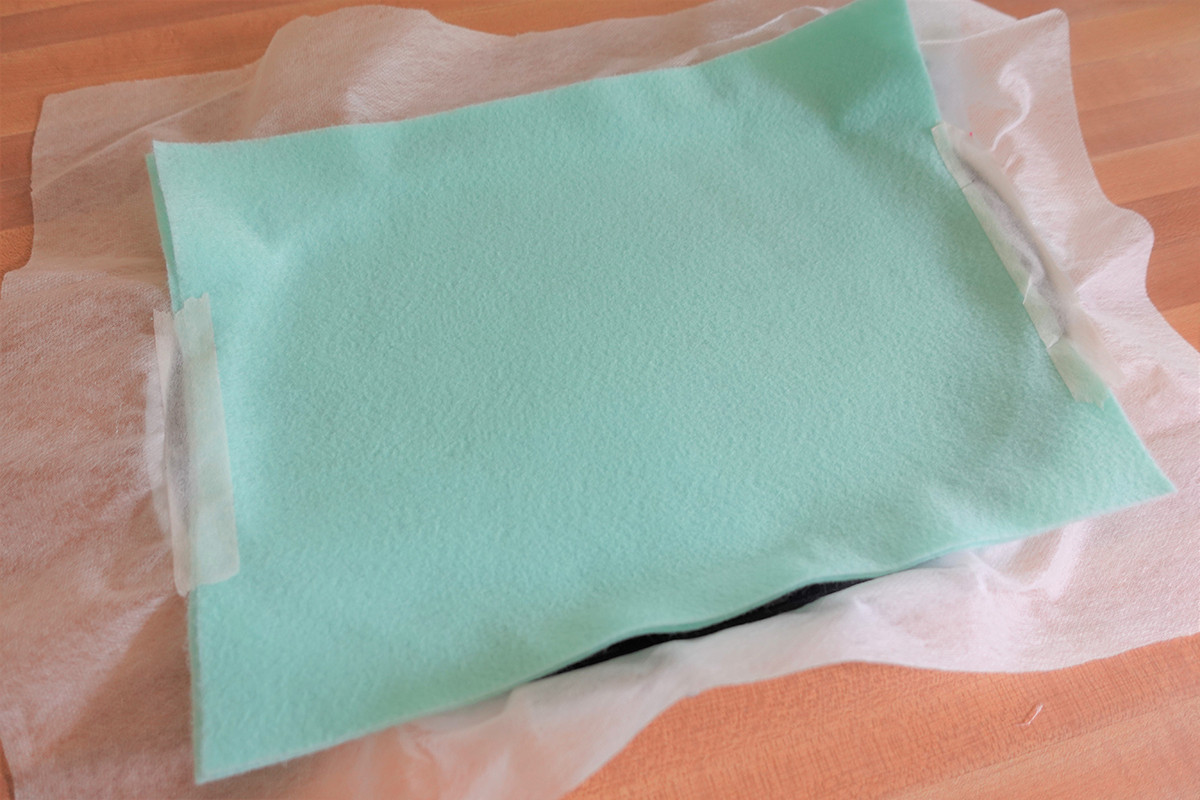
Take two pieces of felt and center them in the hoop. Use embroidery tape to secure them.
Wind a bobbin with embroidery thread. Install the 90/14 Topstitch needle and thread the machine with embroidery thread to match the bobbin. Attach your embroidery module and ensure all your designs are properly transferred to the machine using the Wi-Fi device or a USB stick. Bring up your first embroidery design, set all the machine settings for embroidery and go to the stitch out screen when you’re ready.
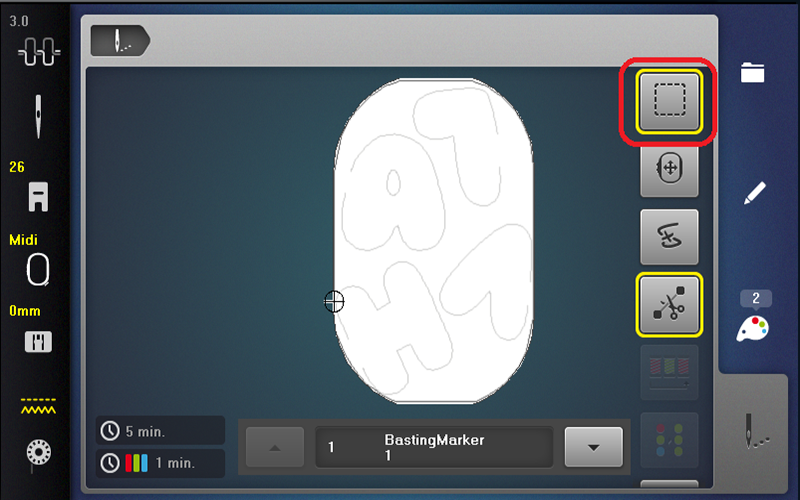
Select the basting box, tap twice to select a box around the whole hoop. This will help secure the felt in the hoop for embroidery. When you’re ready stitch out the basting box using your machine’s foot pedal or the start/stop button.
Tip: I love that my BERNINA allows me to use my foot pedal to embroider, which really comes in handy for basting boxes. By using the foot pedal, I can stitch slowly and stop the machine instantly to smooth out the felt, fix any bubbles, etc. We typically want to use a basting box when floating material in the hoop, as we are now, and the added control of using the foot pedal to stitch really helps!
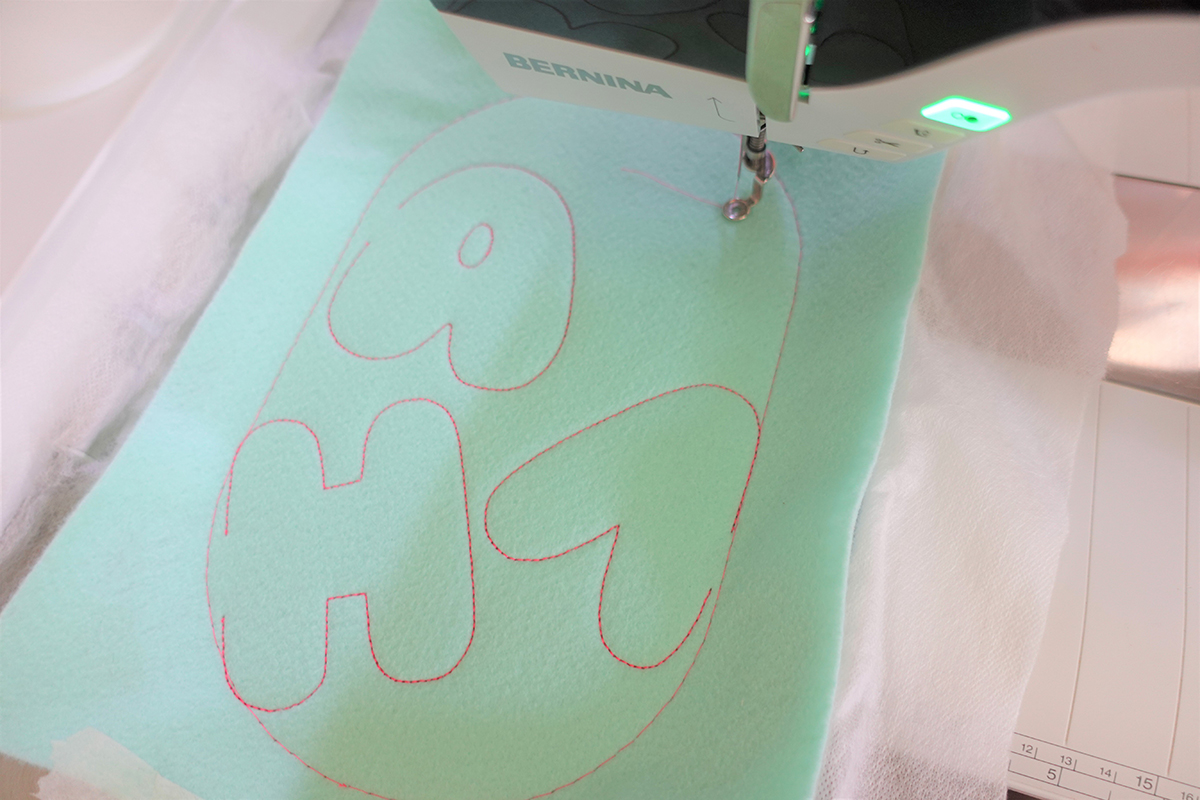
Step 3: Embroidering the Letters
After the basting box is complete, press the green flashing Start/Stop button and hold it until the embroidery machine starts (roughly three seconds). Embroider the design.
Once the embroidery is finished, tap the checkered flag on the screen and remove the hoop from the machine. Turn the hoop over and snip the basting stitches on back before unhooping the material. This will allow you to pull away the basting thread from the front easily.
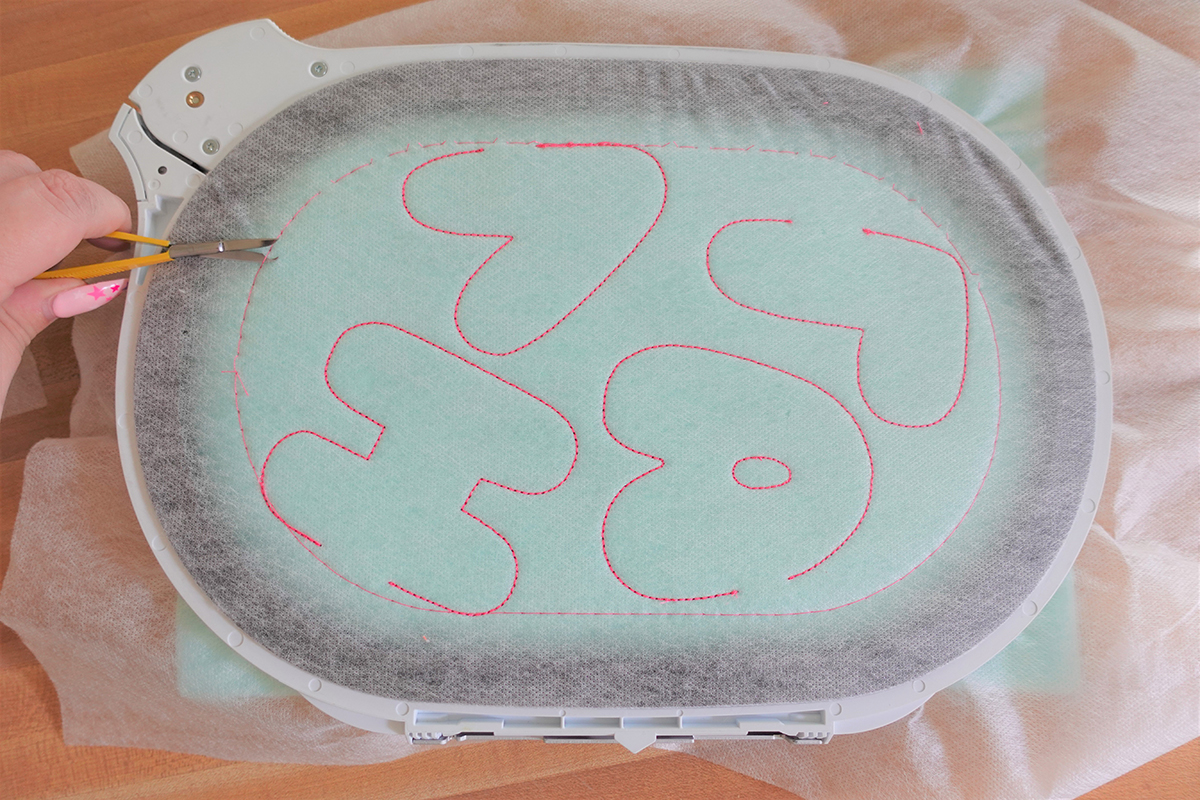
Unhoop the material and set the hoop contents aside for now. Repeat all the steps as many times as necessary until you have all your letters embroidered.
Tip: My favorite time-saving tip is to prep my first set of letters while the next set stitches out. Once I get another hooping all set up I will go back to the letters I just stitched to remove stabilizer, cut out the shapes, etc.
Step 4: Making the Letters
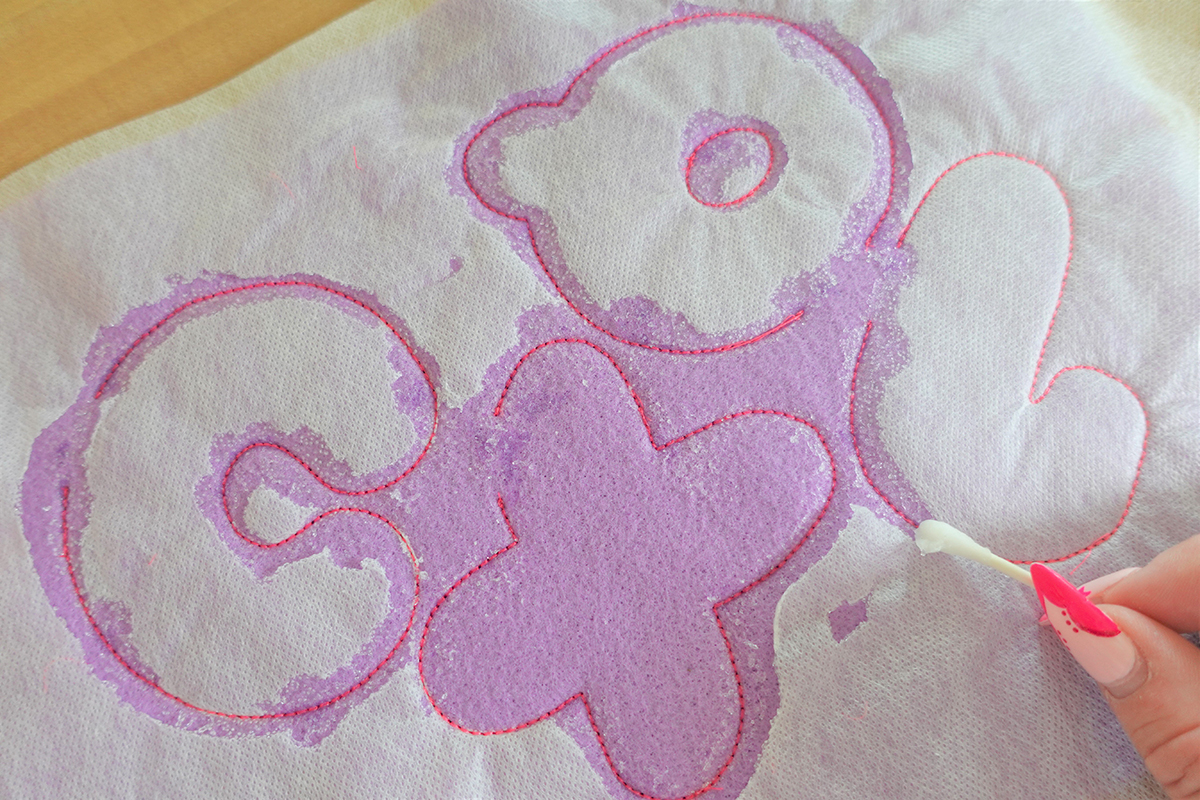
Remove all the stabilizer from the back of the felt pieces.
If using Ultra Clean and Tear Stabilizer then gently tear the stabilizer along the stitching lines, supporting the stitches with your fingers to ensure they don’t loosen or distort.
If using Aquamesh, use a Q-tip or paintbrush to paint along the stitching to dissolve the stabilizer, then simply remove the leftovers. Use water to remove any starch residue for a clean back.
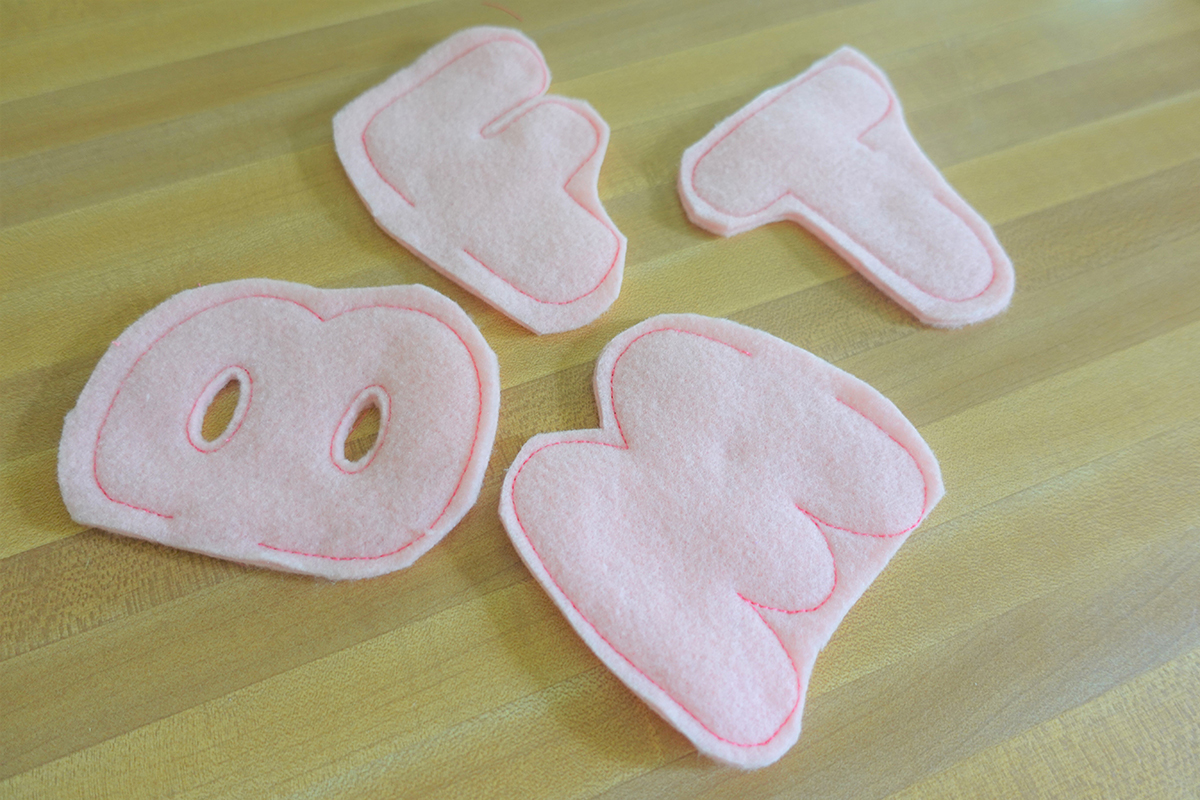
Cut out each letter roughly 1/4”-1/5” away from the stitching. Don’t worry about making it look good now, we will clean it up later. Cut out the centers of letters like “O” and “A” as well, being extremely careful not to cut the stitching.
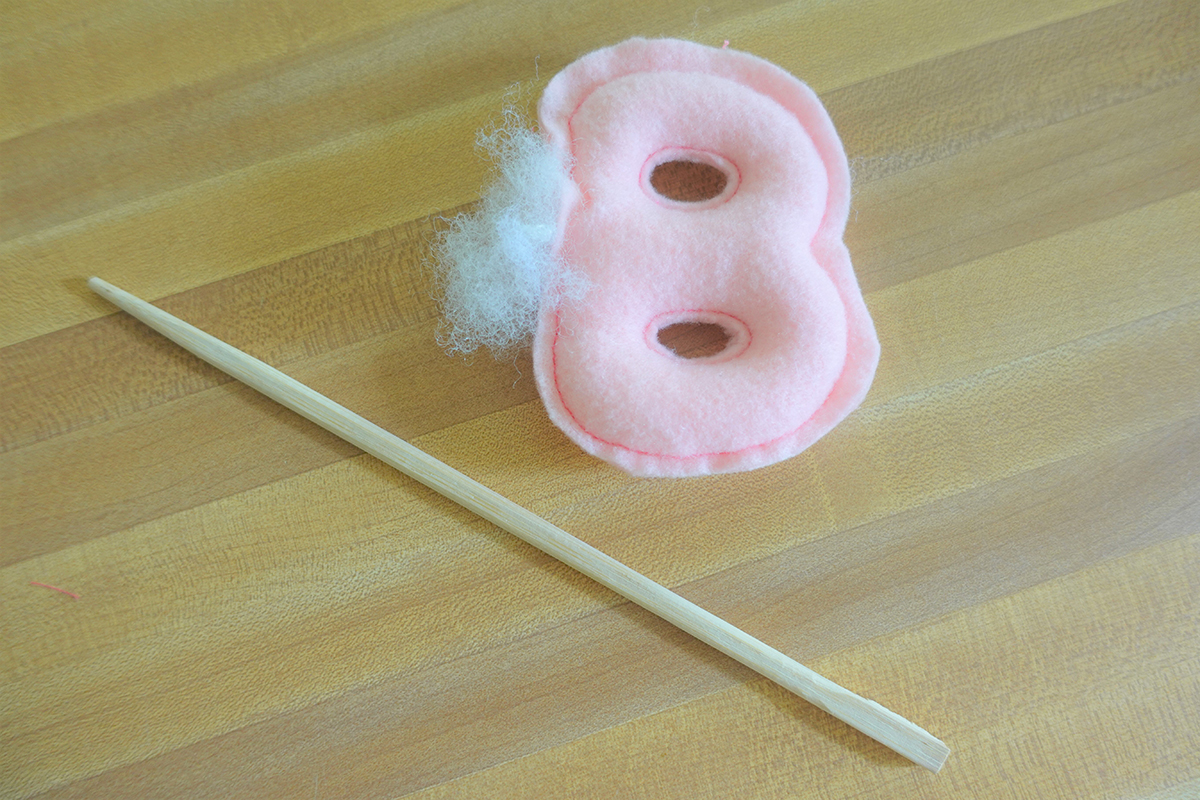
Stuff each letter as desired using a chopstick or similar tool. This step takes little time so I highly recommend grabbing a drink and an audiobook or podcast! I found it so calming that I ended up enjoying this step a lot.
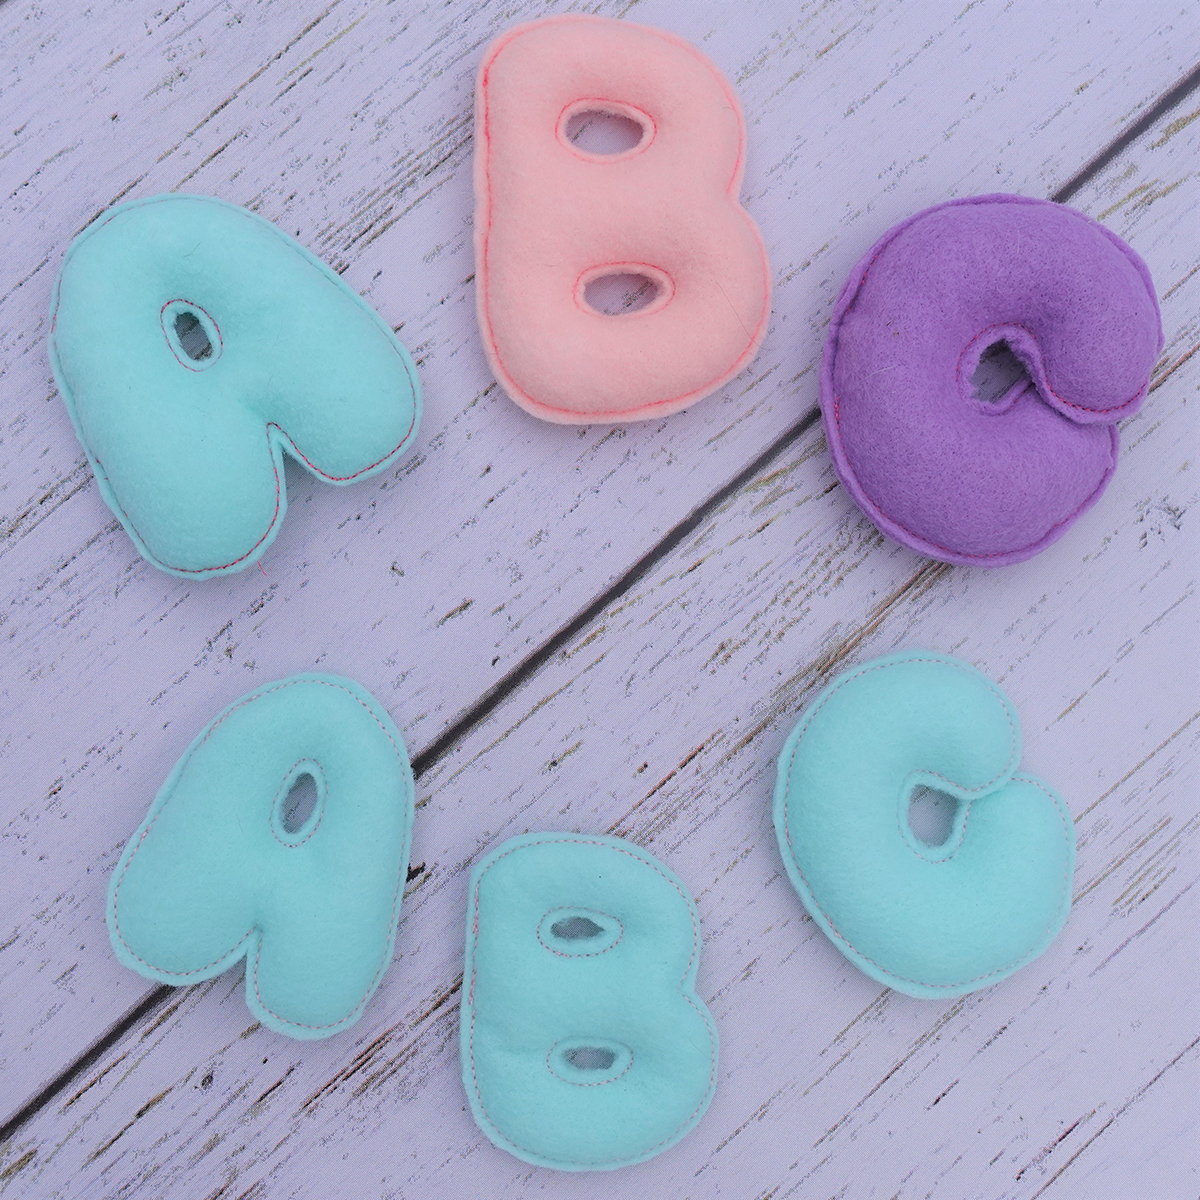
I made two sets of the alphabet. For my first letter set I used minimal stuffing, just enough to add dimension and fill out the letters. This also made them very easy to stitch in the final step.
For the second letter set I stuffed them as much as possible creating puffy, round letters. These were a little tougher to maneuver under the needle but totally worth the stitching being awkward at first. Once I found a good rhythm they were easy to get done well. I liked the more stuffed letters more even though it made them take more time.
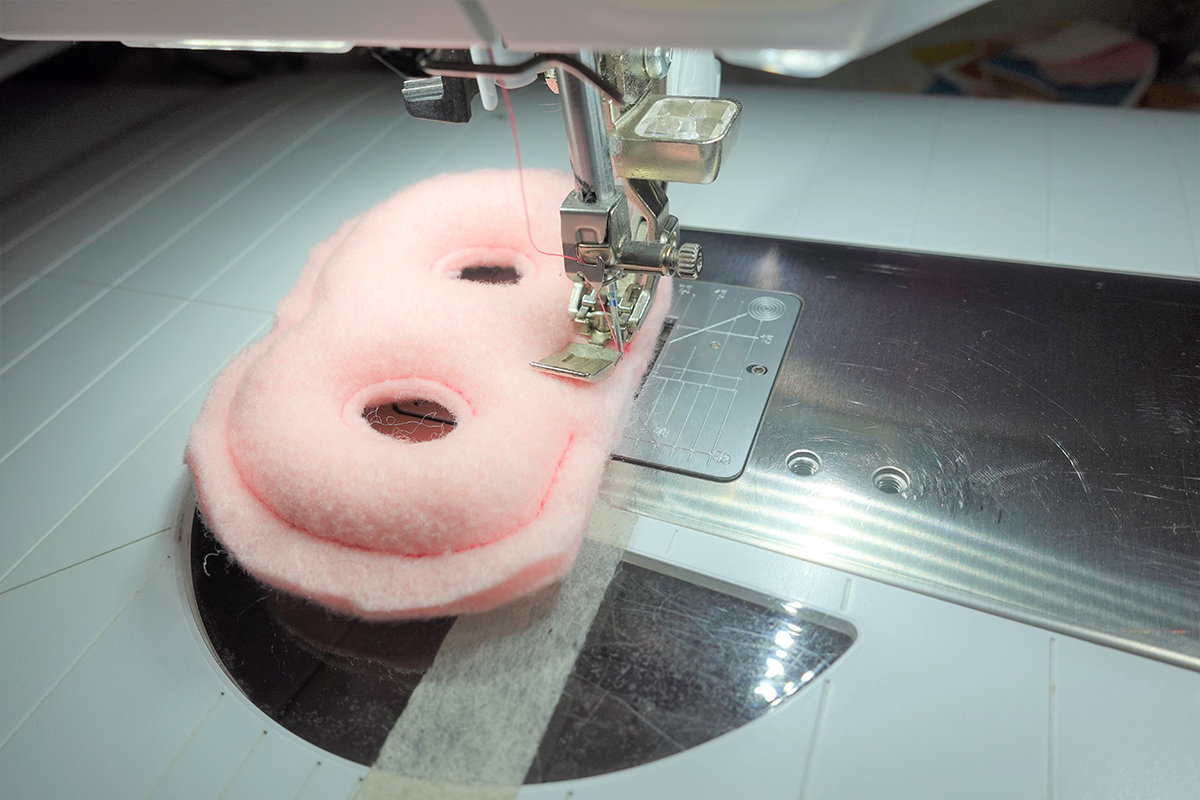
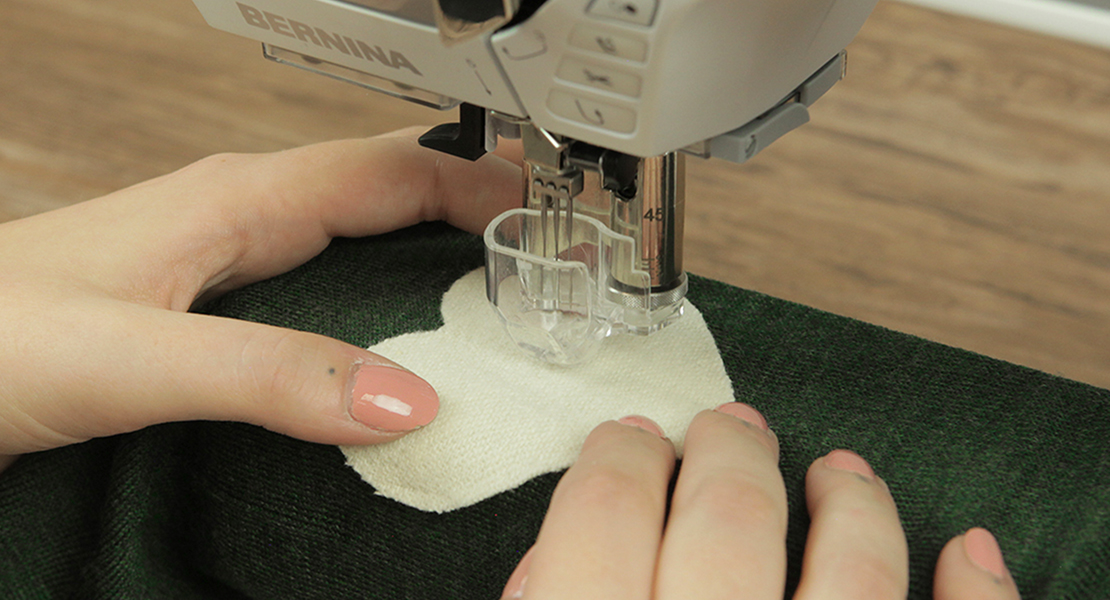
Set up the machine for sewing by changing the machine to sewing mode, raising the feed dogs, putting on the 9mm stitch plate and Zipper Foot #4D. Move the needle to position 5 and choose triple straight stitch #6.
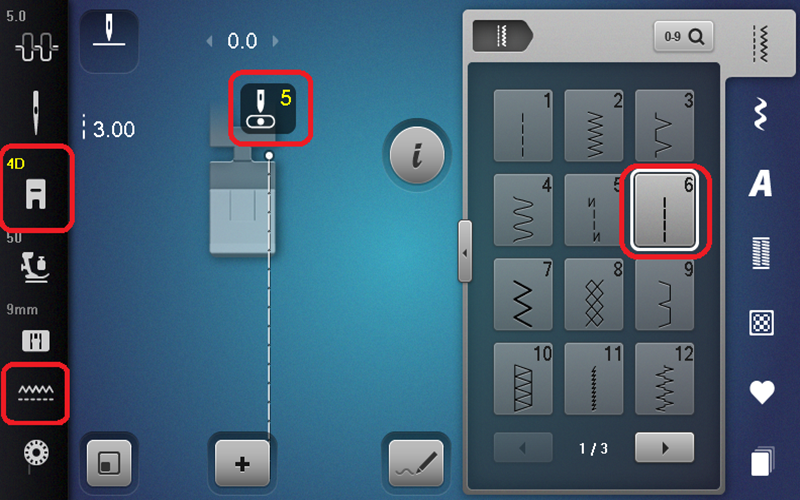
Next we need to stitch the opening closed. Place the letter underneath the presser foot so it is fully supported by the stuffed letter. Line up the needle with the stitching from the embroidery, a few stitches back from the opening. Secure your stitch using the Reverse button and stitch the opening closed, connecting the two lines of stitching. I don’t really line anything up here I just eyeball it and stitch slowly. Secure the stitching using the reverse button once you have gotten to the other side and stitched over the end by a few stitches.
Repeat for every letter
Trim down the felt around each letter to a consistent size. Mine is roughly 1/8” away from the stitching.
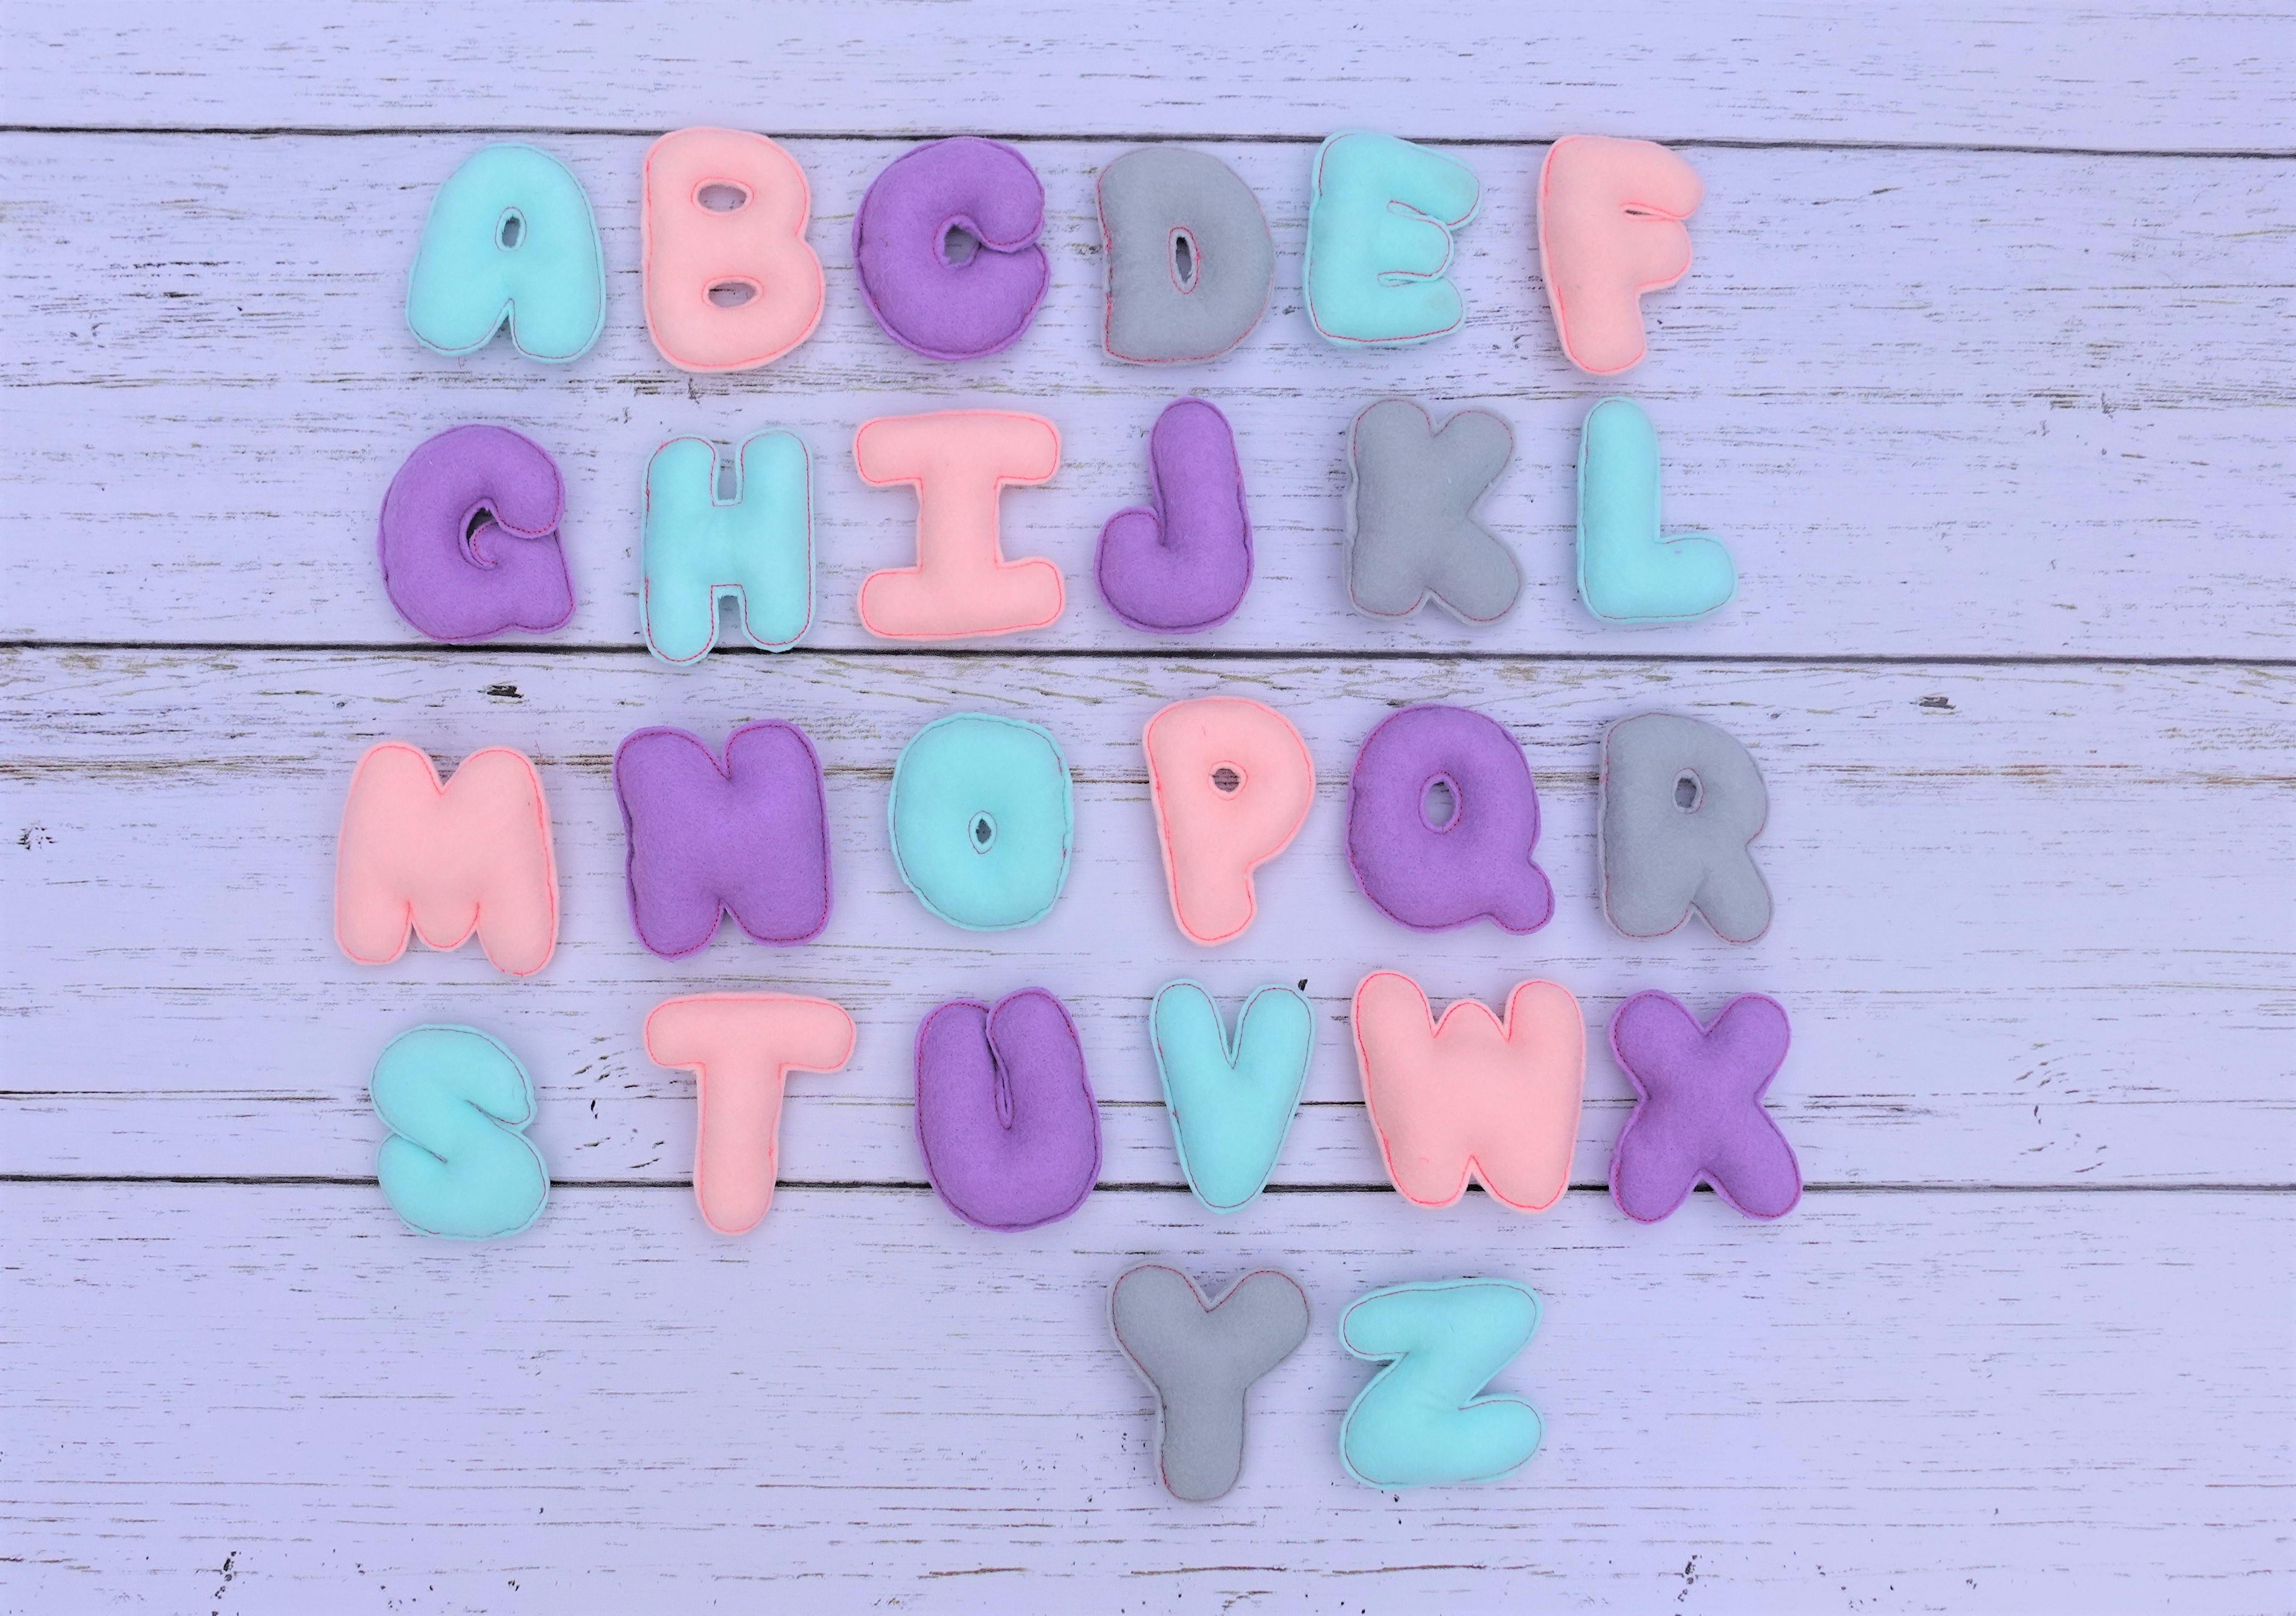
You’ve done it! Not so bad, huh? Now I’m dreaming up a million ways to use them like adding these letters as gift decorations, garland for holidays or even adding magnets to add them to the fridge. The possibilities are endless. I think before I give these as a birthday gift for my niece I will make some extra letters so she can spell her name out as well as words like “mom” and “dad”
I’m thinking my next project will the making a Simple String Bag, a Fabric Storage Bin or an Overlocker Drawstring bag as a way to keep these cute little letters all together when they aren’t being played with. I can’t wait to see what you do with your letters!
Happy Embroidering!


Very clear and detailed instruction steps. Thank you.