Fabric Tortilla Warmer
If I had to pick one type of cuisine to eat, hands down and every time, it’s Mexican food! I sometimes joke with my family that I should have been born in Mexico, because I really do love it that much! Needless to say, we eat a lot of Mexican food in our home…and we all LOVE tortillas! But have you ever cooked up Fajita meat or some Carne Asada with a side of fresh salsa and corn tortillas, but are disappointed with your cold and dried out tortillas, once it’s time to eat?! Yeah, me too! Generally, we wrap them up in paper towels and then some tin foil until we’re ready to eat them, but I’ll admit, it’s a little wasteful. I’ve been wanting to buy some sort of tortilla warmer for a long time (you know, like the kind you see at Mexican restaurants), but haven’t found one I like. So instead, I decided to make one from a few layers of fabric and some insulation.
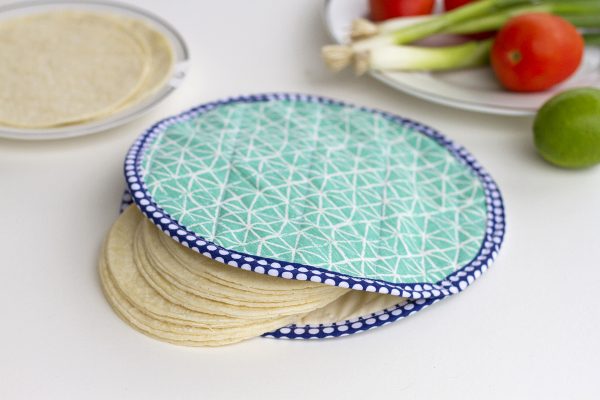
The cool part is that this Tortilla Warmer is microwave-able. Just load it up with tortillas, close the flap, microwave for 15 seconds-check it, add more time if needed (depending on how many you’re warming up), and then done! And now your tortillas stay warm and chewy for the whole meal!
Then once the tortillas are steamy warm, carry the whole thing over to the table and then tortillas can be removed as needed. Oh, and don’t worry…the warmer is bigger than the tortillas, so there’s plenty of space to push those tortillas down deep inside and keep them extra insulated when the flap is closed. Definitely a great item to keep tucked away in the drawer for Mexican night! 🙂
Ready to make one for your home? Or as a gift for those Mexican food loving friends of yours?
Materials to make a Fabric Tortilla Warmer
- 100% cotton fabric, outside layer
- 100% cotton fabric, inside layer (choose something without a print/color, because this is the layer that touches food)
- 100% natural cotton batting (Pellon makes something called Wrap-N-Zap that’s microwave safe)
- 100% cotton 1-inch double fold bias tape (if you’d like to make your own, HERE’S a Bias Tape Tutorial)
- 100% cotton thread
You can use fat quarters of fabrics for this project along with a small piece of batting, or scraps that are about 12″ x 12″ square.
Before you get started, decide on how big you want your Tortilla Warmer to be. If you eat larger flour tortillas more often, you may want to make yours larger than the one shown here, but we normally only eat corn tortillas (and they tend to dry out a little easier too..so this is extra helpful). So, I decided that a circle diameter of 9 inches was perfect for the different corn tortilla brands that we buy.
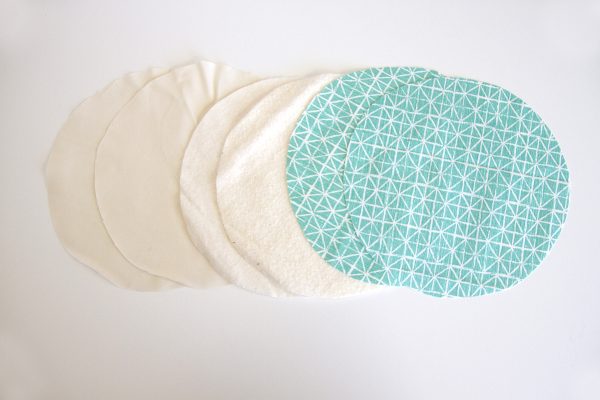
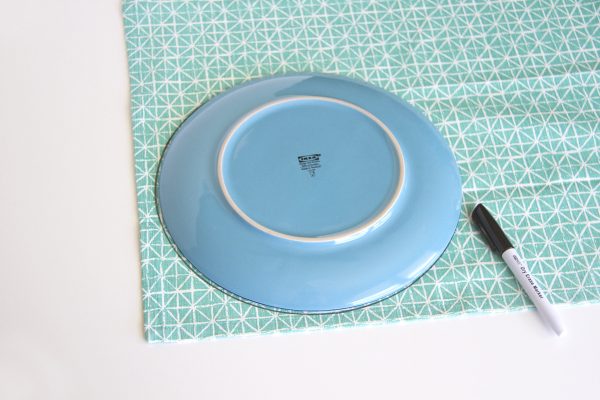
First, cut 2 circles from each of the fabrics that are the diameter you’re wanting.
TIP: The easiest way to trace your circles, is to find a plate or bowl with the same diameter size you’re needing, and trace right around it onto the fabric with a pen/marker.
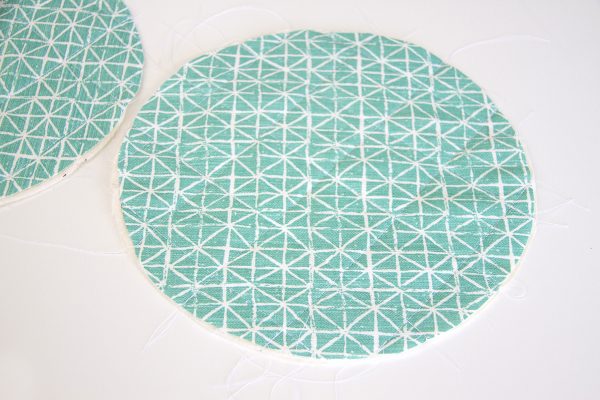
Now, grab one of your outer circles, one of your inner circles, and sandwich them between one of the batting layers…making sure the RIGHT side of the fabrics are facing away from the batting. Then, sew (or quilt) a few a few horizontal lines and a few vertical lines across these three layers, to help all of the layers stay in place. I spaced my lines about 2 inches apart…but it doesn’t really matter the spacing or how many you actually sew. Repeat with the other set of circles.
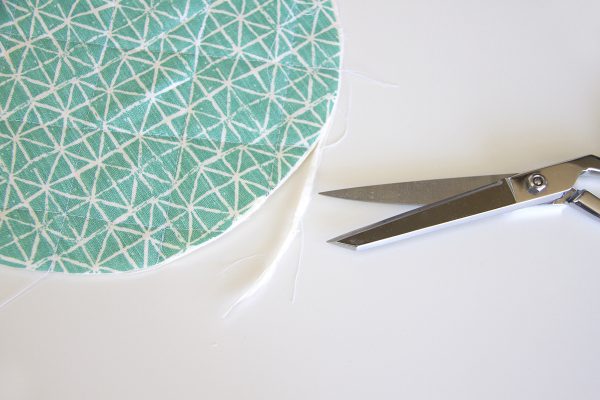
More than likely, your fabrics probably shifted just a bit while sewing your lines. That’s okay, just trim down any uneven edges until your circle is perfectly round and even again.
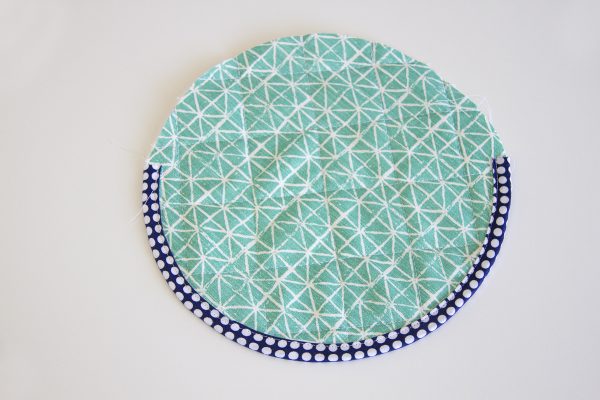
Now, grab one of the circles and attach your bias tape around a little more than half of the outer edge of the circle. (Need help attaching BIAS TAPE?)
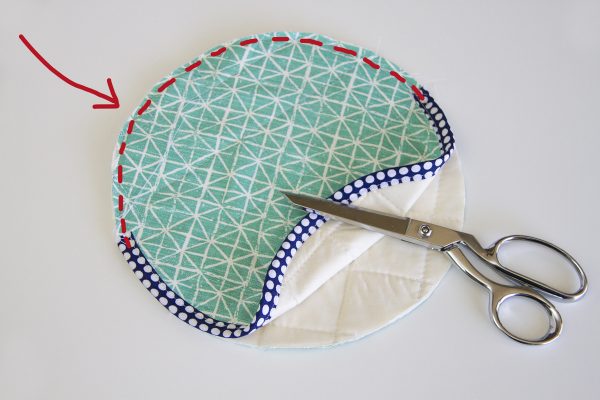
Now, place your two circles together, with each of the INSIDE fabrics facing each other, then sew them together along the edge OPPOSITE of where you attached the bias tape to the top circle (reference the red line in the image below). Use a 1/4 inch seam allowance and overlap onto the bias tape on each side, by about 1 inch.
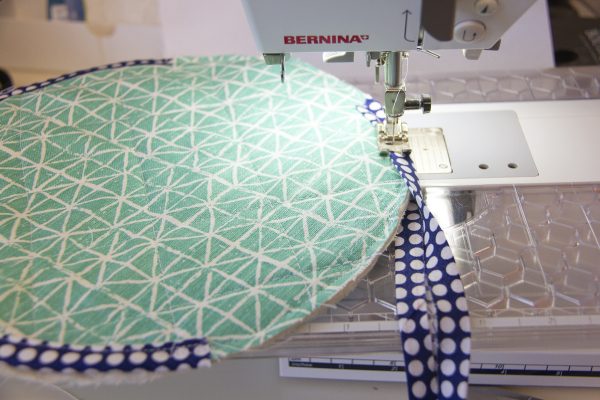
Now, place your circles up to your sewing machine with the bias tape side FACE UP. Then, grab more of your bias tape and begin sandwiching it around BOTH layers of circles, starting about in the middle of the seam you just sewed in the previous step. (You can use pins to hold your bias tape but I think it’s a little easier to sew a few stitches, adjust the bias tape, sew some more, and repeat.)
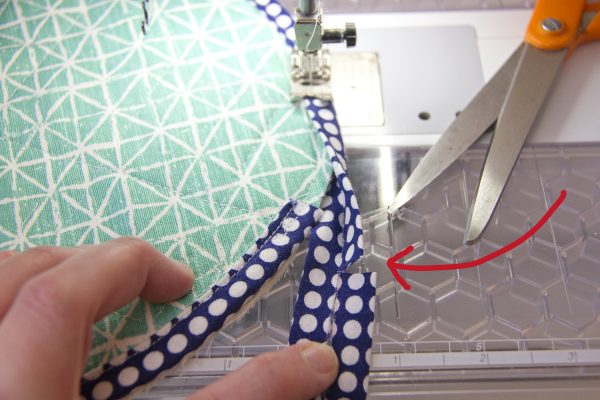
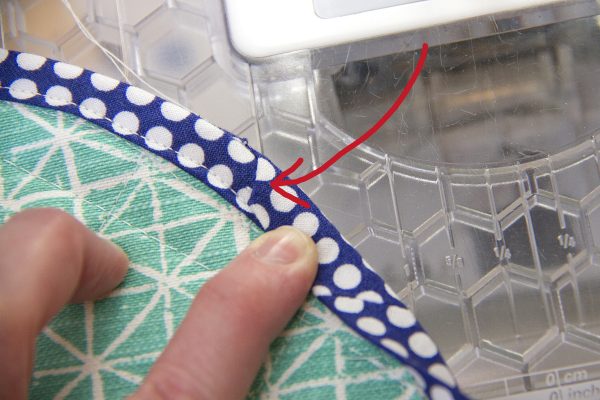
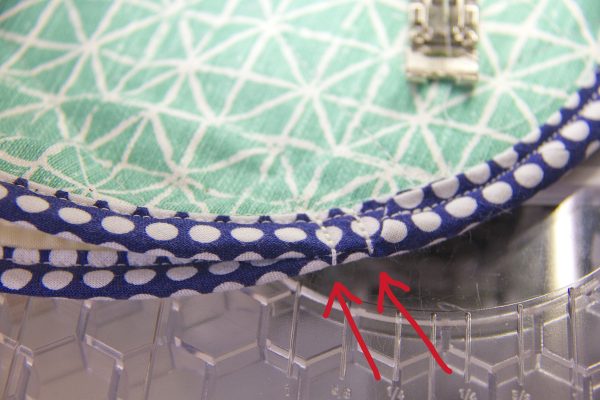
Keep sewing until you reach the side where the bias tape already exists. Stop about 1-2 inches before you reach the attached bias tape and then cut a slit in the current bias tape that you’re sewing, about one inch past where it would meet the already sewn bias tape. Only cut halfway through the bias tape, right to the fold (reference the arrow below).
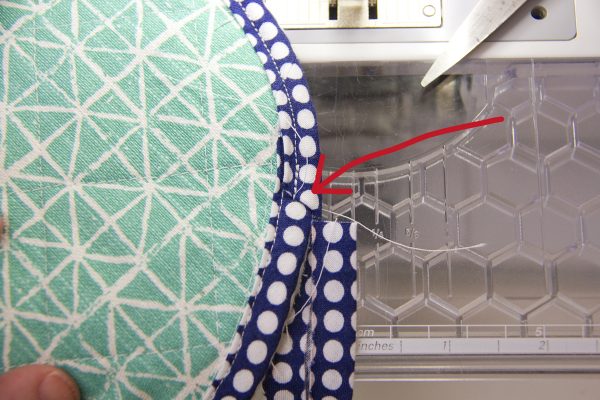
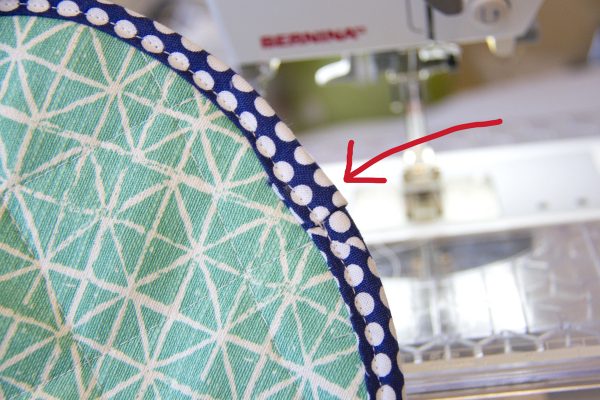
Continue sewing the bias tape around the edge of the circle, overlapping the previous bias tape. Right before reaching the end, fold under the edge that you cut at a diagonal (to hide the raw edge) and then sew right to the very end (reference the red arrow).
Now, lift up that top circle and continue wrapping the bias tape around the edge of the bottom circle.
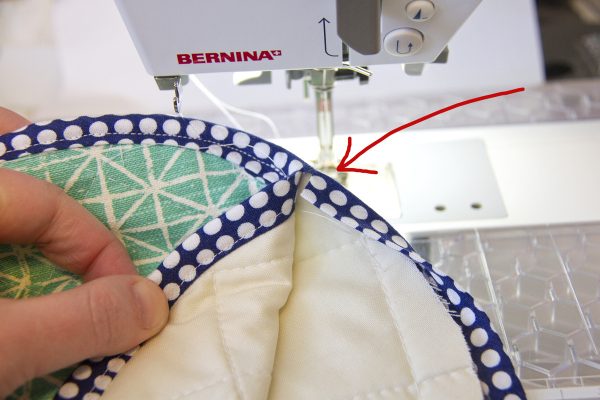
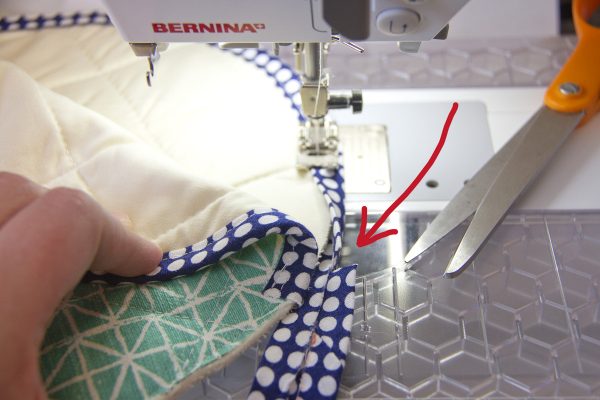
Sew the bias tape around just the single circle until you reach the other side where the 2 circle layers are attached again. Stop about 2 inches prior. Cut a slit in the bias tape the same way as a few steps above, making the slit right at the same point as where the two circle layers are attached.
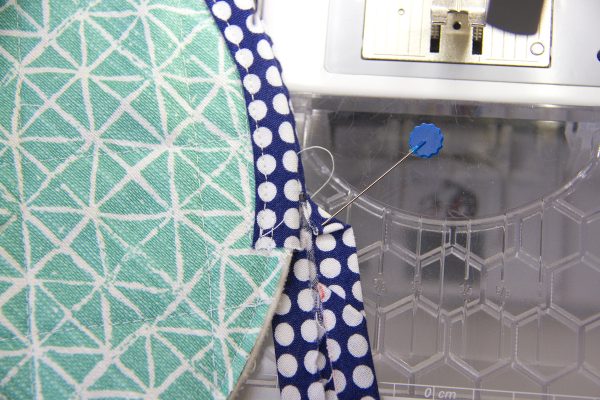
Continue sewing as far as you can sew on that single circle layer. Then fold the top circle layer back down in place. Now, fold over the raw edge of the bias tape that you cut, at a diagonal (right where my pin is holding it in place).
Then sandwich the bias tape (keeping that diagonal fold in place) around both layers of circles and continue sewing around both circles.
Once you reach the point where you very first started, cut the bias tape about 2 inches longer than needed, fold it under about an inch, re-sandwich it around the edge of your circle, and then sew in place.
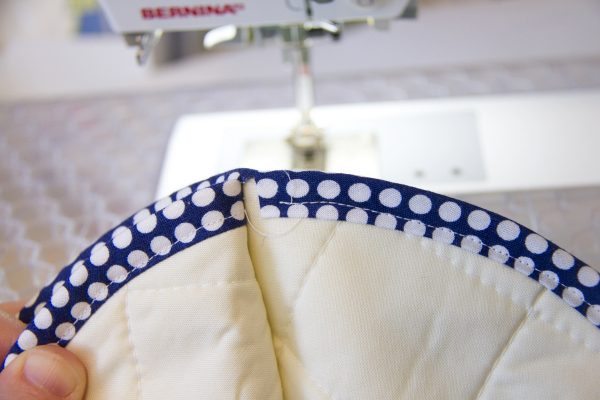
Now, if you open up your circle, you’ll see at the two sides where the circle are joined, there’s a raw edge of bias tape….
Sew two stitches right at that point to enclose the raw edges of the bias tape, but to also keep the layers secure together.
And that’s it! And because all fabrics and thread used are 100% cotton, your Tortilla Warmer is safe to use in the microwave!
So stuff it with some tortillas and place them in the microwave for 15 seconds, test, and repeat as needed. (The more tortillas you have, the longer it will take to warm.)
Thanks so much for having me here on WeAllSew today!
If you’re looking for more projects such as these, come and join me over at Make It and Love It! (And for certain project types, be sure and visit the Tutorials Category page.)
-Ashley
What you might also like
5 comments on “Fabric Tortilla Warmer”
-
-
I make mine 12″ and use them for baking potatoes, corn, warming buns and large tortilla for wraps etc.
-
Hi Ashley,
I’ve just bought all the fabric for these tortilla warmers, and I’m excited to get cracking on making some. I do have one question though. Would it work to sew the bias tape around both halves first, and then add the bias tape around both of them? Just wondering, as this would seem to be easier.
🙂-
?
-
I was thinking along similar lines…
Why not just sew the binding all the way around on both potholders and then just sew both potholders together half-way around? Even though you would use more binding material, I would find this easier.
-
Leave a Reply
You must be logged in to post a comment.









Oh my goodness…..yes, thank you! I fixed it! 15 minutes would be awful! 😉
-Ashley