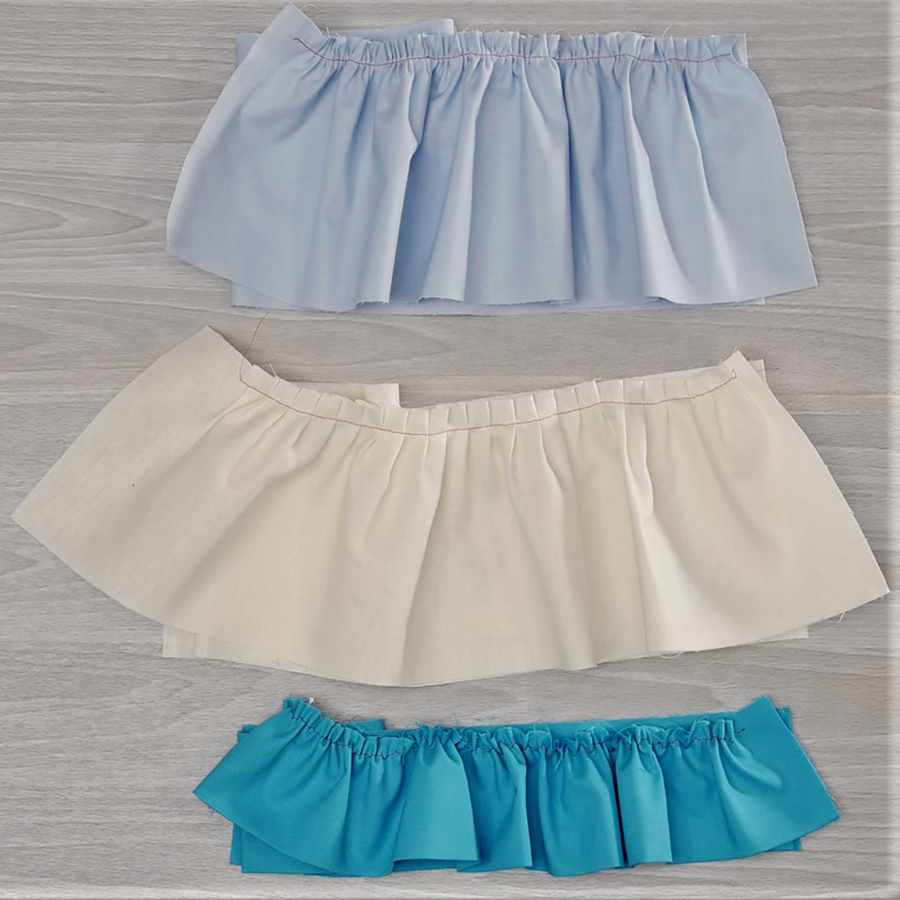
How to Gather Fabric: Three Ways
The funny thing about gathering fabric is that while it looks like you’re messing up your material, something we spend years learning to avoid doing, it’s actually very easy to do. The key is to use the right method for the type of gathers we need. And, the foundation of method chosen is using the right tool for the job.

In this article, we will review 3 basic ways to gather fabric:
- Using a gathering foot
- Using an automatic Ruffler
- Sewing over cords and pulling the fabric (adjustable, manual gathers)
Each method has its advantages, making it suited for a variety of applications. That means you usually have more than one option for your gathering needs. And options are good to have!
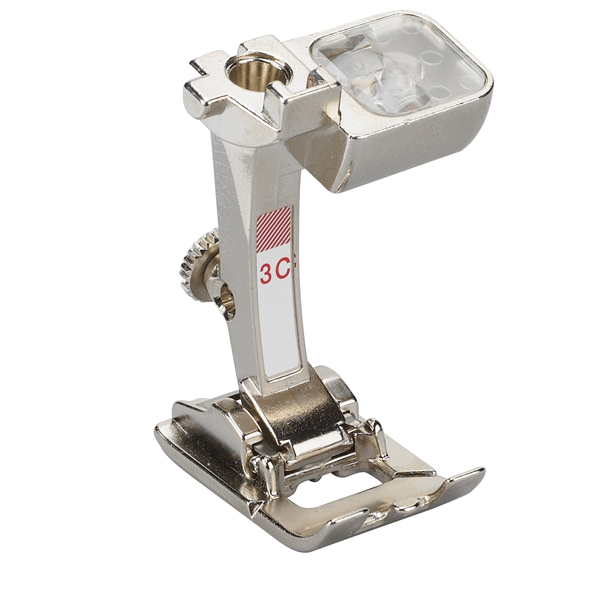
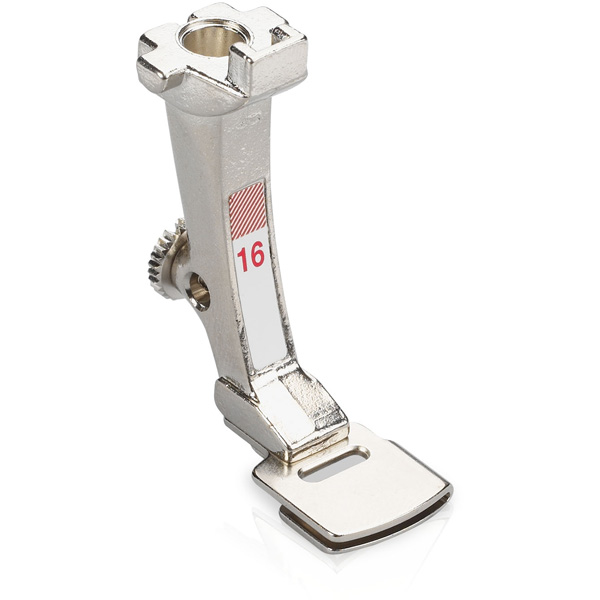
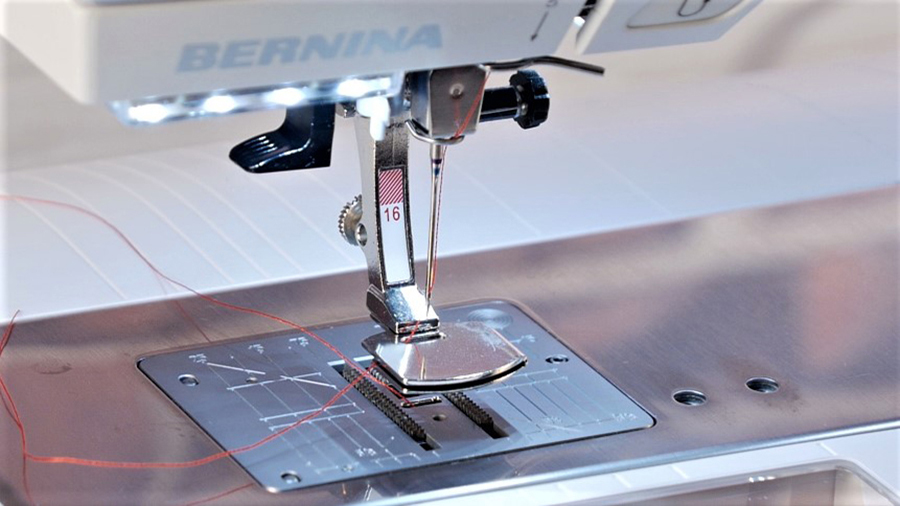
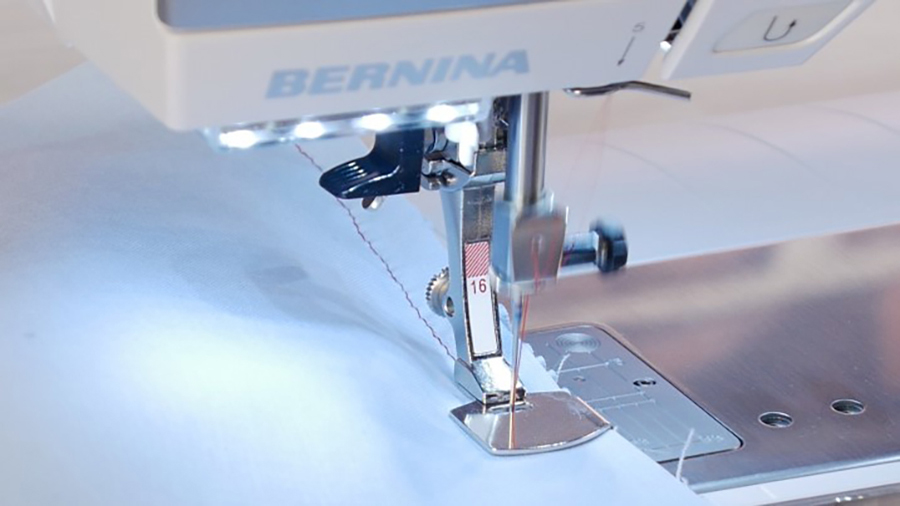
Gathering with a Gathering Foot #16
The method using Gathering Foot #16:
- Is ideally suited for light-to-medium weight fabrics.
- Relies on a long straight stitch (e.g. 5.0 mm).
- Uses high thread tension (e.g. 9.0) to accentuate the gathering effect.
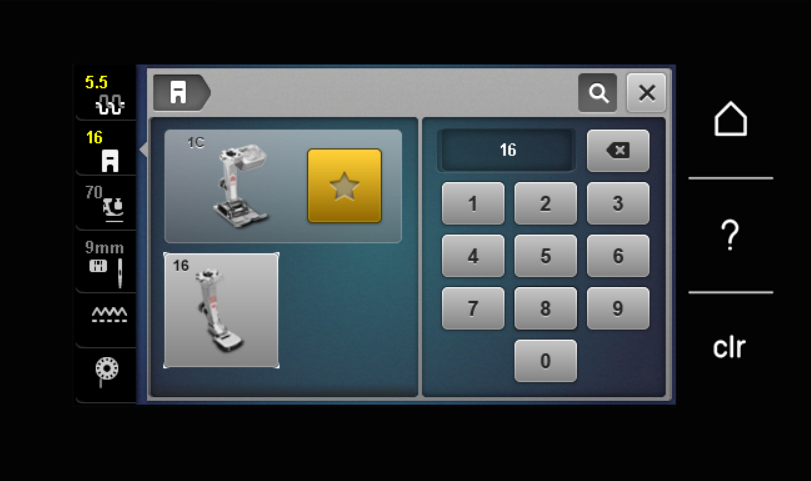
- Note: Gathering Foot #16 is available in 2 versions: regular for 5.5mm machines or wide for 9 mm machinesTIP: If you have both types of machines in your sewing studio, I would suggest you go for the wide version of the foot first. It will work well on both narrow and wide feed dogs.
The way the foot works: controlled bunching (aka gathering) of your fabric.
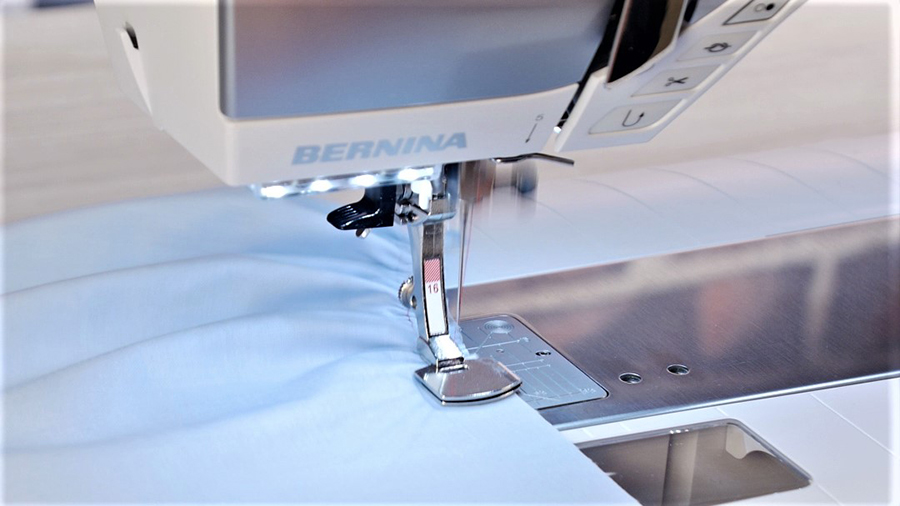
- The sole of the foot only makes contact with the feed dog in front of the foot.
- The machine actively feeds fabric toward the needle.
- Behind the needle, the foot does not make contact with the feed dog.
- Once the stitch is formed, the fabric is not being actively fed ‘out the back’.
- The result is that the machine is ‘stuffing’ fabric into the stitch and the lack of ‘after stitch’ feeding means that the fabric will have to be pushed back from the front.
- Combine that incomplete feeding with a long stitch and you now are stuffing more fabric than normal into each stitch, causing it to bunch up (aka gather).
- Add high thread tension: this will put a leash on the already stitched fabric, resisting its rearward travel, accentuating further the bunching/gathering of the fabric with each stitch.
- That controlled bunching of your fabric is the gathering you seek!

Talking of control…how do you control the gathering ratio?
Controlling the Gathering Ratio with the Gathering Foot
Say you want every yard of your fabric to gather to 1/2 yard in length (2:1 gathering ratio):
- Start with a long test strip of the fabric (so you can adjust along the way until you get the results you want).
- Mark the fabric every 12 inches or so.
- Once gathered, you’d want the marks to come closer to one another (e.g. 6 inches apart with a 2:1 ratio).
- Start with a long straight stitch (e.g. Stitch Length = 5 mm).
- Start with a high thread tension (e.g. 9.0).
- Sew slowly and measure the spacing between gathered marks.
- Adjust the Stitch Length as needed first.
- Only lower needle thread tension if your thread breaks or if you need to ‘ease up’ on the gathering (e.g. your gathering).
TIPS for success with the Gathering Foot:
- Test first! This is key!
- Test on a representative piece of fabric. If you plan on gathering a ruffle for a garment that will be done on the cross-grain, test a sample on the cross grain of the fabric.
- If attaching a separate ruffle that is cut on the grain, test with fabric cut on the grain.
- A moderate sewing speed is preferable for even results, especially when sewing with a high needle thread tension.
- Set the Needle Up/Down function to stop with the needle in the down position. The machine will keep the ‘wiggly’ fabric being gathered in place when you reposition your hands.
- If gathering long pieces, fanfold the fabric on your lap first so you can easily deliver it to the machine. Notice that I didn’t say ‘feed it’ to the machine…the machine feeds the fabric on its own!
BONUS: With BERNINA Gathering Foot #16, you can gather a layer of fabric while sewing it to a flat layer at the same time!
When you look at the sole of the foot, the front area that contacts the feed dog is actually separated from the body of the foot by a gap, forming a slot. You can insert a flat piece of fabric (cut to the project size) into the slot. When doing so, the machine will:
- Gather the layer of the fabric that is under the foot.
- Allow the (top) layer of the fabric to pass through smoothly (not gathered).
The result is that the gathered layer (e.g. a ruffle) can be gathered and attached to the flat layer in one pass.

While this requires guiding two separate fabric layers, with one feeding faster (e.g. twice as fast with a 2:1 ratio), it is a great time-saver after a bit of practice.
There is an option B: if coordinating two separate layers is tricky for you, you can gather the ruffle first and sew it later to a flat piece with a regular presser foot.
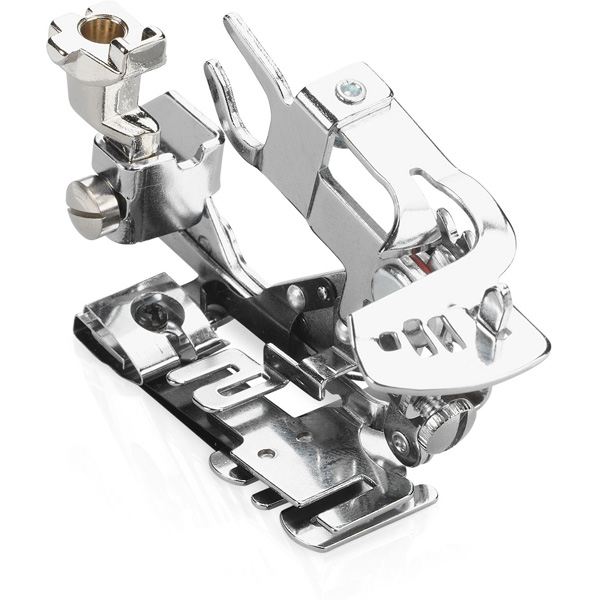
Gathering with a Ruffler (#86)

First, a small clarification . . .
Remember the ‘controlled bunching’ above? A BERNINA’s Ruffler #86 doesn’t gather fabric in the conventional sense. Rather, it tucks in small pleats in the fabric at regular intervals.
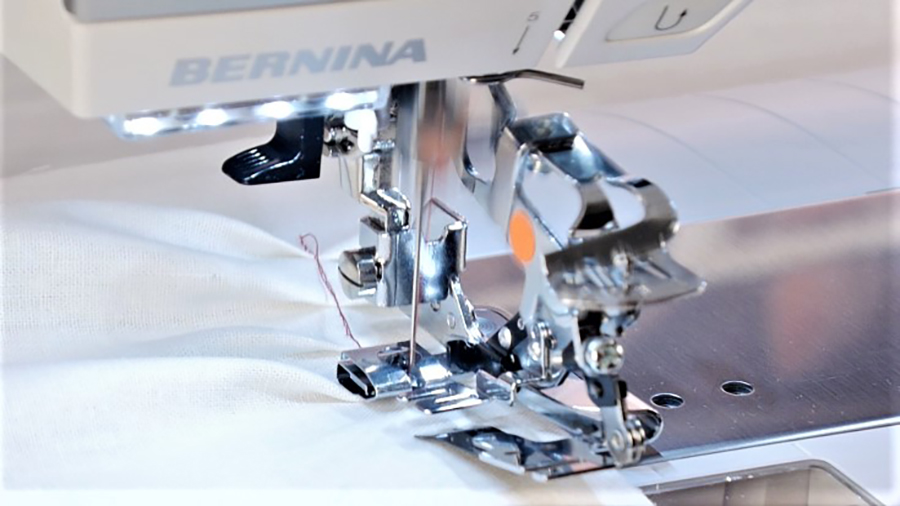
That being said, the beauty of the ruffler is that it makes precise, even tucks that are regularly spaced, allowing for neat and even results.
The Ruffler has a few settings that you can adjust:
- Frequency of tucking: It can take a tuck every stitch, every 6 or 12 stitches, or not at all if disengaged (position ‘zero’ on the selector).
- The depth of each tuck can be controlled with a screw.
- g. you can have tiny tucks very often or deeper, spaced out tucks.
- Another adjustment can be made to your straight stitch: Stitch length will affect the spacing between tucks.

By combining the three factors above, you can achieve a ‘gathering ratio’ of sorts. The final look will be structured.

Tips for Success with the Ruffler
The ruffler is really easy to set up and use. There are however a few of things to keep in mind.
- It helps to have a lead (e.g. about 1-inch extra fabric) at the start end of the piece to prime the tucking process, especially if you need the ruffling to begin right at the edge of the intended finished piece.
- The fabric can only flow through the ruffler in one direction–front-to-back.
- The tucking blade has teeth at the end meeting (and tucking) the fabric. These are very “grippy” and won’t allow the fabric to be pulled back toward you if you need to realign your piece when you start.
- If you think the fabric wasn’t inserted correctly, simply pull it to the back and the left to have it escape from the tucking blade.
- The tucking action creates small jerks (expectedly) in the flow of the fabric. Keeping the fabric flowing toward the machine will help keep it aligned in the ruffler as you stitch.
- Muslin is a good fabric to practice with the ruffler: It tucks well and feeds evenly, letting you concentrate on how to align and guide the fabric evenly.
- Keep the Needle Stop Up/Down function set in the down position. The machine will keep the fabric being tucked in place when you reposition your hands.
- If tucking a folded ruffle (fabric folded in half), it helps to baste the layers together in the seam allowance first. It will flow through the ruffler as one layer that way, with better results.
BONUS: Just as when using the Gathering Foot, you can ruffle a layer of fabric while attaching it to a flat layer. It requires handling the two layers of fabric that will feed at different speeds. Again, you can separate the two operations and ruffle one layer first, then attach it later with a regular presser foot if you find it easier.
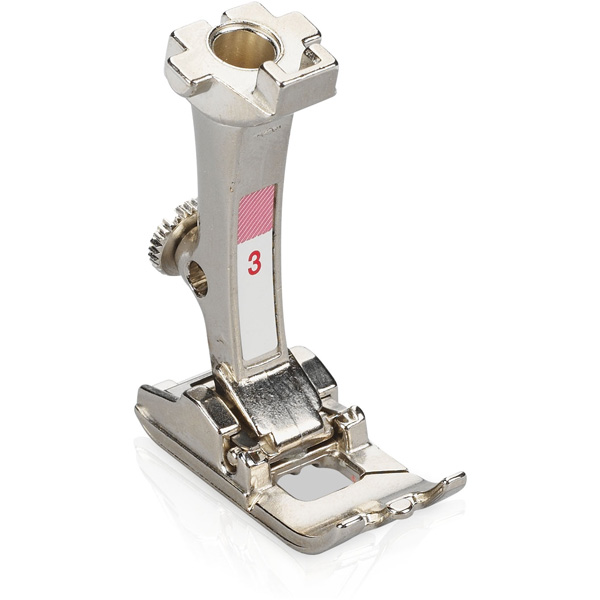
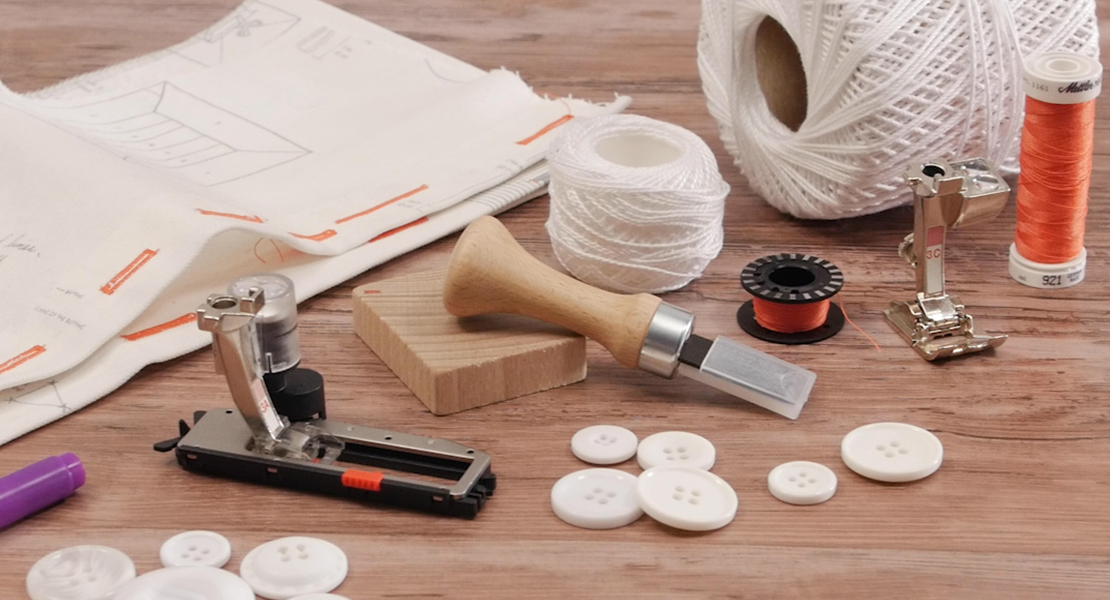
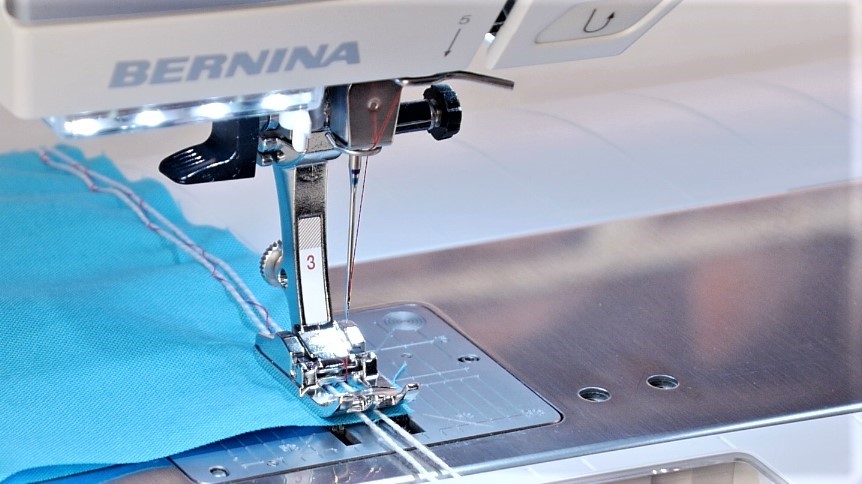
Gathering Over Cords with Buttonhole Foot #3/3C
The Manual (and Flexible) Method
This method consists of sewing over cords (e.g. zigzag over a single cord or use a gathering stitch over two cords) and then sliding the fabric against the cords to achieve the desired gathering ratio. You can use a single thread, string, or cord for lightweight or sheer fabrics, or two cords for stronger applications like medium weight or heavier fabrics. You will need Buttonhole Foot #3/3C for this method.
It has a couple of advantages:
- It works on anything from sheer to heavy fabrics.
- You can easily achieve an exact gathering ratio by marking the fabric and the cord(s). Then it’s a simple matter of matching your marks along the way.
- To hold your gathers in place once they are on the marks, pin the layers together.
TIP: While I rarely use pins in my sewing, preferring clips generally, this is one instance where pins work better. They are more effective at fastening the layers together and preventing slipping as the project is handled.
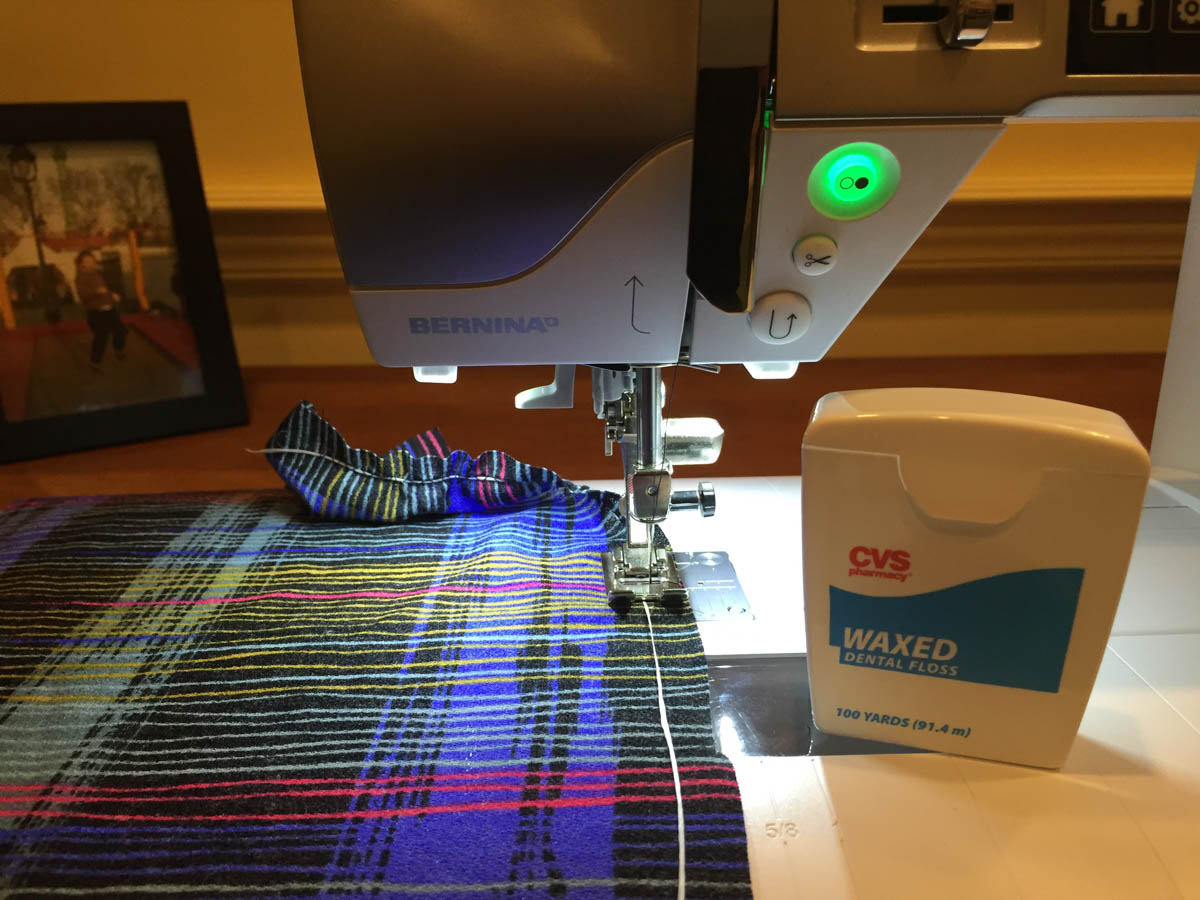
For this article, I gathered over two cords, which is my favorite option. Using two cords distributes the stress of gathering the fabric more evenly after stitching and helps prevent popping stitches in the process.
Note: I use kitchen trussing cord (or similar cotton string), which I have handy. You can use coarse threads or twisted cords for heavier projects. Aim for a cord type that will slide well against the fabric.
The process is simple:
- Stitch along the edge to be gathered (e.g. edge of the foot at the edge of the fabric, so the cords will be within the stitch allowance).
- Make sure that the stitches are bridging over the cords, (and not through the cords).
- Secure the stitching at both start and endpoints to avoid popped stitches when you tug at the fabric.
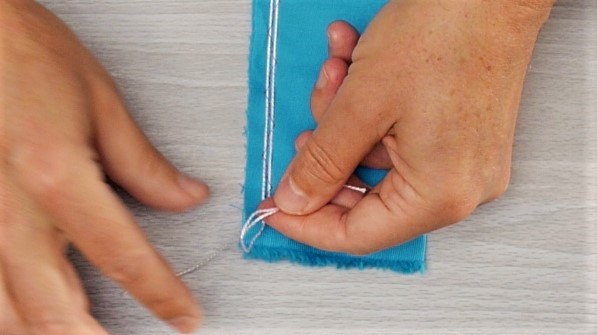
- Tie the cord ends at both start and endpoints.
Setting up for Gathering over Cords
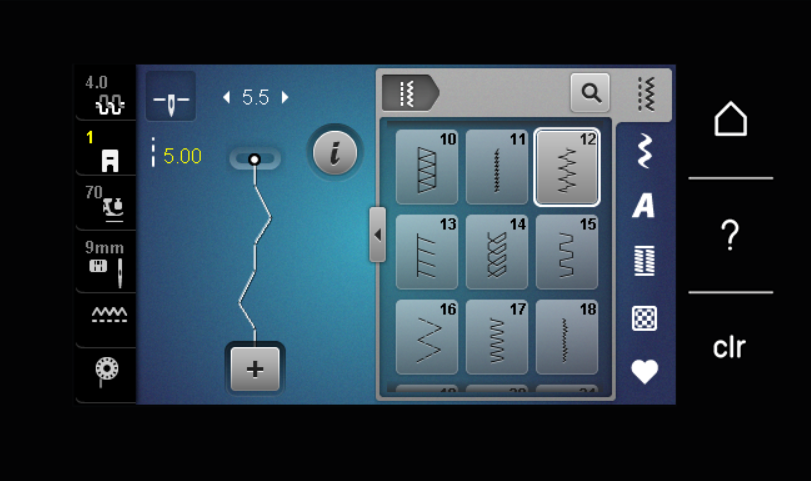
- Select Gathering Stitch #12:
- This stitch takes a stitch forward, a right zig zag, a stitch forward, a left zigzag and repeats.
- Lengthen the stitch to 5.0 mm.
- Engage the Needle Stop Up/Down function to be in the down position
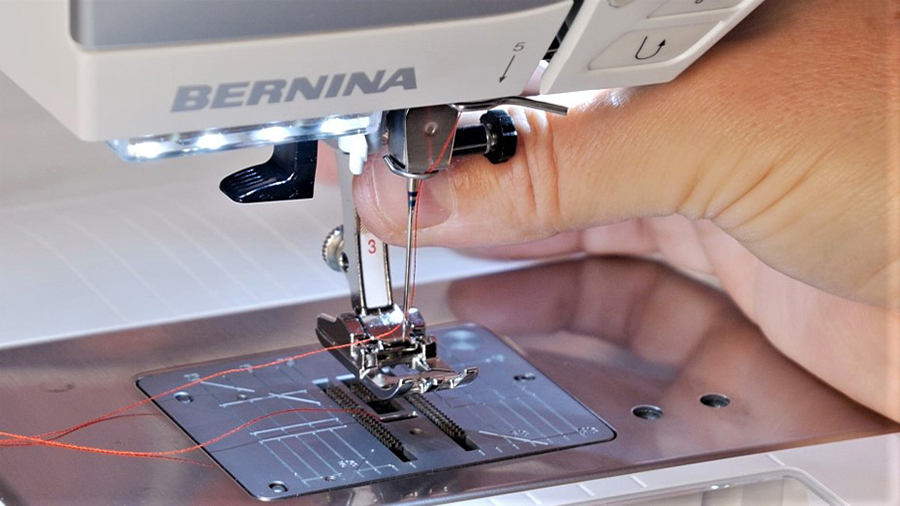
At the start of the stitching run:
- Lay the two cords under the channels of the buttonhole foot #3 or 3C
- Leaving long tails behind the foot for tying together later.
- Lower the feed dog on your machine and take a good 6-8 stitches in place to anchor the cords
- This will create a bracing point after the cord ends are tied together for you to start gathering the piece.
- Reengage the feed dog and sew along the piece, keeping the cords parallel and under the foot channels
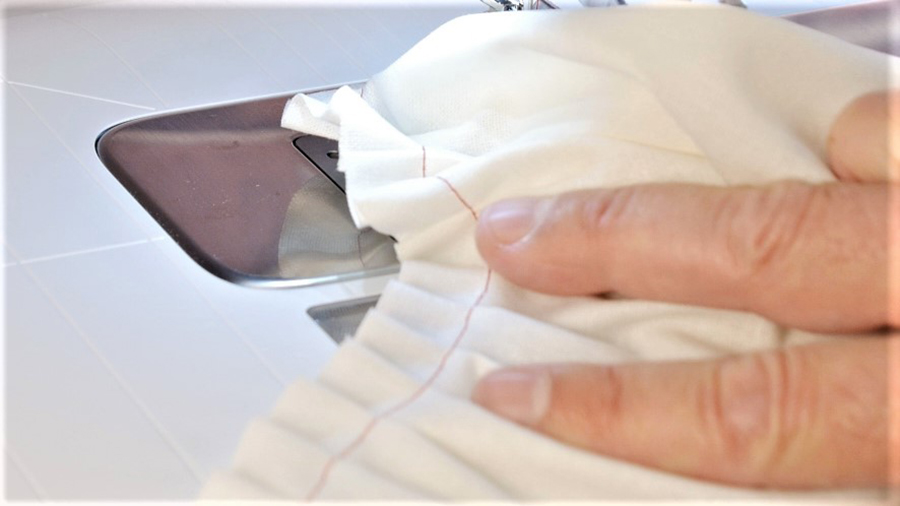
Notice the heavier stitching (in red) at the start of the stitching run (behind the foot). Those ‘in place’ stitches create a bracing point for the cords once they are tied together.

Repeat the stitching in place once you reach the end of the piece to create a bracing point.
Do not tie the cords together yet!
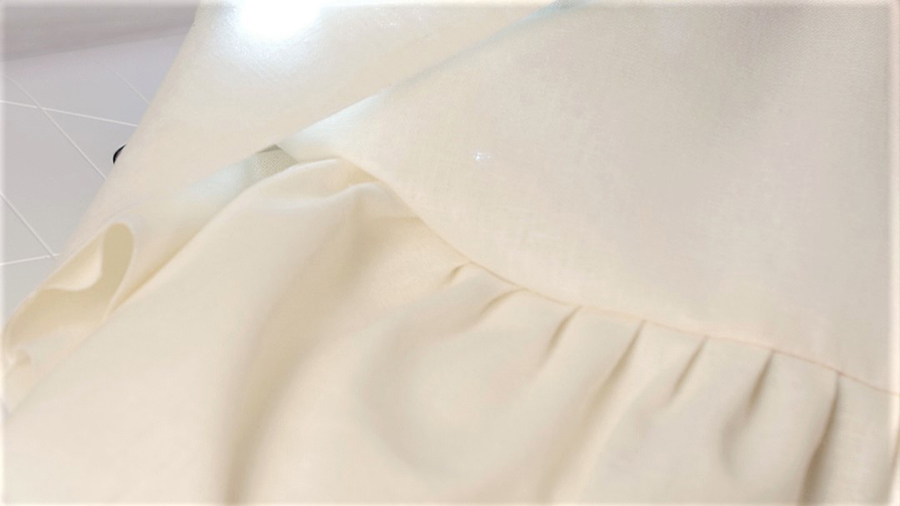
After stitching along the whole piece . . time to gather!
- Tie the start cord tails together.
- Don’t tie the end tails together yet!
- Start sliding the fabric against the cords.
- Work from the ‘end’ point and slide the gathered fabric down toward the start
- Redistribute the gathers regularly to avoid uneven ‘zones’ in your gathers
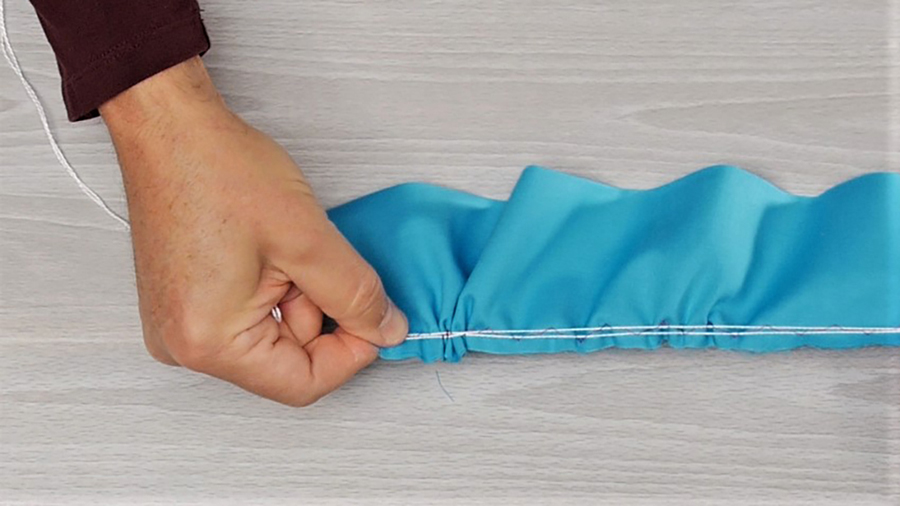
- Measure along the way to verify your gathering ratio
- Review the gathers for evenness and redistribute as needed
- Tie the cord ends together at the end to secure the gathering

- Note: typically, the cords being within the seam allowance, they don’t need to be clipped and removed after the gathered piece is sewn into the project. They will merely disappear with the seam allowances.
Tips for Gathering Over Cords
- For very long pieces, you can gather from both ends to reduce the overall ‘drag’ of gathering
- Use a cord type that flows well.
- Pearl crown cotton works well.
- La Espiga nylon cord (size 18) works well also
In the end, gathering is really simple. The key is a bit of practice. With a precise machine, an excellent feed dog, and well-designed presser feet, you can pick the method best adapted to your project and fabric types.
The best part is having options. I like having options!