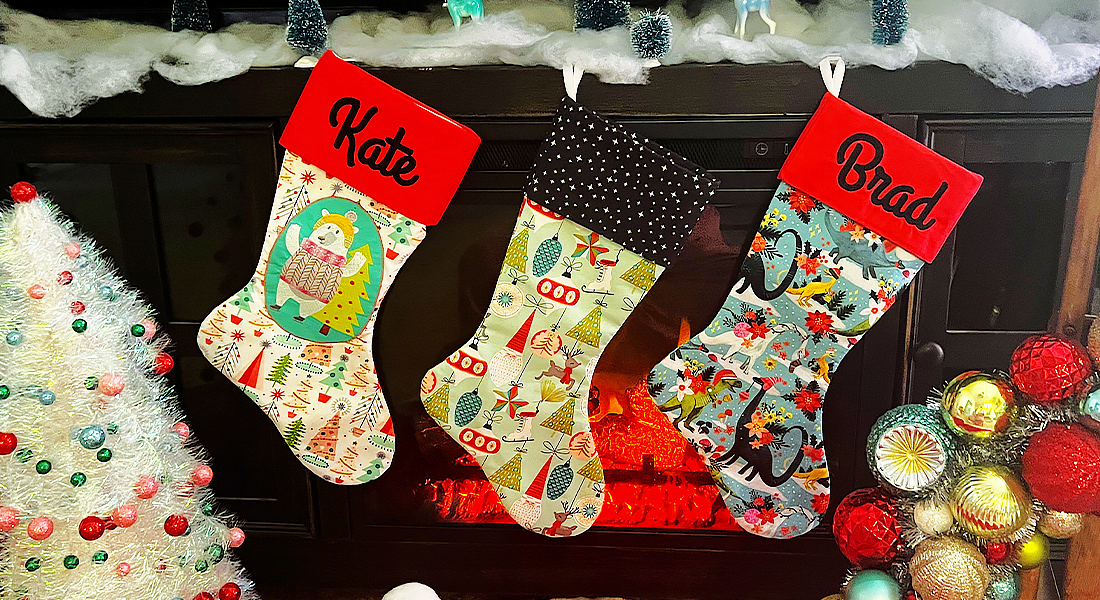
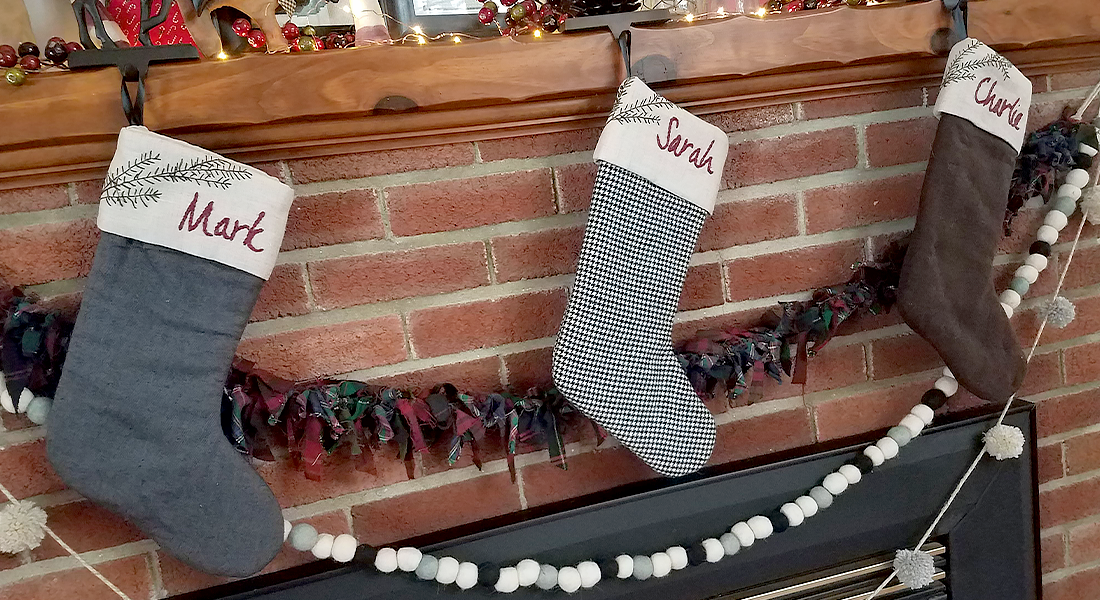
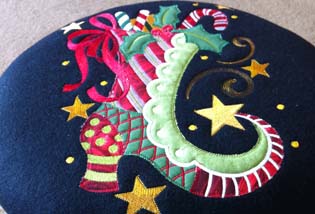
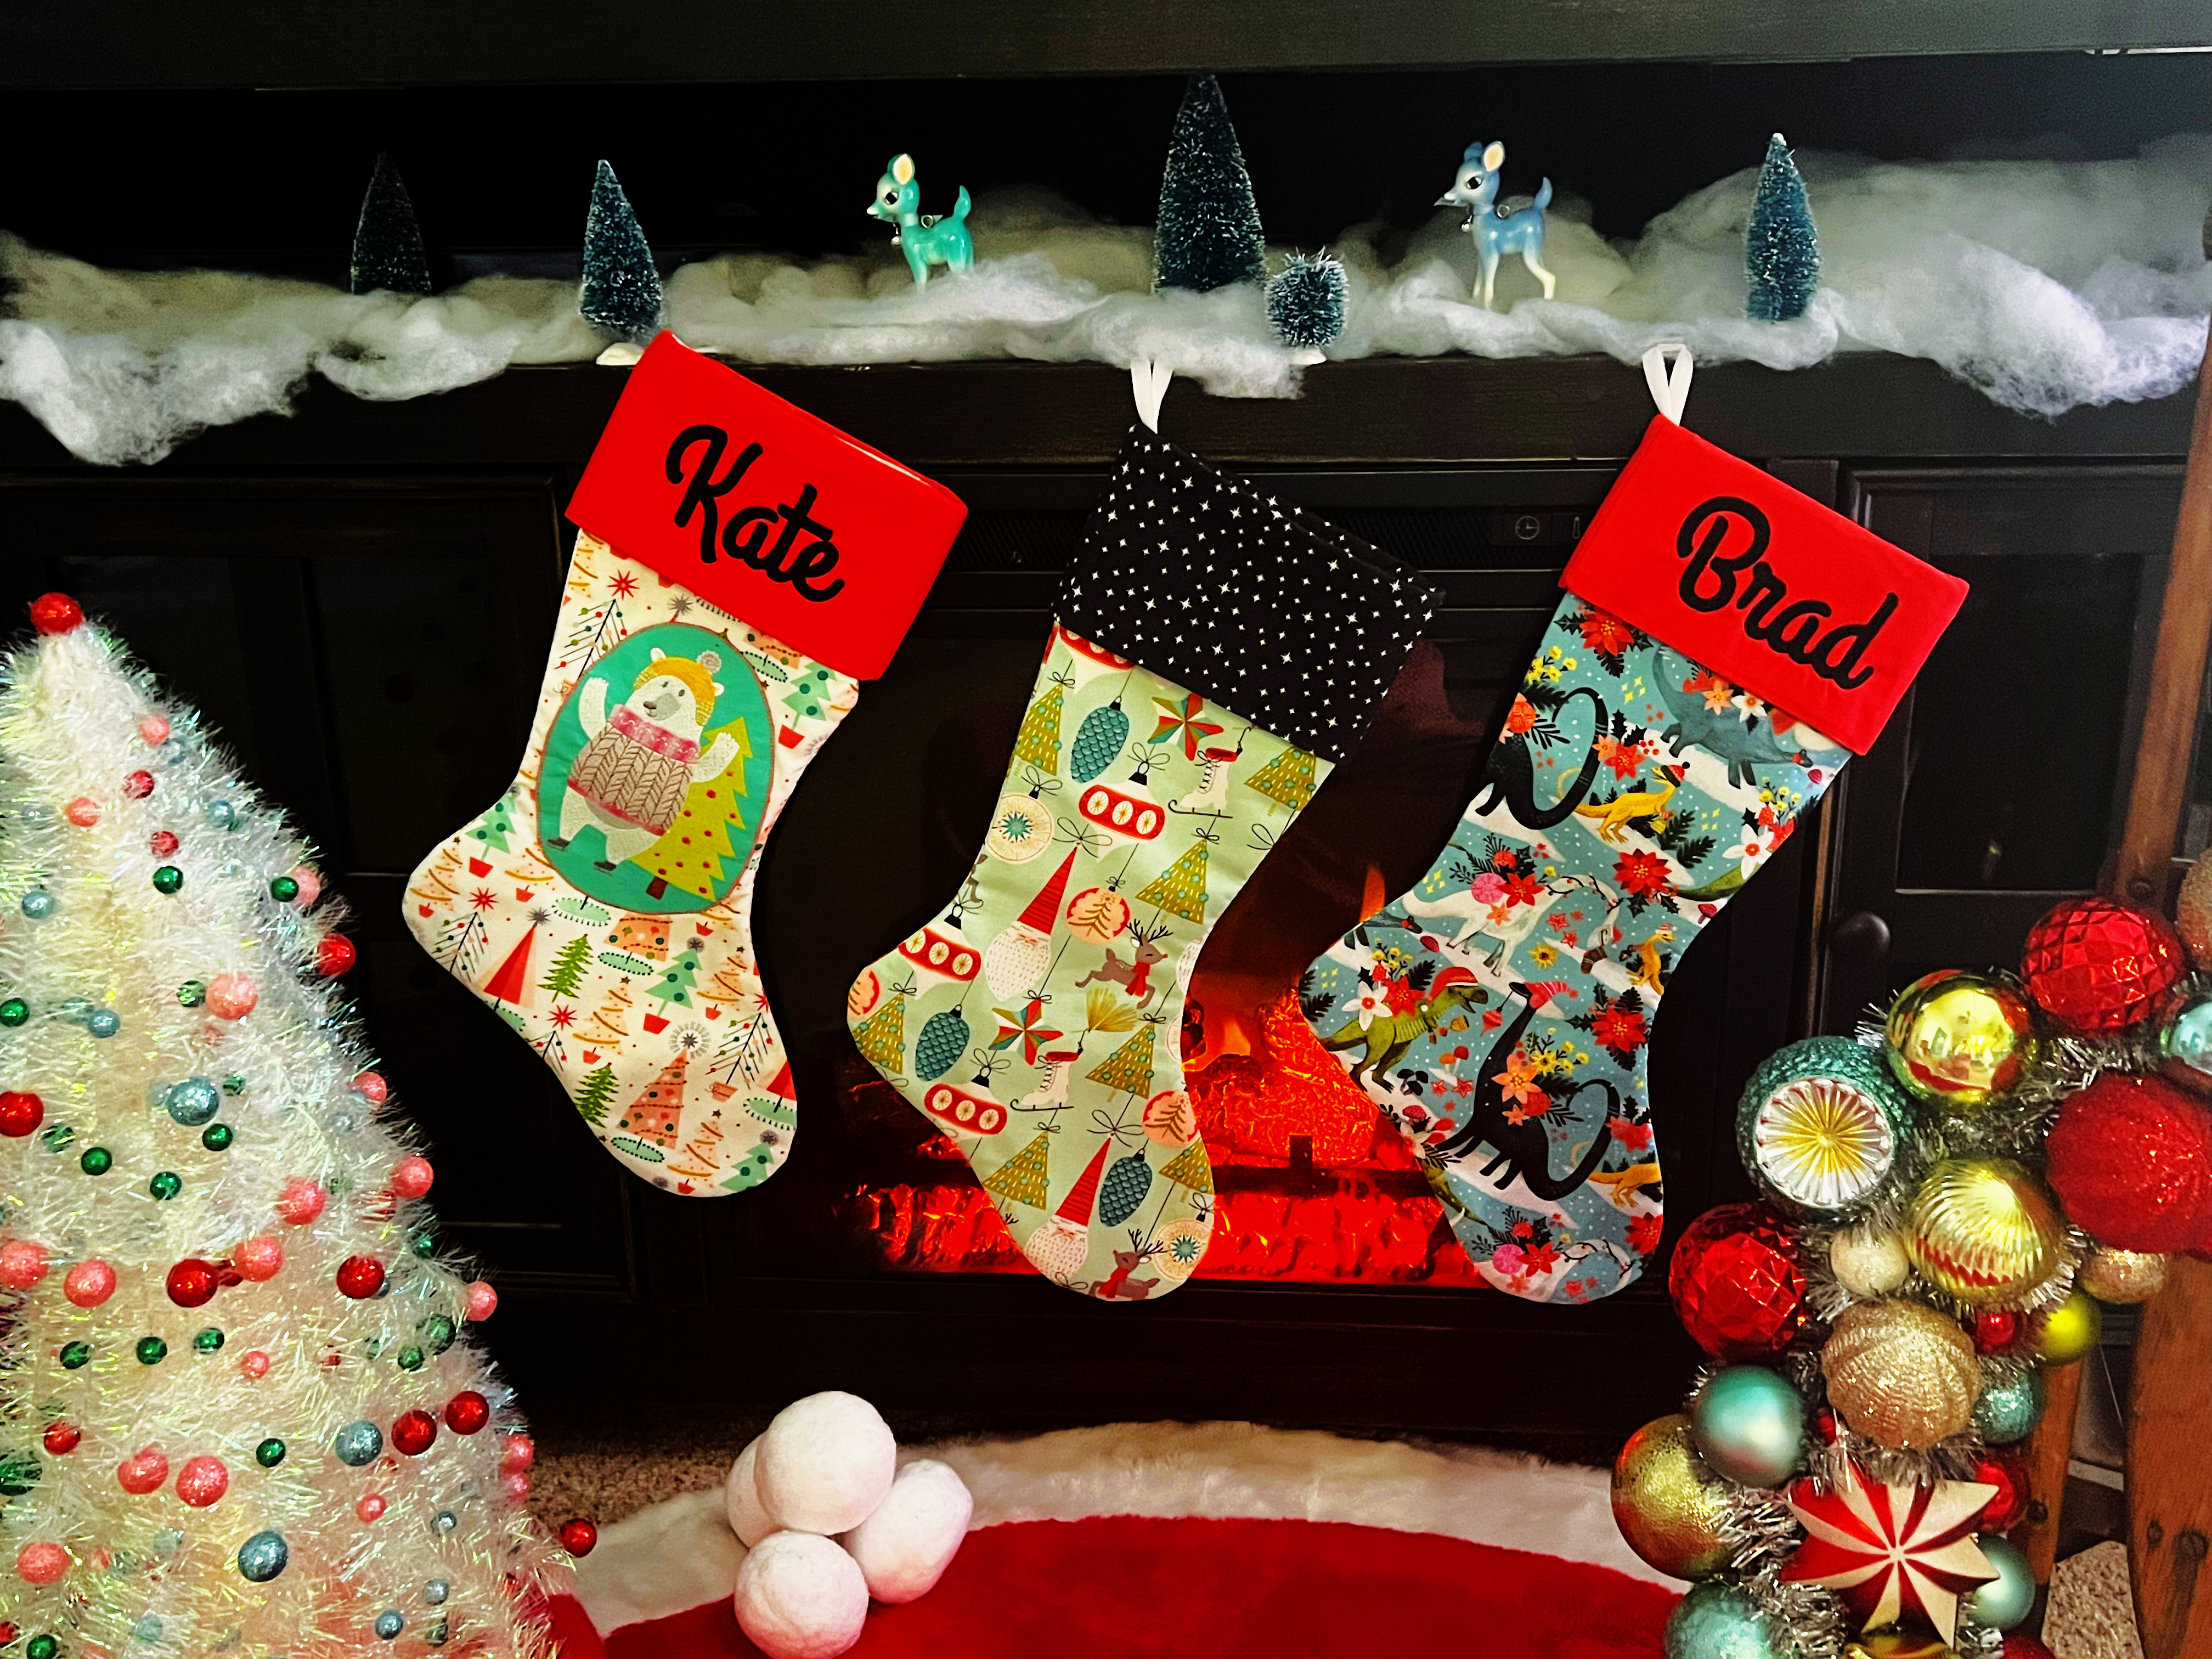
Machine-embroidered Christmas Stocking, Part 3: Embroider the Design
Hi, I’m Kate from Tough Kitten Crafts! I empower sewists to transform from frustrated to fearless with machine embroidery via online education and fun tutorials, like the one we have lined up for you today.
In this three-part series, I am going to teach you how to sew an adorable Christmas stocking and personalize it with machine embroidery!
Machine Embroidered Christmas Stocking Series
- Part 1: Learn to sew this adorable stocking.
- Part 2: Add an embroidered name to the cuff.
- Part 3: (This post!) How to embroider a cameo design for your stocking.
This stocking makes up really fast, even with the embroidery, so you can have new, personalized stockings for the whole family in no time.
They’re a little addictive too, I found myself thinking up new ideas and just kept adding tutorials! Hop over to Tough Kitten Crafts Blog to see even more ways to personalize your stockings.
You will need all the supplies from the Christmas Stocking Tutorial
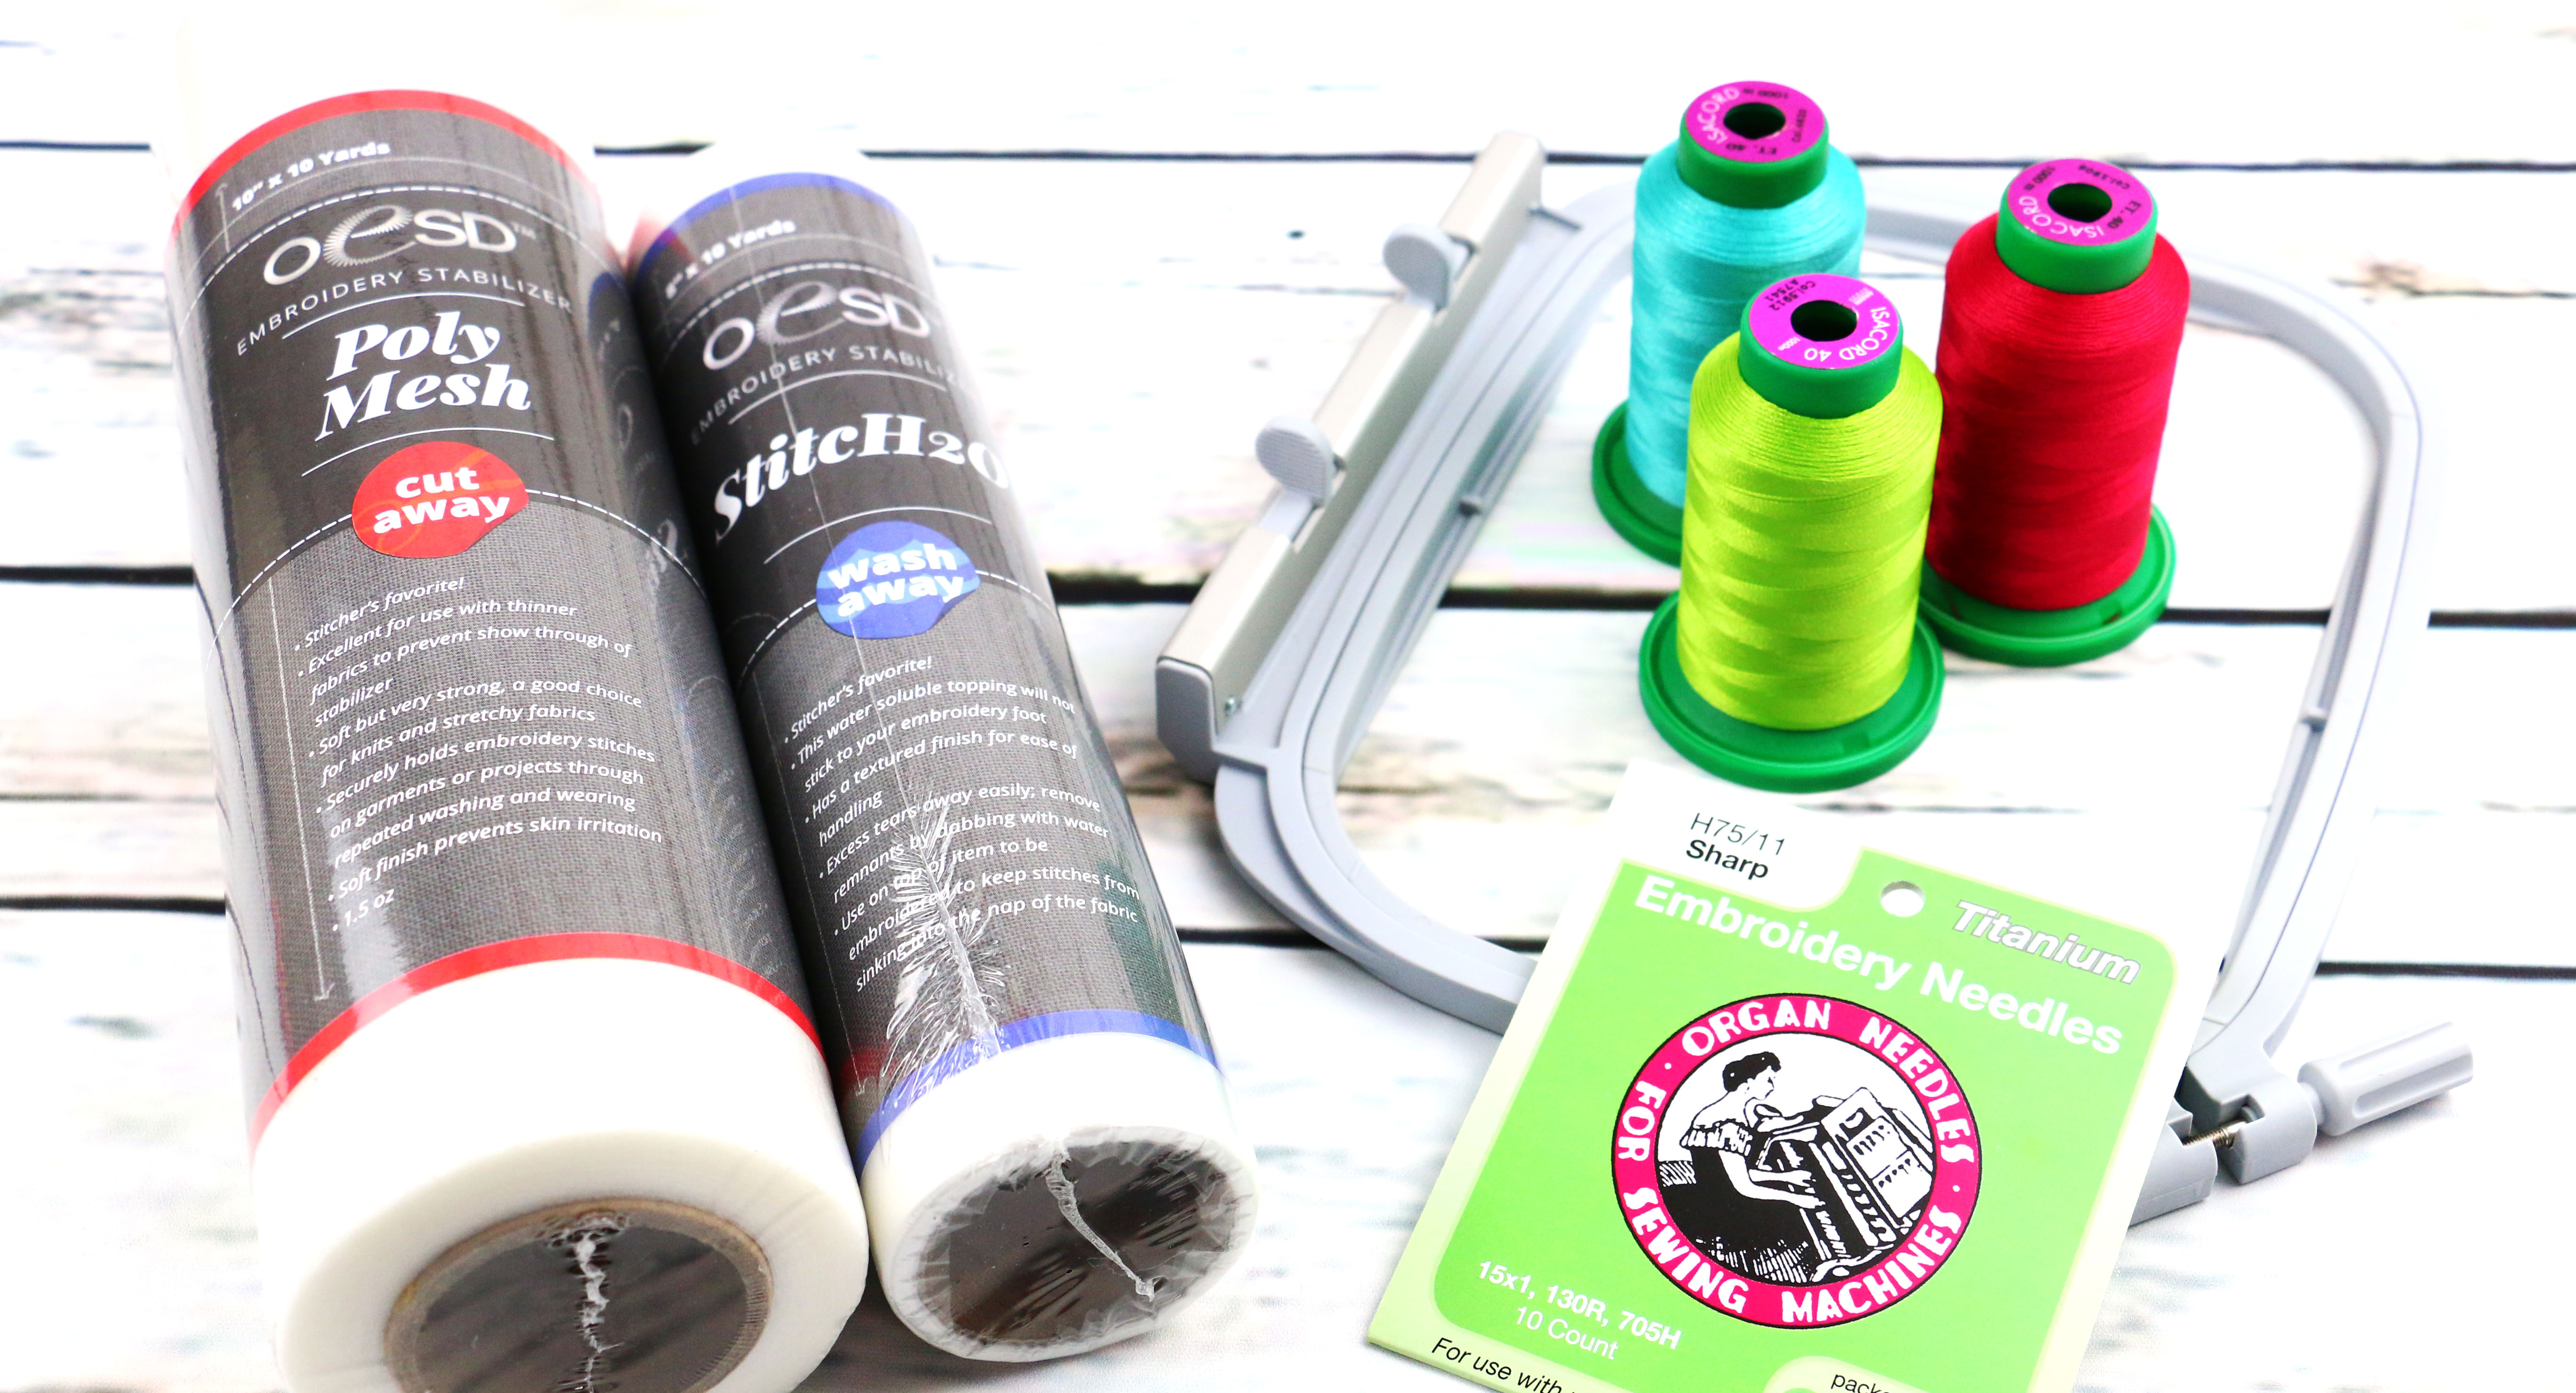
Additional Supplies Needed to Embroider the Design
- 1/2 FQ for Embroidery Background Fabric
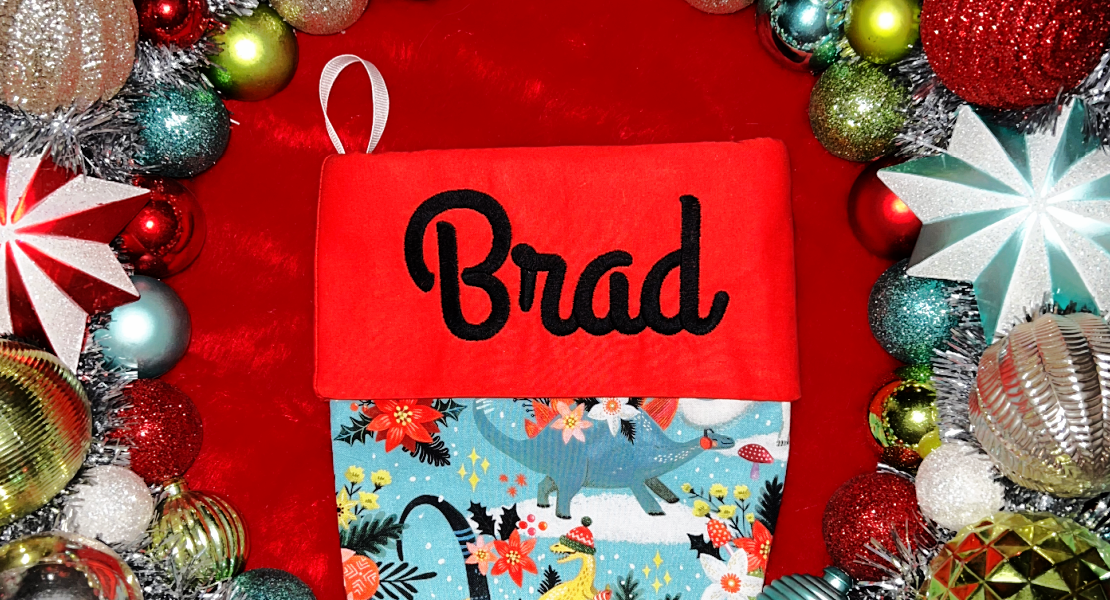
- Embroidery Design (I used Winter Bear from the OESD Warm Winter Wishes collection)
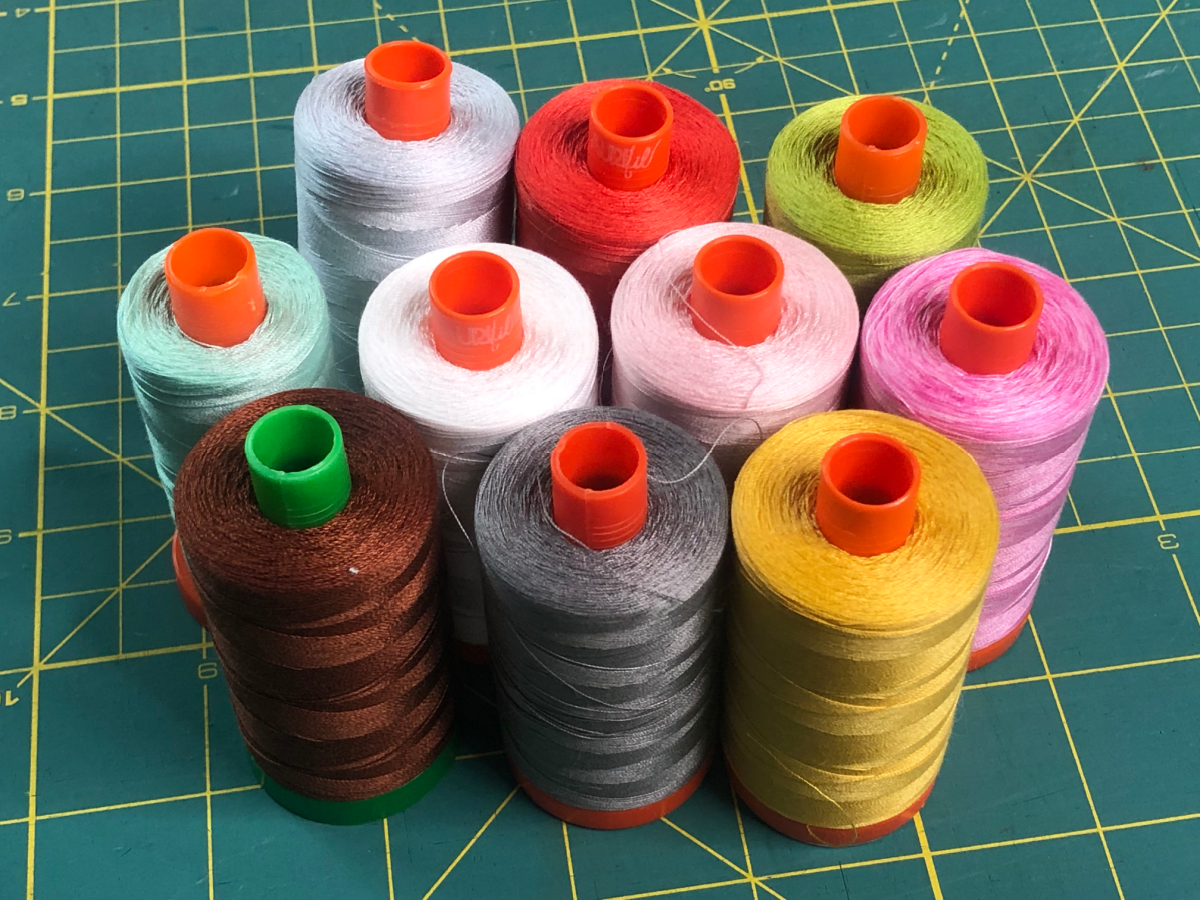
- Embroidery thread for design (I used a mix of Aurifil 40wt and 50 wt)
- 12 wt Aurifil
- 40 wt Aurifil to match the top thread
- 100/16 Top Stitch Needle
- 75/11 Embroidery Needle
- OESD Stabilstick Cut Away
- Drop-Shaped Embroidery Foot #26
- Open Embroidery Foot #20D
Optional Supplies
- OESD Tear Away Embroidery Tape
Before we start this tutorial you’ll want to do steps 1-3 of the Christmas Stocking tutorial.
Instructions to Embroider the Design
1. Cut a piece of Fusible Woven to fit your hoop. Fuse it to the wrong side of your embroidery background.
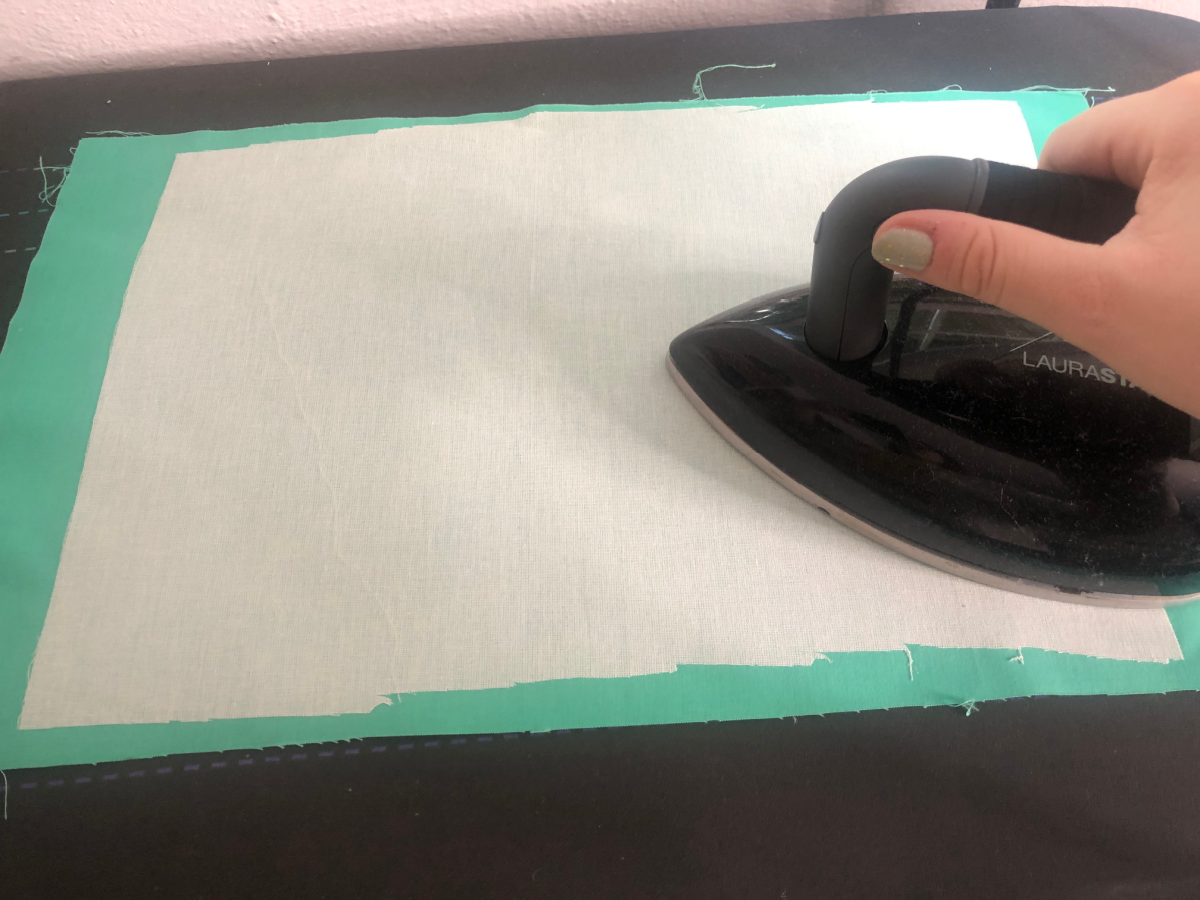
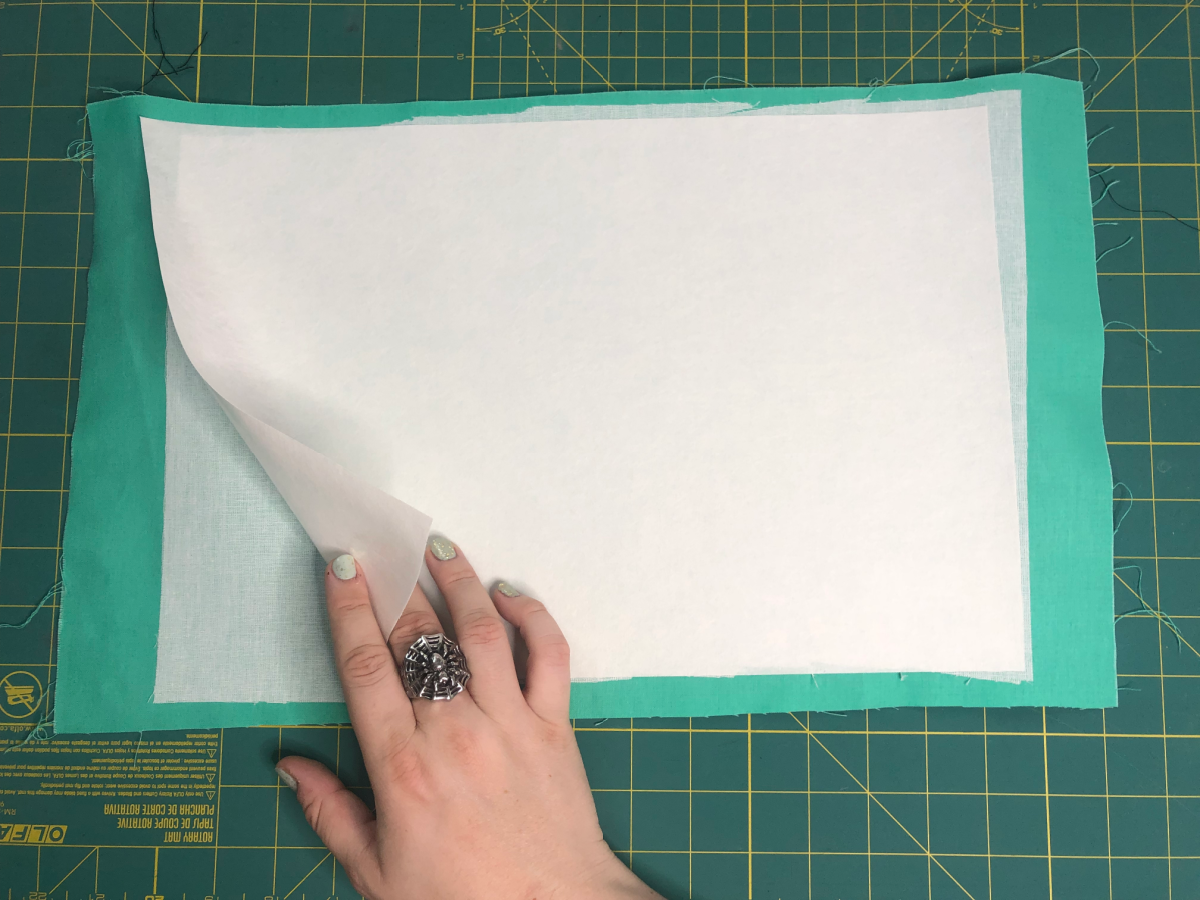
2. Cut StabilStick Cut Away the size of your hoop. Remove the paper backing and smooth your StabilStick to the wrong side of your fabric, over the fusible woven. Press firmly to ensure there are no bubbles or creases.
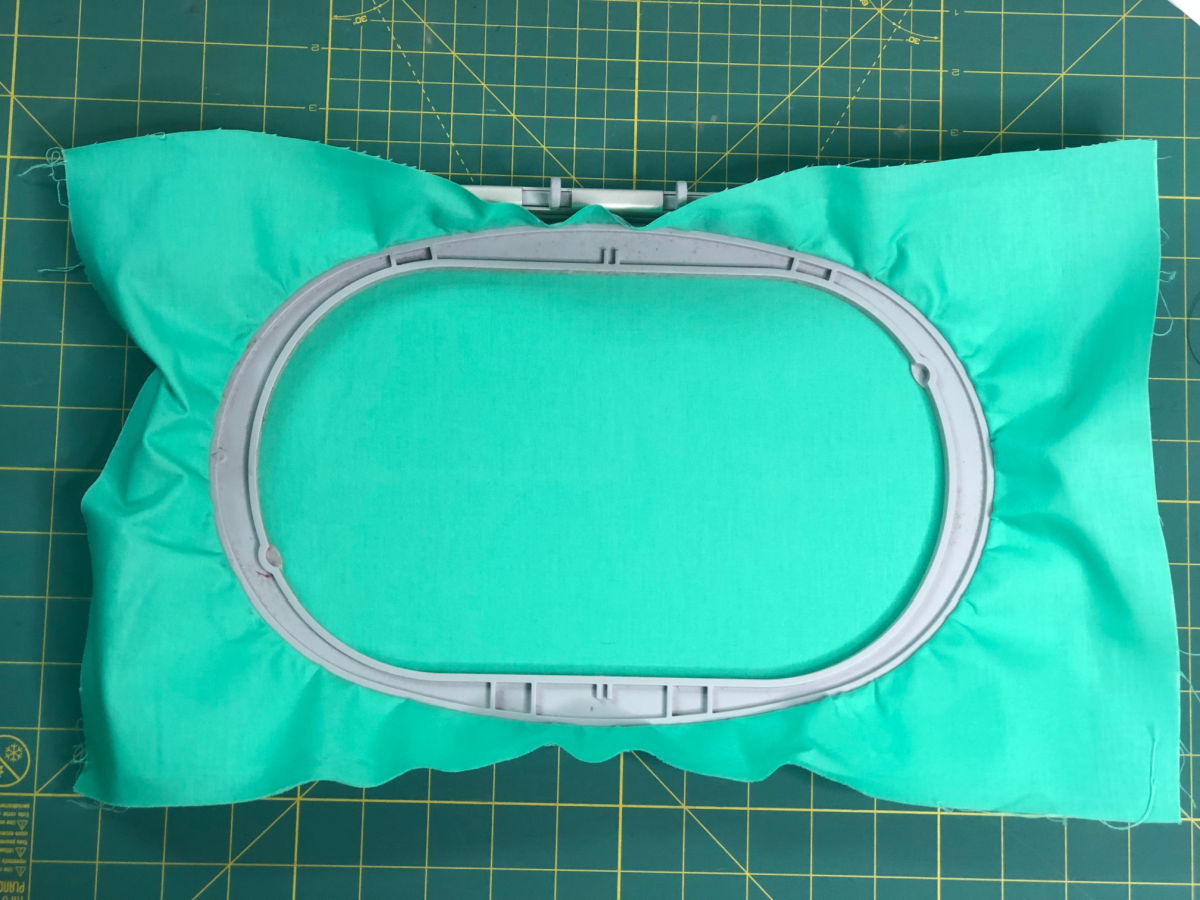
3. Hoop your layers together.
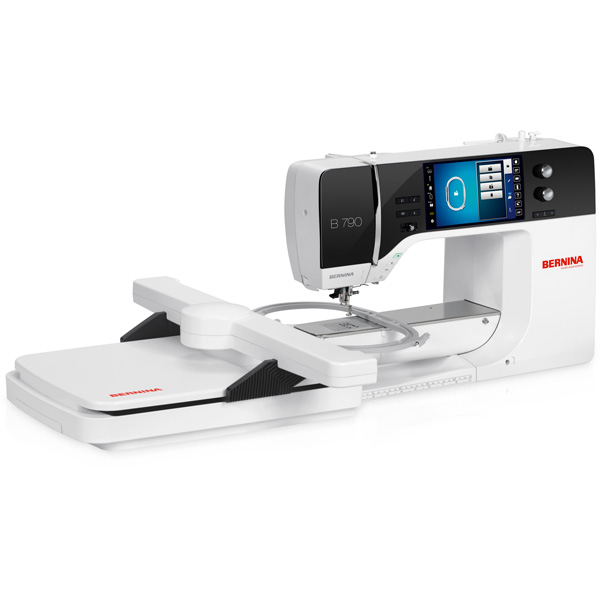
4. Prep your machine by installing a 75/11 embroidery needle and threading your machine. Clean and oil your machine before use. You may also prep by adding your thread colors into the color palette. I used a mix of Aurifil 40wt and 50 wt.
5. Embroider your design.
Note: When choosing different designs be sure the final size will fit on the front of the stocking without getting stuck in the seam allowance.

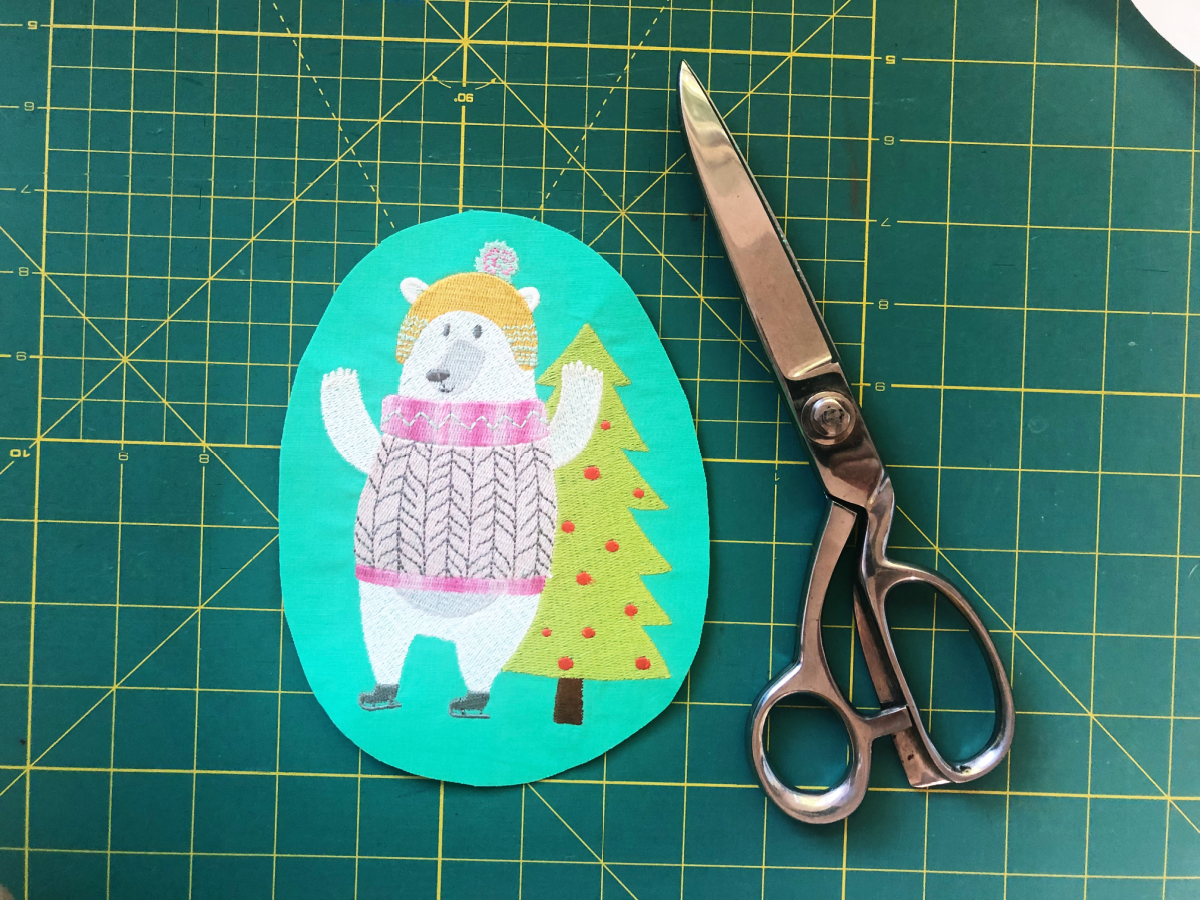
6. When stitching is finished, unhoop your embroidery.
Cut your background into the desired shape, I went with an oval. Make sure your design is cut slim enough to not get caught in the seam allowances but not cut so close that the blanket stitch will affect the design.
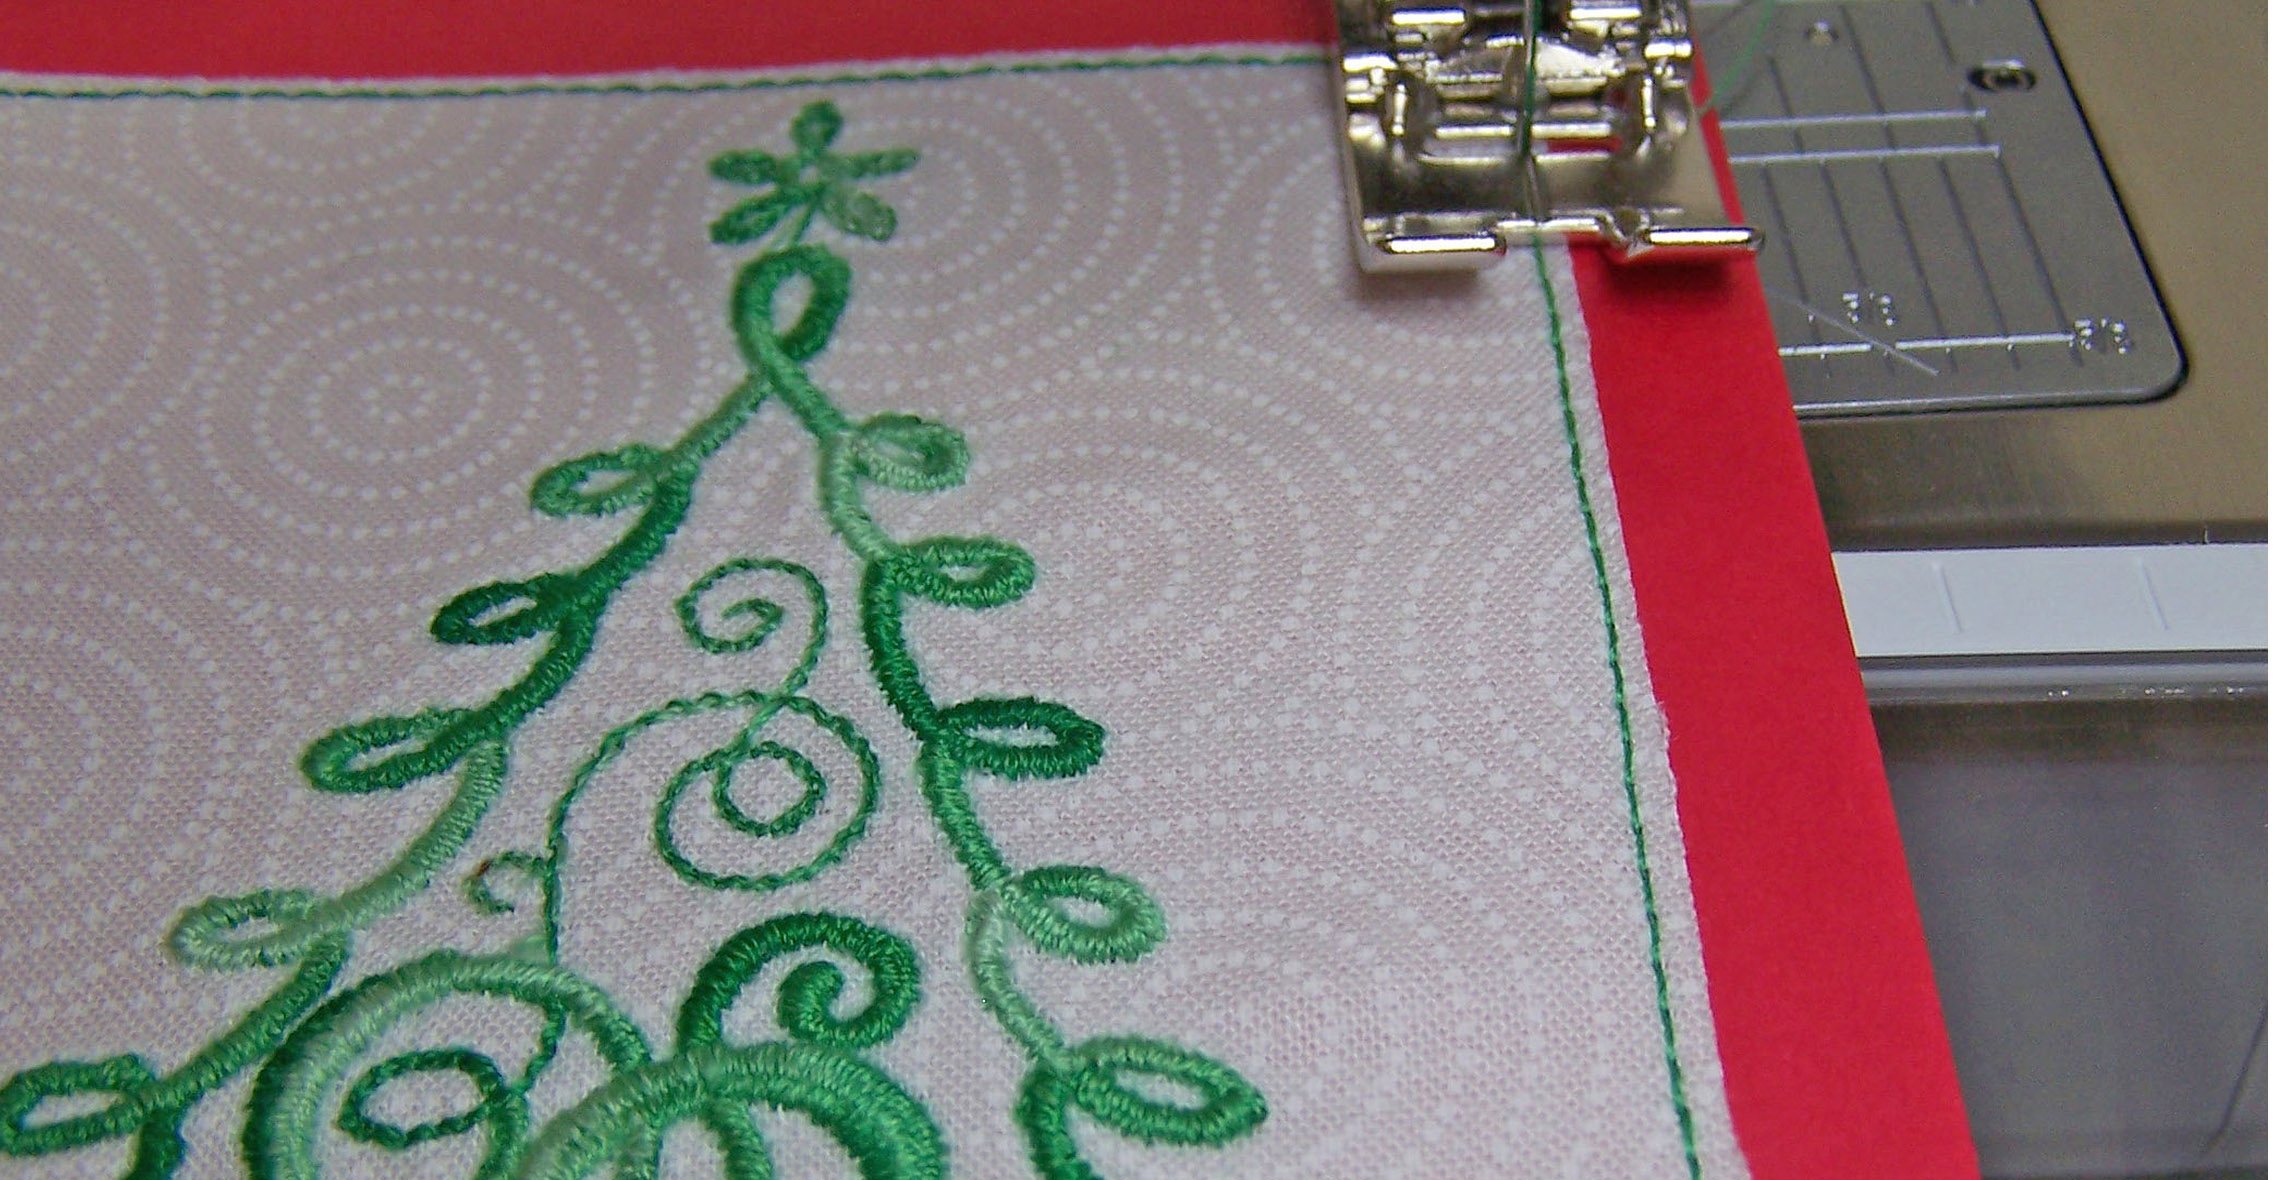
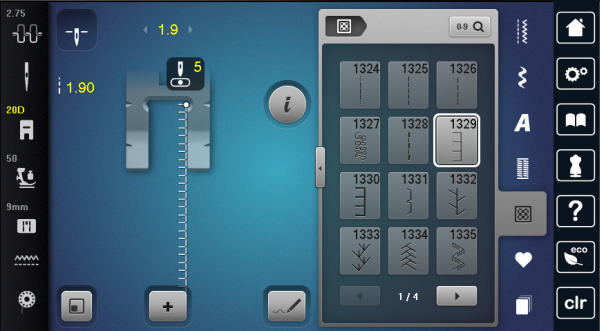
7. Install the 100/16 Top Stitch Needle and thread the machine with 12 wt Aurifil in the needle and a matching 40wt in the bobbin. Put the Open Embroidery Foot #20D on the machine and engage your Dual Feed.
8. I chose a single blanket stitch and used my multifunction knobs to change the length and width to 1.9mm each. Use your right needle position button to move your needle to the 5th needle position. Your machine should be set up like mine.
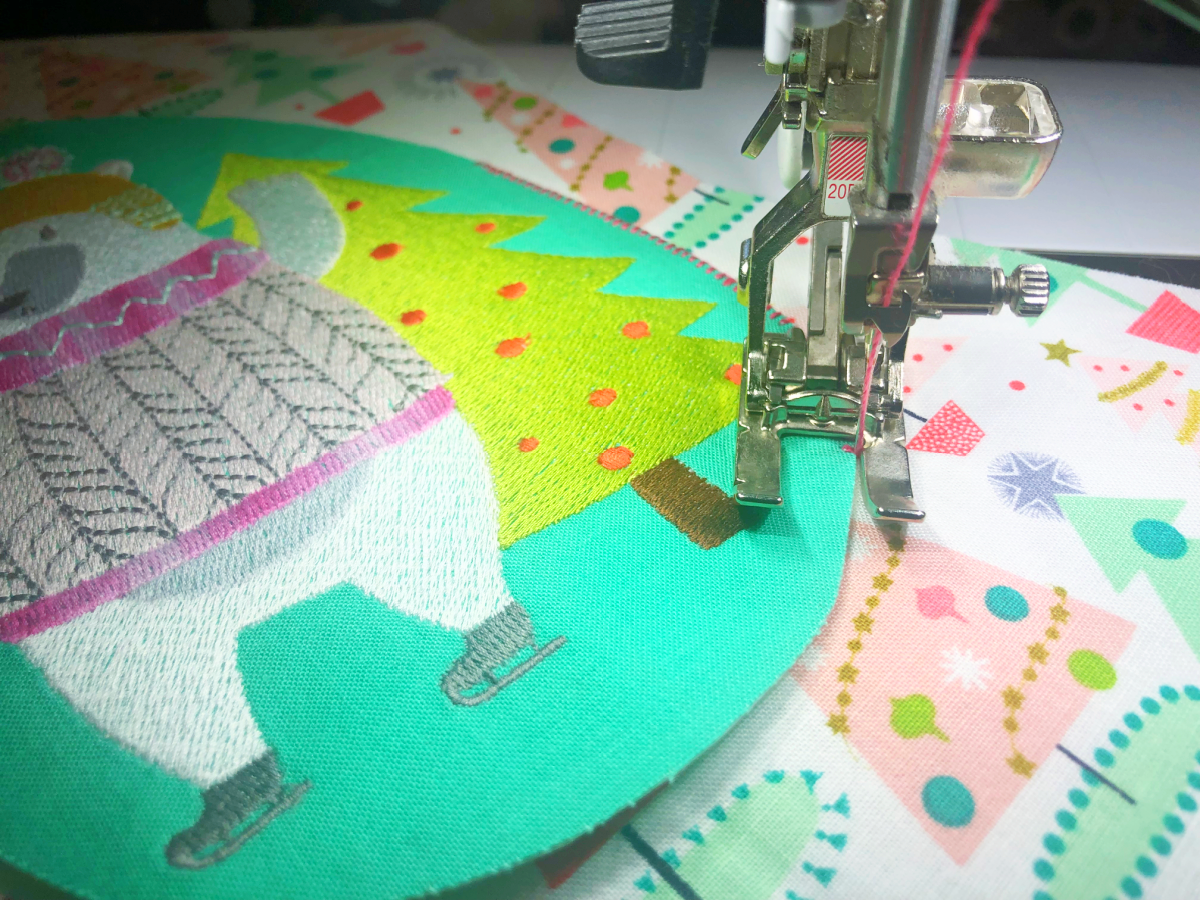
10. Center your design on the stocking. (Remember! You have a cuff being added! Don’t add your design too high.) Use a couple of loops of embroidery tape to secure it, if you like.
Use the inside of the right toe of the Open Embroidery Foot #20D to guide yourself along the outside of your fabric. Stitch slow and adjust often to ensure your stitches look great.
11. Once finished bring the threads to the back and tie them off. You are now ready to finish your stockings by completing steps 4- 18 of the Christmas Stocking tutorial.

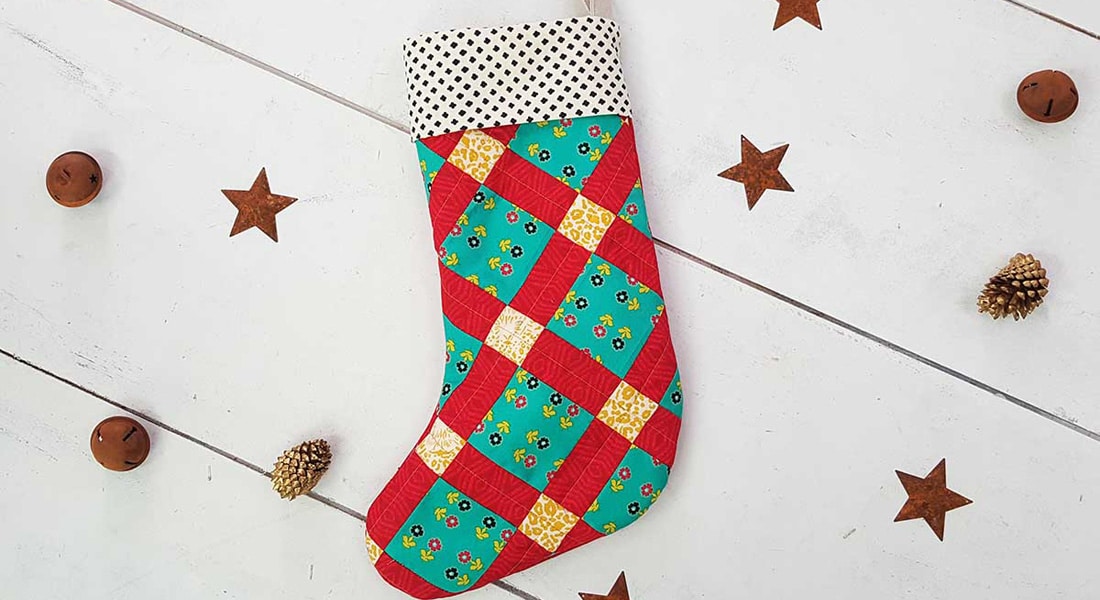
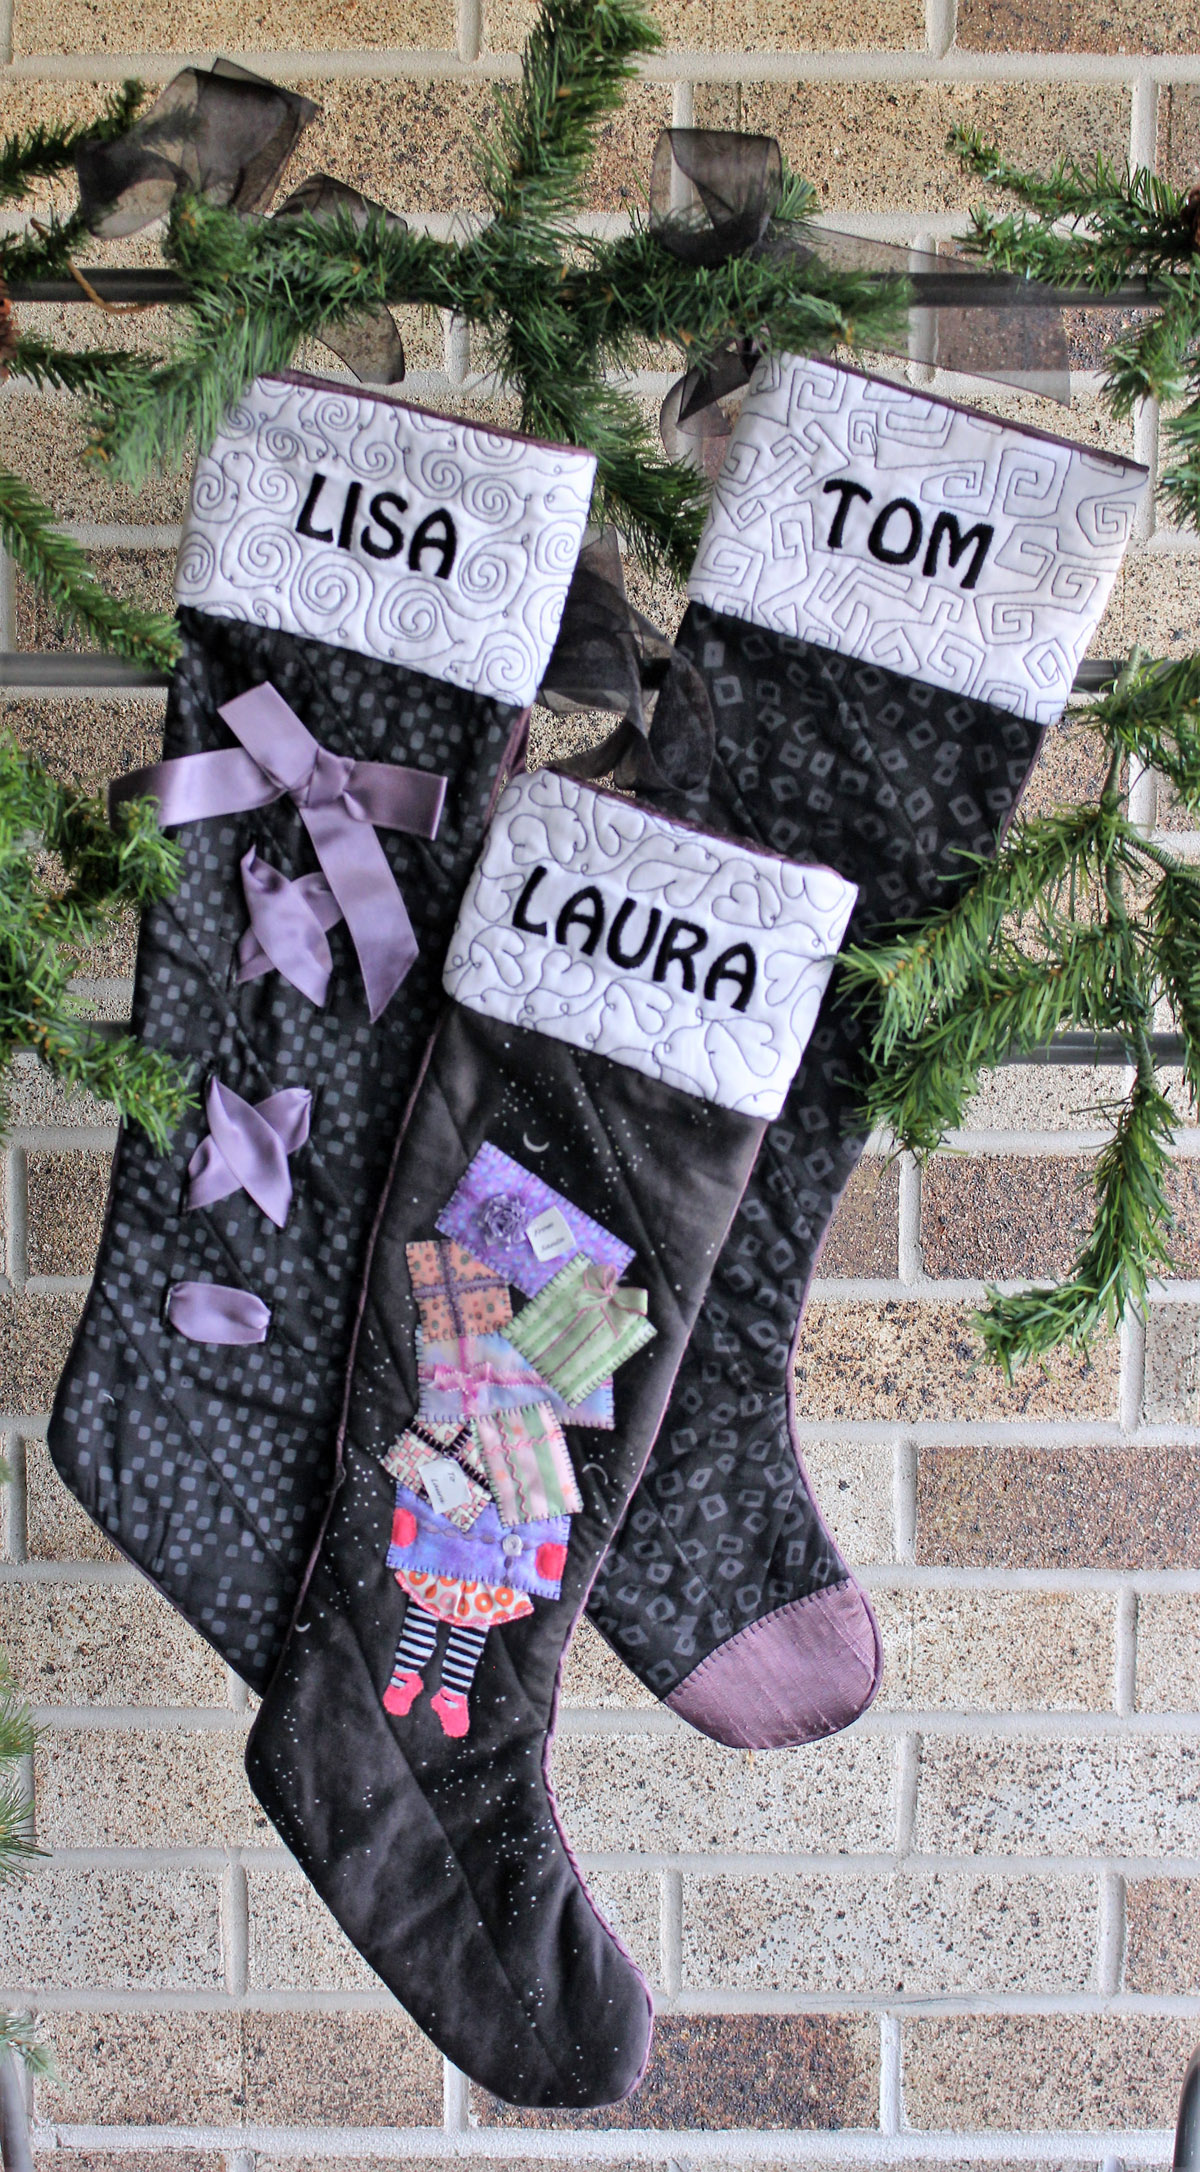
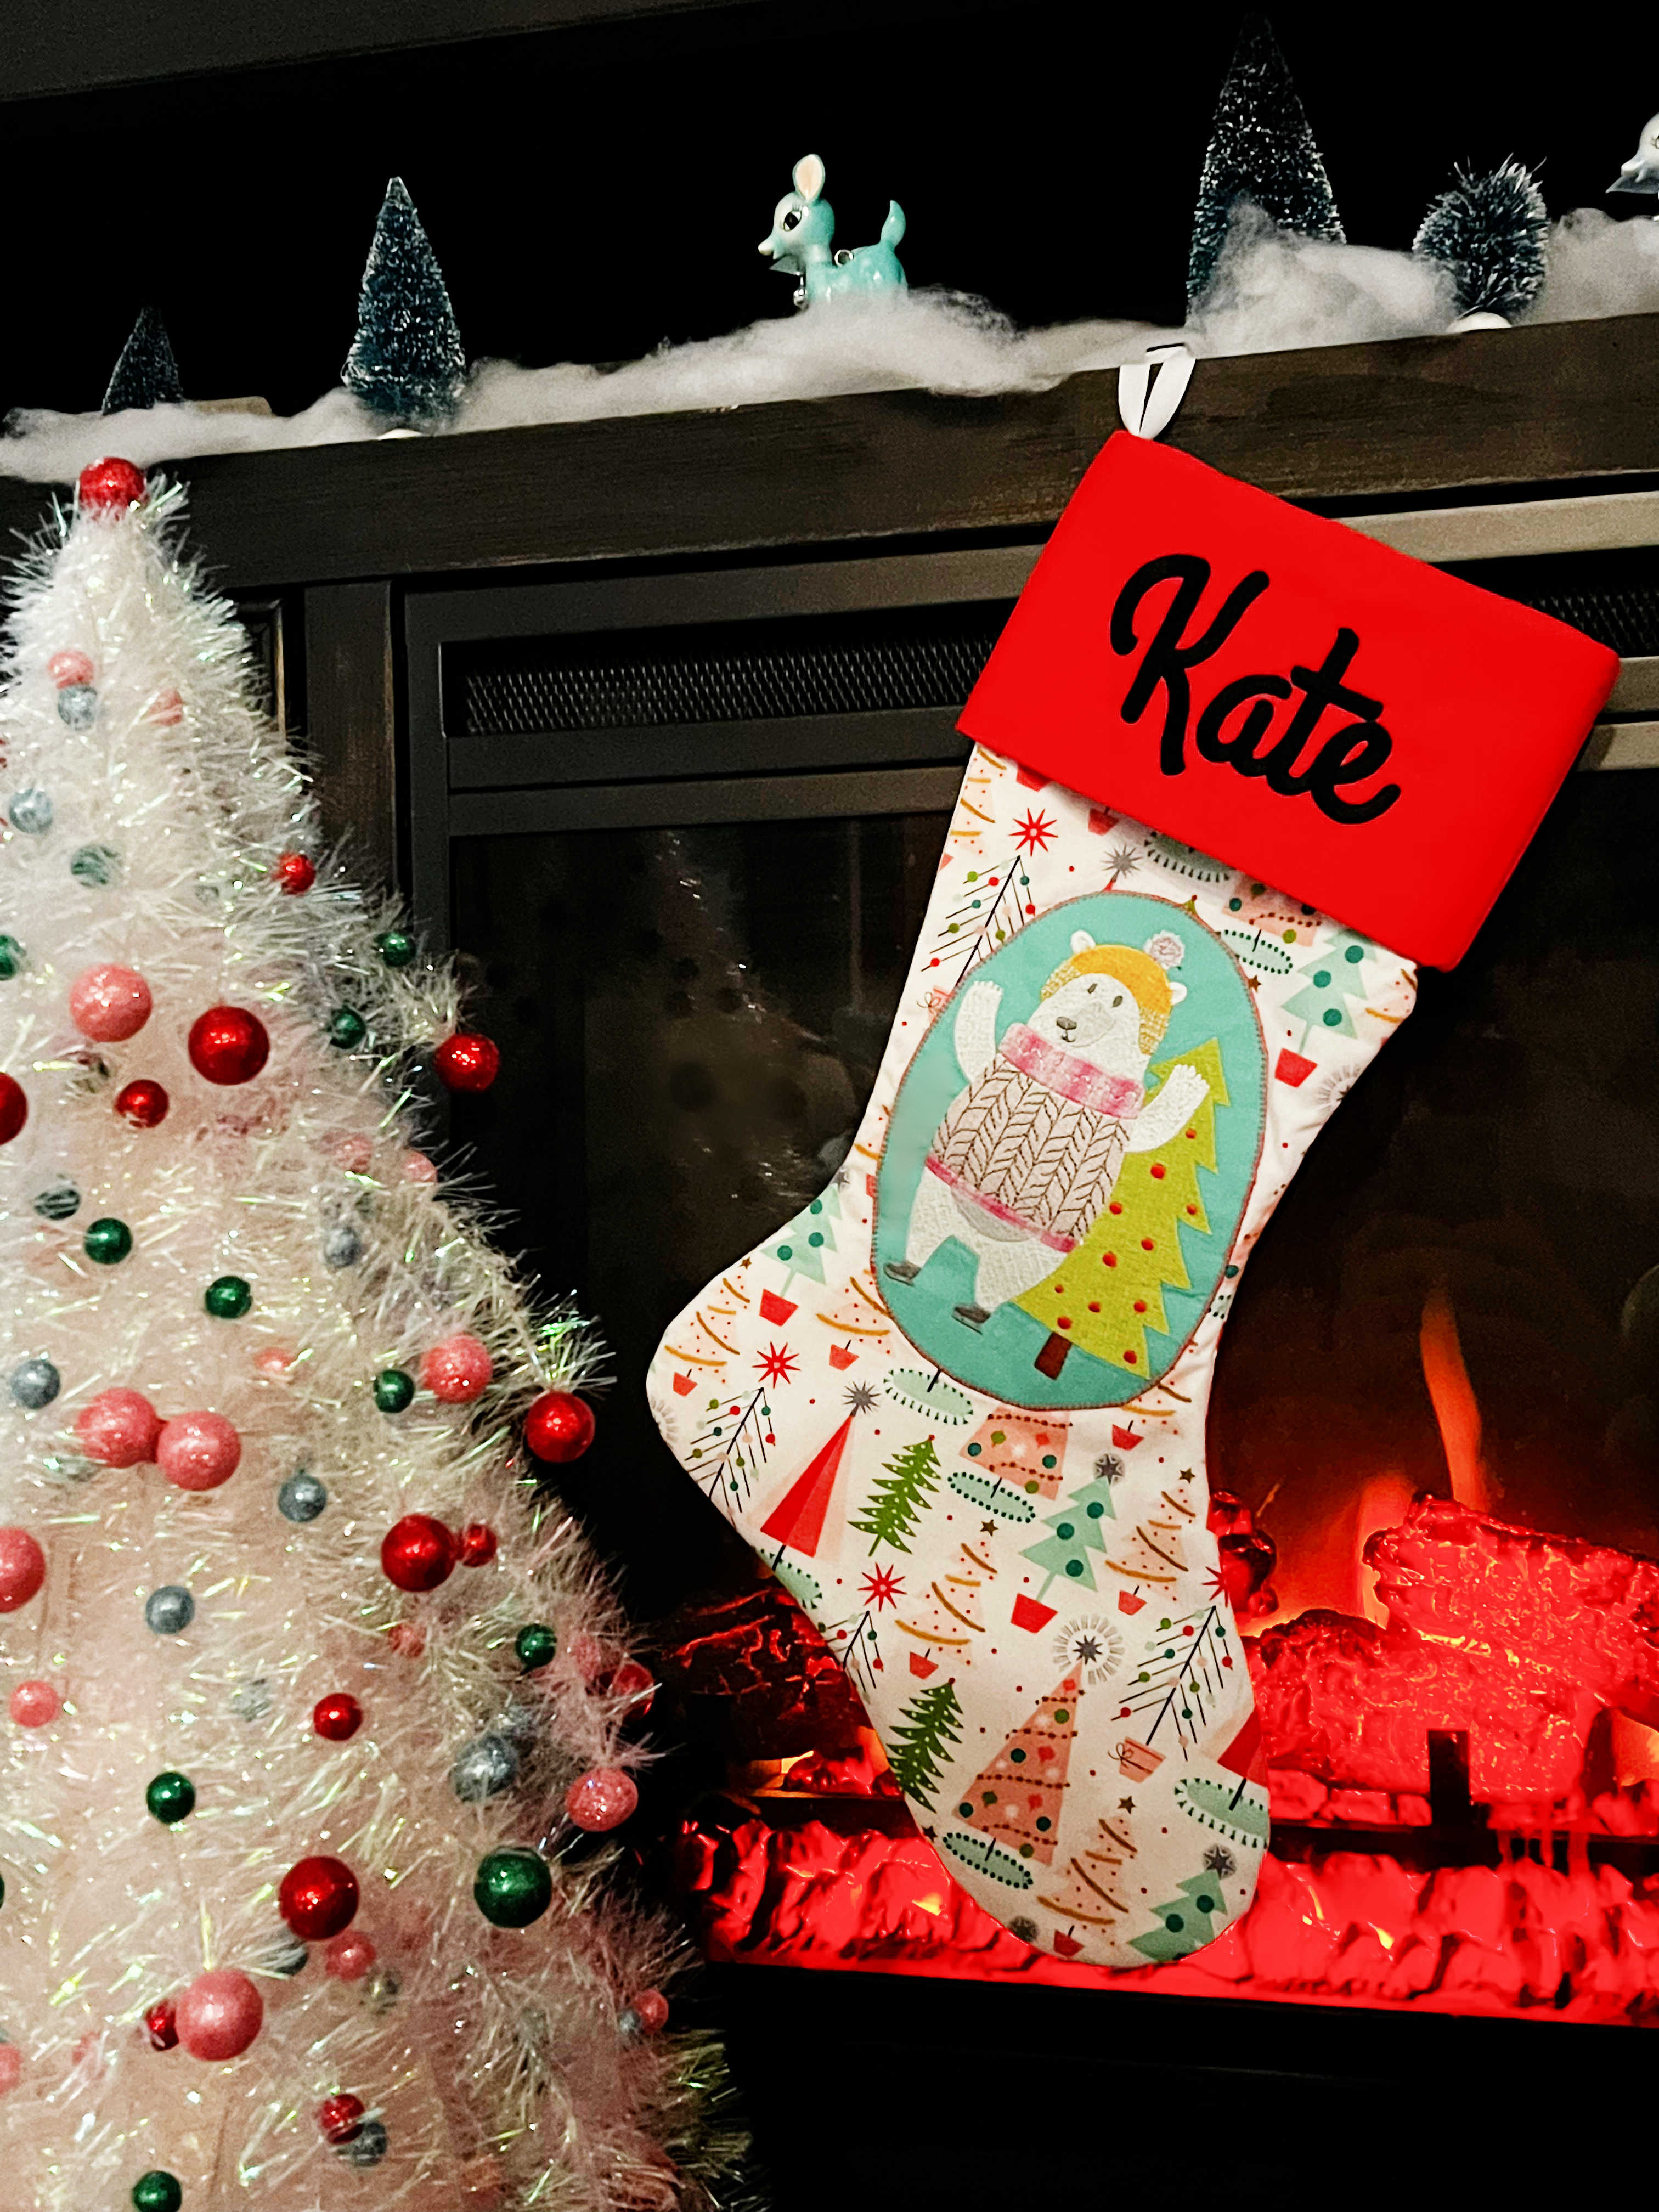
What a fun way to further personalize stockings for the whole family. You can add machine embroidered designs to show off your family’s interests or personal style.
Don’t forget to tag @ToughKittenCrafts and @BERNINAUSA when you share your stockings on Instagram! We’d love to see what you make!
Head over to to the Tough Kitten Crafts blog for more Christmas Stocking pattern hacks, including how to use knapped fabric like Minky for the cuff, and how to add toe and heel accents to your stocking!
I also have a 5 part blog series called Machine Embroidery for Beginners that is wrapping up next week where I cover everything from machine recommendations to how to download and organize designs to stabilizer basics! This series has been so much fun and there’s even more information on the Tough Kitten Crafts Instagram.
Will you add an embroidered cameo to your stockings?
Will you match the fabric or showcase an interest for the person who the stocking is for?
If you have any questions feel free to ask them below in the comments!