How to Supersize Quilt Blocks
I love taking traditional, vintage, classic (so many names for them!) quilt blocks and re-imagining them in new and fresh ways. That might be through a simplification of design, playing with the colors, or changing the scale of the block. One fun way to create a statement is to supersize the quilt block.
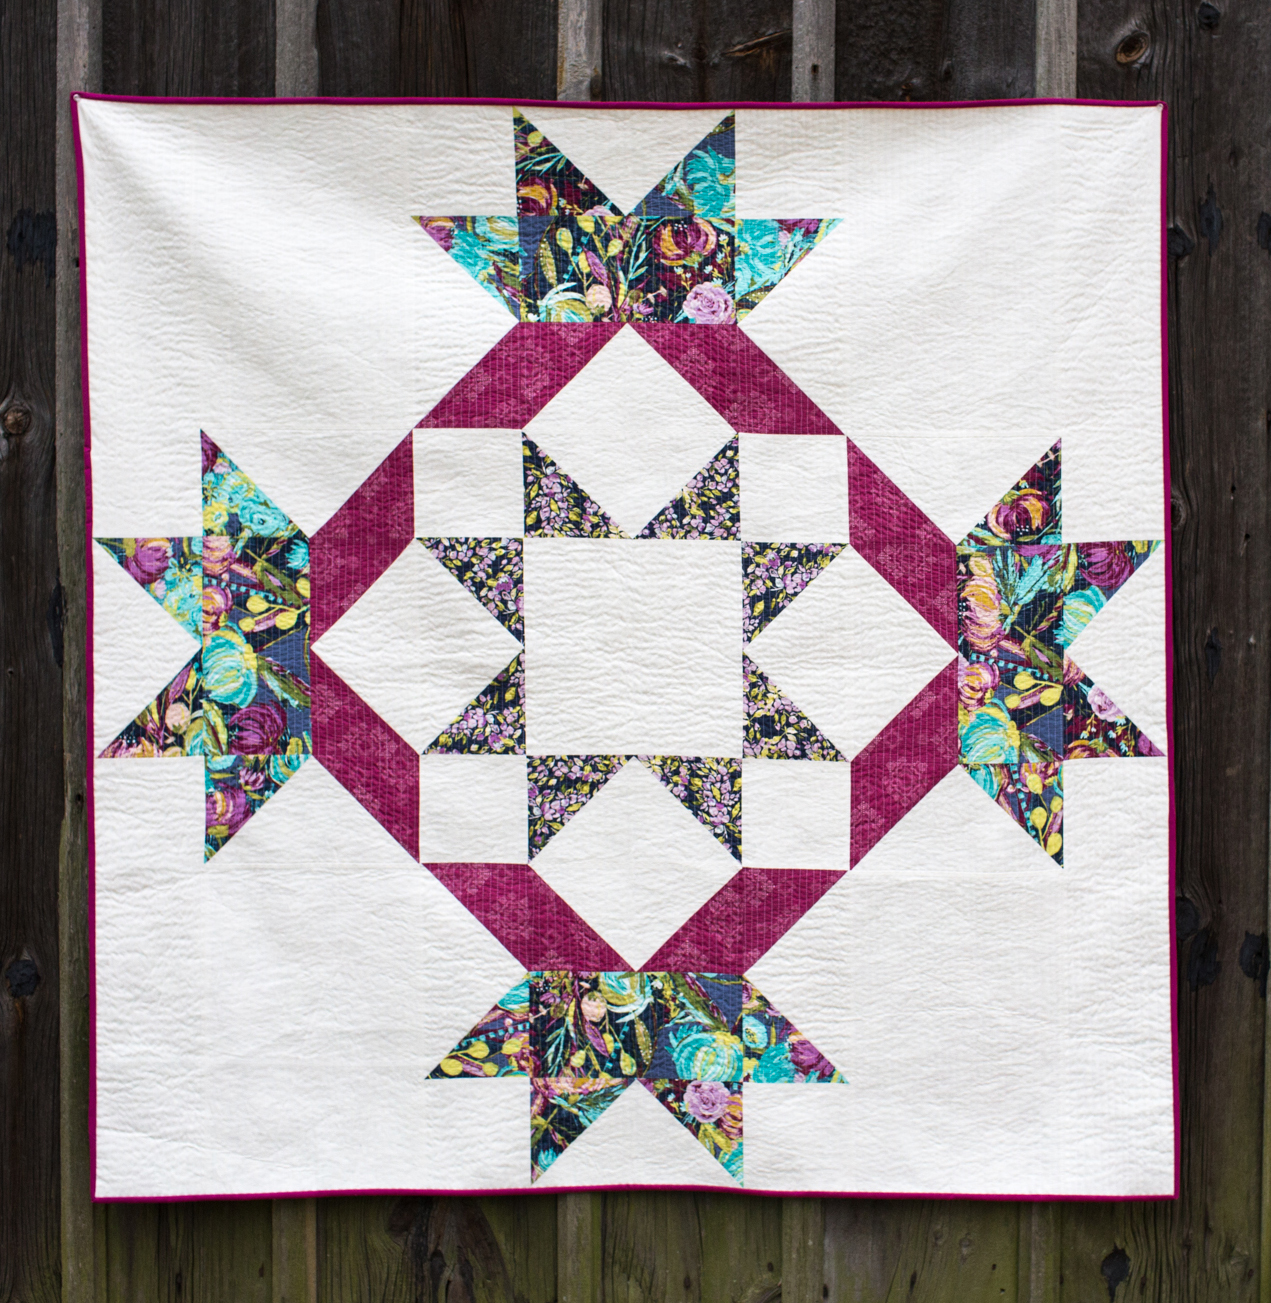
You may remember my Radiant Splendor Supersized Quilt-along last winter here at WeAllSew. I took one of my favorite quilt blocks and enlarged it from 20″ x 20″ to make a 60″ x 60″ quilt.
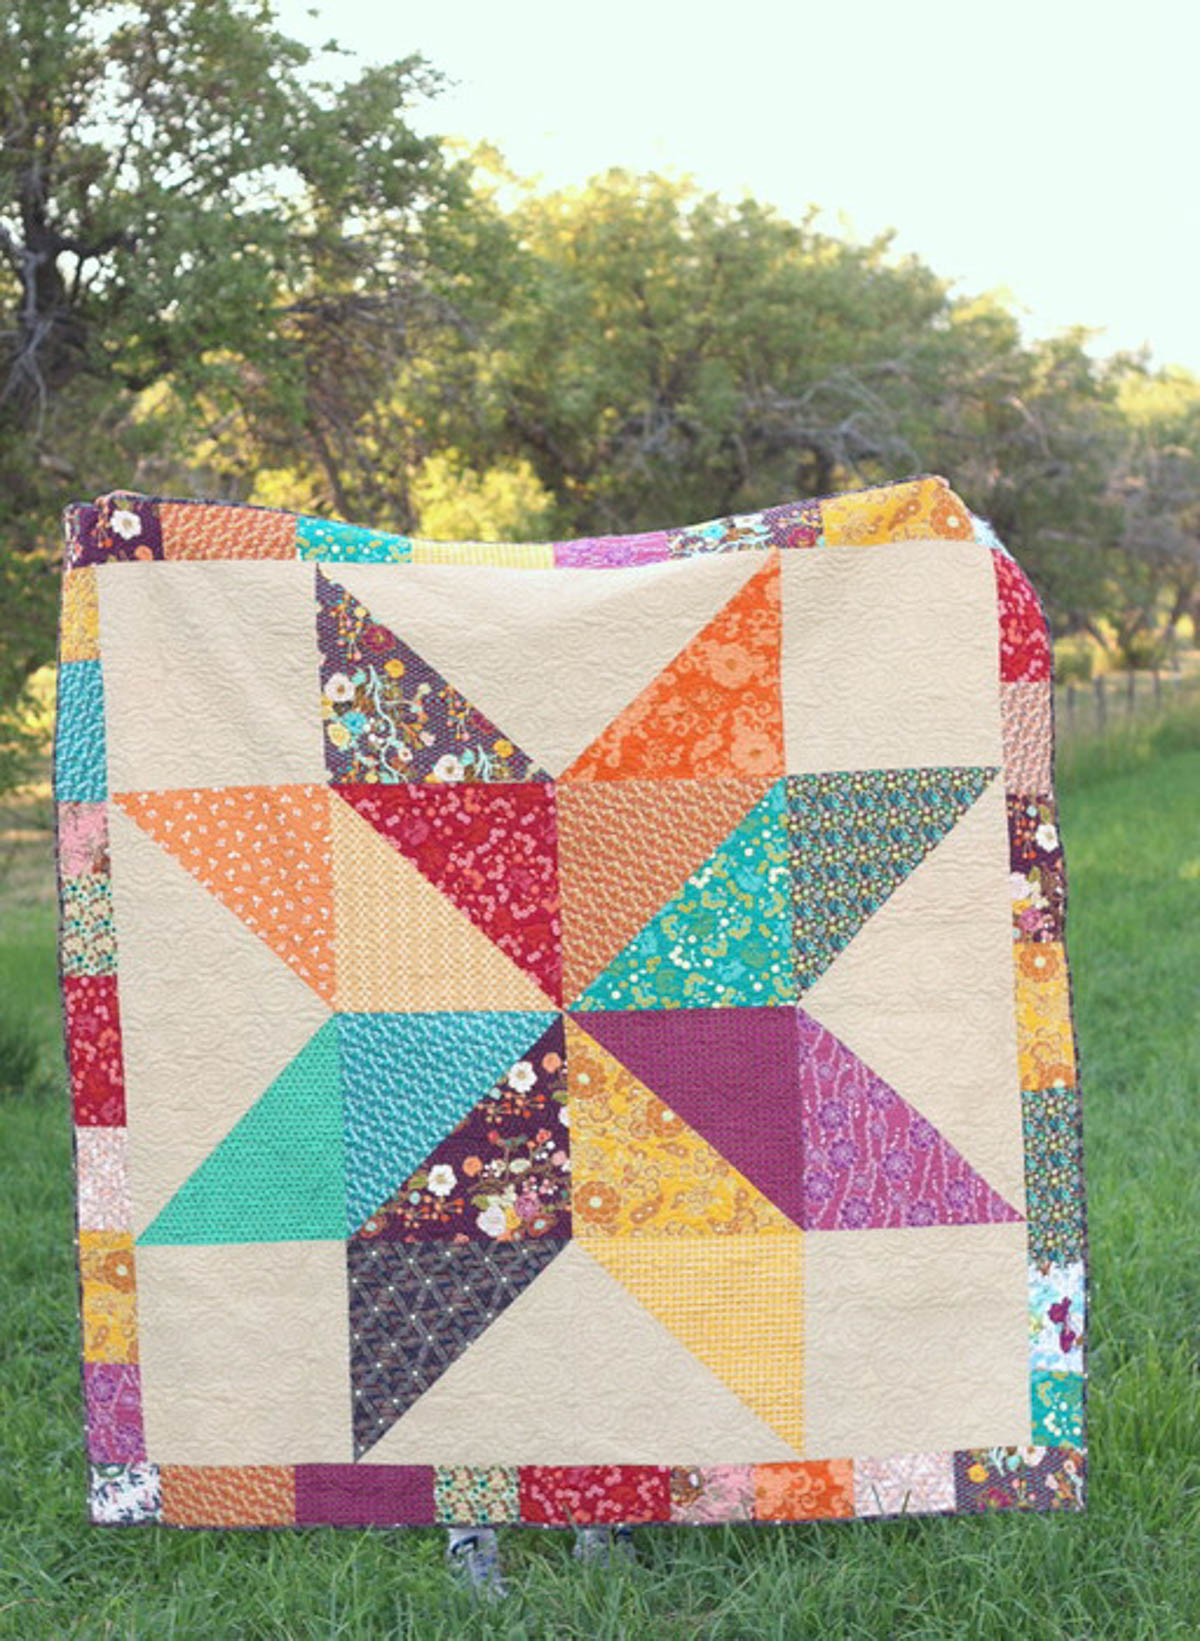
Megan Pitz of Canoe Ridge Creations made this stunning Giant Starburst quilt, measuring 60″ x 60″. She even has a mini version for comparison.

Above photo used with permission from Megan Pitz of Canoe Ridge Creations.
Karen Lewis designed this dramatic 52″ x 52″ Giant Pineapple quilt for Kona Cottons.

Above photo used with permission from Karen Lewis.
Kaye Prince of Miss Print created this beautiful Falling Maple quilt (with tutorial) based on an enlarged Maple Leaf quilt block.
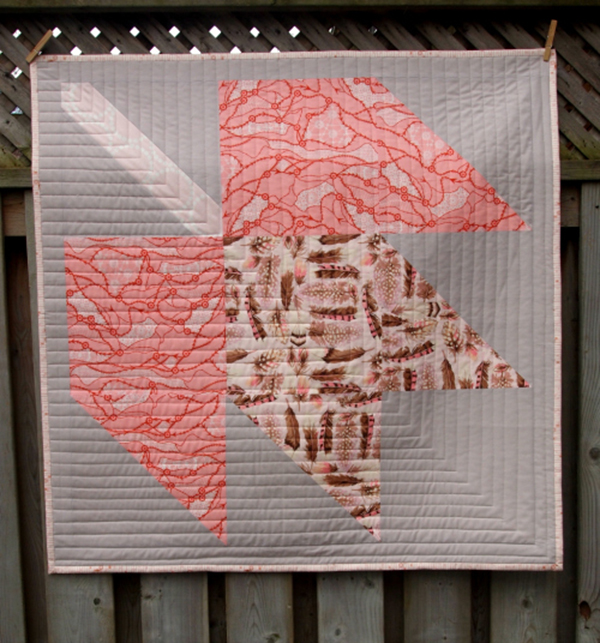
Above photo used with permission from Kaye Prince of Miss Print.
Amy Smart started with a simple lone star quilt to create the Lone Star Baby Quilt right here at WeAllSew.
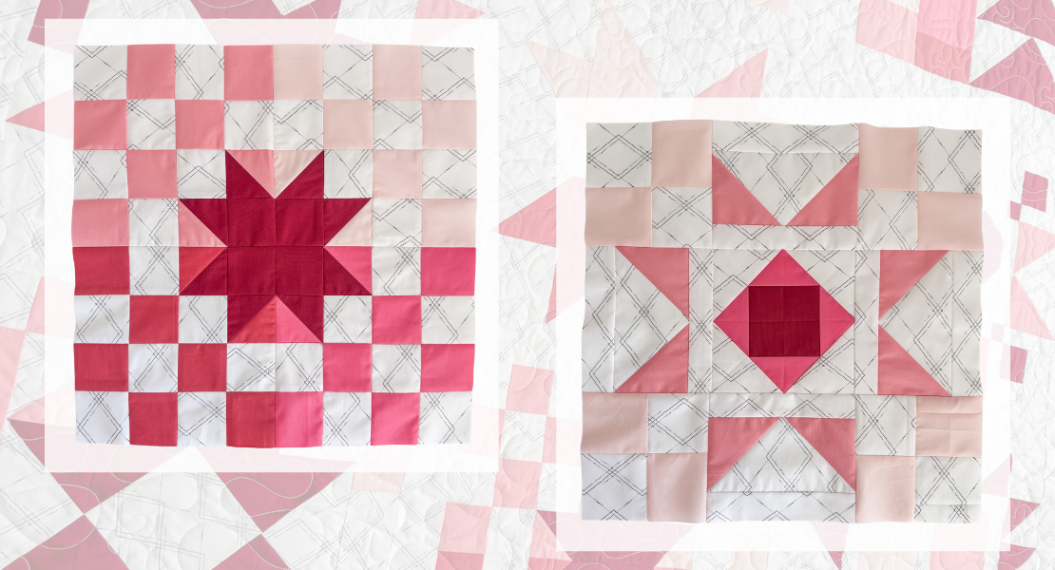
Do you want to try your hand at supersizing a quilt? Grab some graph paper and let’s get started. Today we are going to create a supersize pattern of a Pinwheel quilt block.

I generally like to work with traditionally pieced blocks that I can break down into mathematically simple components. Start with a simple block with common elements (like squares, rectangles, half square triangles, flying geese) and you can work your way to more complex blocks as you gain experience.
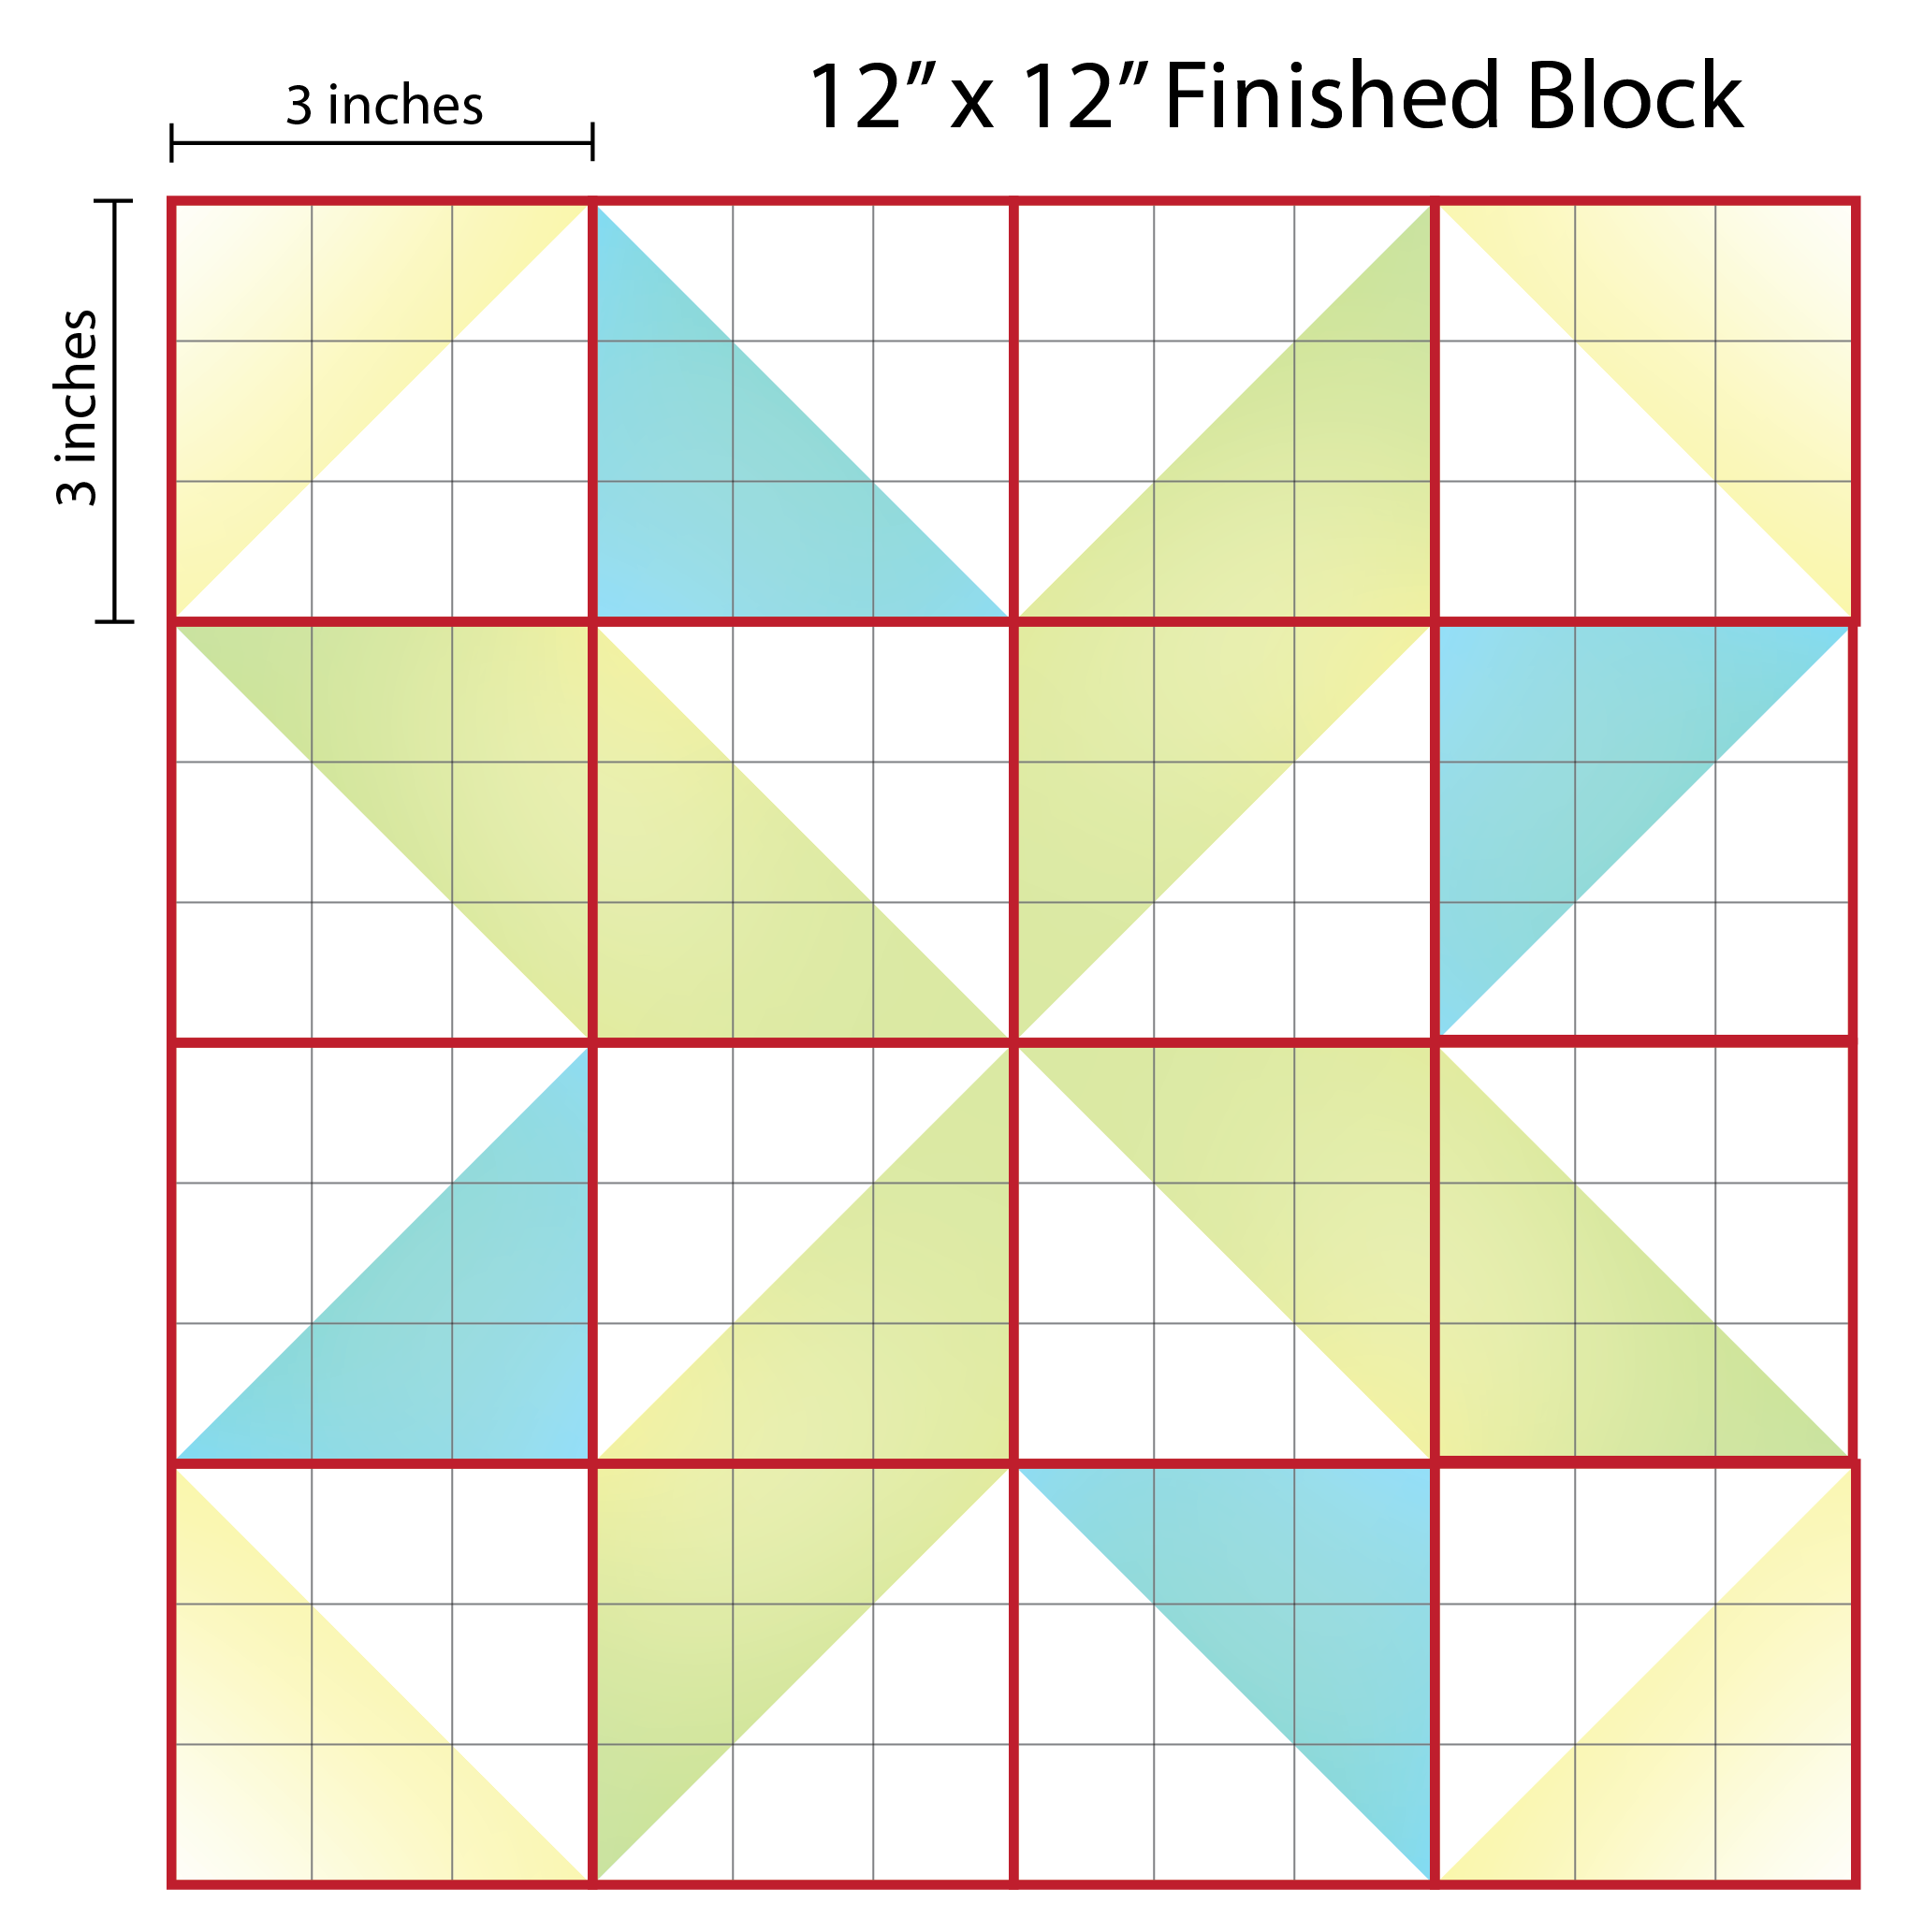
Step 1. Look at your graph paper. Every square should represent a measurement. In this Pinwheel sketch, every graph paper square represents 1″ x 1″ and the final quilt block is 12″ x 12″.
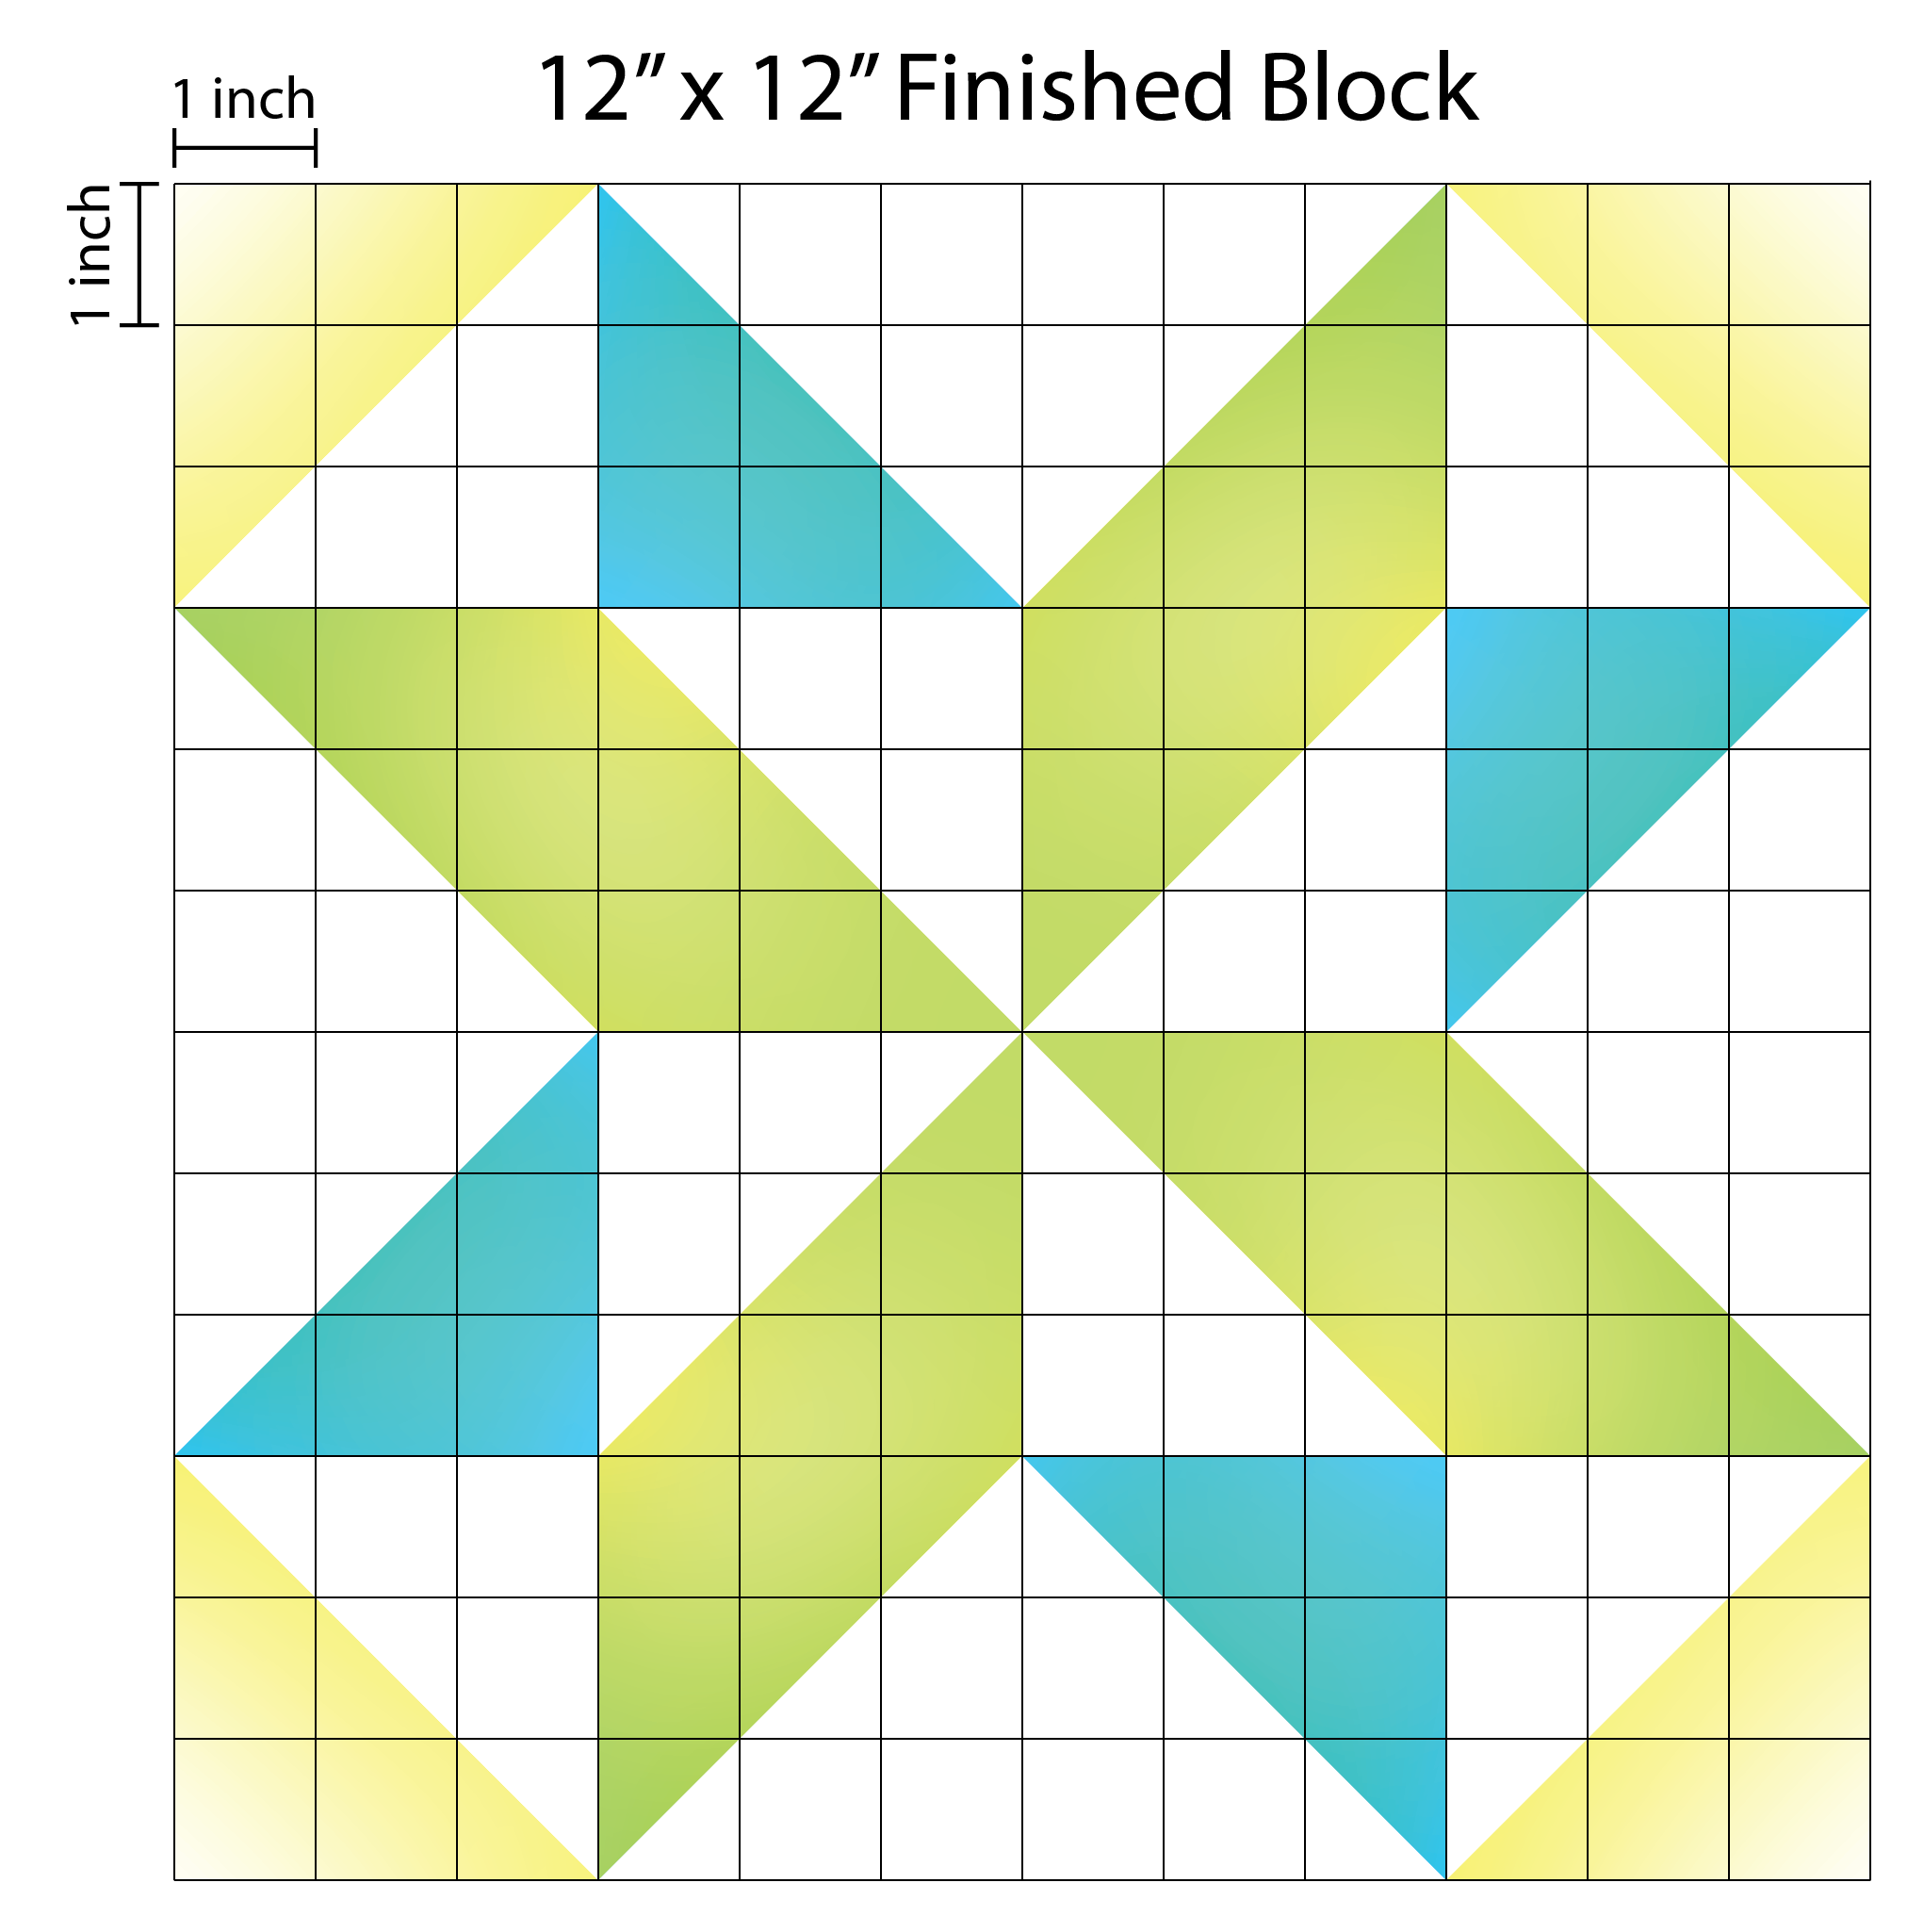
Step 2. Isolate the components of your quilt block. I broke this Pinwheel quilt block down into a 4 x 4 grid. Each grid measures 3″ x 3″ and contains one half square triangle.
Step 3. Decide how large you would like to make your quilt. Pick a number that is a multiple of your original design. For example:
12″ quilt block x 2 = 24″ x 24″ Quilt
12″ quilt block x 3 = 36″ x 36″ Quilt
12″ quilt block x 4 = 48″ x 48″ Quilt
12″ quilt block x 5 = 60″ x 60″ Quilt
And so on.
Step 4. I decided to mock this quilt up as a 48″ x 48″ square, or 4 times the original size.
This means now each square on my graph paper represents a 4″ x 4″ square.
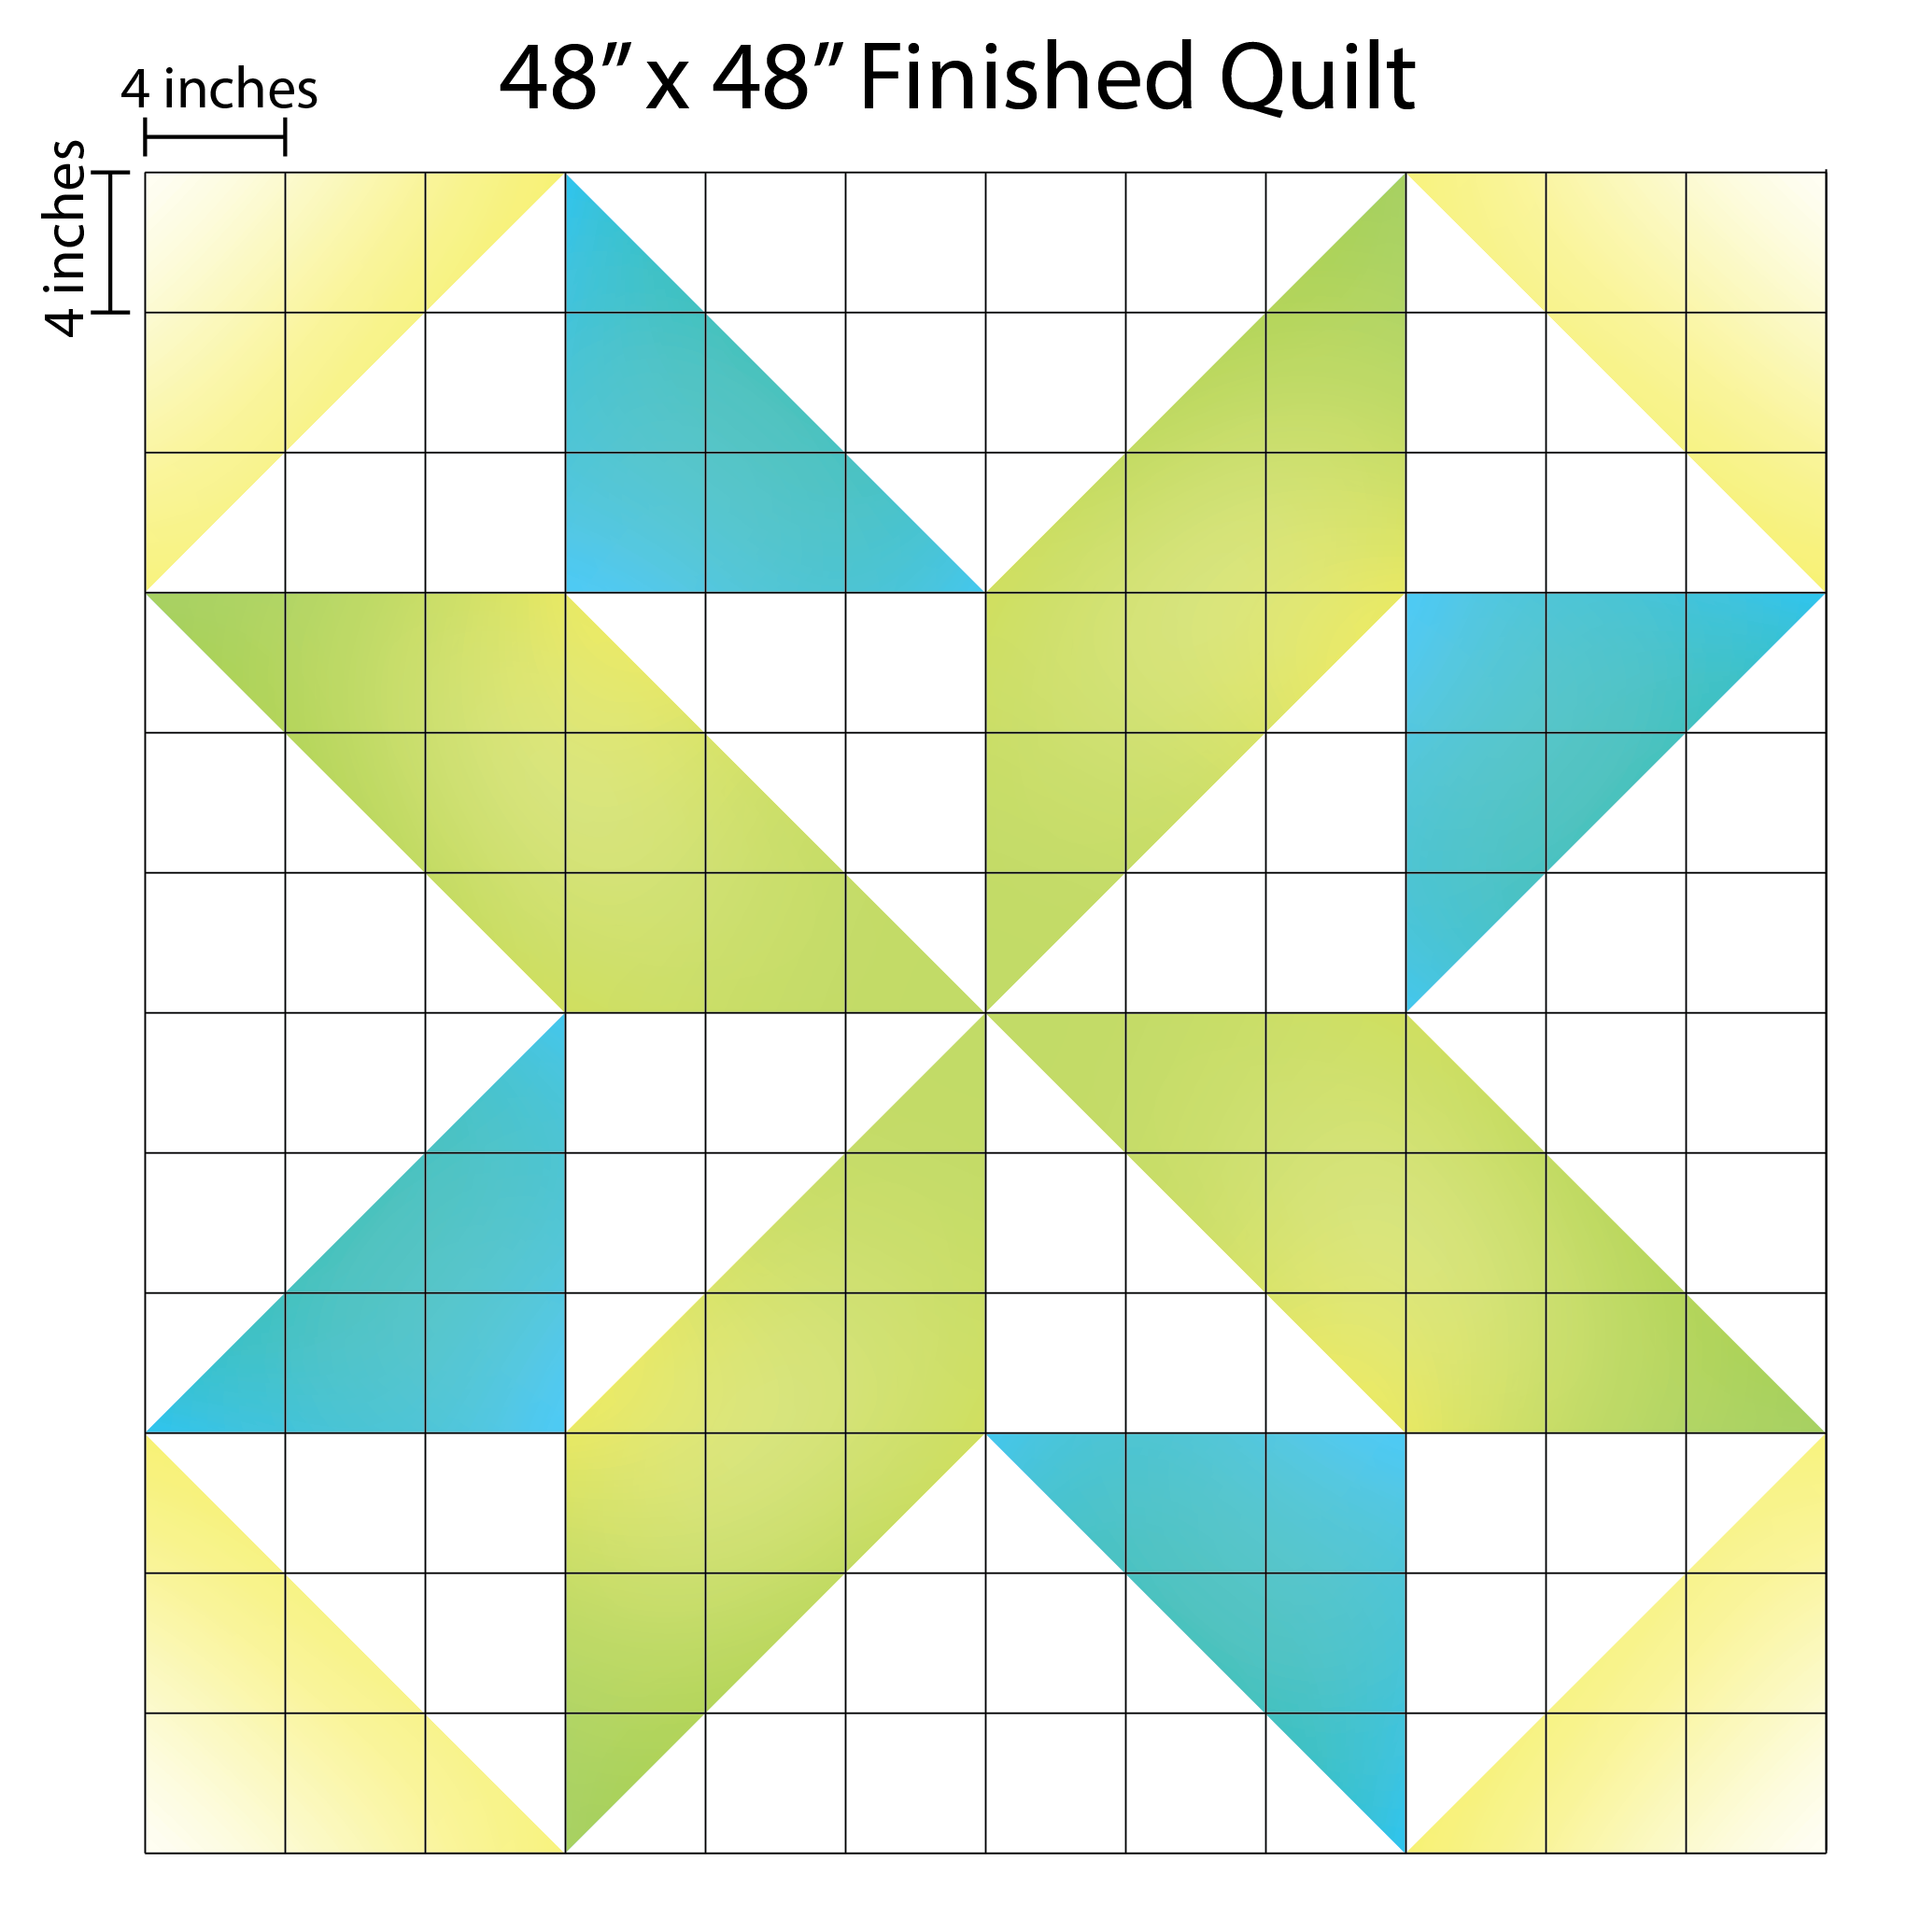
Step 5. Look at the quilt block units. Multiple those units by your new scale as well.
3″ x 4 = 12″ x 12″ units
This means each HST unit needs to be 12″ x 12″, to finish a 48″ x 48″ quilt.
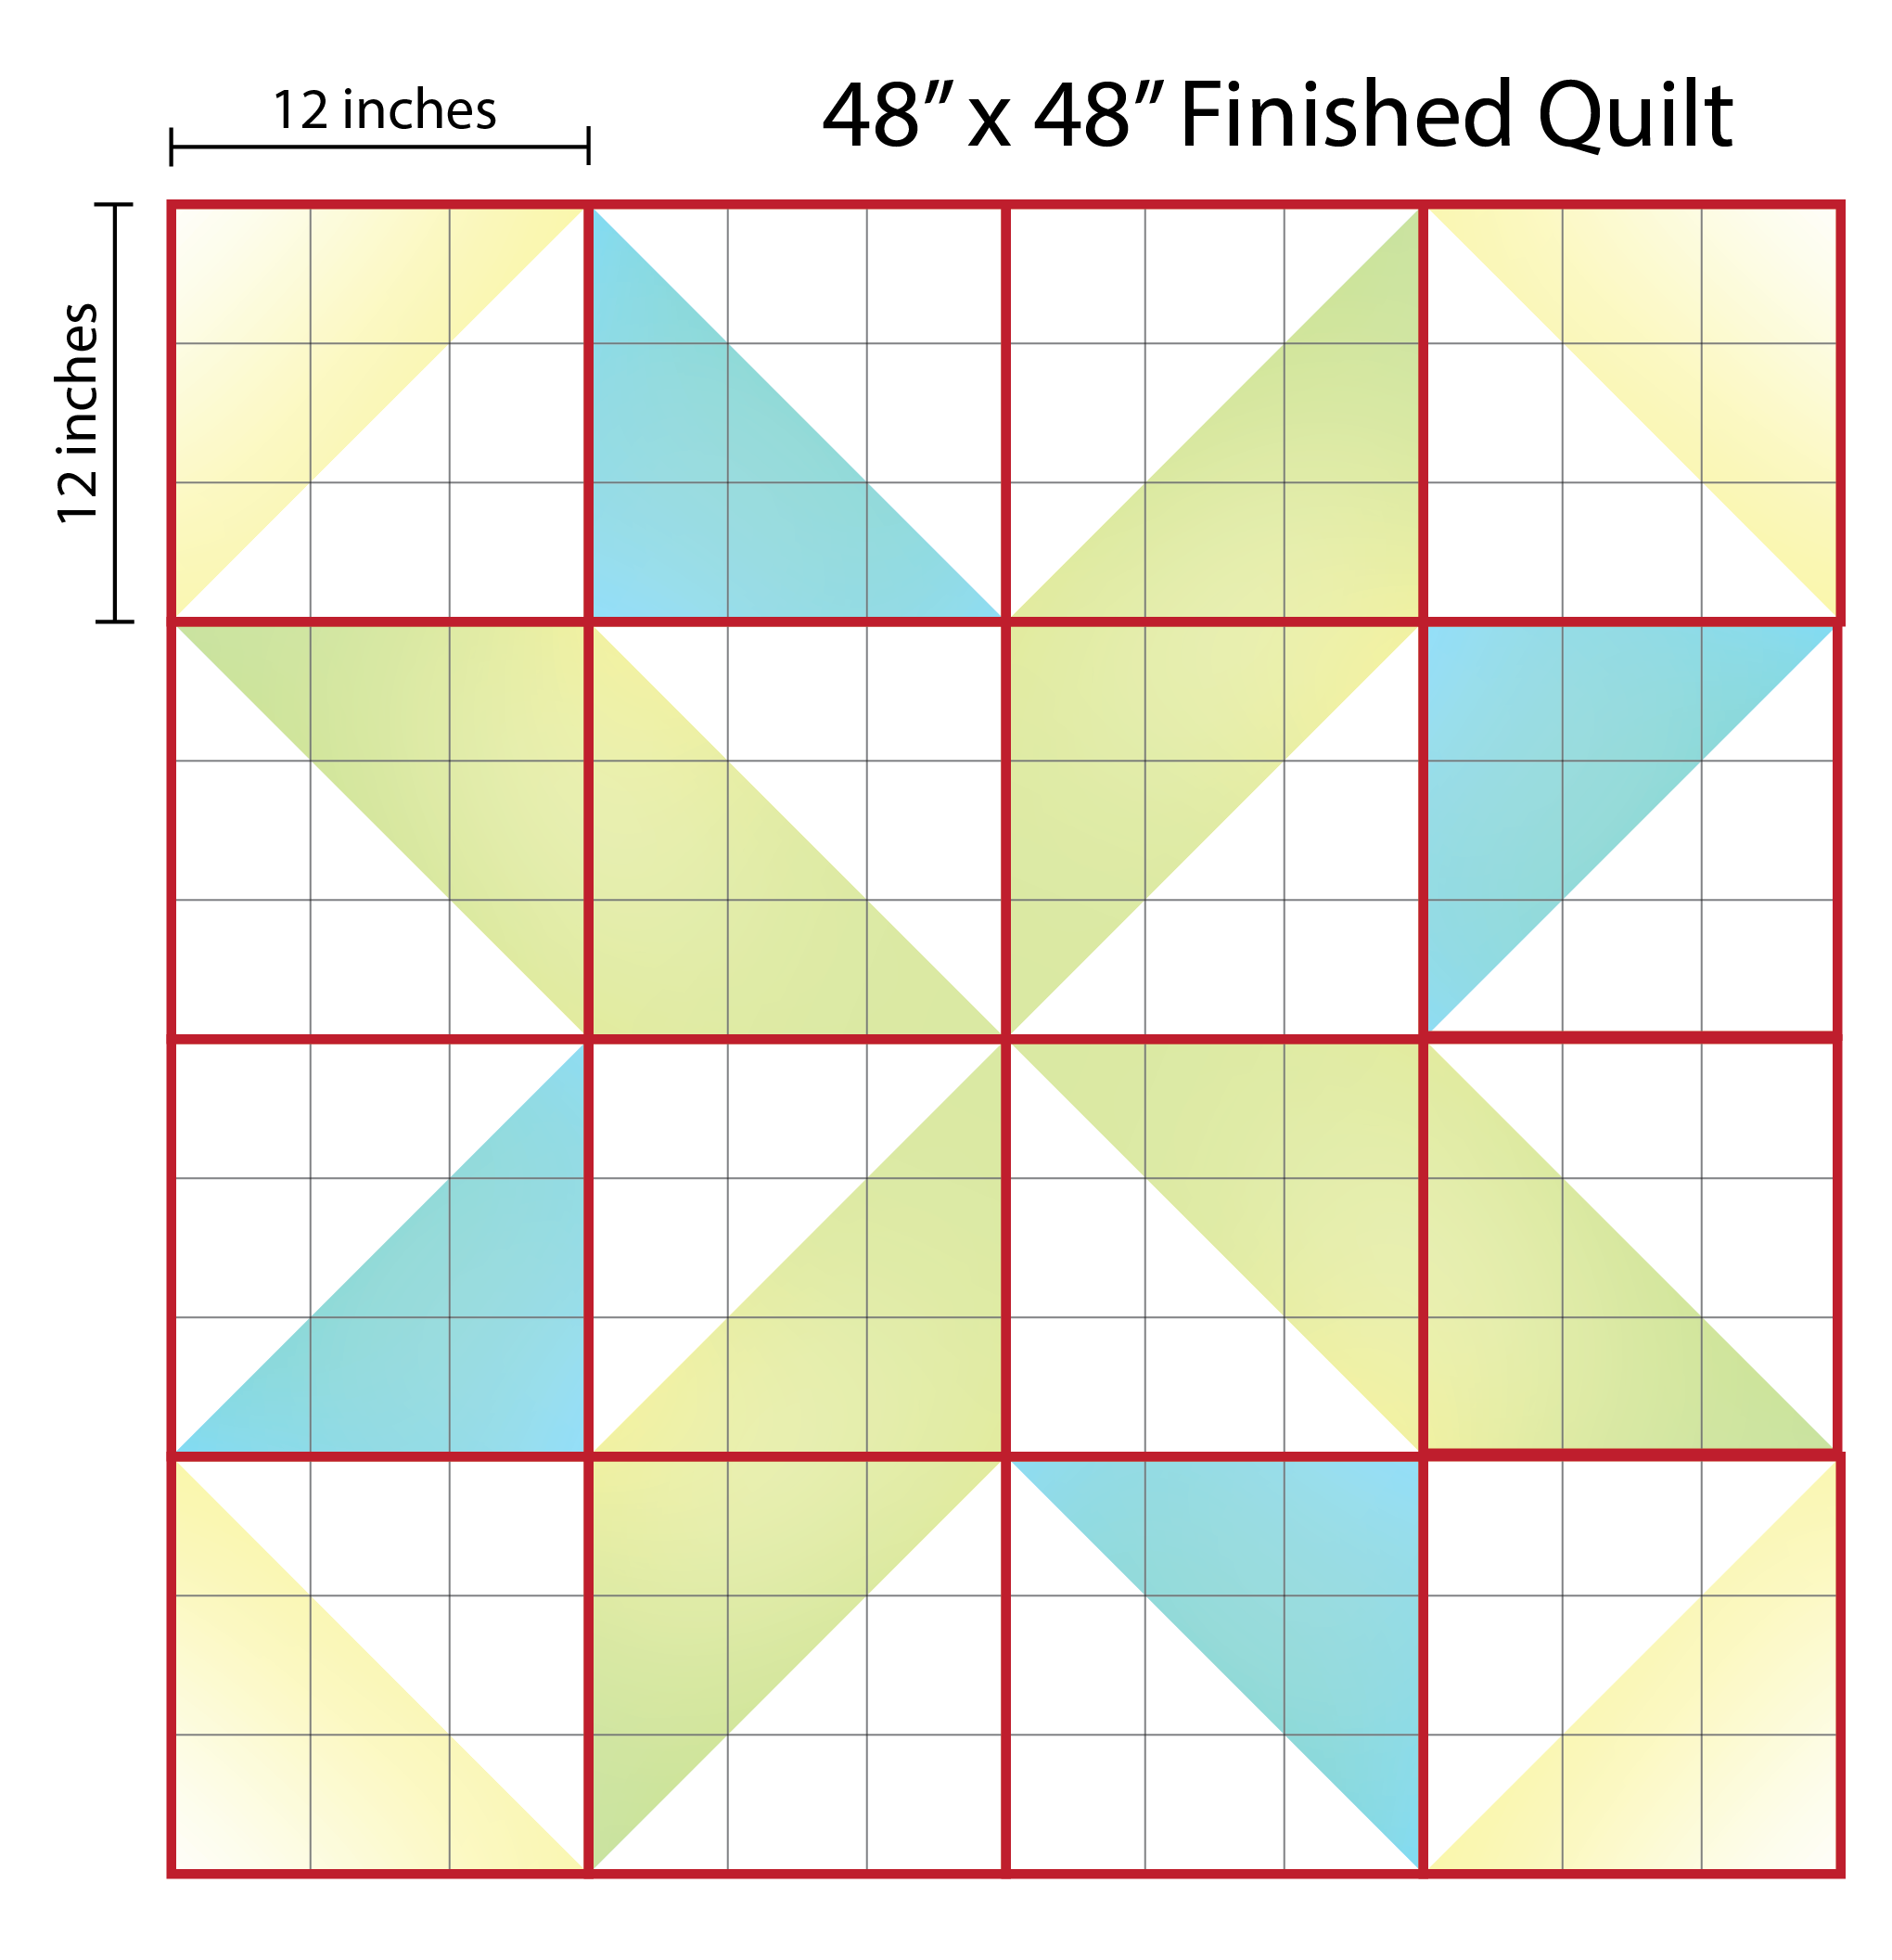
Step 6. You now know the size units for your quilt! In the case of this Supersized Pinwheel quilt, you will need:
(8) Green and White 12″ x 12″ finished HST units
(4) Yellow and White 12″ x 12″ finished HST units
(4) Aqua and White 12″ x 12″ finished HST units
There are a lot of tutorials online to calculate your cut fabric sizes for various common quilting components. Here is one for HSTs.
I hope you enjoy supersizing quilt blocks for future dramatic quilts!


What you might also like


3 comments on “How to Supersize Quilt Blocks”
-
-
Thanks for explaining the process in a simple way. Even the draft-averse can understand it.
-
Remember to add to the size of your squares so that when you make half square triangles they finish at 12or whatever size block you are making.
Leave a Reply
You must be logged in to post a comment.

Thank you for sharing this tutorial! It has opened a wonderful new door of ideas.