All About Sewing Machine Needles
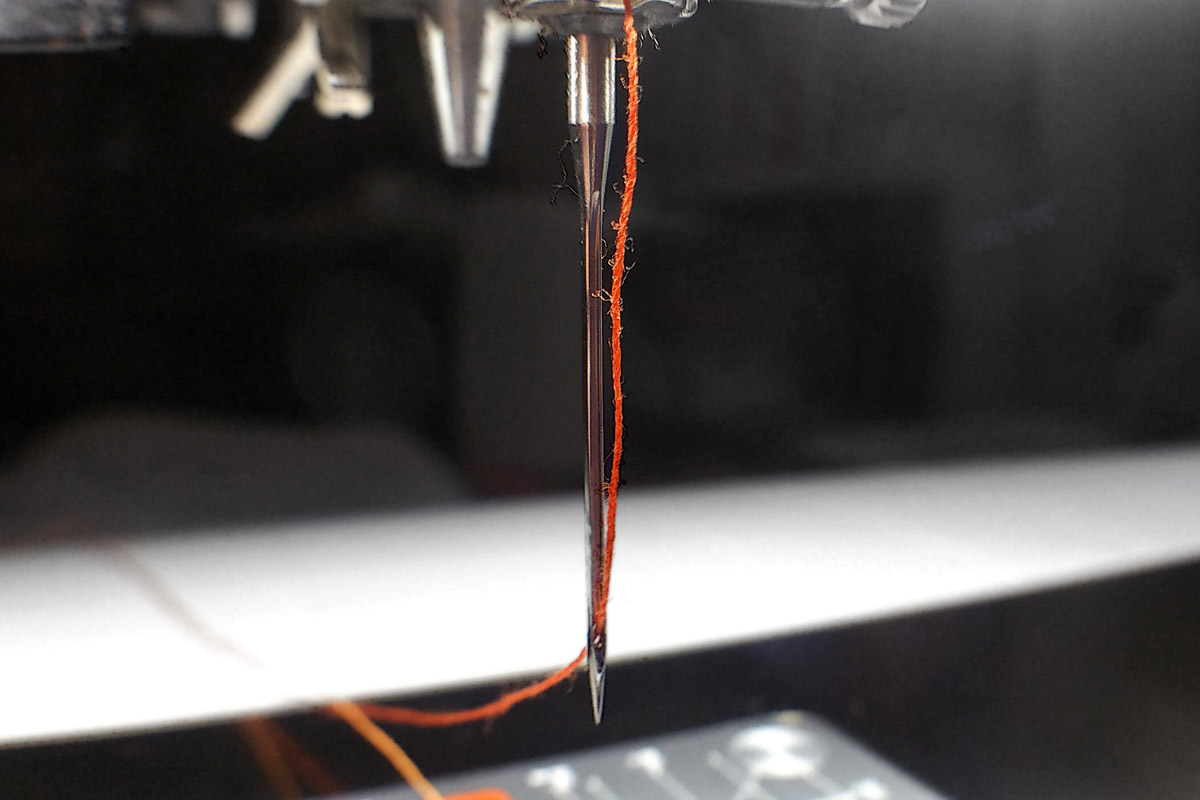
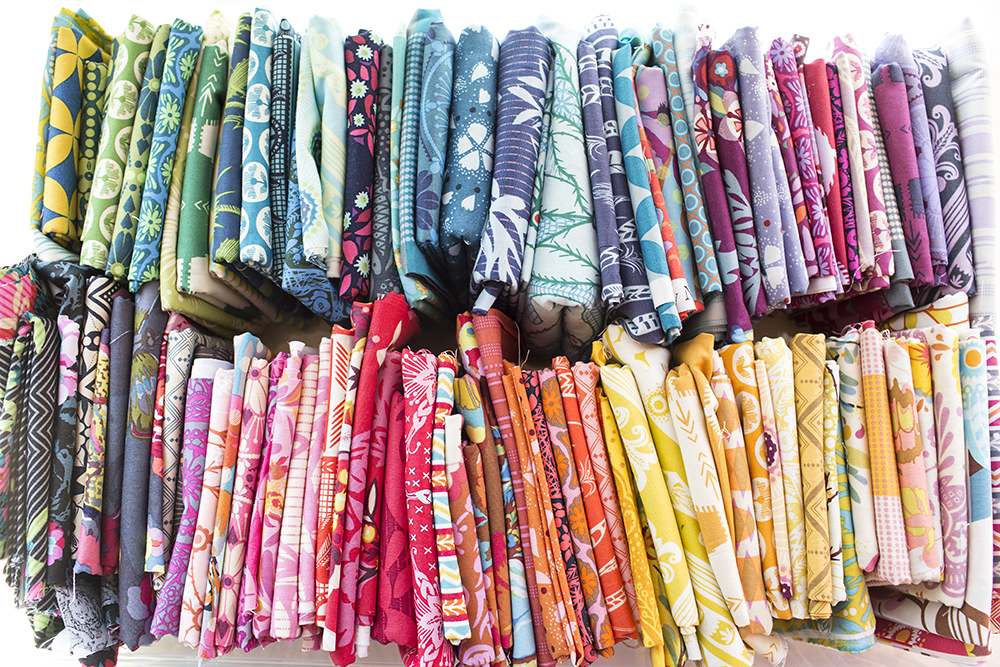
It’s amazing how something as small as a needle can make such a huge impact on your sewing project! The right needle for your sewing project can create perfectly even and beautifully made stitches. The wrong needle (even a worn or damaged needle) can create all kinds of headaches—like skipped stitches, crooked stitches, frayed and broken threads, and holes or tears in your fabric. So how do you make sure you are choosing the right needle for the sewing project you’re making? And how would you know if the needle is worn or damaged? Read on to find out all about sewing machine needles, and be sure to download our free BERNINA PDF Needle Brochure as a handy reference.
Anatomy of a Sewing Machine Needle
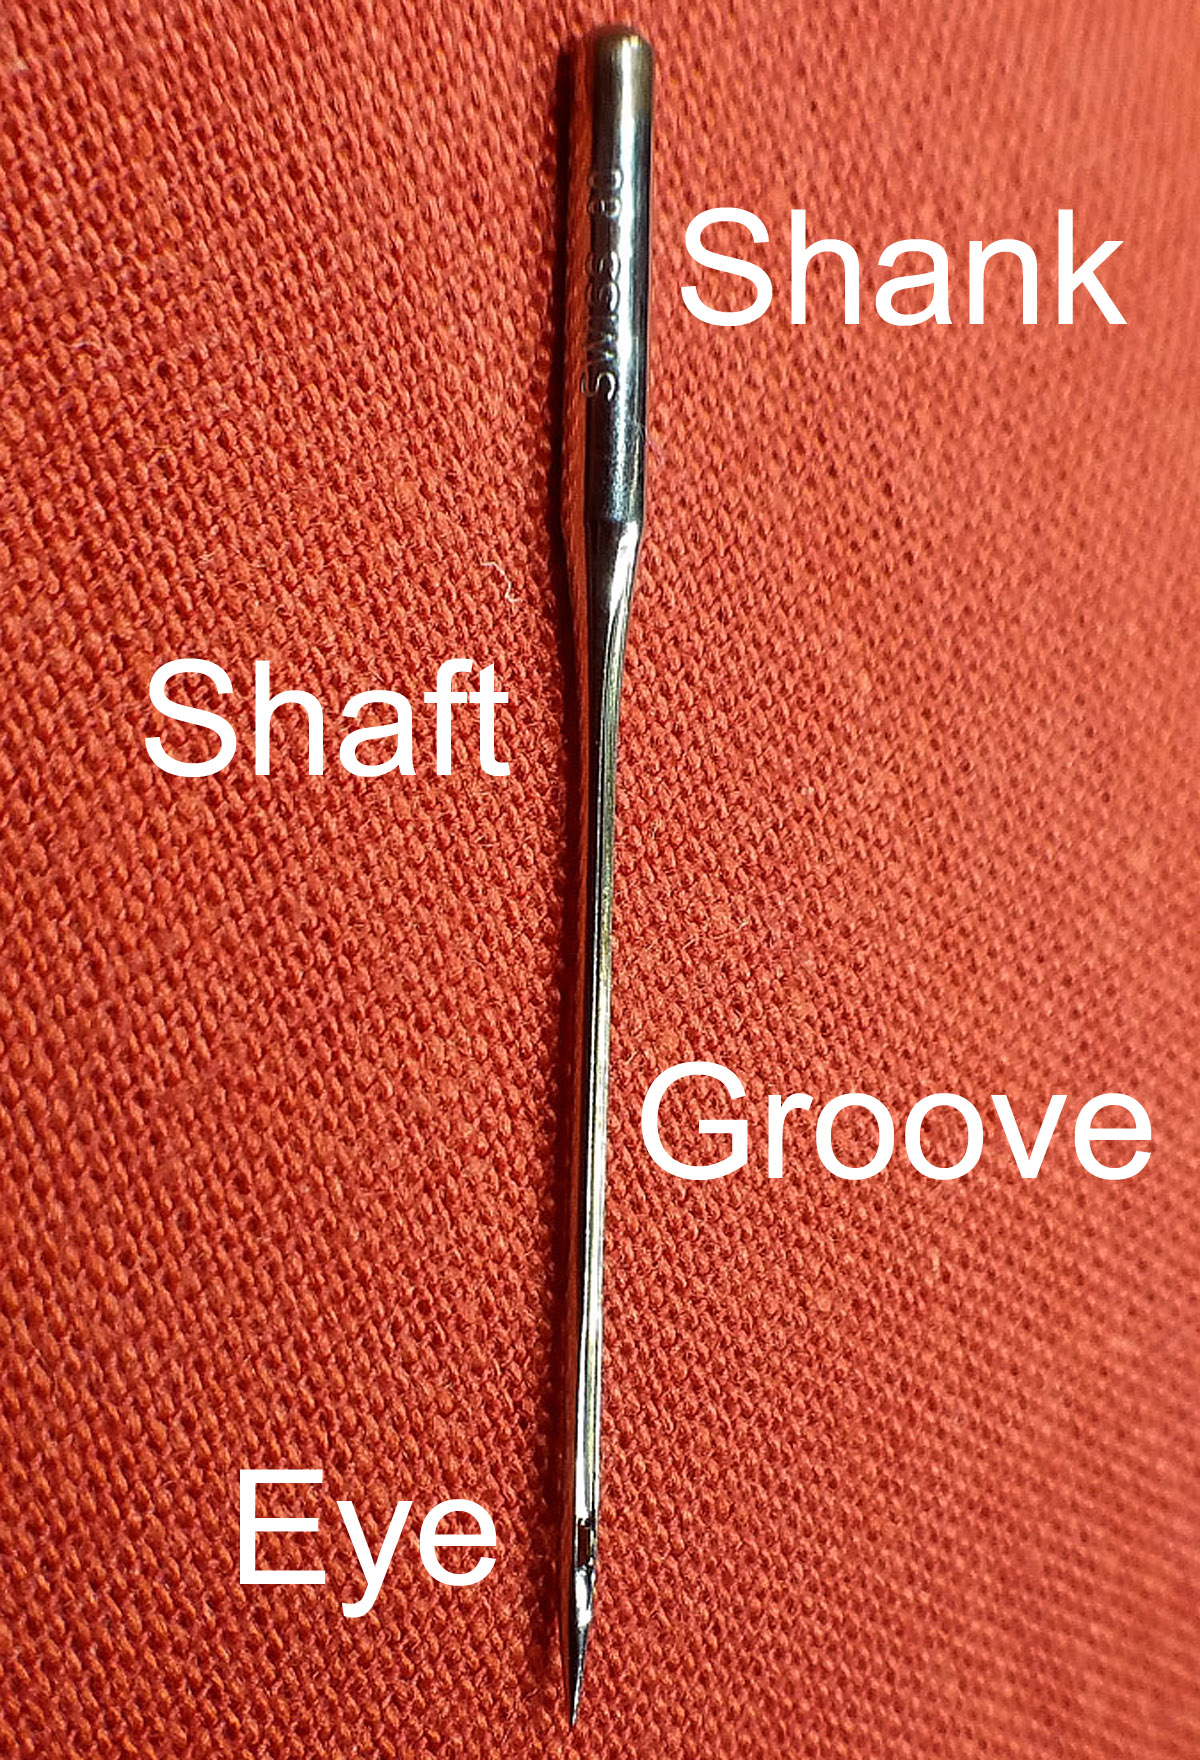
A sewing machine needle looks simple but has many different parts.
- The shank is the part that seats into your sewing machine; the flat side usually goes towards the back, and the rounded side towards the front. Some specialty needles may have a completely round shank.
- The shaft is the part of the needle that tapers down from the shank.
- The groove runs in the front of the needle to the eye. The thread is seated securely in this groove when the needle penetrates the fabric. You can feel the groove by passing your fingernail over the front of the needle.
- The eye of the needle is where the thread passes from the front to the back. Different types of needles will have different types of eyes.
- The scarf is located on the BACK of the needle, and is a smooth indentation behind the eye. You can easily find the scarf with your finger. The scarf is where the hook passes to pick up the top thread from the needle to pass it around the bobbin to create a lock stitch, and can be shaped differently on various types of needles.
- The point is the first part of the needle to penetrate the fabric. Different types of needles will have different points engineered to work best with specific kinds of fabrics.
Needle Sizing
Needles come in various sizes noted by a set of numbers. The European sizing system gauges the needle diameter in fractions of a millimeter, while the American size is usually a smaller number. The smaller the number in either European or American sizing, the finer the needle. Basic needle sizes are as follows.
For very fine or lightweight fabrics: use size 60/8 or 65/9
For light weight fabrics: use size 70/10 or 75/11
For medium weight fabrics: use size 80/12 or 90/14
For heavy weight fabrics: use size 90/14 or 100/16
For very heavy fabrics: use size 110/18
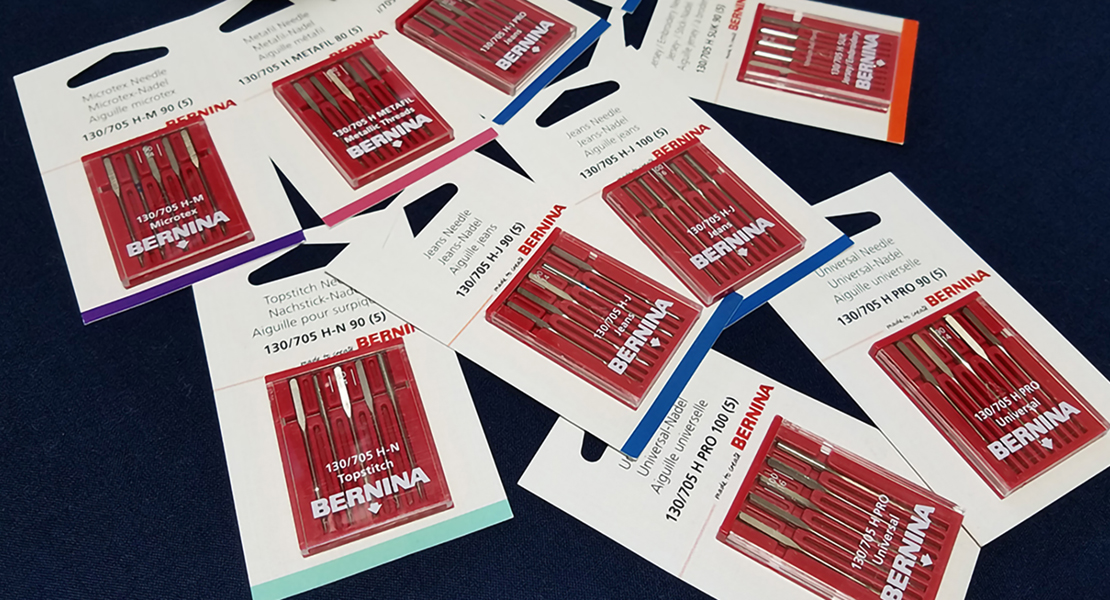
Sewing Machine Needle Types
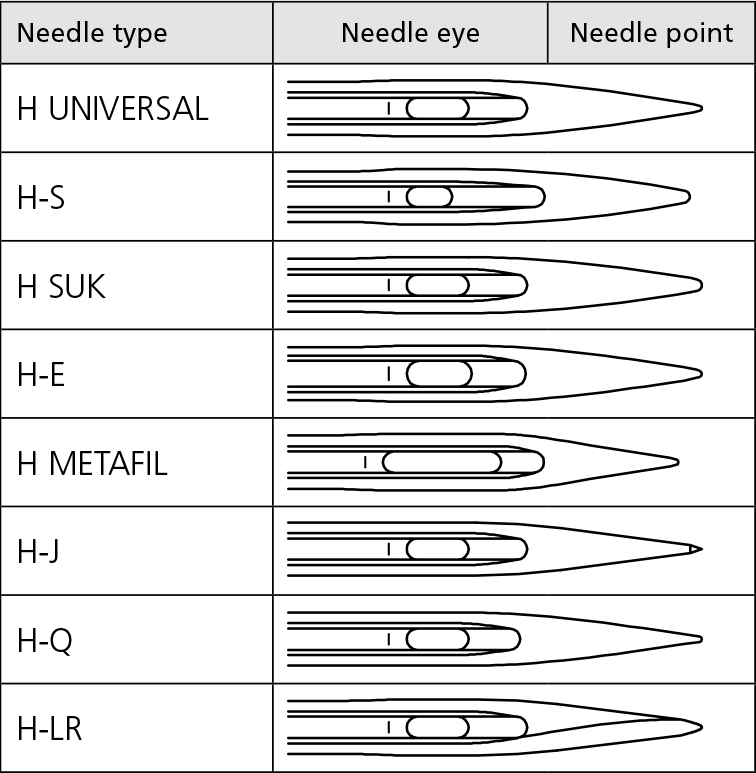
There are many different types of sewing machine needles, each engineered to work best with a specific kind of material. The major types of needles are noted with a letter code as follows on BERNINA needles. You can see the differences in the types of needle in the chart above.
- UNIVERSAL: Universal needles has a slightly rounded point and a standard eye made to sew basic woven or knit fabrics.
- S: Stretch needles have a very rounded point and smaller eye to accommodate stitching with very stretchy knit fabrics. The rounded point pushes the knit fibers out of the way to maintain the integrity of the material, where a sharp pointed needle may cut or slice through fibers to create pulls or small holes.
- SUK: All-purpose embroidery needles have a slightly rounded point and smooth eye to help slide through knit or woven embroidery fabrics without cutting or slicing through threads that have already been stitched out in the design.
- E: Specialty embroidery needles with a larger eye and groove to accommodate thicker embroidery threads like wools.
- METAFIL: Specialty needle with a longer eye engineered to sew or embroidery with metallic or specialty threads.
- J: Jeans needles have a long, slender sharp point to penetrate thick tightly woven fabrics like denim.
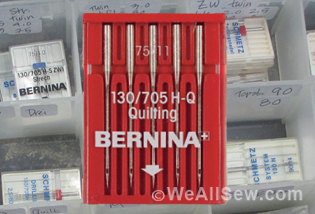
- Q: Quilting needles have a delicate, slightly rounded point to help penetrate thick layers (like a quilt with batting) without damaging the materials. These needles also work well for topstitching or precise patchwork.
- LR: Leather needles have one sharp edge made to help cut through non-woven thick material such as leather and artificial leather.
There are also other types of specialty needles, such as double-needles, wing needles, and triple-needles to name a few. There are so many different needle types and sizes, it’s easy for a beginner to feel overwhelmed! But don’t hesitate to ask for help finding the right needle for your project at your next visit to your local BERNINA store.
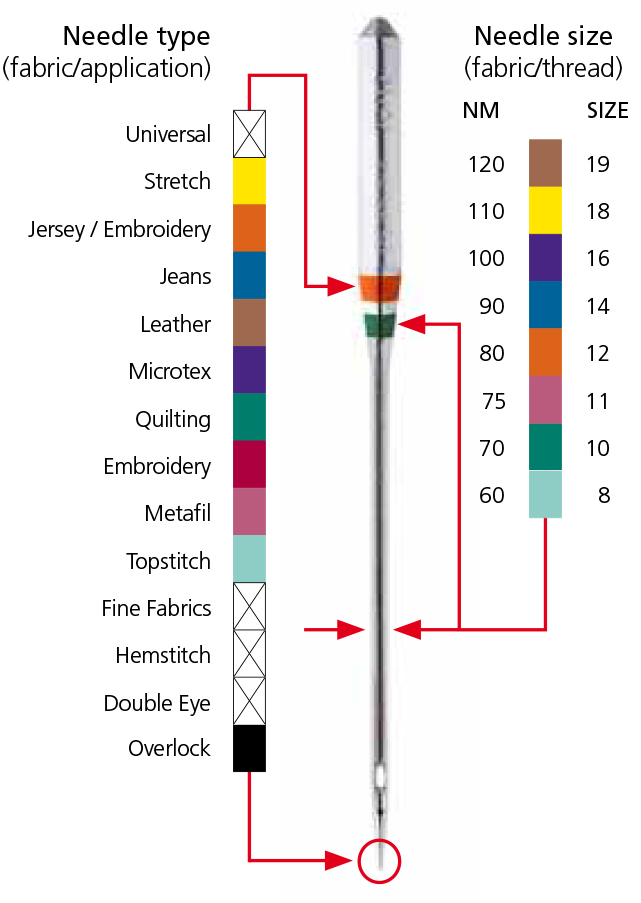
Also helpful in identifying needles once you open a package (especially after you quick-changed your needle the last time you were at your sewing machine and forgot to write down the type!) is our BERNINA color code. Just look for the colored bars on the needle shaft: The first bar corresponds to the needle type, and the second bar corresponds to size.
Needle and Thread Ratio

The point is the first part of the needle to penetrate the material. The right needle point is essential for a good sewing result. During sewing and embroidery, the thread slides through the eye of the needle several times at high speed. This is why it’s important to choose the right needle/thread ratio. The thread should pass smoothly and snugly through the eye of the needle. If the thread is too tight in the needle, or very loose, it can create problems when stitching.
How can you tell if you have the right needle to thread ratio? Here’s a quick tip to help you determine if you’ve got it right!

Before inserting the sewing machine needle into your machine, pass it through a length of thread you have selected to sew your project. Hold the thread tightly at a 45° angle with the needle at the top, and let the needle slide down the thread. It should slide steadily down the thread. If the needle hops, skips, or gets stuck on the thread, the needle is too small for the thread you have selected. Move up one needle size and try the test again.
Worn and Damaged Needles
It’s important to replace your needles before they get worn down. How often you need to change your needle depends somewhat on how often you sew and what kinds of project you are making. Pay close attention to your needle after about 4 or more hours of sewing. If you are experiencing skipped stitches, or hear a pop, pop, pop sound (some people say it’s a whoop, whoop, whoop, or like a knocking sound) when the needle penetrates the fabric, it’s time to load a fresh needle.
If you accidentally hit a pin while sewing, or hit a foot or needle plate (it happens to the best of us!), you may have bent or damaged the needle. Sometimes a damaged needle can result in skipped stitches, but this can also result in fraying or breaking top thread, or even worse—small holes or tears in your fabric. Here’s a quick tip to discover if your needle may be damaged with a bent point or burr.

Keep an old pair of hose or stockings near your sewing machine to test needles. Hold the hose taut in one hand, and gently drag the needle point across the hose with your other hand. If the needle snags fibers and creates holes, it’s definitely damaged. Time for a new needle! See these needle tips in action at our needle video tutorial here.
We hope you’ve picked up a little bit of needle know-how and needle tips. Pick up BERNINA sewing machine needles for all of your projects at your next visit to your local BERNINA store.
Used Products


What you might also like


9 comments on “All About Sewing Machine Needles”
-
-
You are so right on this. This would be a wonderful chart to keep handy by your machine.
-
-
I would love a poster about machine needles,Thanks Gwen
Mary Brand -
I agree with Gwen! Make a poster!
-
I really only use 1 needle for everything, from embroidery to jeans and that is the 75/11. I do keep a couple of top stitch to use with metallic. I buy them in boxes of 100 and change the needle every 4th bobbin. I just save the empties and when I get 4 time to change. Needles are one of the cheapest things you can buy and a new one can make you project.
-
Amazing information! Wish I could print this.
-
Try choosing control P.
-
-
Excellent information is given regarding needle usage. Things you would really not think is important.
-
I also think a poster for this excellent tutorial on needle’s would help out immensely!
Leave a Reply
You must be logged in to post a comment.

You should make this into a poster for everyone’s sewing room!