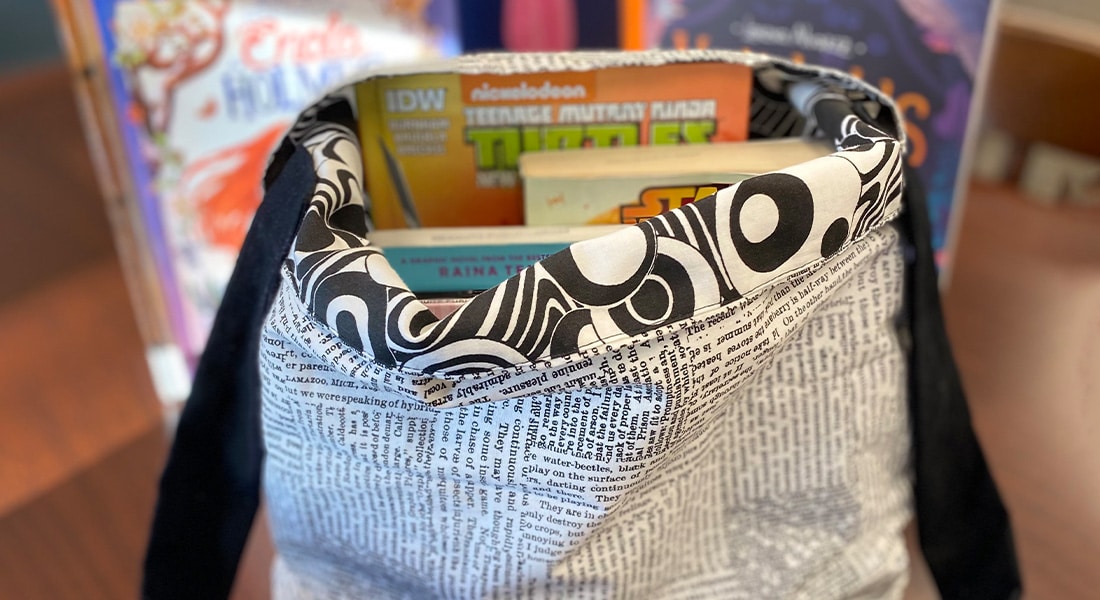
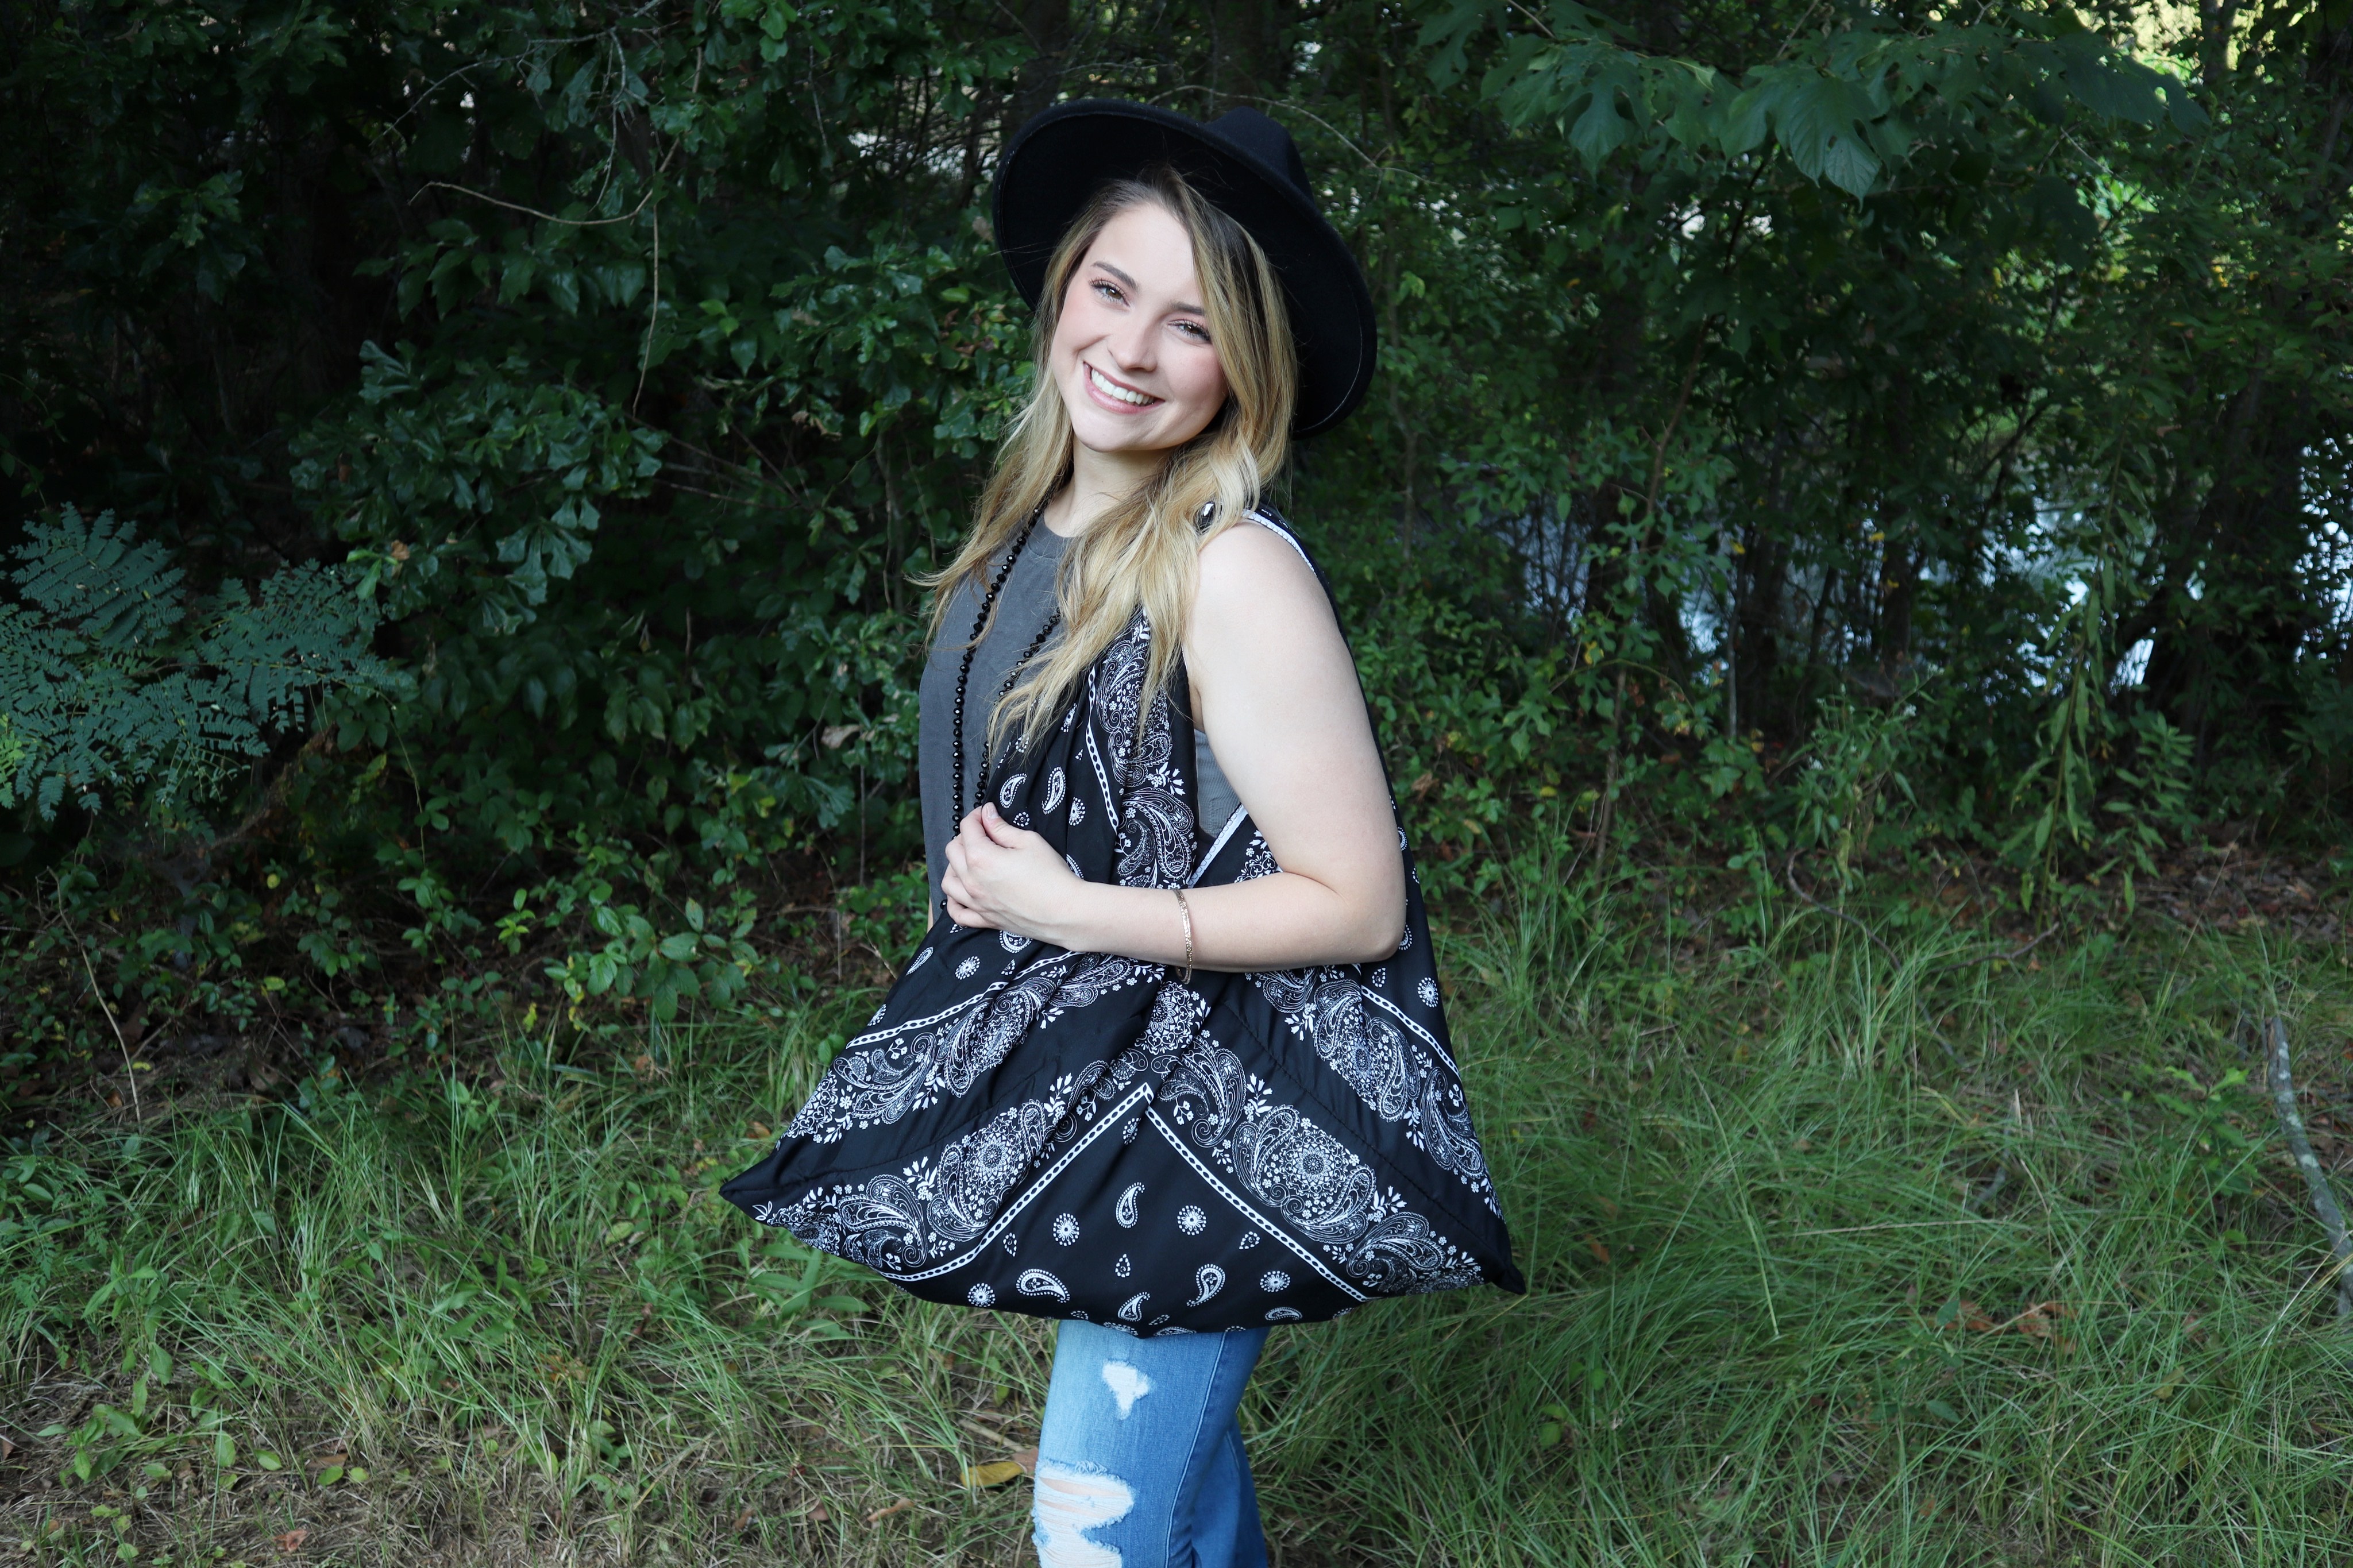
How to Sew a Reversible Bandana Bento Bag
My favorite go-to bag for quick sewing is definitely the classic and utilitarian Bento Bag. I love the simple construction and timeless design. I will sit down every so often and make multiple to stash away for future use. They are my go-to way of wrapping gifts throughout the year. Why not save some wrapping paper and pair a gift with an adorable reusable and handmade bag? Though Bento Bags are already simplistic in their construction, I wanted to challenge myself to make a bag that was, even more, beginner-friendly and intrinsic! And the best part? They require absolutely NO measuring or cutting!
Check out the written tutorial below, and if you enjoy it please tune in to the live tutorial to sew this bento bag on the BERNINA USA Instagram page on Friday, September 17, 2021, at 5:30 PM CST! It will be the perfect time to ask any questions, and I hope to see you there! If you aren’t able to catch it live, don’t worry! The video will be available for viewing on the BERNINA USA Instagram IGTV following the event.

Supplies to Sew a Reversible Bandana Bento Bag
- Six Square Bandannas (For the reversible bag, you need 3 bandannas of each color)
- Iron and ironing table
- Clover Wonder Clips
- 50 Weight Cotton Thread (Sample uses Aurifil)
- BERNINA 570 QE Sewing Machine
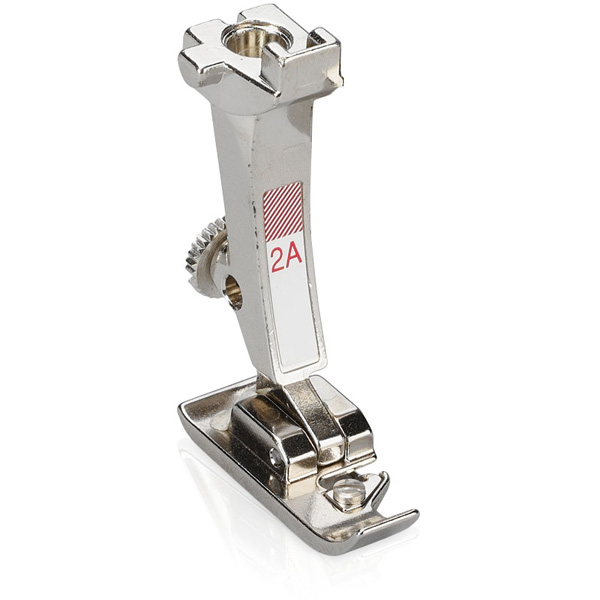
- Overlocker Foot #2A
Steps to Sew a Reversible Bandana Bento Bag
Pinning and Prep
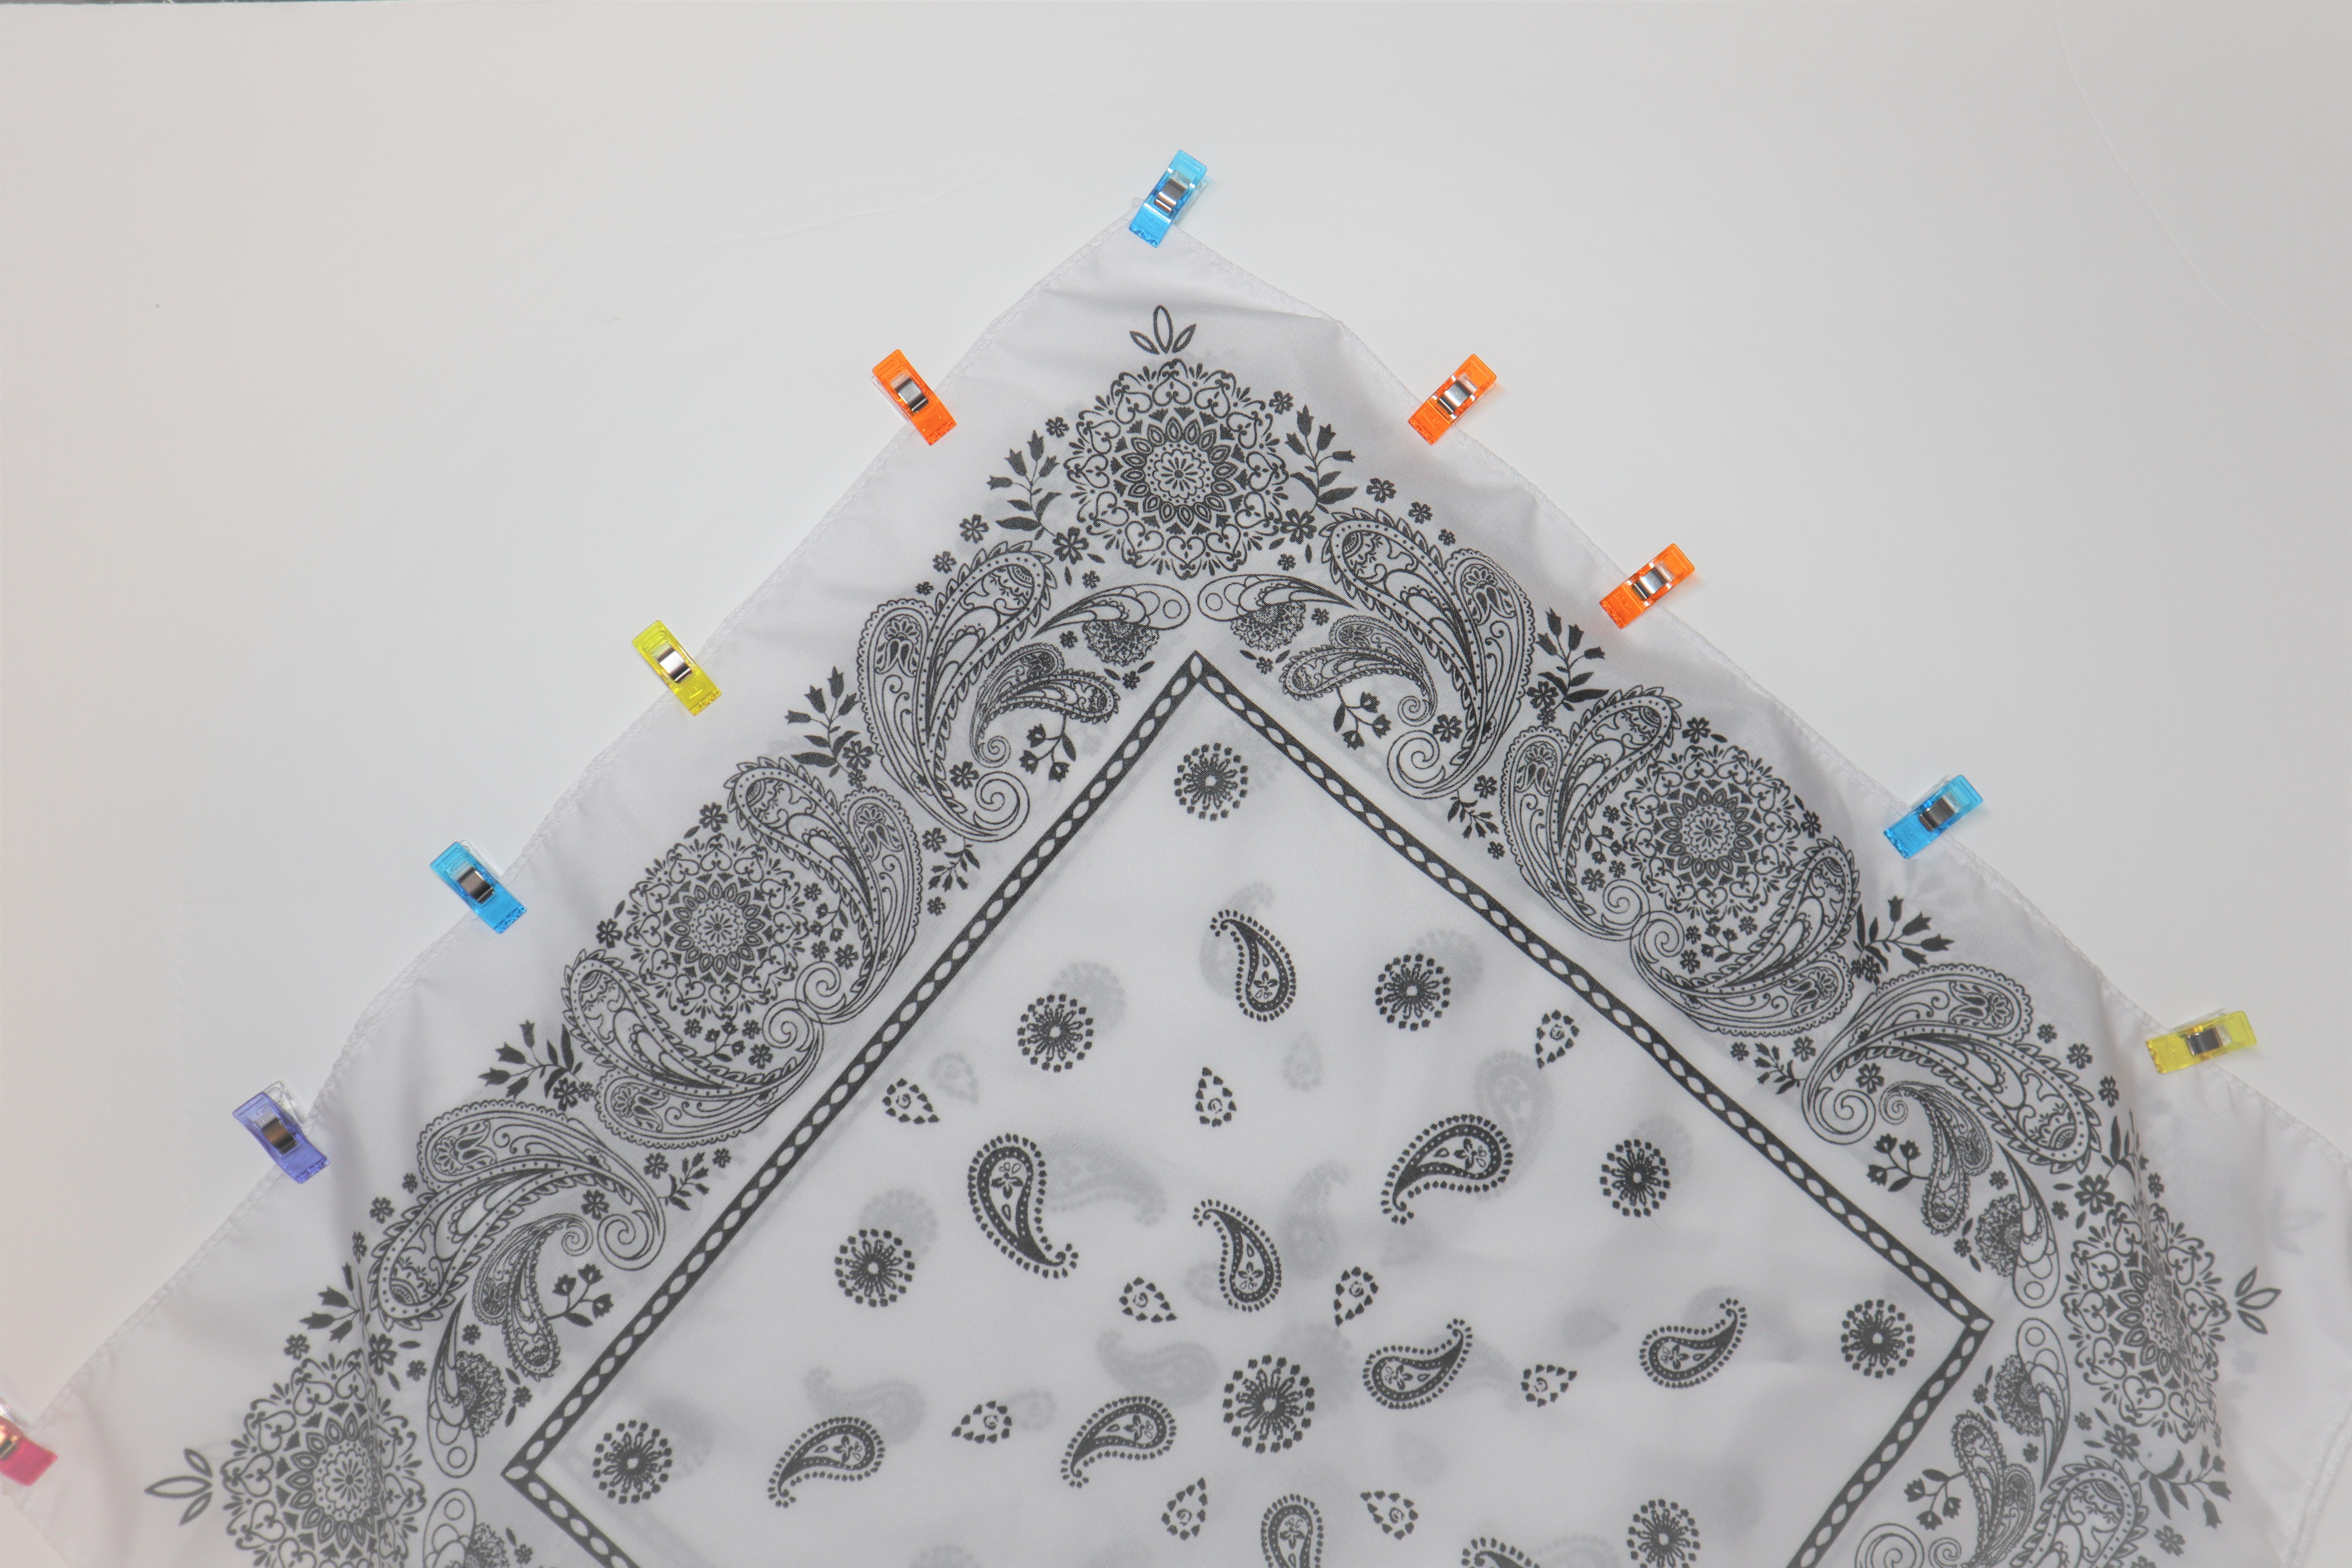
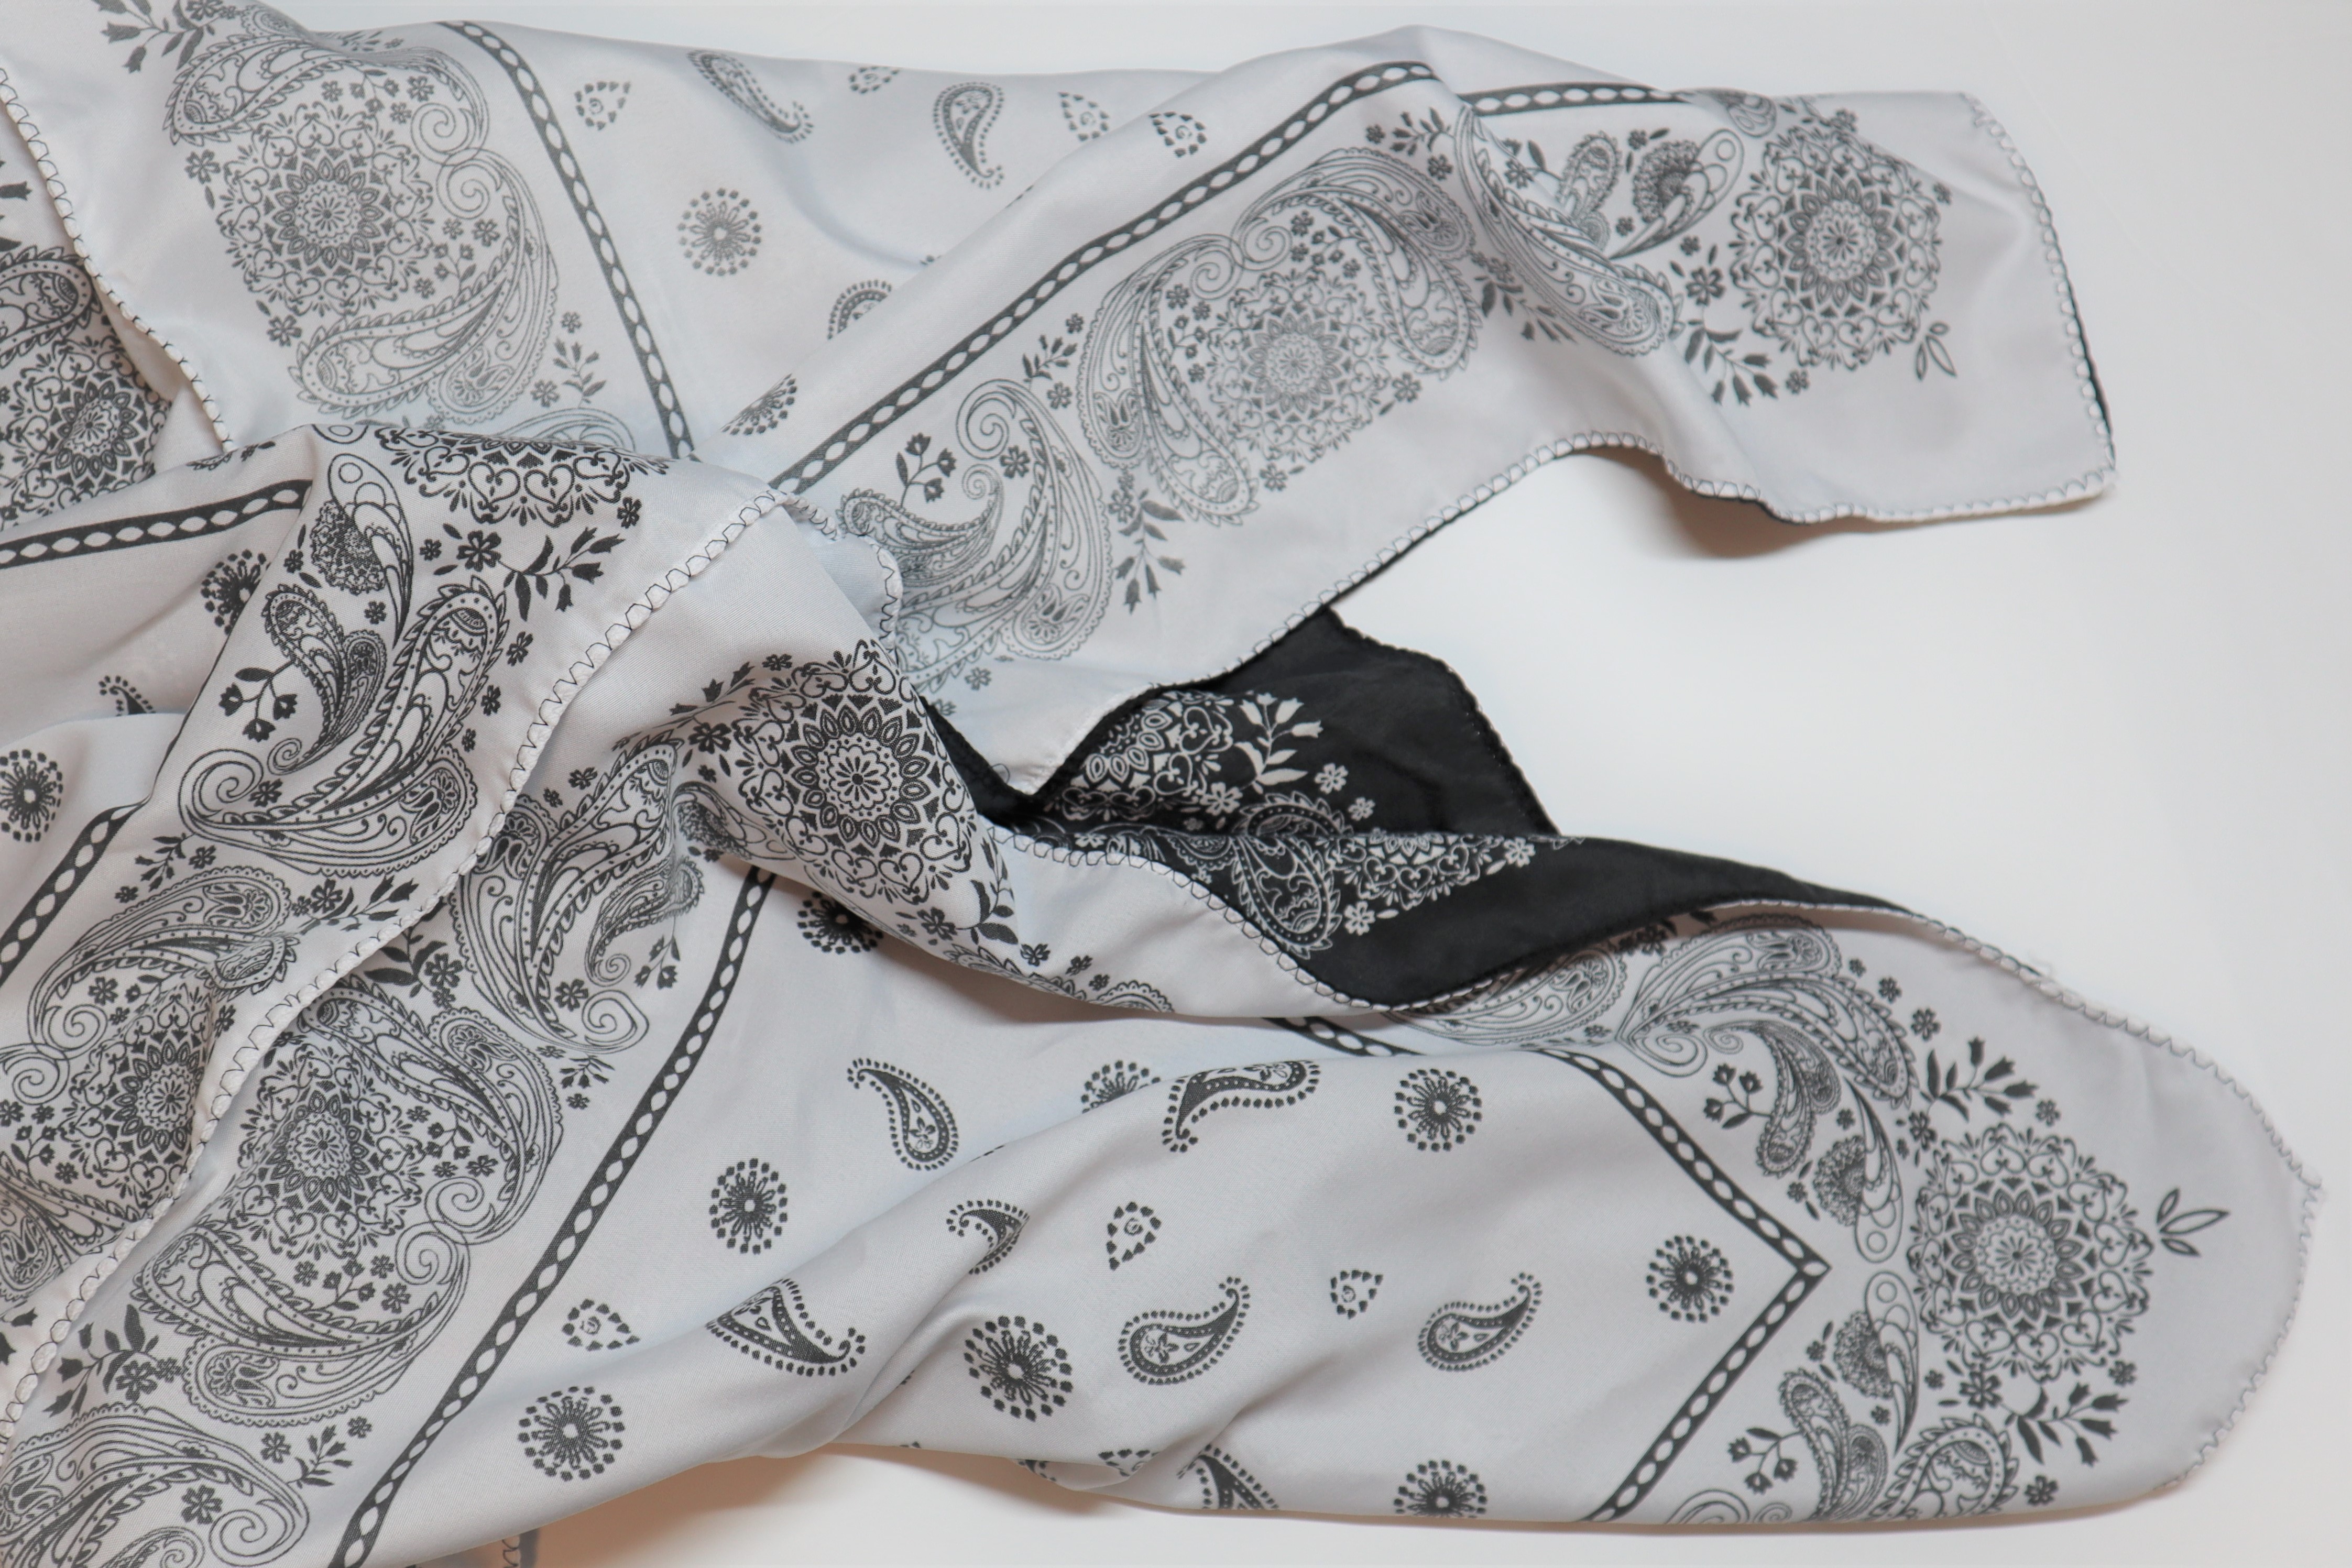
Begin by ironing or steaming all bandannas and removing any labels or tags. Take two of the same colored bandanna and place right sides facing together. Pin along one edge, securing both bandannas together.
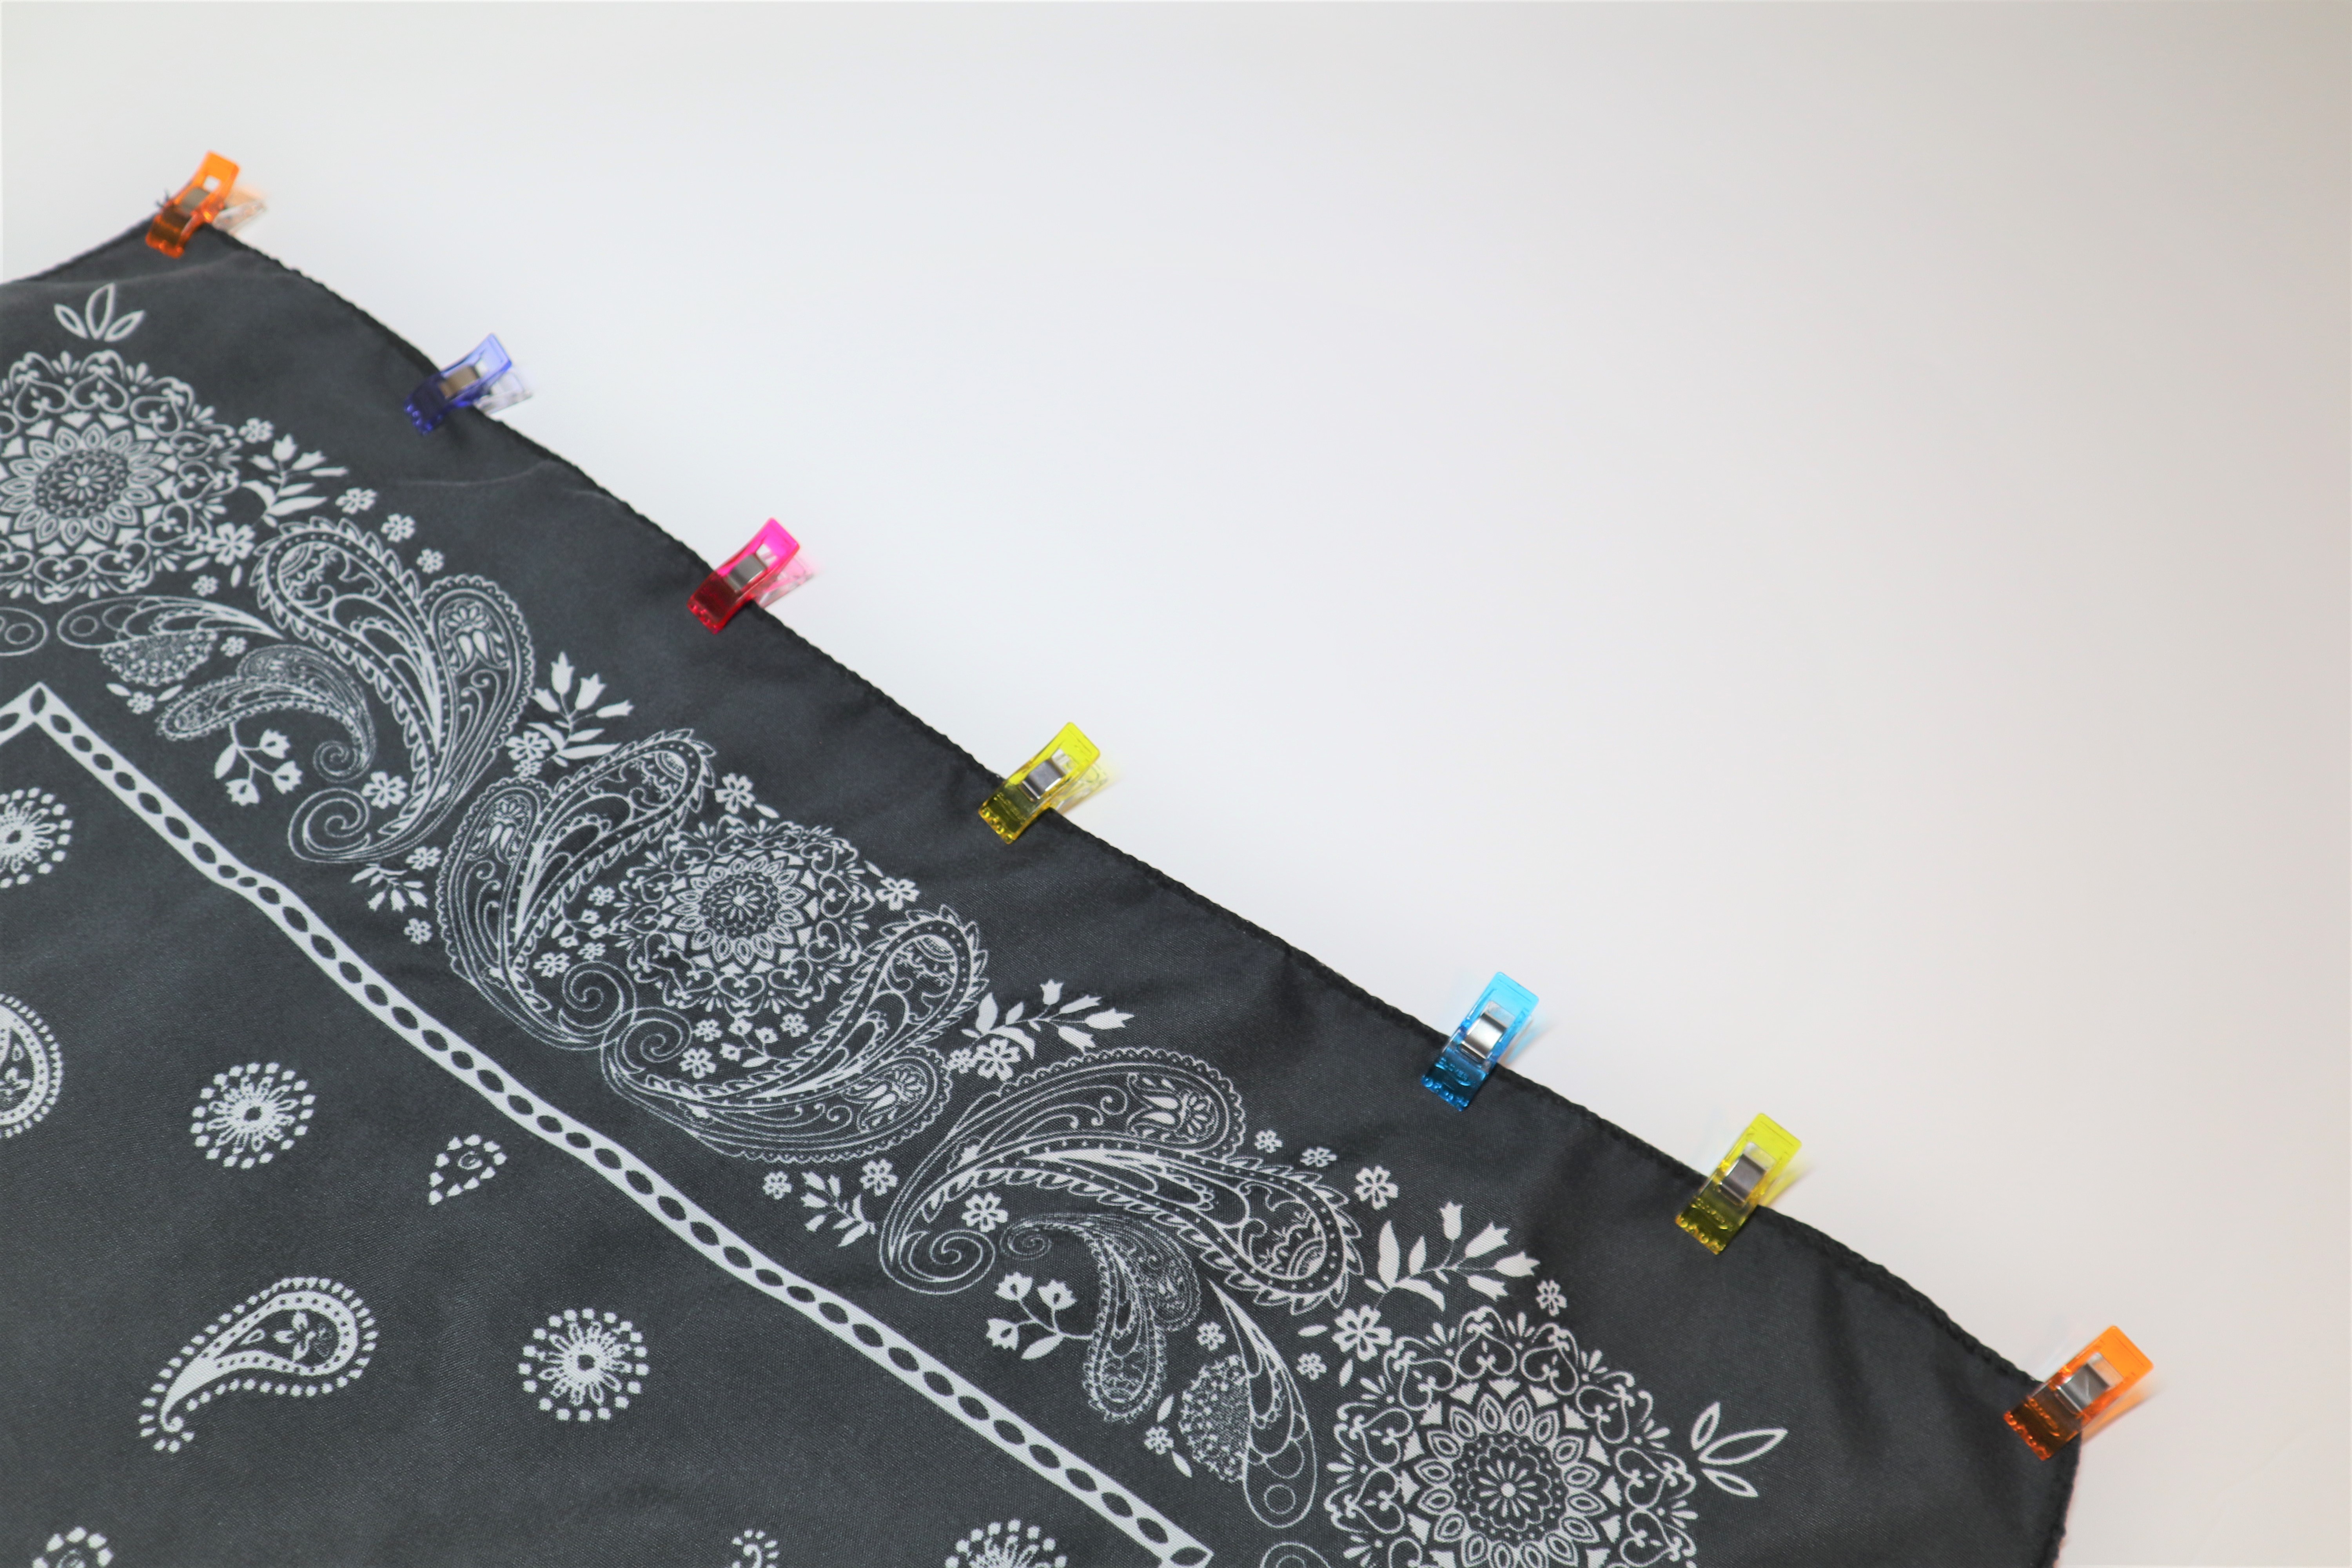
Next, pin alongside the edge directly to the right of the previous edge. 

Sewing Bandannas Together
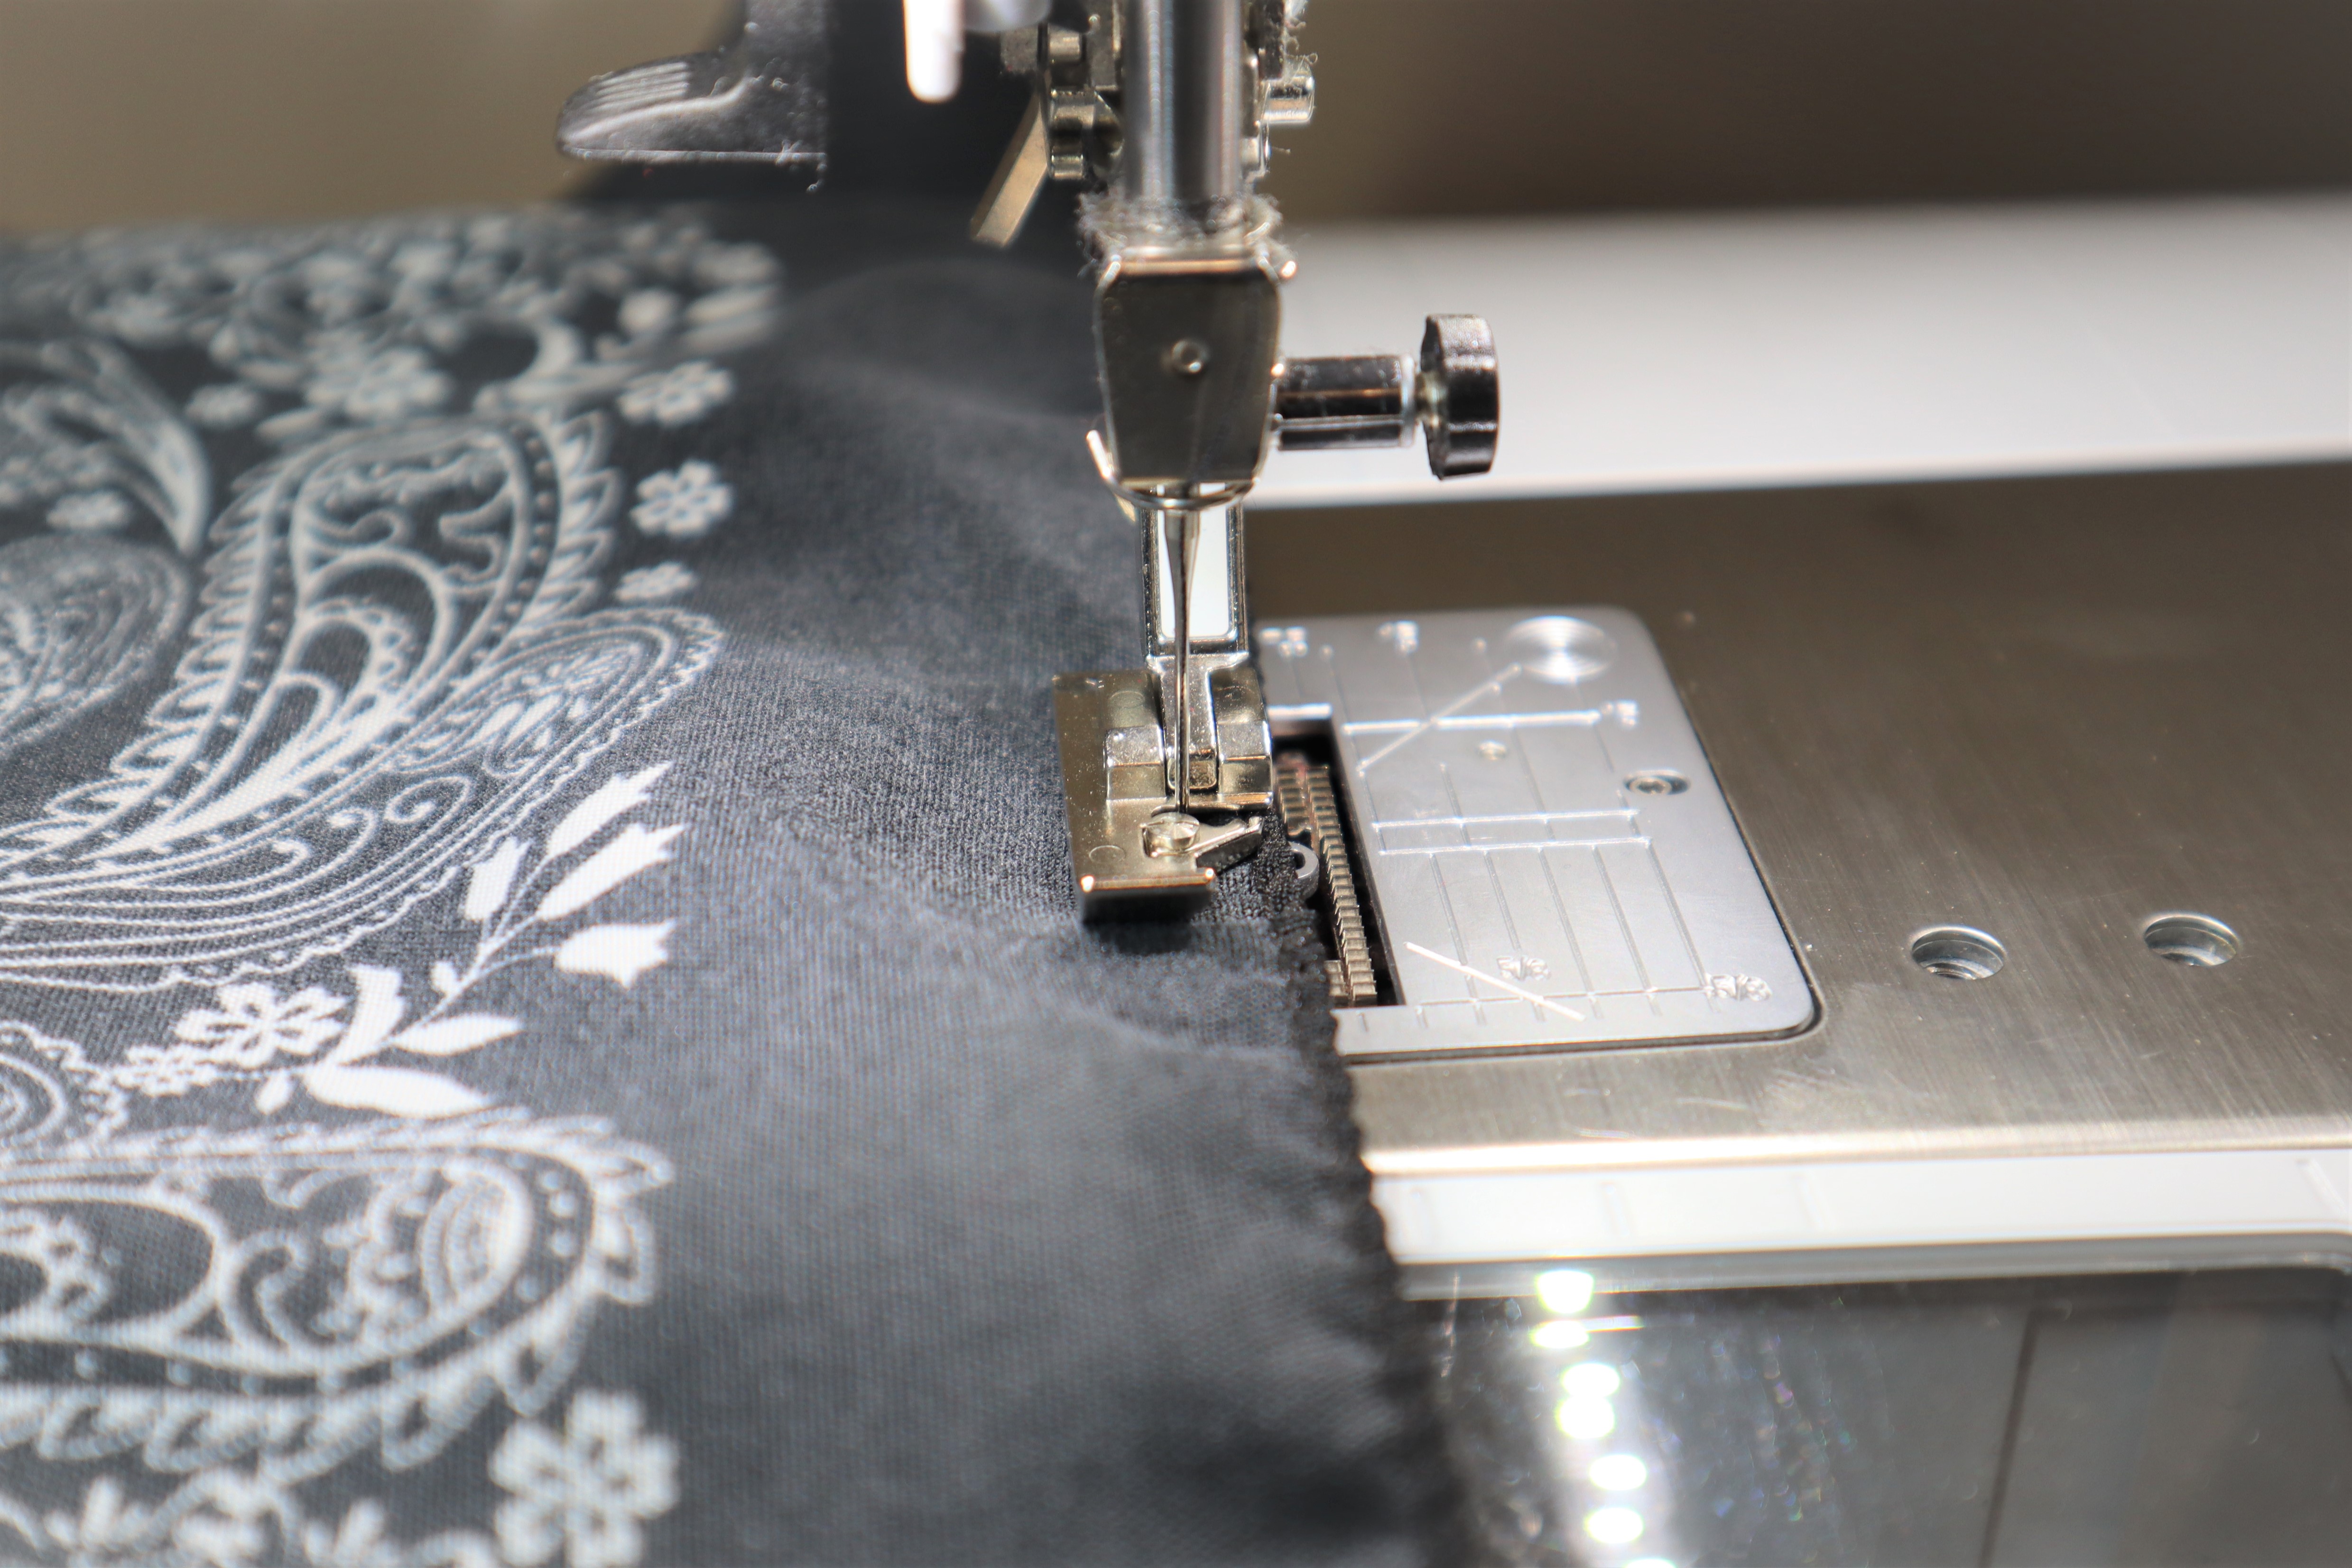
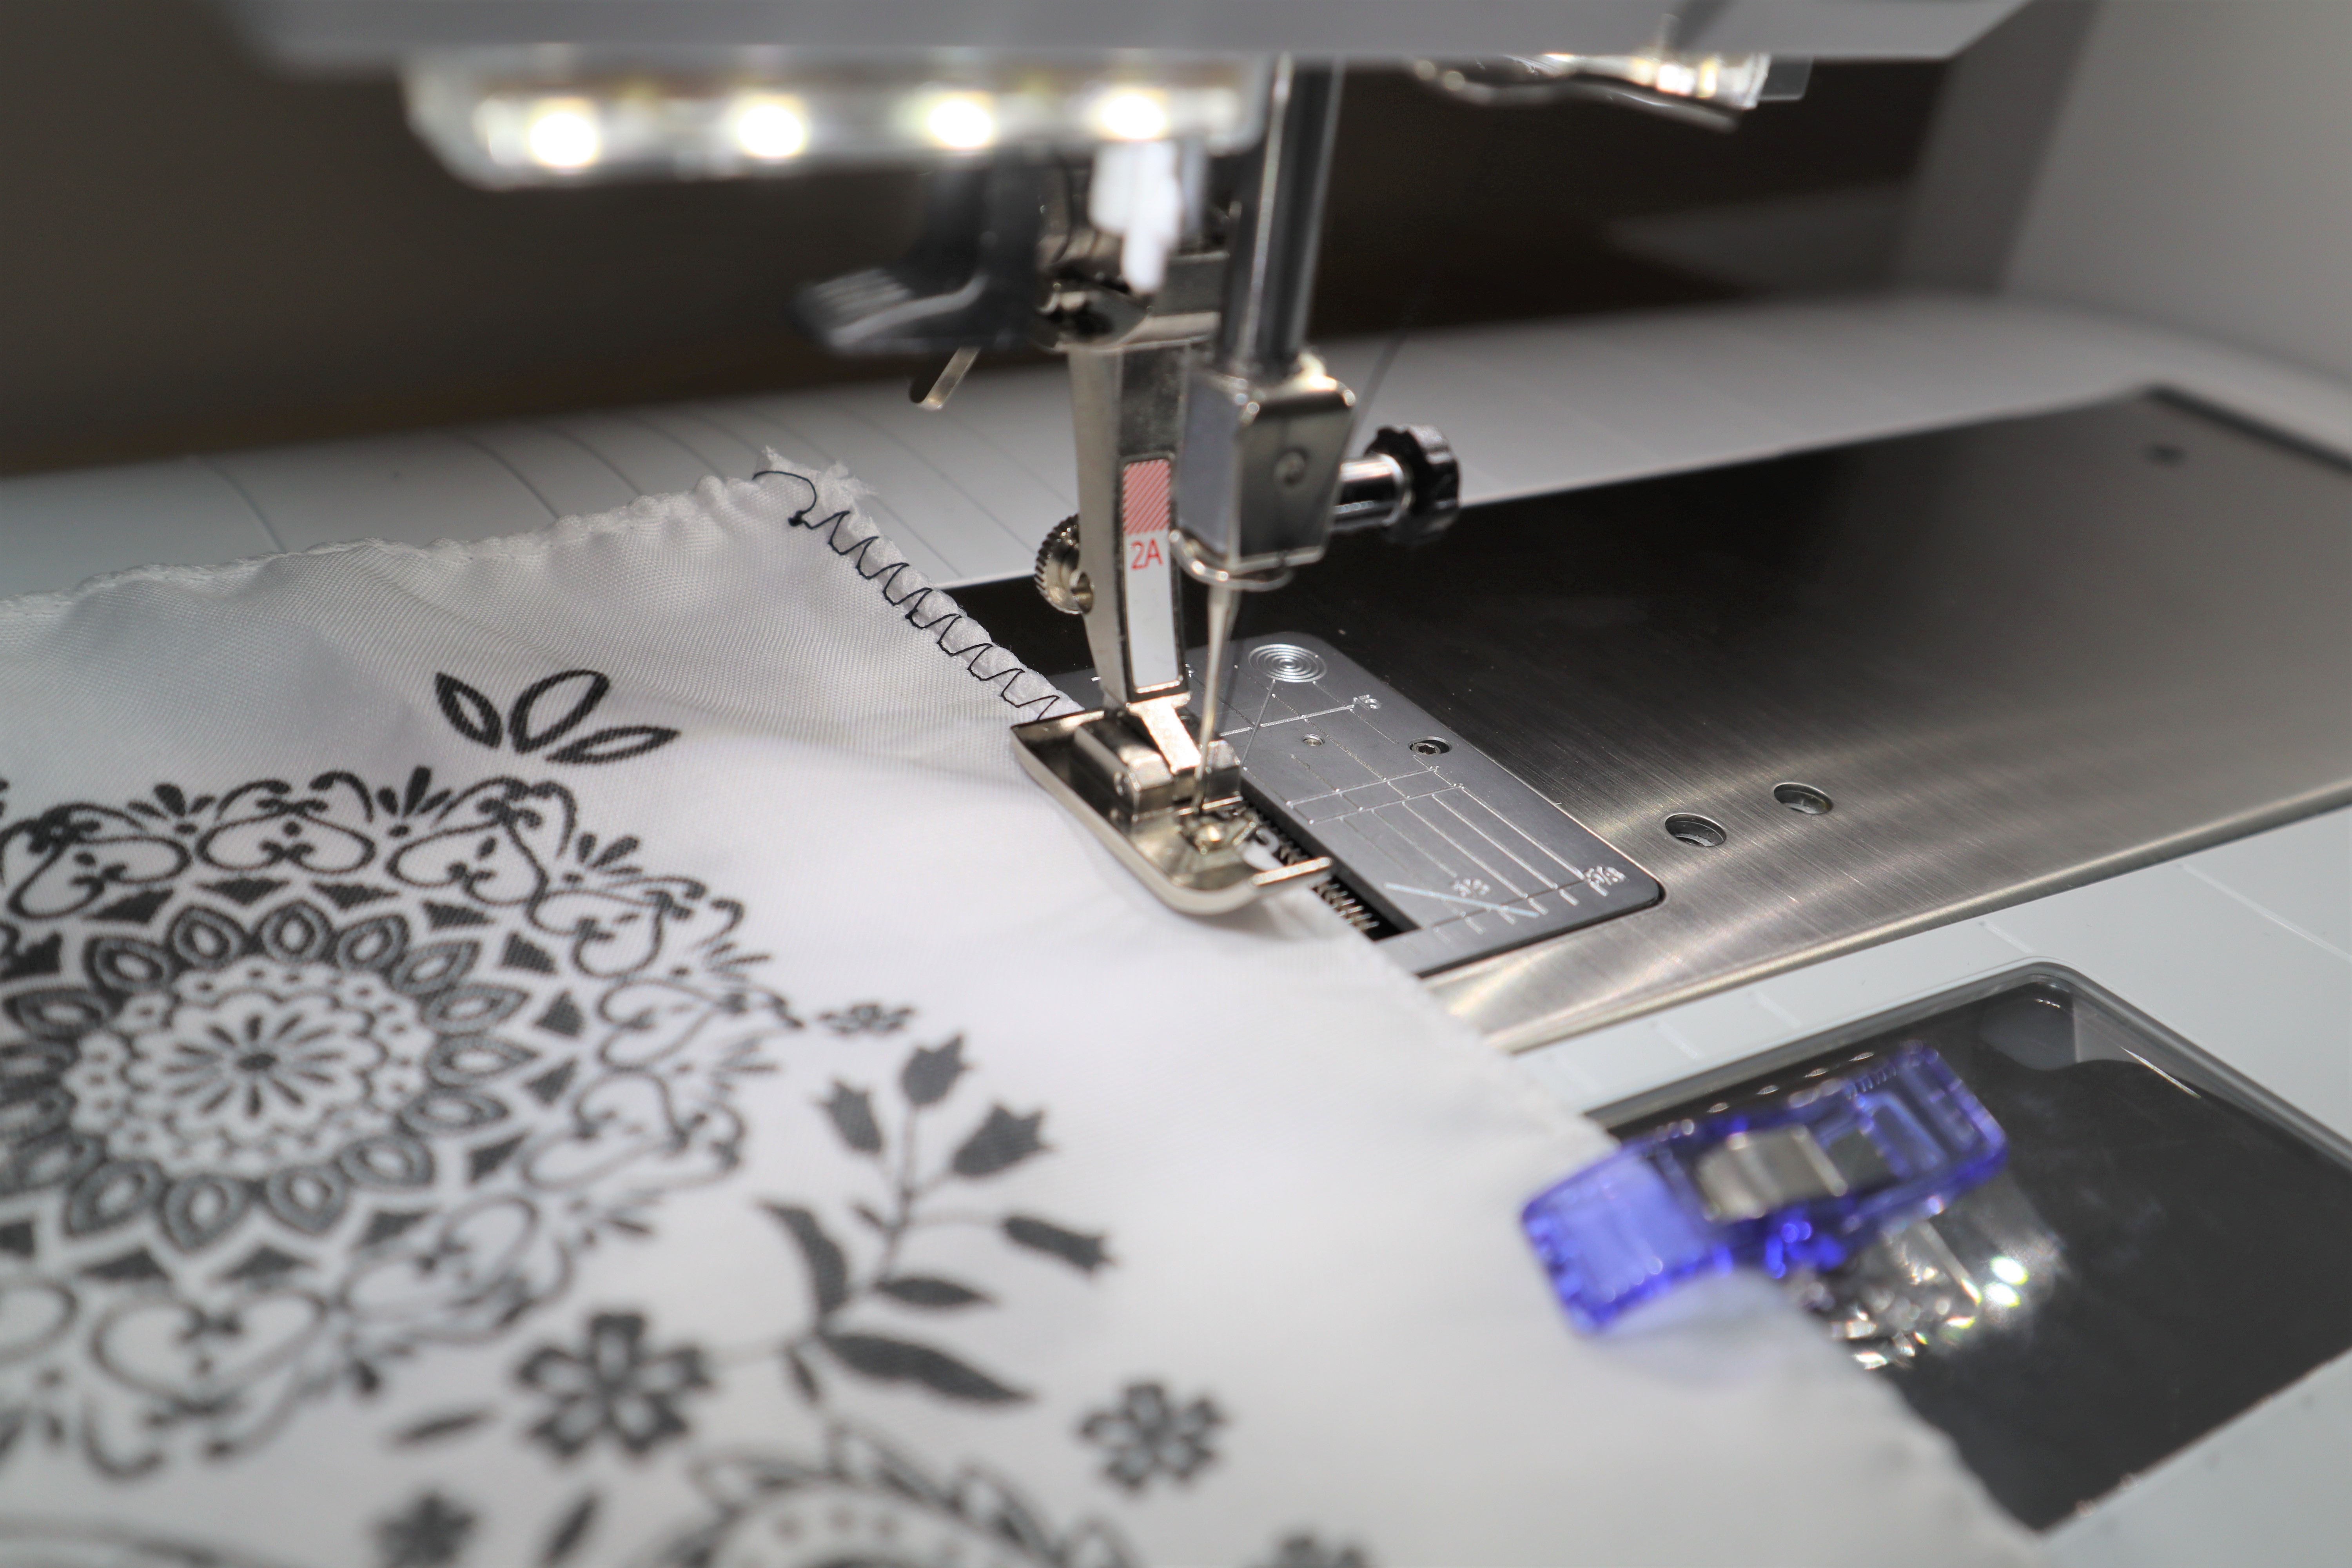
Prep sewing machine by threading bobbin and attaching presser foot #2A.
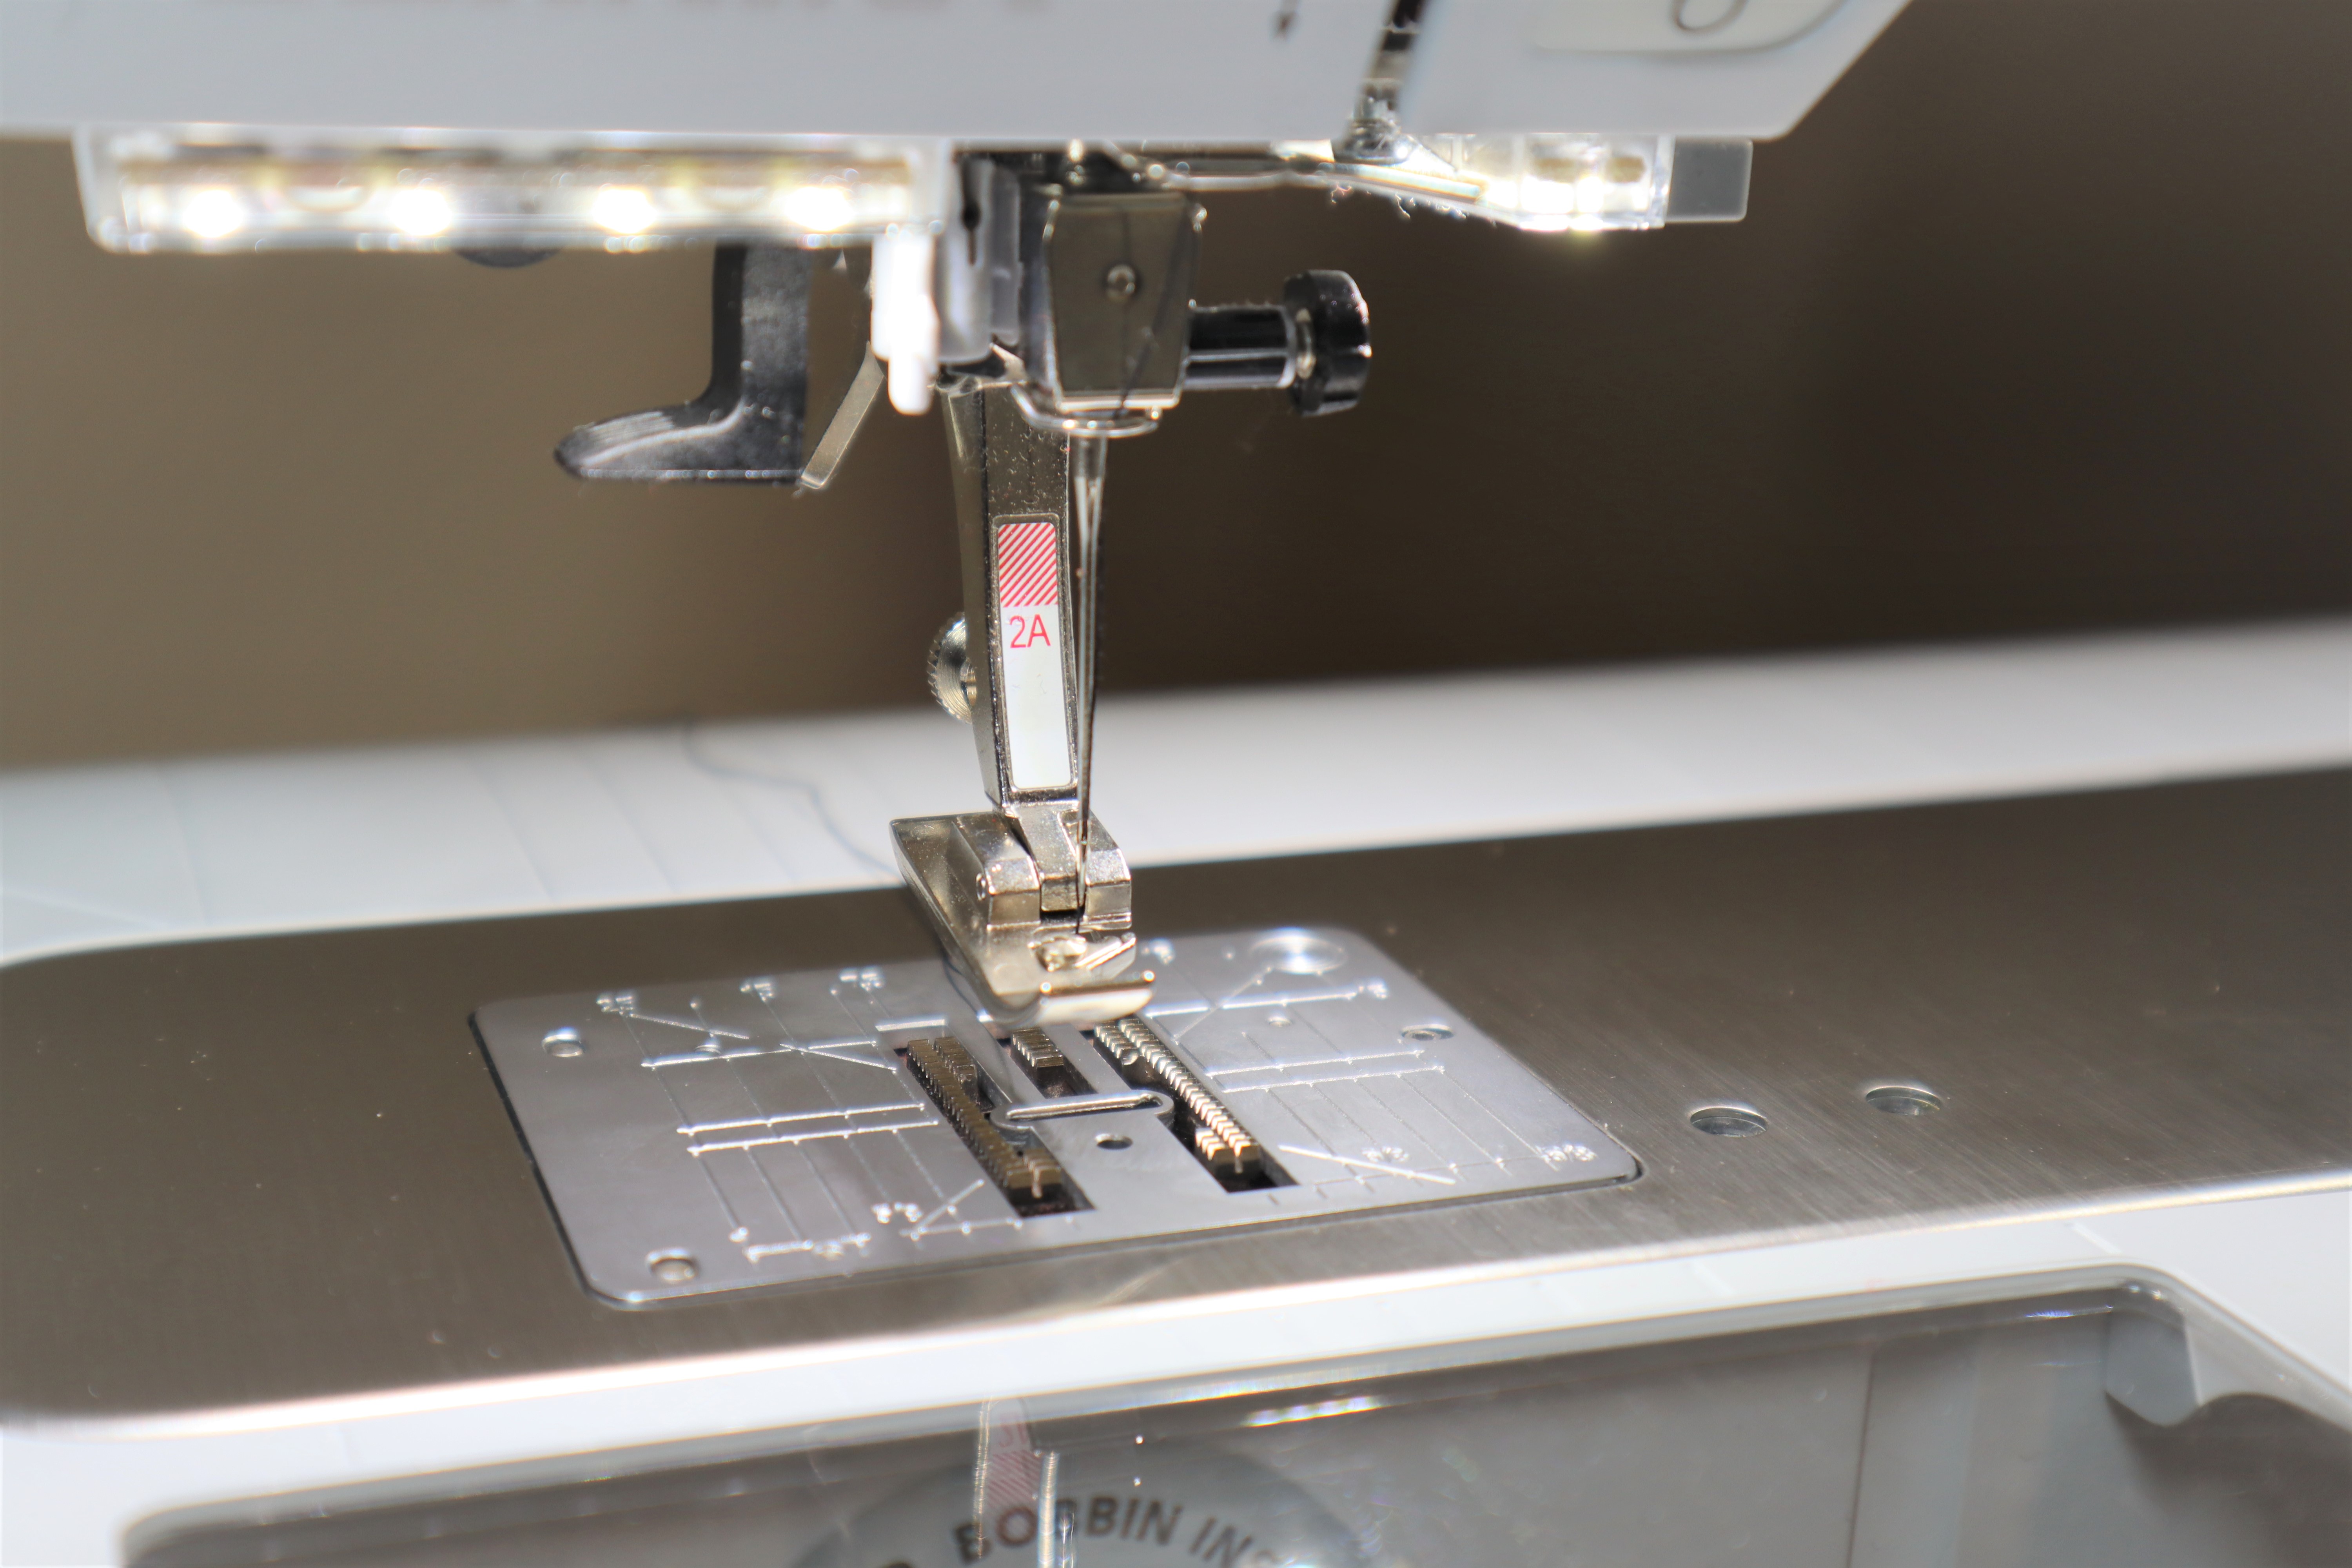
Set stitch to stitch #3 with no adjustments and place bandannas under the foot to be sewn staring at a pinned corner edge. Sew an overlocked stitch along the entire first edge, then turn your work and sew an overlocked stitch along the second pinned edge. Backstitching is not necessary. 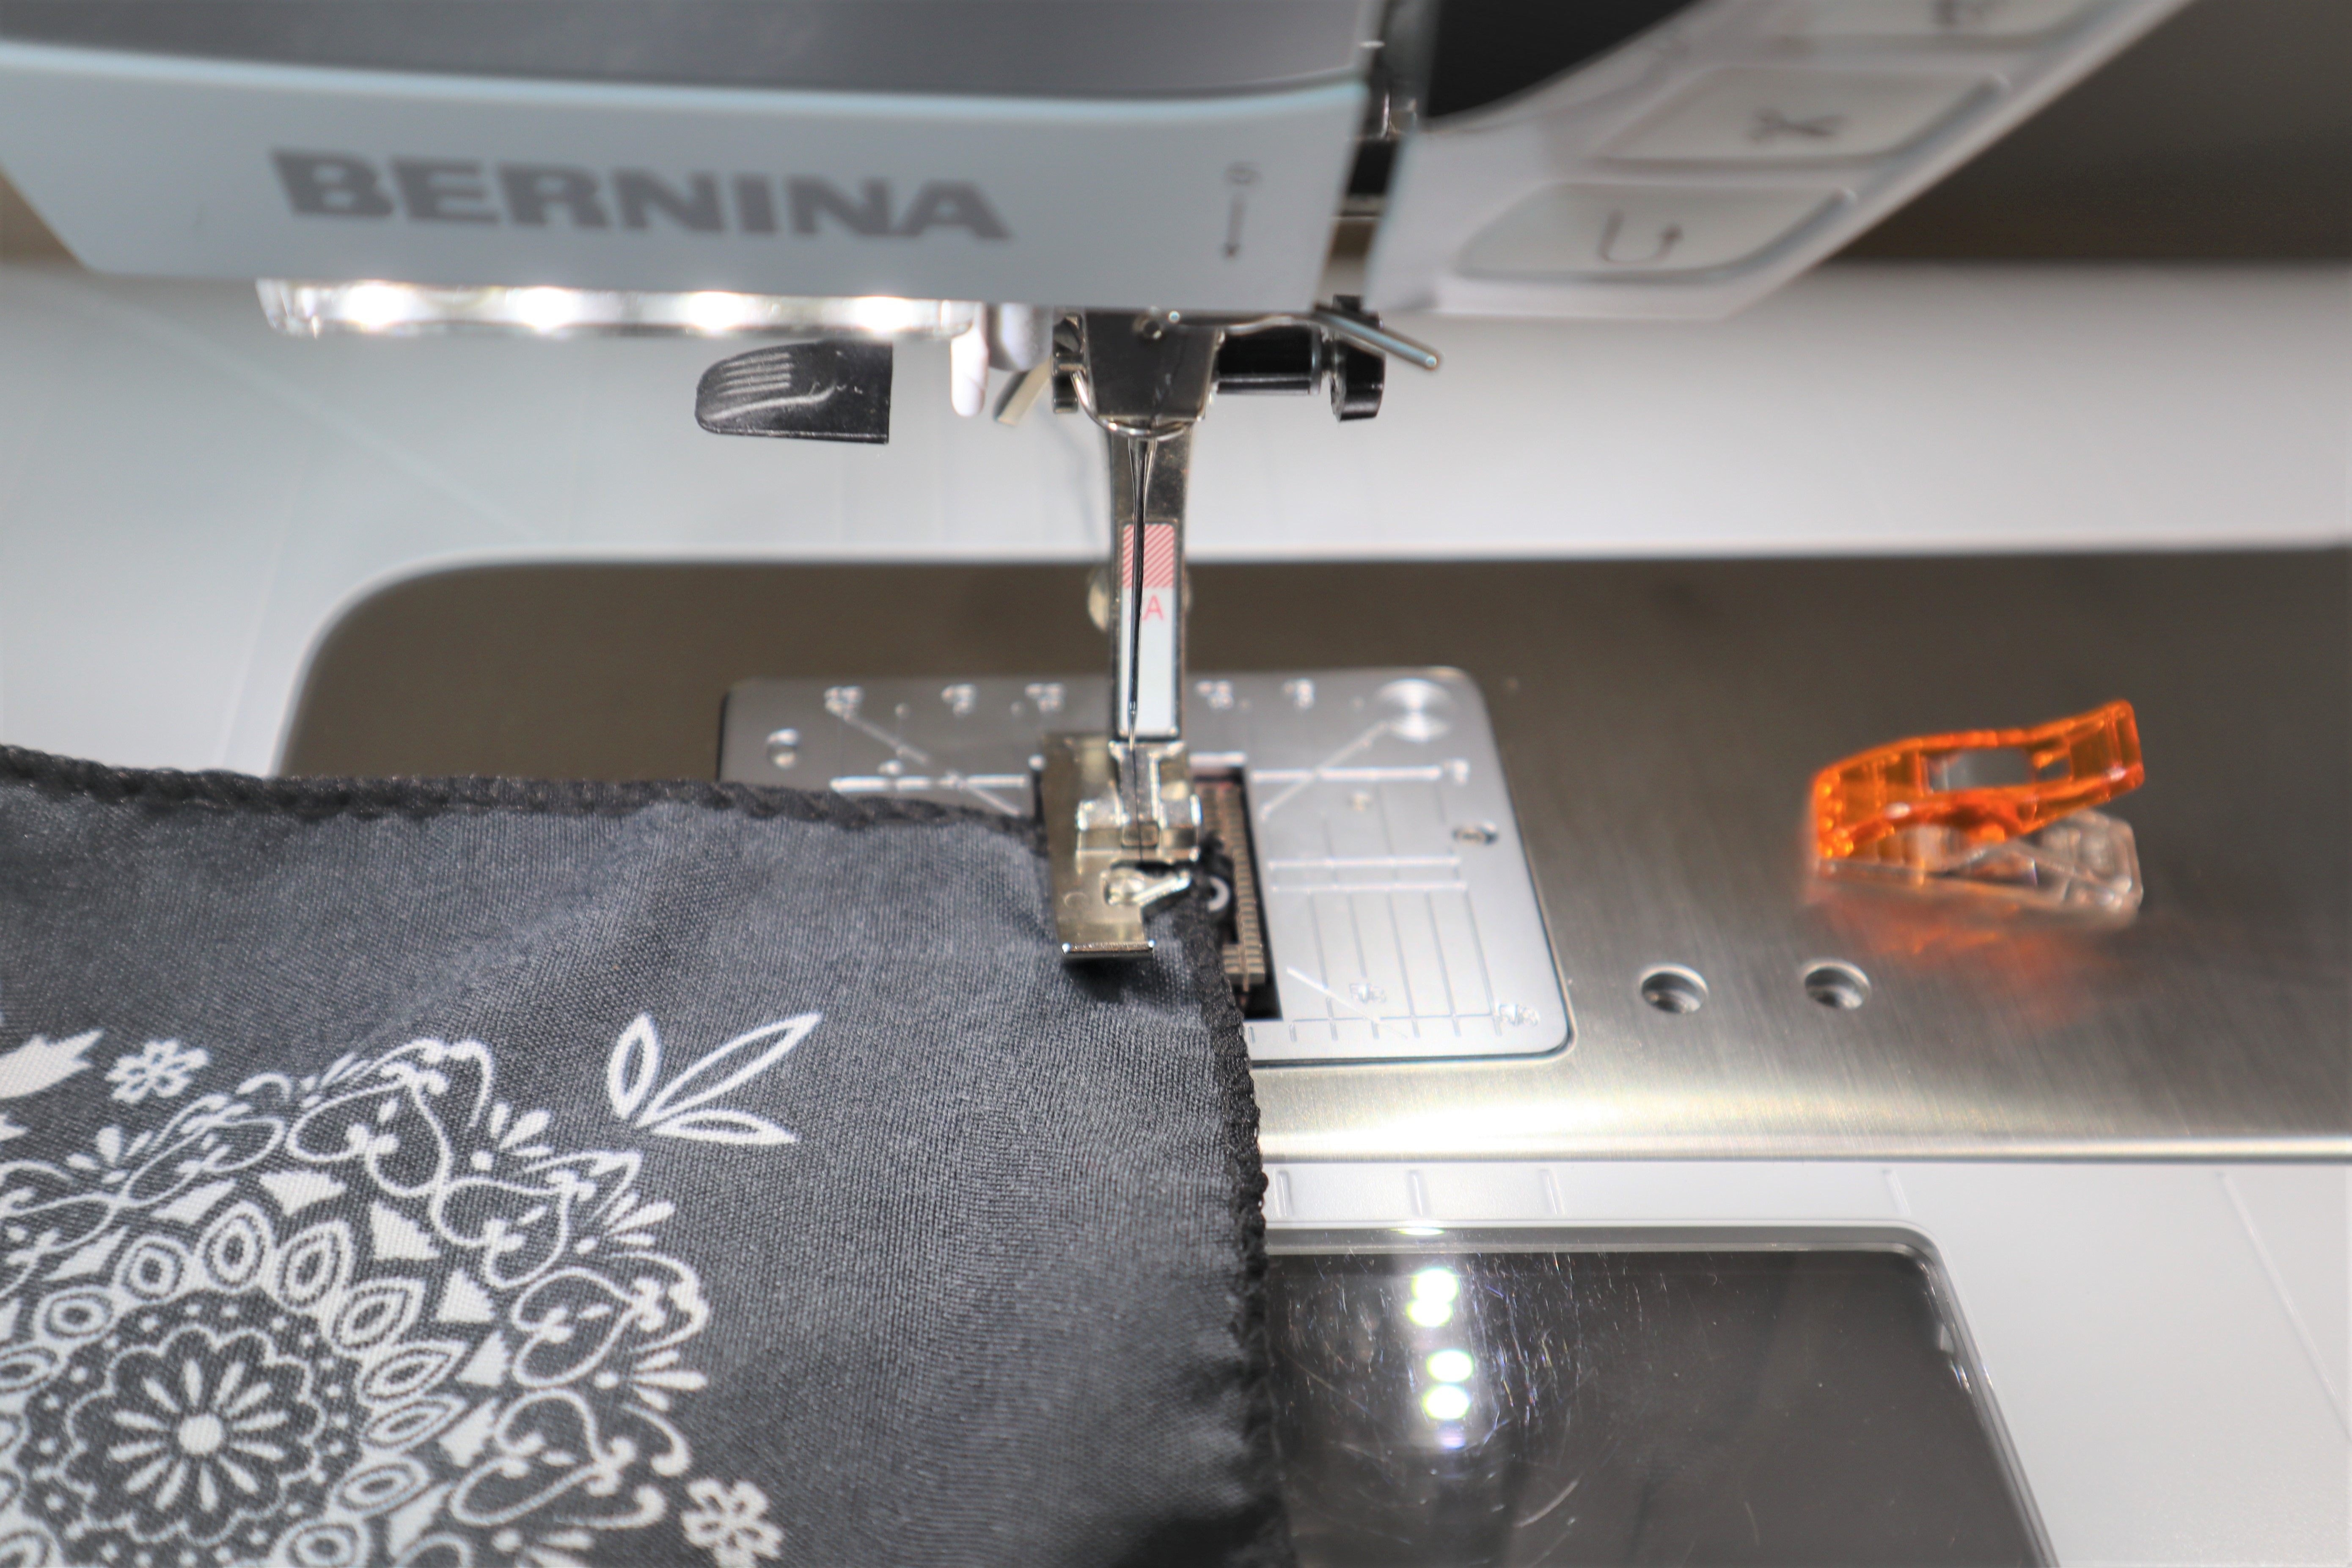
Finishing the First Panel
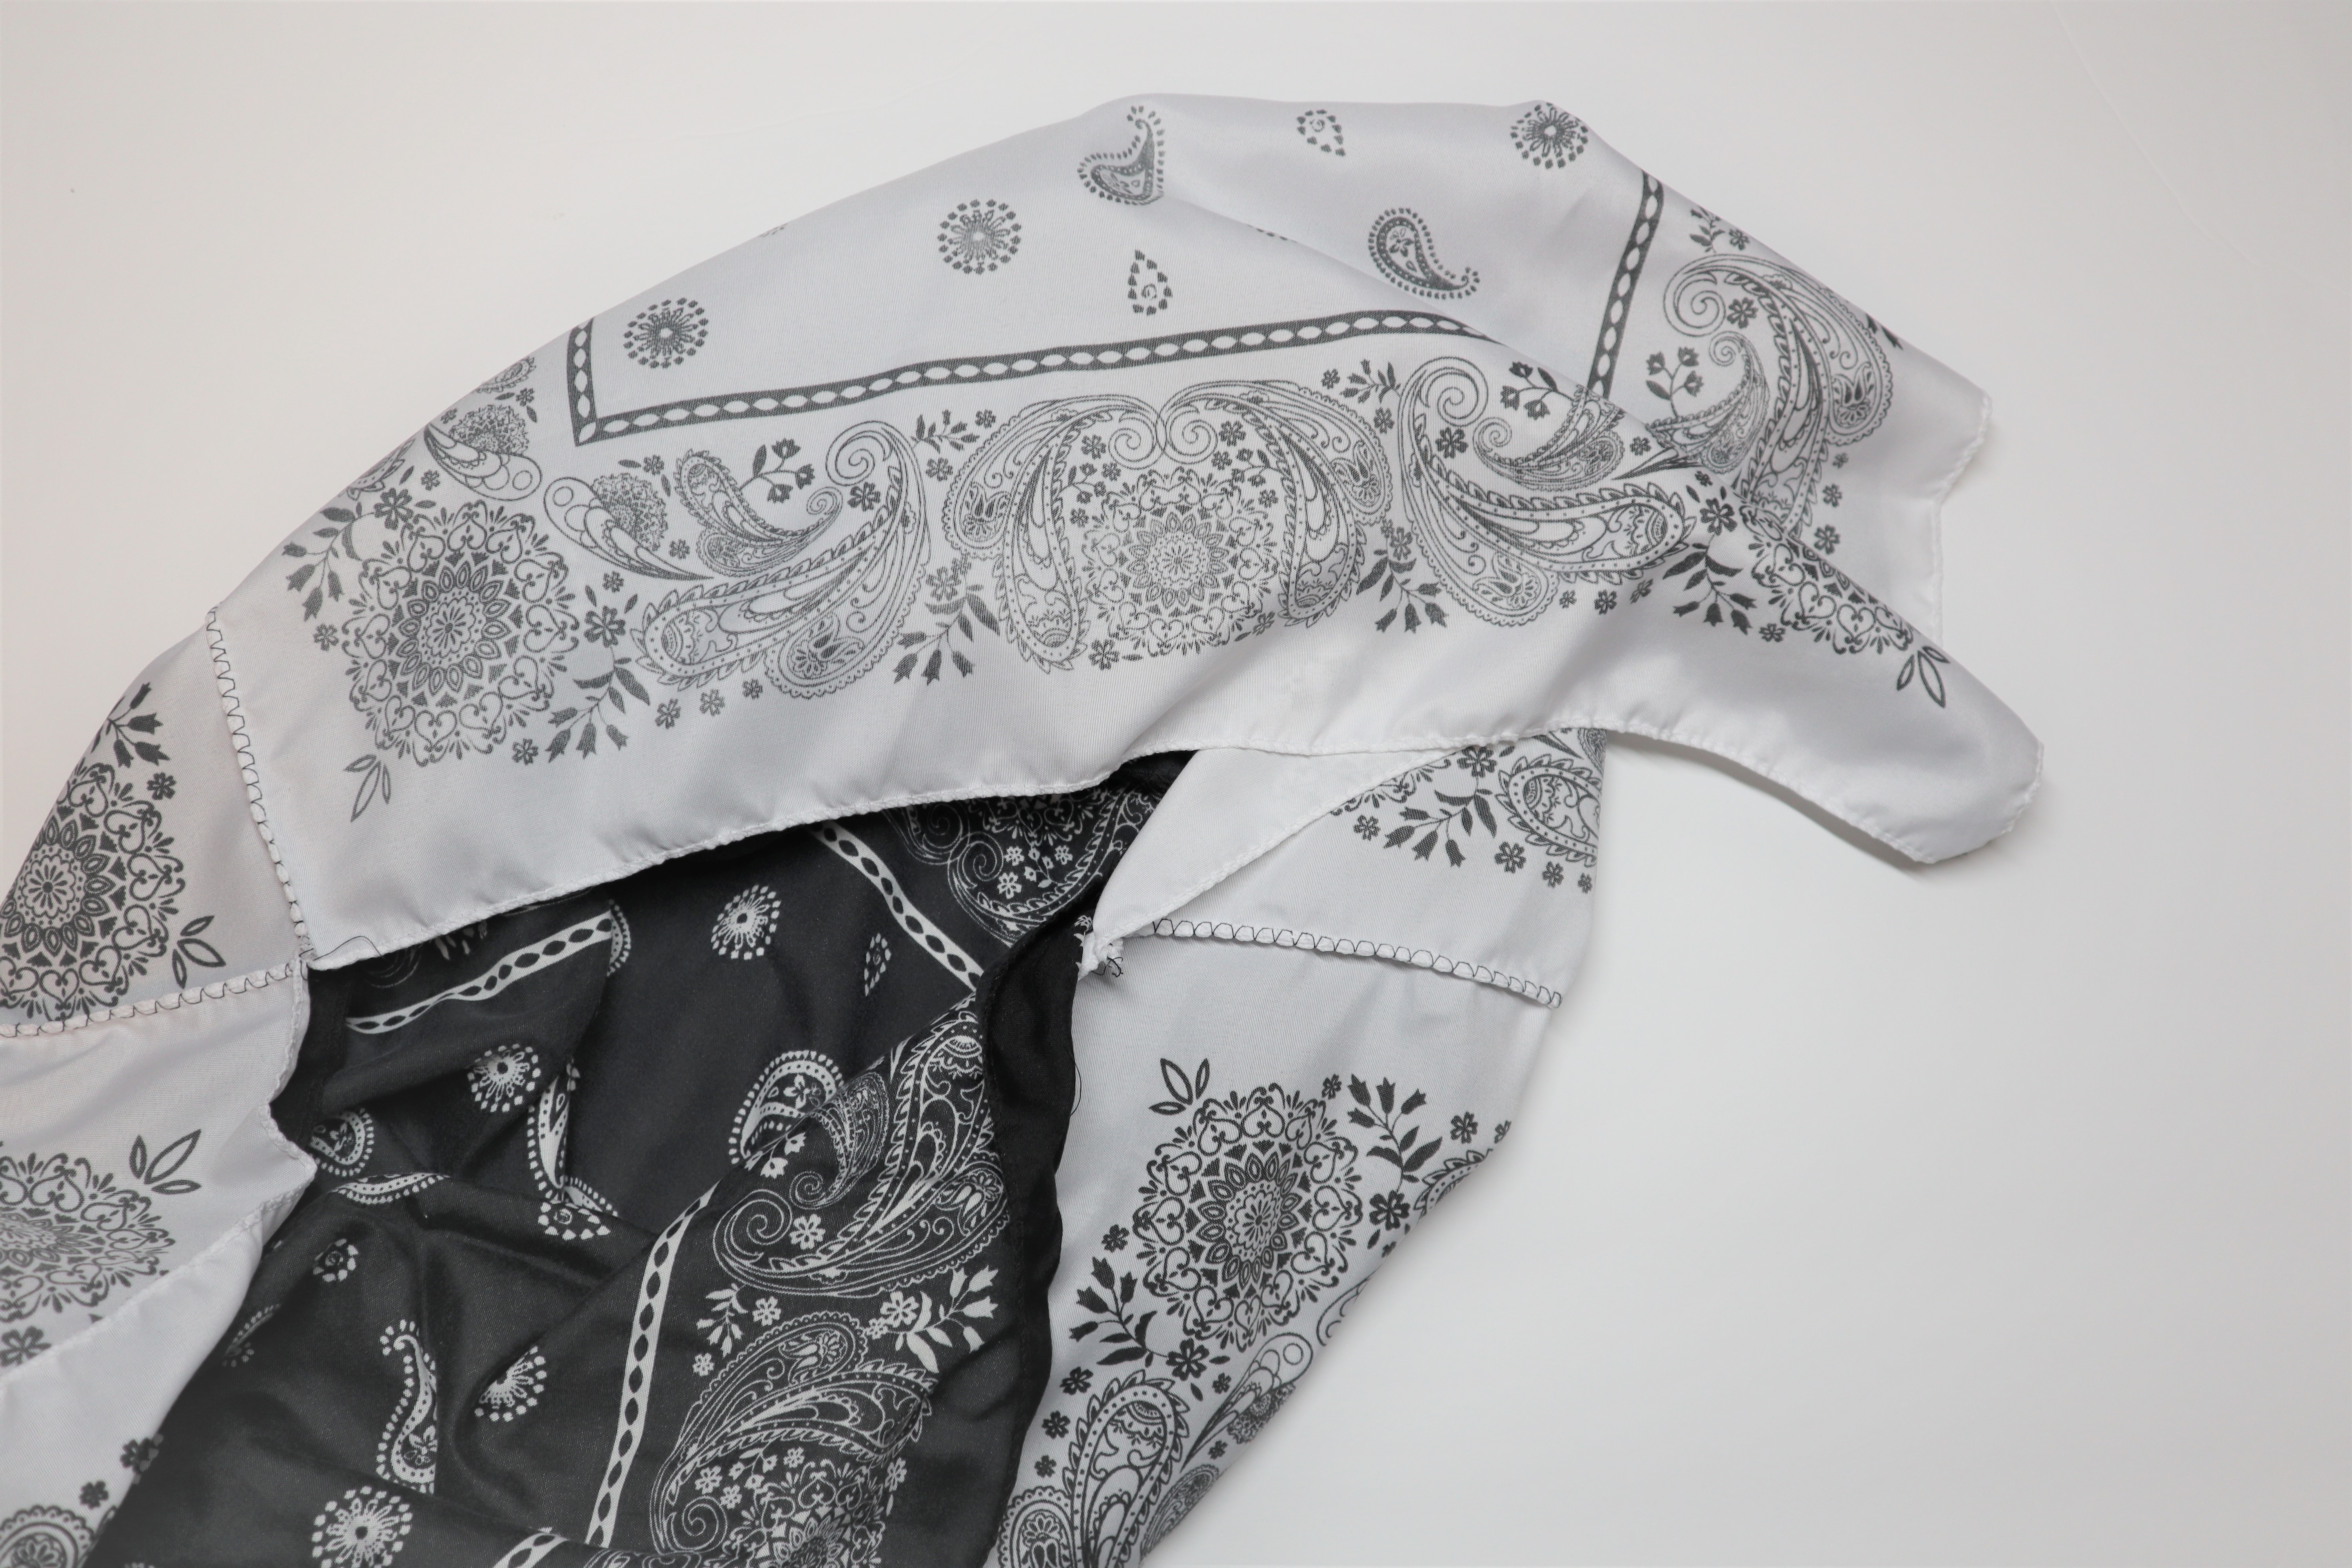
You will now have two bandannas that have been sewn together along two connecting sides. Now, chose one of your sewn bandannas to become the middle, and grab your 3rd matching bandanna.
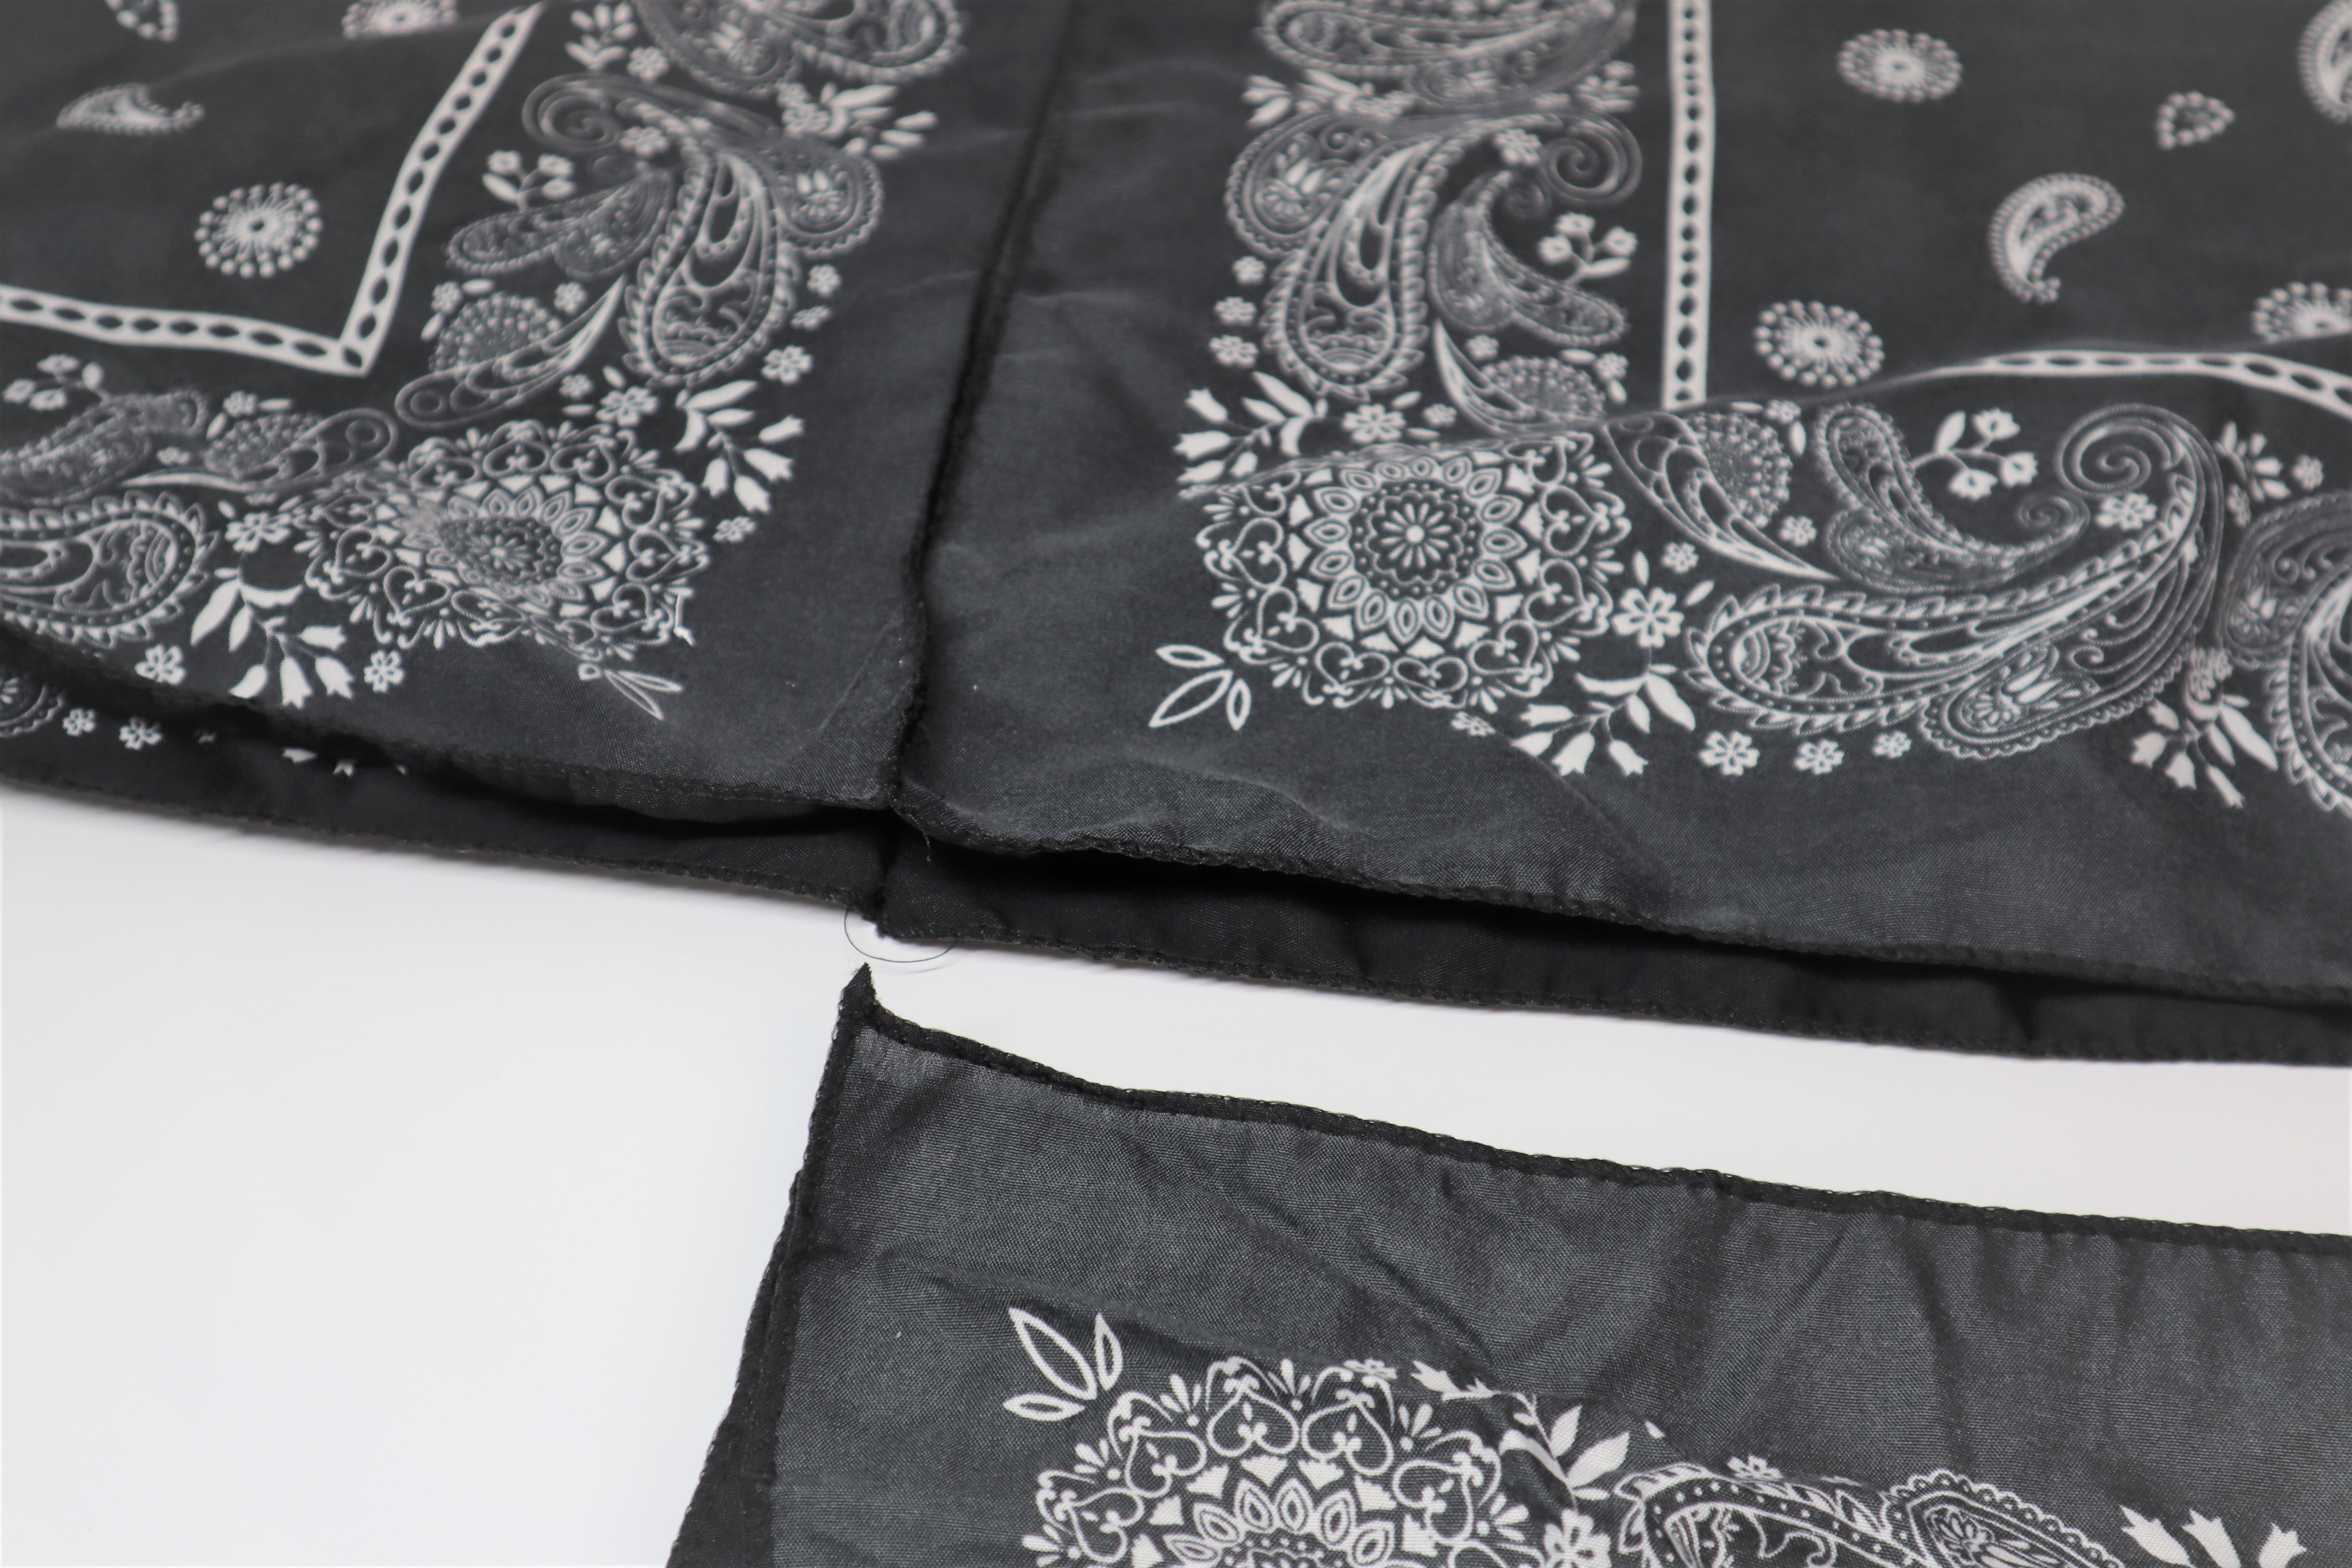

With right sides together, repeat the pinning process between the new bandanna and the middle bandanna. You will be pinning the middle bandanna along the two edges that were left untouched in the previous step. Seam middle and third bandanna as before.
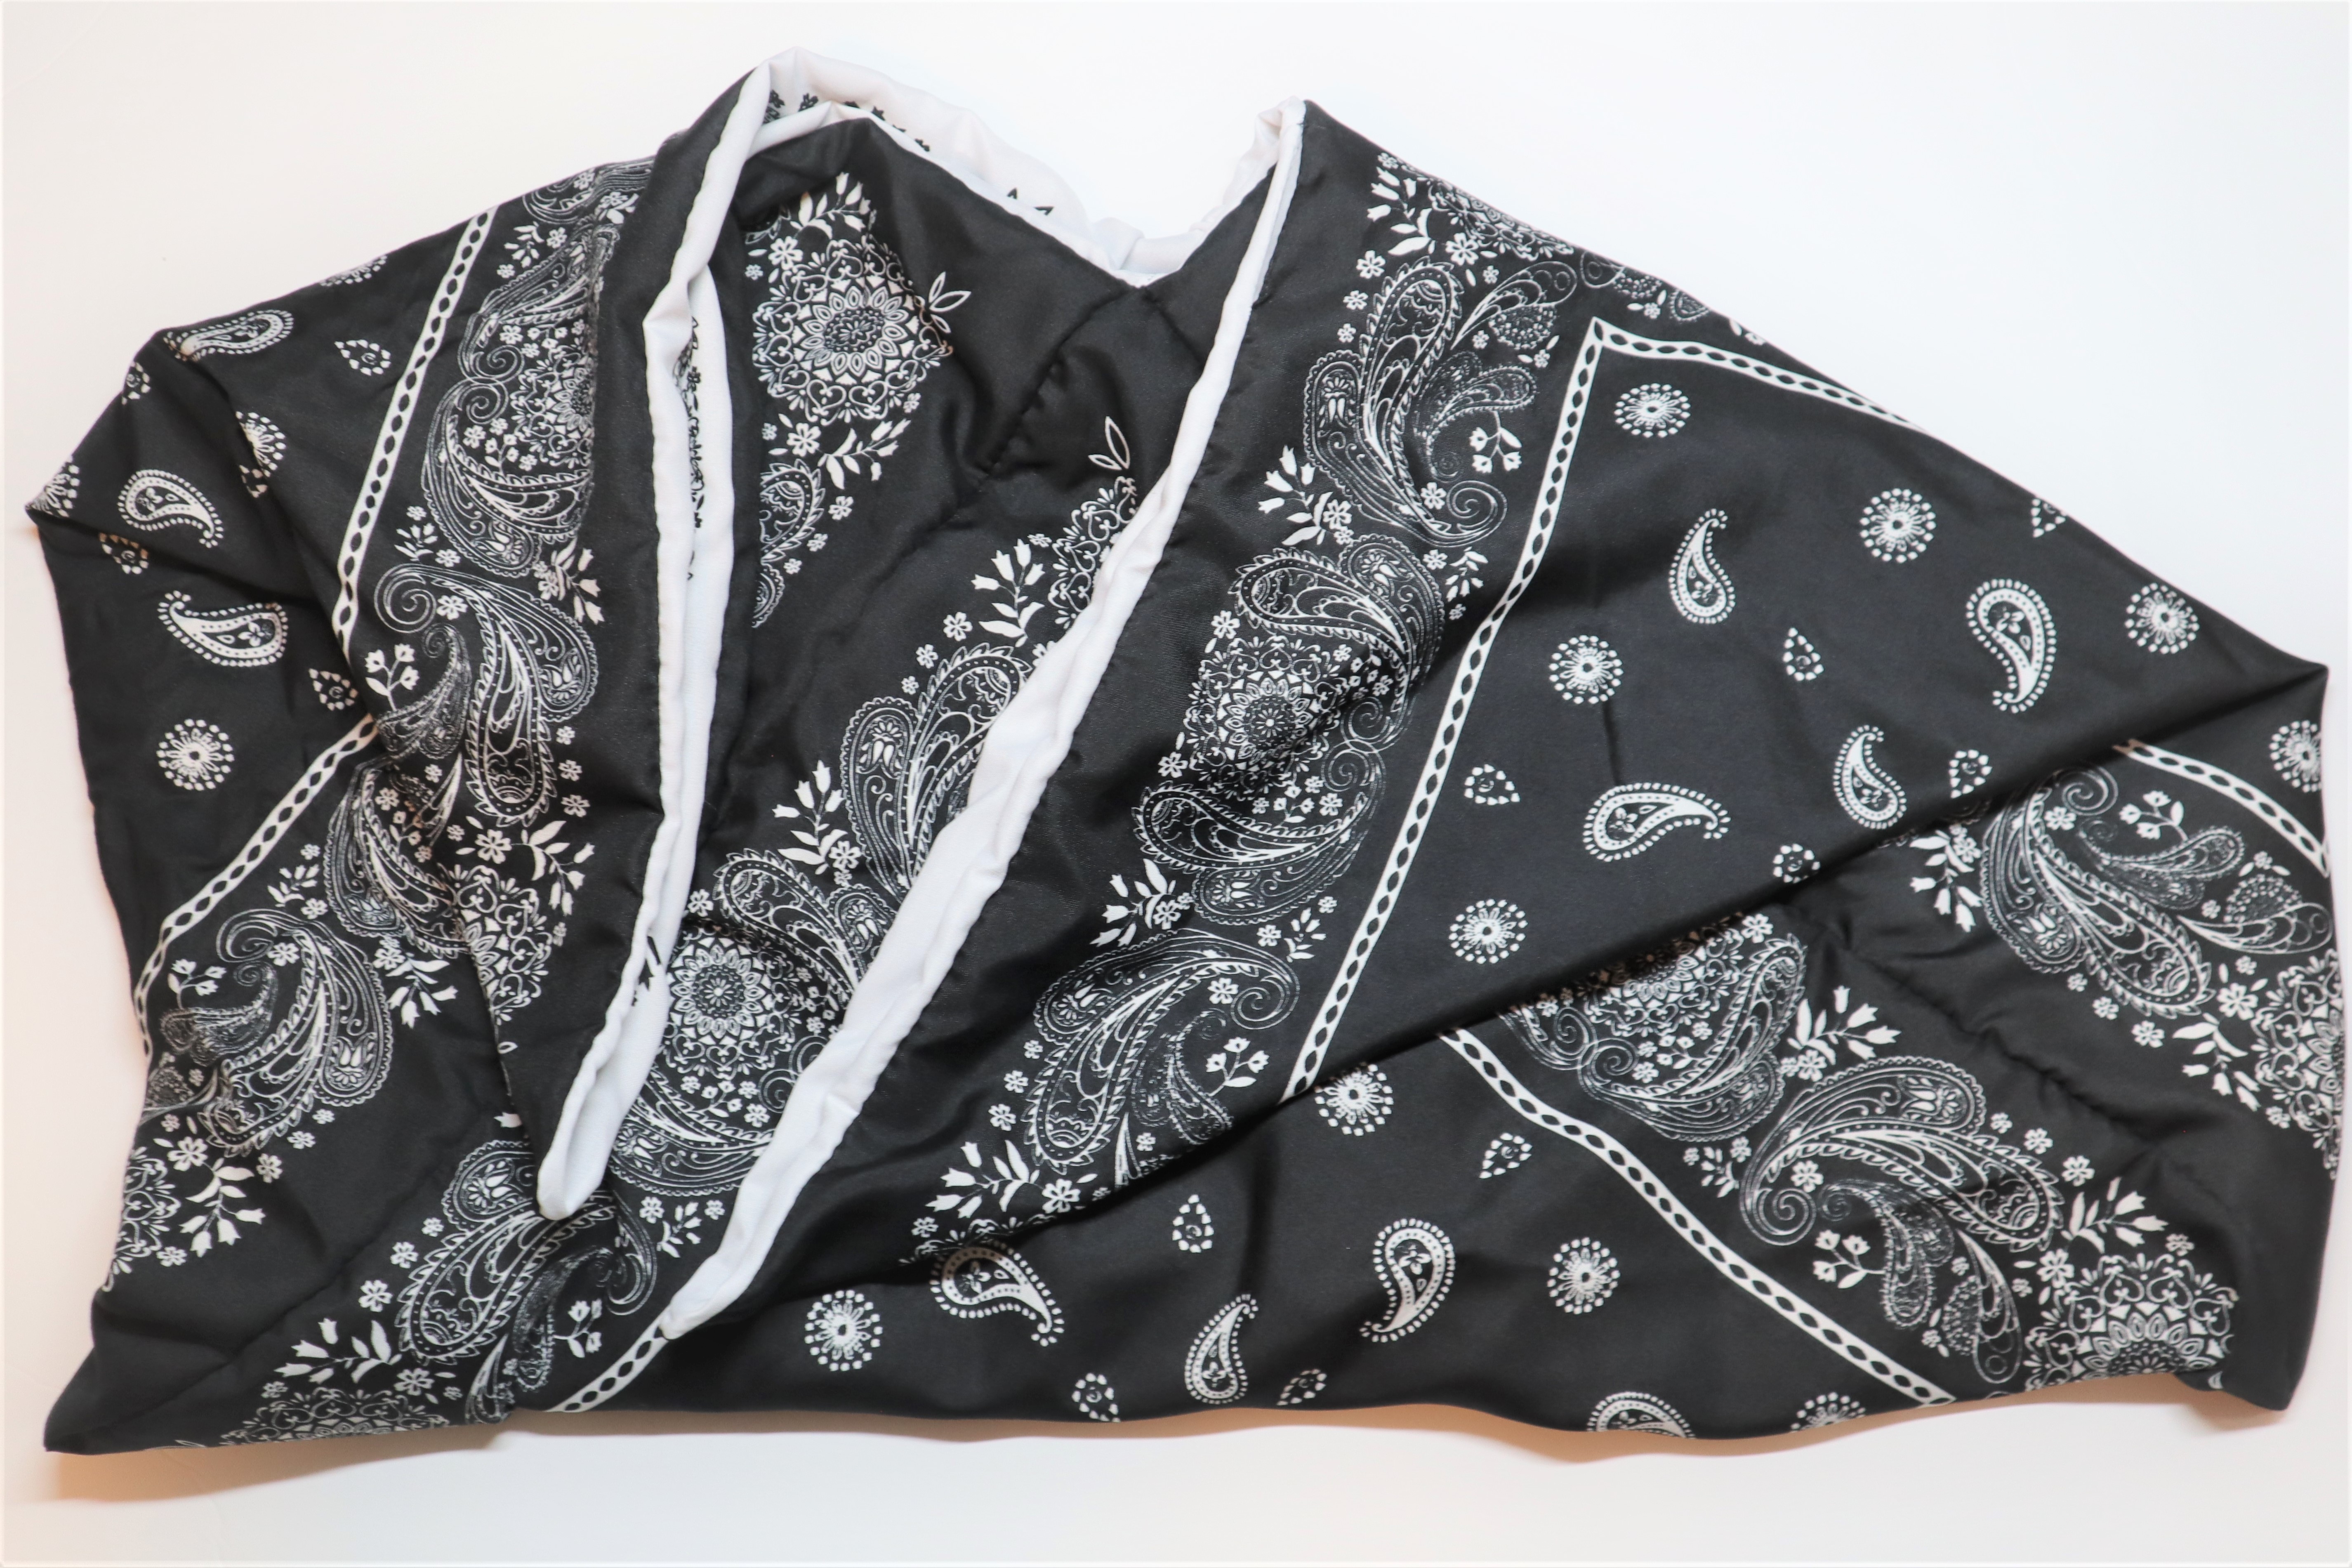
Sewing the Second Panel
Now with your remaining bandannas, sew the second panel in the same way as the first. Because I am using a thread color that matches the fabric of the black panel and print of the white panel, I did not change the bobbin and thread color. However, if that is desired, change the thread color before seaming the second panel. Additionally, if you don’t mind seams showing on the inside of a bag and don’t care about reversibility, your bag can be completed after finishing the first panel. This will allow you to sew a bento bag with three bandannas only.
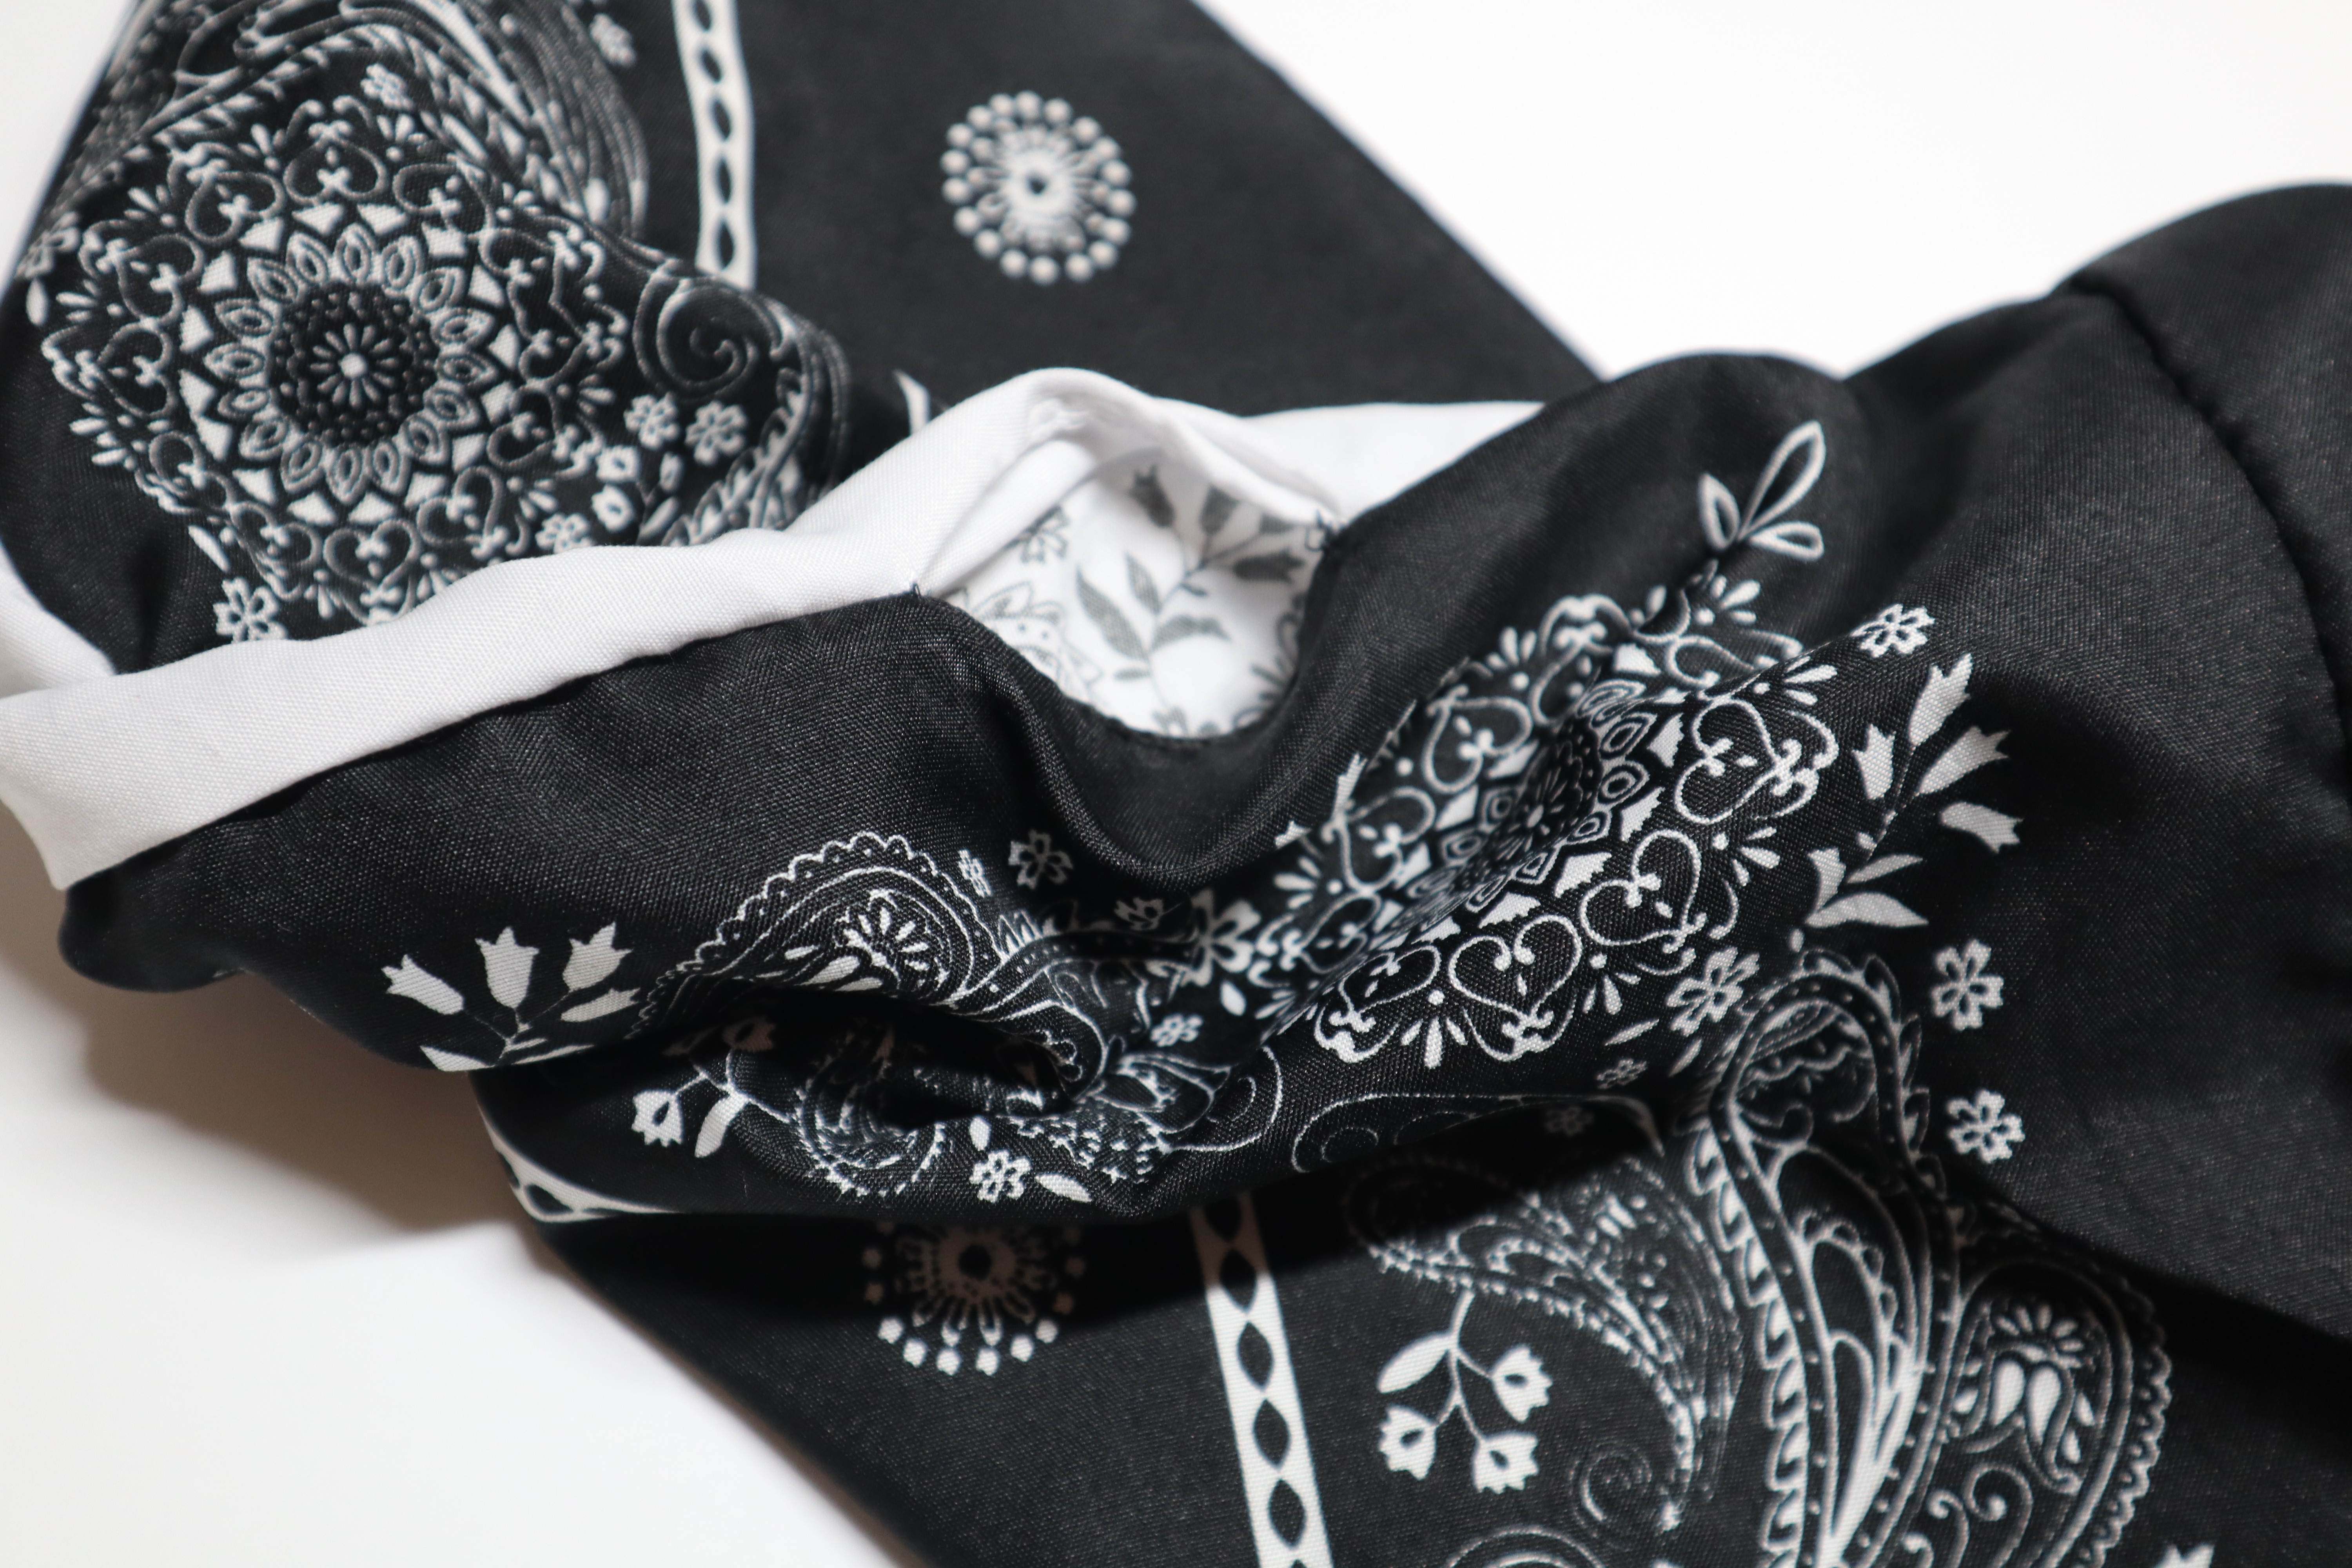
Joining the Panels
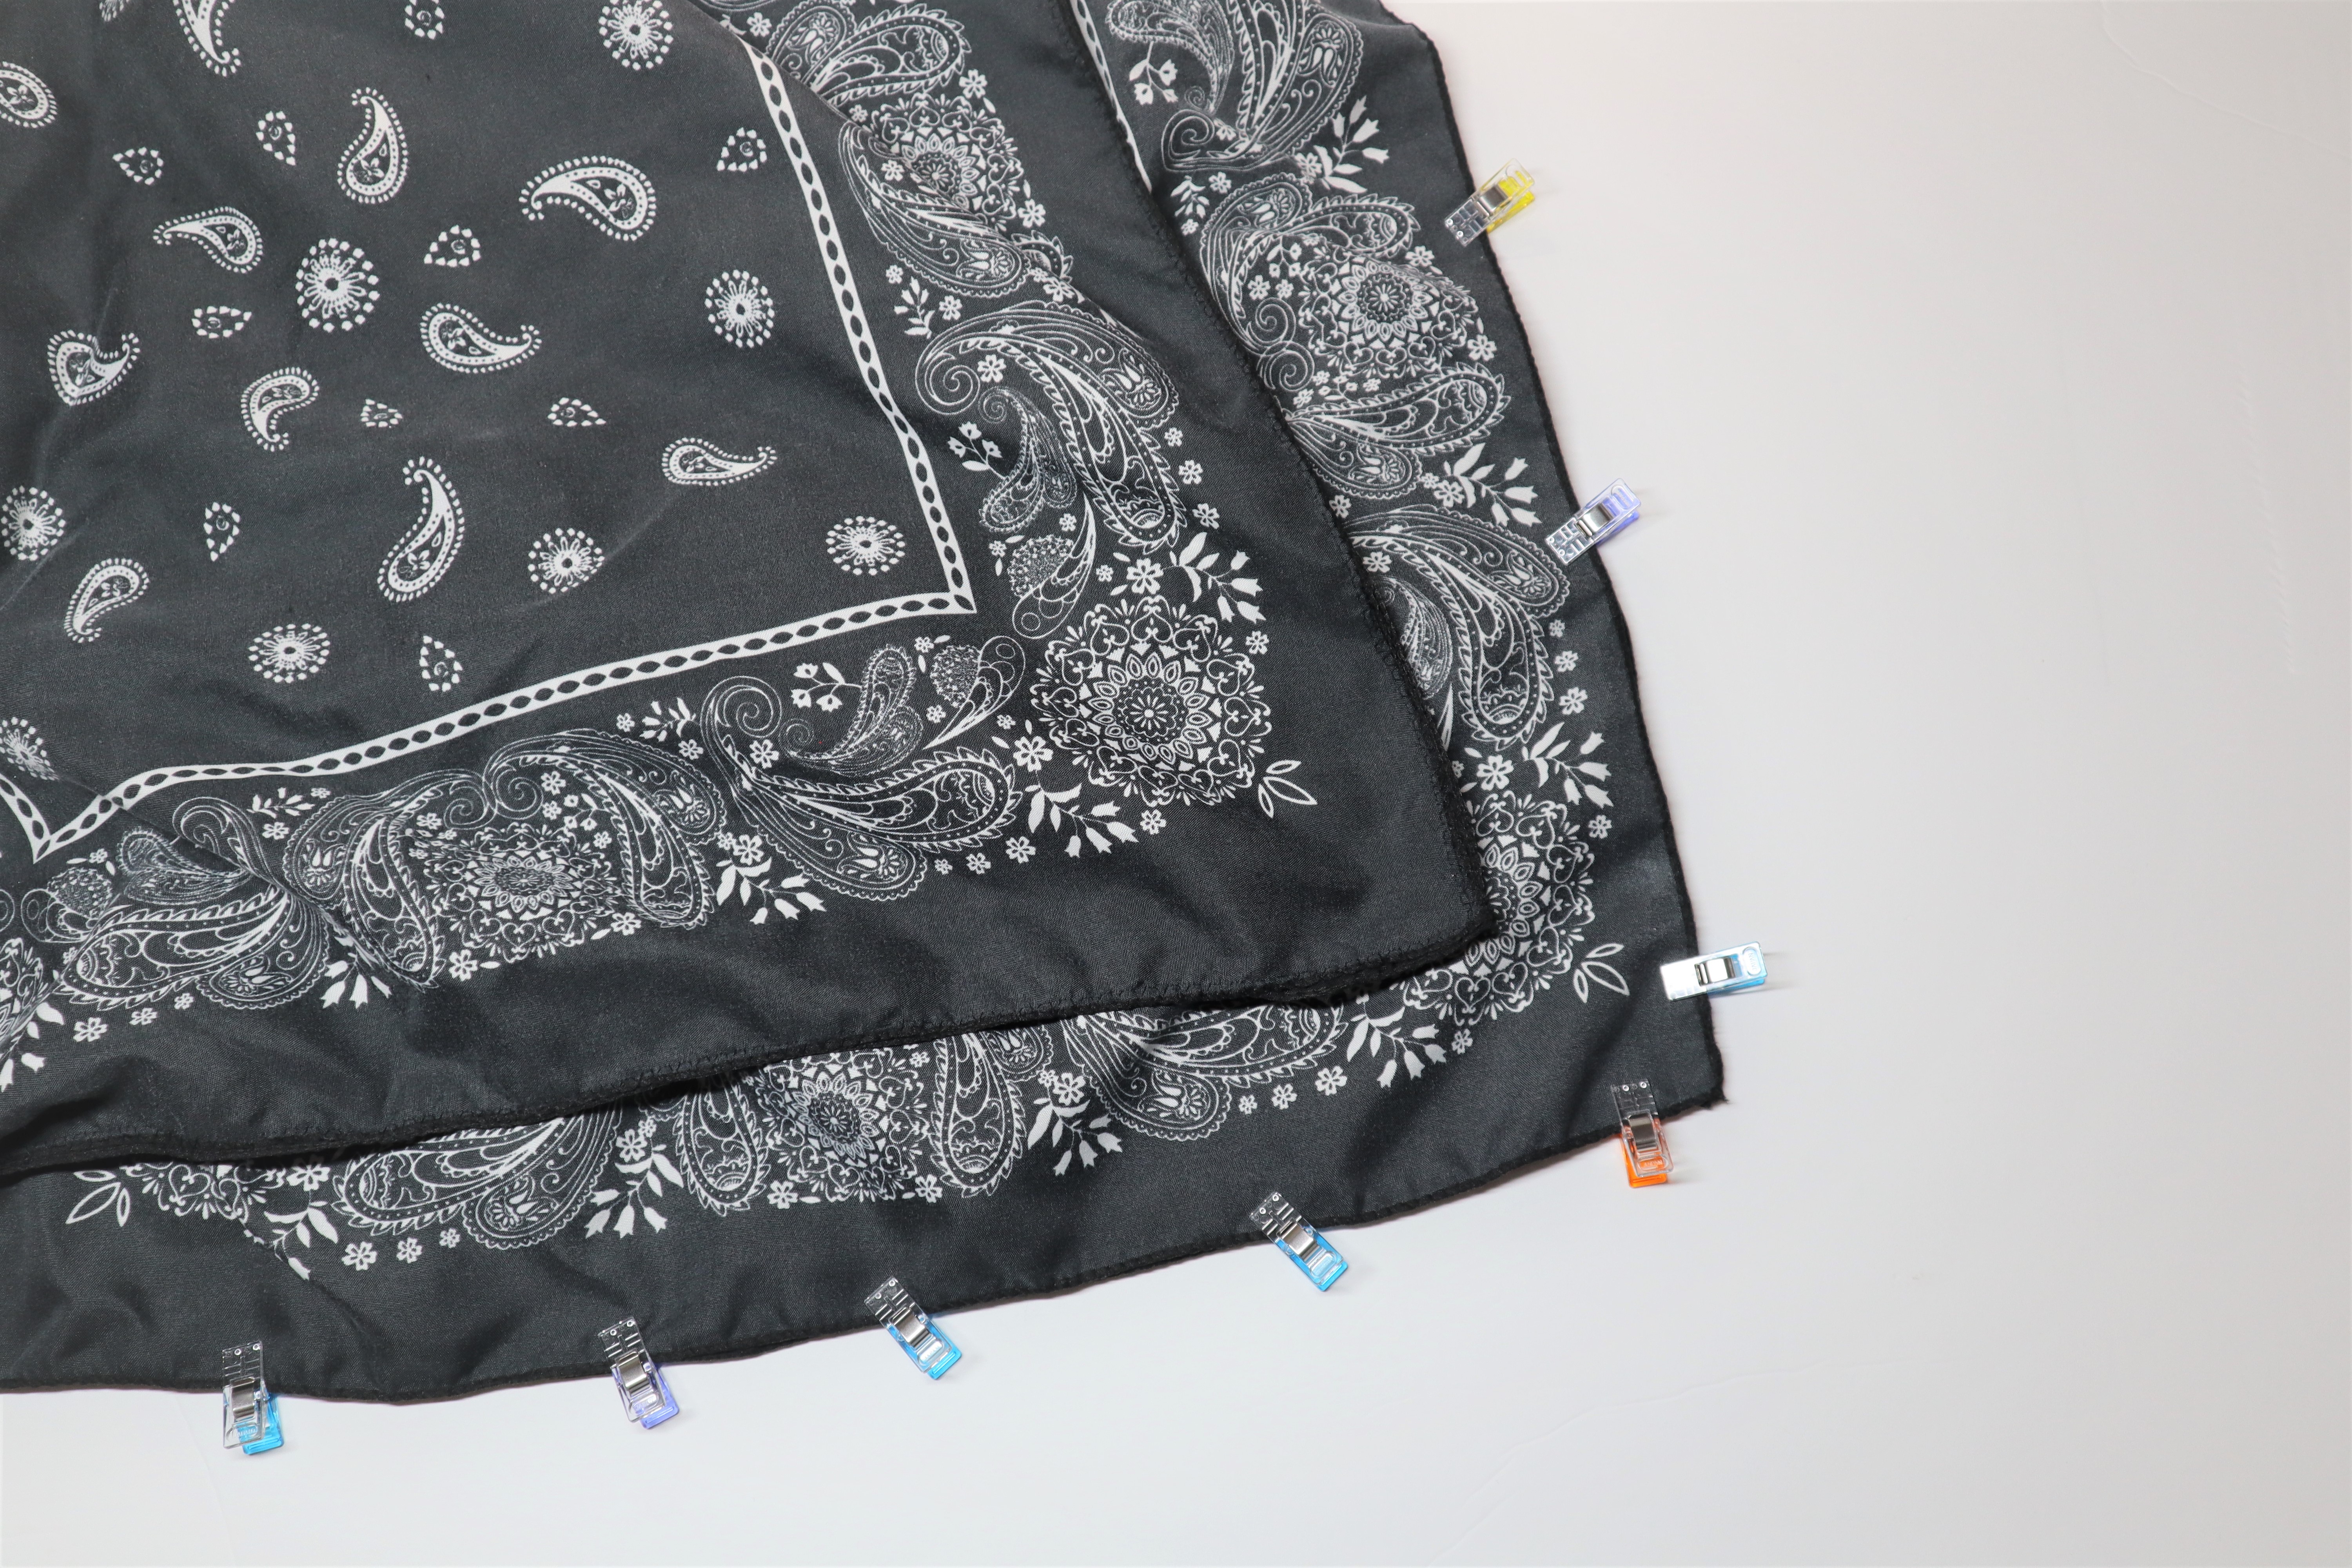
On to joining the two panels. Place one panel inside the other with right sides facing each other.
Now pin along all four unseamed edges which will make up the opening of the bag.
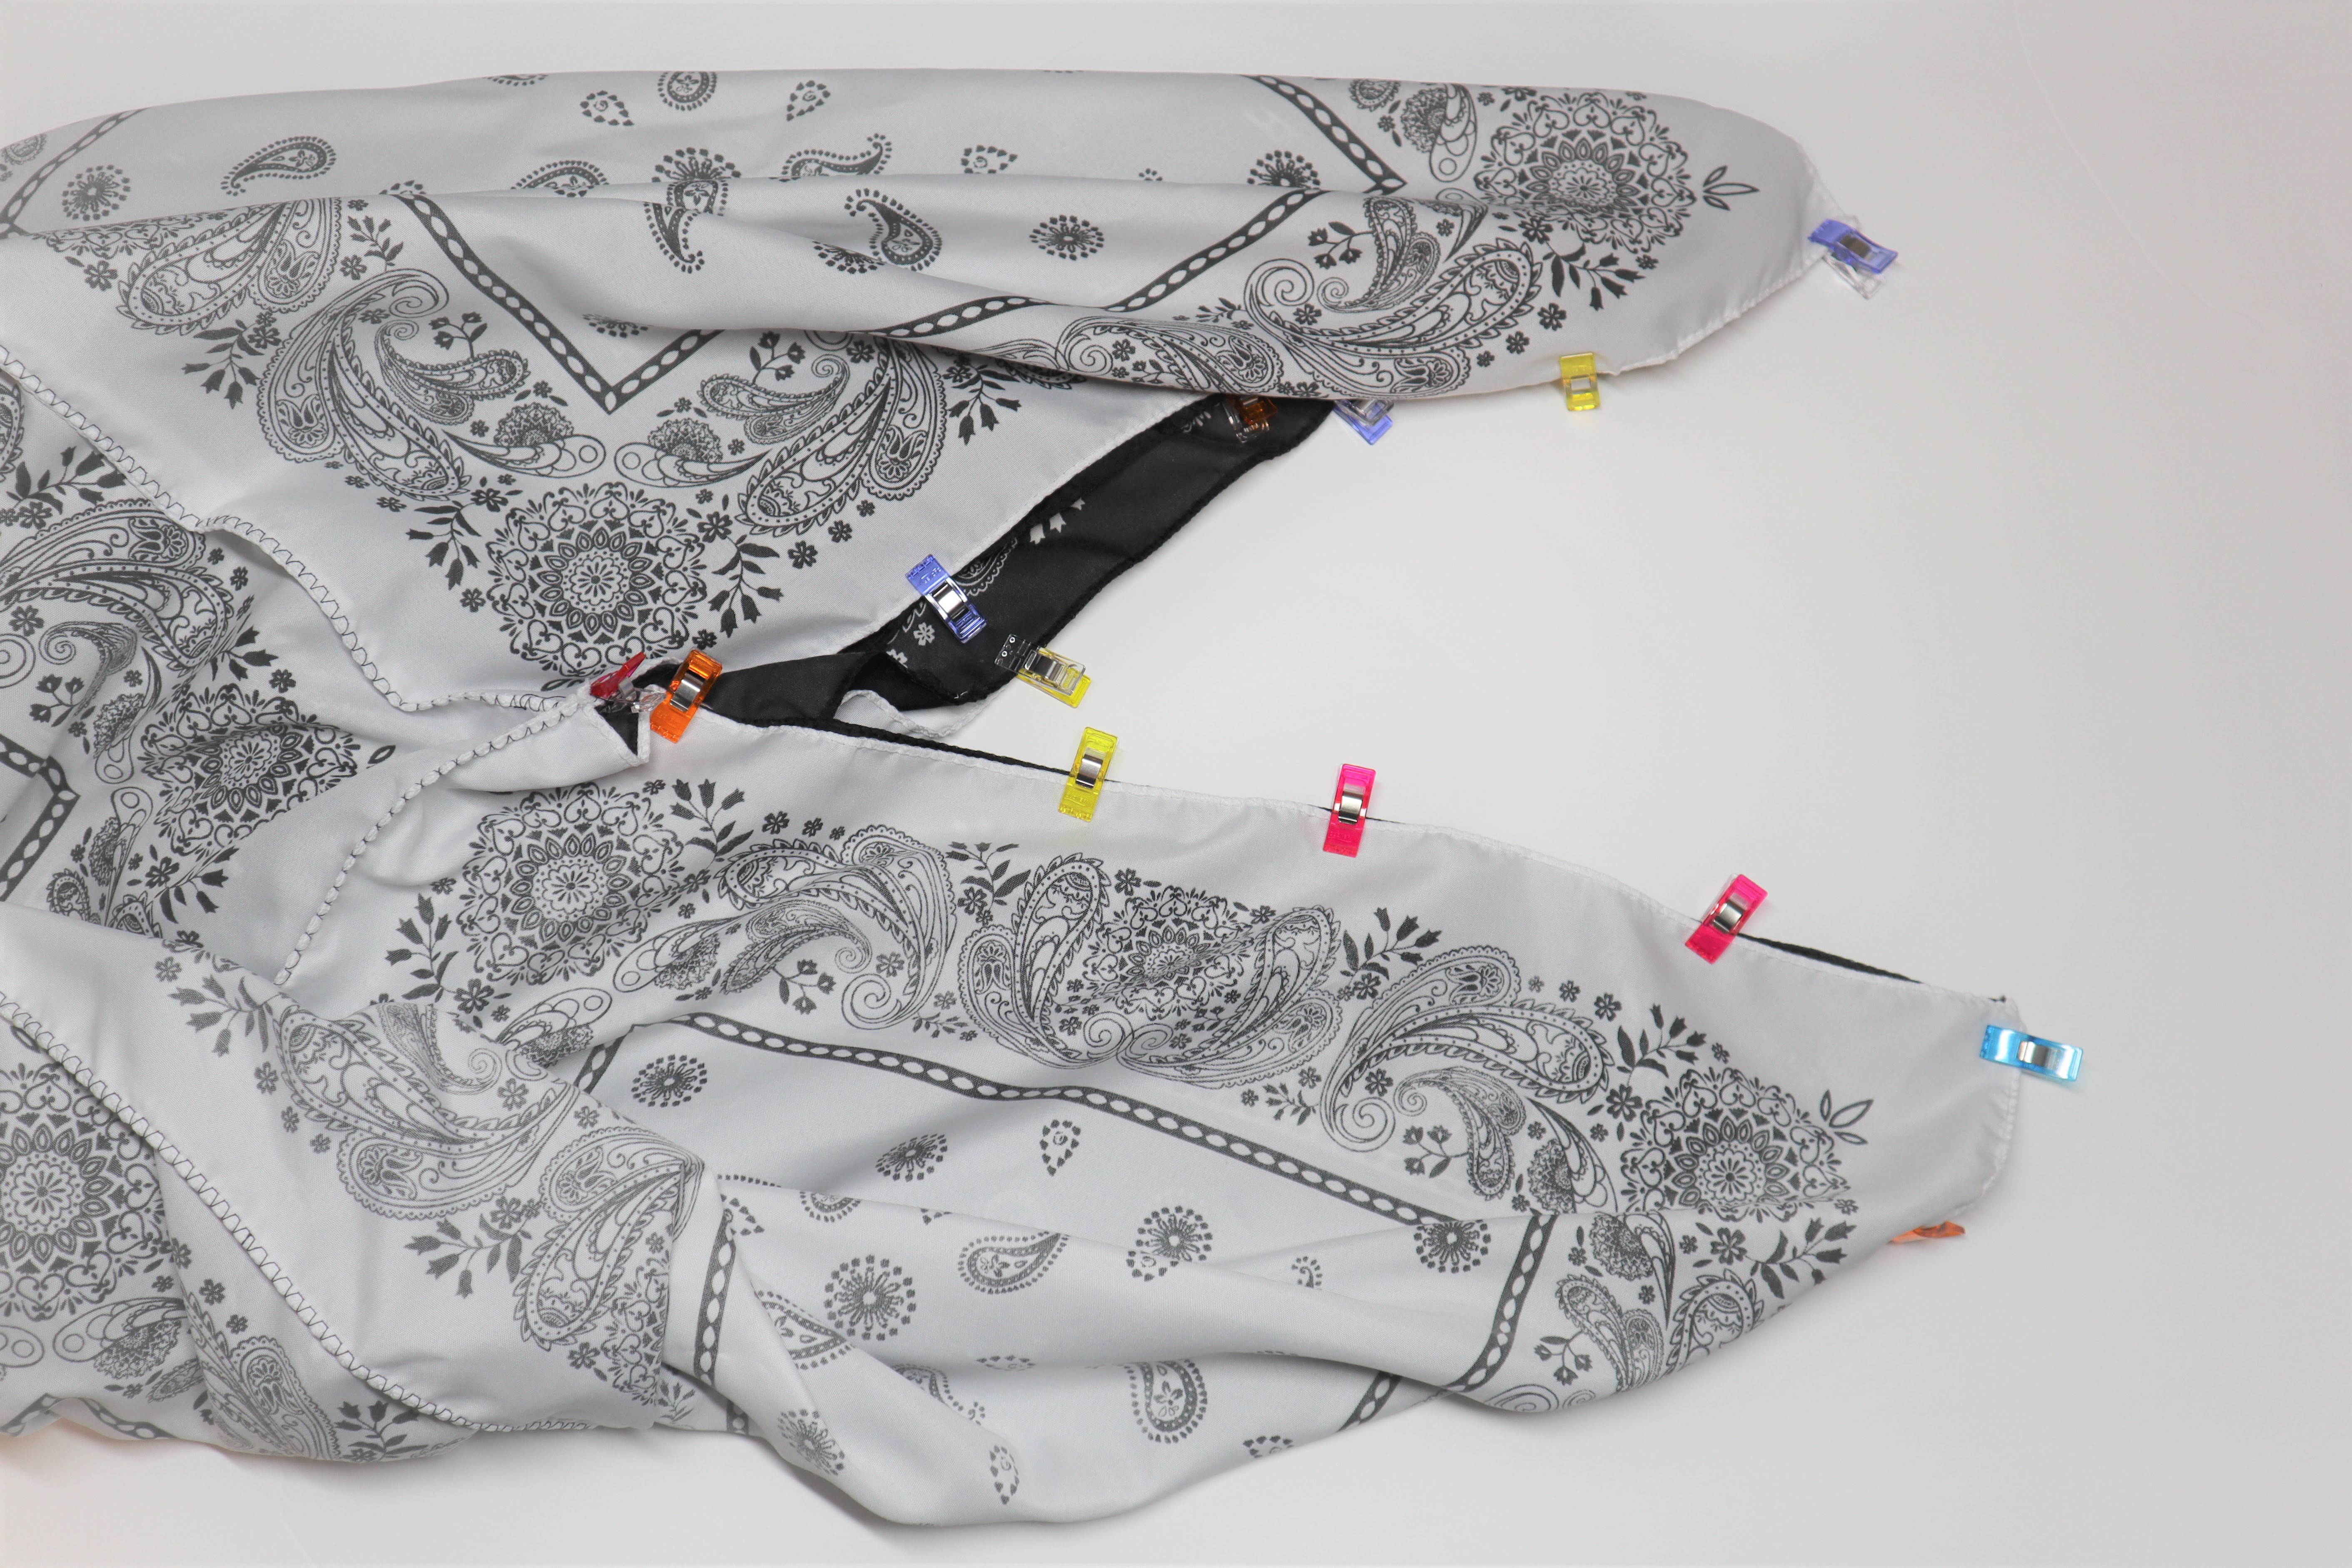

Mark at least a 2’’ space for turning your bag right side out and seam as previously stated.
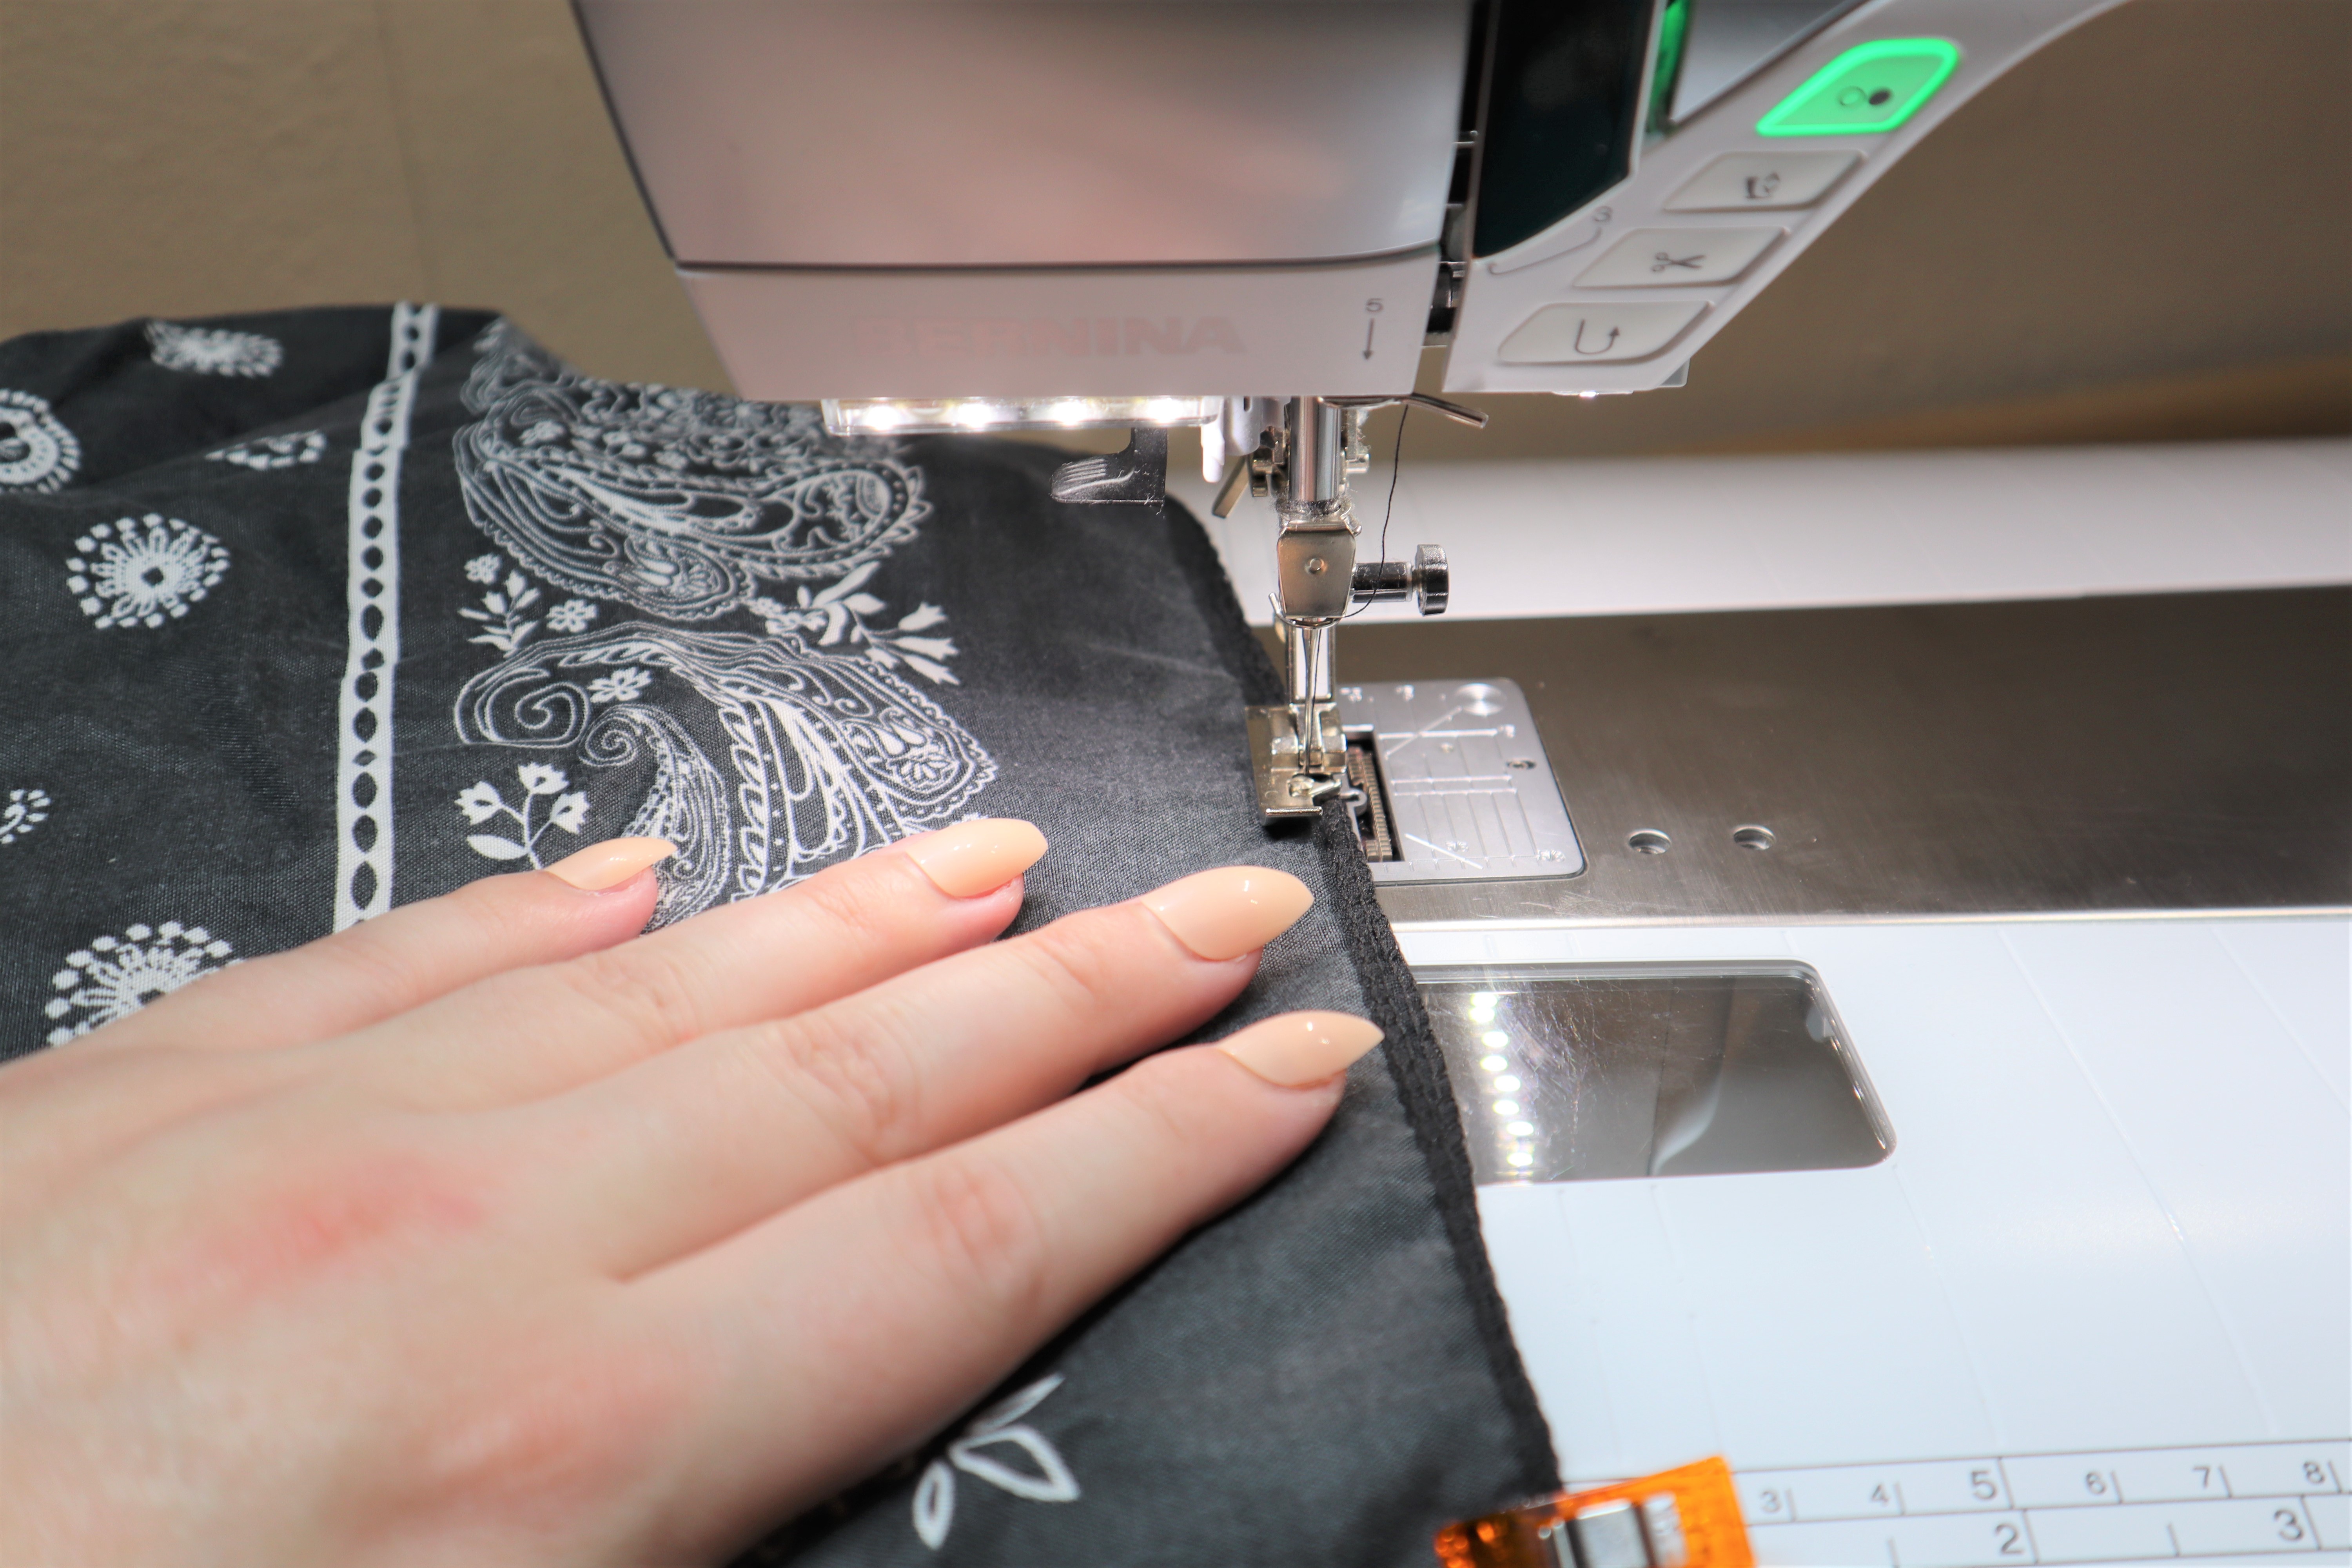
Finishing the Bento Bag
Flip bag right side out through turning hole. Now, starting about 1’’ before the turning hole, sew an overlock stitch all the way around the outer edge of the bag.
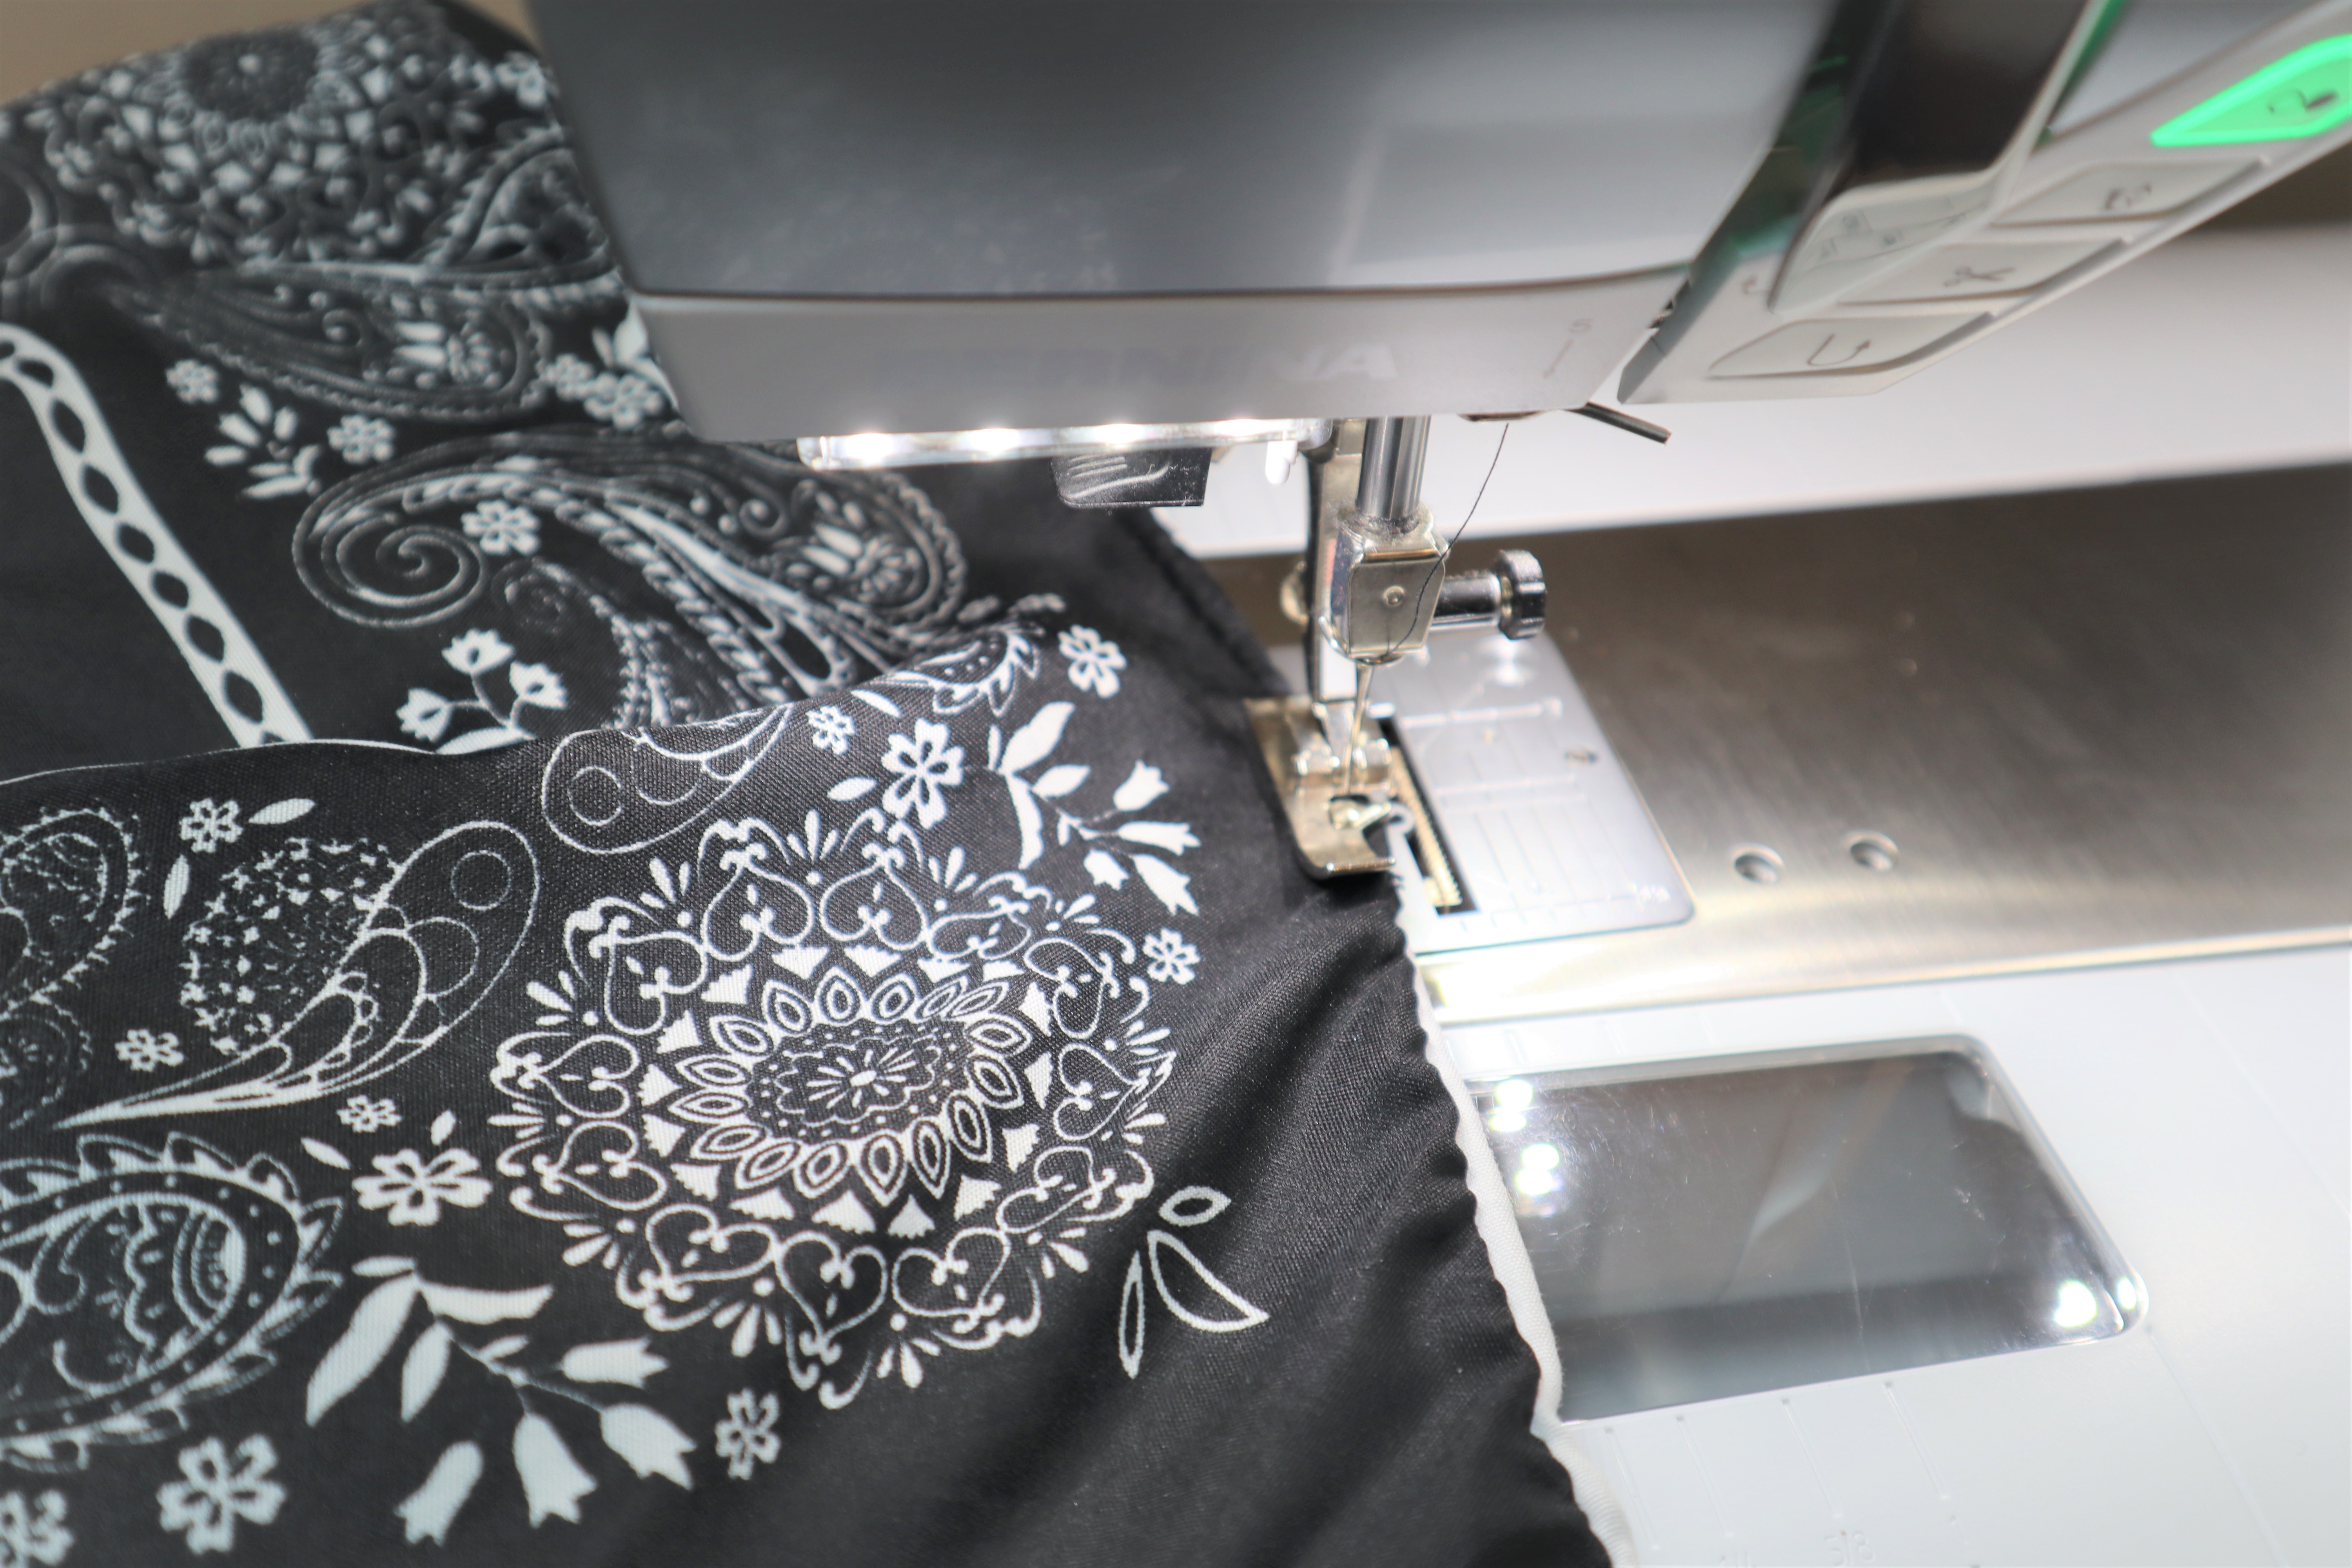
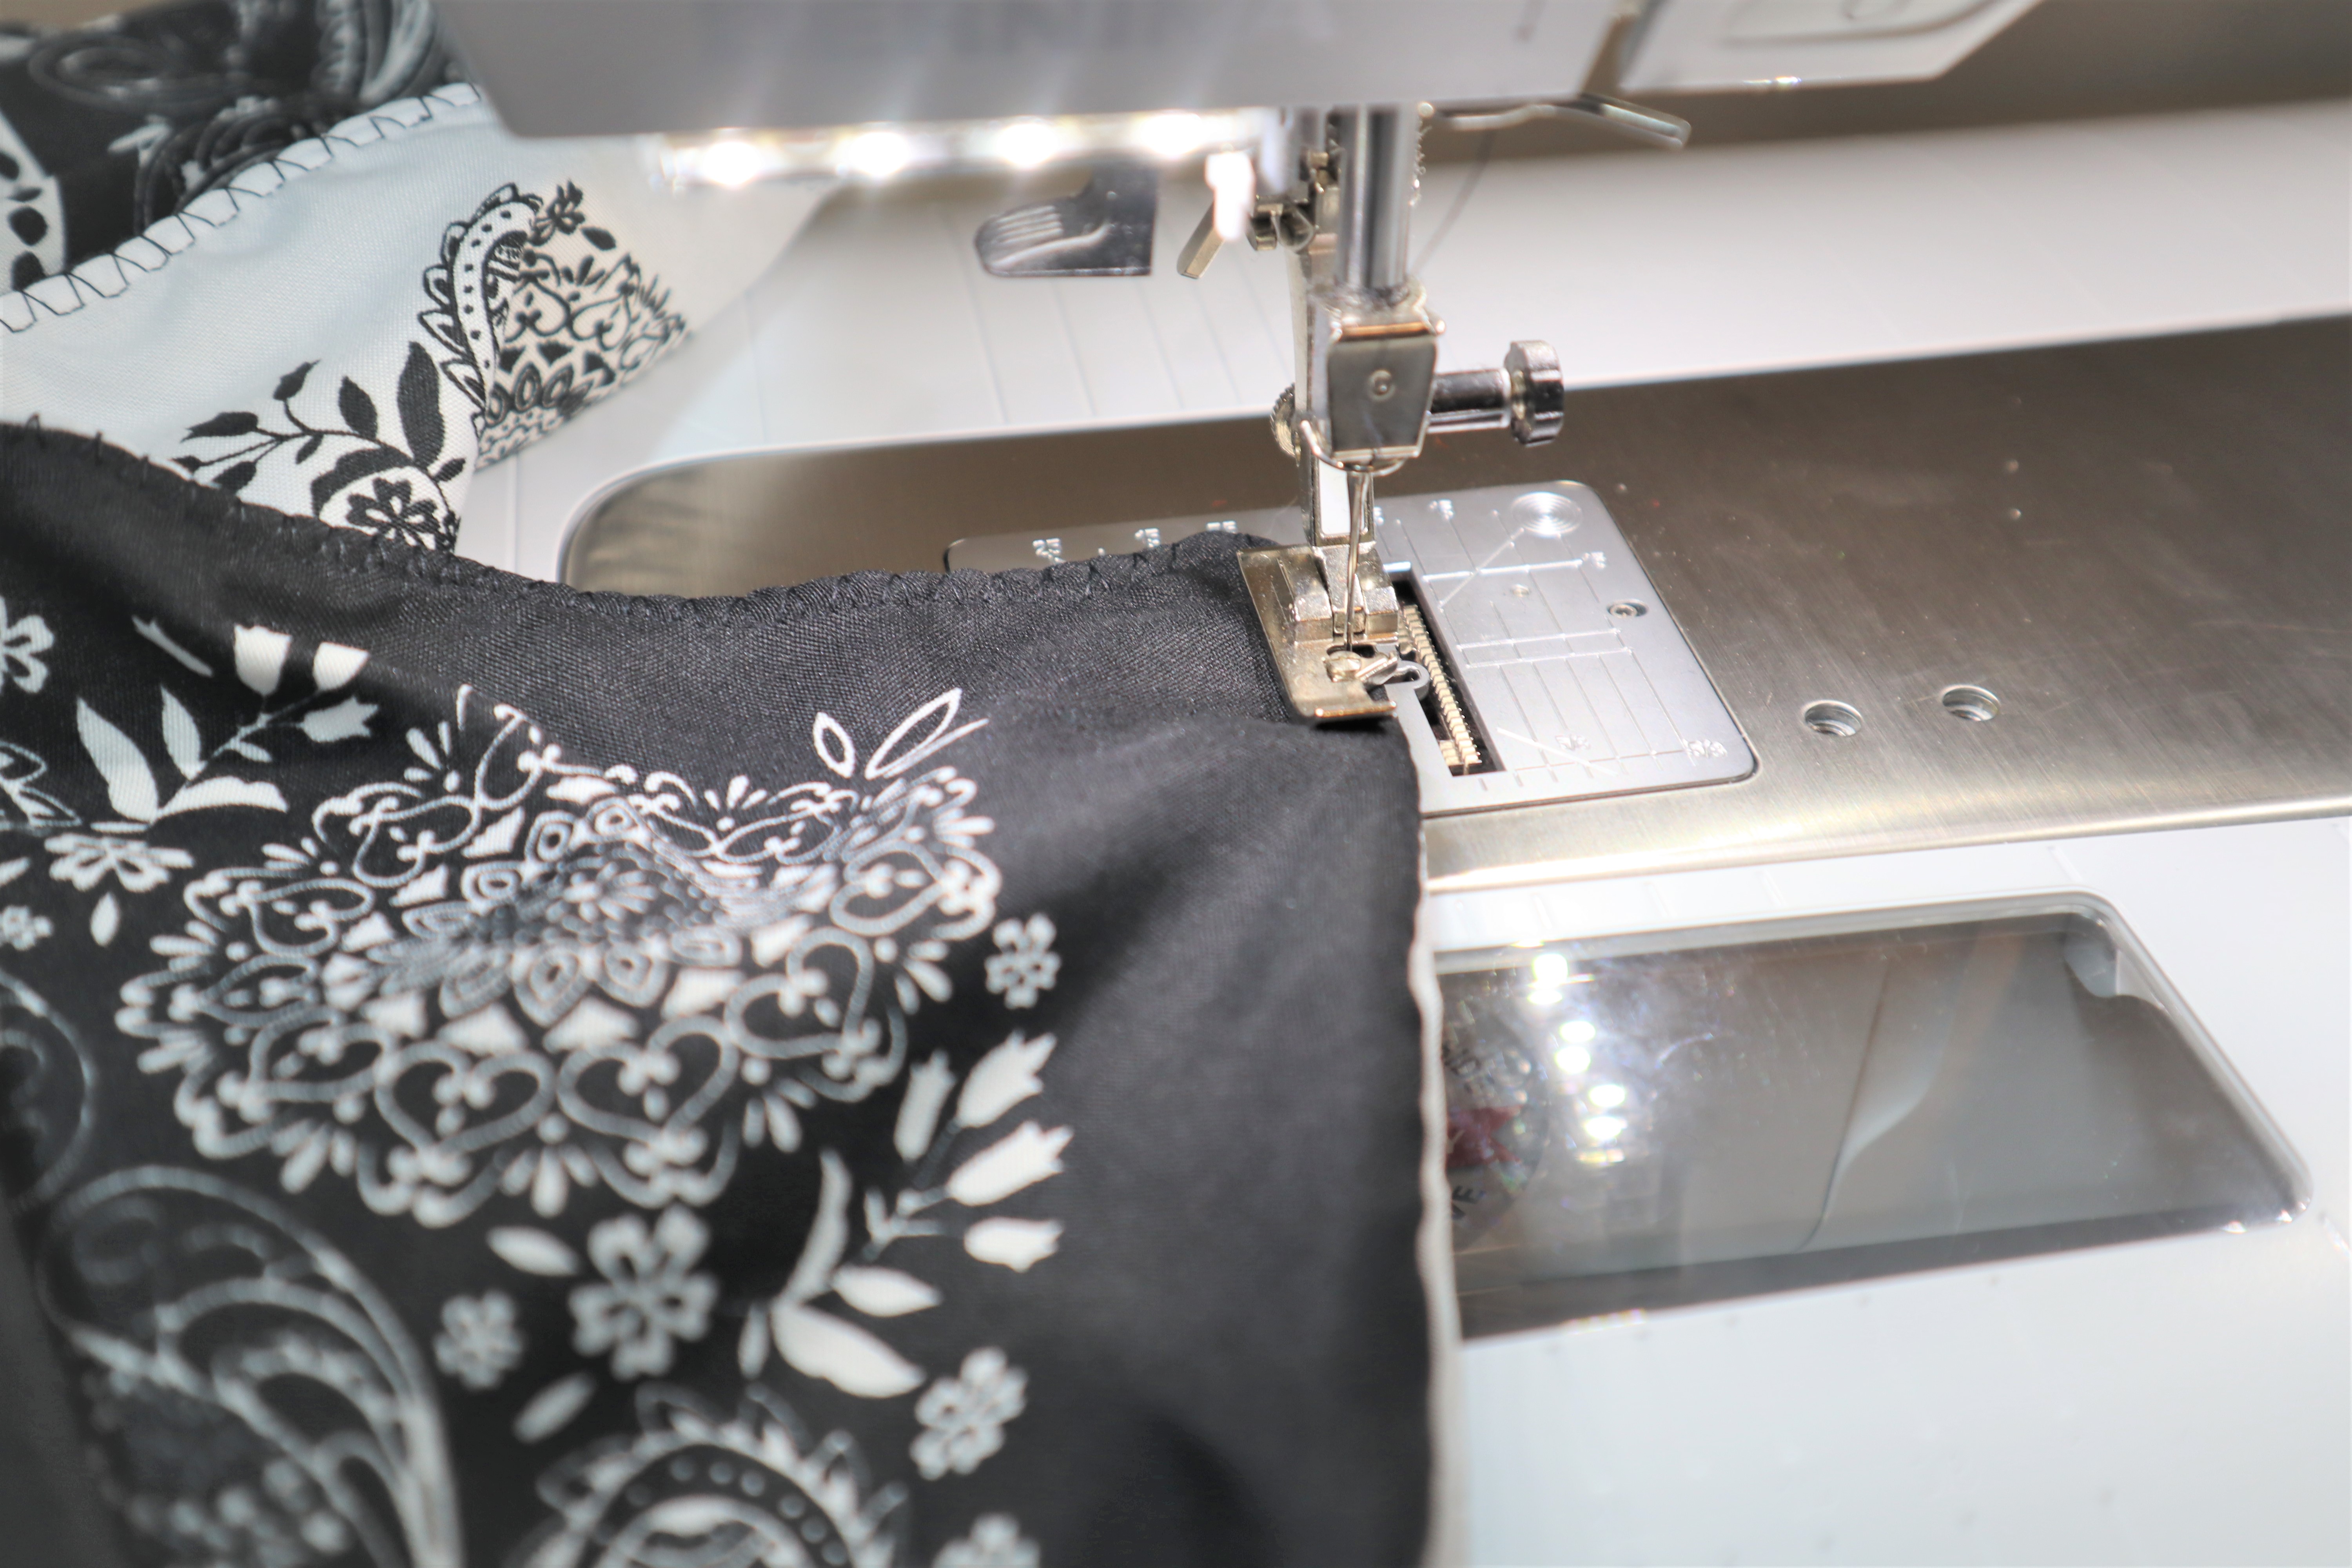
Backstitch after returning to the beginning and trim all threads to finish.

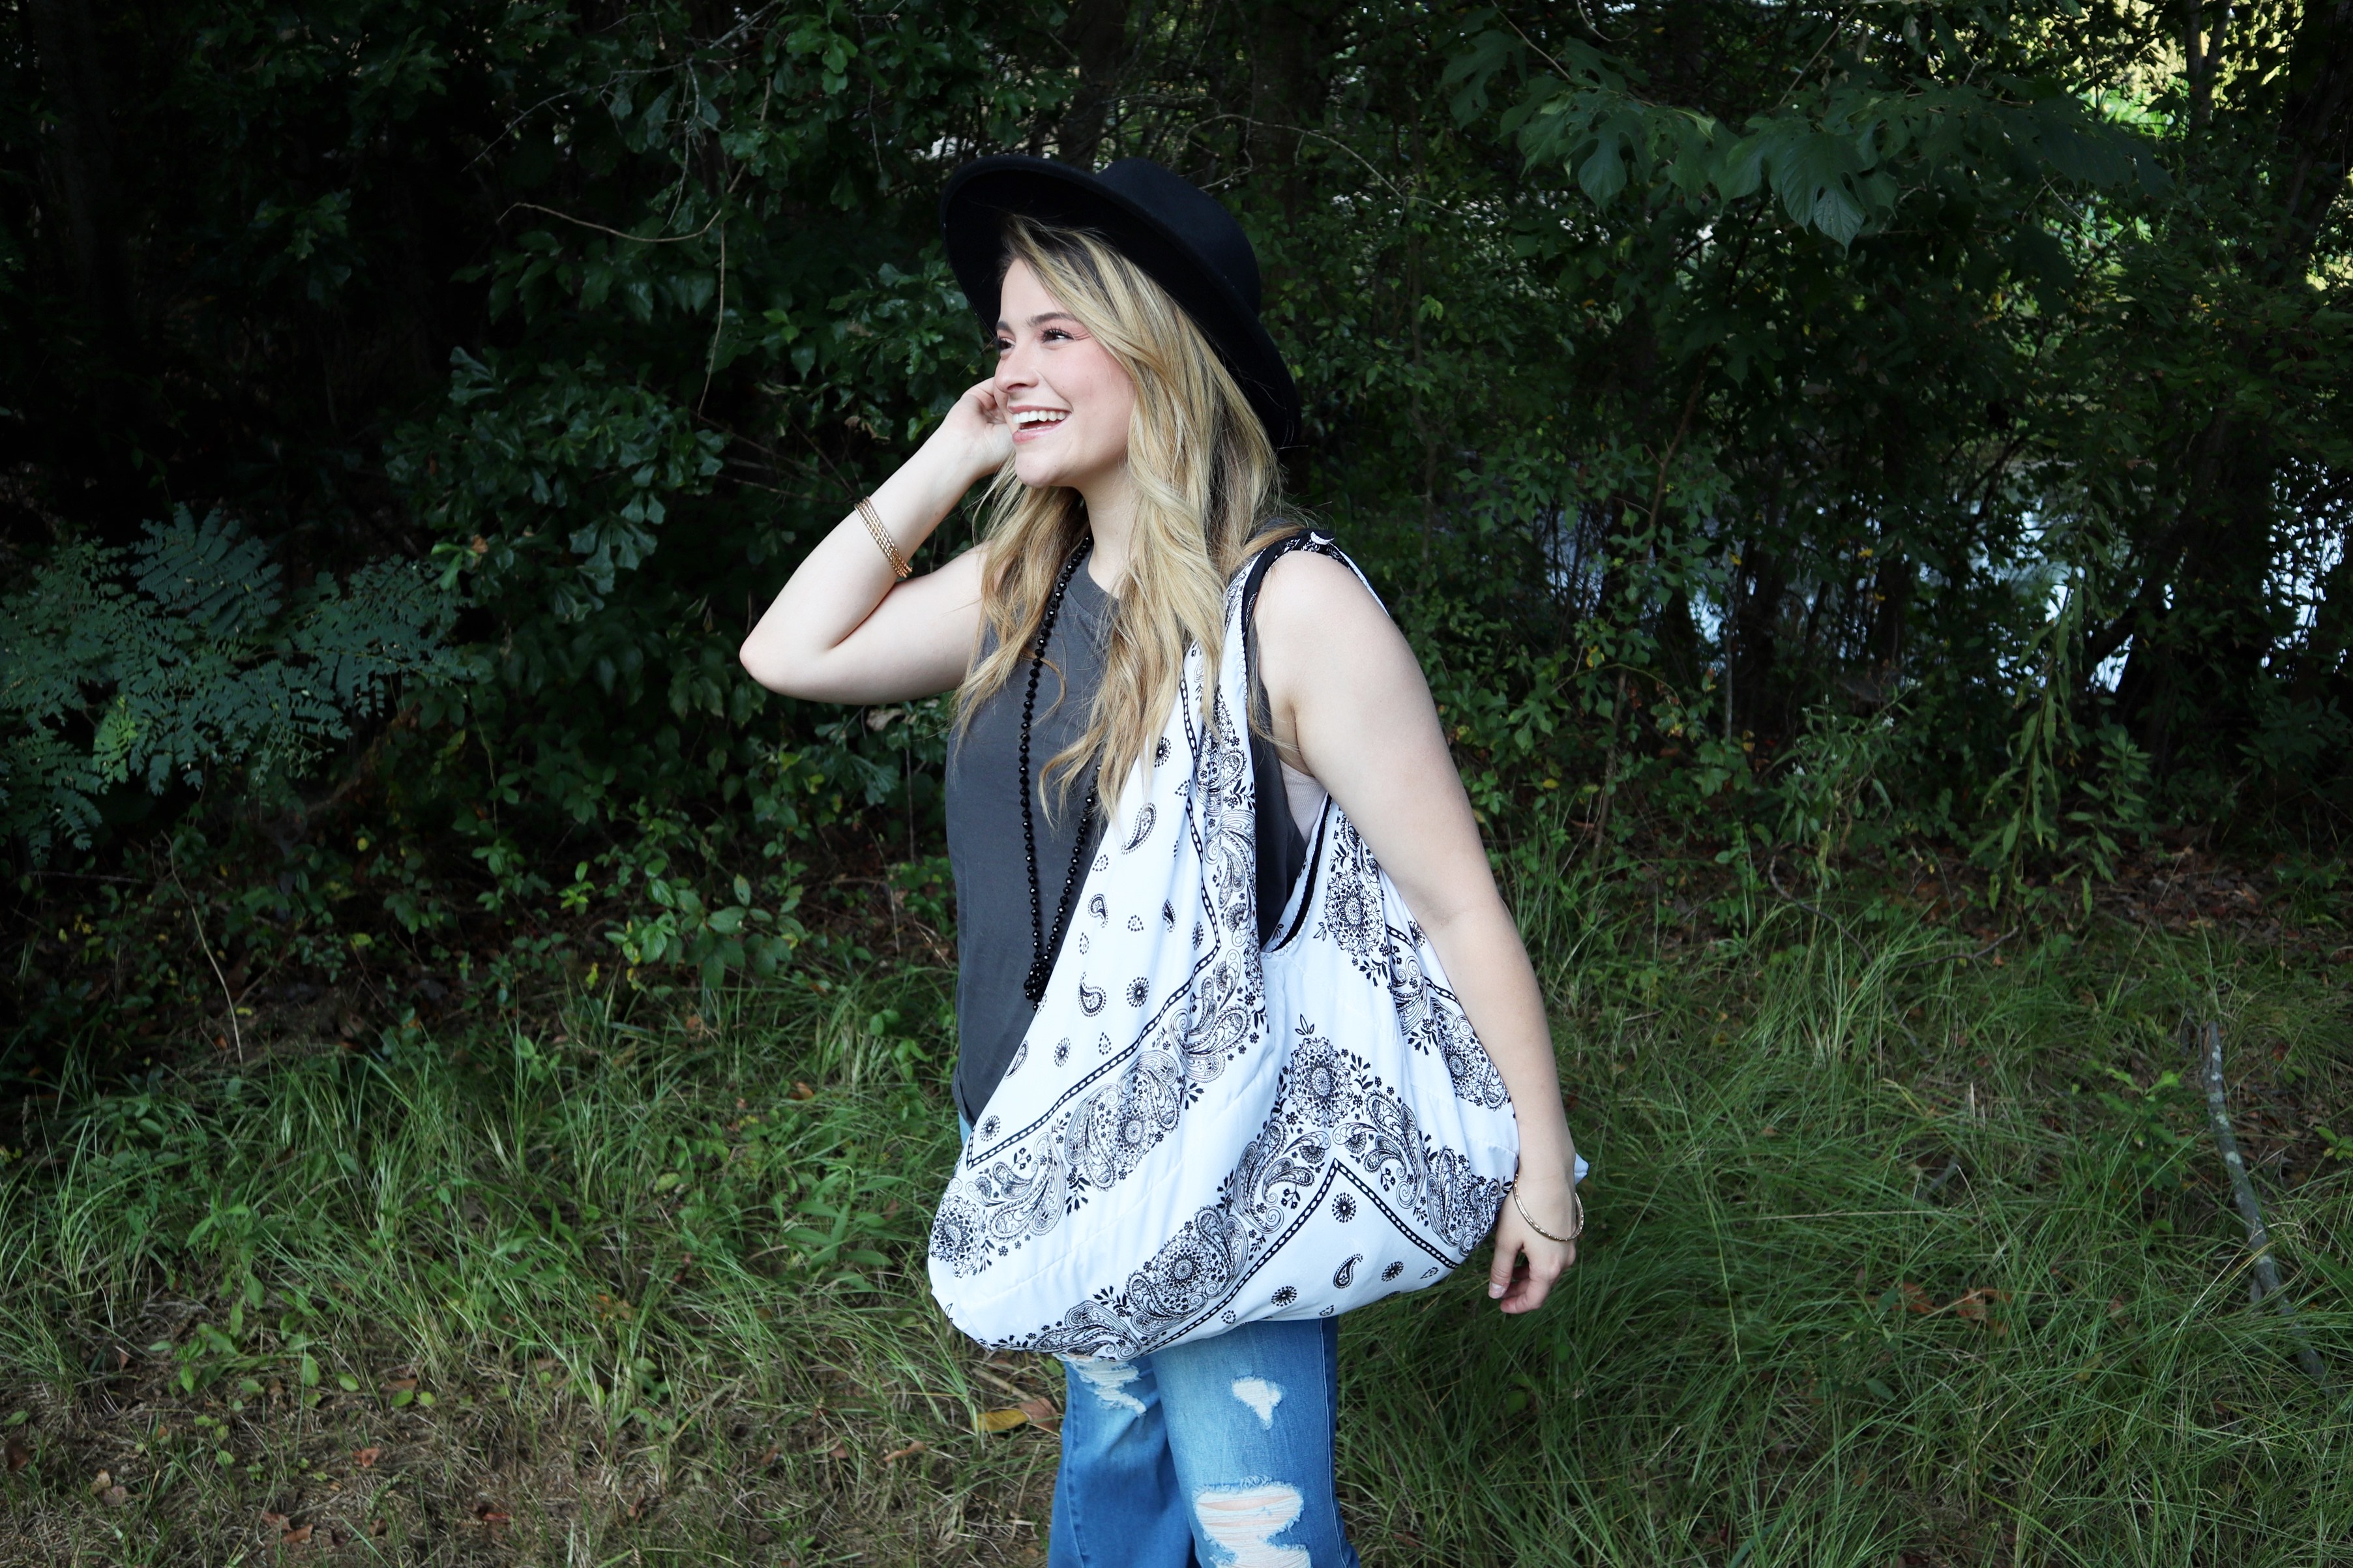
We are done sewing our bento bag! To style it in a myriad of ways, I recommend looking through Pinterest and YouTube for ideas. The simplest, and a go-to way for myself is a square knot at the top, but the options are endless! If you enjoyed this tutorial, drop by and say hello in the chat for the live stream over this bag on the BERNINA USA Instagram page on Friday, September 17, 2021, at 5:30 PM CST. In the meantime, stay up to date on all things QUOE on Instagram, Tiktok, or my Website!