BERNINA Stitch Recipes—Then & Now
A sewing machine with an electric foot control—the BERNINA 830, came to market in 1971.
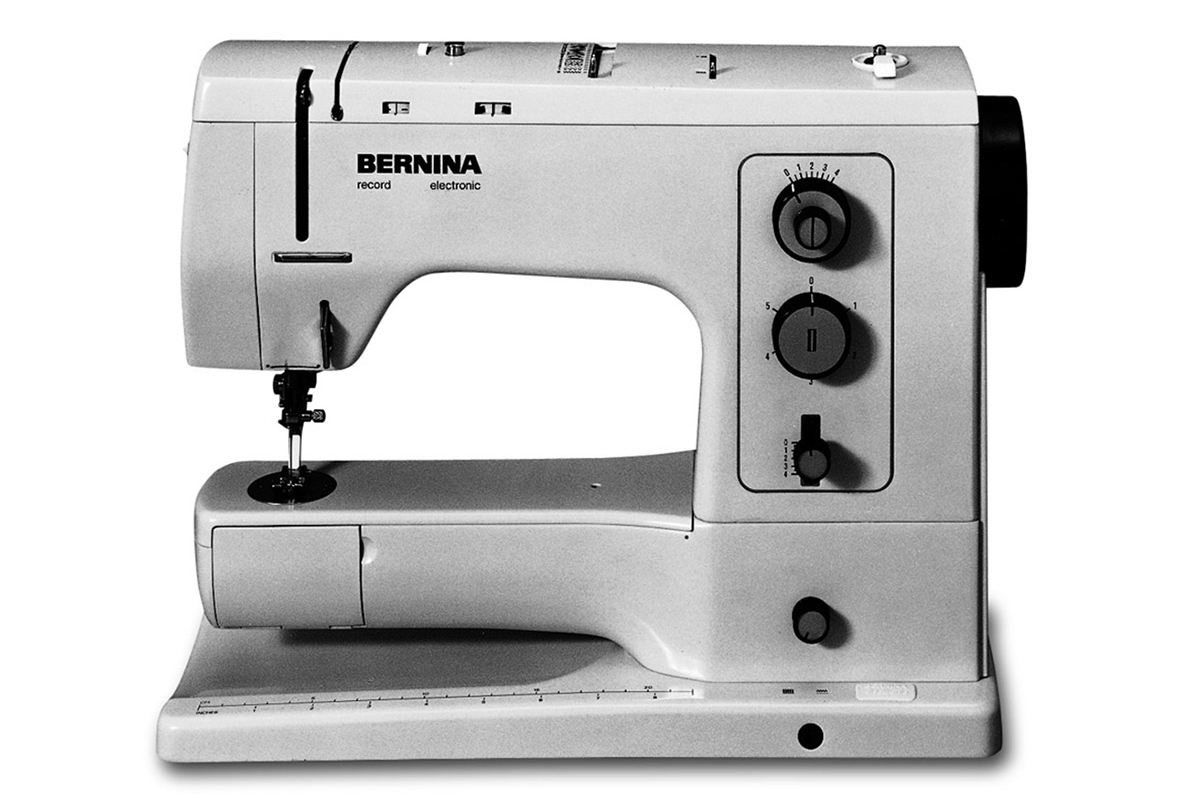
This machine established itself as a top model in the 70s, remained the best seller for eleven years, and enjoys legendary status even today. Today, the foot control is programmable on many BERNINA machines!
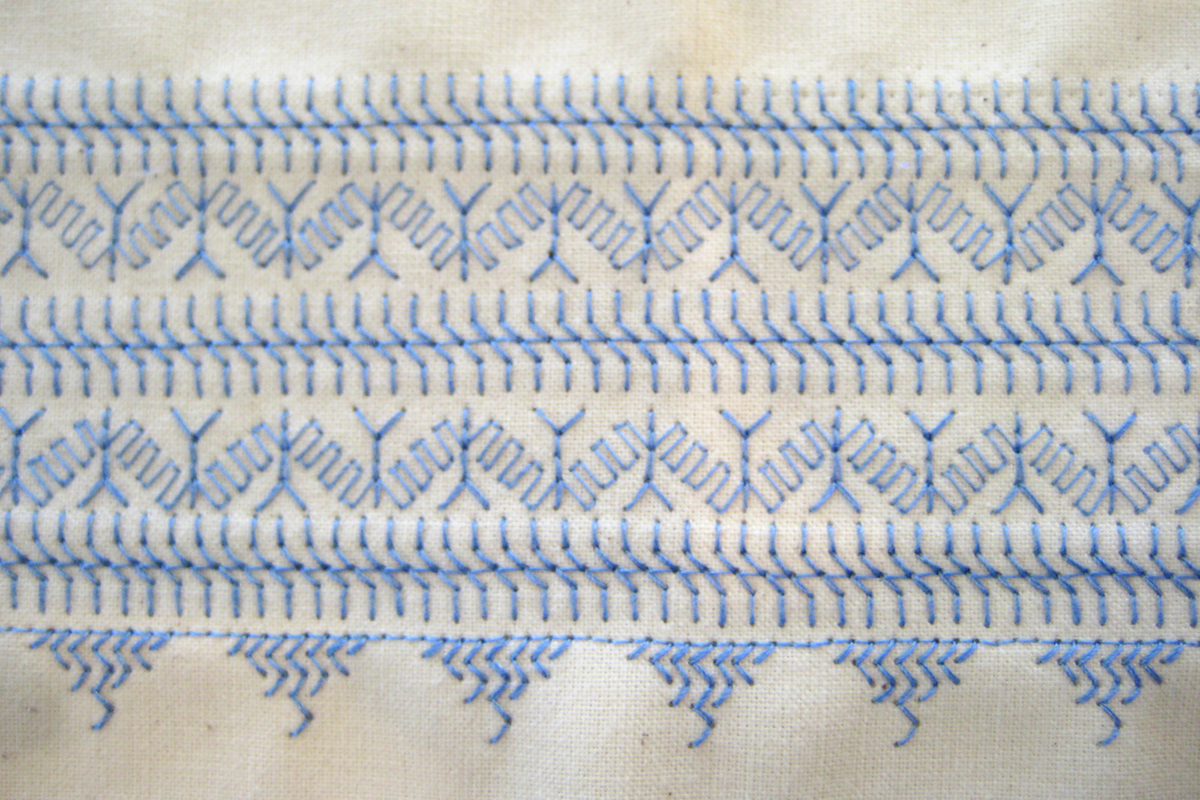
The original BERNINA Model 830 offered beautiful decorative stitches, which were showcased in “stitch recipes”—lining up different stitches next to each other to create “ribbons” of stitches!
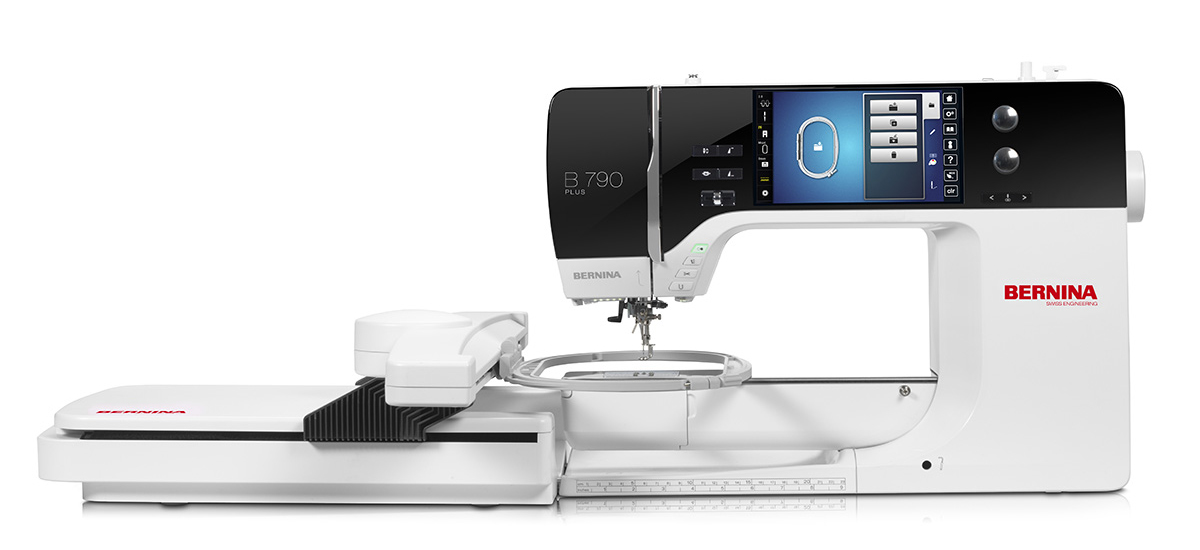
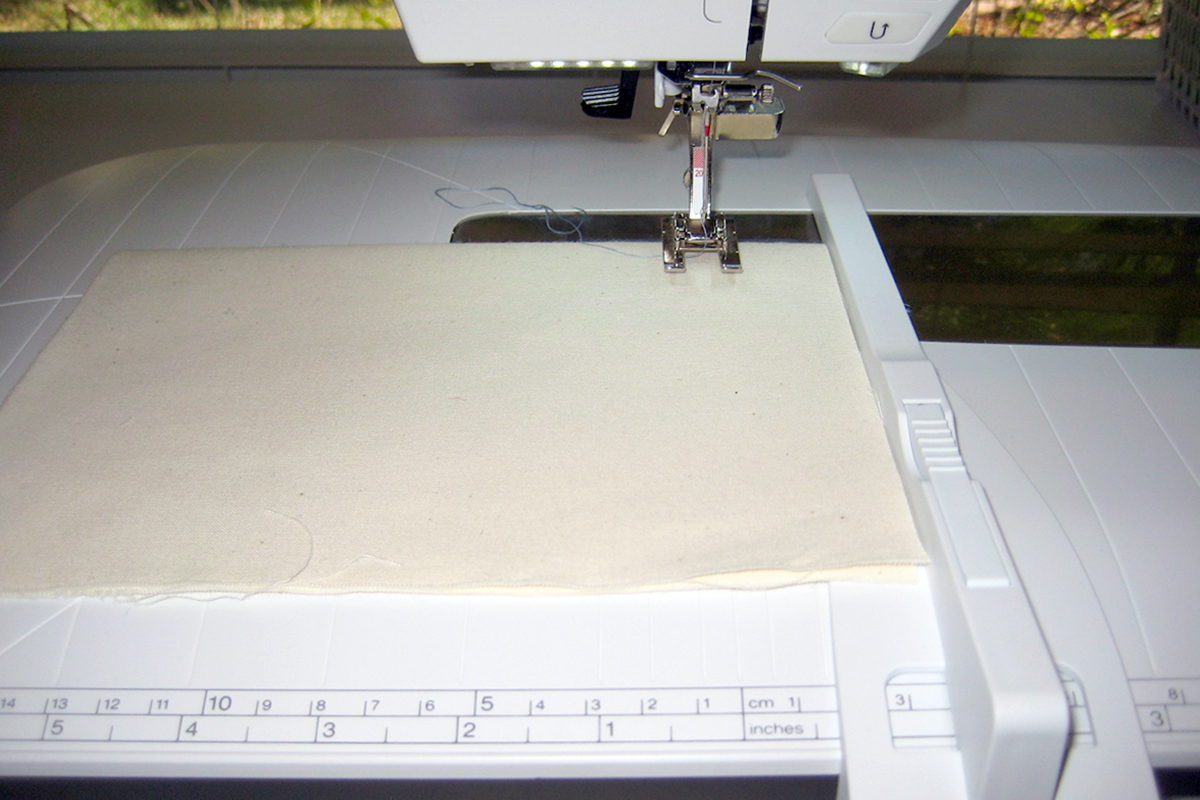
Stitch Recipes are sewn rows of stitches that form a band of decorative embellishment. When the rows are stitched close together, the compact embellishment loses the look of individual stitches. Stitch recipes still enjoy popularity today. With larger machines having more stitches, more functions and accessories, the creative stitcher has more choices when creating the stitch recipes. Hundreds of 9 mm wide stitches, Sideways motion stitches up to 40mm wide, designing custom stitches with Stitch Designer, and embroidering decorative stitches are but a few of today’s upgrades for creating stitch recipes. Let’s take look at creating stitch recipes today on the BERNINA 790 PLUS, a combination sewing and embroidery machine.
General Tips for Sewing Stitch Recipes
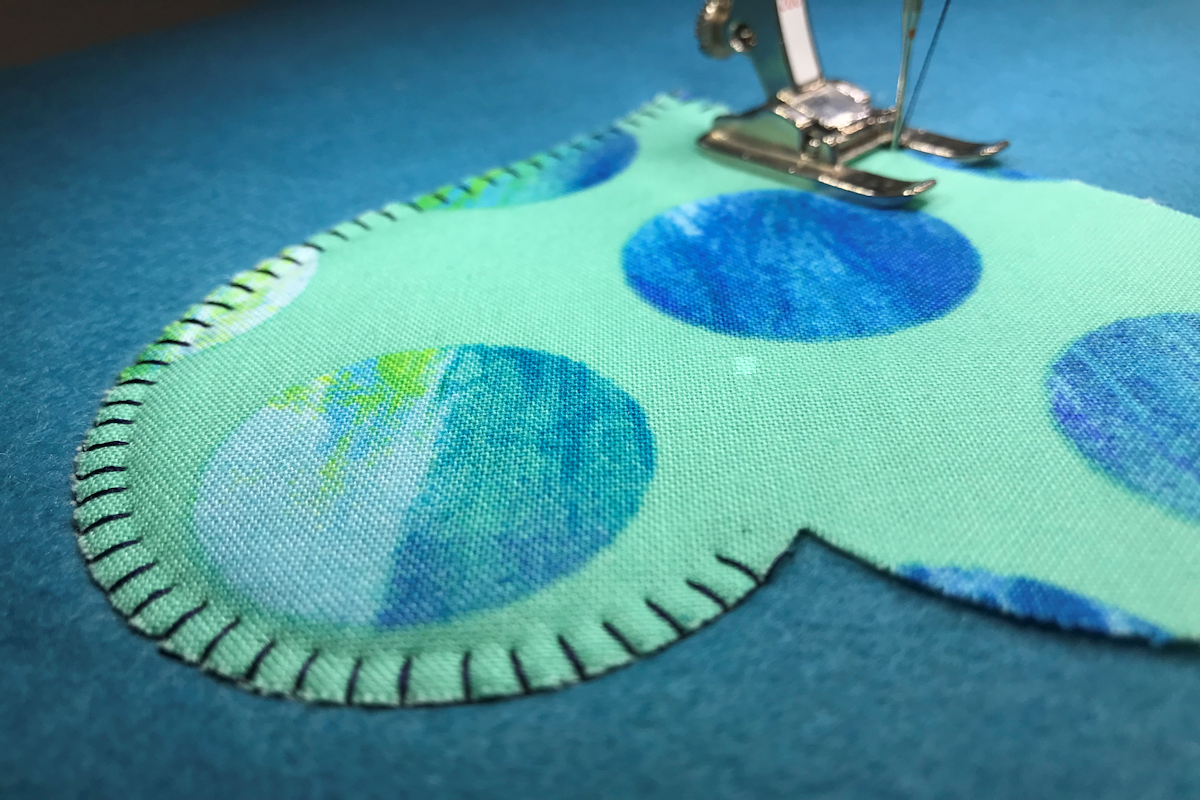
- Use proper stabilization. Consider the stitches selected to decide if stabilizer is needed. Satin-type stitches often require more support. Lightweight tearaway stabilizer or a spray starch alternative are good starting points. The fabric should not buckle within the stitch, but remain flat.
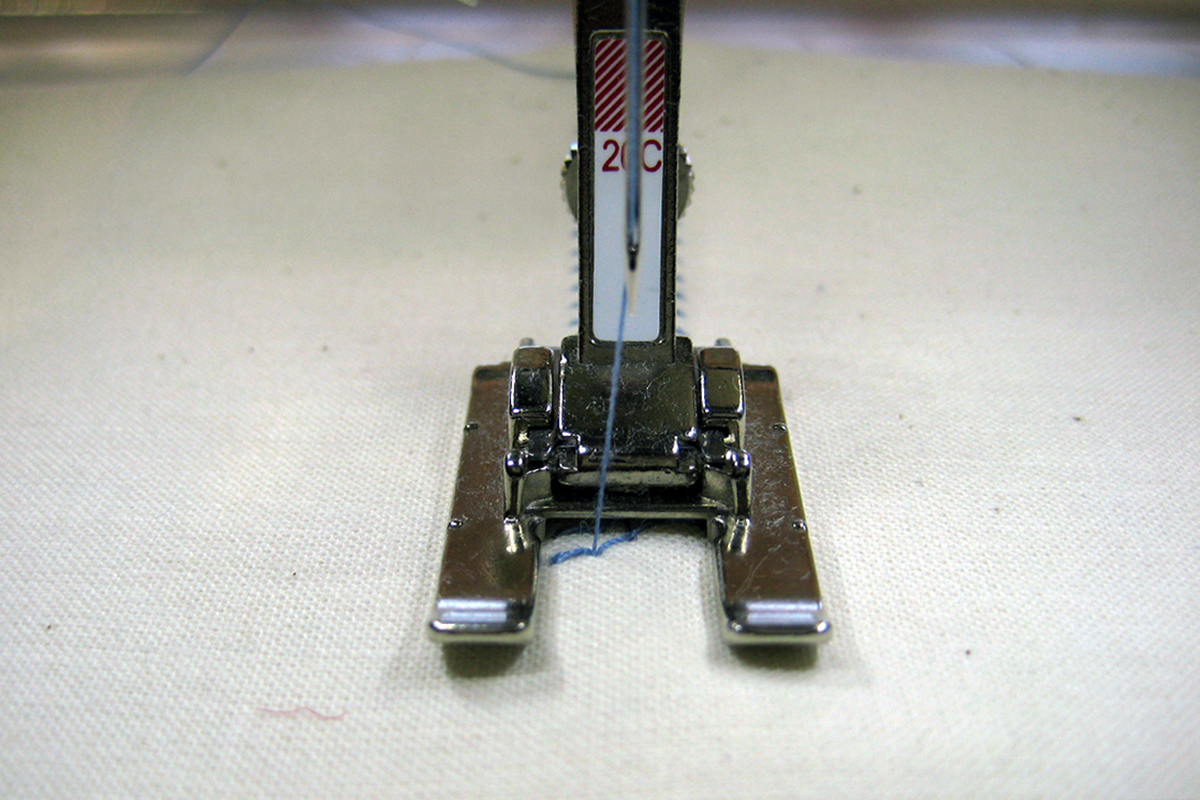
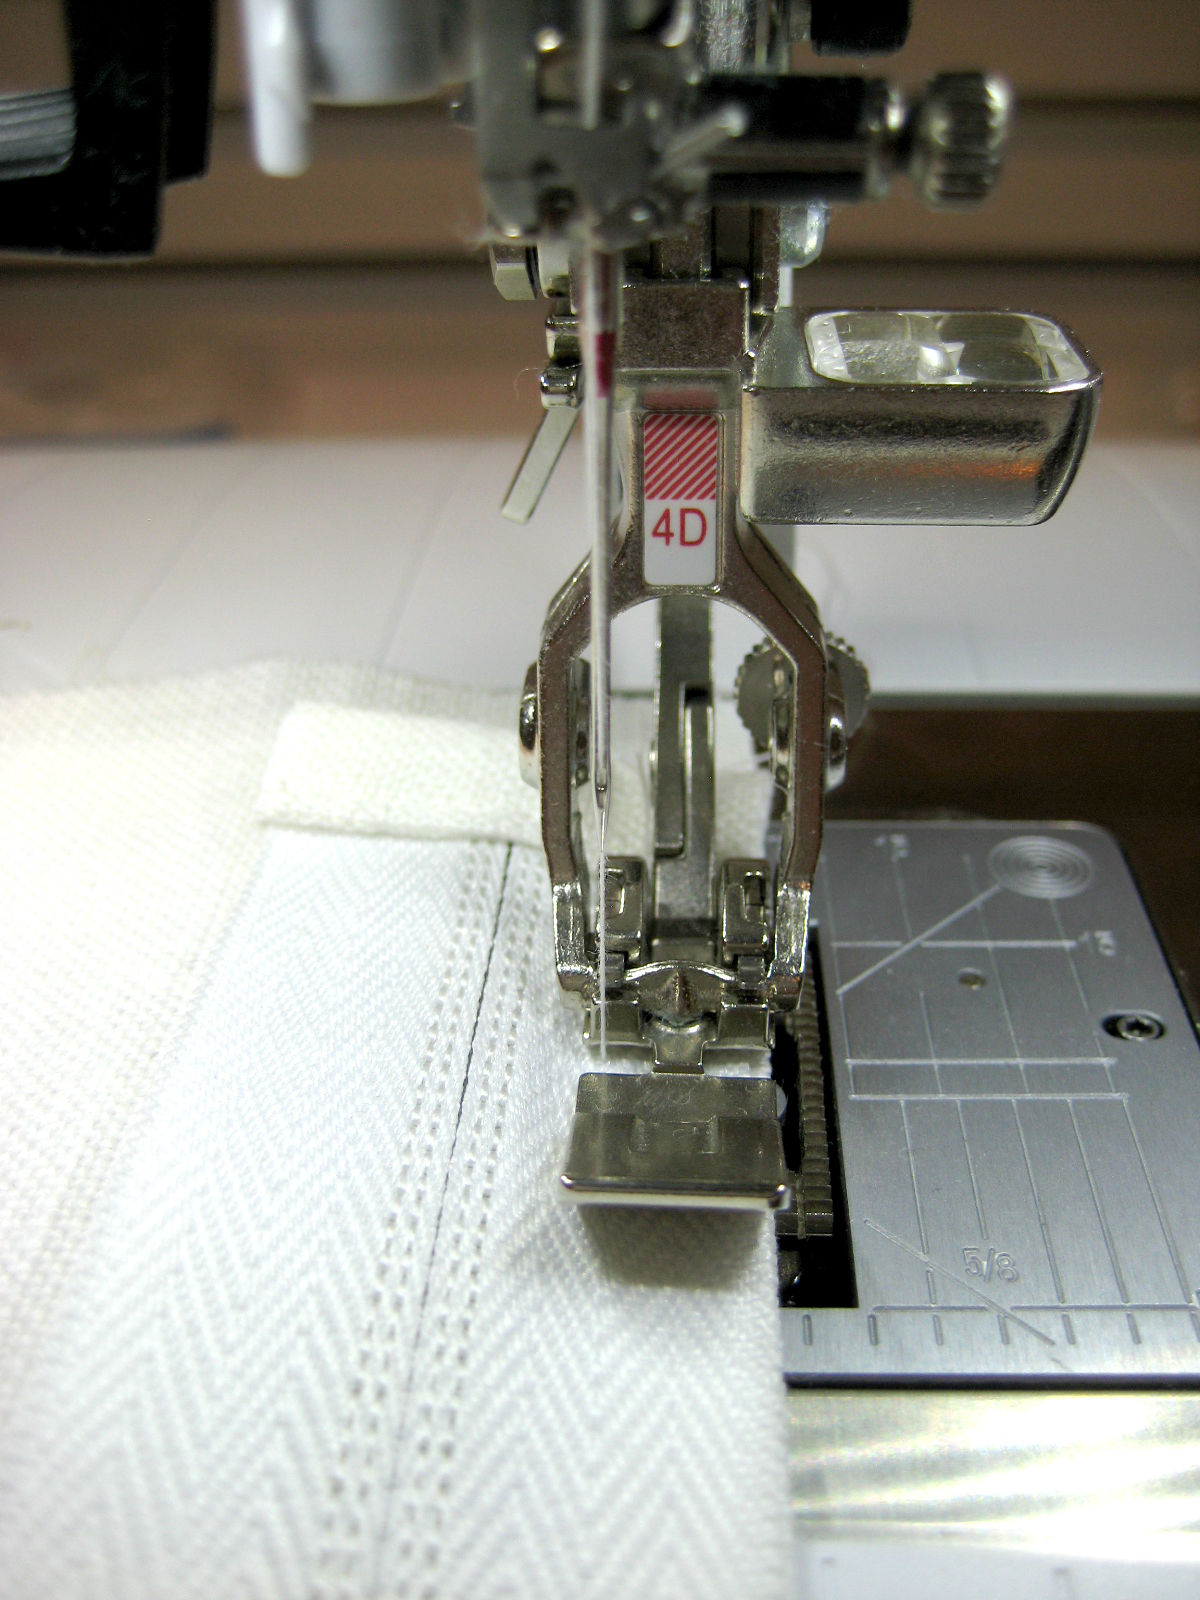
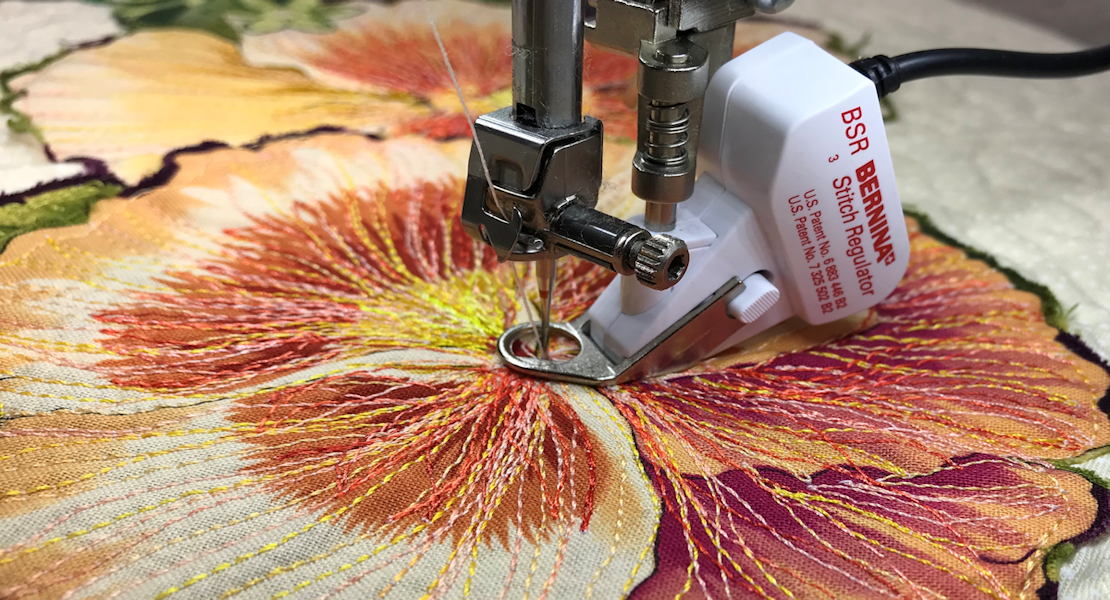
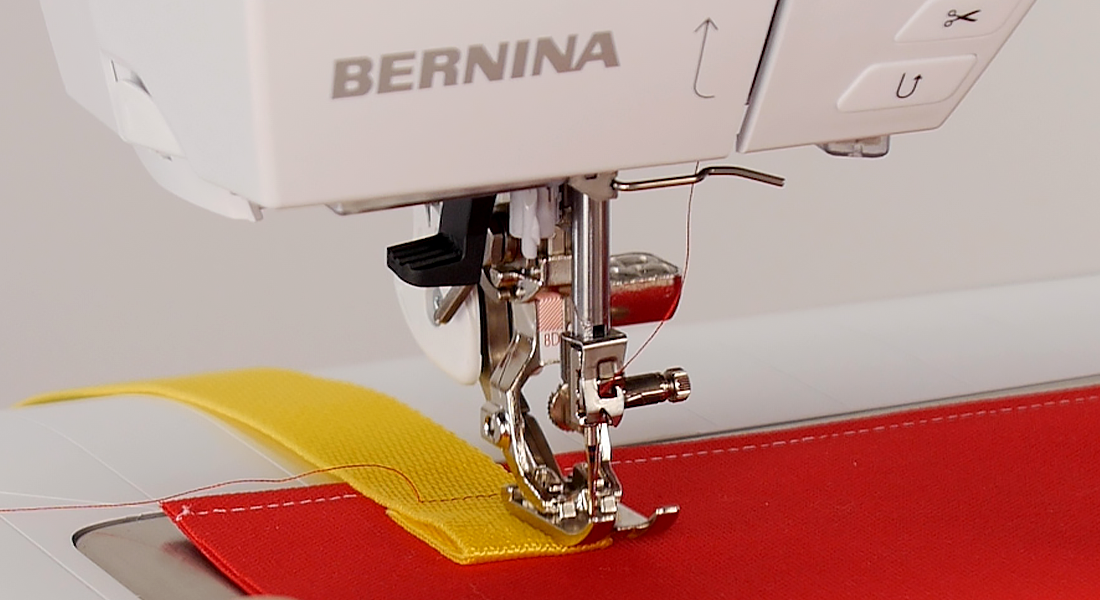
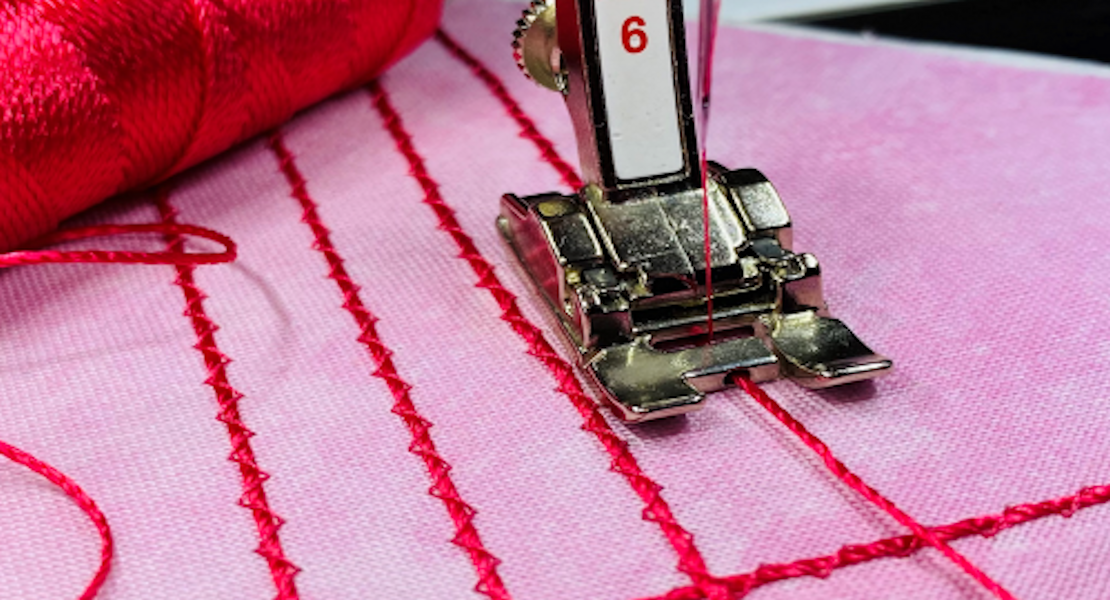
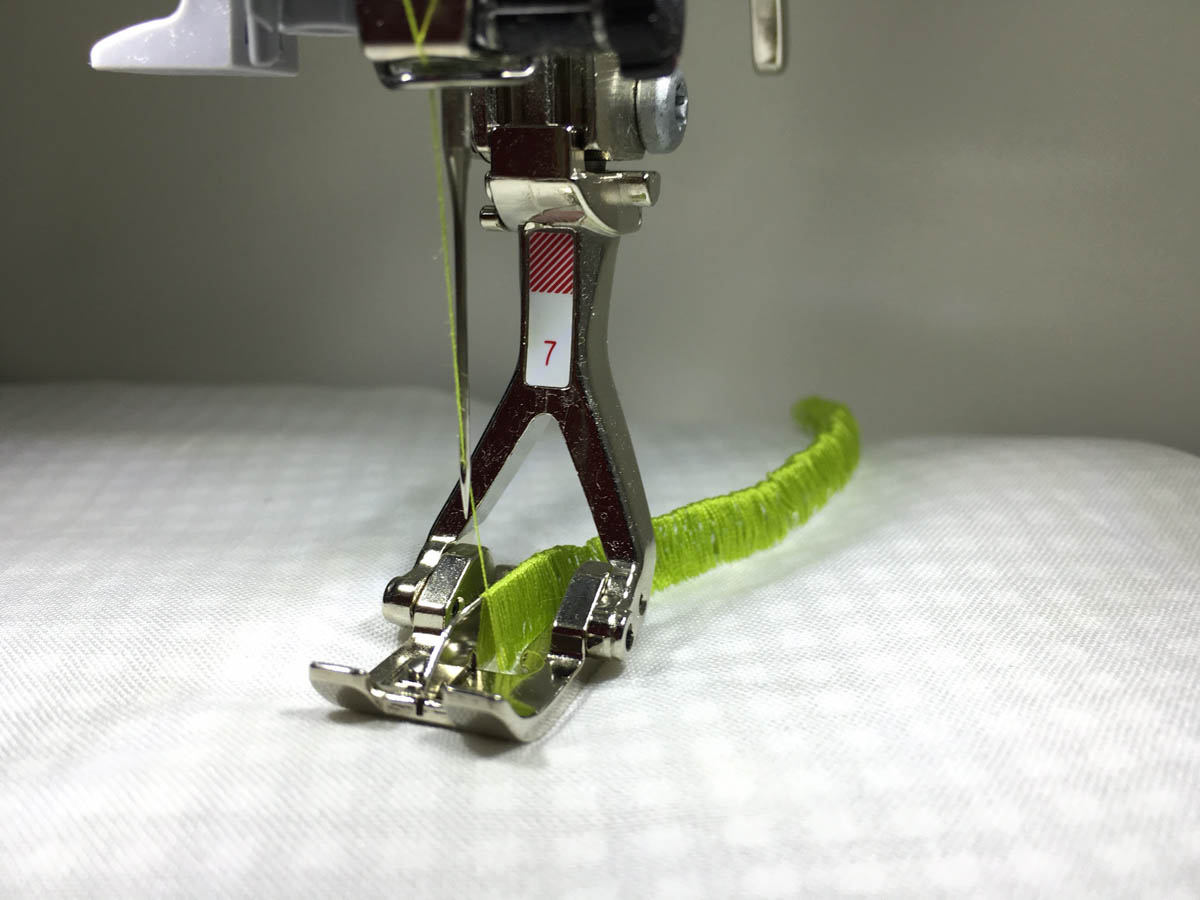
- Select the appropriate foot. If stitching satin-like decorative stitches, select a presser foot with a tunnel on the bottom of the sole so stitches can pass easily under the foot without distortion. The Open Embroidery Foot #20/20C/20D or Clear Embroidery Foot #39/39C are feet with this type of sole. Feet #39/39C are clear feet offering the advantage of seeing through the sole, which increases visibility for desired placement of stitches, as well as marked guides for lining up start points of stitches. Foot #20 offers a completely open area in front of the needle.
- Sew at a consistent moderate speed. Set the Slide Speed Control to limit speed. This is especially beneficial when incorporating Sideways Motion Stitches into stitch recipes to ensure the feed dog has time to move the fabric as the stitch is formed.
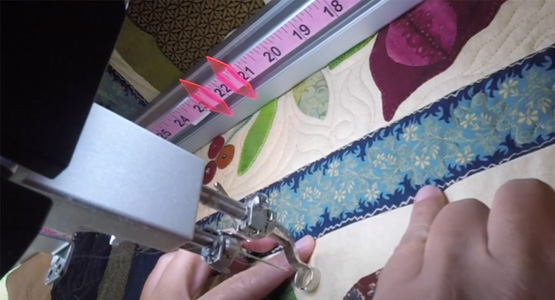
- Draw Guidelines. To maintain straight rows, plan some type of guideline. Draw rows or use the edge of the foot as a guide. For Sideways Motion Stitches, draw several guidelines ½” apart and for about 2” wide depending on the width of the stitch.
Creating a Stitch Recipe
With so many stitches on the machine, how can you decide which ones to use? A great tip from award-winning quilter, Pat Holly, is to make sample stitchouts on heavy muslin, about the size of a business card. This will give you ‘playing cards’ of stitches to pair up and audition.
Keep them handy in a business card sheet protector page and make a note of the stitch numbers for future reference.

The realistic view of the stitch on the color screen also helps. Still can’t find just the right stitch? Use Stitch Designer (a feature found on the BERNINA 880 PLUS and BERNINA 790 PLUS) to edit existing stitches, create your own or turn a stitch into a triple stitch. Click HERE to download an eBook about the Stitch Designer. If you would prefer to watch a Tool Tip Video, click HERE.
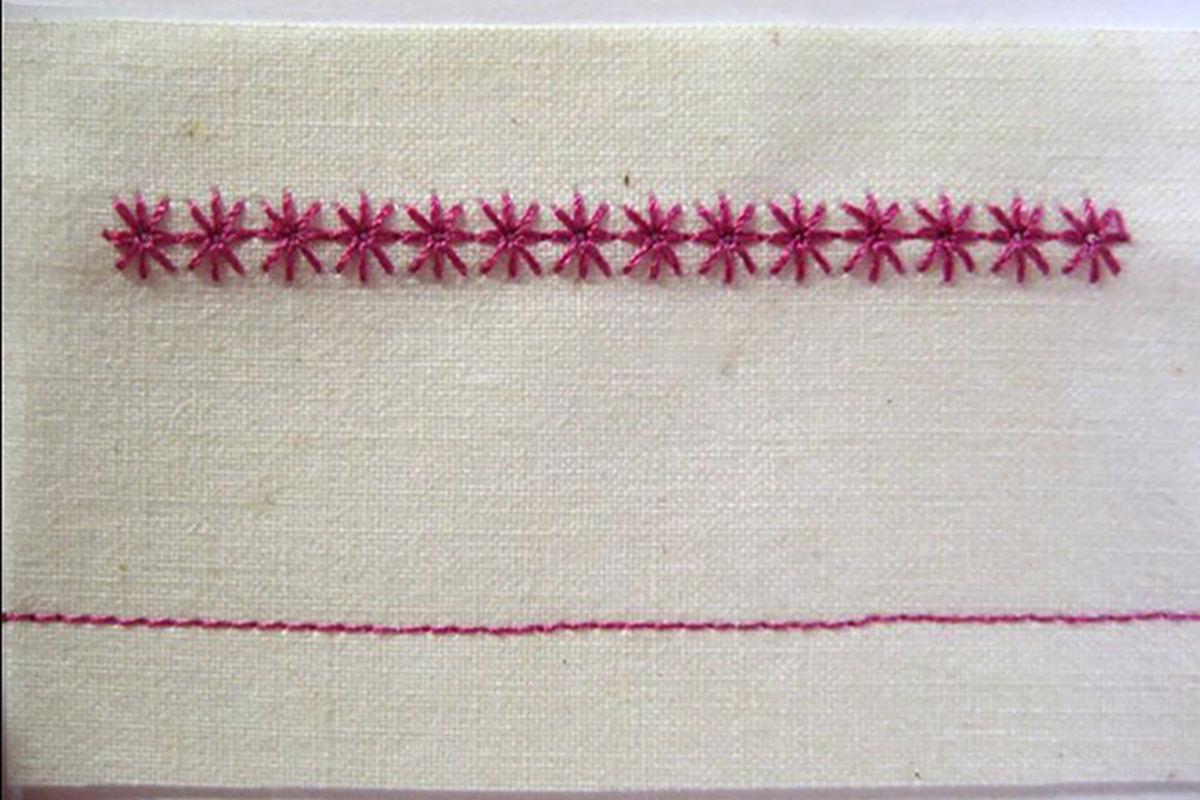
Sewn Stitch Recipe
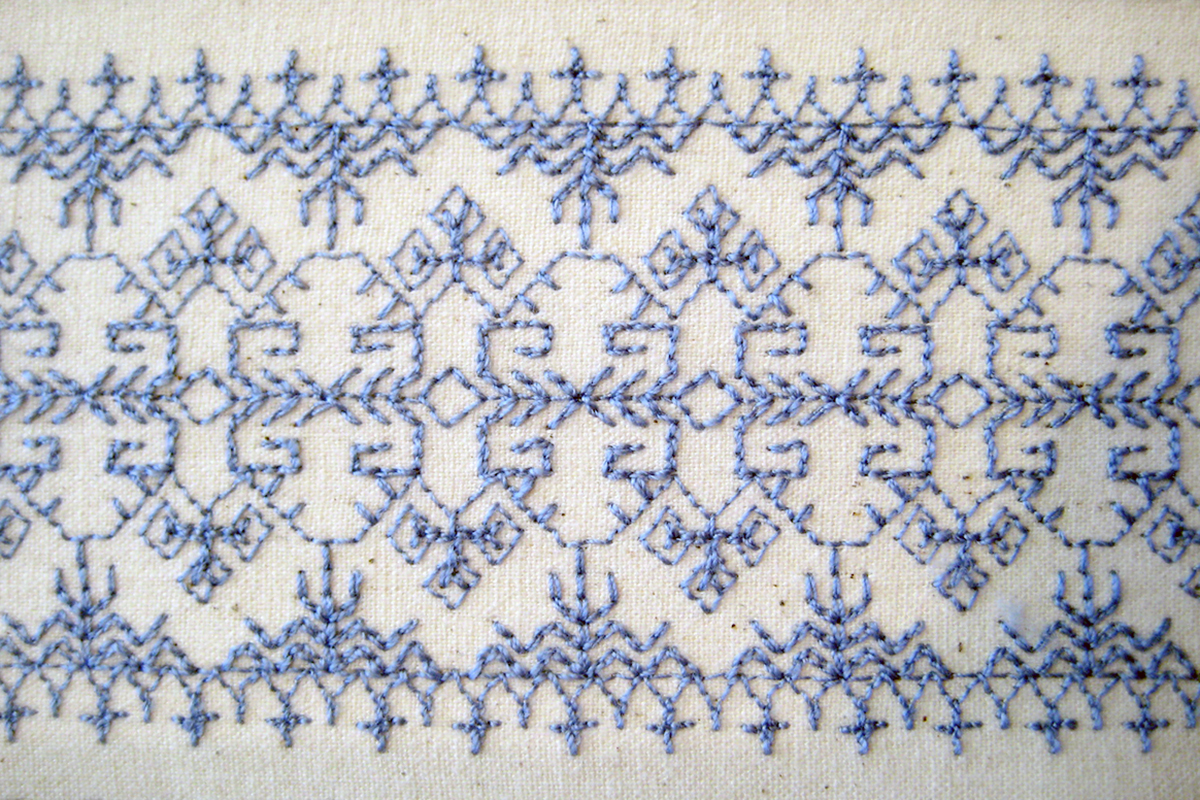
This recipe uses Stitches 1395, 1720 and 1717.
To create the recipe, begin by defining the center stitch location—either draw this line, press a line or use the Slide-on-Table Seam Guide.
Sew Stitch 1395 with Open Embroidery Foot #20C; this offers great visibility.
Change to Foot #39C. Align the edge of the foot to the straight line in Stitch 1395. Sew stitch 1720 along one side of the first stitch.
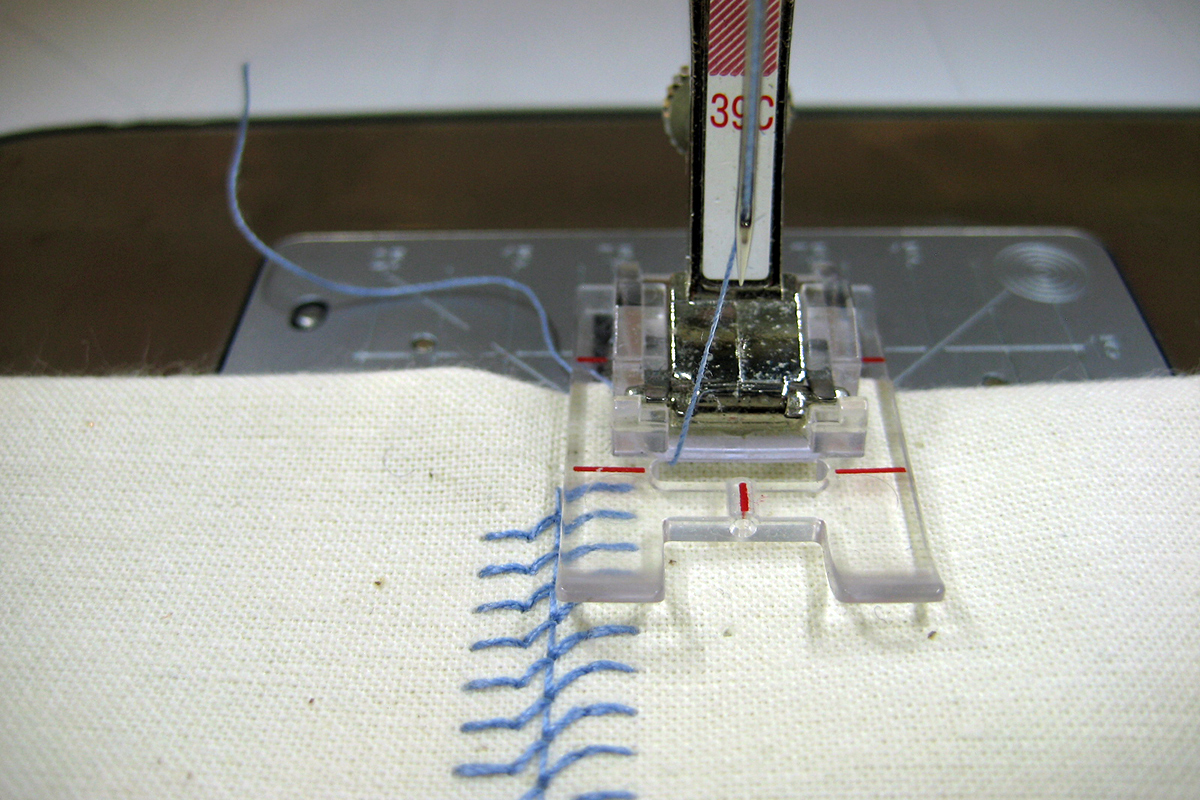
Turn the fabric to add Stitch 1720 to the other side of Stitch 1395. Select Pattern Begin. The red markings on Foot #39C to the right and left of the needle indicate the starting point of the stitch. Reference the start position of Stitch 1720 to establish the start point for the next row of stitching. Sew the stitch.
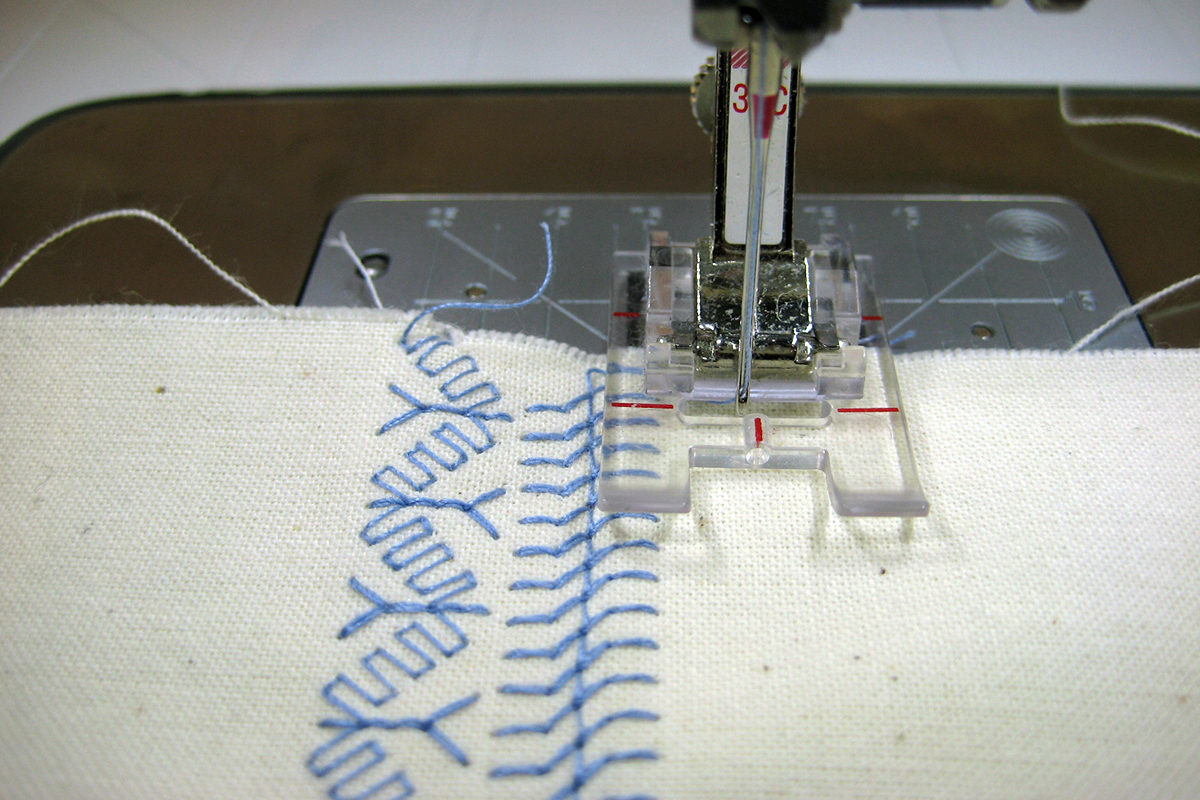
Stitch 1395 is added to both sides. Select the foot you prefer. Access History (available on the B 880 PLUS, 790 PLUS) to quickly find the repeated stitch. If alterations were made, History records and stores alterations to the stitch even after the machine has been turned off.
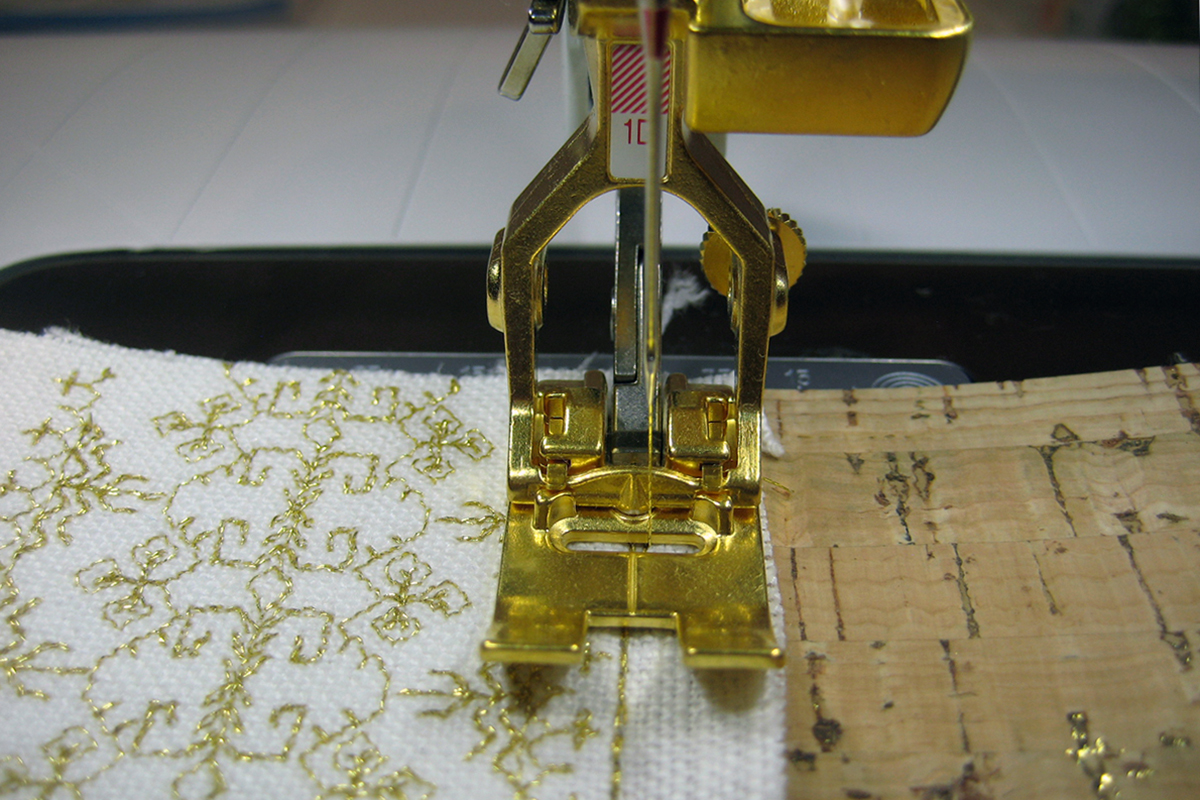
Add Stitch 1717 to one side only. This stitch will emulate fringe.
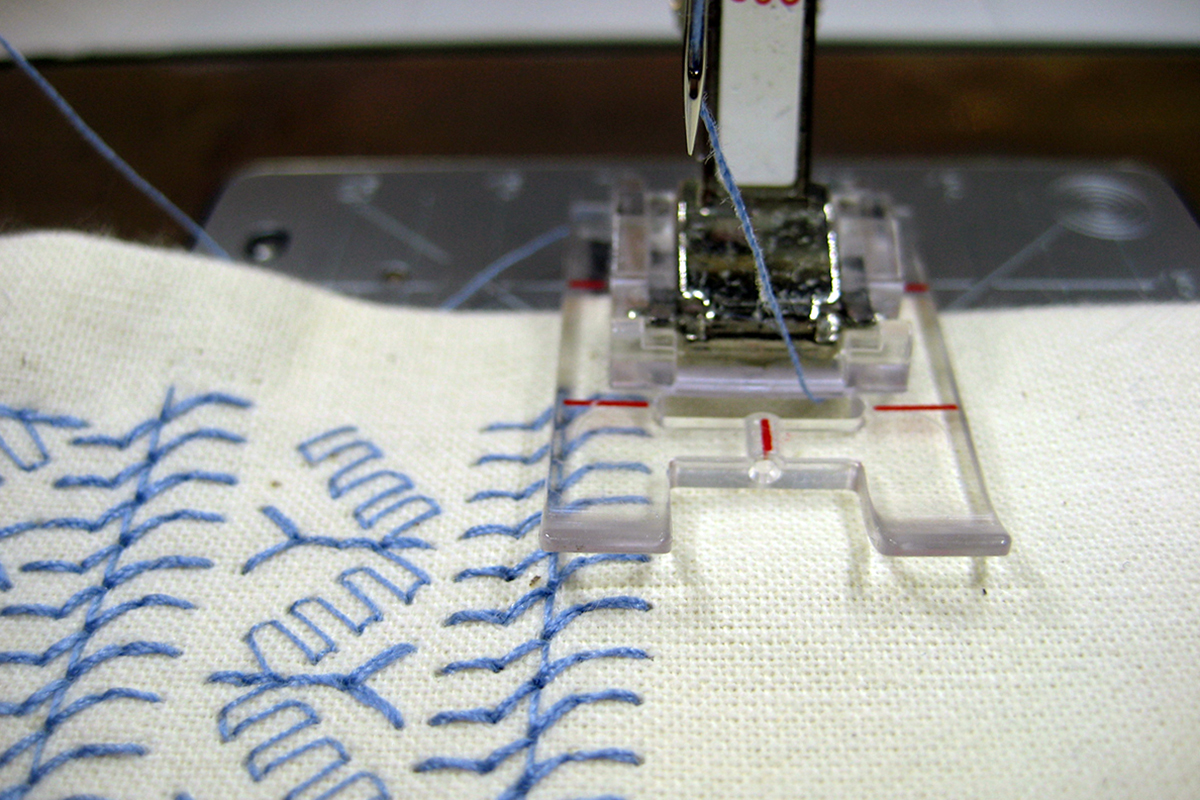
Tips:
As stitches are added, the fabric is turned and stitches are sewn in the default orientation and not mirror-imaged.
When starting a second row of the same stitch, select Pattern Begin.
On the touch screen, a white dot on the stitch pattern indicates where the needle is in the pattern.
Use pattern length to determine how long a stitch will be. It can be elongated with the stitch length button or with the Pattern Extend function. This can help with alignment of the patterns.
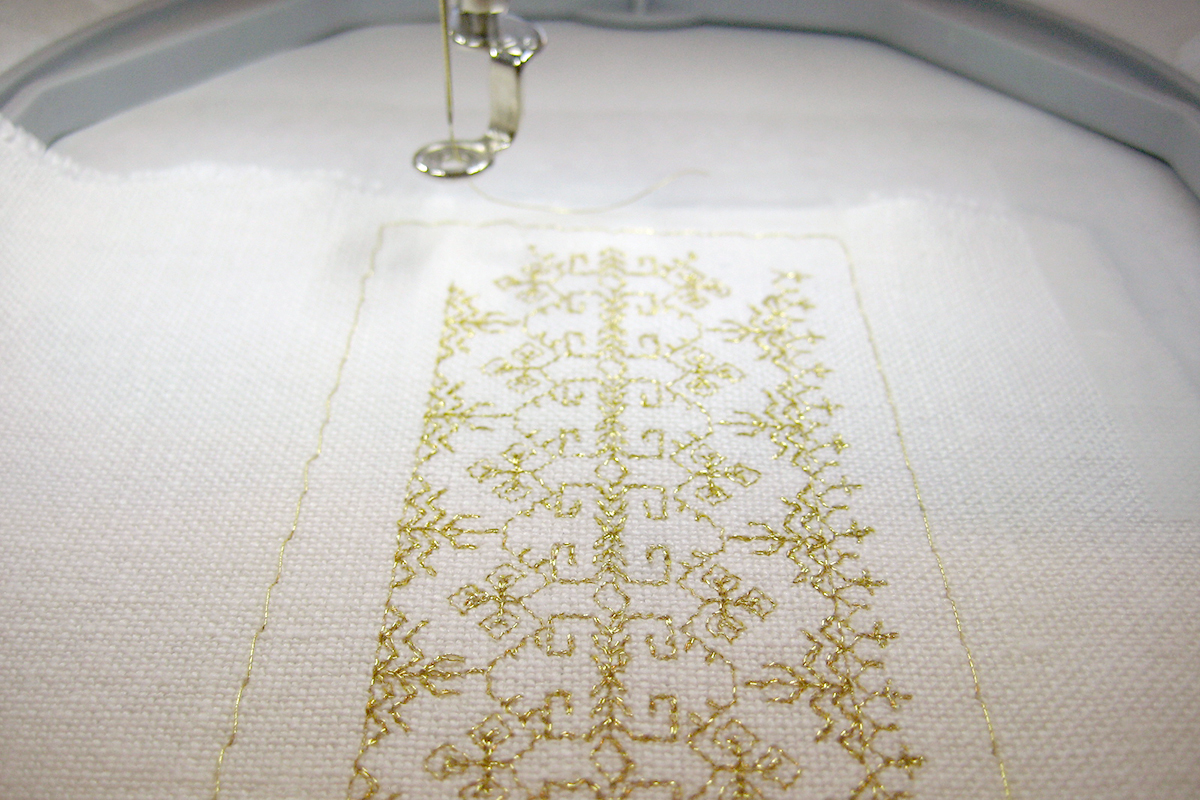
Embroidering a Stitch Recipe
Embroidering stitches may improve the result – there is no need for fabric guiding and often there is no tunneling of fabric. For very long lengths of stitch bands, engage the Endless Embroidery function with stitched reference marks for easy matchups going from hoop to hoop.
Creating a Stitch Recipe using BERNINA Embroidery Software
Machine stitches can be saved to a USB stick, imported into the embroidery software and arranged into precise stitch recipes that are embroidered. Additional stitch options exist in the BERNINA Embroidery Software, such as candlewicking and blackwork stitches. Create stitch recipes using the software to create them perfectly straight, then embroider. Enjoy the added advantage of mixing additional small embroideries within the stitch recipe, too.
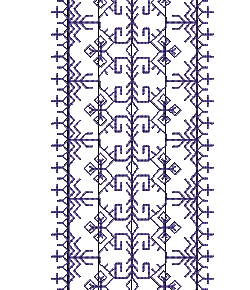
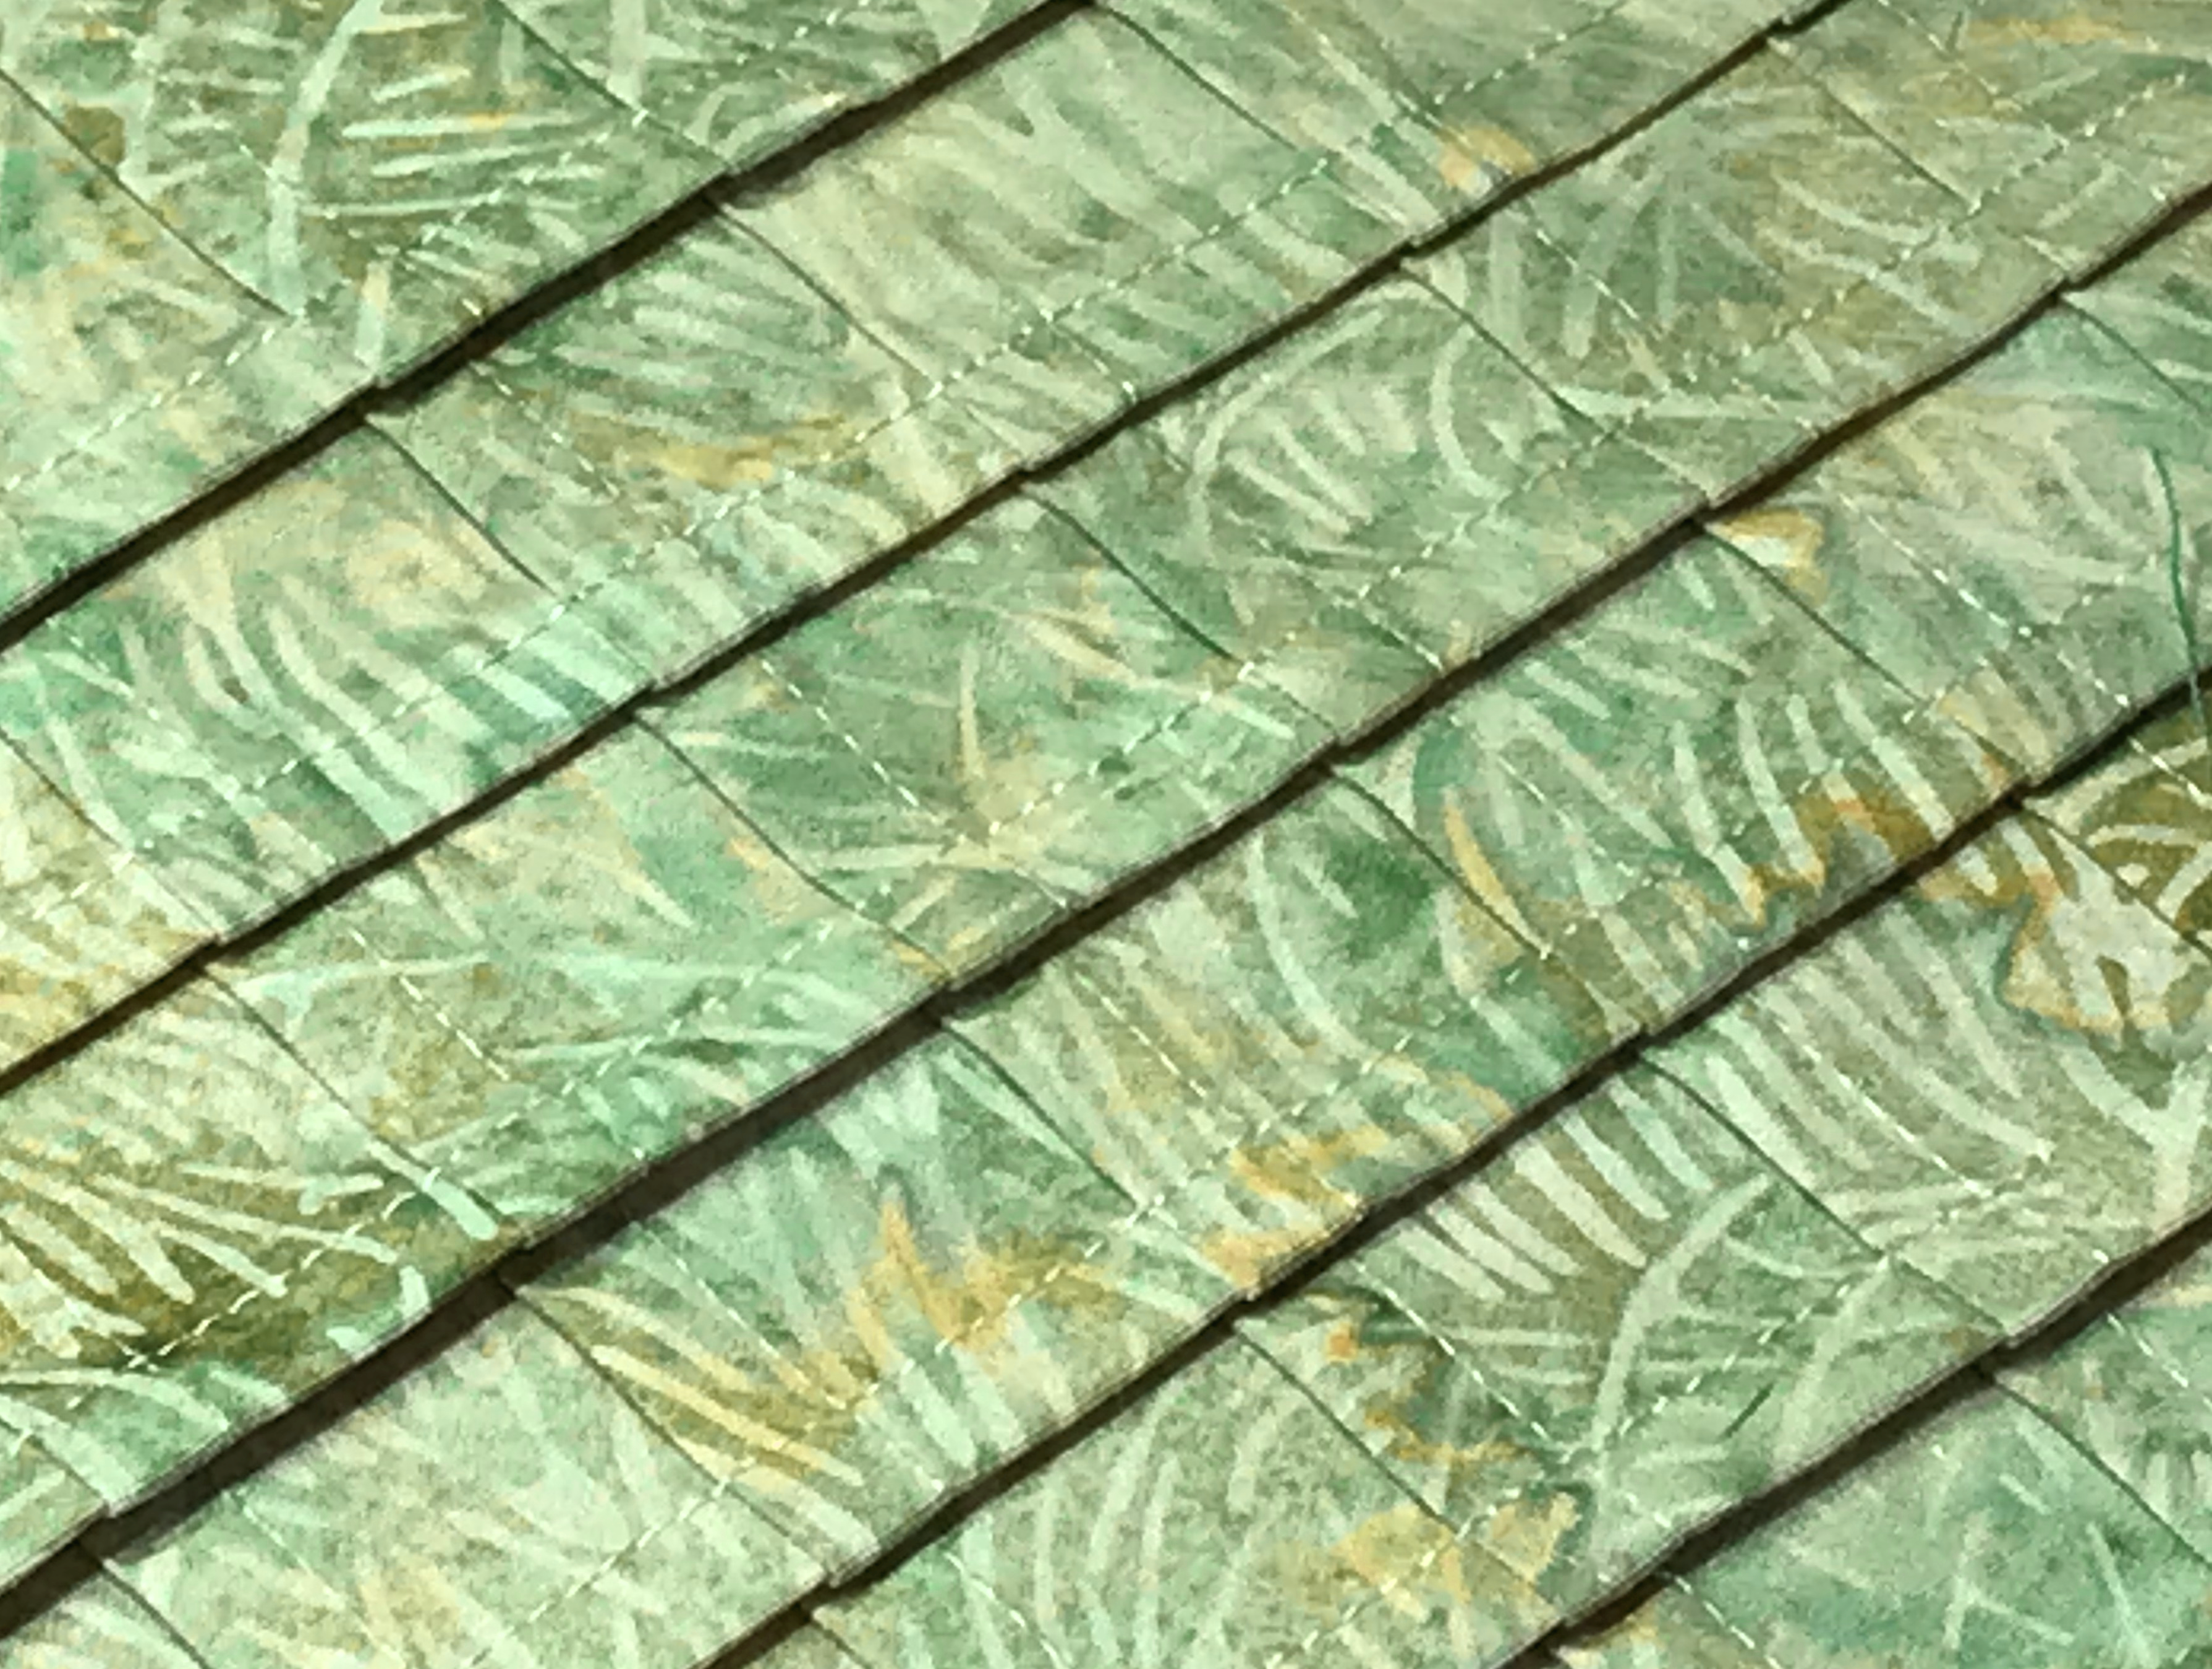
The following stitch recipe uses stitches 1722, 1719, 1716 and 317. It can be sewn or imported into the embroidery software and embroidered.
Alternate method: Importing Stitches into Embroidery Software
Worried about sewing straight or drifting? Let the embroidery software provide perfect results. Save these stitches to the USB: 1722, 1719, 1716 and 317. To save stitches to the USB stick, select the stitch > select Personal Program > Save > USB stick > touch the highlighted stitch. Open the embroidery software and select File > Open Design > and select one of the stitches on the USB. Use the Selection tool to select the stitch. To create a pattern that can be used as a pattern outline, select Settings > Create Pattern. Select Create, and in the New Pattern Set Name, name the pattern and select OK. Give the pattern a name, such as the corresponding stitch number on the machine.

Define the pattern by selecting ‘enter the start point of the reference line’ and then ‘enter the end point of the reference line’.
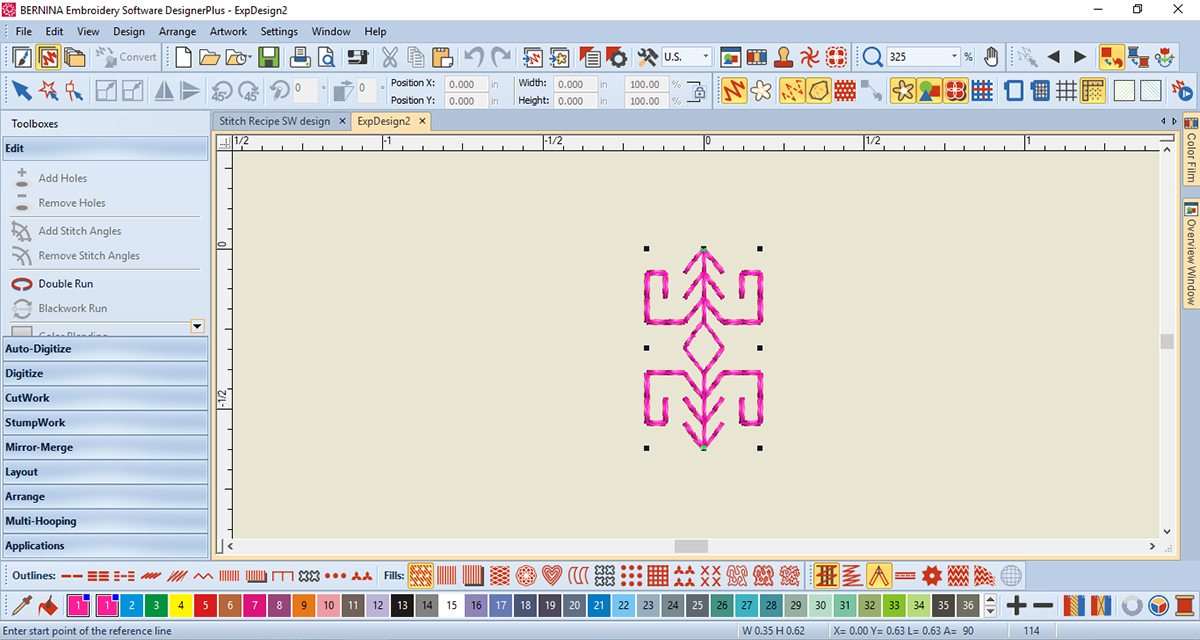
Repeat the process for each of the stitches on the USB.
Draw a line: Digitize > Open Object and select Single Outline. Once the line is drawn, select and define the length in the tool bar, such as 12”. Duplicate the line to make 4 lines.
Select a line, select Object Properties > change the Outline type to Pattern Run > change the Pattern Set to the one created > select stitch 1719. It replaces the single outline. This is the center of the Stitch Recipe.
Select line 2 and apply stitch 1722. Move it close to the line of stitches (1719). Change the unit of measurement to metric from the toolbar. Alter the spacing of any of the patterns by referencing the pattern length measurement from the B 790 PLUS. The pattern length of stitch 1719 is 15.9, so change the pattern length of 1722 to 15.9 for more symmetrical spacing. With the line of 1722 stitches selected, copy, paste and mirror image left/right. Use the arrow keys on the keyboard to move the column of stitches to the opposite side of the center stitch.
Change another line to Stitch 1716 and duplicate so there are 2 columns of this stitch on each side. Repeat with Stitch 317 to finish the recipe.
Save the recipe in the software, but also to the USB stick using File > Machine Write > USB. Back at the machine, set up the B 790 PLUS to embroider the recipe. Stitch a test of the recipe.
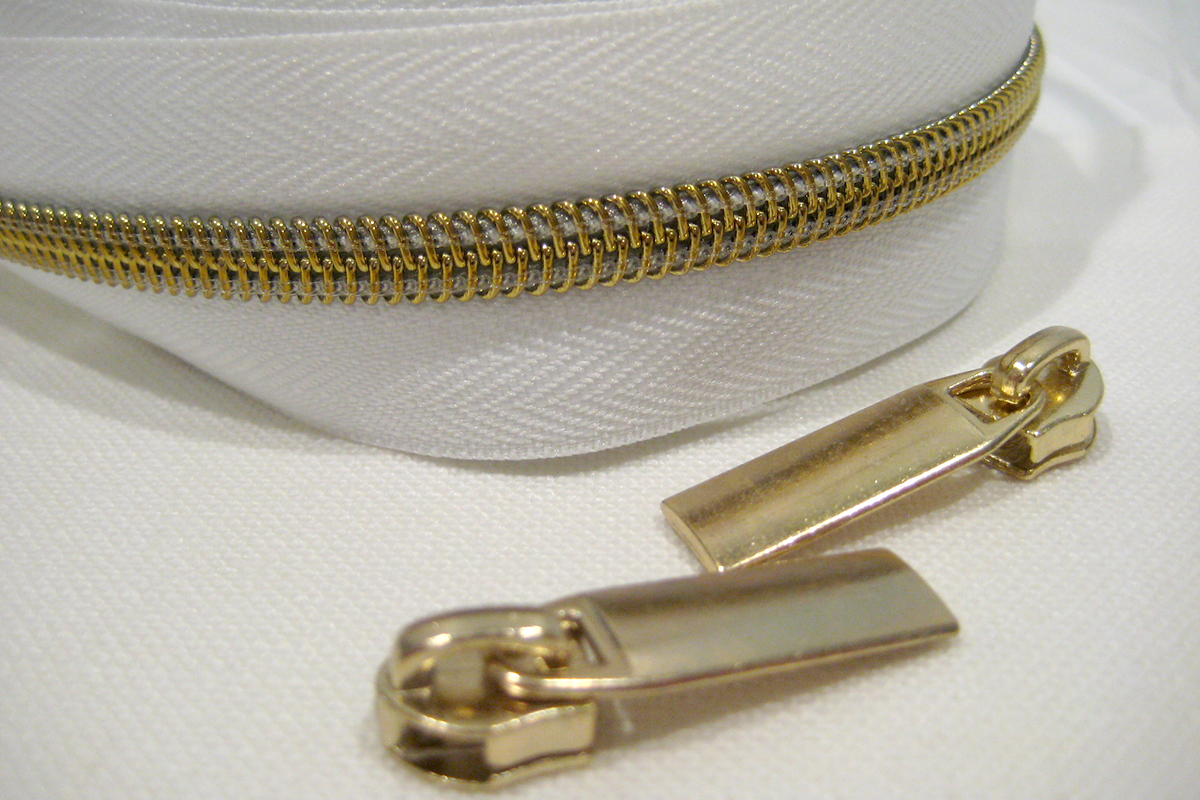
To celebrate BERNINA’s Golden 125th Anniversary, integrate gold accents into your projects. Enjoy adding stitch recipes to your favorite projects, such as this classic zippered pouch. The finished pouch measures approximately 7” x 9”. The zippered bag shown here is made using gold-flecked cork fabric, gold Yenmet embroidery thread, gold ‘you won’t believe it’s not metal’ nylon zipper and white linen.

Embroider or stitch a stitch recipe on the linen. If embroidering, reduce speed slightly and use a ballpoint needle. This will help minimize if not eliminate thread breaks. The stitch recipe I used is approximately 2” wide. It’s always a good practice to cut and embroider a piece larger than needed, then cut to size.
The linen and lining pieces are cut 5” x 10”, and the cork fabric is cut 6 ½” x 10”.
The gold nylon zipper is from Sallie Tomato zippers by the yard. It’s a 3 yard piece with 12 zipper pulls.
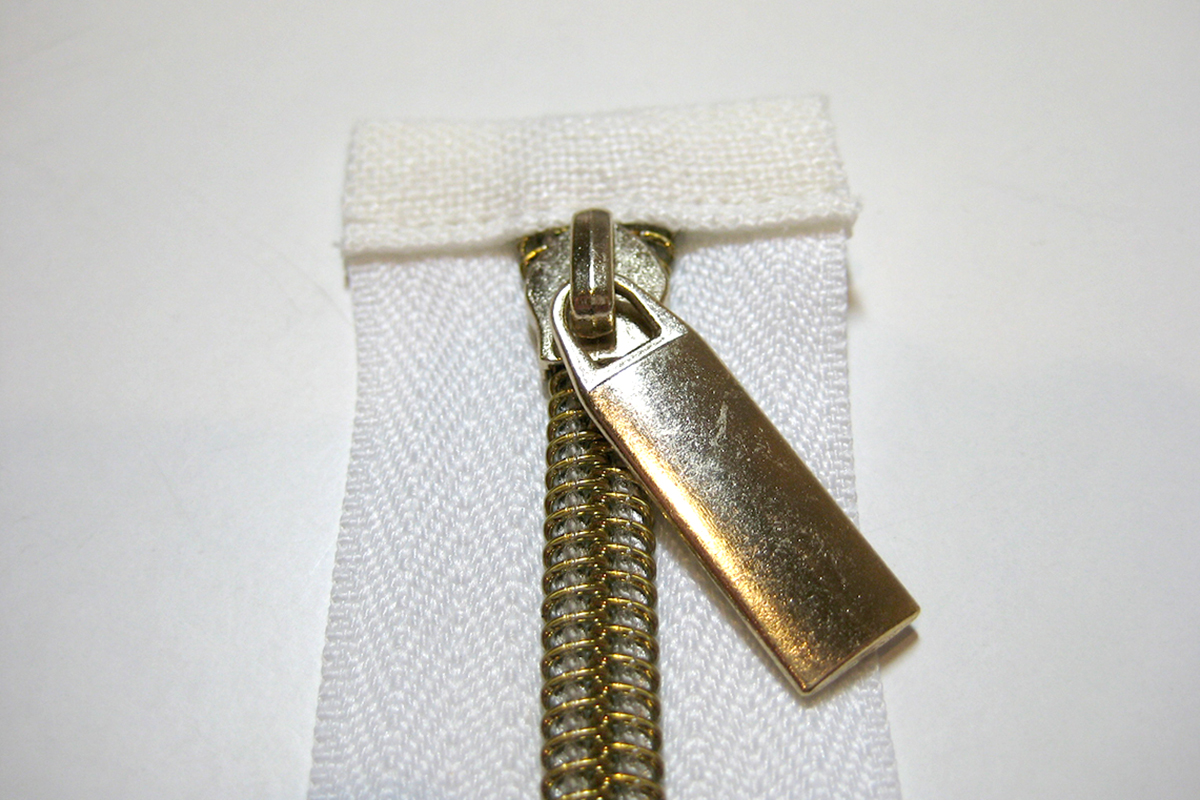
Install the pull on the zipper tape and cut the zipper 9” (or 1” less than the width of the bag). Create a fabric stop at each end of the zipper with double folded linen and stitch in place.
Sew the embroidered linen strip to the cork with the raw edge on top of the cork. Allow ½” of raw edge to hang over the cork – this will be fringed at the end. Pull a thread to establish the fringe border, and stitch to the cork with a Triple Straight Stitch and gold thread.

Install the zipper to the linen and lining pieces for both sides of the bag.
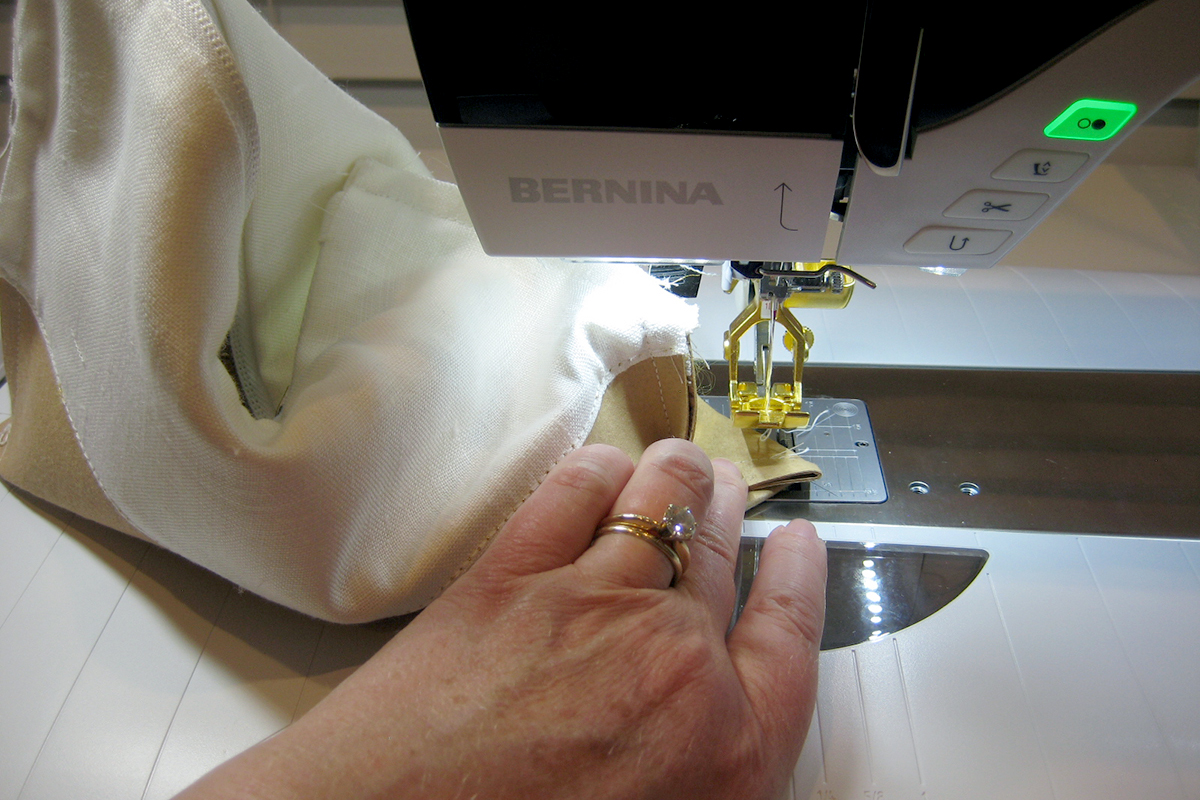
The lower edge of the lining behind the embellished linen can be overlocked/serged and a second row of stitching will secure in place. Align the center mark of the Foot #1D to the first row of stitching and move the needle position 2 to the right.
For the non-embroidered side, serge or overcast the linen and lining wrong sides together. With right sides together, stitch the linen unit to the right side of the cork with a ½ – ⅜ ” seam allowance. Open the zipper and stitch the sides right sides together with the zipper foot, enabling you to stitch next to the covered zipper ends, but not on them. Stitch from top to the bottom on both sides. Finish the side seams.
Box the bottom of the bag, if desired. Today’s larger machines also have more height and make sewing dimensional projects even easier.
Turn right side out through the zipper opening, fringe the linen, and your zippered pouch is ready.
Used Products


What you might also like


9 comments on “BERNINA Stitch Recipes—Then & Now”
-
-
Can these be combined on the embroidery side of the new 800 series machines? Can you include those instructions?
-
Thanks so much for your interest in this project and technique. The stitches used in this project are unique the B 790 PLUS, but there are many others that would work and create a similar look using the B 880 PLUS. To do this on the B 880 PLUS in embroidery (without software), the stitches would need to be opened individually, apply the Endless Embroidery function and saved. Combine all the saved stitch rows on screen to create the embroidered band and place on any project. If stitching only one hooping, deactivate the reference marks in Endless Embroidery. Hope you have fun!
-
-
-
Thank you, Susan…as always, your in-depth information is so much appreciated. I purchased my first Bernina 830 Record at the State Fair of Texas in September 1971, what a fantastic machine. I’ve purchased every top-of-the-line Bernina since then, except two, and am now really enjoying my B880 PLUS upgrade. A lifetime of Bernina machines–WOW!!!
-
Brilliant article. Thank you. More on stitch designer please and combining the latest V8 software with the 790 Plus. Keep them coming !!!!!
-
I’ve just completed this exercise using the V8 software as described. Wonderful. I made the mistake of creating a Pattern Run/Pattern set folder which I now cannot delete. How do I do that? Can’t find where it’s located in the filing system or library.
-
The folder has to be deleted by going to C: Program Files (X86)> BERNINA> B Embroidery Software 8> USERLETW. Find the named file folder and right click and select Delete. This will delete the entire contents of the folder.
To delete only a stitch in the folder, go to Digitize> Pattern Stamps, then navigate to the custom folder created. Select the stitch to delete, and press Delete at the bottom of the dialog box.
Thanks for your interest in this project.
Susan
-
-
Finally finished my purse! The pattern run came out great and posted a picture on my facebook page!
-
I have the 830 Record. I absolute love that machine. Unfortunately, it’s in storage right now 700 miles away. I bought it in 1974. Thanks for the great article. I’m going to have to make some combinations of my own now.
Leave a Reply
You must be logged in to post a comment.

Great article. I’m definitely interested in seeing more articles about stitch recipies and using fancy stitches on our projects.