Drunkard’s Path Block Basics
Hi, it’s Lee from Freshly Pieced, and I’m back with another piecing basics tutorial—this time we’re going to be tackling curved sewing in a Drunkard’s Path block!
If you’ve never tried curved piecing before, it may seem intimidating at first, but all it really takes is a few tips and a little practice. I hope you’ll give it a shot with me right now!
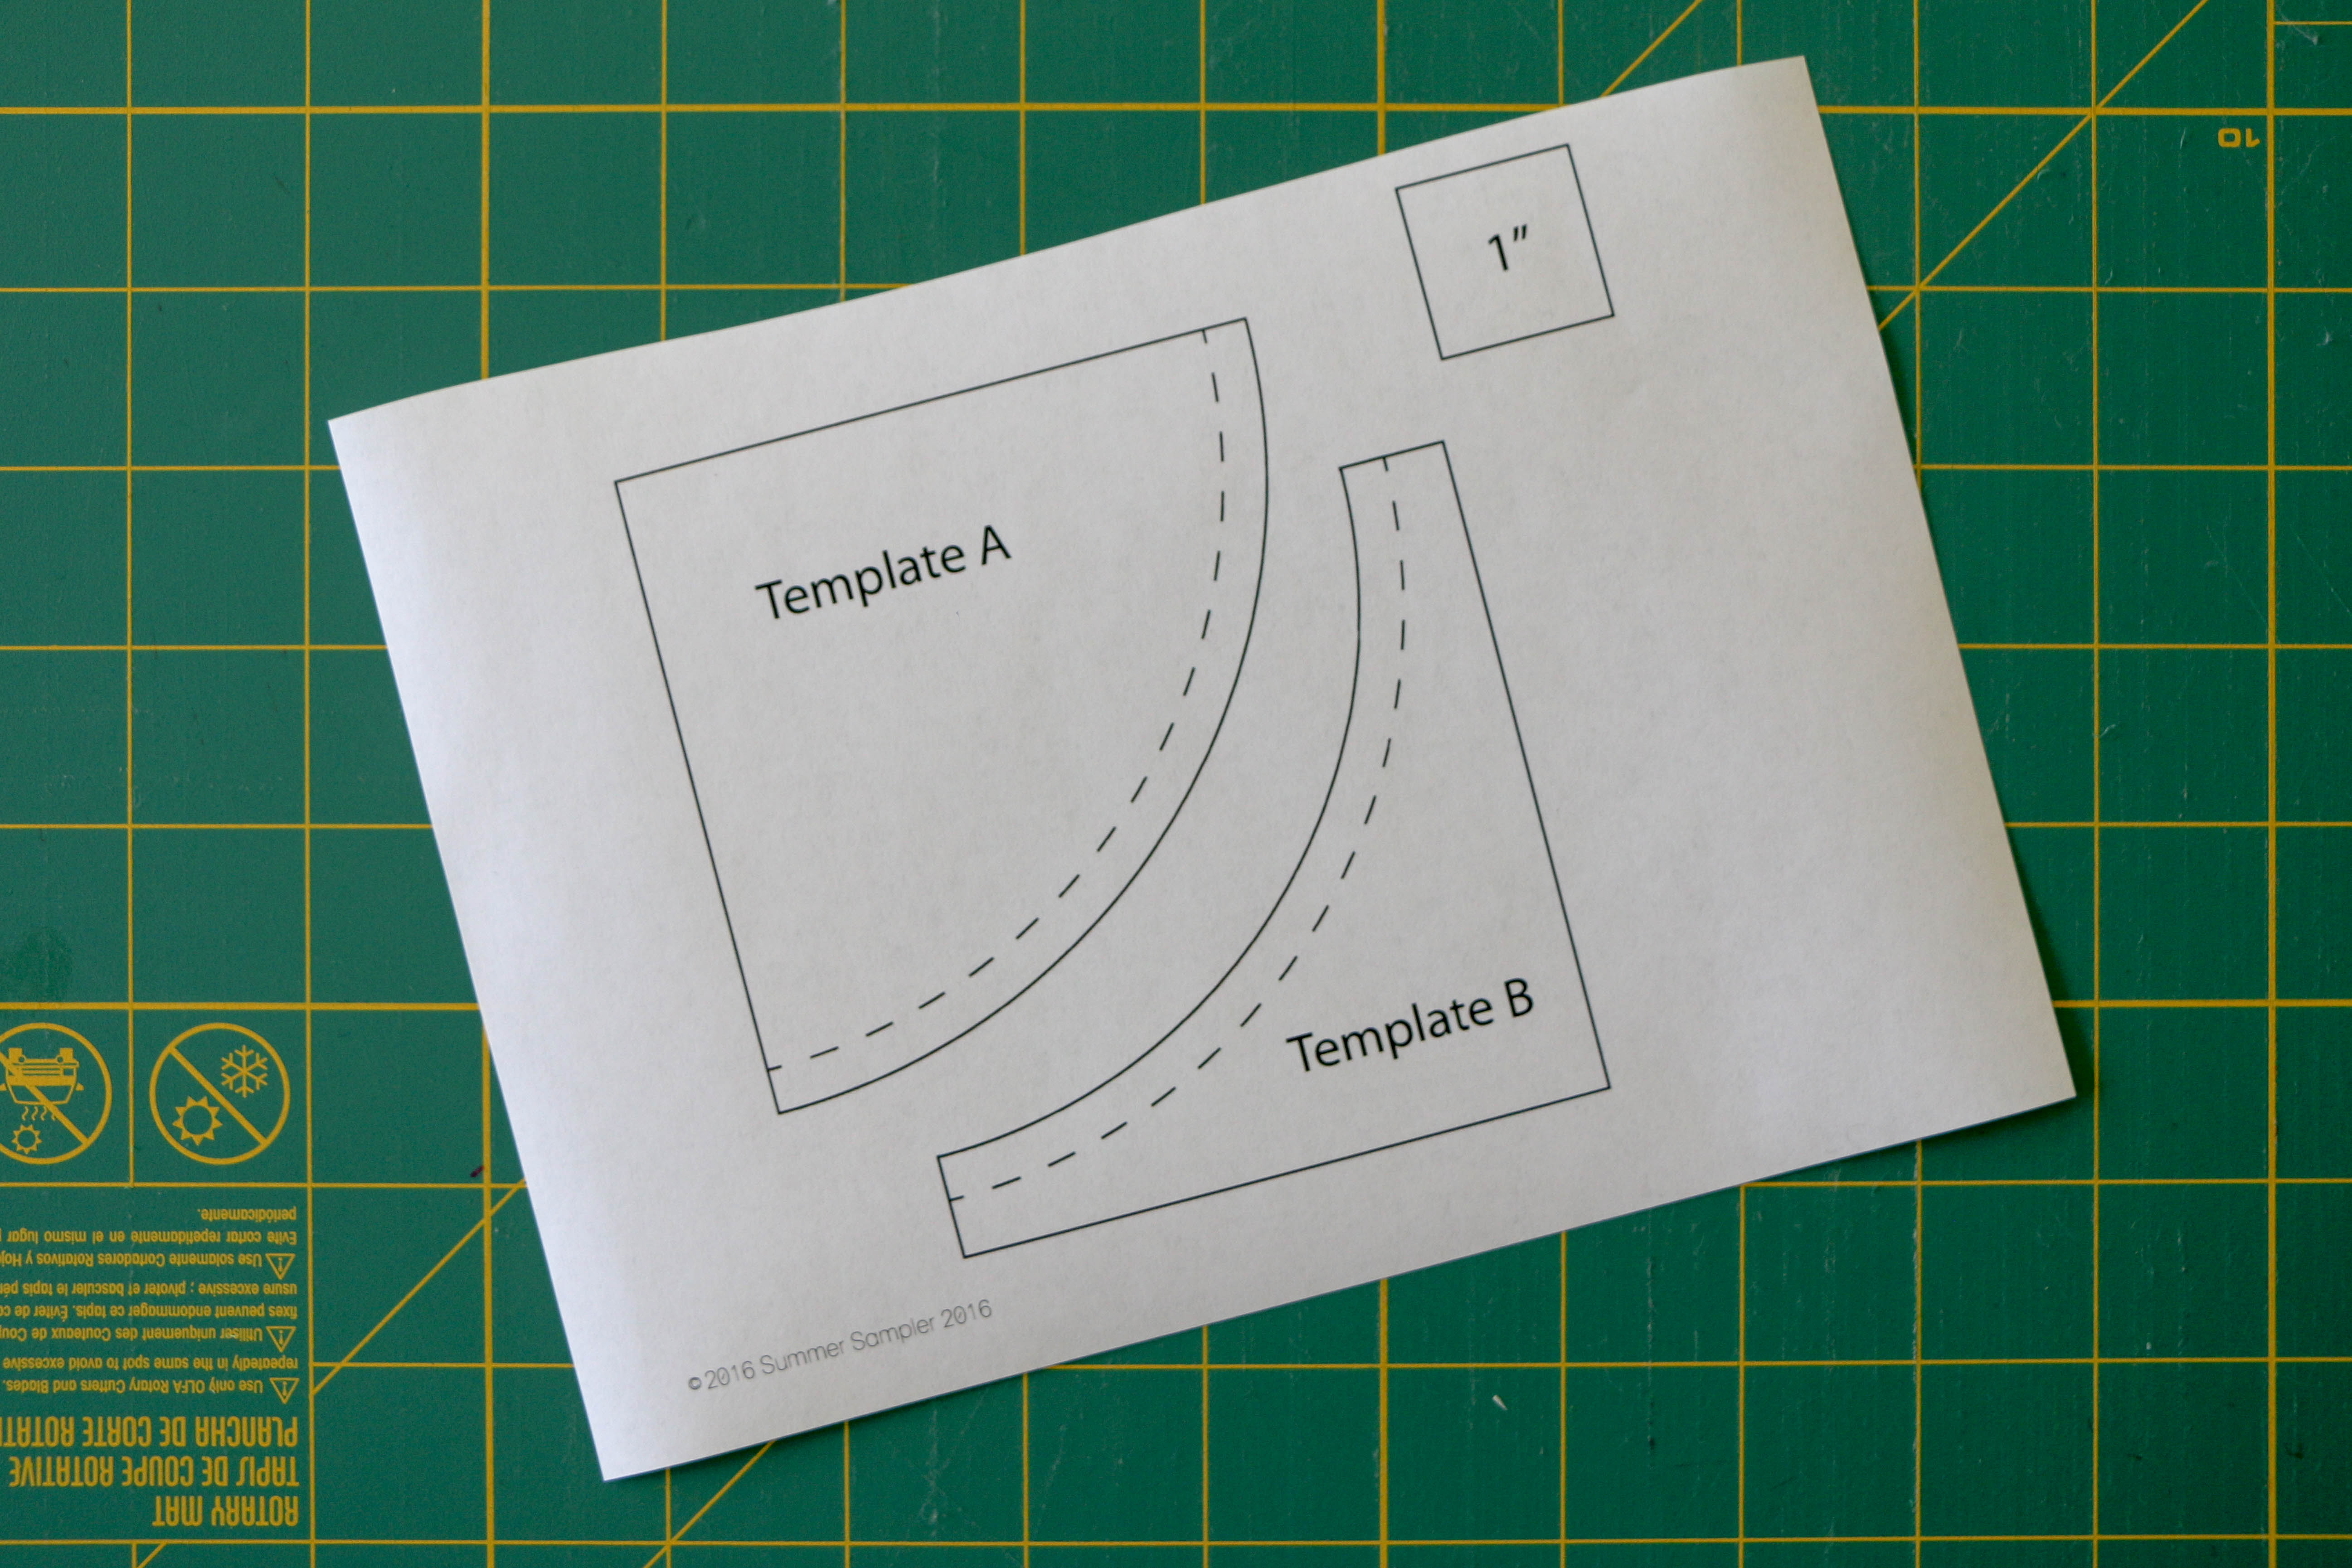
The first thing you need for any curved piecing is a template. I’ve got a PDF Drunkards Path Template that you can download right here, or you can buy plastic Drunkard’s Path templates such as this one.
If you’re using my PDF to make your own templates, here’s how I do it:
- Print out the PDF, making sure to print it at ACTUAL SIZE (i.e., do not click “Fit to page” in your print dialogue window). Printing at actual size is very important, so that your blocks will end up being the correct size! My template comes with a 1″ reference box—use your ruler to check that the 1″ box printed at exactly 1″ before proceeding.
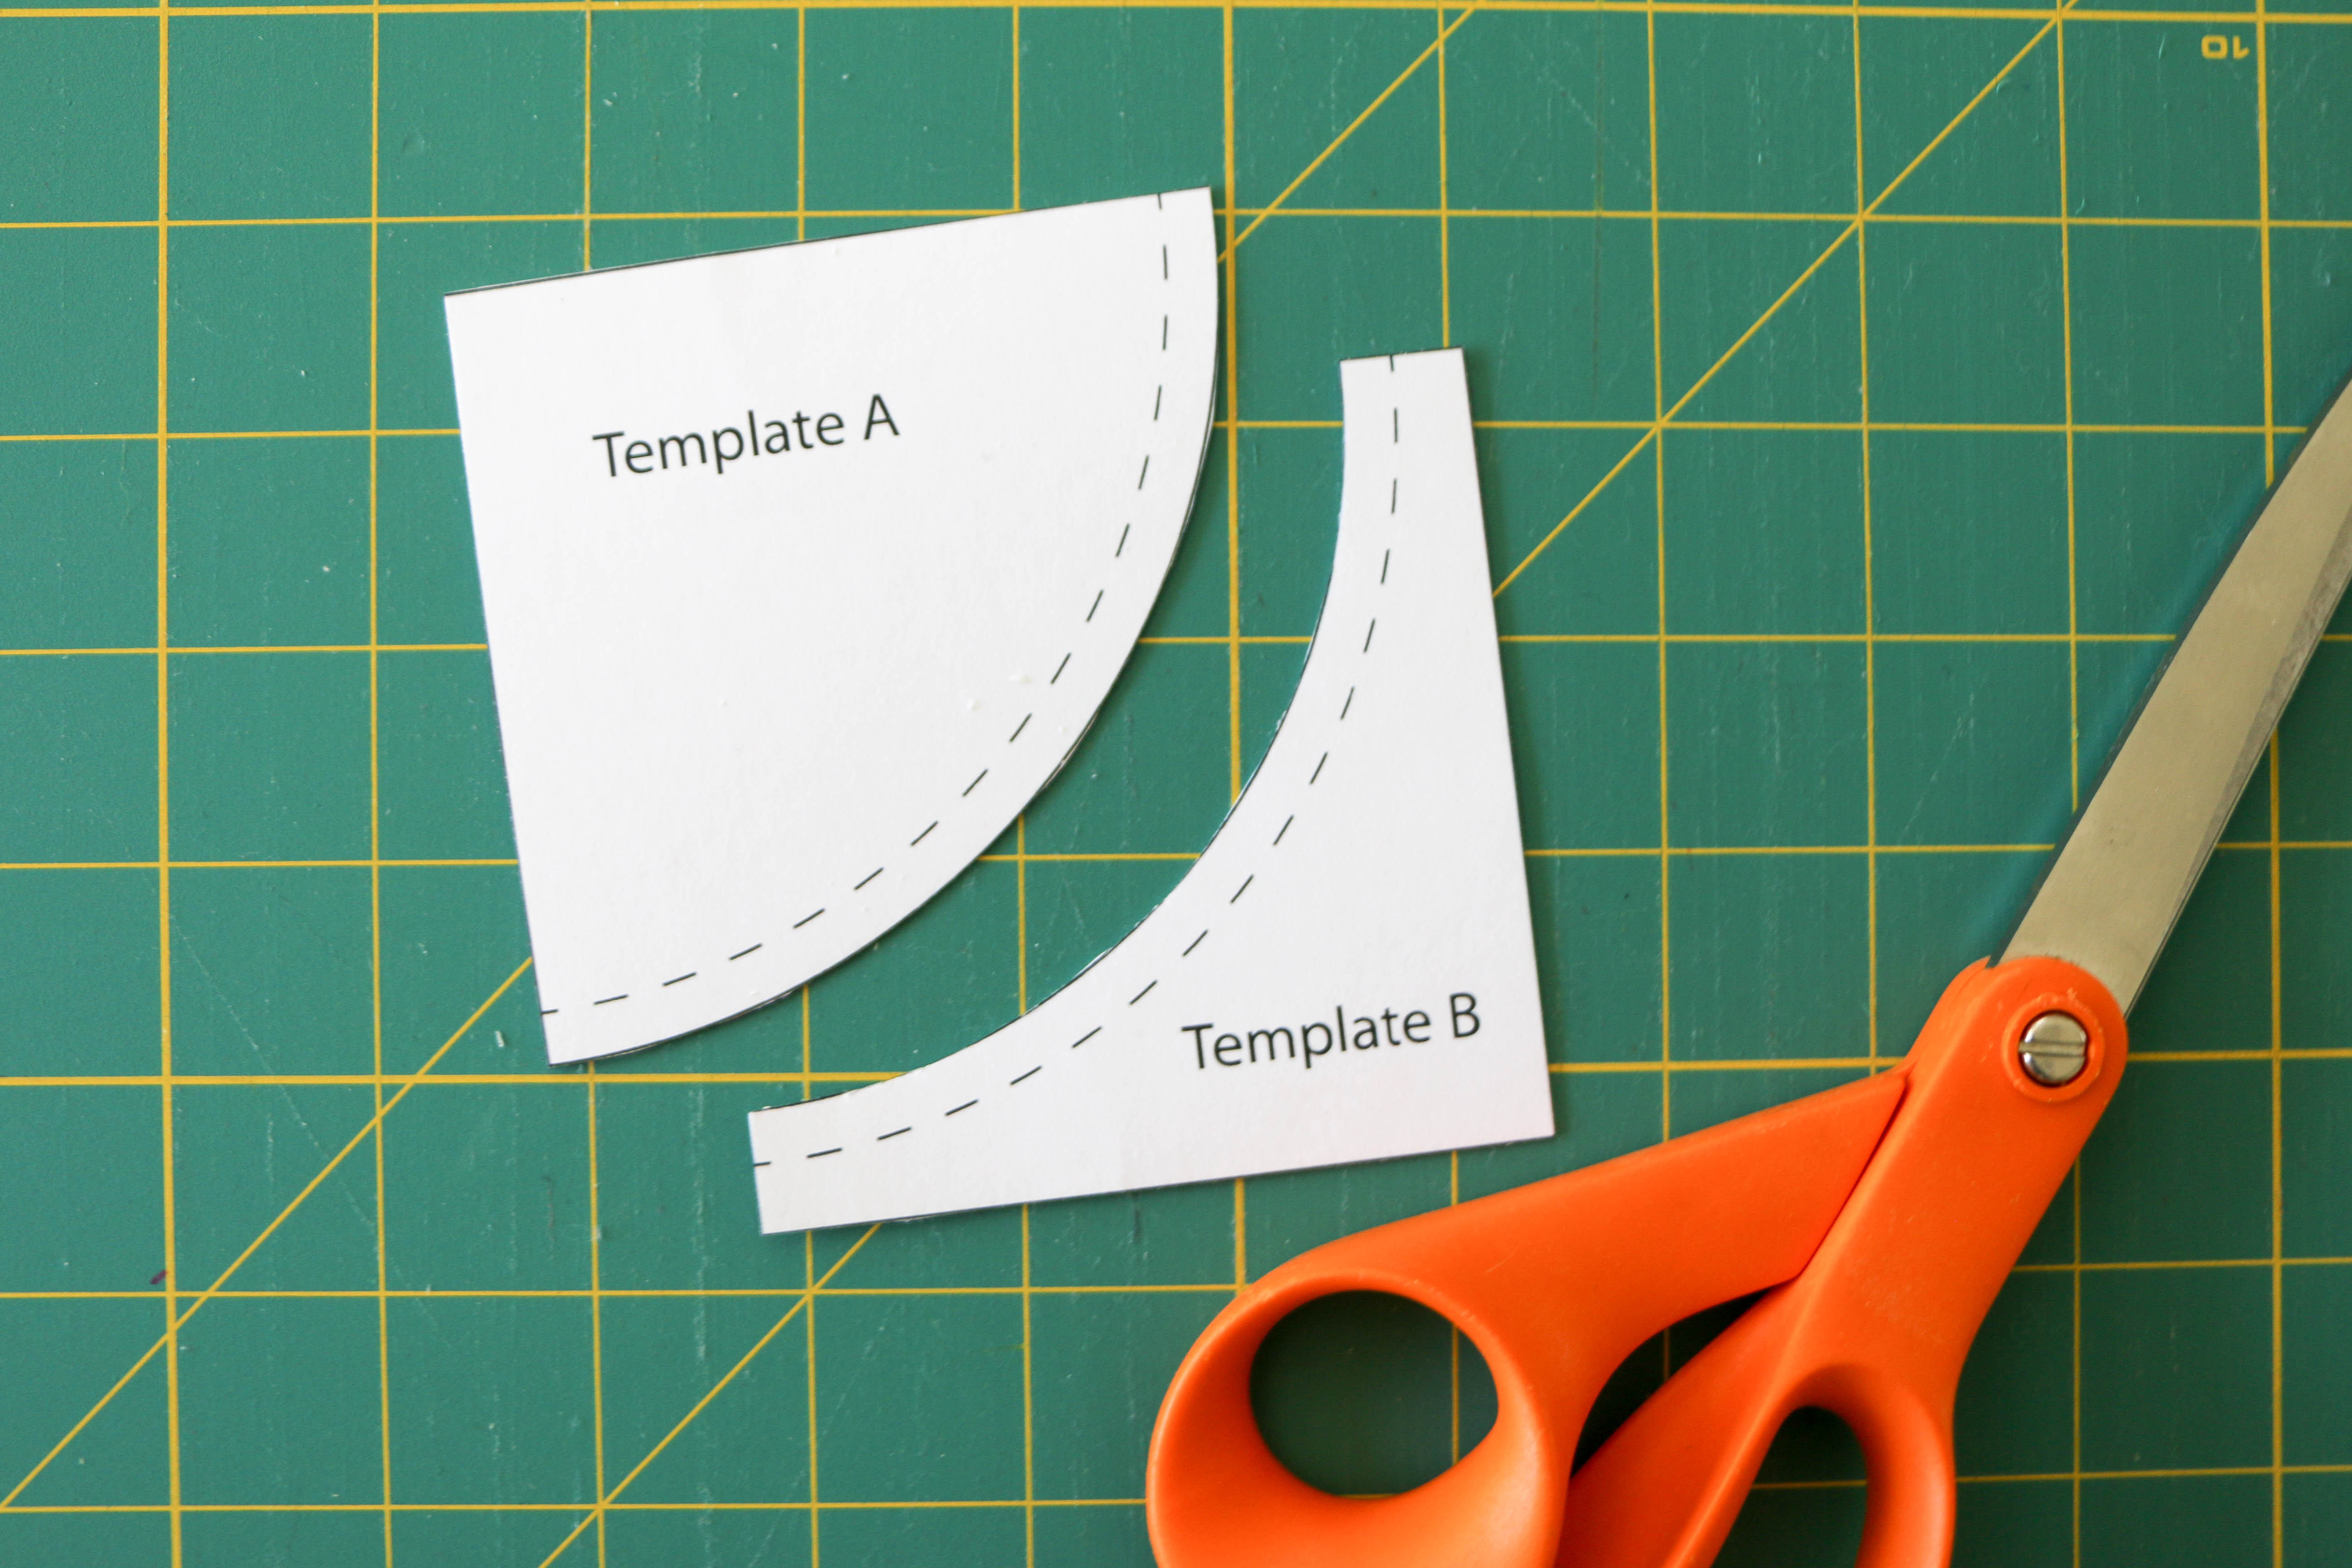
- Before cutting out the Template A and Template B shapes, I use lots of double-sided tape to stick my printed sheet of paper onto a piece of cardboard. Once the printed PDF is securely adhered to the cardboard, then I cut out the shapes, giving me nice sturdy templates that can be used multiple times.
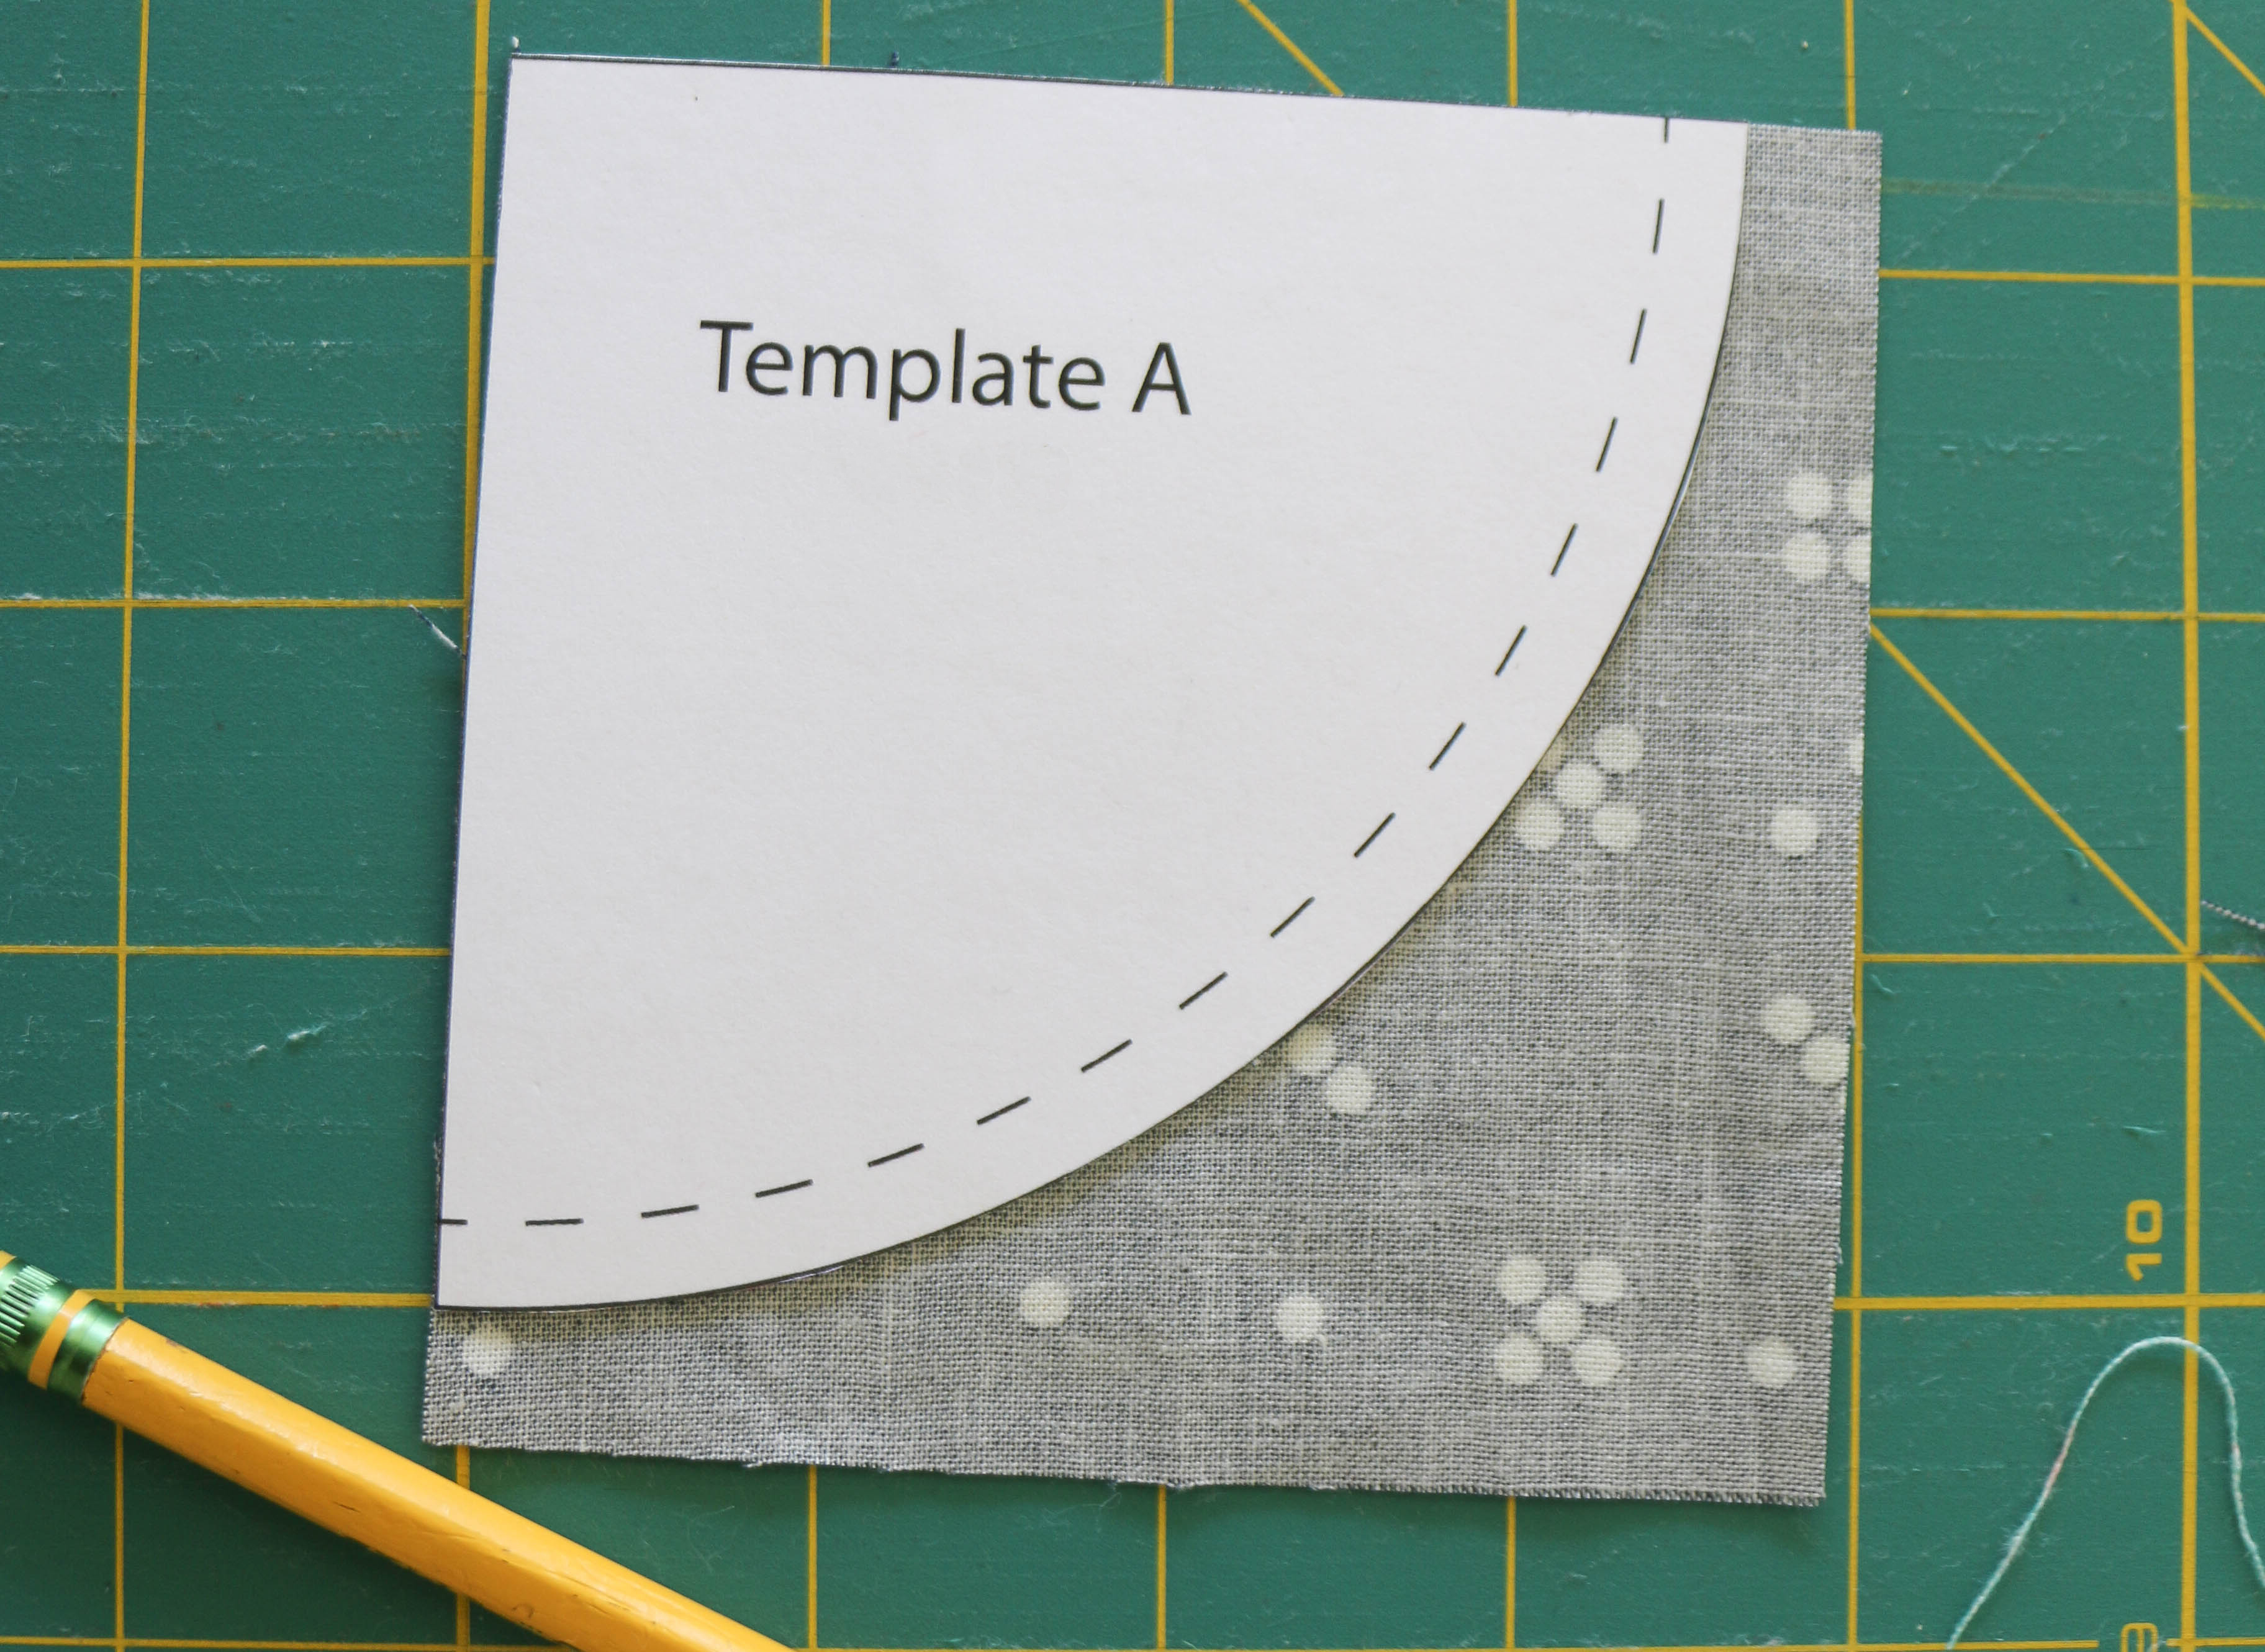
Now you’re ready to use the templates to cut your fabric. First, I like to use my rotary cutter to cut my fabric into squares just a bit larger than the template size. In this case, the templates make a 3-1/2″ Drunkard’s Path unit, so I cut 4″ fabric squares—(4) 4″ squares for Template A and (4) 4″ squares for Template B. Then align the square edges of the template with the fabric edges and draw around the remaining template edge(s).
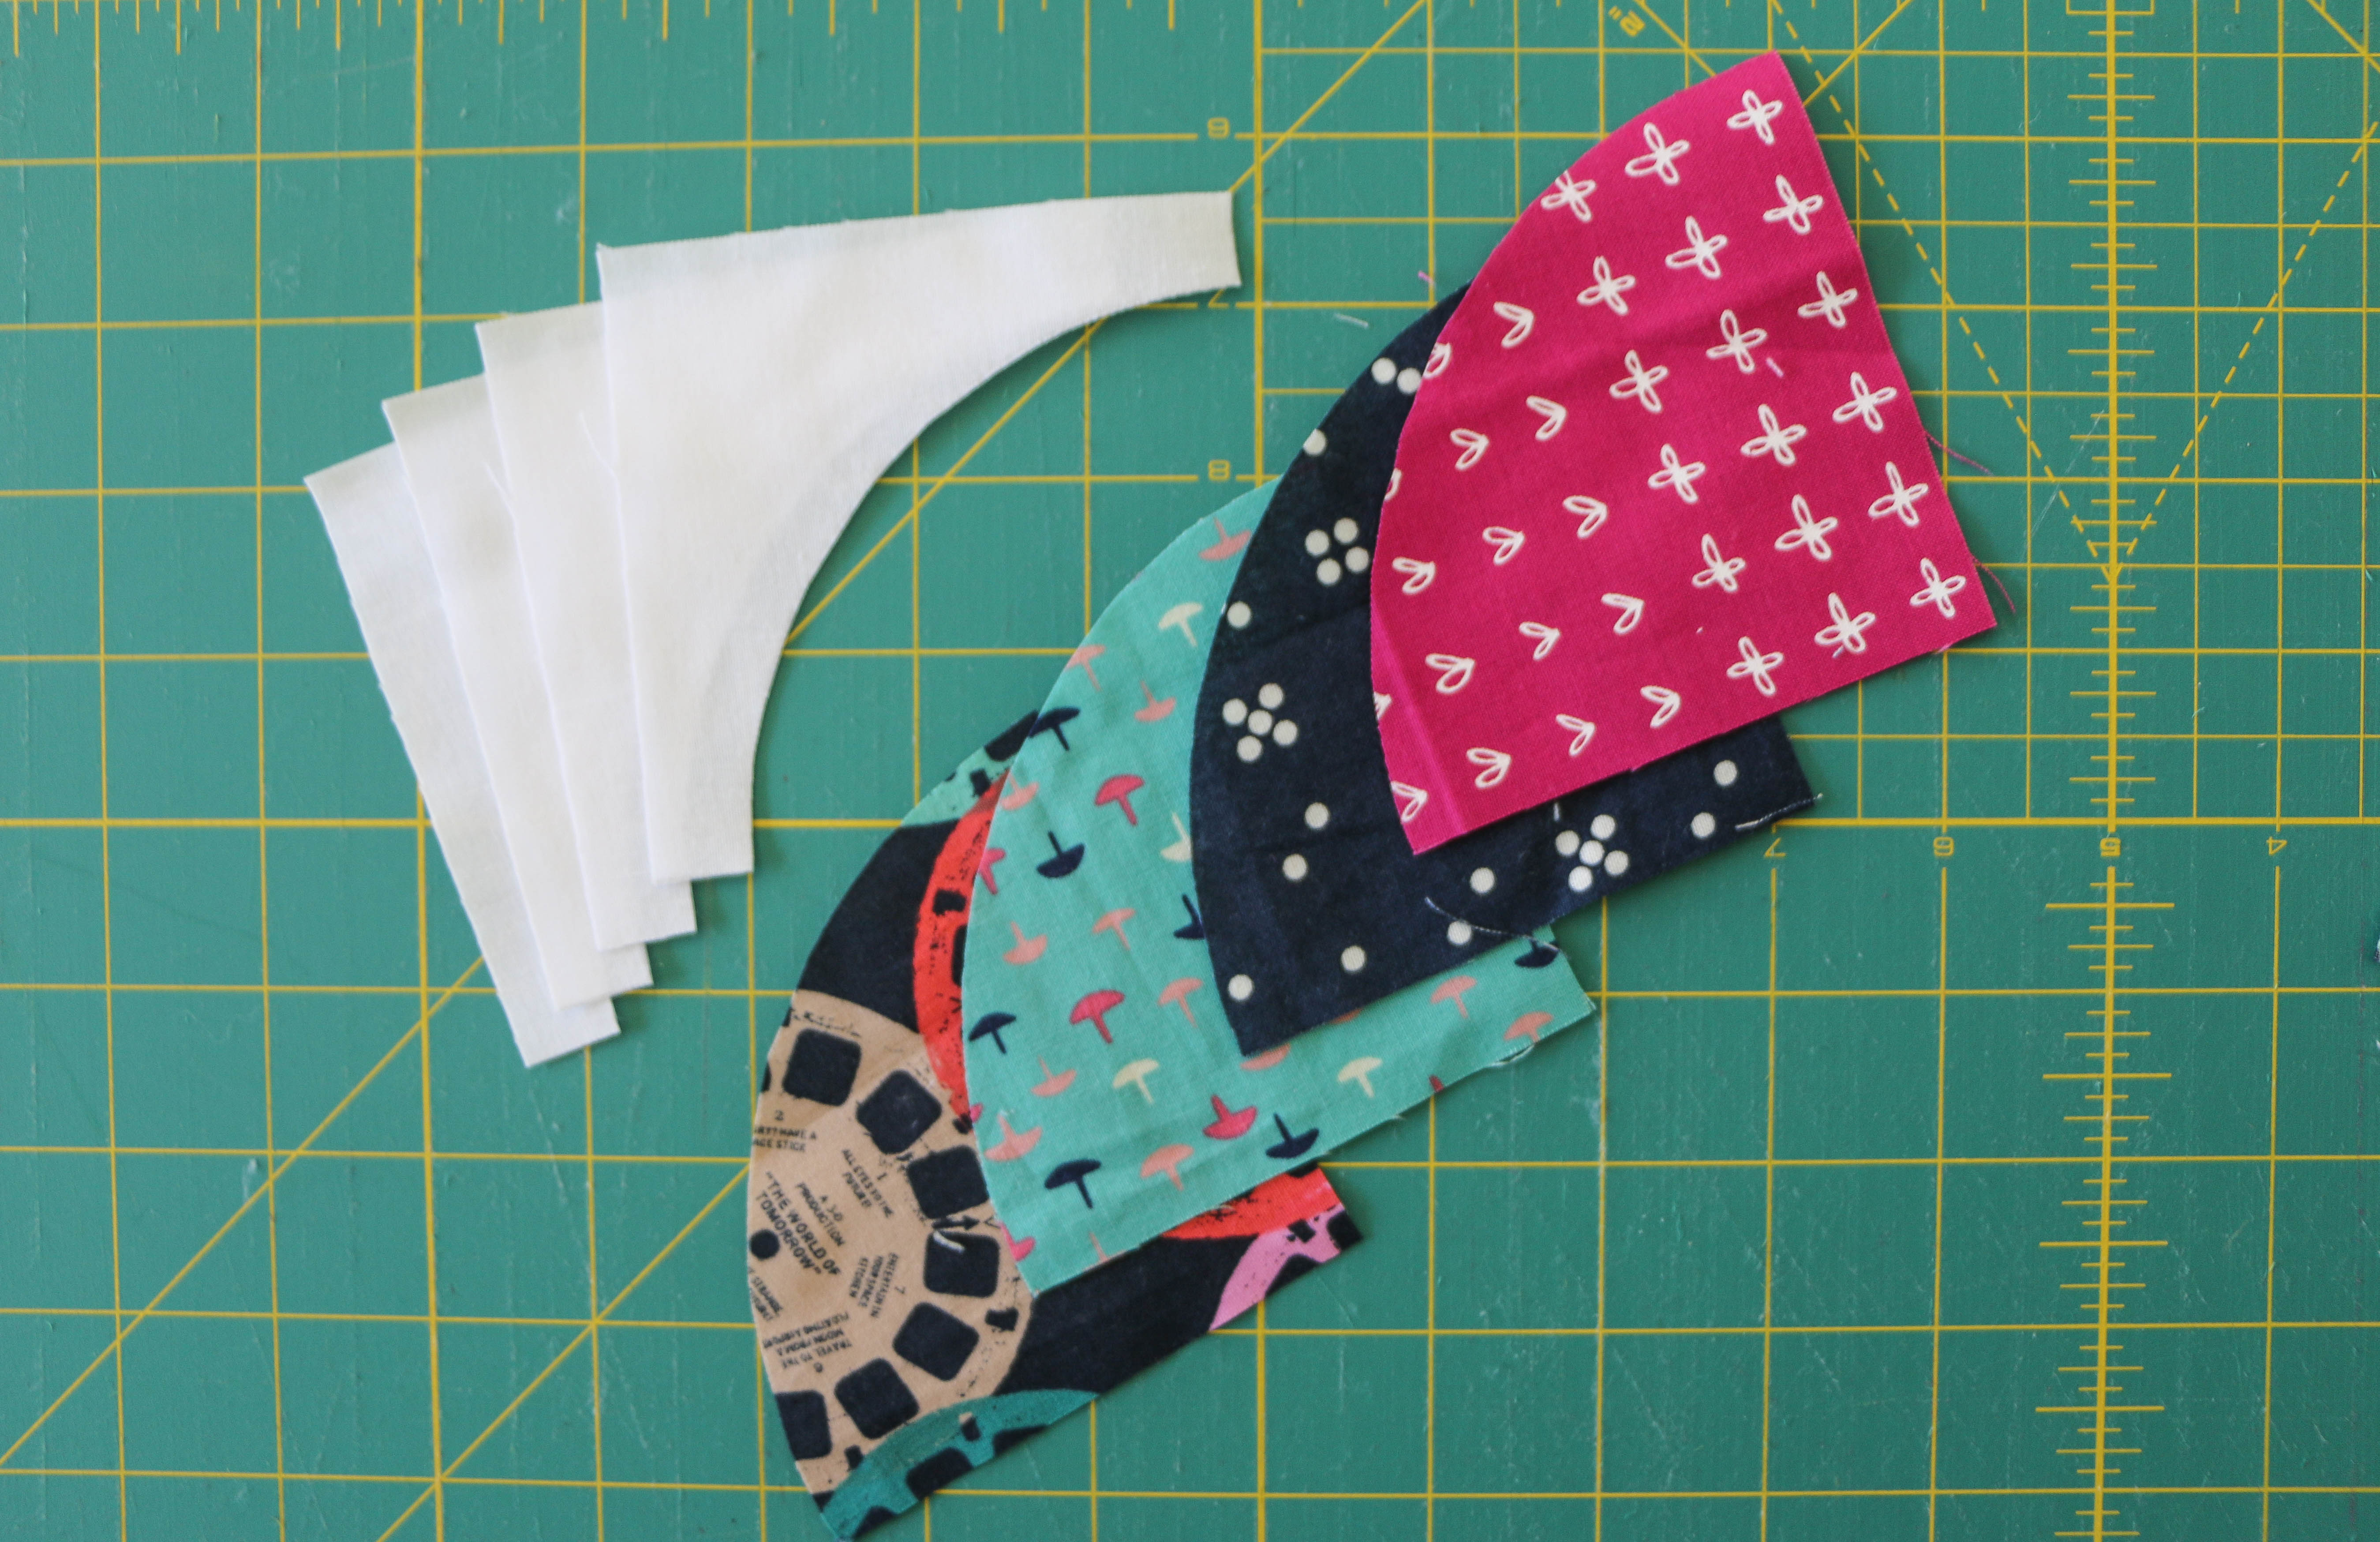
Then use scissors to finish cutting out the shapes.
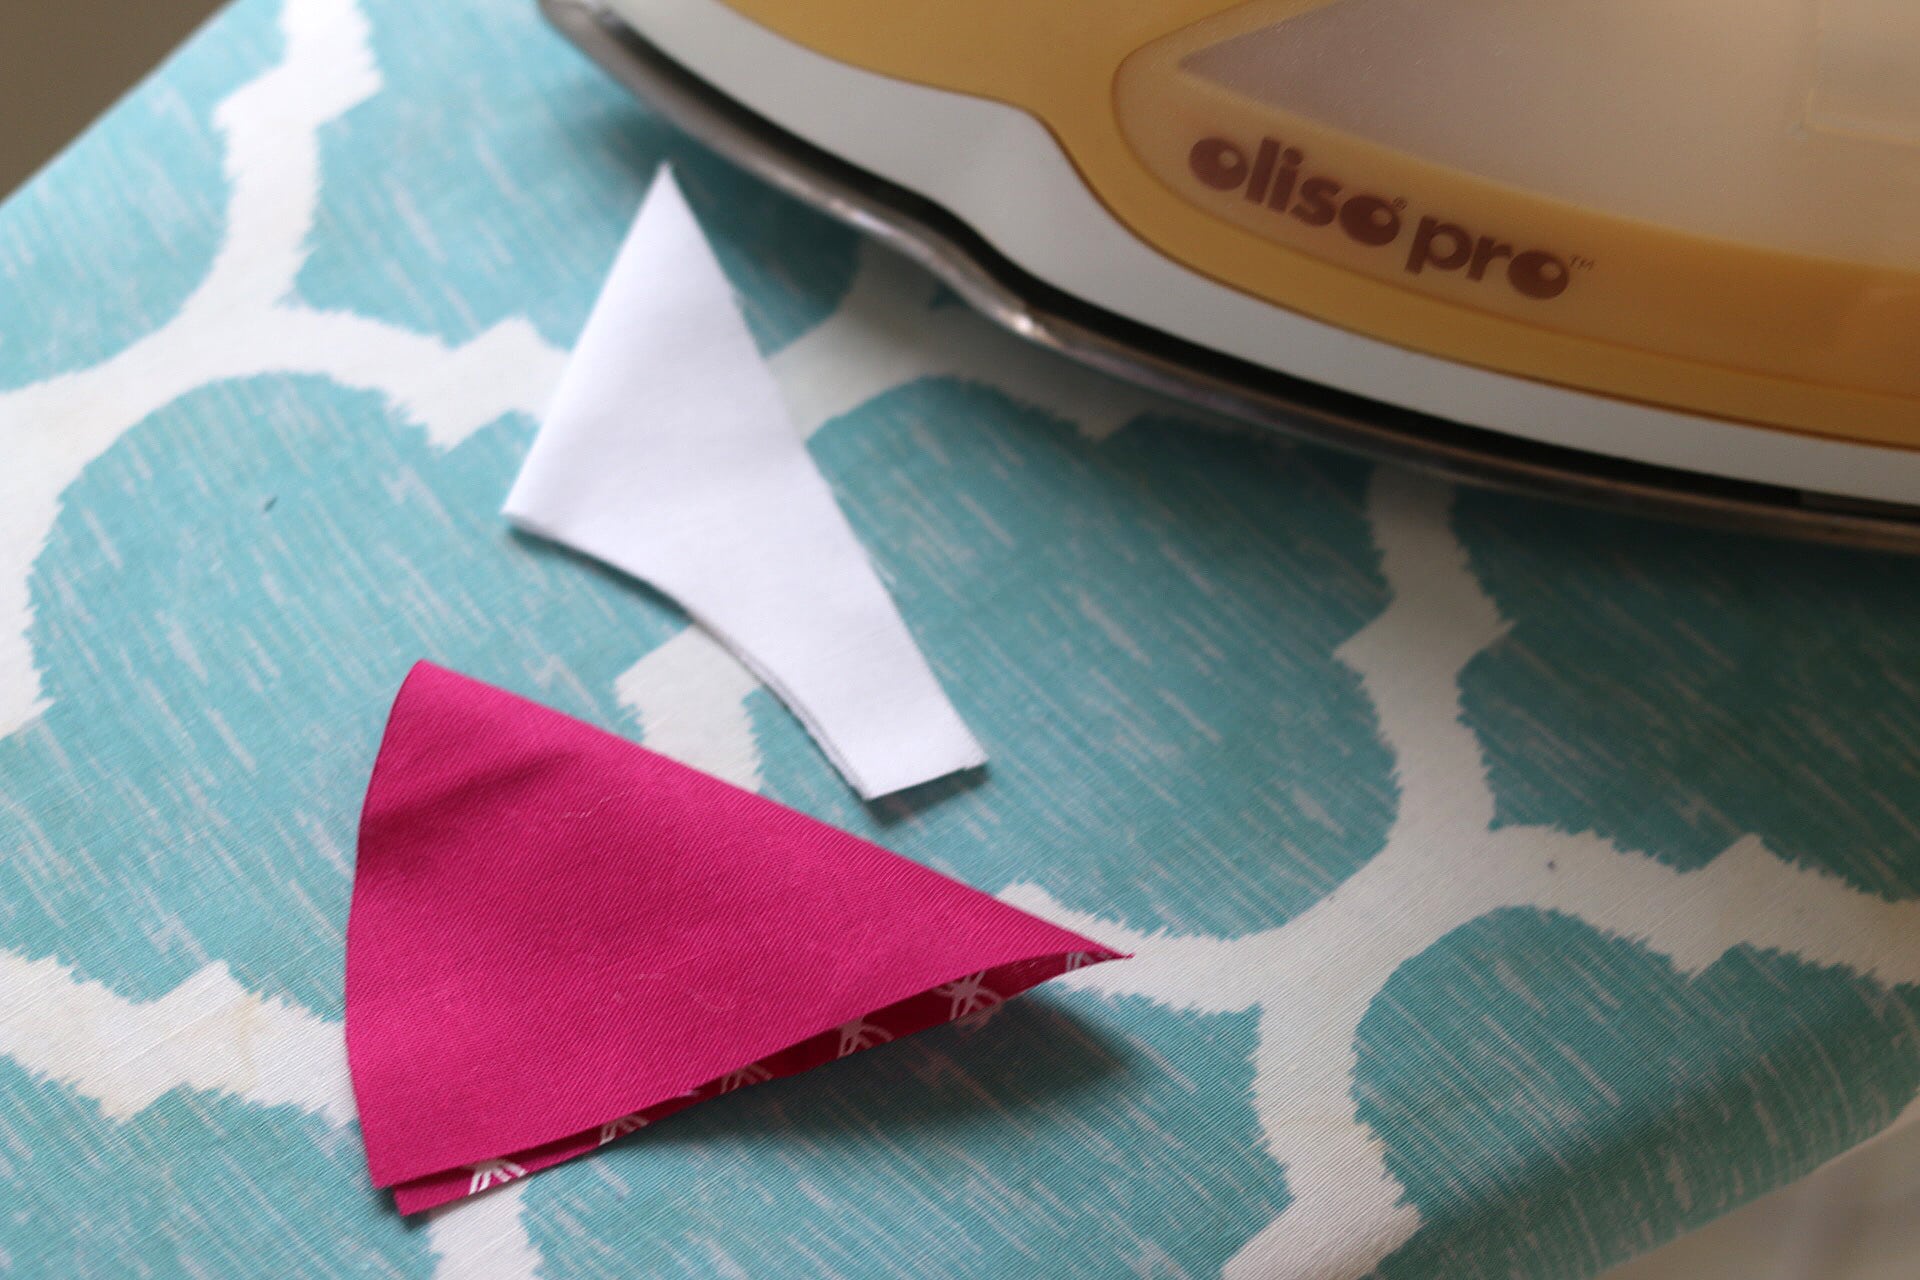
Next, I fold each piece (both the Template A and Template B pieces) in half and press to crease, right in the middle. On the inside piece (Template A, in hot pink above), I press right sides together, as shown. For the background piece (Template B, in white above) I press wrong sides together. This will allow the creases to nest together when you’re pinning in a later step.
Now the crease can serve as a reference point for aligning the center of the pieces.
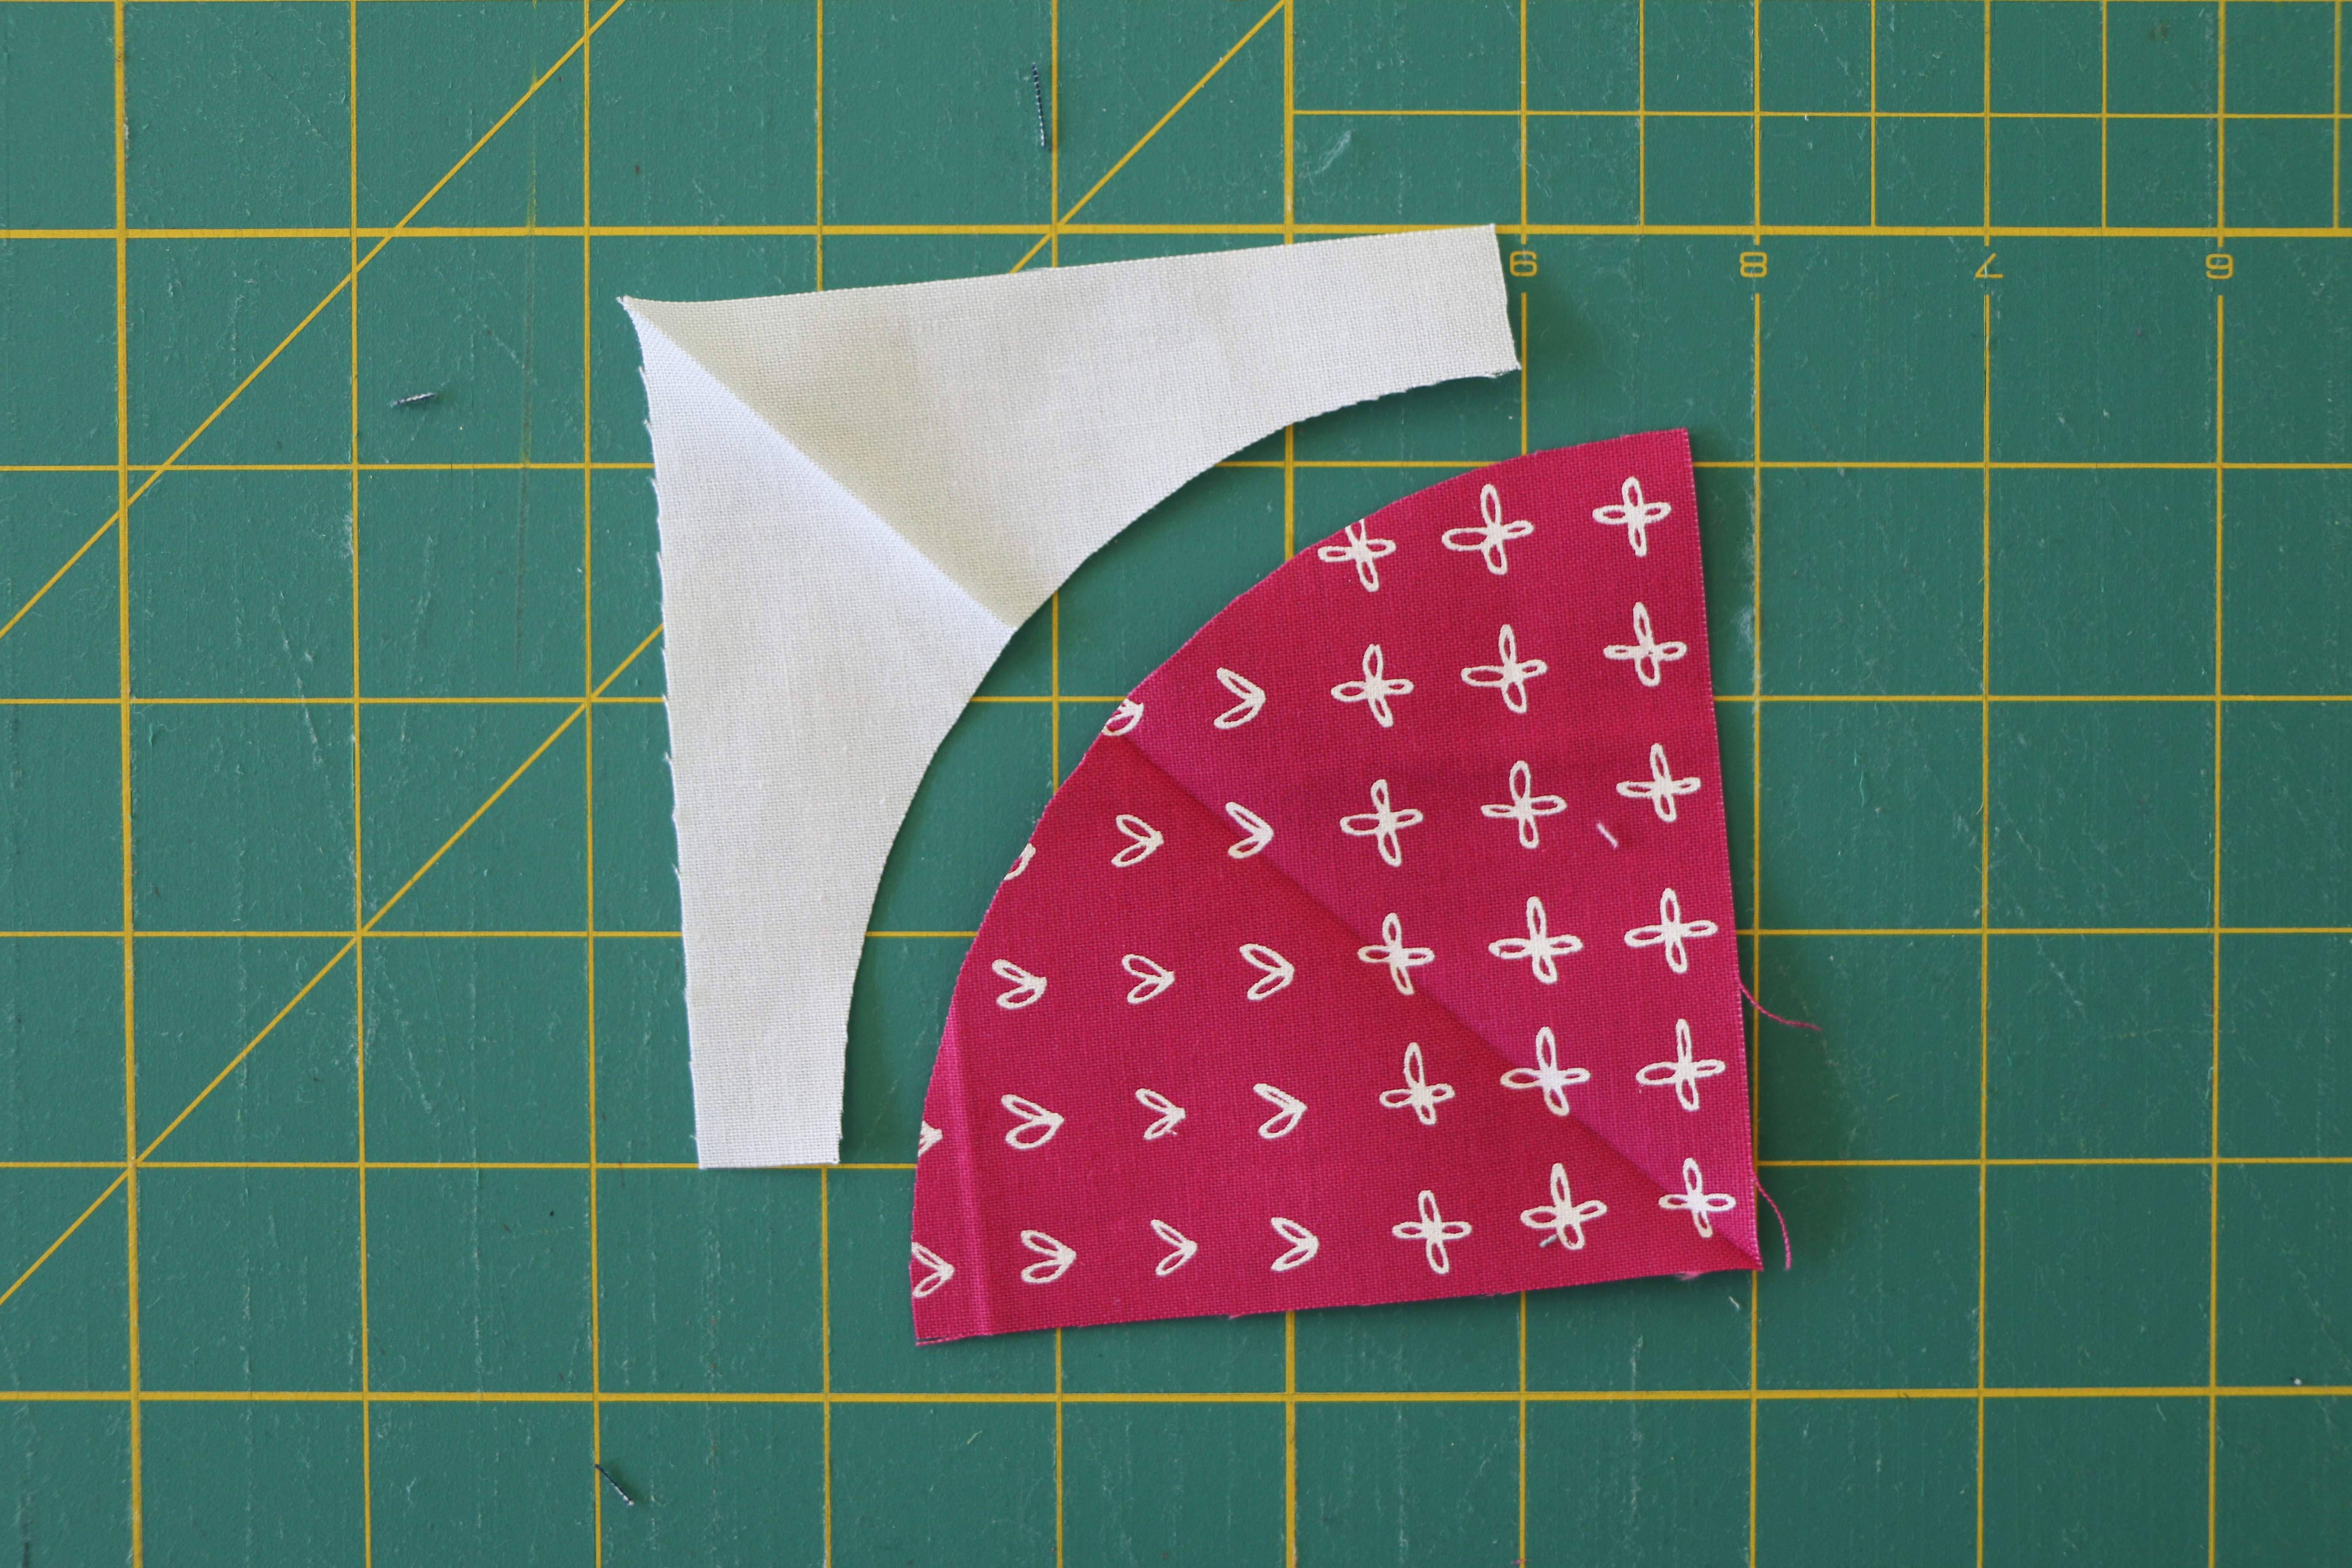
Now pin the Template B background piece onto the Template A inside piece, right sides together, and lining up/nesting the two creases, as shown. I know—with the way these pieces are positioned, it looks like it will never work to piece them together. But it will, don’t worry!
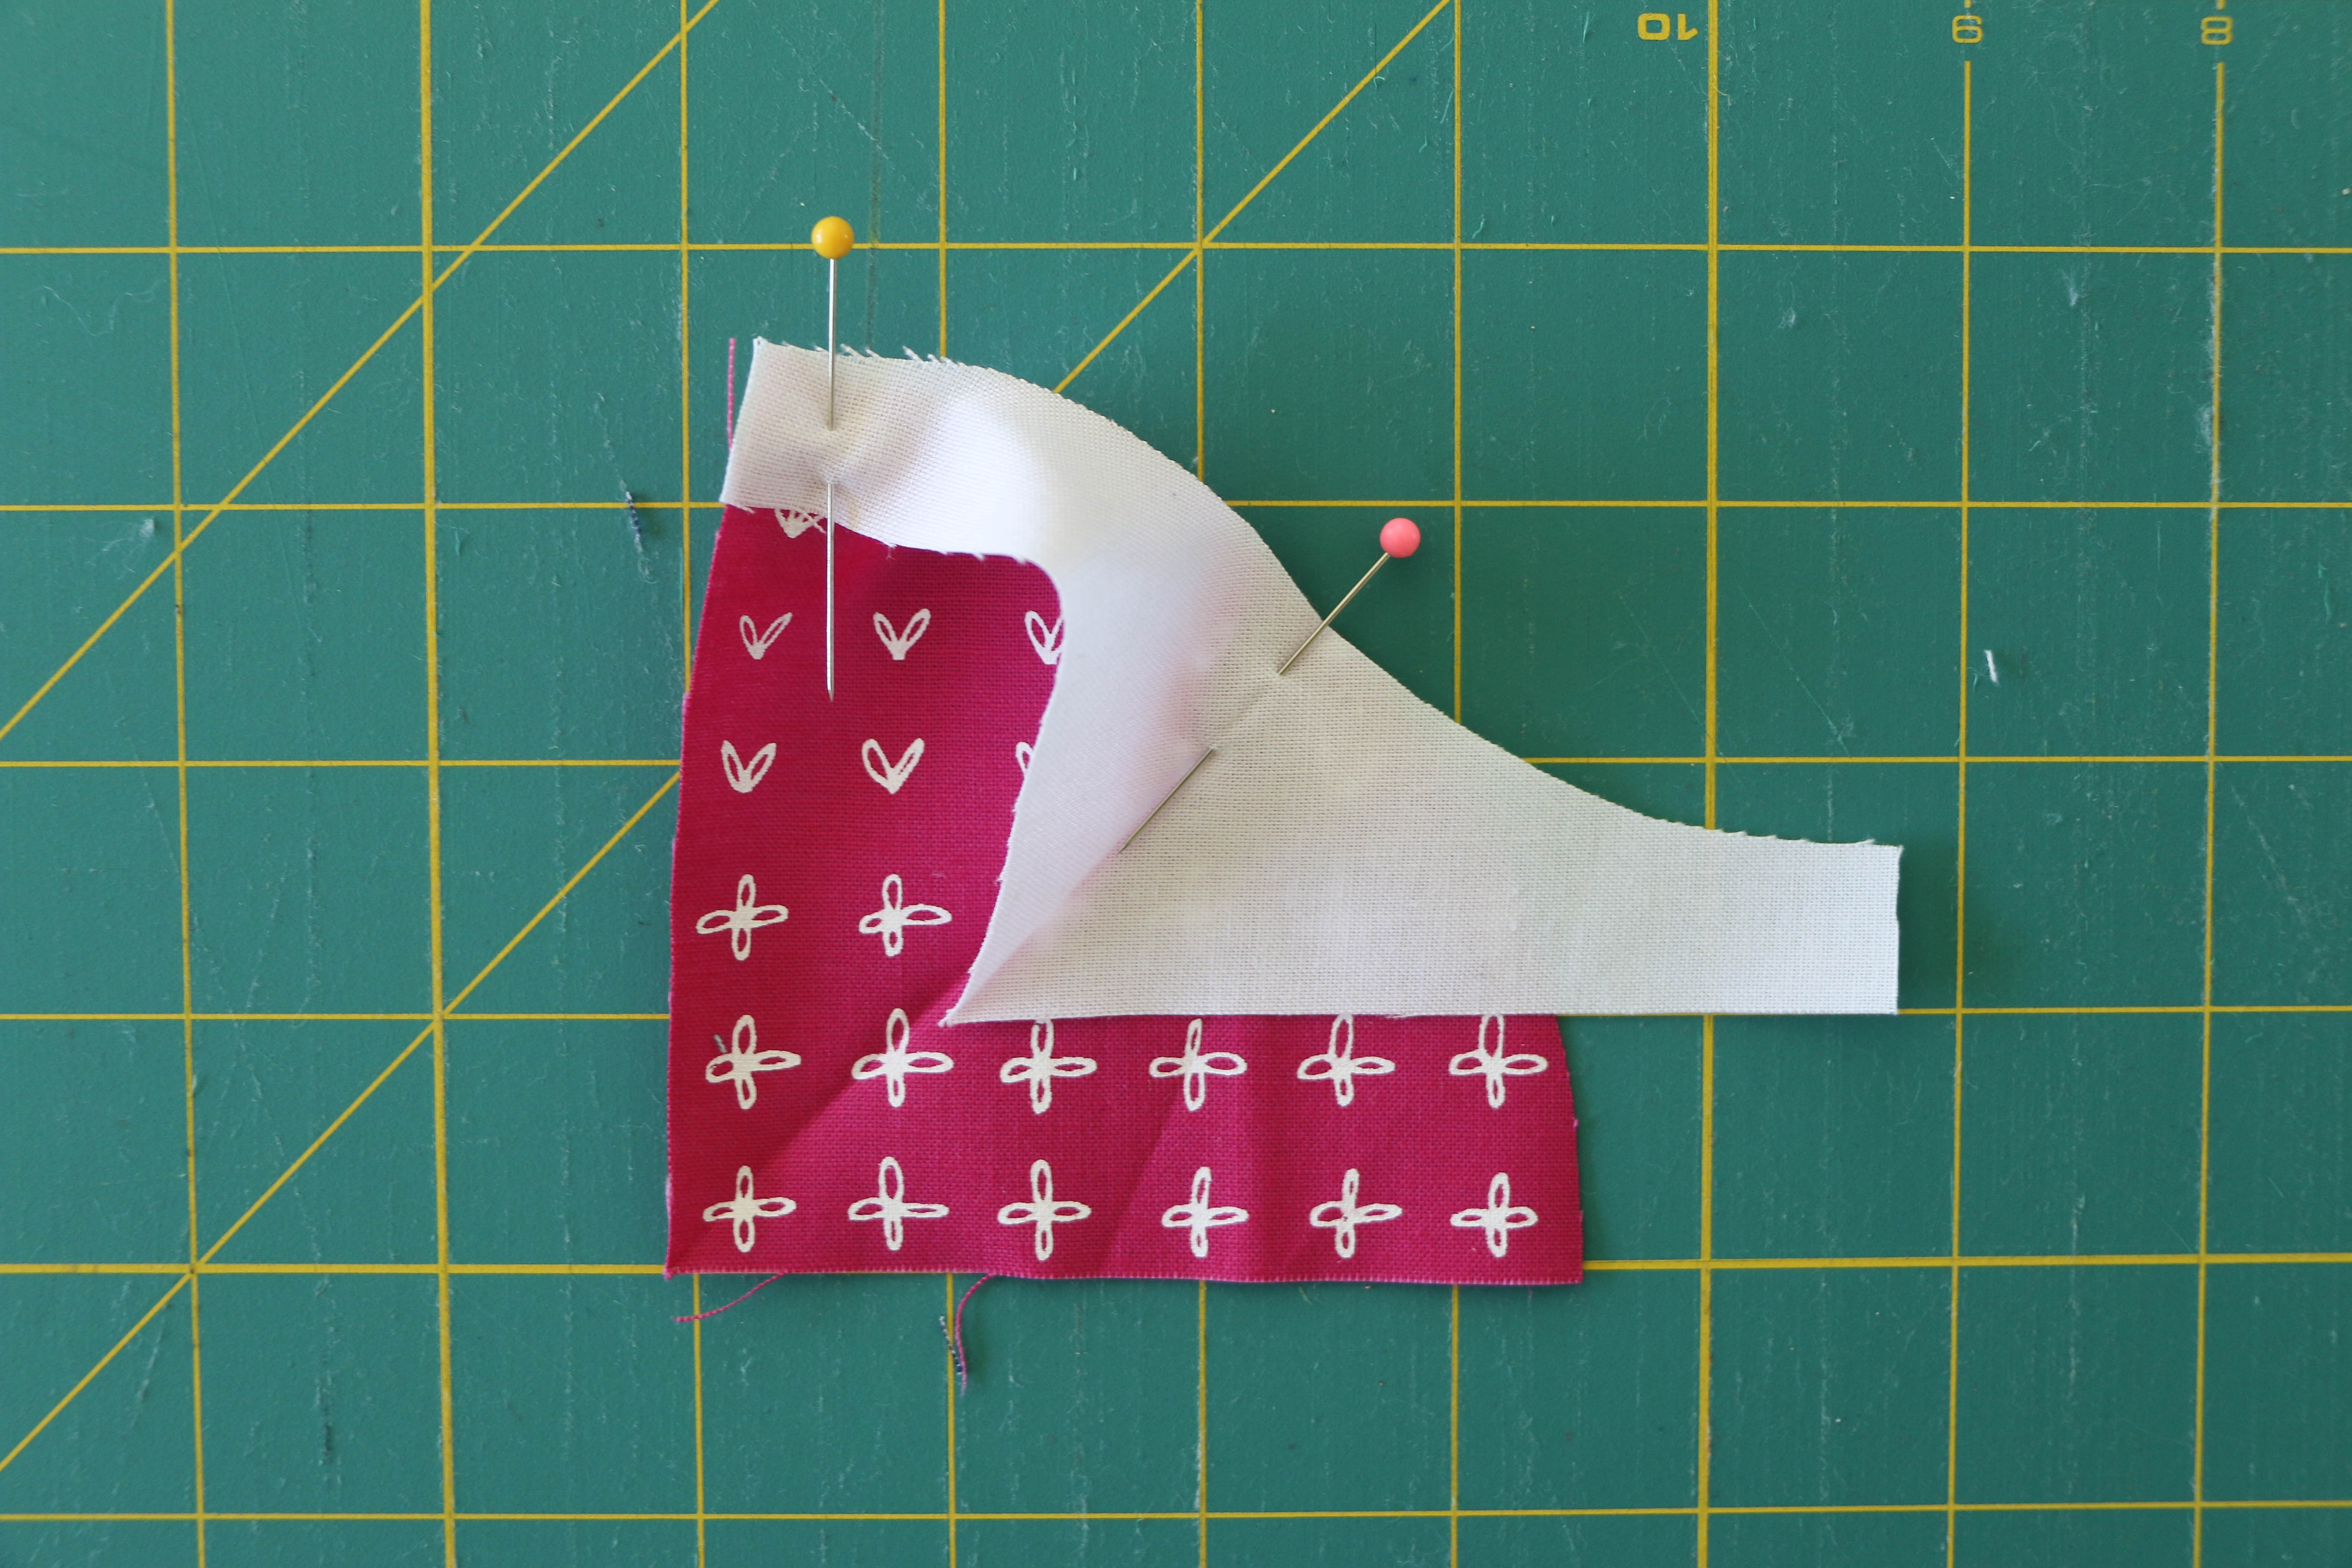
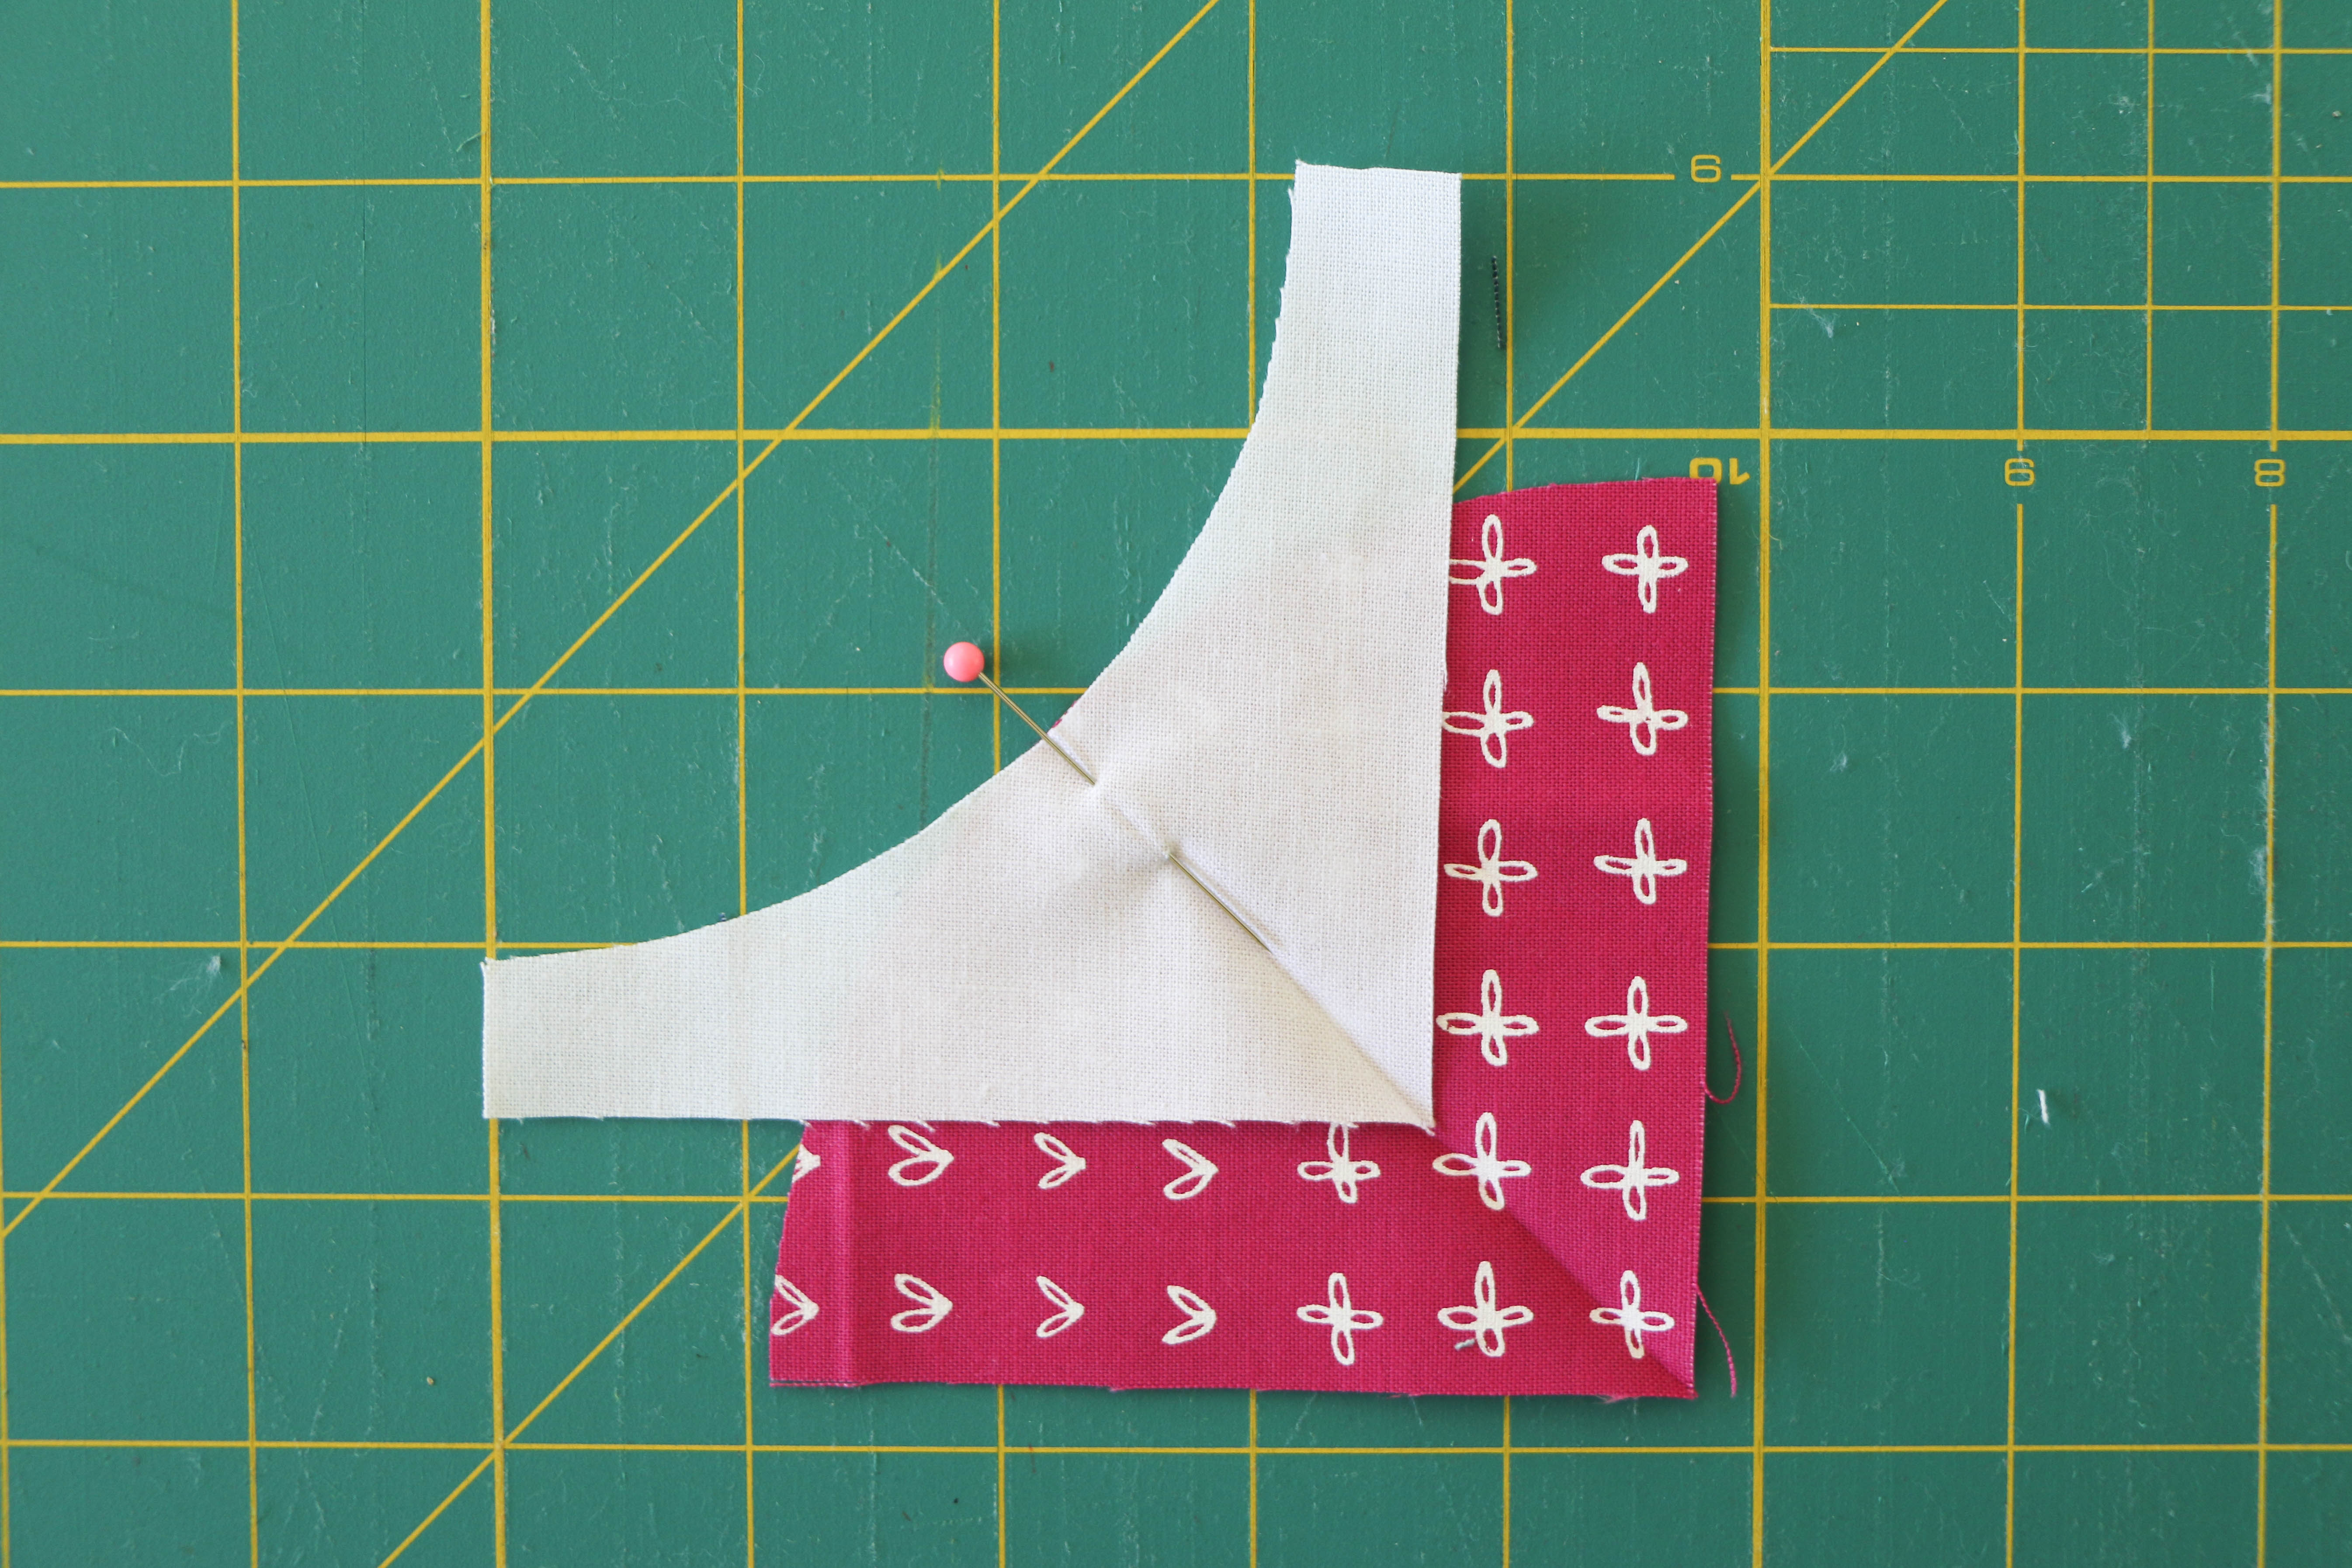
Next, take one straight short end of the Template B background piece and line it up with the corner of the Template A inside piece, and pin, as shown. It’s going to look really crazy and wonky, like in the picture above. No worries, this is exactly how it should look!
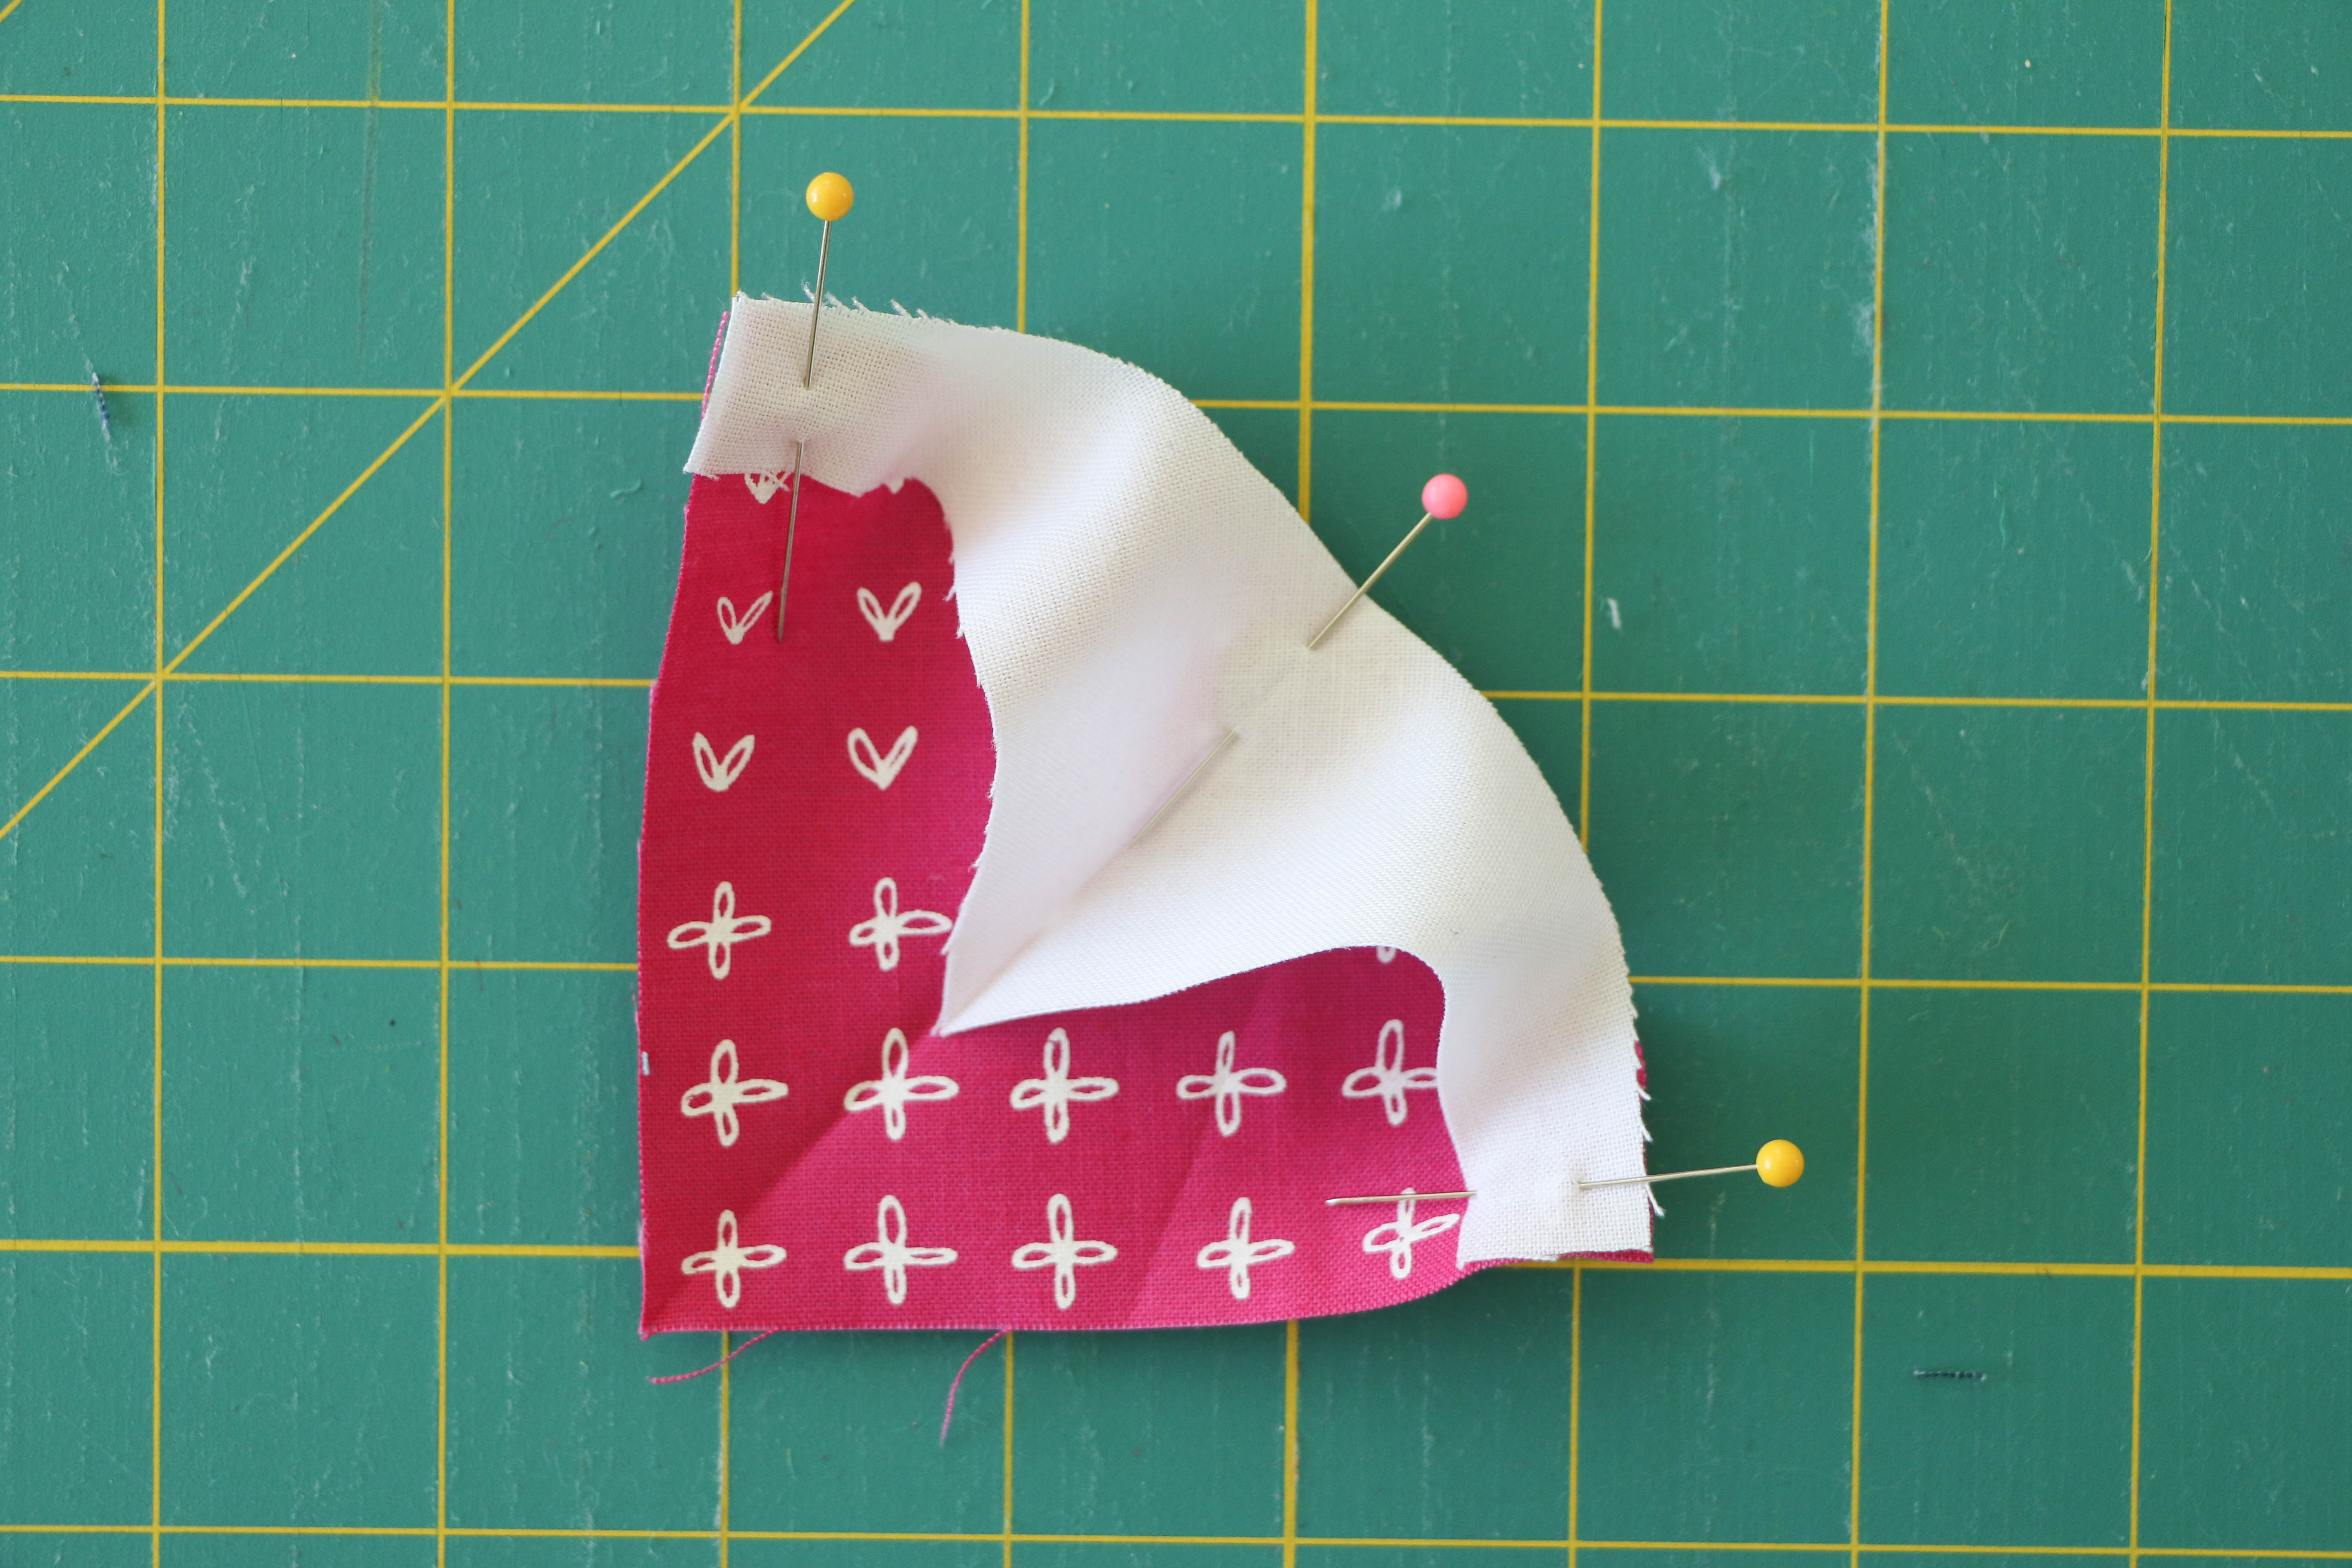
Now do the same thing on the other corner, pinning the short, straight edge into place. At this point, your pinned unit will probably curl up at the corners and it won’t lay flat at all. That’s okay (for now!).
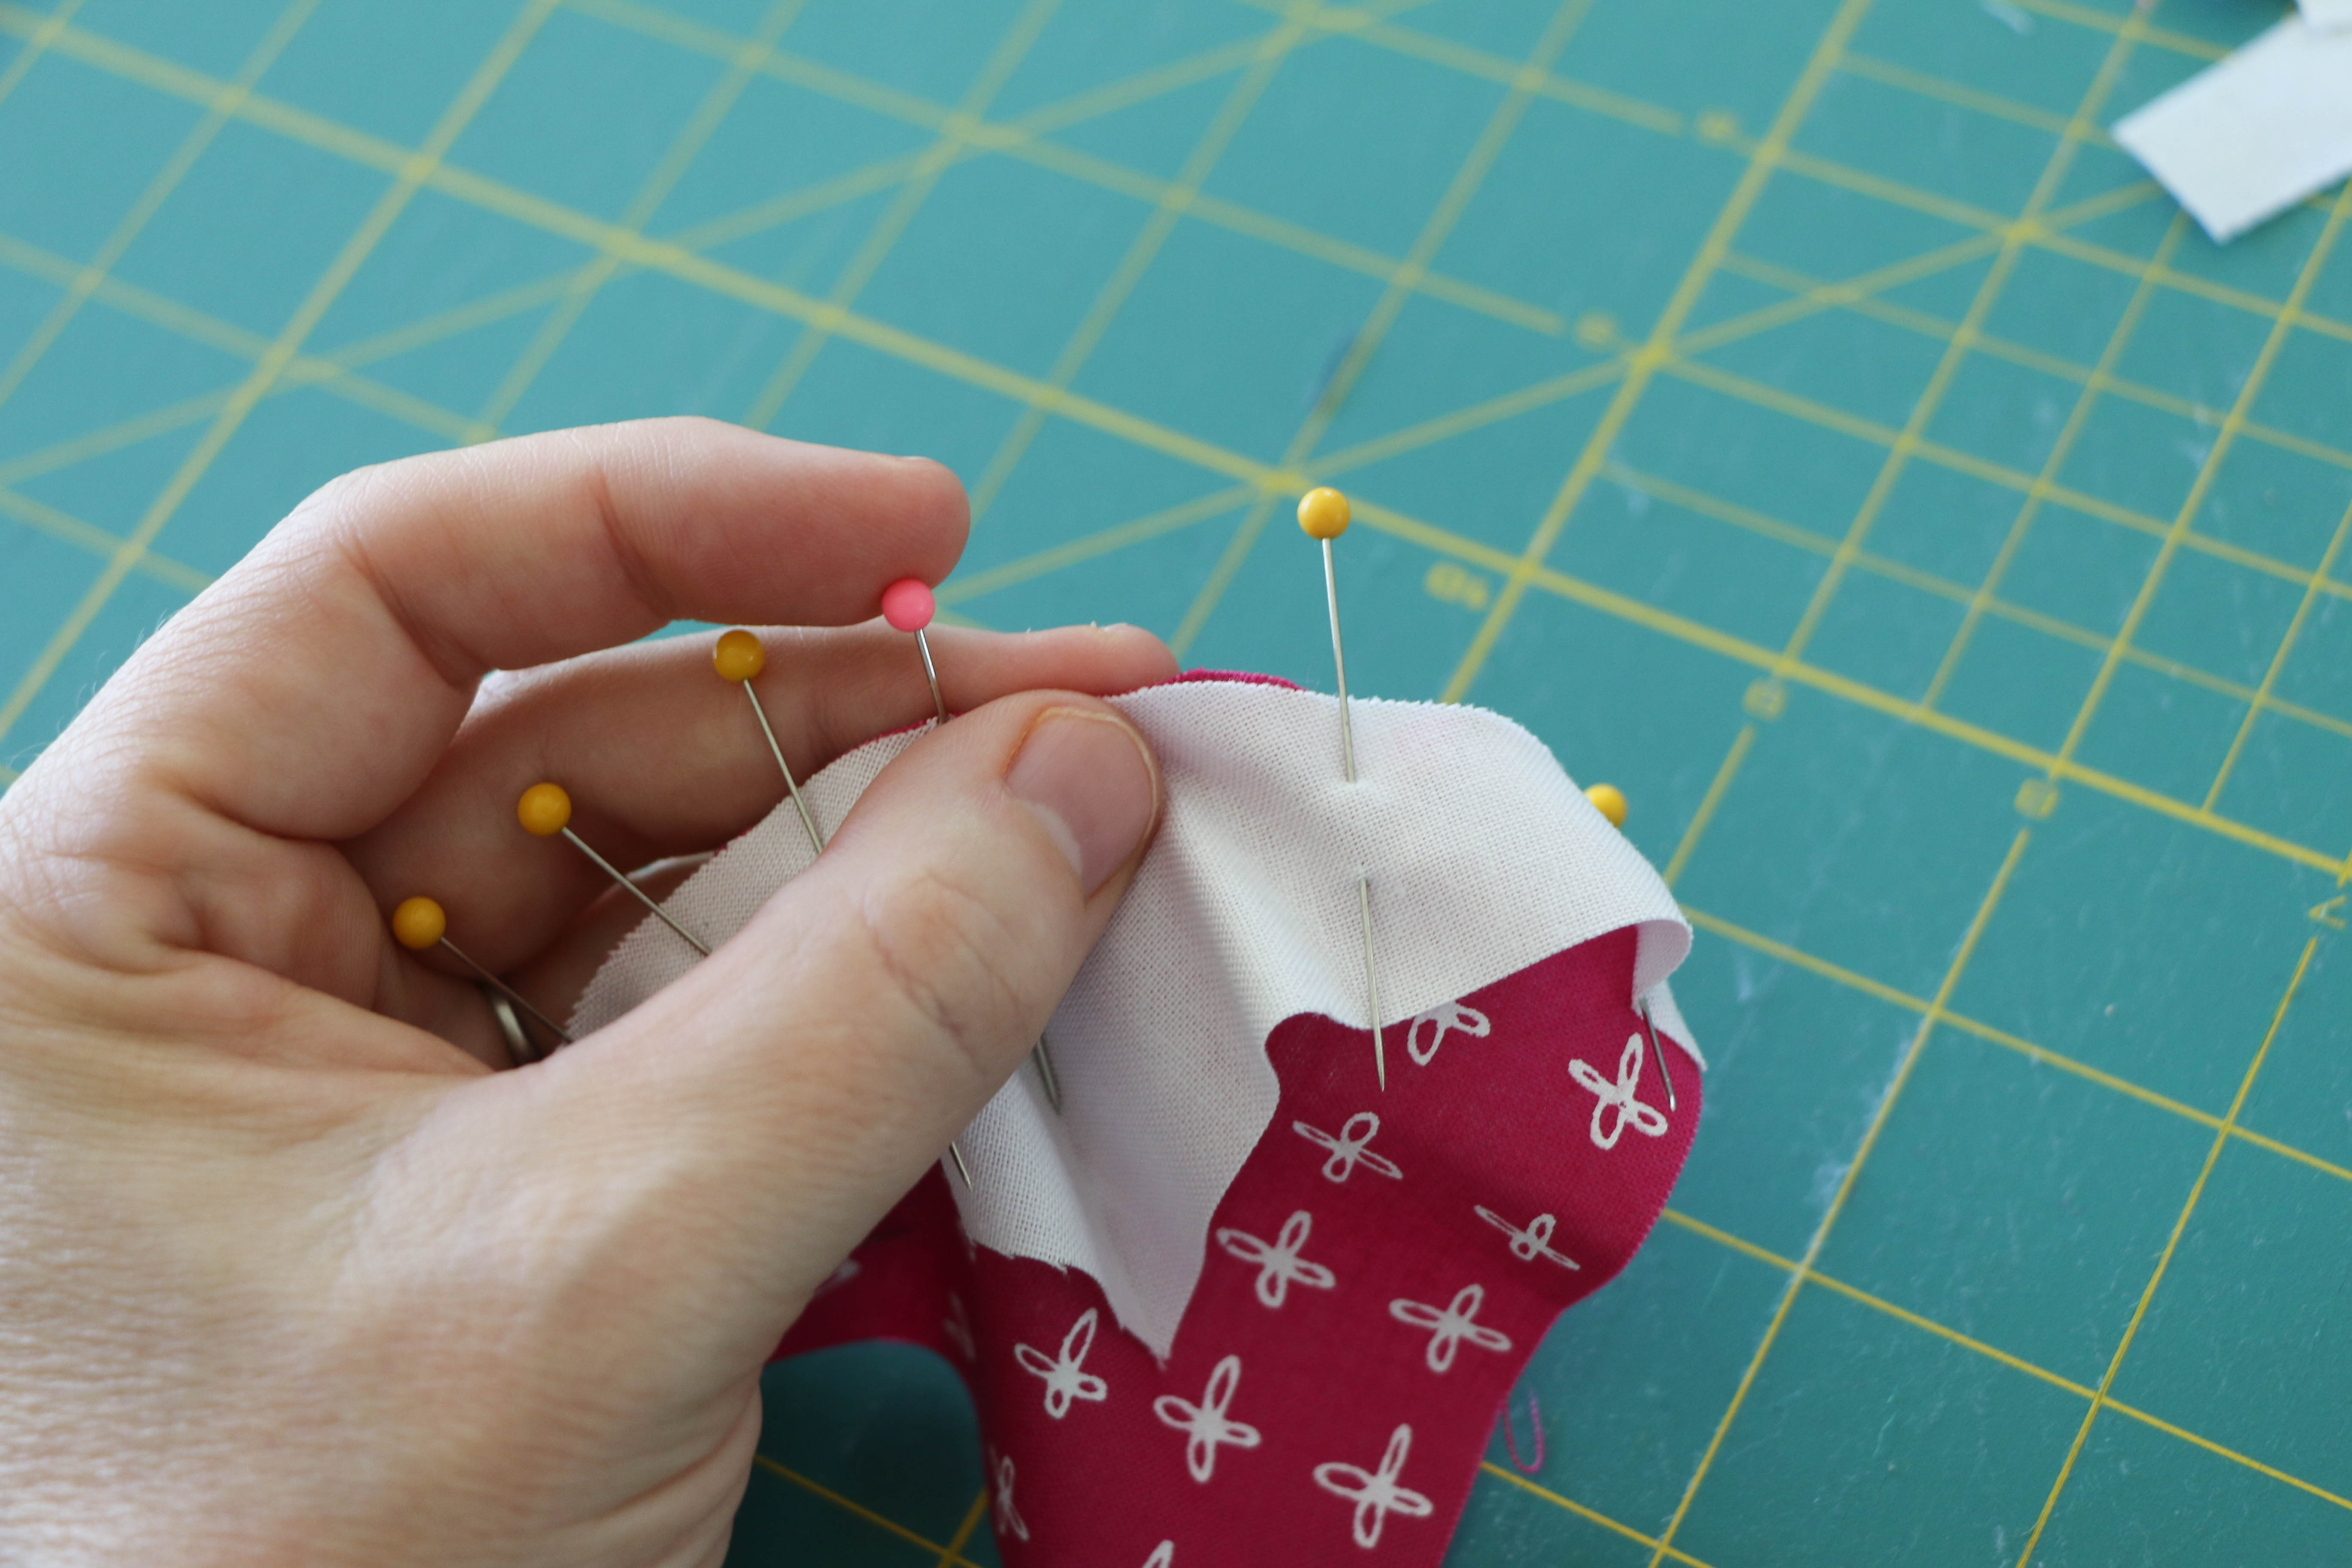
Now, just continue pinning along the curved edge, easing the fabric so that it’s bunched up away from the pins. At this point, I believe the more pins you use, the better off you’ll be, especially when you’re first beginning to sew curves. But of course, more pins takes more time! As you get more practice and start getting more comfortable with curved piecing, you may be able to skip some of these pins and go a little faster.
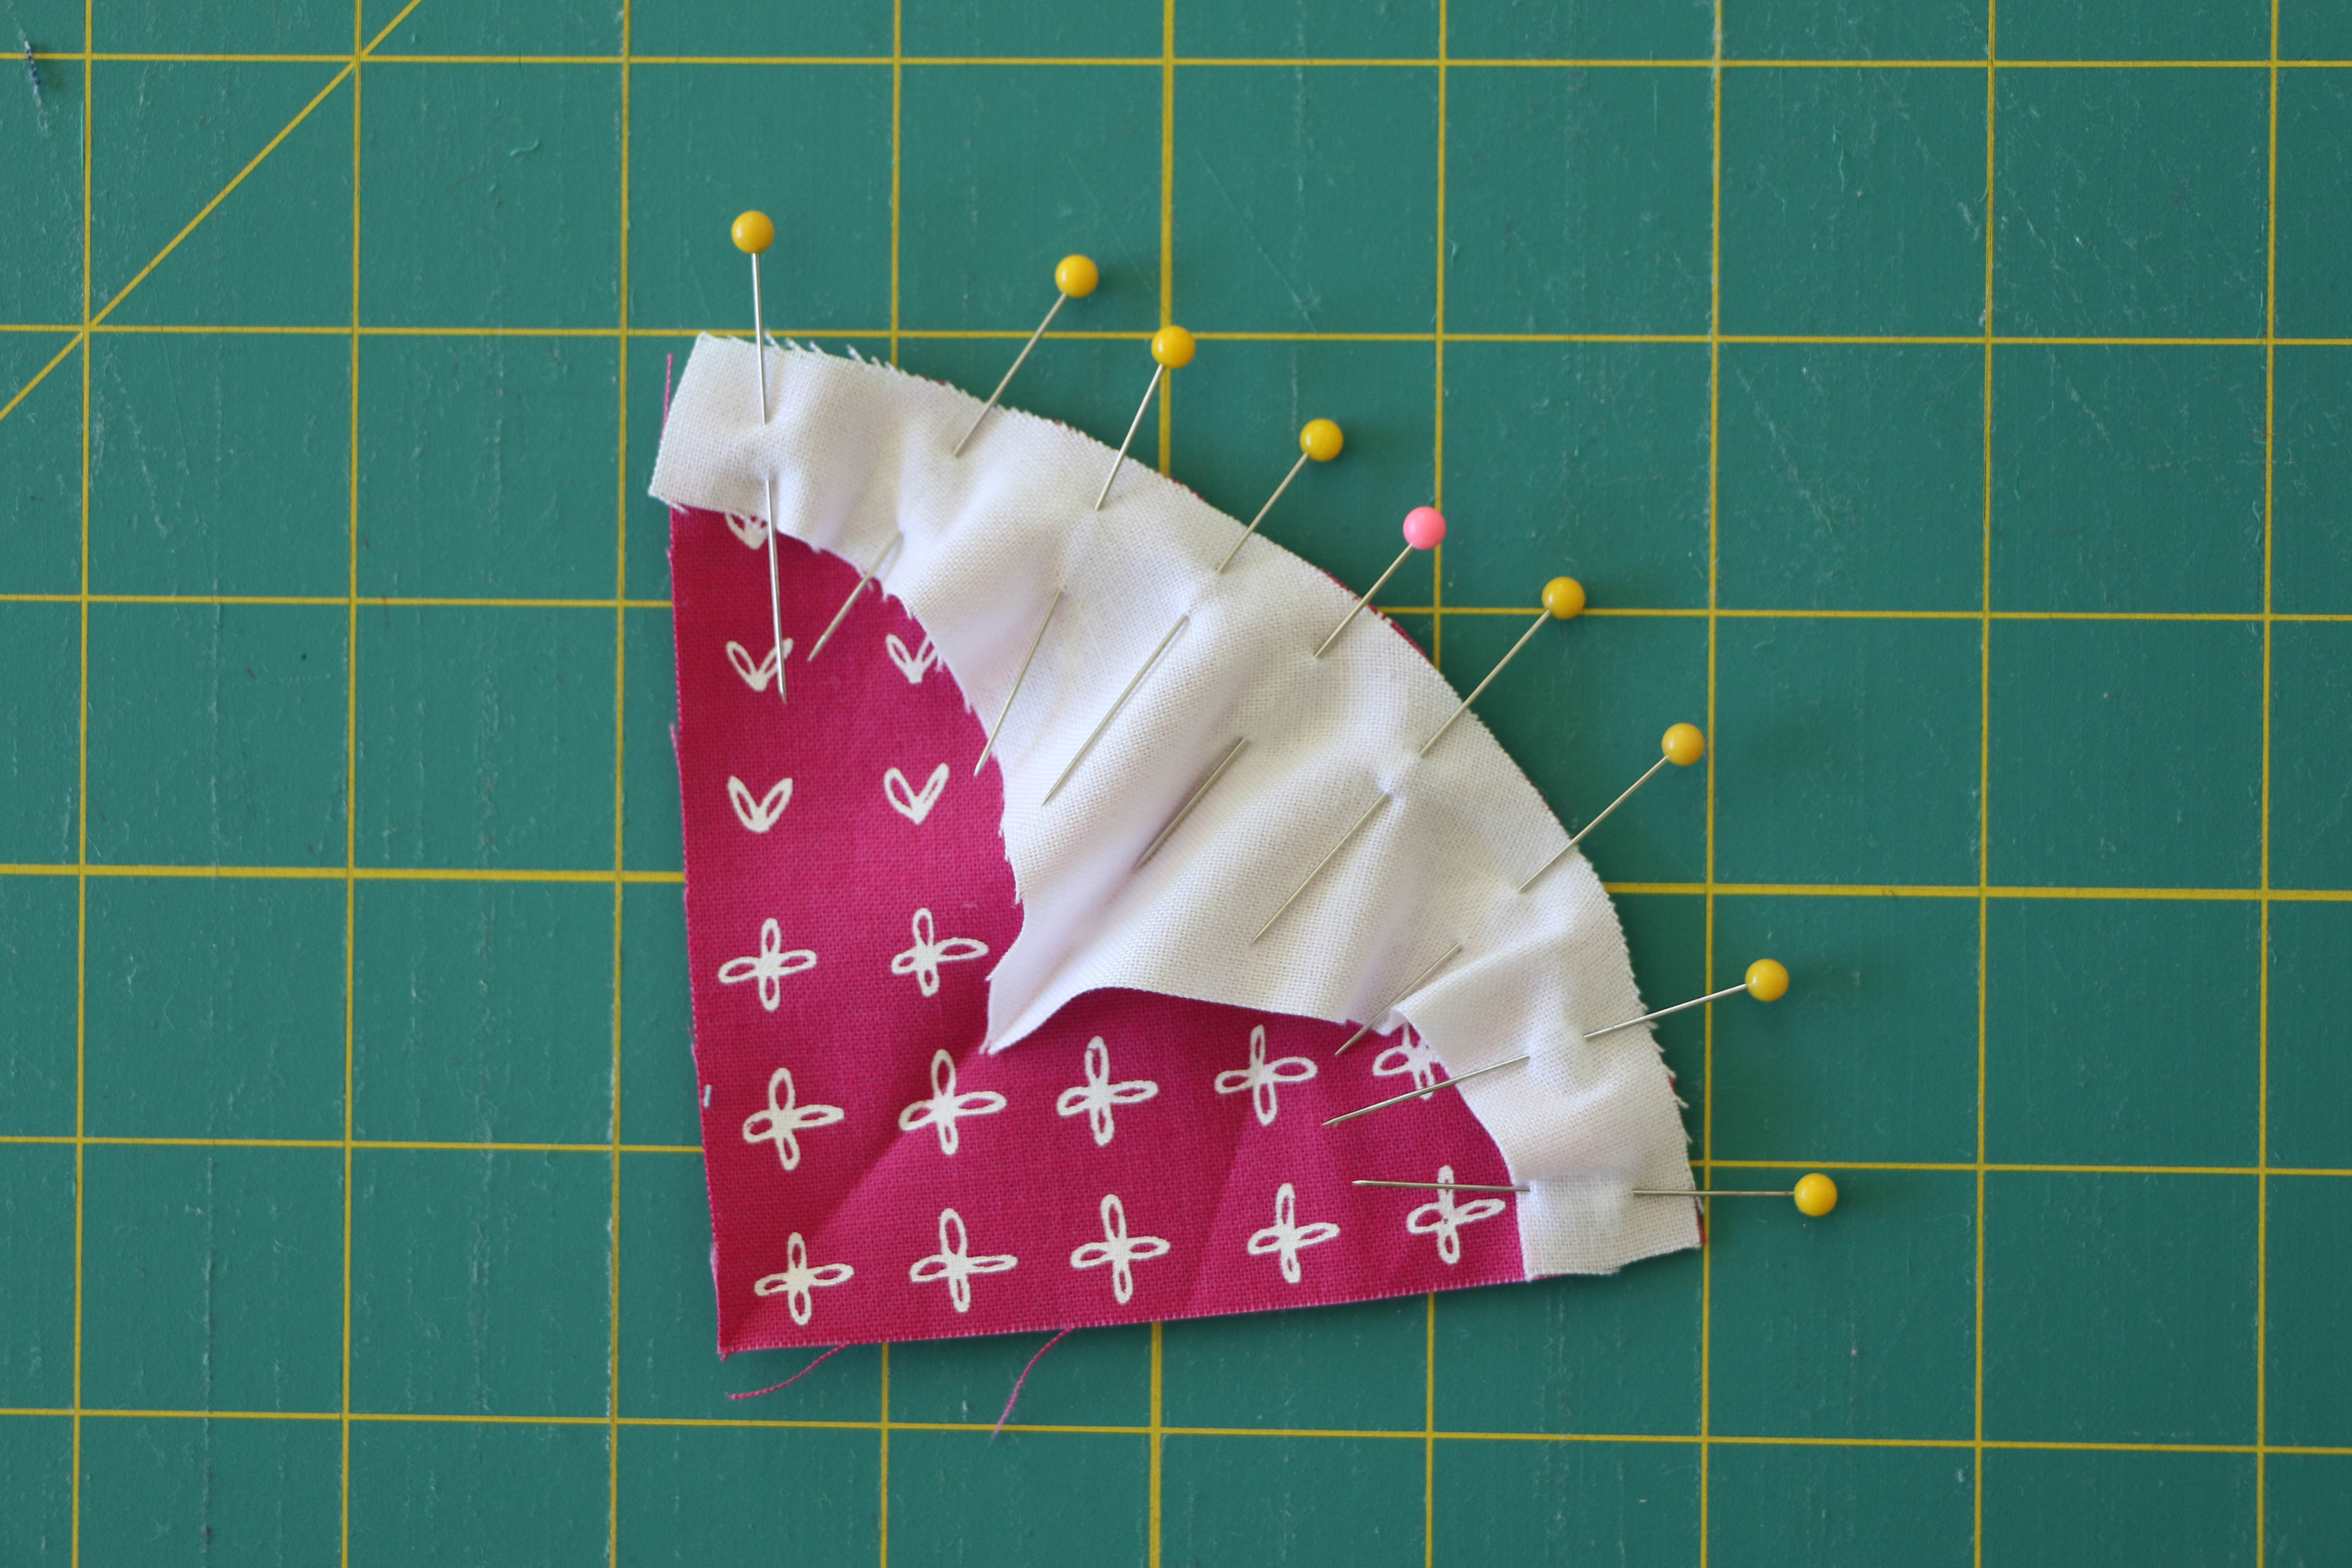
Here it is, very thoroughly pinned and ready for the sewing machine. You’ll notice, now that it’s all pinned up, it’s lying a lot flatter than it did when we only had the center and ends pinned.
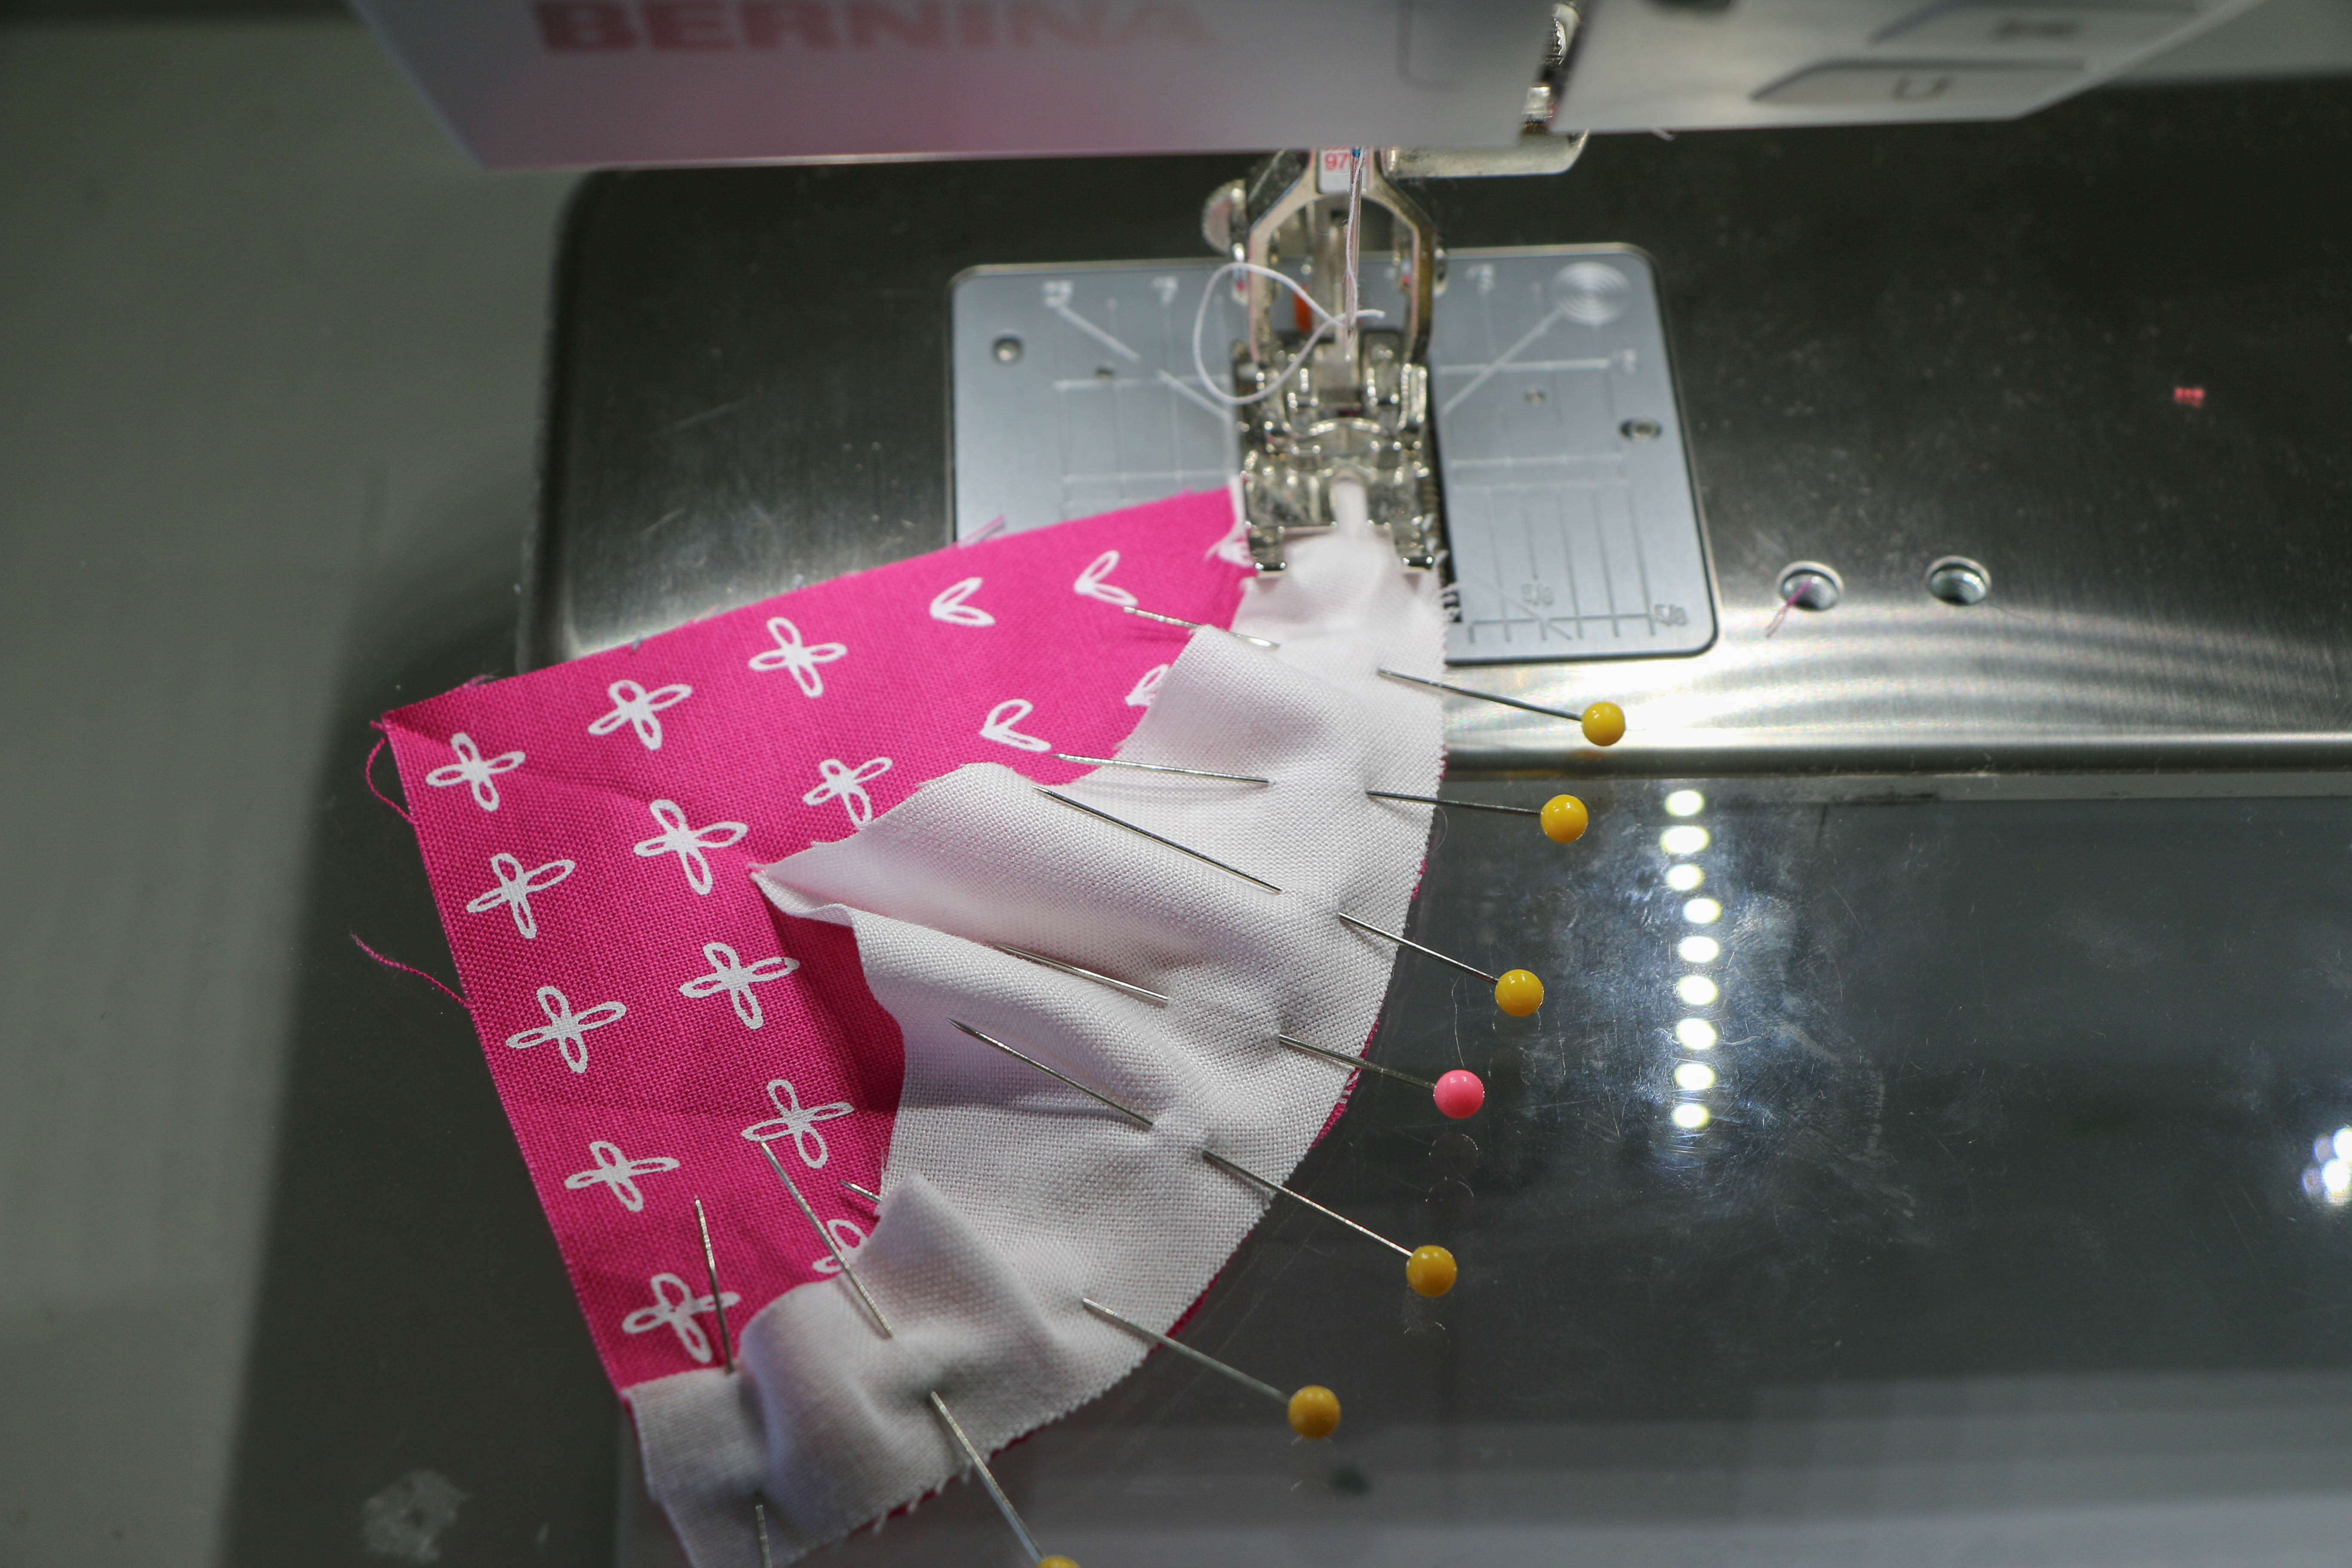
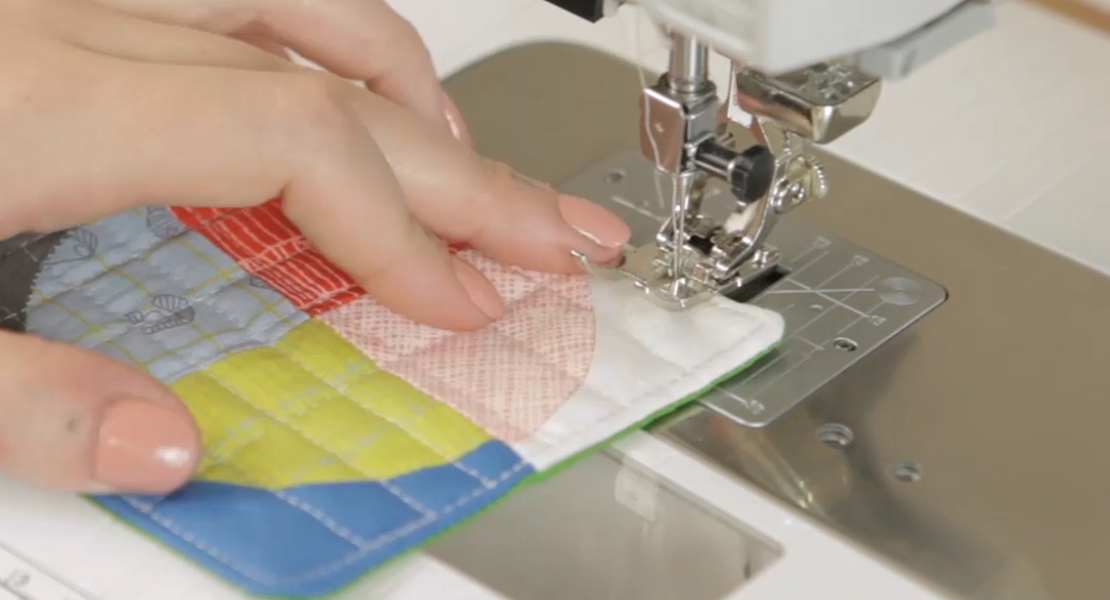
Ready to stitch? Just go slowly, stitching your 1/4″ seam allowance, aligning the edge of your machine foot with the curved edge and carefully removing the pins as you get to them. The following tips should help:
• With more gradual curves such as this one, I find I’m able to maneuver around the curve without stopping to lift the presser foot. But if you see any gathers or the fabric starts bunching up by the foot, stop, raise the presser foot (without raising the needle), adjust the fabric and continue sewing.
• As you’re stitching, keep an eye on the gathers in the Template B background fabric. Keep adjusting that piece so that the gathers are away from the needle and the stitching, otherwise, you’ll end up with puckers and/or wrinkles in your seam.
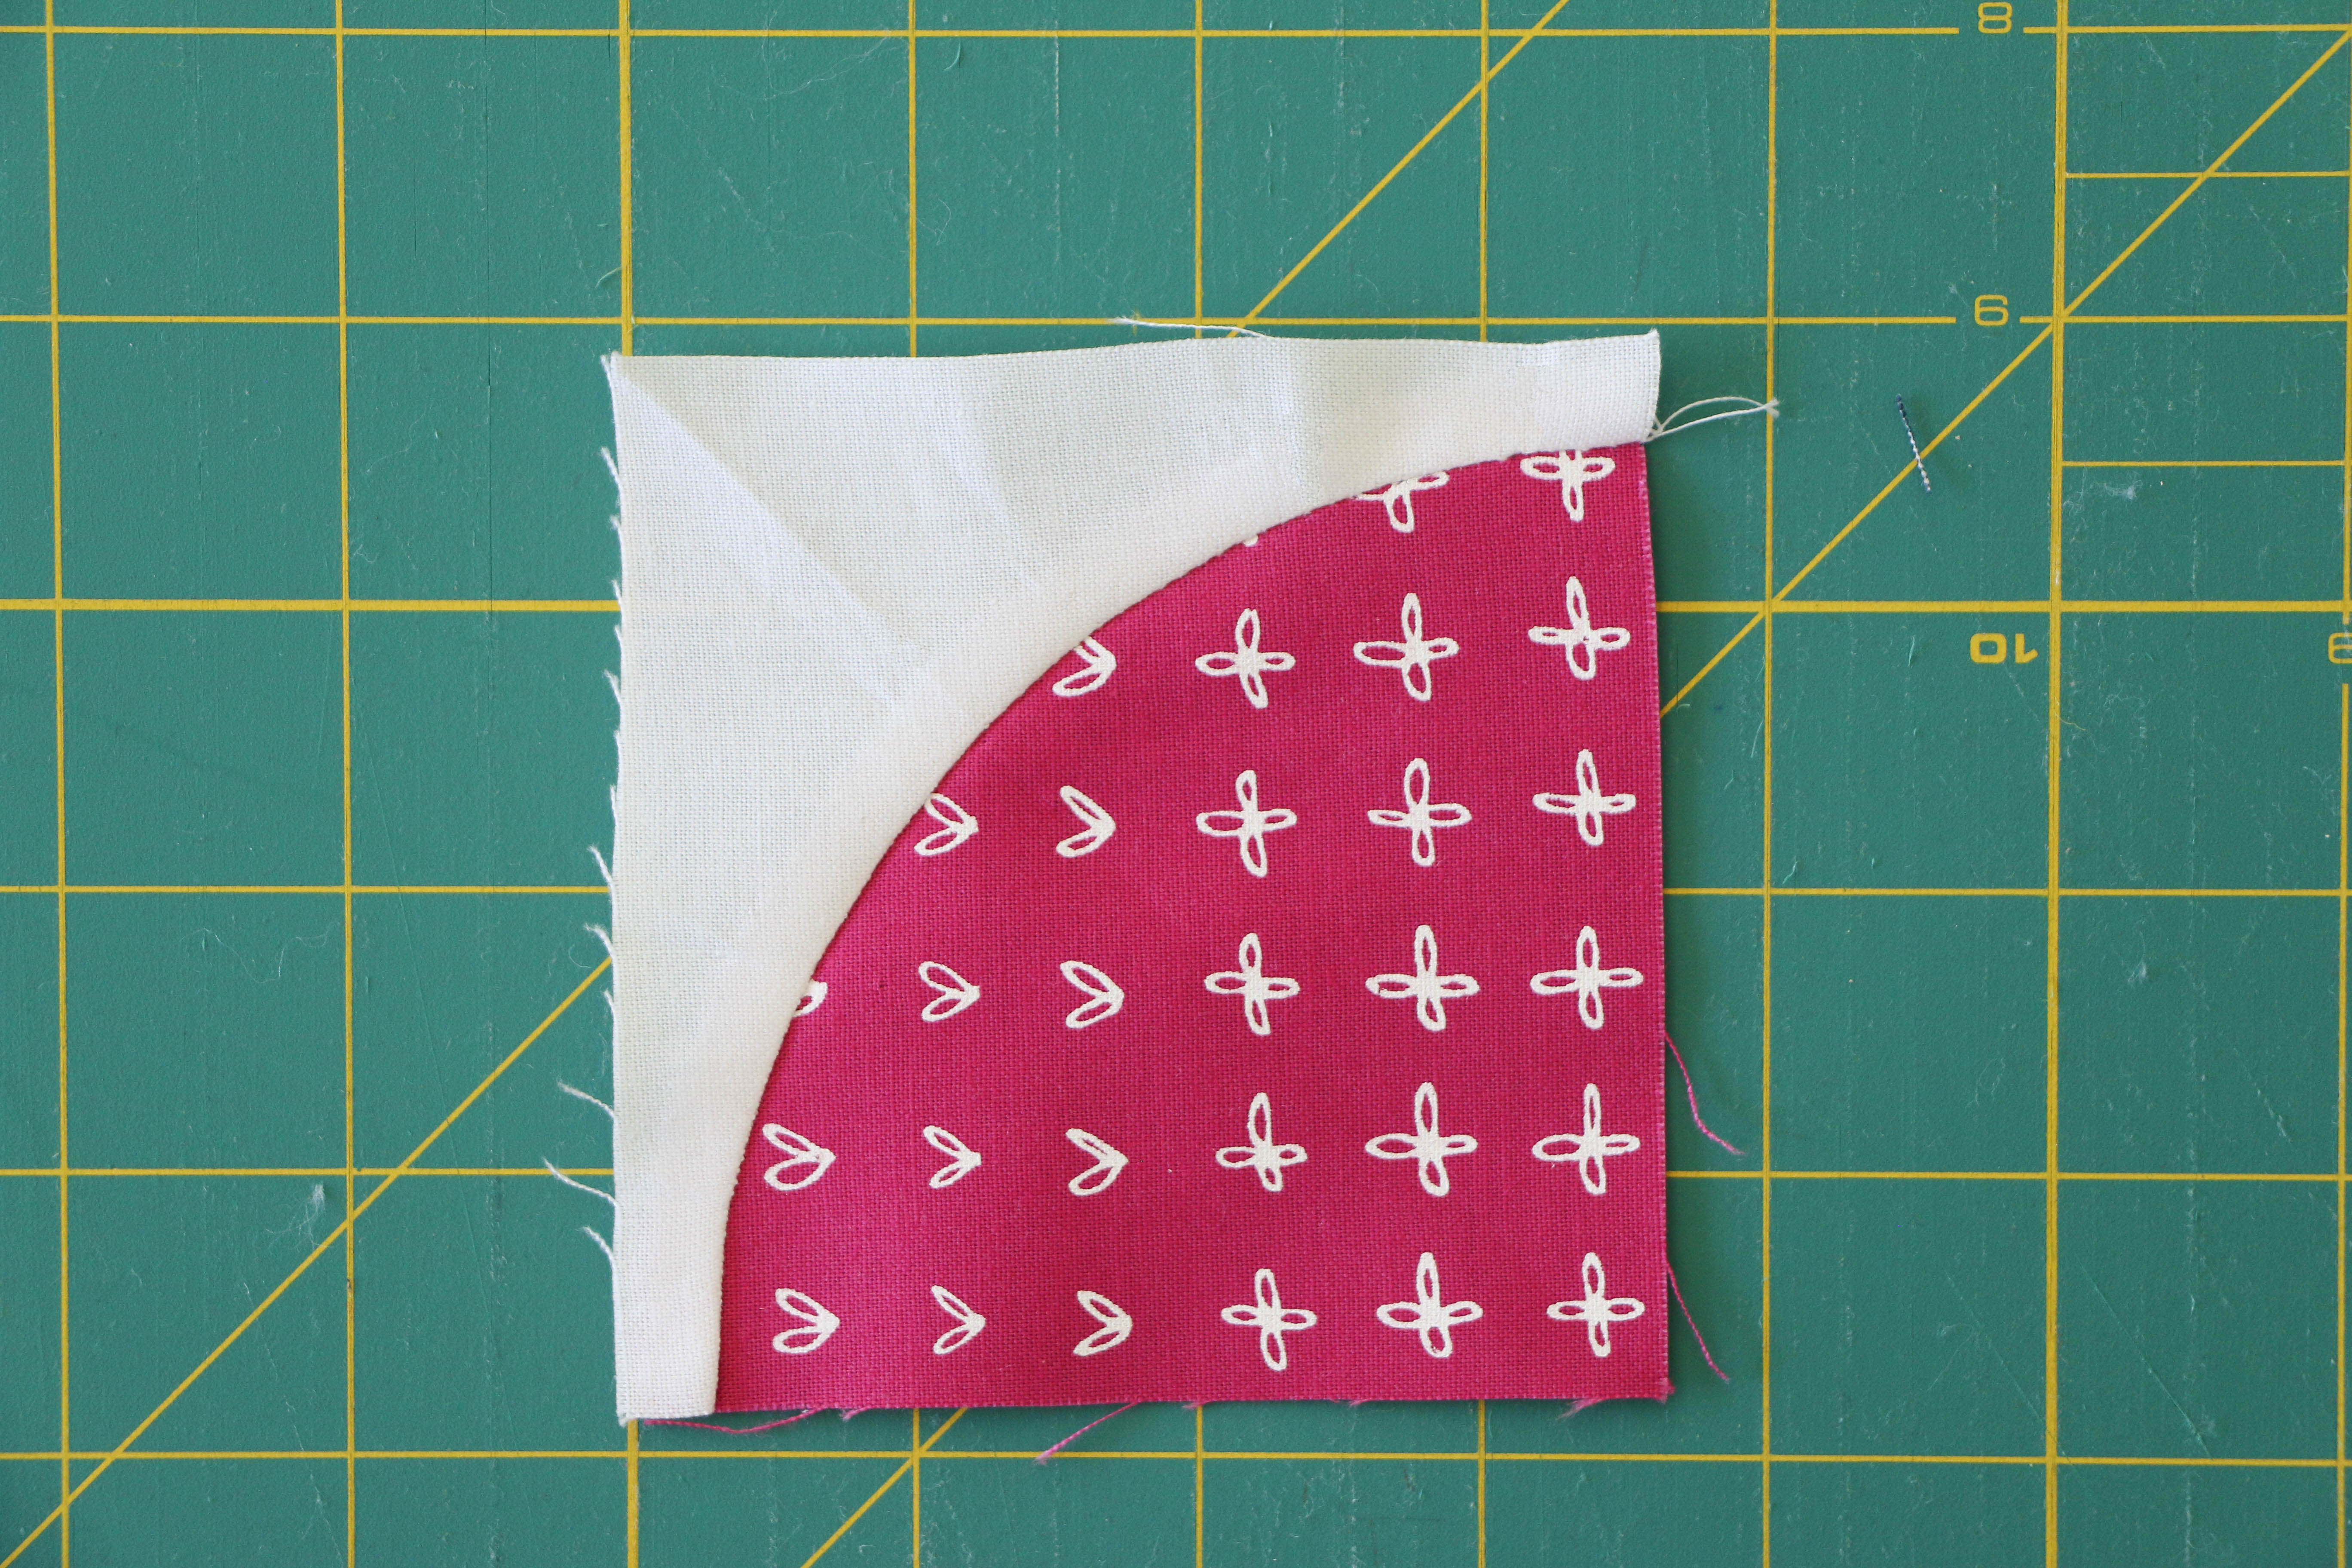
Most Drunkard’s Path templates are intentionally a little oversized, because that allows you to square up the unit after it’s sewn. Let’s do that now.

For this unit, we’ll square it up to 3-1/2″ x 3-1/2″. The key here is to make sure the 1/4″ marks on the ruler align perfectly with the ends of the curve you just sewed, as shown above. This will give you the seam allowance you need when sewing the units together into blocks. You may need to slide the ruler around a bit to find the perfect placement for squaring up correctly.

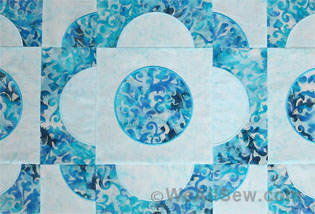
Ta-da! Your Drunkard’s Path unit is complete.
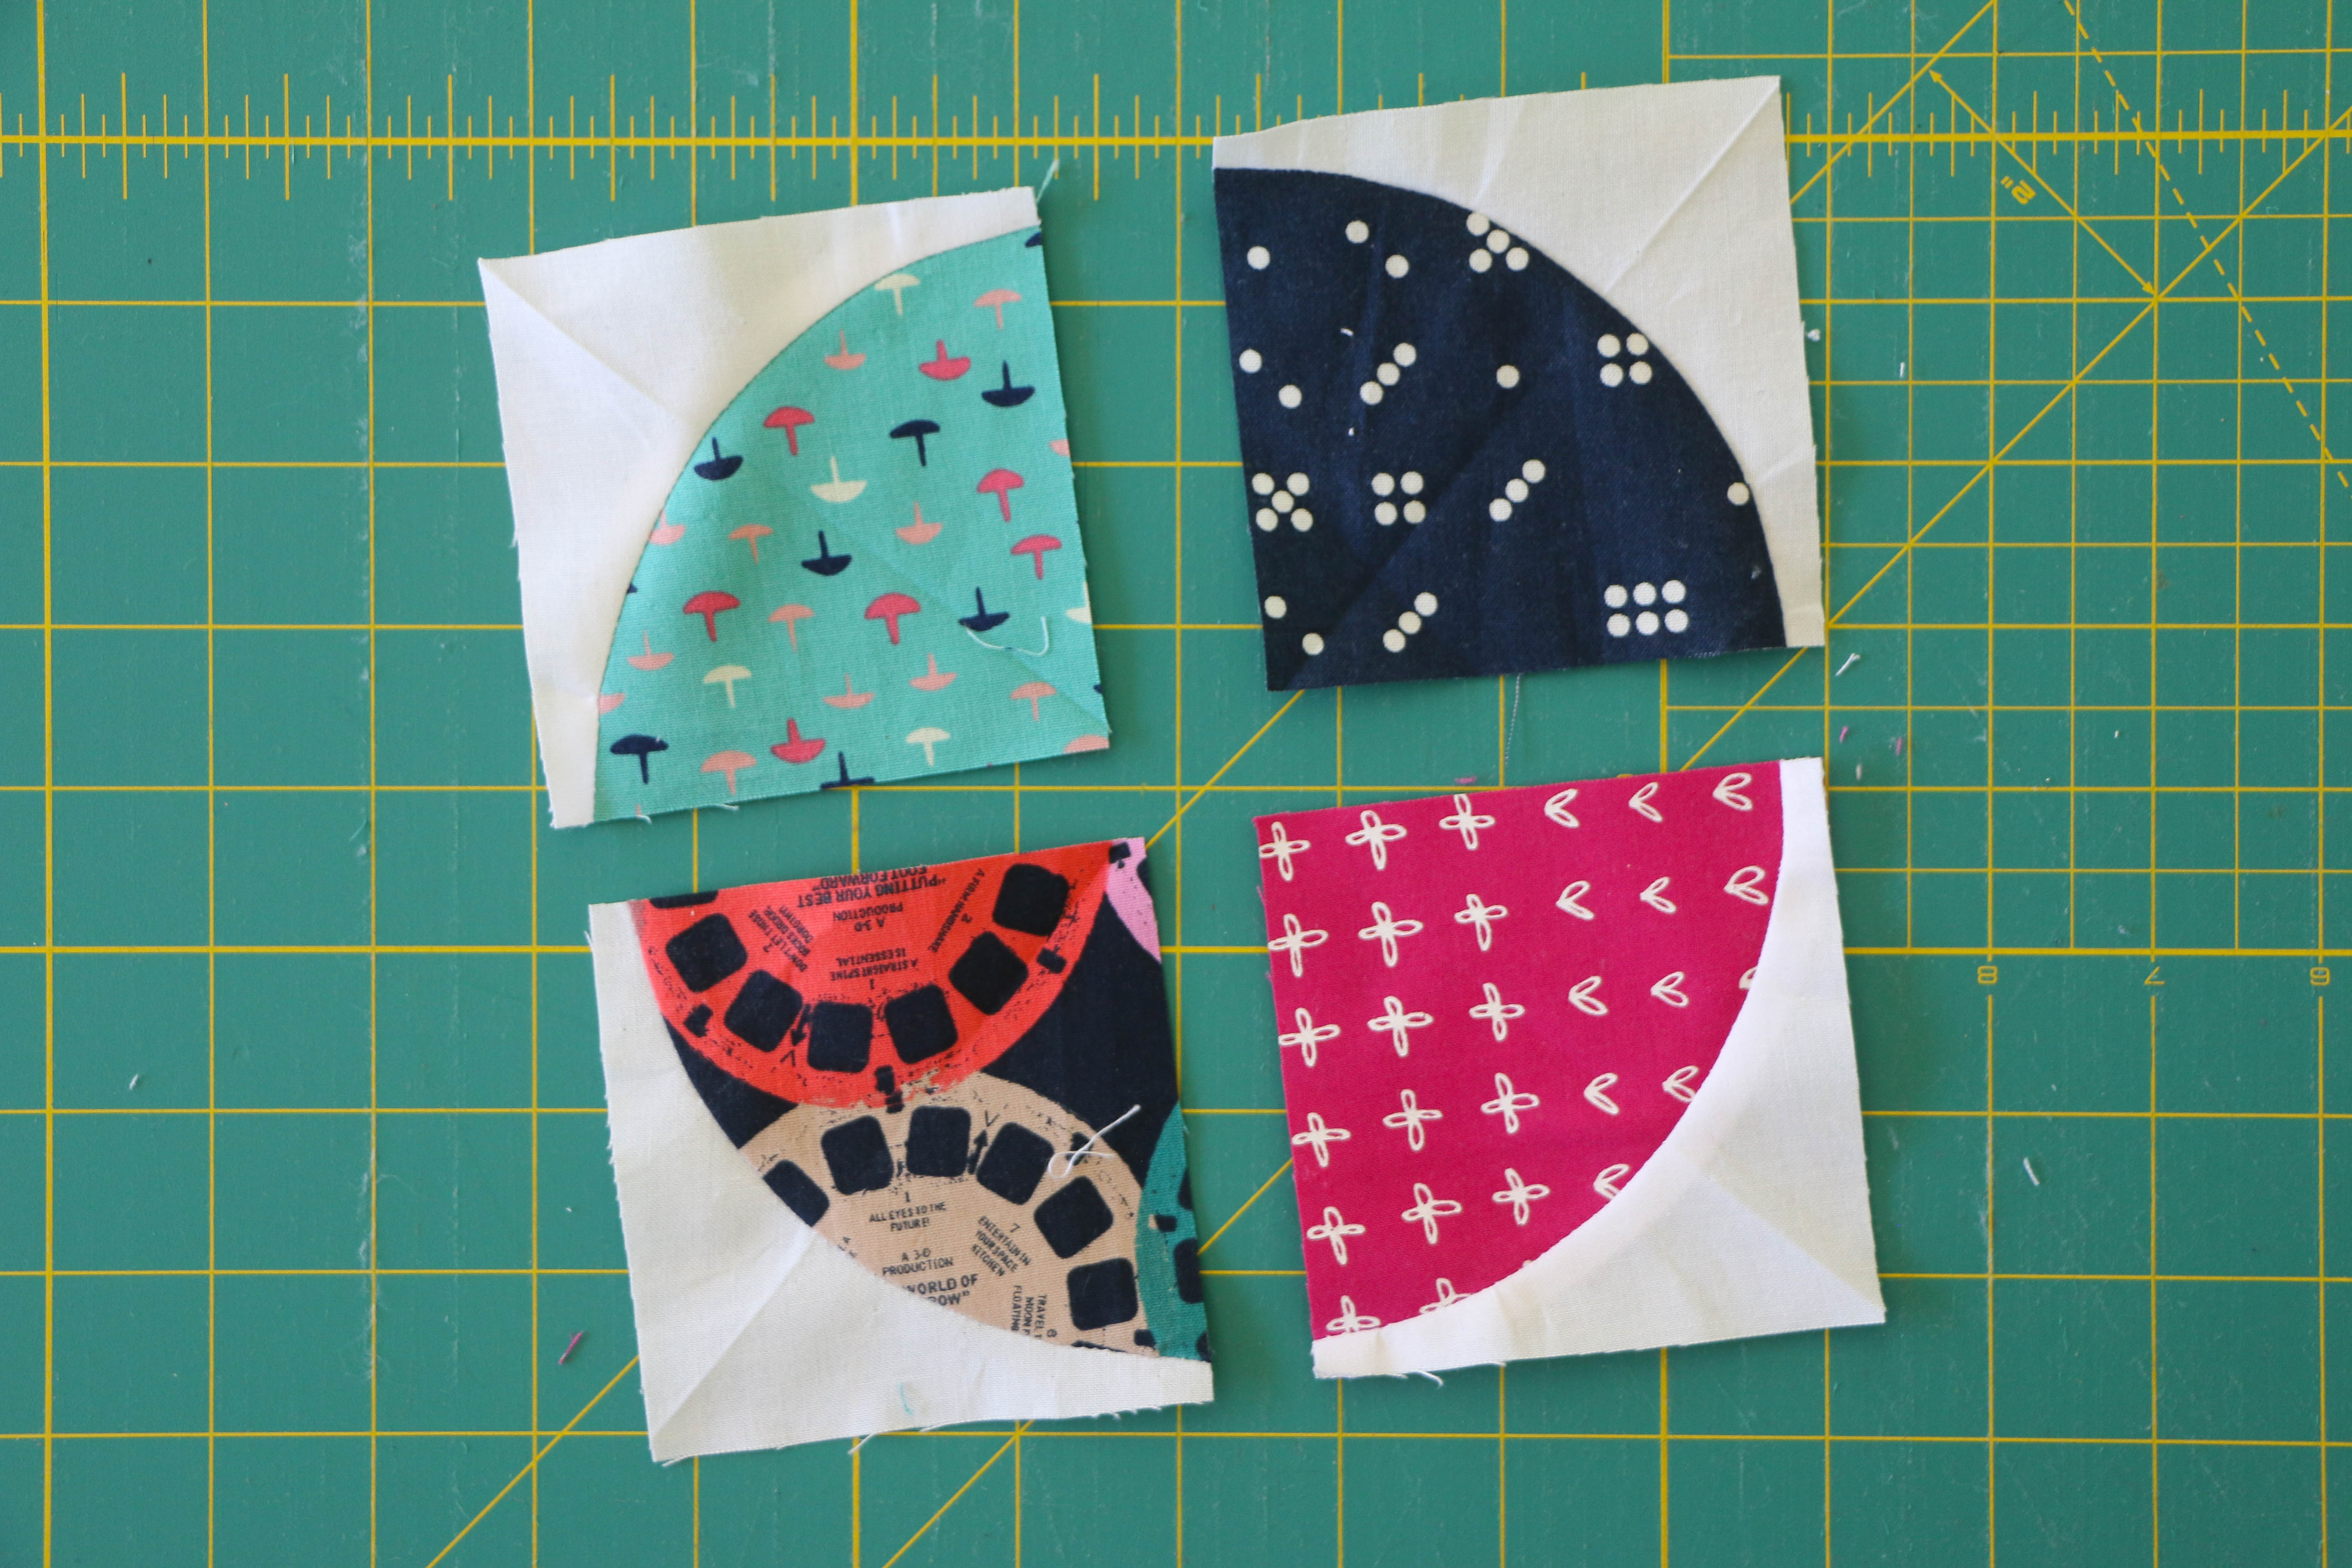
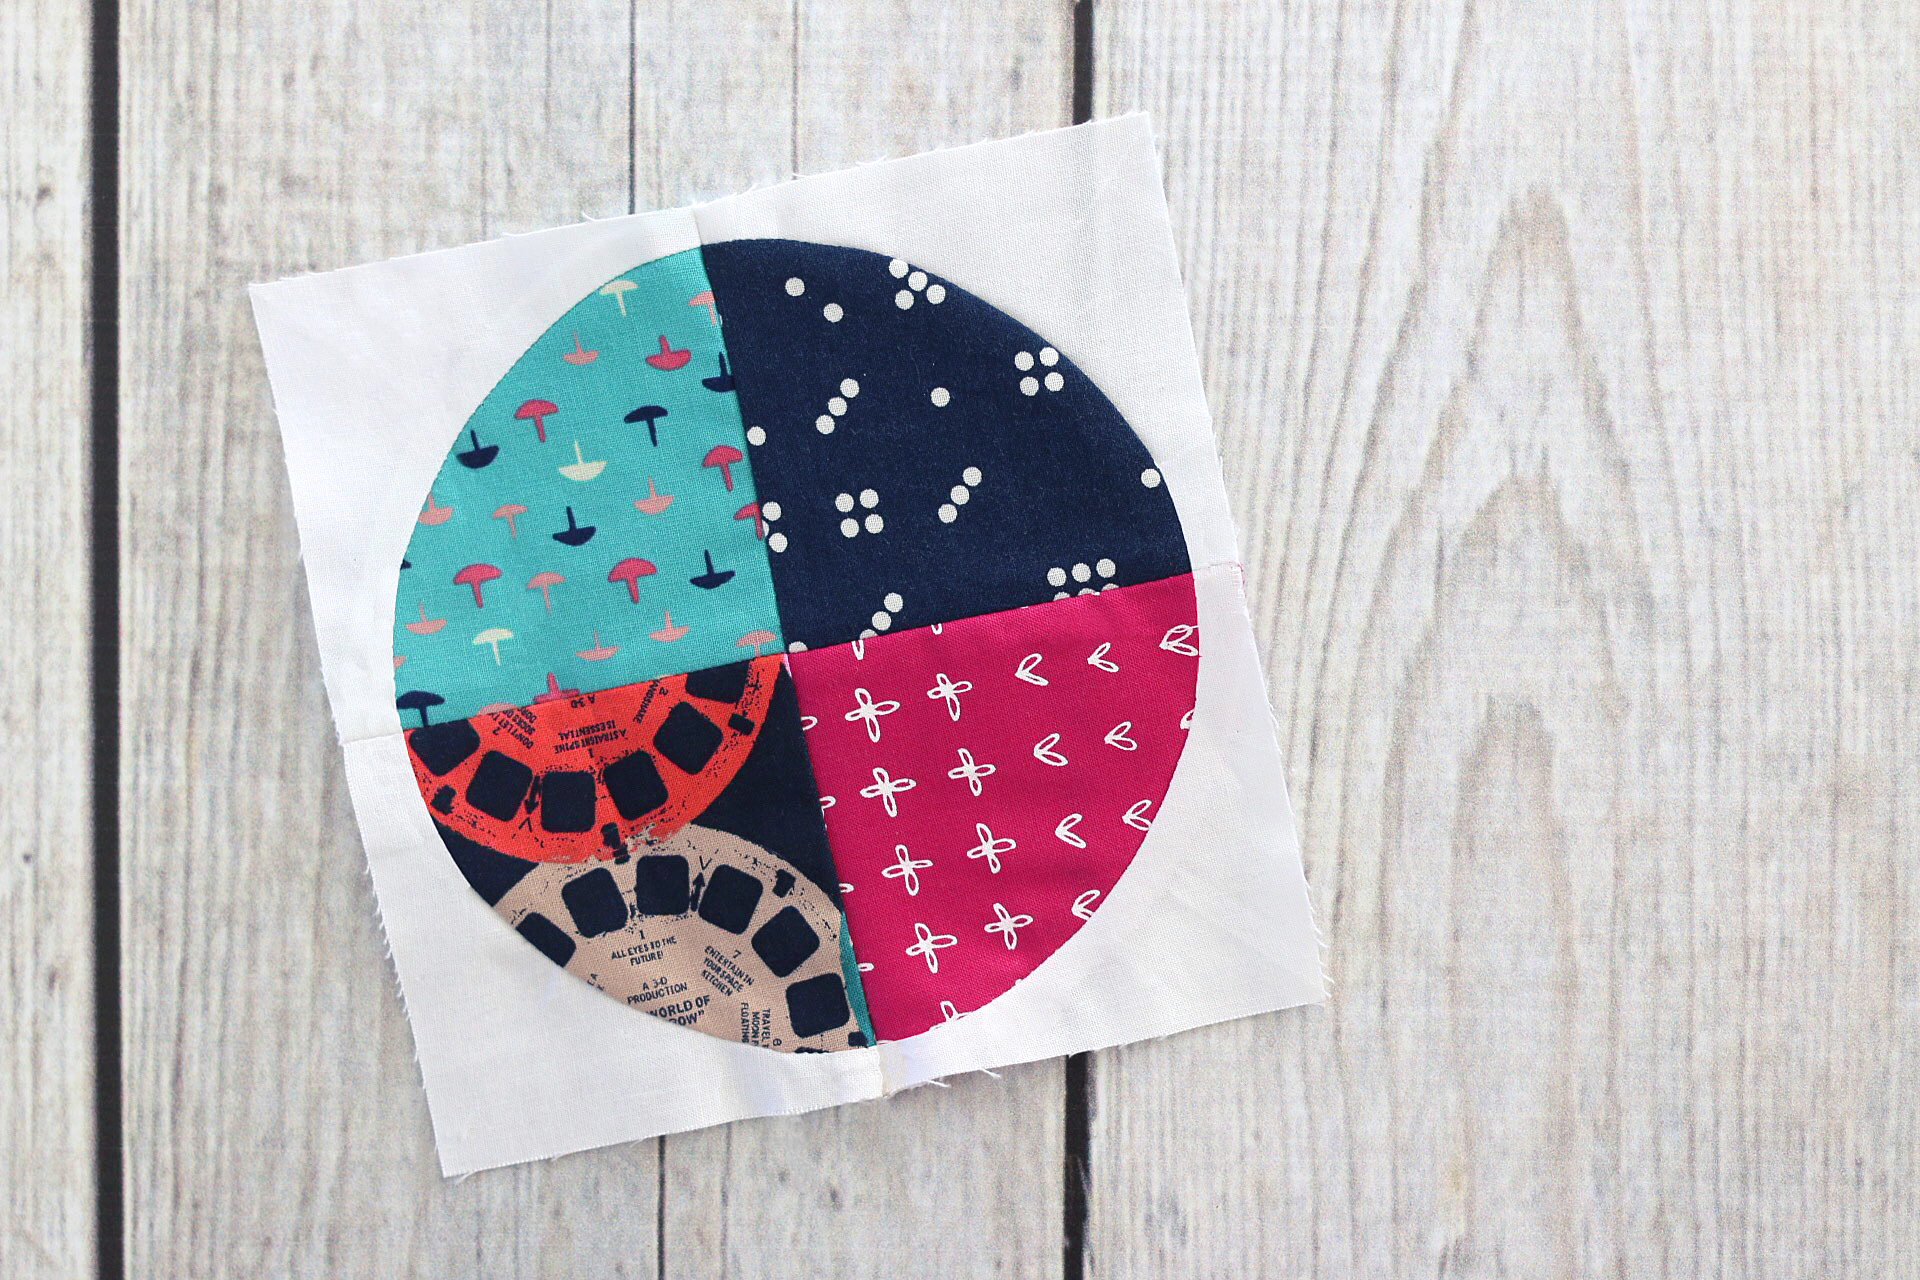
I’m usually a press-seams-open kind of gal, but of course that’s not really an option with curved sewing. So, if you’re using your Drunkard’s Path units to make a circle block, like I did here, be sure to press two of the units out (toward the white fabric) and two of the units in (toward the print). In this case, I pressed both of the navy prints in, and the aqua and hot pink units were pressed out. That way, when I sewed everything together, the seams nested neatly and the block came together perfectly!
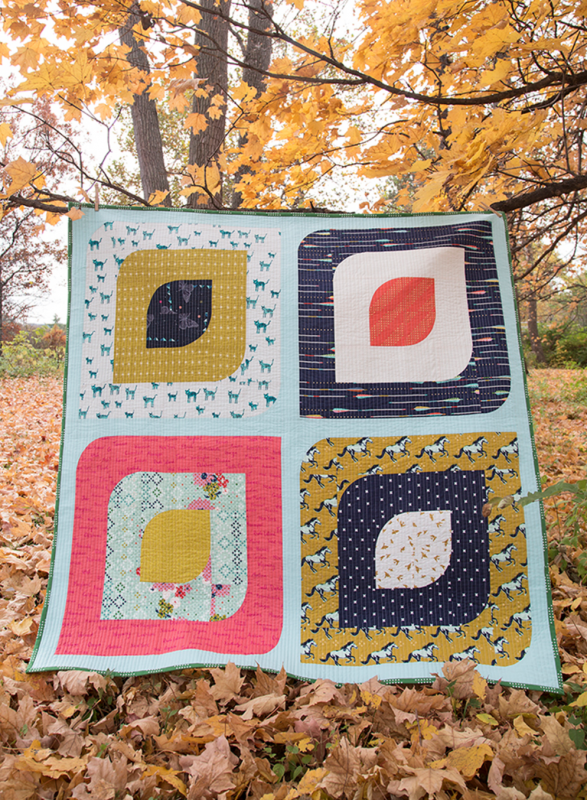
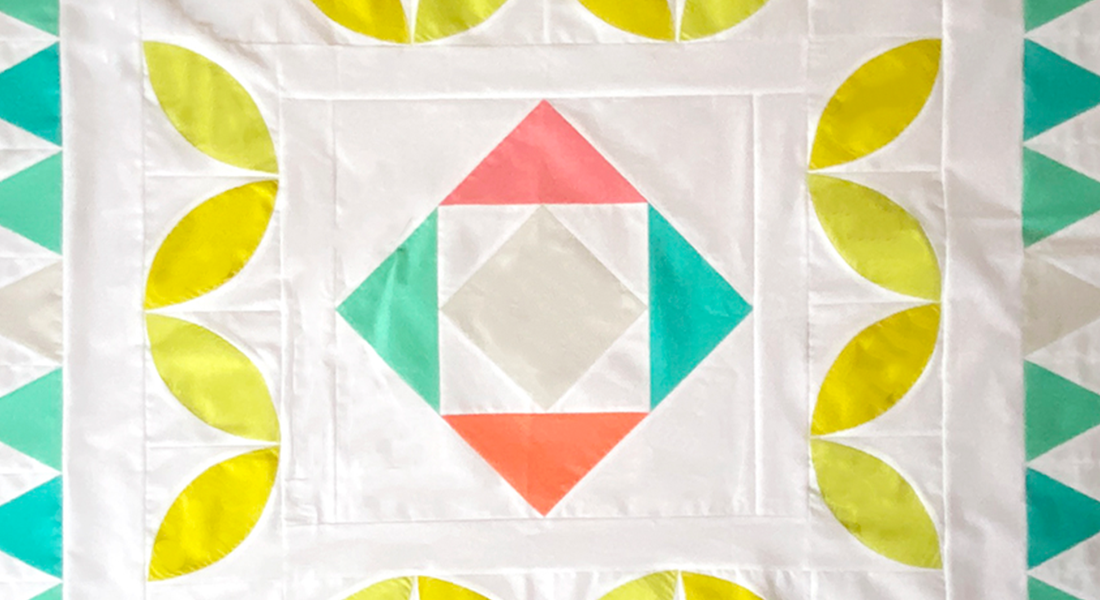
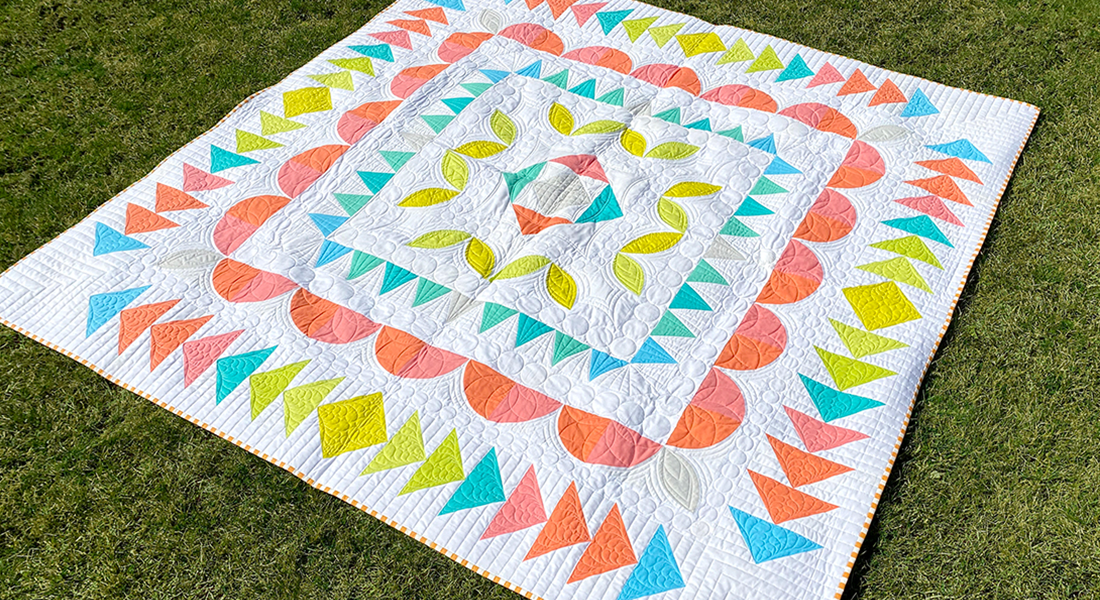
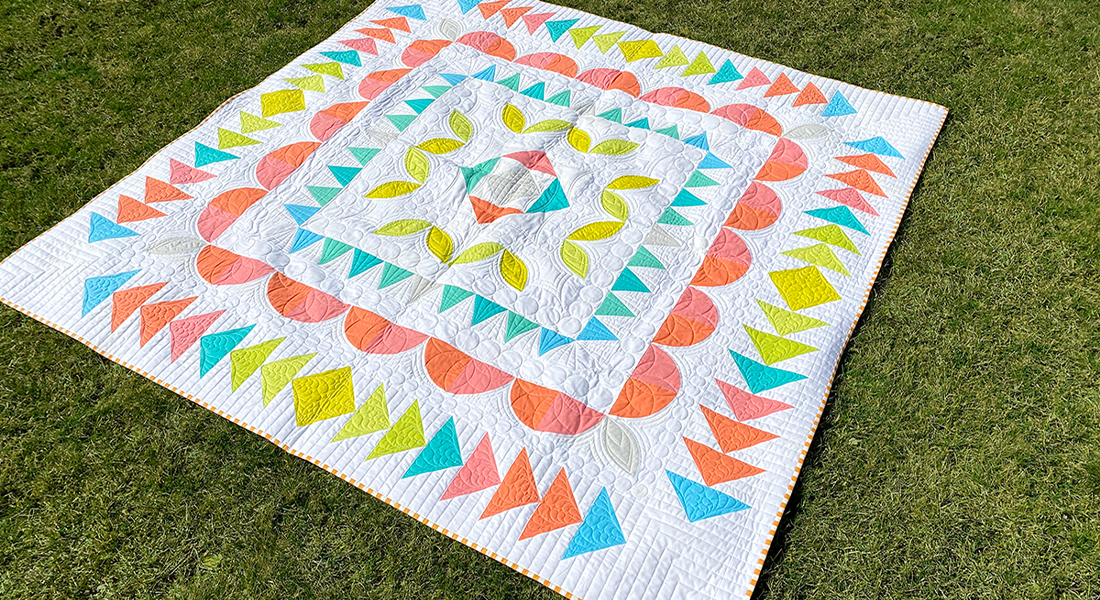
Now that you’ve mastered Drunkard’s Path units, go have a drink! No, just kidding. Now you can start thinking about all the design possibilities you’ve given yourself by adding curved piecing to your repertoire. Here are just a few gorgeous examples of Drunkard’s Path units in action.

By Angela Pingel, from her book A Quilter’s Mixology

By Amy Gibson, from her book For Keeps: Meaningful Patchwork for Everyday Living
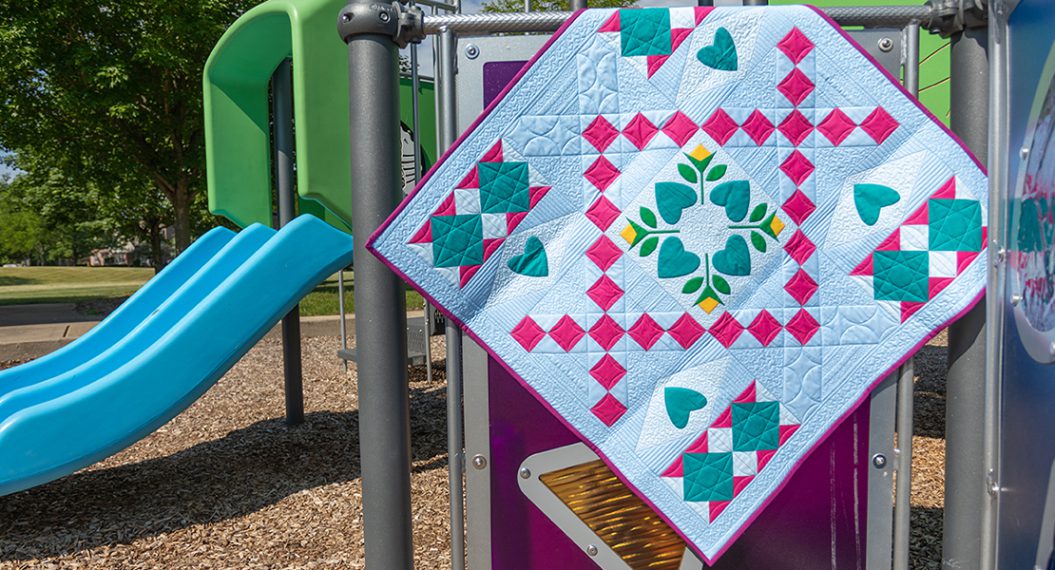
Petal Pusher by Faith of Fresh Lemons Quilts (from a design by Angela Pingel, from her book A Quilter’s Mixology)
Used Products


What you might also like


3 comments on “Drunkard’s Path Block Basics”
-
-
Thank you!
-
I discovered that when lining up the 2 template pieces instead of folding each piece and matching I place the 2 90 degree pieces together and pull up the cut edges to meet, keeping the points of the fabric in line and you will then have perfect matches.
Leave a Reply
You must be logged in to post a comment.

Lee, thank you for that tutorial. I’ve also seen one where the two pieces are glued together before sewing. Would it be possible to show the underside, where you’ve pressed the seams in opposite directions, to illustrate how they nest together?