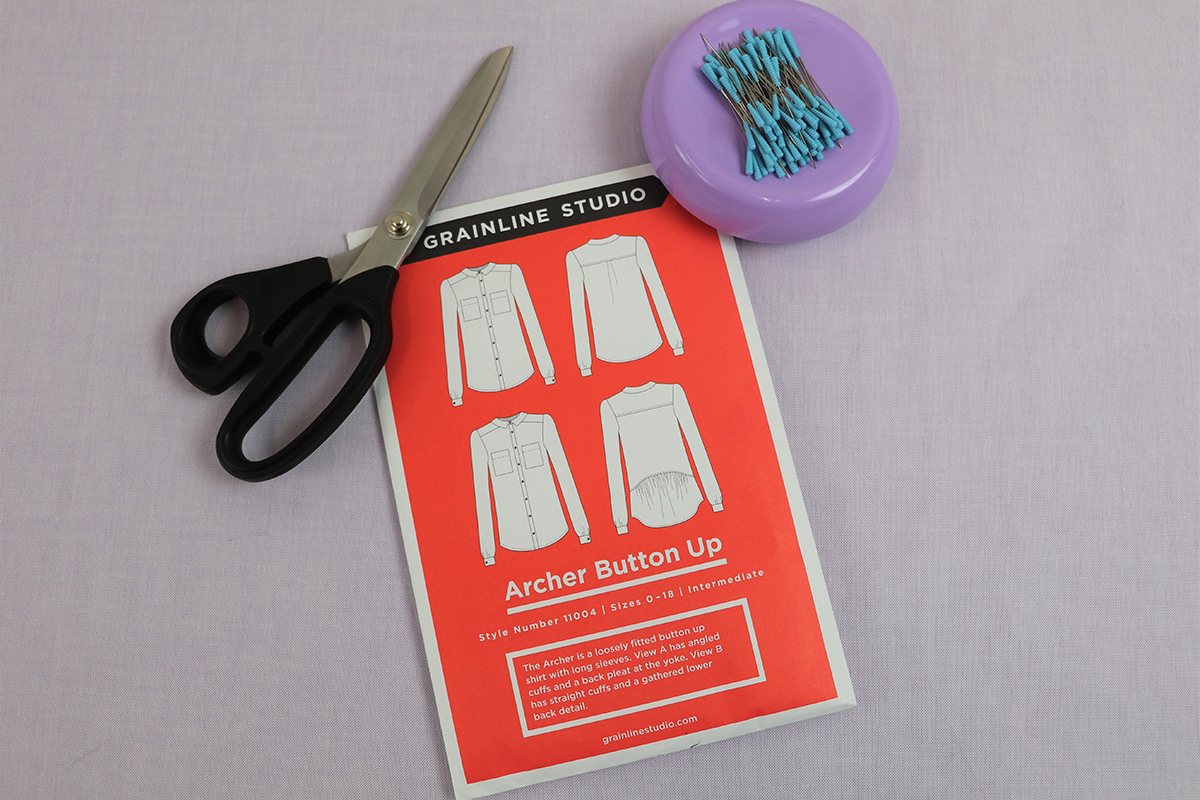
Garment Sew Along Part 2: Pattern Cutting, Markings and Fitting
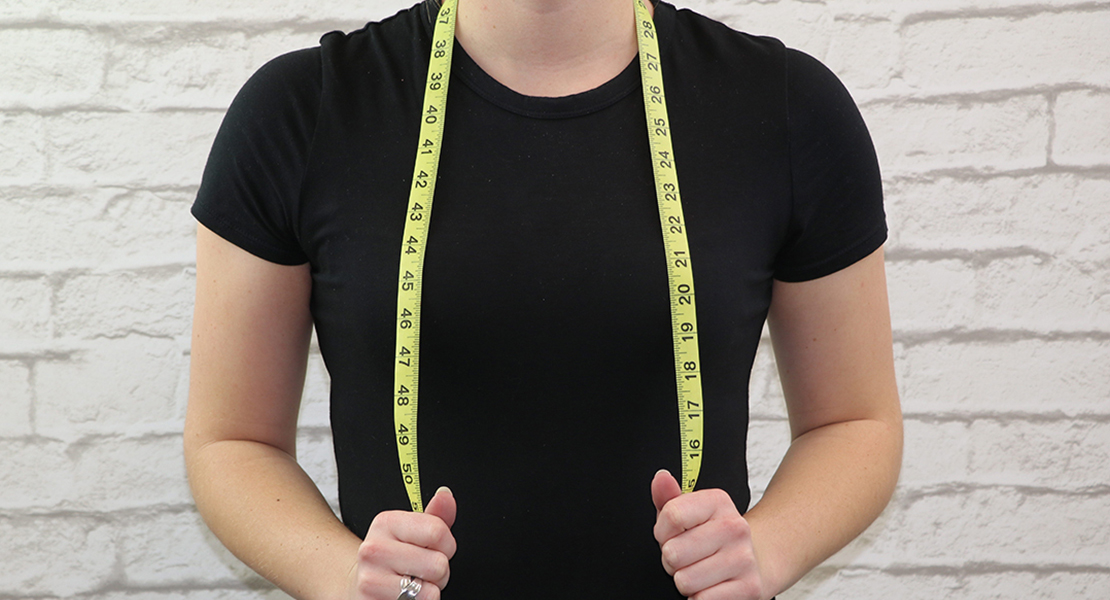
Welcome back to the garment sew-along! In part I of our garment sew-along, we discussed factors to think about when selecting a pattern, how to find the perfect size within the pattern by taking accurate measurements of the body, and what to consider in the fabric selection process.
This week there is even more on the agenda. We will take some tips from last time with our sizing and measuring to discuss different ways to cut the pattern out of the fabric, define the list of pattern markings that can be found on the pattern pieces, and demonstrate ways to make some simple adjustments to the pattern before the cutting process for an even better fit.
Materials for Pattern Cutting, Marking and Fitting
- Cutting
- Regular paper scissors, for cutting out the pattern pieces
- Dressmaking shears
- I have been using both the KAI 8” shears, as well as the Gingher 8” shears
- Highlighter
- Fabric that will be used for the garment
- Pinningindie patterns,
- Pins of choice for fabric type
- Wonder Clips by Clover
- Tracing & Fitting
- FriXion pens, my personal favorite for marking fabric
CUTTING
In the last post, I discussed how taking accurate measurements results in well-constructed clothing. Cutting is the next most important step to success. You have probably heard the saying, “Measure twice, cut once.” That certainly applies here! Laying things out ahead of time, planning the cutting, and knowing what size to make will help when cutting out the pattern pieces and lead to a smooth construction.
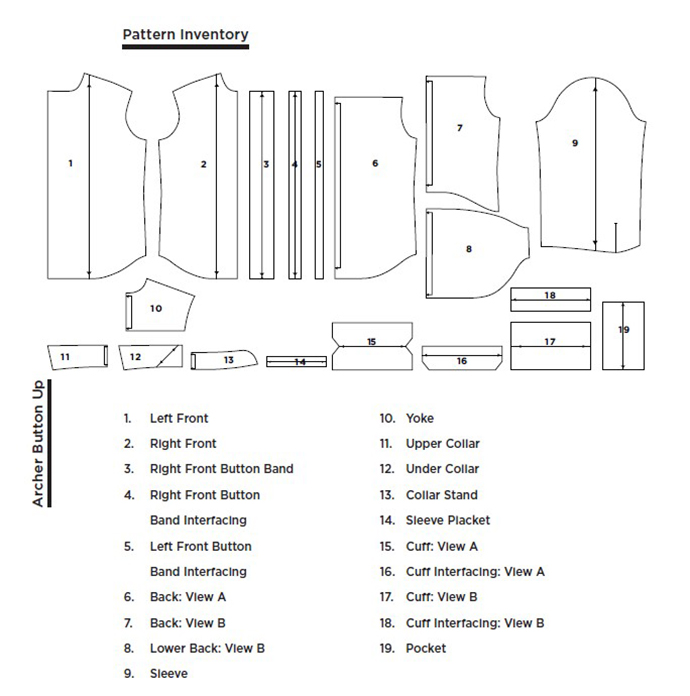
First things first, the pattern pieces must be cut out from the original packaged sheets. Different pieces are required for the two different shirt variations. Look at the instructions in the ‘Pattern Inventory’ to determine which pieces will be needed. I am making View A, but using the cuffs from View B. I will need pieces 1, 2, 3, 4, 5, 6, 9, 10, 11, 12, 13, 14, 17, 18, and 19.
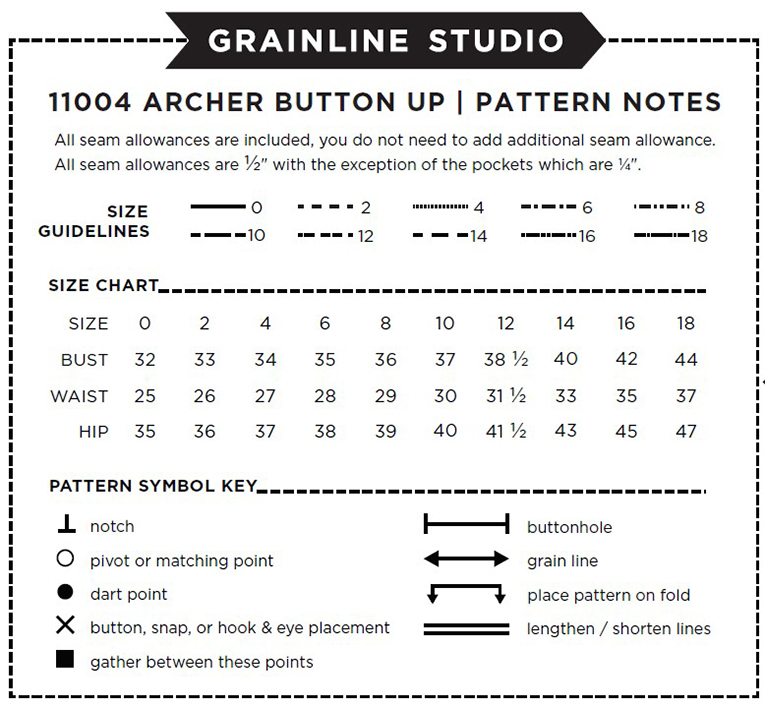
Use regular scissors to cut out each piece from the large sheets of tracing paper. Start by cutting out the pieces along the markings for the largest size. If you are planning on making fitting adjustments to the garment, do not trim down any more than this. Jump ahead to the FITTING section to learn about some of the adjustments you can make before trimming down the pattern anymore. Since I know my size and will not have to make any adjustments, I prefer to cut out my pattern pieces down to the size I need, with about 3/16” extra on the outside of the size. Because my measurements fell between sizes, I will be making a size 5, which means I will be trimming my pieces down to just shy of size 6. Each size uses a different line with a different dashed pattern. Cut out the ‘Pattern Notes’ from the pattern and use that to find what the line pattern looks like for the size you need.
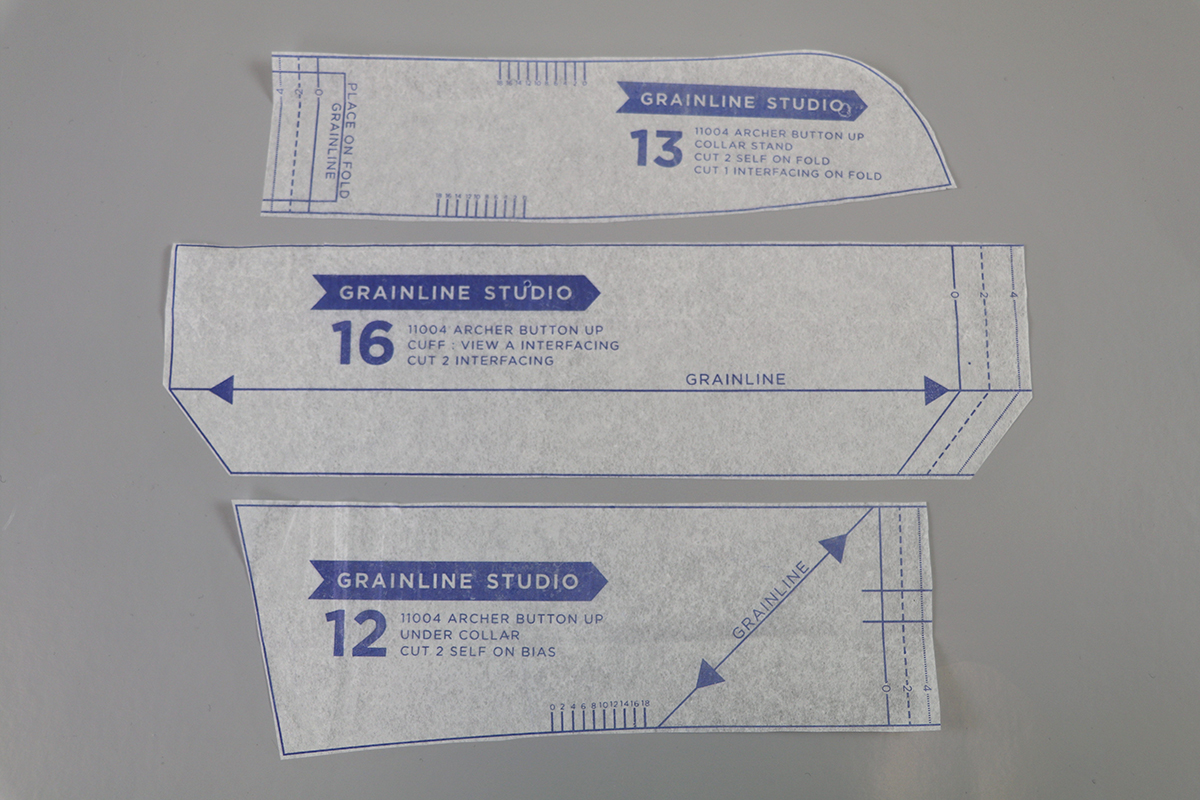
Patterns are typically printed on tracing paper, which is very thin and easy to cut and trace through. It is great for marking directly onto the fabric just by poking through the paper. However, being so thin and delicate, this paper wrinkles easily. A simple solution: Once the pieces are cut out, set an iron to low heat with no steam, and gently iron the pieces flat. There is valuable information listed on each pattern piece including the number of times it needs to be cut, where it is placed on the fabric in terms of the grain, and if it requires interfacing.
FABRIC & PIECE LAYOUT
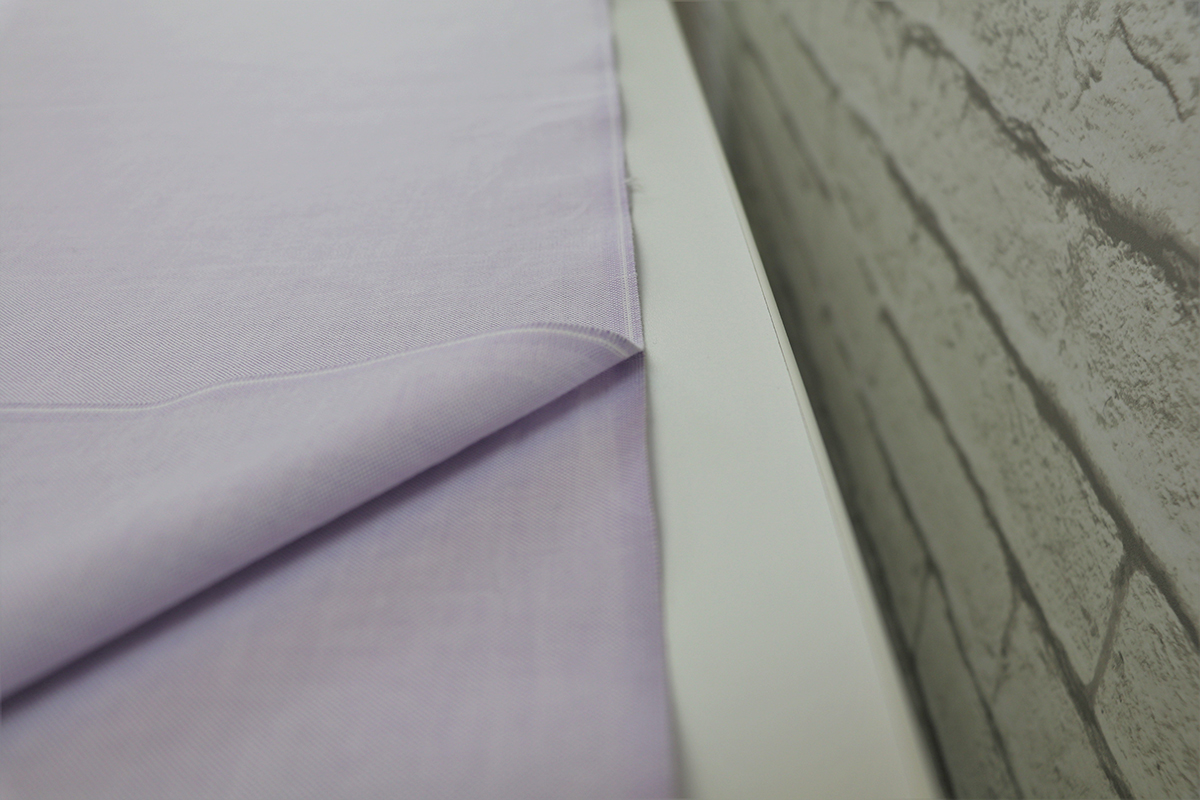
Now that all the pieces are cut out, it is time to lay out the fabric. Fabric should be prewashed and ironed. Fold in half, right side out, and match the selvage edges together.
If you notice that the selvage edges are not staying together, pin them or use Wonder Clips to hold them. When fabric is folded onto the bolt, it is not always straight or even, which creates a crease that is not in the center of the fabric and could be pulling the selvage edges in different directions.
After the fabric is folded, lay it flat on the cutting table. If excess fabric lands over the edge, fold it accordion style and place it on the edge of the table. This way you can easily pull more fabric from the pile after cutting out some of the pieces.
Laying the pattern pieces out on the fabric can be an intimidating task, considering how many this pattern requires. In the directions, there is a layout given for each width of fabric, but if your sewing studio is like mine, you do not have enough room to lay out all the pieces at once. Use the given layout as a guide.
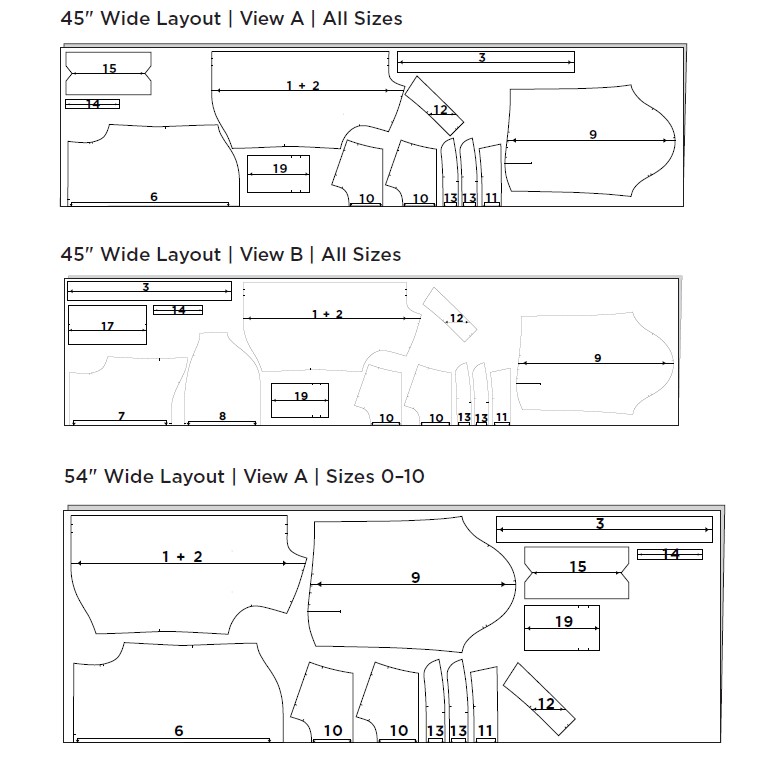
Since it is next to impossible to lay out all the pattern pieces at once, I have an order of importance. First, I layout anything that has to go on the fold. Next are those pieces on the straight of grain (parallel to the selvage), and last is anything cut on the bias. Patterns always call for more fabric than needed, but if a cut does go wrong, the fabric can always be refolded and pieces can be readjusted to fit. Another detail to pay attention to is how many of each piece is cut. With this pattern, pieces 1 and 2 are only cut once, so they can be placed in the same position on opposite sides of the fold.
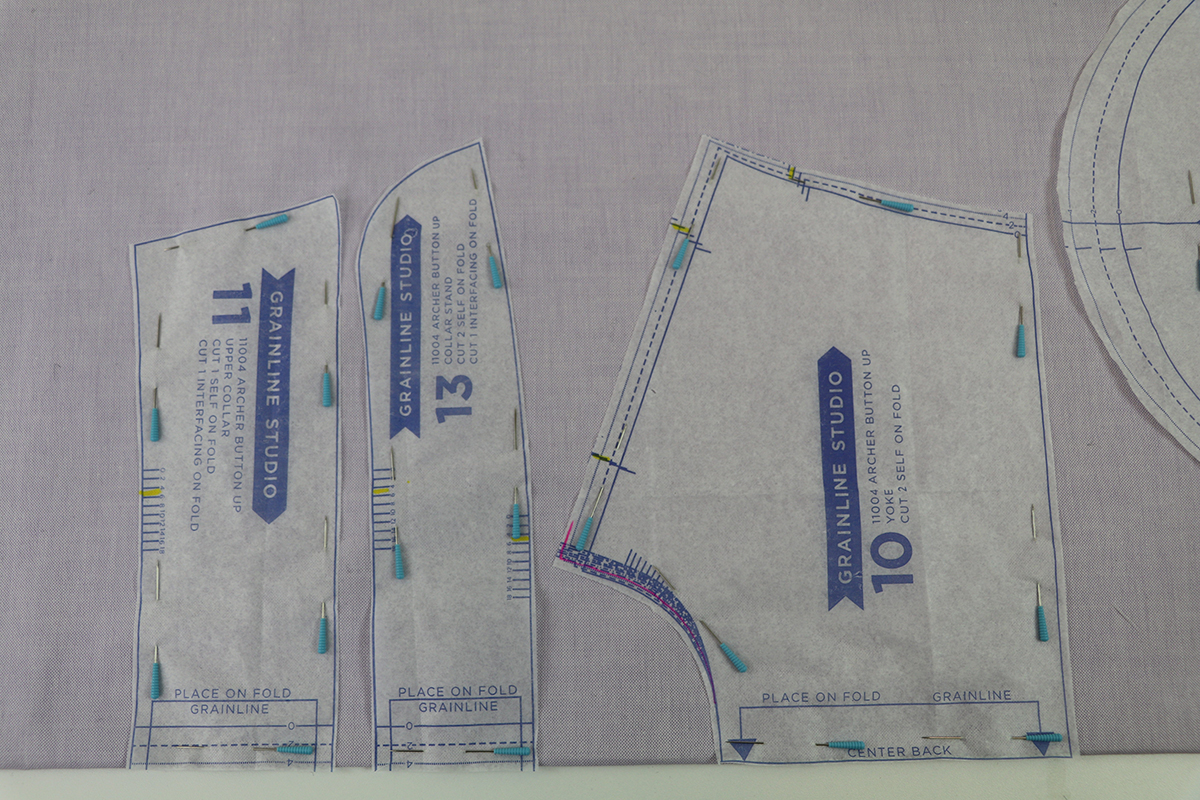
Four pieces from this pattern are cut on the fold. For this pattern, those pieces are the upper collar, the collar stand (cut 2), the yoke (cut 2), and the back. The pattern pieces say ‘PLACE ON FOLD’ with arrows pointing to the line that should be anchored to the fold.
On the grain means that these pieces will not have a lot of stretch. They are usually foundation or structured pieces that hold the garment’s shape. This includes the left and right fronts (cut 1 of each), the right front button band (cut 1), the sleeves, the cuffs, and the pockets. These pieces have a line in the middle of them with arrows on both ends. This line should be parallel to the selvage edges when placed on the fabric.
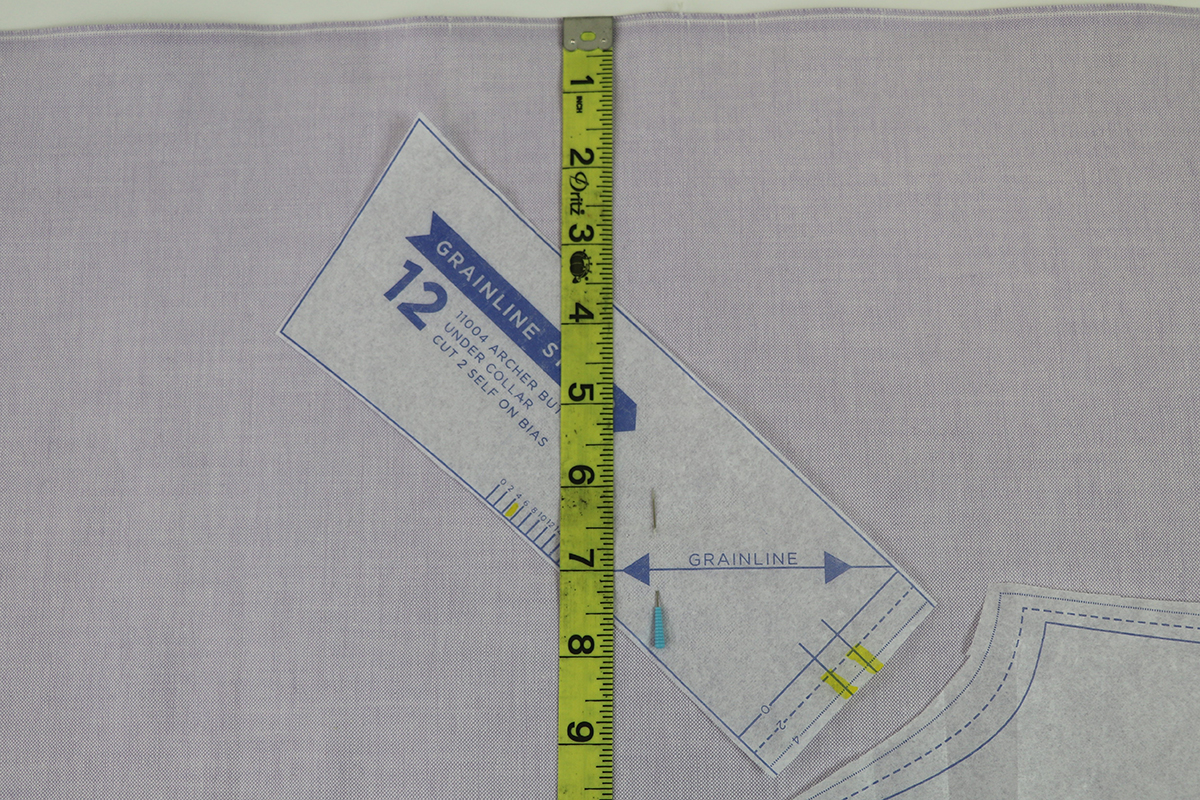
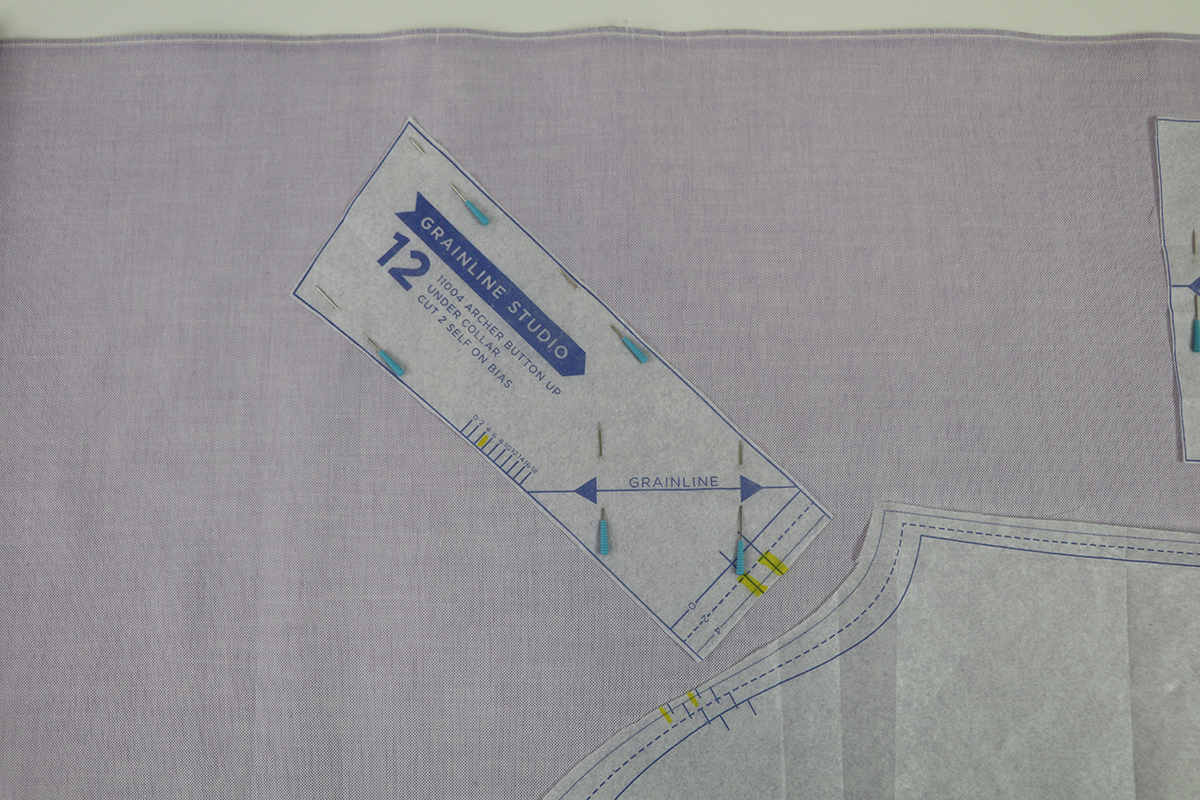
The under collar is the only piece that is to be cut on the bias. It will give the piece some stretch so can be eased into the neckline, and also lay nicely when the collar is folded over. This piece also has a line with arrows on both ends, which should be parallel to the selvage edges.
Before I get too far ahead of myself and before pinning anything onto the fabric, I go through and mark all of my notches with a highlighter.
Notches are used as matching points within the pattern. After pieces are cut and some are sewn together, it may be hard to distinguish where the next one goes. The pattern shows where notches are to be matched up to ensure you are constructing the garment correctly and that the pieces are fitting together properly. I always forget to cut my notches, so I have found that it is very simple to look at pattern pieces first, find the notches, and highlight them using a bright highlighter.
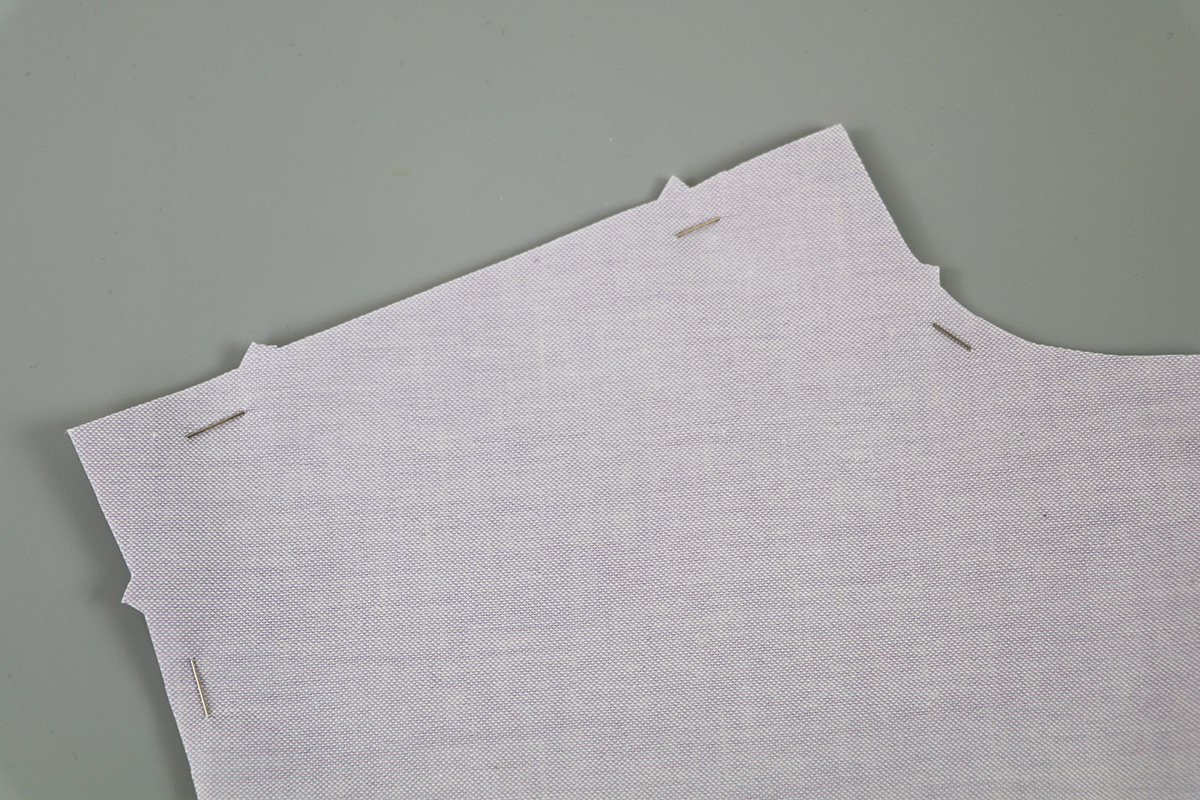
Once the pieces are laid out on the fabric, pin them on. This will prevent shifting as you are cutting. Pin as close as possible to the very edge of the piece in the direction the cutting will occur, otherwise you risk getting stuck by a pin.
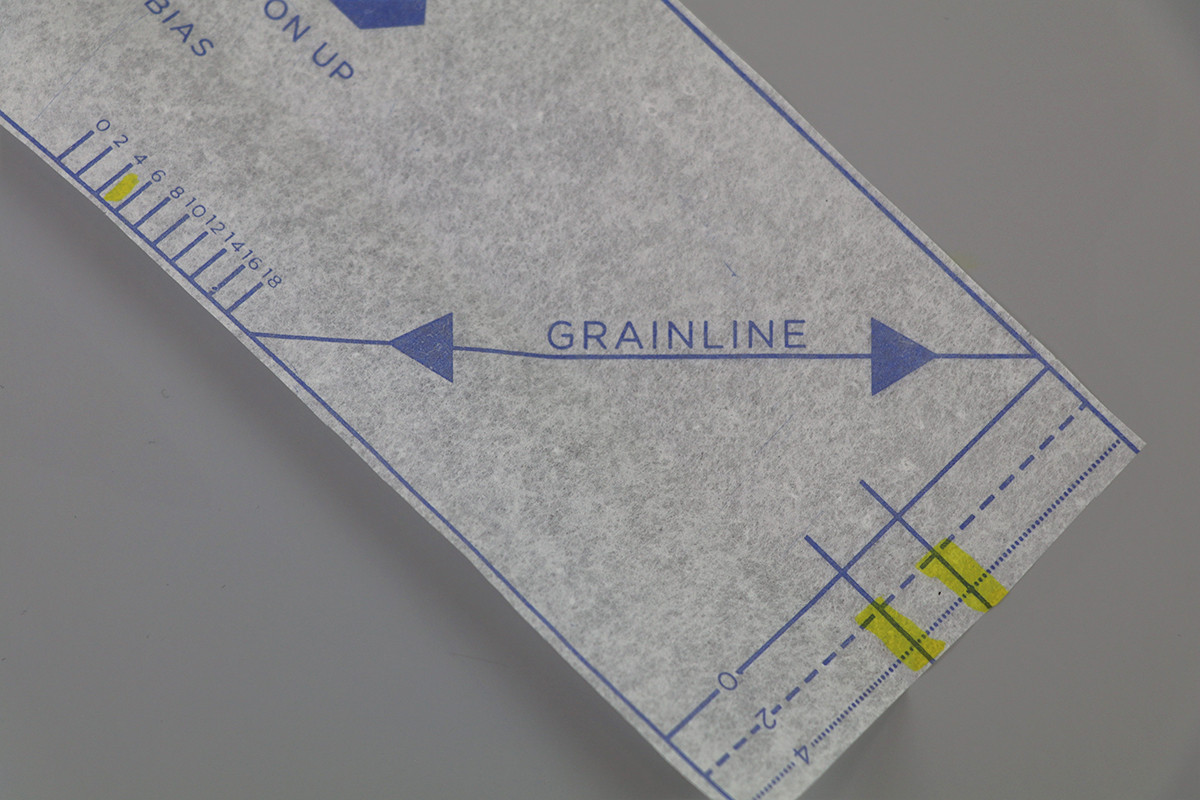
To make sure that the pattern pieces are even with the grain, use a tape measure and measure from the selvage edge of the fabric to the marked line on the piece. What I do is pin through the pattern piece and both layers of fabric on one side of the line at the arrow. I then measure from the edge of the fabric to the line next to the pin and record the distance.
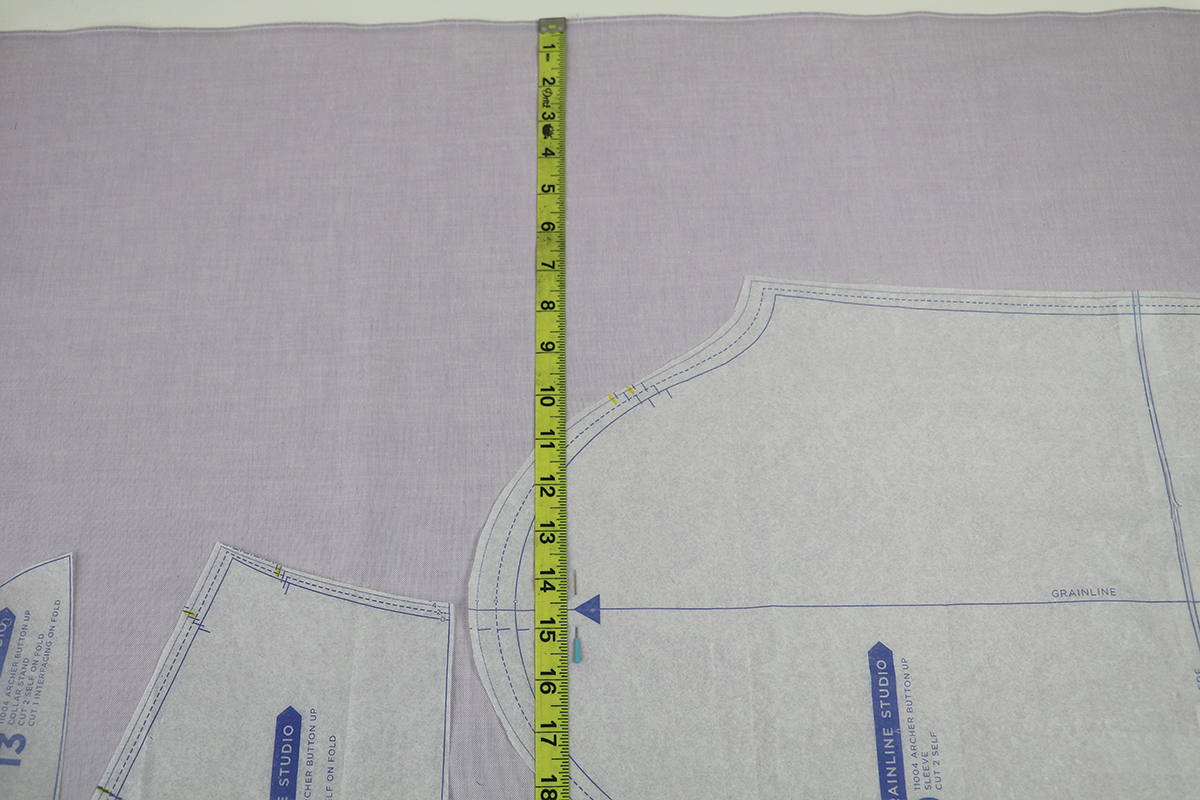
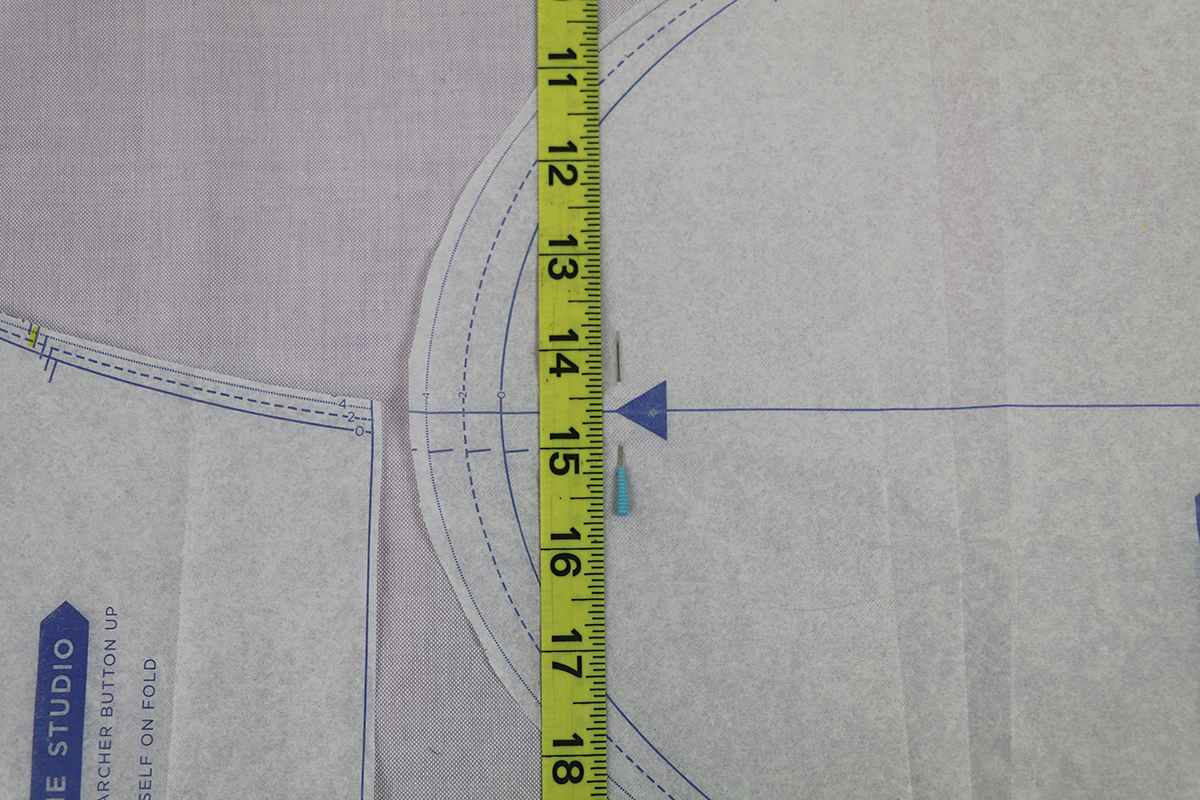
I move to the other side of the pattern piece, and before pinning it in place, I measure from the selvage edge to the line. The measurements should be the same. Adjust the piece up or down if it is not. Once the line is even on both sides, pin next to the arrow, then all the way around the piece.


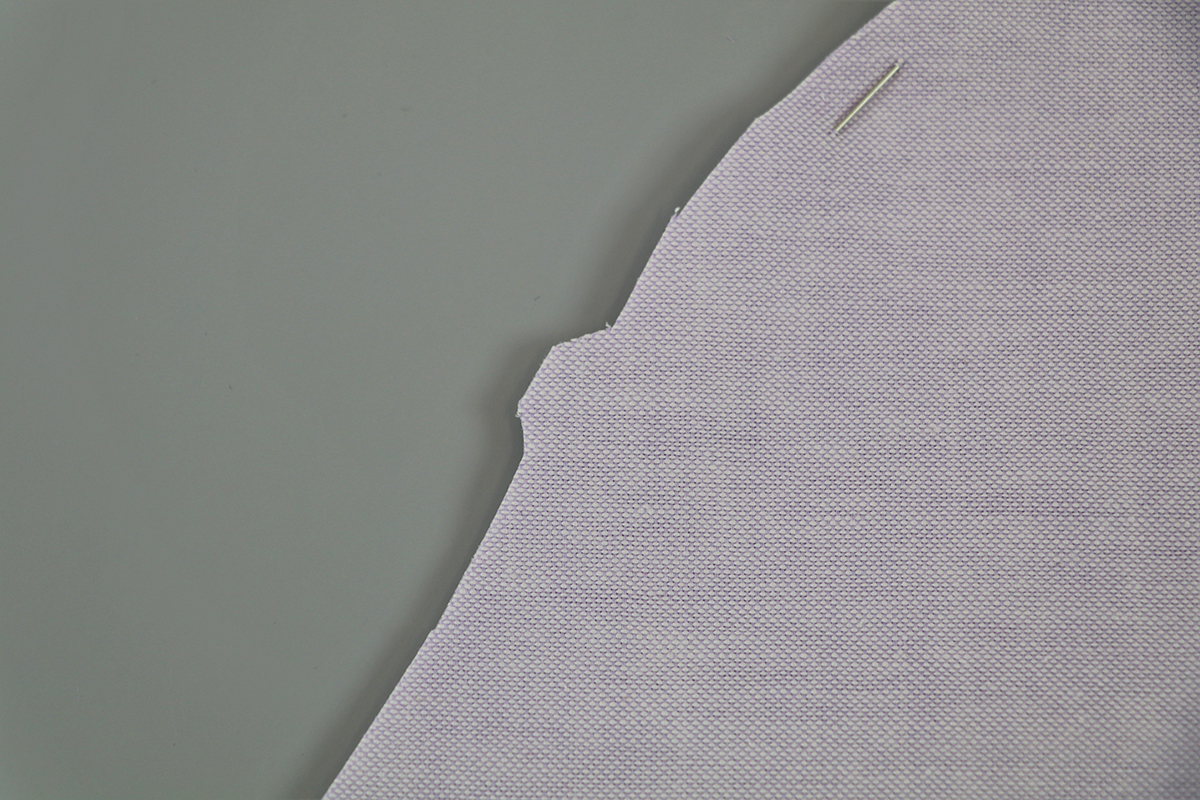
This should be done with every piece that has the arrow-ended line on it, especially those cut on the bias.
There are other ways to position and hold the pattern pieces on the fabric besides just pinning it. Try different methods and see which one is best for you. One way might include pattern weights. Once the pieces are positioned on the fabric, place the pattern weights on top of the pieces and cut around. Go a step further by tracing around the weighted-down pieces with tailor’s chalk or a tracing wheel. The tracing wheel may be serrated or smooth, but both will leave a line in the fabric. After the piece is traced, remove the pattern piece and cut on the line.
CUTTING NOTIONS
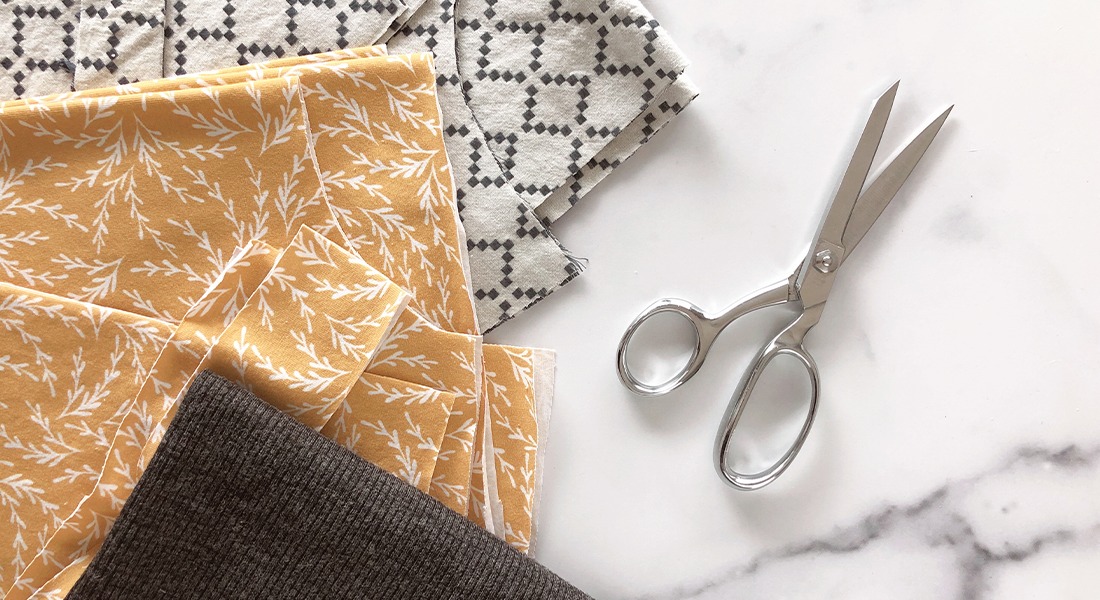
Like the pattern layout and the several different techniques you can use to hold the pieces on the fabric, there are also different notions that can be used to cut the fabric. The two most notable options are dressmaking shears or a rotary cutter. Dressmaking shears are scissors created with the intent of using them for garment sewing. They have a bent handle and very sharp blades. The bent handle allows the user to keep their wrist in a comfortable position while the bottom blade stays flat on the cutting surface. A rotary cutter allows the user to easily navigate the curves of the pattern pieces.
It is a personal preference what you choose to use. I prefer to use my KAI scissors because I feel as though I have more control with those than a rotary cutter. The edges of my pieces might not be completely straight, but I do not worry about that because after a seam is sewn, I use my BERNINA L 460 to trim and overlock the edges.
Before cutting, double check that the pieces are positioned correctly on the fabric. Keep the fabric as flat as possible while cutting. Once you have cut out all the pieces that were pinned on at that time, pull more fabric onto the cutting table, check that the selvage edges are still together, and pin on more pieces. Be frugal with the fabric. Place the pieces close together to avoid wasting in case a spare needs to be cut.
Do not forget to cut out the interfacing needed! Pieces requiring interfacing are the upper collar, collar stand, both cuffs, and the two front button bands for the left front and right front pieces. The cutting directions for the interfacing are also listed in the instructions and the layouts are given. The pattern calls for a fusible interfacing, so there is no grainline or selvage edges to follow. I simply line my pattern pieces up with an edge so that they all fit at one time.
PATTERN MARKINGS
Besides each pattern piece being a different size and shape, they also have different markings. The first thing that should be mentioned is notches. As I explained before, they are used as matching points and should be cut out of the fabric. I typically cut mine out as a large triangle, to be very visible.
The upper part of the sleeve actually calls for two different notches to be cut. When I see the double lines close to each other, I consider it a ‘double notch’ and cut it a little wider (almost the shape of a trapezoid, rather than a triangle). This helps distinguish the difference between the front and the back of the piece. Those notches will correspond with the notches on the front and back of the shirt.

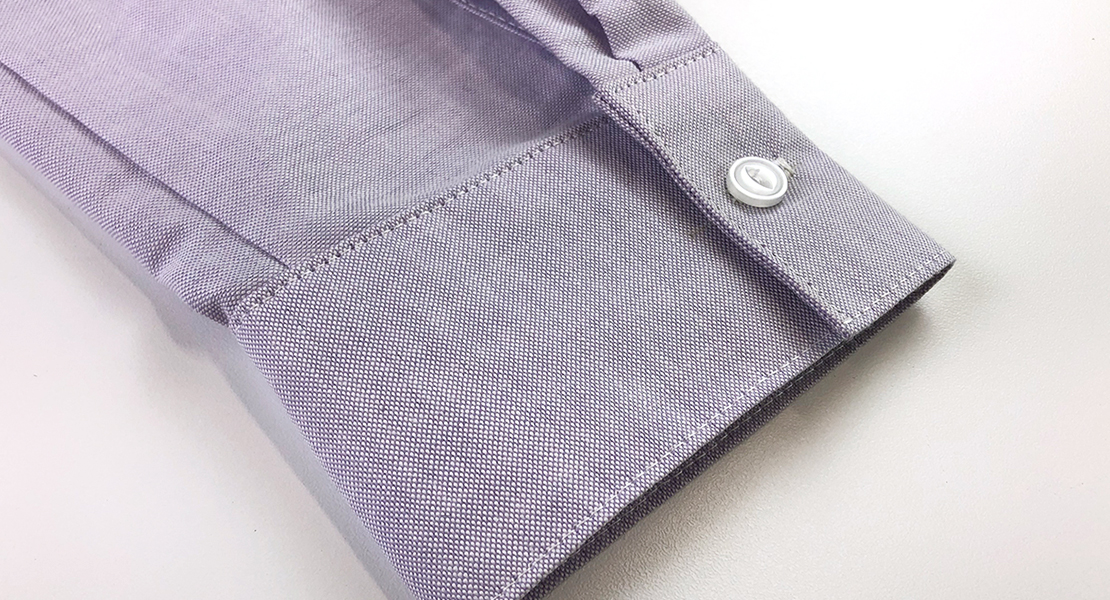
Since this fabric will have no problems being ironed, I will be using a FriXion pen to do all my other markings. The marks erase with heat! On the sleeve piece, I marked the pivot point for the sleeve placket using my FriXion pen. To do so, I poked through the tracing paper with the tip of the pen and marked right onto the fabric. It is important to remember that both pieces have to be marked. I later went back and used a ruler to draw a straight line from the pivot point to the hem of the sleeve for my cutting line.
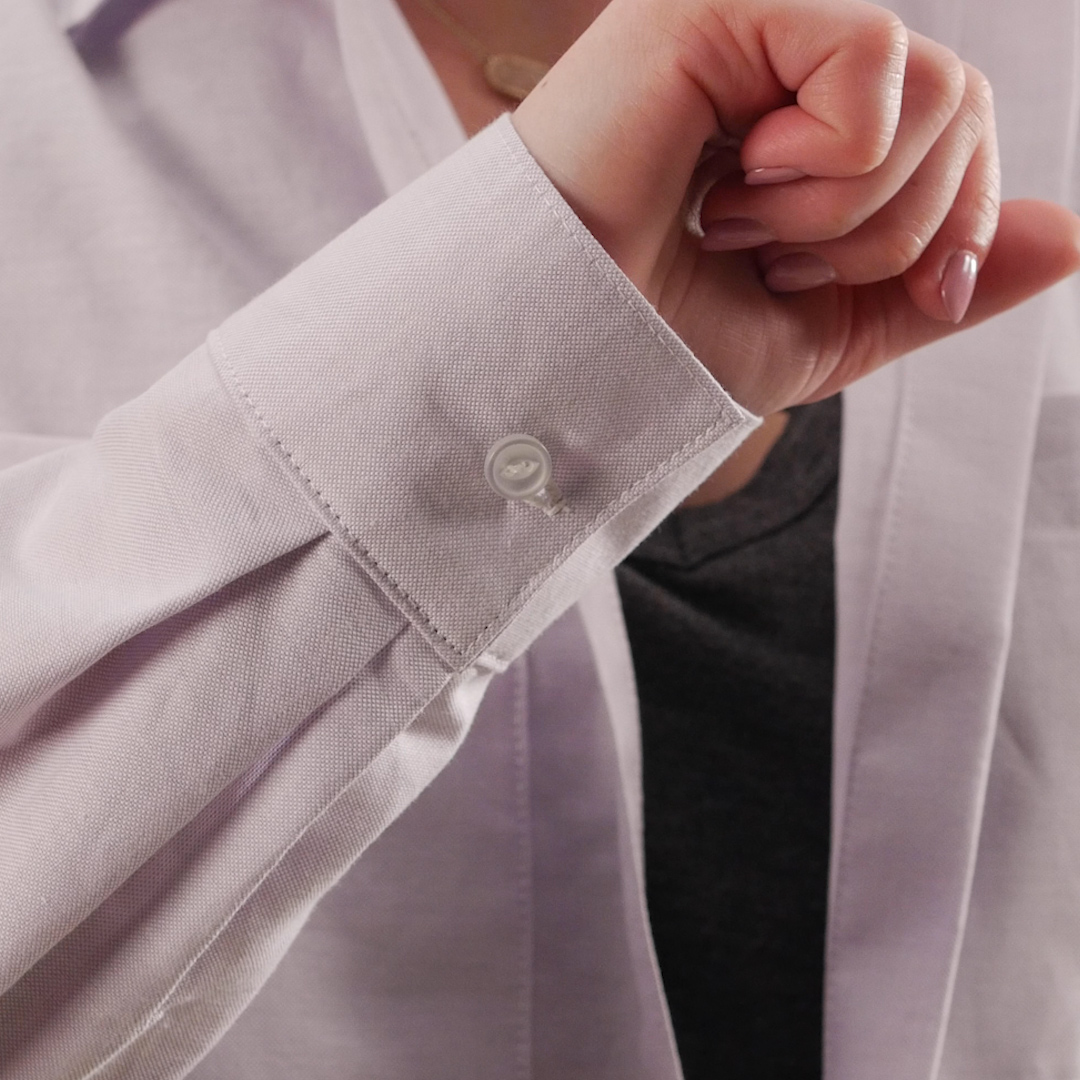
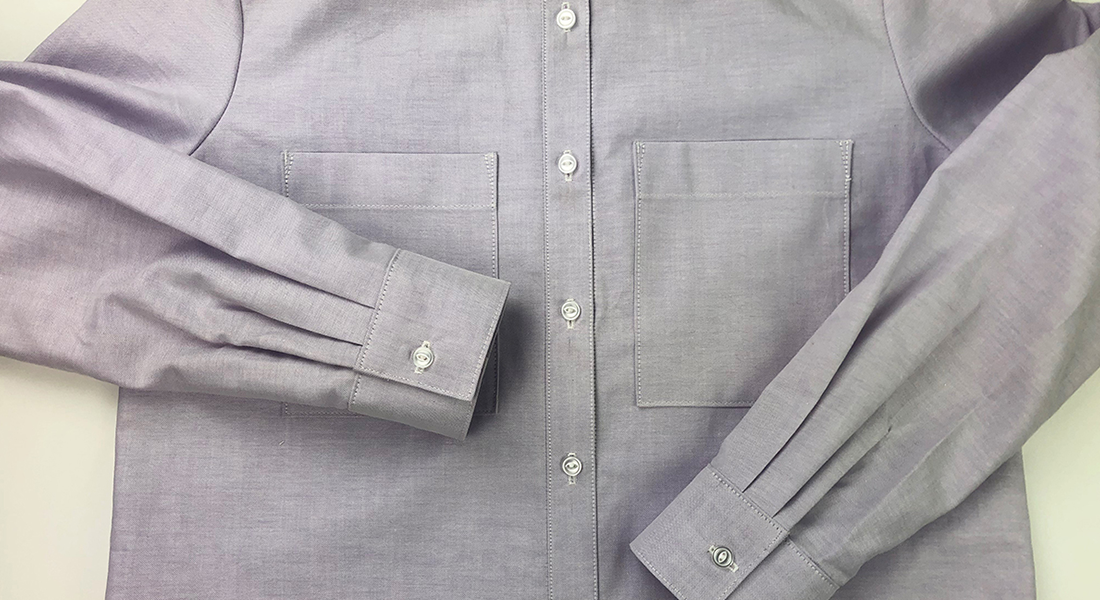
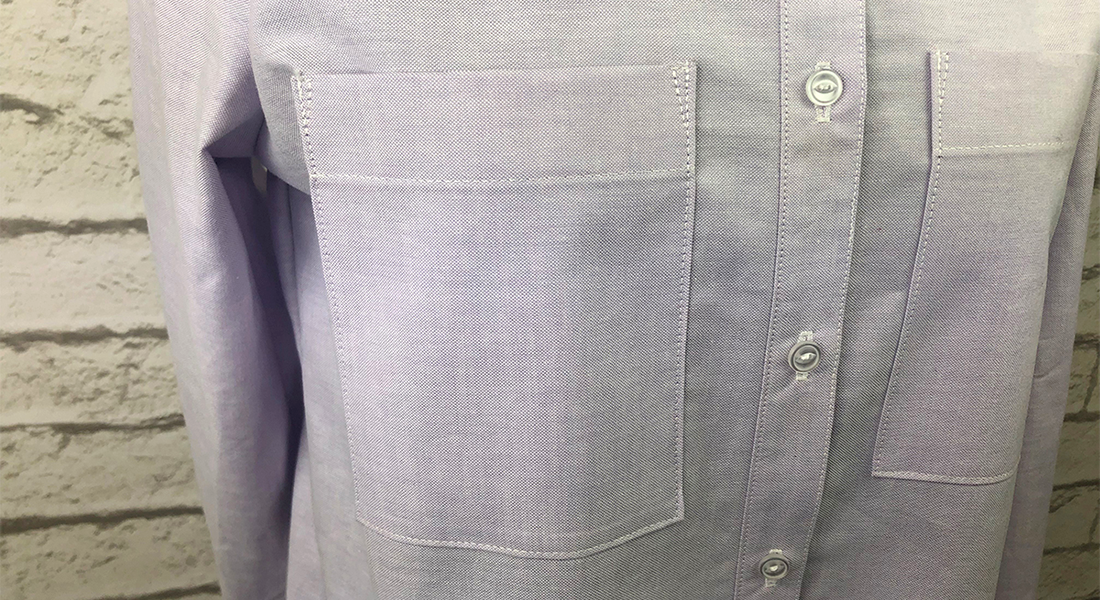
Other markings that should be transferred to the fabric are the pocket alignment points on both the left and right fronts, which will match with the upper corners of the pockets, the buttonholes on the right front button band, and the button and buttonhole on the cuffs. I do not usually mark these points until after I have ironed on the interfacing, if interfacing is required.

Like any other aspect of garment making, there are several ways to accomplish the same thing! With markings, it typically depends on the fabric. Alternatives to the heat-erase pens could be chalk, water-soluble marker, or air-soluble marker. If you are wanting something more visible you could give tailor’s tacks a try. Using a hand sewing needle and thread, take a complete stitch through the fabric at the marking point and leave the tails long. These are easily removable after the mark is used, or when the garment is complete.
FITTING
Fitting can be quite a challenge, but knowing what you are looking for and knowing how patterns generally fit you will help you to make adjustments before you even cut out the fabric pieces. I will discuss more fitting tips throughout the series as we focus on different sections of the garment, but the cutting stage is a good place to start.
As I mentioned in part one of this sew-along, patterns are really just the baseline to make changes to. They do not take into consideration all the natural curves of the body, shorter torsos, higher hips, or shoulder widths. The beauty of pattern pieces are that adjustments can be easily made, and markings can be added and transferred to the fabric.
Always start from the top of the garment and work down. Keep in mind that changing one thing may cause a chain reaction. In the case of the shirt we are creating, start with the shoulders. If you were wanting to take up the shoulder seams, first draw a new line smaller than the size originally chosen or use the existing line of a different size, then cut the fabric to that new size on the two front pieces, as well as on the yokes. This will create better fit in the underarm, cause the yoke seam to sit higher on the shoulder blades, and shorten the hem. This may eliminate the need to take the garment in near the waist because it has shifted up. However, now it may be more difficult to set in the sleeve. You may want to size down the top of the sleeve (the rounded part), or ease in the extra using the basting stitches that will be sewn in later.
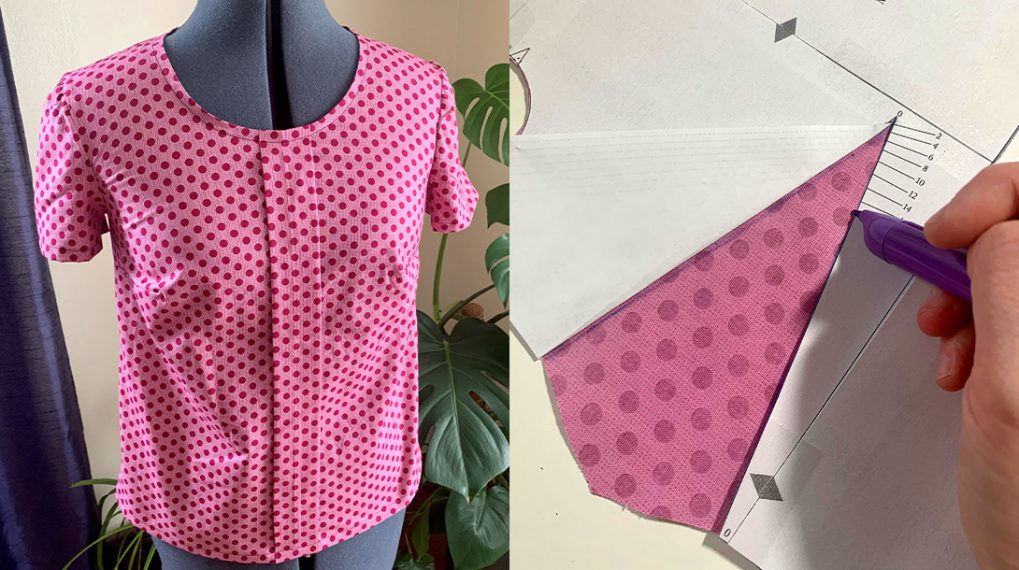
Another area of attention are the side seams. Looking as these pieces, I can see that the seams will be straight, without any real detail for the natural curves of the body. Maybe you want to have more room in the bust, more fit around the waist, but a bit looser at the hips. Fix this by drawing a curve in the pattern.
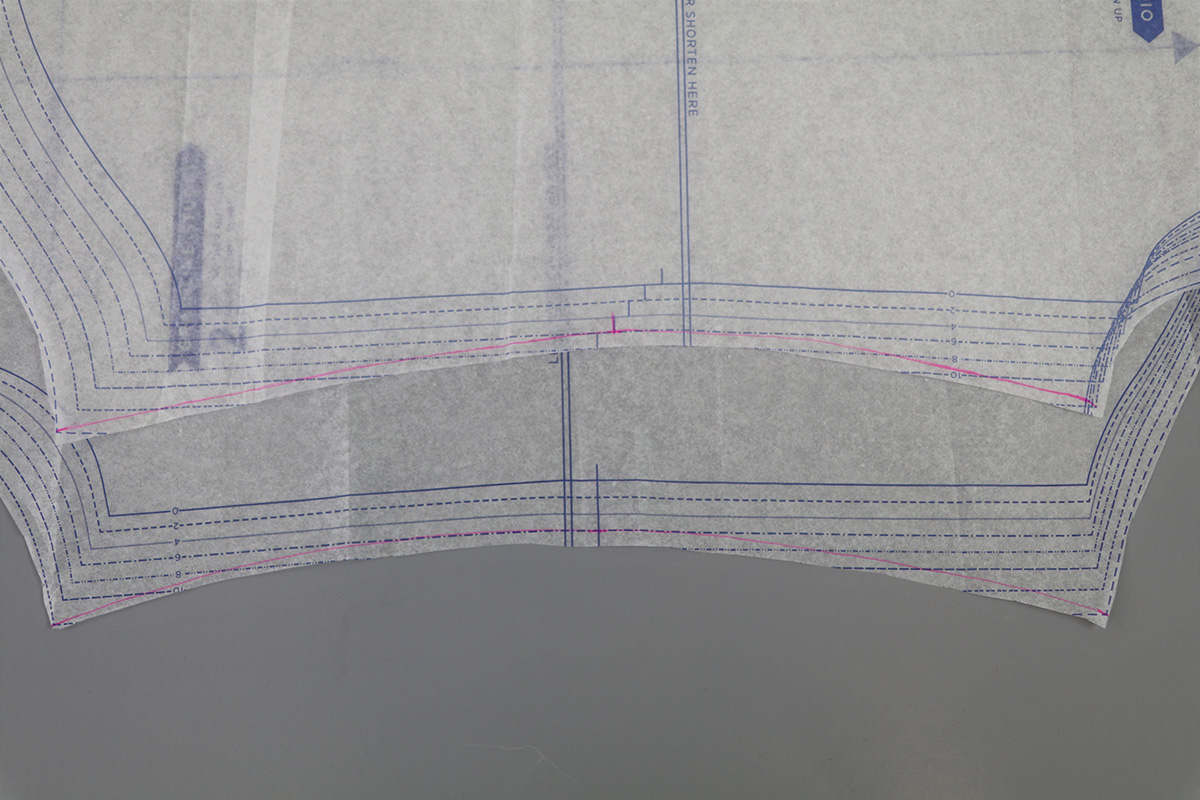
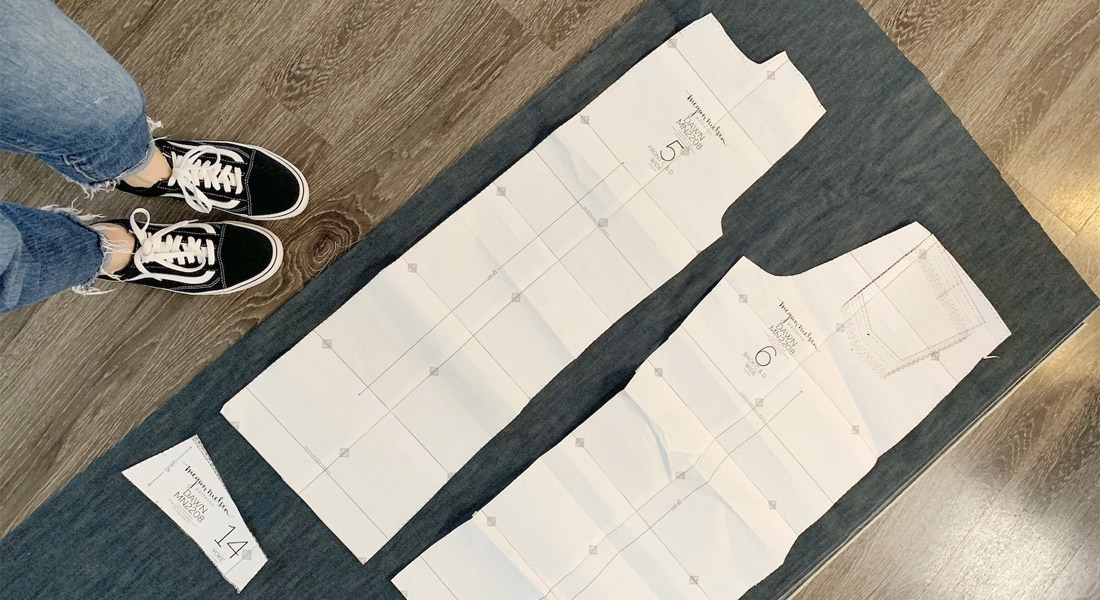
As you can see in the images above, I added a curve to the pattern piece, where the bust is a size 12, it narrows to a size 8 in the waist, and then back up to a size 14 for the hips. You can decide on the sizes based on the measurements you take. It was very simple to draw on with my FriXion pen. I had to add this curve to both the left and right fronts, as well as the back piece. Be sure to add notches to this newly-drawn line to help when lining up pieces for the side seams. This will give a nice curve to the shirt for a more tailored fit.
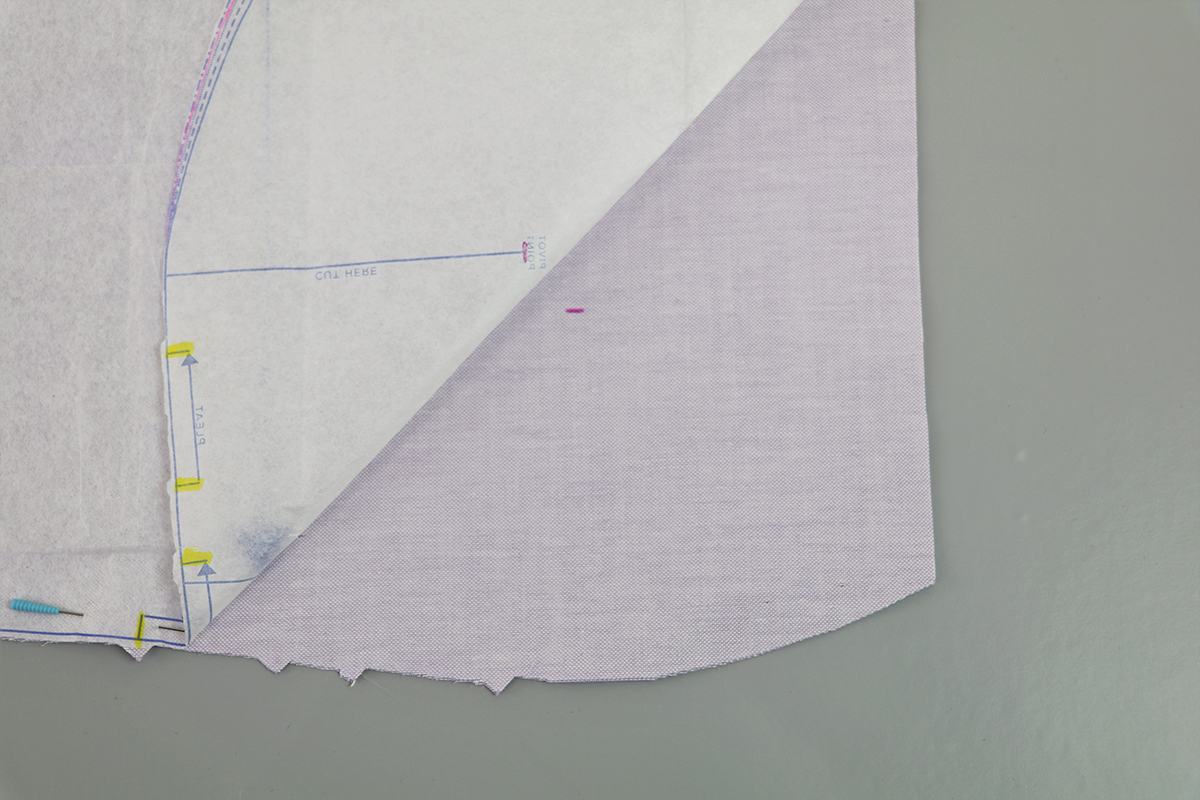
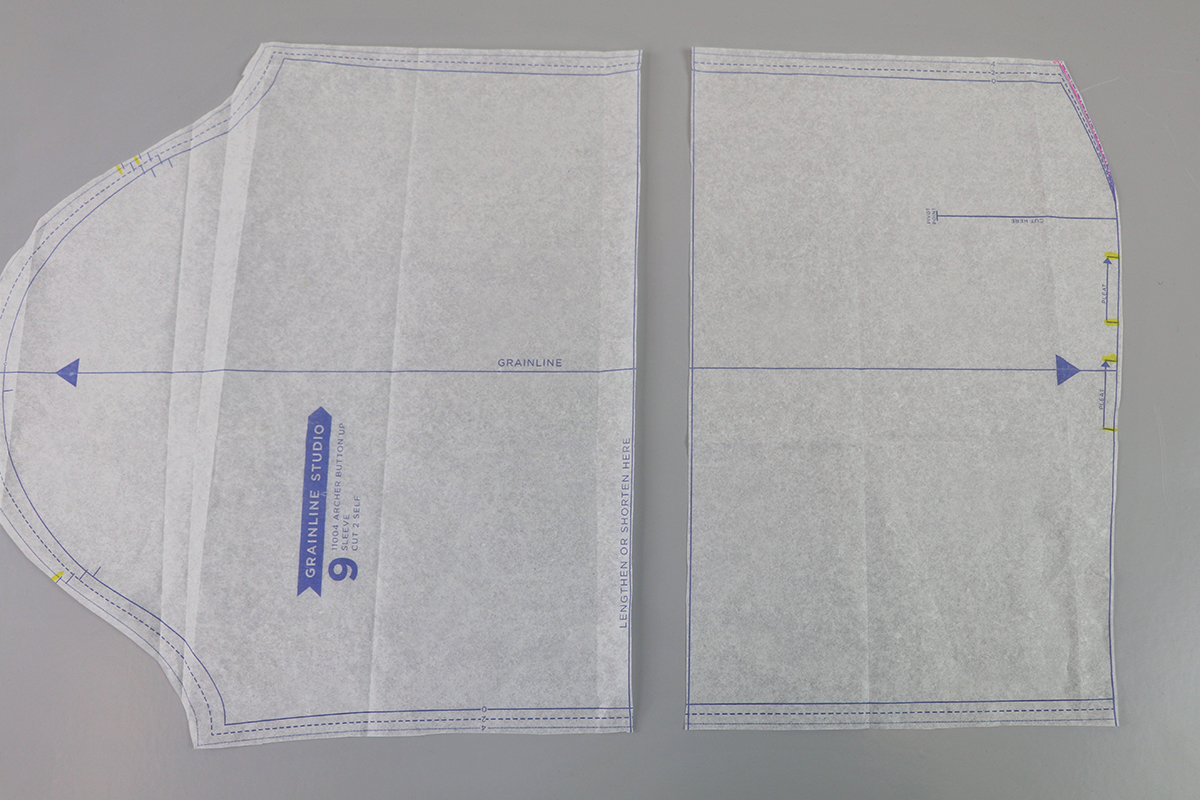
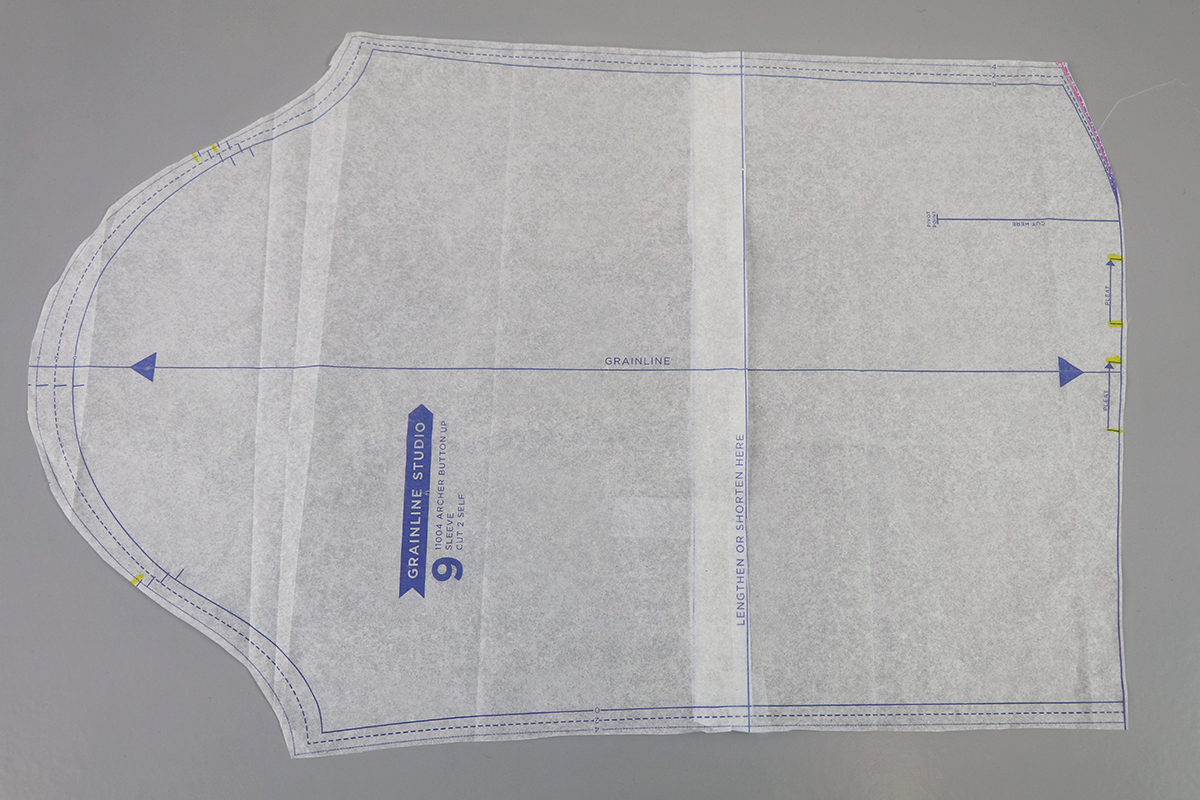
After all the previous adjustments have been decided upon, a final adjustment to consider are the hems of the shirt itself and the sleeves. Start by checking the measurements from the pattern instructions to see if the hem and sleeve lengths will be appropriate for your body measurements. This pattern is great because it includes an option to lengthen or shorten on the pattern pieces. I demonstrated on the sleeve pattern piece. I cut the sleeve piece right between the two lines that say ‘LENGTHEN OR SHORTEN HERE’ to make it two pieces. To add length, I inserted a piece of paper that was 1 ½” wide and overlapped each sides of the pattern piece so that the lines were ¼” away from the edge.
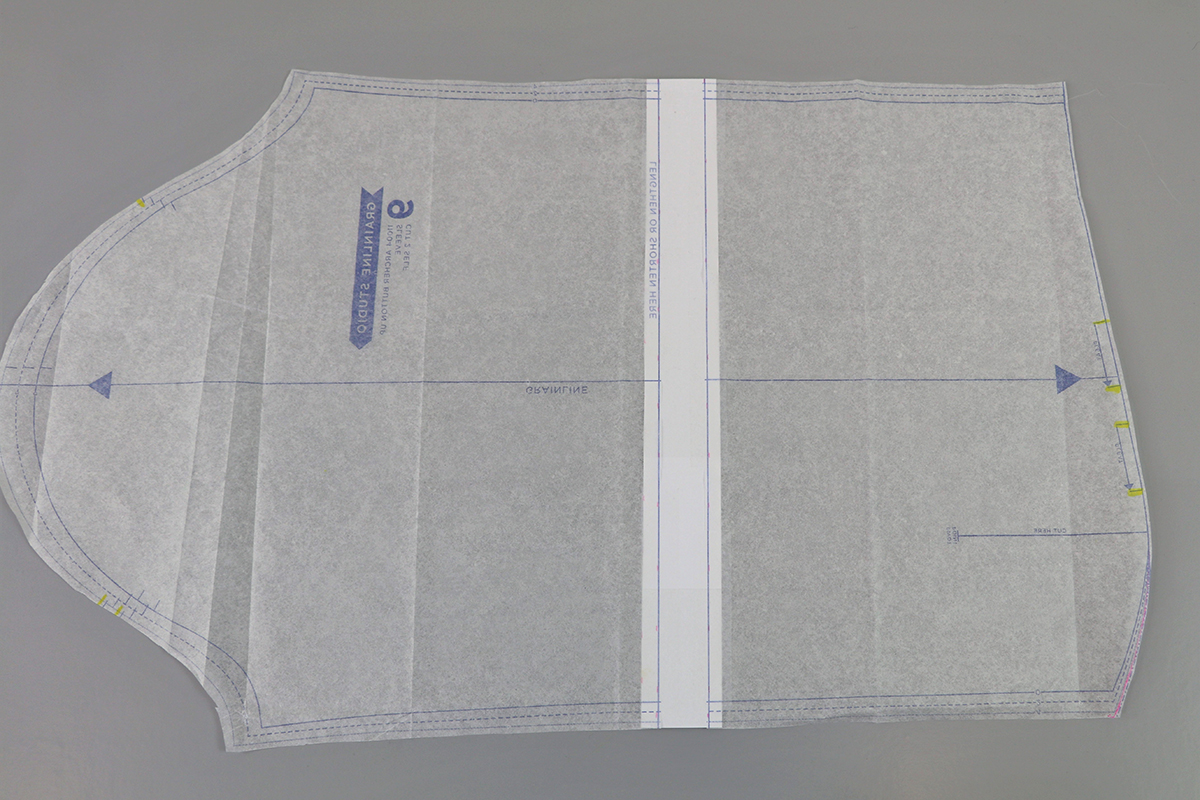
To shorten, cut between the lines again, and overlap as much as necessary. I shortened mine 1”. Hold in place with tape. If necessary, draw out the cutting line on the pattern piece using a pen or pencil.
If you want to be sure that the adjustments made will work for you, make the garment out of muslin first. It may take a bit of time, but by using basting stitches and not finishing any hems, you can get an idea of what the fit will be like. It may be better for you to practice on this inexpensive fabric, rather than chopping right into the quality fabric you selected for the project.
UNTIL NEXT TIME
Hopefully by the end of this post, you have your fabric pieces cut out and can distinguish what each of the markings mean on the pattern. Remember that these posts relate to more than just our button up. Garment construction can be challenging, but once you understand a basic garment, such as a shirt, you will be prepared to take on even more projects! In the third post, I will talk about the different types of stitching frequently found in garment sewing, as well as how to finish and press seams.
Garment Sew-along
Part 1: Garment Sizing and Fabric Selection
Part 2: Pattern Cutting, Markings and Fitting
Used Products


What you might also like


4 comments on “Garment Sew Along Part 2: Pattern Cutting, Markings and Fitting”
-
-
The pattern is available at https://grainlinestudio.com/collections/tops/products/archer-button-up-shirt?variant=22533586387026
-
Actually, the pattern is only available as a download, and they give you a $2.00 discount, but you have to print out way too many pages and then piece parts of the pattern together. I’ll wait until they start shipping the pattern again.
-
-
-
When is part 3 coming out. And the rest of the garment sew-along?
Leave a Reply
You must be logged in to post a comment.

Where can I find the pattern you are using?