How To Use Piping as an Edging
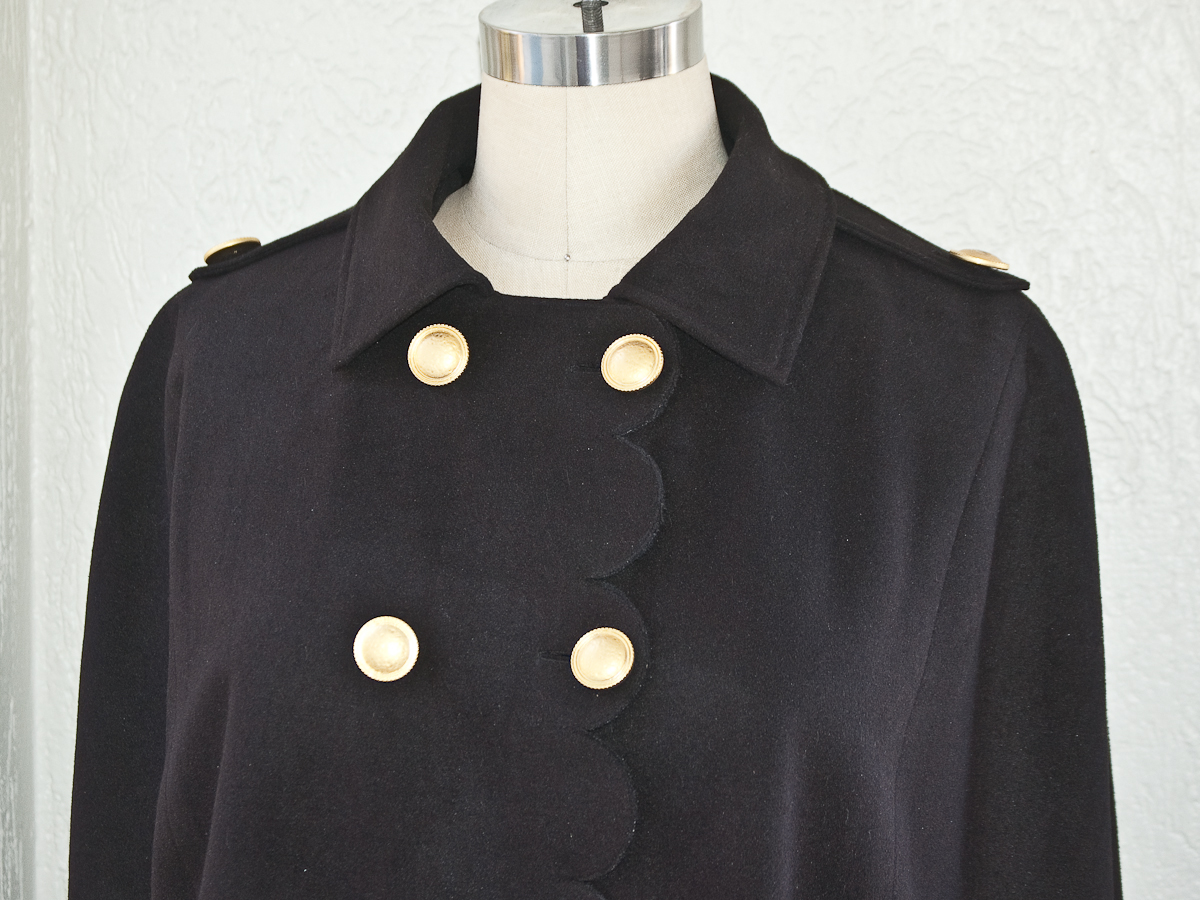
Hi everyone, Julie Eilber of JetSetSewing.com here to show you how to make piping that works as facing, too! My BERNINA 560 (AKA “Karl”) and I have been sewing with sweater knits, and I’ve found this technique can give your knit garments soft support and a lot of style. In the photos below, I’m putting piping on the front of a retro knit jacket, but you can also use this on all sorts of necklines, sleeve edges and openings.
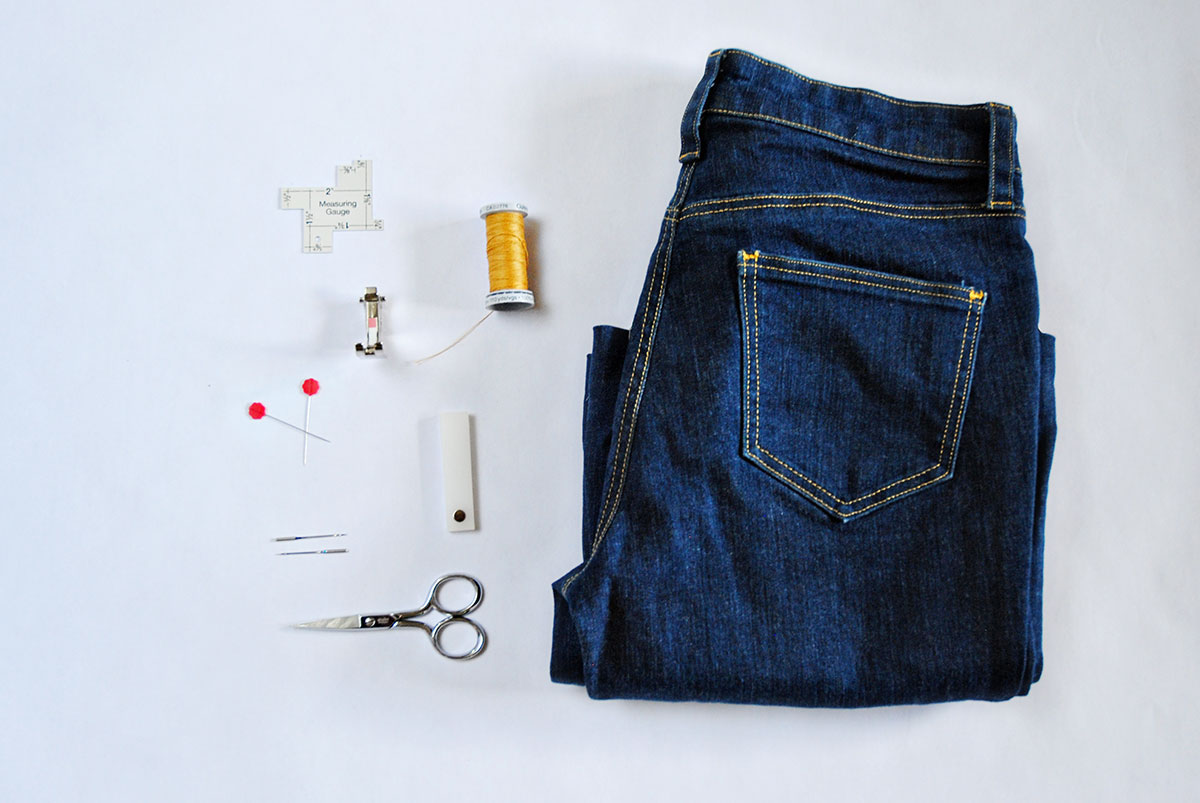
Materials needed:
- ¼ yard of a mid-weight stable knit, such ponte (a double-knit fabric) that won’t roll up on the edges when cut, and won’t unravel.
- ¼” wide piping cord that’s as long as the piping you need, plus a few extra inches.
- Bulky Overlock foot #12C (Zipper Foot #4 will work as well, if you sew along the edge of the piping).
Cut the binding strips.
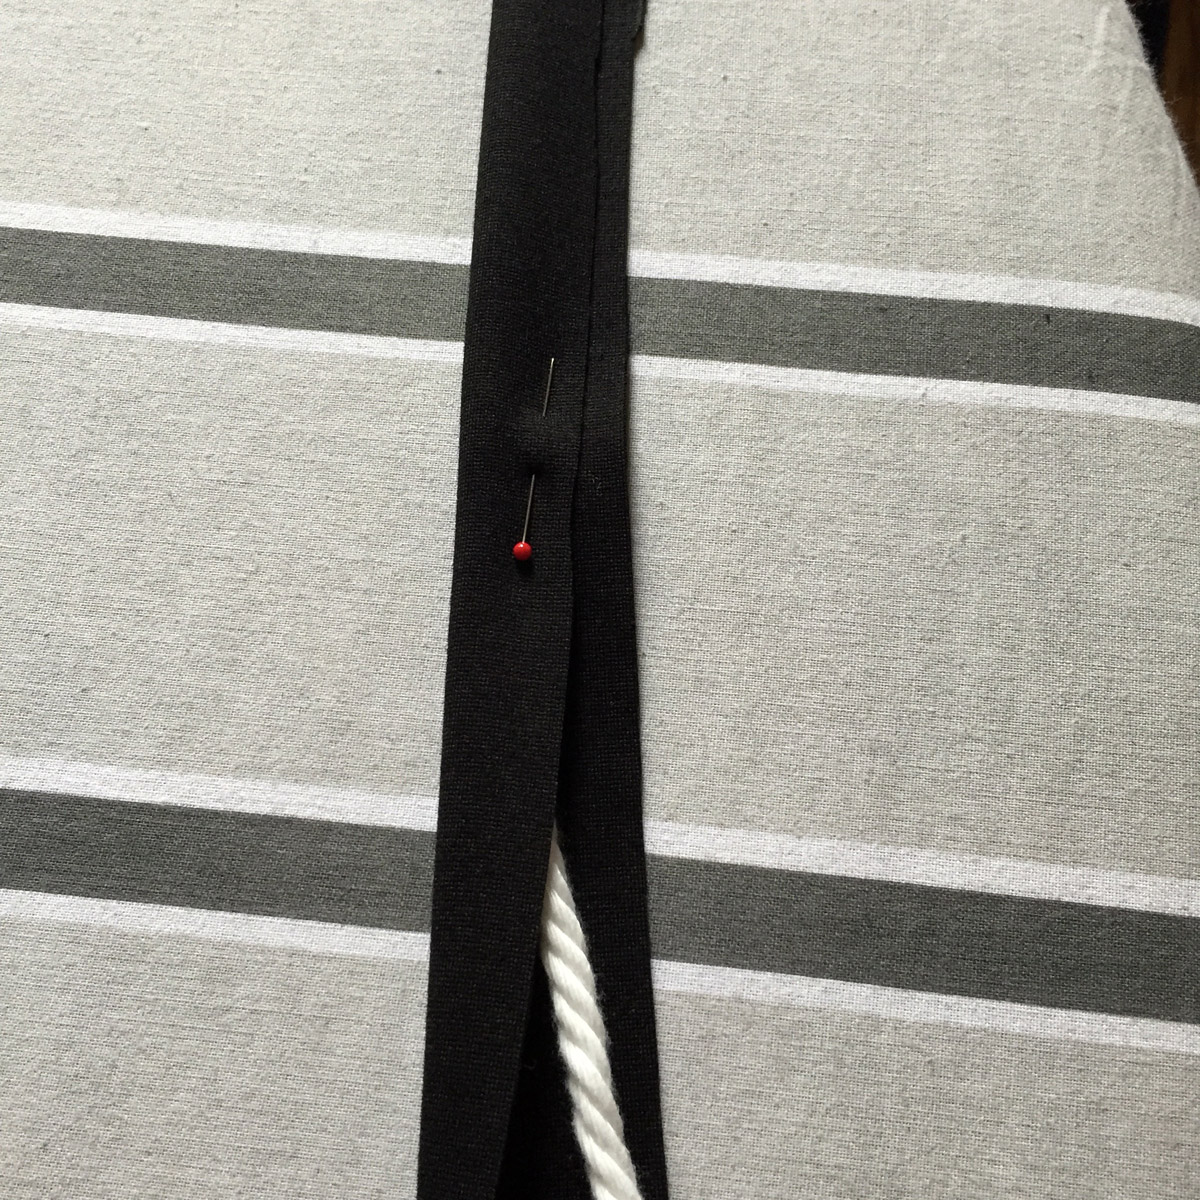
Wash or steam the piping fabric to prep it. Wash the piping cord and hang to dry. Cut strips of the piping fabric straight along the crosswise (cut) edge of the fabric, 2″ wide. If the strip is not long enough for your piping, piece another 2″ strip of fabric at one end. Enclose the piping cord in the strip of fabric, a little to the side, so that one edge of the fabric overlaps the other by 3/8″.
Prepare the binding.
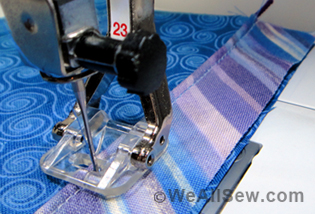
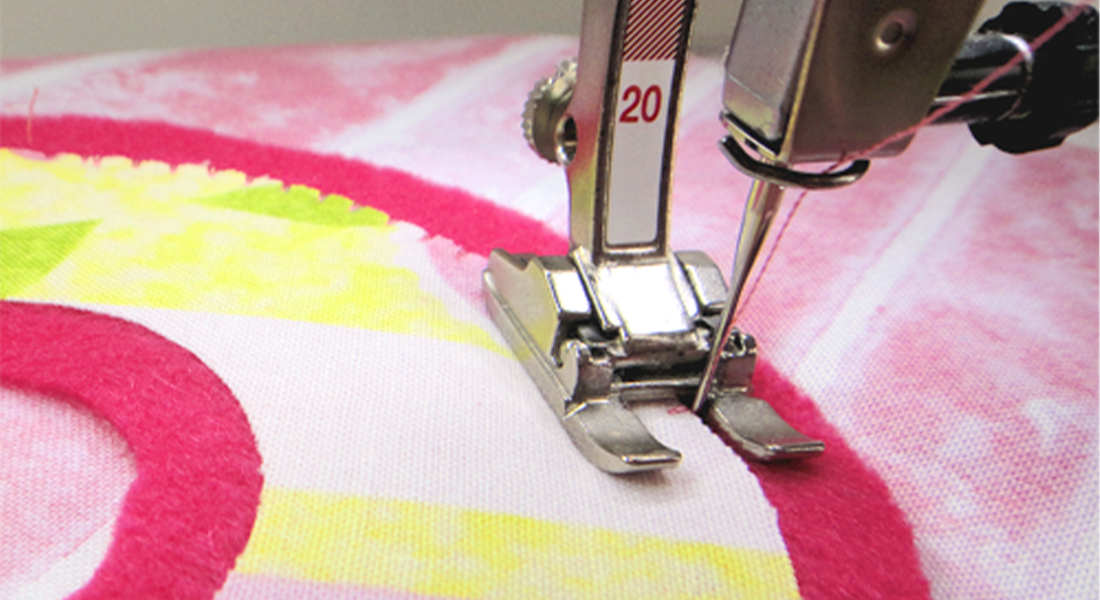
Use Bulky Overlock Foot #12C or Zipper Foot #4 on your machine to sew in the piping cord, using a straight stitch. Sew this first seam a little bit away from the piping cord, so the piping will be loose in the fabric. You will sew closer to the cord when you attach the piping to your garment, and that will keep the piping seam nice and smooth.
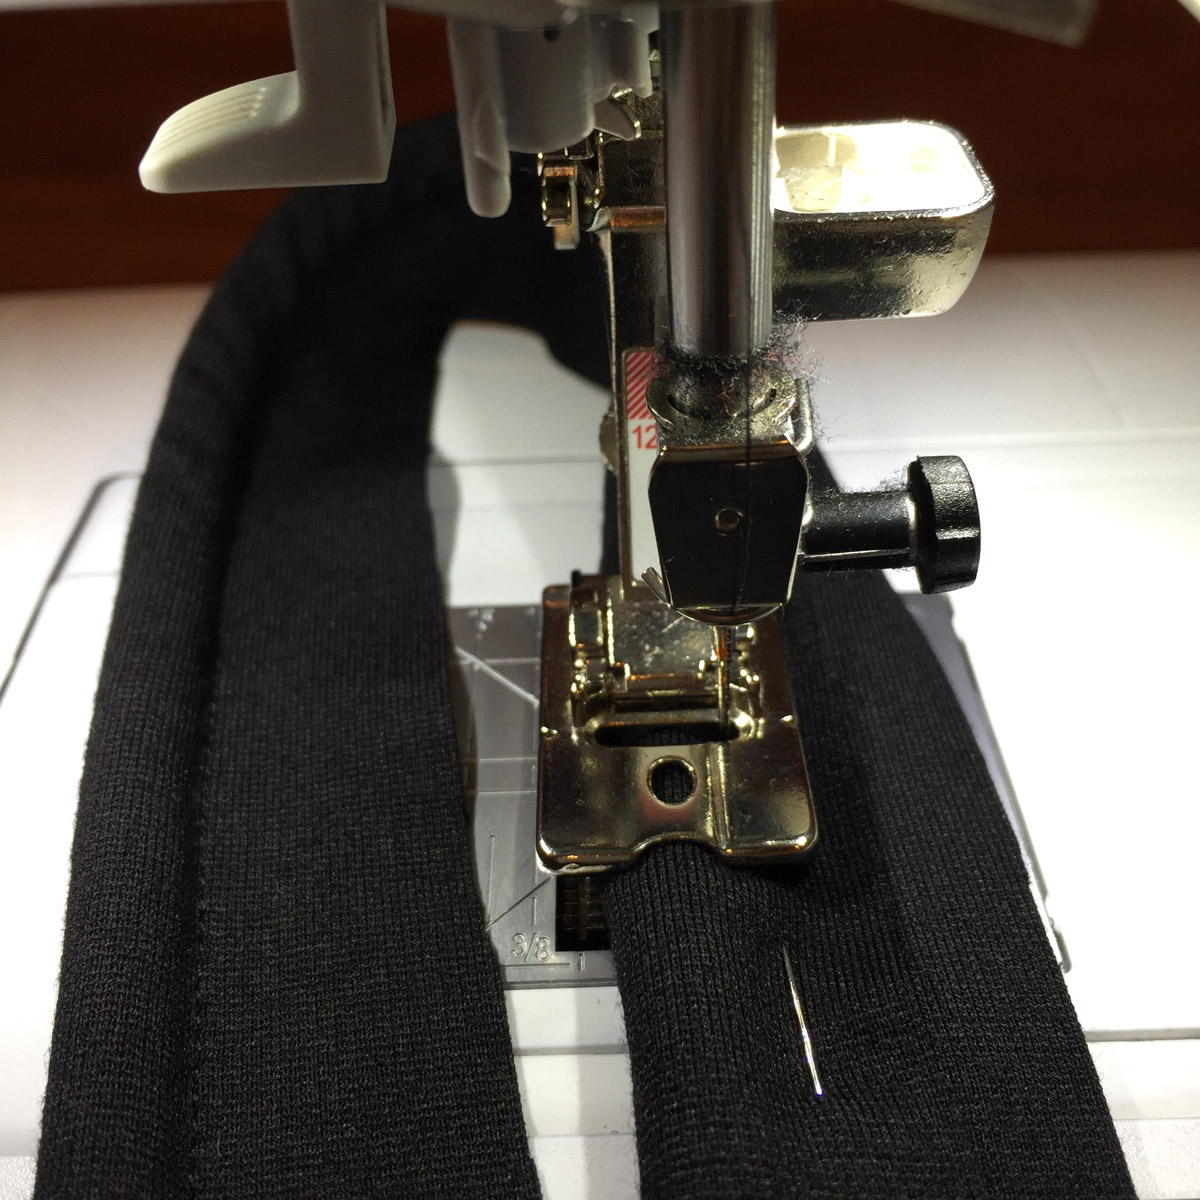
See, Karl’s needle is alllll the way over to the right, in position #5.
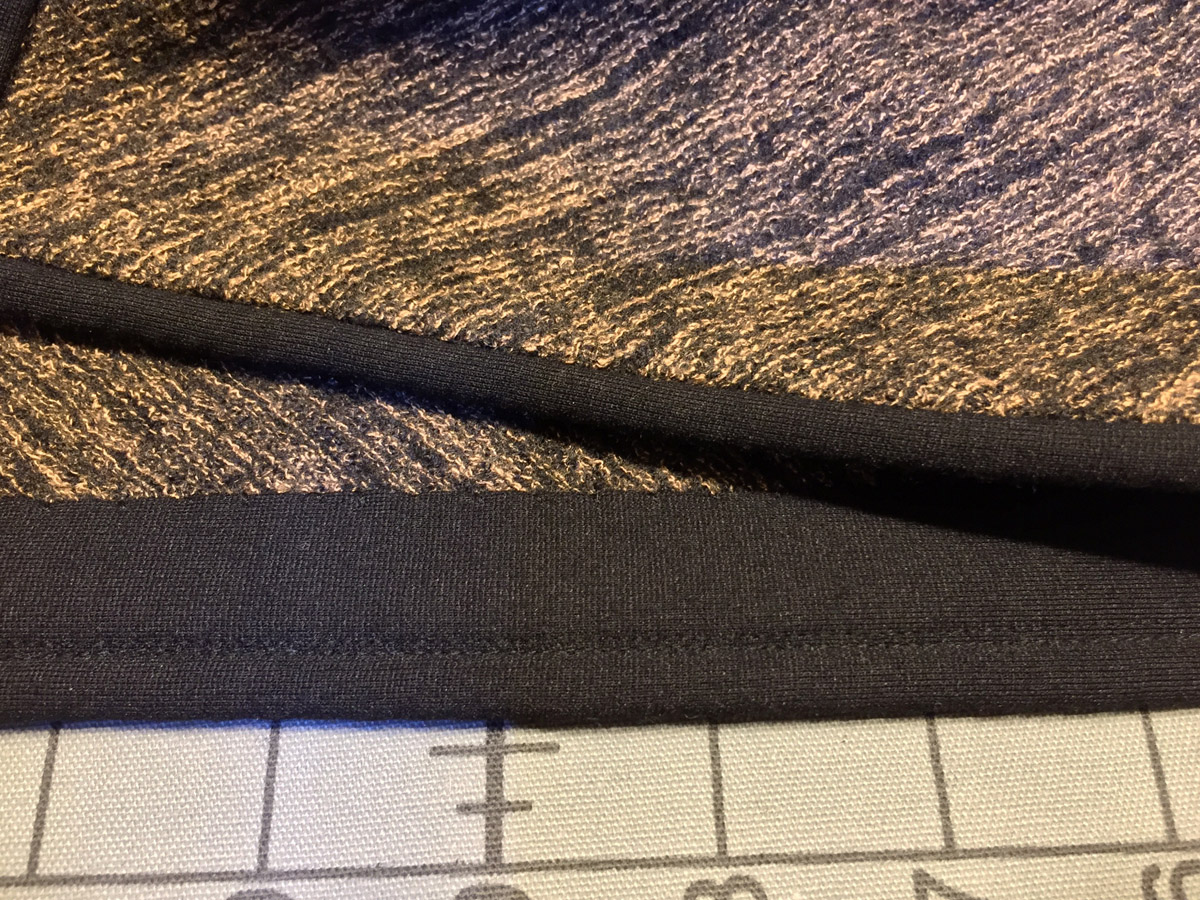
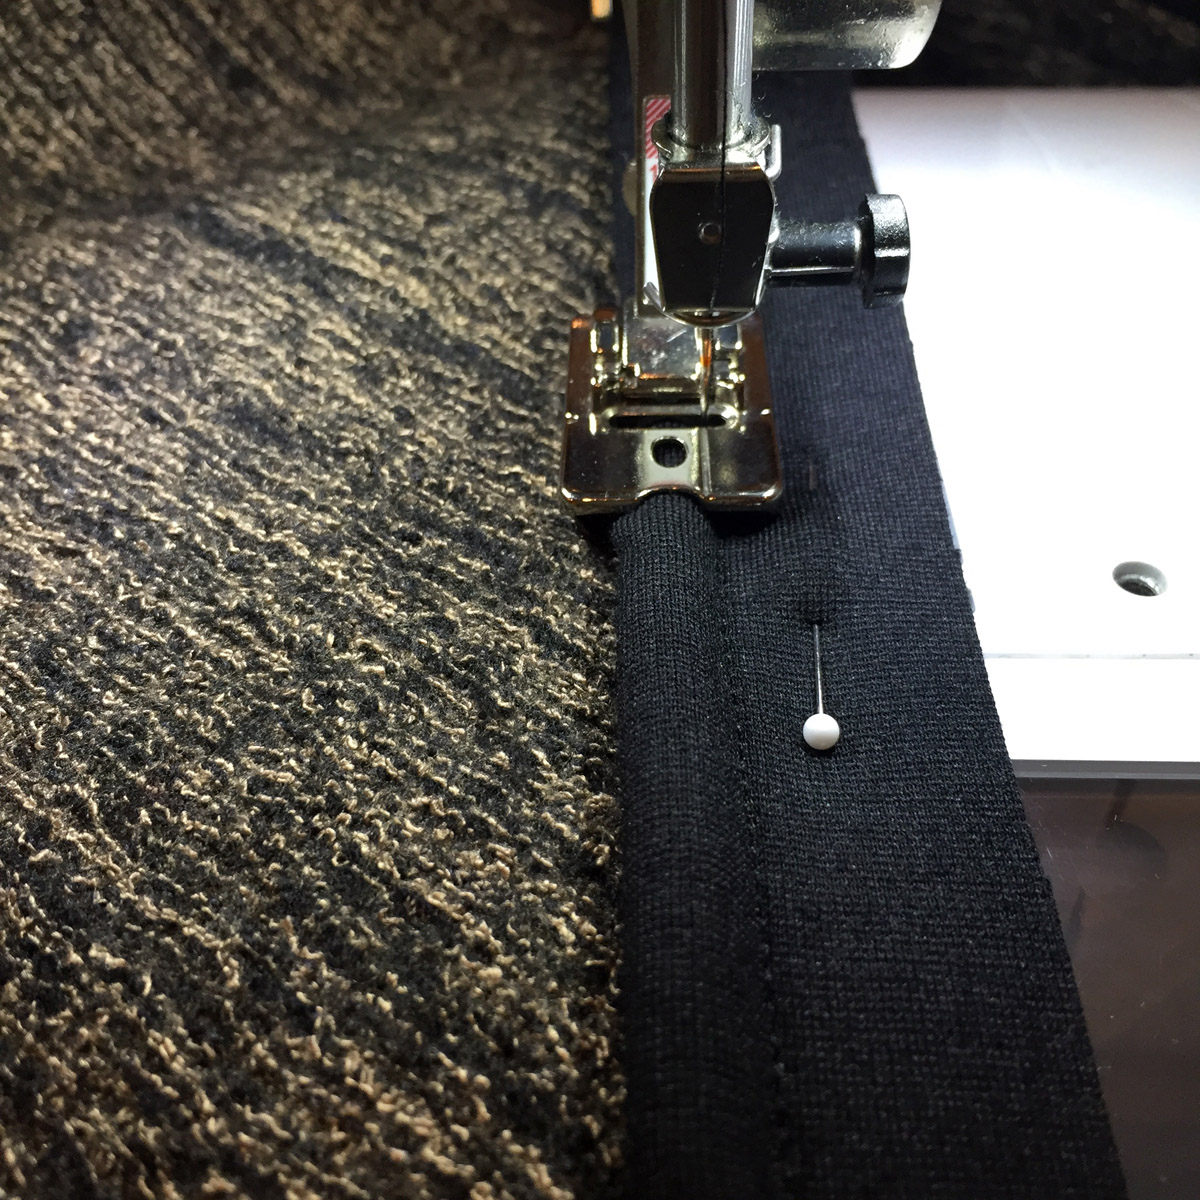
Attach piping to your garment.
Pin the piping onto the outside of your garment. The piping seamline should match the seamline of the garment, and the raw edge (seam allowance) of the piping should face away from the garment. The wider edge of the piping seam allowance will be on top (it will be turned inside to become the facing).
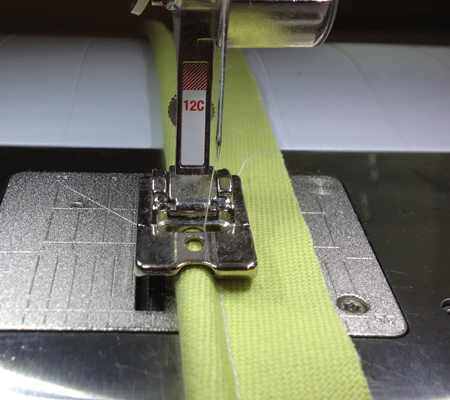
Use a straight stitch to sew the piping to the garment, making this seam closer to the piping. Now I have the needle to the right in position #4.
Trim the garment fabric seam allowance to 1/4″ away from the seam line, to grade (stagger) the seam allowances.
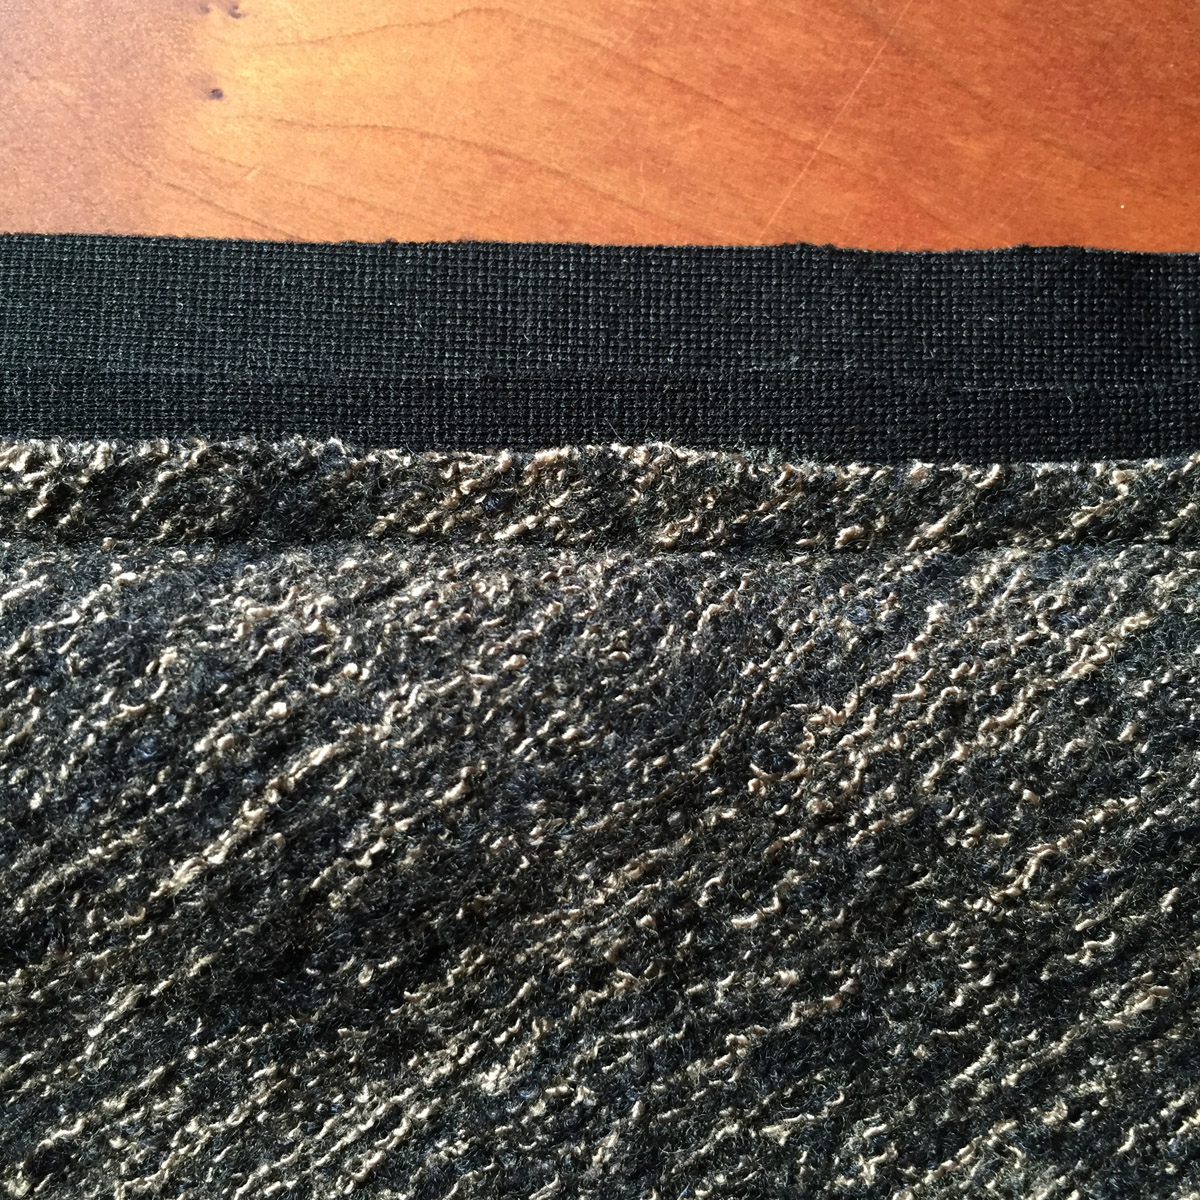
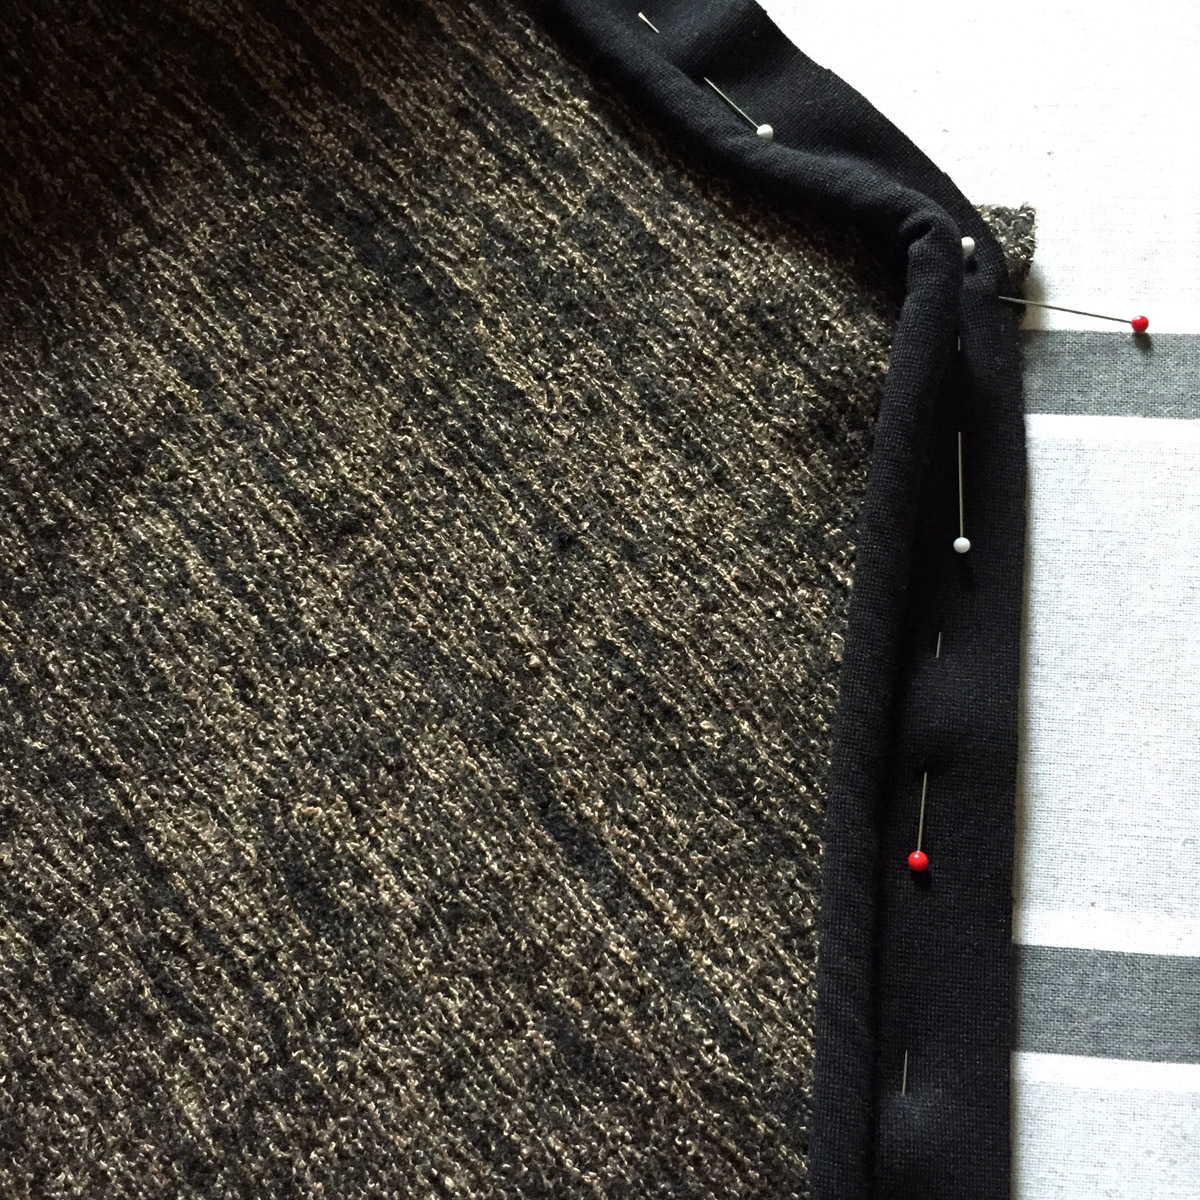
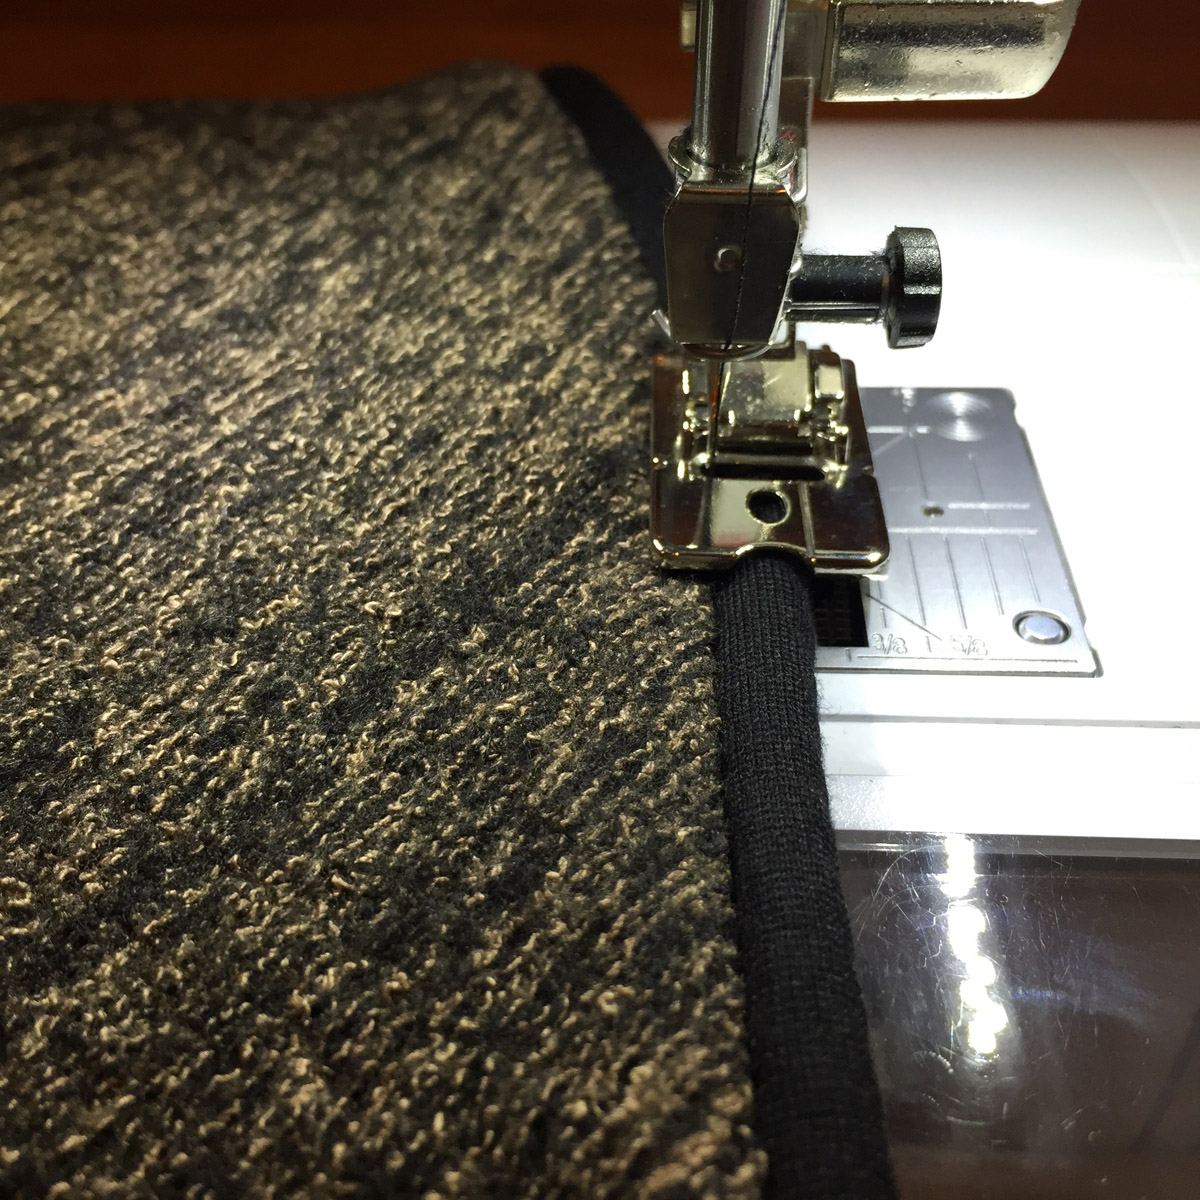
Turn the raw edge of the piping to the inside of the garment and press. On the right side of the garment, use a straight stitch to “stitch in the ditch” between the piping and the garment fabric to secure the facing. At this point, I’ve moved the needle to position #4 on the left. The Bulky Overlock foot really helps to keep the piping even and precise.
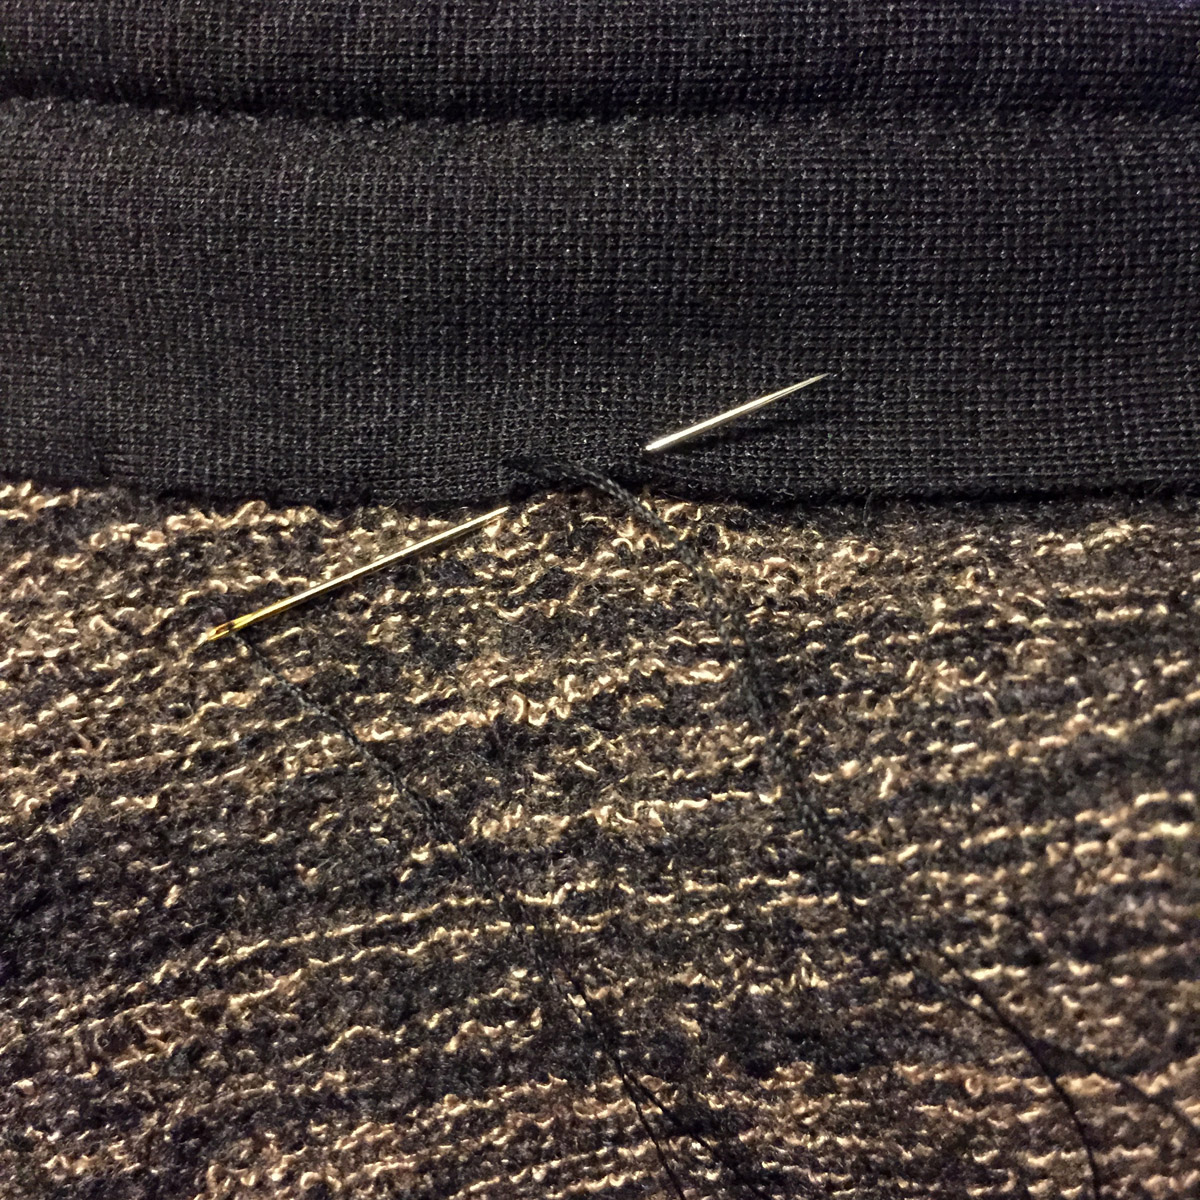
Use fell stitches to invisibly hand sew the seam allowance/facing to the inside edge of the garment. You don’t need to turn the raw edge under.
Here’s how it turned out on my jacket:

Give it a try! It will give your garment a nice clean finish that’s stable, but not bulky.


6 comments on “How To Use Piping as an Edging”
The jacket looks great and the piping provides a classic touch. And it is so easy. Thanks for sharing.
Thanks very much! I hope you’ll give it a try.
Beautiful jacket. How do you finish the ends of the piping/join them around the cuffs? And how do you turn 90 degree corners? Thank you
Thanks so much! The piping is only on the center front edges and neckline of the jacket. I put ponte binding on the bottom hem and sleeve edges. I made binding loops for each sleeve and attached them to the sleeve edges. On the hem, I attached the binding, but didn’t finish the corners. I left some of the binding sticking out beyond the center front edges at the bottom corners. Then I wrapped the extra binding around the piping at the bottom corners and secured it inside the jacket with some hand stitches. It’s tricky to describe without a picture, so I hope that makes sense!
Leave about 2″ to the back of where you start to sew the piping (on the sleeves for instance). When you get to within the 2″ pull the project out from the machine a bit and butt the two ends of the piping (not the cover fabric together and cut. Now fold the piping fabric over so it looks neat and tidy and finish stitching.