“Joy” Holiday Card Holder Part 1—Appliqué

Christine Conner created this Holiday Card Holder especially for you! Download the free embroidery designs to make the appliqué and create the quiting, and stitch a lovely wall hanging using your favorite colored fabrics and threads.
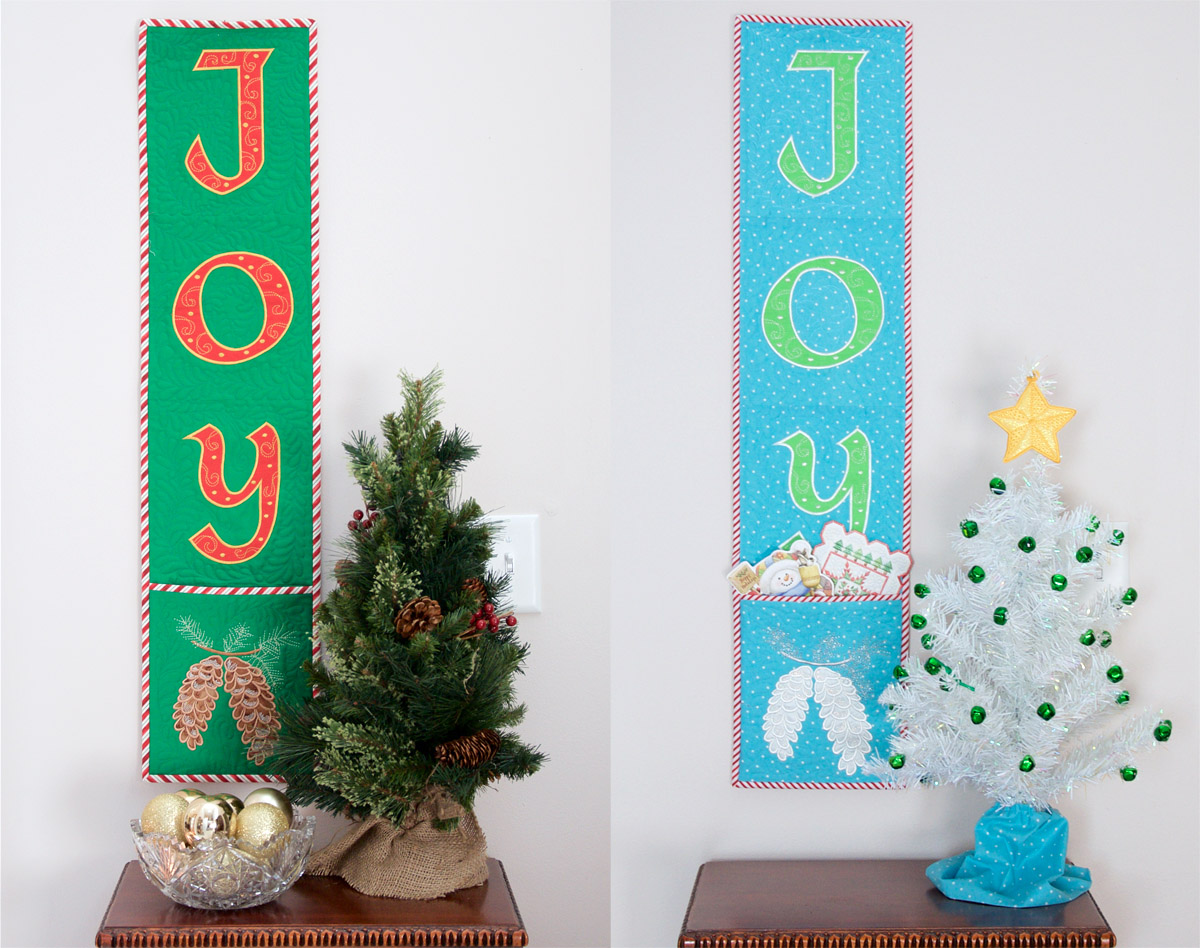
I have always wanted a festive place to put my Christmas Cards. I have also been getting lots of requests for feather quilting designs for my Edge-to-Edge quilting products, so I thought it would be fun to combine appliqué with custom feather quilting!
This will be a 2 part series. In the first part, you will appliqué and assemble the card wall hanging. In the second part, I will show you how to use my designs to create custom quilting to complete your wall hanging.
These are large files, intended for large hoops like the Maxi and Jumbo Hoops. If your embroidery system doesn’t have the ability to stitch a large design in one hooping, there are Embroidery Software programs available that offer the option to split a design. The BERNINA Embroidery Software 8 – DesignerPlus is one available program. Check with your local BERNINA store to find out more information.
Now, let’s get started!
Materials to make the Joy Holiday Card Holder
- OESD lightweight tear-away stabilizer
- 1-1/3 yards background fabric
- 1/4 yard fabric for letters
- 1/4 yard binding
- 8.5″ x 10.5″ fabric for top edge and back of pocket (contrasting fabric)
- Two 6.5″ x 3.5″ pine cone fabric
- 48″ x 16″ backing fabric
- 48″ x 16″ batting
- 16″ x 21″ scrap of batting for pocket
- Temporary Spray Adhesive like 505 Spray and Fix
- Embroidery thread like Isacord
- Painter’s tape
- Embroidery designs
Cutting instructions
From Background Fabric cut: Four 16″ x 21″ rectangles for Letters and Pine Cone Blocks, and one 8.5″ x 10″ for bottom of wall hanging behind the pine cone pocket.
From Letter Fabric, cut three 6″ x 9″ rectangles.
From Binding Fabric, cut three 2.5″ x width of fabric strips.
Download the Embroidery Files: JOY Cardholder Appliqué Designs
You will use the following embroidery files:
- JDesign.###
- ODesign.###
- YDesign.###
- PineDesn.###
Where ### is the extension of the file format for your embroidery machine.
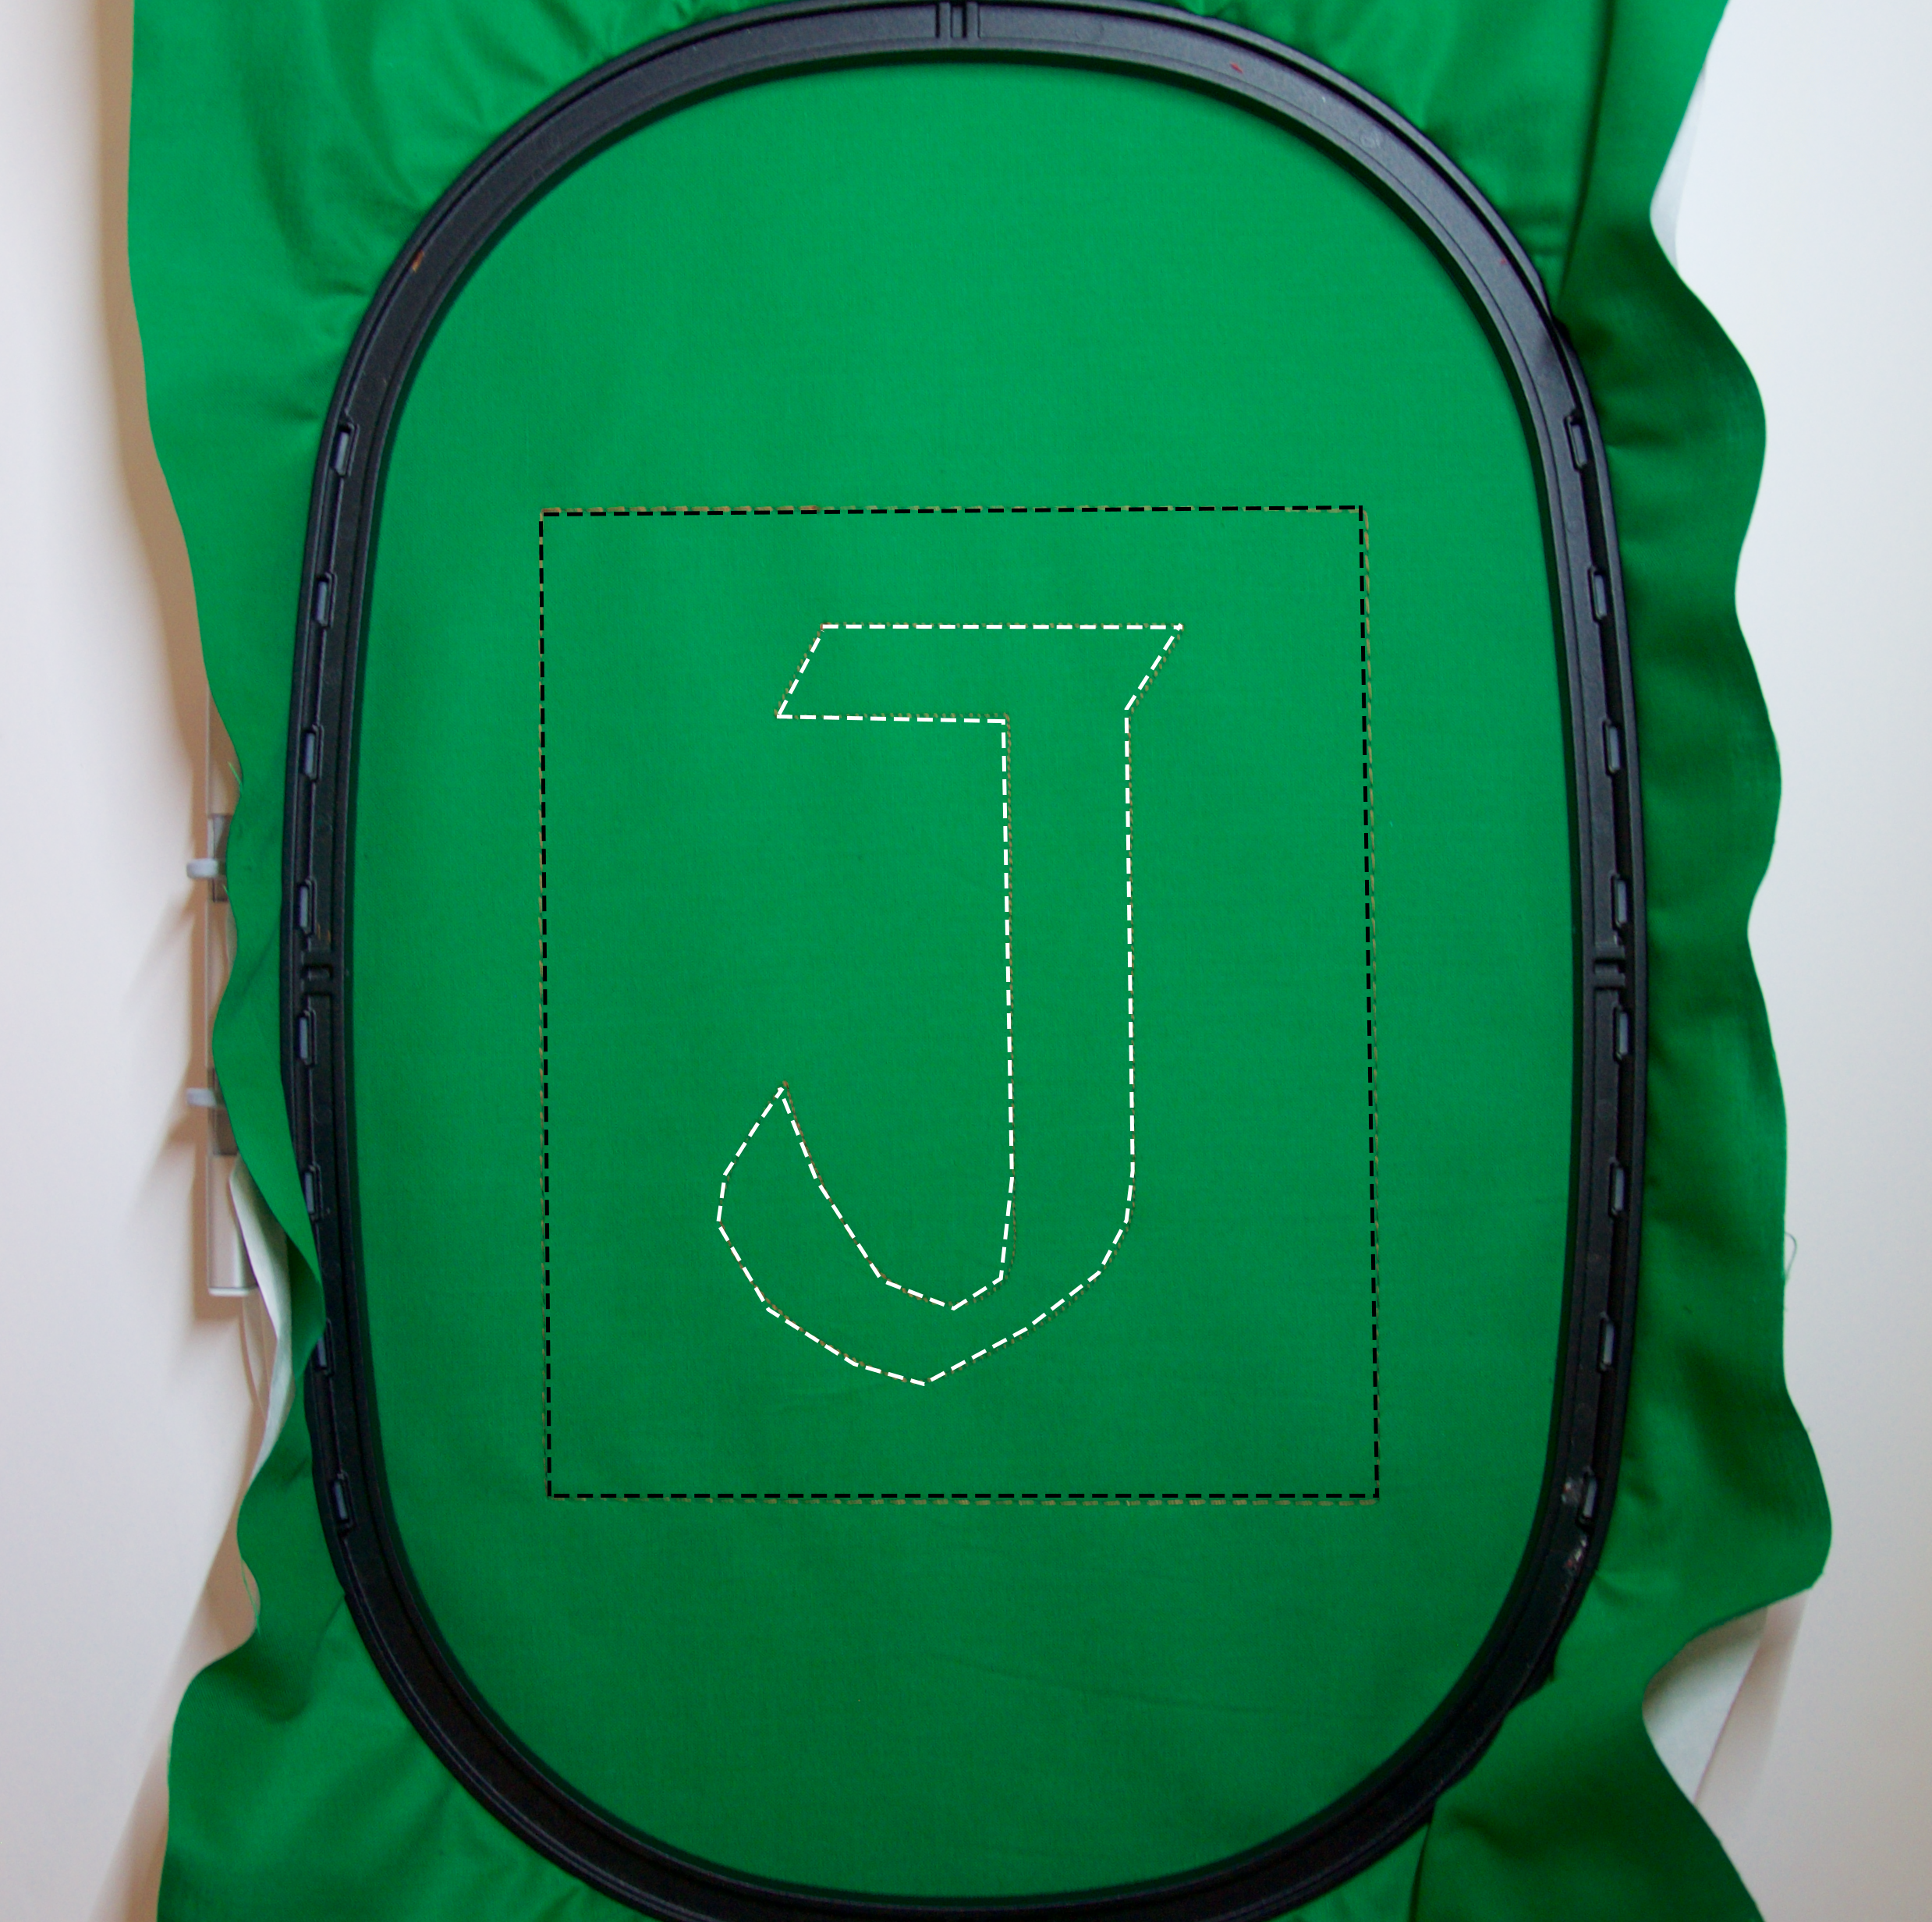
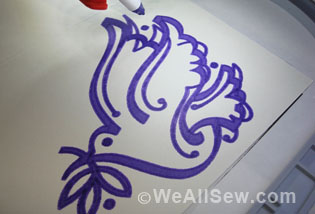
Step 1: Making the J Block
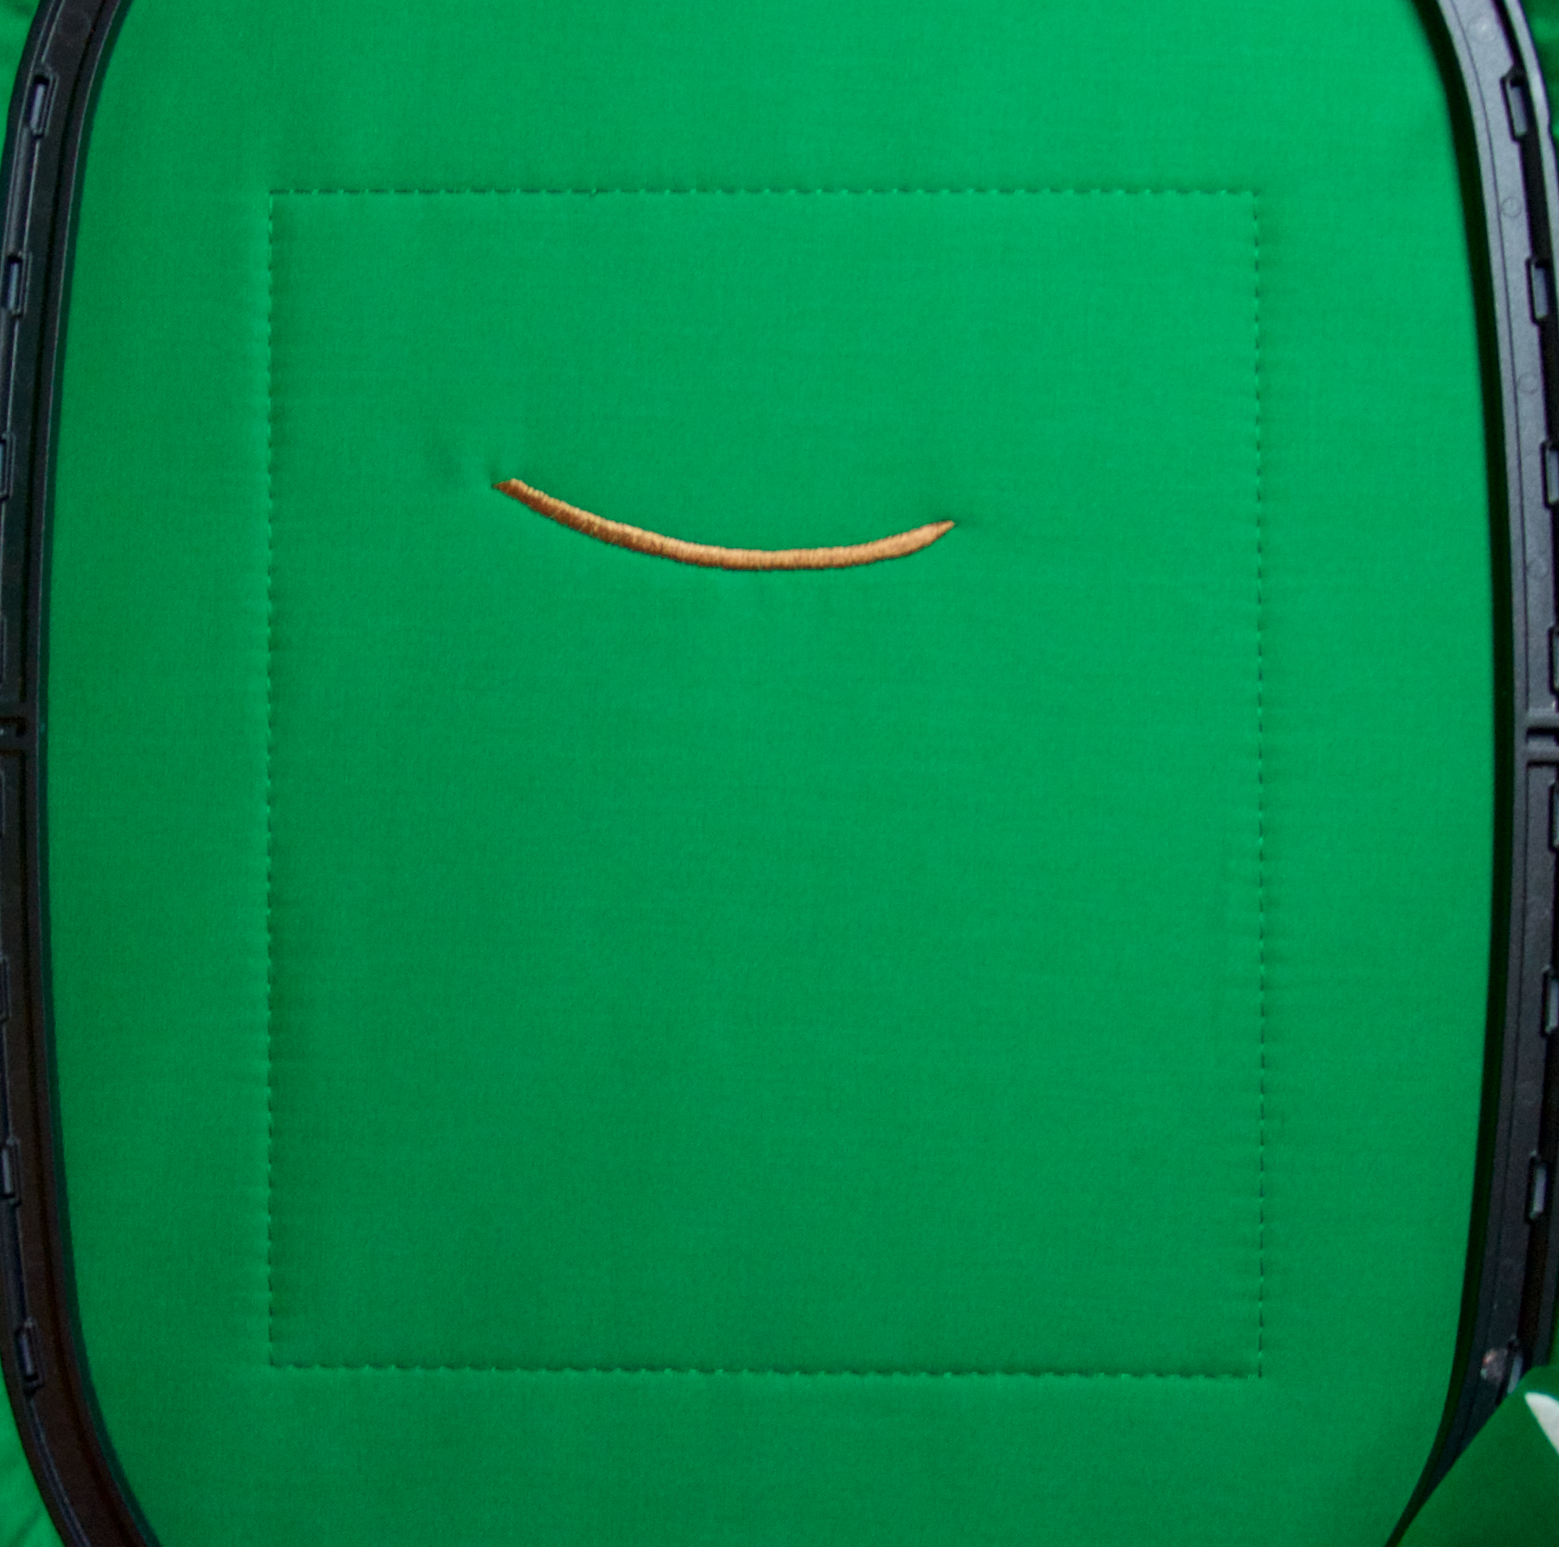
Stabilize a 21″ x 16″ background fabric with tear-away stabilizer. Hoop the fabric. Load the JDesign.### into your machine. Thread your machine with a neutral colored thread. Start the machine. The machine will stitch first a basting rectangle, and then the placement line.
TIP: Basting lines are important for trimming.
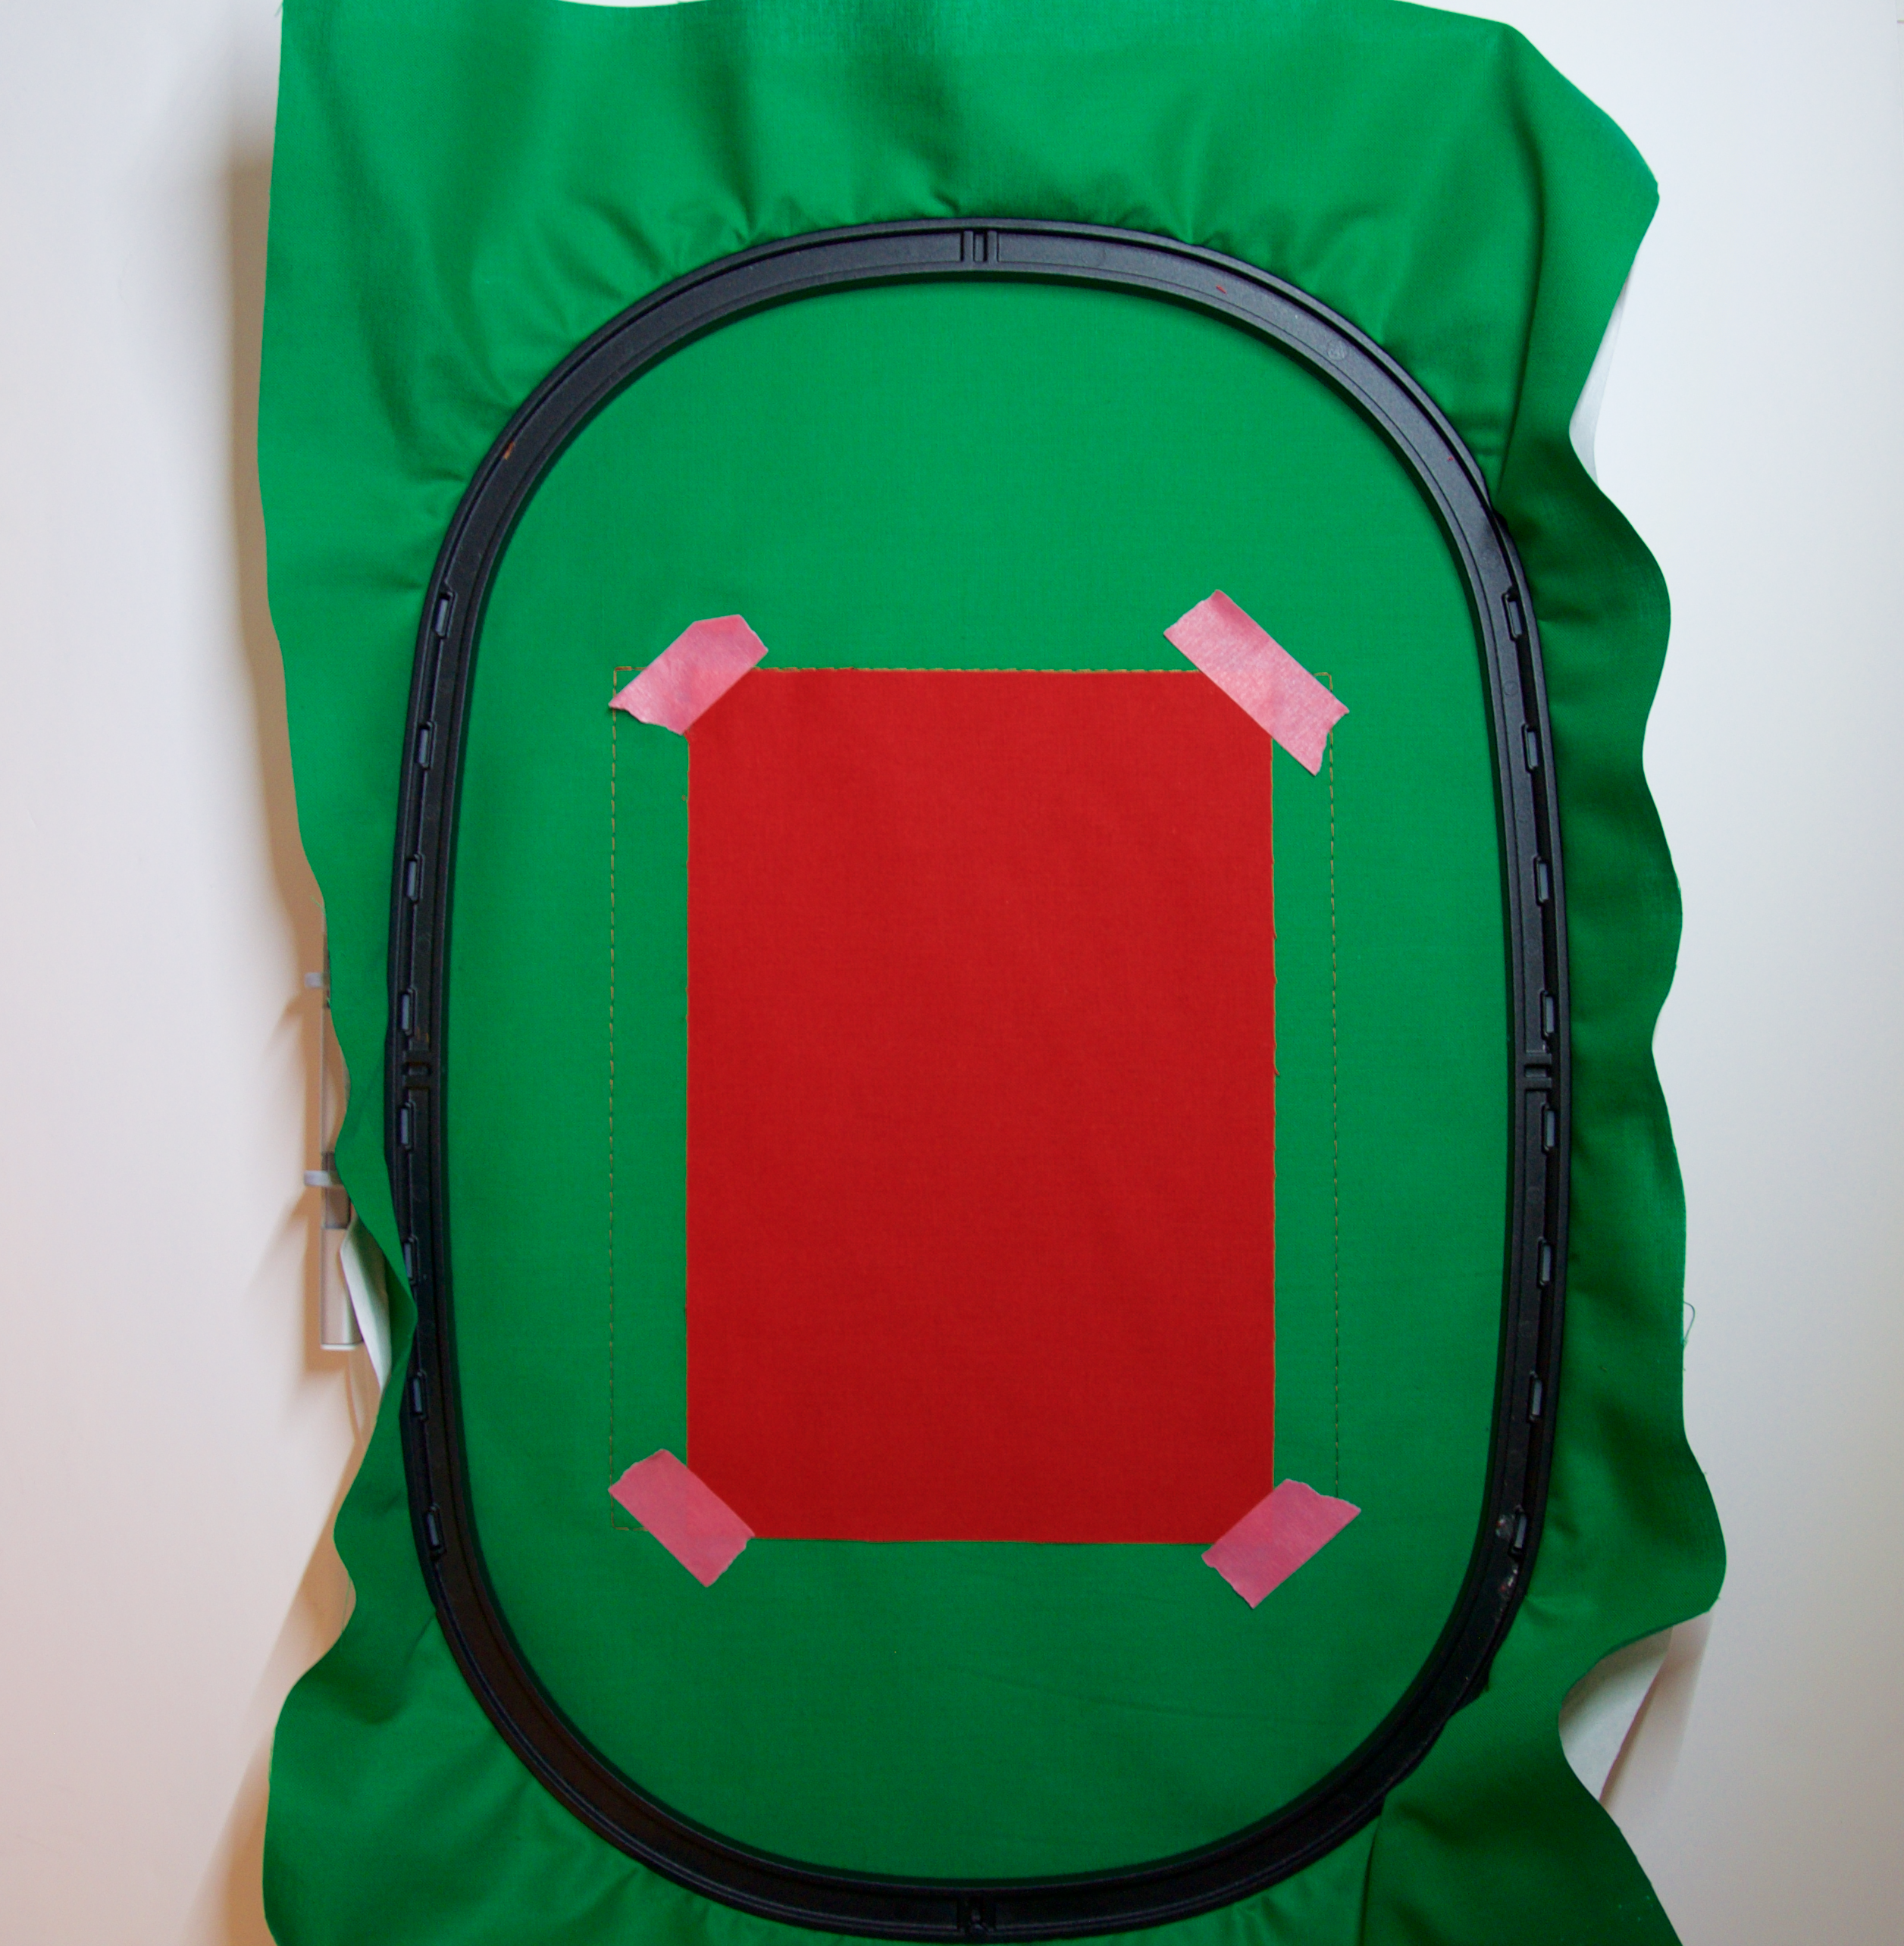
Step 2
When the machine stops, place the 6″ x 9″ letter fabric over the placement line. Use painter’s tape to hold the fabric in place.
Step 3
Start the machine. The machine will tack the fabric in place.

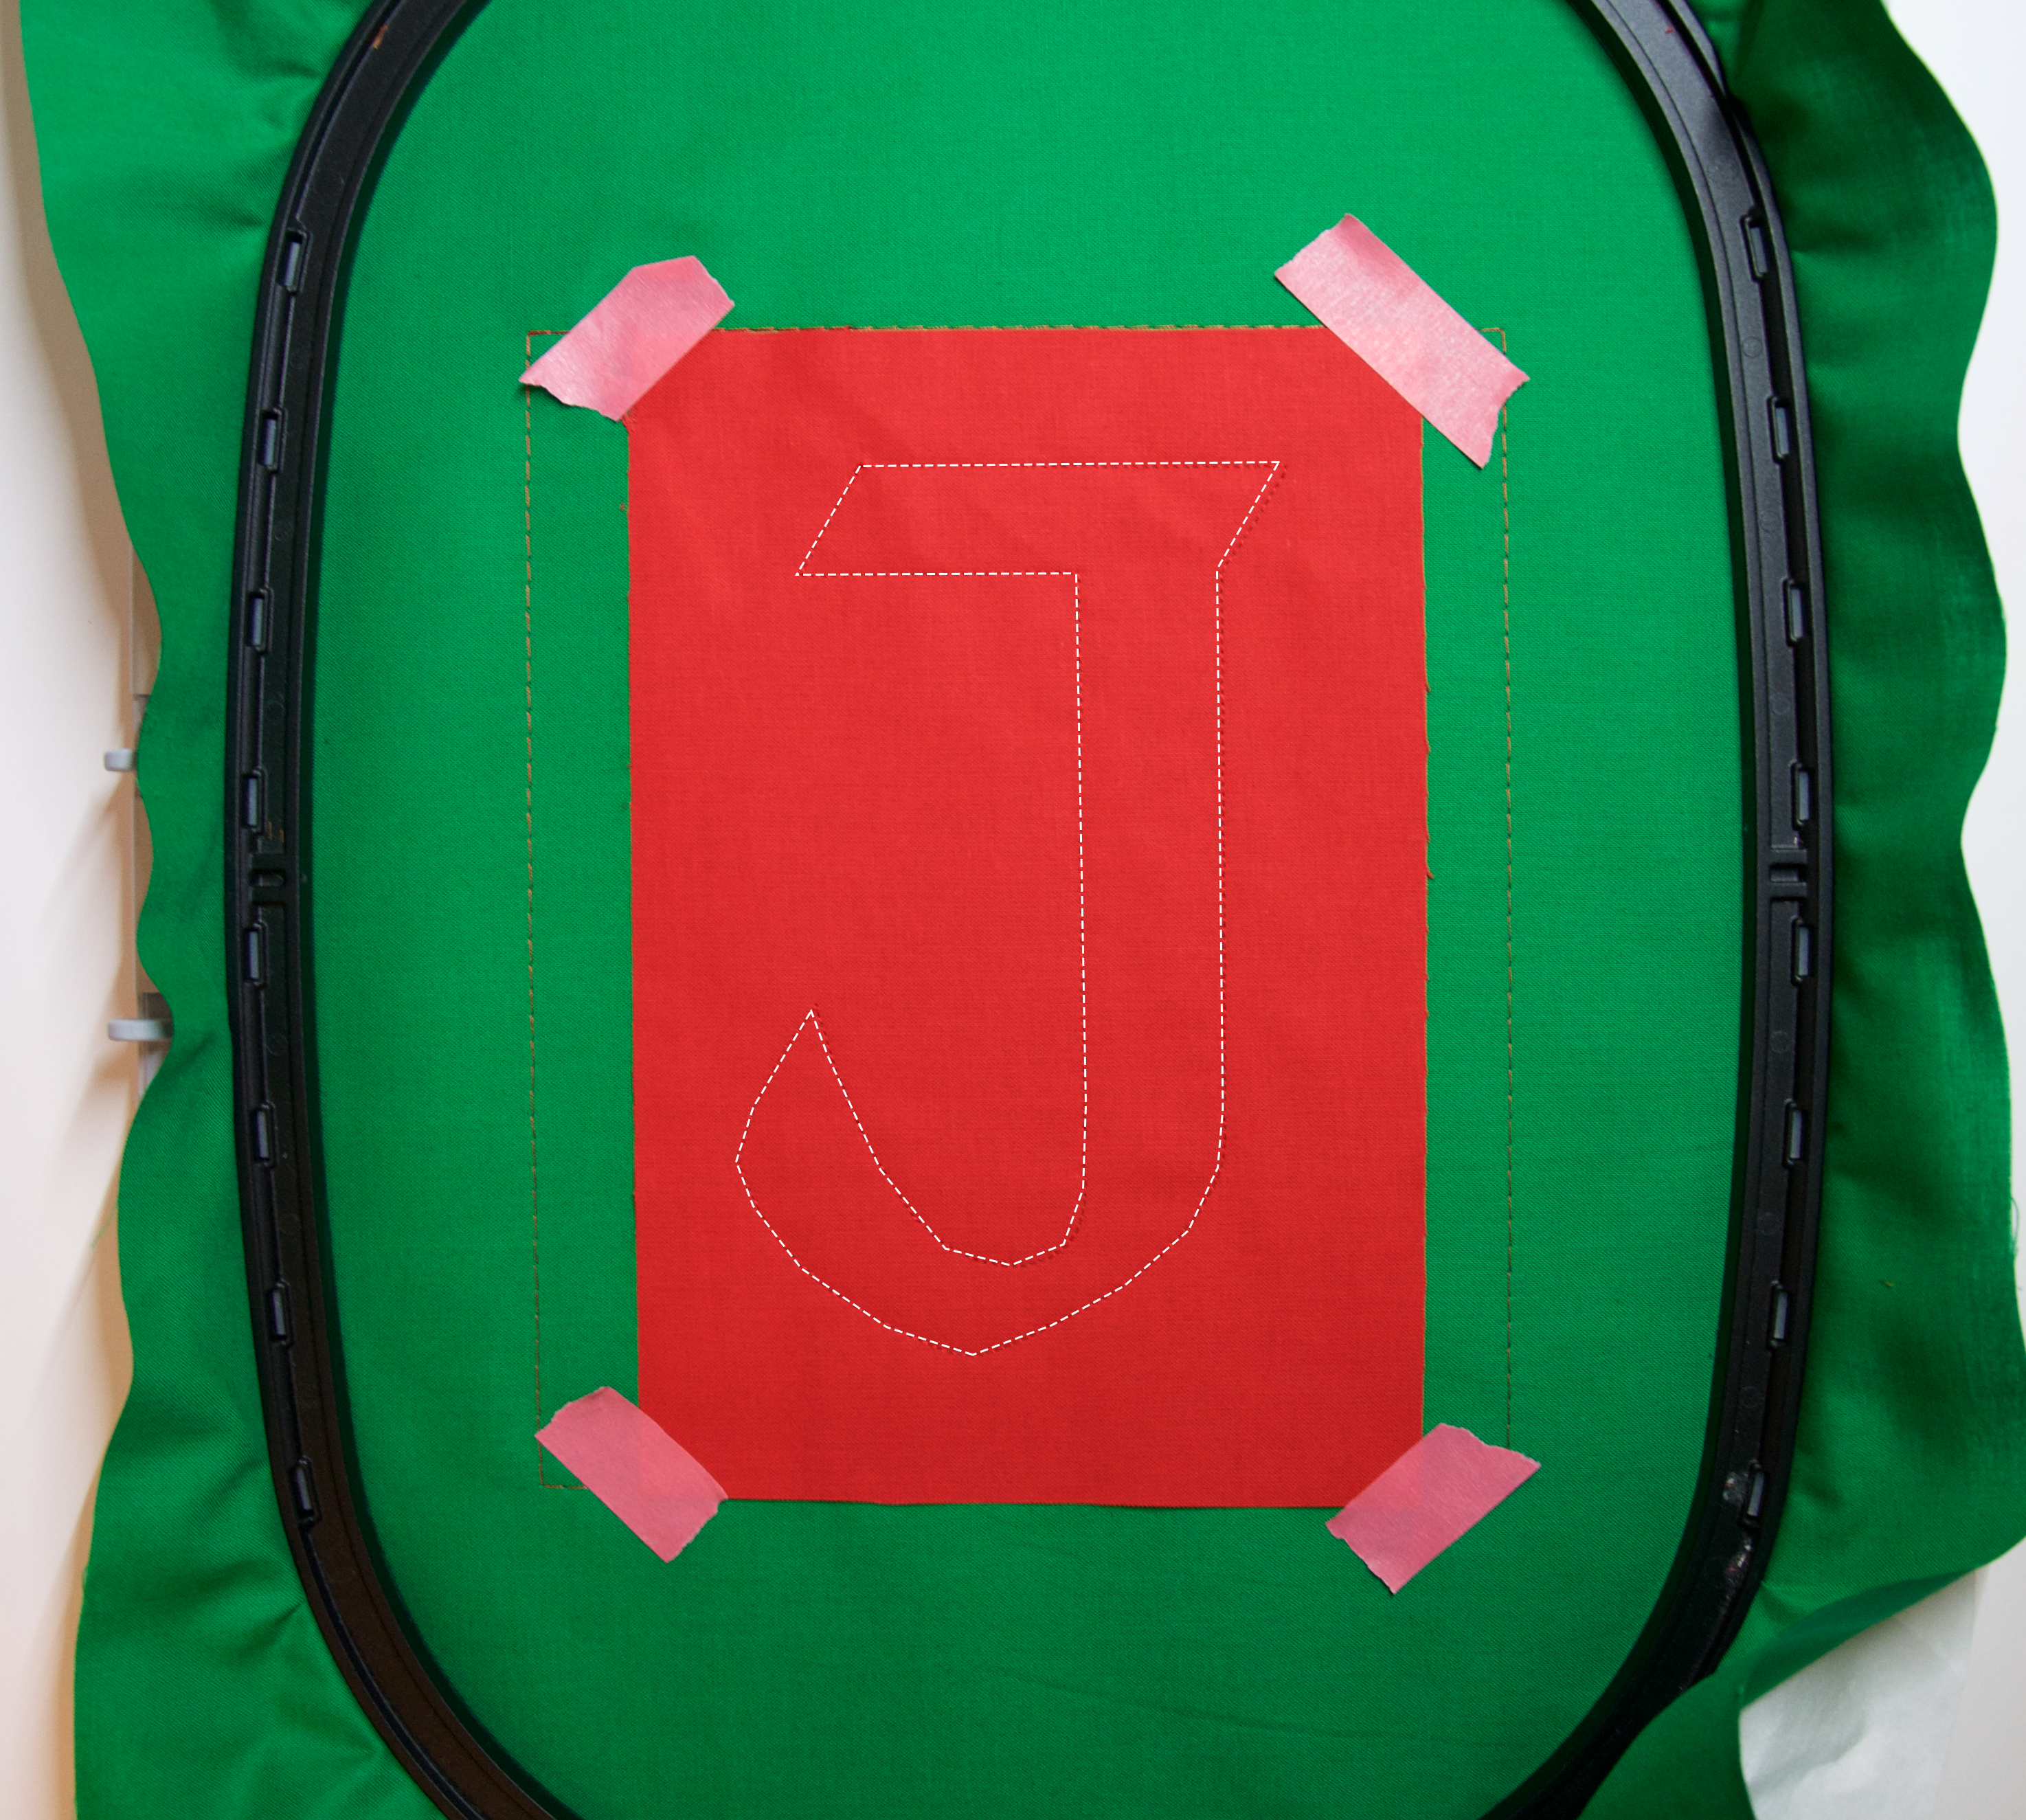
Step 4
When the machine stops, remove the hoop from the machine, but leave the fabric in the hoop. Lay the hoop on a flat surface and trim away the excess fabric. Trim close to the stitches, but don’t cut through the stitches.

Step 5
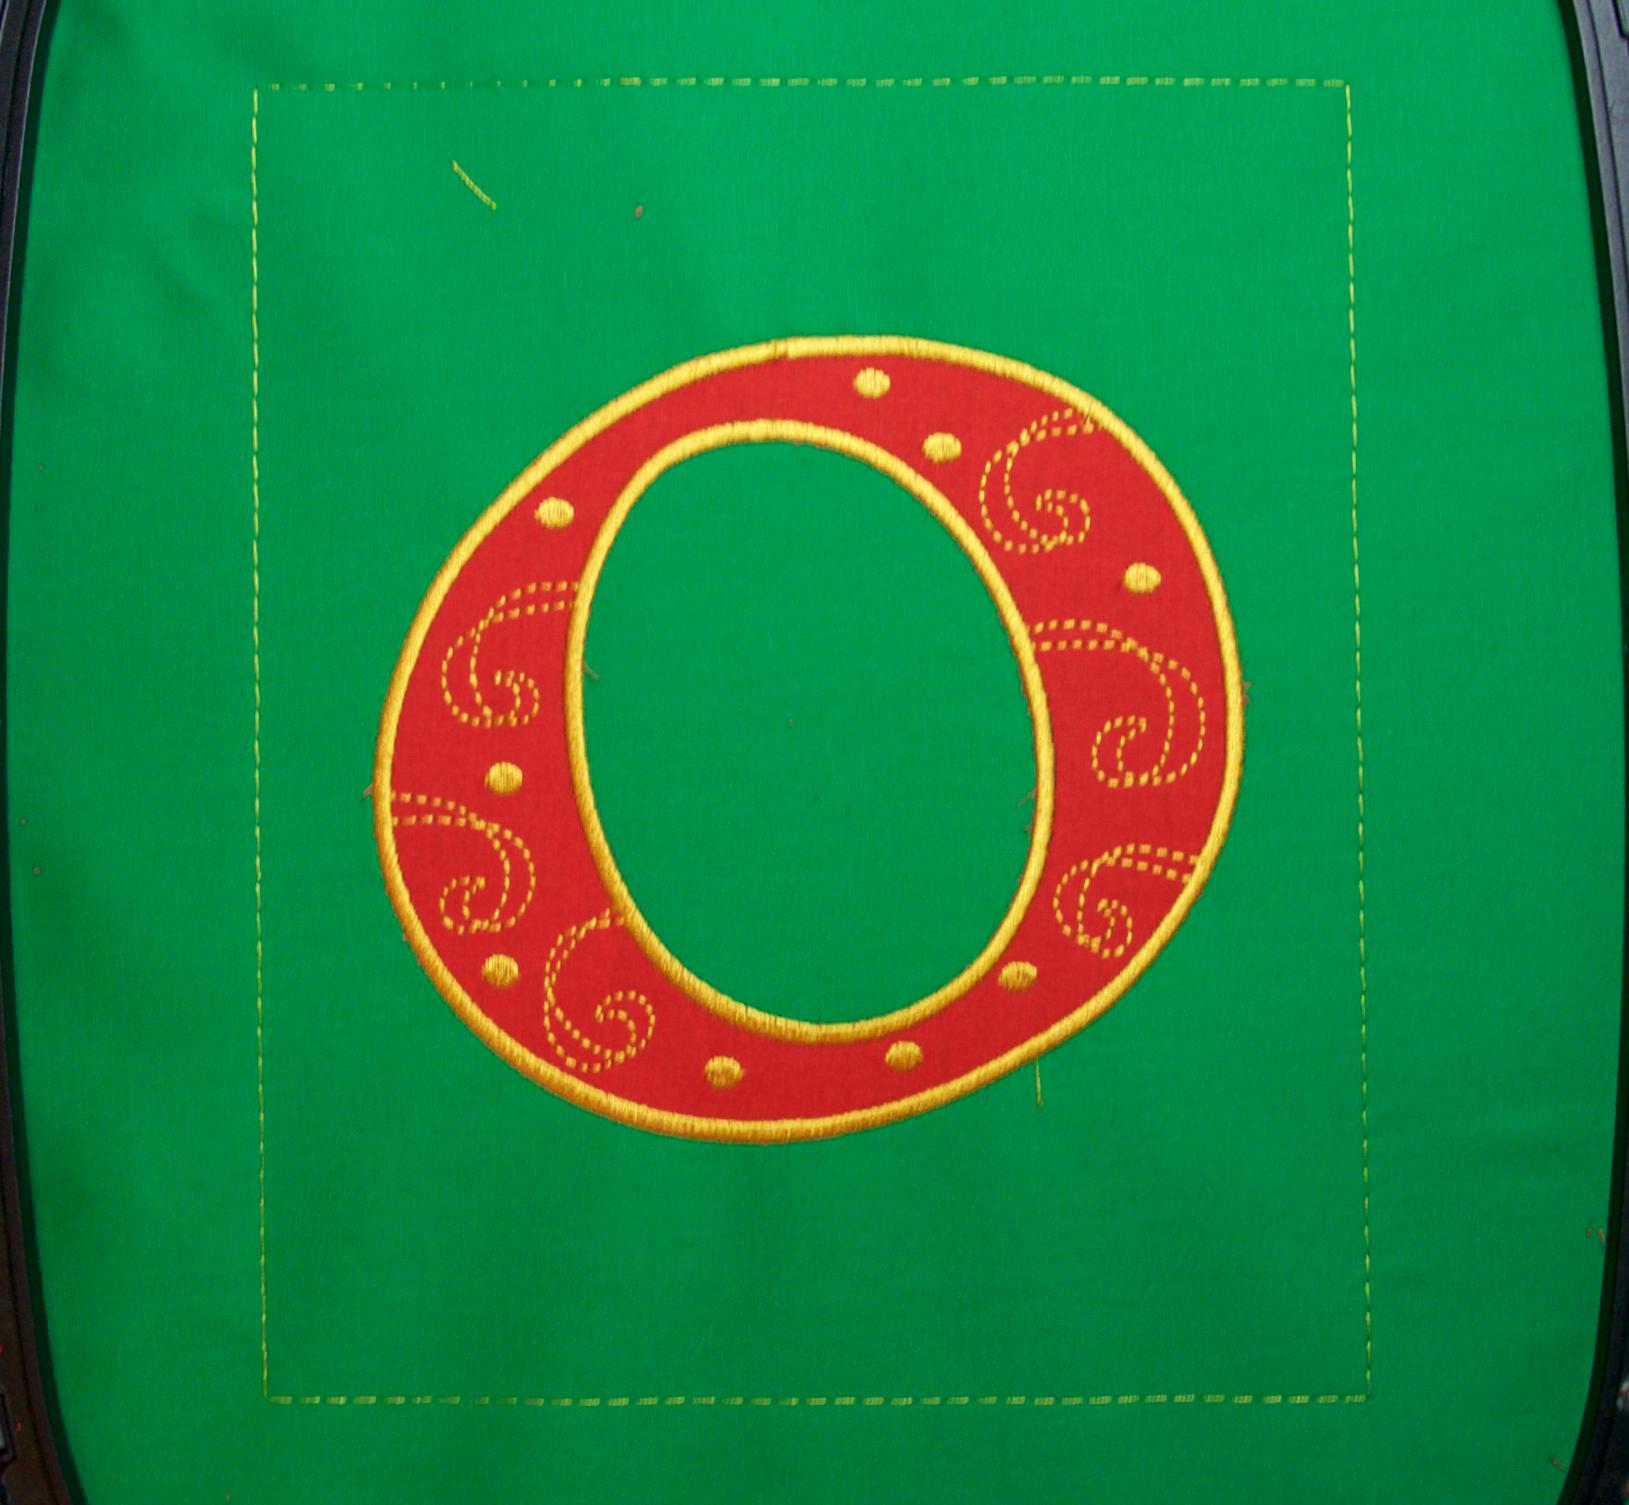
Return the hoop to the machine. Place gold thread in the machine, or the thread color you would like for the scrolls and dots inside the letter. Start the machine. The machine will stitch the scrolls and dots that are on the letter.
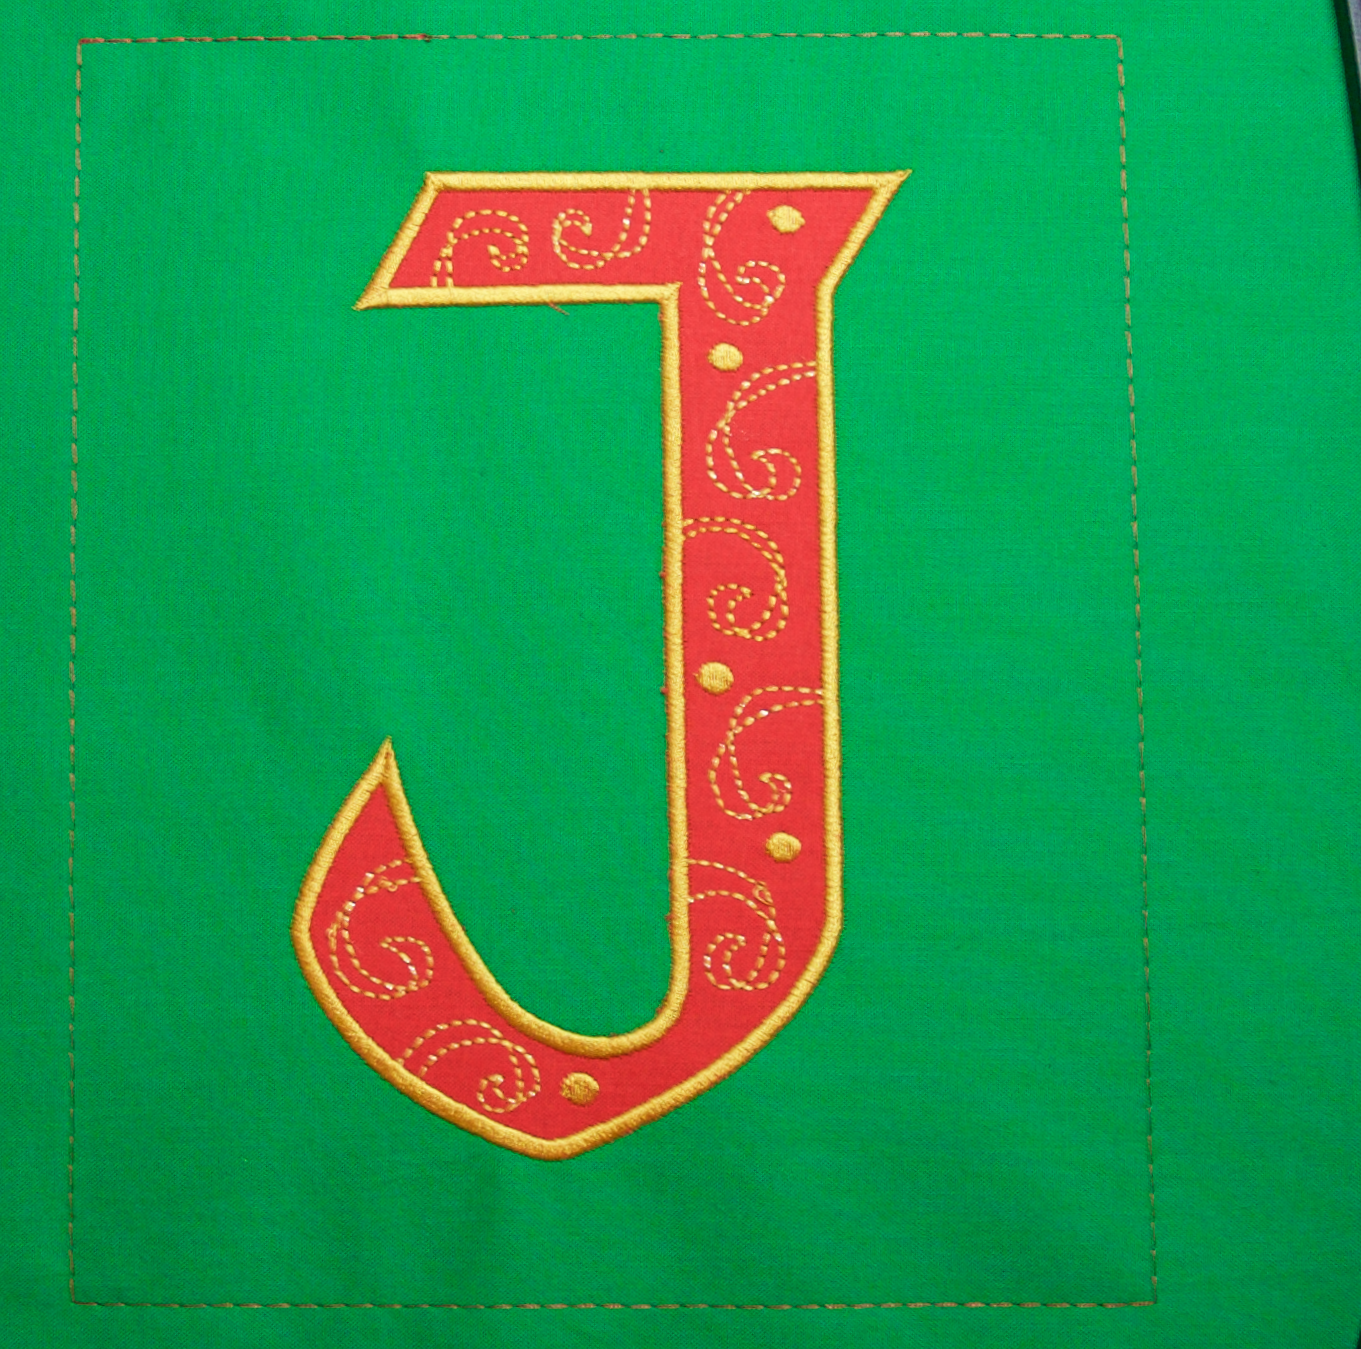
Step 6
Change the thread color to the color you would like for the satin edge. Start the machine. The machine will satin stitch around the letter. When the machine stops, remove the letter from the hoop, and set aside. Trim 1/2″ past the basting line. The piece will be 8.5″ x 10″ when finished. Remove basting stitches.
Step 7
Repeat steps 1-6 for both the ODesign.### and the YDesign.###
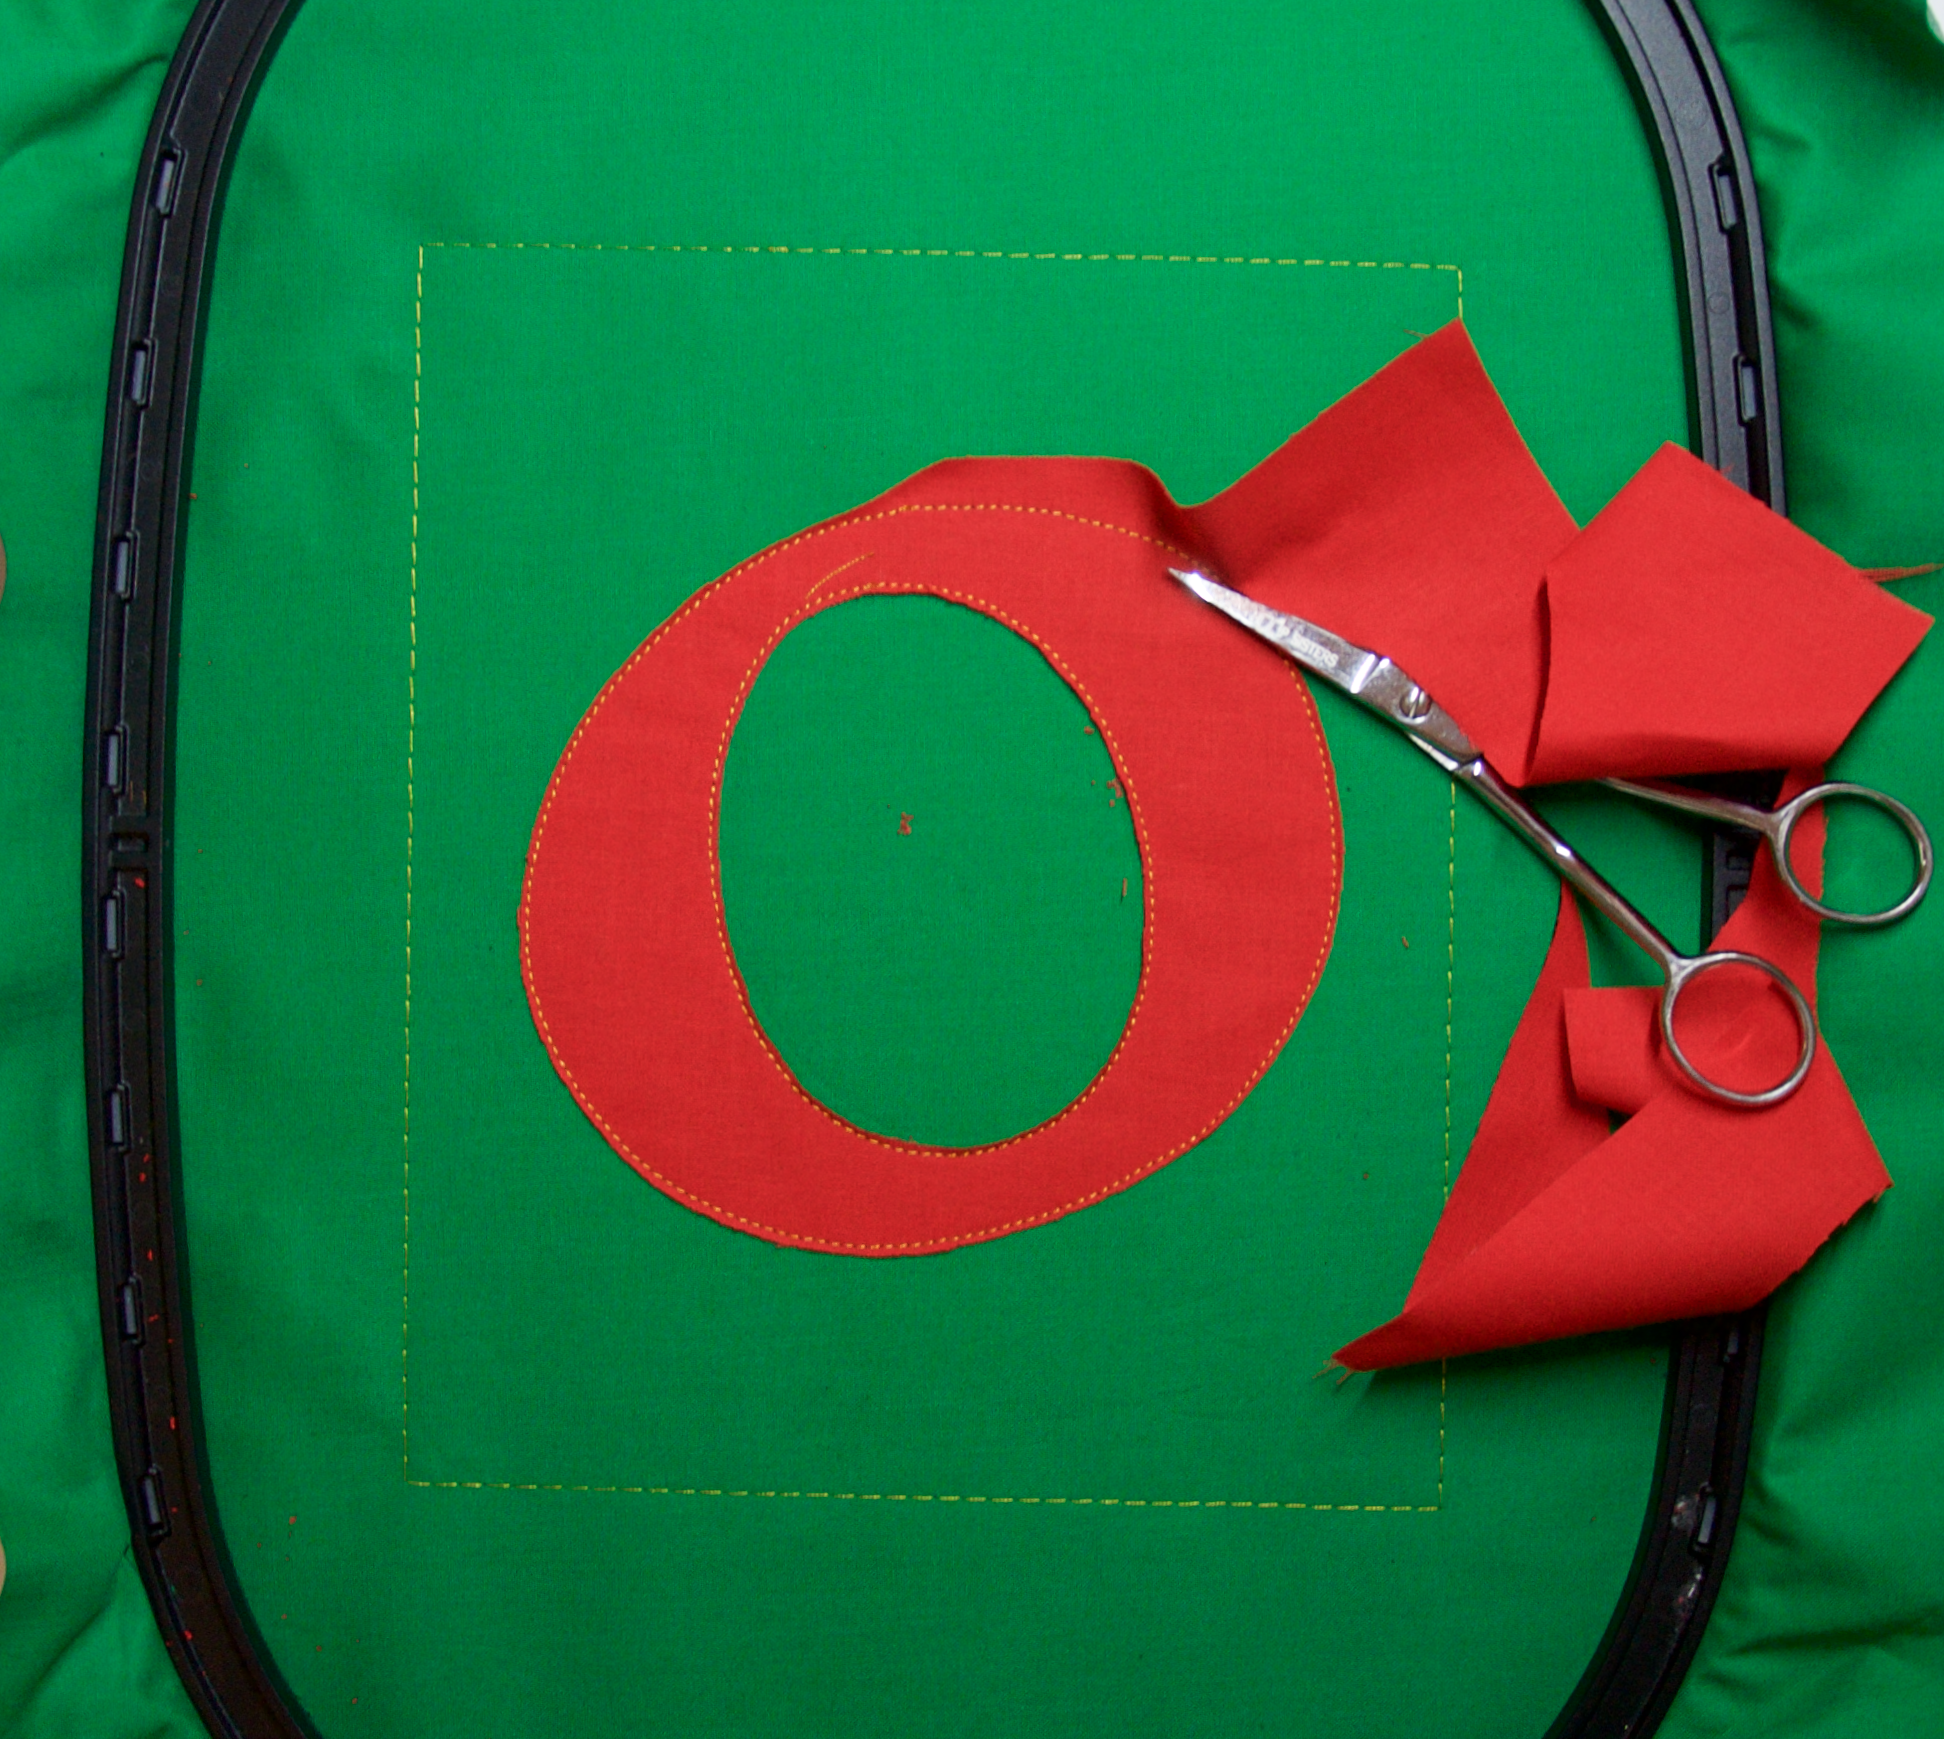
TIP: When I cut out the center of the O, I slide a ripper between the top layer of fabric and the bottom layer of fabric to start a small hole. Then, I finish trimming with my scissors.
Step 8
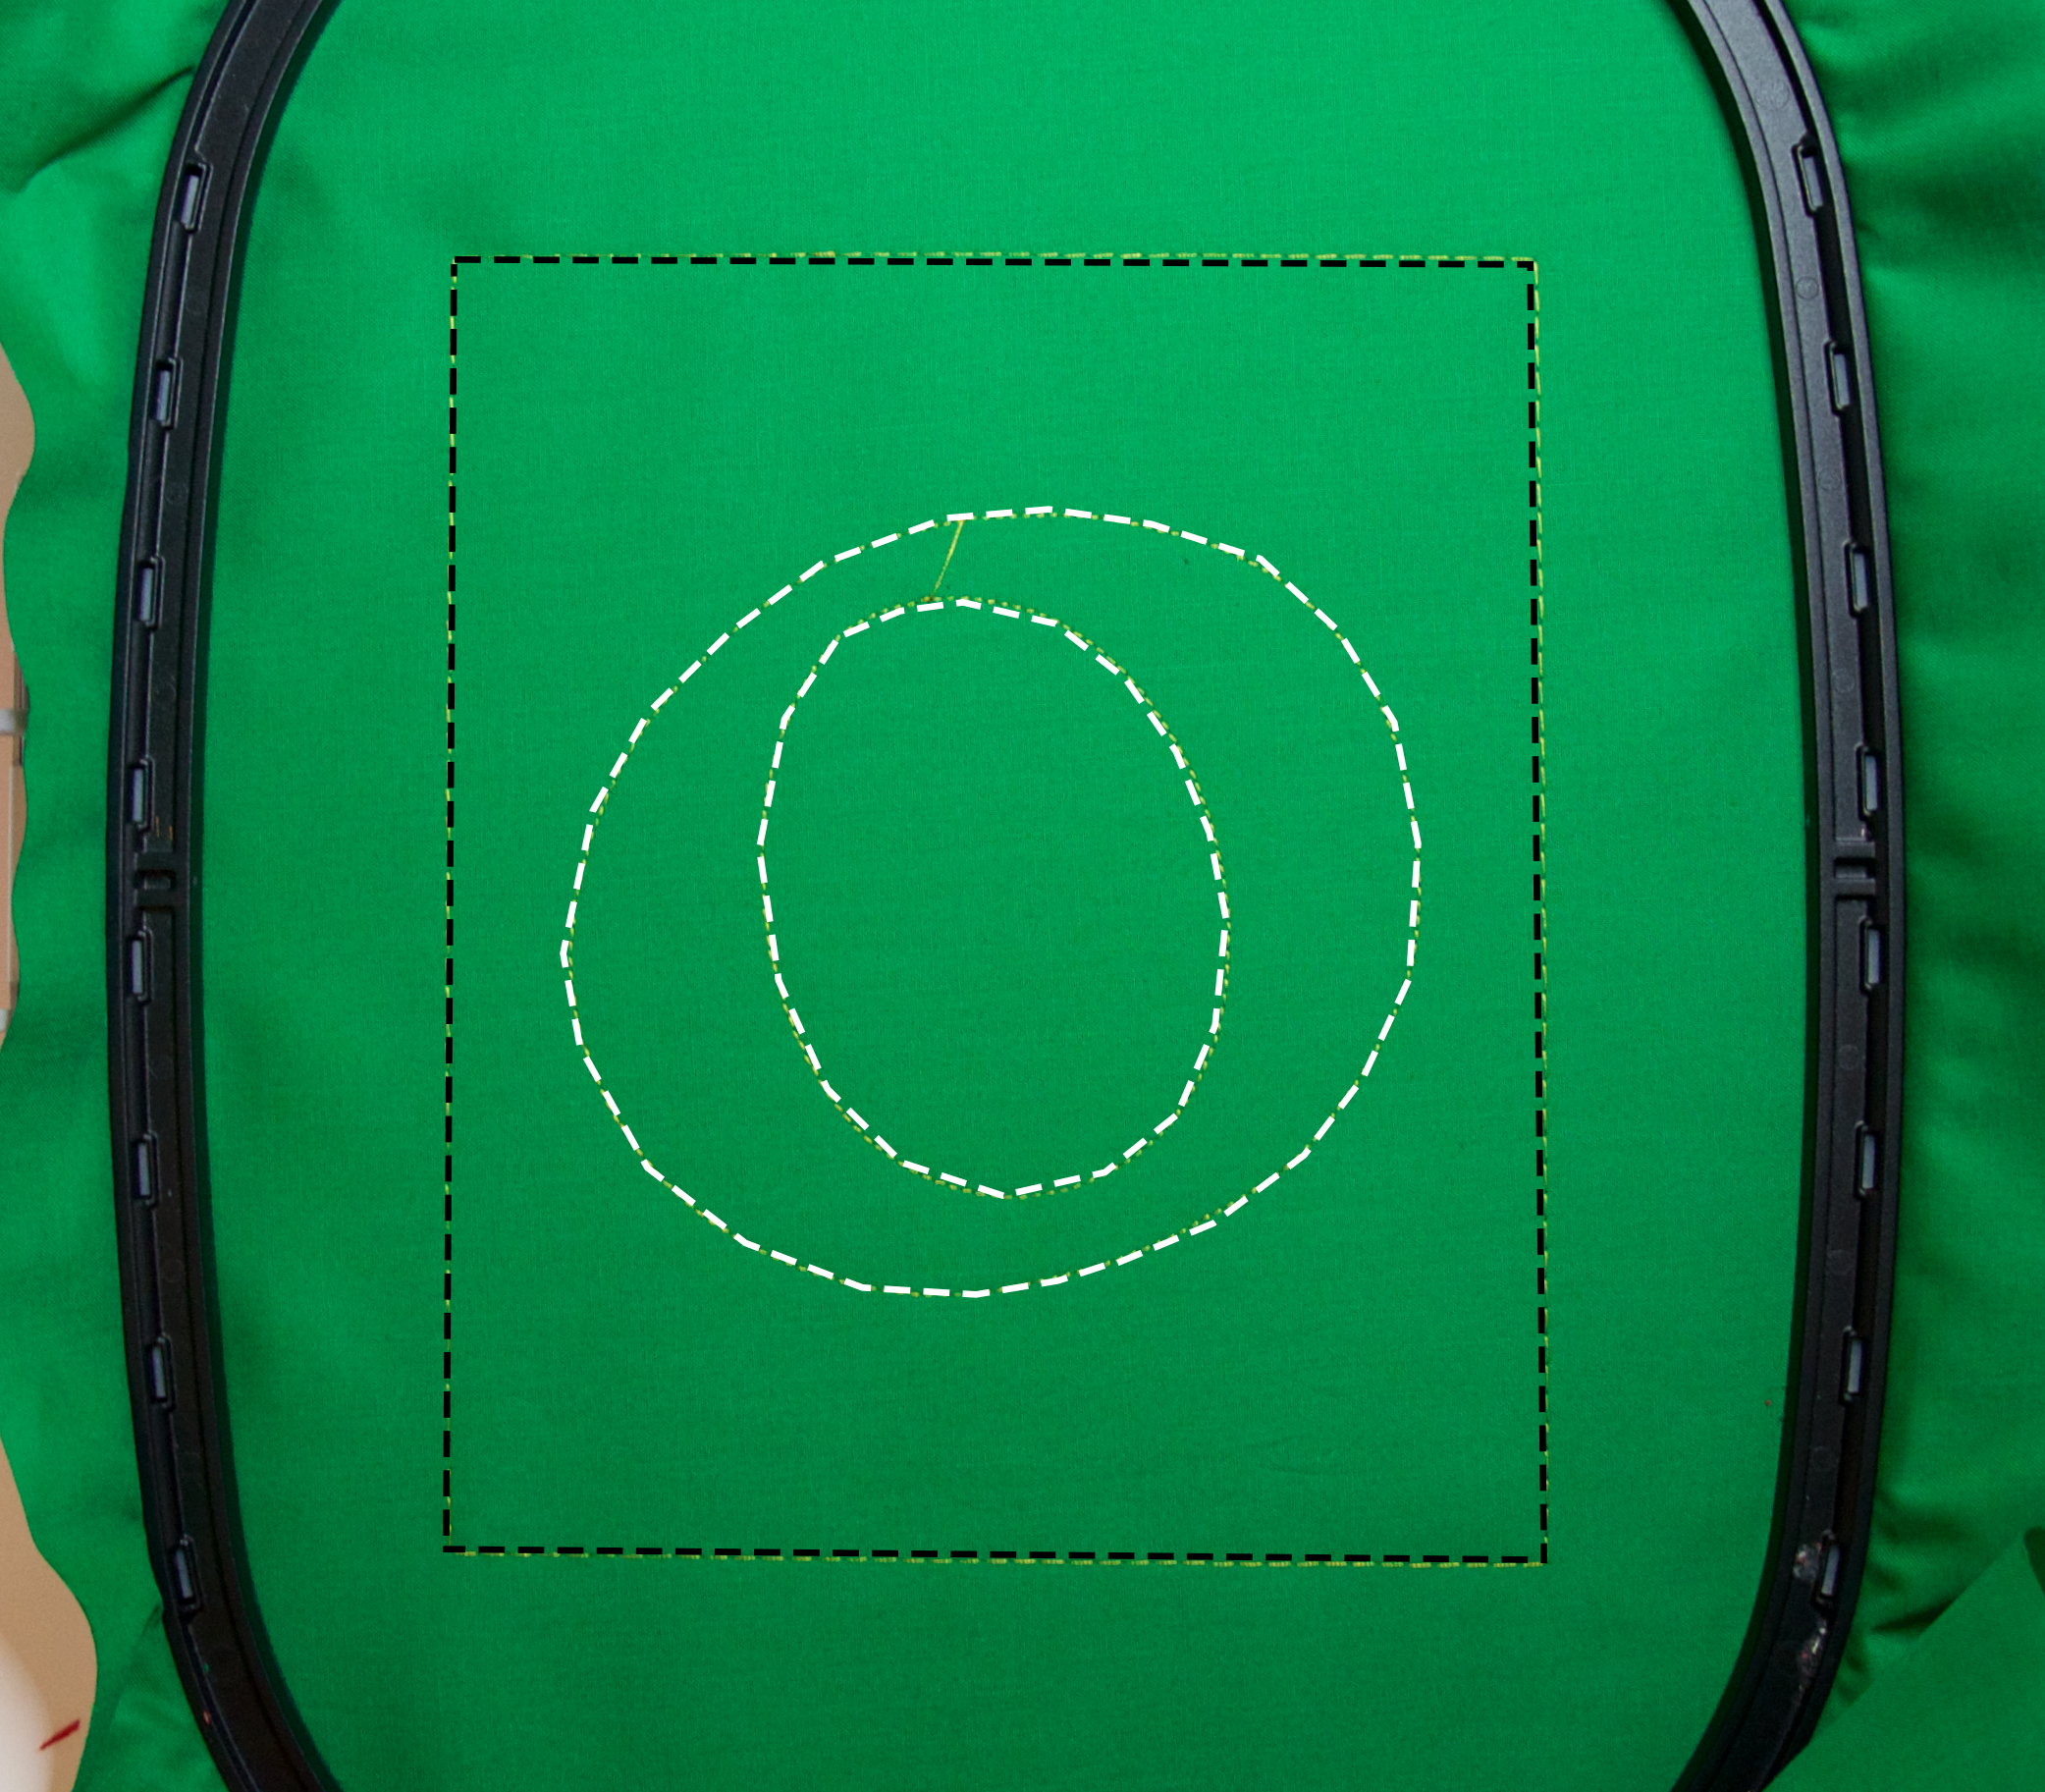
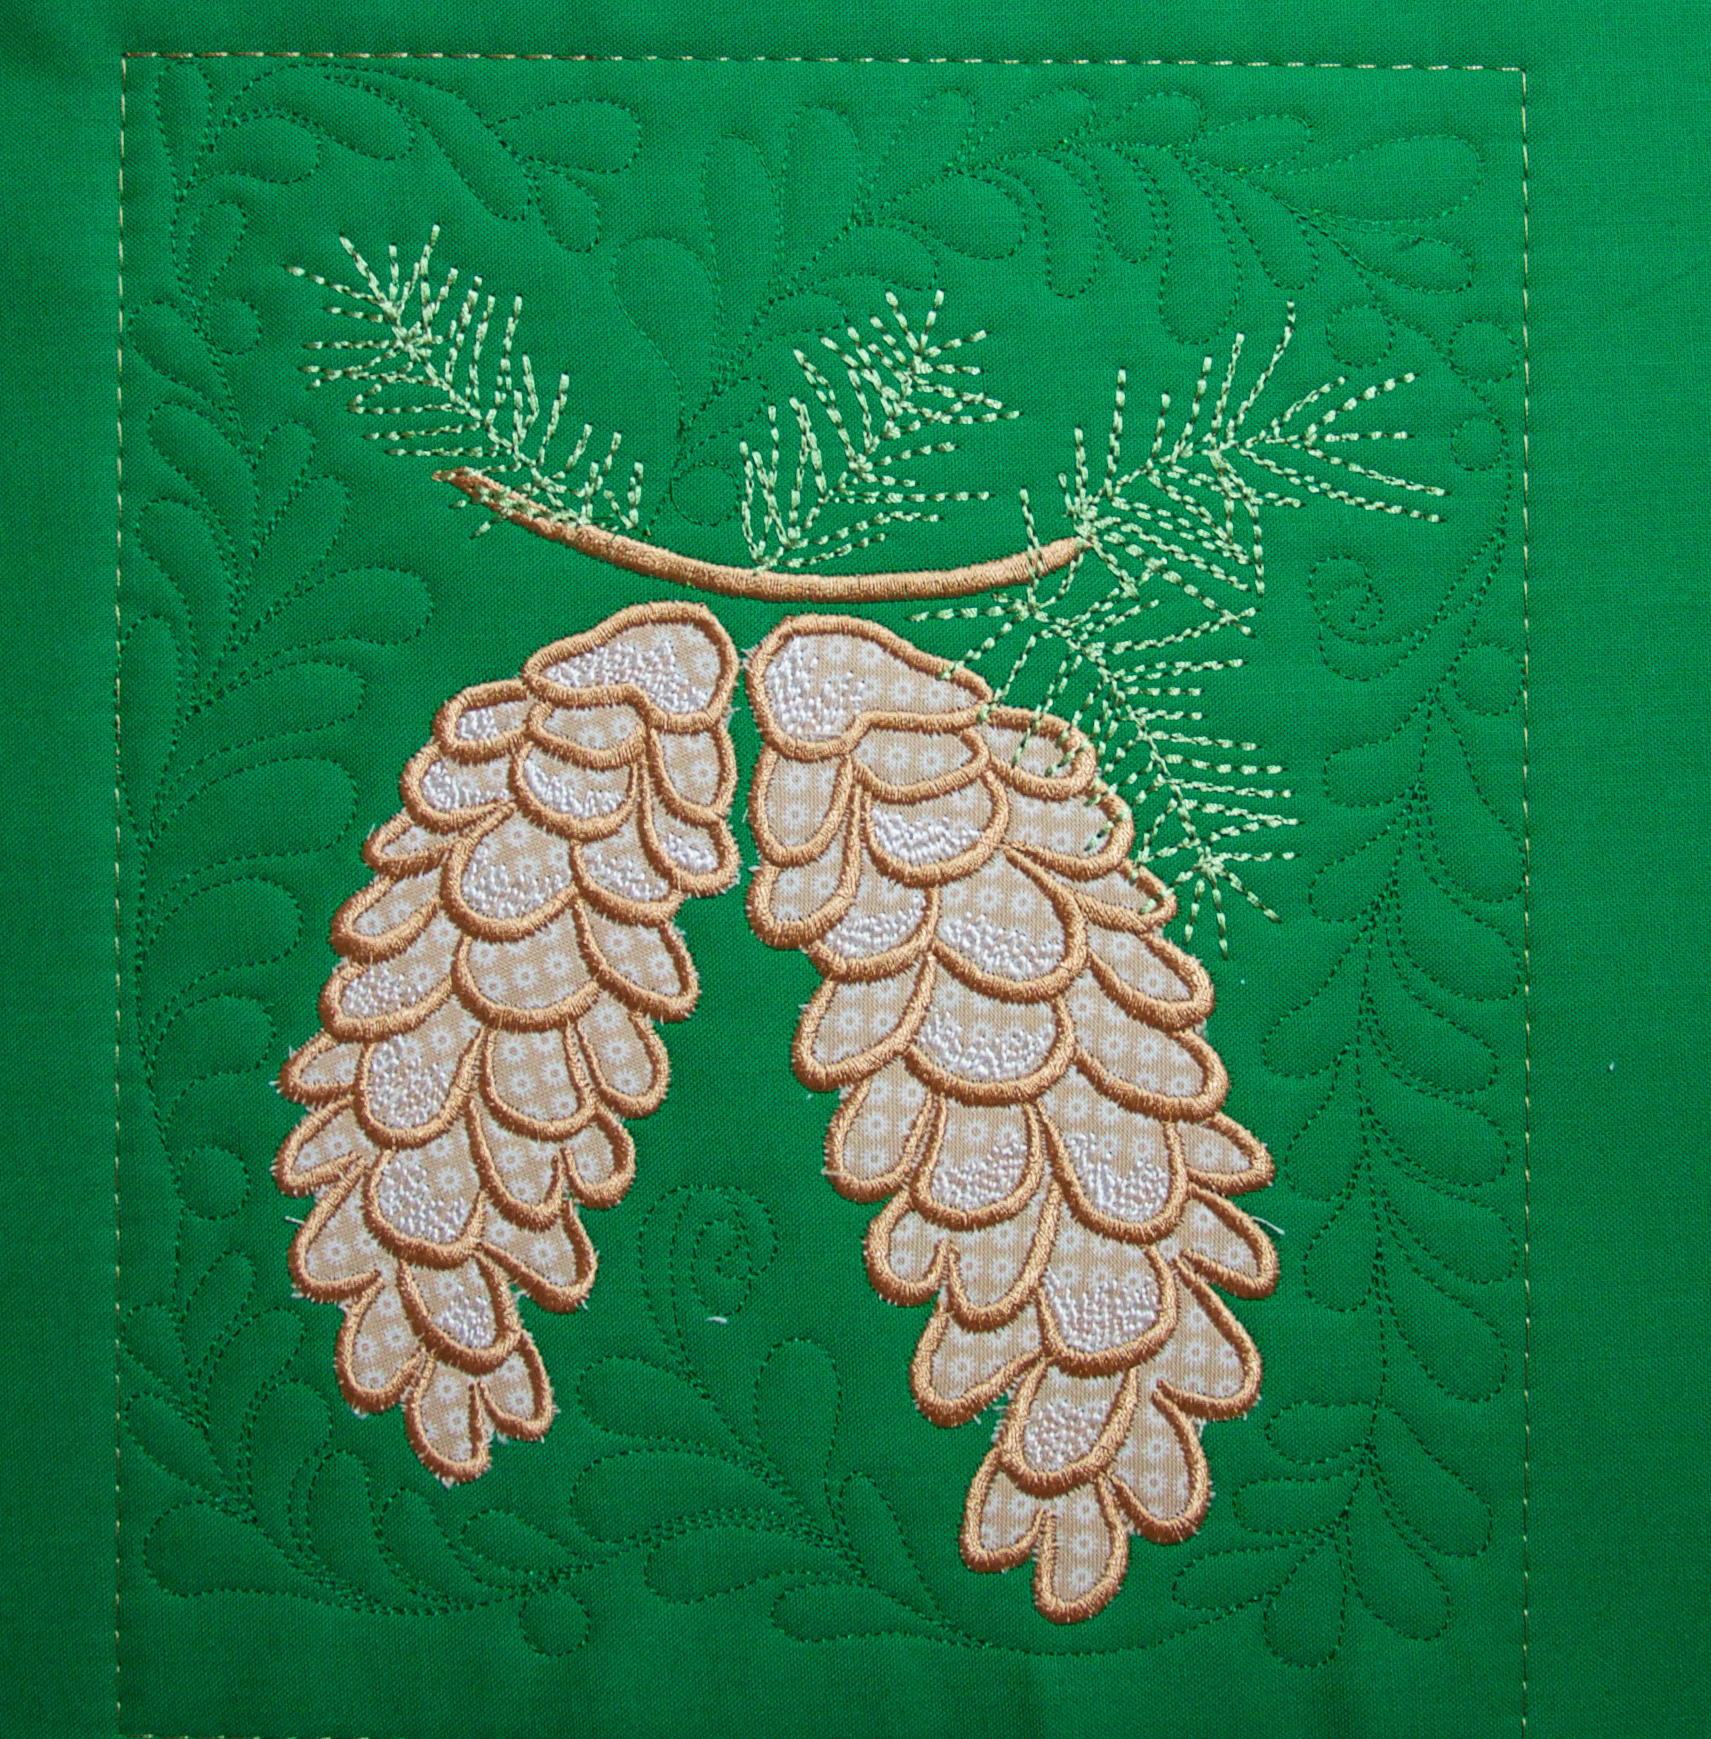
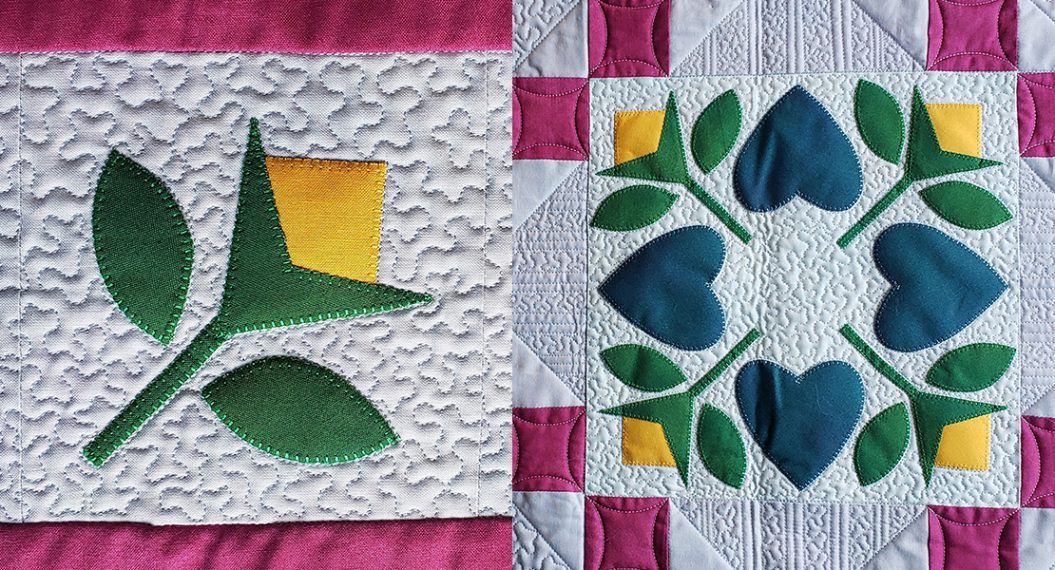
Making the Pine Cone Pocket
The Pocket has appliqué and quilting, so you will want to hoop the stabilizer, the 16″ x 21″ square of batting, and then the 16″ x 21″ square of background fabric.
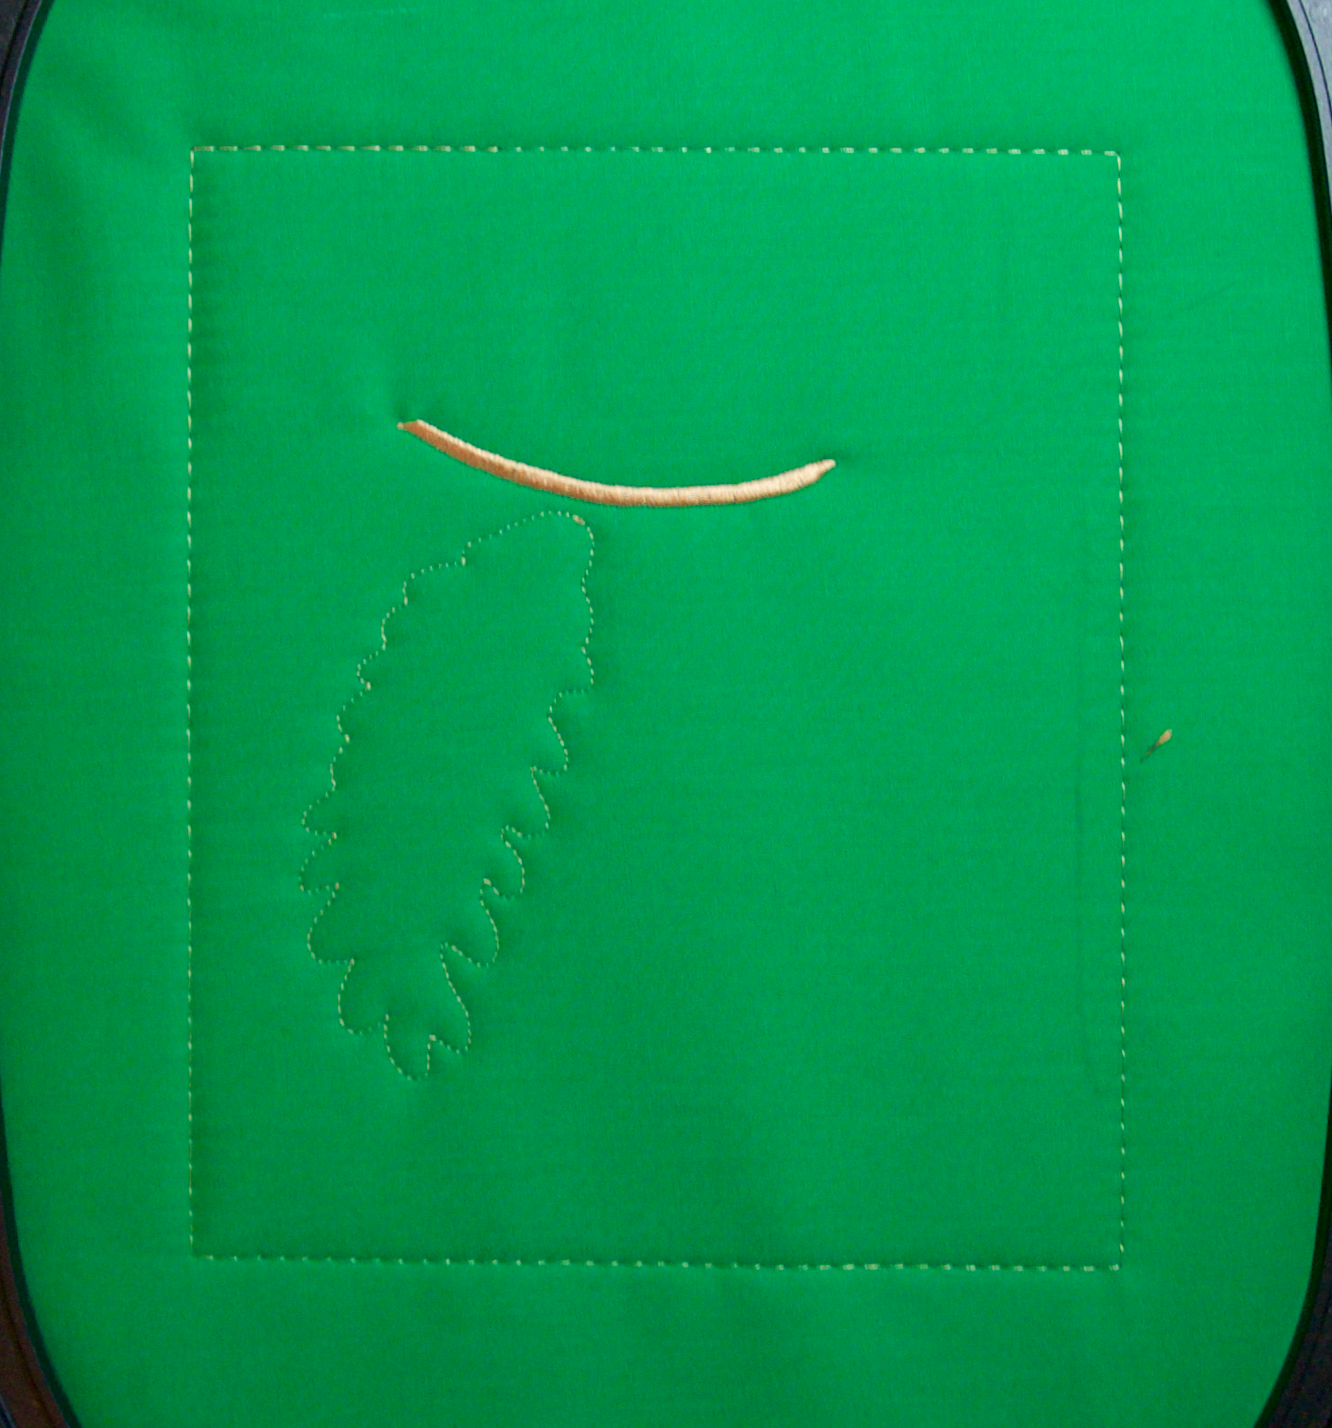
Put the hoop in the machine. Load the PineDesign.### file into your machine. Thread the machine with the color you want for the pine cone branch. Start the machine. The machine will stitch the basting line, and then the branch.
Step 9
Start the machine again. The machine will stitch a placement line for the left pine cone.
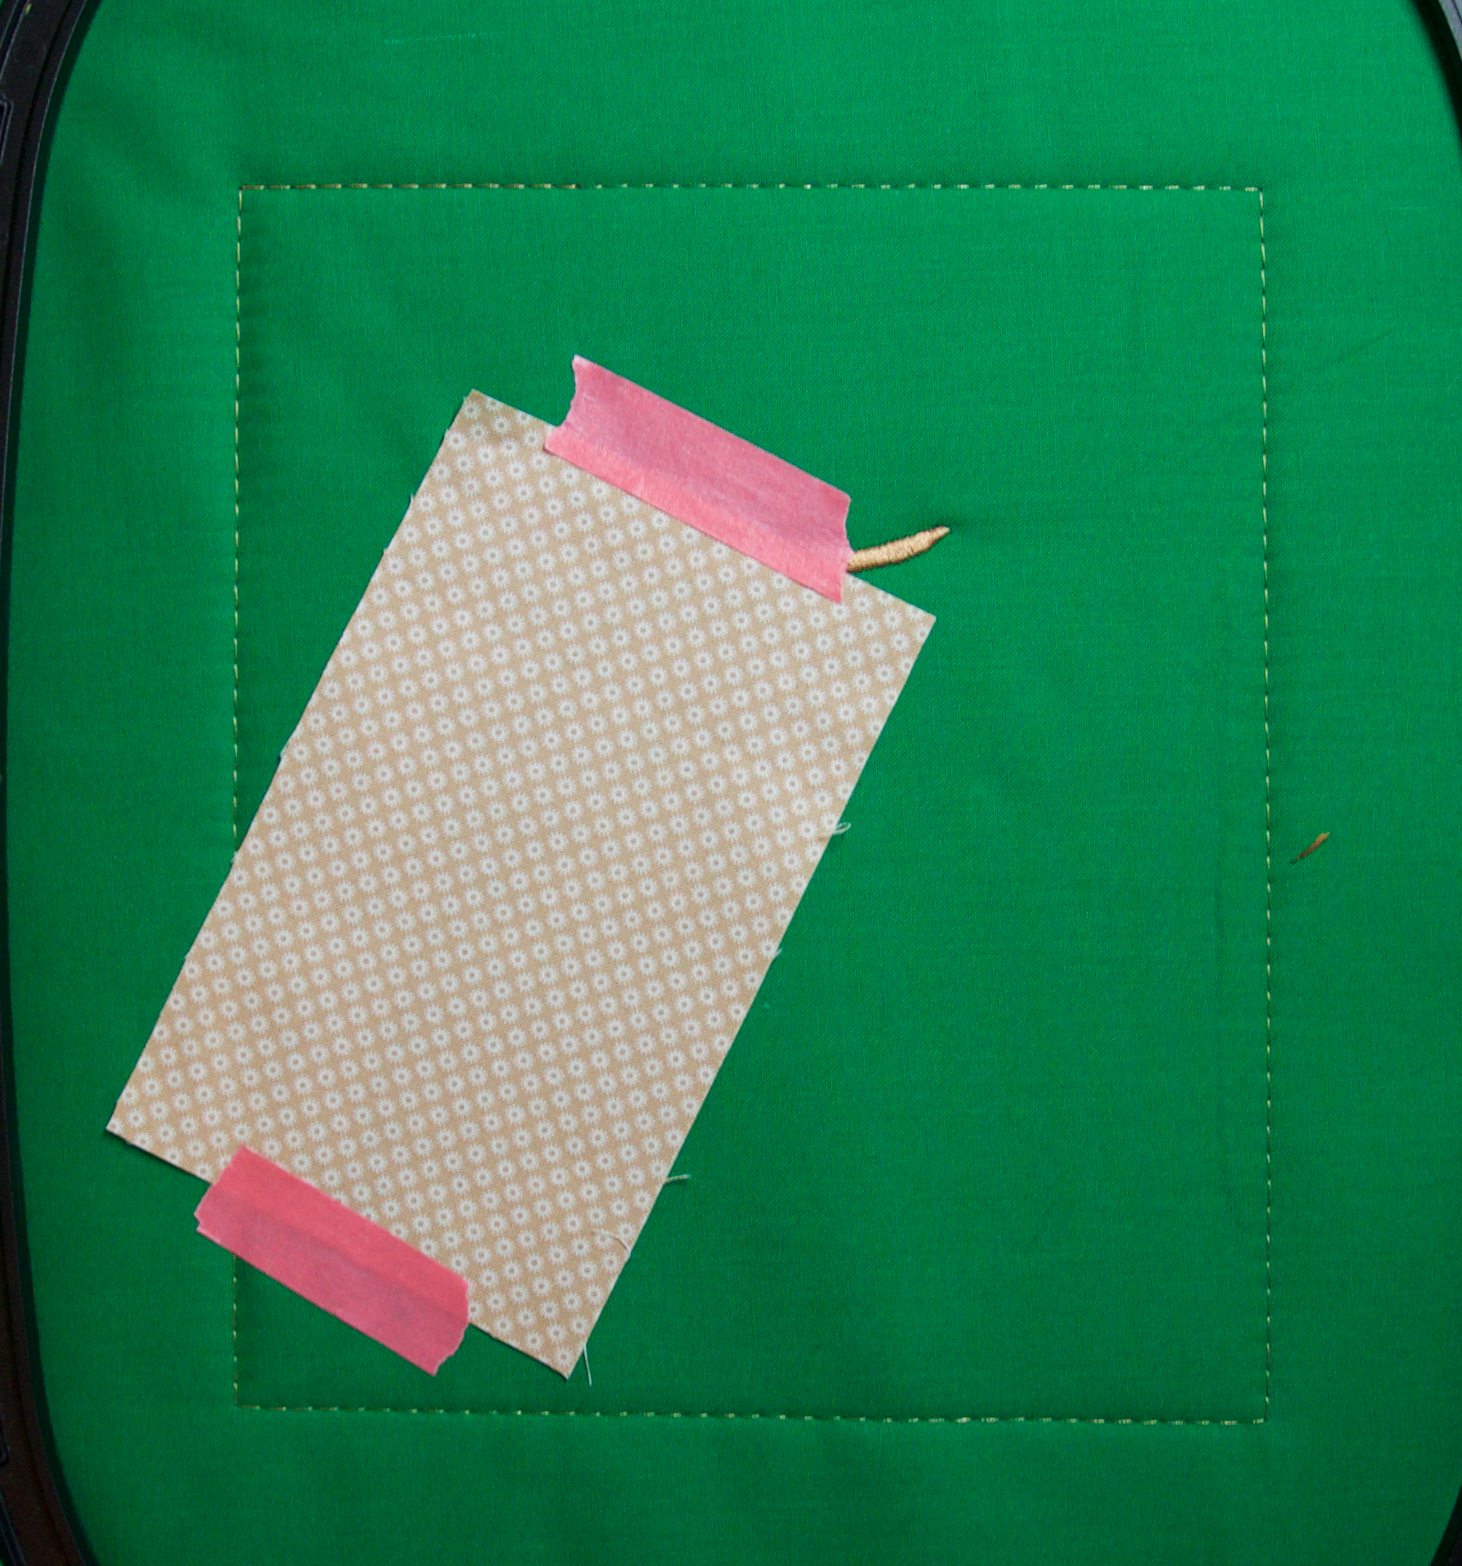
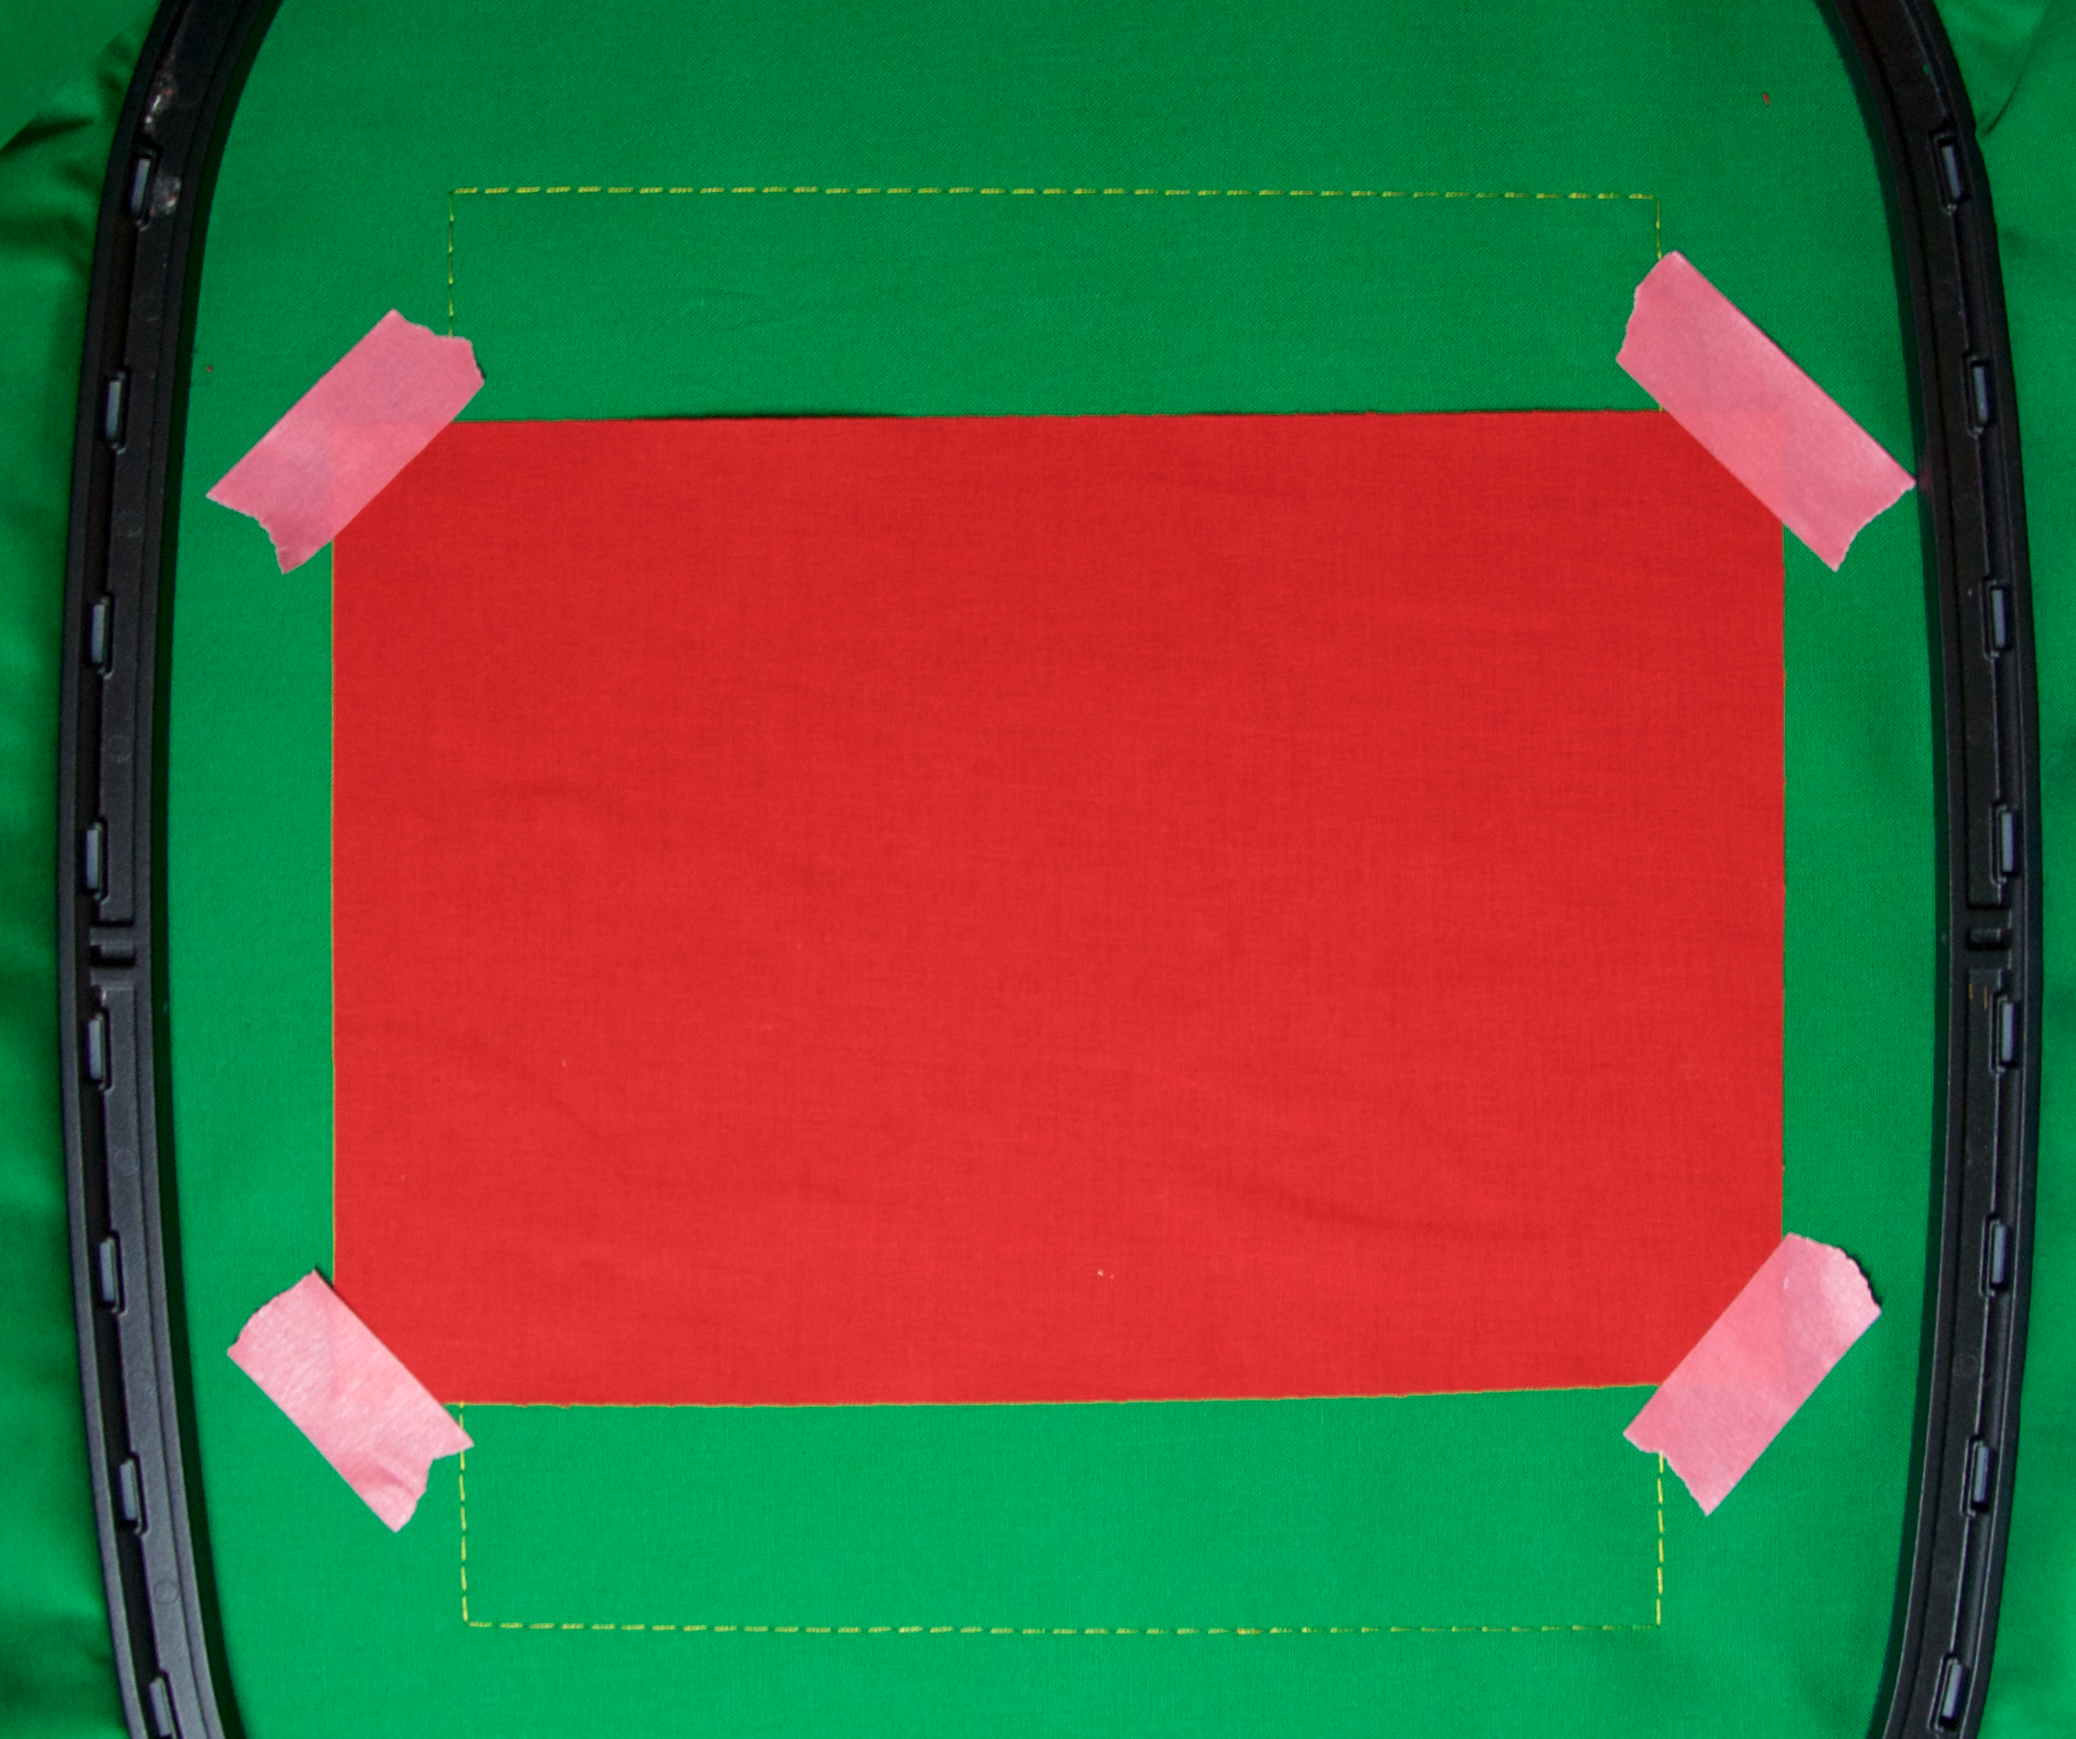
Step 10
When the machine stops, place the pine cone fabric over the placement lines. Tape to hold in place. Start the machine. The machine will tack stitch the fabric in place.
Step 11
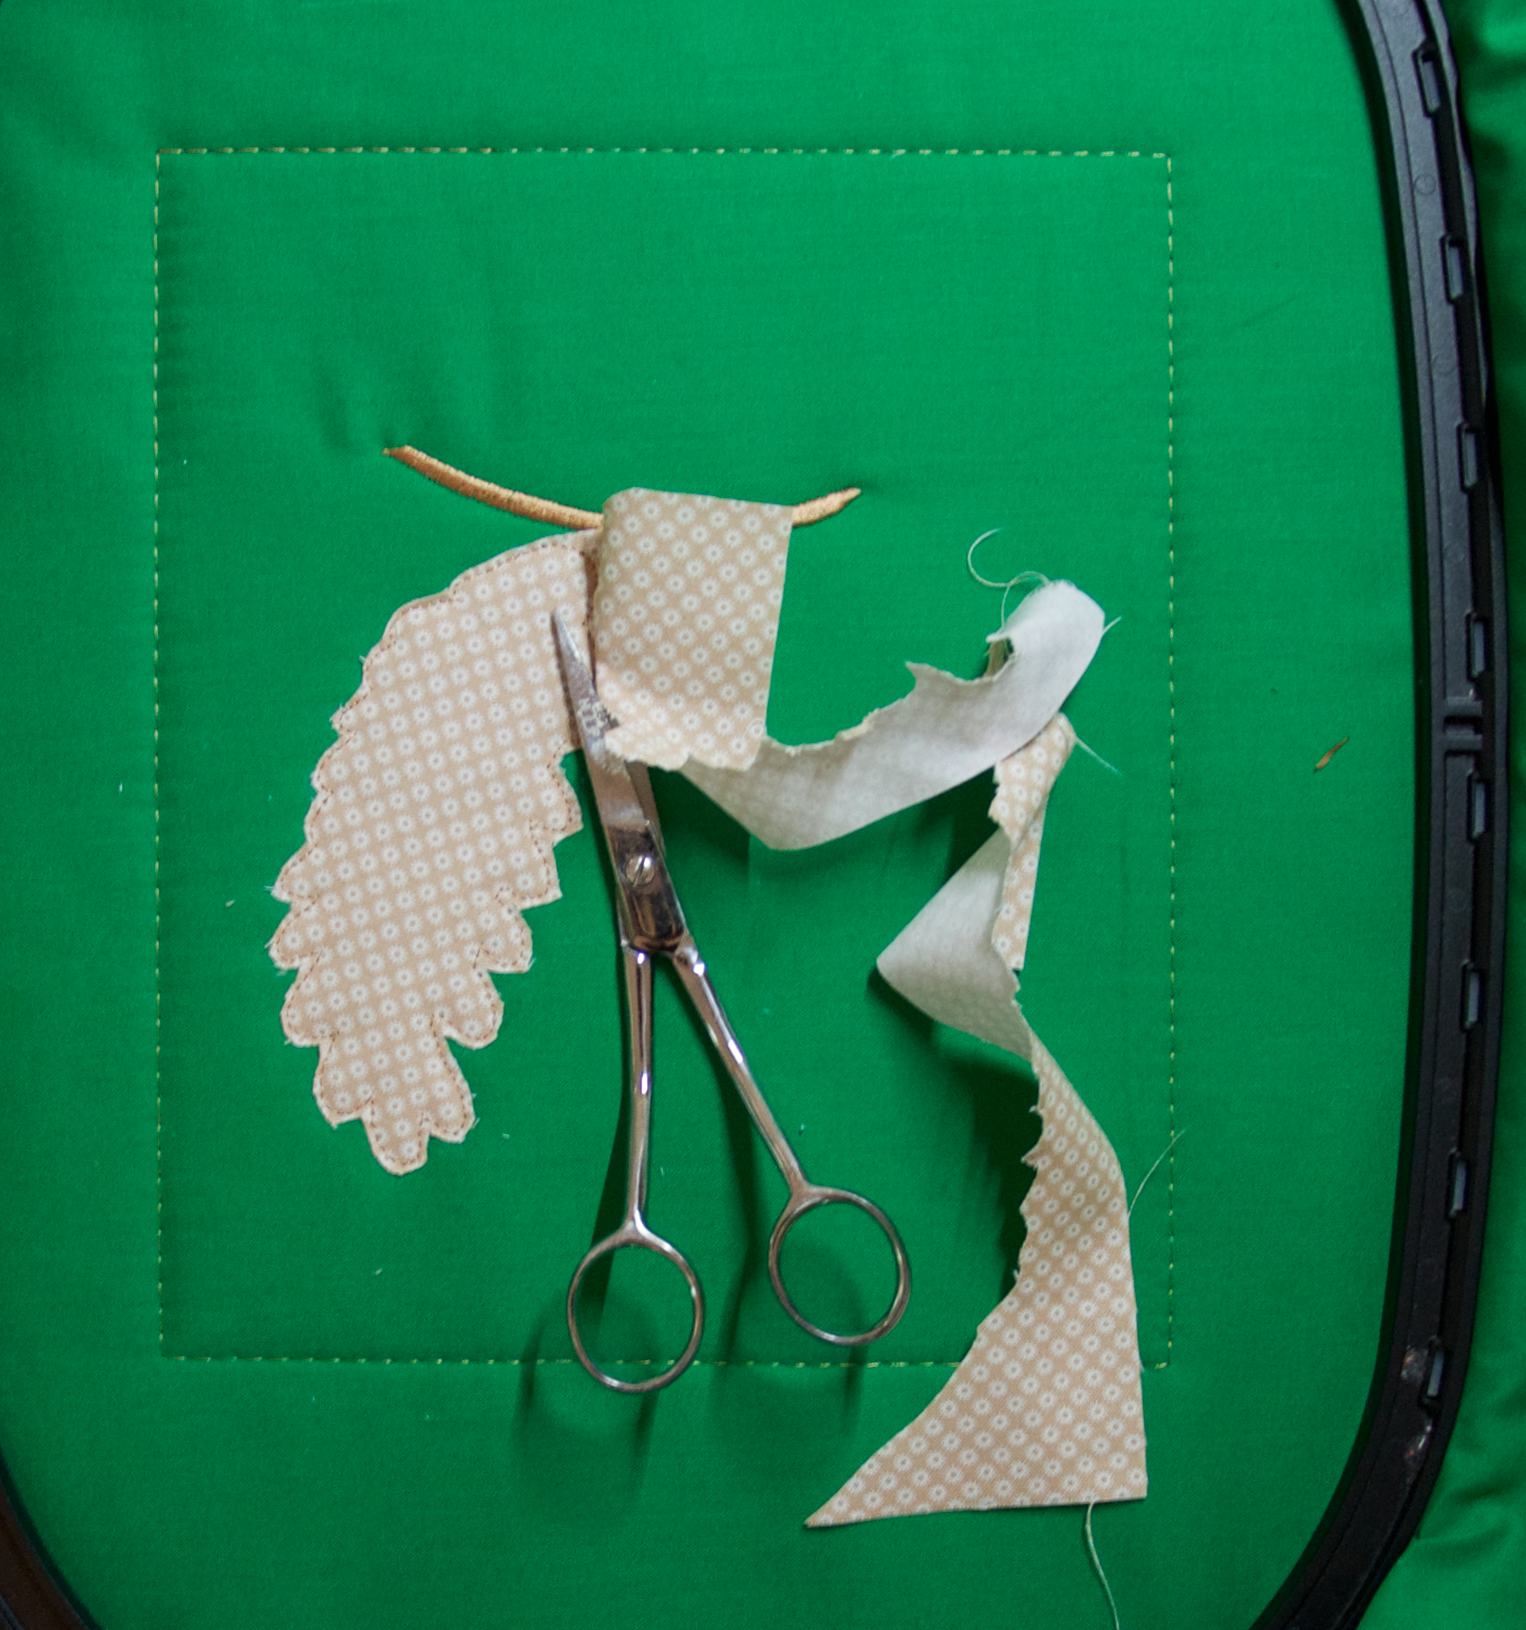
When the machine stops, remove the hoop from the machine, but do not remove the project from the hoop. Lay the hoop on a flat surface, and trim away the excess fabric. Return the hoop to the machine. Repeat steps 9-11 for the right pine cone, and then continue with step 12.
Step 12
Change the thread to white. Start the machine. The machine will stitch the snow on the pine cones.
TIP: It is fun to use an iridescent thread for the snow. Sadly, it doesn’t photograph well, but it looks really pretty when you see it in person.
Step 13
Change the thread to brown for the pine cones. Start the machine. The machine will stitch the satin detail on first the left pine cone. Start the machine again, and it will stitch the detail on the right pine cone.
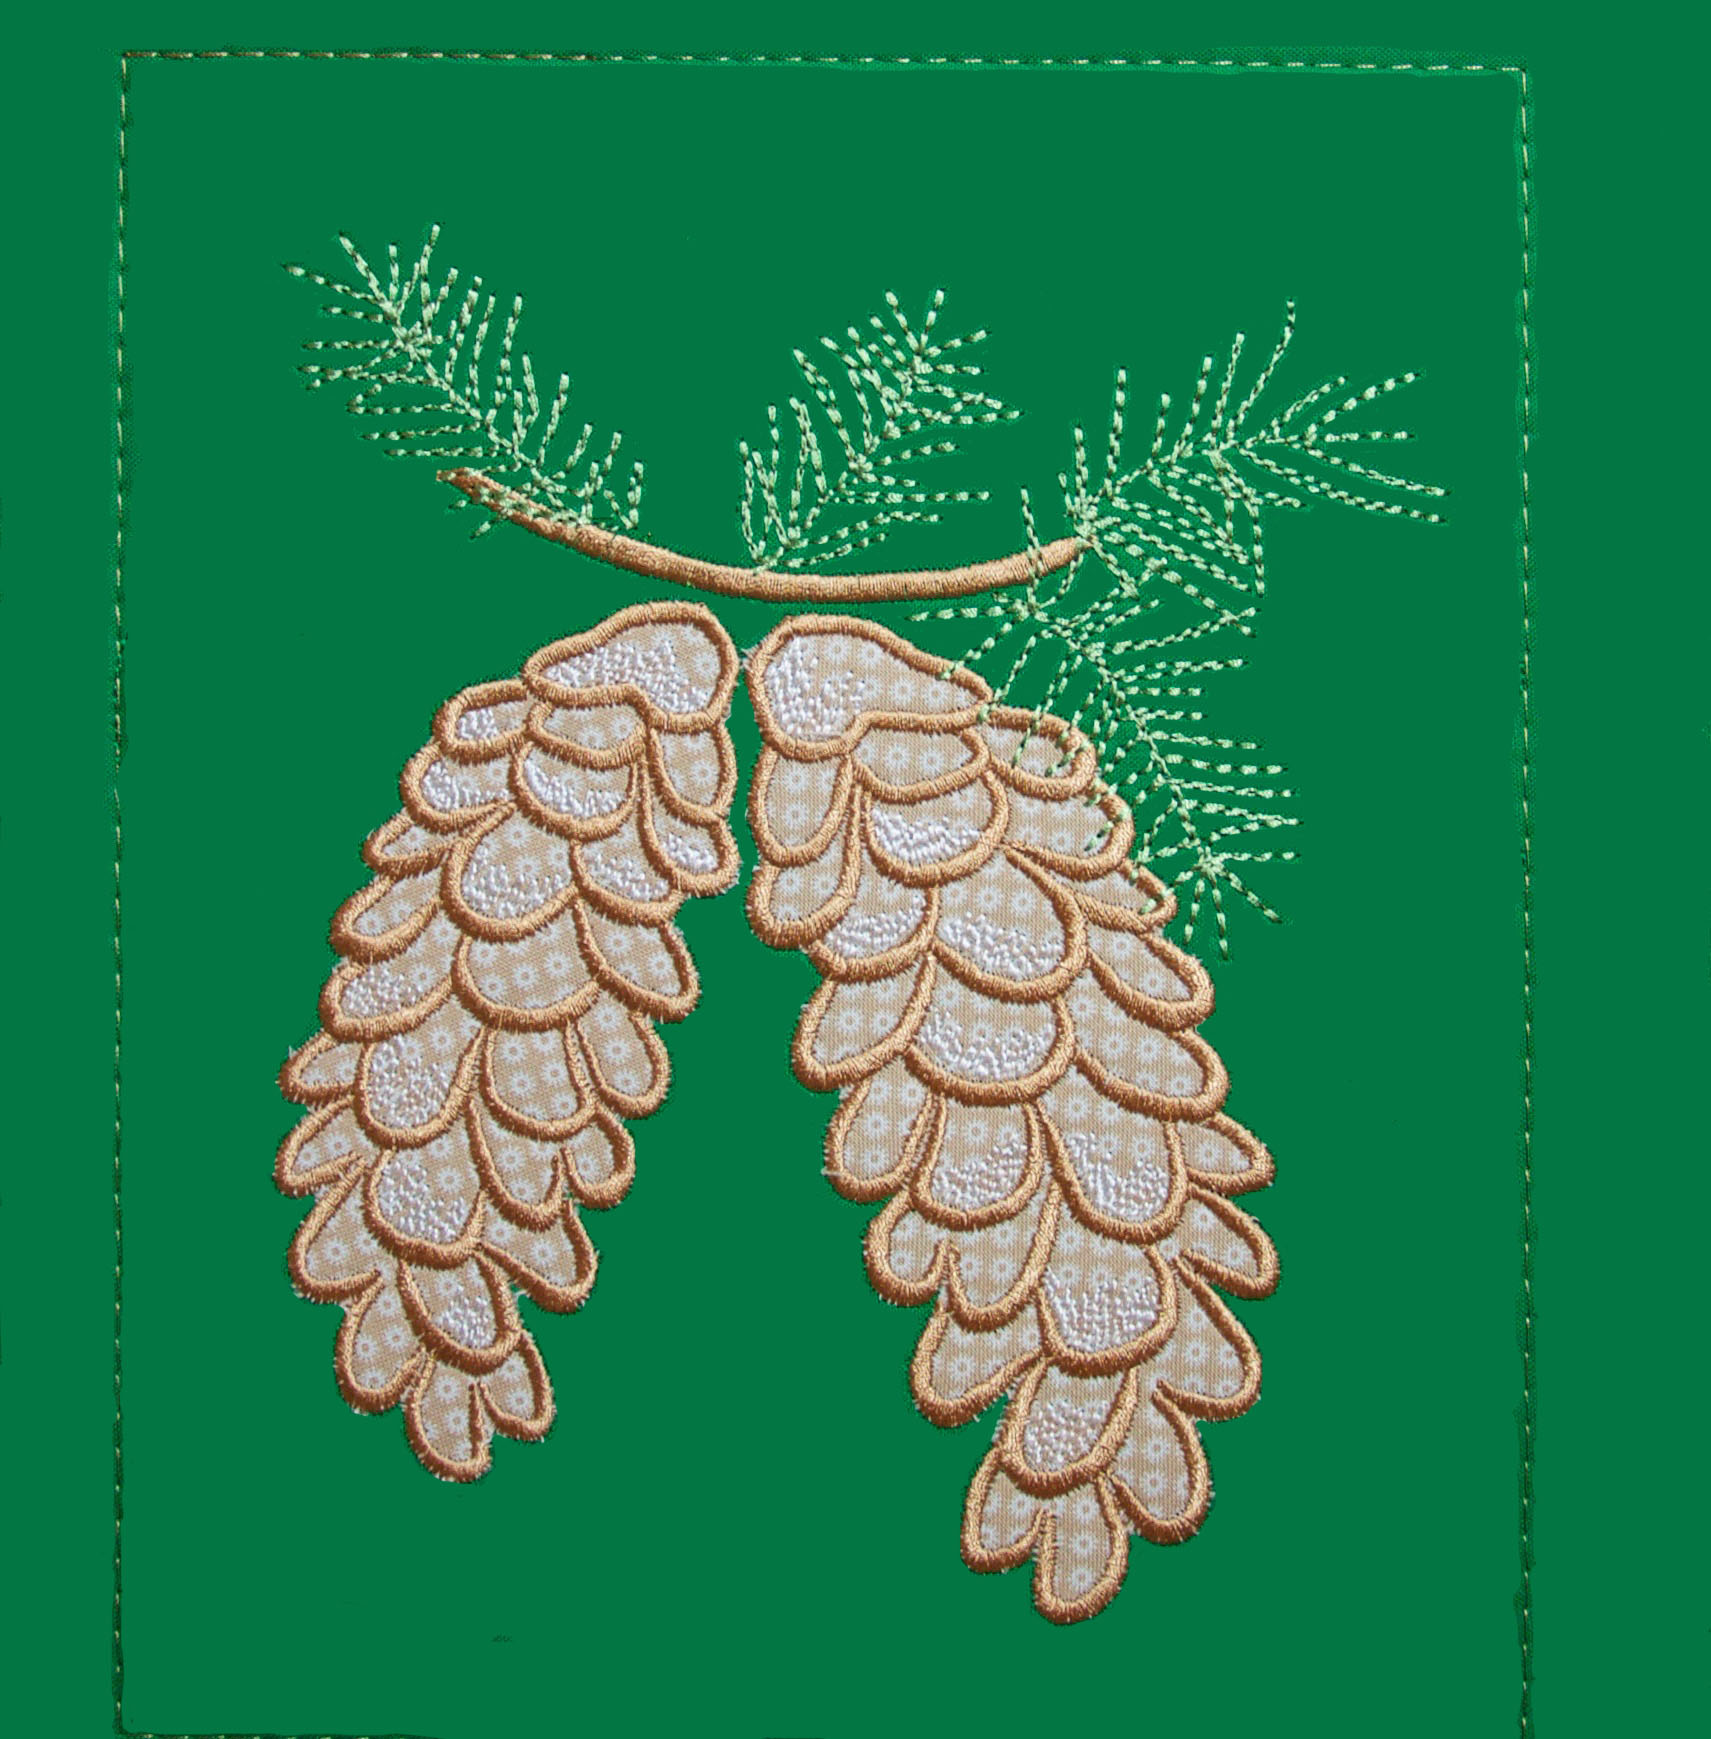
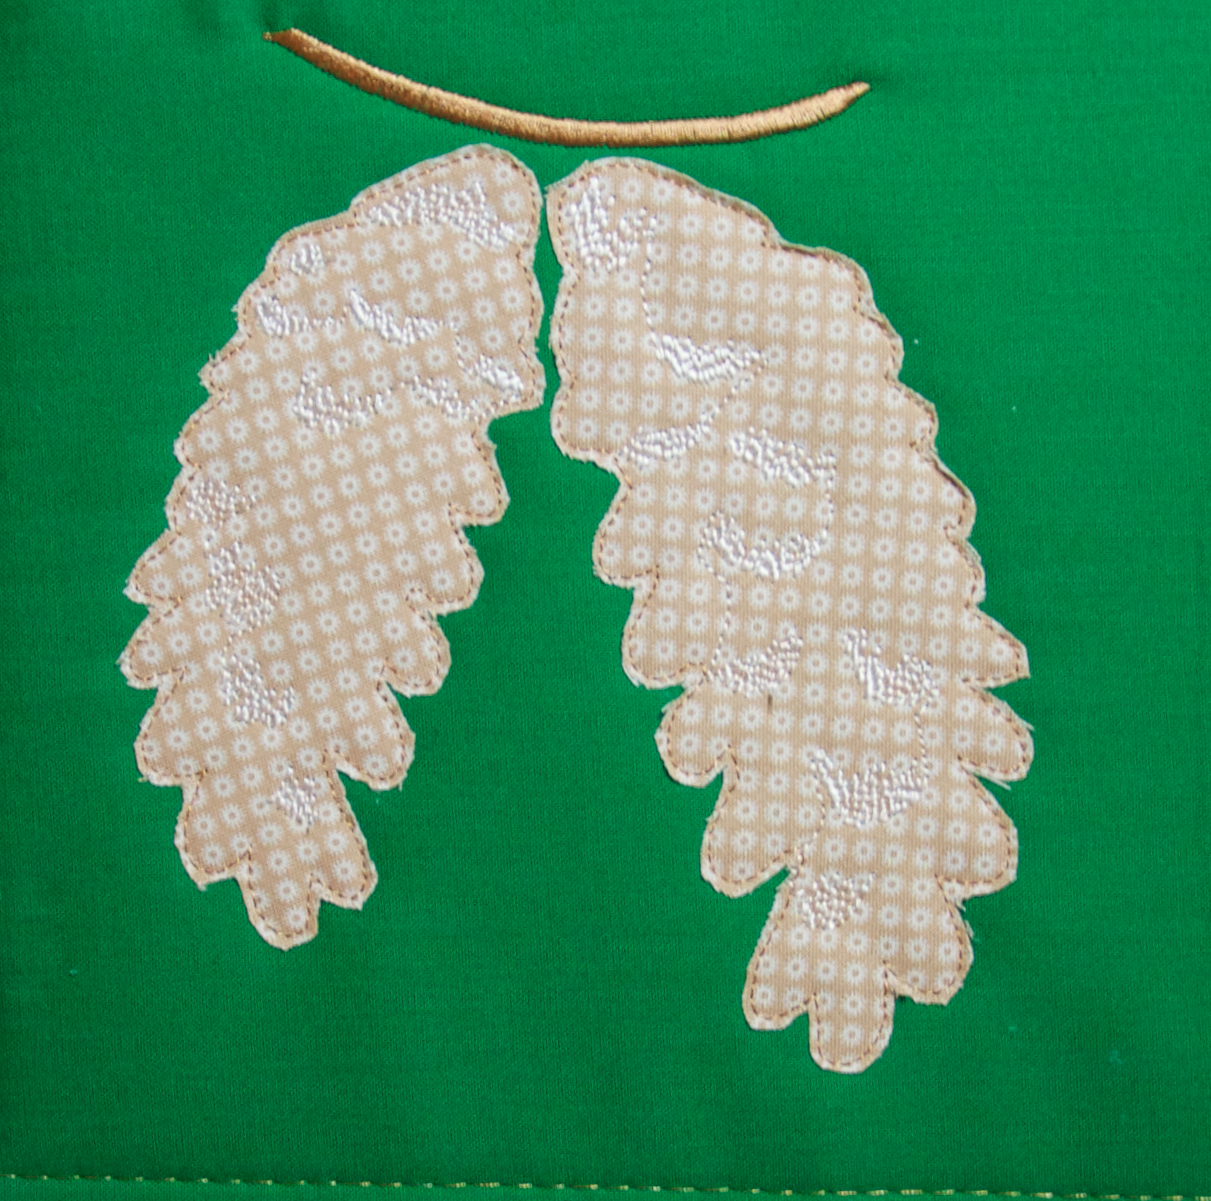
Step 14
Change the thread to green. Start the machine. The machine will stitch the pine needles.
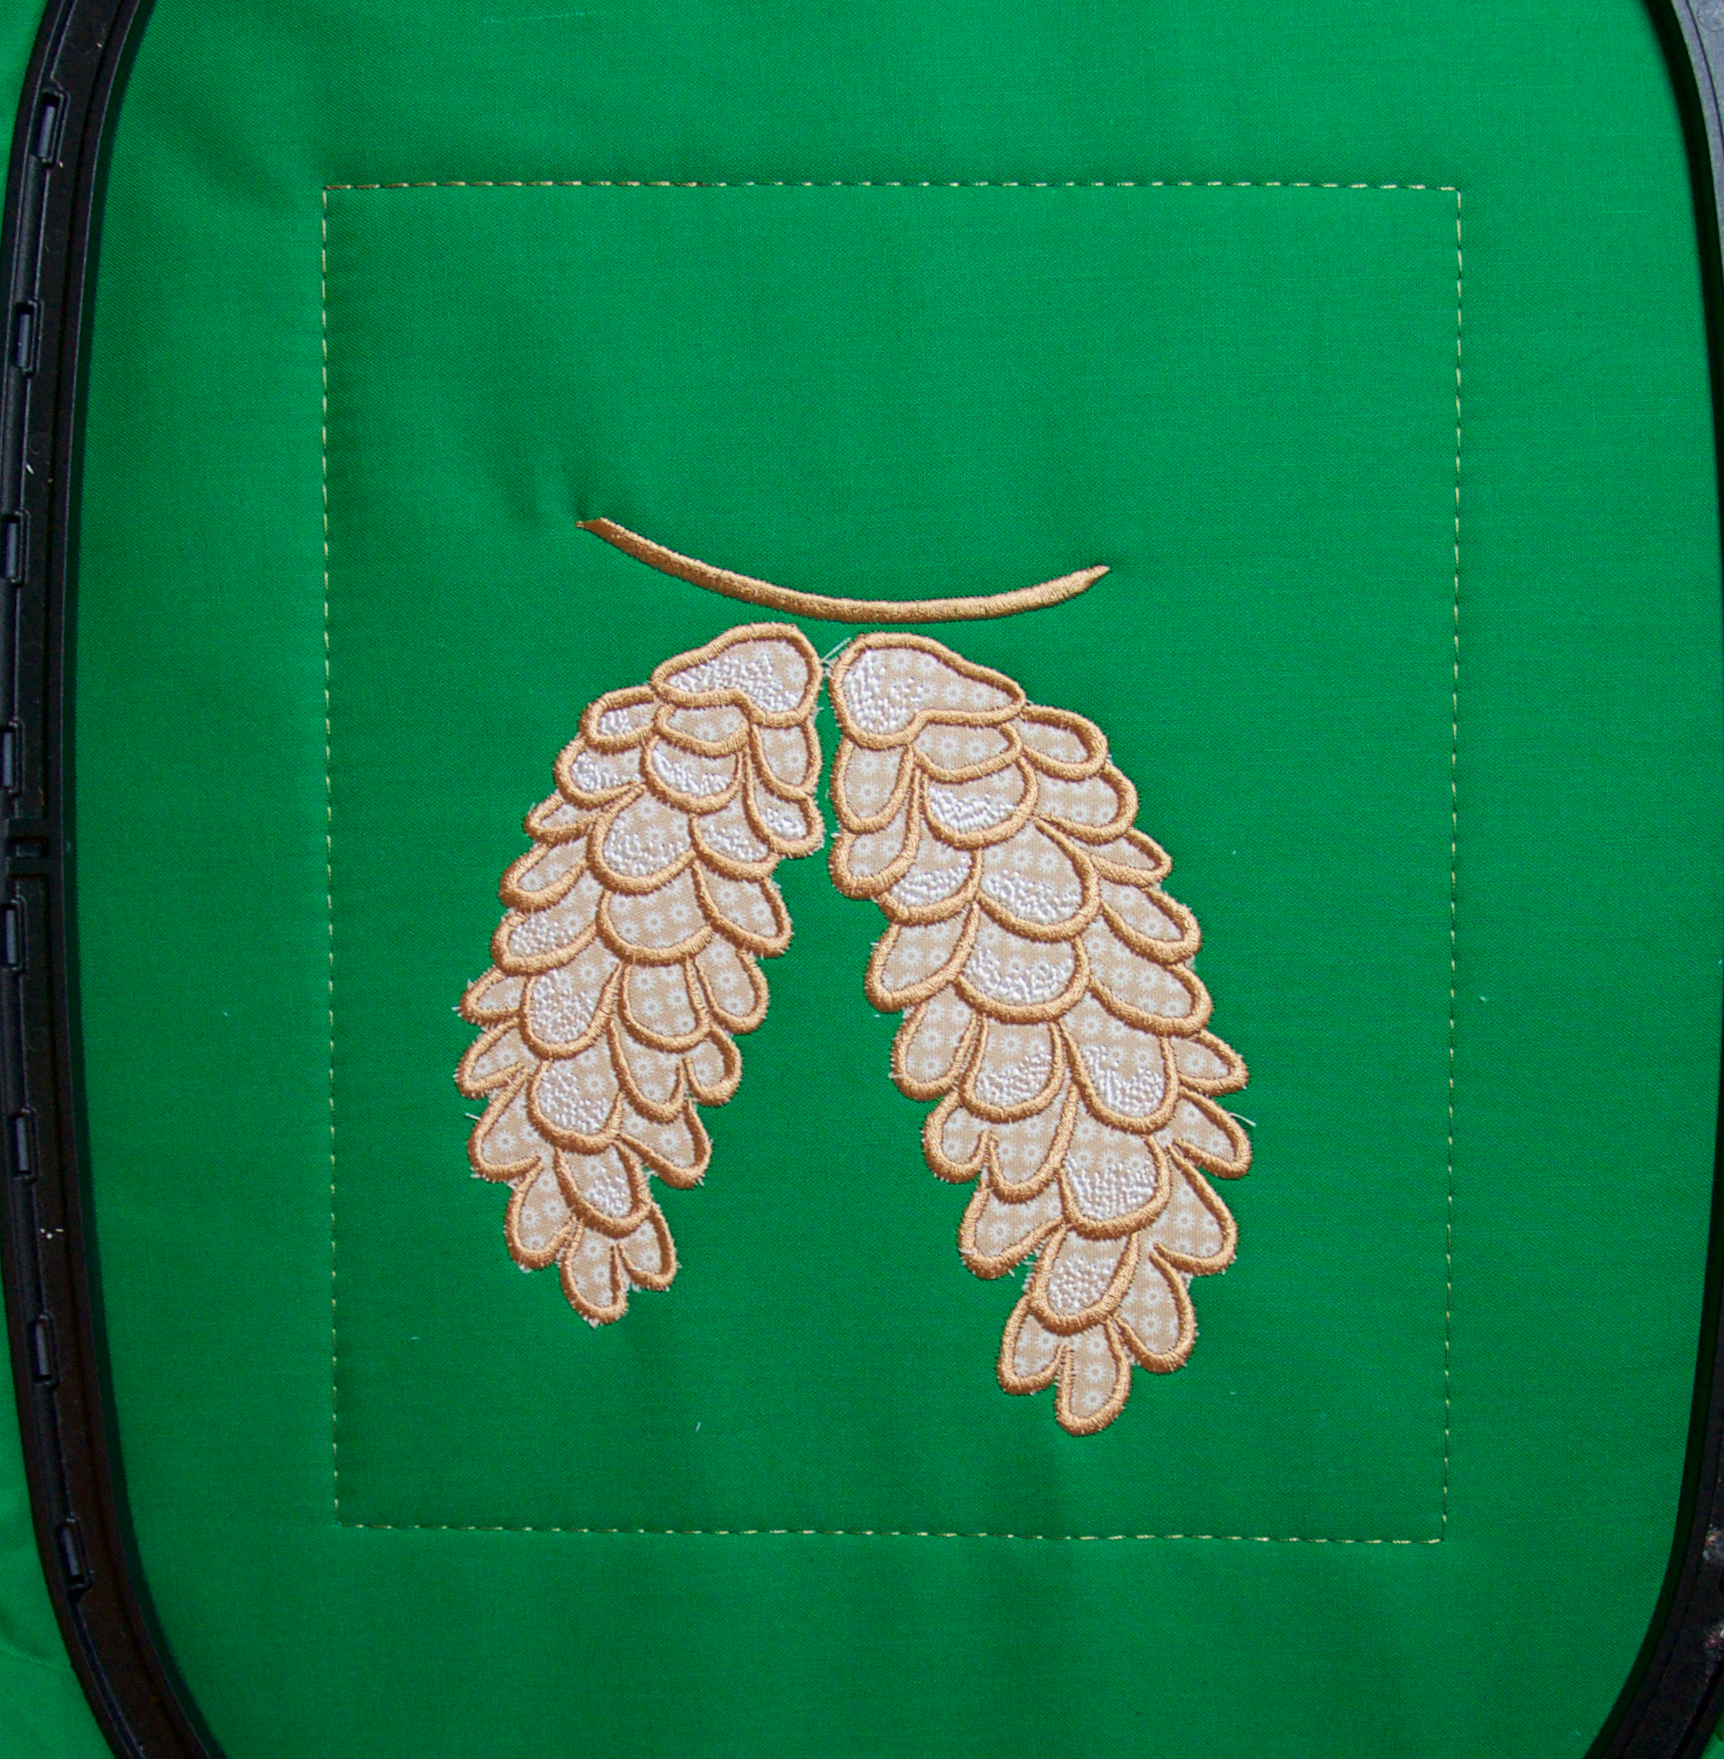
Step 15
Change the thread to match your background fabric. You may want to change your bobbin to match as well. Start the machine. The machine will stitch quilting around the pine cone design.

Step 16
Remove the stitch out from the hoop. Trim the pocket 1/2″ past the basting stitches.
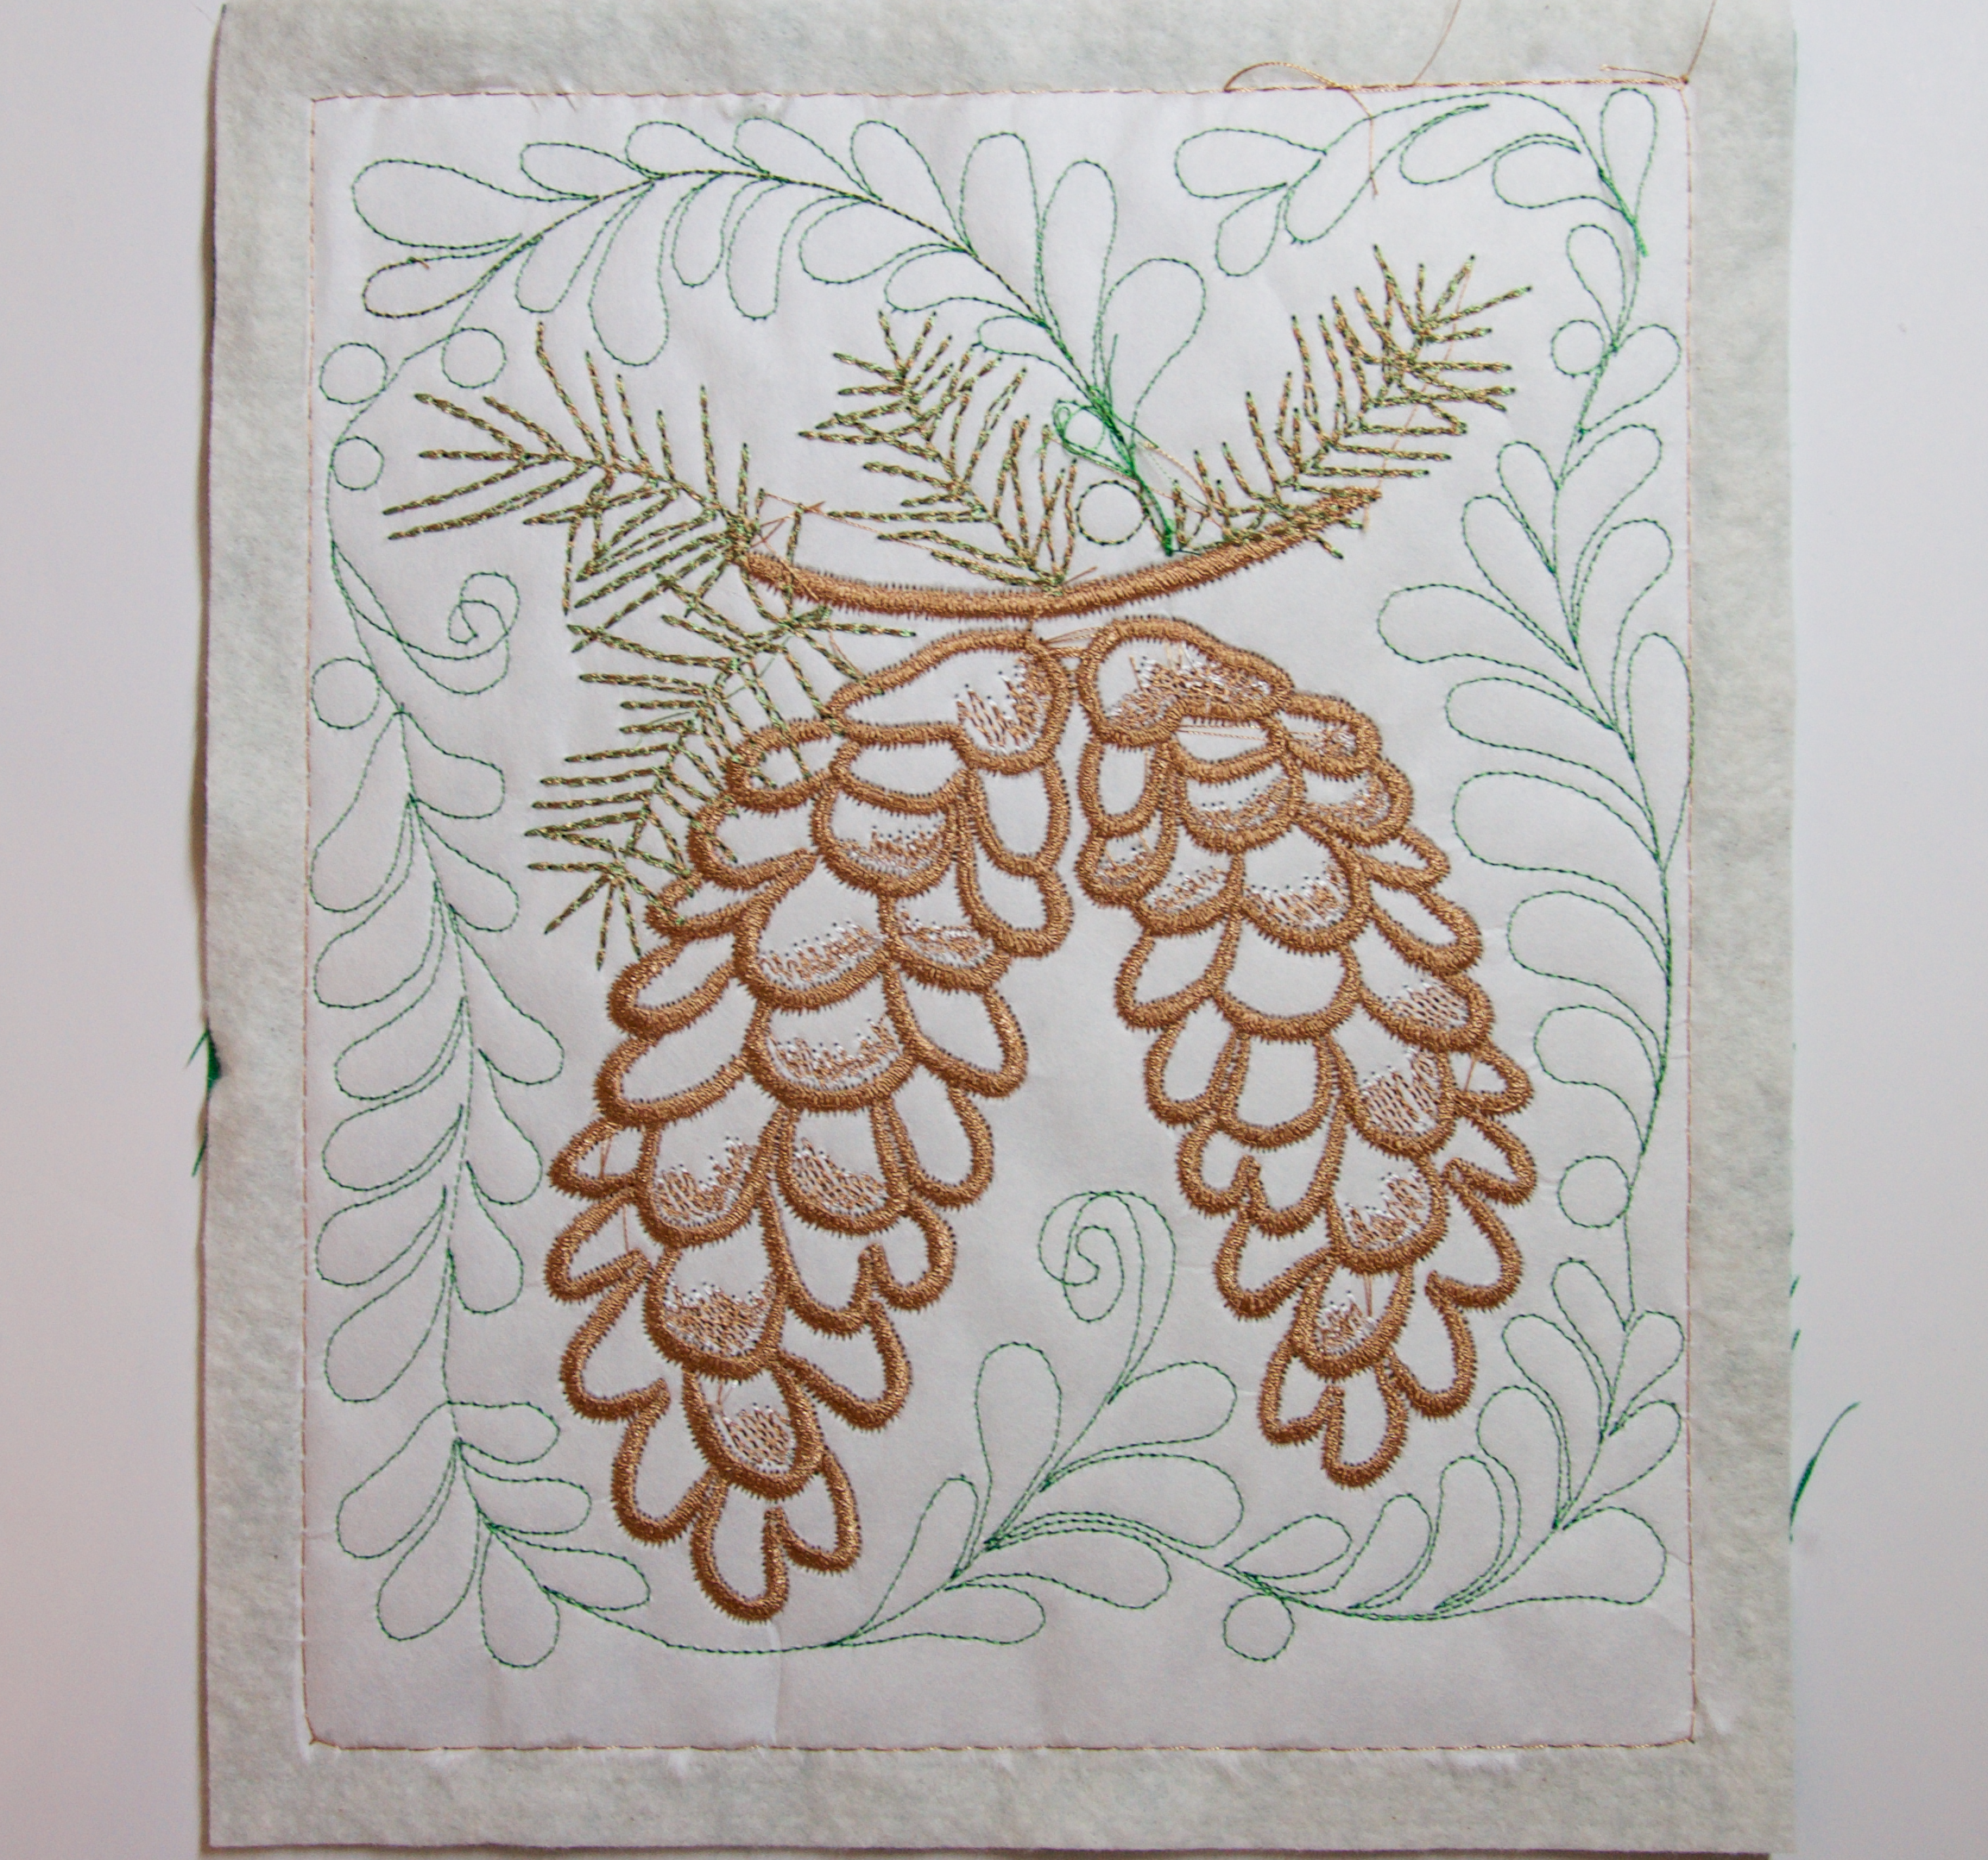
Step 17: Making the Pocket Back
Flip the block over, and trim away the stabilizer from the basting line to the edge of the pocket block. The rest of the stabilizer can stay. Remove the basting stitches.
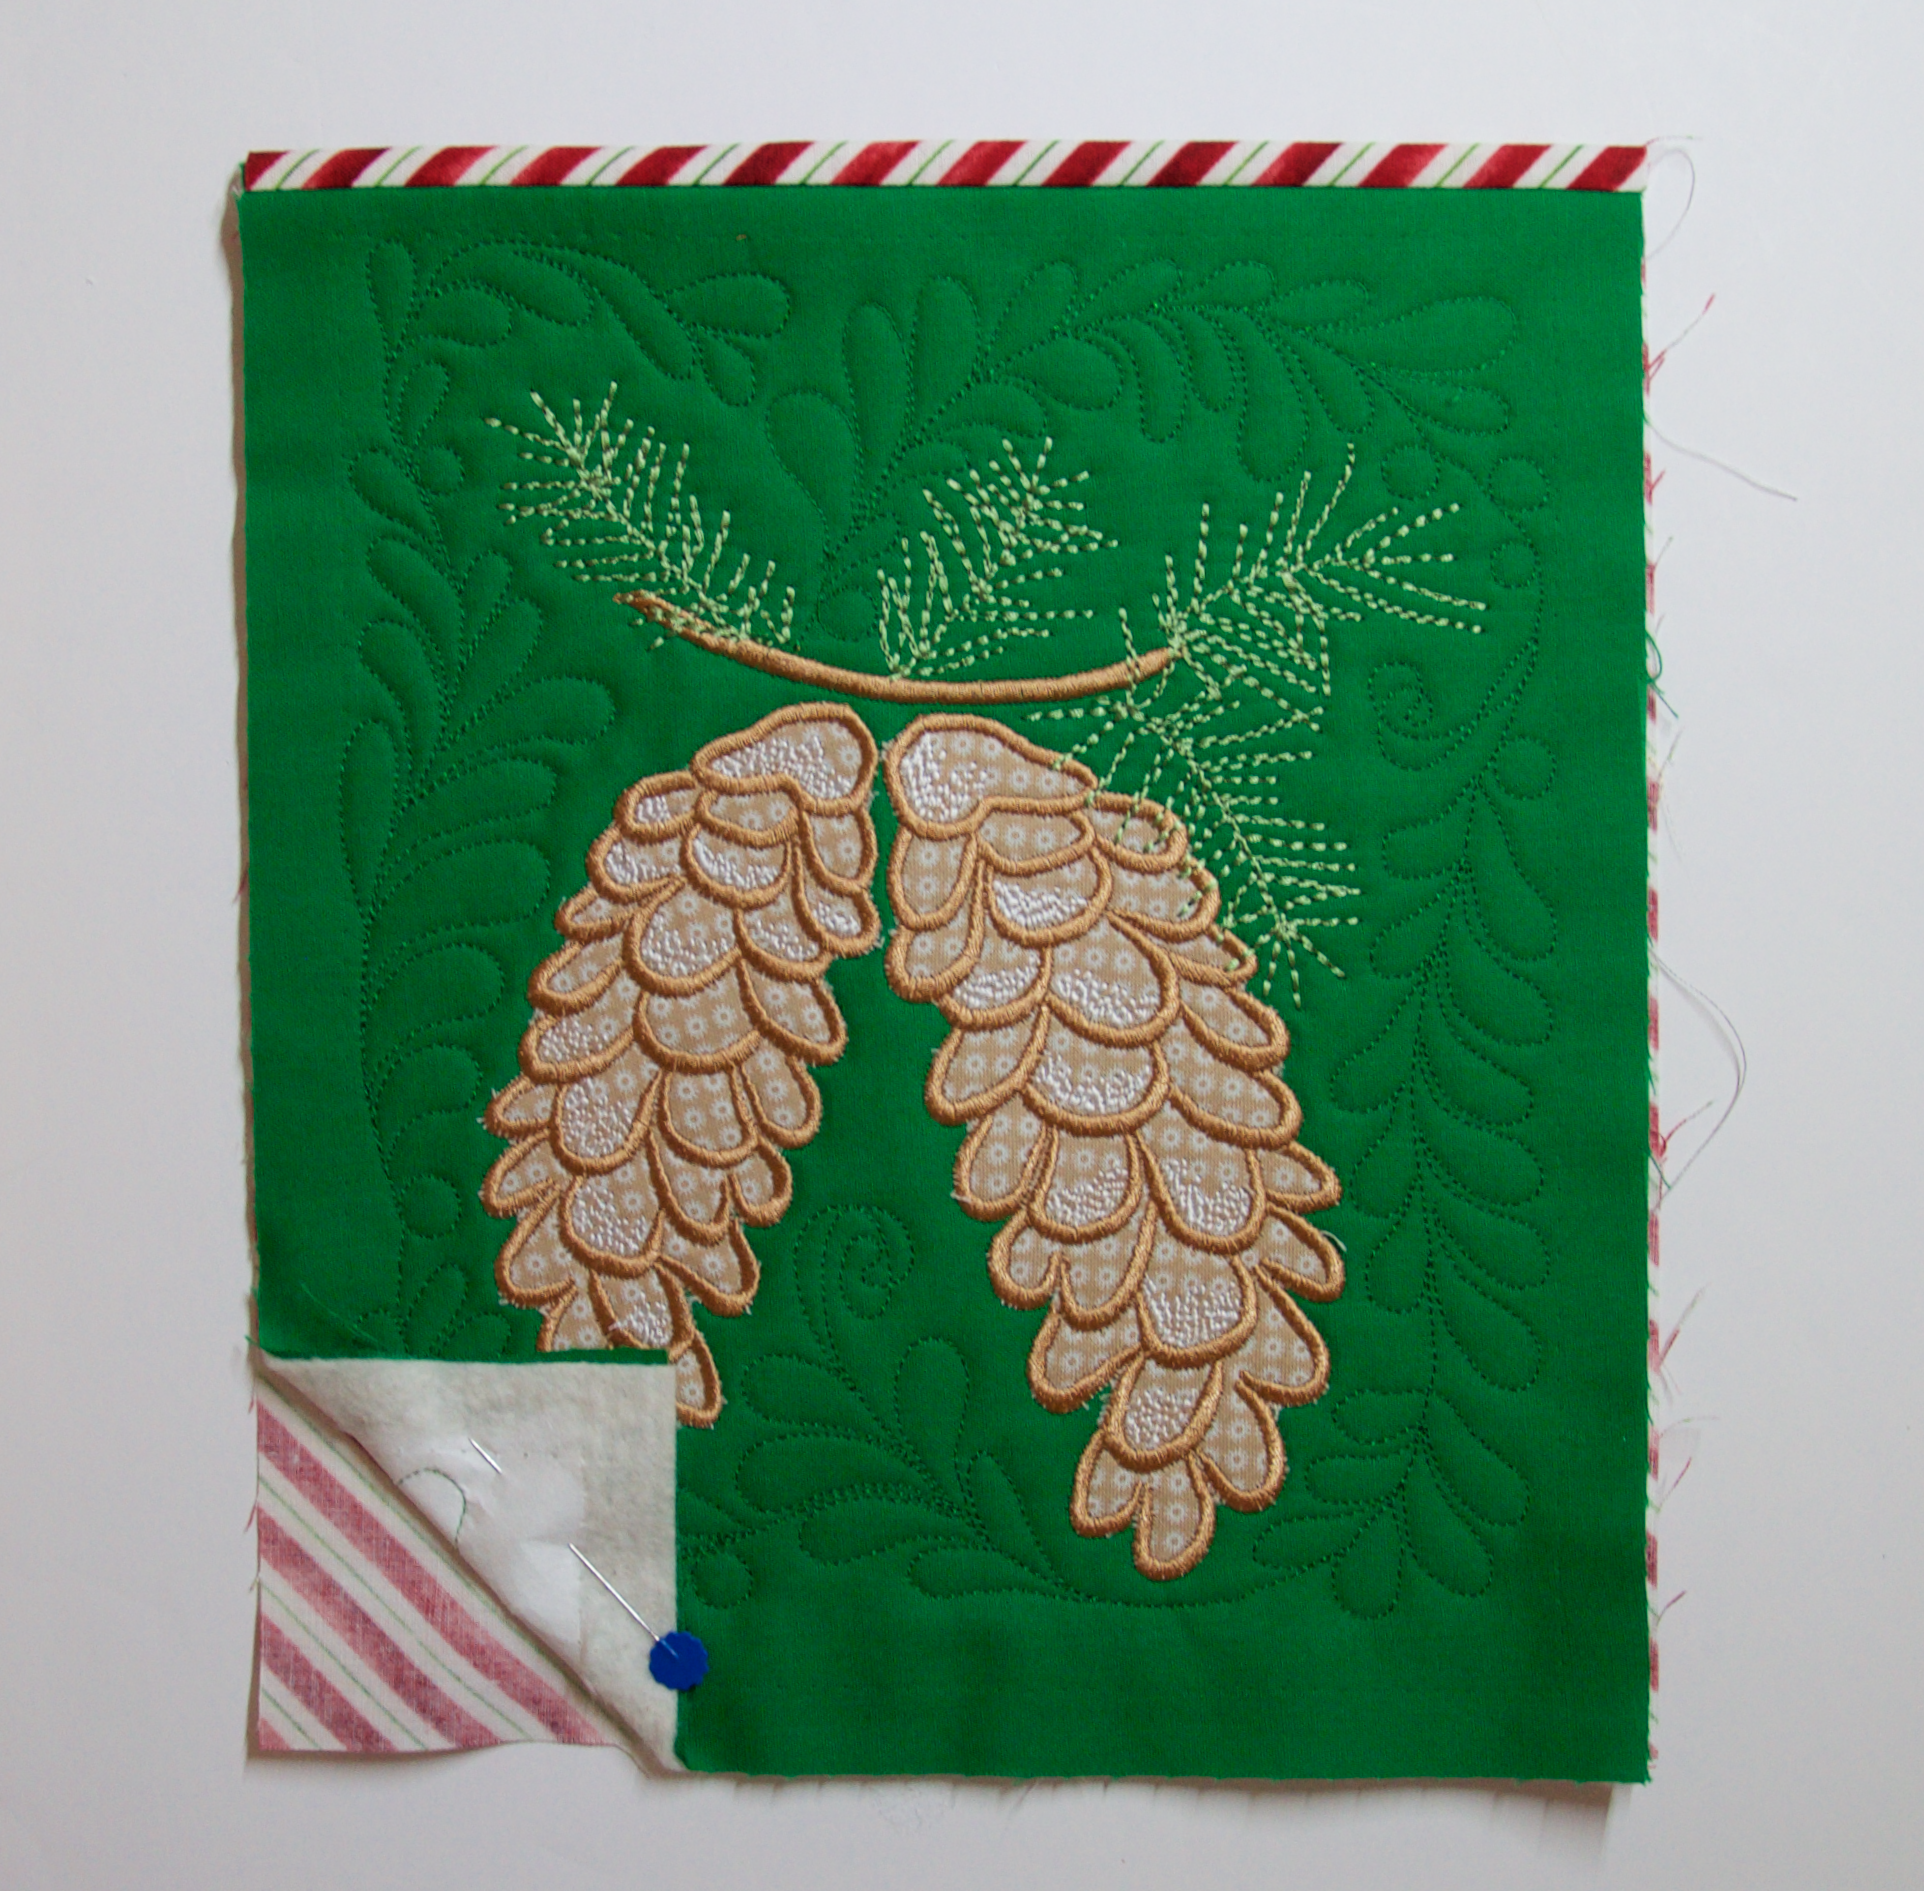
Step 18
Place the 8.5” x 10.5” pocket back fabric and the pine cone pocket right sides together. Sew a 1/4″ seam along the top edge. Fold the backing fabric over the back side of the pocket. Press.
Note: I folded up the left corner so you can see how the backing fabric will be even with the bottom of the pocket, yet there will be a 1/4″ edge of the backing fabric showing at the top.

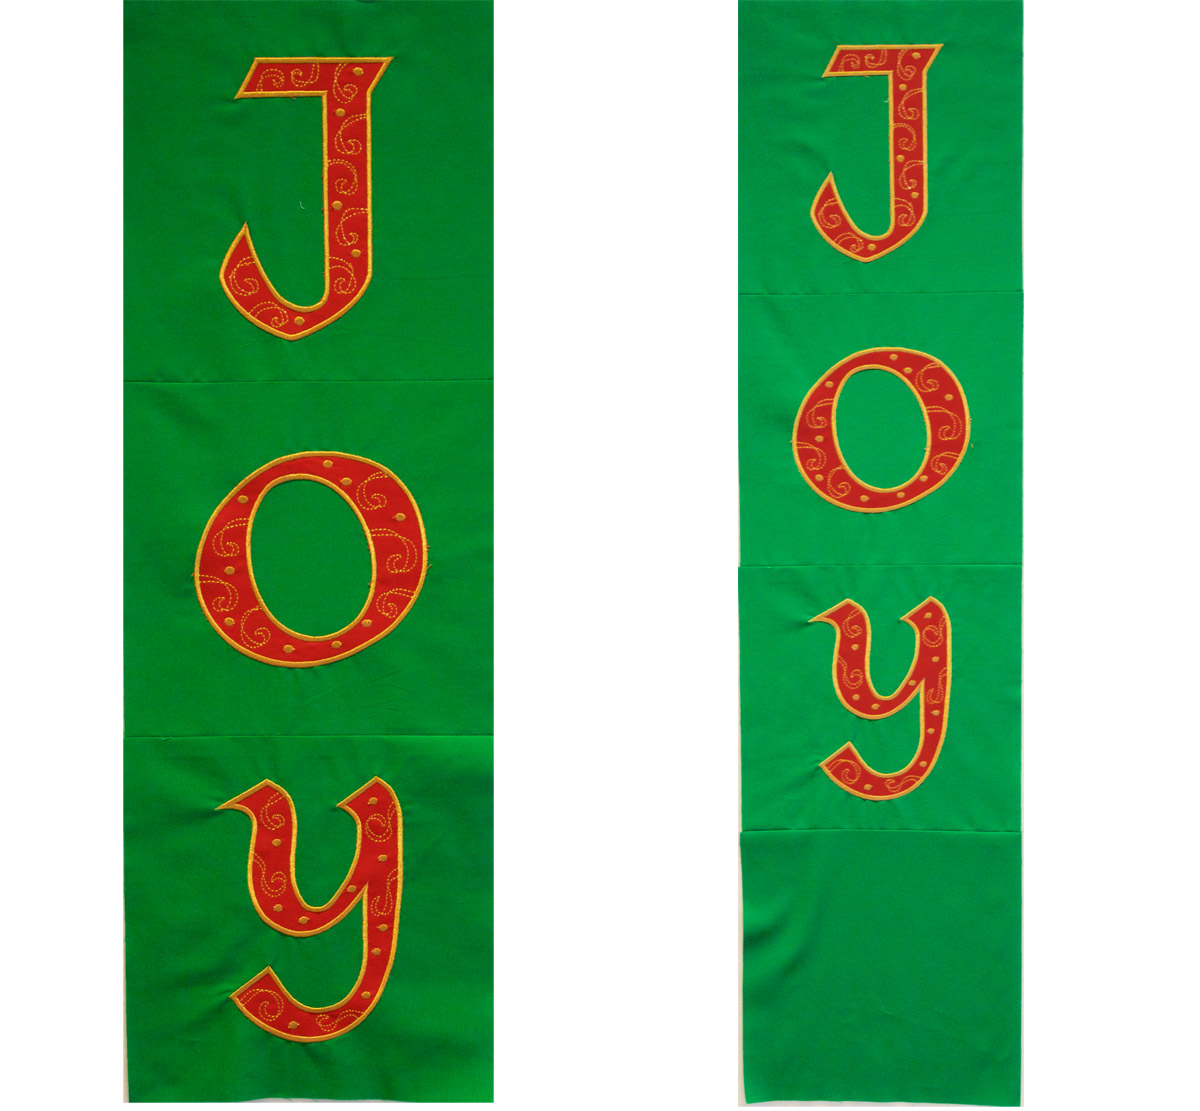
Step 19: Joining the Blocks
Using the slide on seam guide (one of my favorite gadgets), attach the J,O, and Y blocks vertically together using a 1/2″ seam, so they spell JOY!
Attach the 8.5″ x 10″ background rectangle with a 1/2″ seam allowance below the Y block. This will be where the pocket will be placed later. Now, your project is ready for custom quilting in Part 2 of the tutorial!
Christine’s December 3 Gift For You
Today’s gift is the download of the JOY Holiday Card Holder Appliqué Designs for all our awesome WeAllSew fans.
Enjoy!
Used Products


What you might also like


29 comments on ““Joy” Holiday Card Holder Part 1—Appliqué”
-
-
You are so welcome!
-
-
I’ve downloaded the designs, but the pine cone is missing. 🙁 The JOY files are there, but not the last one. Is that somewhere else? Thanks.
-
The pine cone design is in Part 2 with the quilting. After the pine cone stitches the quilting goes around it. I went back and forth on where the pine cone design should be: appliqué or quitting since it is both. I guess I forgot to change the over view. Oops! –Christine
-
Thanks, Christine! 🙂
-
-
-
The pine cone is really beautiful. I would use that on a table runner.
-
Thank you!!!! I’m going to let my Dad know. He hated my first pine cone so much he sent me several videos on how to draw them. He is a physicist, and pine cones apparently are very mathematics. Who knew? I must say though, he loved the one I finally submitted.
–Christine
-
-
lovely!
-
This project is very nice. Thanks so much.
-
You are so very welcome! –Christine
-
-
This project is really neat and easy to follow!
-
Thank you! I really appreciate that.
-
-
Thanks!
-
Thank you for the great design..I found the JOY to download however I wasn’t able to find the pine cone when I went to download the project. Did I miss something? Thanks!
-
The pine cone design is in Part 2 with the quilting. After the pine cone stitches the quilting goes around it. I went back and forth on where the pine cone design should be: appliqué or quitting since it is both. I guess I forgot to change the over view. Oops!
–Christine
-
-
Thank you, what a lovely project. However I can seem to find the pinecone design.
-
The pine cone design is in Part 2 with the quilting. After the pine cone stitches the quilting goes around it. I forgot to change the over view. Oops! –Chrisitne
-
-
Nice simple idea
-
Really cute design. Hope to get it made this week.
-
HI, love the project and would like to do it but when I downloaded it I could not find EXP for my bernina 750 qe
can you help me?
thank you-
My husband did the batch conversion for the files and left off the MOST important EXP file format. :o) We corrected that last night, so they should be there now. Sorry about that.
–Christine-
thank you so much,
great gift
Anne-
You are so very welcome!
-
-
-
-
What a wonderful gift! Thank you so much for this project.
-
I’m glad you like it! –Christine
-
-
You are so welcome! –Christine
-
Christine – thank you so much; I’ve done part I, Waiting for sewing machine to be cleaned and hope to start on part 2 next week. The pine cones with the snow are gorgorous!
-
You are very welcome!
Thank you for the pinecone compliment too. It means a lot to me. My Dad gives me feedback on my projects all the time, and it is usually very positive, but he hated my first pinecone attempt. I had spent a lot of time digitizing it, and I don’t want to redo it. But he hated it so much that he kept sending me drawings of pinecones, and then videos on how to draw pinecones. I finally broke down and told him I would redo it. I got to say, I too like the second pinecone much better than the first one.
-
-
I love appliqué I need to learn how on my bernina. This would be a great one to practice with. Thanks.
Leave a Reply
You must be logged in to post a comment.

Thanks for the JOY Holiday Card Applique Design pattern.