Using the Wreath Tool in BERNINA Embroidery Software 8.2
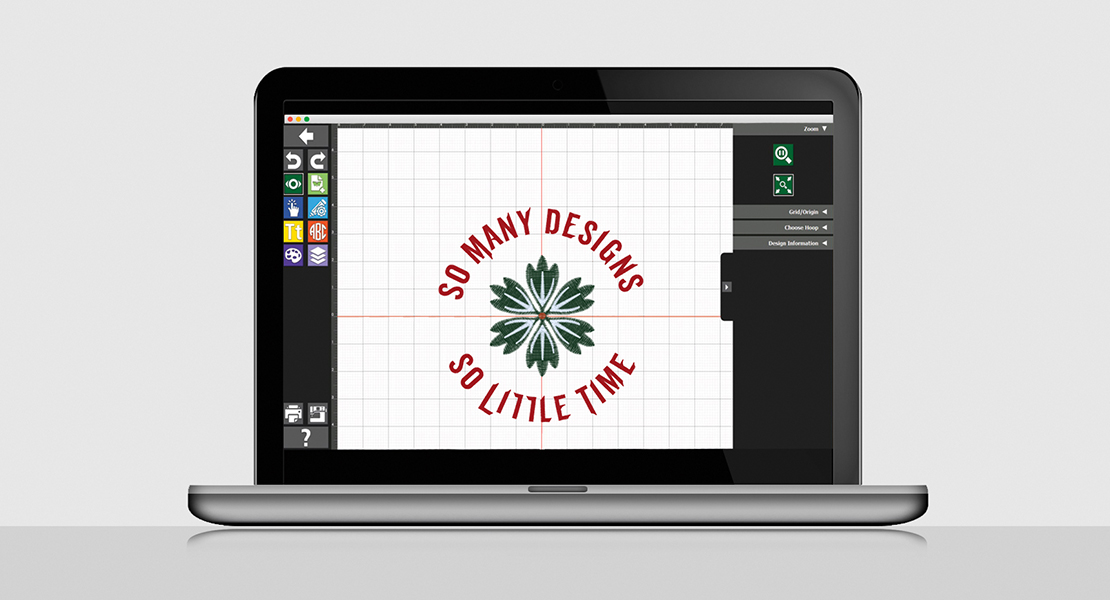
The Wreath tool is easily the most fun feature of BERNINA Embroidery Software 8.2! You can turn a single design element into a complex arrangement quickly and easily, with just a few clicks.
You can create naturalistic wreaths using floral designs, but why stop there! Feel free to create your own original geometric designs. As this companion video shows, you can even swirl letters into a wreath.
To use the Wreath tool, follow this simple process:
- First: Select the object(s) or design elements you wish to turn into a wreath.
Remember: no selection—no wreath. - Open the Mirror-Merge Toolbox (on the left of your screen) and click on the Wreath
The Mirror-Merge Settings bar will open on screen:
TIP: You can dock the settings bar with the toolbars above your designing area. The bar will be kept in the dock position in future uses of the tool—nice, simple and easy to find on the screen.
- Specify how many repeats of the original object you want in the end from the Number of Copies drop list to the right of the bar:
- Click on the screen to generate the wreath.
To illustrate how the Wreath tool works, we will use an uppercase letter F as our starting object. If you’ve used illustration or graphics editing software, you are already familiar with the use of this letter as clear and simple indication of the orientation of design elements. From this letter F, it is easy to tell whether it was mirrored, rotated, etc.
Creating the Letter F as starting object
- Click on the Lettering Tool in the Digitize Toolbox.
- Click on the embroidery canvas (design pane).
A blinking cursor will appear where you clicked on screen, indicating that you can start typing lettering. - Type an uppercase letter F.
- Press Enter,
You now have your starting letter F, the seed for your wreath.
Creating a 5-copy Wreath from the Letter F
Your letter F should already be selected. If it’s not, click on it to select it. This is the seed object for your wreath. Remember . . . no selection . . . no wreath!
- Click on the Mirror-Merge toolbox on the left to open it.
- Click on the Wreath Look for the Mirror Merge Settings bar to open up.
- In the Number of Copies list, select 5.
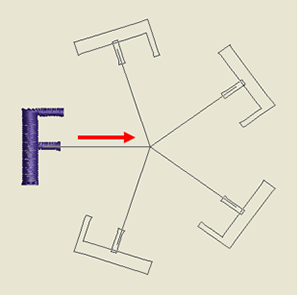
- You can now move the mouse pointer, which will mark the center of the wreath.
You can observe the following:- Radial lines projecting out from the center and linking to each copy.
- The seed object or design will be shown as is (e.g. stitches in artistic view).
- You will also see an outline for each of the additional copies (here 4 out of 5).
- These lines and outlines will move as you move the mouse, letting you preview in real time what the final wreath arrangement will look like if you click on the canvas.
- When you like what you see, click on the canvas and shazzam! Your wreath will be created instantly.
A few things to keep in mind as you move the mouse to form the wreath (before you click).
- Where the mouse pointer (wreath center point) lies relative to the seed object will determine the
- Orientation
- Distance
of the final copies in relation to the center of the wreath.
For instance, if making a wreath from a single bird and the mouse pointer is moved to face the tip of the beak of the bird, all birds in the wreath will have their beaks pointing toward the center of the wreath.
Let’s use our letter F as an example.
With the letter F selected and the number of copies set to 5 (as specified above):
- Move the mouse pointing to the right (due East) a couple of inches.
Note how the line linking the seed F follows the short horizontal stroke of the letter.TIP: To maintain alignment, hold down the Control (CTRL) key while moving the mouse. It will ‘control’ the angles at which you can move the mouse and help maintain a horizontal line. - Watch how the 5 F’s are now oriented so that all have the same short stroke pointing directly toward the center of the proposed wreath.
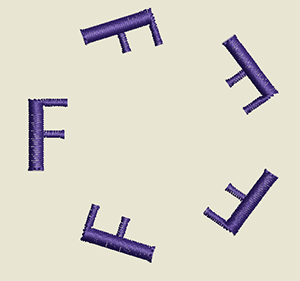
- Click on the canvas and the wreath is generated.
The new wreath should now look like this:
Note that with the preview lines are no longer shown, the symmetry may seem to have changed. It has not. Promise!
If you look closely at the short strokes of the F’s. they are still pointing to and converging to a single central point.
Let’s try this again!
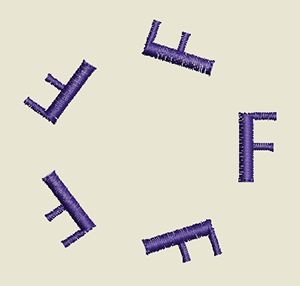
The beauty of the wreath tool is that with a simple Undo command (CTRL-Z), you can revert to where you were before you clicked on the Wreath tool. This is a great feature. You get to keep your seed object or design and simply have to retry. Let’s do that. But this time, let’s go left from the seed object, so the vertical stem of the F’s will all face center:
- When you Undo the wreath, the seed design will be left unselected. Reselect
- Click on the Wreath tool again.
- Move the mouse to the left of the first F (hold the CTRL key to get a stable horizontal line) for a couple of inches. Your screen should look like this:
png - Click on the canvas to generate the wreath. It will look like this:
Note that the F’s all have their back facing the center of the wreath.
An Added Touch of Symmetry
There is an extra option available with the Wreath tool. It used to be called Kaleidoscope in previous versions of the software. In version 8, it’s now called Mirror Alternate.
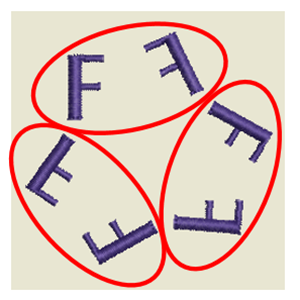
What this feature does is make each pair of copies in the wreath face each other. As the word ‘pair’ suggests, this option will only be available when you are working with an even number of copies in the wreath.
For instance, using our previous exercise with 5 copies for the letter F, the Mirror Merge Settings bar settings for the wreath show 5 as number of copies and immediately to the right of the number of copies is the Mirror Alternate option shows that it is disabled (ghosted out). With 5 being an odd number, the wreath tool cannot form a set of pairs out of it so the option is made unavailable.
If using 6 copies instead, the Mirror Alternate options becomes available. You’ll have to click on it to activate the pairing mode. You’ll know the option is activated when it his highlighted in yellow.
When making a 6-copy wreath with the Mirror Alternate option activated, notice below that the F’s are now paired up, with 2 letters F in each pair facing each other.
This option is great for geometric designs. Just remember…even numbers only!
Have Fun With It!
Do you remember the geometric drawing tool of your youth, using pens and gears? The Wreath tool is like that, but with embroidery! When we teach how to use this tools, our students’ faces always light up. I know I did when I first learned about it. And with the Undo feature, I don’t have to worry about having erased what didn’t work. So have fun playing with the Wreath tool!
Practical Tips:
- Mother Nature rarely does even numbers. For floral/botanical wreaths and arrangements, use an odd number of copies.
- For more structural and geometric designs, the number 6 is a good one. Bees have long known and used this number in building their hives.
- Number 4 is great to create 4-sided designs. Can you say photo frame from a border design?
- The maximum number of copies is 50. And guess who tried that on his first project focused on the wreath?
- Remember that Undo is your friend. If you clicked too soon or in the wrong spot, you can quickly retry making your wreath by using Undo, reselecting and re-wreathing your design. Your software will remember how many copies you had in the previous attempt, saving you the step of having to re-specify the number of copies.
What you might also like
2 comments on “Using the Wreath Tool in BERNINA Embroidery Software 8.2”
-
-
If only even numbers are available, this means you have the ‘Mirror Alternate’ option activated (look for a mention of the function in the article). If you have a version older than v8 of the Software, it was called Kaleidoscoped until v7.
-
Leave a Reply
You must be logged in to post a comment.





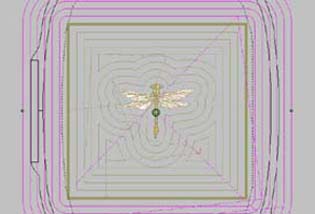



Is it possible to do odd numbers in the wreath tool. From 1-10 all numbers are listed but after that they are in even numbers. I tried typing in the number 15 but it only gave me 2 objects. I also have a question about the stippling fill. I was trying to make some templates for quilting by making a good looking fairly large meander in a 6 inch block but the stippling looks more like worms than stippling. Do you have a solution? I have brought in pictures of meandering and sized them for the block size I want and digitized over top of them but it would be nice if the software could do it nicely. Thank you for your answer. Margie Jones [email protected]