How to Create Buttonholes Three Different Ways

Making buttonholes on a BERNINA sewing machine is truly a breeze! The sturdy presser feet and on-screen navigation make this an easy operation for beginners and experienced sewists alike. With multiple variations and styles of buttonholes including features for adjusting slit width opening and stitch density, there is a perfect buttonhole option for every project. Whether you use the Automatic Buttonhole Foot #3A or Buttonhole Foot #3 or 3C for a manual version, you will not only love the outcome but the simple process of creating buttonholes with your BERNINA too.
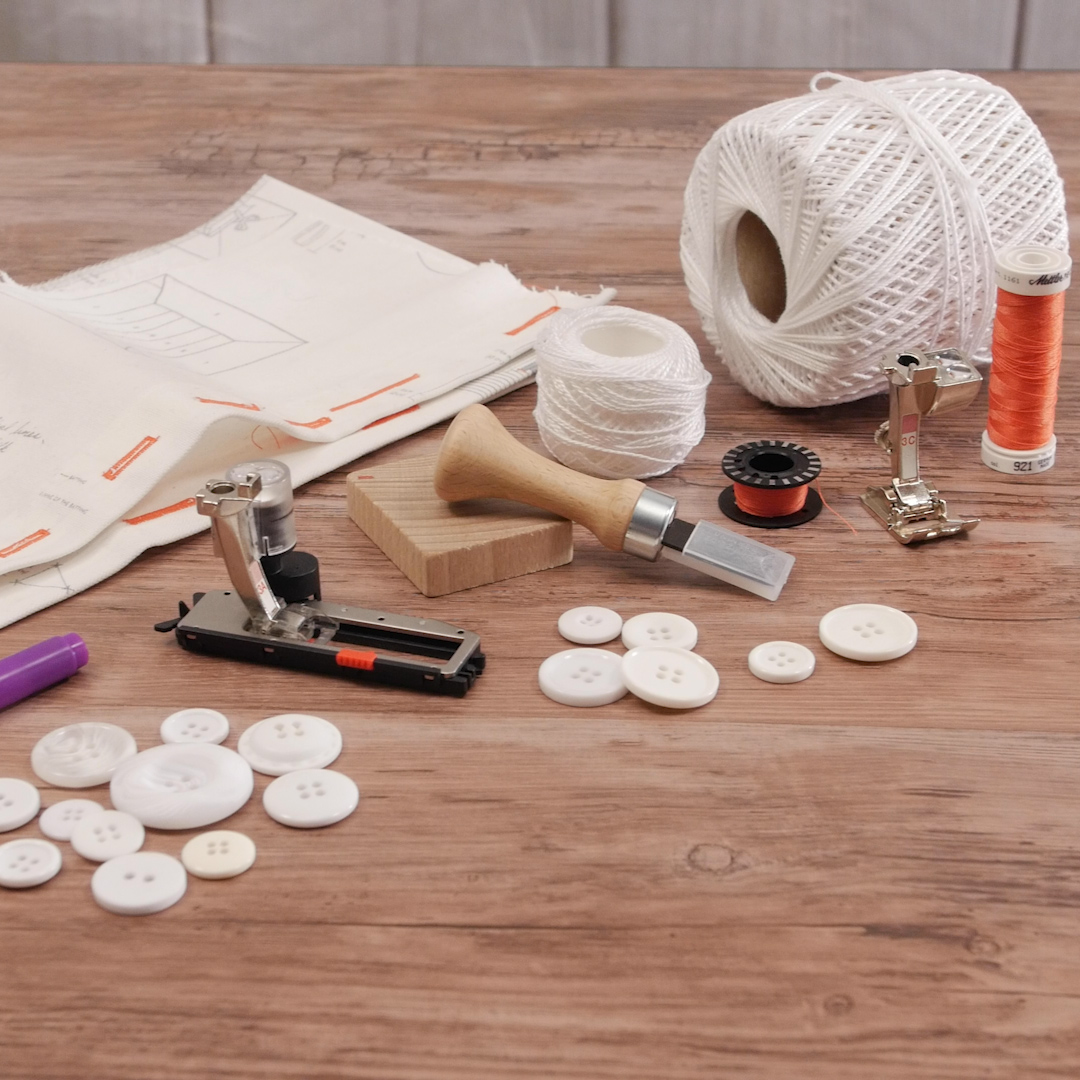
Materials for Buttonhole Success
- BERNINA B 480
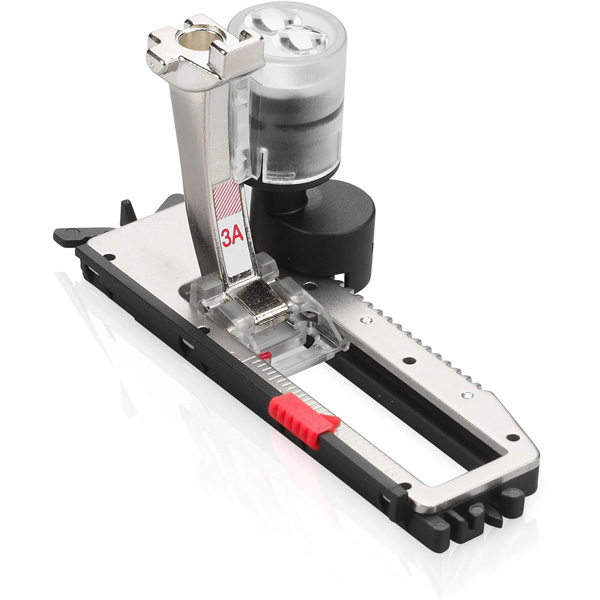
- Buttonhole Foot #3A
- Buttonhole Foot #3C
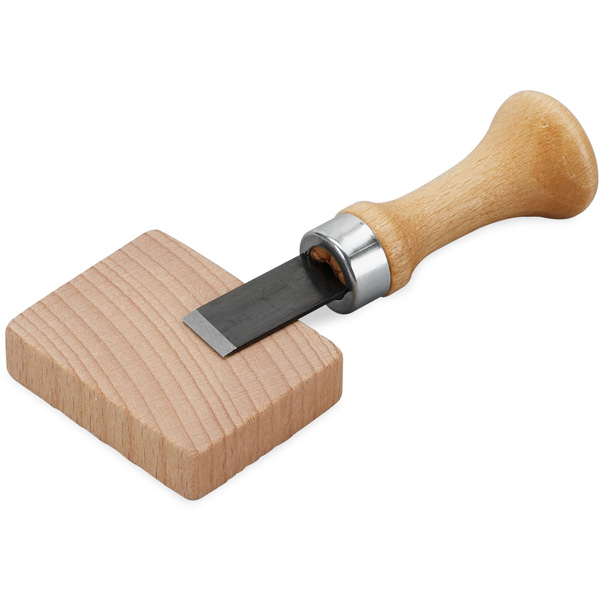
- Buttonhole Cutter with wooden block
- Cording
- Fabric Marker
3 Variations on Creating Buttonholes
Version 1: Automatic Buttonhole
I remember making my first buttonhole using the automatic Buttonhole Foot #3A and how amazingly easy it was to use. Fast forward to our machines today and many machines, including the new BERNINA 4 Series, have the computer touchscreen. This makes it even more user friendly. The presser foot has a sliding track and a sensor that allow the machine to measure the buttonhole and create the same size over and over again. This foot will create buttonholes up to 1-1/4” in length.
Step 1: To create an automatic buttonhole on a BERNINA with a touch screen, begin by selecting the Buttonhole tab icon.
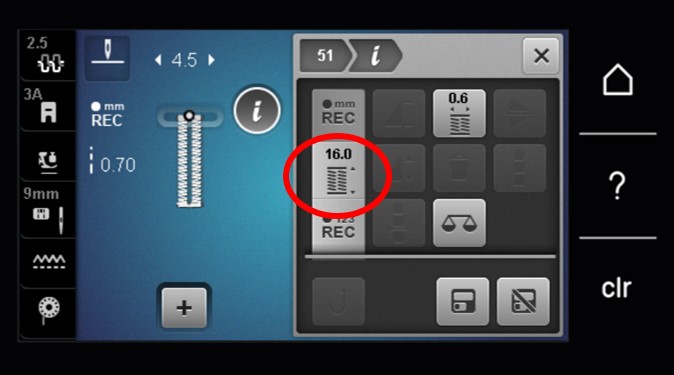
This will open up the menu with all the buttonhole options your machine will do. On the B 480, there are 11 buttonhole options.

From the buttonhole menu, you can select the style of buttonhole that you would like. The most basic version is stitch #51.
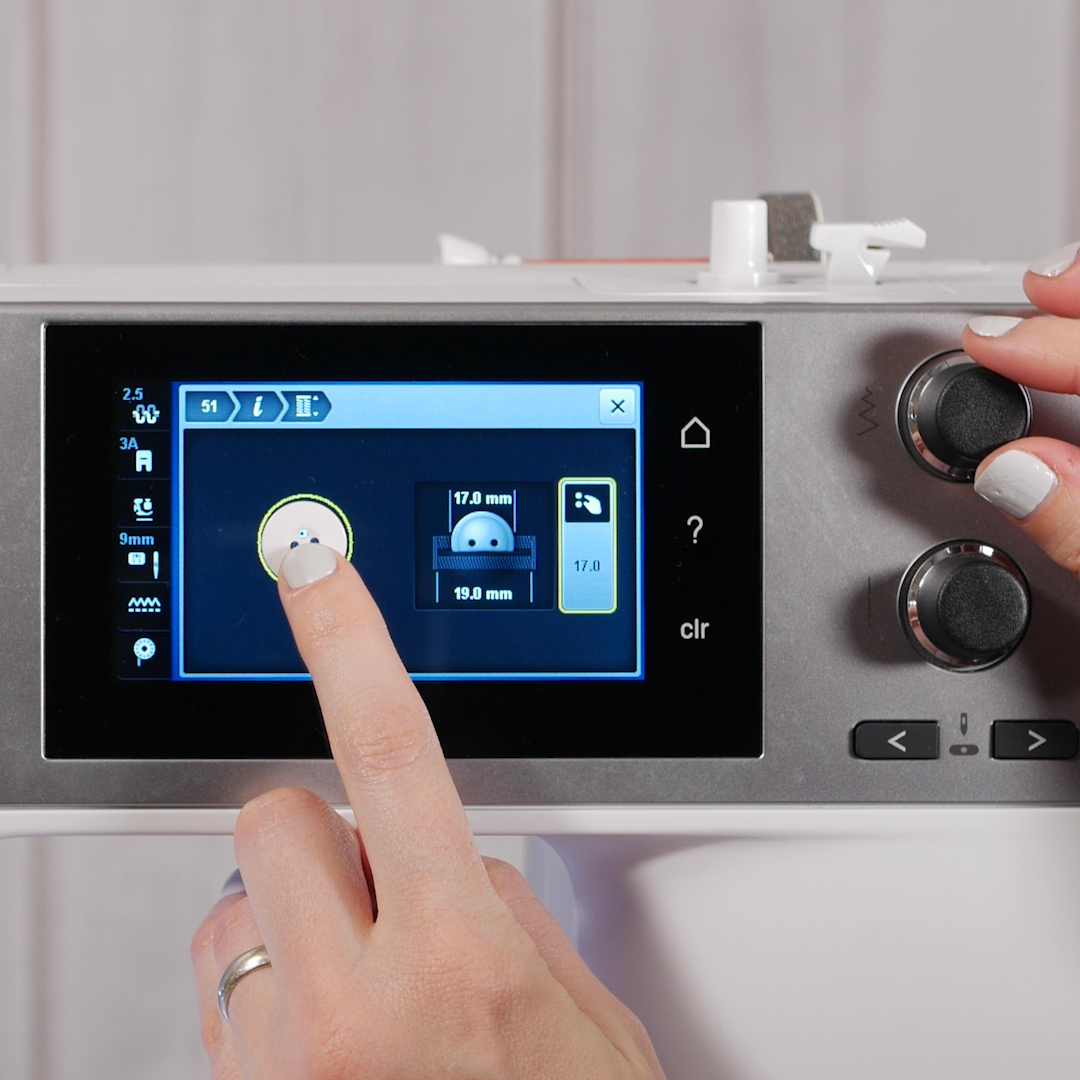
Step 2: Once selected, touch Information (the “i” icon) to program the size and shape of buttonhole.
![]()
Step 3: Program the size of your buttonhole by selecting the Buttonhole Length icon.
It is easy to simply place your button over the yellow circle and use the stitch width knob to adjust the diameter of the circle until it is the size you desire.
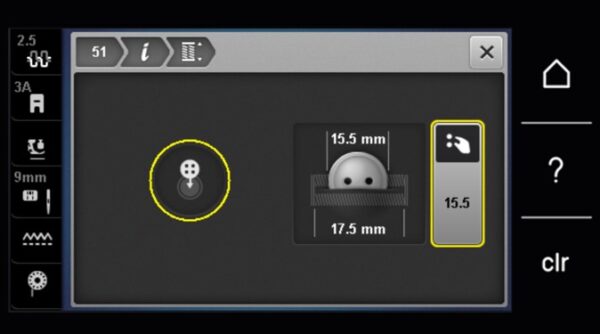
You can also adjust the slit width opening from this same menu. Touch the “buttonhole slit width” icon and use the stitch width knob to adjust the opening size. You will notice that when anything has been adjusted or changed, it will be highlighted in yellow.

Step 4: Use the start/stop button or the foot control to sew the buttonhole. If you are making a shirt, I typically mark only the beginning of the buttonhole and align this point in the opening of the presser foot. All your buttonholes will be the exact same!
For information on using this foot on a machine without a touch screen, please read this Tips for Sewing Buttons and Buttonholes by Machine blog post.
Version 2: Corded Buttonhole

Adding a cord to the buttonhole is a useful technique for creating a more substantial buttonhole. It is great to use a corded buttonhole on fabrics that have some loft, like velvet or on stretchy fabrics like knits to add more stability. You may decide that you prefer how adding a cord to a buttonhole will give it a more pronounced look.
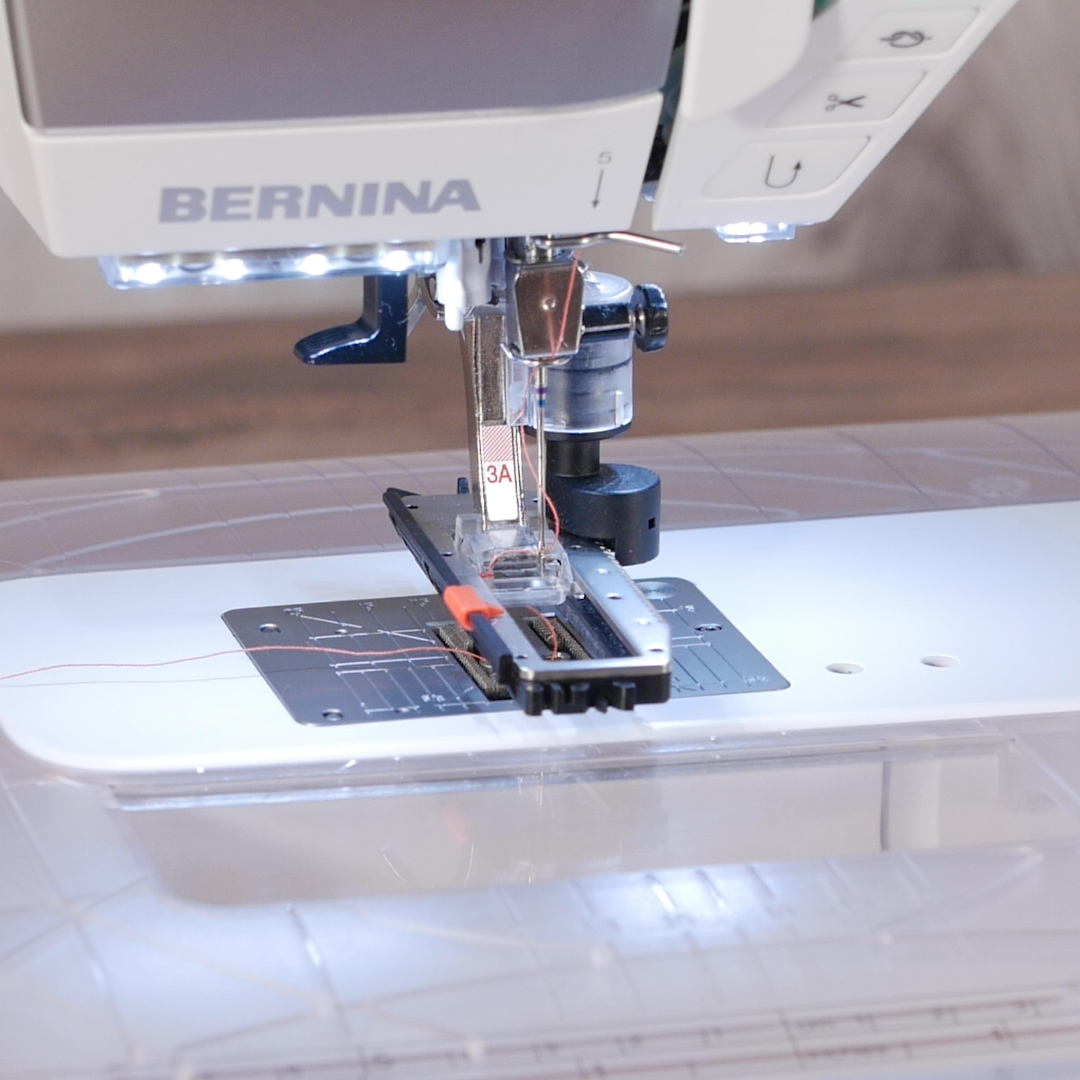
Creating a corded buttonhole is done the same way as a regular buttonhole, but you add the cord to the presser foot before beginning the stitch. The wonderful thing about BERNINA presser feet is that they are all specifically designed for ultimate functionality. All the buttonhole feet, Buttonhole Foot #3, 3C and 3A have a place to hook and hold the cord for a corded buttonhole. Use a fine cord, such as Perle Cotton #8, crochet or gimp cord.
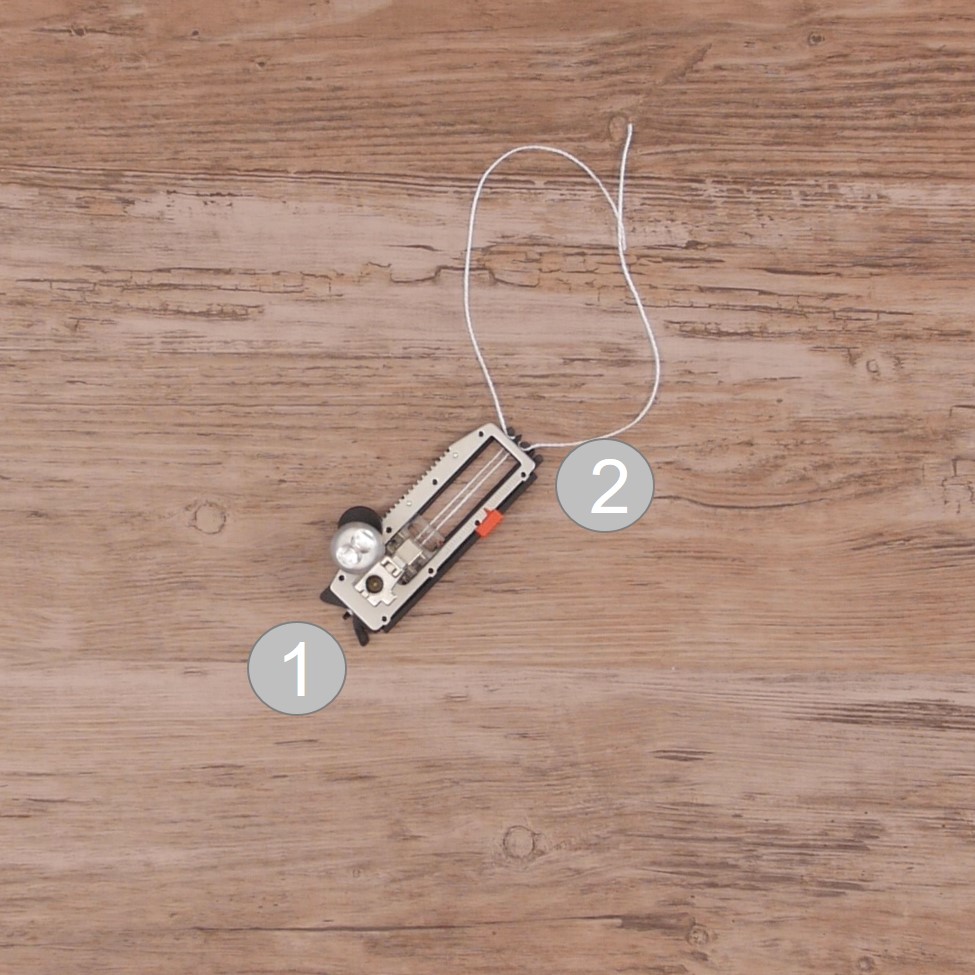
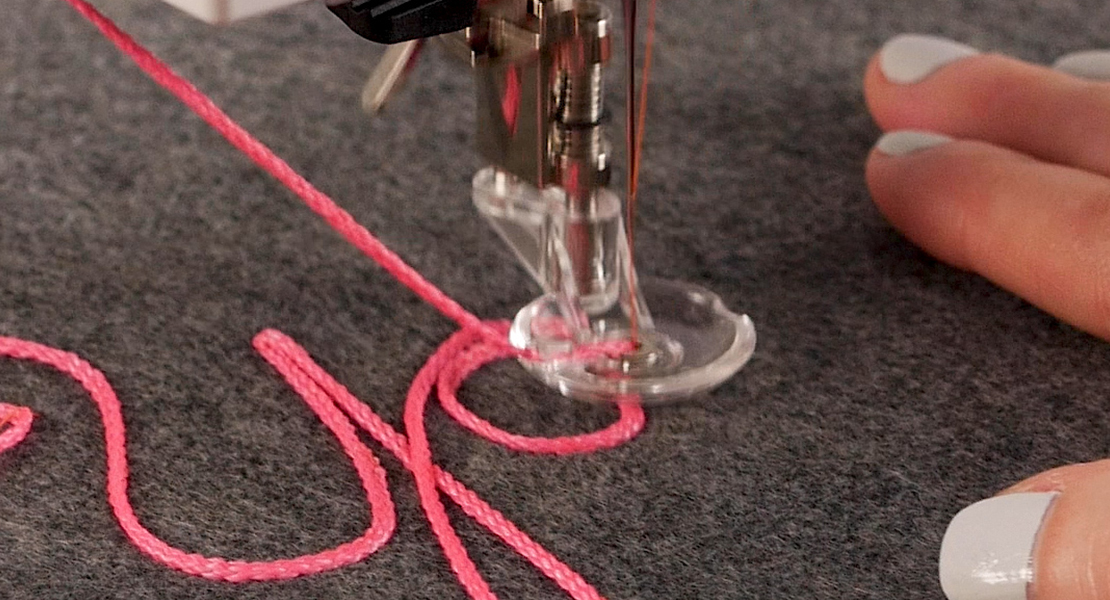
Step 1: Using the Buttonhole Foot #3A, hook the cord around the pin (1) at the back of the presser foot. Then place the right and left sides of the cords into the guides (2) at the front of the presser foot. You may find this is easier to do when the presser foot is removed from the machine, but it can be accomplished while the foot is attached to the machine also.
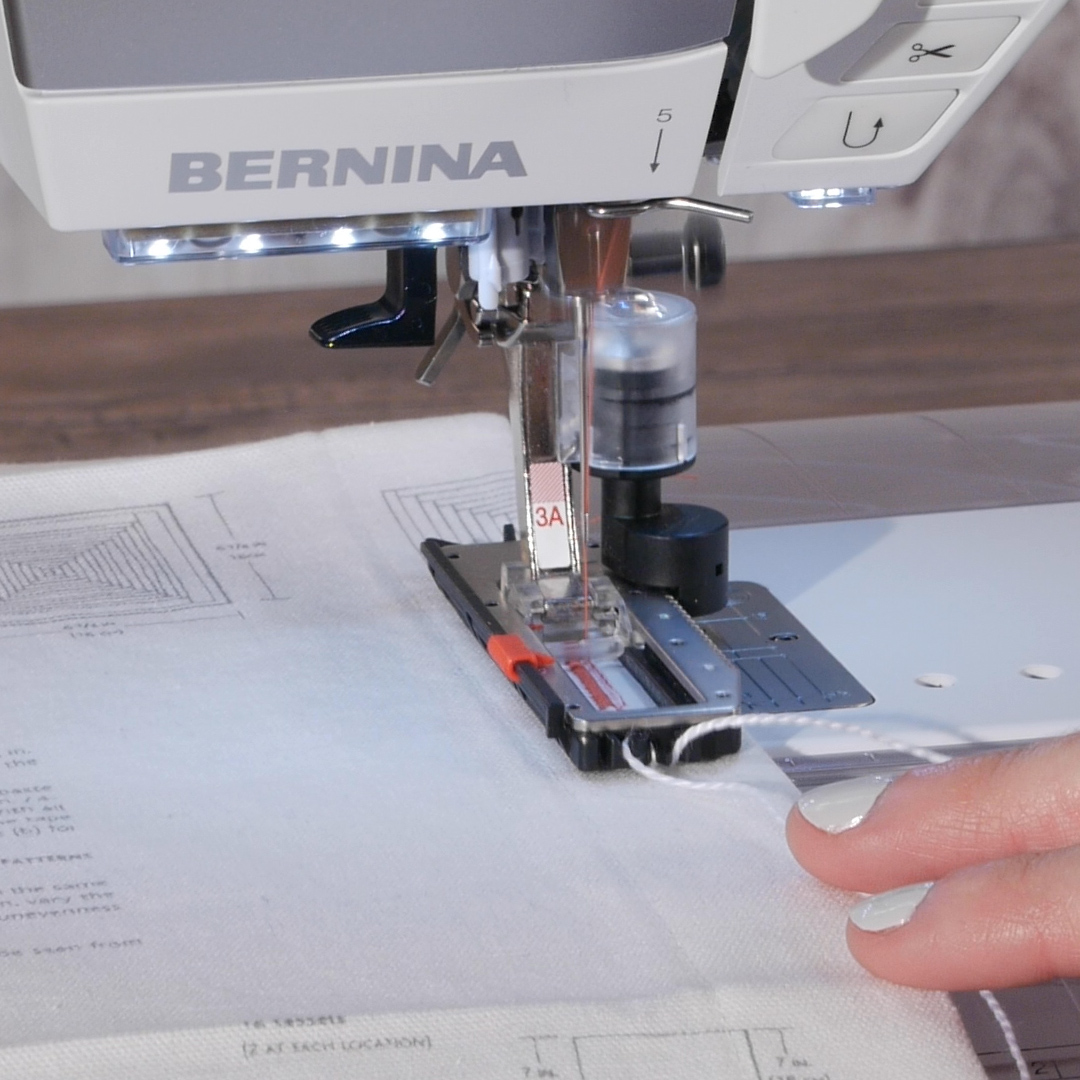
Step 2: Sew the buttonhole as desired, making sure that as the machine is stitching the cord is falling between the stitches and not being caught by the needle.
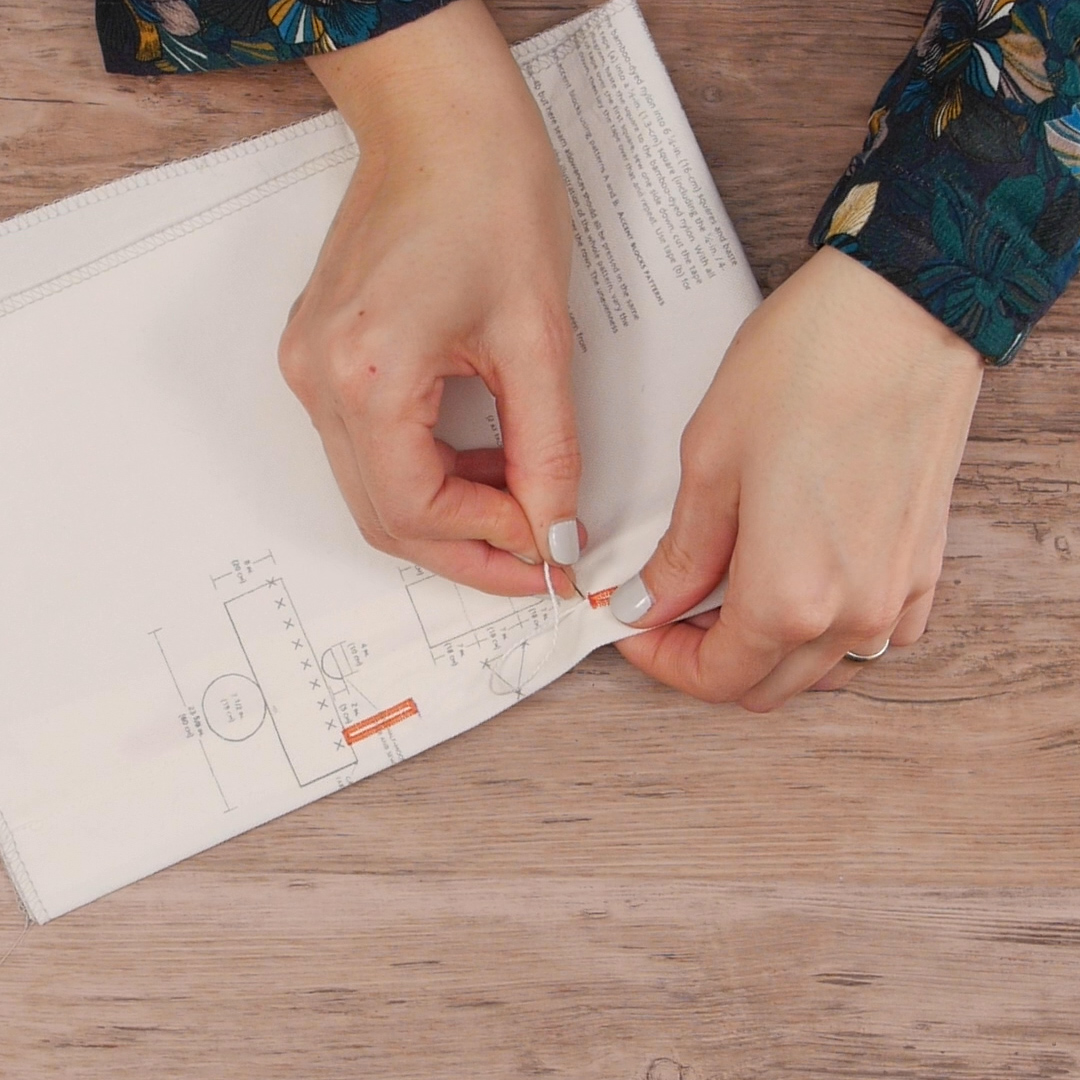
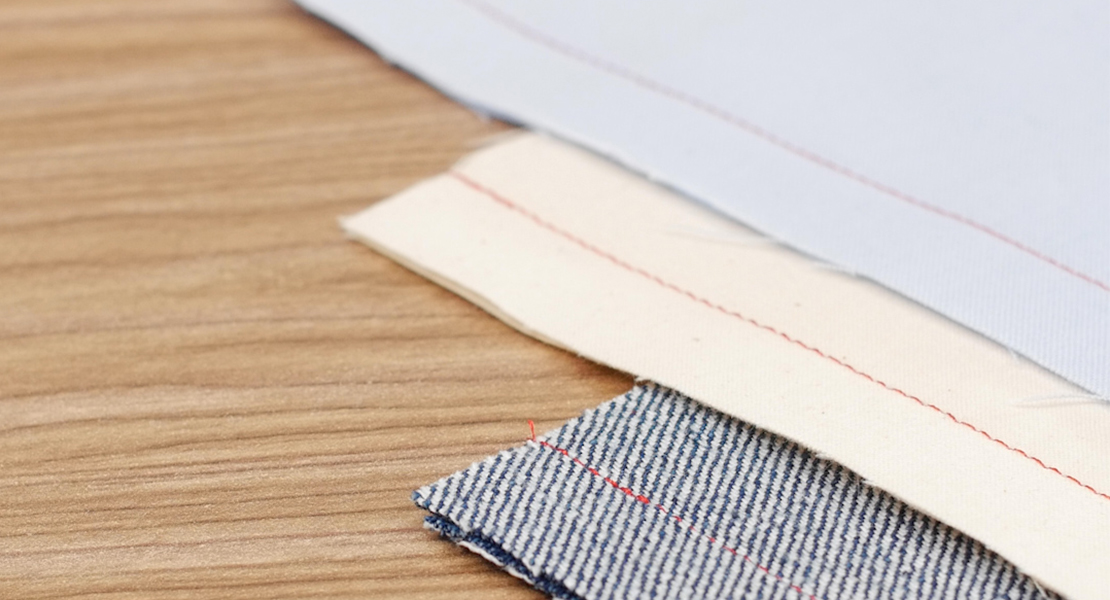
Buttonholes_14_corded_buttonhole_finishing_BERNINA_WeAllSew_Blog_1080x1080px.jpgStep 3: When the buttonhole is finished, remove the cord from the foot and release the fabric from under the presser foot. Pull the cord thread tails until the loop at the back disappears under the bartack stitches of the buttonhole. Trim the cord ends so they disappear under the buttonhole stitches.
Tip: For knit fabrics especially, use a needle to pull the cord ends to the back of the fabric and further secure the cord with a knot form the backside.
Version 3: Manual Buttonhole
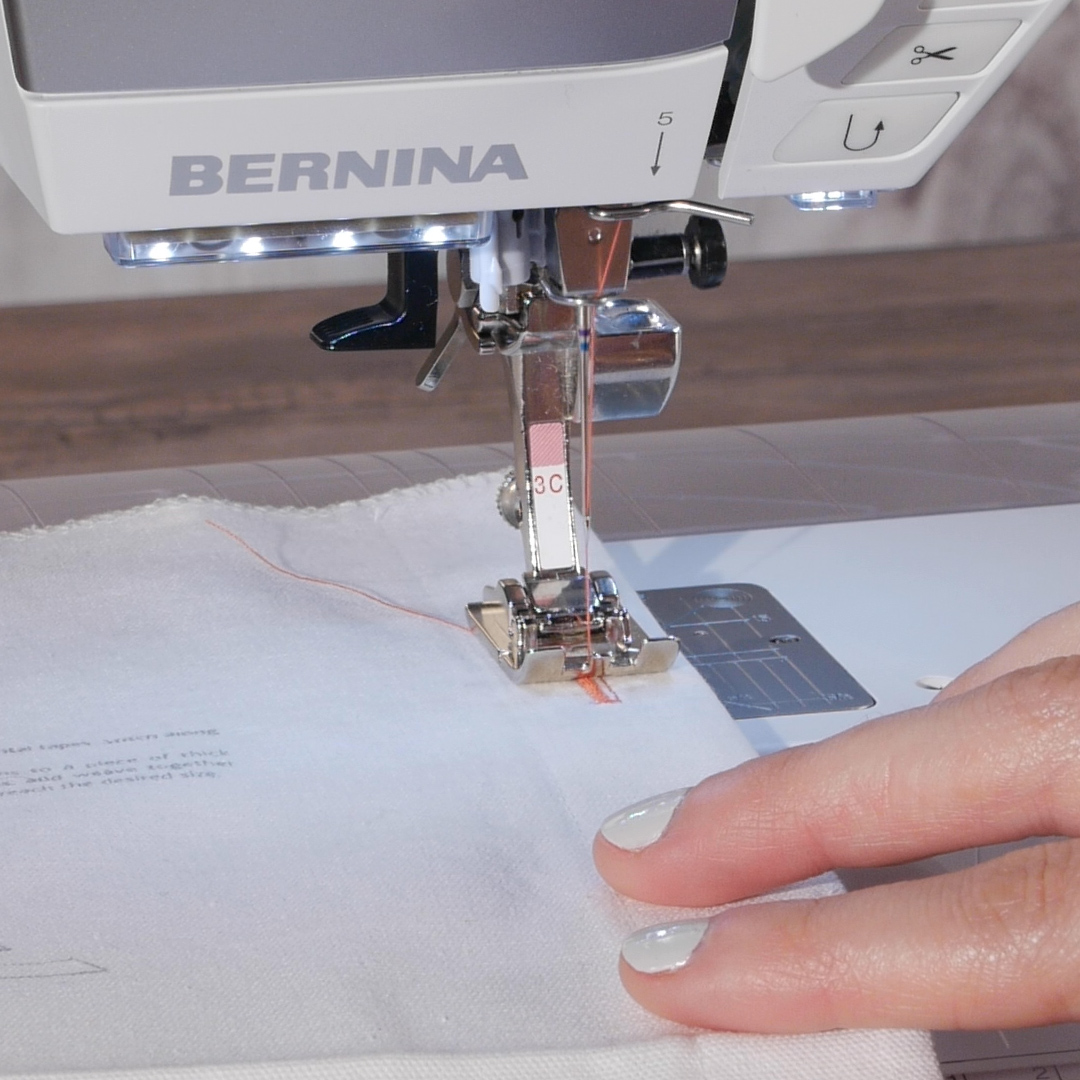
There may come a time when you need to make a manual buttonhole, for example when you want a buttonhole longer than 1-1/4”, or if you have a particularly thick or awkward fabric that will not easily move underneath the Buttonhole Foot #3A. You will need to use the Buttonhole Foot #3 or 3C for this operation. The process for creating a manual buttonhole requires that you prompt the machine through each step of the buttonhole formation. This means you will need to mark the entire buttonhole length and stop the machine and tell it when to start the next step.
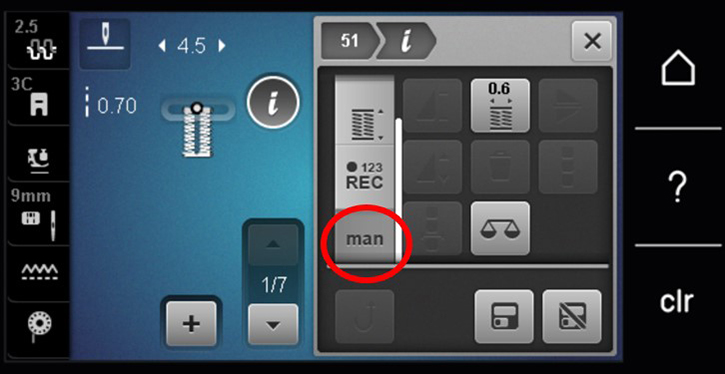
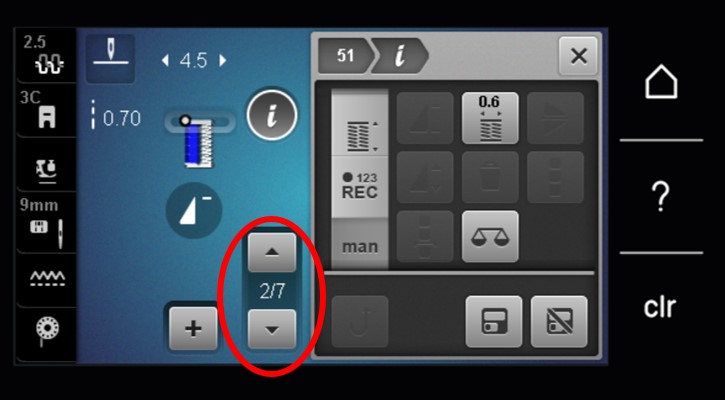
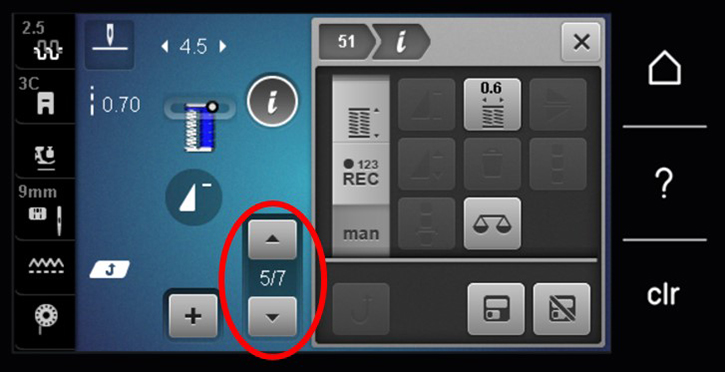
Step 1: Attach the Buttonhole Foot #3 (5.5 mm) or 3C (9 mm) to the machine. For machines with a touchscreen, you will need to select the manual buttonhole operation mode from the information screen. Select the manual mode by scrolling down on the left hand selection bar until you see “man” and touch the icon. A new box will open in the bottom right of the stitching screen that indicates the point in the seven-step process 1/7 to 7/7.
Step 2: Mark your fabric with the length of the buttonhole you wish to create—remember you must mark the beginning and ending for this process.

Line the opening in the presser foot up with the starting mark and sew the first step, a securing stitch. Touch the reverse button on the sewing machine head to advance the machine to the next step.
Step 3: Sew the 2/7 sequence until you reach the bottom of the buttonhole marking. Touch the reverse button on the sewing machine to move to the next step in the sequence.
Follow the prompts on screen through all steps matching the beginning of the buttonhole until you have completed the final 7/7 sequence.
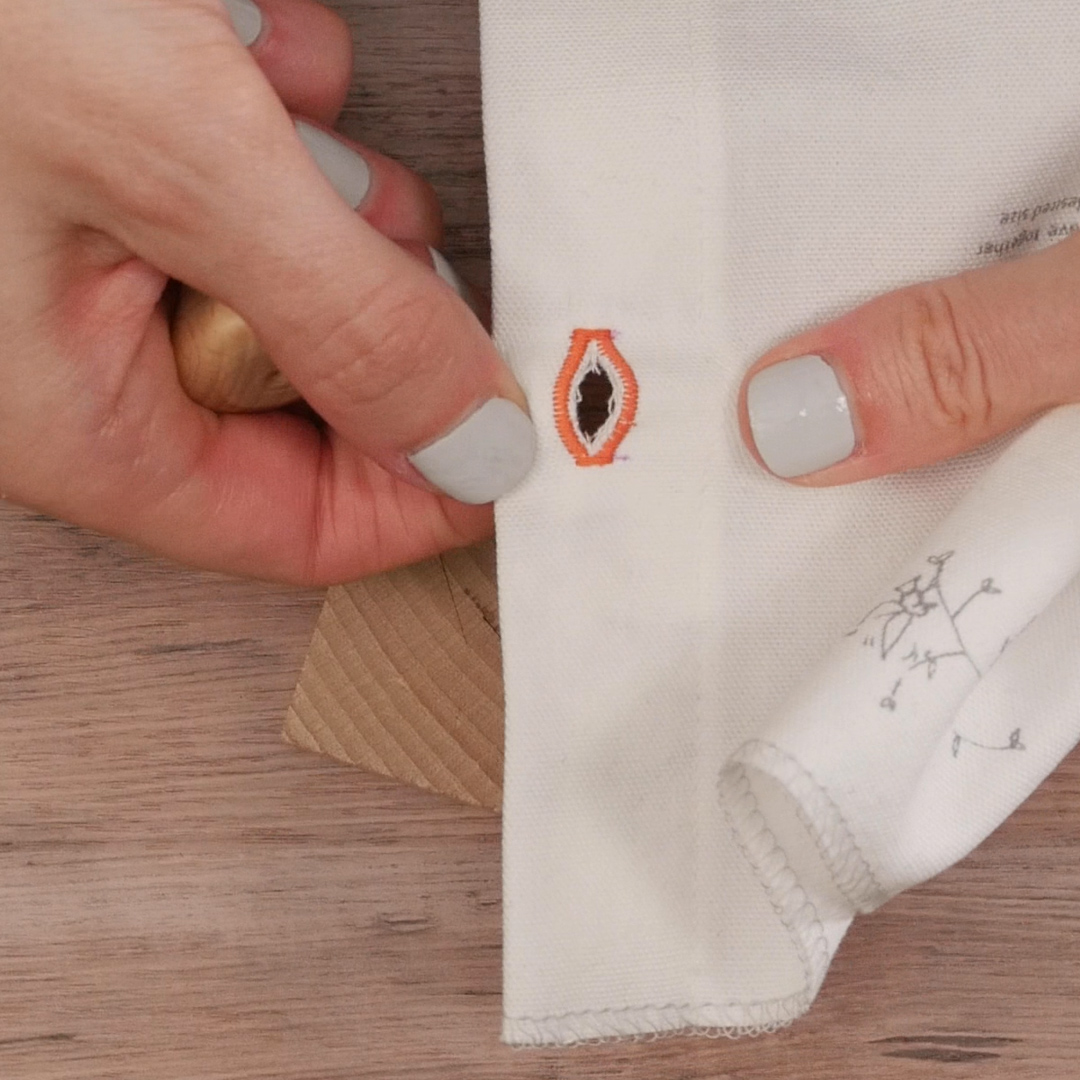
Buttonhole Cutter
Use the BERNINA Buttonhole Cutter with Wooden Block to cut open the buttonhole without damaging the stitching. Place the buttonhole over the wooden block and align the cutter within the buttonhole opening. Press down firmly on the cutter until it cuts open the fabric.
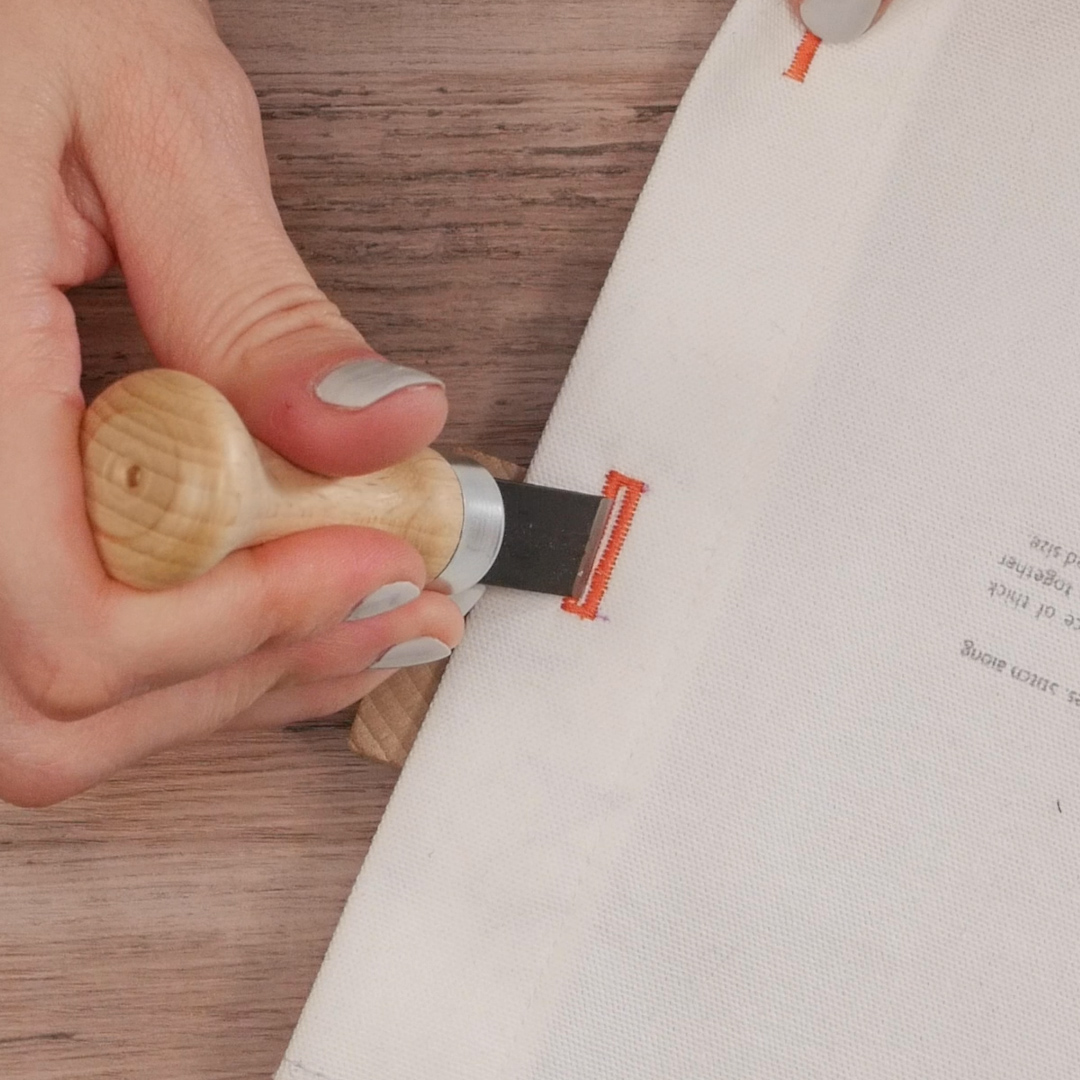
Tip: Repeat process to cut the opening for large buttonholes. For small buttonholes, wrap one end of the buttonhole over the edge of the block and position the buttonhole cutter so that the blade rests on the opening and over the side of the block. Cut each end of the buttonhole this way to ensure that you don’t cut through the threads in the bartack of the buttonhole.
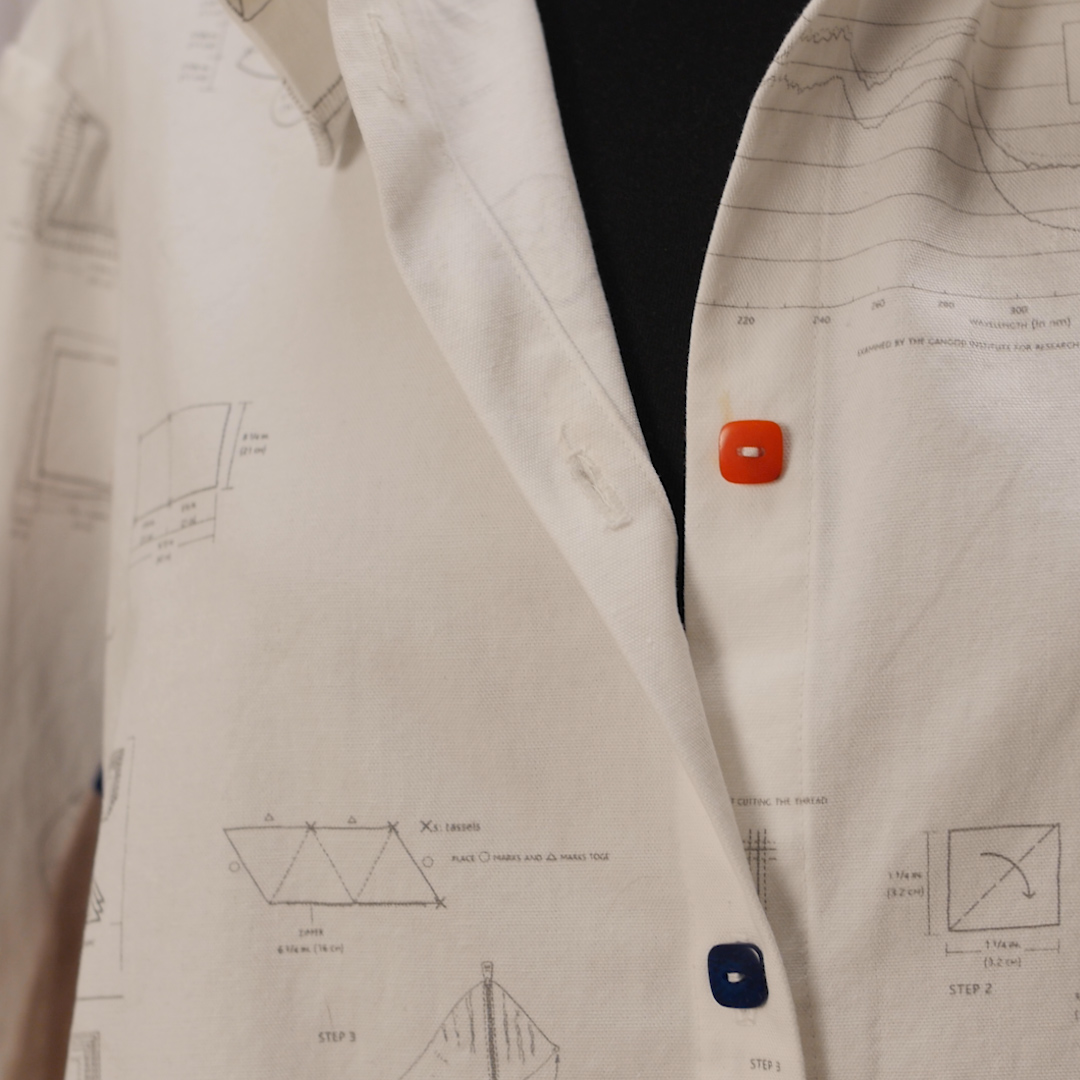
Now it’s time to finish up all those projects that need buttonholes. There are so many easy ways to create the perfect buttonhole for you next project! To learn even more, check out this video. I hope you are excited to try these techniques on your next project.

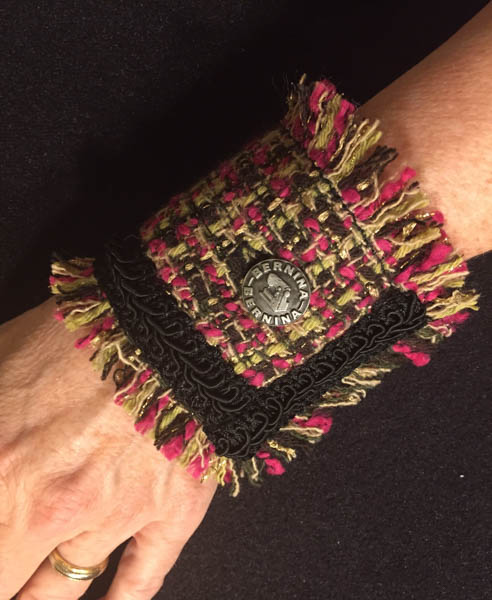
What you might also like


4 comments on “How to Create Buttonholes Three Different Ways”
-
-
Sometimes this will happen when the fabric is thick or not stabilized well. Another thing–especially since your machine is pretty new–is to take the buttonhole foot #3A in when you have your annual service done and ask the technician to check it specifically.
Here a couple options.
1. Use the height compensation plate accessory. This is great for uneven surface especially.
2. Use the manual mode for the foot and/or use the standard button hole foot #3CHere is a blog post I wrote about buttonholes in jeans that might explain in more detail how to try those options.
https://weallsew.com/jeans-tips-buttonholes-rivets-and-hardware/
-
-
Once I have made a manual buttonhole, is there a way to program my B770 so I can make 4 more buttonholes that will be the same size?
-
That is a primary difference between manual and automatic. The automatic buttonhole is repeatable because on the top of the 3A foot there is an “eye” that the machine is able to use to measure(count) the distance of the buttonhole. Often when I make a “manual” version of the buttonhole it is because of thick fabric that causes the automatic foot to stall in one place and the length measured becomes distorted. So if I make a buttonhole in the manual mode, I am able to tell the machine when it has reached the desired distance. I hope that helps explain it.
-
Leave a Reply
You must be logged in to post a comment.
Does anyone else have a problem with the automatic buttonhole getting stuck in one place? I have a 570 QE and seem to get stuck in the middle of the buttonhole more often that not. Any suggestions?